Page 11 of 147
Page 1 text
NOVEMBER 2016
Page 2 text
Cake! magazine PUBLISHER: Cake! is published by the Australian Cake Decorating Network Pty Ltd. ACN: 91 164 927 584. © All content copyright 2014 Australian Cake Decorating Network Pty Ltd. All rights reserved. Reproduction any part of the magazine without written permission is prohibited. All prices included in Cake! are approximate and are in AUD unless otherwise stated. Prices quoted are correct at the time of publishing and may vary or be subject to change. The Australian Cake Decorating Network Pty Ltd accepts no responsibility for damage or loss as a result of material submitted for, published in or as a result of this publication. The Australian Cake Decorating Network does not have an affiliation with any other magazine. The views and opinions expressed within this publication are not necessarily the views of the publisher or it's affiliates. While every effort has been made to ensure the accuracy of the informtion contained within Cake! the publisher and Cake! hold no responsibility for any errors, omissions, or consequences subsequent or otherwise, including loss or damage arising from reliance on information in this publication. Content is supplied for publication in Cake! by parties external to the Australian Cake Decorating Network and it is the external party's responsibility to ensure content and credits are accurate. Cake! contains advertising through individual arrangements, which may include paid affiliate arrangements. Cake! may also contain affiliate links. The agreements are held between the advertiser or affiliate and the Australian Cake Decorating Network Ptd Ltd. To advertise in Cake! magazine, contact: [email protected] f www.acdn.me [email protected] click here to join our mailing list!
Page 3 text
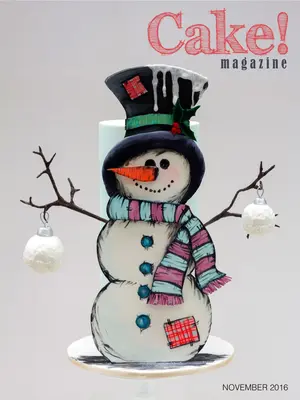
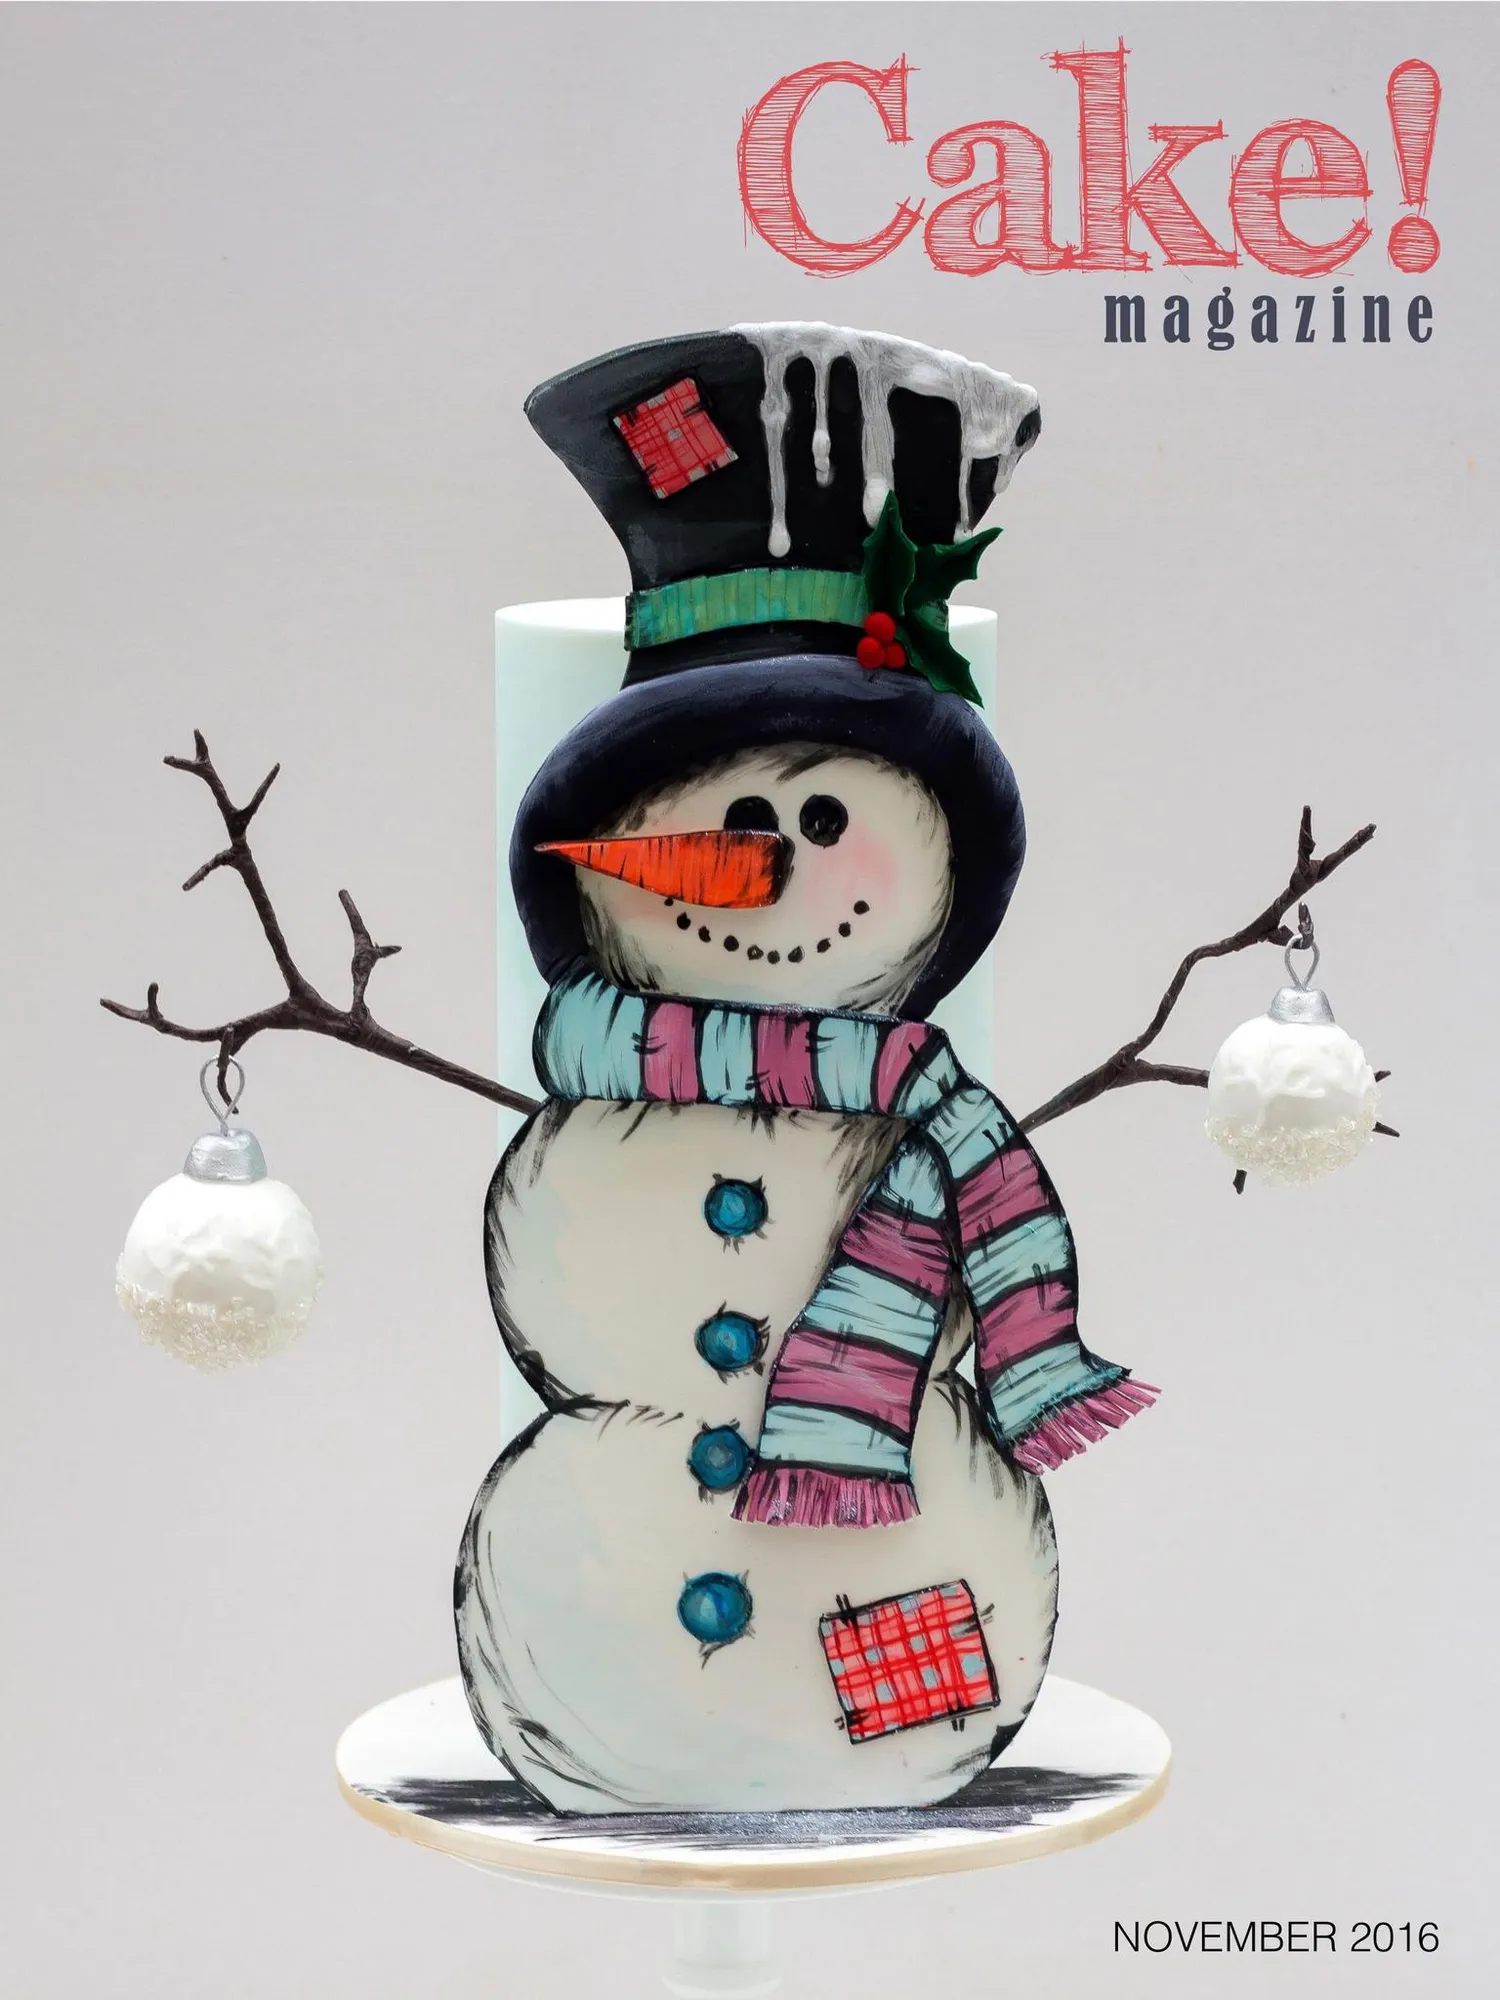
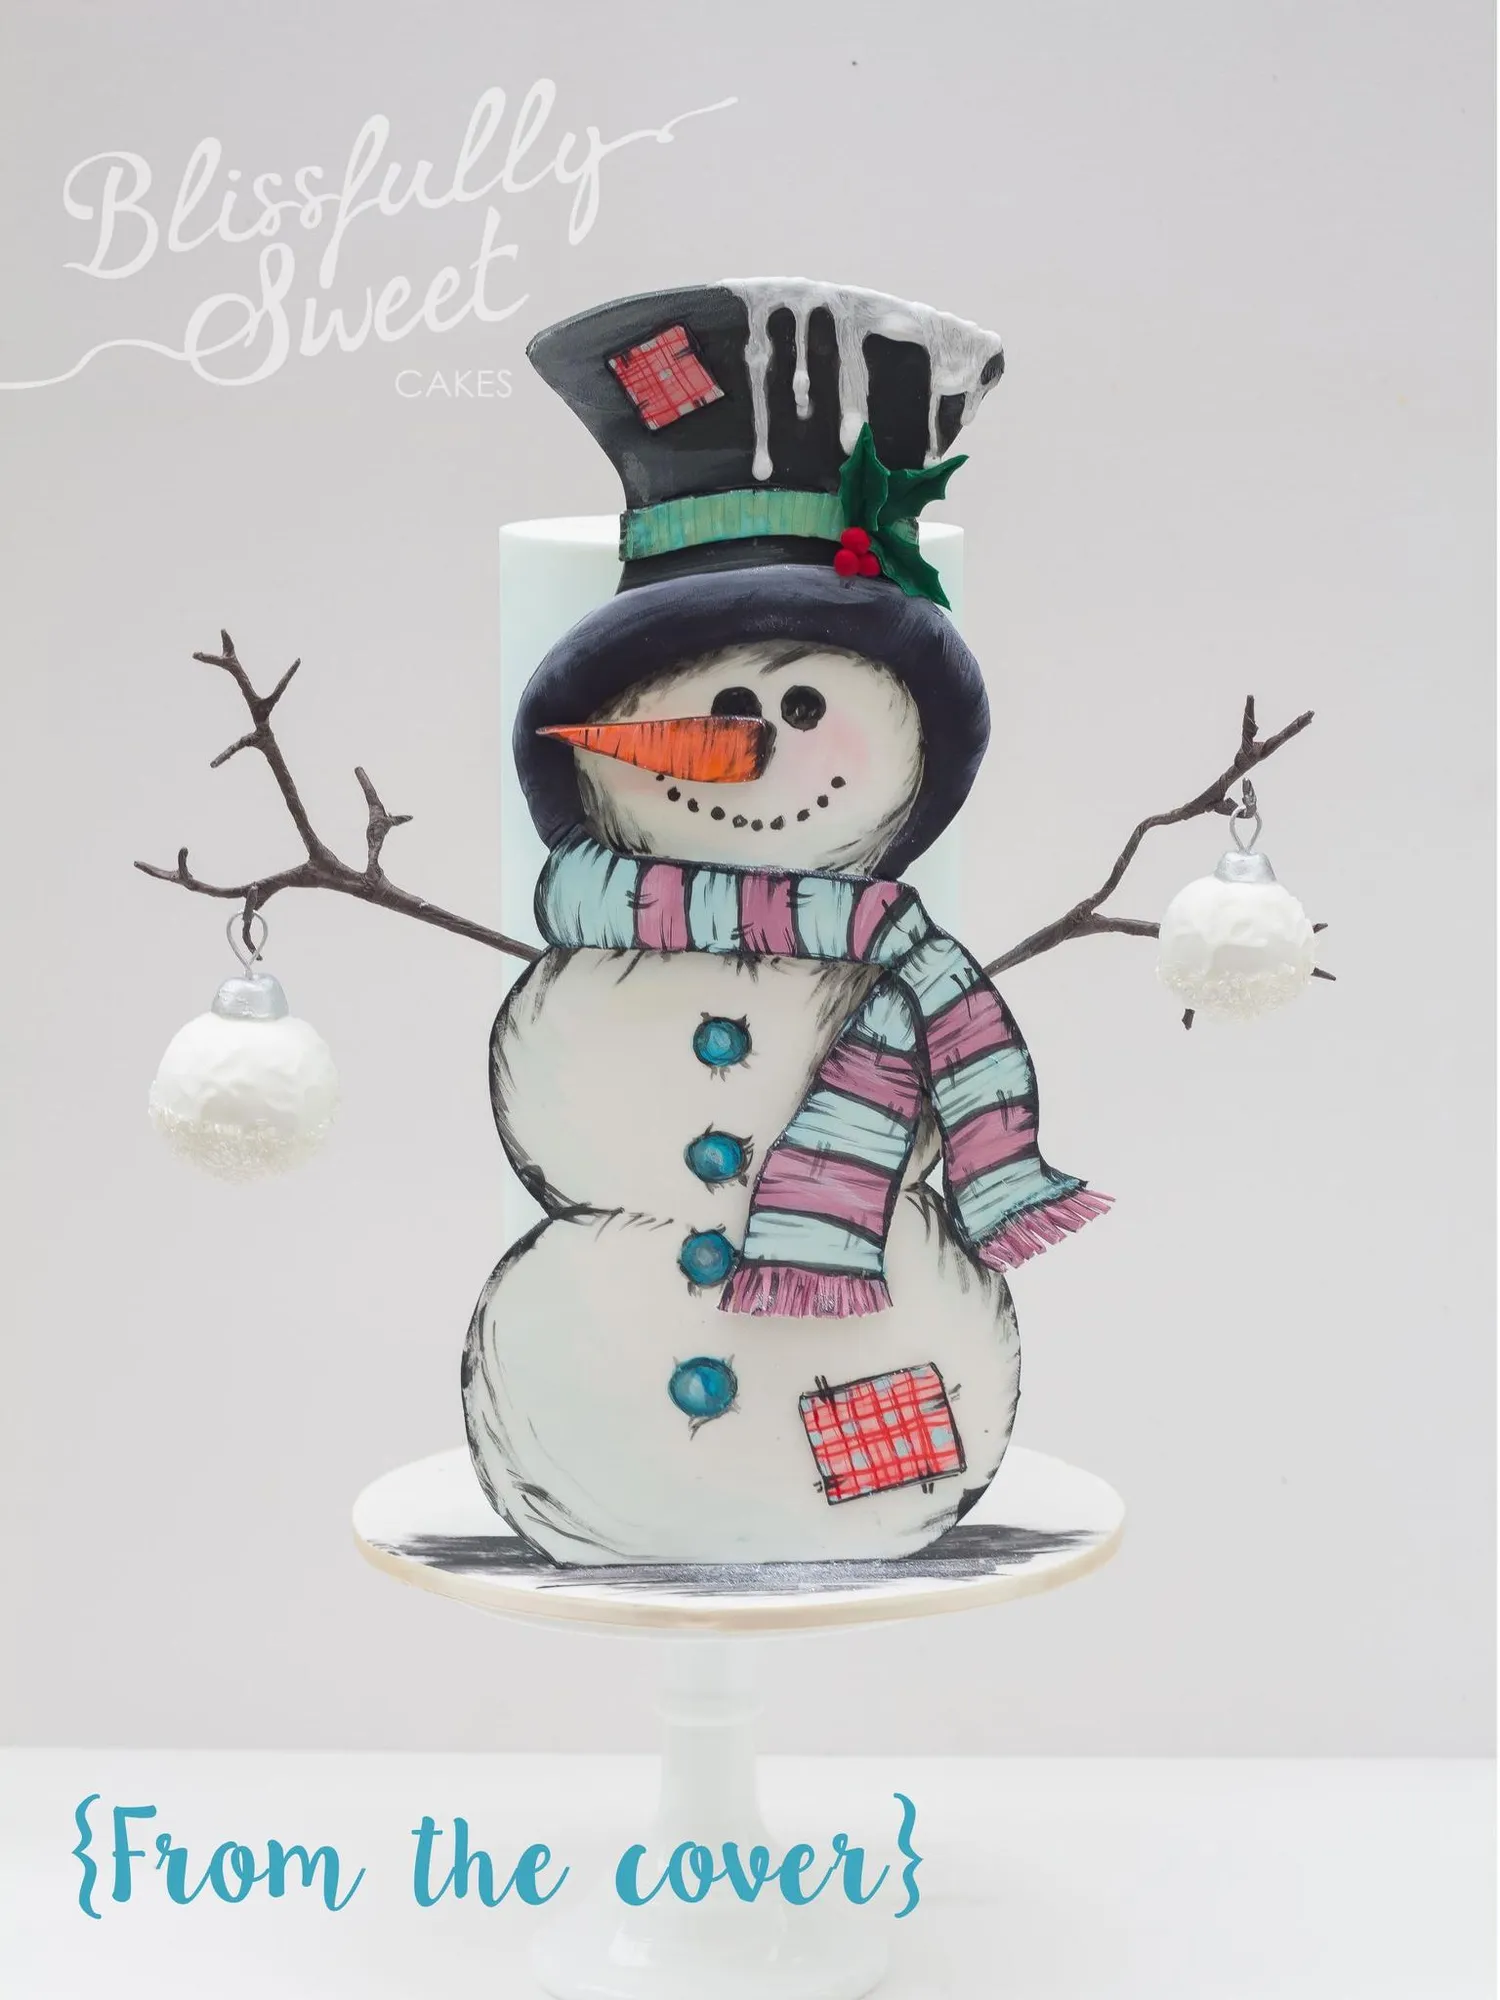
letter from the editor Welcome to our November 2016 issue of Cake! magazine. We think this is the most wonderful time of the year, and the November issue is definitely our favourite issue to produce. It makes us feel so festive and happy and hope it gives you some great inspiration for your Christmas creations! In this issue we feature interviews with the incredible Jacki Fanto and Shawna McGreevy. The cake in our cover image by Jacki Fanto is also featured as a step by step tutorial on page 25. We have some amazing tutorials in this issue which would be perfect for any Christmas celebration, from thankyou gifts for teachers to sharing with your friends and family at Christmas time, we hope you enjoy making them as much as our decorators enjoyed creating the tutorials for you. I hope you enjoy our gorgeous Celebration themed issue of Cake! and we look forward to seeing your Christmas creations please remember to share them with us on Facebook and Instagram @austcake decoratingnetwork! Seasons Greetings from all of the team at Australian Cake Decorating Network! See you in the new year! Liz Liz Wright editor Liz is the editor of Cake! magazine and founder and owner of the Australian Cake Decorating Network. Liz grew up surrounded by cake, spending hours upon hours watching her mum create stunning wedding cakes (in the days of intricate piping and extension work!). Liz is excited to have the opportunity to use Cake! magazine to showcase the incredbile talent of cake decorators worldwide. COVER IMAGE: JACKI FANTO BLISSFULLY SWEET Aika Jeane Kellie Rudland Kirsty Vierdag marketing administrative assistant Kellie discovered the world of cakes 8 years ago. Since then she has worked alongside pastry chefs as a head decorator for an established cake company. Kellie joined the ACDN team in 2013 and along with Contribution Manager for Cake! magazine, Kellie is also Social Media Manager for ACDN. WIth a background in marketing and a passion for baking, Kirsty has become an integral part of the ACDN team. Kirsty runs her own catering business creating delicious cakes and treats. Kirsty is Marketing and Advertising Manager for ACDN. Born in the Philippines, Aika is the Administrative Assistant of the ACDN. She was new to the cake world when she joined the ACDN team in 2015 and has since discovered her love for cakes & baking. She hopes to pursue her passion and enter into a professional culinary program in the future. contribution manager
Page 4 text
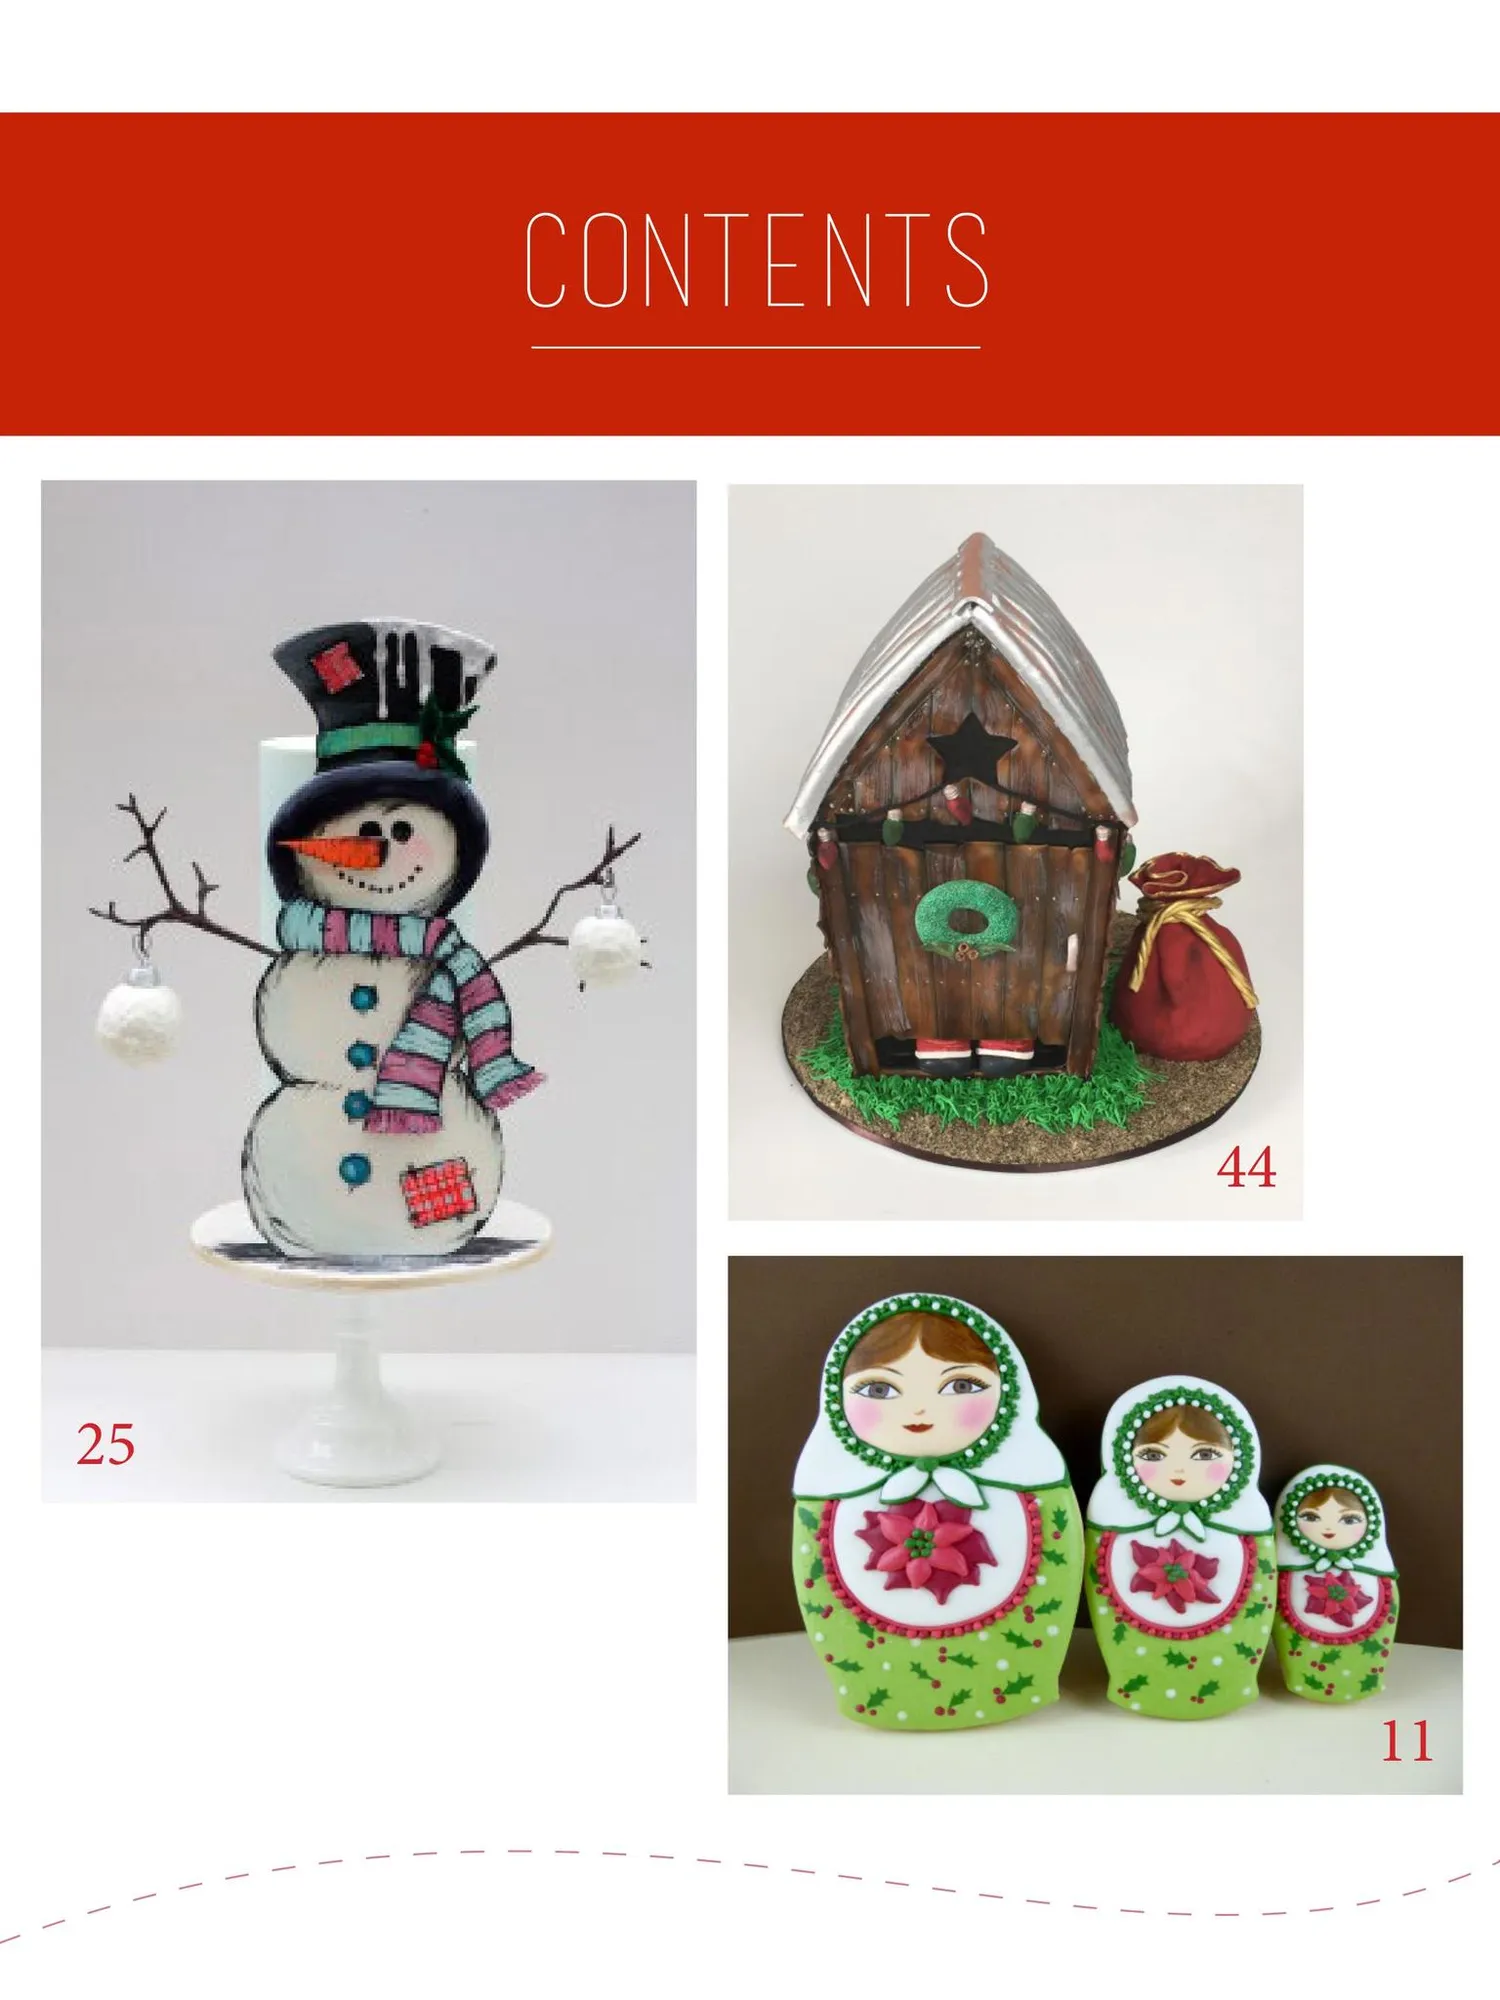
contents 17 44 25 72 11
Page 5 text
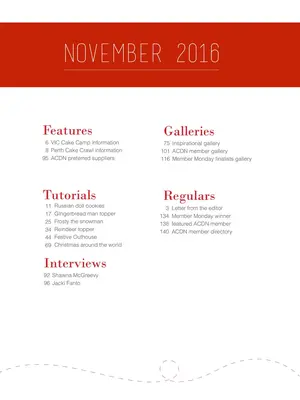
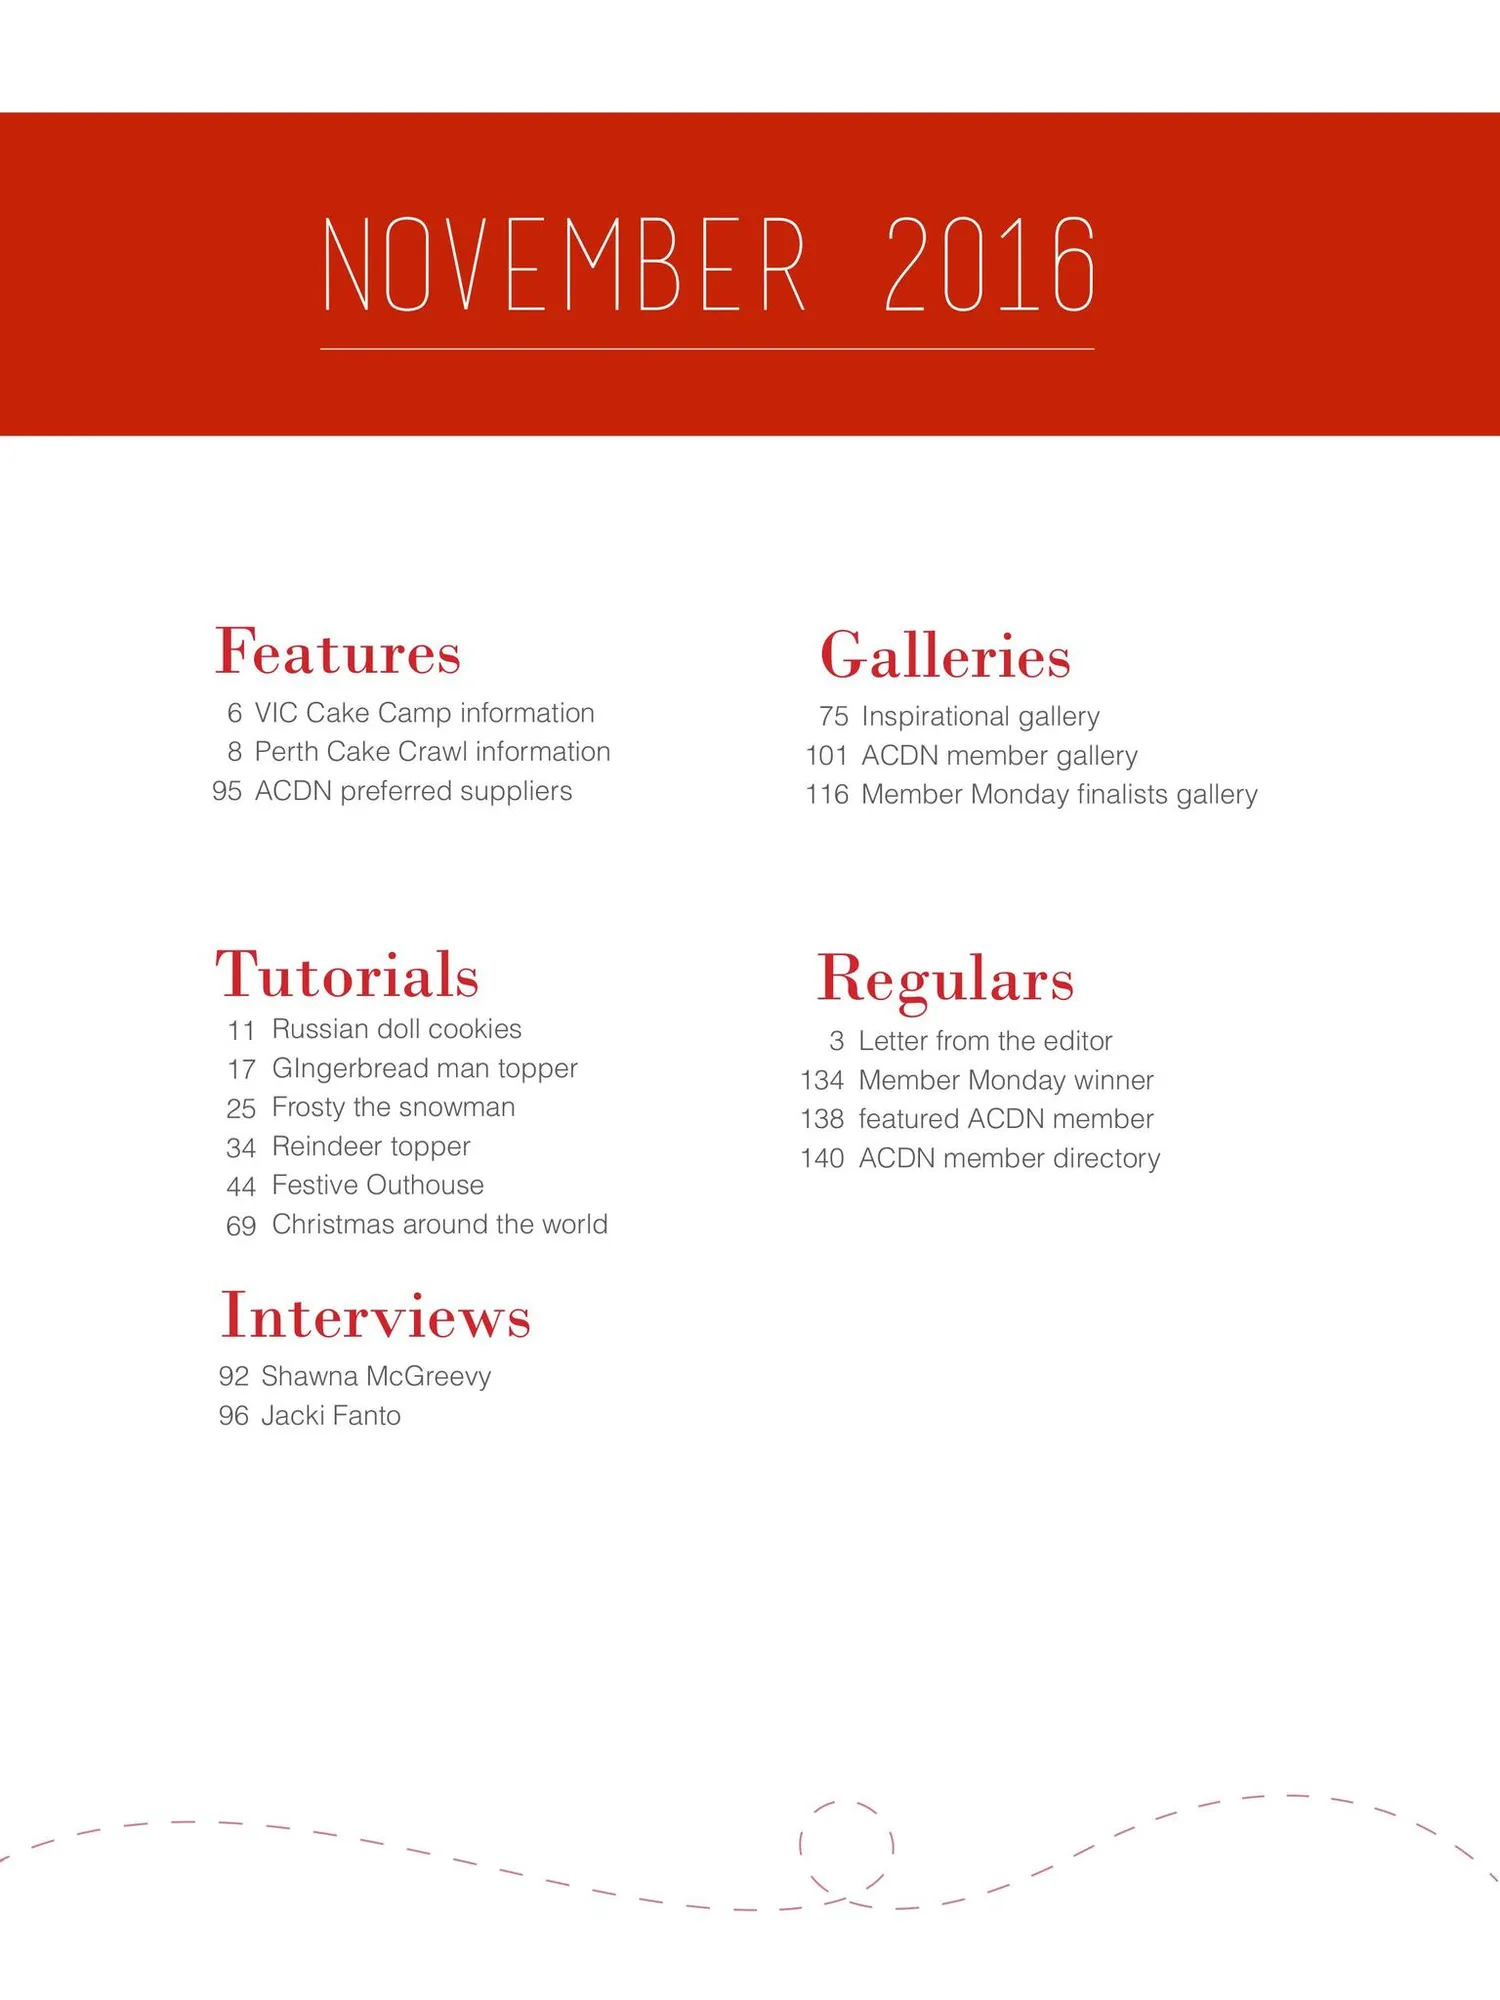
november 2016 84 Features 6 VIC Cake Camp information 8 Perth Cake Crawl information 95 ACDN preferred suppliers Tutorials 11 17 25 34 44 69 Russian doll cookies GIngerbread man topper Frosty the snowman Reindeer topper Festive Outhouse Christmas around the world Interviews 92 Shawna McGreevy 96 Jacki Fanto Galleries 75 Inspirational gallery 101 ACDN member gallery 116 Member Monday finalists gallery Regulars 3 134 138 140 Letter from the editor Member Monday winner featured ACDN member ACDN member directory
Page 6 text
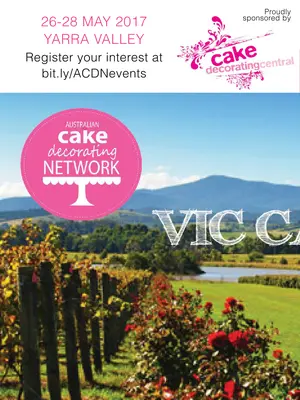
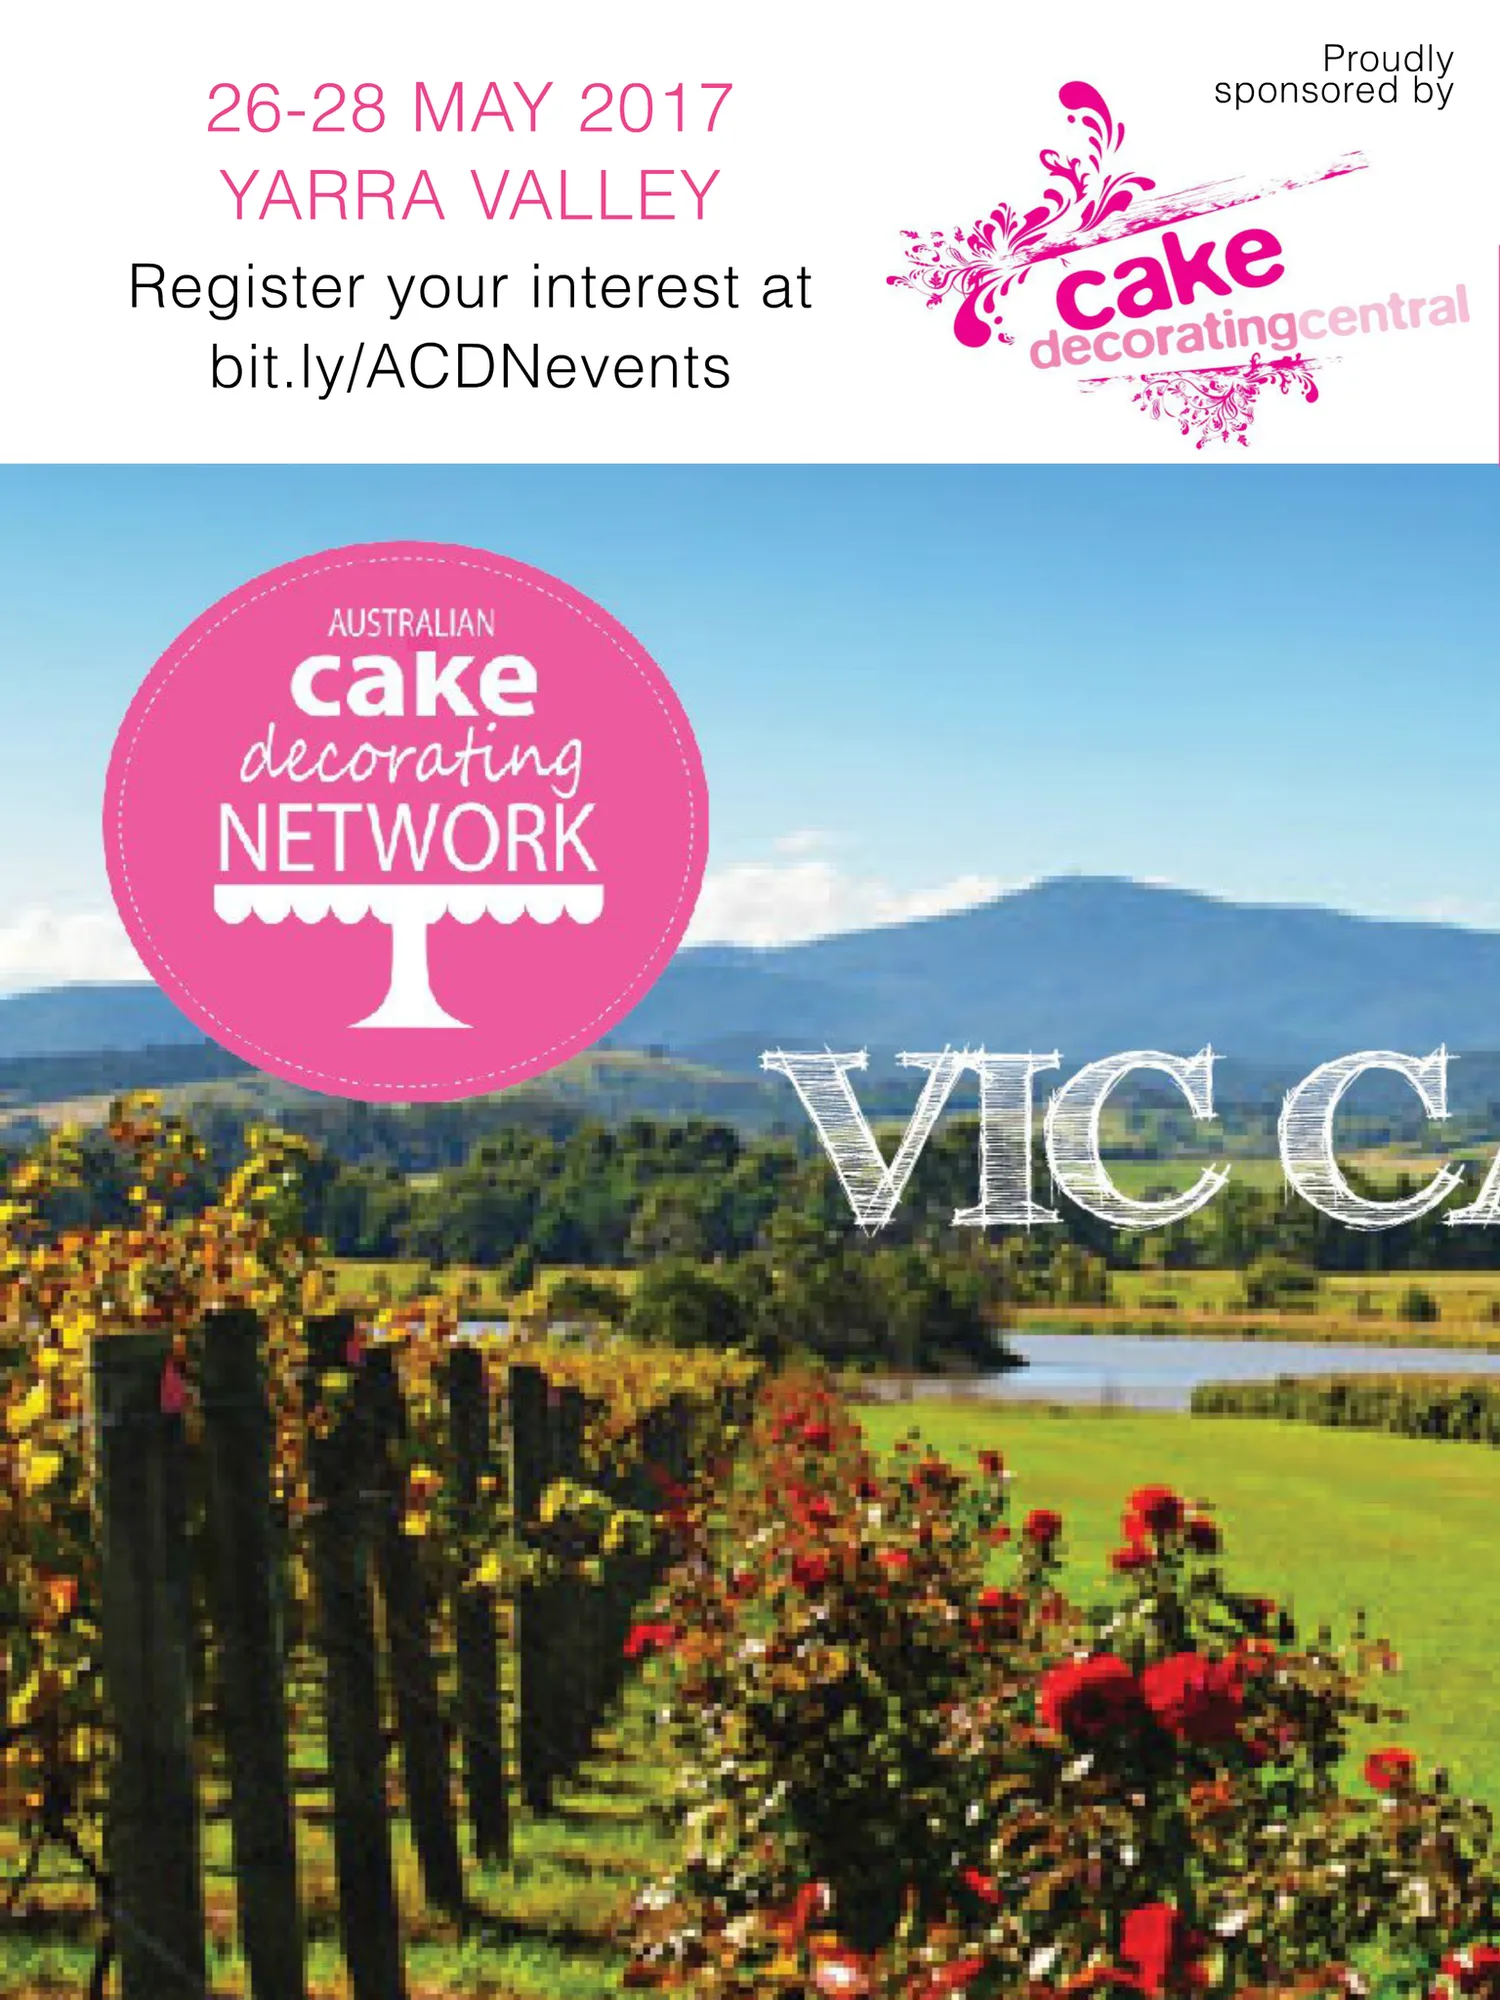
26-28 MAY 2017 YARRA VALLEY Register your interest at bit.ly/ACDNevents Proudly sponsored by
Page 7 text
JOIN US FOR AUSTRALIA'S BEST CAKE DECORATING RETREAT 8 COURSES 3 DAYS 60 CAKE CAMPERS Tickets on sale 4th December! IMAGE: YARRA VALLEY LODGE


Page 8 text
the cake crawl bus! high tea, demos, champagne, bus games, showbag & shopping at Perth Cake Crawl February 2017 Register your interest at www.acdn.me
Page 9 text
Celebrate! A collection of tutorials to help you make your own gorgeous Christmas creations
Page 10 text
Read Cake! magazine online or download & print for offline viewing HERE! f www.acdn.me [email protected] click here to join our mailing list! To advertise in Cake! magazine, contact [email protected]
Page 11 text
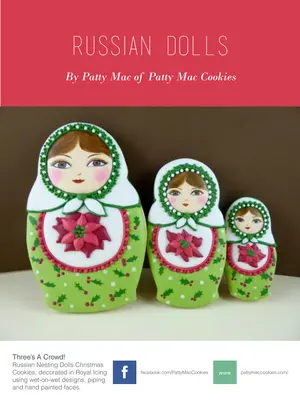
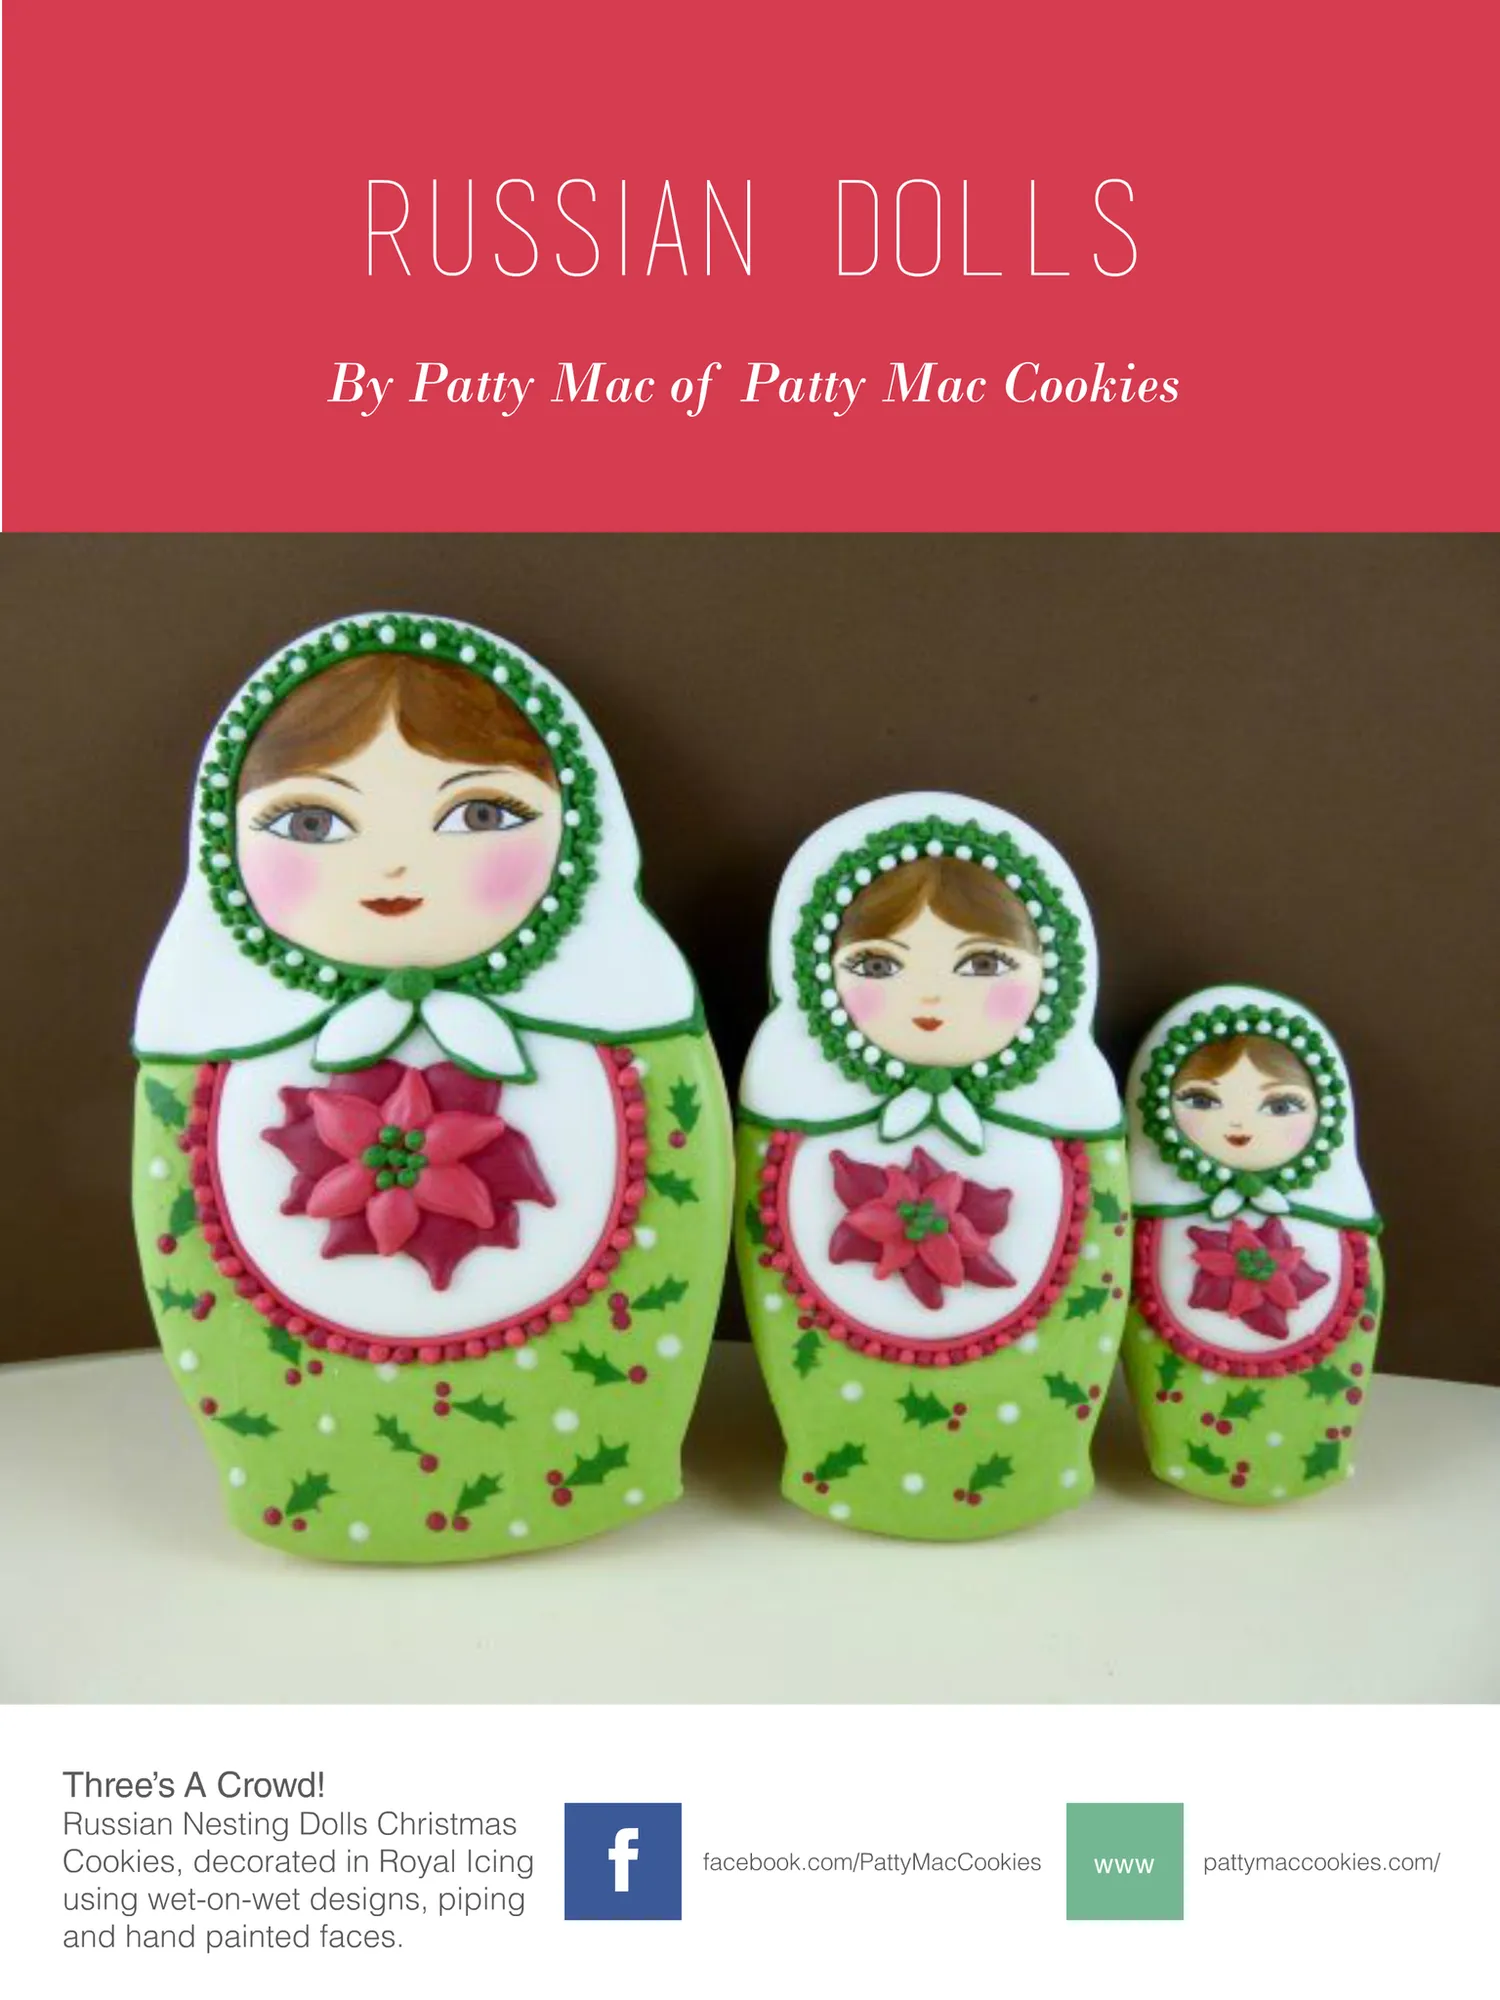
Russian Dolls By Patty Mac of Patty Mac Cookies Three’s A Crowd! Russian Nesting Dolls Christmas Cookies, decorated in Royal Icing using wet-on-wet designs, piping and hand painted faces. f facebook.com/PattyMacCookies www pattymaccookies.com/
Page 12 text
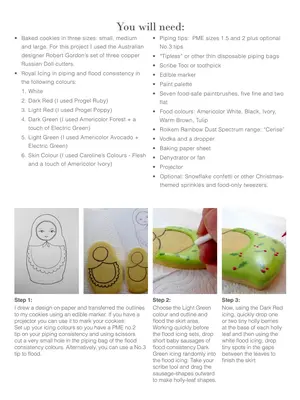
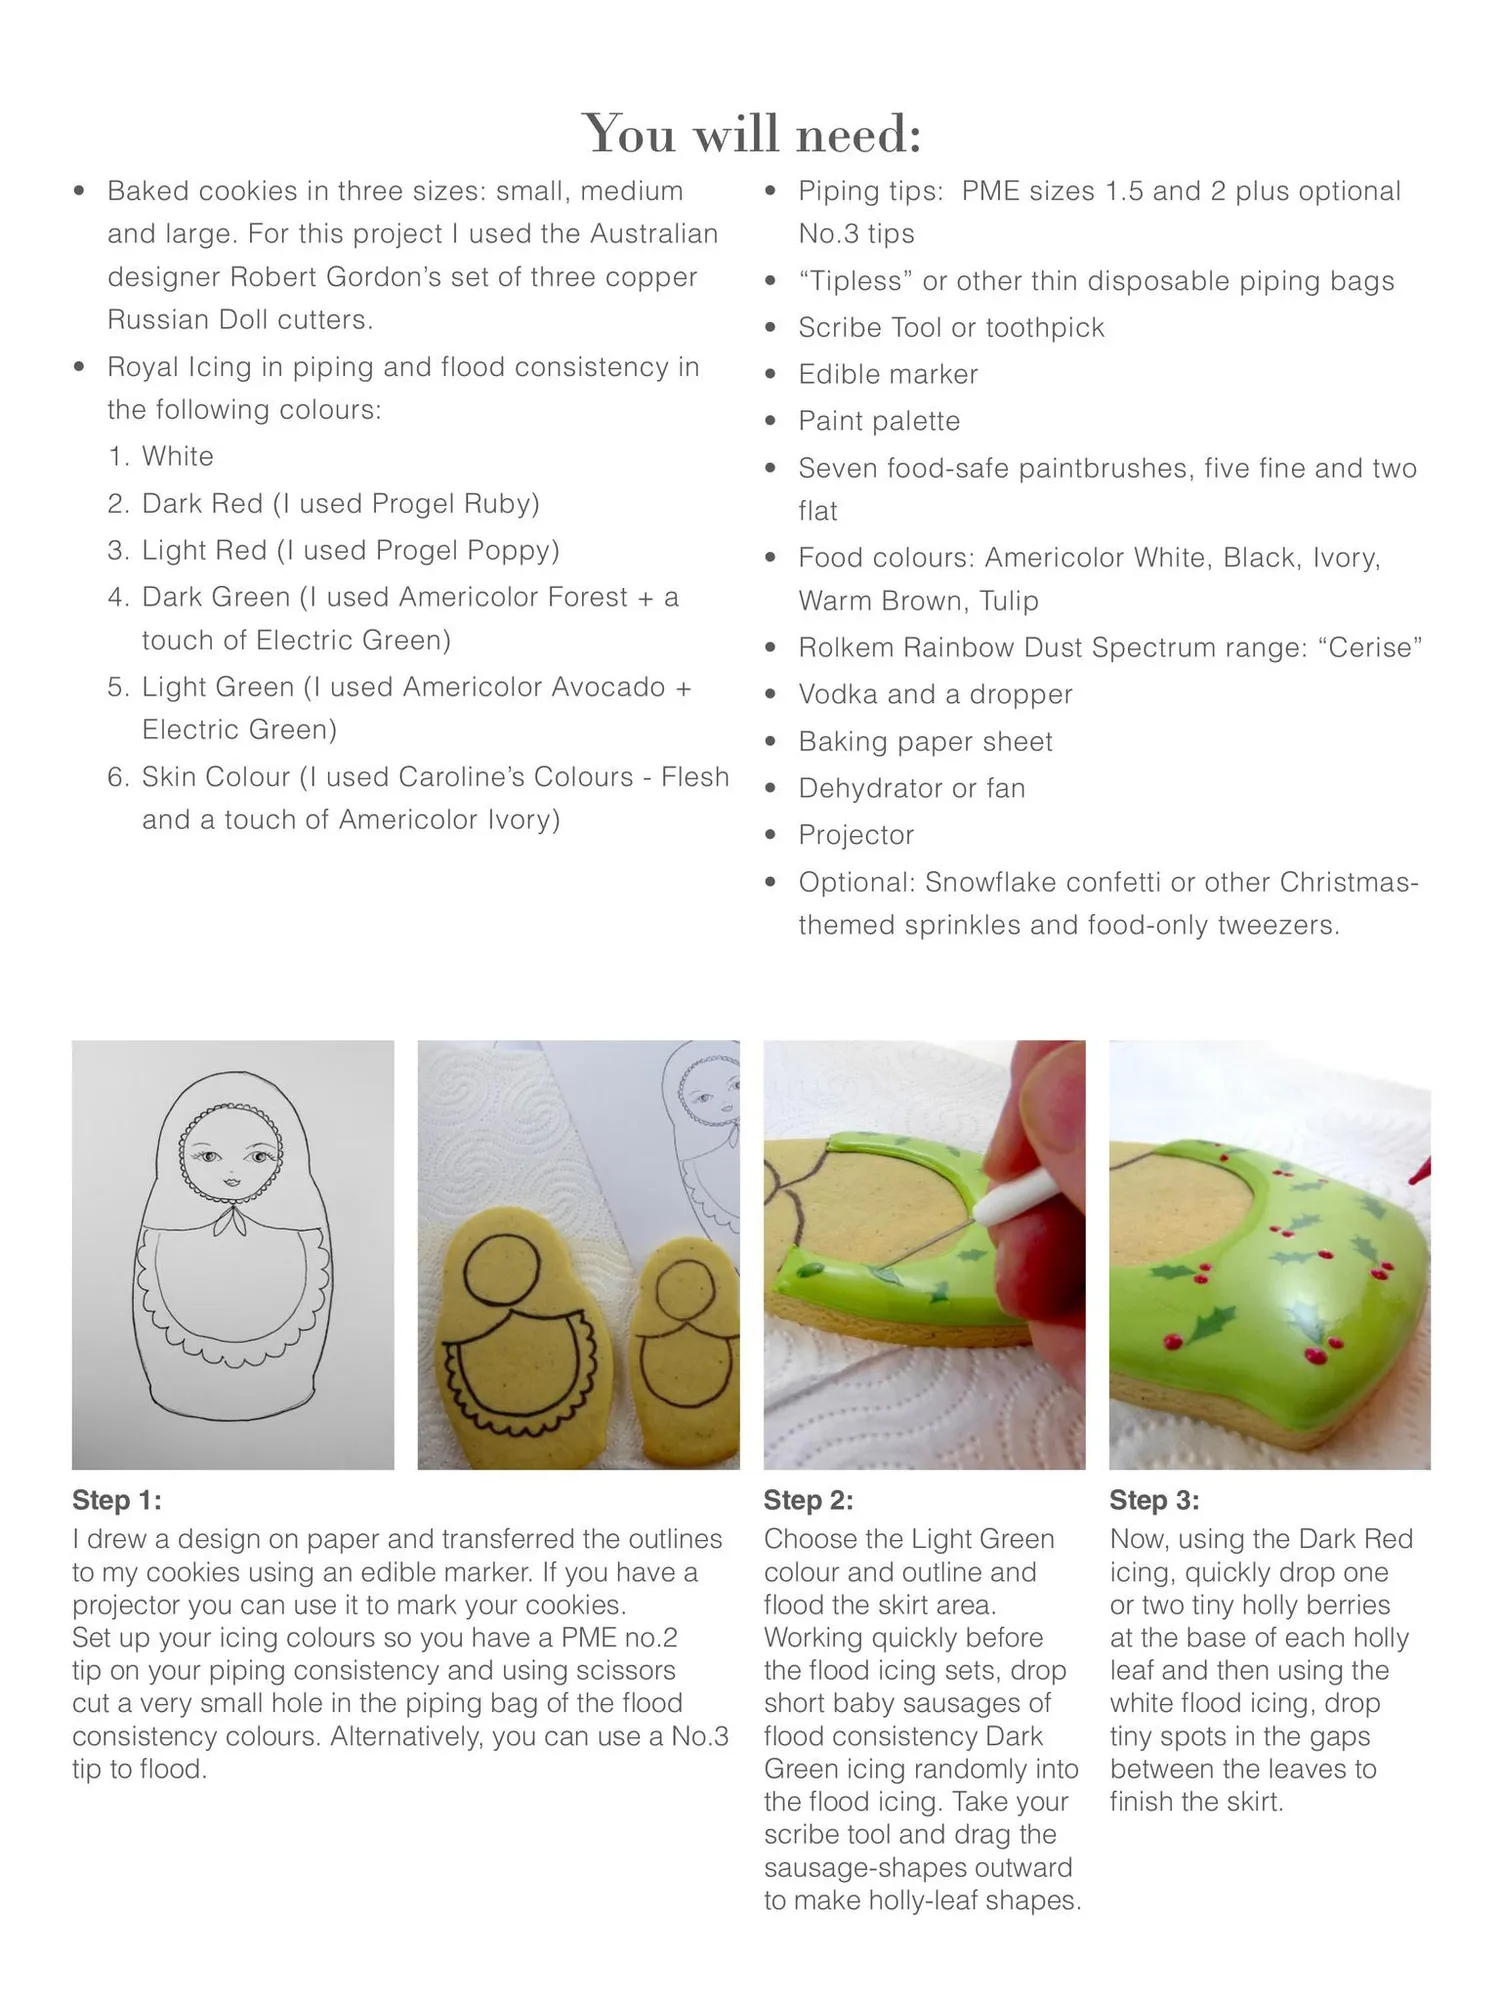
You will need: • Baked cookies in three sizes: small, medium and large. For this project I used the Australian • Piping tips: PME sizes 1.5 and 2 plus optional No.3 tips designer Robert Gordon’s set of three copper • “Tipless” or other thin disposable piping bags Russian Doll cutters. • Scribe Tool or toothpick • Royal Icing in piping and flood consistency in • Edible marker the following colours: • Paint palette 1. White • Seven food-safe paintbrushes, five fine and two 2. Dark Red (I used Progel Ruby) 3. Light Red (I used Progel Poppy) 4. Dark Green (I used Americolor Forest + a touch of Electric Green) 5. Light Green (I used Americolor Avocado + Electric Green) 6. Skin Colour (I used Caroline’s Colours - Flesh and a touch of Americolor Ivory) flat • Food colours: Americolor White, Black, Ivory, Warm Brown, Tulip • Rolkem Rainbow Dust Spectrum range: “Cerise” • Vodka and a dropper • Baking paper sheet • Dehydrator or fan • Projector • Optional: Snowflake confetti or other Christmasthemed sprinkles and food-only tweezers. Step 1: I drew a design on paper and transferred the outlines to my cookies using an edible marker. If you have a projector you can use it to mark your cookies. Set up your icing colours so you have a PME no.2 tip on your piping consistency and using scissors cut a very small hole in the piping bag of the flood consistency colours. Alternatively, you can use a No.3 tip to flood. Step 2: Choose the Light Green colour and outline and flood the skirt area. Working quickly before the flood icing sets, drop short baby sausages of flood consistency Dark Green icing randomly into the flood icing. Take your scribe tool and drag the sausage-shapes outward to make holly-leaf shapes. Step 3: Now, using the Dark Red icing, quickly drop one or two tiny holly berries at the base of each holly leaf and then using the white flood icing, drop tiny spots in the gaps between the leaves to finish the skirt.
Page 13 text
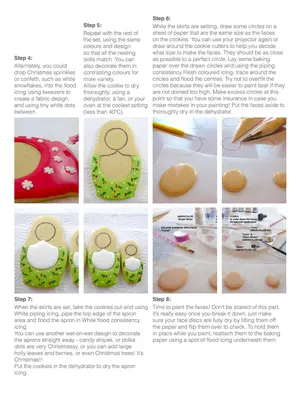
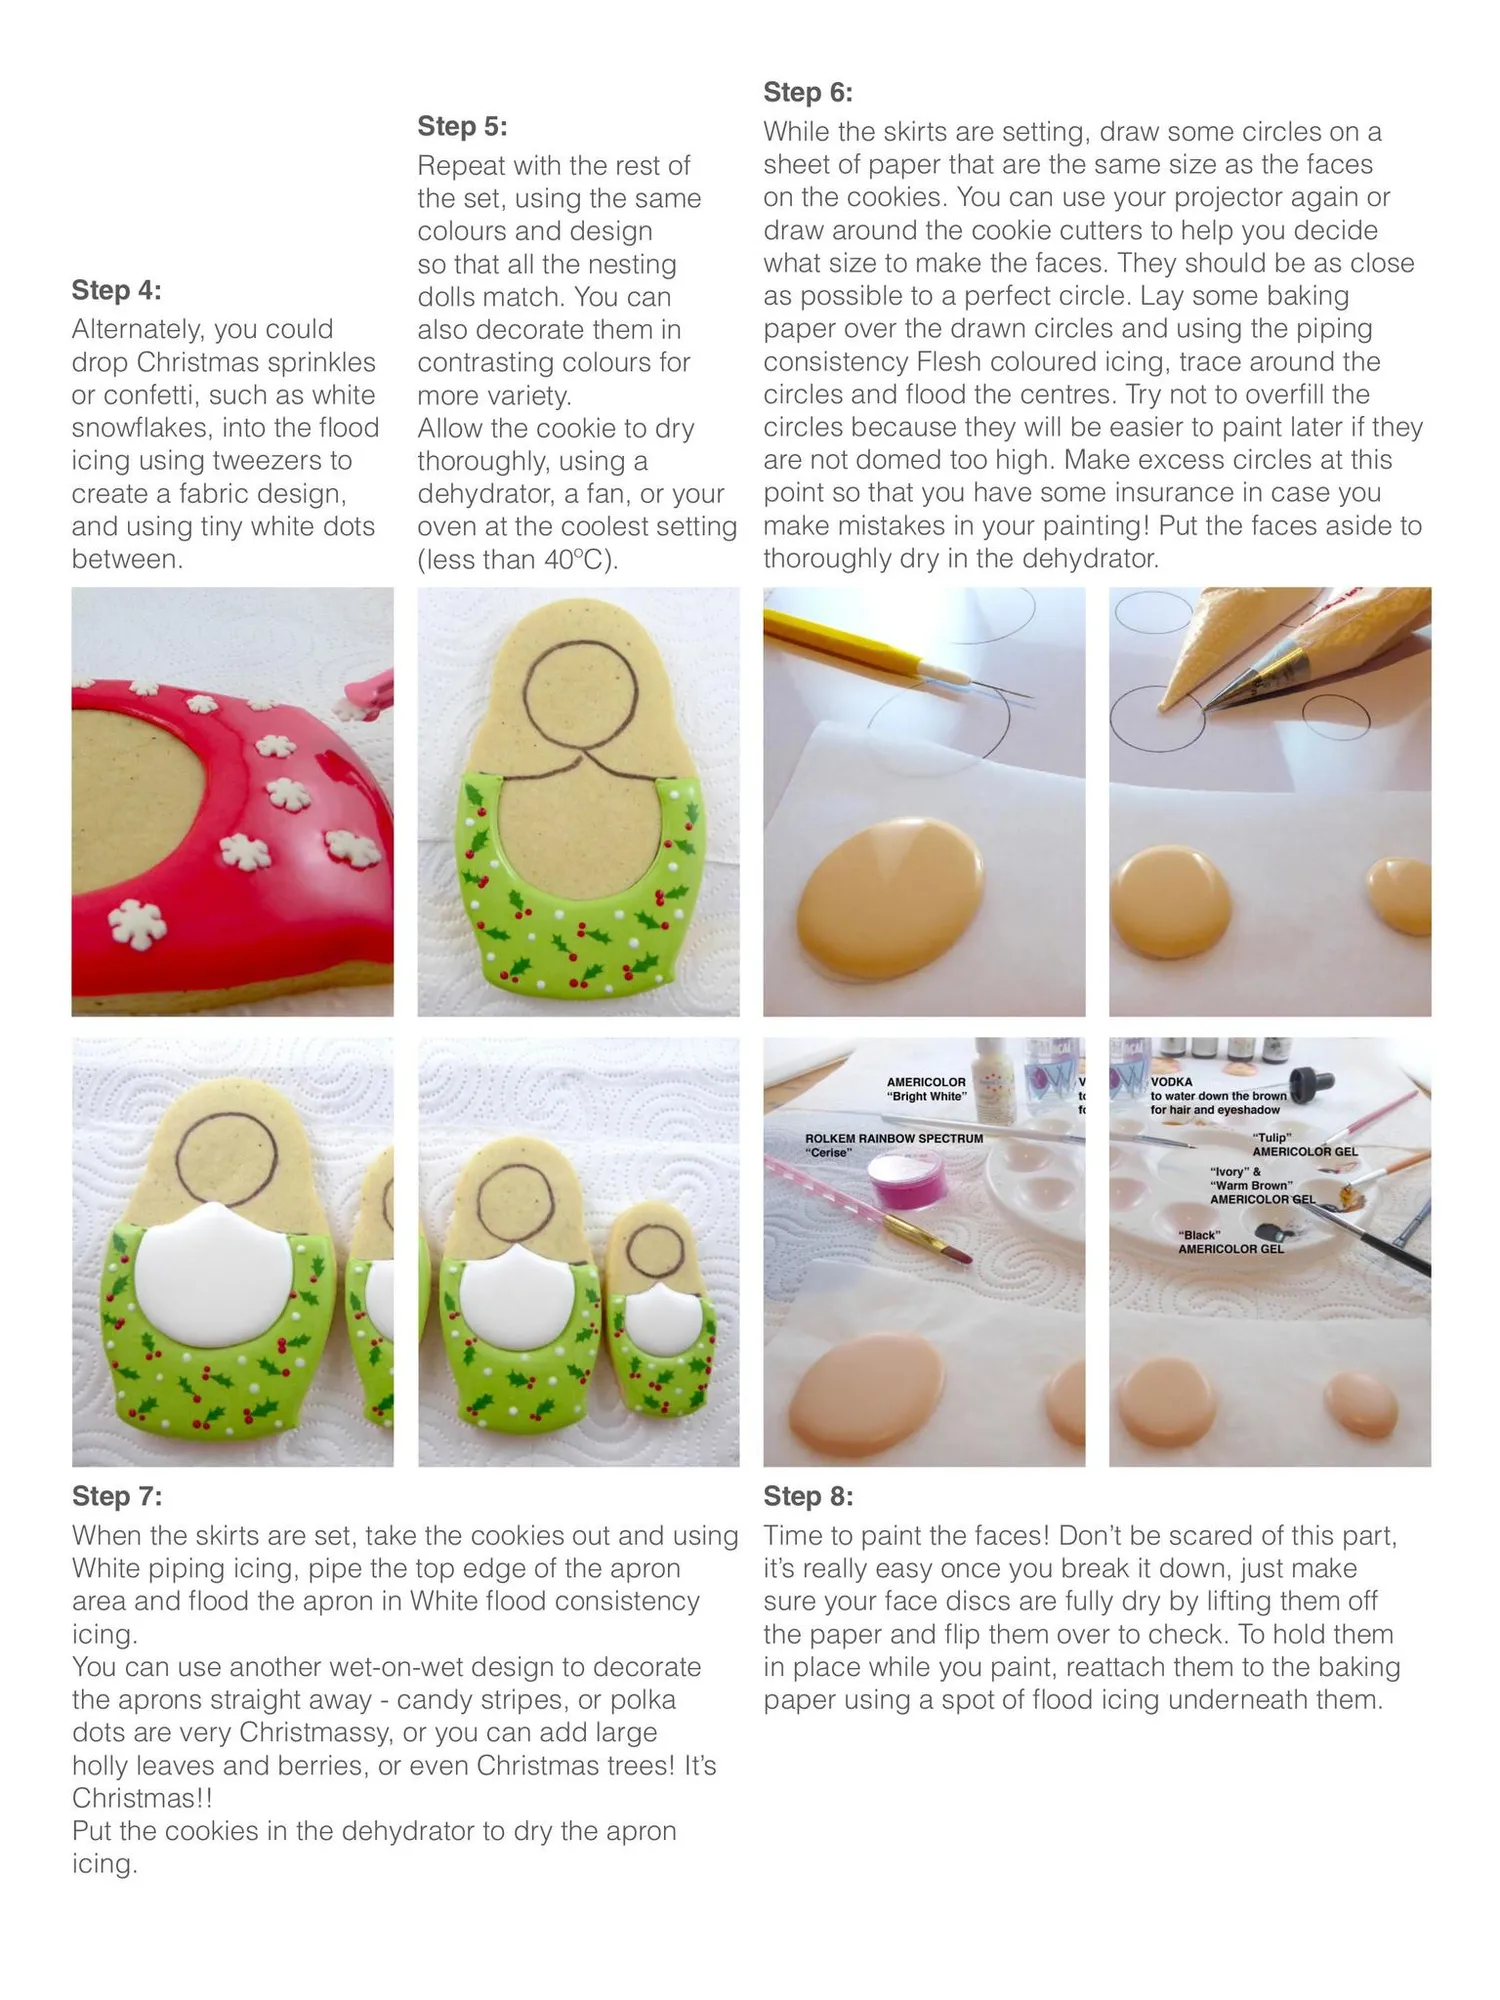
Step 4: Alternately, you could drop Christmas sprinkles or confetti, such as white snowflakes, into the flood icing using tweezers to create a fabric design, and using tiny white dots between. Step 6: Step 5: While the skirts are setting, draw some circles on a sheet of paper that are the same size as the faces Repeat with the rest of on the cookies. You can use your projector again or the set, using the same draw around the cookie cutters to help you decide colours and design what size to make the faces. They should be as close so that all the nesting as possible to a perfect circle. Lay some baking dolls match. You can paper over the drawn circles and using the piping also decorate them in consistency Flesh coloured icing, trace around the contrasting colours for circles and flood the centres. Try not to overfill the more variety. circles because they will be easier to paint later if they Allow the cookie to dry are not domed too high. Make excess circles at this thoroughly, using a dehydrator, a fan, or your point so that you have some insurance in case you oven at the coolest setting make mistakes in your painting! Put the faces aside to thoroughly dry in the dehydrator. (less than 40ºC). Step 7: When the skirts are set, take the cookies out and using White piping icing, pipe the top edge of the apron area and flood the apron in White flood consistency icing. You can use another wet-on-wet design to decorate the aprons straight away - candy stripes, or polka dots are very Christmassy, or you can add large holly leaves and berries, or even Christmas trees! It’s Christmas!! Put the cookies in the dehydrator to dry the apron icing. Step 8: Time to paint the faces! Don’t be scared of this part, it’s really easy once you break it down, just make sure your face discs are fully dry by lifting them off the paper and flip them over to check. To hold them in place while you paint, reattach them to the baking paper using a spot of flood icing underneath them.
Page 14 text
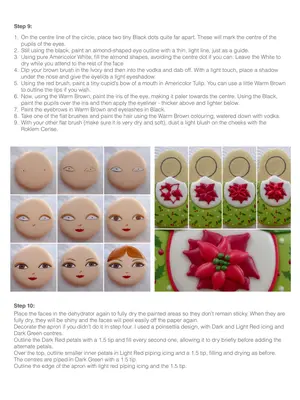
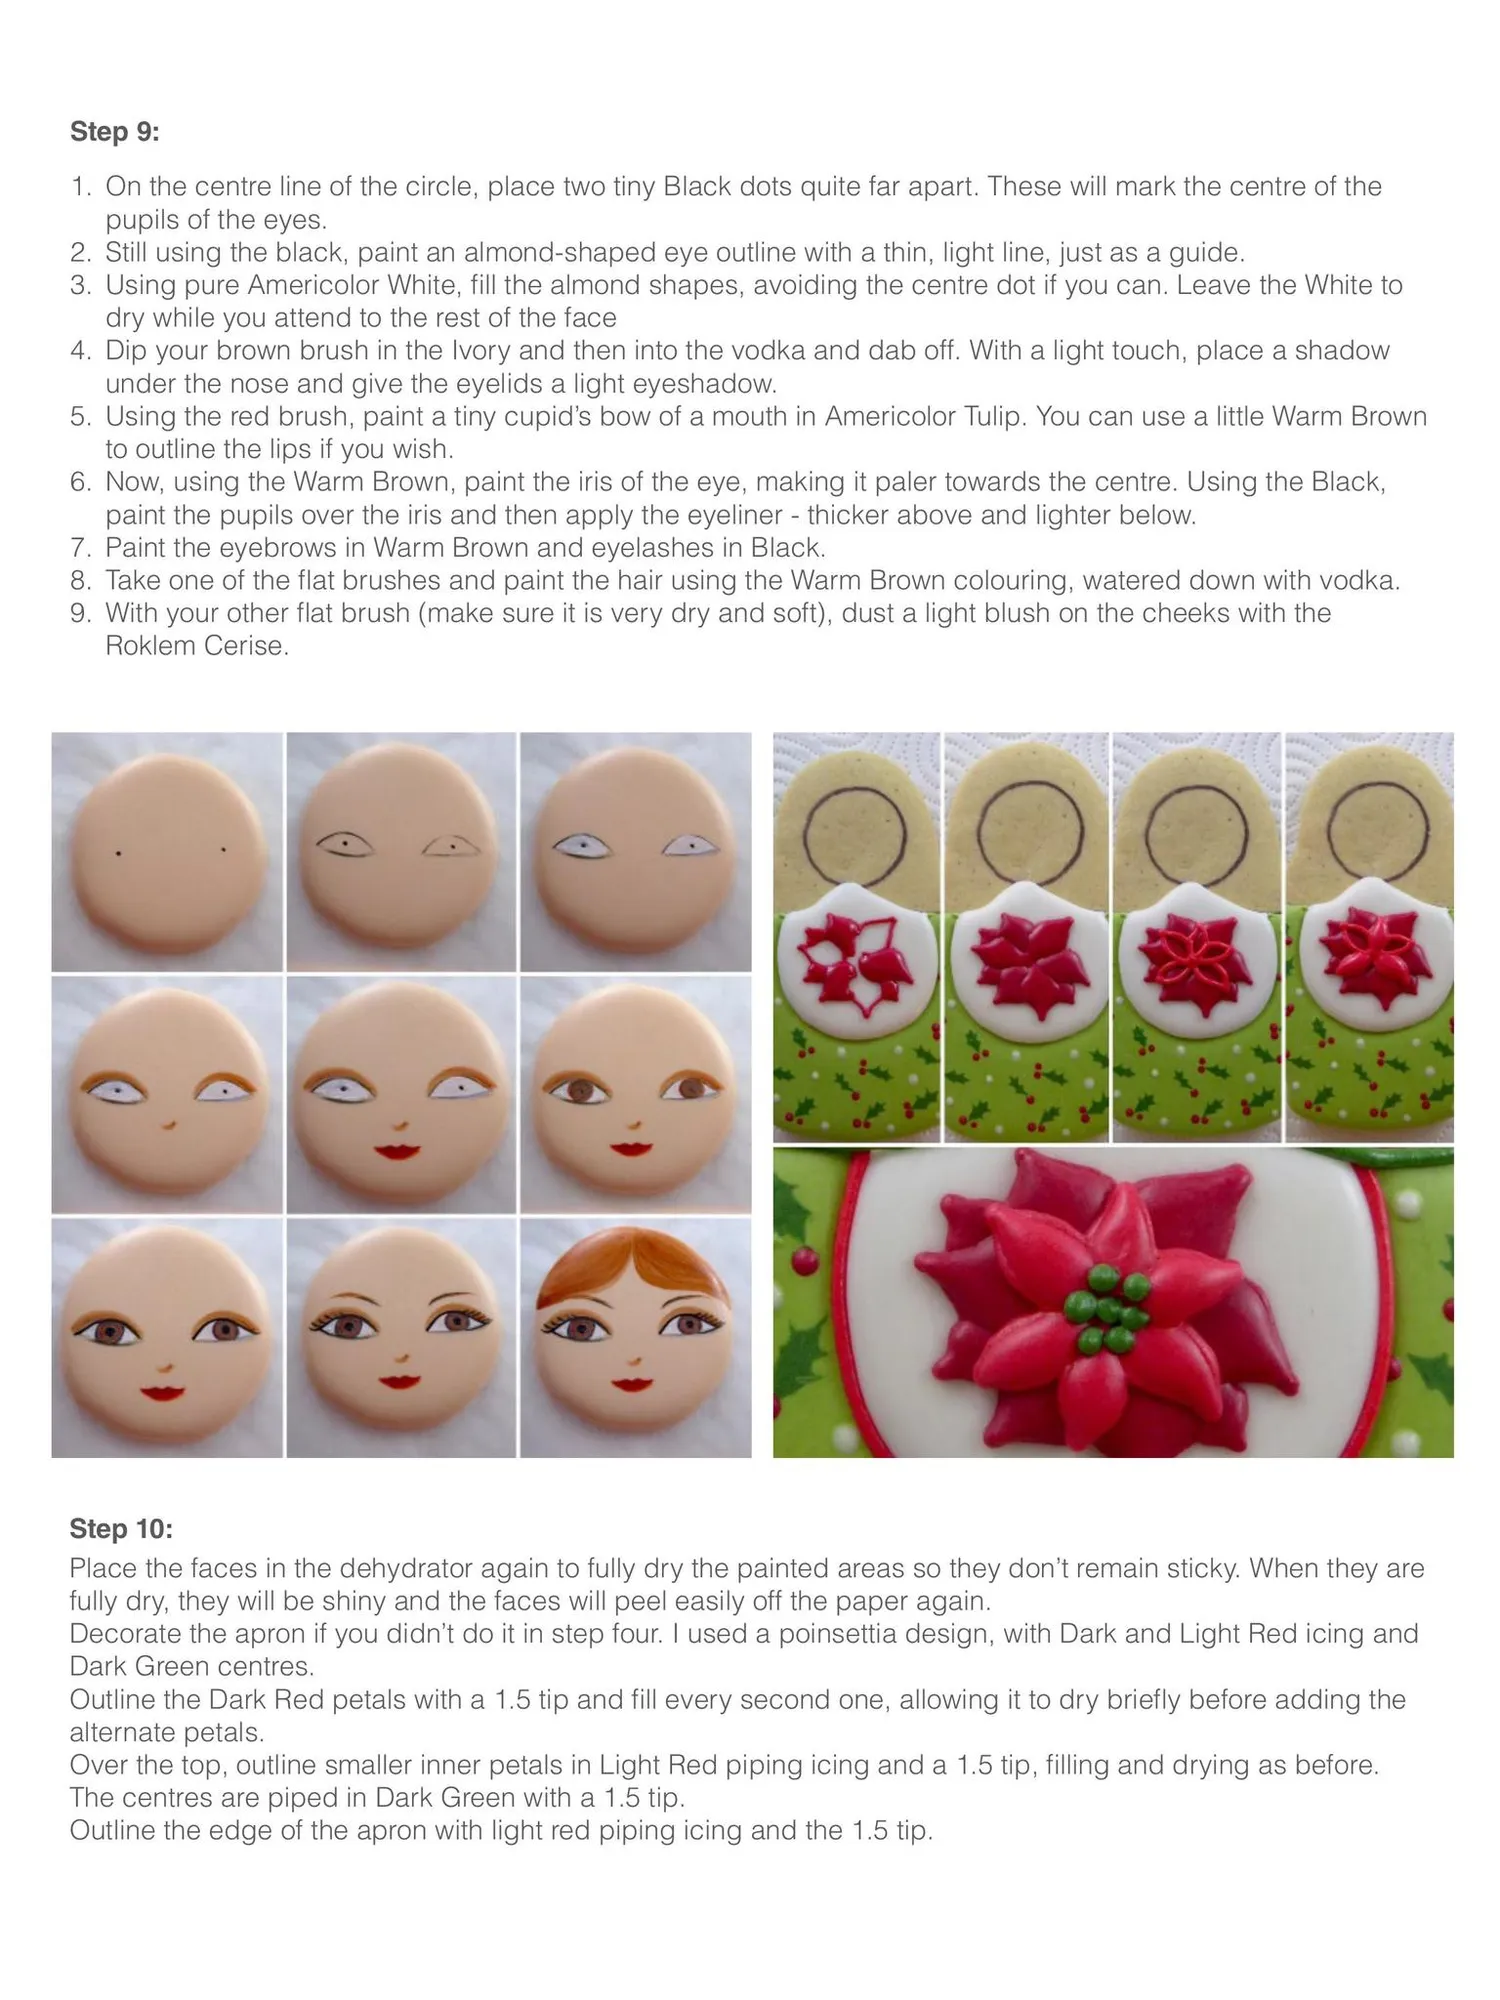
Step 9: 1. On the centre line of the circle, place two tiny Black dots quite far apart. These will mark the centre of the pupils of the eyes. 2. Still using the black, paint an almond-shaped eye outline with a thin, light line, just as a guide. 3. Using pure Americolor White, fill the almond shapes, avoiding the centre dot if you can. Leave the White to dry while you attend to the rest of the face 4. Dip your brown brush in the Ivory and then into the vodka and dab off. With a light touch, place a shadow under the nose and give the eyelids a light eyeshadow. 5. Using the red brush, paint a tiny cupid’s bow of a mouth in Americolor Tulip. You can use a little Warm Brown to outline the lips if you wish. 6. Now, using the Warm Brown, paint the iris of the eye, making it paler towards the centre. Using the Black, paint the pupils over the iris and then apply the eyeliner - thicker above and lighter below. 7. Paint the eyebrows in Warm Brown and eyelashes in Black. 8. Take one of the flat brushes and paint the hair using the Warm Brown colouring, watered down with vodka. 9. With your other flat brush (make sure it is very dry and soft), dust a light blush on the cheeks with the Roklem Cerise. Step 10: Place the faces in the dehydrator again to fully dry the painted areas so they don’t remain sticky. When they are fully dry, they will be shiny and the faces will peel easily off the paper again. Decorate the apron if you didn’t do it in step four. I used a poinsettia design, with Dark and Light Red icing and Dark Green centres. Outline the Dark Red petals with a 1.5 tip and fill every second one, allowing it to dry briefly before adding the alternate petals. Over the top, outline smaller inner petals in Light Red piping icing and a 1.5 tip, filling and drying as before. The centres are piped in Dark Green with a 1.5 tip. Outline the edge of the apron with light red piping icing and the 1.5 tip.
Page 15 text
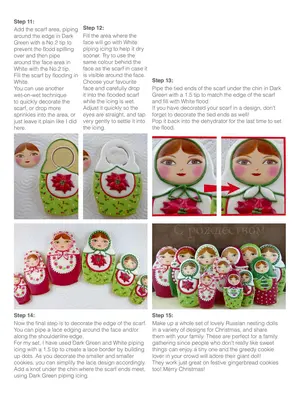
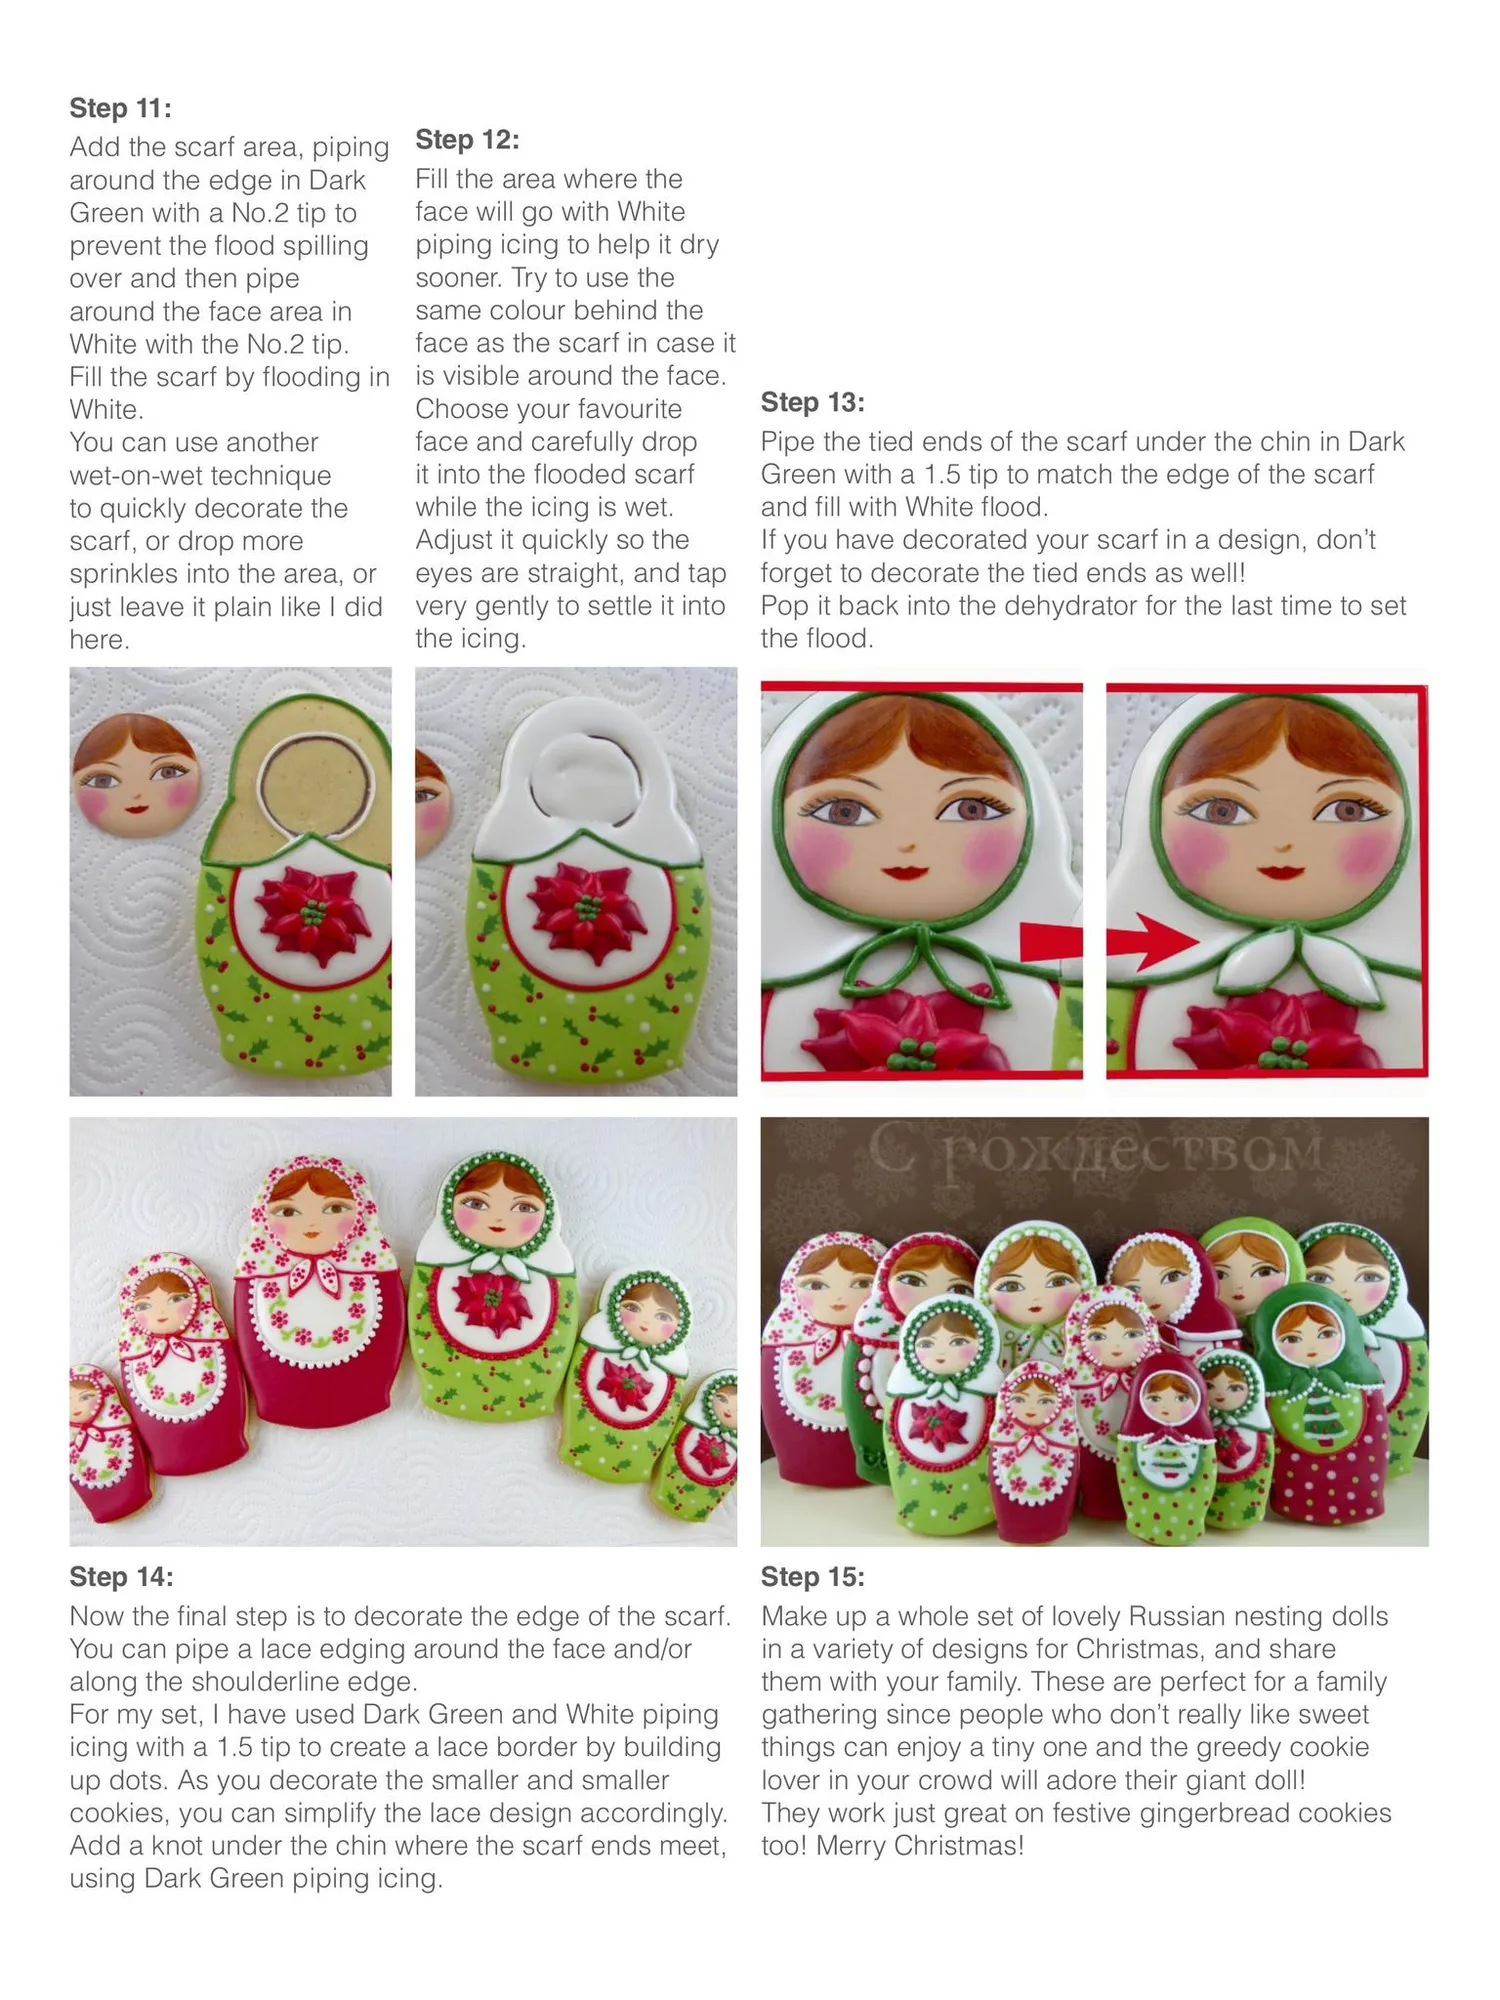
Step 11: Add the scarf area, piping around the edge in Dark Green with a No.2 tip to prevent the flood spilling over and then pipe around the face area in White with the No.2 tip. Fill the scarf by flooding in White. You can use another wet-on-wet technique to quickly decorate the scarf, or drop more sprinkles into the area, or just leave it plain like I did here. Step 12: Fill the area where the face will go with White piping icing to help it dry sooner. Try to use the same colour behind the face as the scarf in case it is visible around the face. Choose your favourite face and carefully drop it into the flooded scarf while the icing is wet. Adjust it quickly so the eyes are straight, and tap very gently to settle it into the icing. Step 14: Now the final step is to decorate the edge of the scarf. You can pipe a lace edging around the face and/or along the shoulderline edge. For my set, I have used Dark Green and White piping icing with a 1.5 tip to create a lace border by building up dots. As you decorate the smaller and smaller cookies, you can simplify the lace design accordingly. Add a knot under the chin where the scarf ends meet, using Dark Green piping icing. Step 13: Pipe the tied ends of the scarf under the chin in Dark Green with a 1.5 tip to match the edge of the scarf and fill with White flood. If you have decorated your scarf in a design, don’t forget to decorate the tied ends as well! Pop it back into the dehydrator for the last time to set the flood. Step 15: Make up a whole set of lovely Russian nesting dolls in a variety of designs for Christmas, and share them with your family. These are perfect for a family gathering since people who don’t really like sweet things can enjoy a tiny one and the greedy cookie lover in your crowd will adore their giant doll! They work just great on festive gingerbread cookies too! Merry Christmas!
Page 16 text
EvErything you nEEd to makE your nExt cakE! Cake Decorating Supplies Store and School Shop 17 Majura Park Shopping Centre, Canberra Airport www.latorta.com.au (02) 6257 1248

Page 17 text
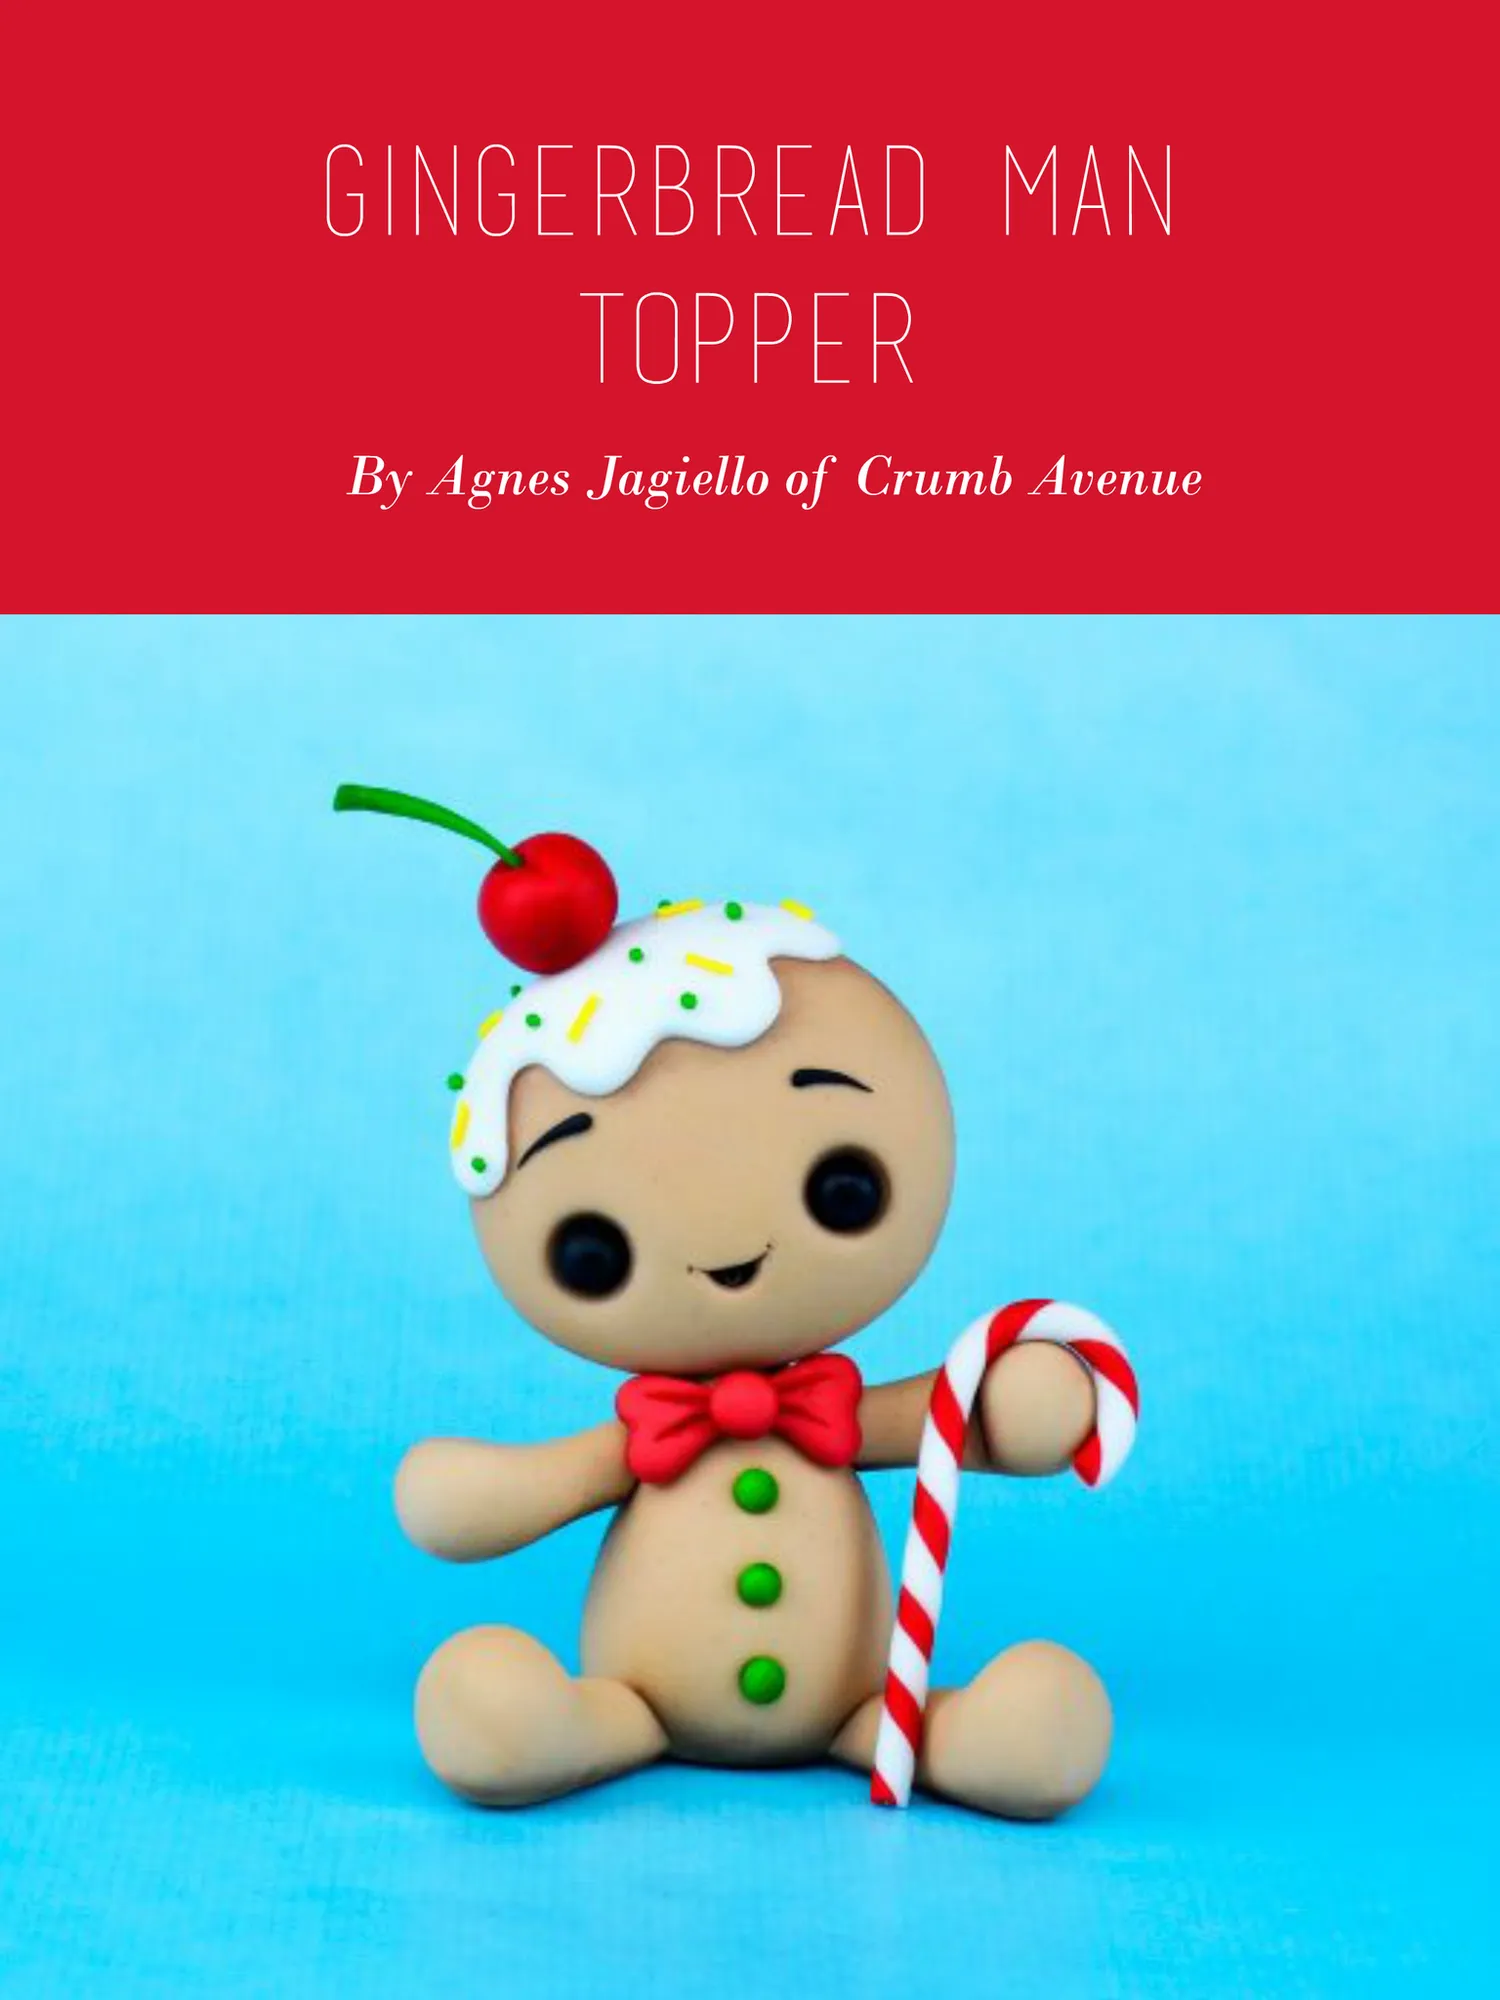
Gingerbread Man Topper By Agnes Jagiello of Crumb Avenue
Page 18 text
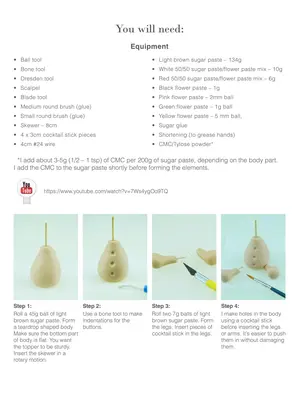
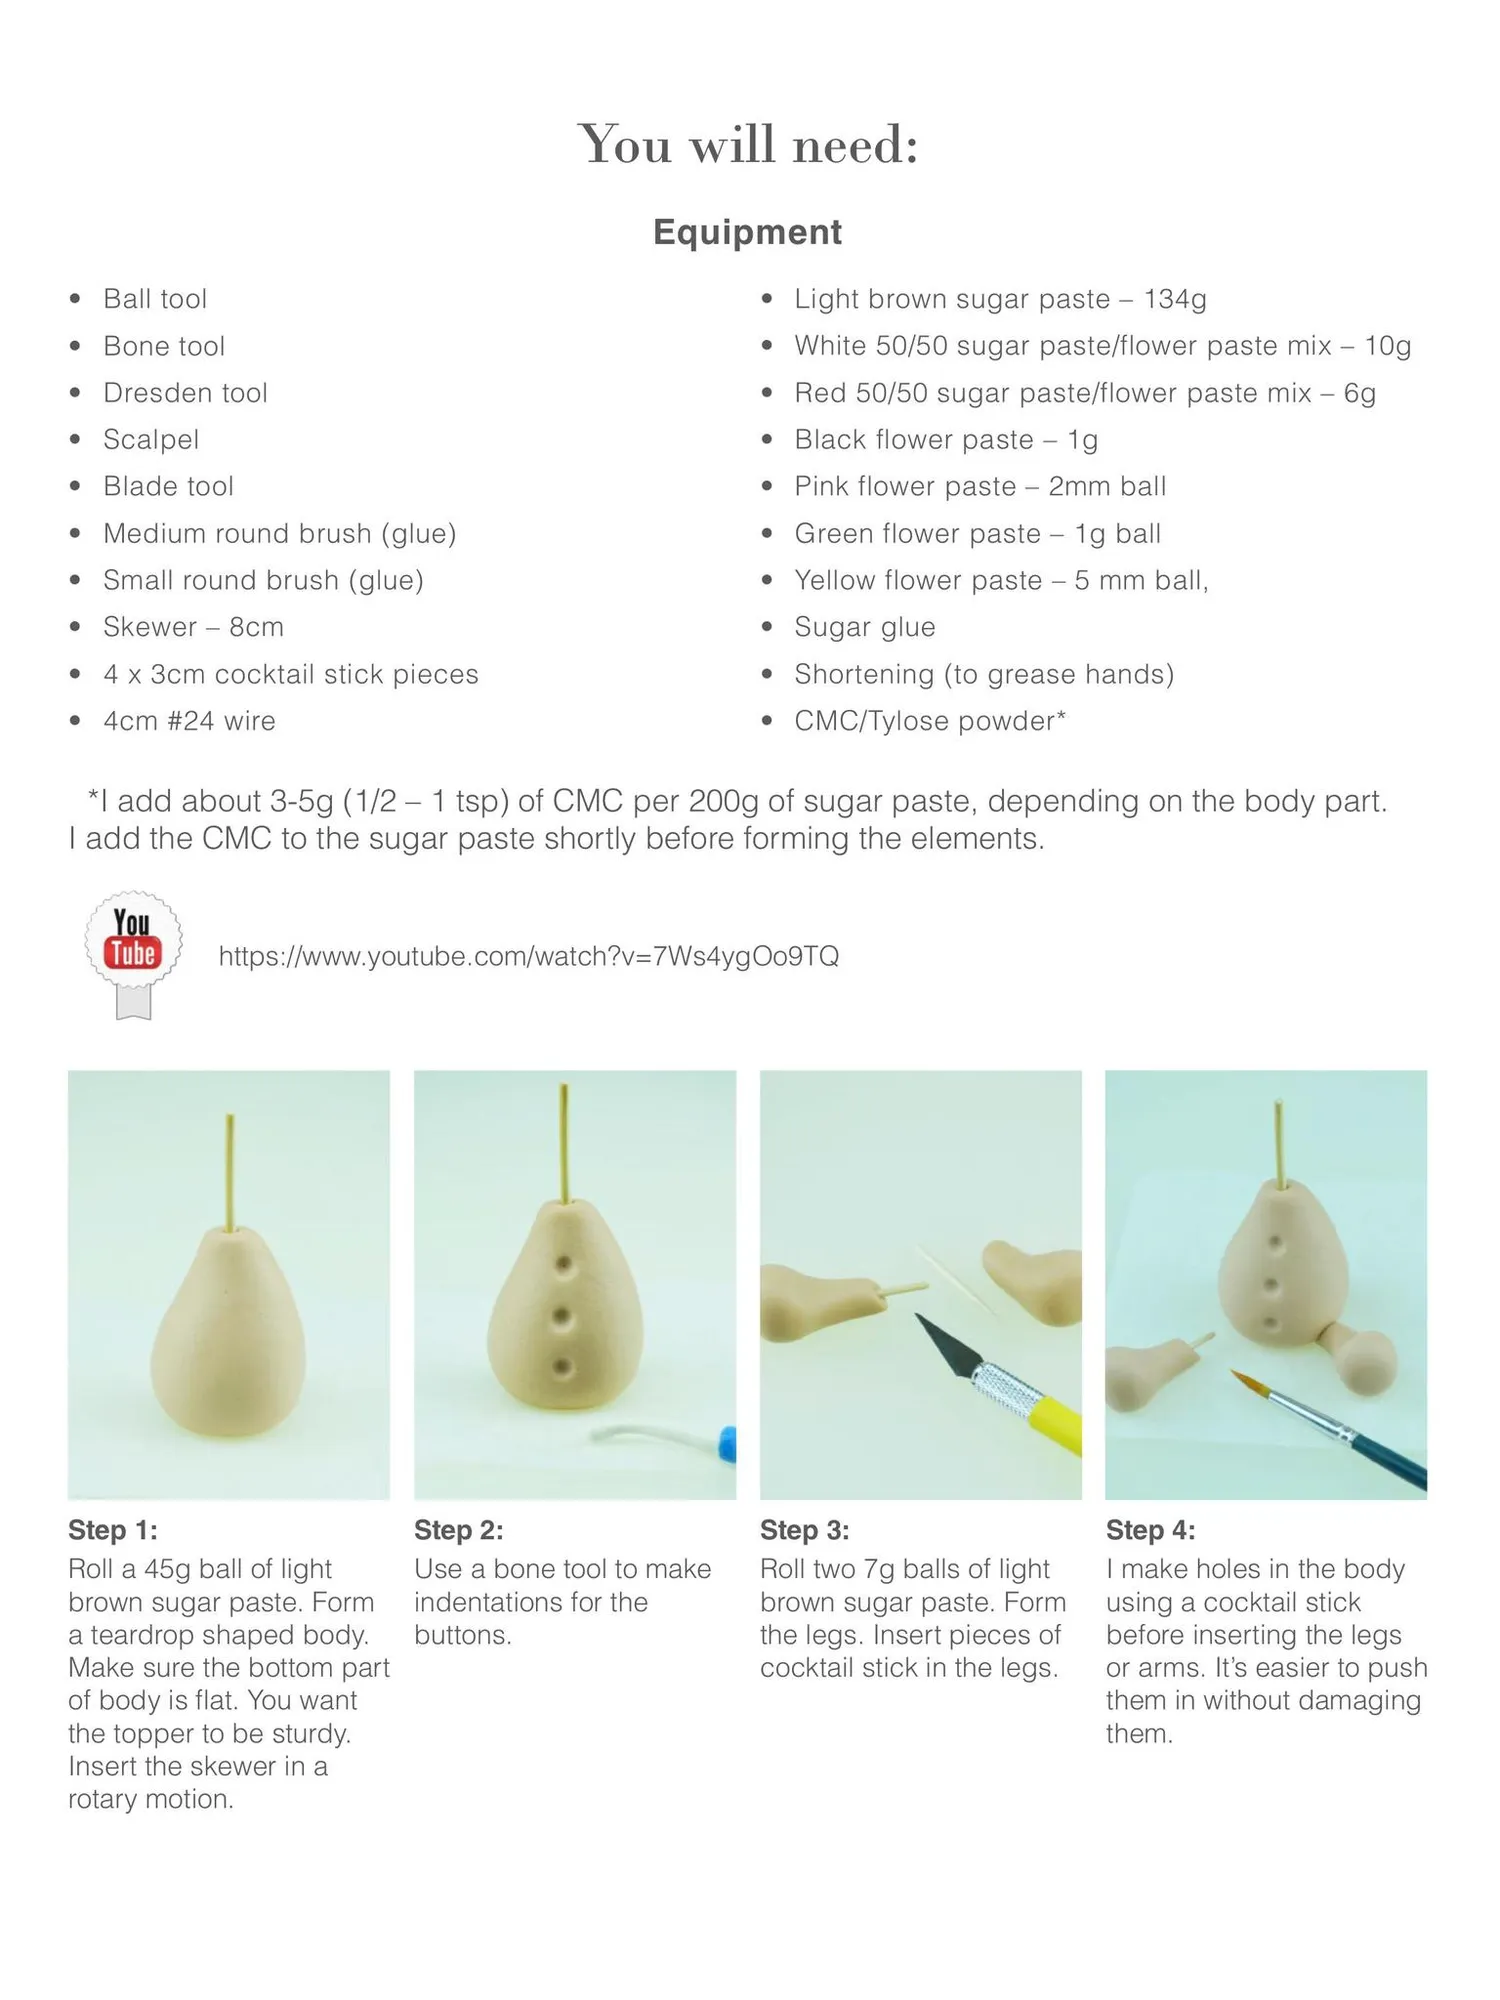
You will need: Equipment • Ball tool • Light brown sugar paste – 134g • Bone tool • White 50/50 sugar paste/flower paste mix – 10g • Dresden tool • Red 50/50 sugar paste/flower paste mix – 6g • Scalpel • Black flower paste – 1g • Blade tool • Pink flower paste – 2mm ball • Medium round brush (glue) • Green flower paste – 1g ball • Small round brush (glue) • Yellow flower paste – 5 mm ball, • Skewer – 8cm • Sugar glue • 4 x 3cm cocktail stick pieces • Shortening (to grease hands) • 4cm #24 wire • CMC/Tylose powder* *I add about 3-5g (1/2 – 1 tsp) of CMC per 200g of sugar paste, depending on the body part. I add the CMC to the sugar paste shortly before forming the elements. https://www.youtube.com/watch?v=7Ws4ygOo9TQ Step 1: Roll a 45g ball of light brown sugar paste. Form a teardrop shaped body. Make sure the bottom part of body is flat. You want the topper to be sturdy. Insert the skewer in a rotary motion. Step 2: Use a bone tool to make indentations for the buttons. Step 3: Roll two 7g balls of light brown sugar paste. Form the legs. Insert pieces of cocktail stick in the legs. Step 4: I make holes in the body using a cocktail stick before inserting the legs or arms. It’s easier to push them in without damaging them.
Page 19 text
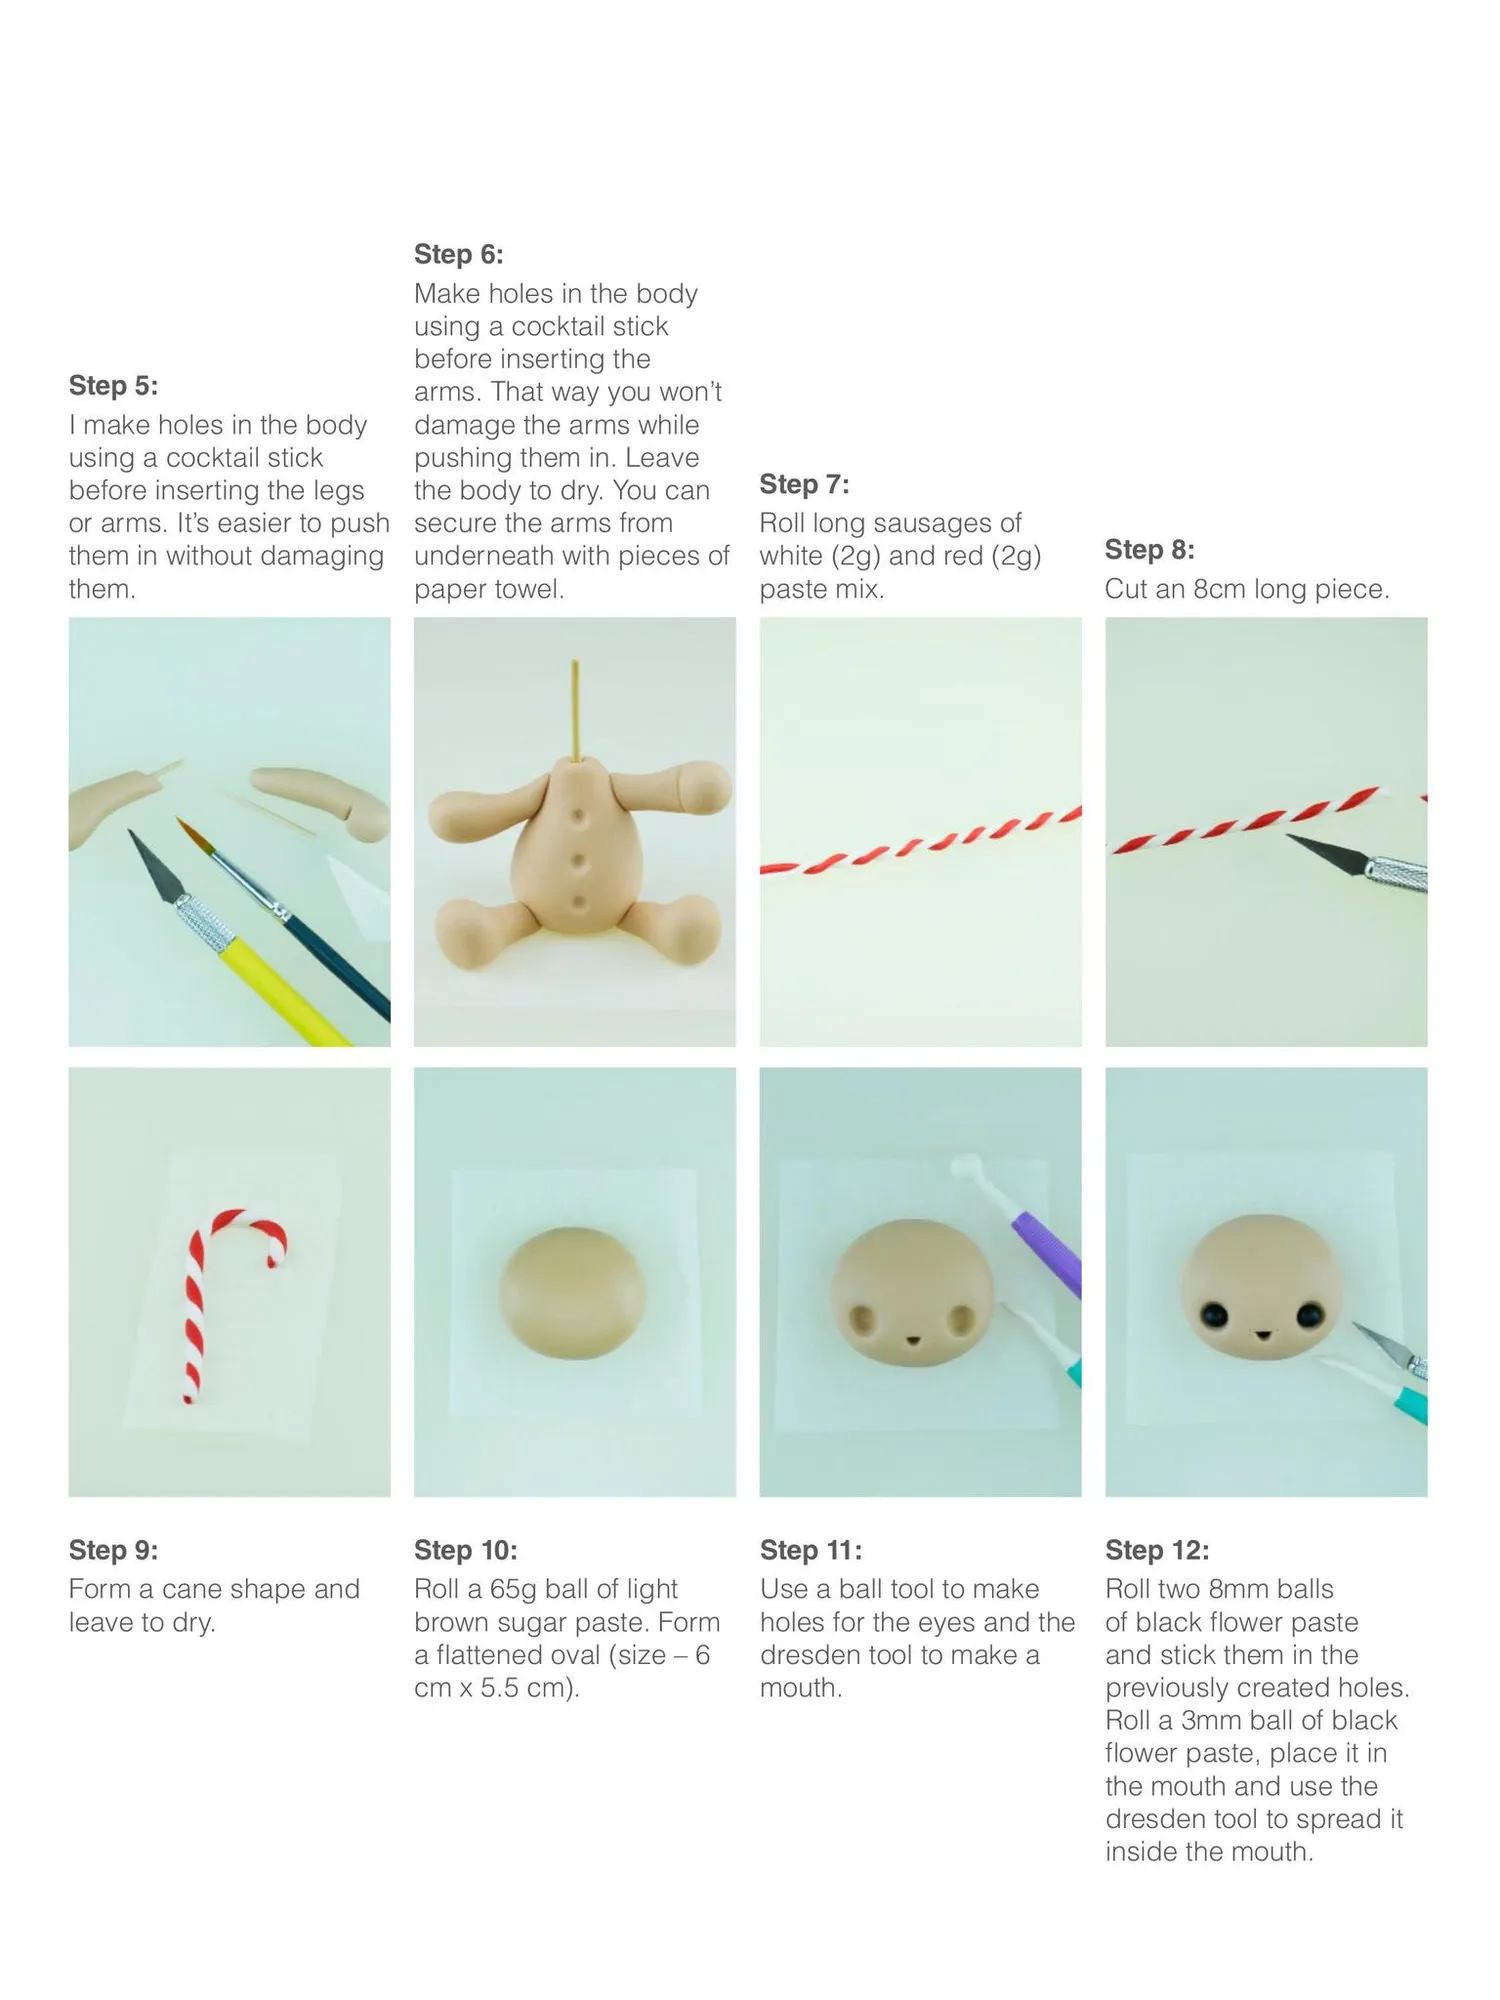
Step 6: Make holes in the body using a cocktail stick before inserting the Step 5: arms. That way you won’t I make holes in the body damage the arms while using a cocktail stick pushing them in. Leave before inserting the legs the body to dry. You can or arms. It’s easier to push secure the arms from them in without damaging underneath with pieces of them. paper towel. Step 9: Form a cane shape and leave to dry. Step 10: Roll a 65g ball of light brown sugar paste. Form a flattened oval (size – 6 cm x 5.5 cm). Step 7: Roll long sausages of white (2g) and red (2g) paste mix. Step 11: Use a ball tool to make holes for the eyes and the dresden tool to make a mouth. Step 8: Cut an 8cm long piece. Step 12: Roll two 8mm balls of black flower paste and stick them in the previously created holes. Roll a 3mm ball of black flower paste, place it in the mouth and use the dresden tool to spread it inside the mouth.
Page 20 text
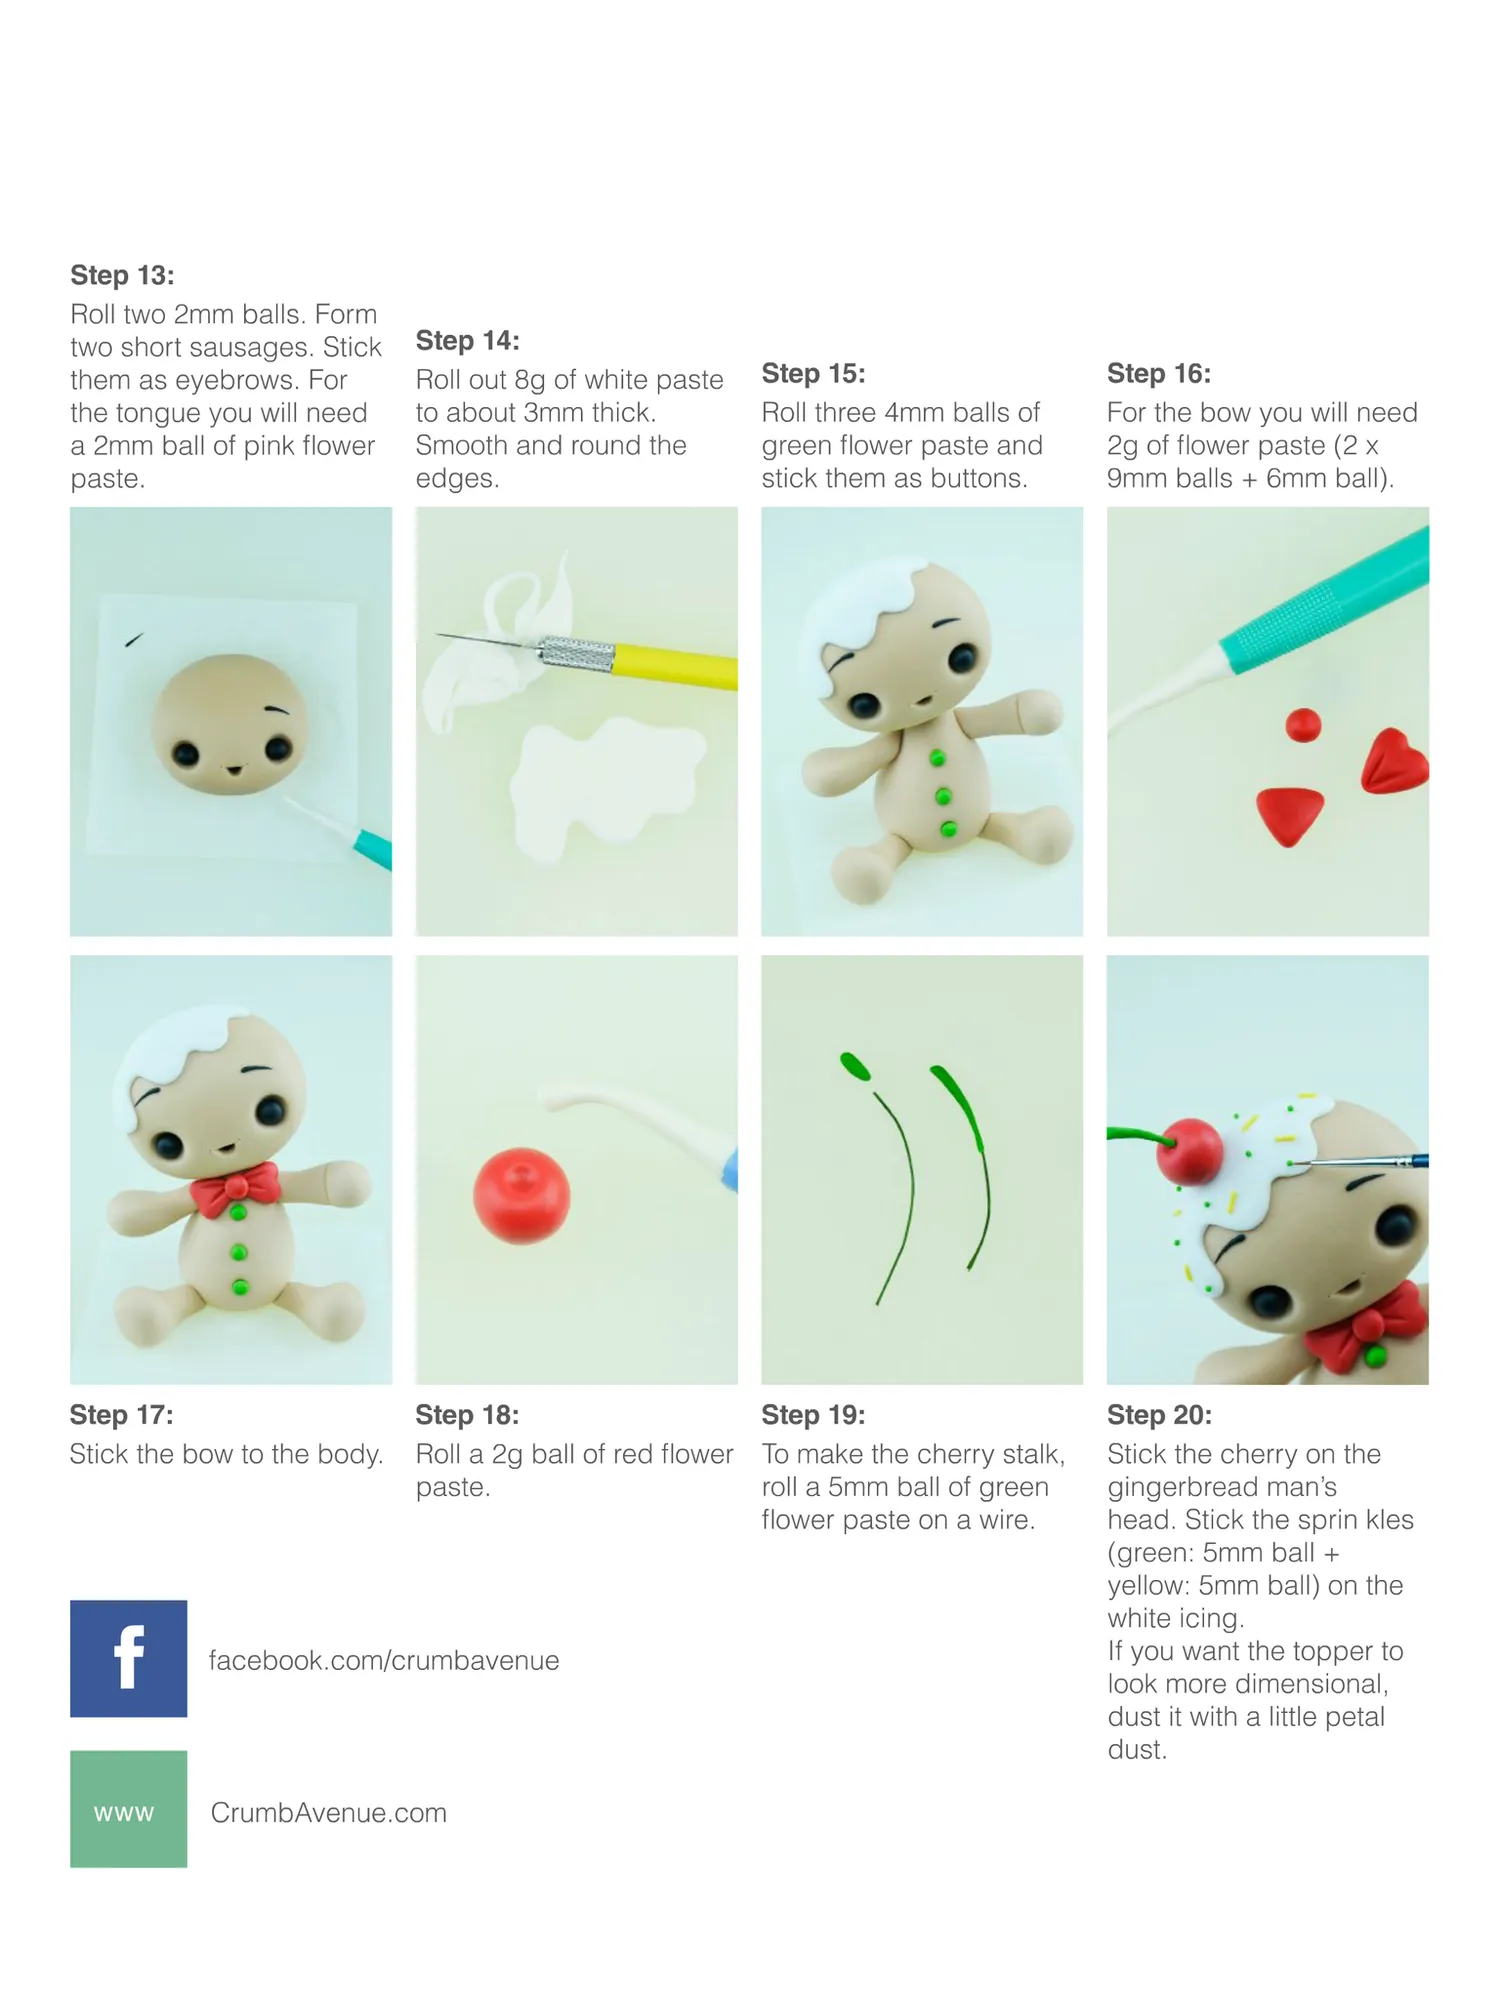
Step 13: Roll two 2mm balls. Form two short sausages. Stick them as eyebrows. For the tongue you will need a 2mm ball of pink flower paste. Step 17: Stick the bow to the body. f www Step 14: Roll out 8g of white paste to about 3mm thick. Smooth and round the edges. Step 15: Roll three 4mm balls of green flower paste and stick them as buttons. Step 18: Step 19: Roll a 2g ball of red flower To make the cherry stalk, paste. roll a 5mm ball of green flower paste on a wire. facebook.com/crumbavenue CrumbAvenue.com Step 16: For the bow you will need 2g of flower paste (2 x 9mm balls + 6mm ball). Step 20: Stick the cherry on the gingerbread man’s head. Stick the sprin kles (green: 5mm ball + yellow: 5mm ball) on the white icing. If you want the topper to look more dimensional, dust it with a little petal dust.

Page 21 text
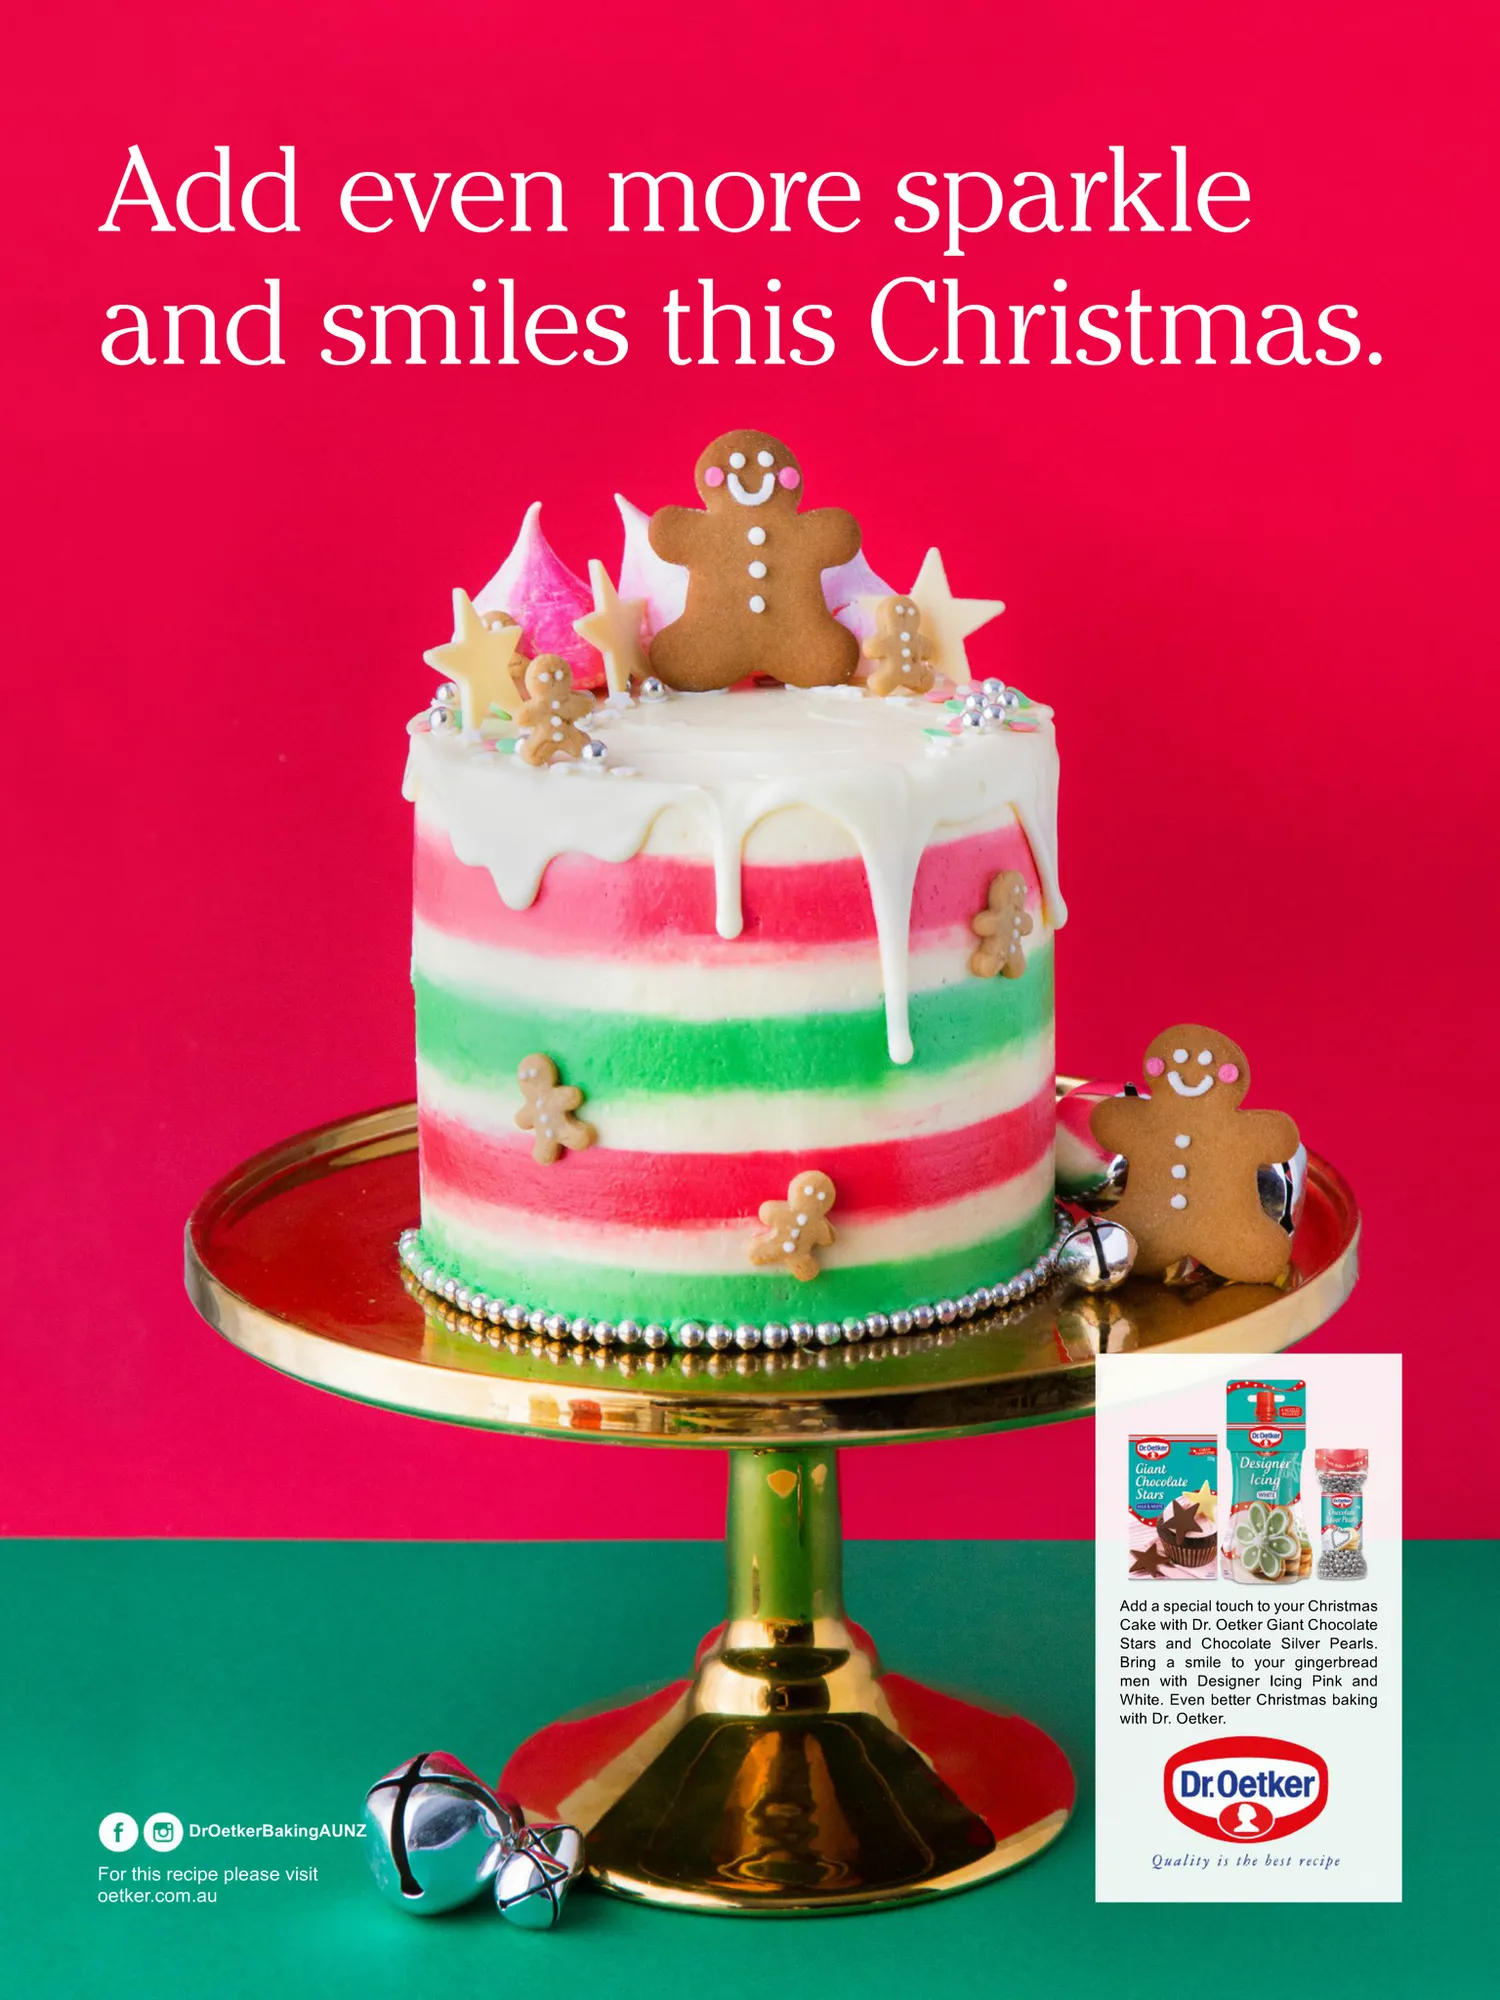
Add even more sparkle and smiles this Christmas. Add a special touch to your Christmas Cake with Dr. Oetker Giant Chocolate Stars and Chocolate Silver Pearls. Bring a smile to your gingerbread men with Designer Icing Pink and White. Even better Christmas baking with Dr. Oetker. DrOetkerBakingAUNZ For this recipe please visit oetker.com.au
Page 22 text
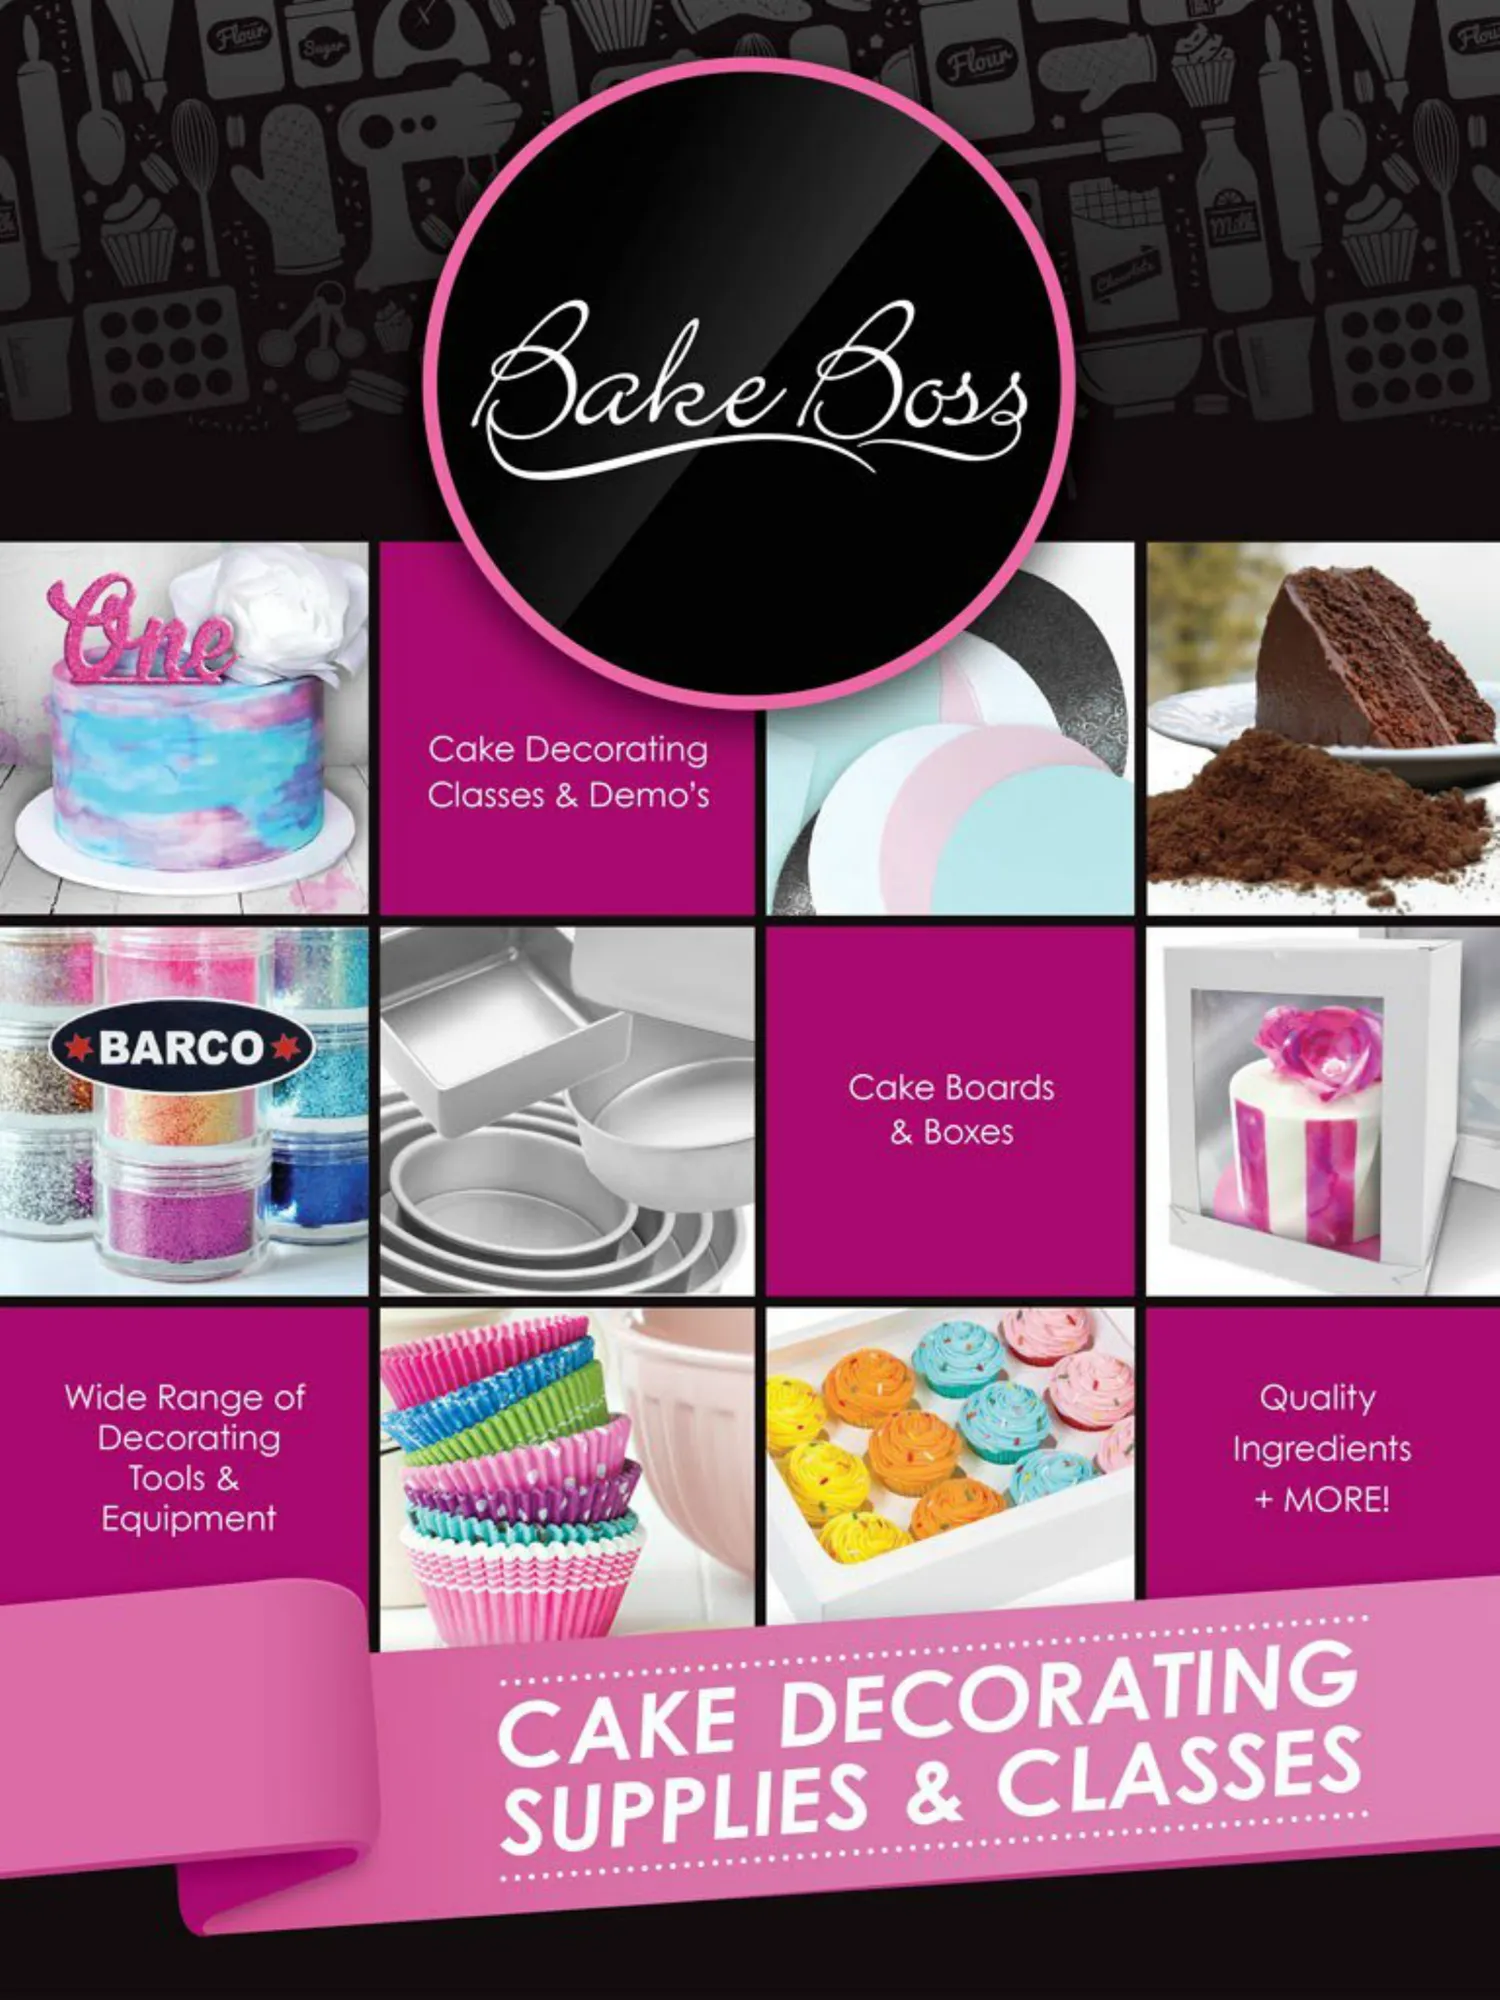
Bake Sne Cake Decorating Classes&Demo's +BARCO CakeBoards & Boxes WideRangeof Quality Decorating Ingredients Tools & +MORE! Equipment DECORATING CAKE SUPPLIES& CLASSES
Page 23 text
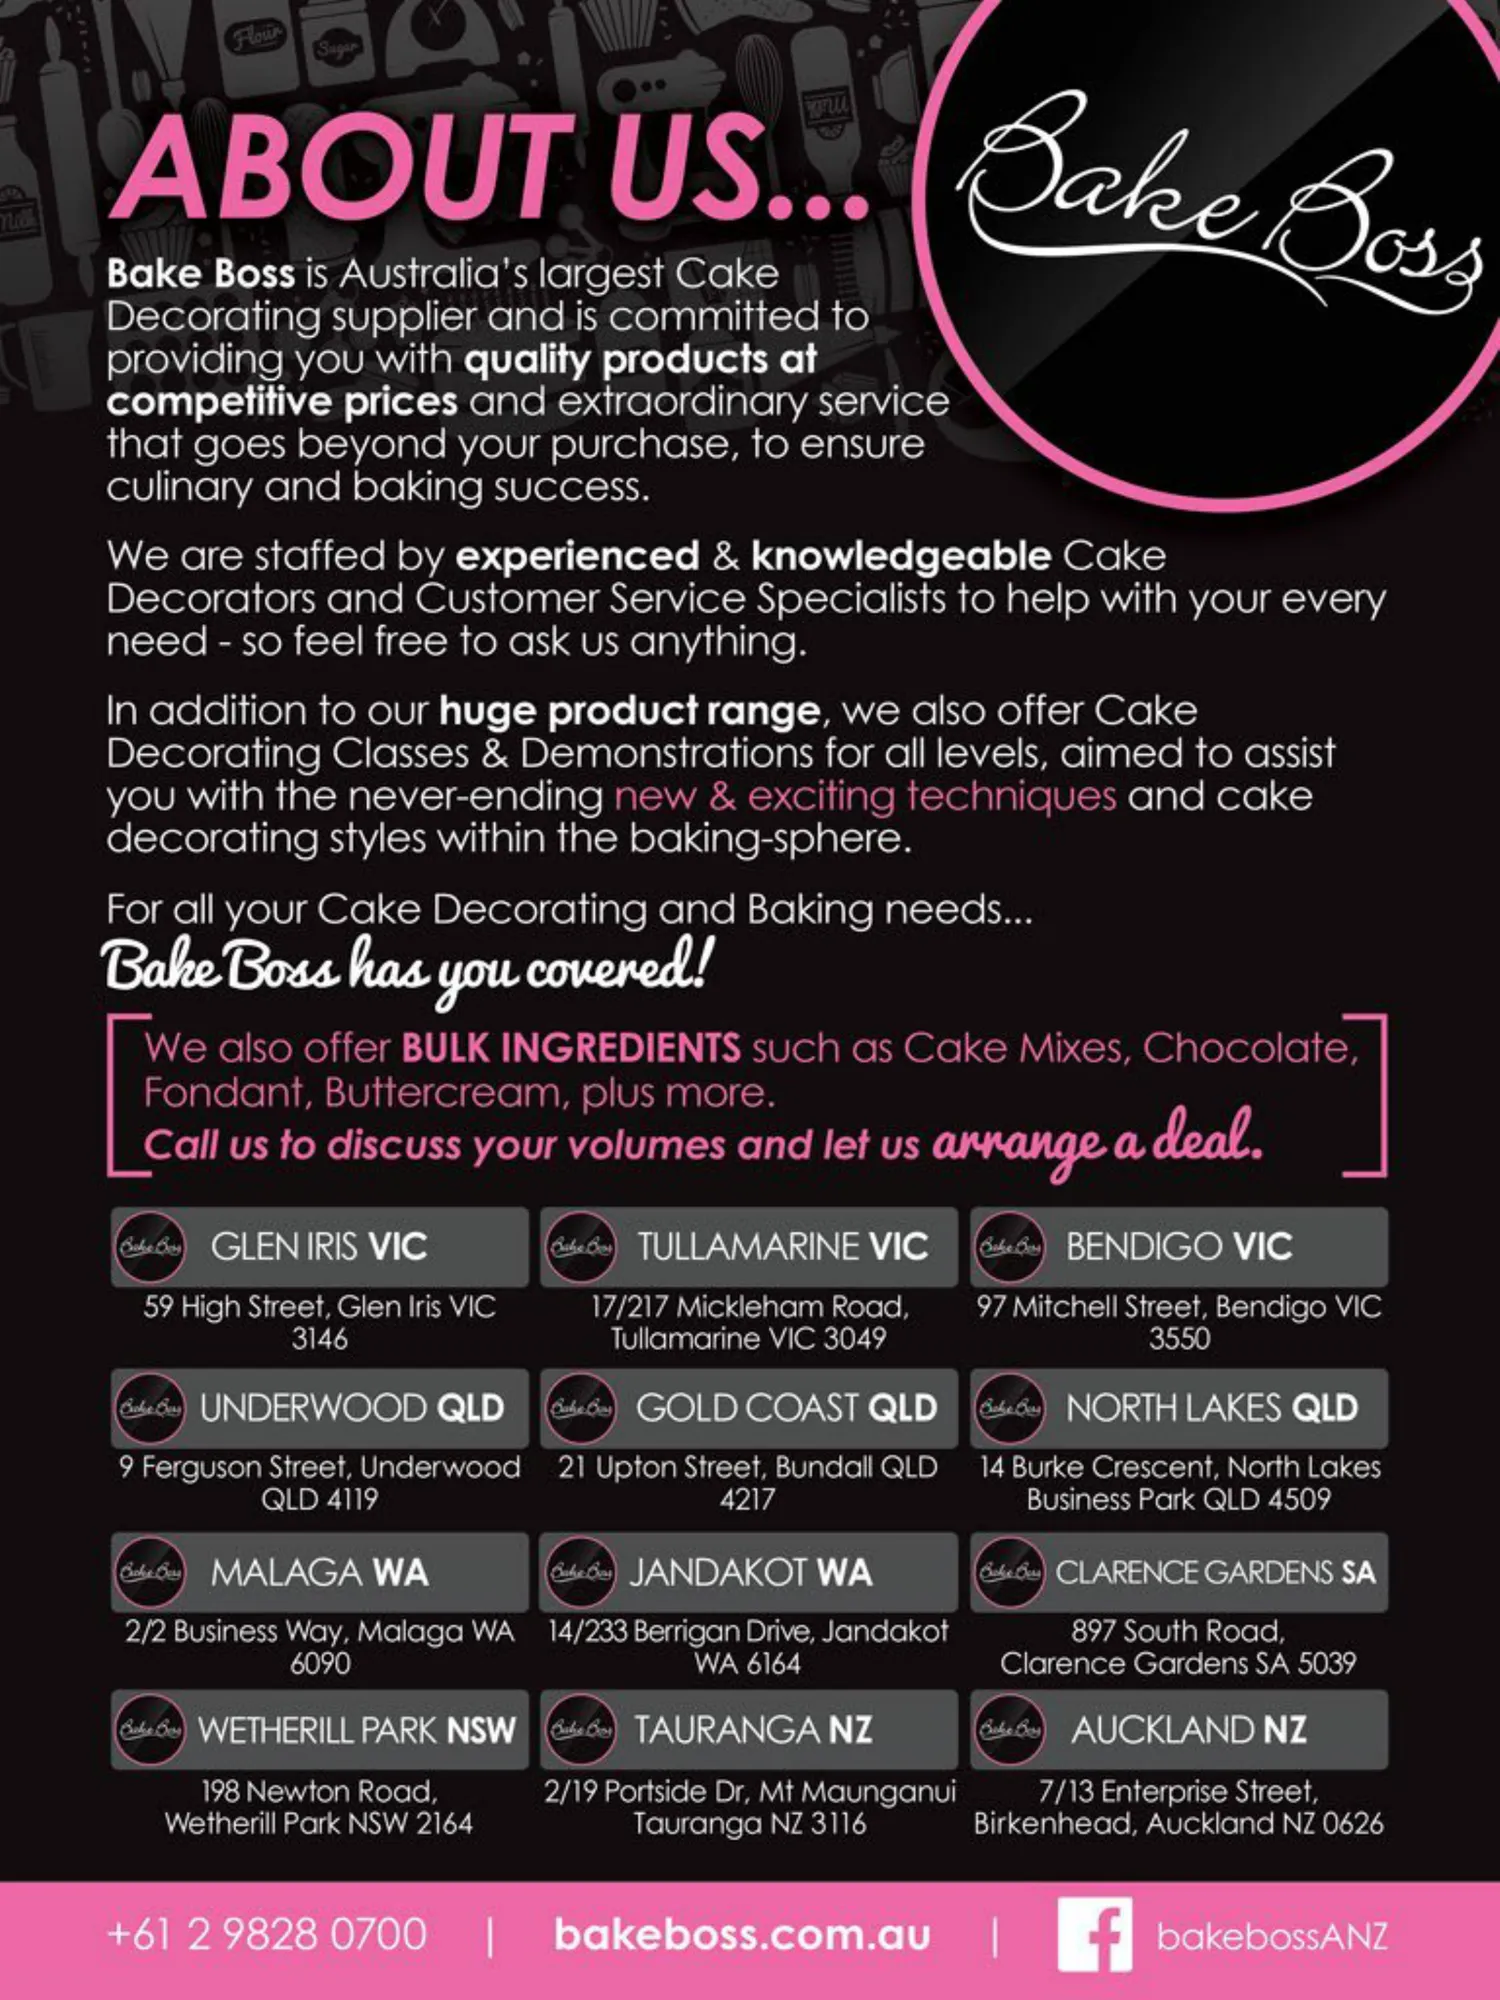
ABOUT US BakeBossisAustralia'slargestCake Decoratingsupplierandis committedto providingyou withqualityproducts at competitivepricesandextraordinaryservice thatgoesbeyondyourpurchase,toensure culinaryandbaking success. Wearestaffedbyexperienced&knowledgeableCake DecoratorsandCustomerServiceSpecialiststohelpwithyourevery need - so feel free to ask us anything. Inadditiontoourhugeproductrange,wealsoofferCake DecoratingClasses &Demonstrationsforall levels,aimedto assist youwiththenever-endingnew& excitingtechniquesand cake decorating styles within the baking-sphere. Forall yourCakeDecoratingandBakingneeds.. Bahe Boss has you couened! WealsoofferBULKINGREDIENTSsUchasCakeMixes,Chocolate Fondant,Buttercream,plusmore. GLENIRISVIC TULLAMARINEVIC BENDIGOVIC 59HighStreet,GlenIrisVIC 17/217MicklehamRoad 97Mitchell Street,BendigoVIC 3146 TullamarineVIC3049 3550 UNDERWOODQLD GOLDCOASTQLD NORTHLAKESQLD 9FergusonStreet,Underwood 21UptonStreet,BundallQLD 14BurkeCrescent,NorthLakes QLD4119 4217 BusinessParkQLD4509 MALAGAWA JANDAKOTWA CLARENCEGARDENSSA 2/2Business Way,Malaga WA 14/233BerriganDrive,Jandakot 897SouthRoad, 6090 WA6164 ClarenceGardensSA5039 TAURANGANZ WETHERILLPARKNSW AUCKLANDNZ 198NewtonRoad 2/19PortsideDr,MtMaunganui 7/13EnterpriseStreet WetherillParkNSW2164 TaurangaNz3116 Birkenhead,AucklandNz0626 +61298280700 bakeboss.com.au bakebossANz
Page 24 text
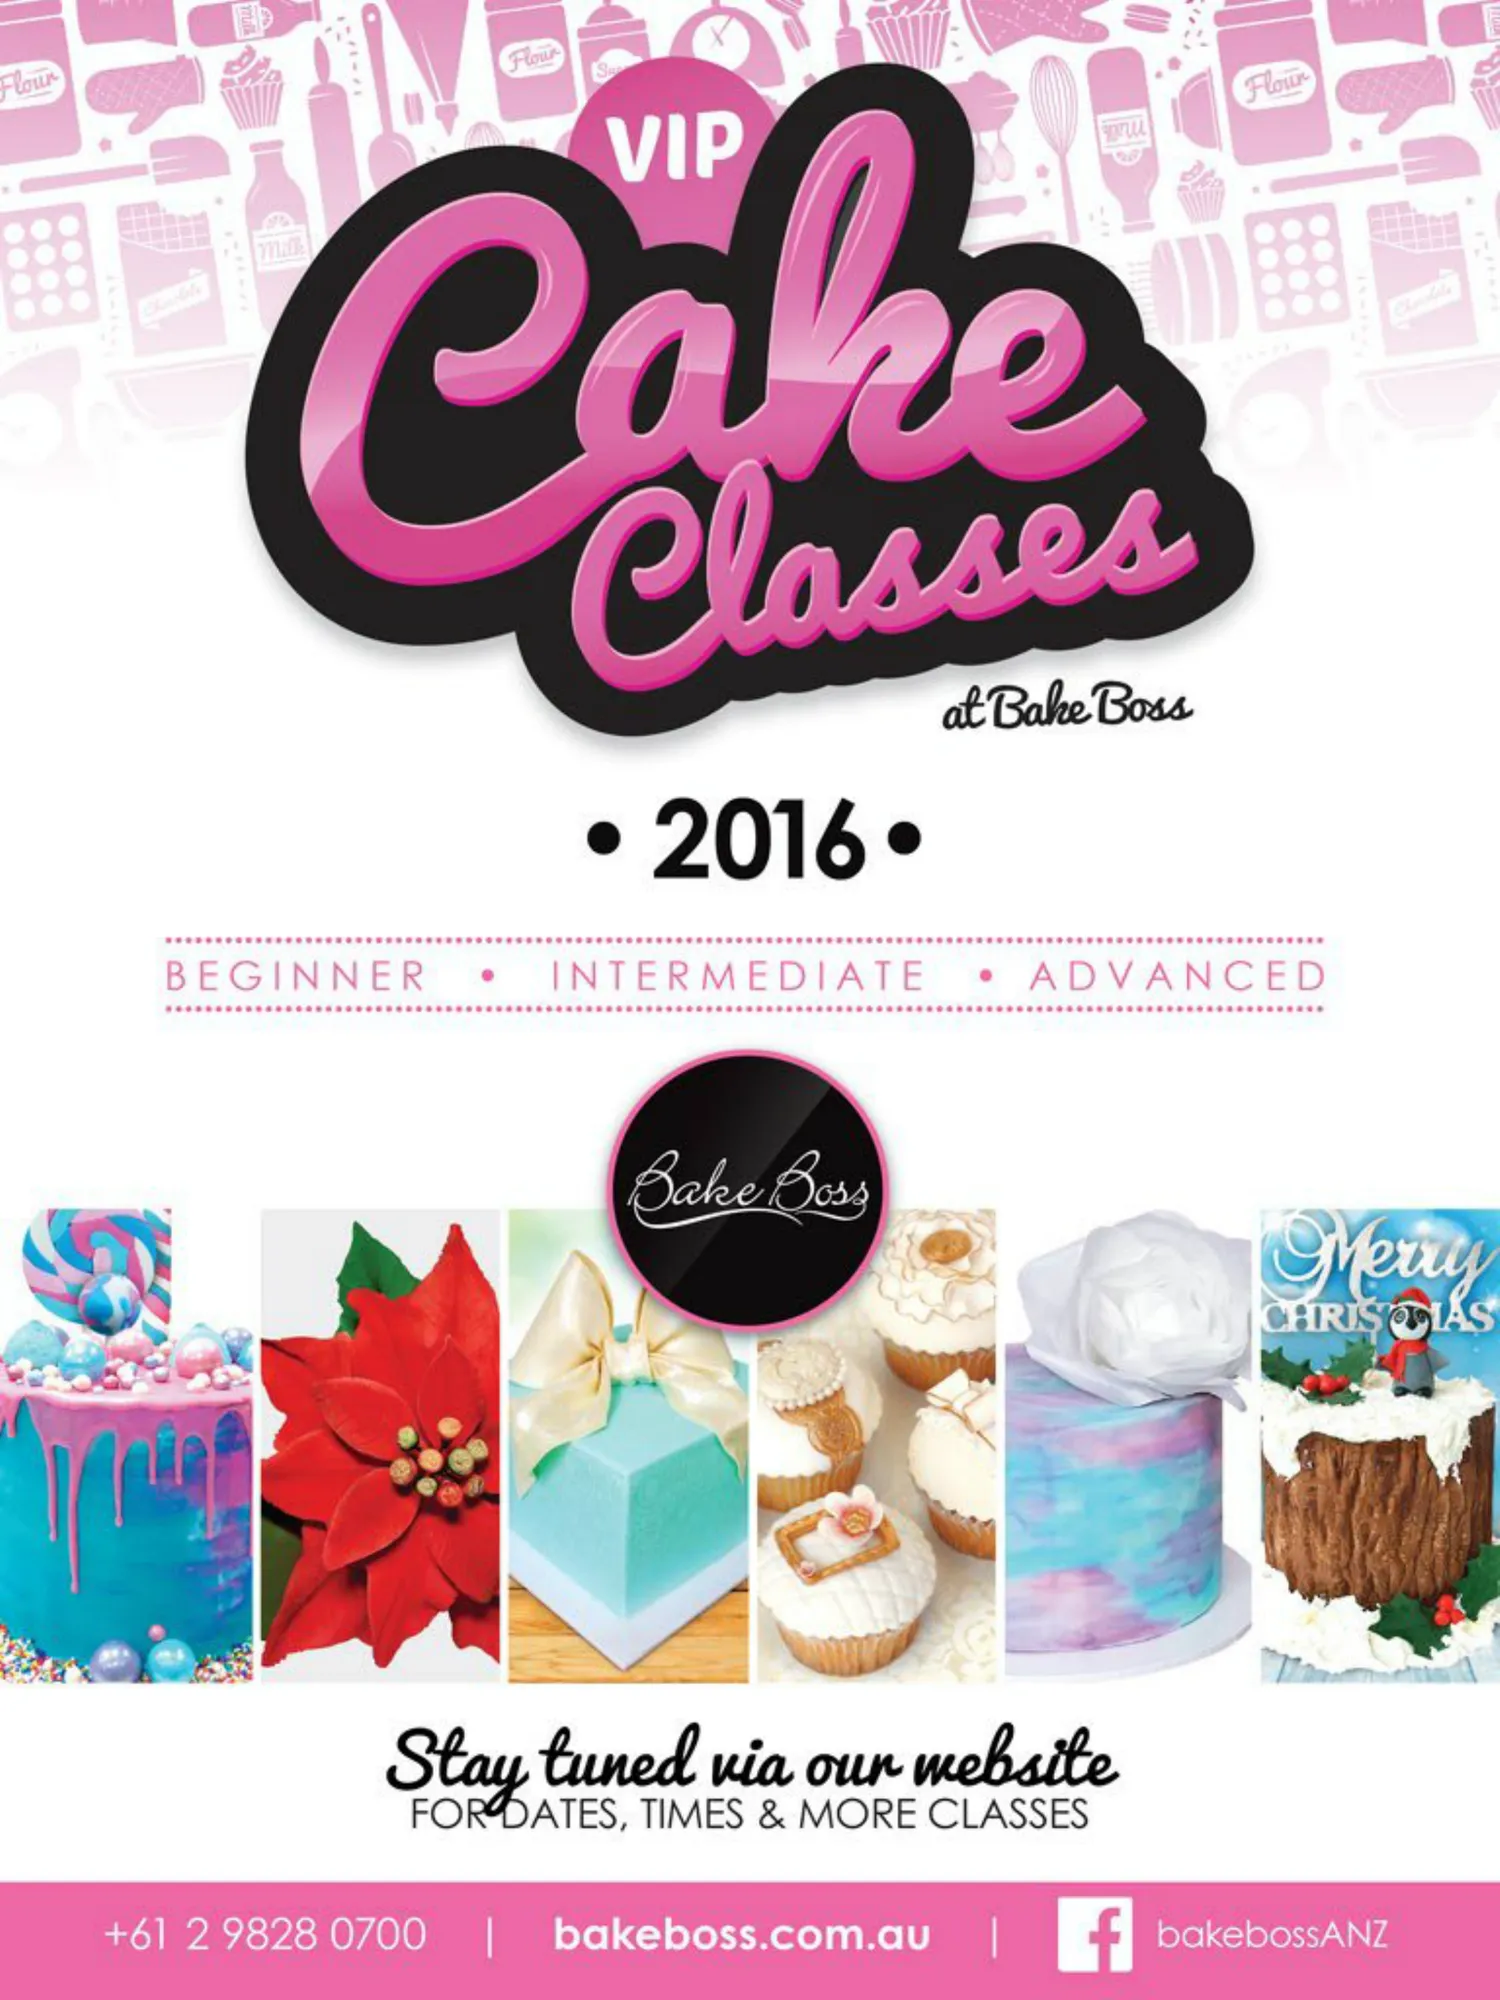
Flou Flour VIP asses at Bahe Boss 2016° BEGINNER INTERMEDIAIE ADVANCED Merry CHRISOLAS Stay tuned uia oun website FORDATES,TIMES &MORE CLASSES bakeboss.com.au +61.298280700 bakebossANz
Page 25 text
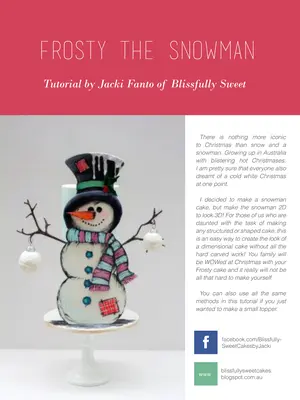
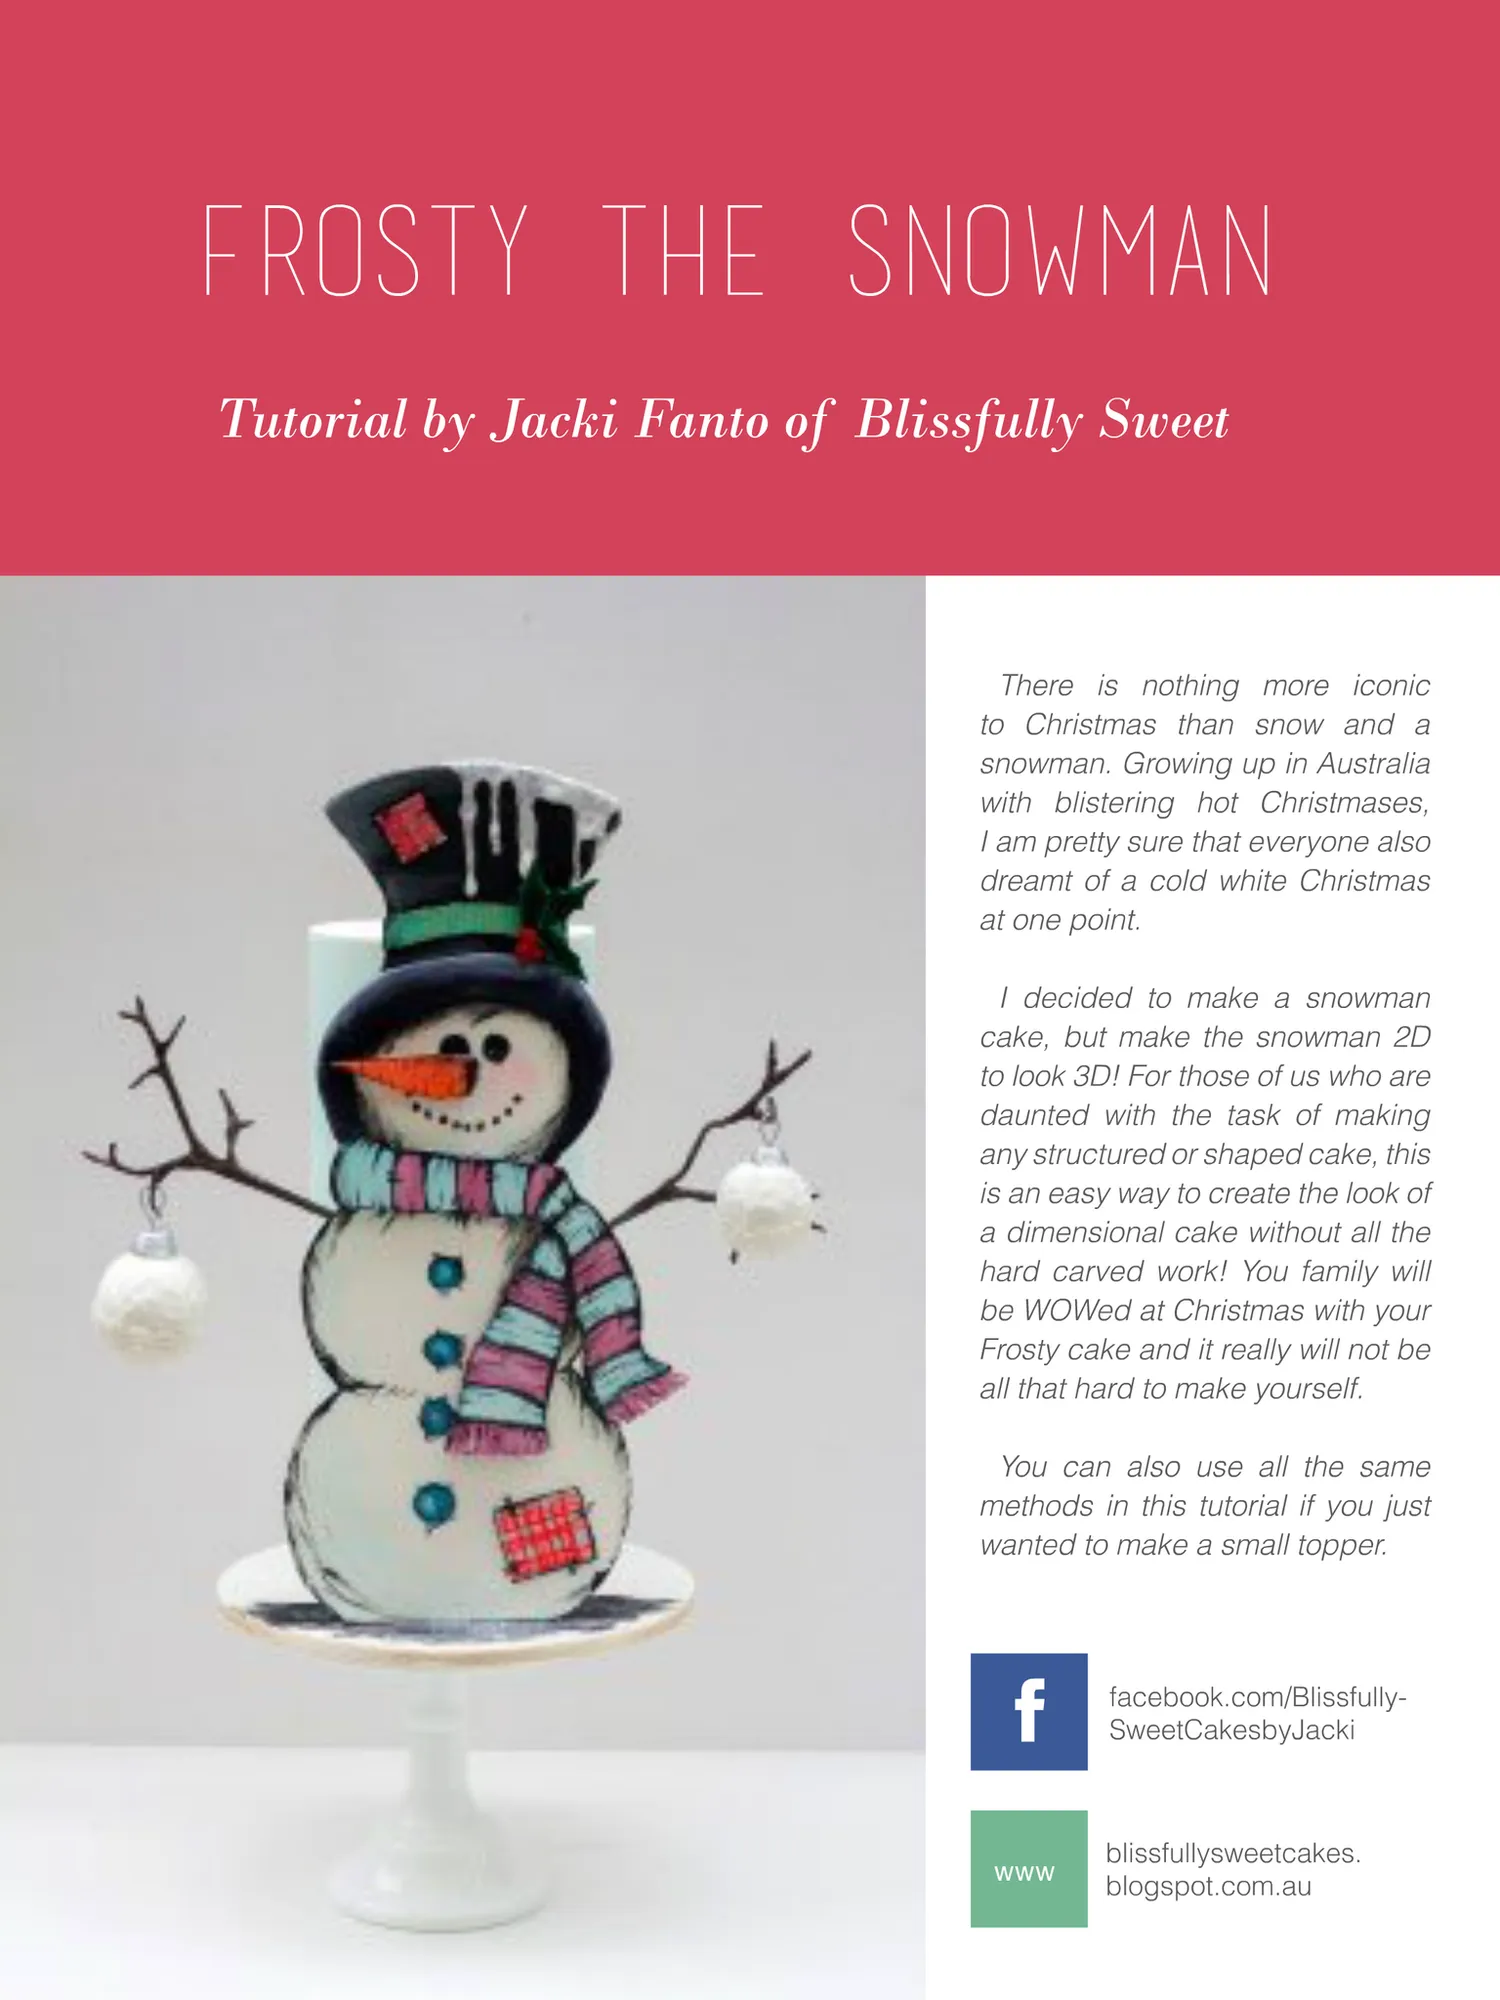
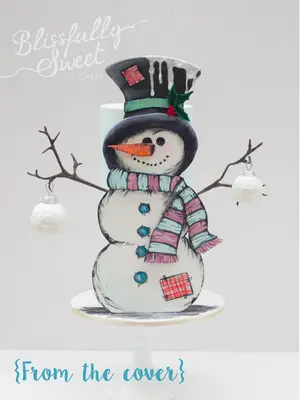
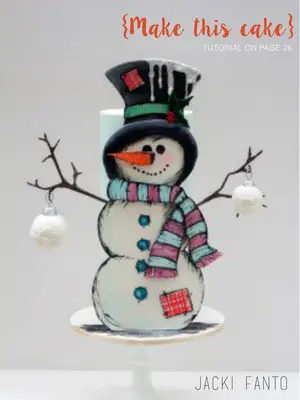
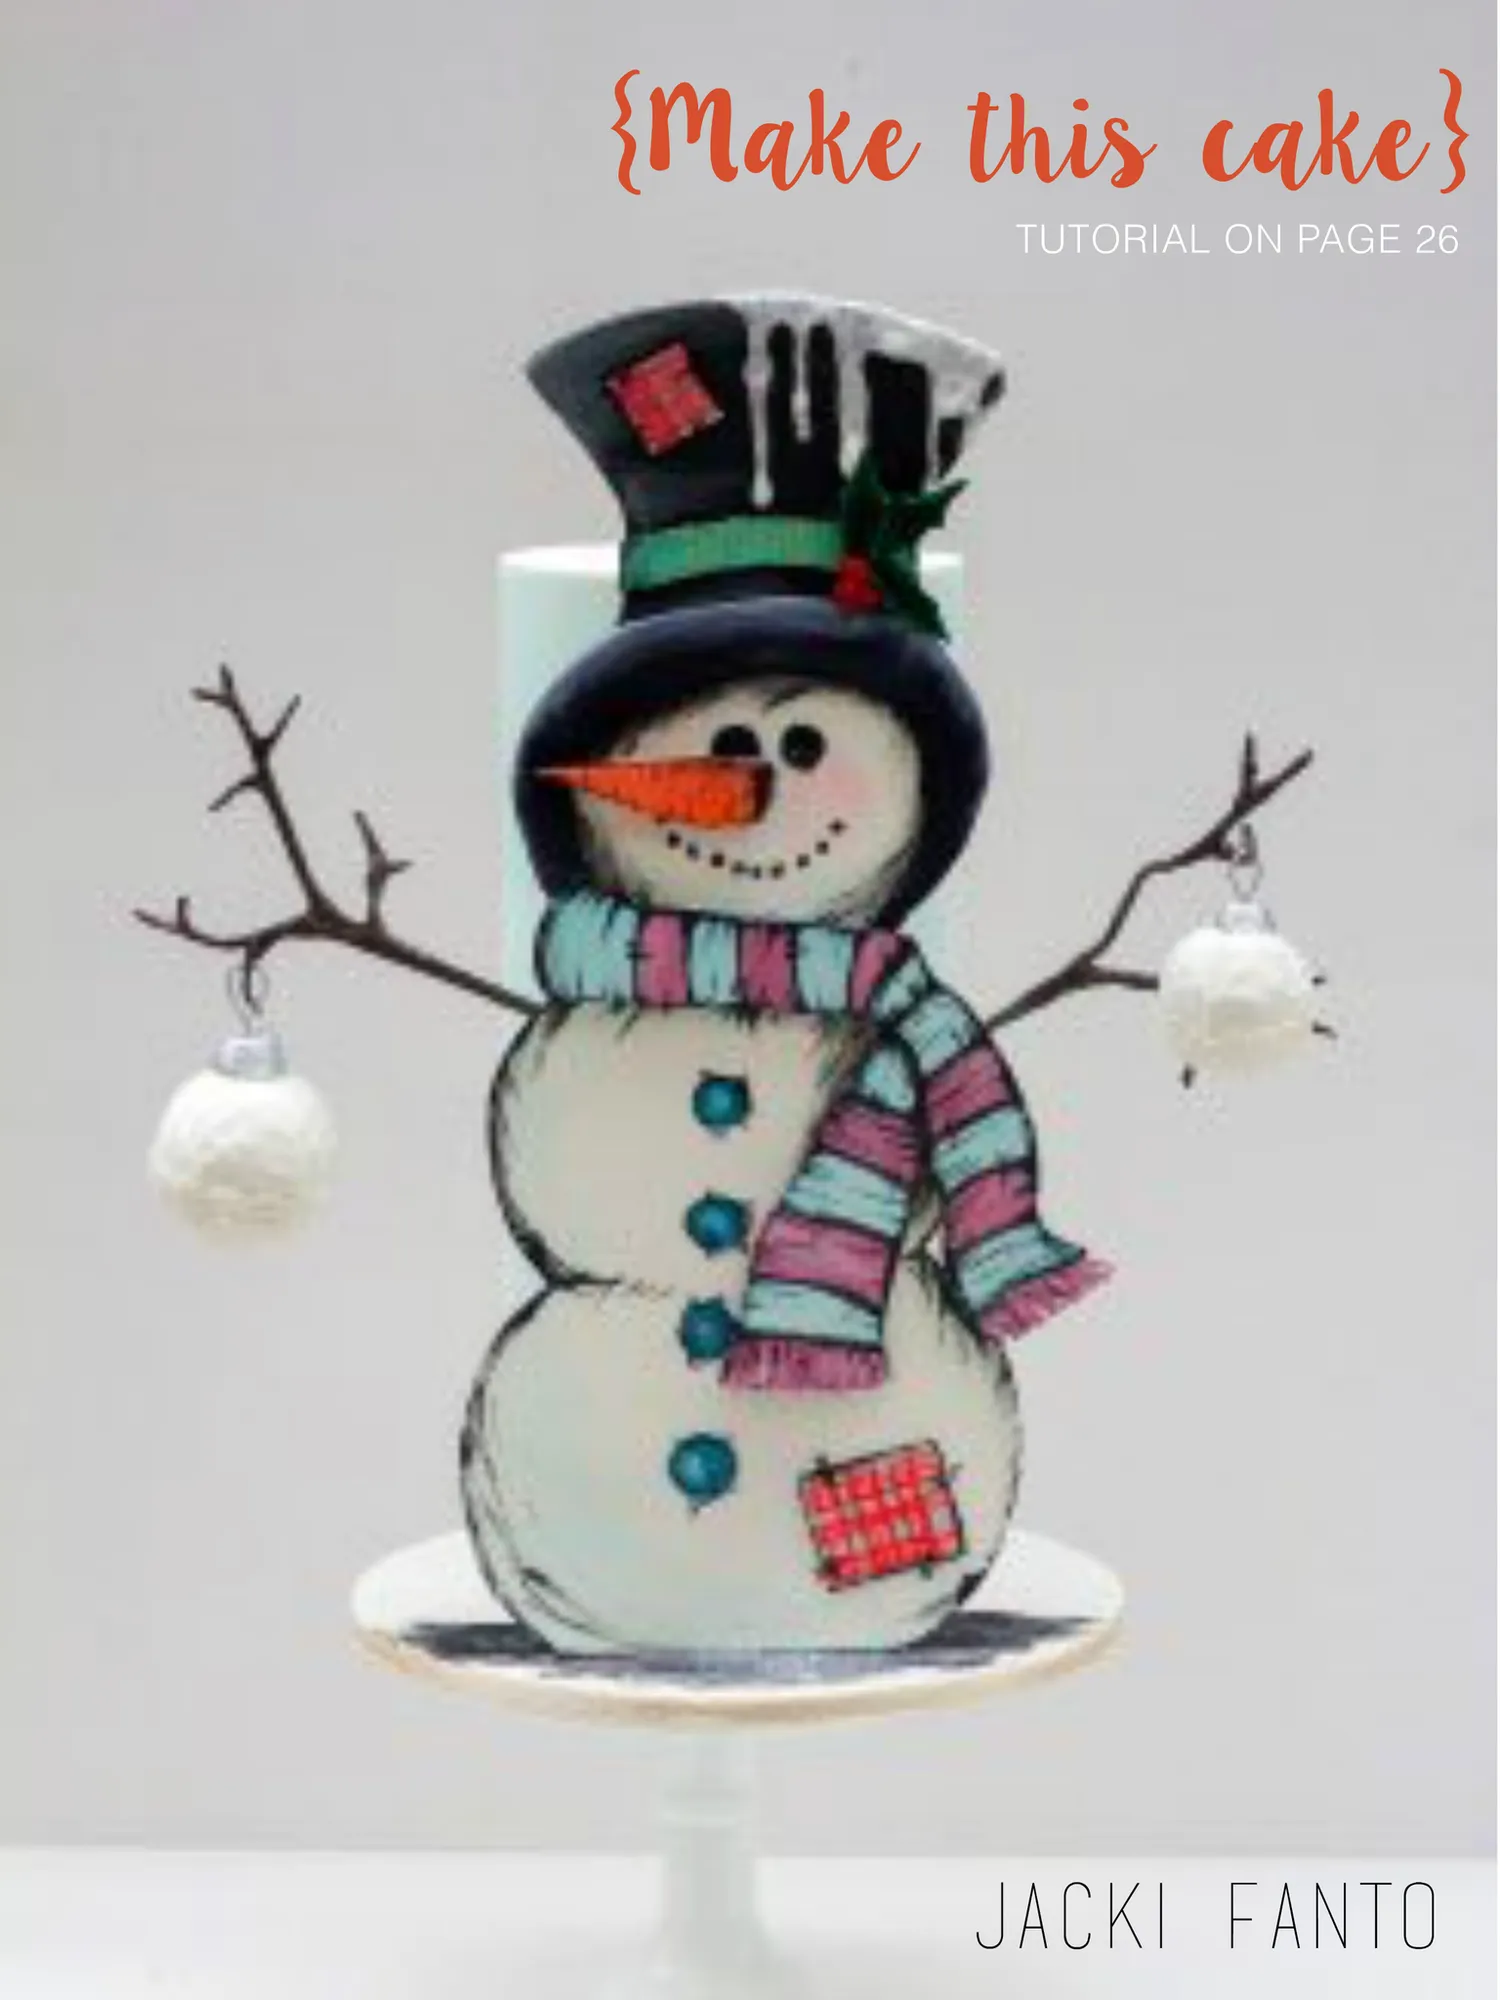
Frosty the Snowman Tutorial by Jacki Fanto of Blissfully Sweet There is nothing more iconic to Christmas than snow and a snowman. Growing up in Australia with blistering hot Christmases, I am pretty sure that everyone also dreamt of a cold white Christmas at one point. I decided to make a snowman cake, but make the snowman 2D to look 3D! For those of us who are daunted with the task of making any structured or shaped cake, this is an easy way to create the look of a dimensional cake without all the hard carved work! You family will be WOWed at Christmas with your Frosty cake and it really will not be all that hard to make yourself. You can also use all the same methods in this tutorial if you just wanted to make a small topper. f www facebook.com/BlissfullySweetCakesbyJacki blissfullysweetcakes. blogspot.com.au
Page 26 text
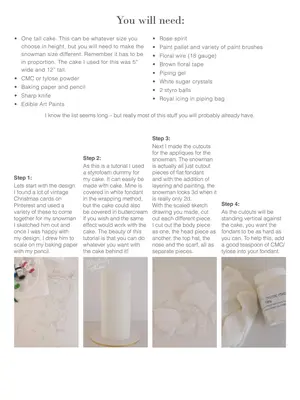
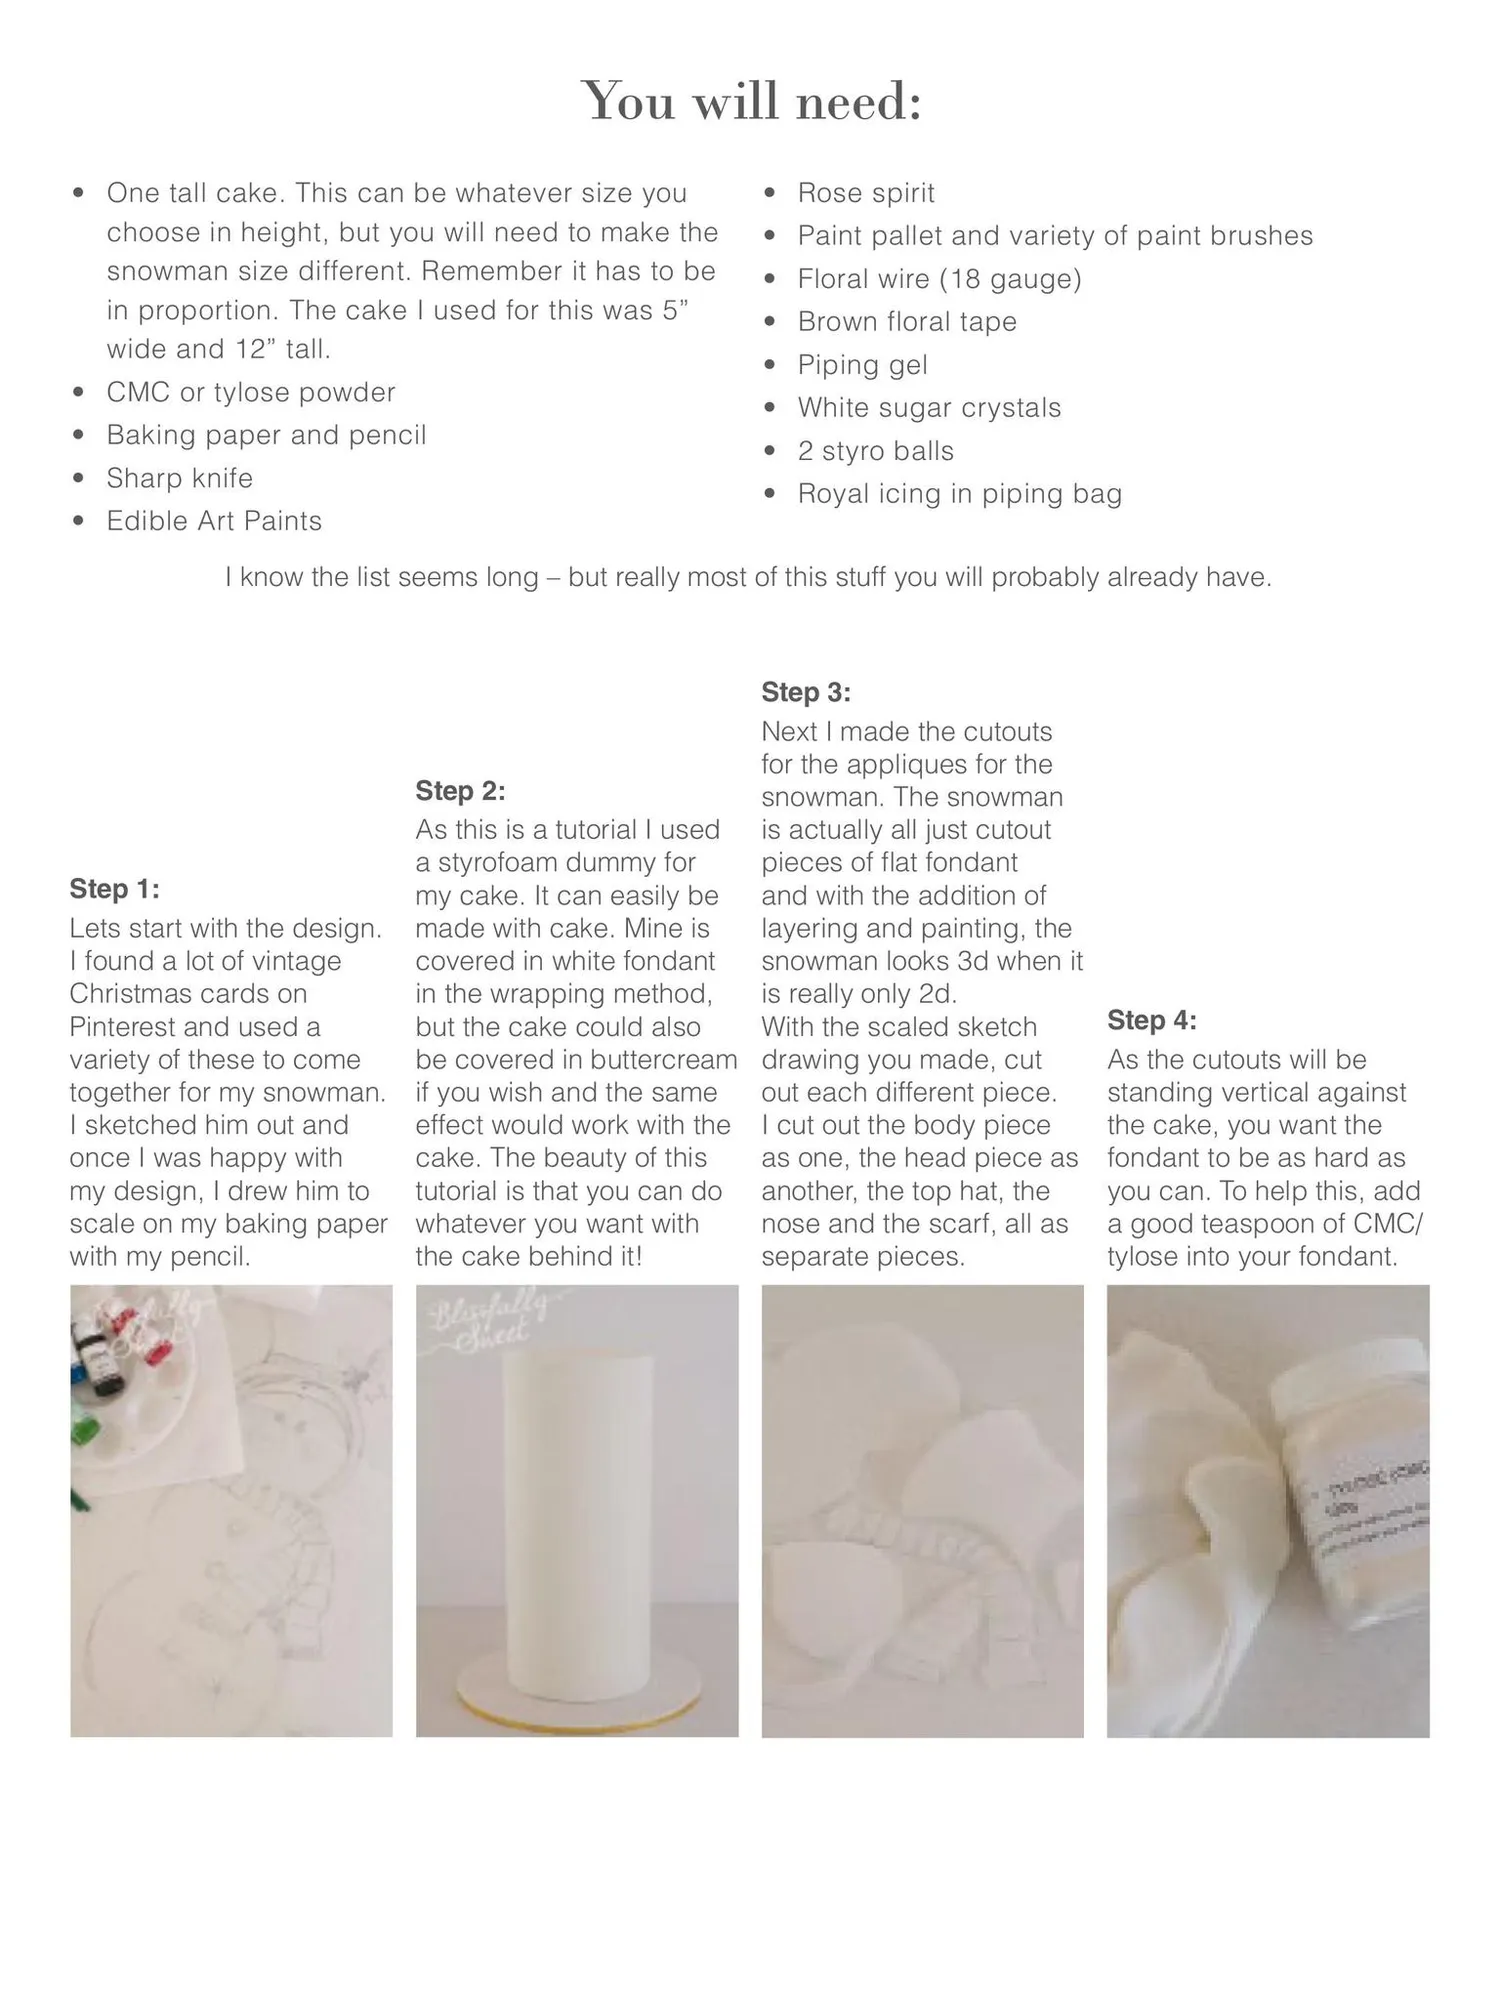
You will need: • One tall cake. This can be whatever size you choose in height, but you will need to make the snowman size different. Remember it has to be in proportion. The cake I used for this was 5” wide and 12” tall. • CMC or tylose powder • Baking paper and pencil • Sharp knife • Edible Art Paints • Rose spirit • Paint pallet and variety of paint brushes • Floral wire (18 gauge) • Brown floral tape • Piping gel • White sugar crystals • 2 styro balls • Royal icing in piping bag I know the list seems long – but really most of this stuff you will probably already have. Step 3: Next I made the cutouts for the appliques for the Step 2: snowman. The snowman As this is a tutorial I used is actually all just cutout a styrofoam dummy for pieces of flat fondant Step 1: my cake. It can easily be and with the addition of Lets start with the design. made with cake. Mine is layering and painting, the I found a lot of vintage covered in white fondant snowman looks 3d when it in the wrapping method, is really only 2d. Christmas cards on Pinterest and used a but the cake could also With the scaled sketch variety of these to come be covered in buttercream drawing you made, cut together for my snowman. if you wish and the same out each different piece. I sketched him out and effect would work with the I cut out the body piece cake. The beauty of this as one, the head piece as once I was happy with my design, I drew him to tutorial is that you can do another, the top hat, the nose and the scarf, all as scale on my baking paper whatever you want with with my pencil. the cake behind it! separate pieces. Step 4: As the cutouts will be standing vertical against the cake, you want the fondant to be as hard as you can. To help this, add a good teaspoon of CMC/ tylose into your fondant.
Page 27 text
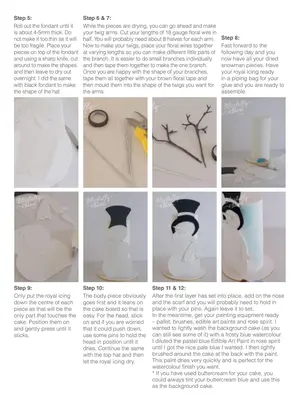
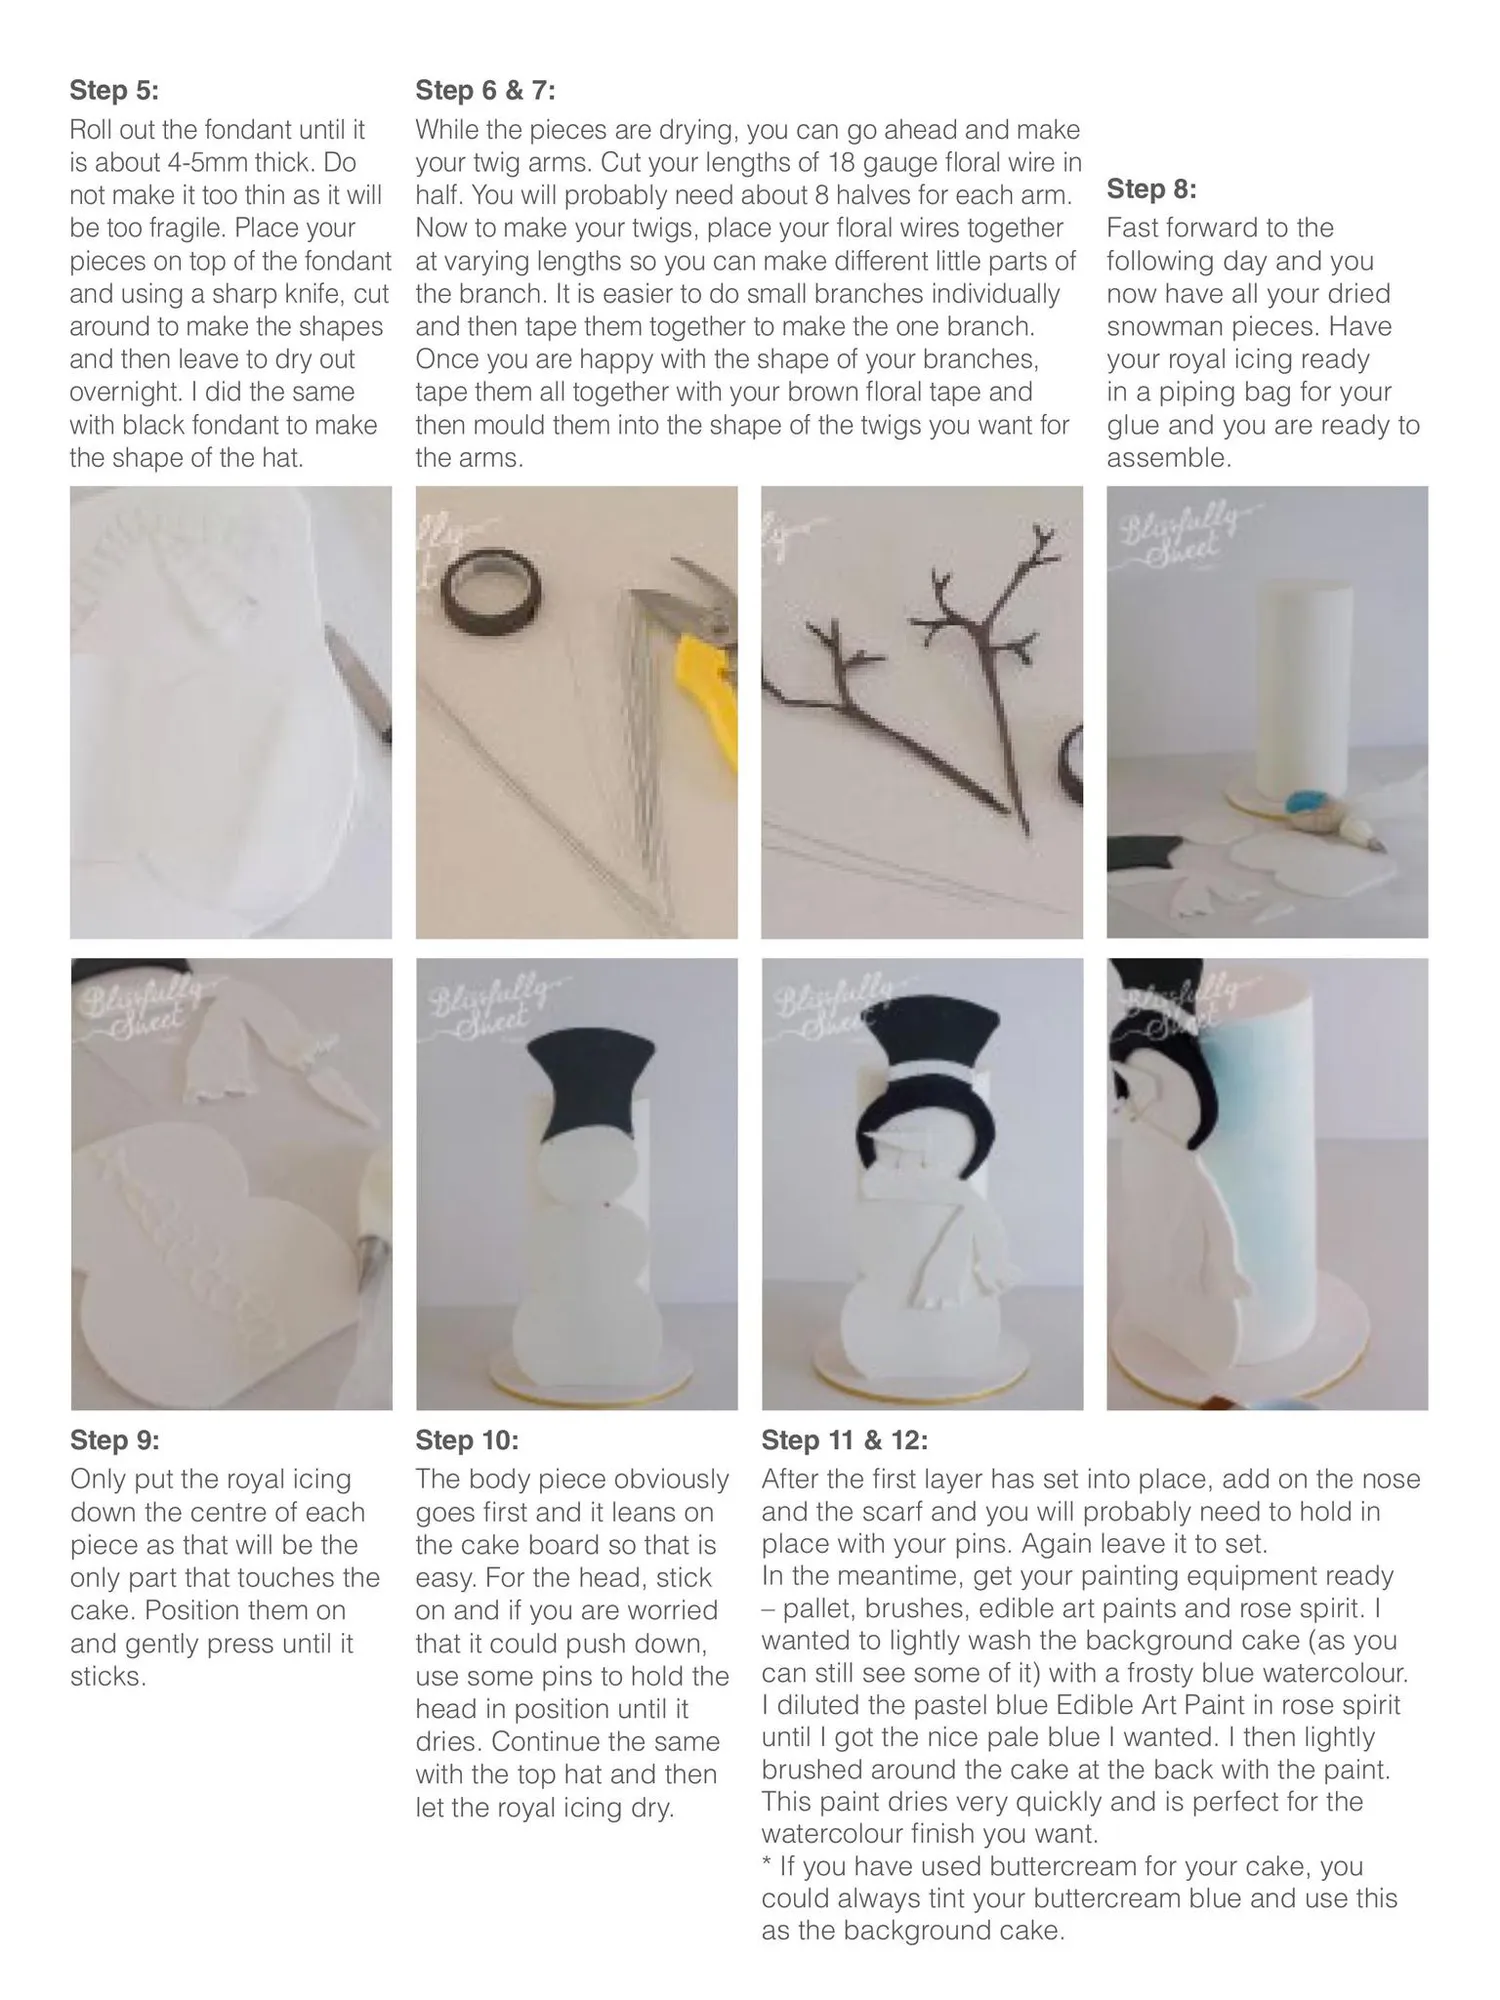
Step 5: Roll out the fondant until it is about 4-5mm thick. Do not make it too thin as it will be too fragile. Place your pieces on top of the fondant and using a sharp knife, cut around to make the shapes and then leave to dry out overnight. I did the same with black fondant to make the shape of the hat. Step 6 & 7: While the pieces are drying, you can go ahead and make your twig arms. Cut your lengths of 18 gauge floral wire in half. You will probably need about 8 halves for each arm. Now to make your twigs, place your floral wires together at varying lengths so you can make different little parts of the branch. It is easier to do small branches individually and then tape them together to make the one branch. Once you are happy with the shape of your branches, tape them all together with your brown floral tape and then mould them into the shape of the twigs you want for the arms. Step 9: Only put the royal icing down the centre of each piece as that will be the only part that touches the cake. Position them on and gently press until it sticks. Step 10: The body piece obviously goes first and it leans on the cake board so that is easy. For the head, stick on and if you are worried that it could push down, use some pins to hold the head in position until it dries. Continue the same with the top hat and then let the royal icing dry. Step 8: Fast forward to the following day and you now have all your dried snowman pieces. Have your royal icing ready in a piping bag for your glue and you are ready to assemble. Step 11 & 12: After the first layer has set into place, add on the nose and the scarf and you will probably need to hold in place with your pins. Again leave it to set. In the meantime, get your painting equipment ready – pallet, brushes, edible art paints and rose spirit. I wanted to lightly wash the background cake (as you can still see some of it) with a frosty blue watercolour. I diluted the pastel blue Edible Art Paint in rose spirit until I got the nice pale blue I wanted. I then lightly brushed around the cake at the back with the paint. This paint dries very quickly and is perfect for the watercolour finish you want. * If you have used buttercream for your cake, you could always tint your buttercream blue and use this as the background cake.
Page 28 text
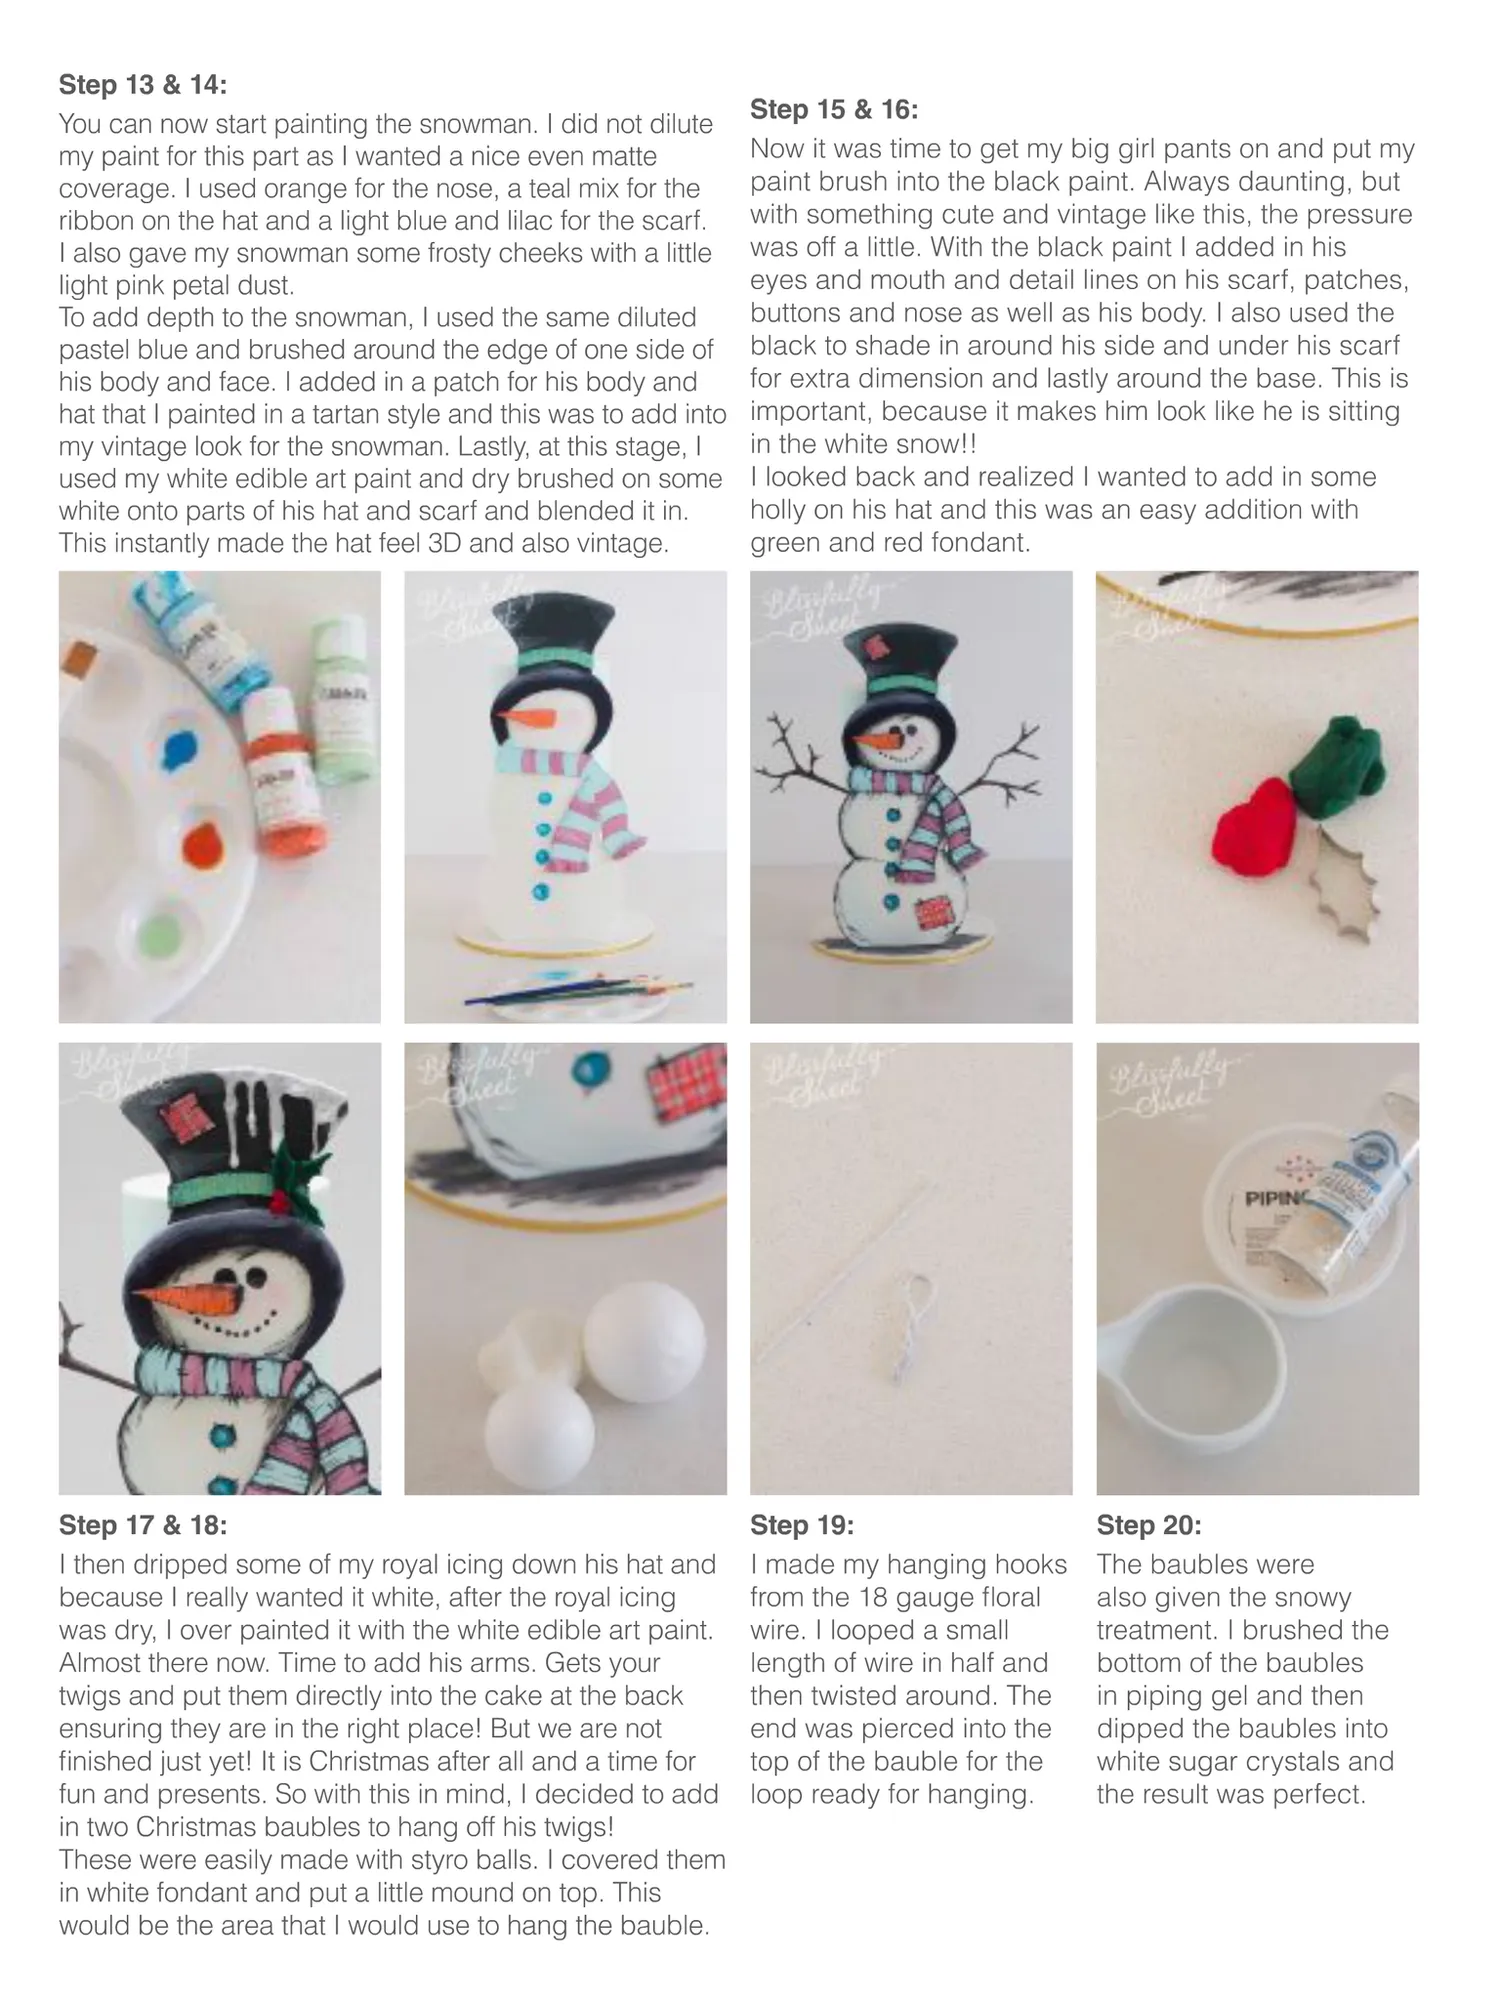
Step 13 & 14: You can now start painting the snowman. I did not dilute my paint for this part as I wanted a nice even matte coverage. I used orange for the nose, a teal mix for the ribbon on the hat and a light blue and lilac for the scarf. I also gave my snowman some frosty cheeks with a little light pink petal dust. To add depth to the snowman, I used the same diluted pastel blue and brushed around the edge of one side of his body and face. I added in a patch for his body and hat that I painted in a tartan style and this was to add into my vintage look for the snowman. Lastly, at this stage, I used my white edible art paint and dry brushed on some white onto parts of his hat and scarf and blended it in. This instantly made the hat feel 3D and also vintage. Step 17 & 18: I then dripped some of my royal icing down his hat and because I really wanted it white, after the royal icing was dry, I over painted it with the white edible art paint. Almost there now. Time to add his arms. Gets your twigs and put them directly into the cake at the back ensuring they are in the right place! But we are not finished just yet! It is Christmas after all and a time for fun and presents. So with this in mind, I decided to add in two Christmas baubles to hang off his twigs! These were easily made with styro balls. I covered them in white fondant and put a little mound on top. This would be the area that I would use to hang the bauble. Step 15 & 16: Now it was time to get my big girl pants on and put my paint brush into the black paint. Always daunting, but with something cute and vintage like this, the pressure was off a little. With the black paint I added in his eyes and mouth and detail lines on his scarf, patches, buttons and nose as well as his body. I also used the black to shade in around his side and under his scarf for extra dimension and lastly around the base. This is important, because it makes him look like he is sitting in the white snow!! I looked back and realized I wanted to add in some holly on his hat and this was an easy addition with green and red fondant. Step 19: I made my hanging hooks from the 18 gauge floral wire. I looped a small length of wire in half and then twisted around. The end was pierced into the top of the bauble for the loop ready for hanging. Step 20: The baubles were also given the snowy treatment. I brushed the bottom of the baubles in piping gel and then dipped the baubles into white sugar crystals and the result was perfect.
Page 29 text
Always something new... ARNDELL PARK WILLOUGHBY NORTHMEAD LIVERPOOL ALEXANDRIA BELMONT CARINGBAH CANBERRA - NOW OPEN www.cakedecoratingsolutions.com.au www.cakedecoratingsolutions.com.au
Page 30 text
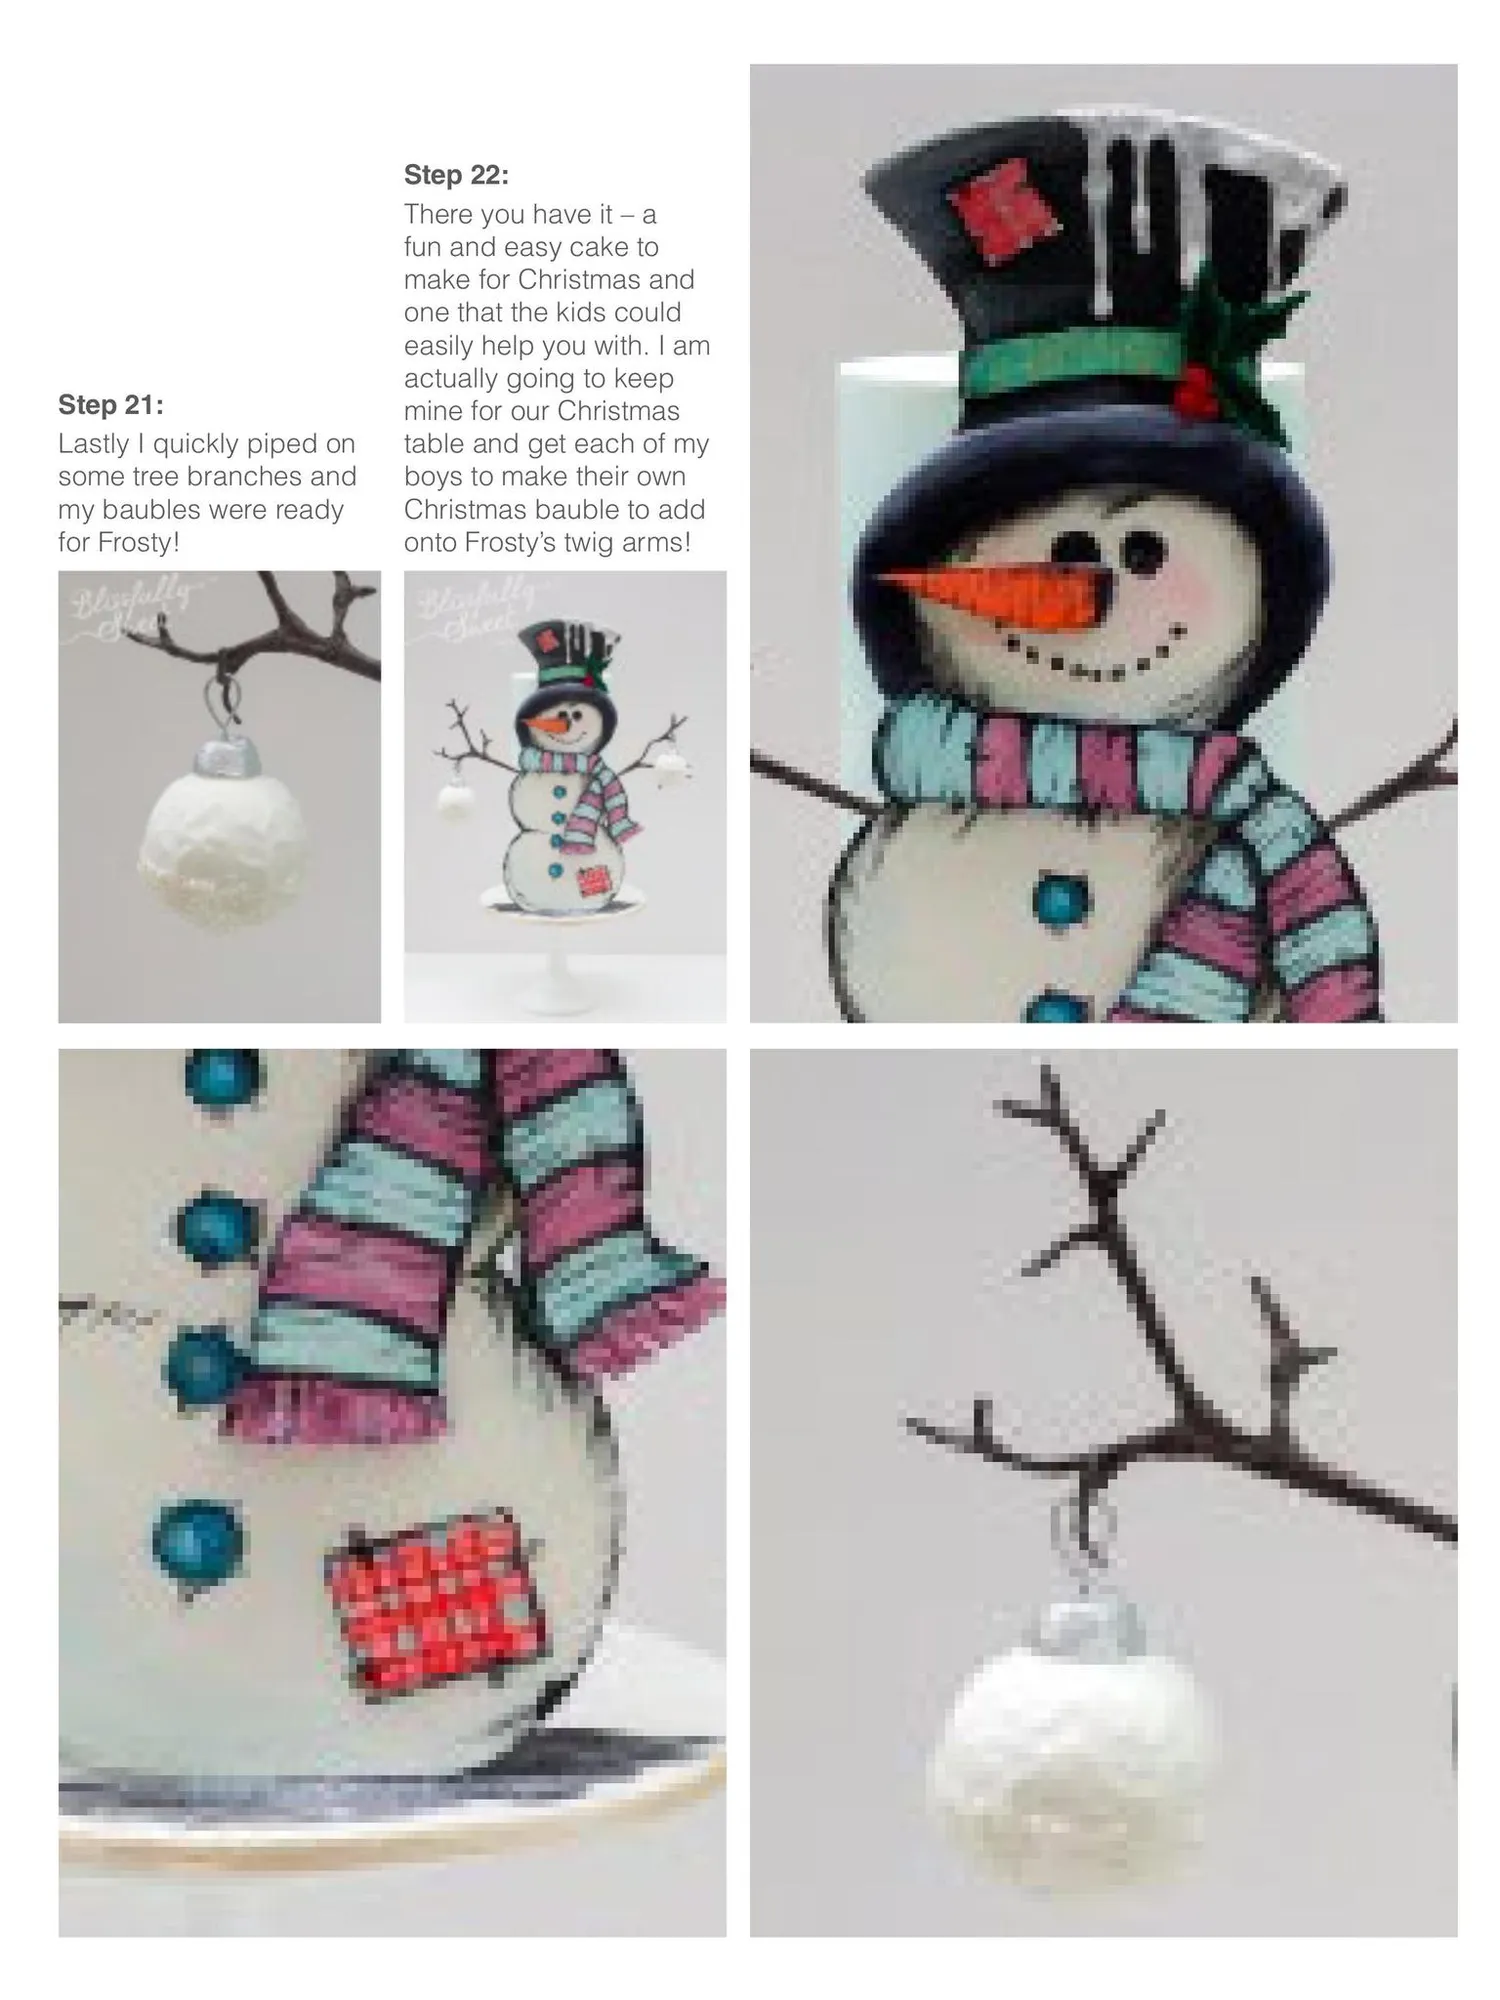
Step 21: Lastly I quickly piped on some tree branches and my baubles were ready for Frosty! Step 22: There you have it – a fun and easy cake to make for Christmas and one that the kids could easily help you with. I am actually going to keep mine for our Christmas table and get each of my boys to make their own Christmas bauble to add onto Frosty’s twig arms!
Page 31 text
{From the cover}
Page 32 text
POLEN vizyon Rolled Fondant FOOD OCEANIA Noelephantskin! vizyon Vizyon WhiteRolledFondant SUGARPASTE SEKERKAMURU No elephantskin! LongerDrying Time VizyonRolled Fondant givesyou moretime tocoatandaddmoredetailstoyourcakes and decorations. HumidityResistance Allowsyoutodecorateacold cakerightafter coating it, withalmost no condensation. IncreasedElasticity SnbtYeaut VizyonRolledFondantcanstretcharoundthe corners of yourcakes with ease... ...say goodbye to cracks! VizyonRolledFondant isproudly endorsedbySerdarYenerfrom Thereisnomagicpaste Yenons Way. that can do everything but withVizyonRolledFondant, you can do manythings CAKEARTTUTORIALS -Serdar Yener www.yenersway.com
Page 33 text
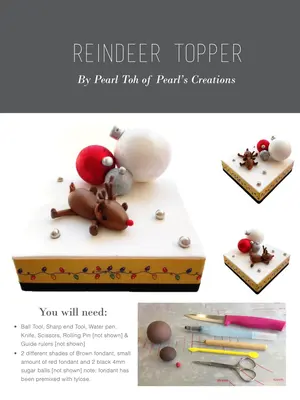
POLEN GlamourGlazes FOOD vizyon OCEANIA vizyon vizyon vizyon vizyon ColdGlazes ChococoverGanache polenfood.com.au [email protected]
Page 34 text
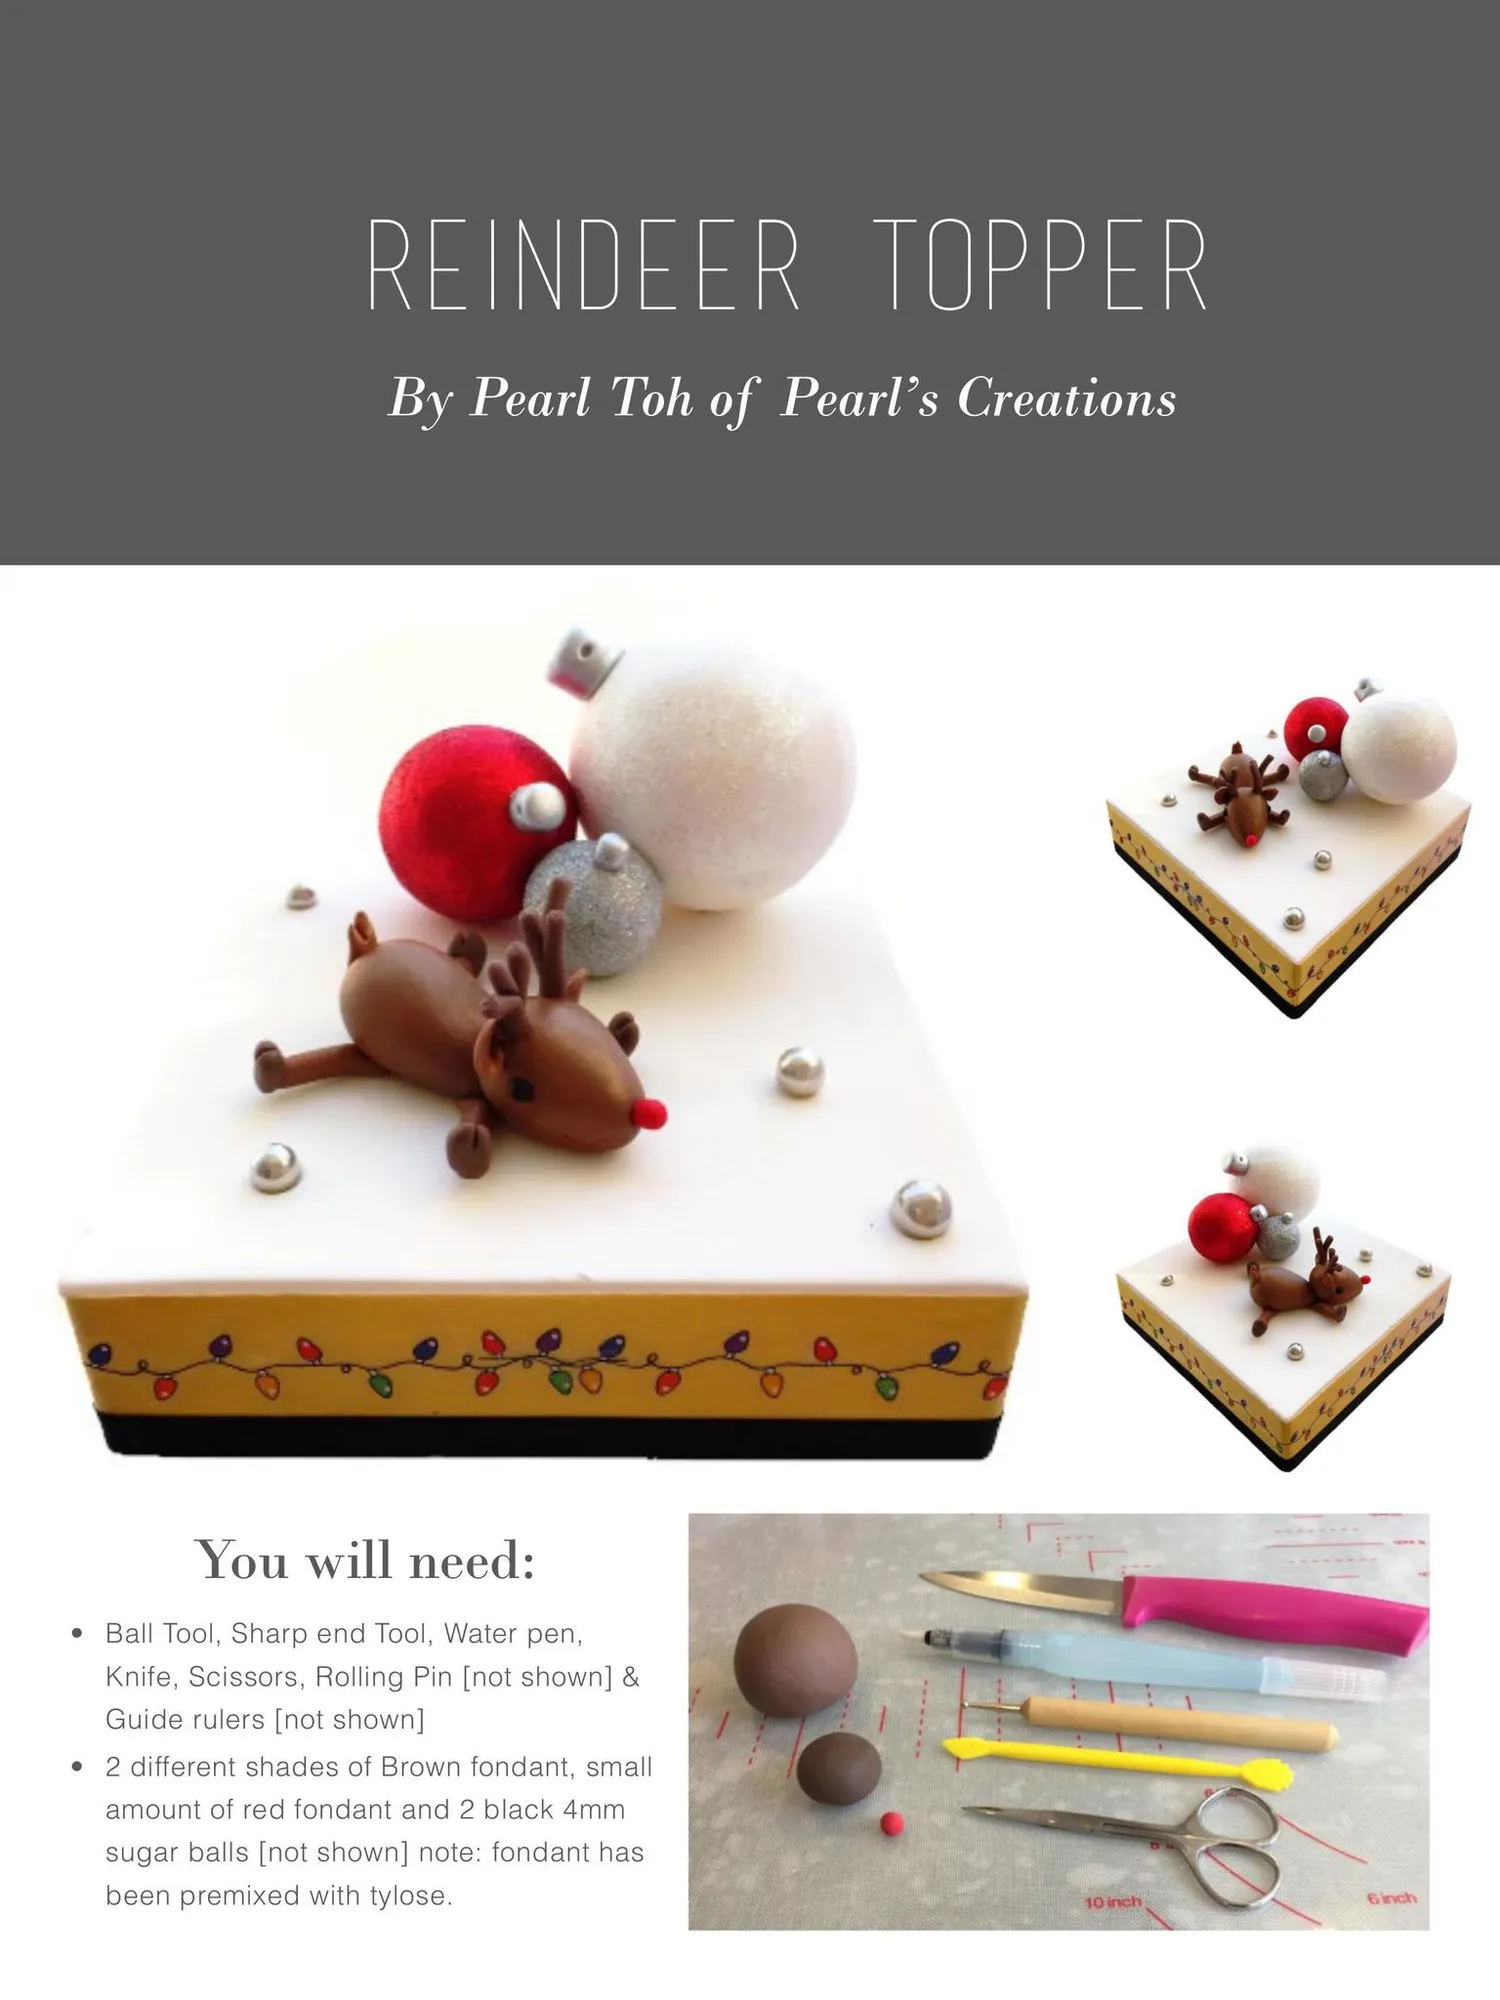
Reindeer topper By Pearl Toh of Pearl’s Creations You will need: • Ball Tool, Sharp end Tool, Water pen, Knife, Scissors, Rolling Pin [not shown] & Guide rulers [not shown] • 2 different shades of Brown fondant, small amount of red fondant and 2 black 4mm sugar balls [not shown] note: fondant has been premixed with tylose.
Page 35 text
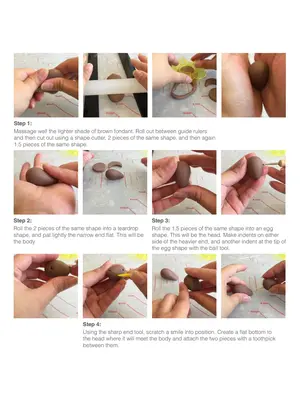
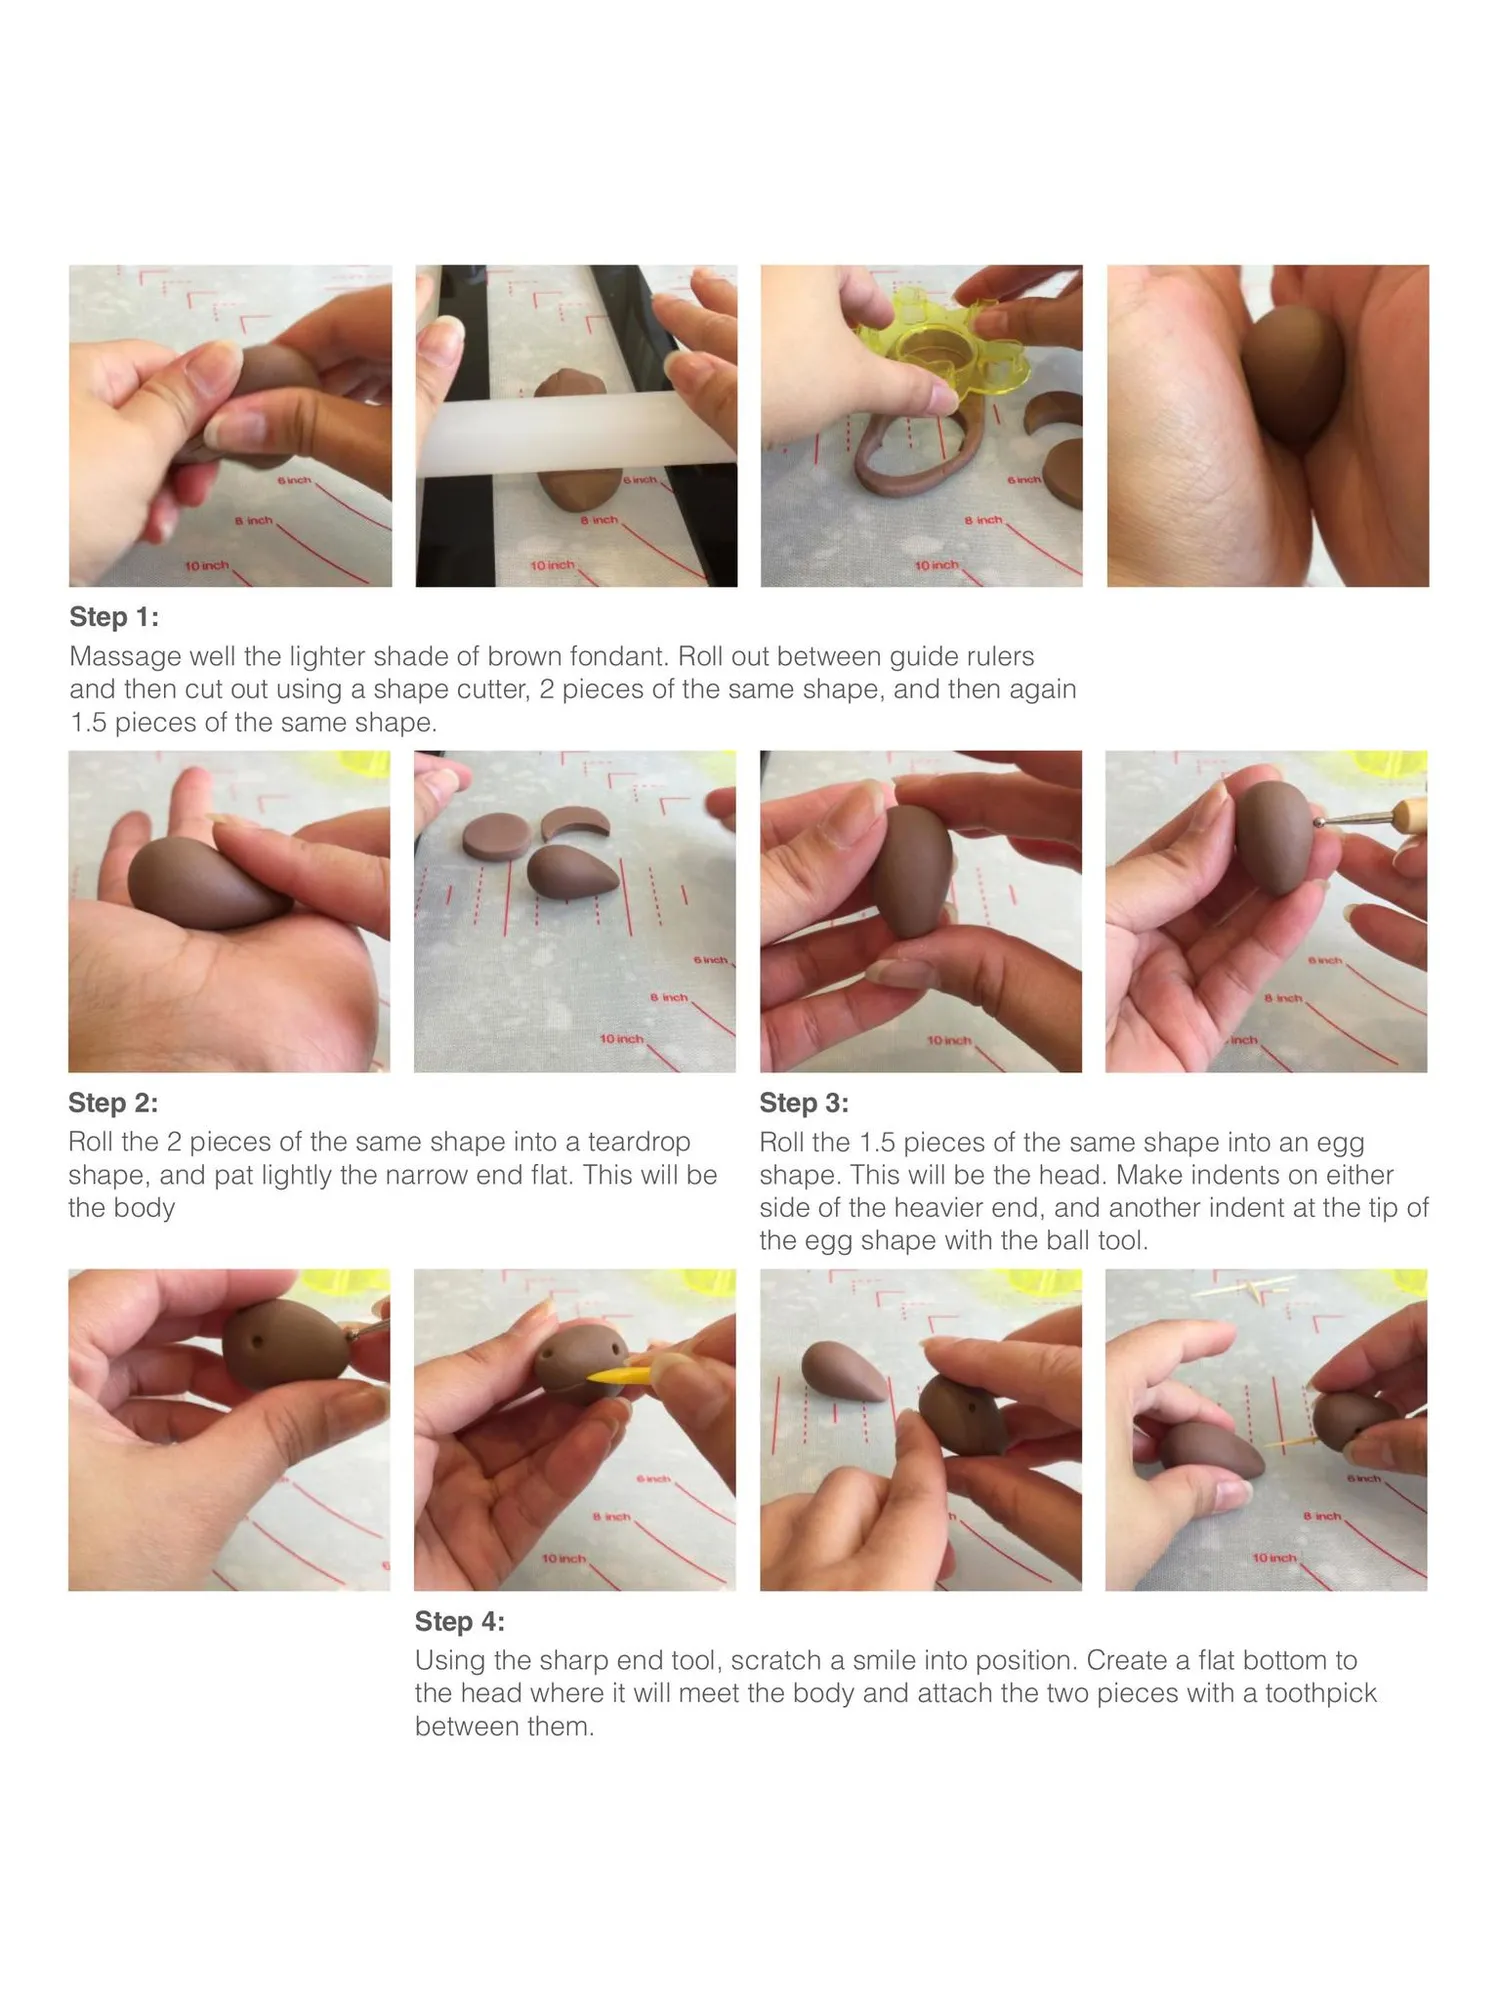
Step 1: Massage well the lighter shade of brown fondant. Roll out between guide rulers and then cut out using a shape cutter, 2 pieces of the same shape, and then again 1.5 pieces of the same shape. Step 2: Roll the 2 pieces of the same shape into a teardrop shape, and pat lightly the narrow end flat. This will be the body Step 3: Roll the 1.5 pieces of the same shape into an egg shape. This will be the head. Make indents on either side of the heavier end, and another indent at the tip of the egg shape with the ball tool. Step 4: Using the sharp end tool, scratch a smile into position. Create a flat bottom to the head where it will meet the body and attach the two pieces with a toothpick between them.
Page 36 text
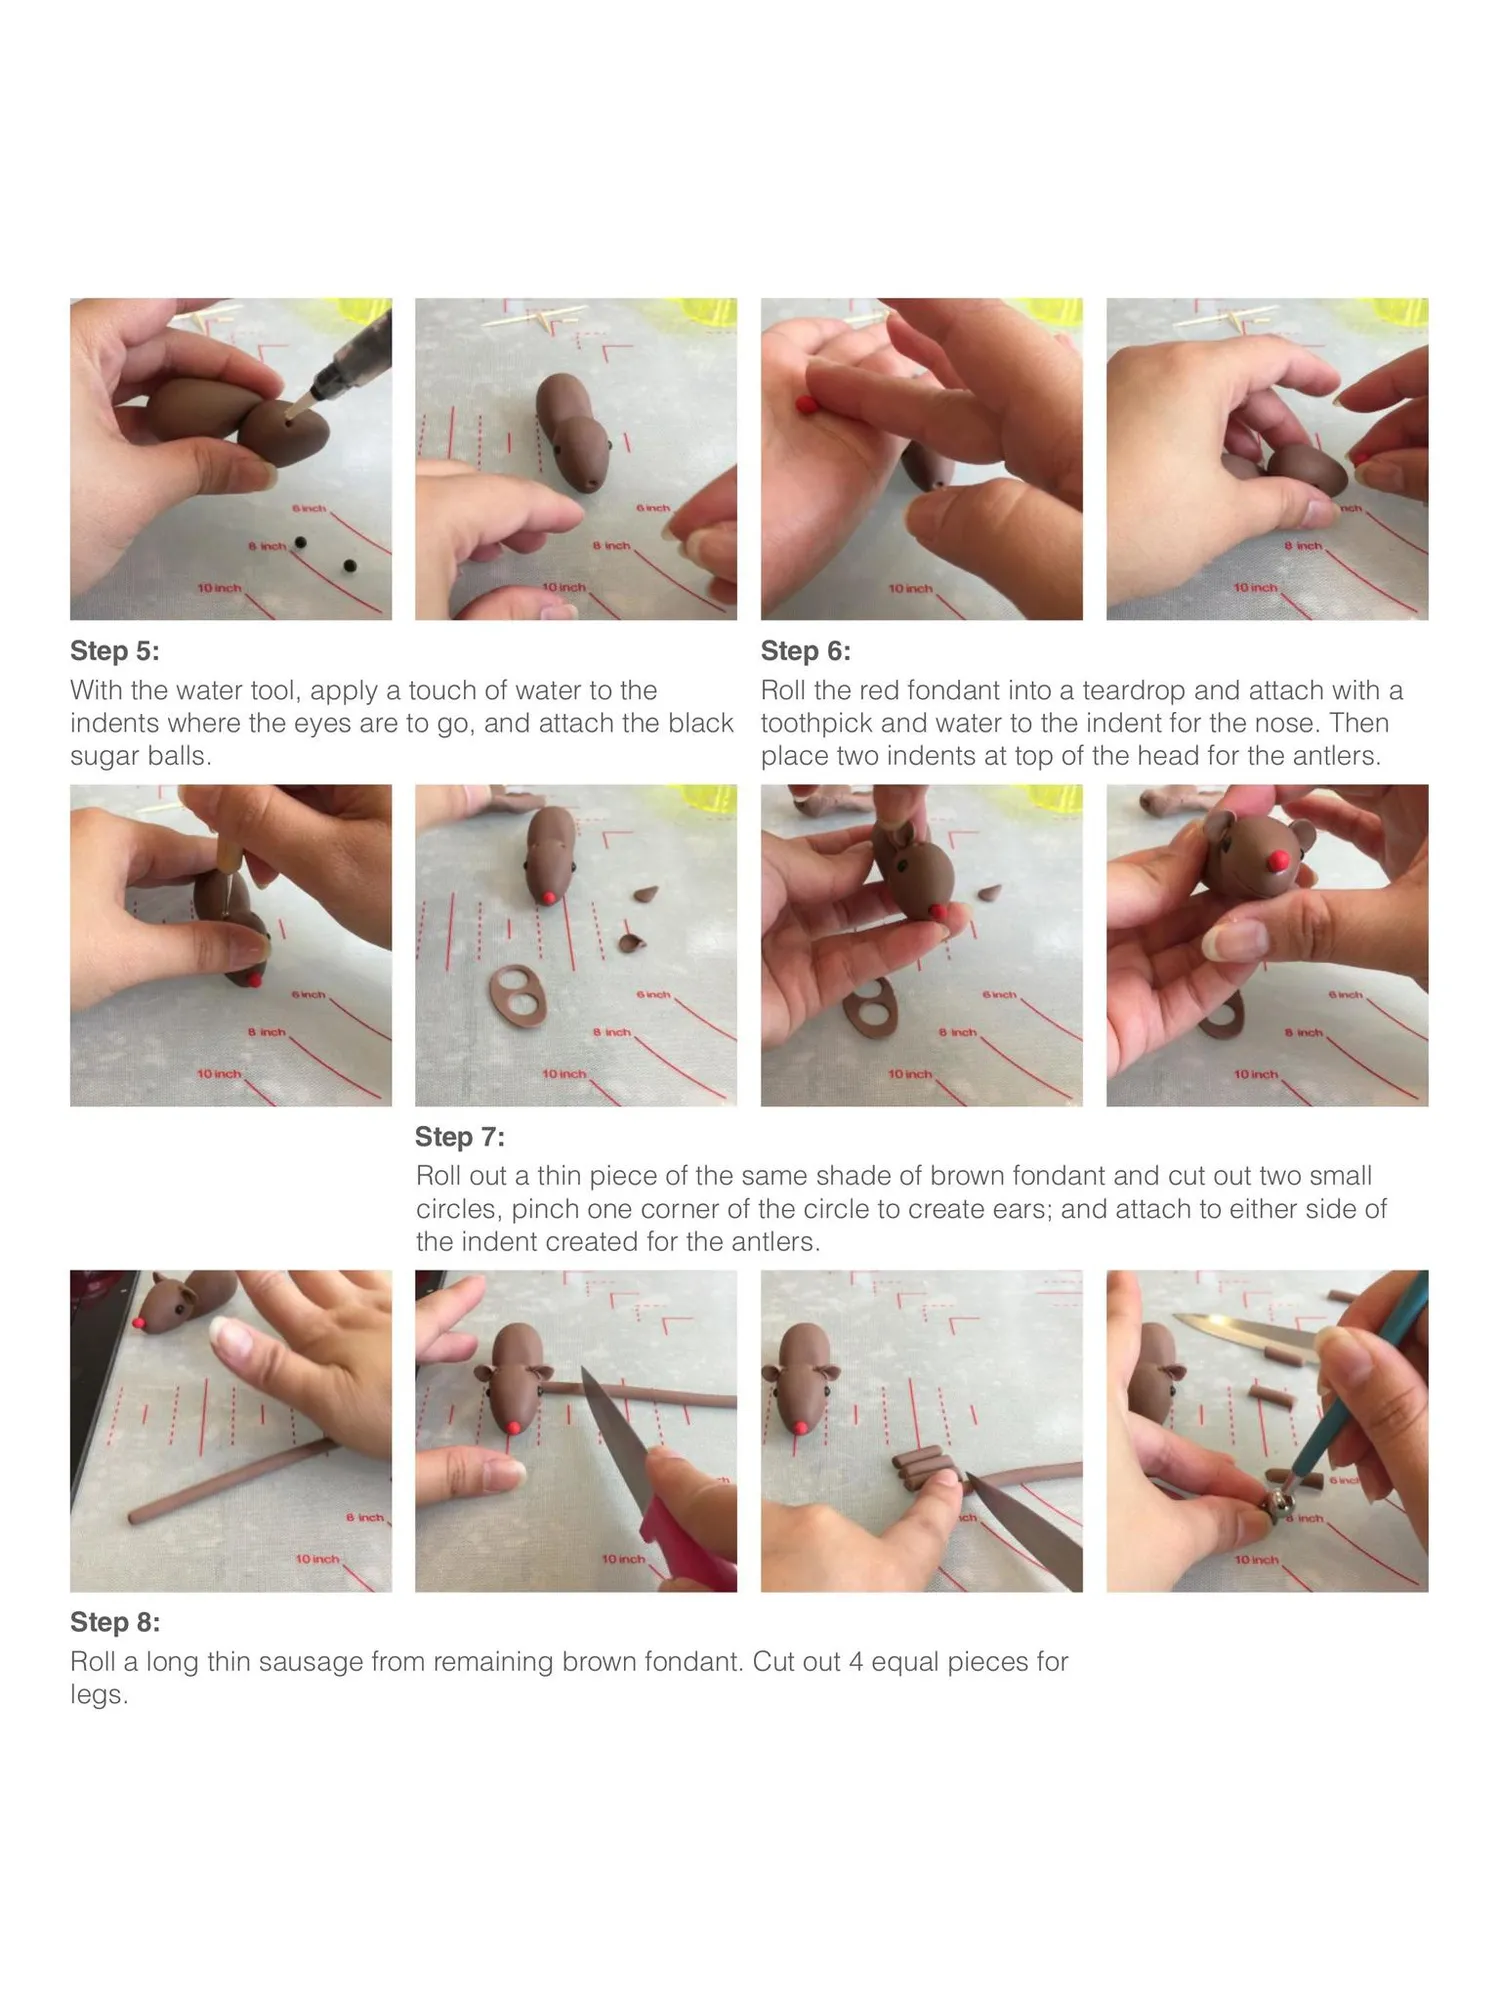
Step 5: With the water tool, apply a touch of water to the indents where the eyes are to go, and attach the black sugar balls. Step 6: Roll the red fondant into a teardrop and attach with a toothpick and water to the indent for the nose. Then place two indents at top of the head for the antlers. Step 7: Roll out a thin piece of the same shade of brown fondant and cut out two small circles, pinch one corner of the circle to create ears; and attach to either side of the indent created for the antlers. Step 8: Roll a long thin sausage from remaining brown fondant. Cut out 4 equal pieces for legs.
Page 37 text
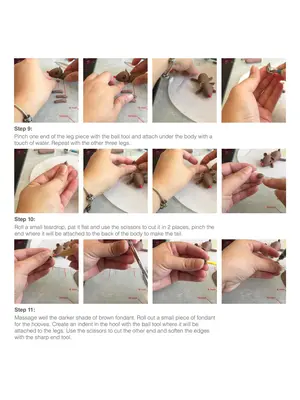
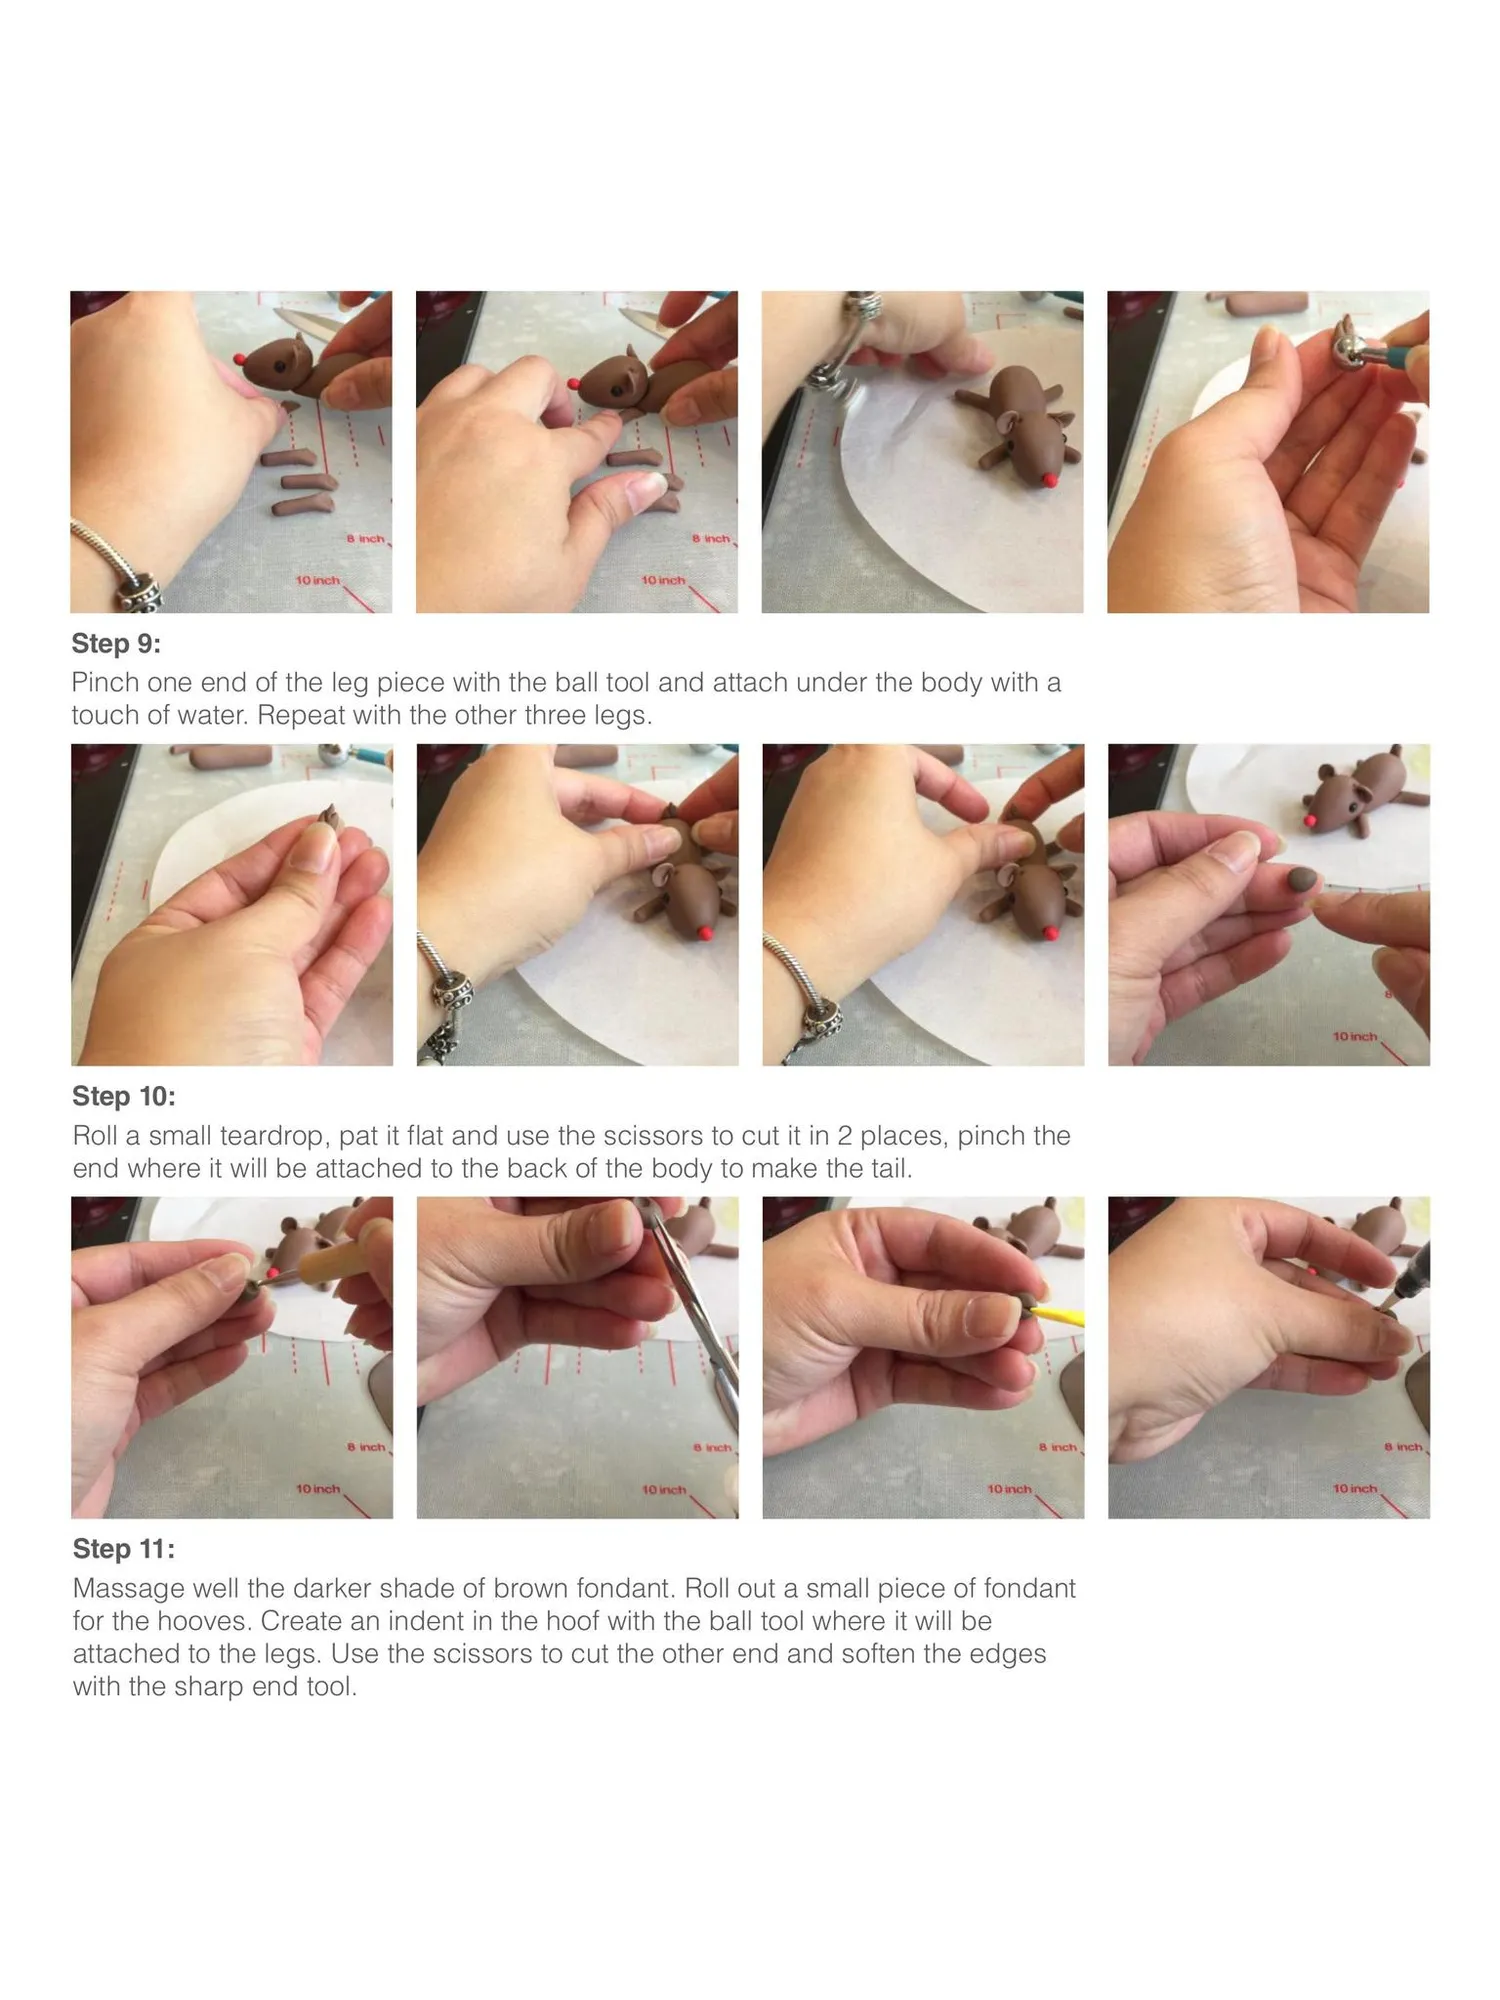
Step 9: Pinch one end of the leg piece with the ball tool and attach under the body with a touch of water. Repeat with the other three legs. Step 10: Roll a small teardrop, pat it flat and use the scissors to cut it in 2 places, pinch the end where it will be attached to the back of the body to make the tail. Step 11: Massage well the darker shade of brown fondant. Roll out a small piece of fondant for the hooves. Create an indent in the hoof with the ball tool where it will be attached to the legs. Use the scissors to cut the other end and soften the edges with the sharp end tool.
Page 38 text
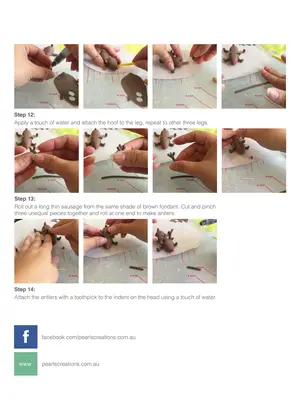
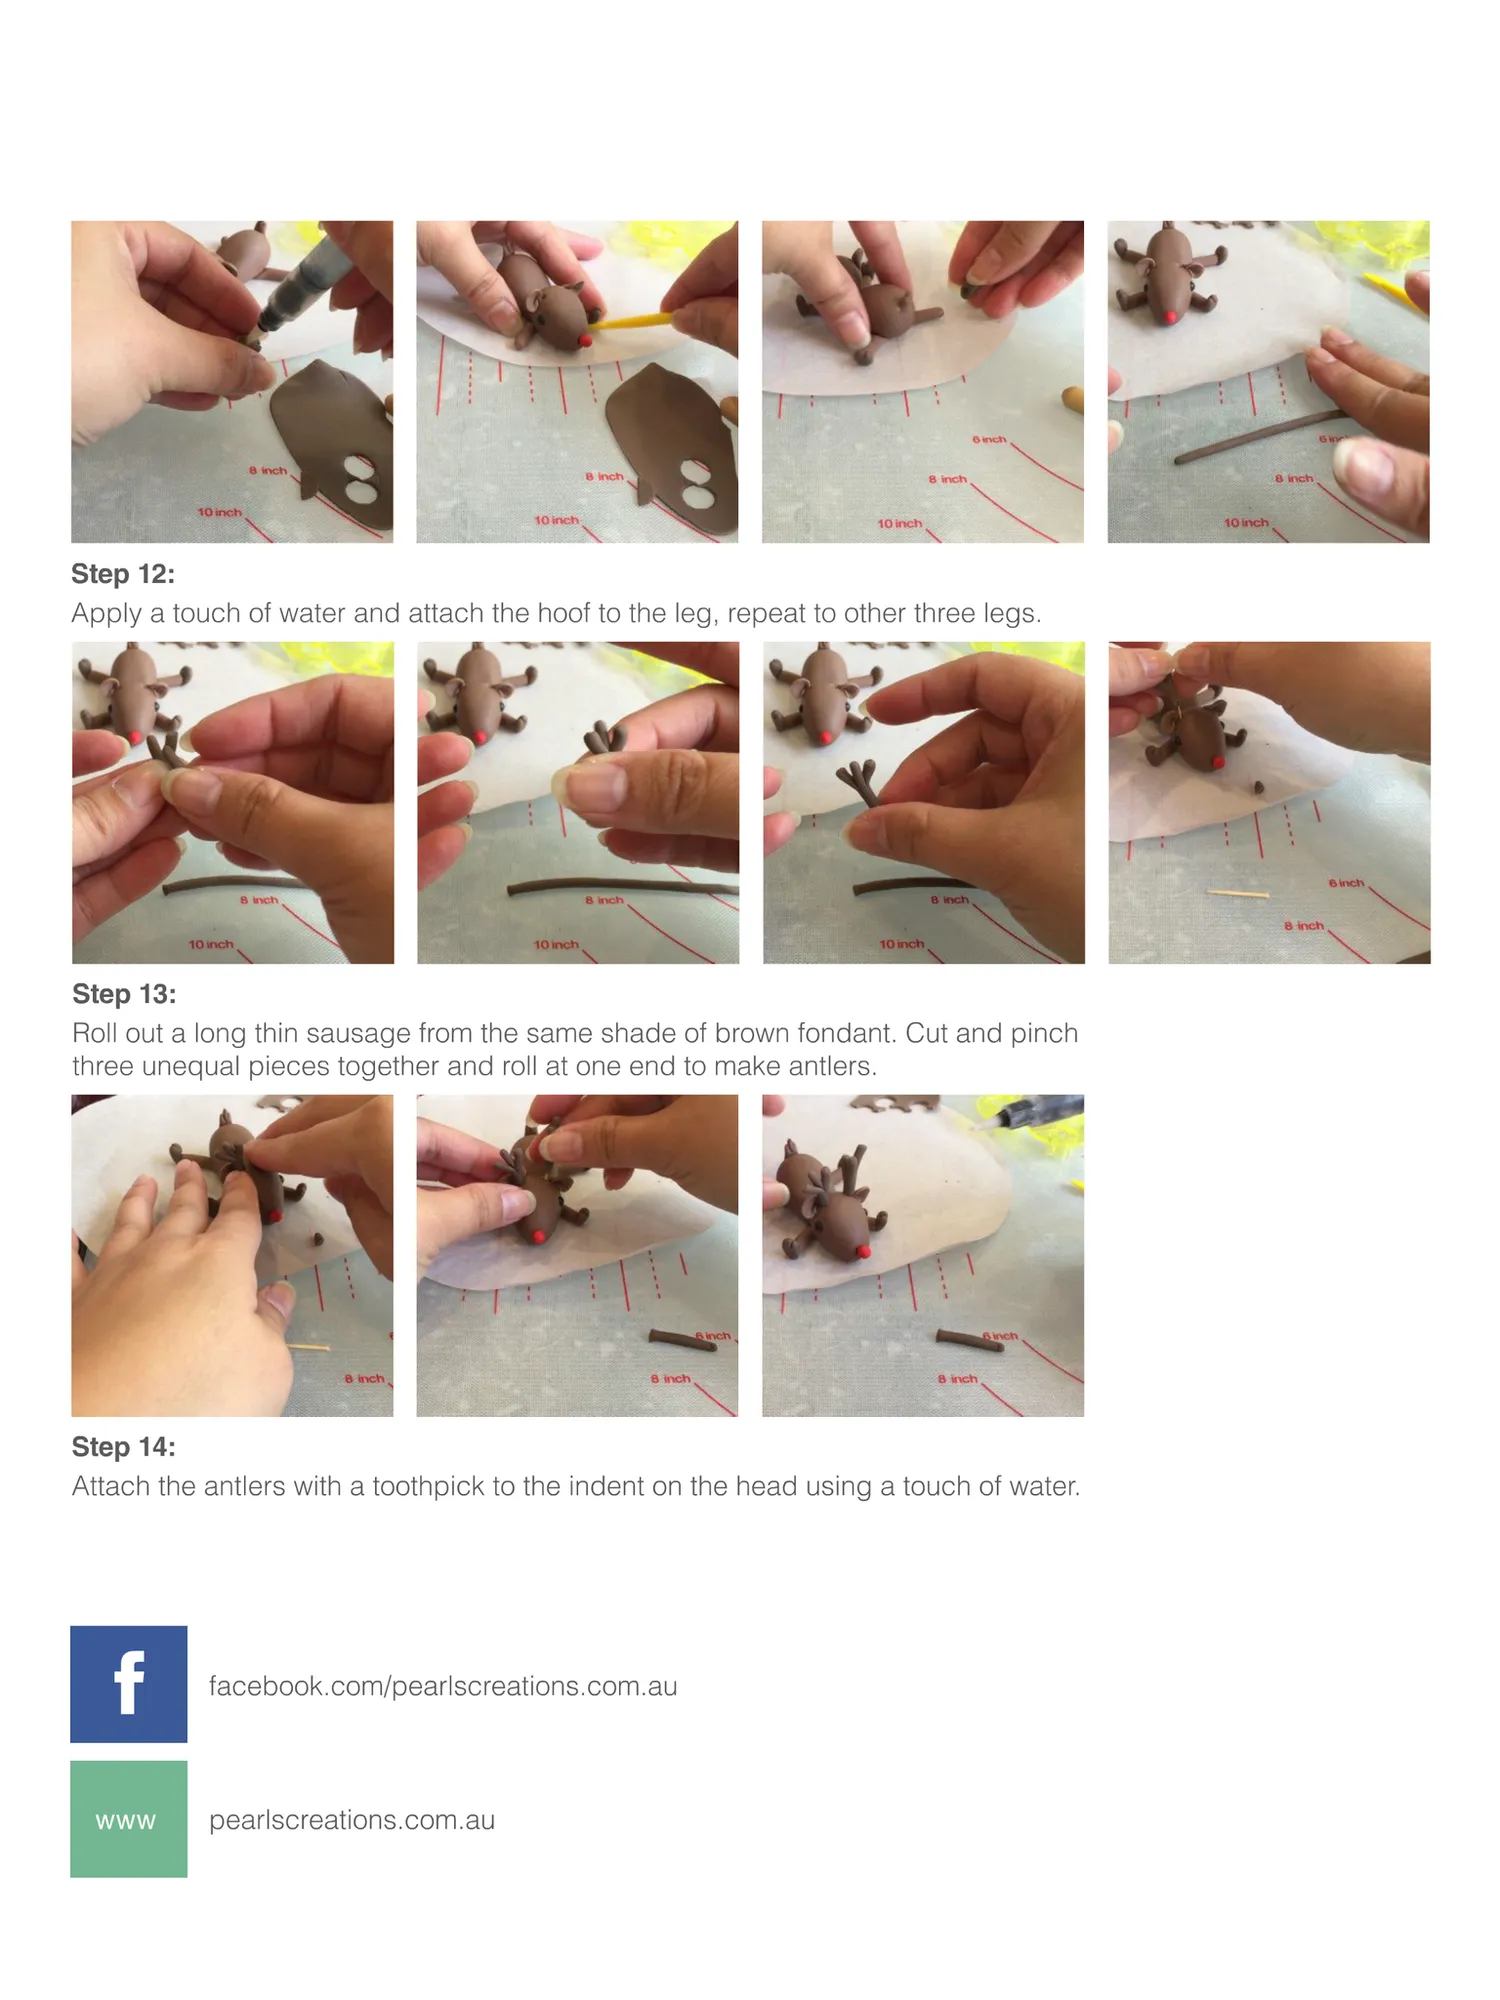
Step 12: Apply a touch of water and attach the hoof to the leg, repeat to other three legs. Step 13: Roll out a long thin sausage from the same shade of brown fondant. Cut and pinch three unequal pieces together and roll at one end to make antlers. Step 14: Attach the antlers with a toothpick to the indent on the head using a touch of water. f www facebook.com/pearlscreations.com.au pearlscreations.com.au
Page 39 text
Let us help you find the right techology ingredients for the icing on your Cake! SPECIAL OFFER 30% OFF We love cake as much as we love technology and that’s why we want to help you. As a special treat for Cake! magazine readers, we’re offering a 30% discount on your first advice ticket. If you’re looking to buy a new piece of techology, we can provide you with expert advice for products within your budget and help you find a product that you’ll love. Simply register your email by visiting rahero.com.au/cake and we’ll send you your personalised code. Keep your code handy, it’s good for 12 months. rahero.com.au/cake PERSONAL TECHNOLOGY CONSULTANTS Terms & conditions apply, see website for details Offer to register for codes ends 31/12/2016
Page 40 text
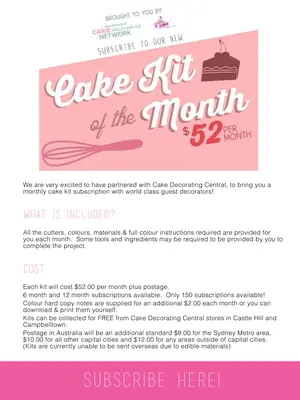
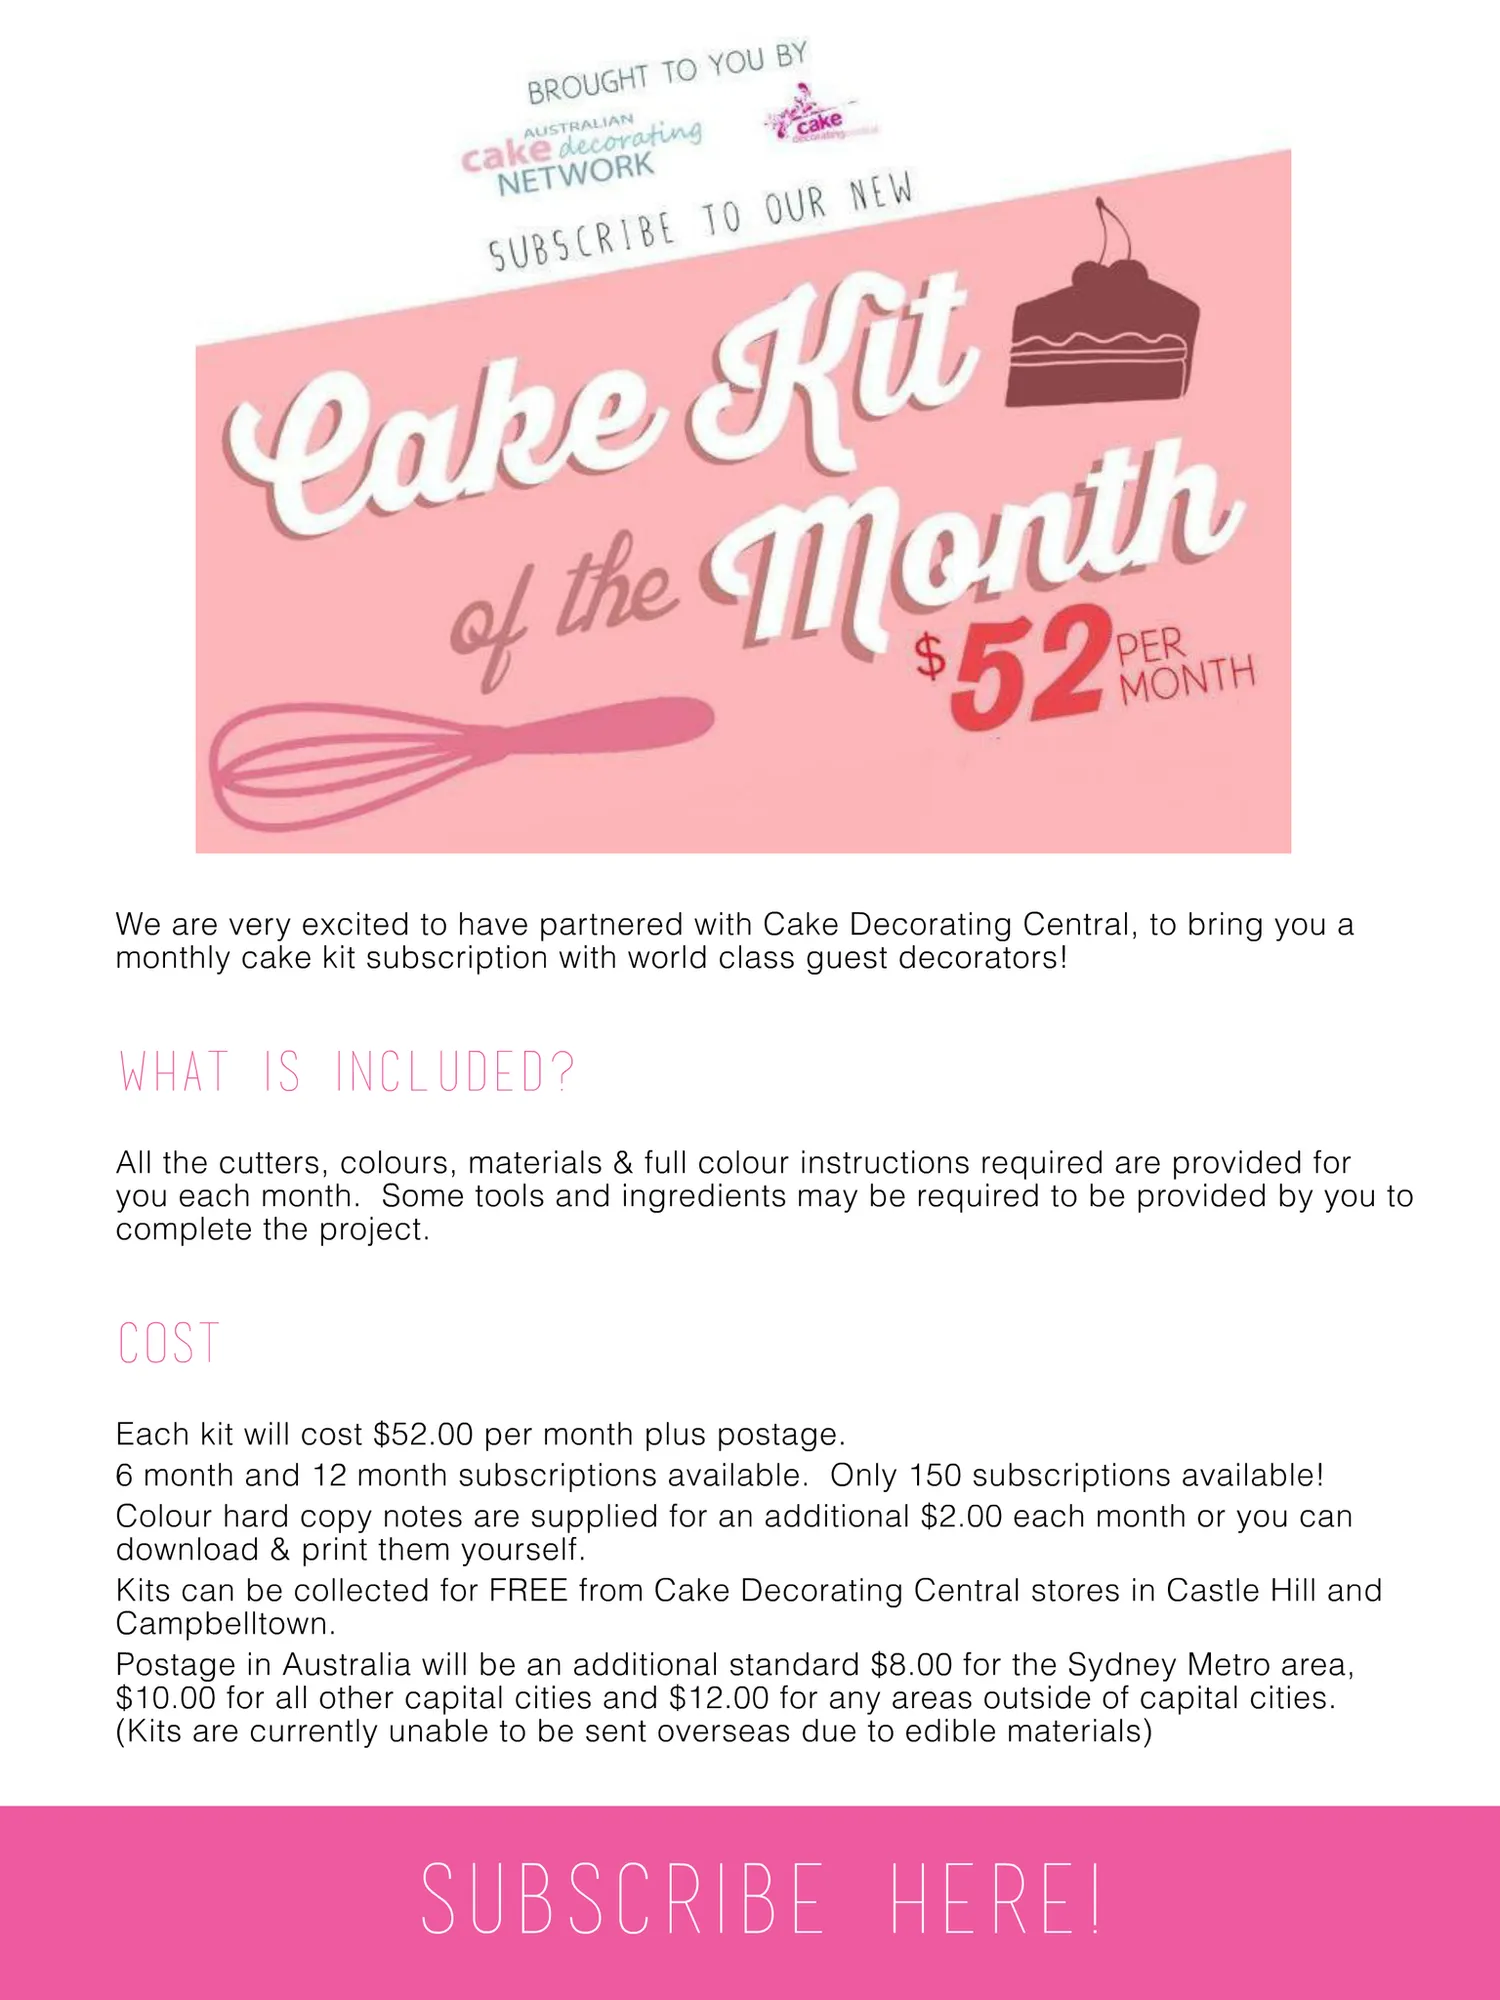
CAKE KIT OF THE MONTH AUSTRALIAN cake decorafing NETWORK cake decoratingcentral Subscribe to our Cake Kit of the Month at www.acdn.me www.cakedecoratingcentral.com.au
Page 41 text
We are very excited to have partnered with Cake Decorating Central, to bring you a monthly cake kit subscription with world class guest decorators! What is included? All the cutters, colours, materials & full colour instructions required are provided for you each month. Some tools and ingredients may be required to be provided by you to complete the project. COST Each kit will cost $52.00 per month plus postage. 6 month and 12 month subscriptions available. Only 150 subscriptions available! Colour hard copy notes are supplied for an additional $2.00 each month or you can download & print them yourself. Kits can be collected for FREE from Cake Decorating Central stores in Castle Hill and Campbelltown. Postage in Australia will be an additional standard $8.00 for the Sydney Metro area, $10.00 for all other capital cities and $12
Page 42 text
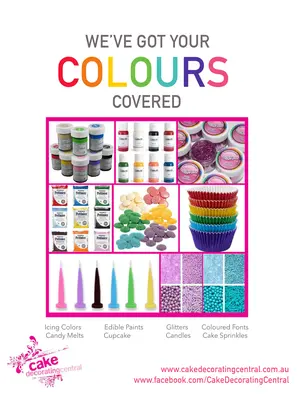
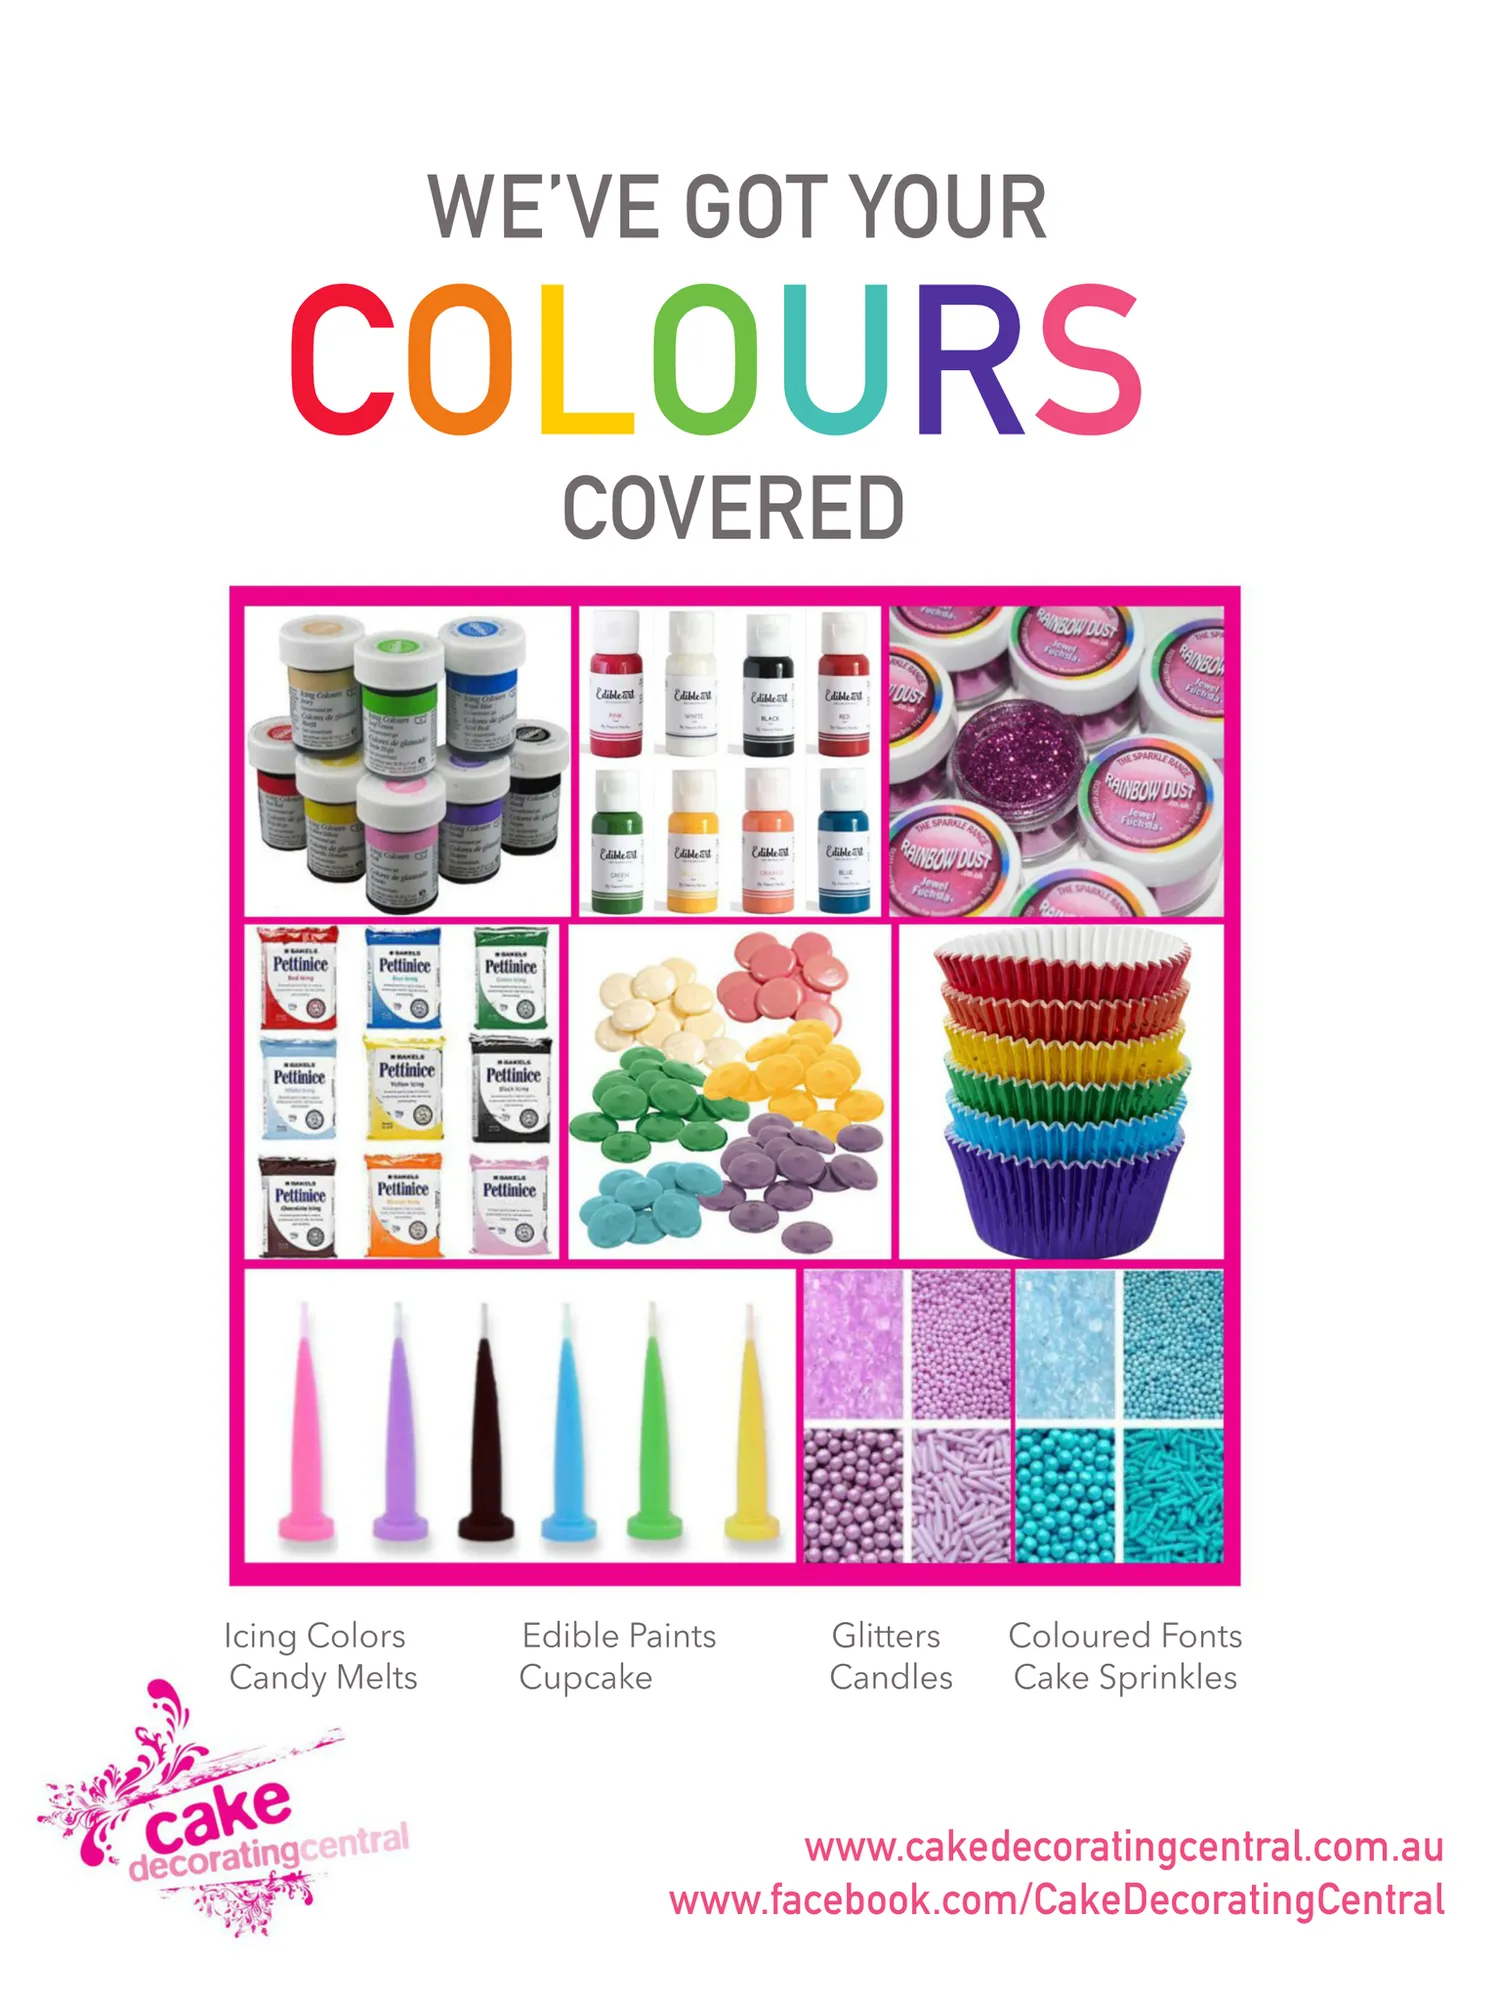
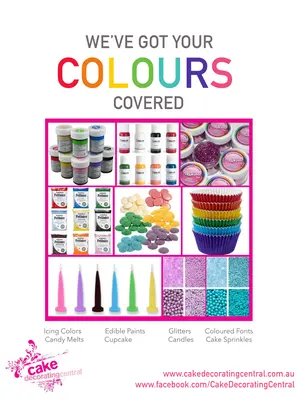
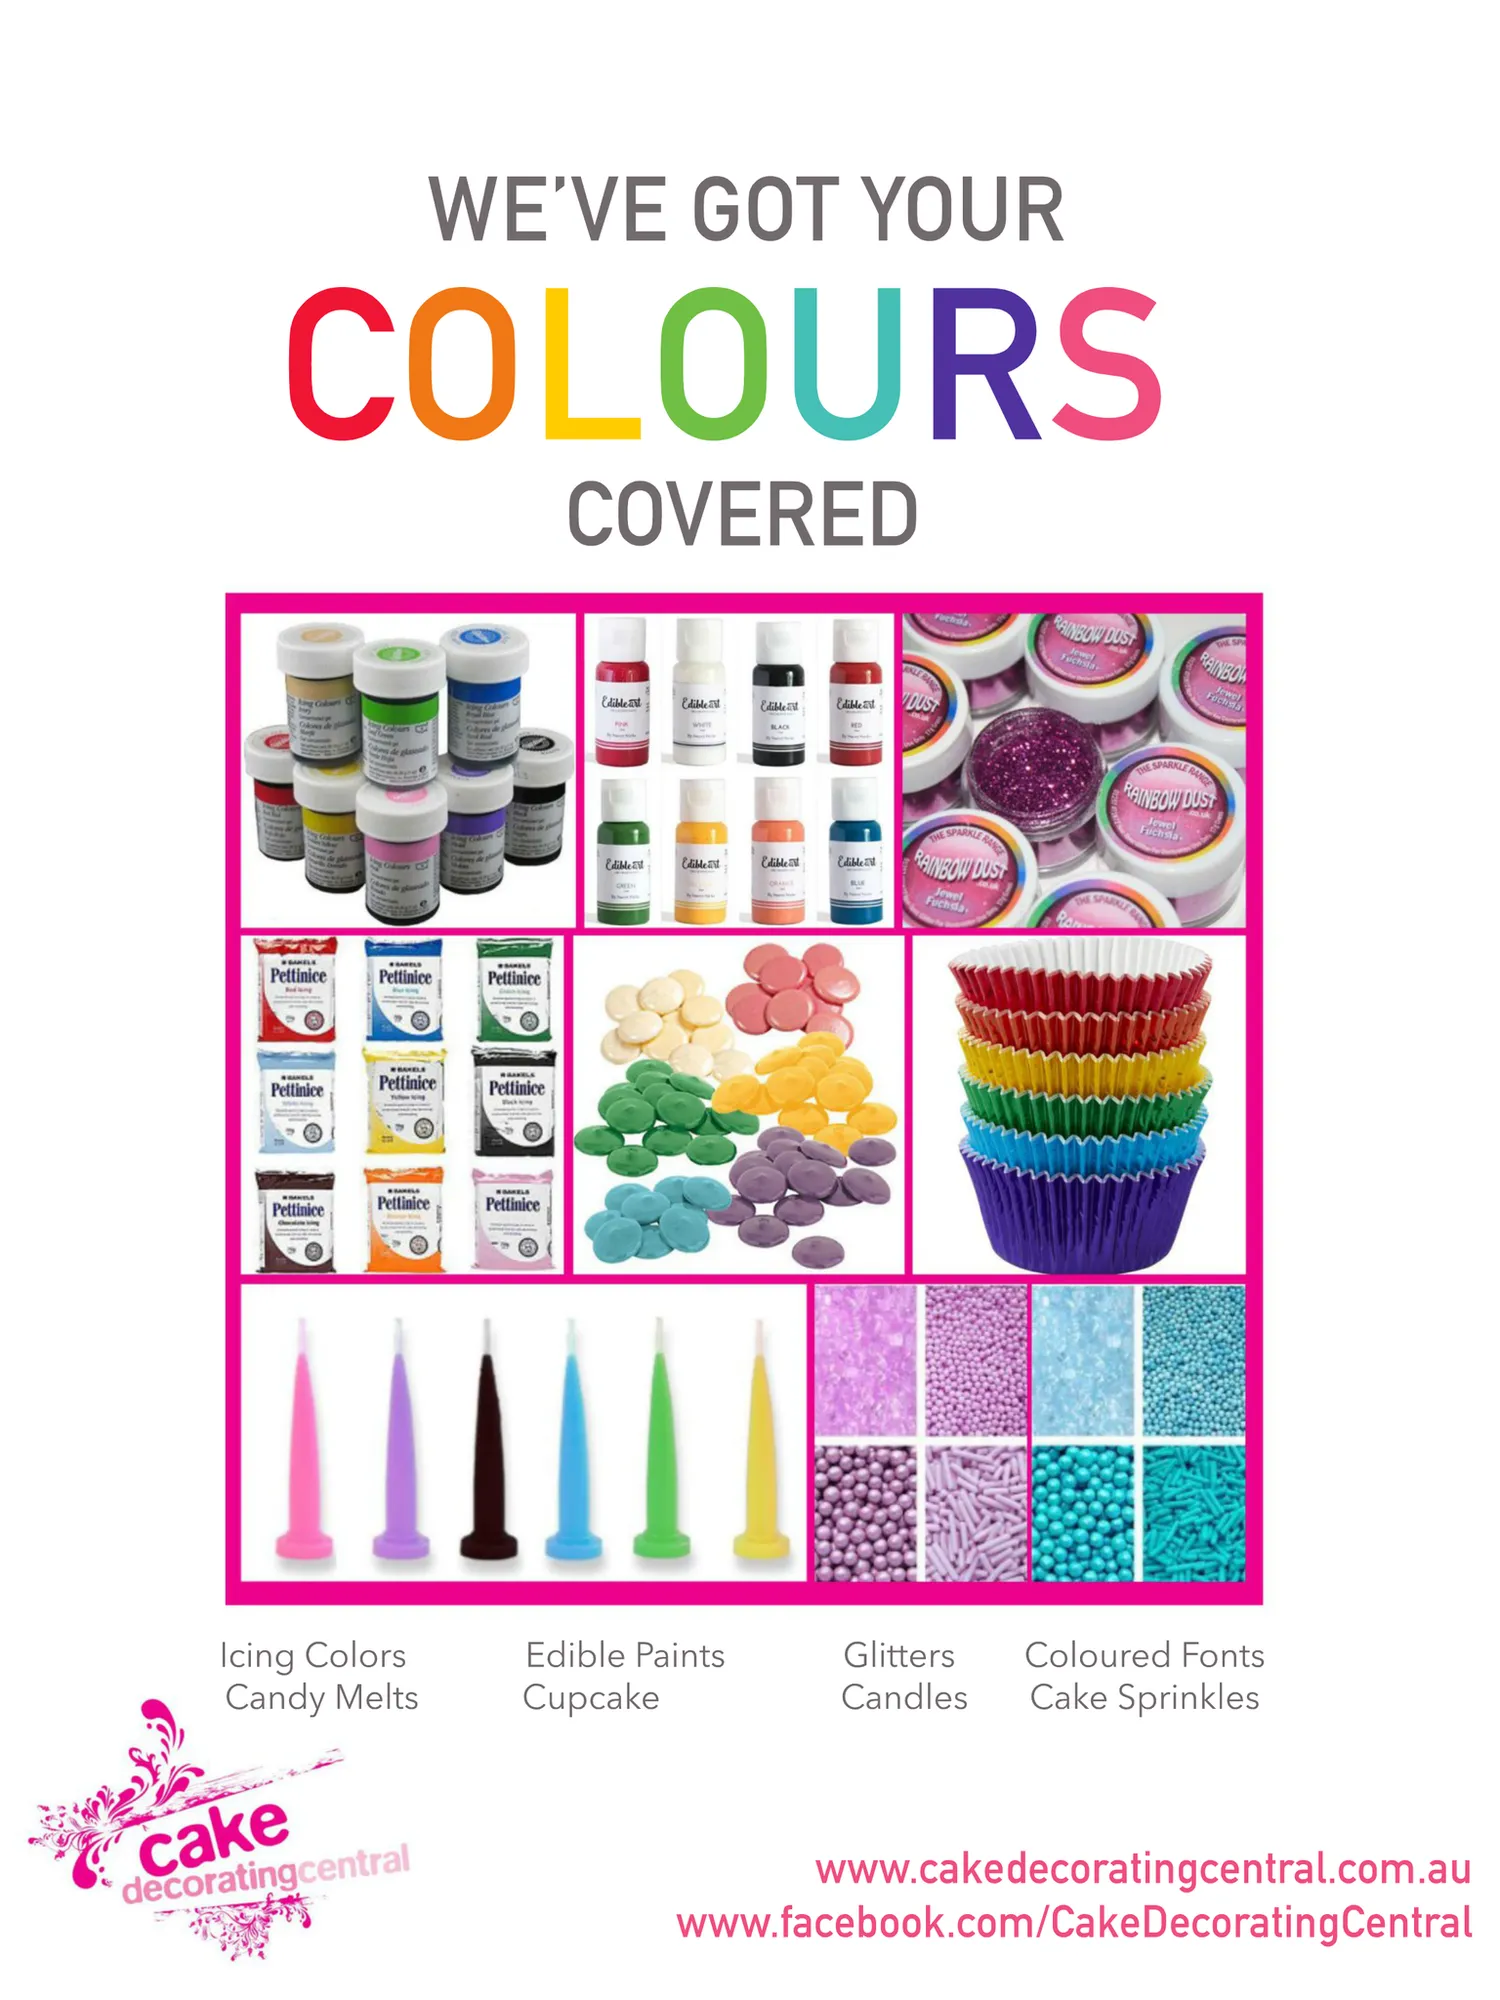
WE’VE GOT YOUR COLOURS COVERED Icing Colors Candy Melts Edible Paints Cupcake Glitters Candles Coloured Fonts Cake Sprinkles www.cakedecoratingcentral.com.au www.facebook.com/CakeDecoratingCentral
Page 43 text
cake decoratingcentral www.cakedecoratingcentral.com CAKEDECORATING WEKNOWCAKEDECORATING,BECAUSEWELOVECAKEDECORATING DECORATING COURSES COURSESDESIGNEDTOSUITALLLEVELS,FROMBEGINNERSTOADVANCED EXPERT ADVICE & SERVICE WETAKETHETIMETOHELPYOUDESIGN,ANDCREATEYOURMASTERPIECE OURSTAFFLOVEDECORATING AMAZING PRODUCTS 5000+ GENUINEPRODUCTSINSTOREGONLINEWESUPPORTGENUINECAKEDECORATORS DESIGNEDTOOLSNOTRIPOFFS EDIBLEIMAGES CAMPBELLTOWN CASTLEHILL TINHIRE Unit2/5HarbordRoad Unit31/9HoyleAvenue READYBAKEDCAKES WoodbineNSW2560 CastleHillNSW2154 GANACHEDCAKES P:0246265526 P:0298993065 E:[email protected] CUSTOMFLOWERS&TOPPERS E:[email protected]
Page 44 text
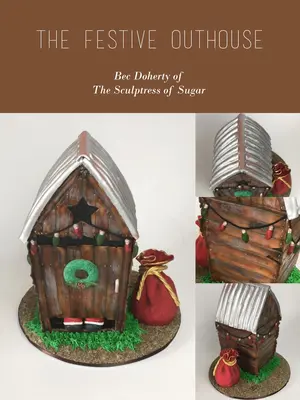
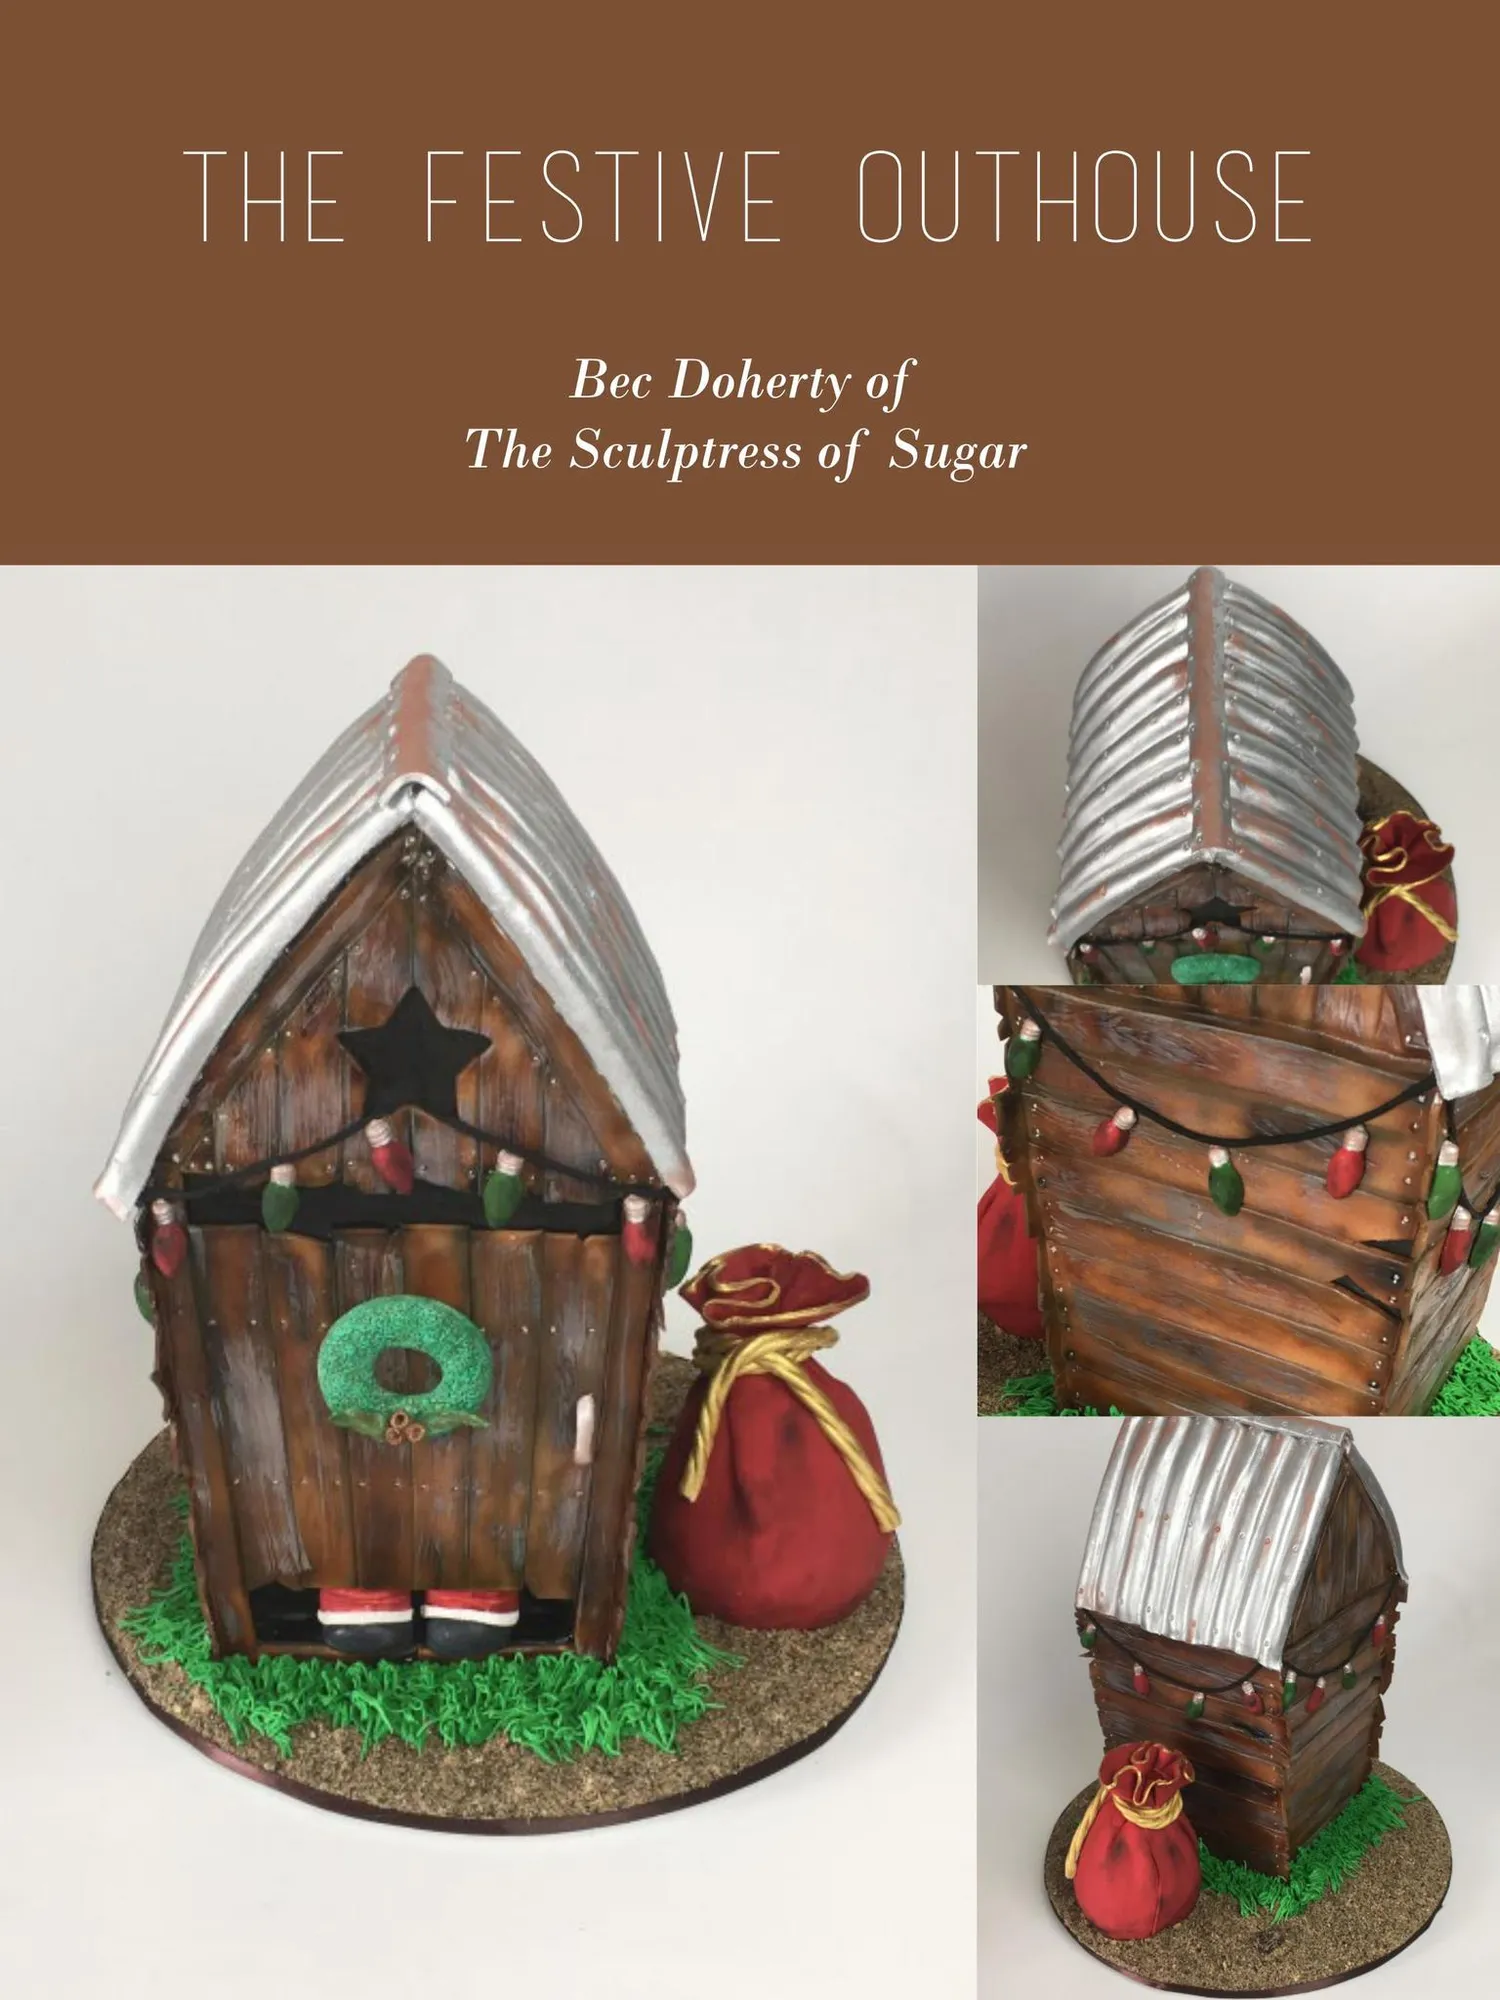
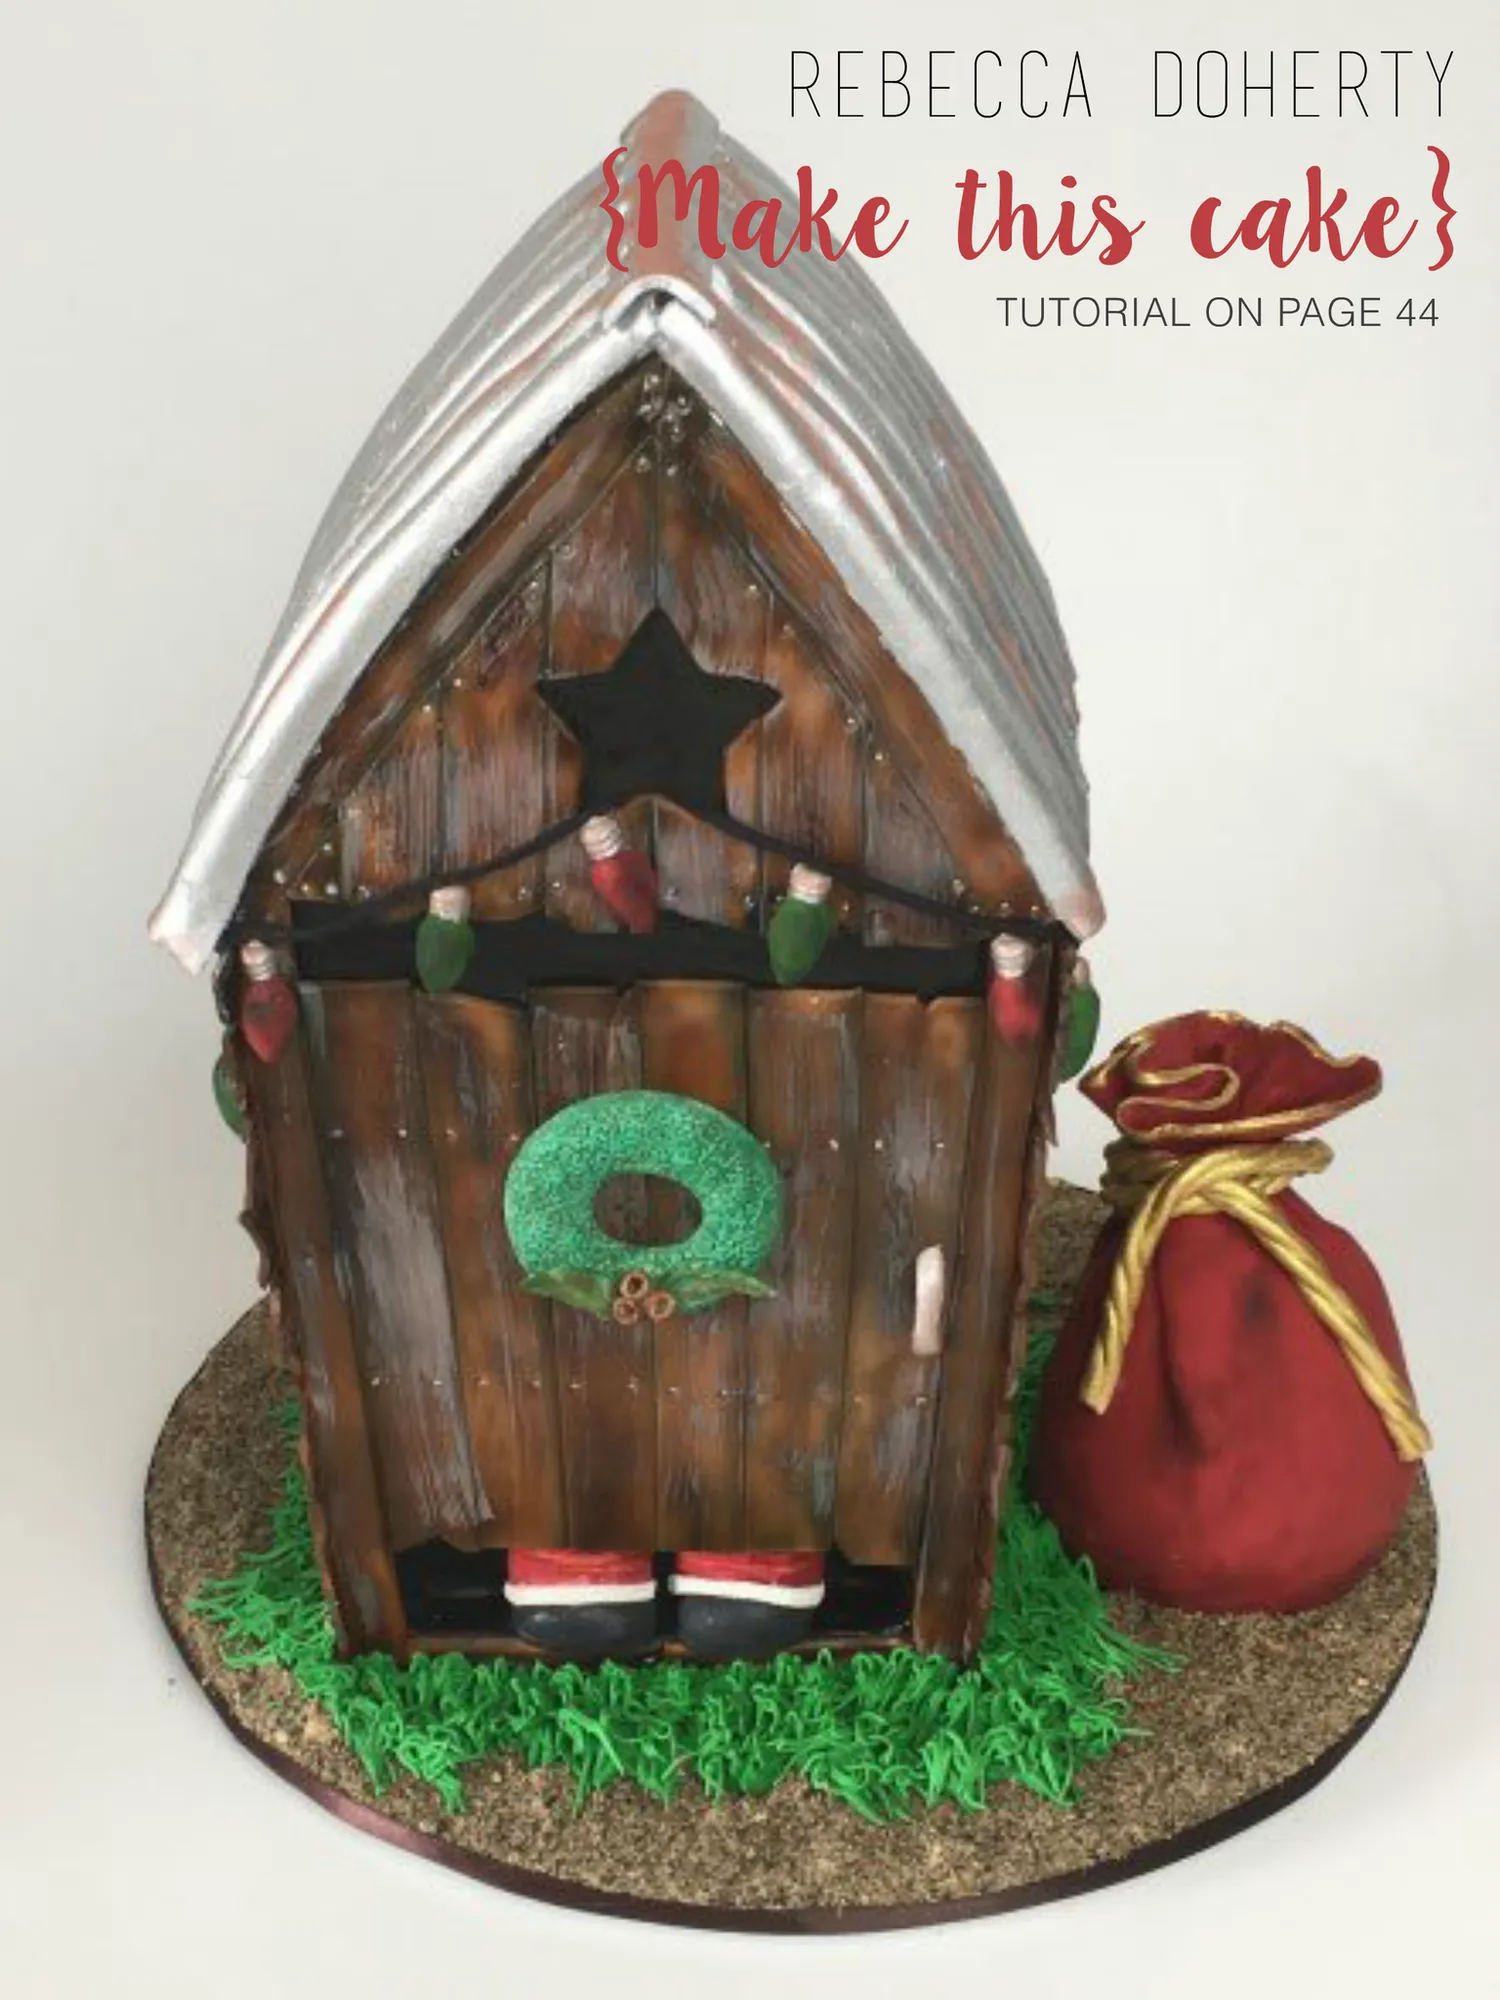
THE FESTIVE OUTHOUSE Bec Doherty of The Sculptress of Sugar
Page 45 text
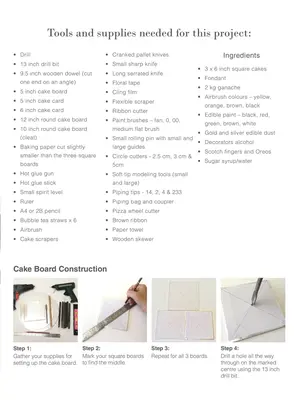
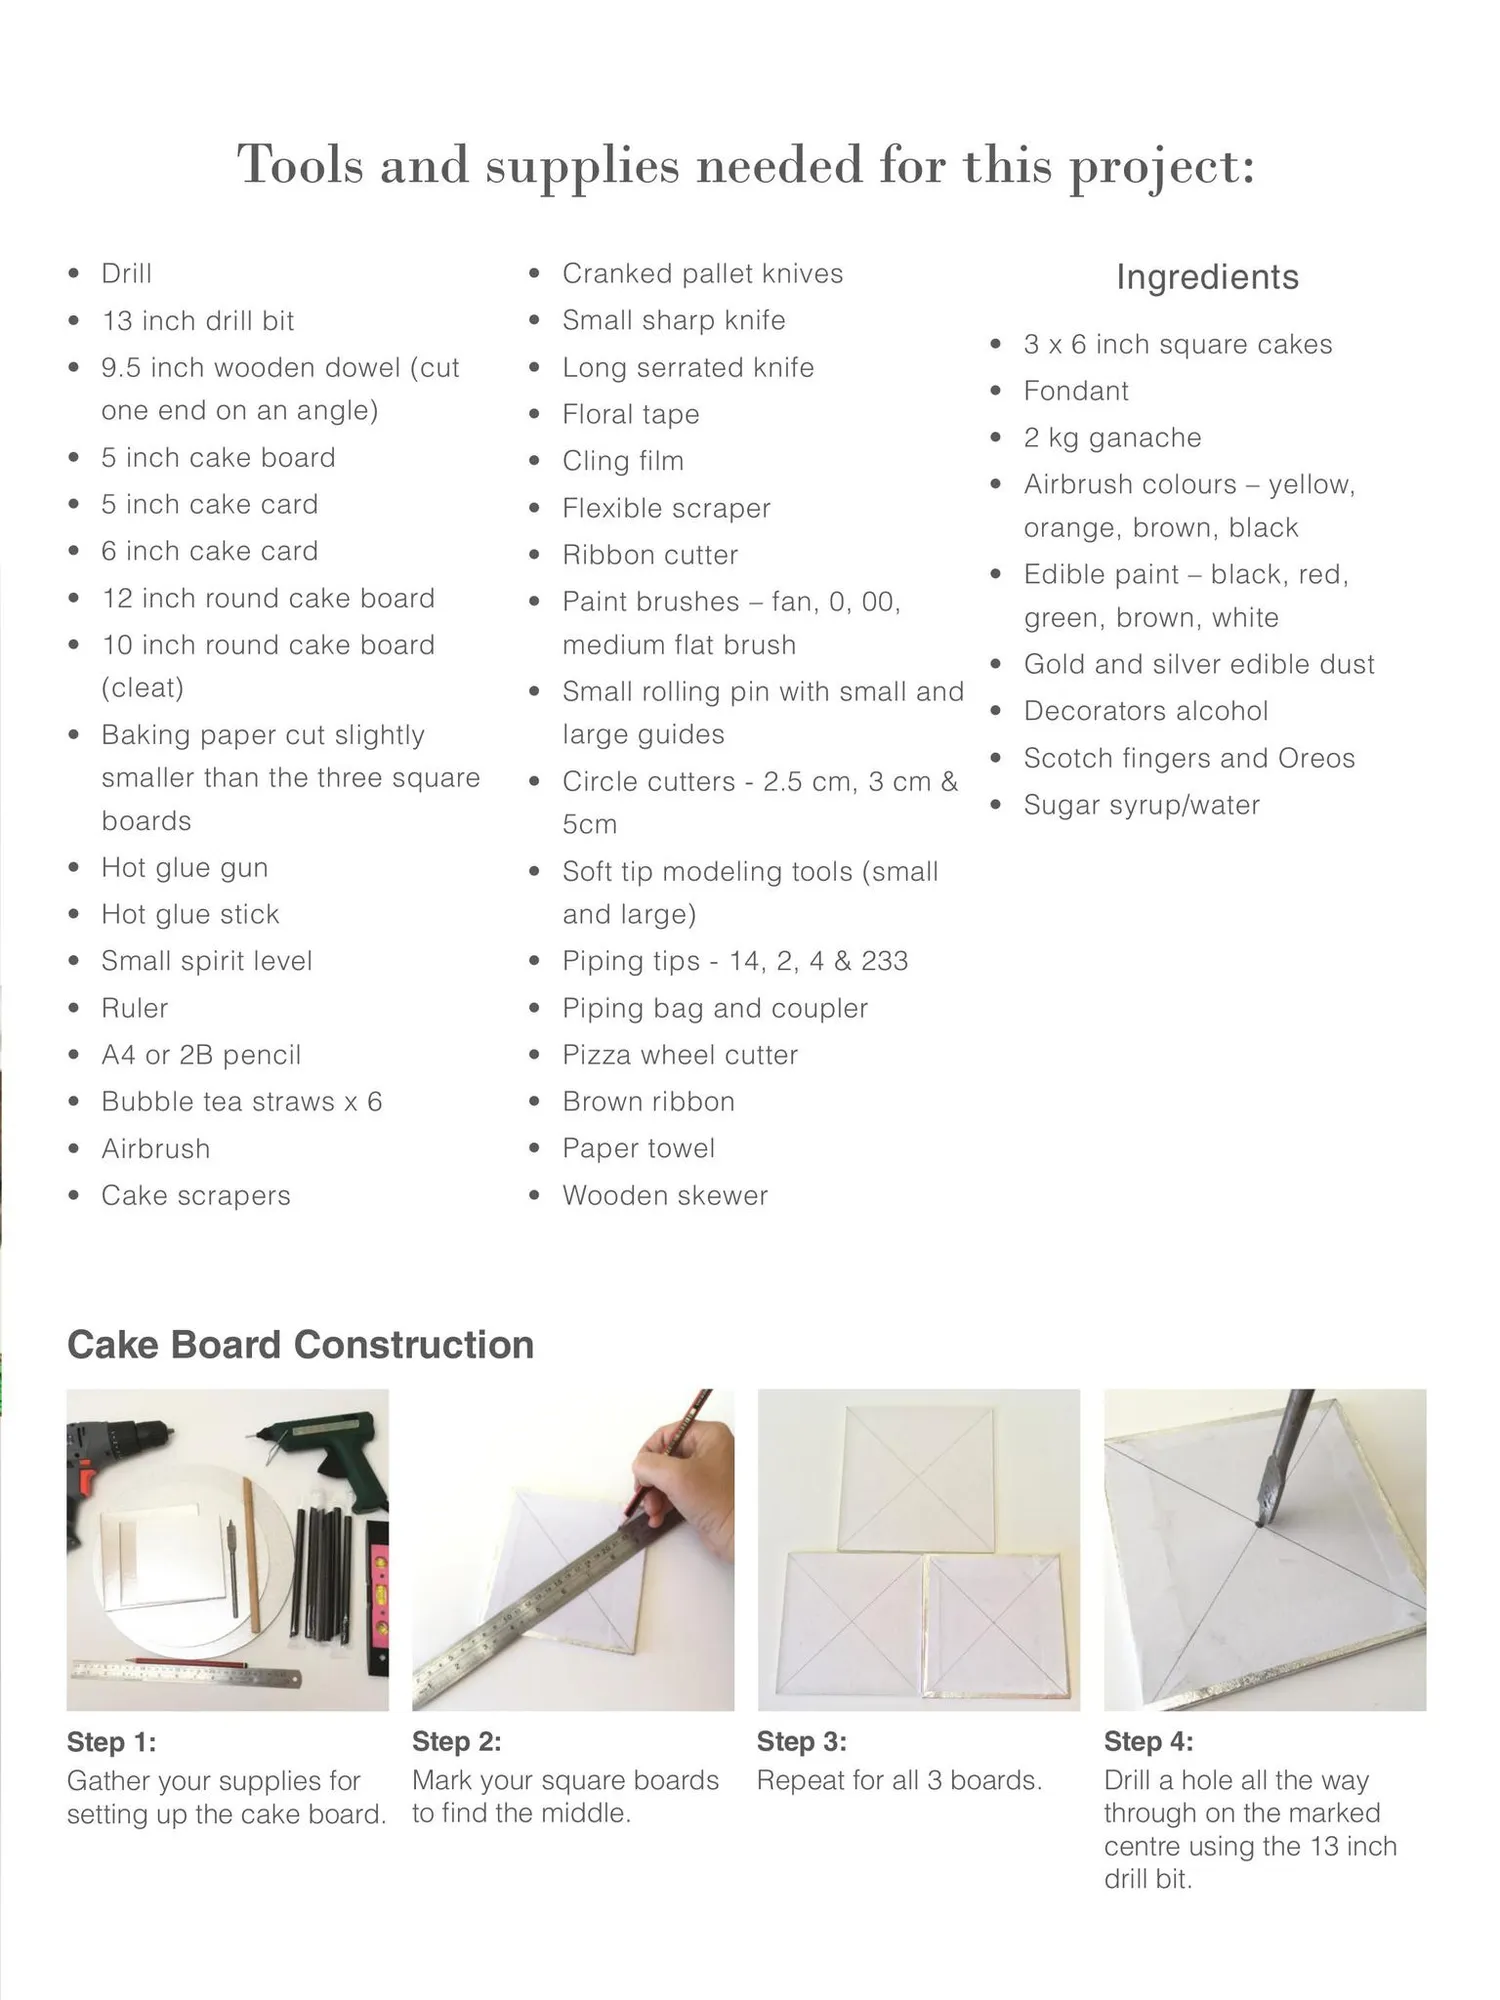
Tools and supplies needed for this project: • Drill • Cranked pallet knives • 13 inch drill bit • Small sharp knife • 9.5 inch wooden dowel (cut • Long serrated knife one end on an angle) • Floral tape • Cling film • 5 inch cake card • Flexible scraper • 6 inch cake card • Ribbon cutter • 12 inch round cake board • Paint brushes – fan, 0, 00, (cleat) medium flat brush • Small rolling pin with small and large guides • Baking paper cut slightly smaller than the three square • Circle cutters - 2.5 cm, 3 cm & boards • Hot glue gun • 3 x 6 inch square cakes • Fondant • 2 kg ganache • 5 inch cake board • 10 inch round cake board Ingredients 5cm • Airbrush colours – yellow, orange, brown, black • Edible paint – black, red, green, brown, white • Gold and silver edible dust • Decorators alcohol • Scotch fingers and Oreos • Sugar syrup/water • Soft tip modeling tools (small and large) • Hot glue stick • Small spirit level • Piping tips - 14, 2, 4 & 233 • Ruler • Piping bag and coupler • A4 or 2B pencil • Pizza wheel cutter • Bubble tea straws x 6 • Brown ribbon • Airbrush • Paper towel • Cake scrapers • Wooden skewer Cake Board Construction Step 2: Step 1: Mark your square boards Gather your supplies for setting up the cake board. to find the middle. Step 3: Repeat for all 3 boards. Step 4: Drill a hole all the way through on the marked centre using the 13 inch drill bit.
Page 46 text
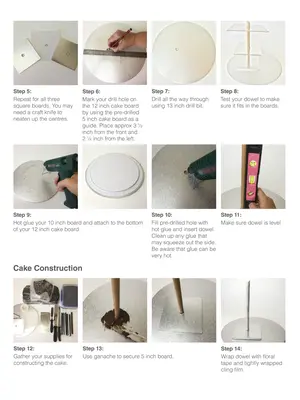
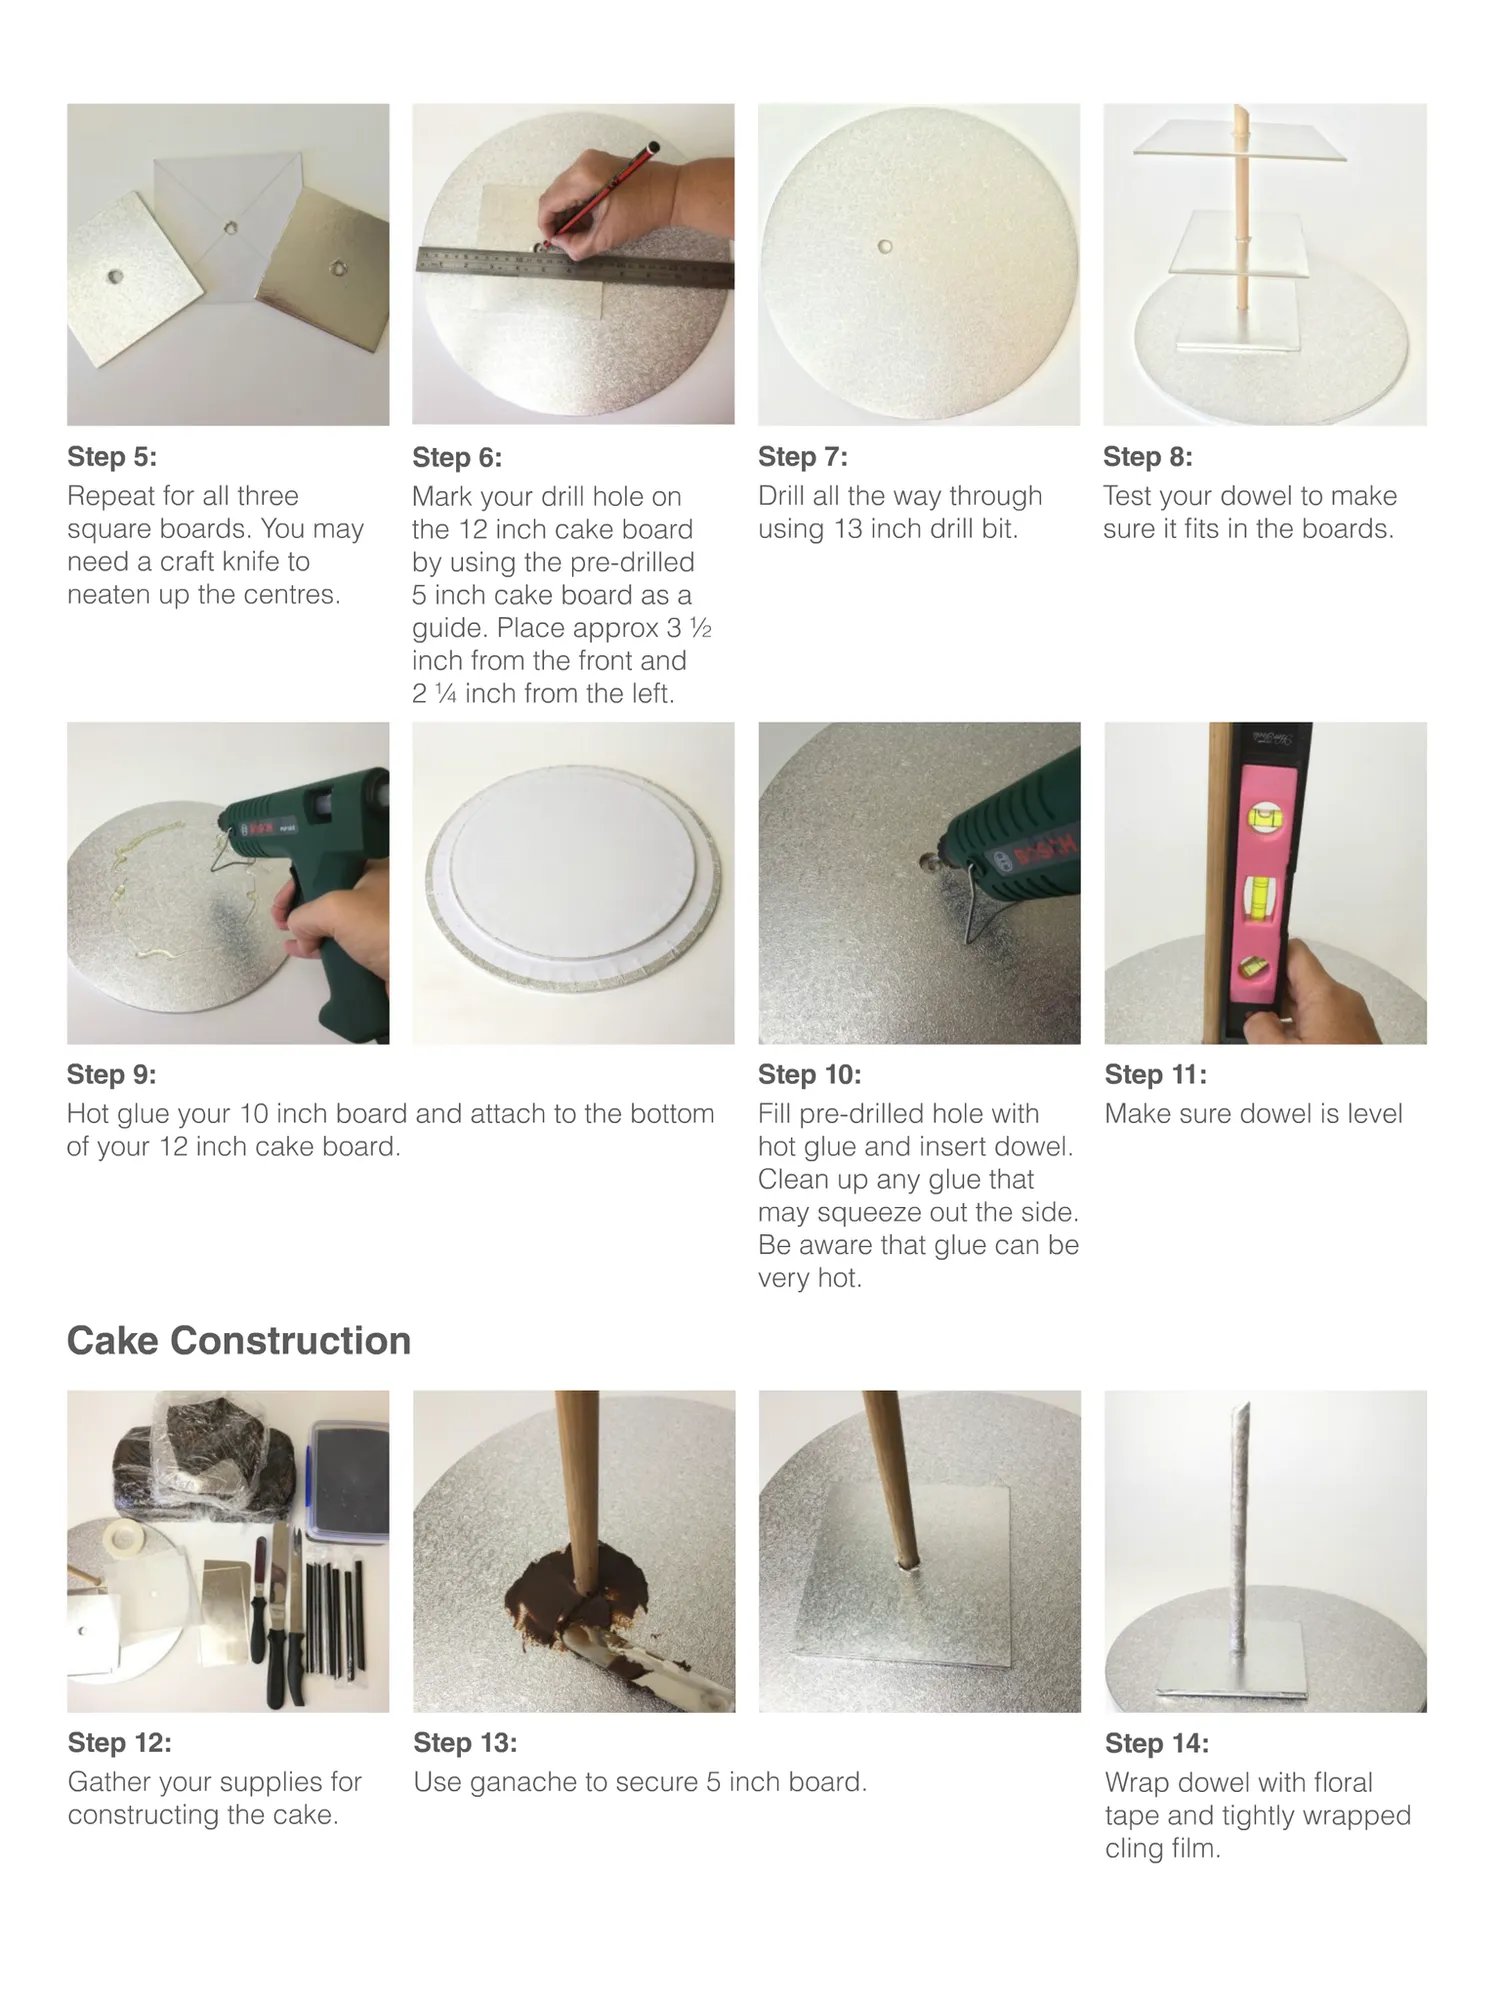
Step 5: Repeat for all three square boards. You may need a craft knife to neaten up the centres. Step 6: Mark your drill hole on the 12 inch cake board by using the pre-drilled 5 inch cake board as a guide. Place approx 3 ½ inch from the front and 2 ¼ inch from the left. Step 9: Hot glue your 10 inch board and attach to the bottom of your 12 inch cake board. Step 7: Drill all the way through using 13 inch drill bit. Step 8: Test your dowel to make sure it fits in the boards. Step 10: Step 11: Make sure dowel is level Fill pre-drilled hole with hot glue and insert dowel. Clean up any glue that may squeeze out the side. Be aware that glue can be very hot. Cake Construction Step 12: Gather your supplies for constructing the cake. Step 13: Use ganache to secure 5 inch board. Step 14: Wrap dowel with floral tape and tightly wrapped cling film.
Page 47 text
www.acdn.me JOIN US! BECOME A MEMBER TODAY! {CLICK HERE FOR MORE INFO!}
Page 48 text
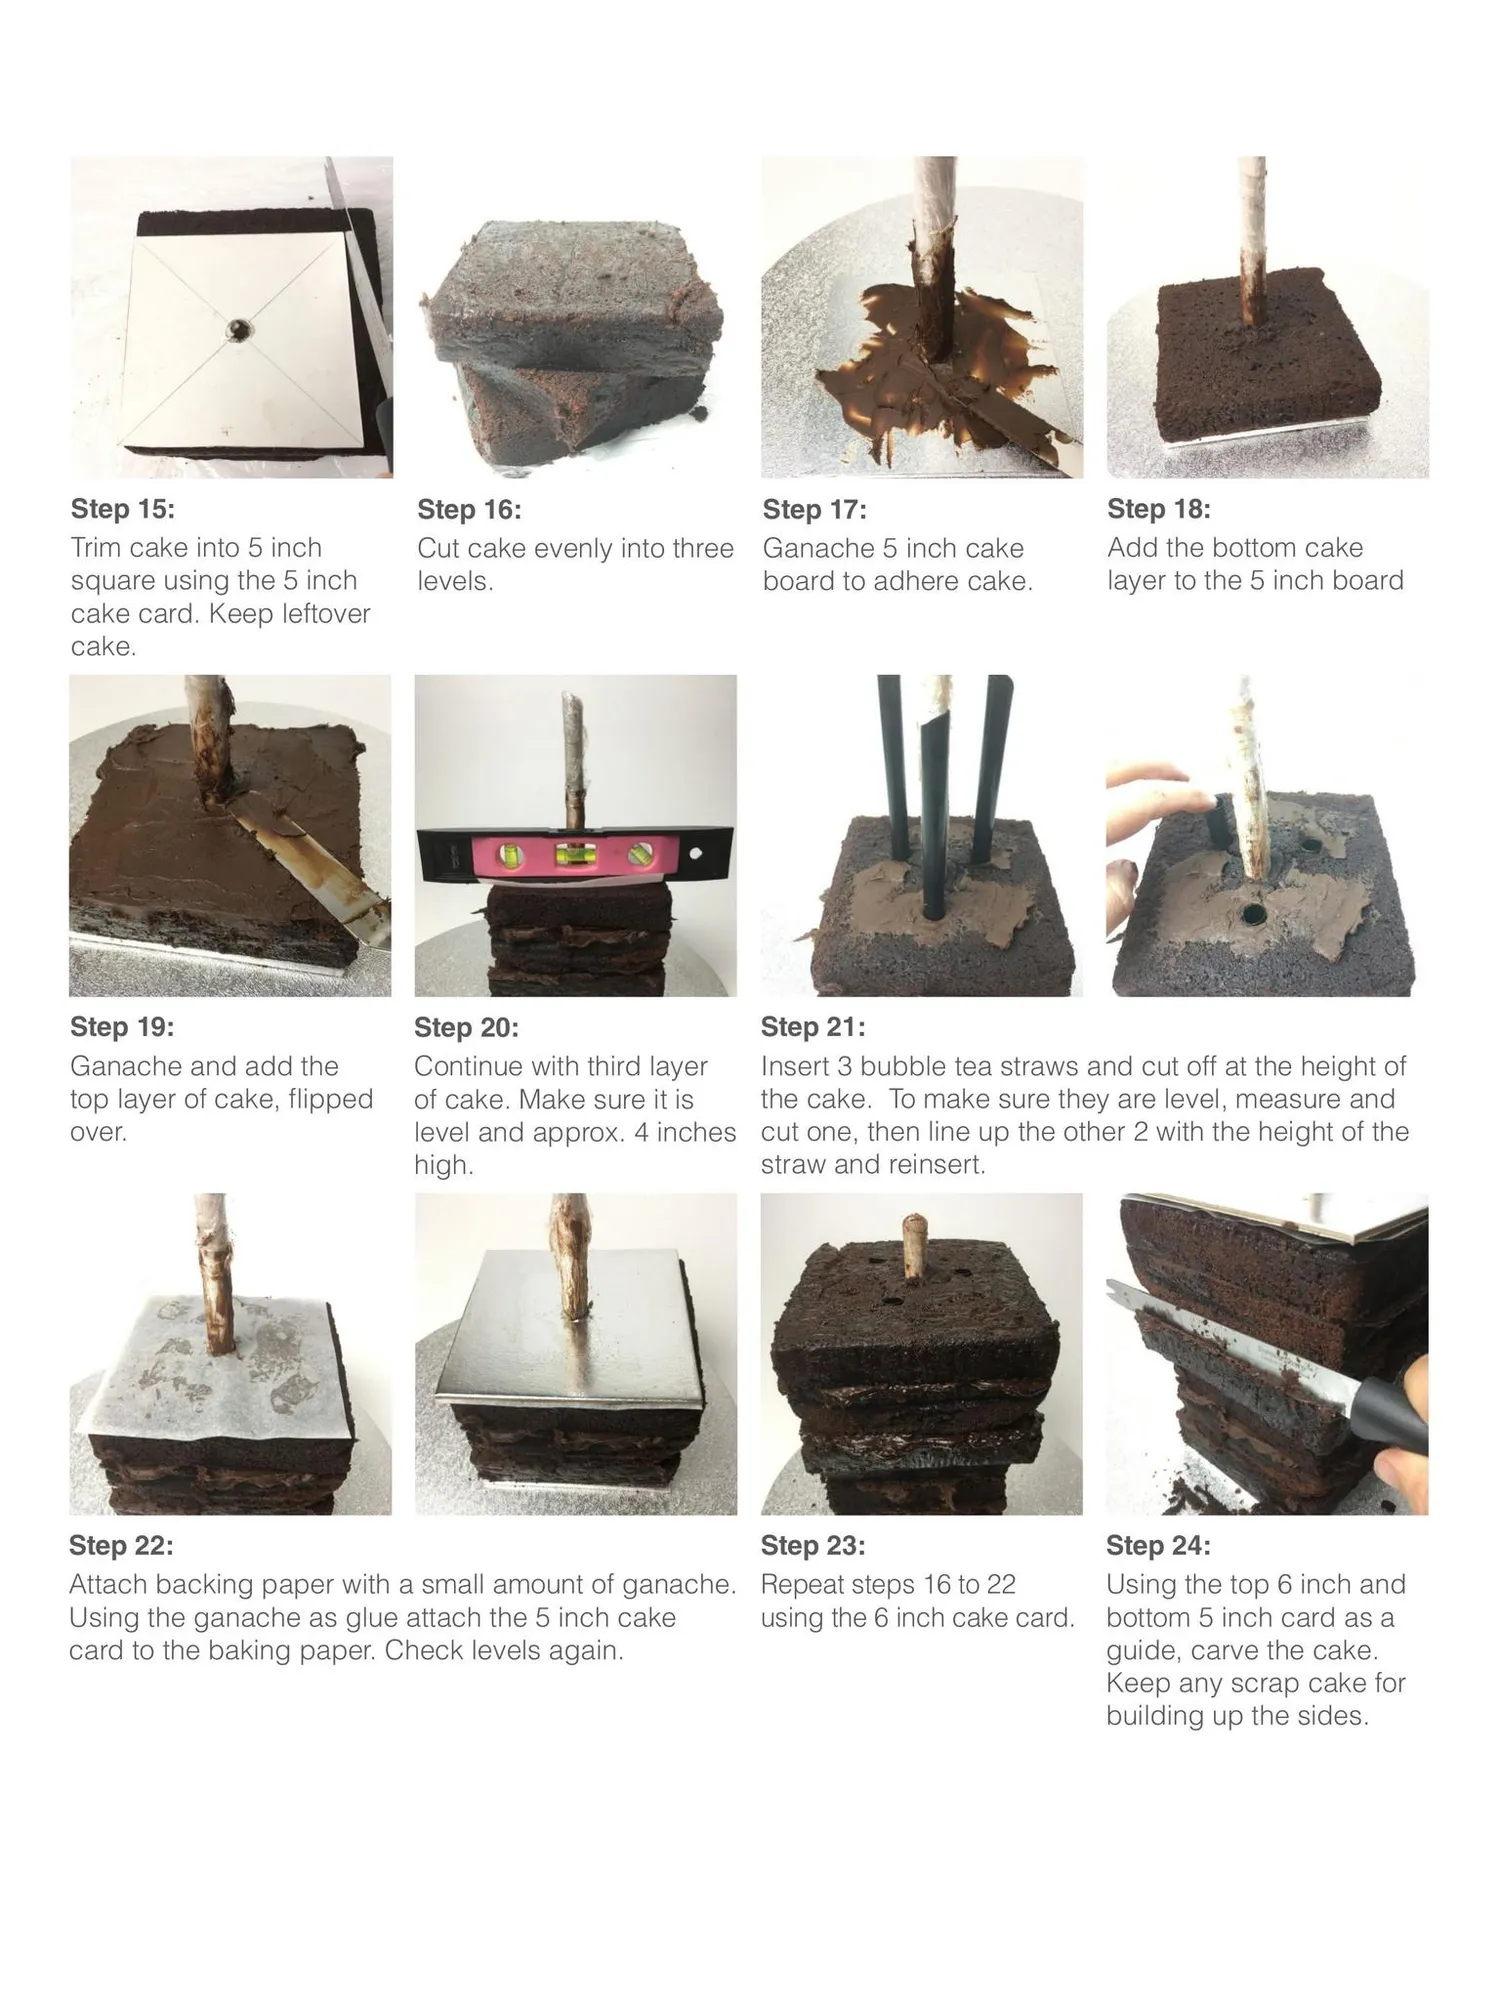
Step 18: Add the bottom cake layer to the 5 inch board Step 15: Trim cake into 5 inch square using the 5 inch cake card. Keep leftover cake. Step 16: Cut cake evenly into three levels. Step 17: Ganache 5 inch cake board to adhere cake. Step 19: Ganache and add the top layer of cake, flipped over. Step 20: Continue with third layer of cake. Make sure it is level and approx. 4 inches high. Step 21: Insert 3 bubble tea straws and cut off at the height of the cake. To make sure they are level, measure and cut one, then line up the other 2 with the height of the straw and reinsert. Step 23: Step 22: Attach backing paper with a small amount of ganache. Repeat steps 16 to 22 Using the ganache as glue attach the 5 inch cake using the 6 inch cake card. card to the baking paper. Check levels again. Step 24: Using the top 6 inch and bottom 5 inch card as a guide, carve the cake. Keep any scrap cake for building up the sides.
Page 49 text
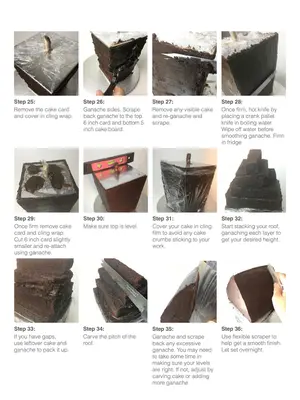
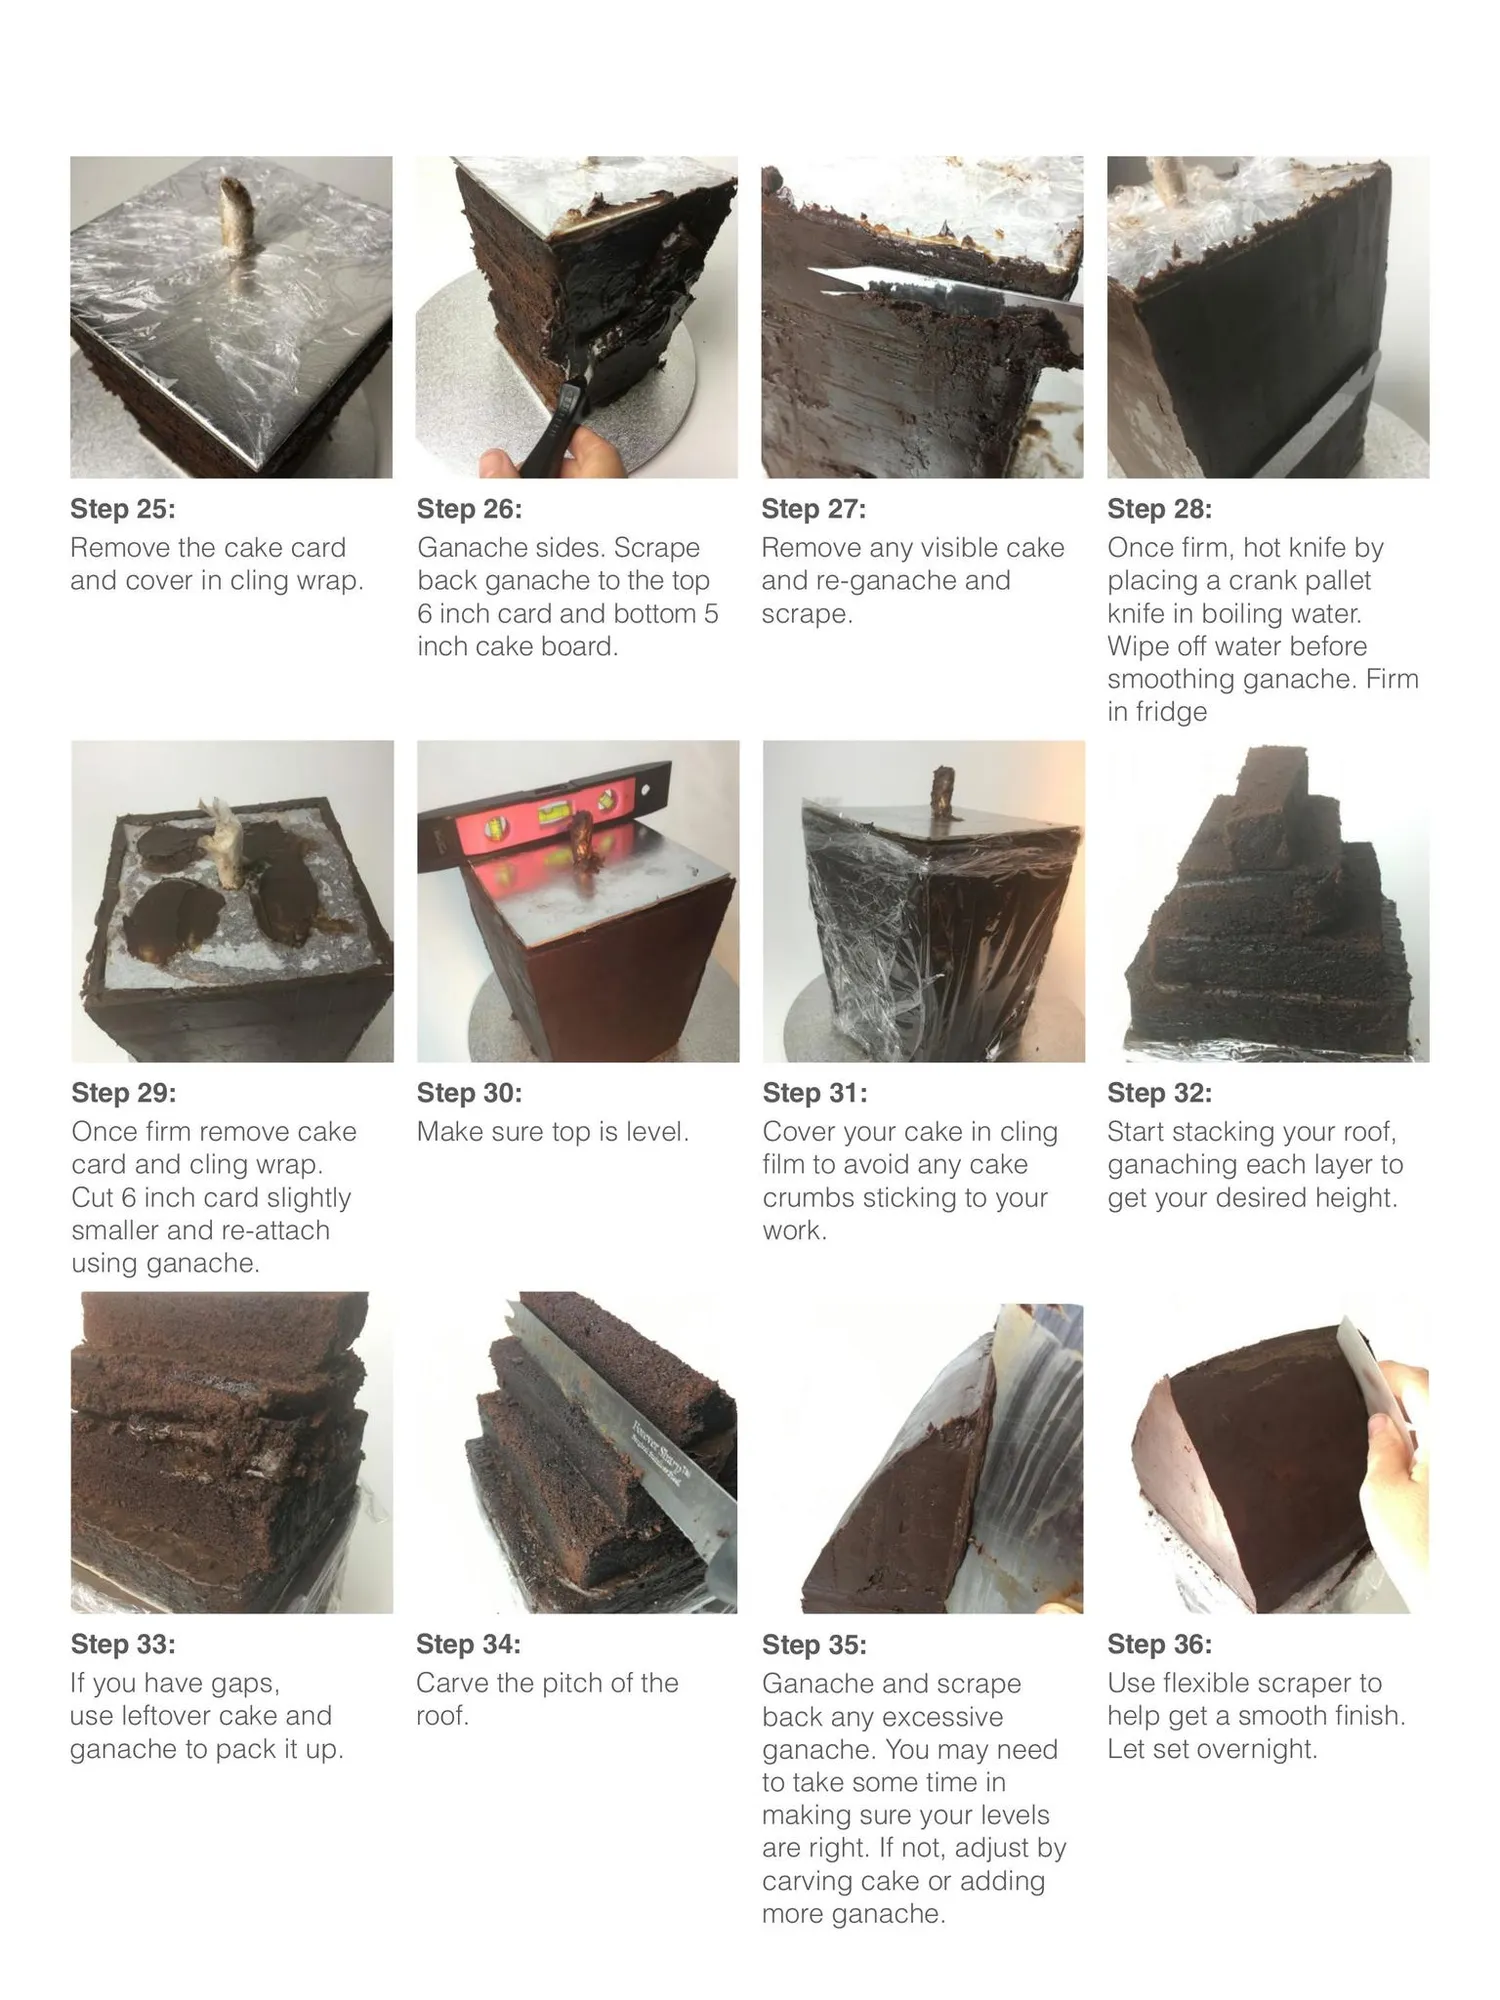
Step 25: Step 27: Step 26: Step 28: Ganache sides.Scrape Remove the cake card Removeanyvisible cake Once firm, hot knife by and cover in cling wrap. backganache to the top and re-ganache and placing a crank pallet 6inchcardandbottom5 scrape. knife in boiling water. inch cake board. Wipeoff waterbefore smoothingganache.Firm in fridge Step 29: Step30: Step31: Step 32: Make sure top is level. Oncefirmremovecake Cover your cake in cling Start stacking your roof, card and cling wrap. film to avoid any cake ganaching each layer to Cut 6 inch card slightly crumbs sticking to your get your desired height. smallerand re-attach work. using ganache. Step 33: Step 34: Step 35: Step36: If you have gaps, Ganache and scrape Carvethepitchof the Useflexiblescraperto roof. use leftovercake and backanyexcessive help get a smooth finish. ganache to pack it up. ganache. You may need Let set overnight. to take some time in making sure your levels are right. If not, adjust by carving cake or adding more ganache.
Page 50 text
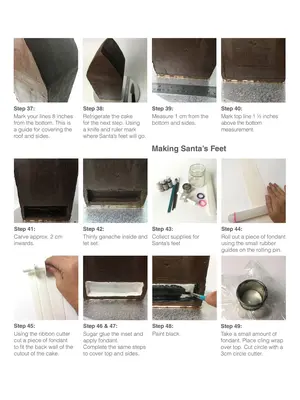
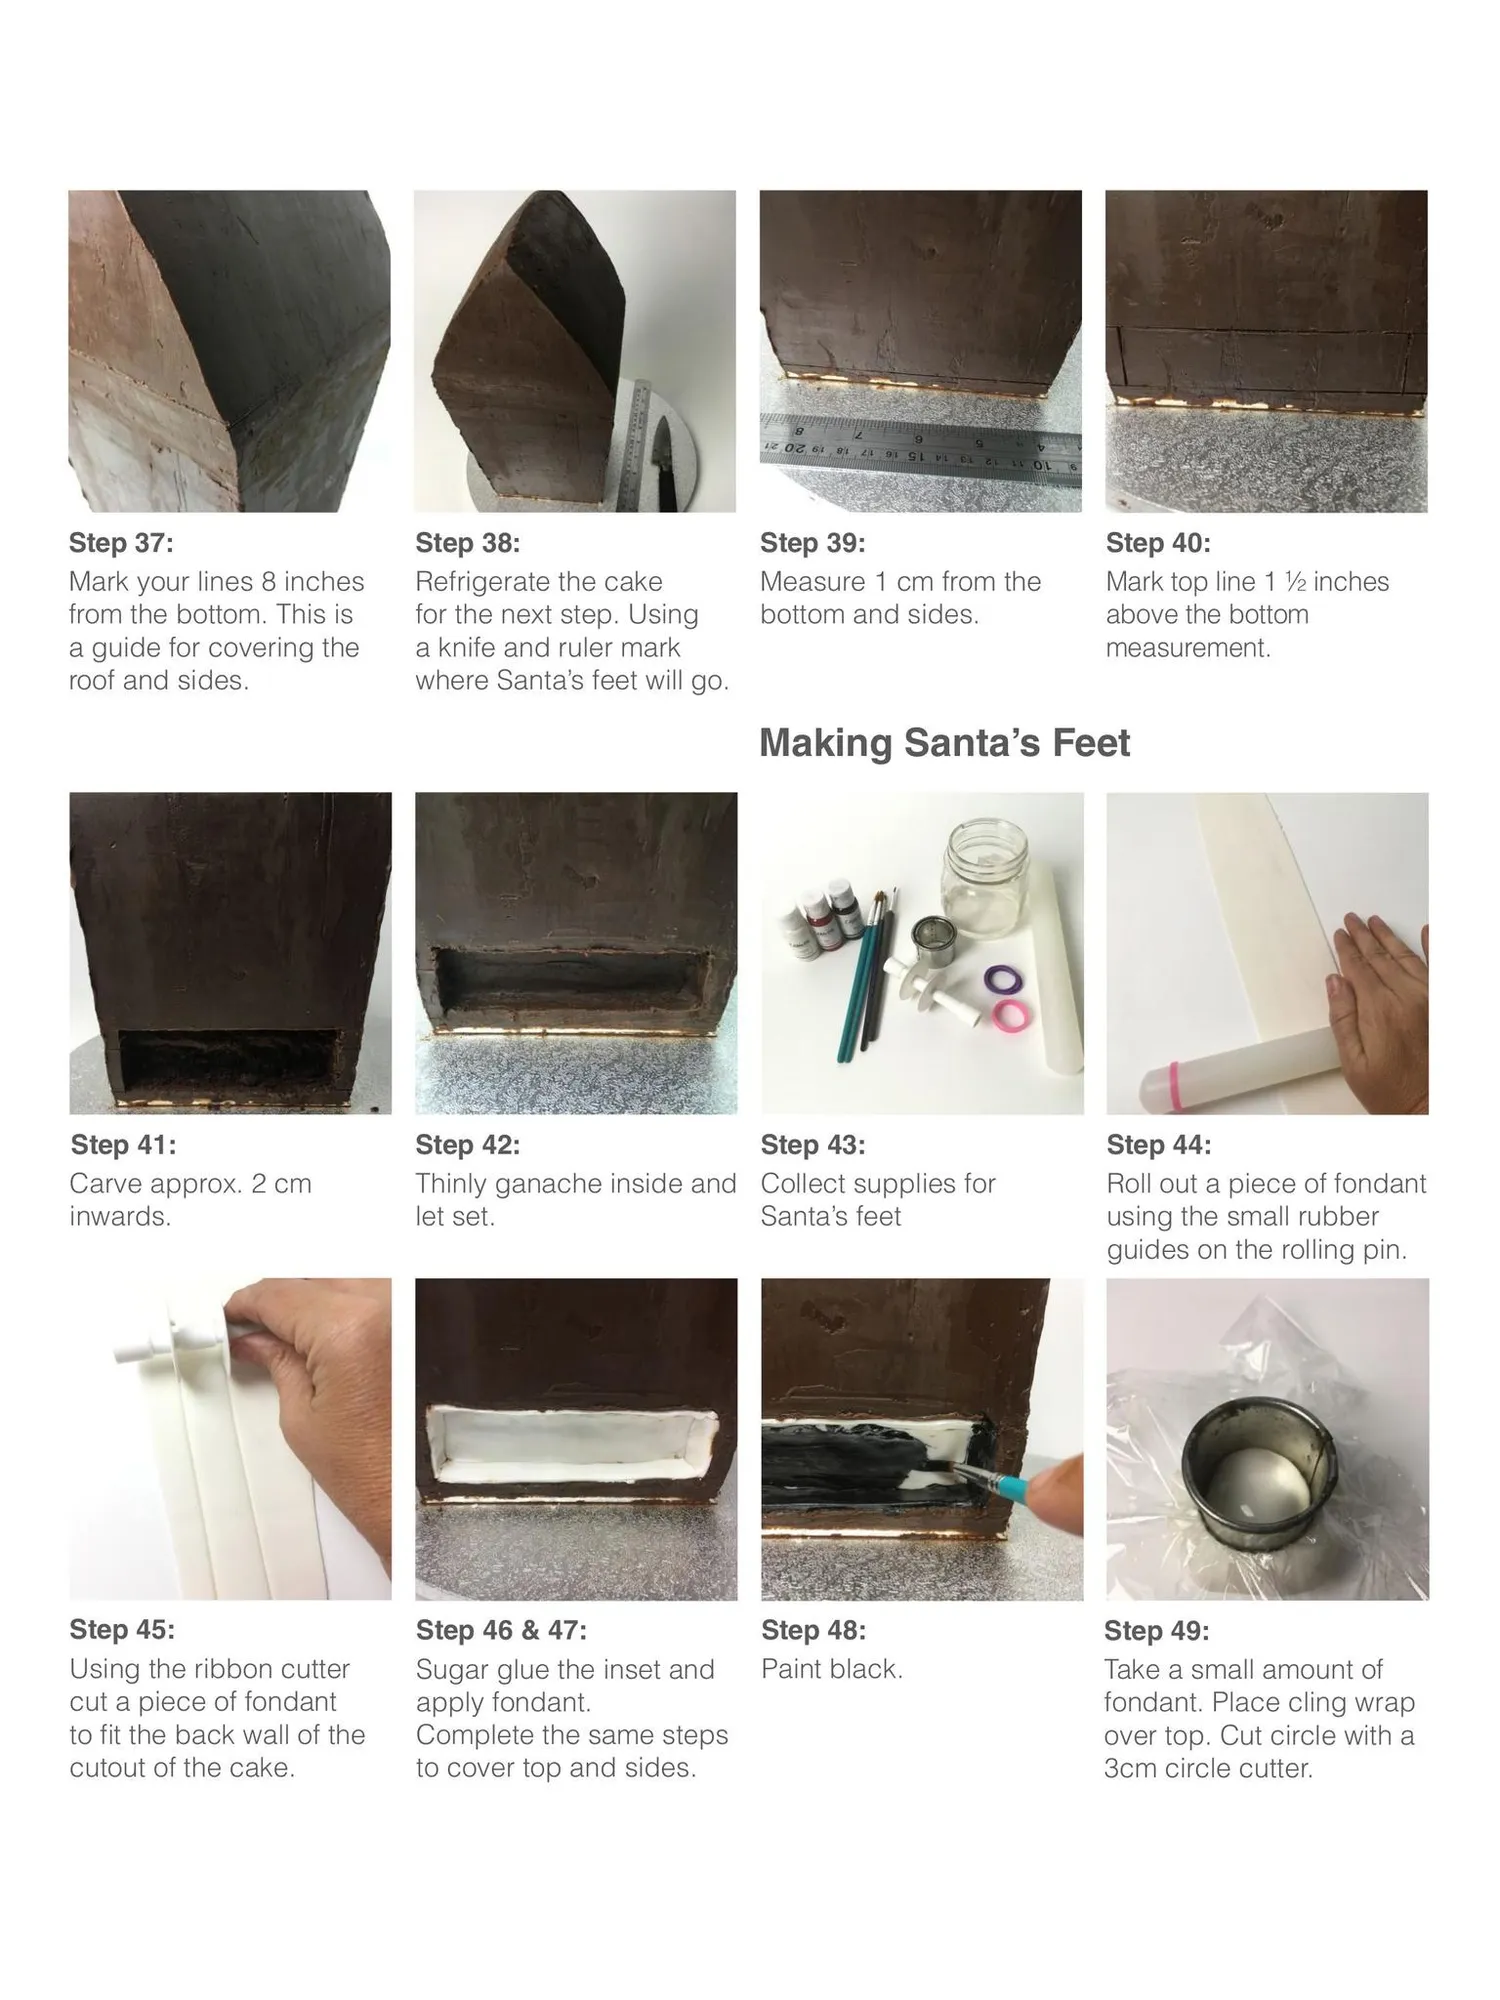
Step 37: Mark your lines 8 inches from the bottom. This is a guide for covering the roof and sides. Step 38: Refrigerate the cake for the next step. Using a knife and ruler mark where Santa’s feet will go. Step 39: Measure 1 cm from the bottom and sides. Step 40: Mark top line 1 ½ inches above the bottom measurement. Making Santa’s Feet Step 41: Carve approx. 2 cm inwards. Step 42: Step 43: Thinly ganache inside and Collect supplies for let set. Santa’s feet Step 45: Using the ribbon cutter cut a piece of fondant to fit the back wall of the cutout of the cake. Step 46 & 47: Sugar glue the inset and apply fondant. Complete the same steps to cover top and sides. Step 48: Paint black. Step 44: Roll out a piece of fondant using the small rubber guides on the rolling pin. Step 49: Take a small amount of fondant. Place cling wrap over top. Cut circle with a 3cm circle cutter.
Page 51 text
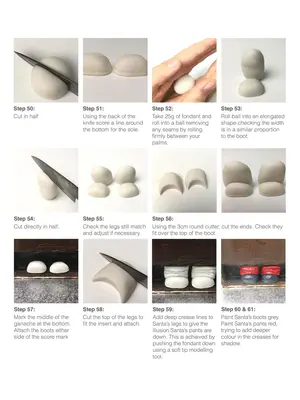
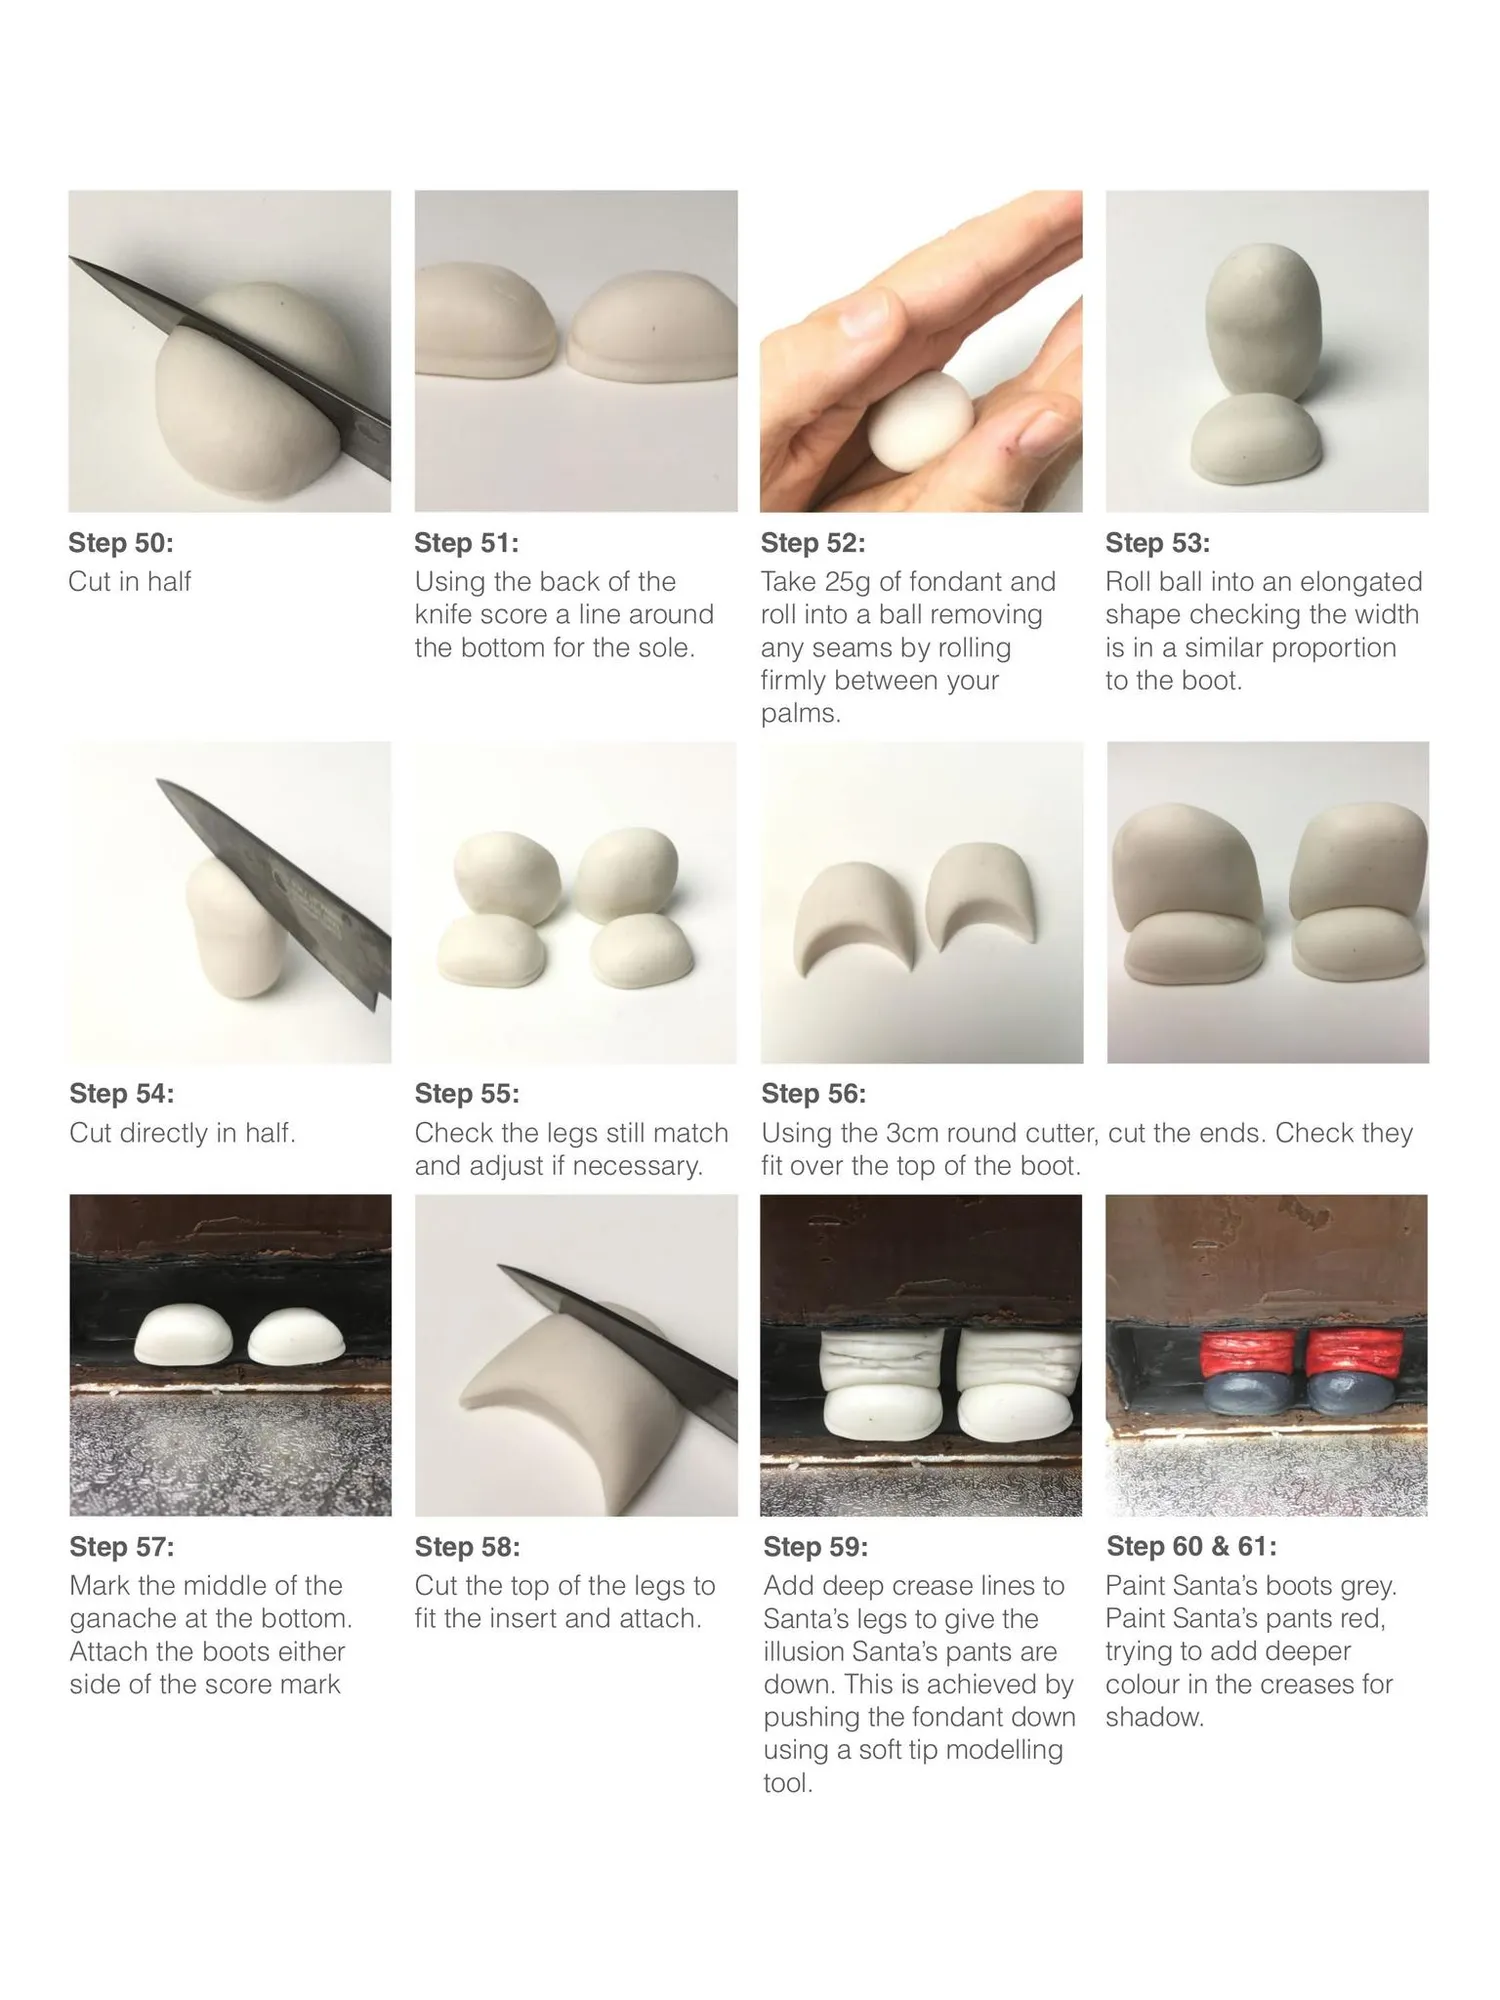
Step 50: Cut in half Step 51: Using the back of the knife score a line around the bottom for the sole. Step 52: Take 25g of fondant and roll into a ball removing any seams by rolling firmly between your palms. Step 54: Cut directly in half. Step 55: Check the legs still match and adjust if necessary. Step 56: Using the 3cm round cutter, cut the ends. Check they fit over the top of the boot. Step 57: Mark the middle of the ganache at the bottom. Attach the boots either side of the score mark Step 58: Cut the top of the legs to fit the insert and attach. Step 59: Add deep crease lines to Santa’s legs to give the illusion Santa’s pants are down. This is achieved by pushing the fondant down using a soft tip modelling tool. Step 53: Roll ball into an elongated shape checking the width is in a similar proportion to the boot. Step 60 & 61: Paint Santa’s boots grey. Paint Santa’s pants red, trying to add deeper colour in the creases for shadow.
Page 52 text
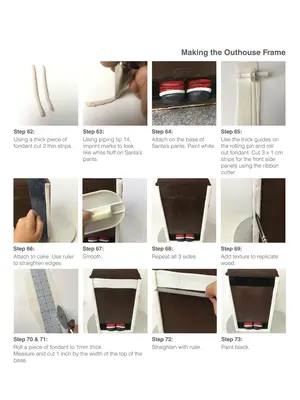
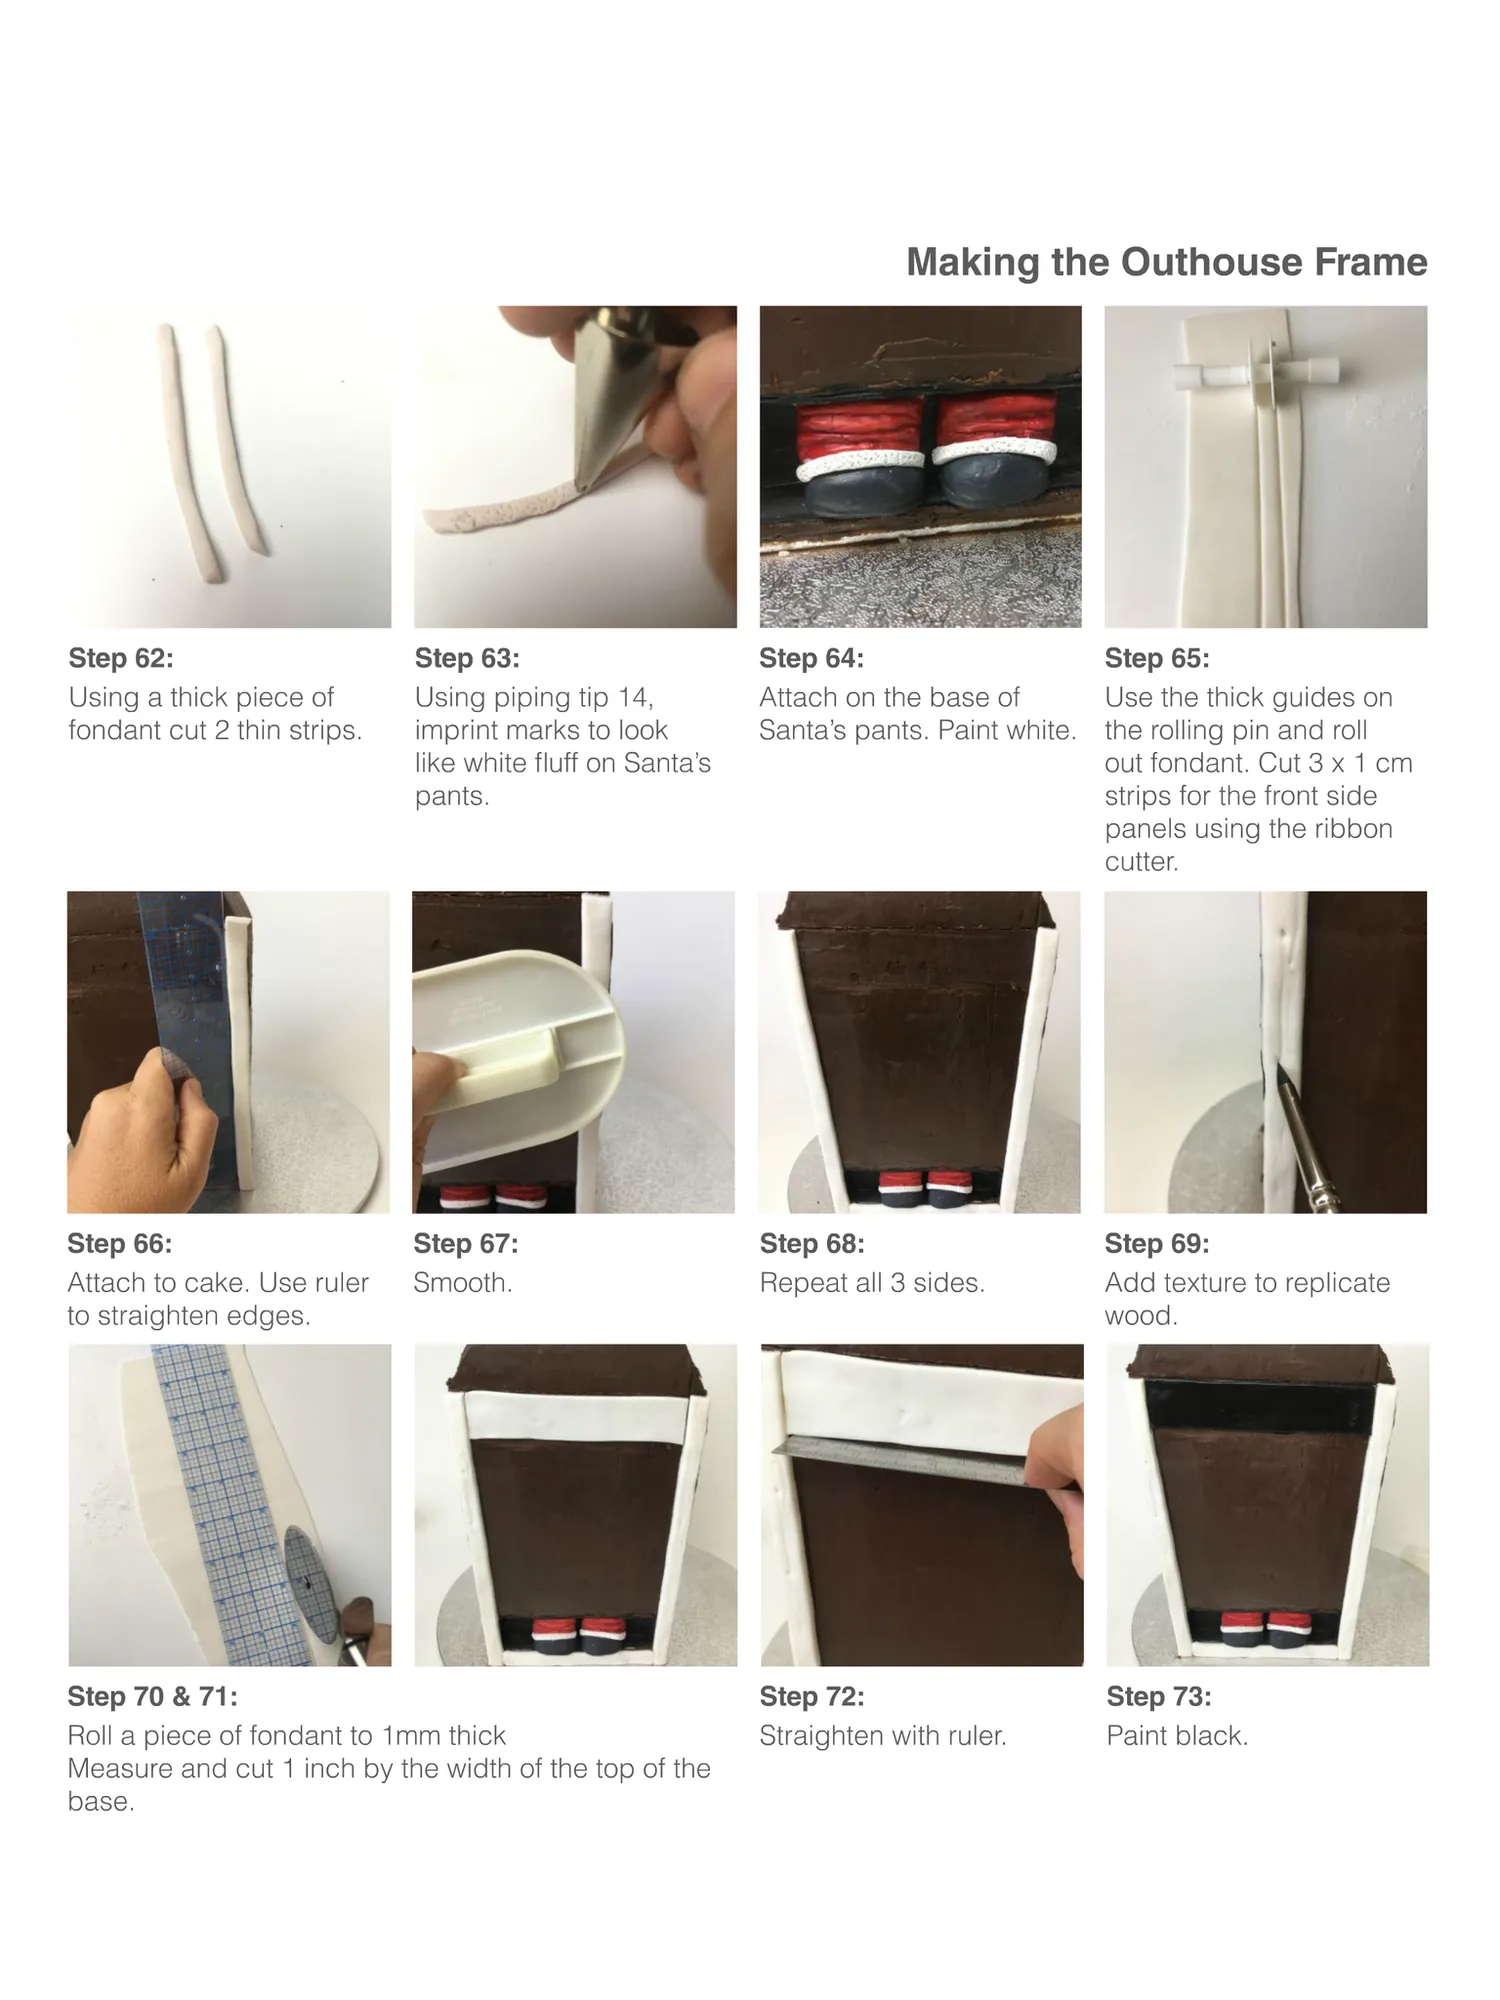
Making the Outhouse Frame Step 62: Using a thick piece of fondant cut 2 thin strips. Step 63: Using piping tip 14, imprint marks to look like white fluff on Santa’s pants. Step 64: Step 65: Use the thick guides on Attach on the base of Santa’s pants. Paint white. the rolling pin and roll out fondant. Cut 3 x 1 cm strips for the front side panels using the ribbon cutter. Step 66: Attach to cake. Use ruler to straighten edges. Step 67: Smooth. Step 68: Repeat all 3 sides. Step 69: Add texture to replicate wood. Step 72: Straighten with ruler. Step 73: Paint black. Step 70 & 71: Roll a piece of fondant to 1mm thick Measure and cut 1 inch by the width of the top of the base.


Page 53 text
CAKE DECORATOR INSURANCE $10m Public & Products Liability $380 PER YEAR FOR ACDN MEMBERS $450 per year for Non-ACDN Members (Insurance subject to acceptance criteria) To arrange cover or for more information visit www.redstarinsurance.com.au/cake Red Star Insurance Pty Ltd (AFSL 444803) T&C apply, see website for details. The Australian Cake Decorating Network Pty Ltd does not provide any advice regarding insurance matters. Please contact Red Star Insurance Brokers on the above contact details to discuss your insurance requirements. AFFILIATE ADVERTISEMENT
Page 54 text
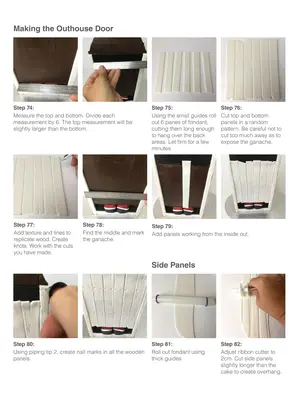
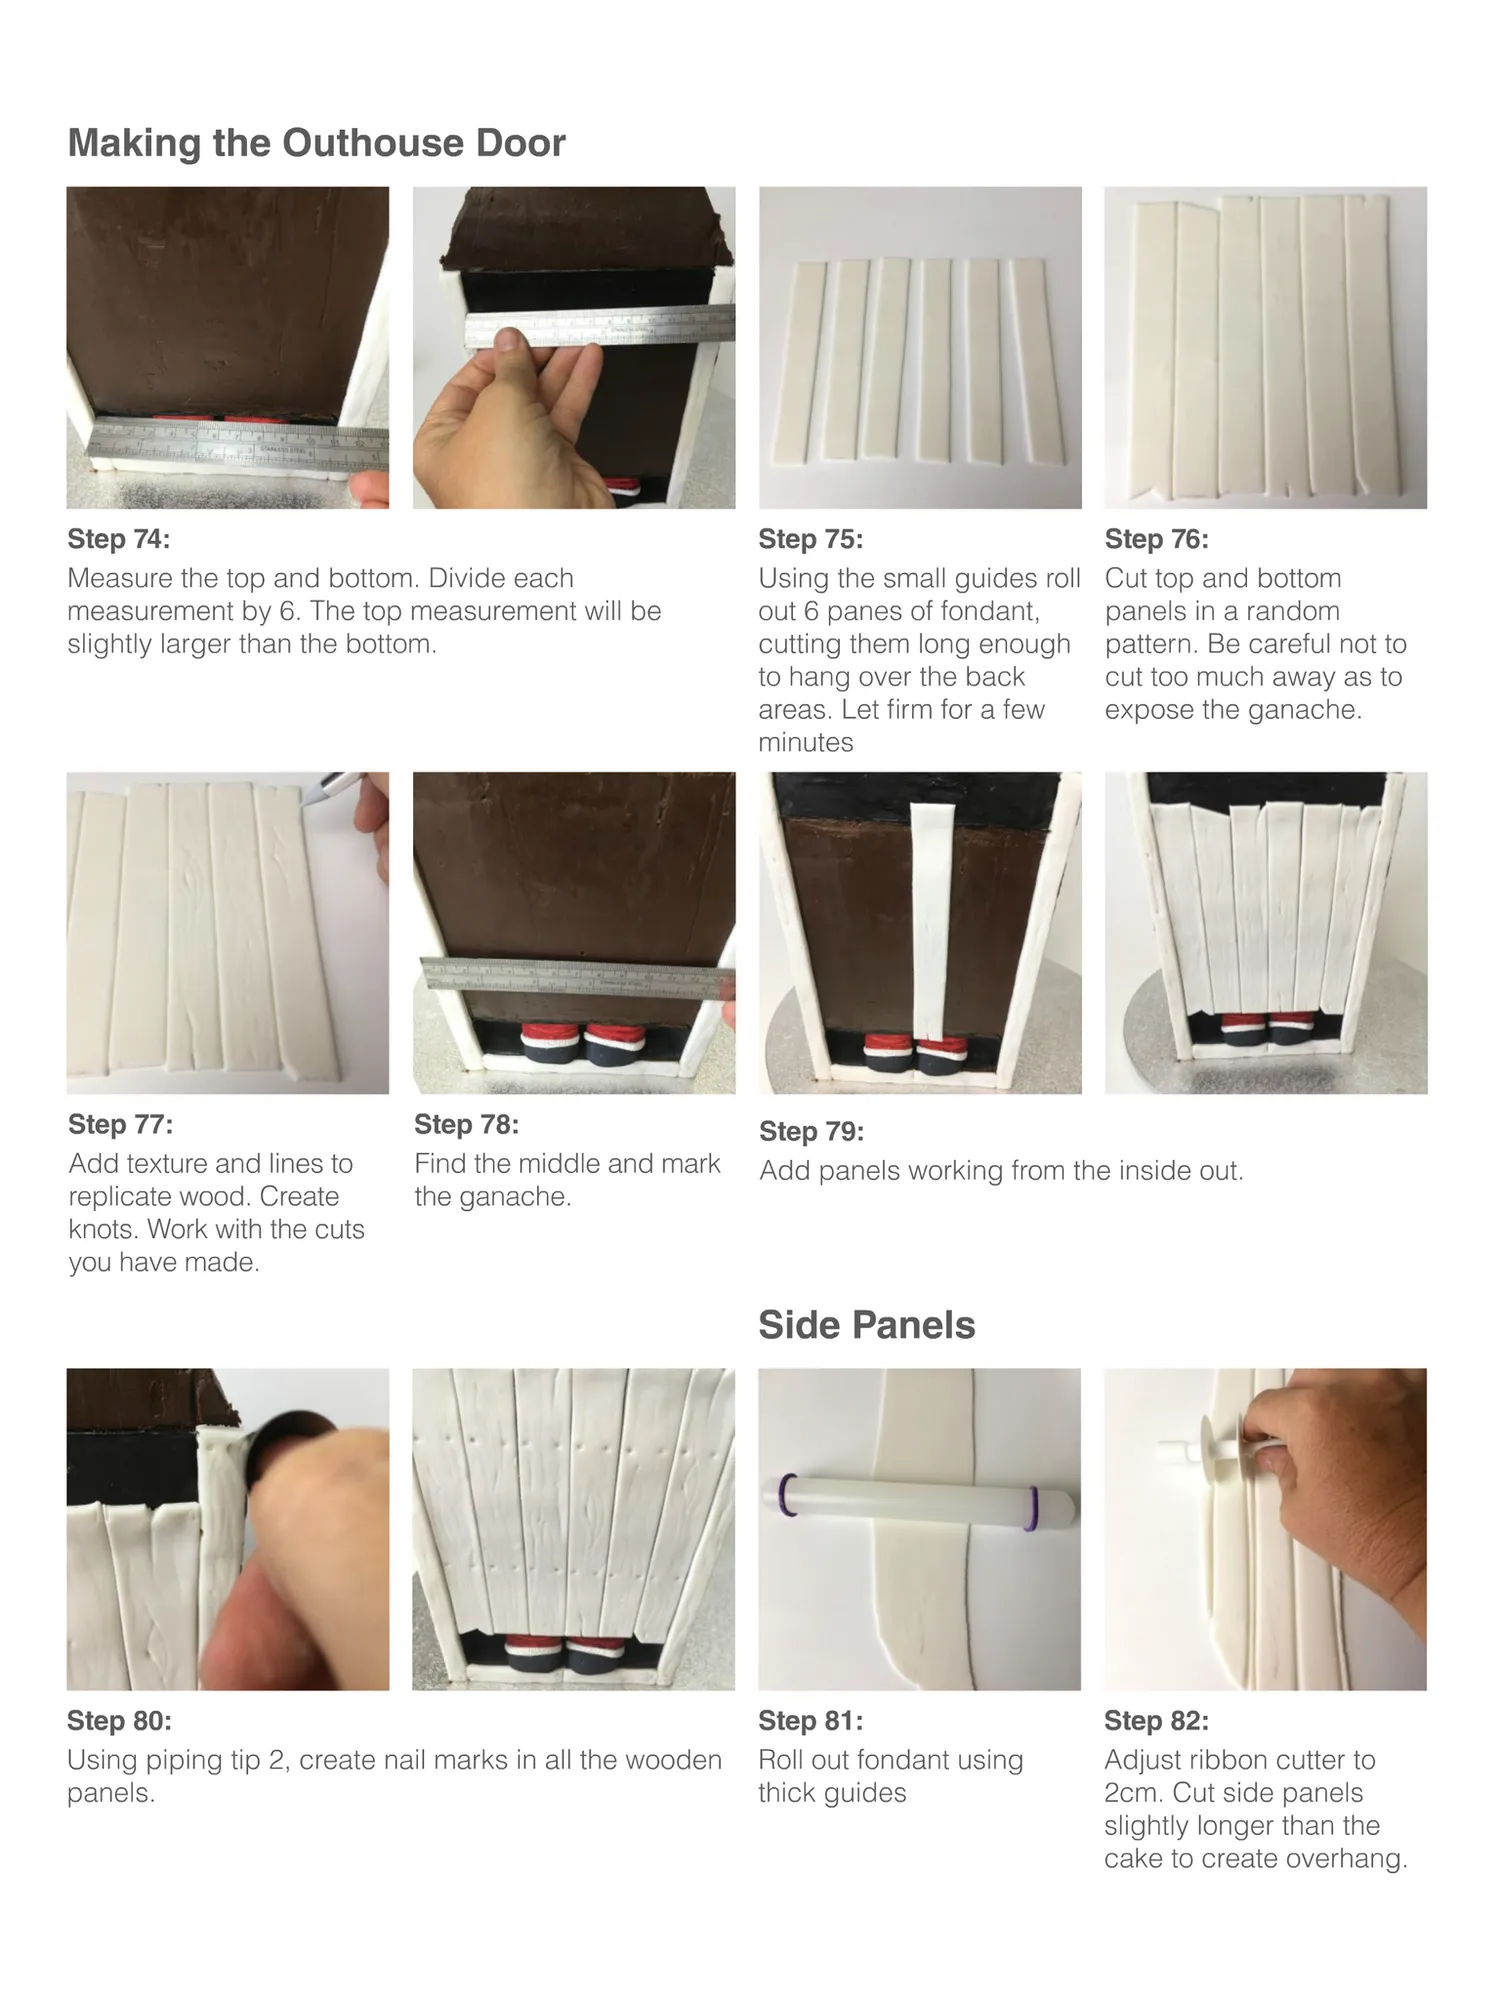
Making the Outhouse Door Step 74: Measure the top and bottom. Divide each measurement by 6. The top measurement will be slightly larger than the bottom. Step 75: Using the small guides roll out 6 panes of fondant, cutting them long enough to hang over the back areas. Let firm for a few minutes Step 77: Add texture and lines to replicate wood. Create knots. Work with the cuts you have made. Step 79: Add panels working from the inside out. Step 78: Find the middle and mark the ganache. Step 76: Cut top and bottom panels in a random pattern. Be careful not to cut too much away as to expose the ganache. Side Panels Step 80: Using piping tip 2, create nail marks in all the wooden panels. Step 81: Roll out fondant using thick guides Step 82: Adjust ribbon cutter to 2cm. Cut side panels slightly longer than the cake to create overhang.
Page 55 text
CEANE KOSHERCERTIFIED &GLUTEN FREE! by Bahe Boss SappySirhckry HAPPYBIRTHDAY HAPPY BIRTHDA MCEY PIDEY! MCHEY Mery HSjmas Customise and cneate yourownEdibleImages! Plustherearemany morepre-designed Edible lmagestochoosefrom If you'reanABNholderandcurrentlyprintEdibleImagesandwouldliketoprint ourrangeofimagesonCreateaCake,contactustodayandwecanorganiseto supplyyouwithalltheprintingequipmentandsetyouupwithaCreateaCake businessaccounttoprintourimagesondemand! [email protected]. [email protected]/(02)98280700.11createacake.com.au
Page 56 text
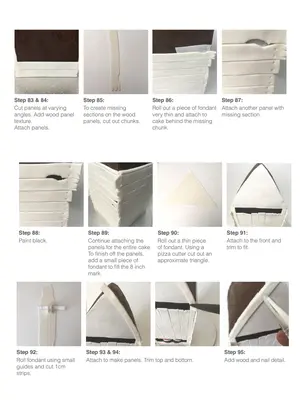
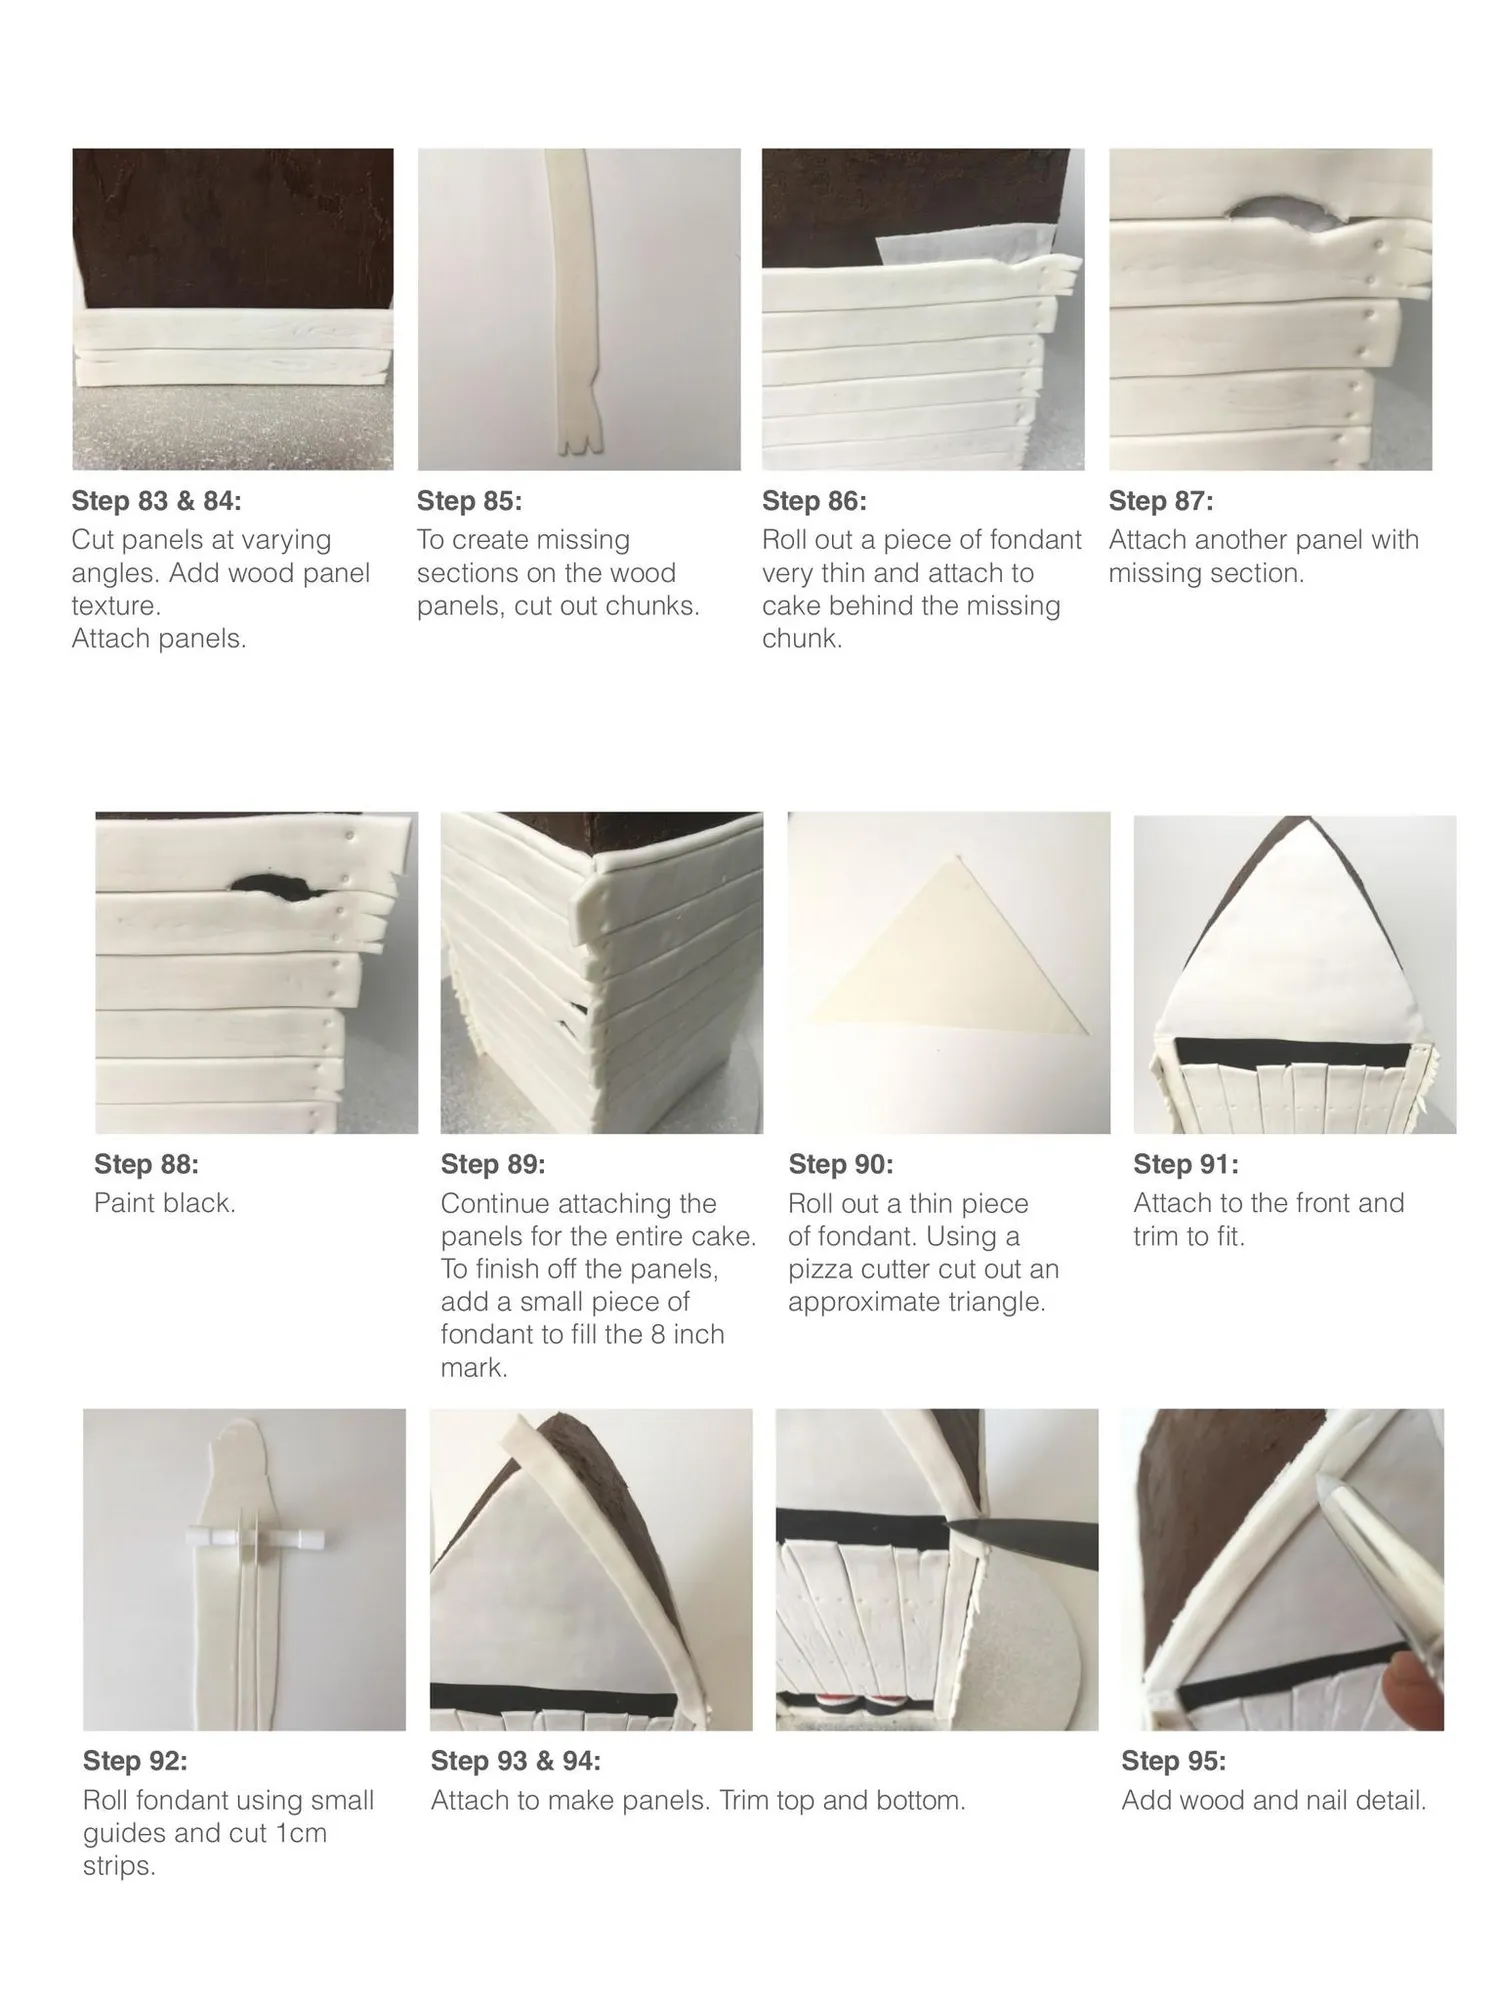
Step 83 & 84: Cut panels at varying angles. Add wood panel texture. Attach panels. Step 88: Paint black. Step 92: Roll fondant using small guides and cut 1cm strips. Step 85: To create missing sections on the wood panels, cut out chunks. Step 89: Continue attaching the panels for the entire cake. To finish off the panels, add a small piece of fondant to fill the 8 inch mark. Step 86: Step 87: Roll out a piece of fondant Attach another panel with very thin and attach to missing section. cake behind the missing chunk. Step 90: Roll out a thin piece of fondant. Using a pizza cutter cut out an approximate triangle. Step 93 & 94: Attach to make panels. Trim top and bottom. Step 91: Attach to the front and trim to fit. Step 95: Add wood and nail detail.
Page 57 text
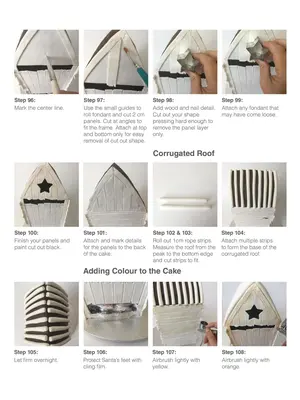
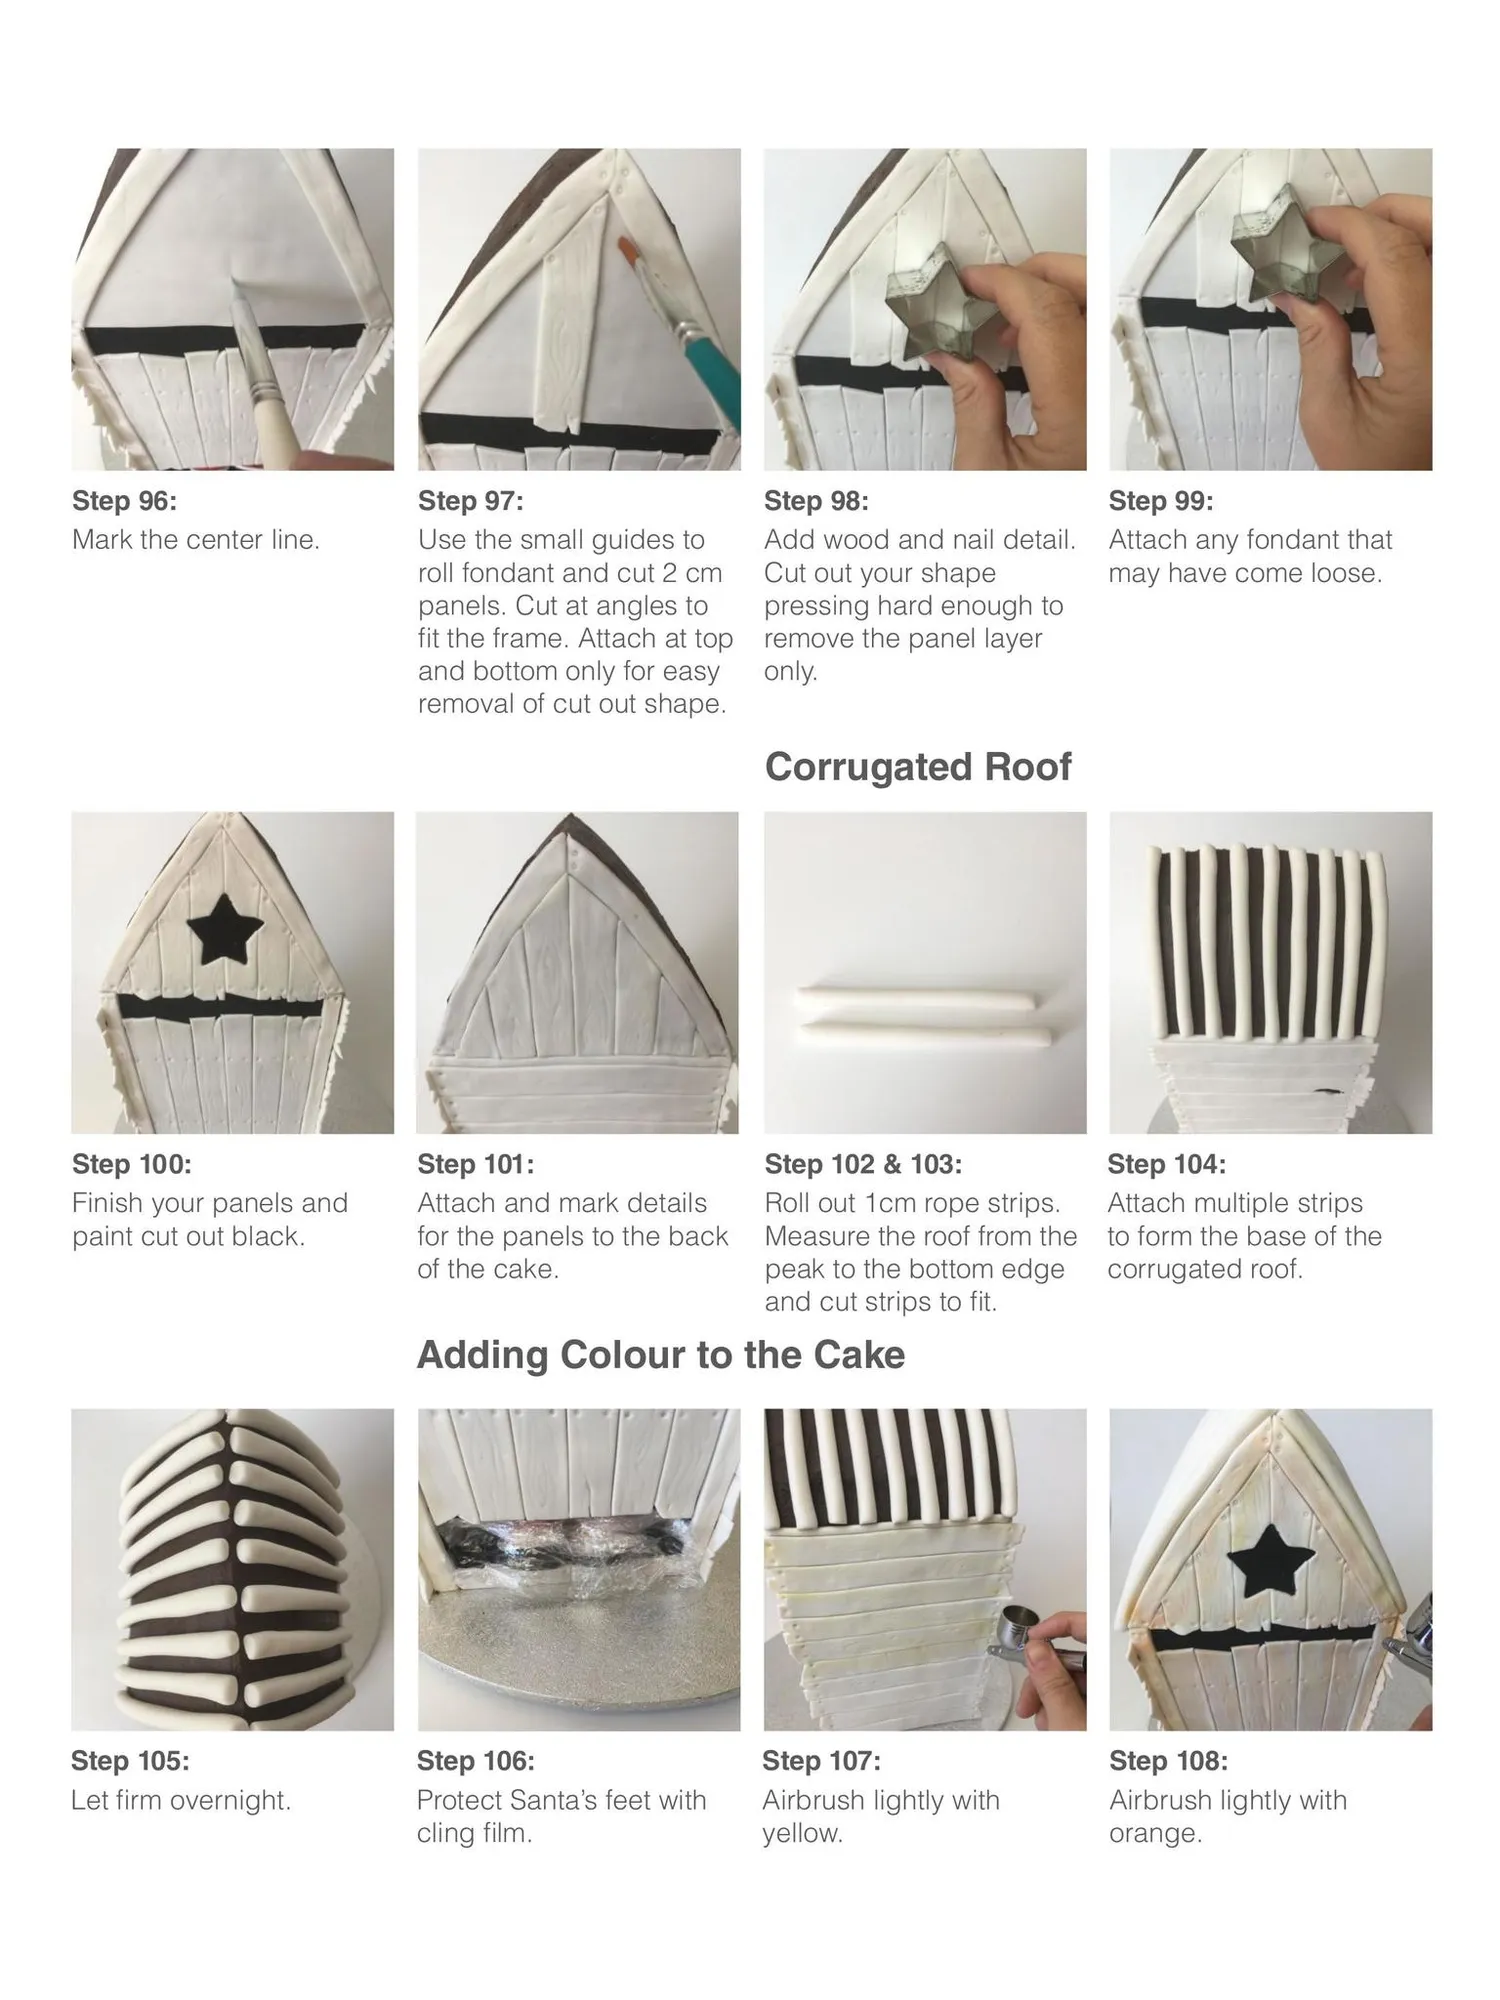
Step 96: Mark the center line. Step 97: Use the small guides to roll fondant and cut 2 cm panels. Cut at angles to fit the frame. Attach at top and bottom only for easy removal of cut out shape. Step 98: Add wood and nail detail. Cut out your shape pressing hard enough to remove the panel layer only. Step 99: Attach any fondant that may have come loose. Corrugated Roof Step 100: Finish your panels and paint cut out black. Step 101: Attach and mark details for the panels to the back of the cake. Step 102 & 103: Roll out 1cm rope strips. Measure the roof from the peak to the bottom edge and cut strips to fit. Step 104: Attach multiple strips to form the base of the corrugated roof. Adding Colour to the Cake Step 105: Let firm overnight. Step 106: Protect Santa’s feet with cling film. Step 107: Airbrush lightly with yellow. Register your interest at www.acdn.me Step 108: Airbrush lightly with orange.
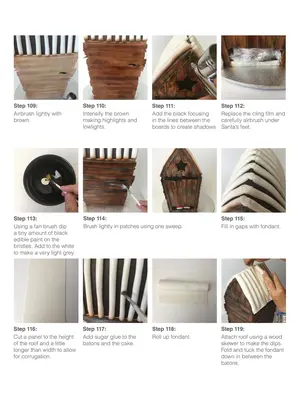
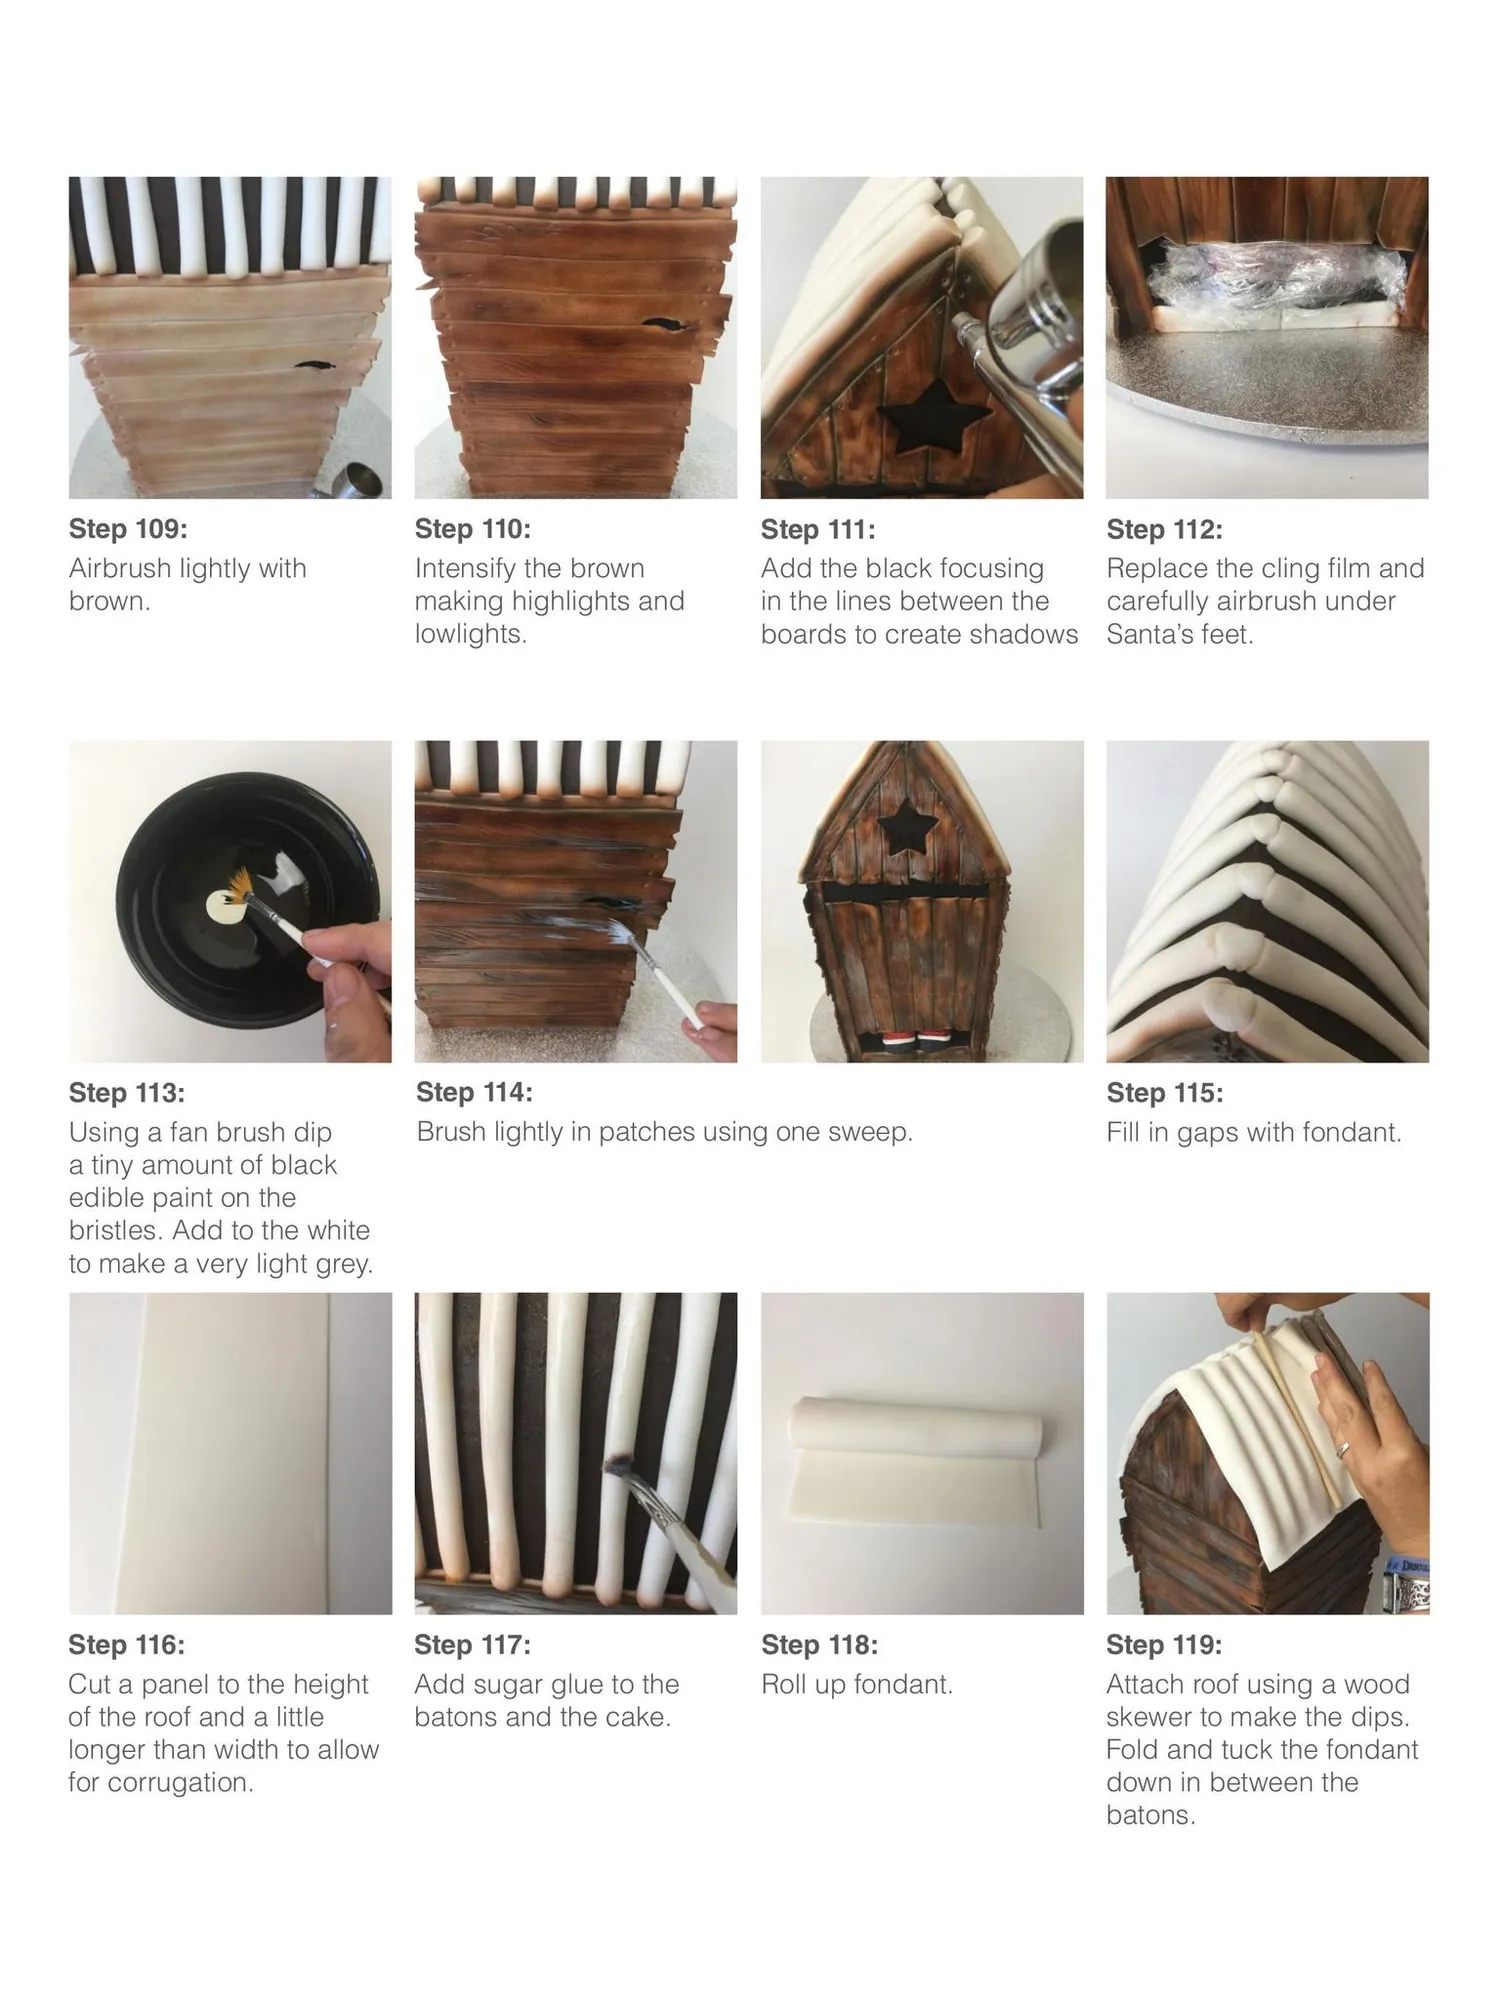
Page 58 text
Step 109: Airbrush lightly with brown. Step 110: Intensify the brown making highlights and lowlights. Step 113: Using a fan brush dip a tiny amount of black edible paint on the bristles. Add to the white to make a very light grey. Step 114: Brush lightly in patches using one sweep. Step 116: Cut a panel to the height of the roof and a little longer than width to allow for corrugation. Step 117: Add sugar glue to the batons and the cake. Step 111: Add the black focusing in the lines between the boards to create shadows Step 118: Roll up fondant. Step 112: Replace the cling film and carefully airbrush under Santa’s feet. Step 115: Fill in gaps with fondant. Step 119: Attach roof using a wood skewer to make the dips. Fold and tuck the fondant down in between the batons.
Page 59 text
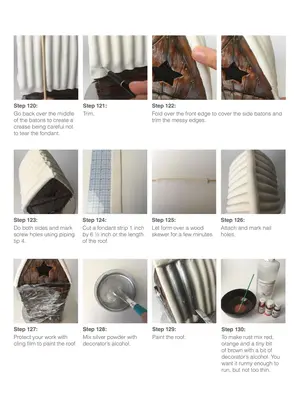
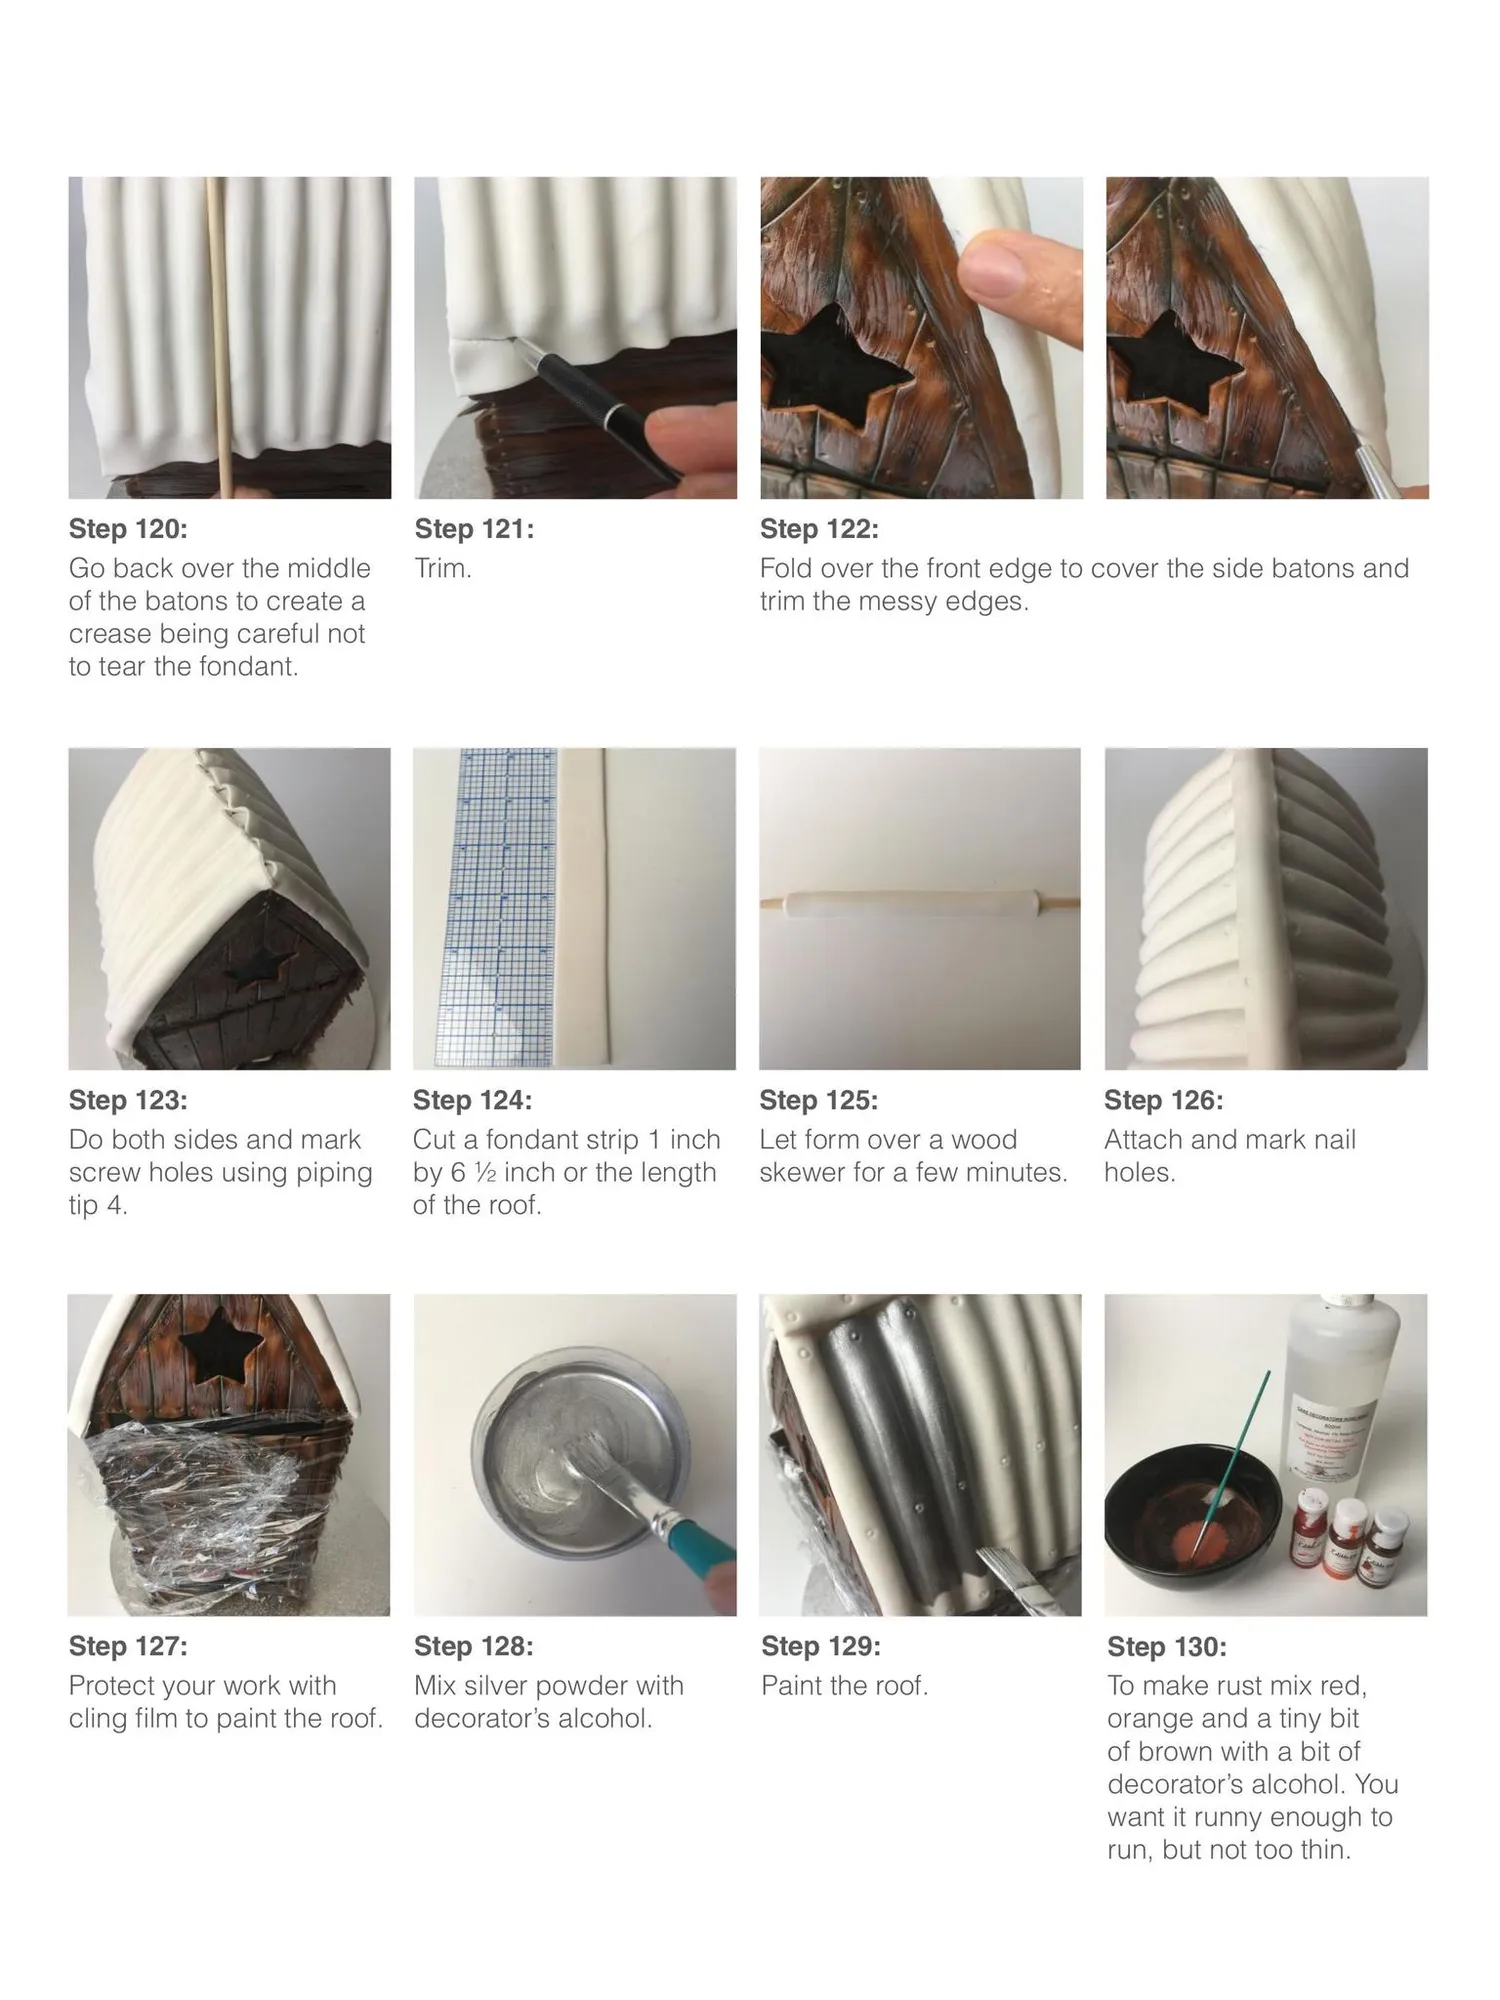
Step 120: Go back over the middle of the batons to create a crease being careful not to tear the fondant. Step 121: Trim. Step 122: Fold over the front edge to cover the side batons and trim the messy edges. Step 123: Do both sides and mark screw holes using piping tip 4. Step 124: Cut a fondant strip 1 inch by 6 ½ inch or the length of the roof. Step 125: Let form over a wood skewer for a few minutes. Step 126: Attach and mark nail holes. Step 127: Protect your work with cling film to paint the roof. Step 128: Mix silver powder with decorator’s alcohol. Step 129: Paint the roof. Step 130: To make rust mix red, orange and a tiny bit of brown with a bit of decorator’s alcohol. You want it runny enough to run, but not too thin.
Page 60 text
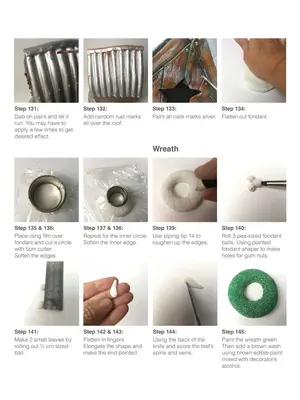
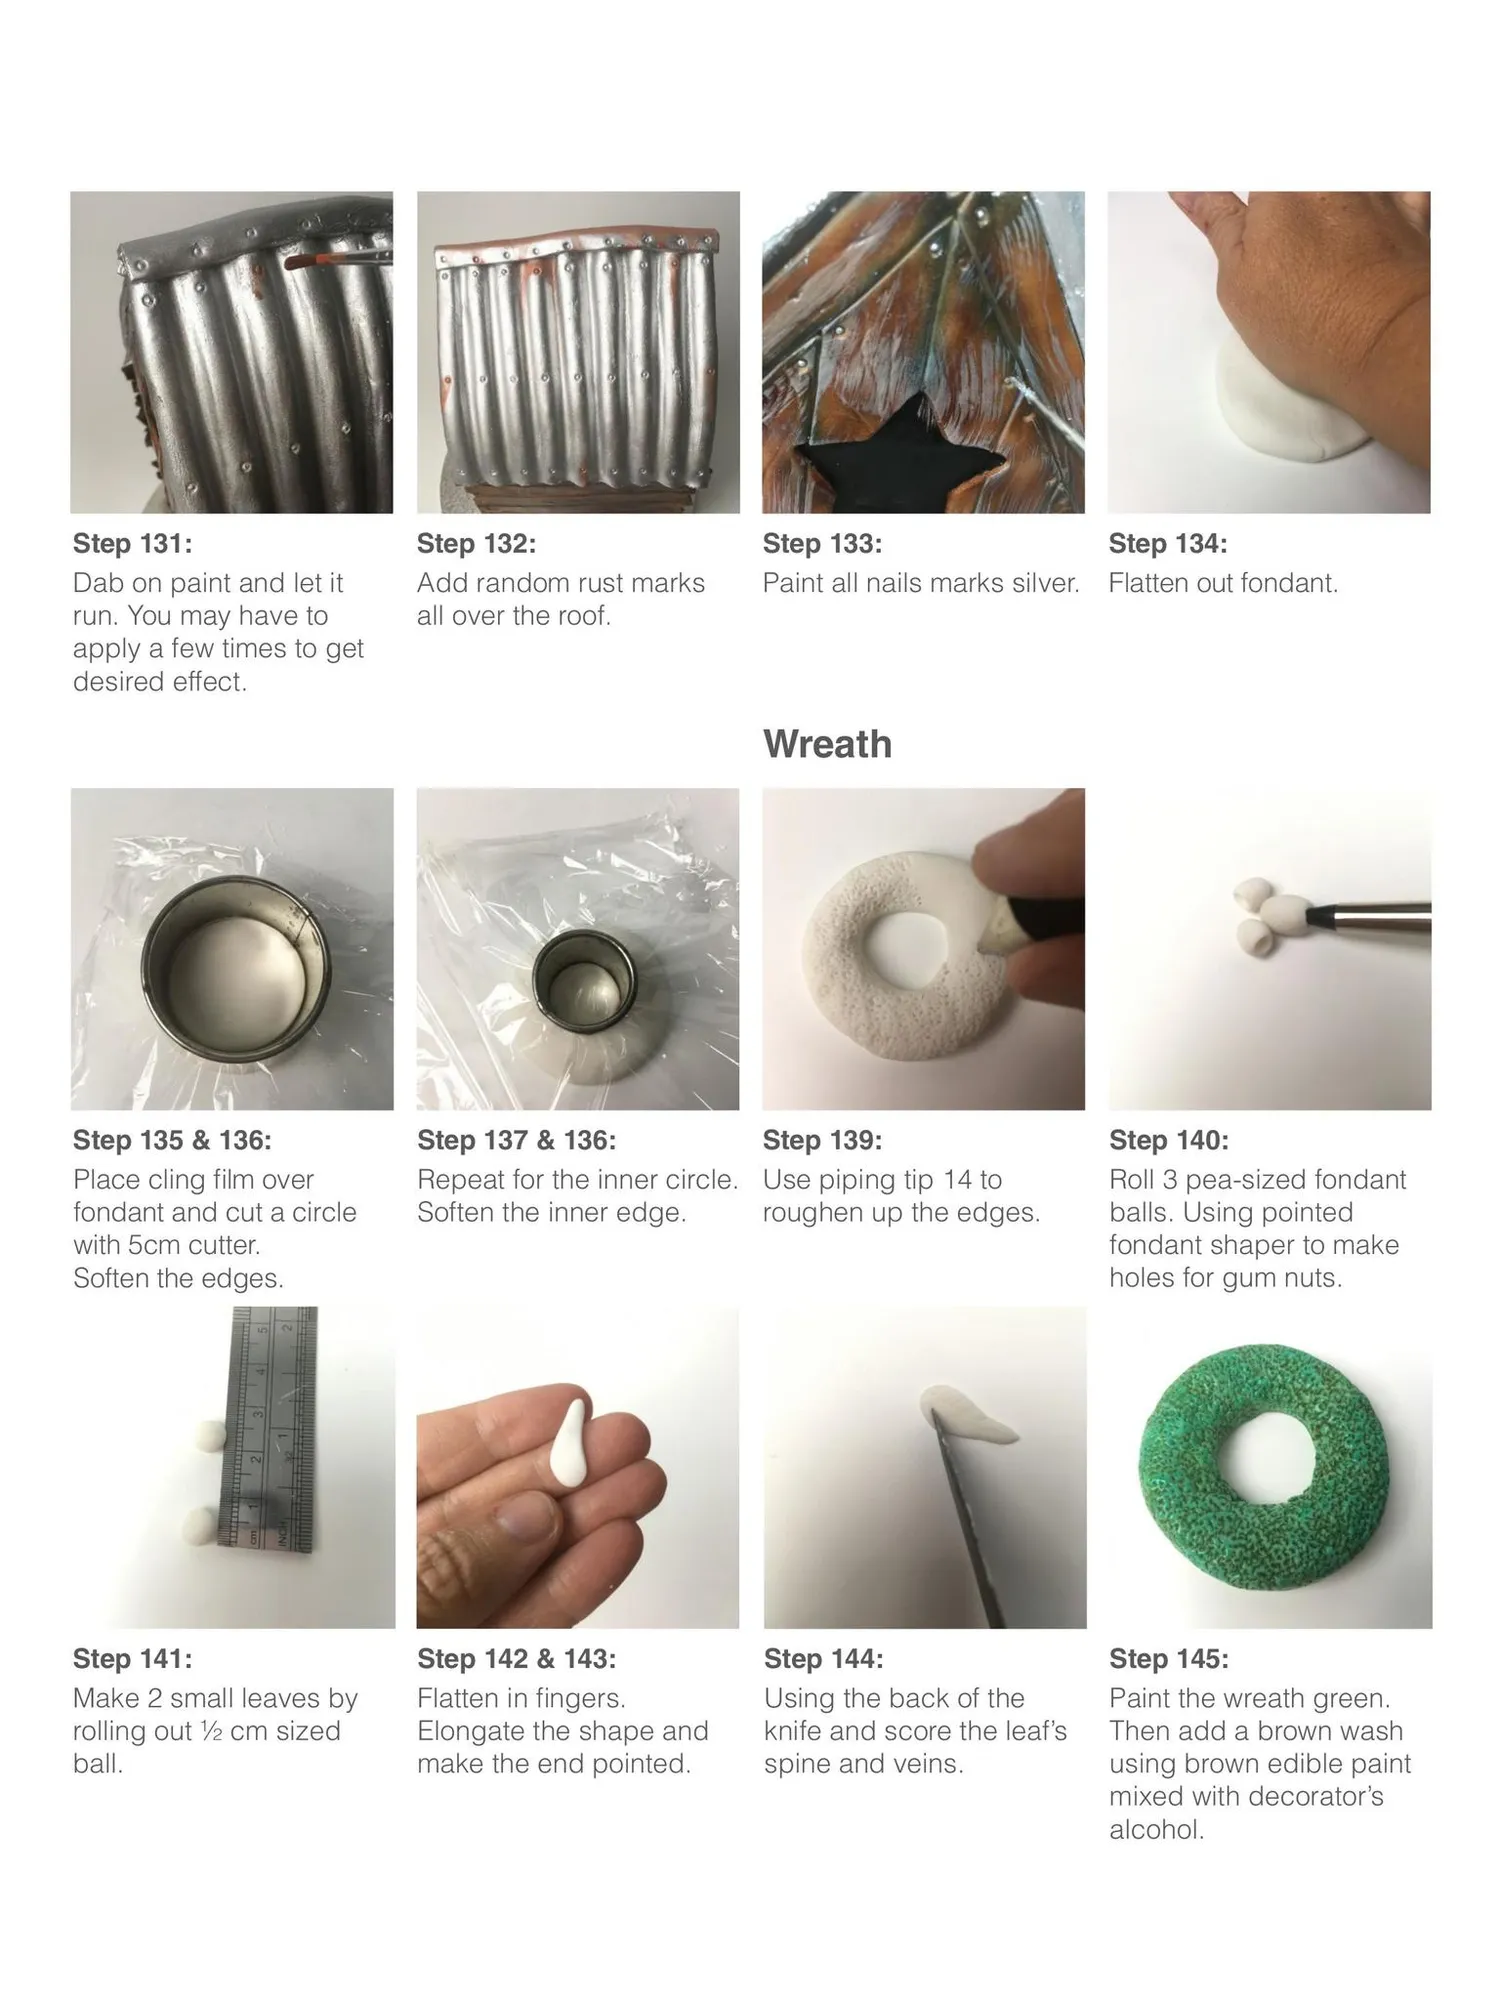
Step 131: Dab on paint and let it run. You may have to apply a few times to get desired effect. Step 132: Add random rust marks all over the roof. Step 133: Paint all nails marks silver. Step 134: Flatten out fondant. Wreath Step 135 & 136: Place cling film over fondant and cut a circle with 5cm cutter. Soften the edges. Step 137 & 136: Step 139: Repeat for the inner circle. Use piping tip 14 to Soften the inner edge. roughen up the edges. Step 140: Roll 3 pea-sized fondant balls. Using pointed fondant shaper to make holes for gum nuts. Step 141: Make 2 small leaves by rolling out ½ cm sized ball. Step 142 & 143: Flatten in fingers. Elongate the shape and make the end pointed. Step 145: Paint the wreath green. Then add a brown wash using brown edible paint mixed with decorator’s alcohol. Step 144: Using the back of the knife and score the leaf’s spine and veins.
Page 61 text
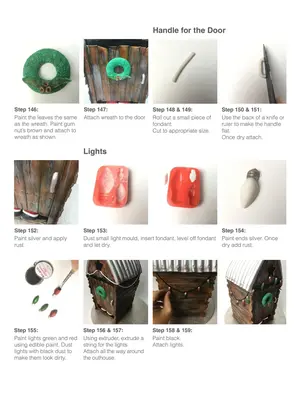
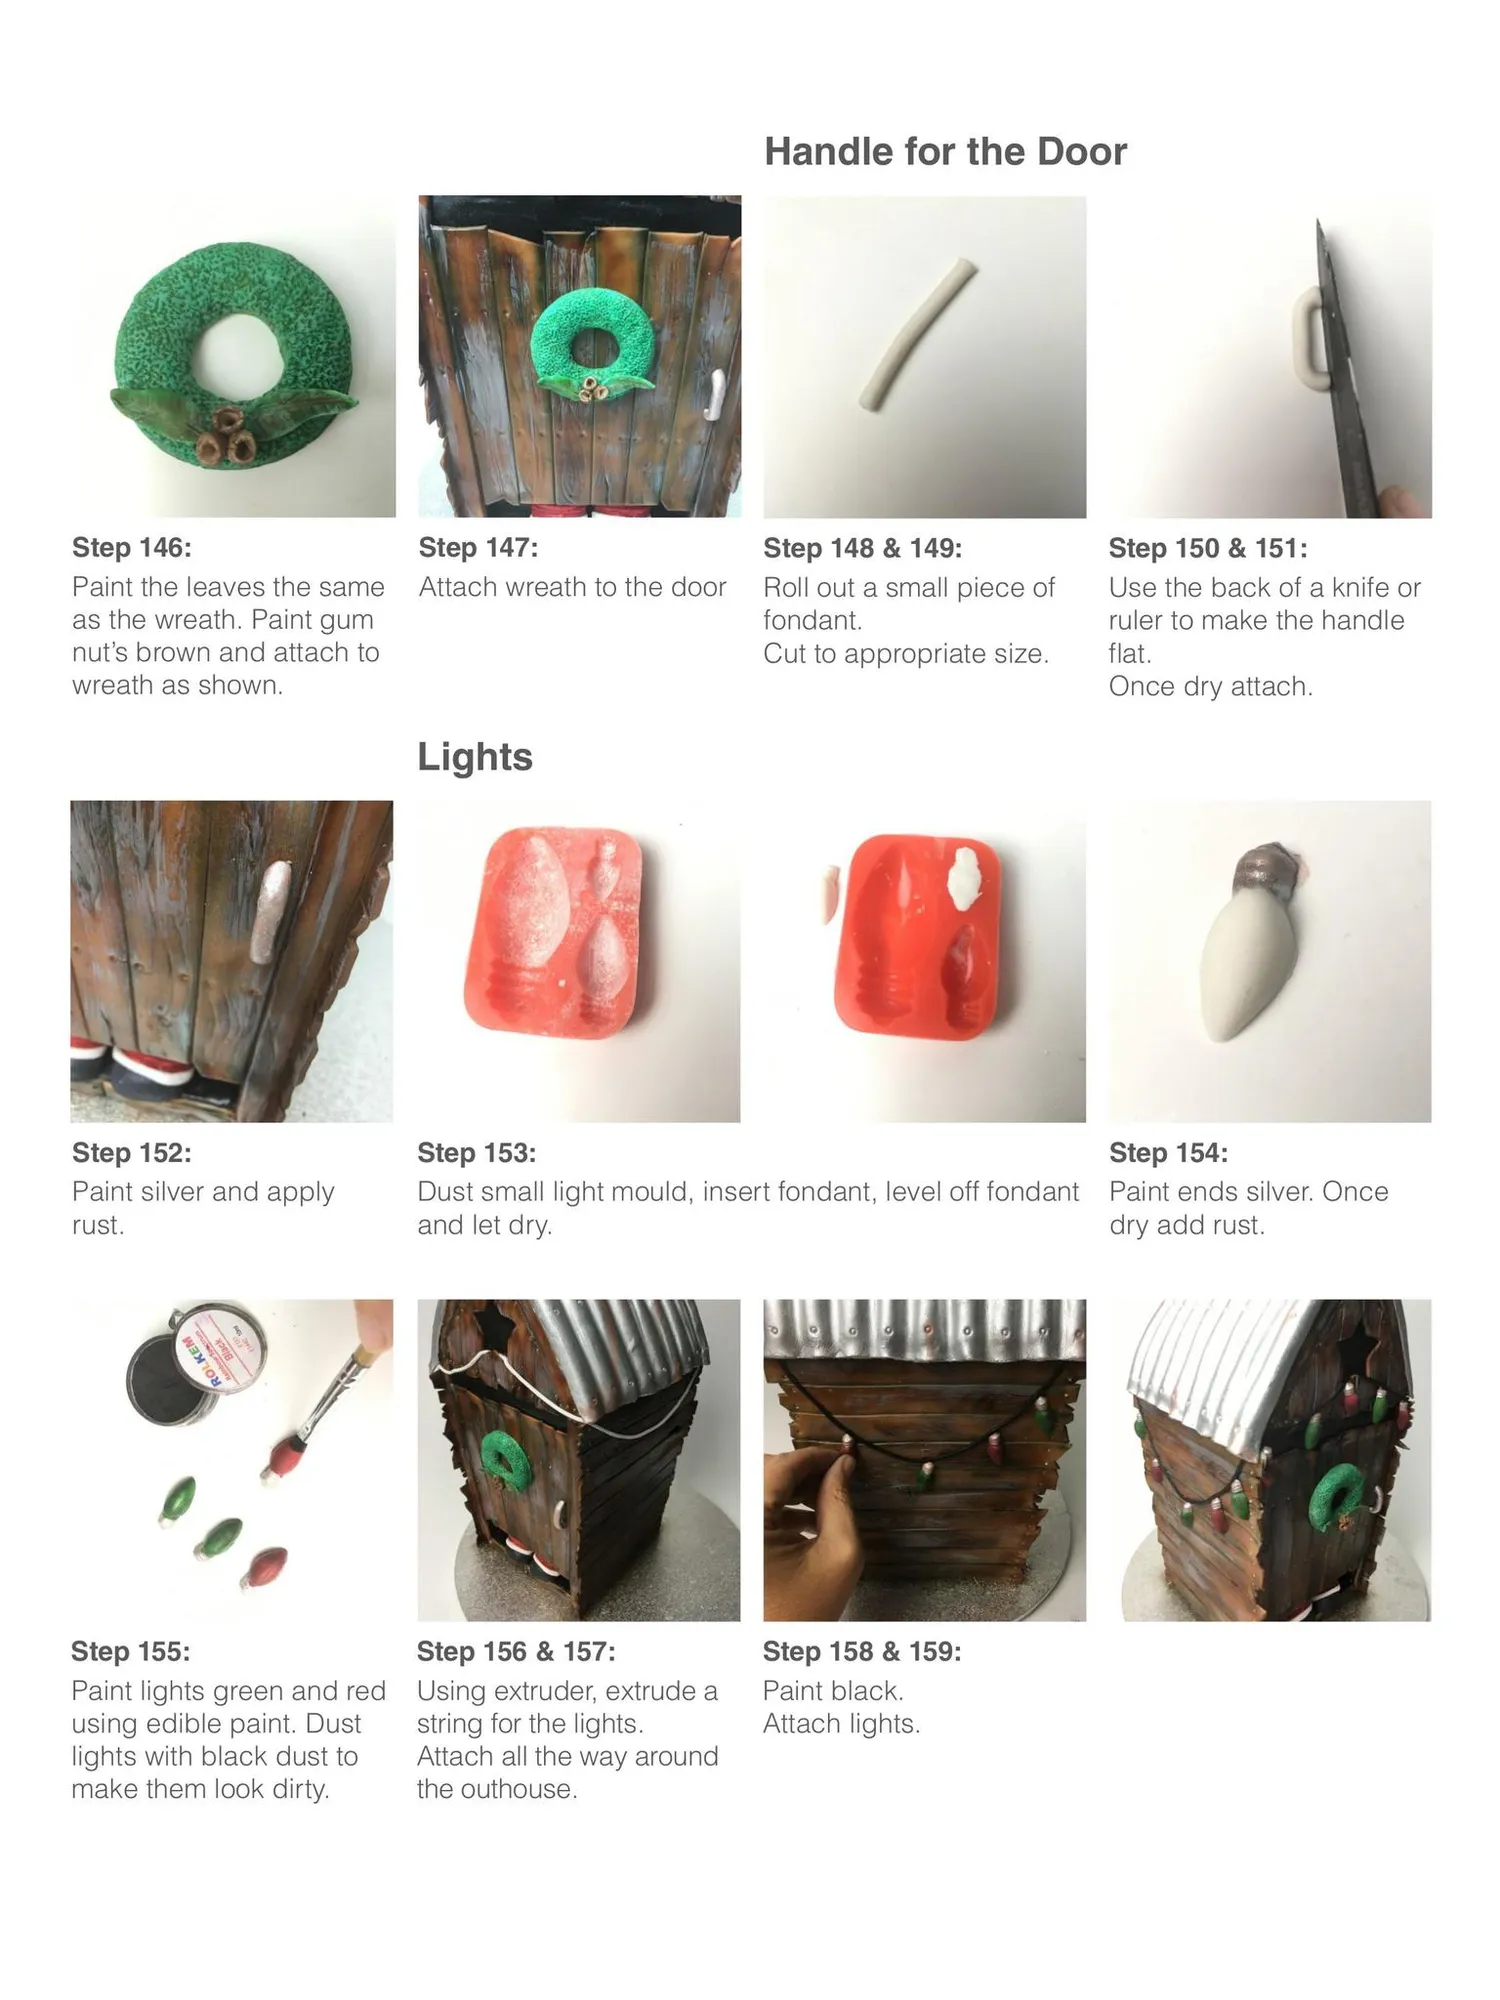
Handle for the Door Step 146: Paint the leaves the same as the wreath. Paint gum nut’s brown and attach to wreath as shown. Step 147: Attach wreath to the door Step 148 & 149: Roll out a small piece of fondant. Cut to appropriate size. Step 150 & 151: Use the back of a knife or ruler to make the handle flat. Once dry attach. Lights Step 152: Paint silver and apply rust. Step 153: Dust small light mould, insert fondant, level off fondant and let dry. Step 155: Paint lights green and red using edible paint. Dust lights with black dust to make them look dirty. Step 156 & 157: Using extruder, extrude a string for the lights. Attach all the way around the outhouse. Step 158 & 159: Paint black. Attach lights. Step 154: Paint ends silver. Once dry add rust.
Page 62 text
26-28 MAY 2017 YARRA VALLEY Register your interest at bit.ly/ACDNevents Proudly sponsored by

Page 63 text
JOIN US FOR AUSTRALIA'S BEST CAKE DECORATING RETREAT Tickets on sale 4th December! IMAGE: YARRA VALLEY LODGE
Page 64 text
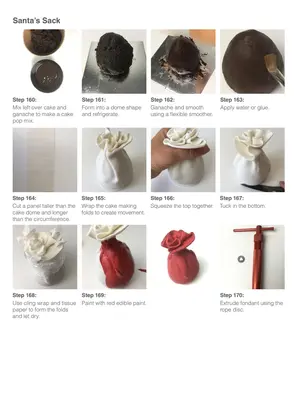
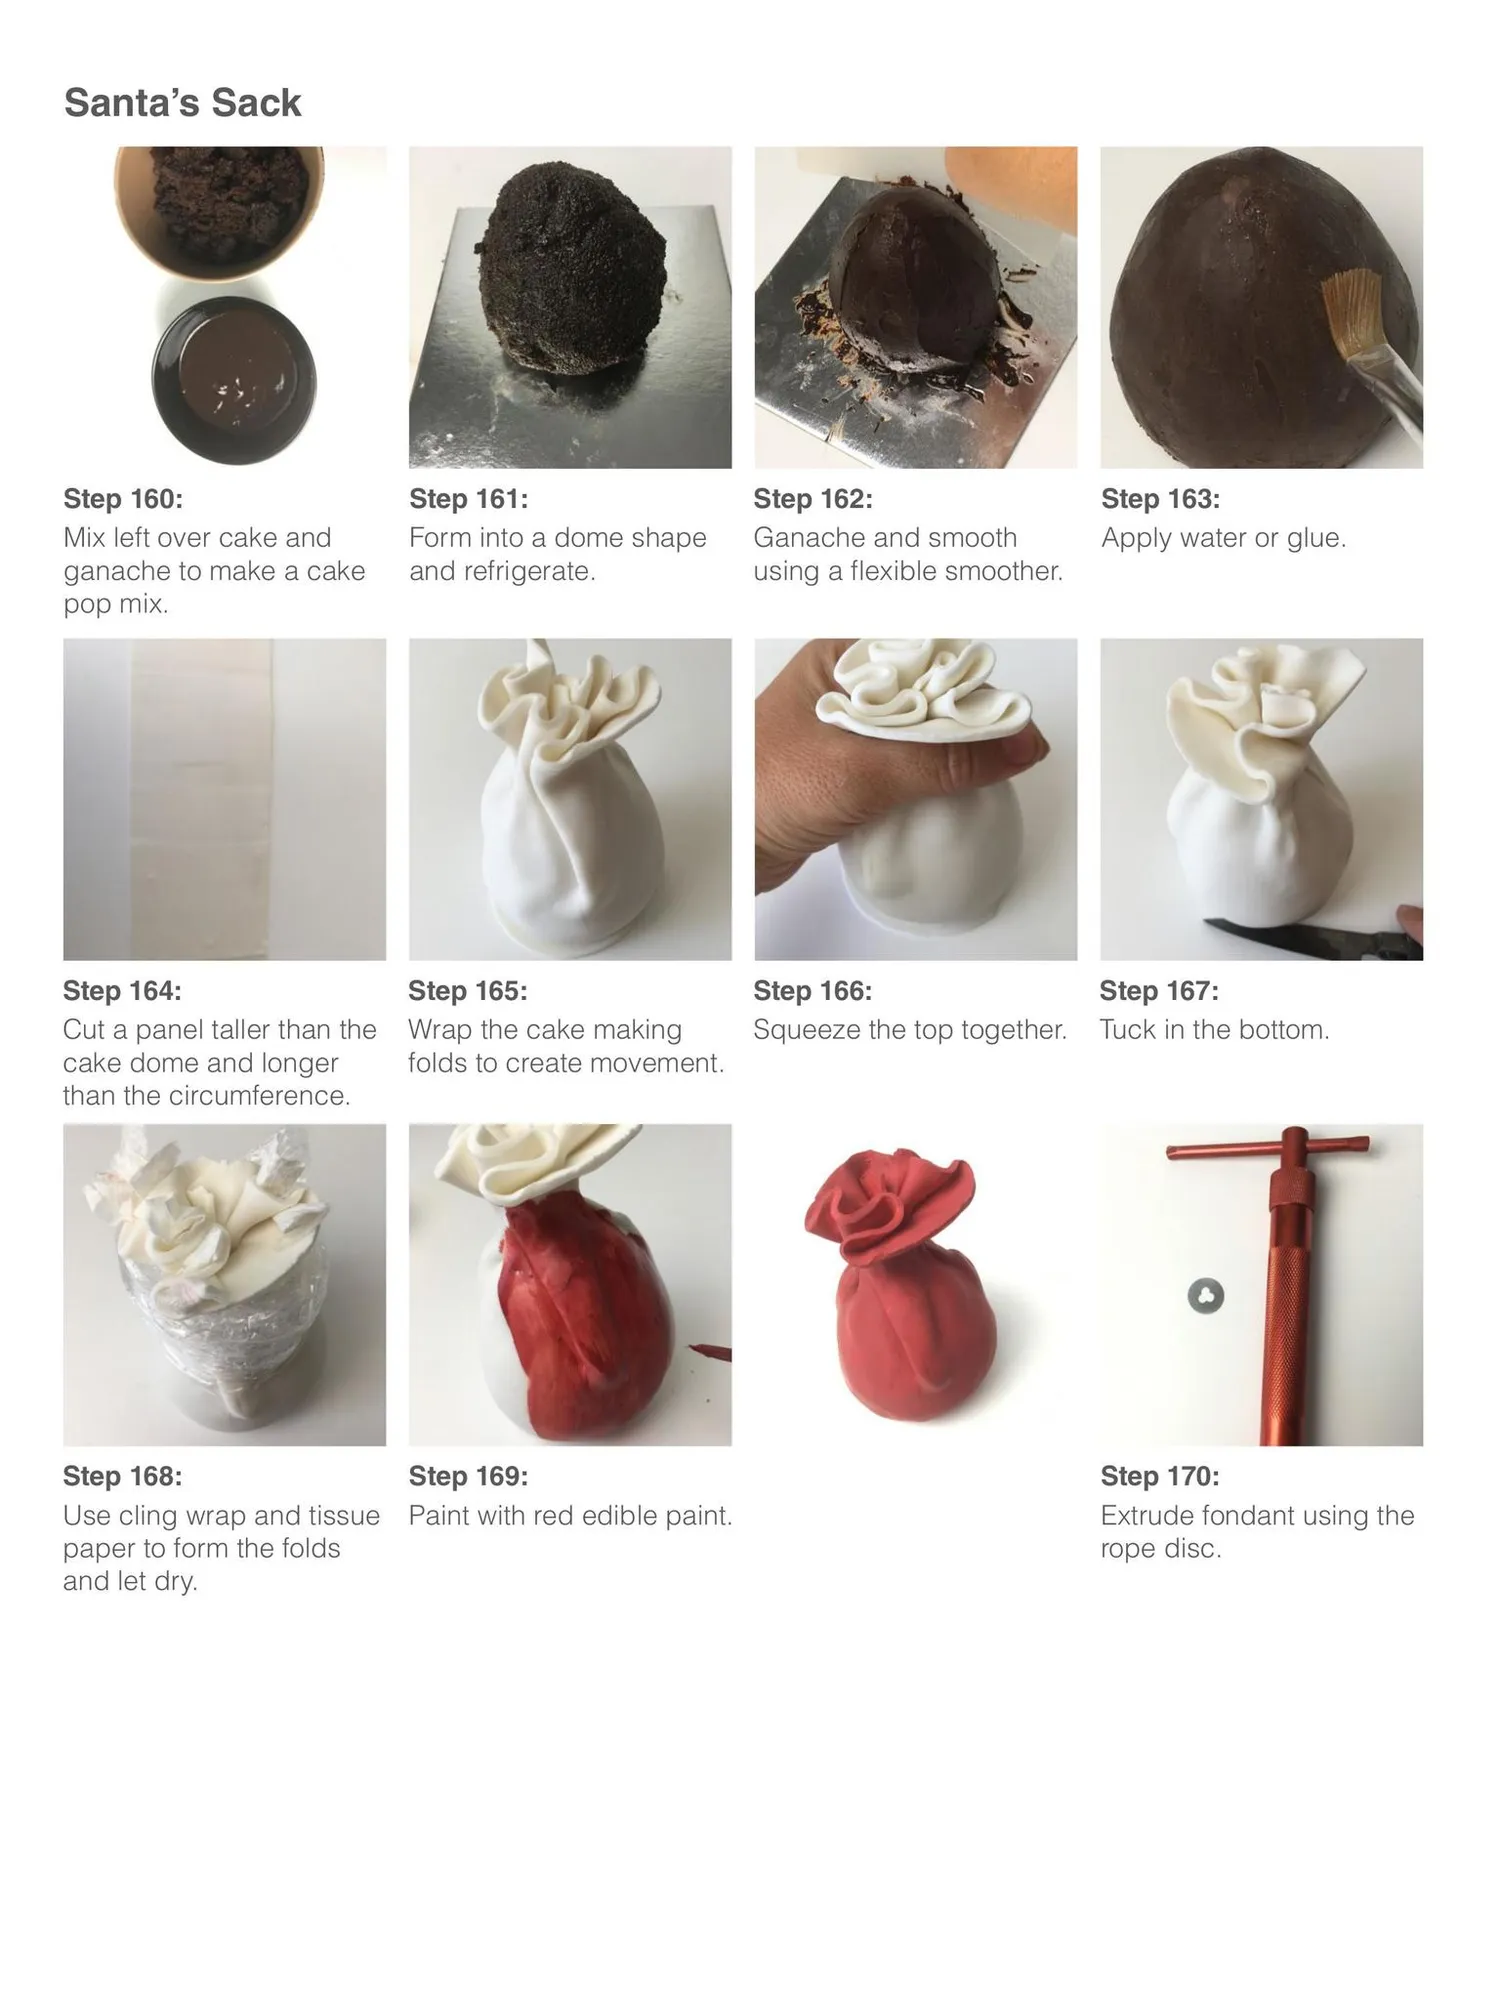
Santa'sSack Step 160: Step 161: Step 162: Step 163: Form into a dome shape Mixleft overcake and Ganache and smooth Applywaterorglue. ganache to make a cake and refrigerate. using a flexible smoother. pop mix. Step 164: Step 165: Step 166: Step 167: Wrap the cake making Cut a panel tallerthan the Squeeze the top together. Tuck in the bottom. cake dome and longer folds to create movement. than the circumference. Step 168: Step 169: Step 170: Paint with red edible paint Use cling wrap andtissue Extrude fondant using the paper to form the folds rope disc. and let dry.
Page 65 text
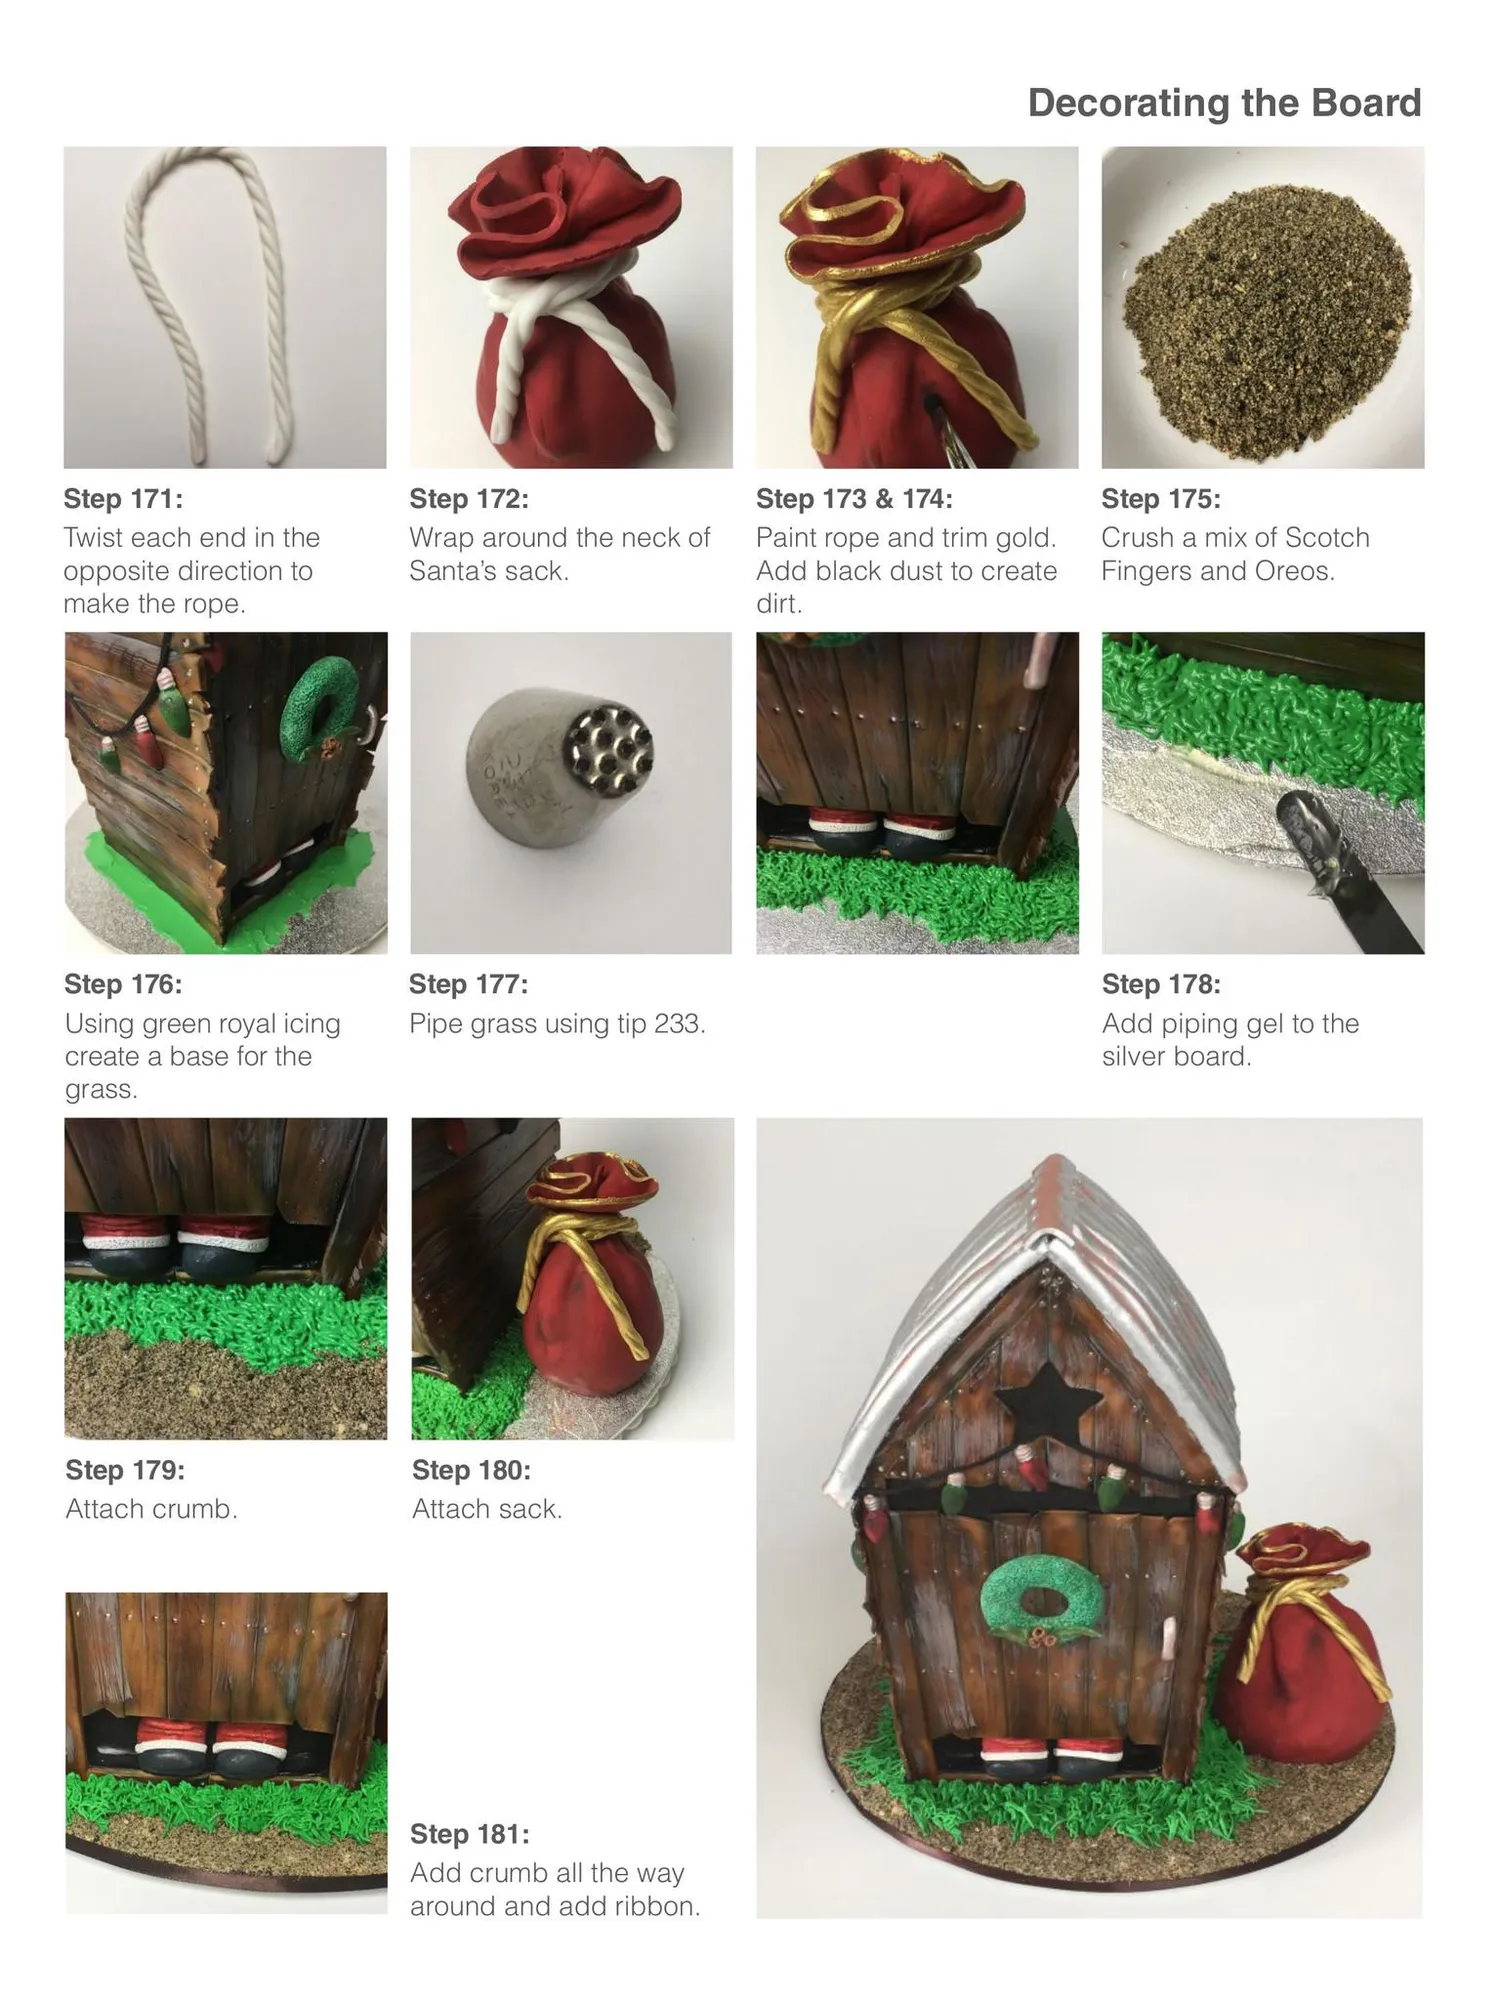
Decorating the Board Step 171: Twist each end in the opposite direction to make the rope. Step 172: Wrap around the neck of Santa’s sack. Step 176: Using green royal icing create a base for the grass. Step 177: Pipe grass using tip 233. Step 179: Attach crumb. Step 180: Attach sack. Step 181: Add crumb all the way around and add ribbon. Step 173 & 174: Paint rope and trim gold. Add black dust to create dirt. Step 175: Crush a mix of Scotch Fingers and Oreos. Step 178: Add piping gel to the silver board.

Page 66 text
Membership open to hobbyists AND professionals WORLDWIDE!


Page 67 text
131,000 JOIN TODAY! www.acdn.me
Page 68 text
PREMIUM FONDANT This smooth and creamy Fondant let’s you do it all. Ideal for designer cakes, cupcakes and modeling. LUXURY FORMULA SOFT & EASY TO USE 13 VIBRANT COLOURS ALLERGEN FREE TRANS FAT FREE KOSHER & HALAL CERTIFIED GELATIN FREE MADE IN CANADA
Page 69 text
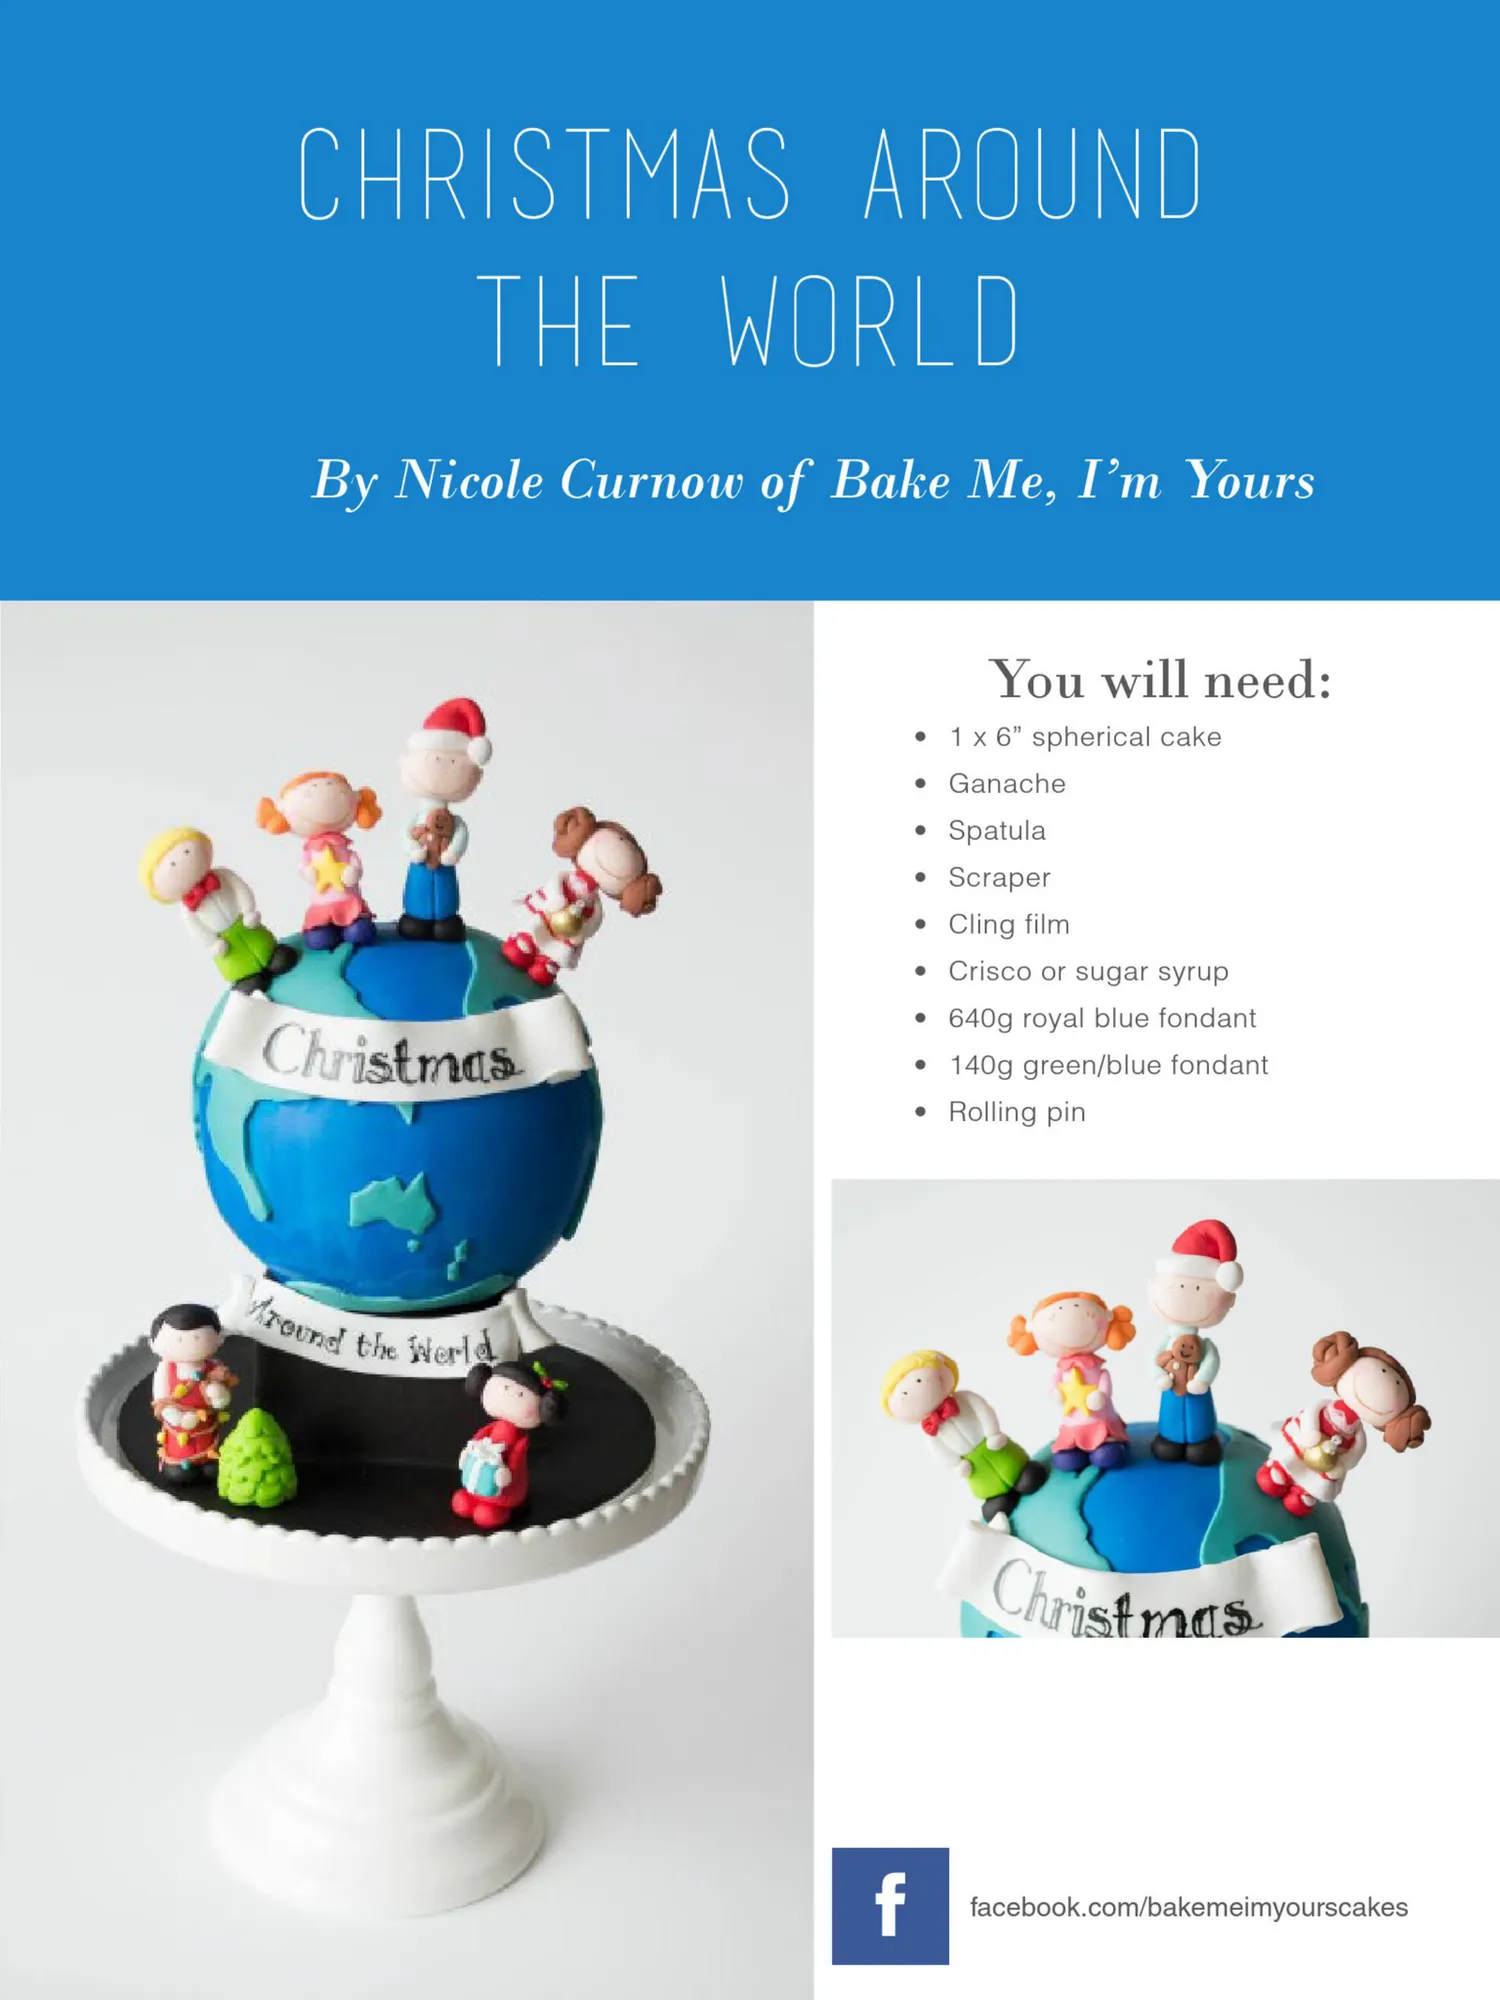
Christmas Around the World By Nicole Curnow of Bake Me, I’m Yours You will need: • 1 x 6” spherical cake • Ganache • Spatula • Scraper • Cling film • Crisco or sugar syrup • 640g royal blue fondant • 140g green/blue fondant • Rolling pin f facebook.com/bakemeimyourscakes
Page 70 text
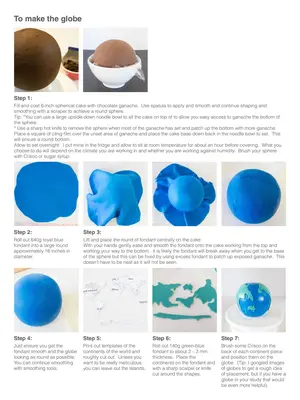
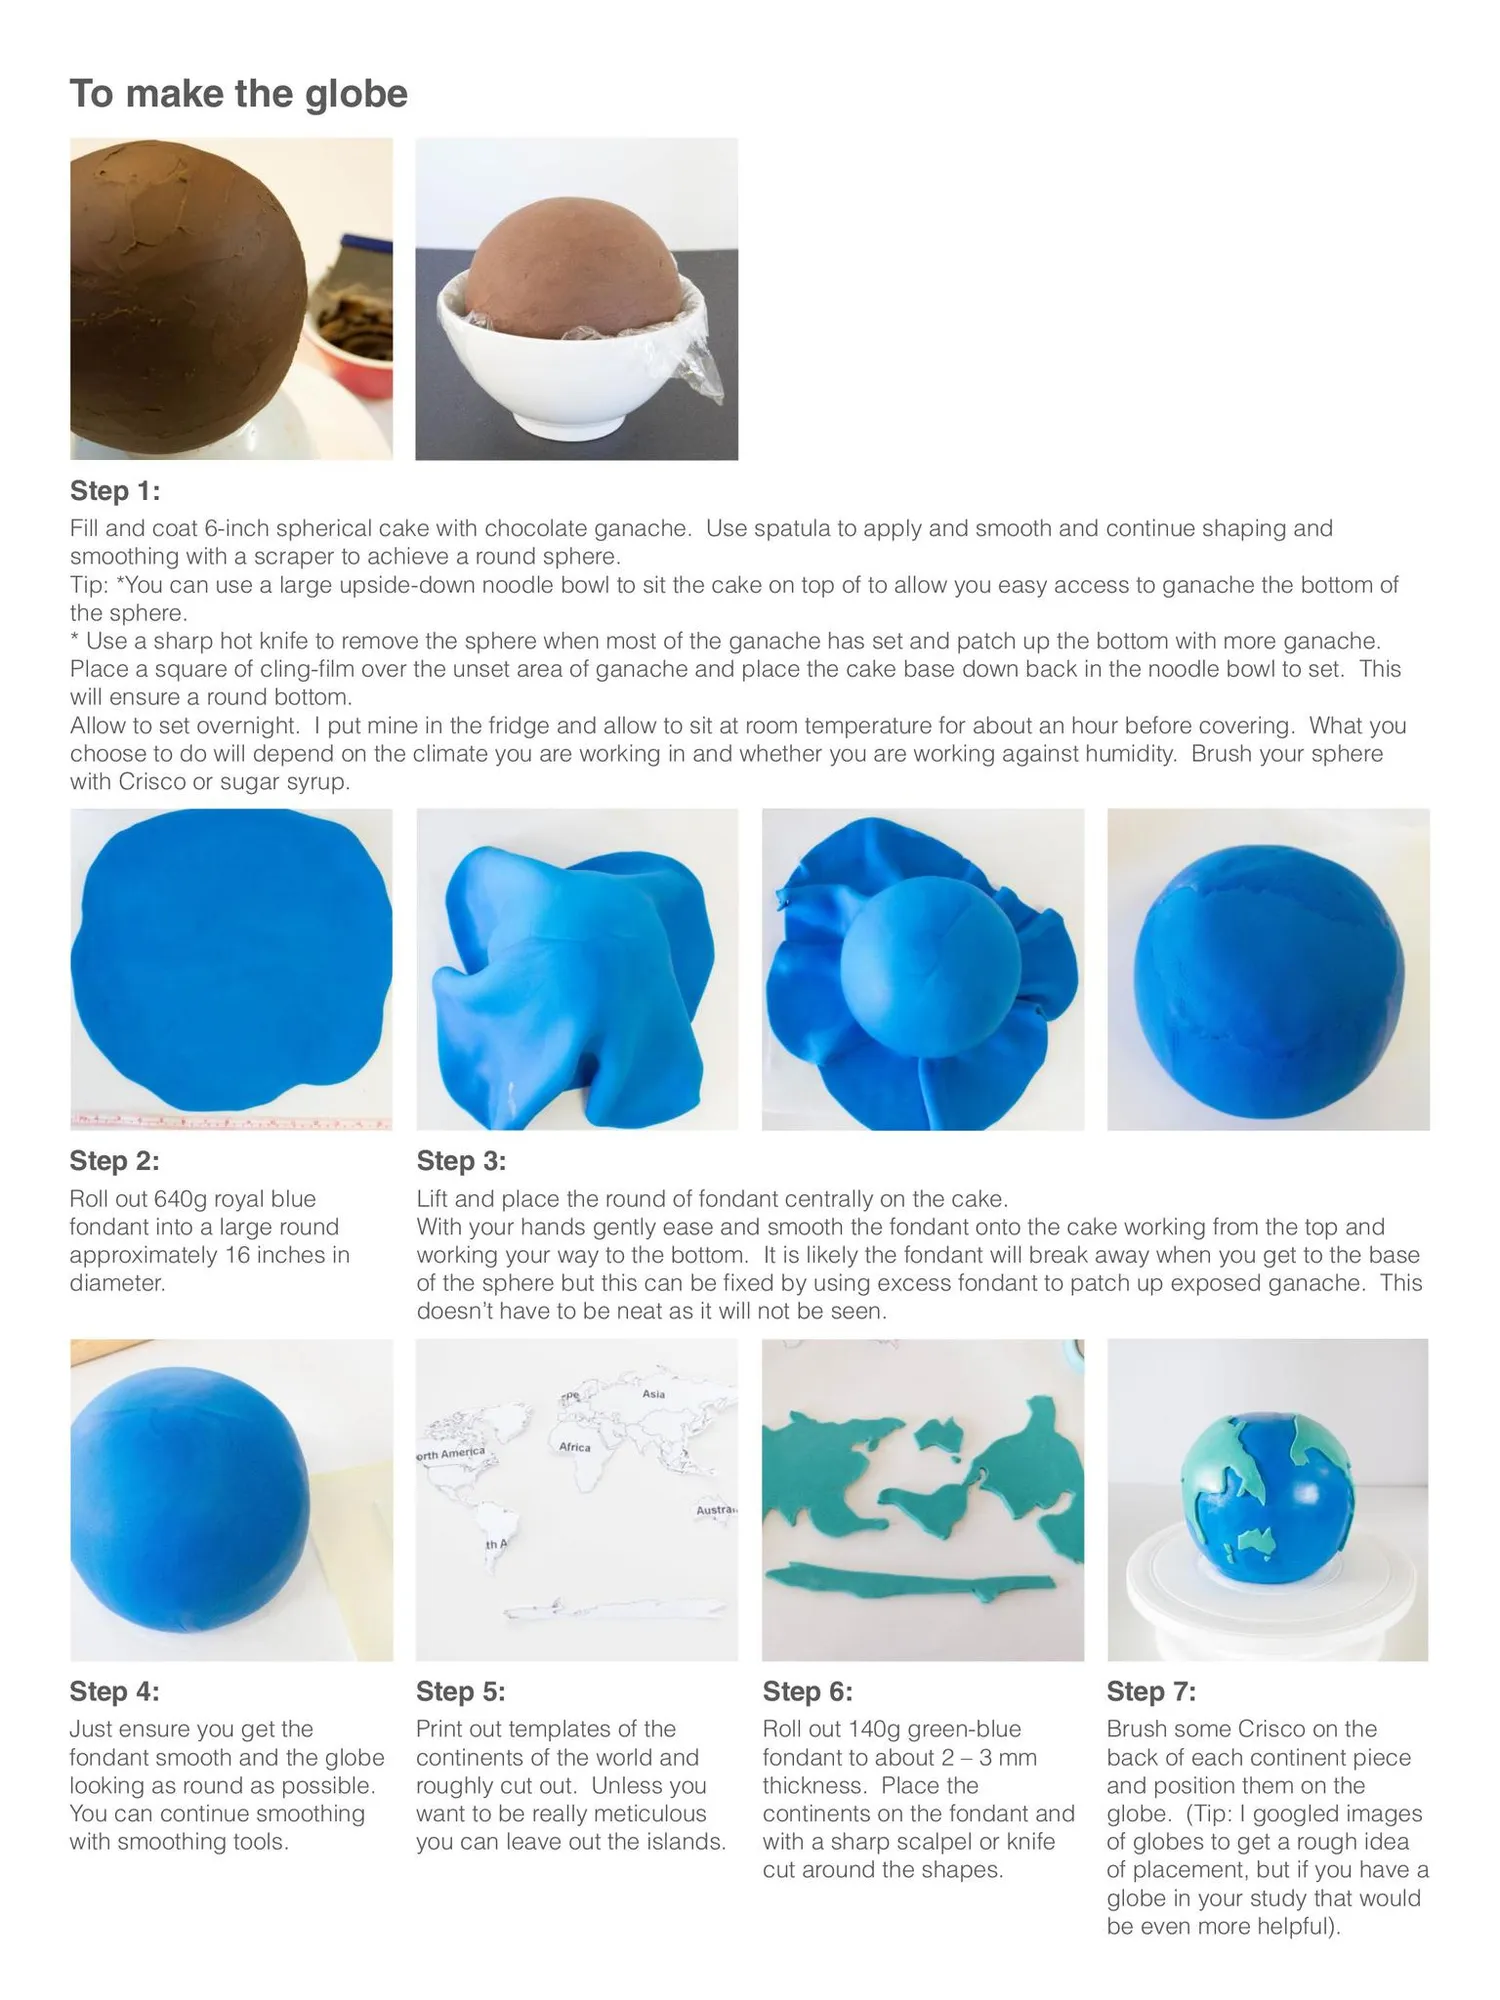
To make the globe Step 1: Fill and coat 6-inch spherical cake with chocolate ganache. Use spatula to apply and smooth and continue shaping and smoothing with a scraper to achieve a round sphere. Tip: *You can use a large upside-down noodle bowl to sit the cake on top of to allow you easy access to ganache the bottom of the sphere. * Use a sharp hot knife to remove the sphere when most of the ganache has set and patch up the bottom with more ganache. Place a square of cling-film over the unset area of ganache and place the cake base down back in the noodle bowl to set. This will ensure a round bottom. Allow to set overnight. I put mine in the fridge and allow to sit at room temperature for about an hour before covering. What you choose to do will depend on the climate you are working in and whether you are working against humidity. Brush your sphere with Crisco or sugar syrup. Step 2: Step 3: Roll out 640g royal blue fondant into a large round approximately 16 inches in diameter. Lift and place the round of fondant centrally on the cake. With your hands gently ease and smooth the fondant onto the cake working from the top and working your way to the bottom. It is likely the fondant will break away when you get to the base of the sphere but this can be fixed by using excess fondant to patch up exposed ganache. This doesn’t have to be neat as it will not be seen. Step 4: Step 5: Step 6: Step 7: Just ensure you get the fondant smooth and the globe looking as round as possible. You can continue smoothing with smoothing tools. Print out templates of the continents of the world and roughly cut out. Unless you want to be really meticulous you can leave out the islands. Roll out 140g green-blue fondant to about 2 – 3 mm thickness. Place the continents on the fondant and with a sharp scalpel or knife cut around the shapes. Brush some Crisco on the back of each continent piece and position them on the globe. (Tip: I googled images of globes to get a rough idea of placement, but if you have a globe in your study that would be even more helpful).
Page 71 text
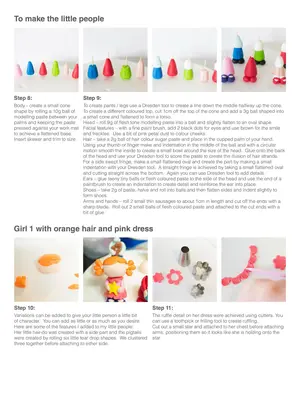
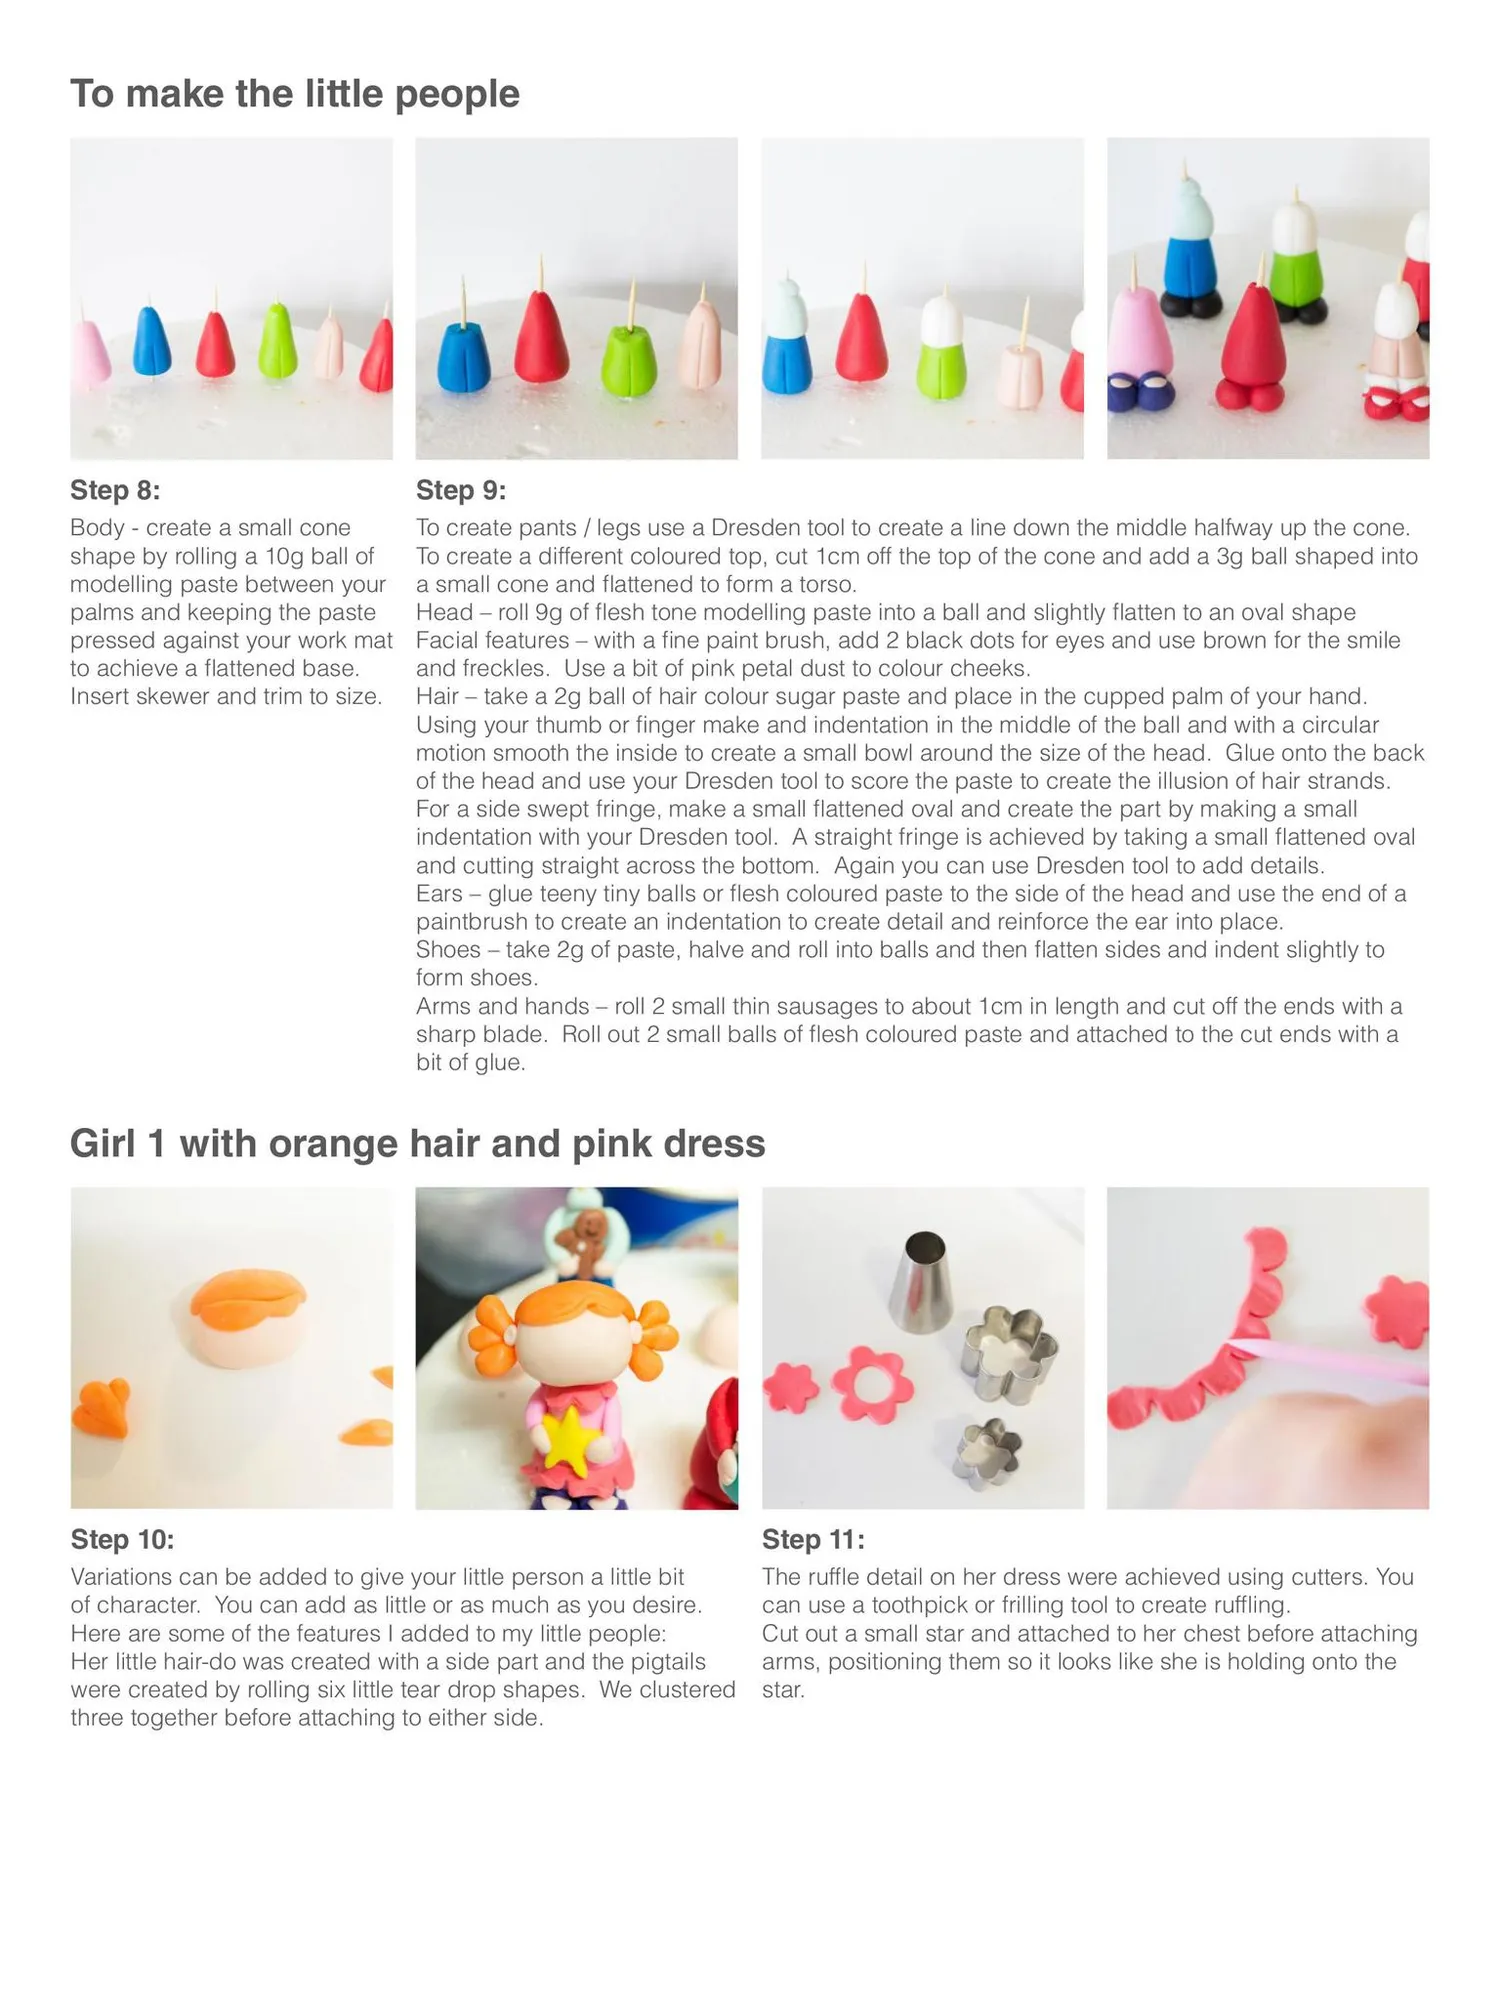
To makethe little people Step 8: Step 9: Body-create a small cone To create pants / legs use a Dresden tool to create a line down the middle halfway up the cone. shape by rolling a 10g ball of To create a different coloured top, cut 1cm off the top of the cone and add a 3g ball shaped into modelling paste between your a small coneandflattenedtoformatorso. palmsandkeepingthepaste Head-roll 9g of flesh tone modelling paste into aball and slightlyflatten to an oval shape pressed againstyourworkmat Facial features-with a fine paint brush, add 2 black dots for eyes and use brown for the smile to achieve a flattened base. and freckles.Use a bit of pink petal dust to colour cheeks. Insert skewerand trim to size. Hair-take a 2g ball of hair colour sugar paste and place in the cupped palm of your hand. Using your thumb or finger make and indentation in the middle of the ball and with a circular motion smooth the inside to create a small bowl around the size of the head. Glue onto the back of the head and use your Dresden tool to score the paste to create the llusion of hair strands. For a side swept fringe,make a small flattened oval and create the part bymaking a small indentation with your Dresden tool. A straight fringe is achieved by taking a small flattened oval and cutting straight across the bottom.Again you can use Dresden tool to add details. Ears-glue teeny tiny balls or flesh coloured paste to the side of the head and use the end of a paintbrush to create an indentation to create detail and reinforce the ear into place. Shoes -take 2g of paste, halve and roll into balls and then flatten sides and indent slightly to form shoes. Arms and hands - roll 2 small thin sausages to about 1cm in length and cut off the ends with a sharpblade.Roll out2 small balls of flesh coloured pasteand attachedtothe cut ends witha bit of glue. Girl 1 withorange hair and pink dress Step 10: Step 11: Variations can be added to give your little person a little bit The ruffle detail on herdress were achieved using cutters. You of character.Youcanadd as littleorasmuchasyou desire. can use a toothpick or frilling tool to create ruffling. HerearesomeofthefeaturesIaddedtomy littlepeople: Cut out a small star and attached to her chest before attaching Her littlehair-dowascreated witha sidepartandthepigtails arms, positioning them so it looks like she is holding onto the were createdbyrolling six littleteardrop shapes.We clustered star. three together before attaching to either side.
Page 72 text
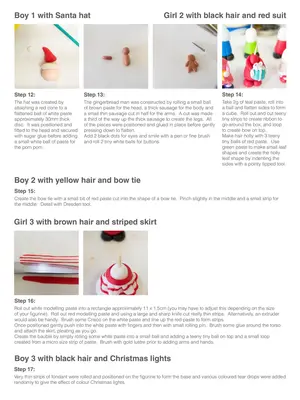
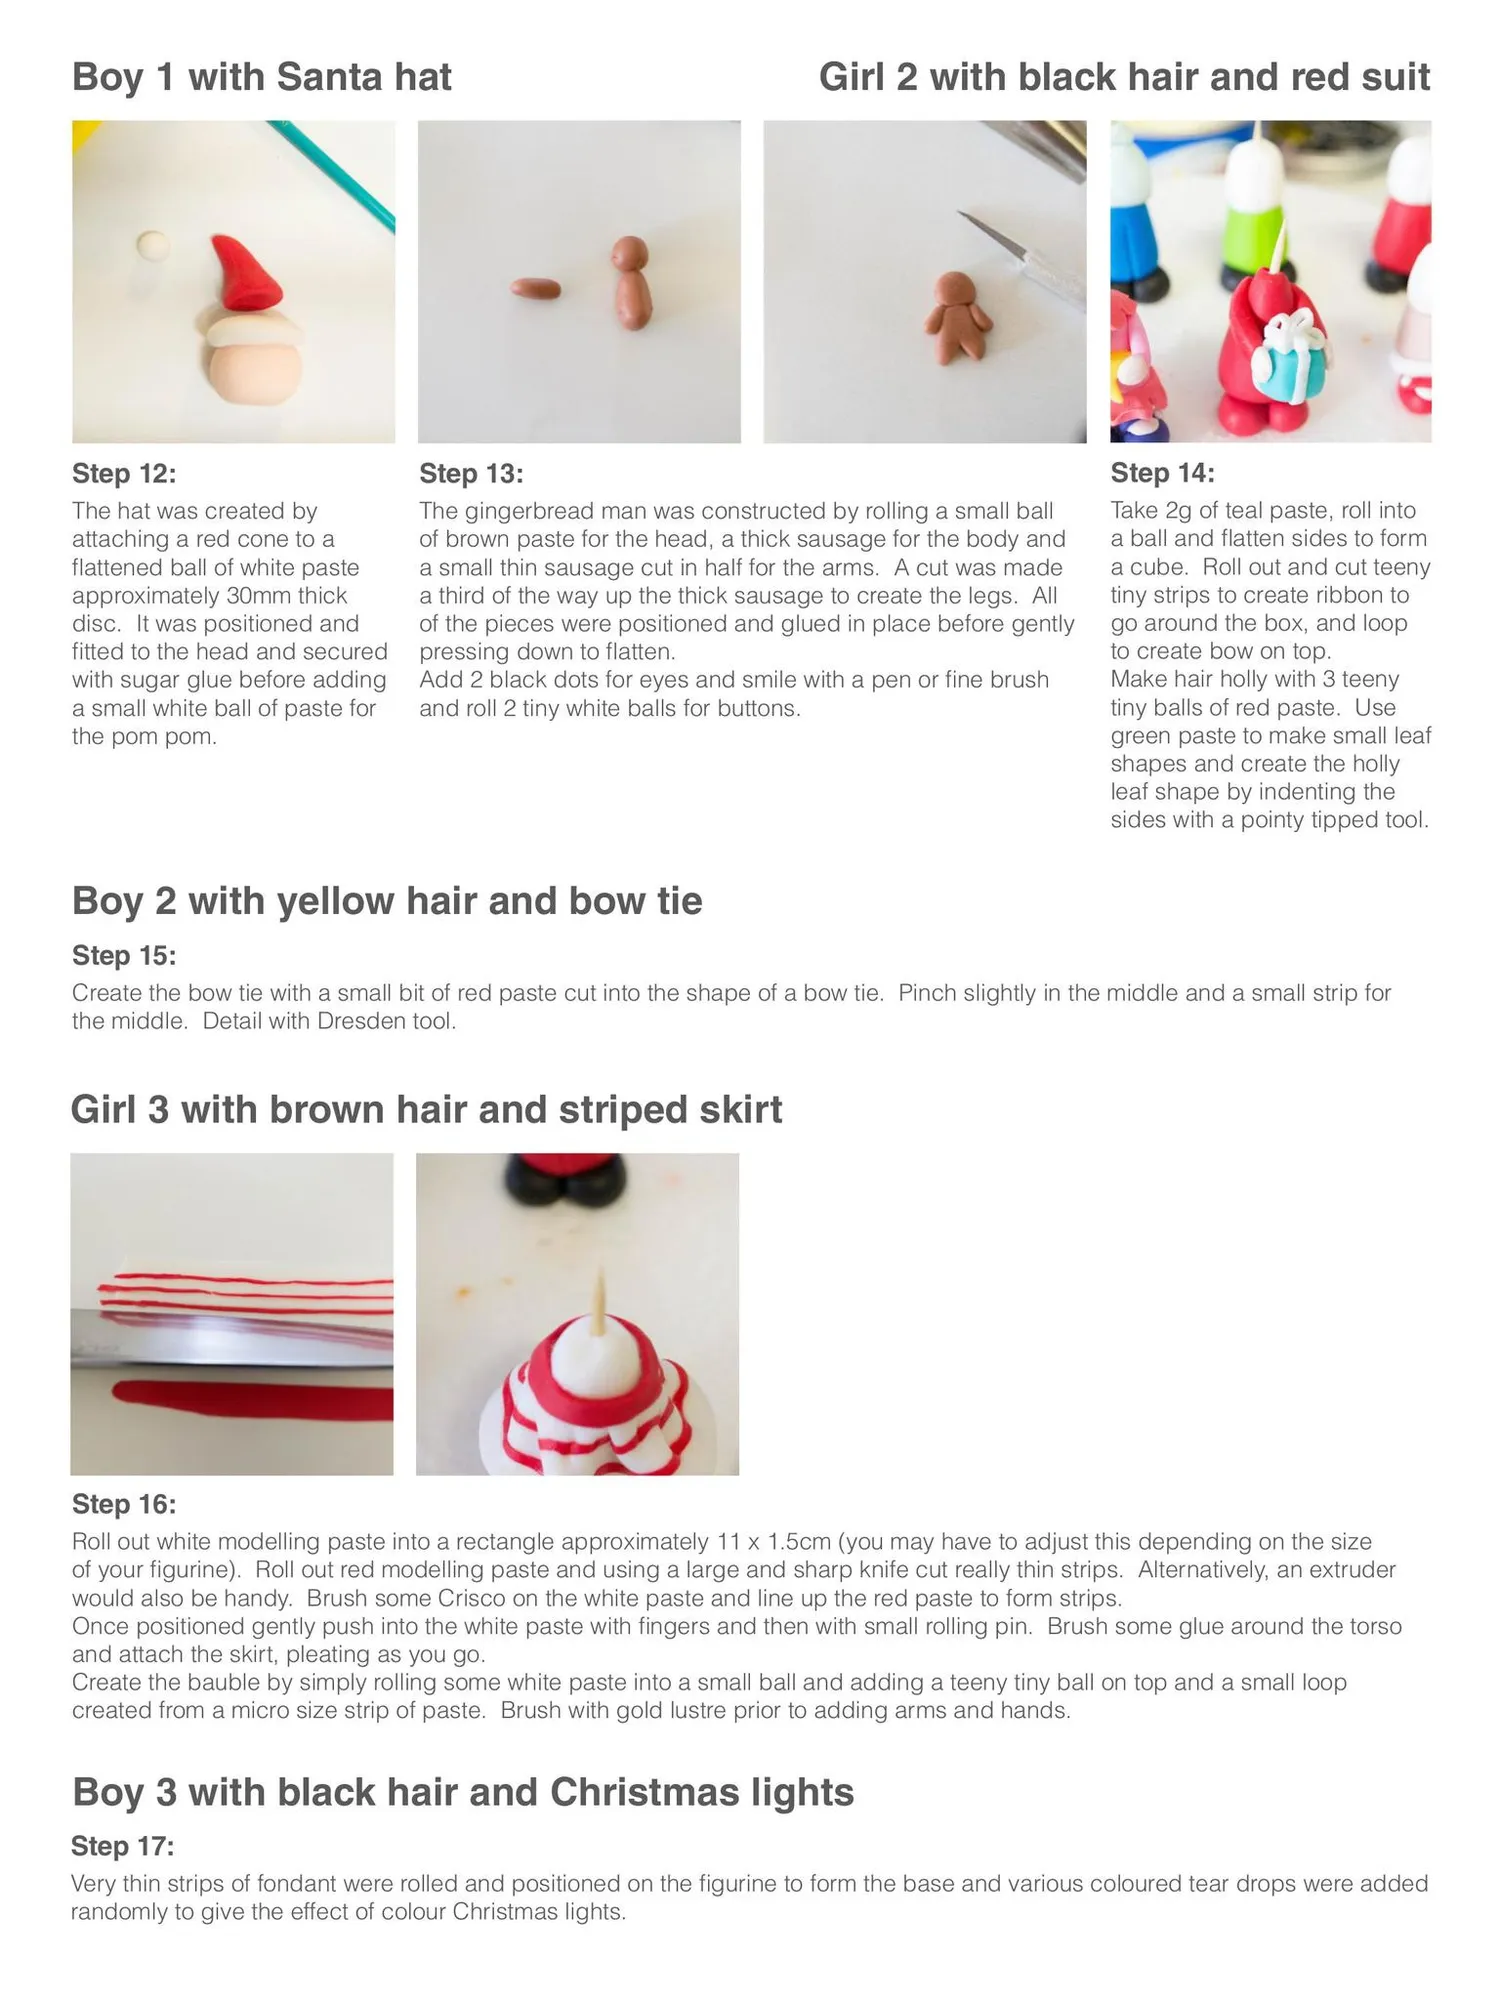
Boy 1 with Santa hat Girl 2 with black hair and red suit Step 12: Step 13: Step 14: The hat was created by attaching a red cone to a flattened ball of white paste approximately 30mm thick disc. It was positioned and fitted to the head and secured with sugar glue before adding a small white ball of paste for the pom pom. The gingerbread man was constructed by rolling a small ball of brown paste for the head, a thick sausage for the body and a small thin sausage cut in half for the arms. A cut was made a third of the way up the thick sausage to create the legs. All of the pieces were positioned and glued in place before gently pressing down to flatten. Add 2 black dots for eyes and smile with a pen or fine brush and roll 2 tiny white balls for buttons. Take 2g of teal paste, roll into a ball and flatten sides to form a cube. Roll out and cut teeny tiny strips to create ribbon to go around the box, and loop to create bow on top. Make hair holly with 3 teeny tiny balls of red paste. Use green paste to make small leaf shapes and create the holly leaf shape by indenting the sides with a pointy tipped tool. Boy 2 with yellow hair and bow tie Step 15: Create the bow tie with a small bit of red paste cut into the shape of a bow tie. Pinch slightly in the middle and a small strip for the middle. Detail with Dresden tool. Girl 3 with brown hair and striped skirt Step 16: Roll out white modelling paste into a rectangle approximately 11 x 1.5cm (you may have to adjust this depending on the size of your figurine). Roll out red modelling paste and using a large and sharp knife cut really thin strips. Alternatively, an extruder would also be handy. Brush some Crisco on the white paste and line up the red paste to form strips. Once positioned gently push into the white paste with fingers and then with small rolling pin. Brush some glue around the torso and attach the skirt, pleating as you go. Create the bauble by simply rolling some white paste into a small ball and adding a teeny tiny ball on top and a small loop created from a micro size strip of paste. Brush with gold lustre prior to adding arms and hands. Boy 3 with black hair and Christmas lights Step 17: Very thin strips of fondant were rolled and positioned on the figurine to form the base and various coloured tear drops were added randomly to give the effect of colour Christmas lights.
Page 73 text
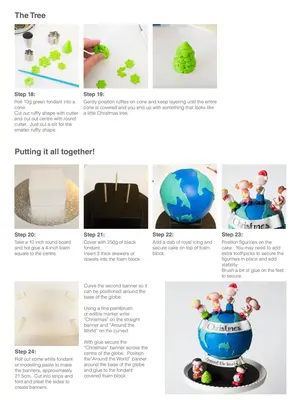
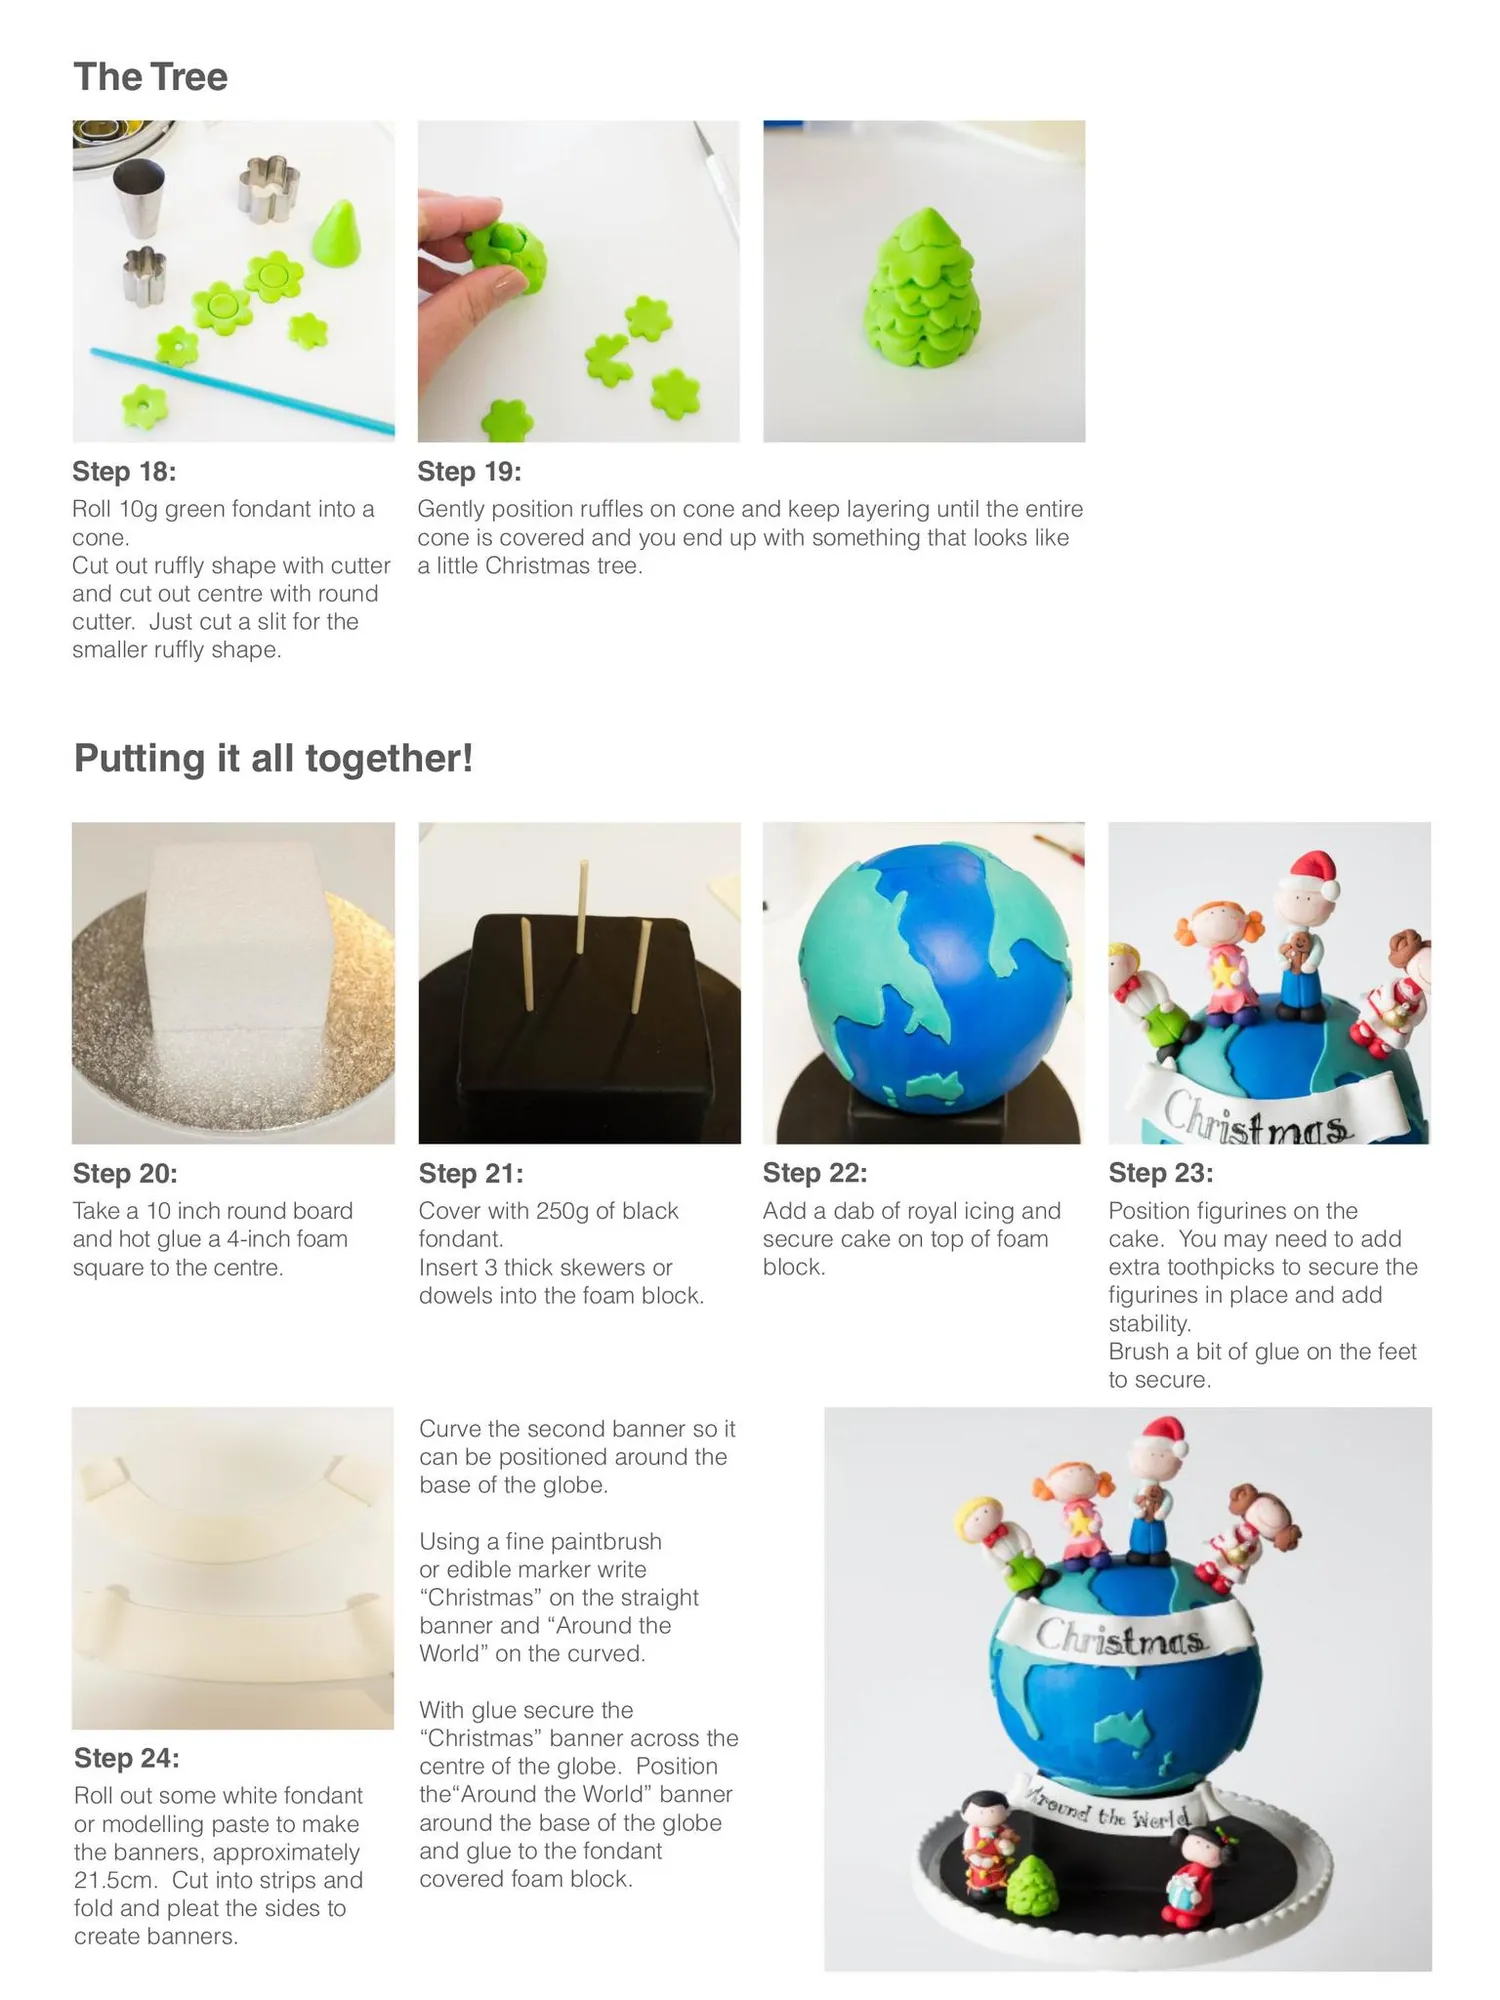
The Tree Step 18: Step 19: Roll 10g green fondant into a cone. Cut out ruffly shape with cutter and cut out centre with round cutter. Just cut a slit for the smaller ruffly shape. Gently position ruffles on cone and keep layering until the entire cone is covered and you end up with something that looks like a little Christmas tree. Putting it all together! Step 20: Step 21: Step 22: Step 23: Take a 10 inch round board and hot glue a 4-inch foam square to the centre. Cover with 250g of black fondant. Insert 3 thick skewers or dowels into the foam block. Add a dab of royal icing and secure cake on top of foam block. Position figurines on the cake. You may need to add extra toothpicks to secure the figurines in place and add stability. Brush a bit of glue on the feet to secure. Curve the second banner so it can be positioned around the base of the globe. Using a fine paintbrush or edible marker write “Christmas” on the straight banner and “Around the World” on the curved. Step 24: Roll out some white fondant or modelling paste to make the banners, approximately 21.5cm. Cut into strips and fold and pleat the sides to create banners. With glue secure the “Christmas” banner across the centre of the globe. Position the“Around the World” banner around the base of the globe and glue to the fondant covered foam block.
Page 74 text
Read Cake! magazine online or download & print for offline viewing HERE! f www.acdn.me [email protected] click here to join our mailing list! To advertise in Cake! magazine, contact [email protected]


Page 75 text
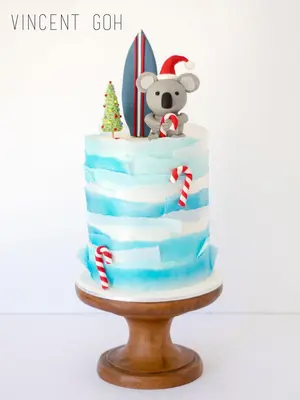
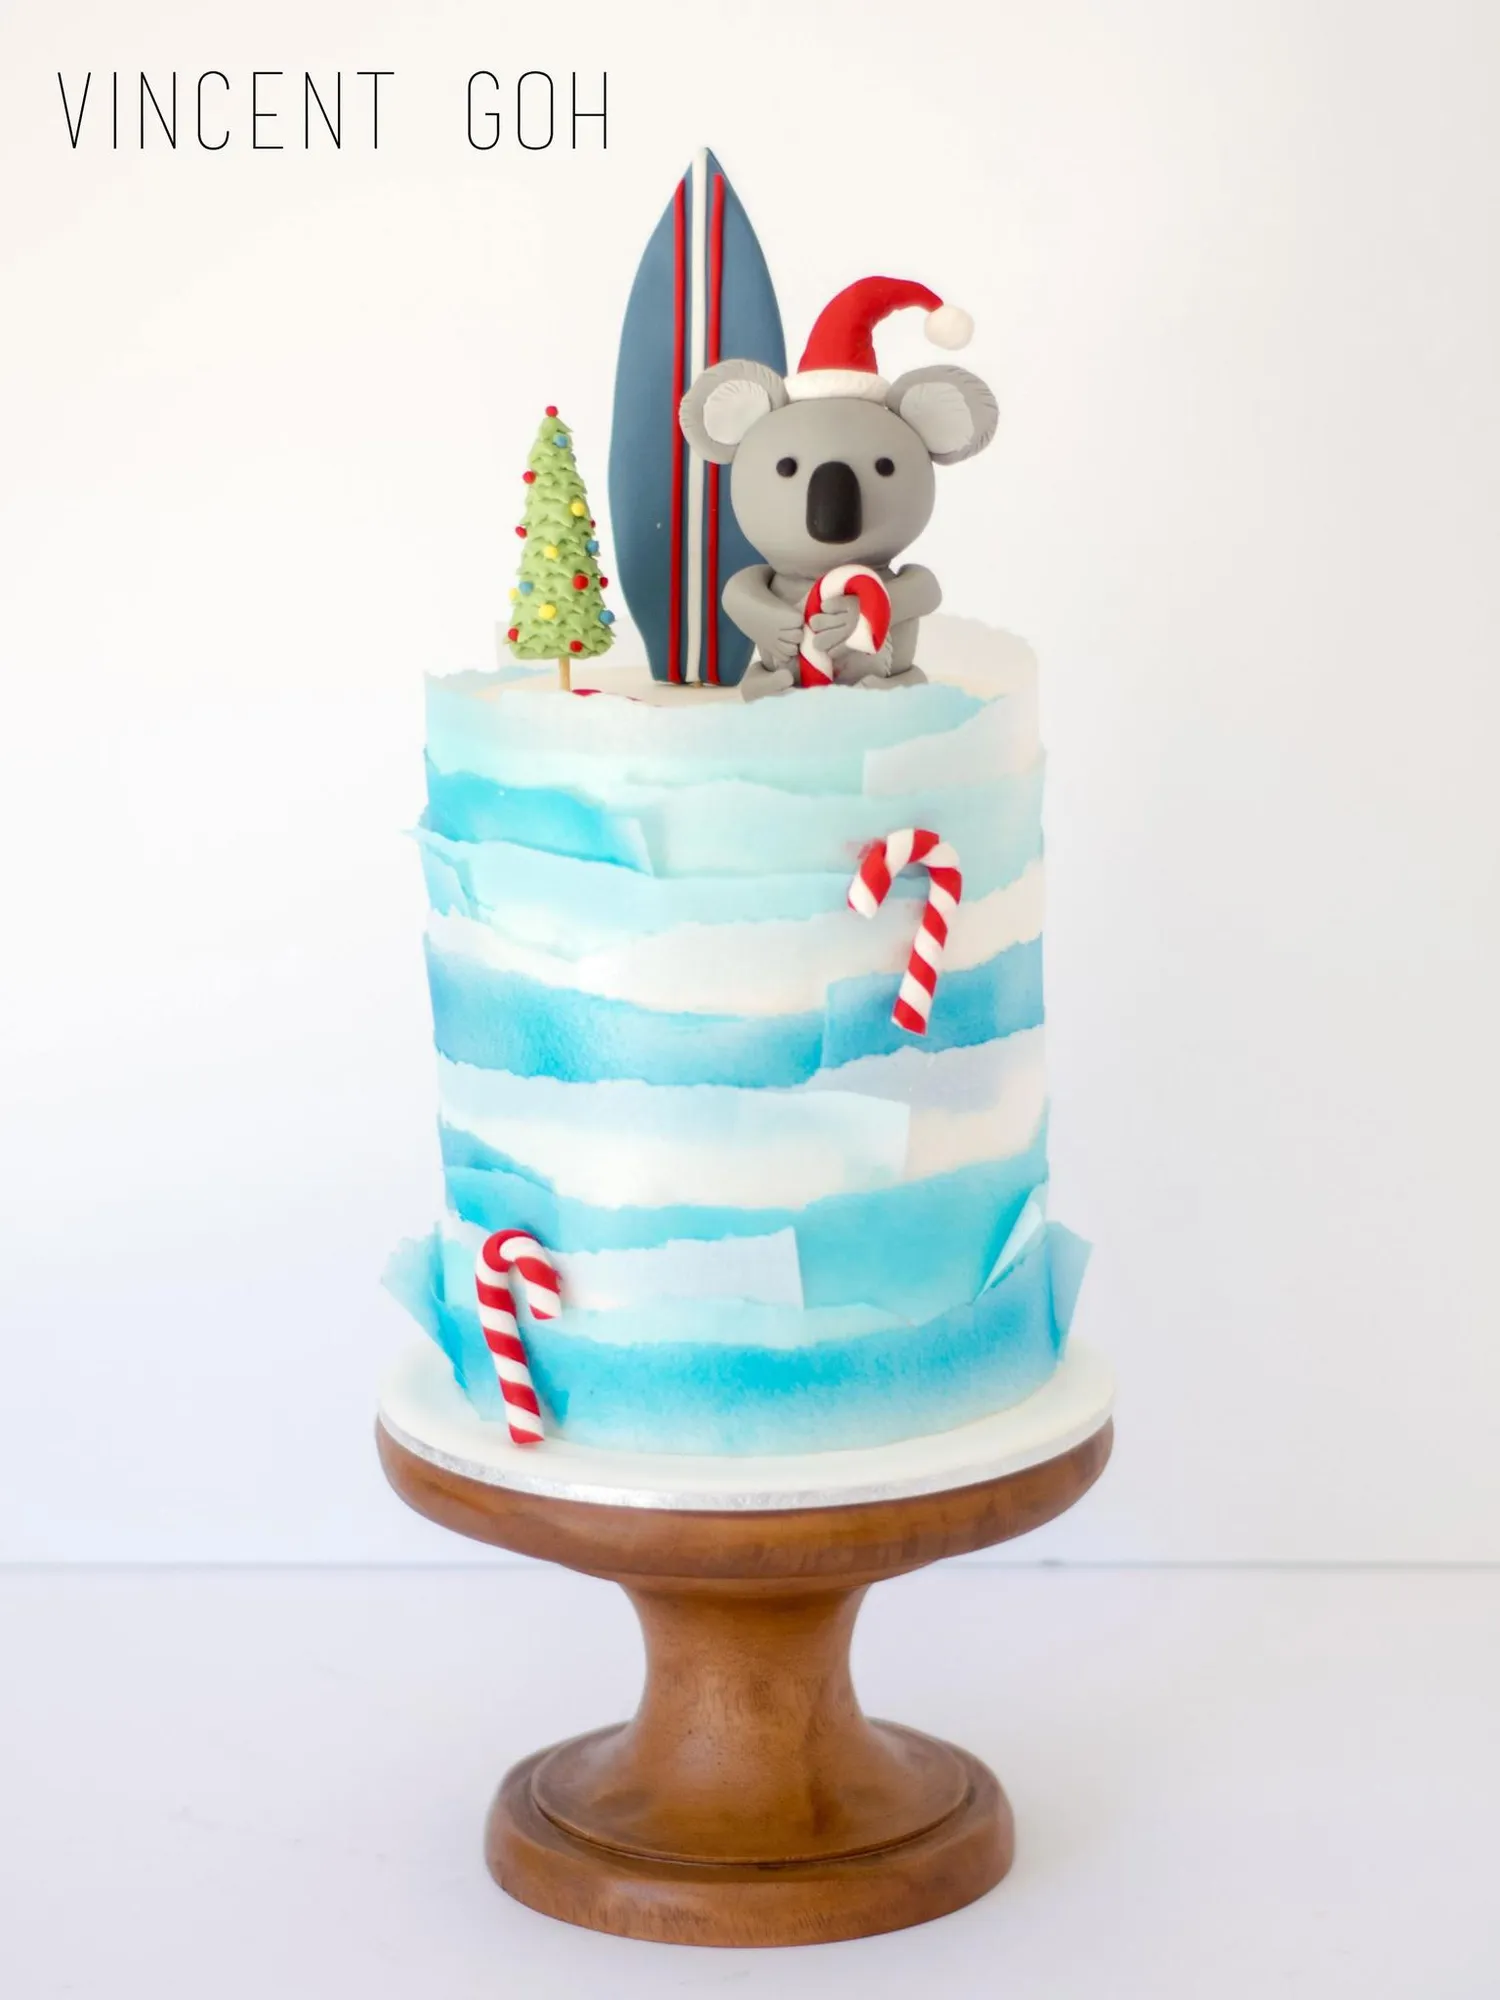
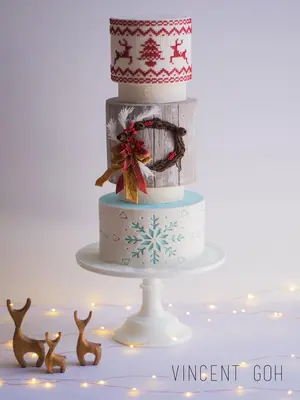
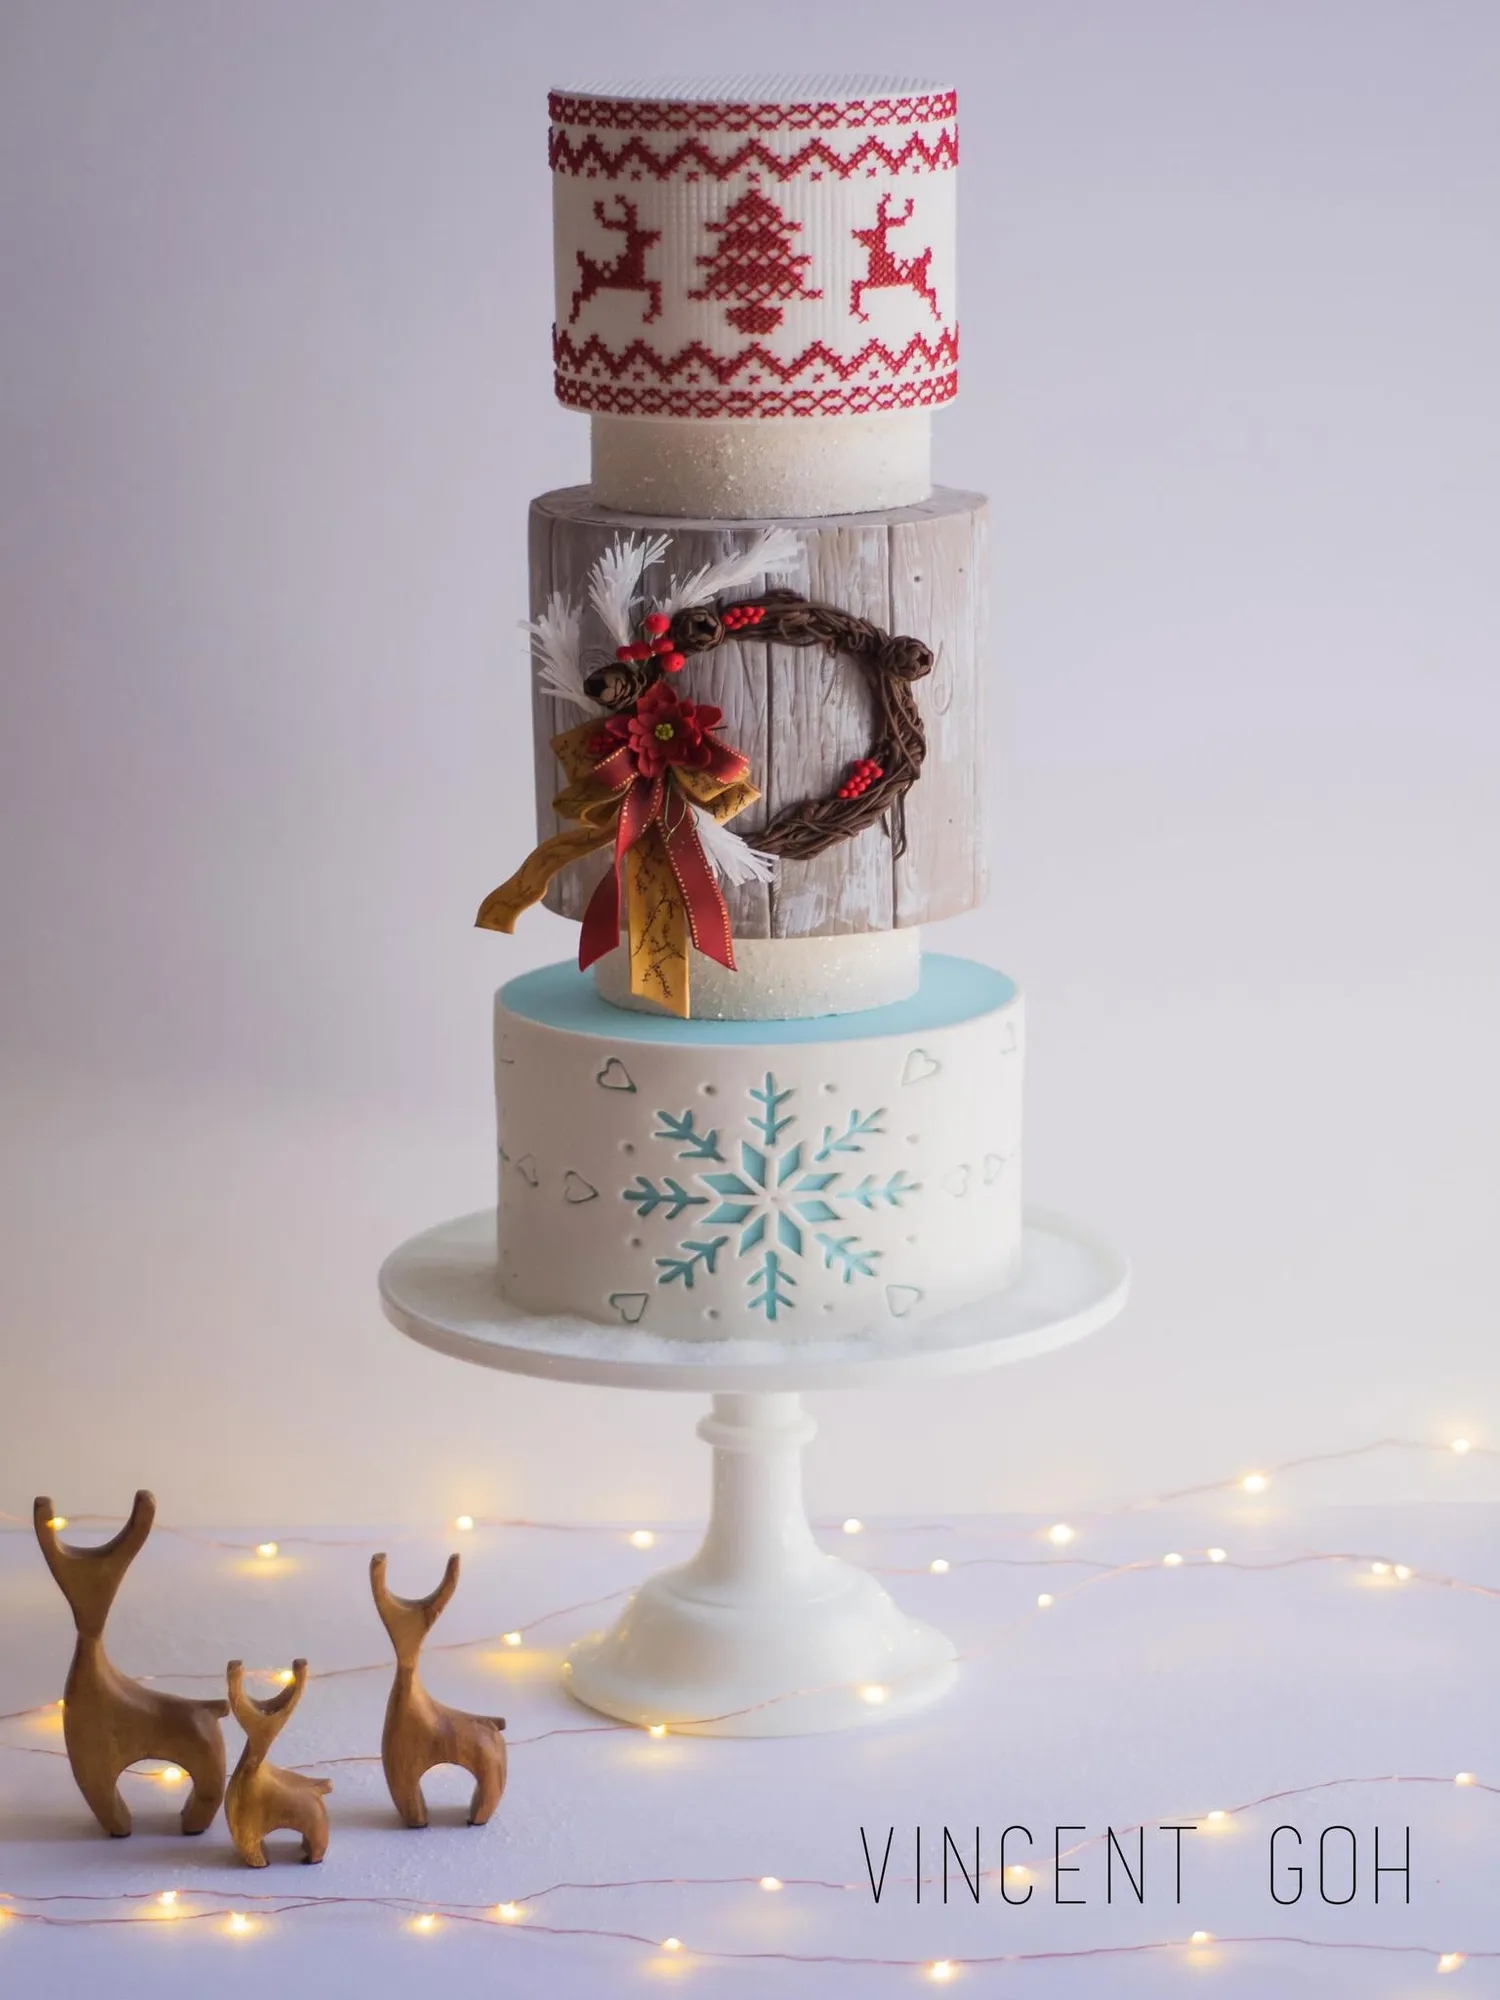
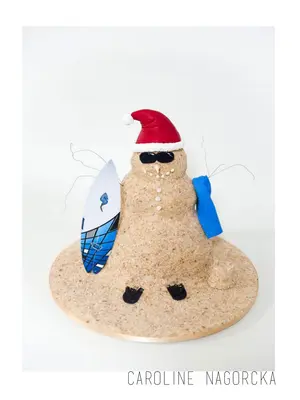
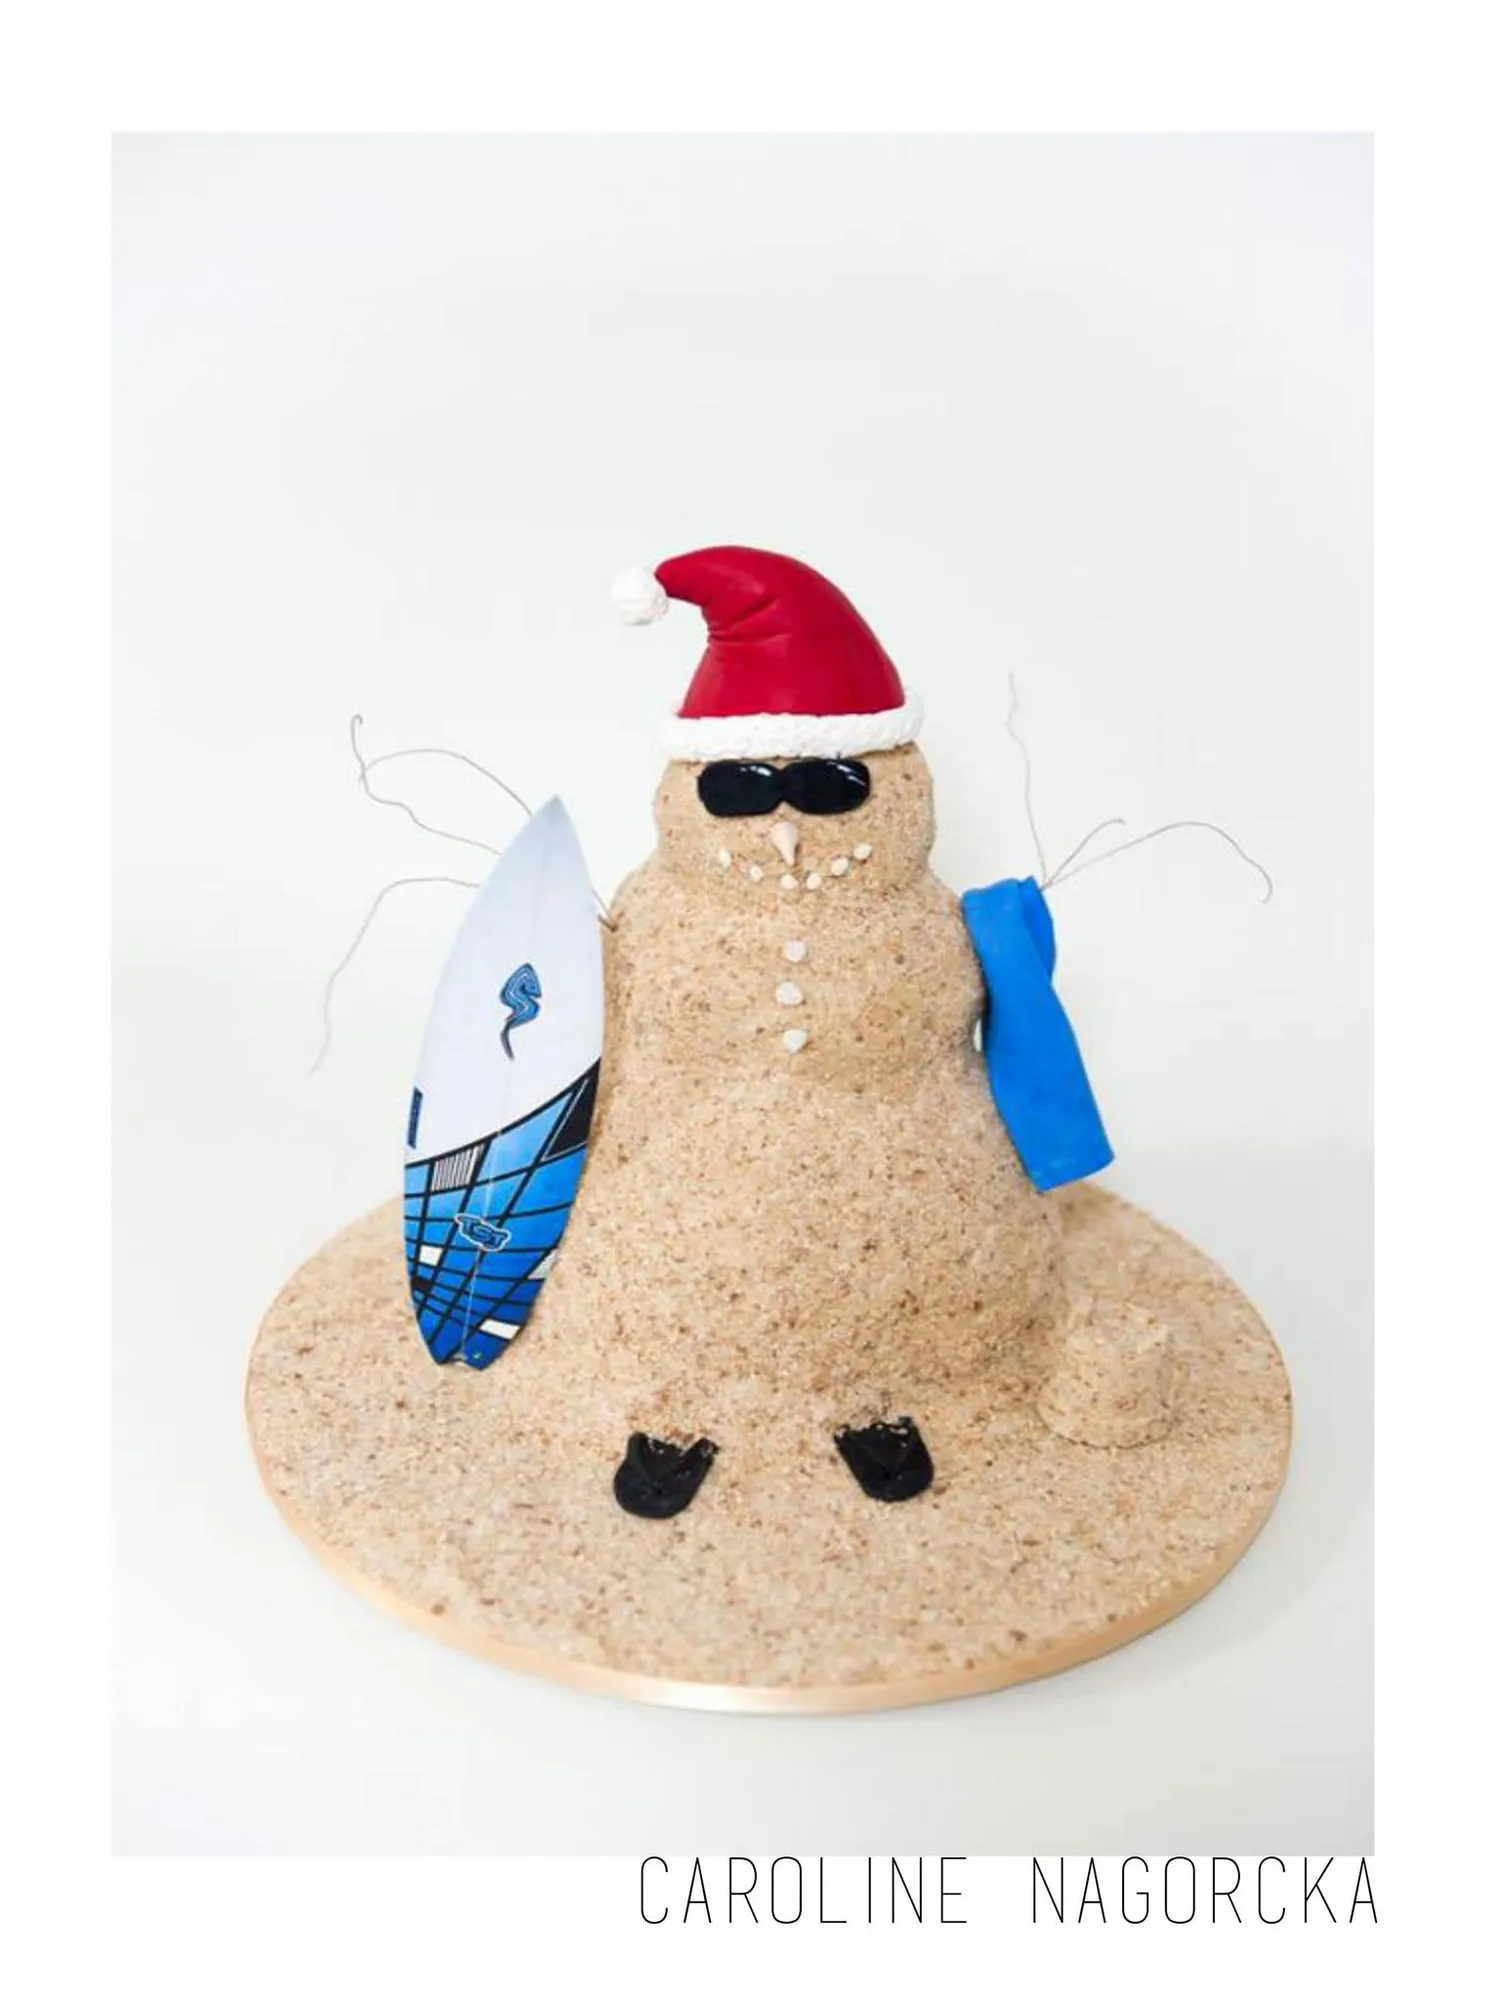
Christmas & Celebration inspiration Be inspired this Christmas season with this collection of beautiful images by decorators from around the globe
Page 76 text
Vincent Goh
Page 77 text
Vincent Goh
Page 78 text
Caroline Nagorcka
Page 79 text
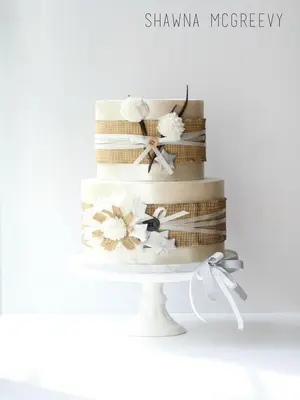
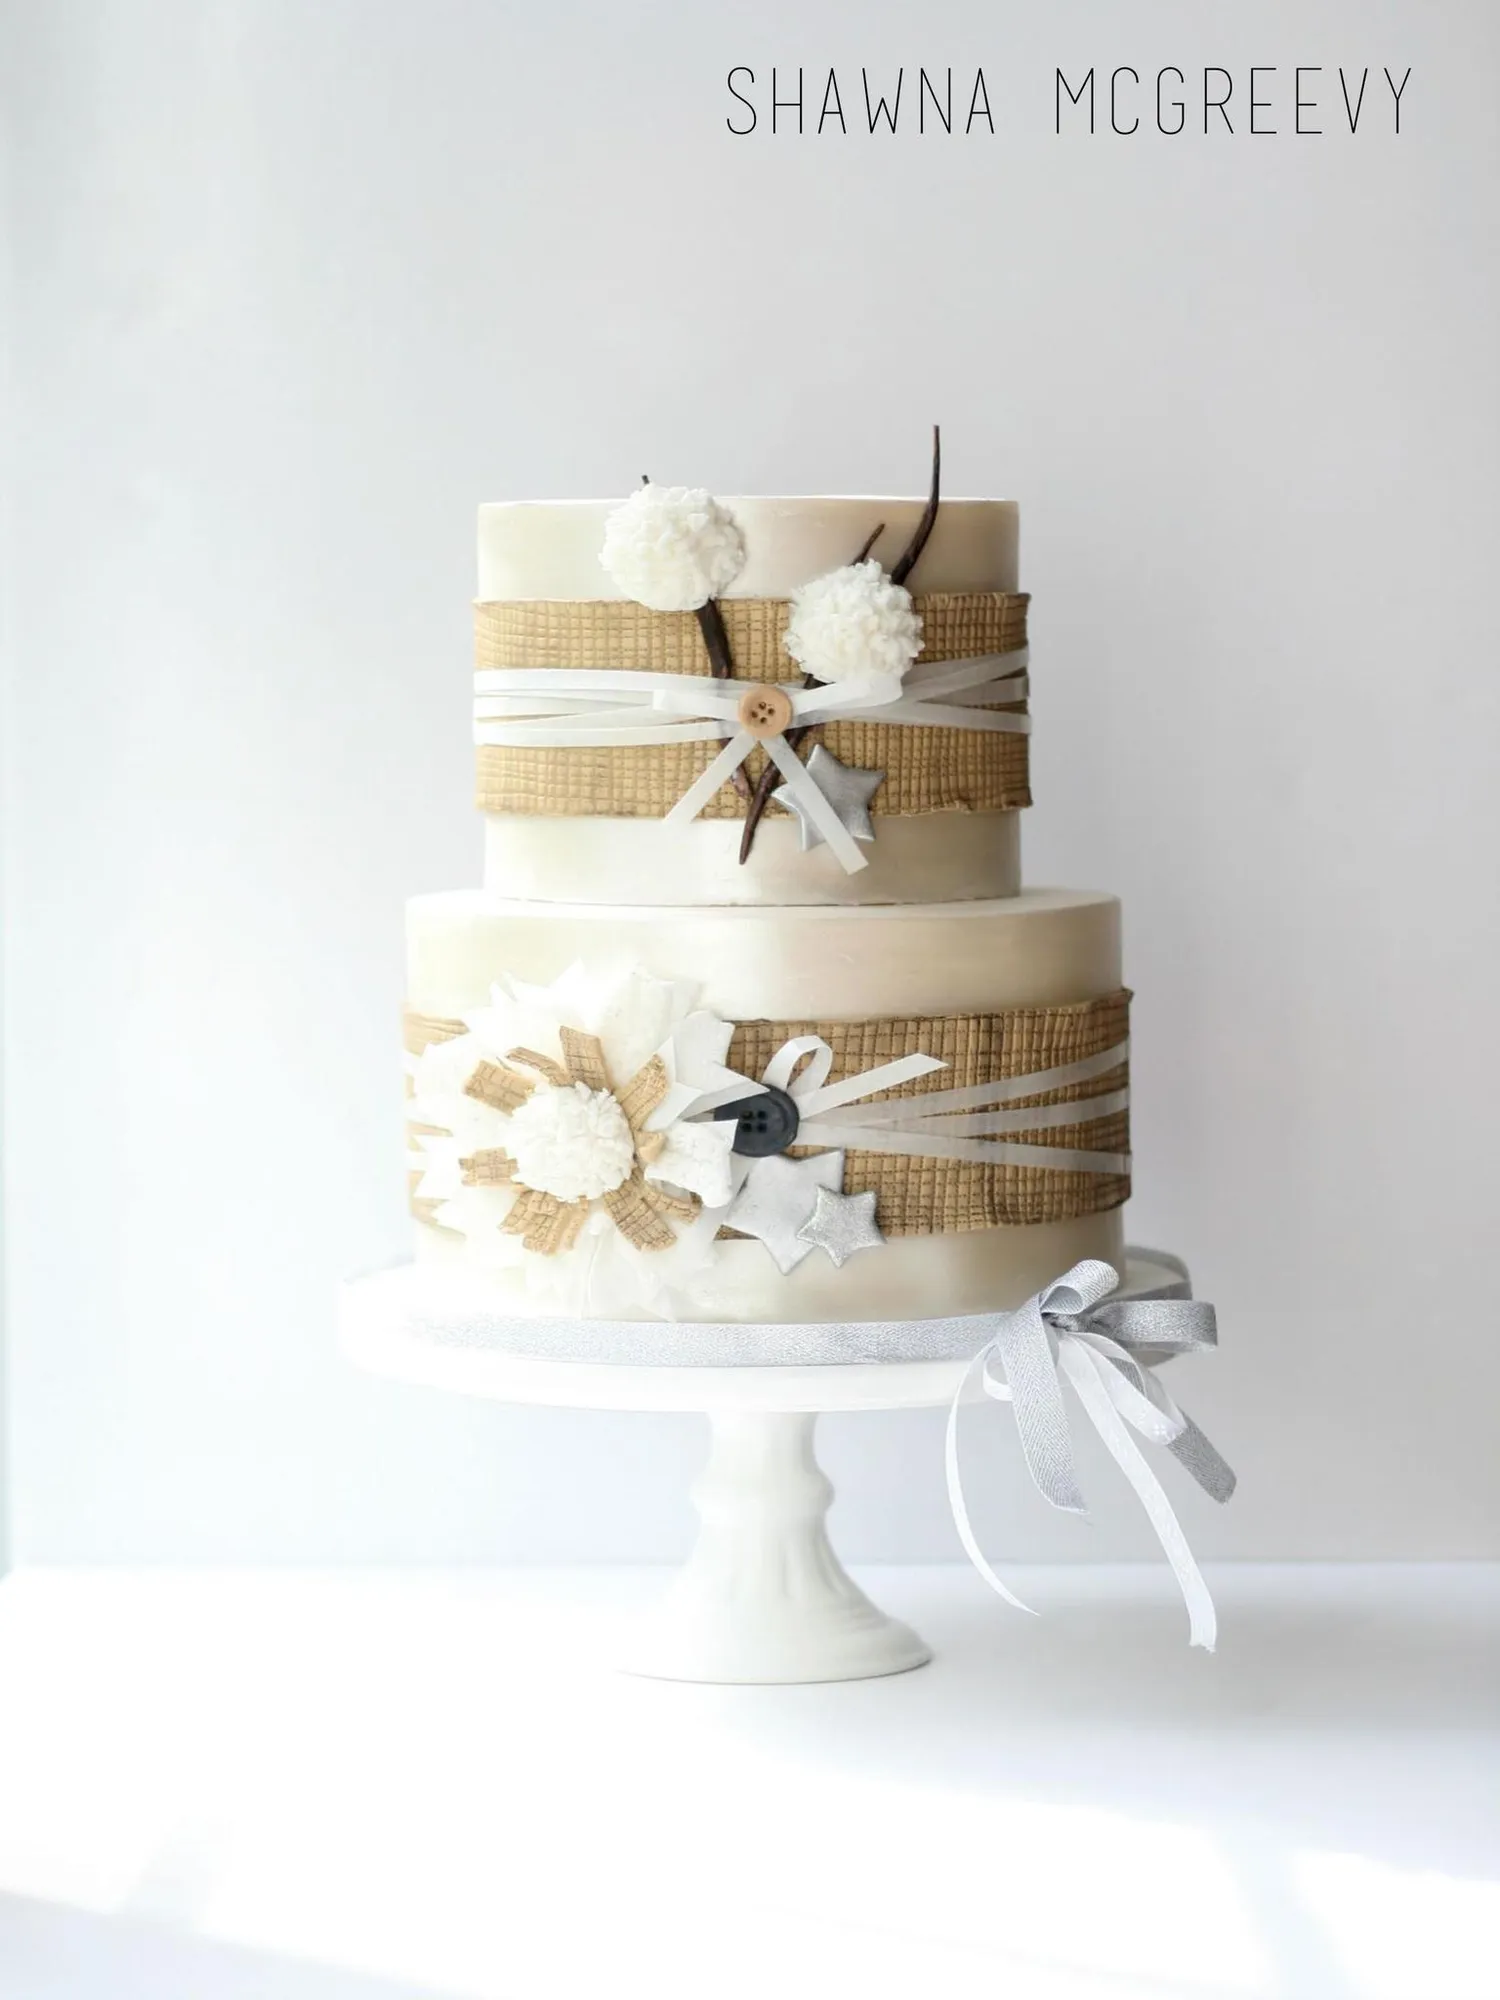
Shawna McGreevy
Page 80 text
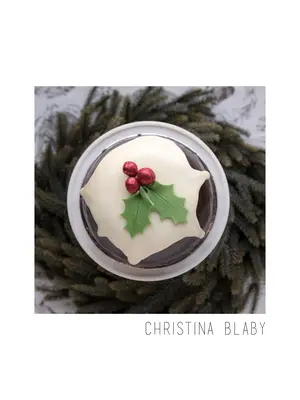
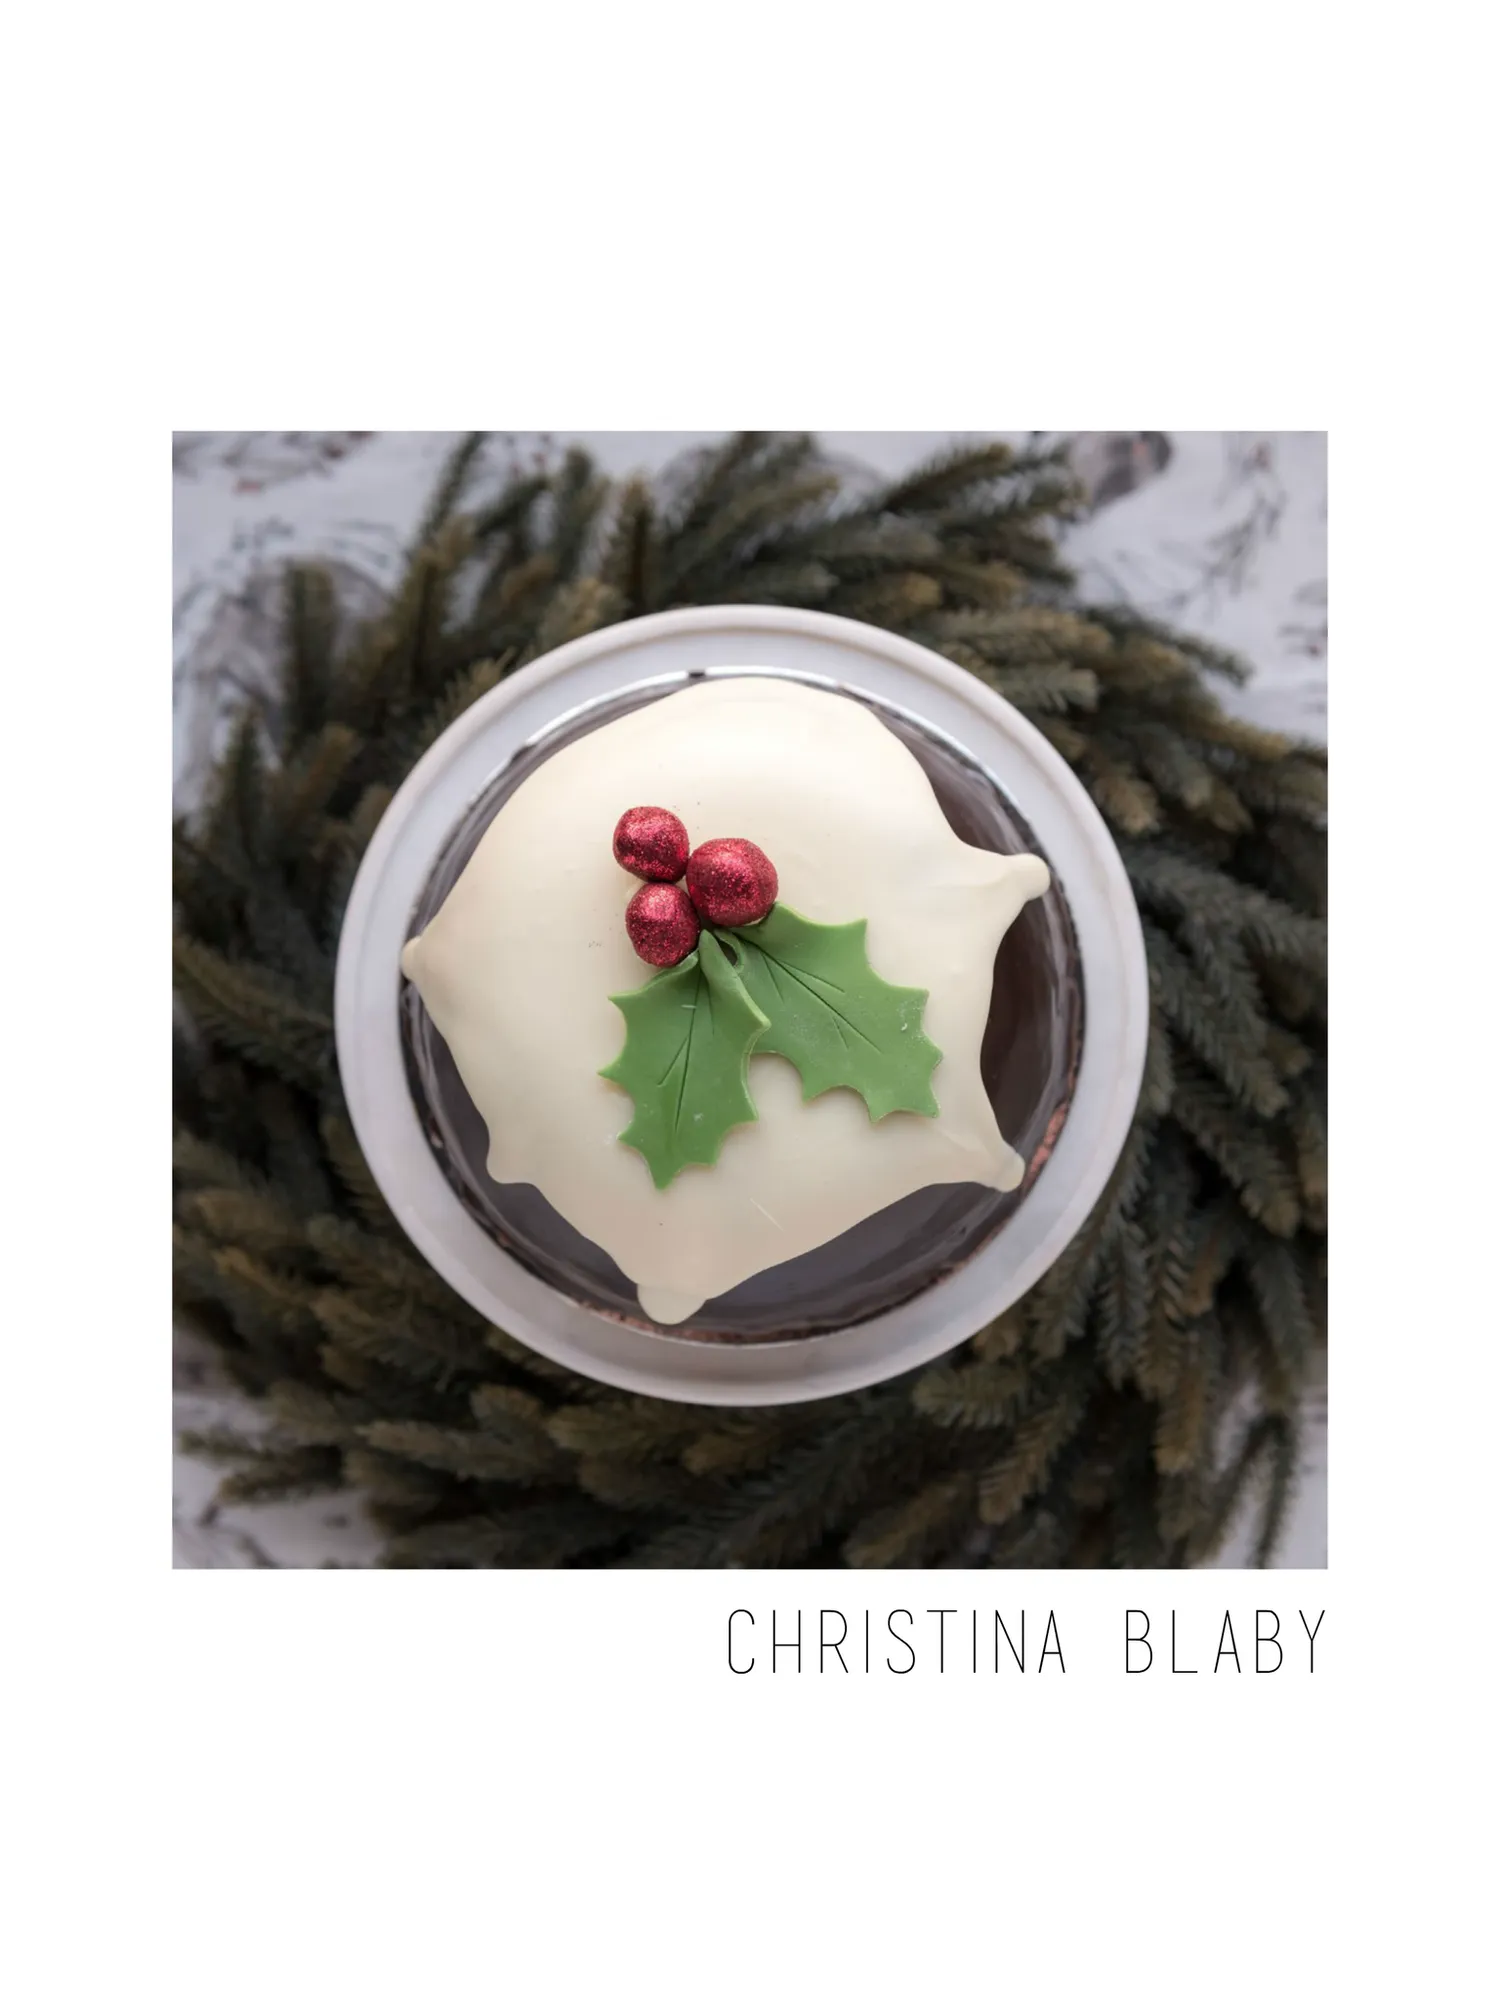
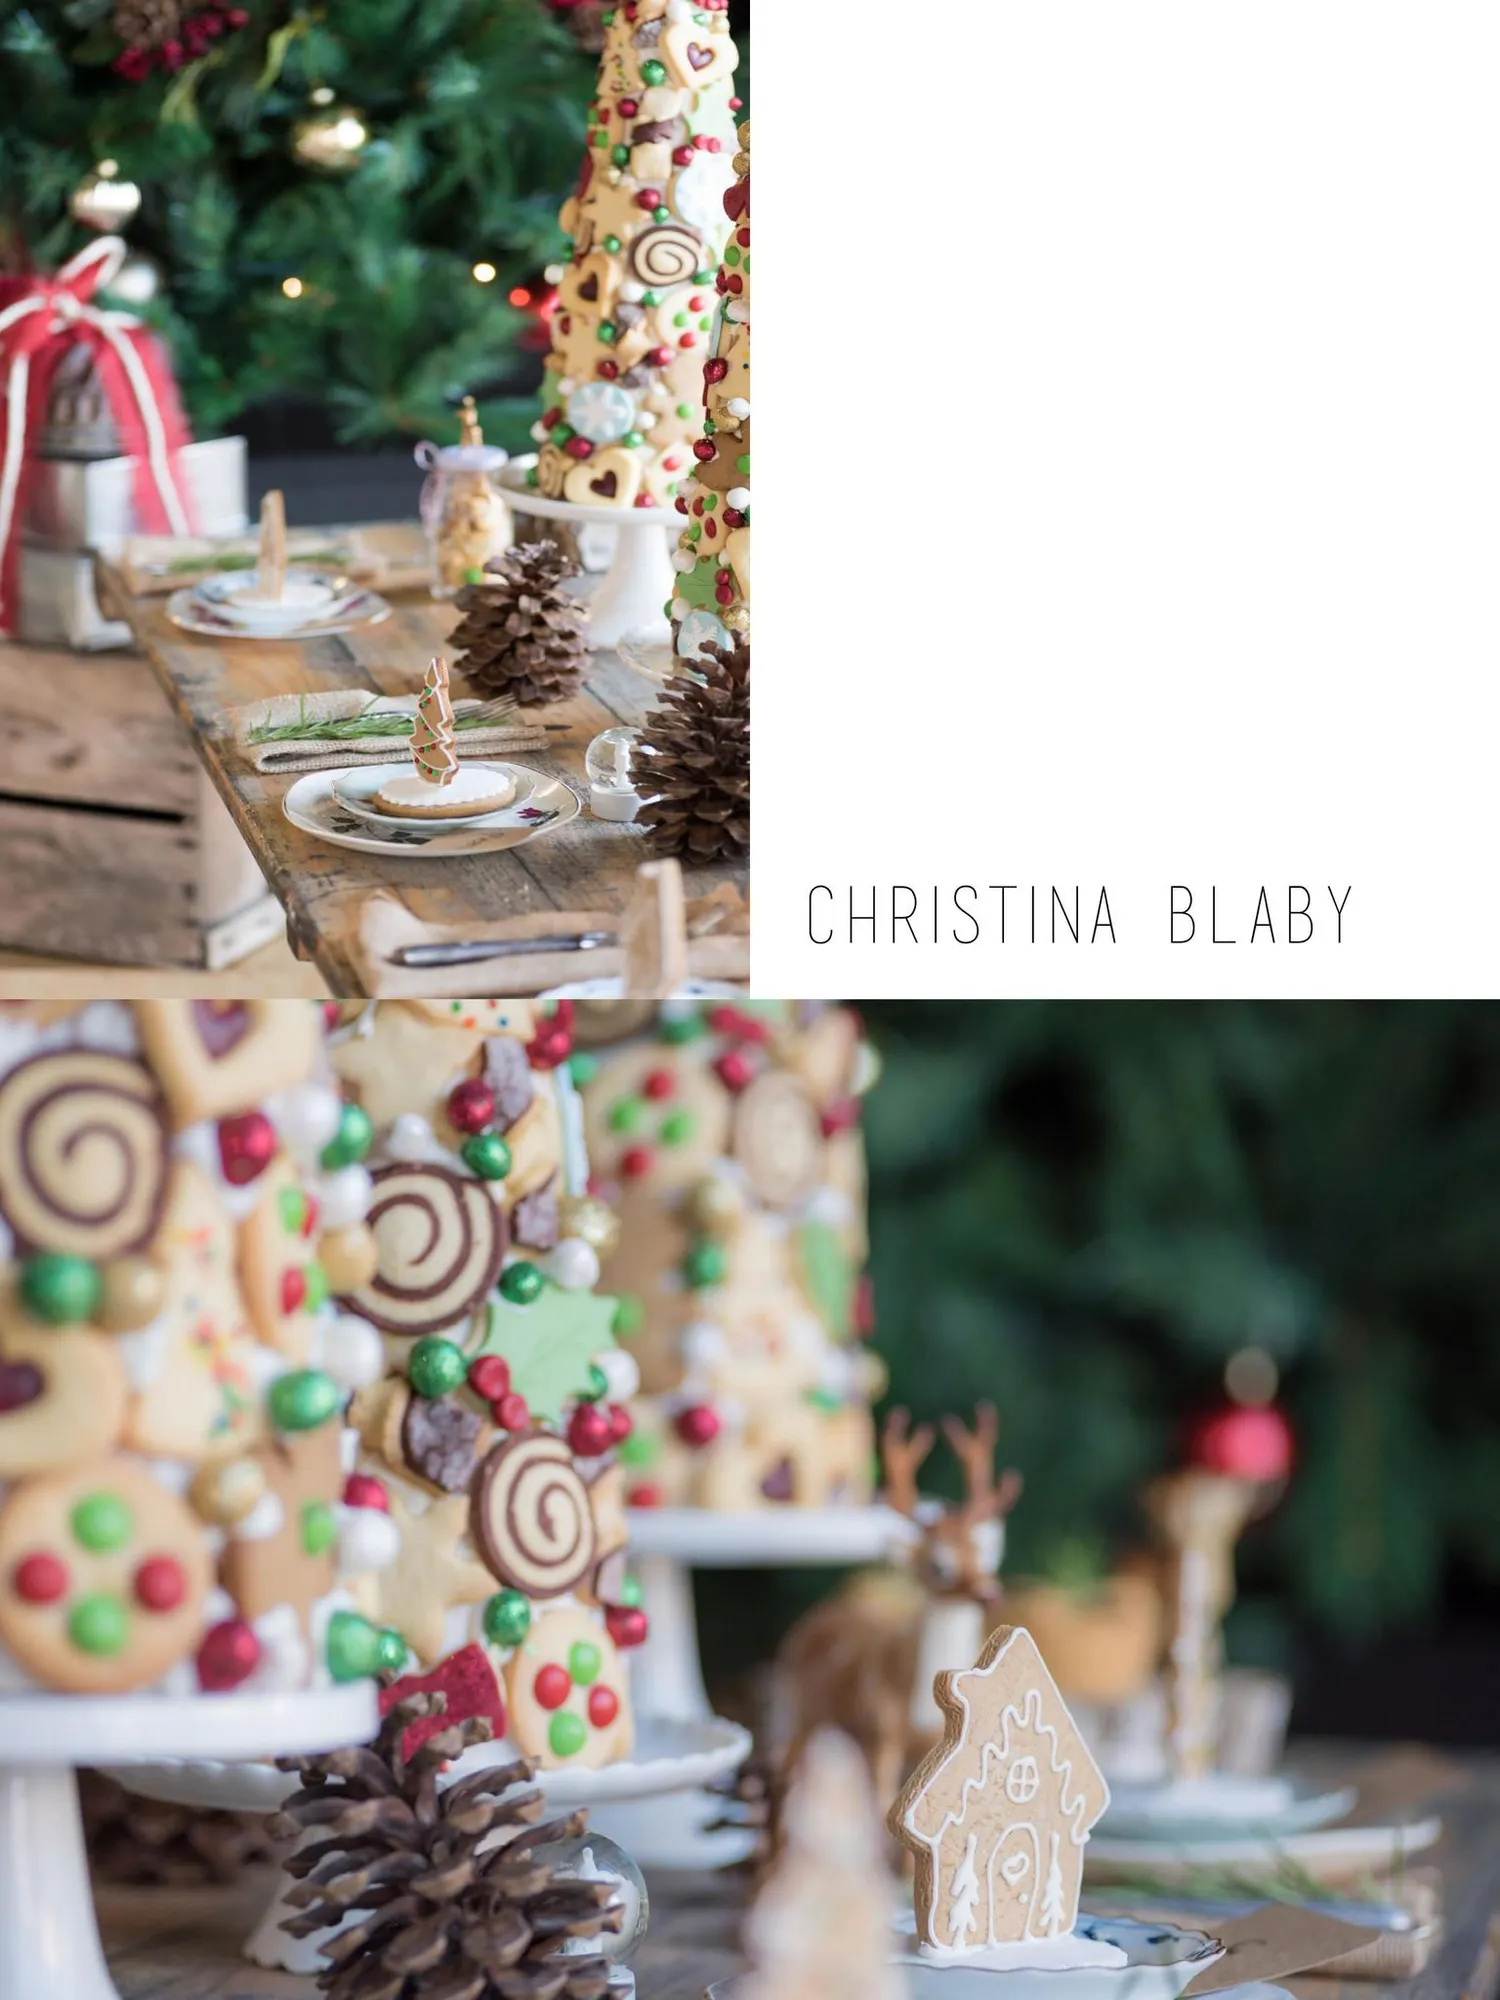
Christina Blaby
Page 81 text
CAKE CRAFT gourmet cakes byyou CAKE CAKE CRAFT CRAFT rolled modeling Fondant GumPaste CAKEC RAFT CAKE Tolled rolled CRAFR Fondant Fondant Pondant Fondant CAKEERAPT Fondant umPaste Gum Past FEATYTOUSE fondant& 250g gumpaste 680g 1KG5KG Armatre Winn Arbatarrine CAKE CICRAFT CARE CRAFT 3m&6m anodised cakepans armaturewire ne CSAF CMC TITANIUMDIOX ISOMALT GLYCERINE titanium dioxide glycerine isomalt aeryliccaketoppers cmc gel mimi airbrush compressors colouring gels 130g&250g [email protected] www.cakecraftaustralia.com.au
Page 82 text
Christina Blaby
Page 84 text
Rebecca Doherty {Make this cake} TUTORIAL ON PAGE 44
Page 85 text
cakesbyximena.com ~ ACDN members receive a discount! (ACDN members, log on to the ACDN website for discount code) DOWNLOAD & PRINT Cake! magazine is now available for download and print. You can read offline or print your favourite tutorials- no more fondant on your ipad! CLICK HERE f To advertise in Cake! magazine, contact: [email protected]
Page 86 text
{Make this cake} TUTORIAL ON PAGE 26 Jacki Fanto
Page 87 text
Looking For A Class.... ARNDELL PARK WILLOUGHBY NORTHMEAD LIVERPOOL ALEXANDRIA BELMONT CARINGBAH CANBERRA - NOW OPEN www.cakedecoratingsolutions.com.au www.cakedecoratingsolutions.com.au
Page 88 text
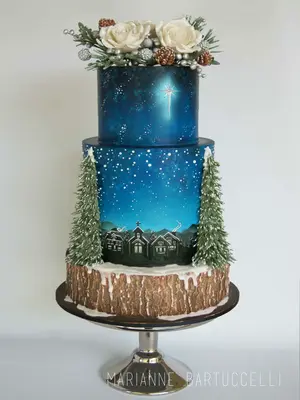
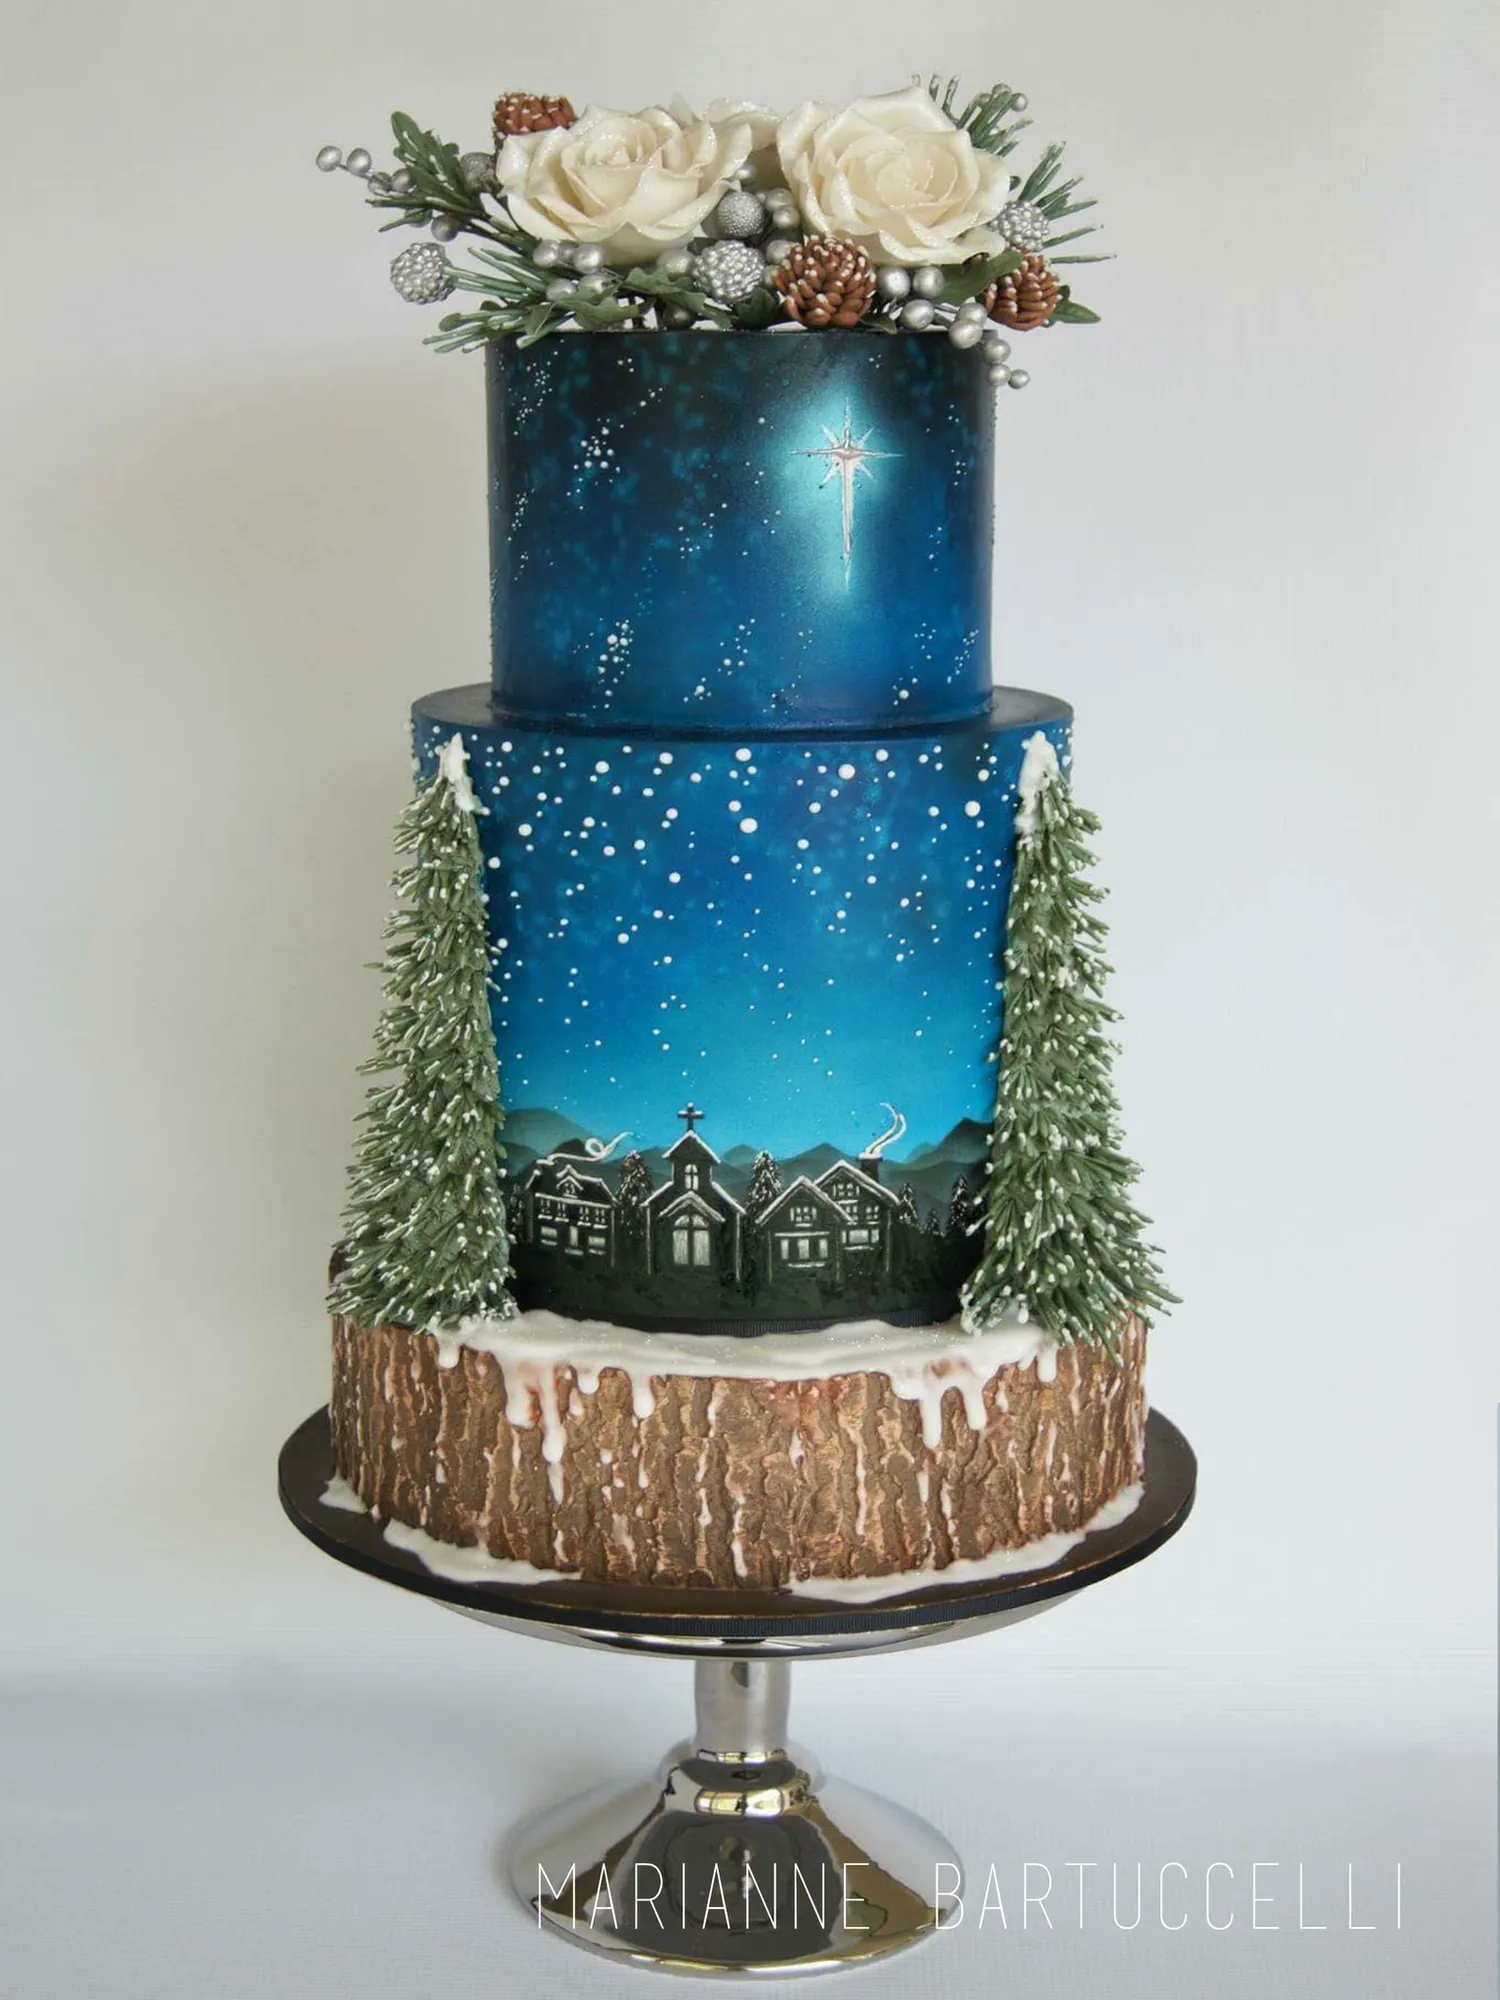
Marianne Bartuccelli
Page 89 text
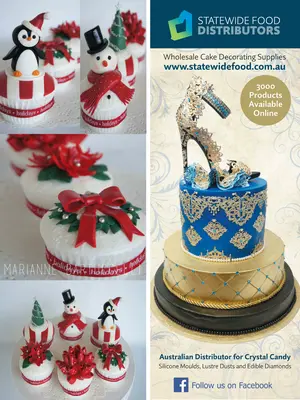
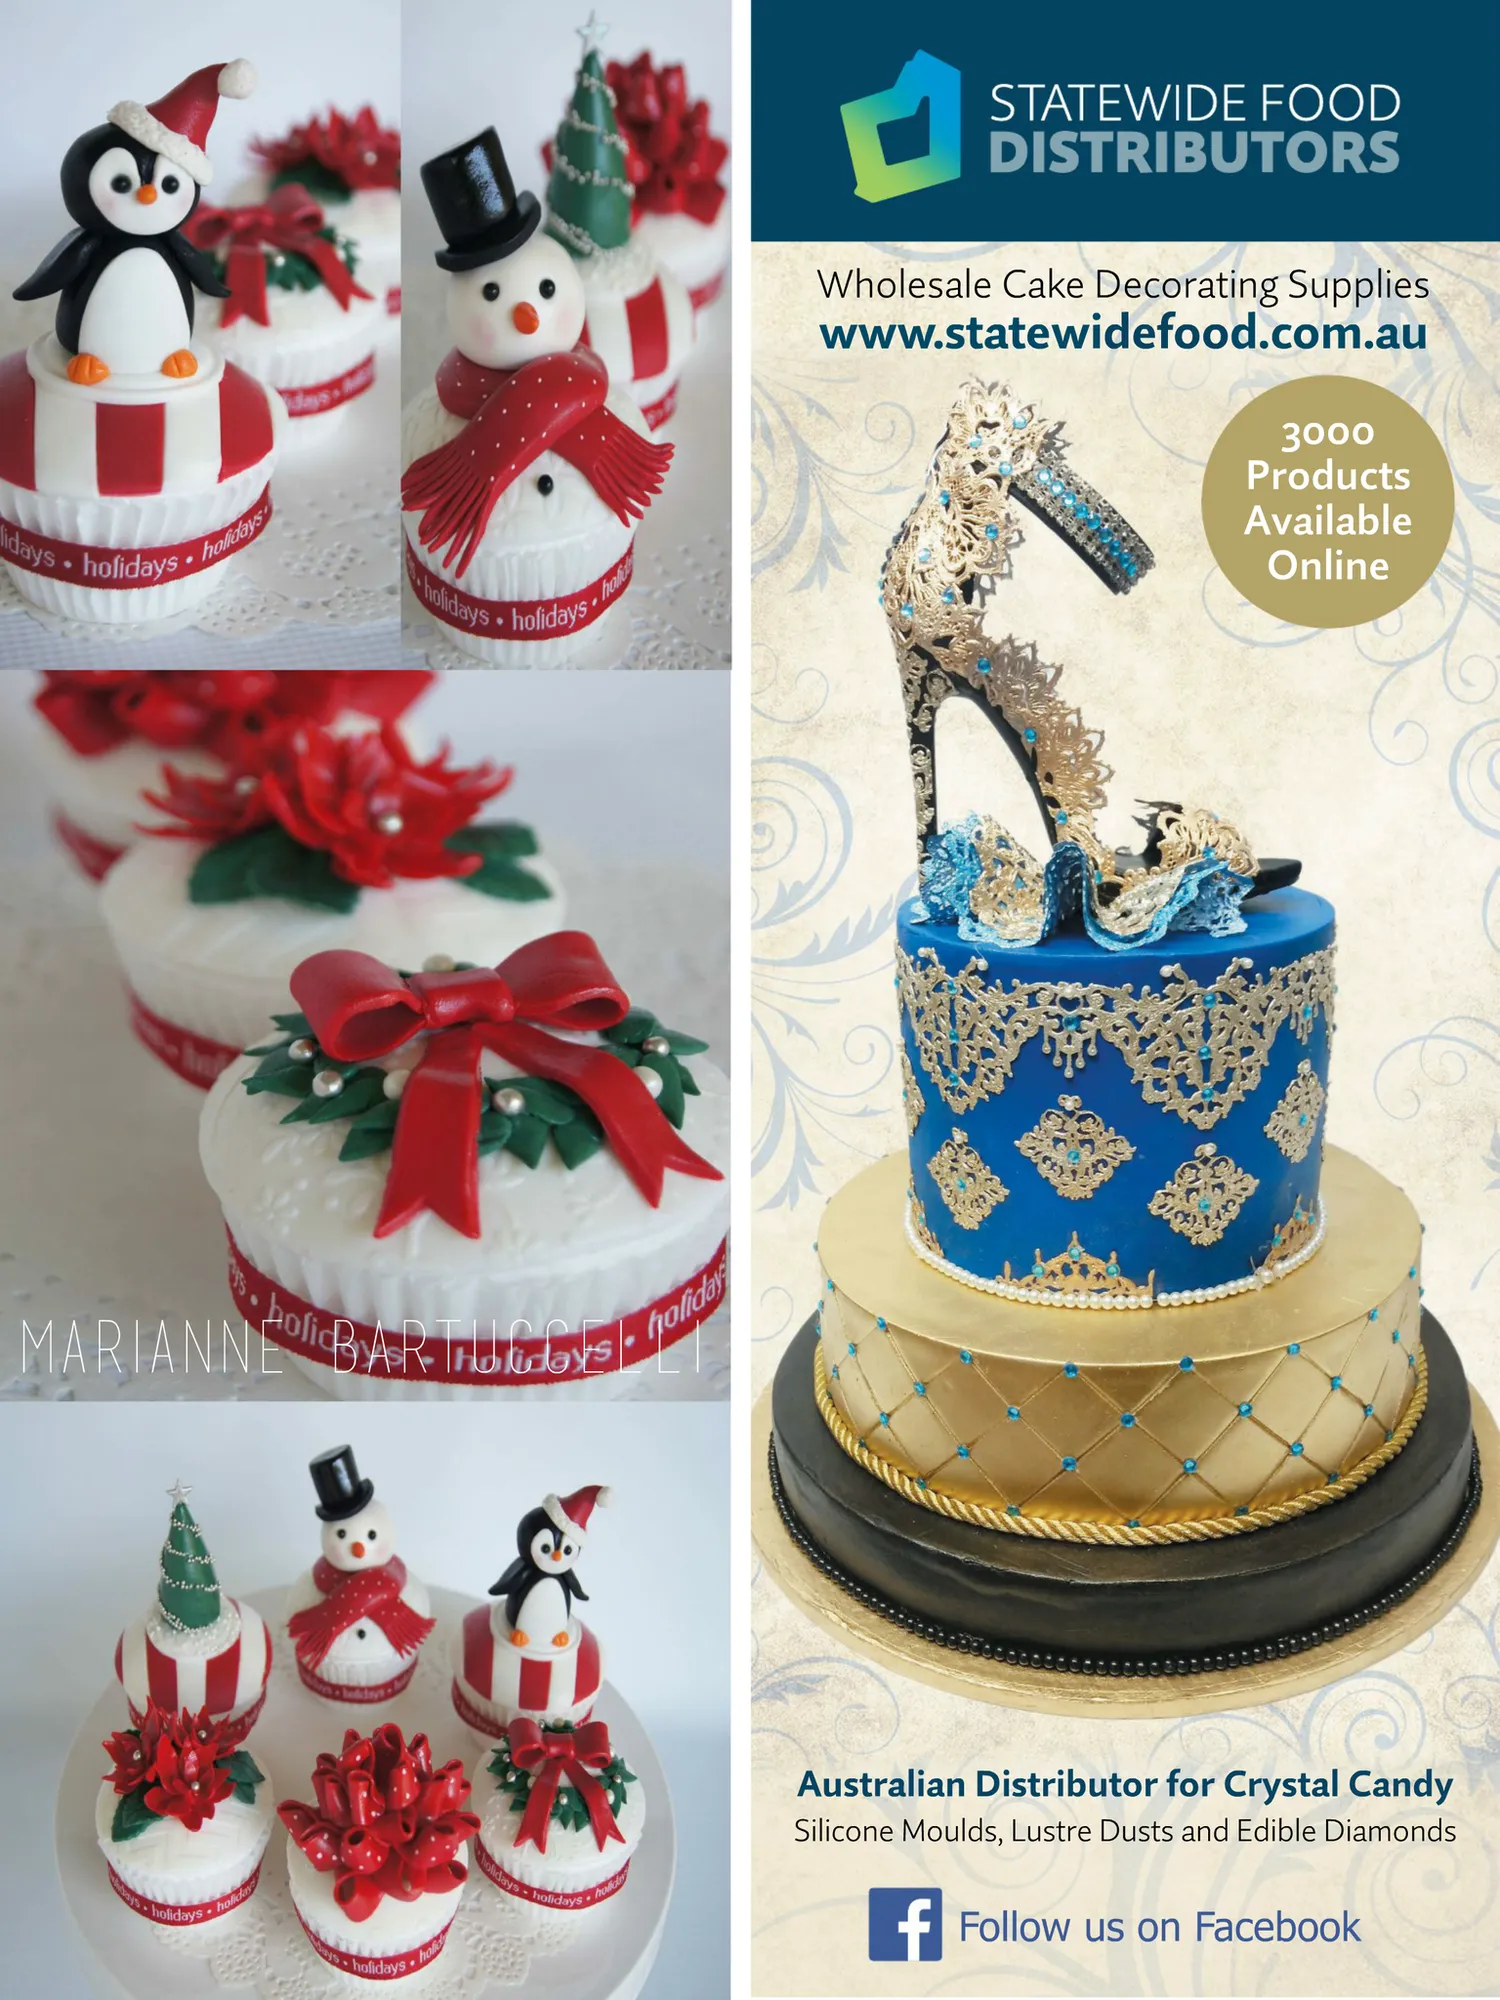
Wholesale Cake Decorating Supplies www.statewidefood.com.au 3000 Products Available Online Marianne Bartuccelli Australian Distributor for Crystal Candy Silicone Moulds, Lustre Dusts and Edible Diamonds Follow us on Facebook


Page 90 text
Serdar Yener


Page 91 text
Interviews In this issue we interview the incredible Shawna McGreevy and Jacki Fanto, two of the world's leading cake artists
Page 92 text
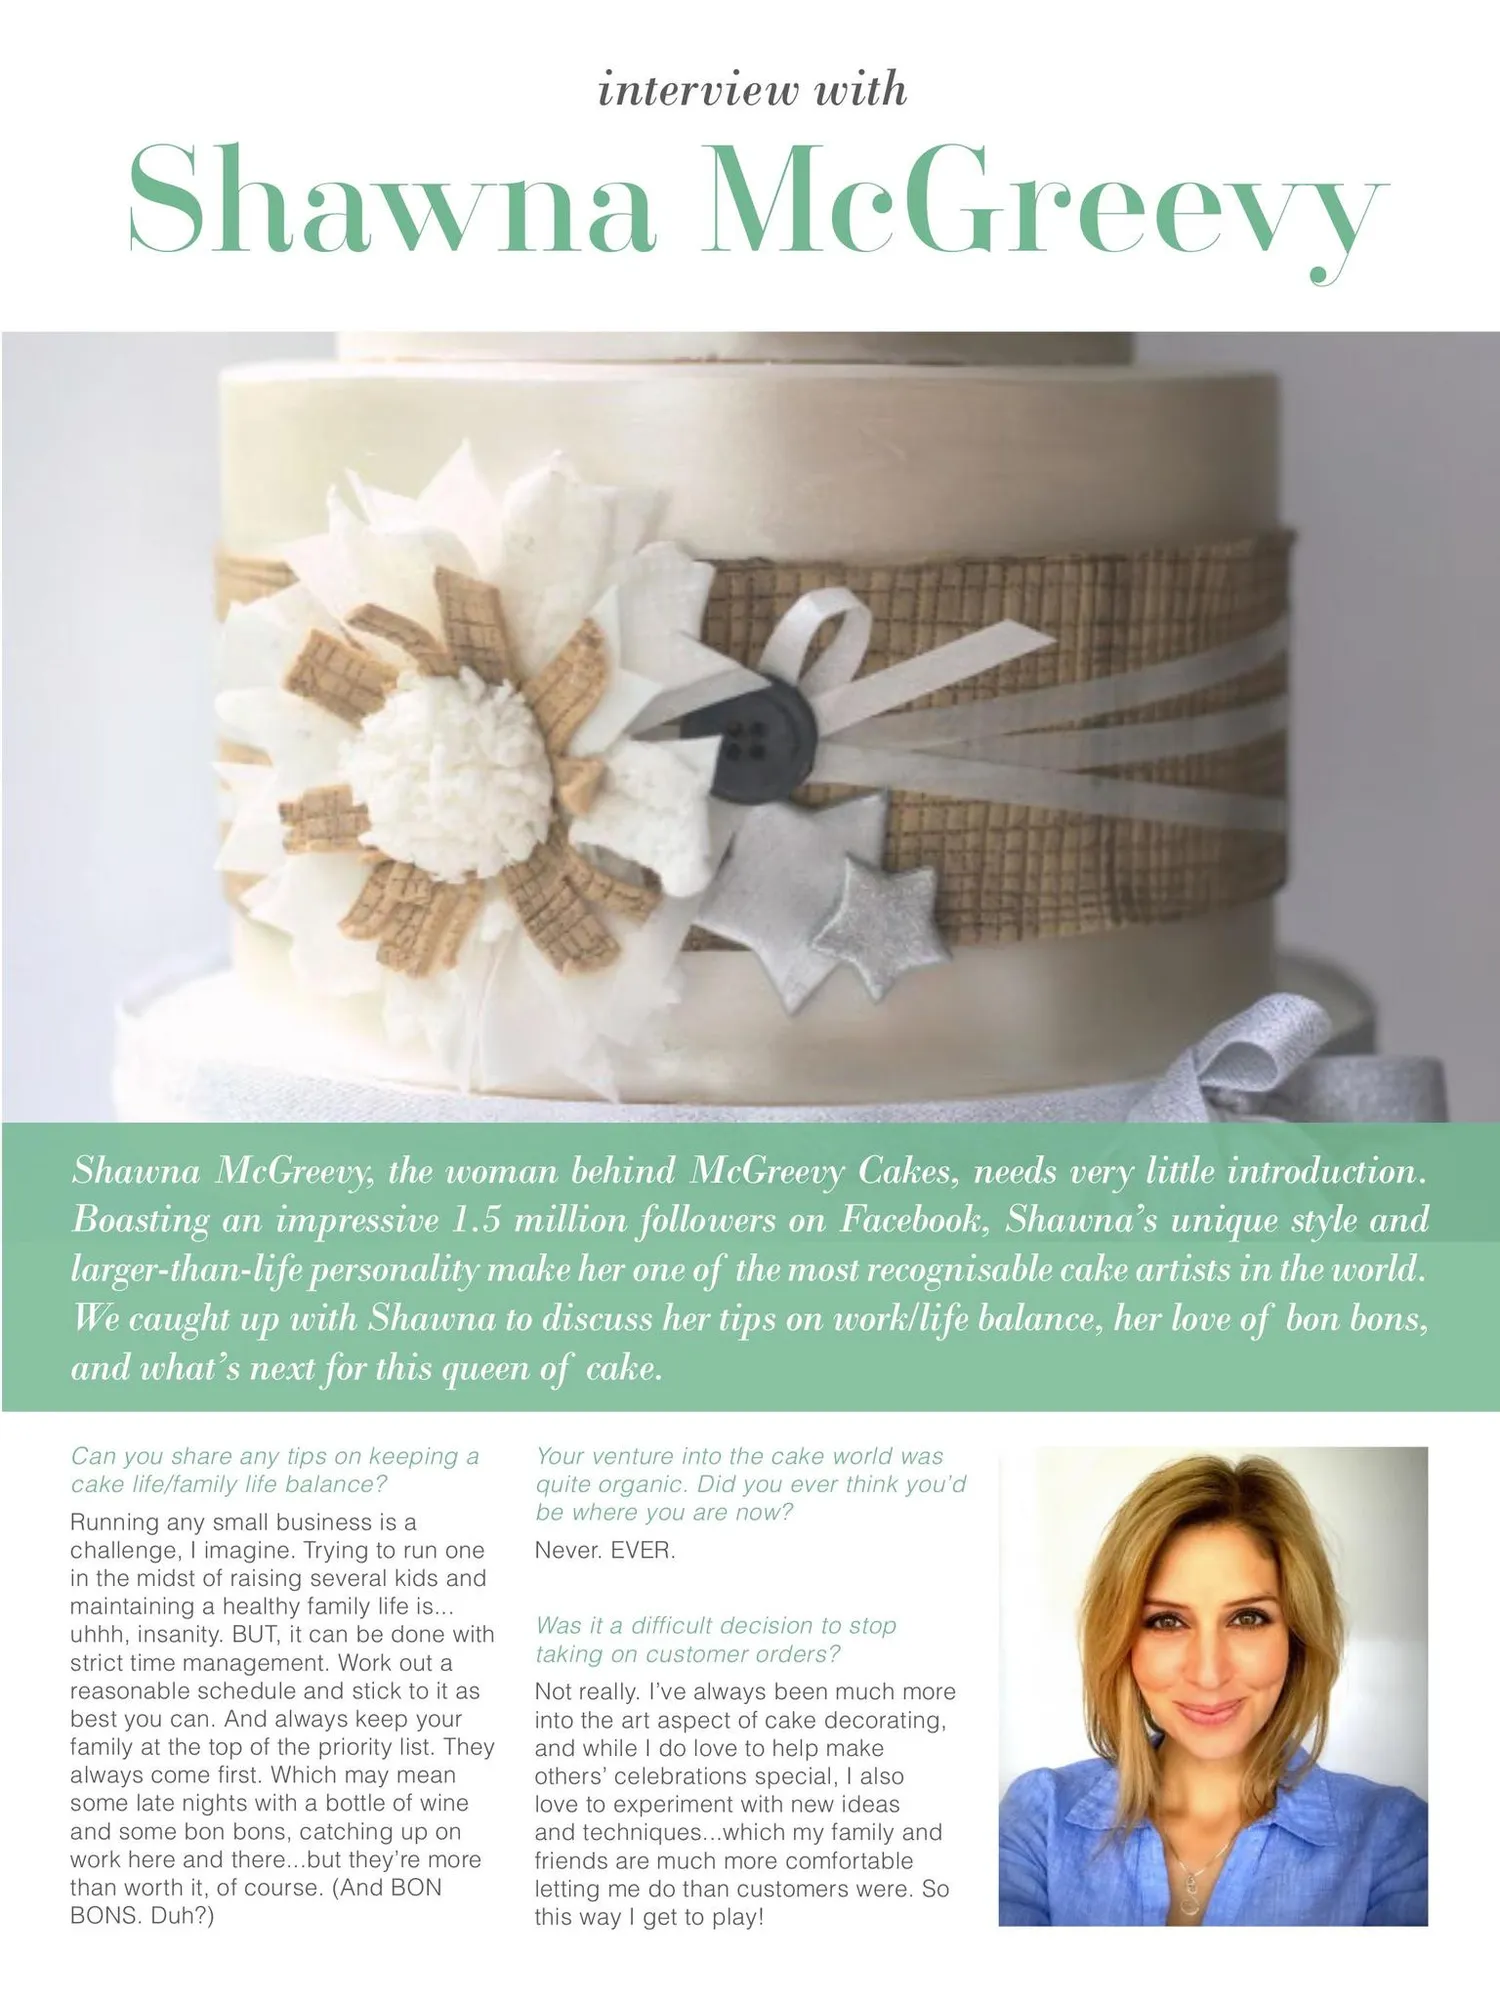
Shawna McGreevy interview with Shawna McGreevy, the woman behind McGreevy Cakes, needs very little introduction. Boasting an impressive 1.5 million followers on Facebook, Shawna’s unique style and larger-than-life personality make her one of the most recognisable cake artists in the world. We caught up with Shawna to discuss her tips on work/life balance, her love of bon bons, and what’s next for this queen of cake. Can you share any tips on keeping a cake life/family life balance? Running any small business is a challenge, I imagine. Trying to run one in the midst of raising several kids and maintaining a healthy family life is... uhhh, insanity. BUT, it can be done with strict time management. Work out a reasonable schedule and stick to it as best you can. And always keep your family at the top of the priority list. They always come first. Which may mean some late nights with a bottle of wine and some bon bons, catching up on work here and there...but they’re more than worth it, of course. (And BON BONS. Duh?) Your venture into the cake world was quite organic. Did you ever think you’d be where you are now? Never. EVER. Was it a difficult decision to stop taking on customer orders? Not really. I’ve always been much more into the art aspect of cake decorating, and while I do love to help make others’ celebrations special, I also love to experiment with new ideas and techniques...which my family and friends are much more comfortable letting me do than customers were. So this way I get to play!
Page 93 text
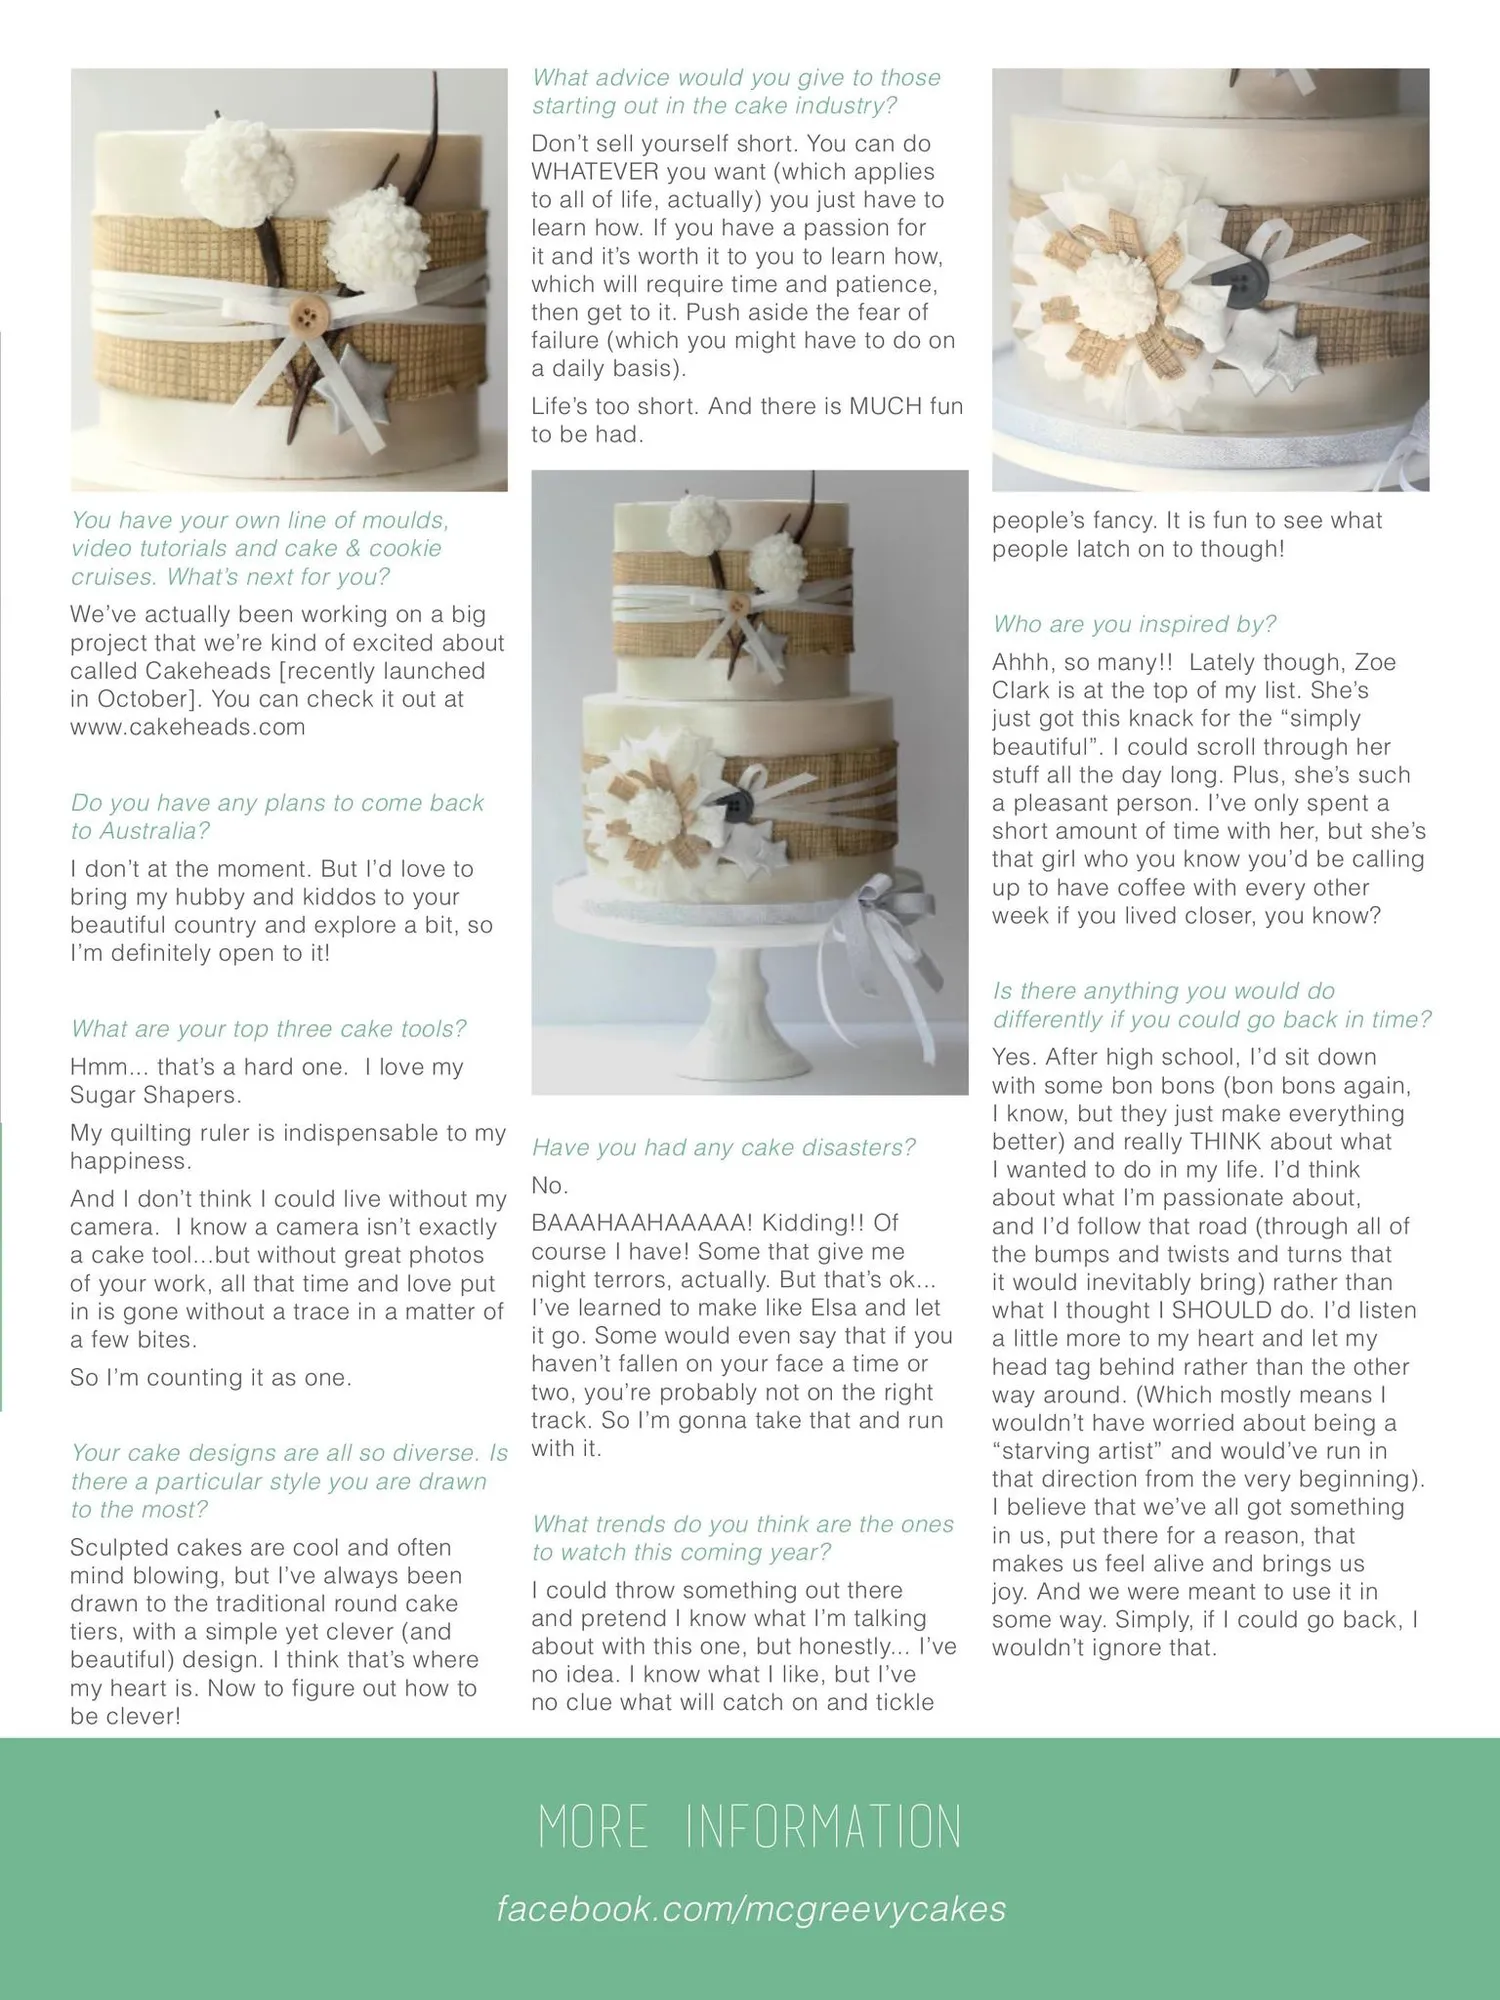
What advice would you give to those starting out in the cake industry? Don’t sell yourself short. You can do WHATEVER you want (which applies to all of life, actually) you just have to learn how. If you have a passion for it and it’s worth it to you to learn how, which will require time and patience, then get to it. Push aside the fear of failure (which you might have to do on a daily basis). Life’s too short. And there is MUCH fun to be had. You have your own line of moulds, video tutorials and cake & cookie cruises. What’s next for you? people’s fancy. It is fun to see what people latch on to though! We’ve
Page 94 text
a division of Over 8000 Cake Decorating SuppliesTop Leading Brands -5pm 9 n Mo pm 6 9 -Fri Tues 9-5pm Sat TO ACDN MEMBERS U2, 261 Princes Hwy, Hallam, Vic 3803 in OFF [email protected] www.mydreamcake.com.au
Page 95 text
AUSTRALIAN CAKE DECORATING NETWORK AUSTRALIAN CAKE DECORATING NETWORK PREFERRED SUPPLIERS PREFERRED SUPPLIERS Cake Decorating Solutions Cake Decorating Solutions AUSTRALIAN CAKE DECORATING NETWOR PREFERRED SUPPLIERS Cake Decorating So Our Preferred Suppliers all offer discounts for ACDN members. Find the Our Preferred Suppliers all offer discounts for ACDN members. Find the code on our website under 'Discounts' code on our website under 'Discounts' couture 10% discount cakes couture cakes sugar art creative cakes offcaroline's the entire range of products at: australia services caroline's sugar art services creative cakes australia Our Preferred Suppliers all offer discounts for ACDN members. code on our website under 'Discounts' caroline's sugar art services couture cakes 5% discount for wholesale and retail customers off the entire the range of products my cake thepod cake pod statewide food distributors statewide food dream my cake dream cake the cake pod 10% discount and a gift with every order creativ austr distributors my dream cake 5% discount off the entire range of products statewi distrib 5% discount off wholesale prices
Page 96 text
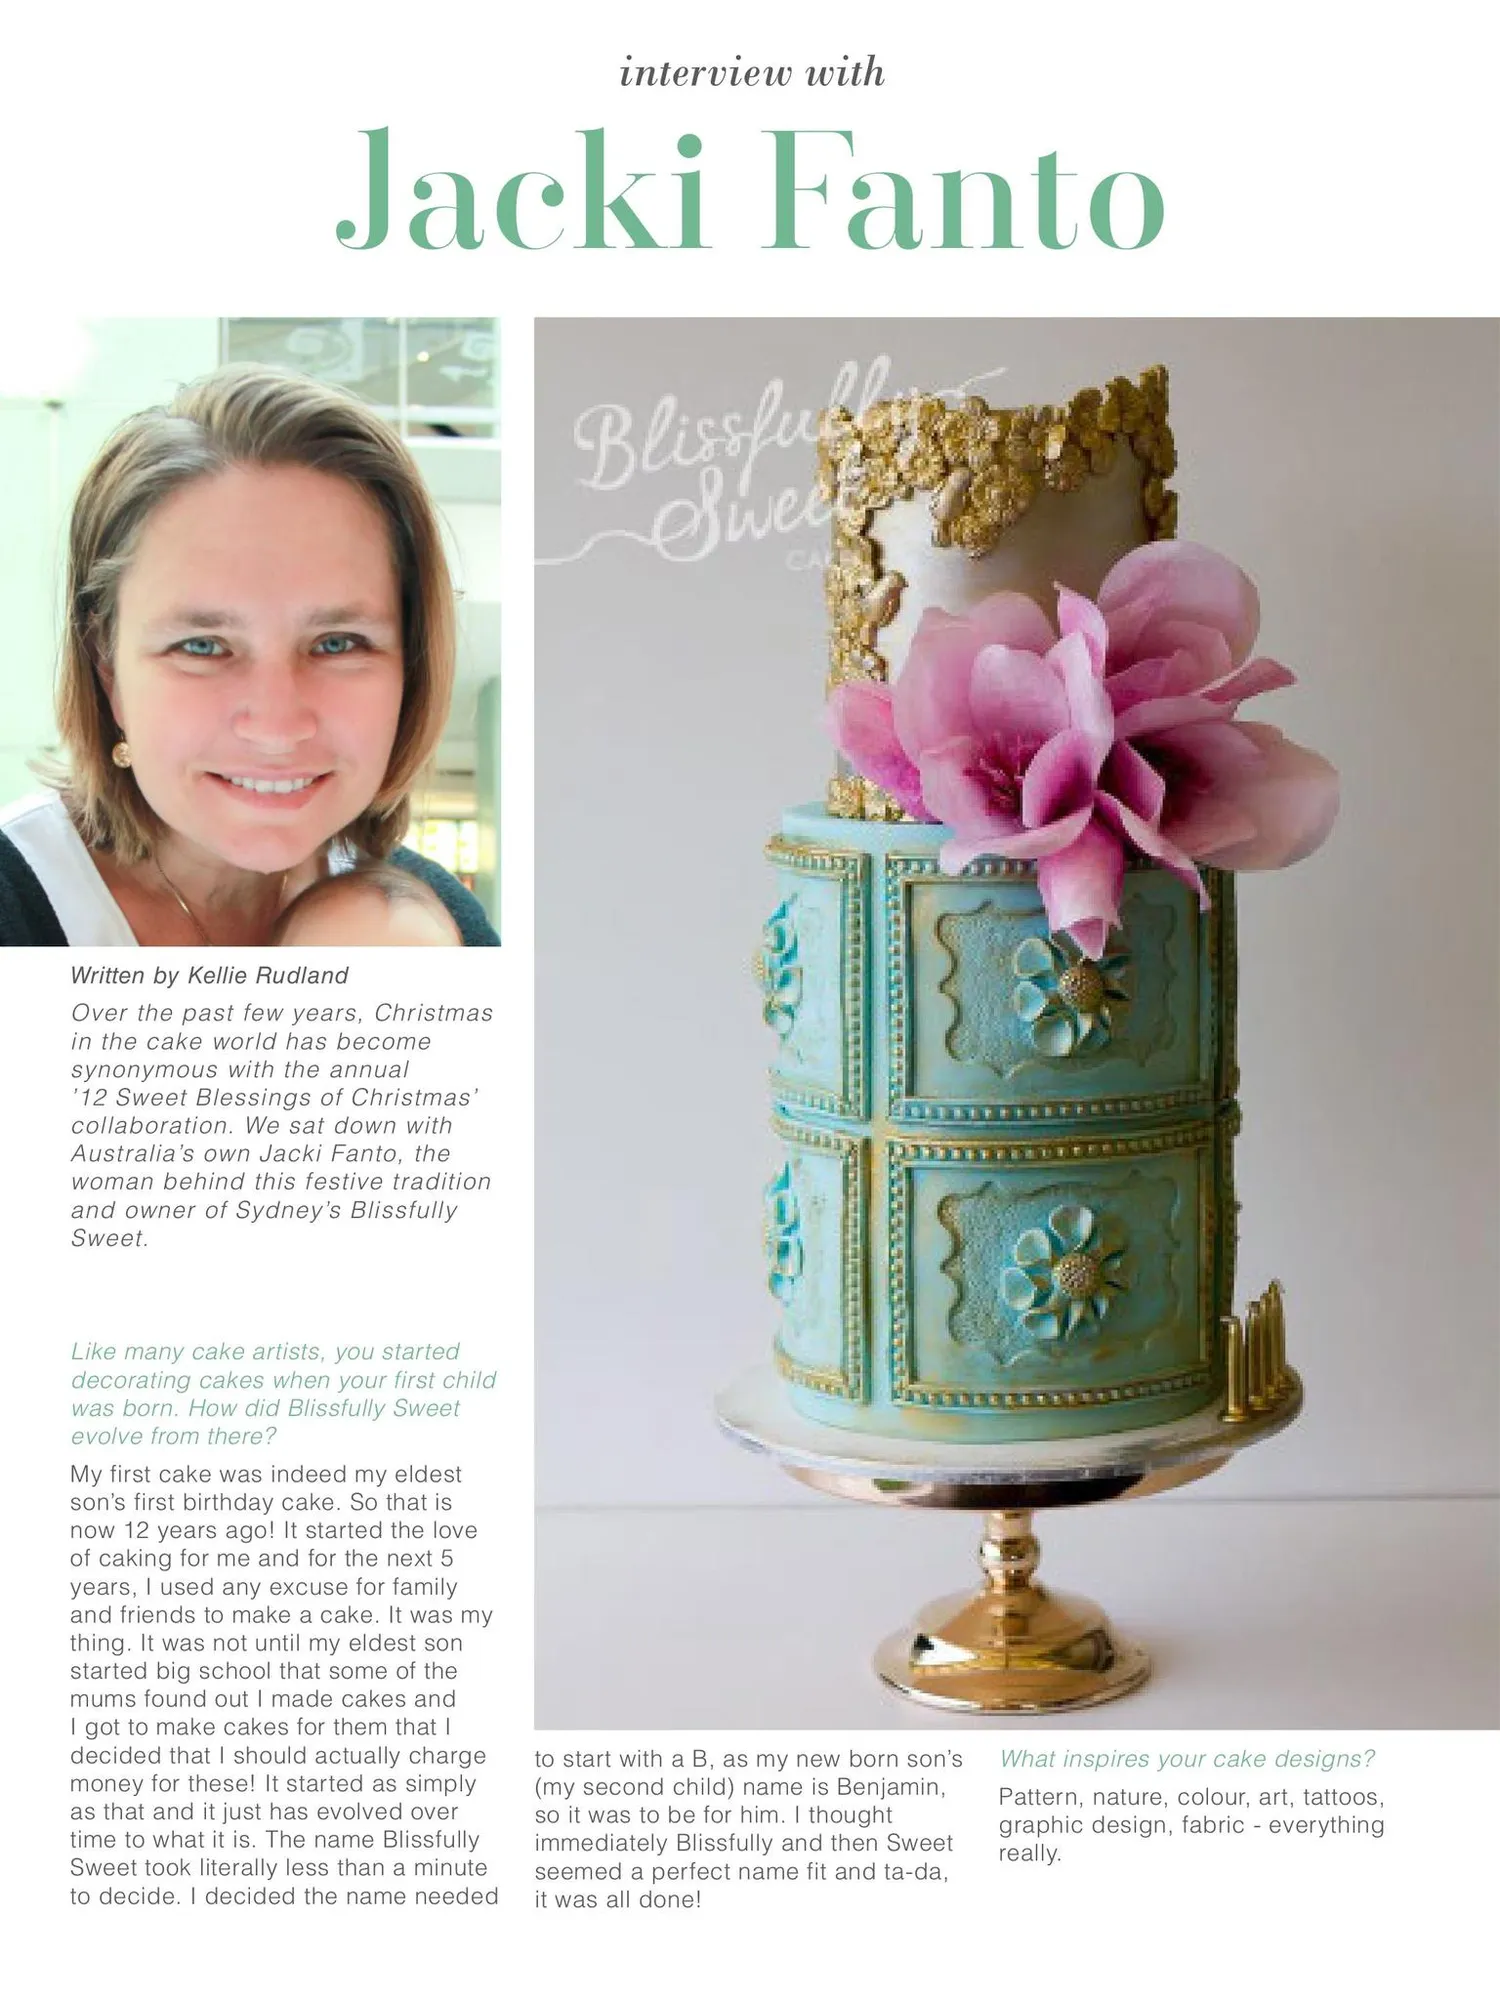
Jacki Fanto interview with Written by Kellie Rudland Over the past few years, Christmas in the cake world has become synonymous with the annual ’12 Sweet Blessings of Christmas’ collaboration. We sat down with Australia’s own Jacki Fanto, the woman behind this festive tradition and owner of Sydney’s Blissfully Sweet. Like many cake artists, you started decorating cakes when your first child was born. How did Blissfully Sweet evolve from there? My first cake was indeed my eldest son’s first birthday cake. So that is now 12 years ago! It started the love of caking for me and for the next 5 years, I used any excuse for family and friends to make a cake. It was my thing. It was not until my eldest son started big school that some of the mums found out I made cakes and I got to make cakes for them that I decided that I should actually charge money for these! It started as simply as that and it just has evolved over time to what it is. The name Blissfully Sweet took literally less than a minute to decide. I decided the name needed to start with a B, as my new born son’s (my second child) name is Benjamin, so
Page 97 text
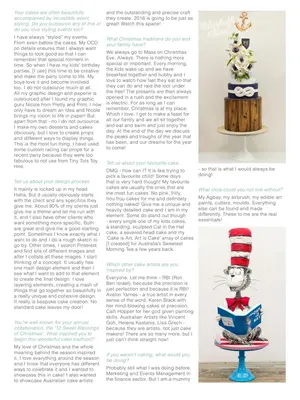
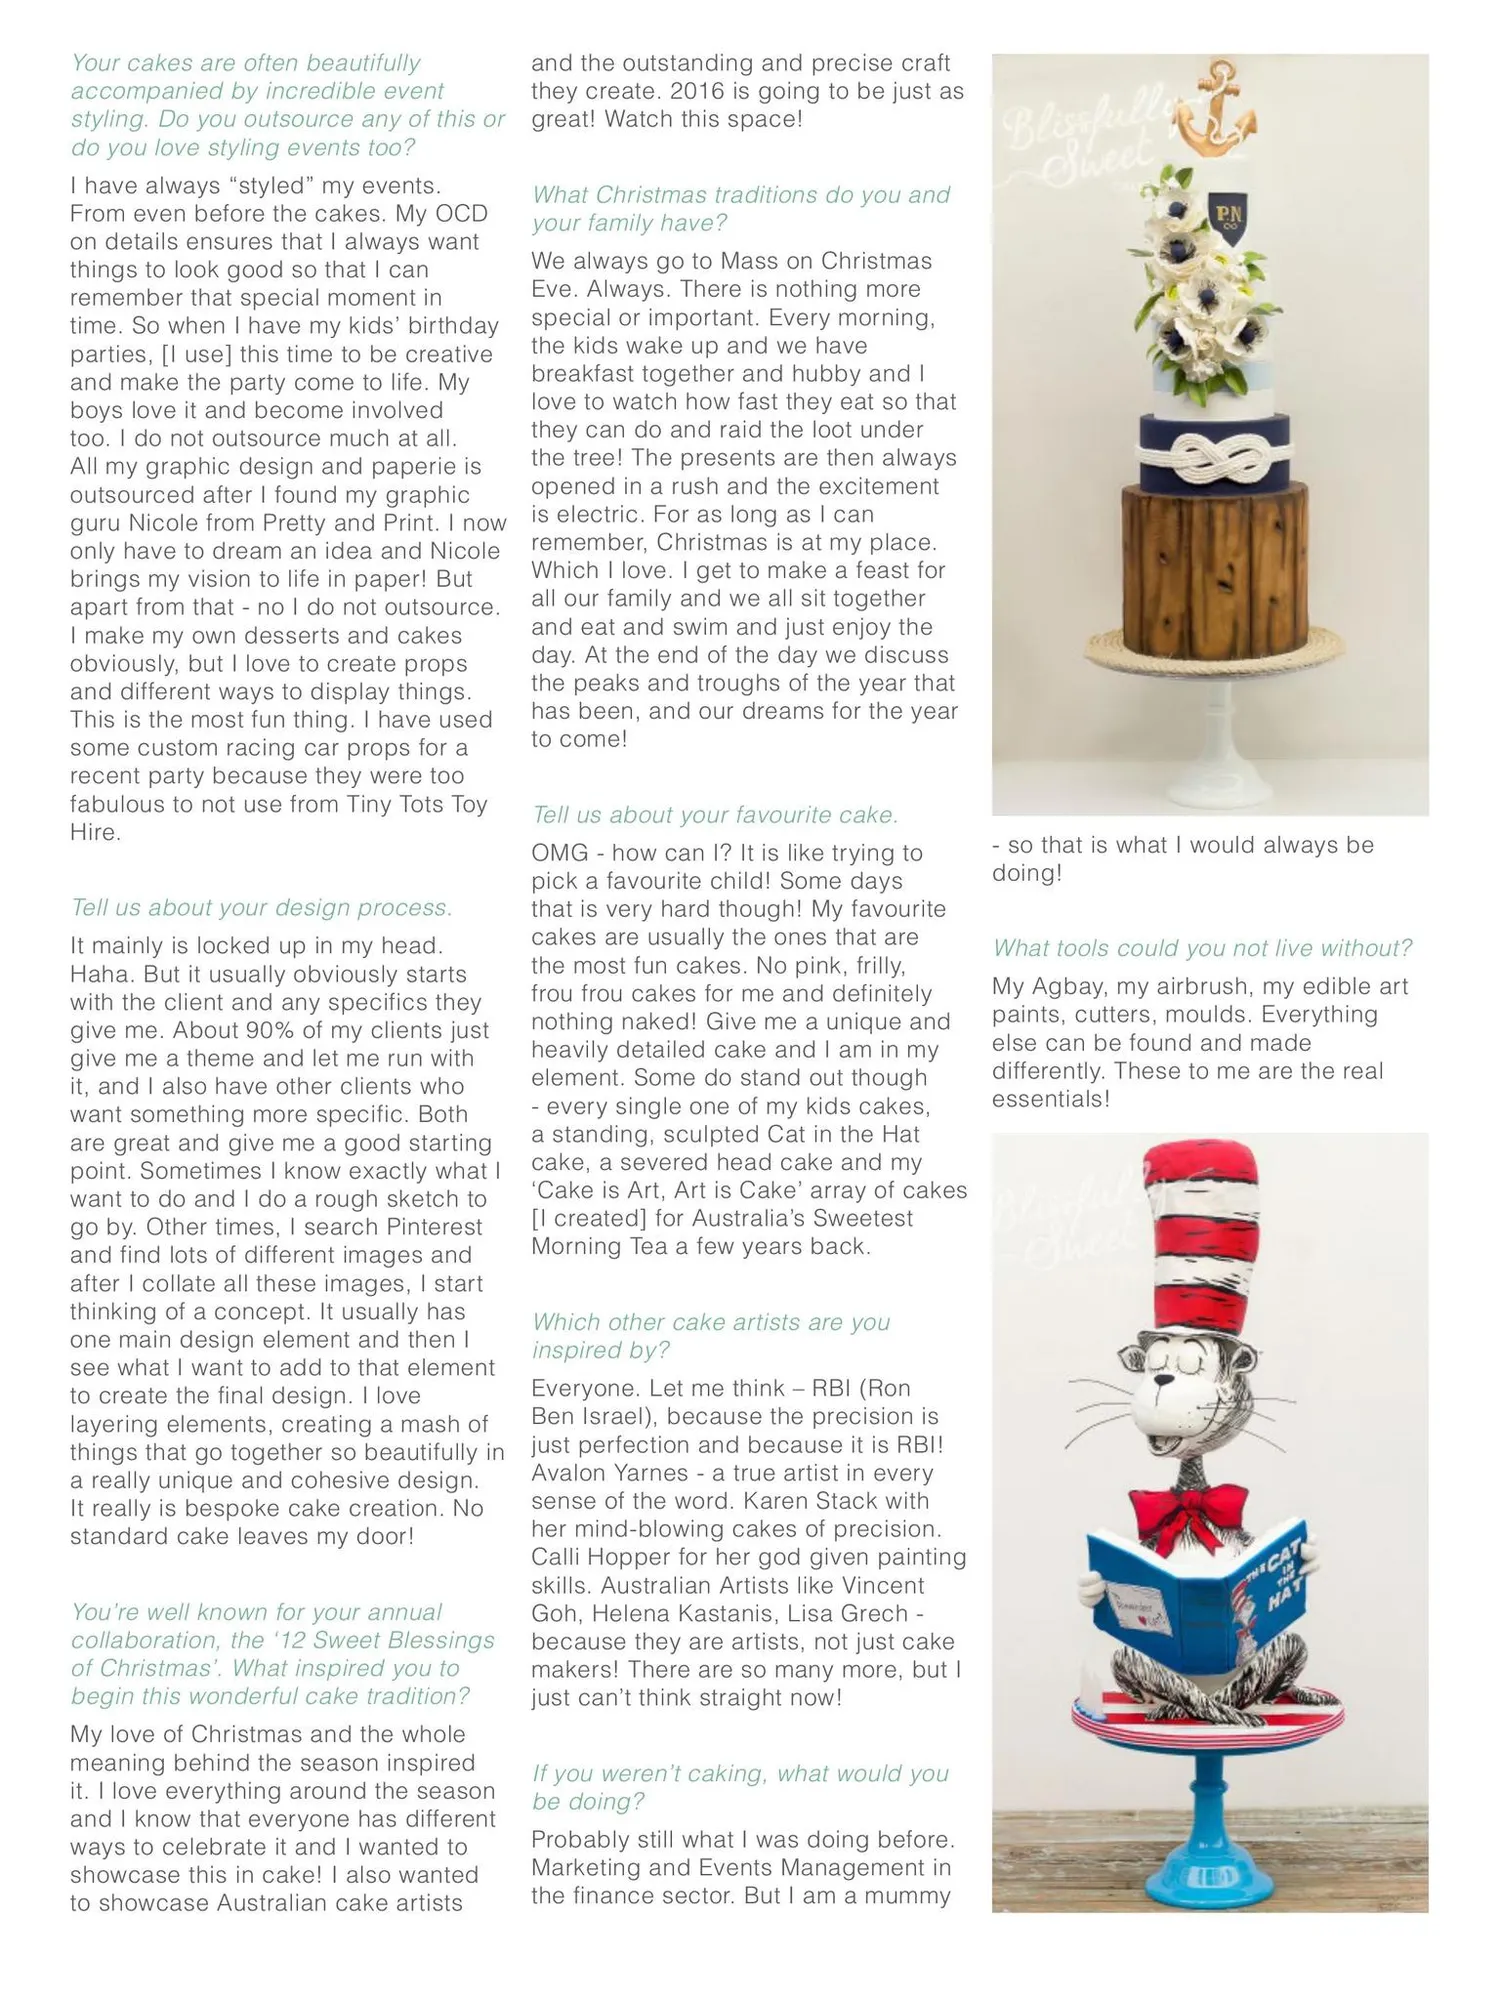
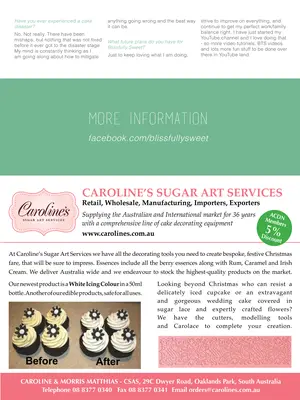
Your cakes are often beautifully accompanied by incredible event styling. Do you outsource any of this or do you love styling events too? and the outstanding and precise craft they create. 2016 is going to be just as great! Watch this space! I have always “styled” my events. From even before the cakes. My OCD on details ensures that I always want things to look good so that I can remember that special moment in time. So when I have my kids’ birthday parties, [I use] this time to be creative and make the party come to life. My boys love it and become involved too. I do not outsource much at all. All my graphic design and paperie is outsourced after I found my graphic guru Nicole from Pretty and Print. I now only have to dream an idea and Nicole brings my vision to life in paper! But apart from that - no I do not outsource. I make my own desserts and cakes obviously, but I love to create props and different ways to display things. This is the most fun thing. I have used some custom racing car props for a recent party because they were too fabulous to not use from Tiny Tots Toy Hire. What Christmas traditions do you and your family have? Tell us about your design process. It mainly is locked up in my head. Haha. But it usually obviously starts with the client and any specifics they give me. About 90% of my clients just give me a theme and let me run with it, and I also have other clients who want something more specific. Both are great and give me a good starting point. Sometimes I know exactly what I want to do and I do a rough sketch to go by. Other times, I search Pinterest and find lots of different images and after I collate all these images, I start thinking of a concept. It usually has one main design element and then I see what I want to add to that element to create the final design. I love layering elements, creating a mash of things that go together so beautifully in a really unique and cohesive design. It really is bespoke cake creation. No standard cake leaves my door! You’re well known for your annual collaboration, the ‘12 Sweet Blessings of Christmas’. What inspired you to begin this wonderful cake tradition? My love of Christmas and the whole meaning behind the season inspired it. I love everything around the season and I know that everyone has different ways to celebrate it and I wanted to showcase this in cake! I also wanted to showcase Australian cake artists We always go to Mass on Christmas Eve. Always. There is nothing more special or important. Every morning, the kids wake up and we have breakfast together and hubby and I love to watch how fast they eat so that they can do and raid the loot under the tree! The presents are then always opened in a rush and the excitement is electric. For as long as I can remember, Christmas is at my place. Which I love. I get to make a feast for all our family and we all sit together and eat and swim and just enjoy the day. At the end of the day we discuss the peaks and troughs of the year that has been, and our dreams for the year to come! Tell us about your favourite cake. OMG - how can I? It is like trying to pick a favourite child! Some days that is very hard though! My favourite cakes are usually the ones that are the most fun cakes. No pink, frilly, frou frou cakes for me and definitely nothing naked! Give me a unique and heavily detailed cake and I am in my element. Some do stand out though - every single one of my kids cakes, a standing, sculpted Cat in the Hat cake, a severed head cake and my ‘Cake is Art, Art is Cake’ array of cakes [I created] for Australia’s Sweetest Morning Tea a few years back. Which other cake artists are you inspired by? Everyone. Let me think – RBI (Ron Ben Israel), because the precision is just perfection and because it is RBI! Avalon Yarnes - a true artist in every sense of the word. Karen Stack with her mind-blowing cakes of precision. Calli Hopper for her god given painting skills. Australian Artists like Vincent Goh, Helena Kastanis, Lisa Grech because they are artists, not just cake makers! There are so many more, but I just can’t think straight now! If you weren’t caking, what would you be doing? Probably still what I was doing before. Marketing and Events Management in the finance sector. But I am a mummy - so that is what I would always be doing! What tools could you not live without? My Agbay, my airbrush, my edible art paints, cutters, moulds. Everything else can be found and made differently. These to me are the real essentials!
Page 98 text
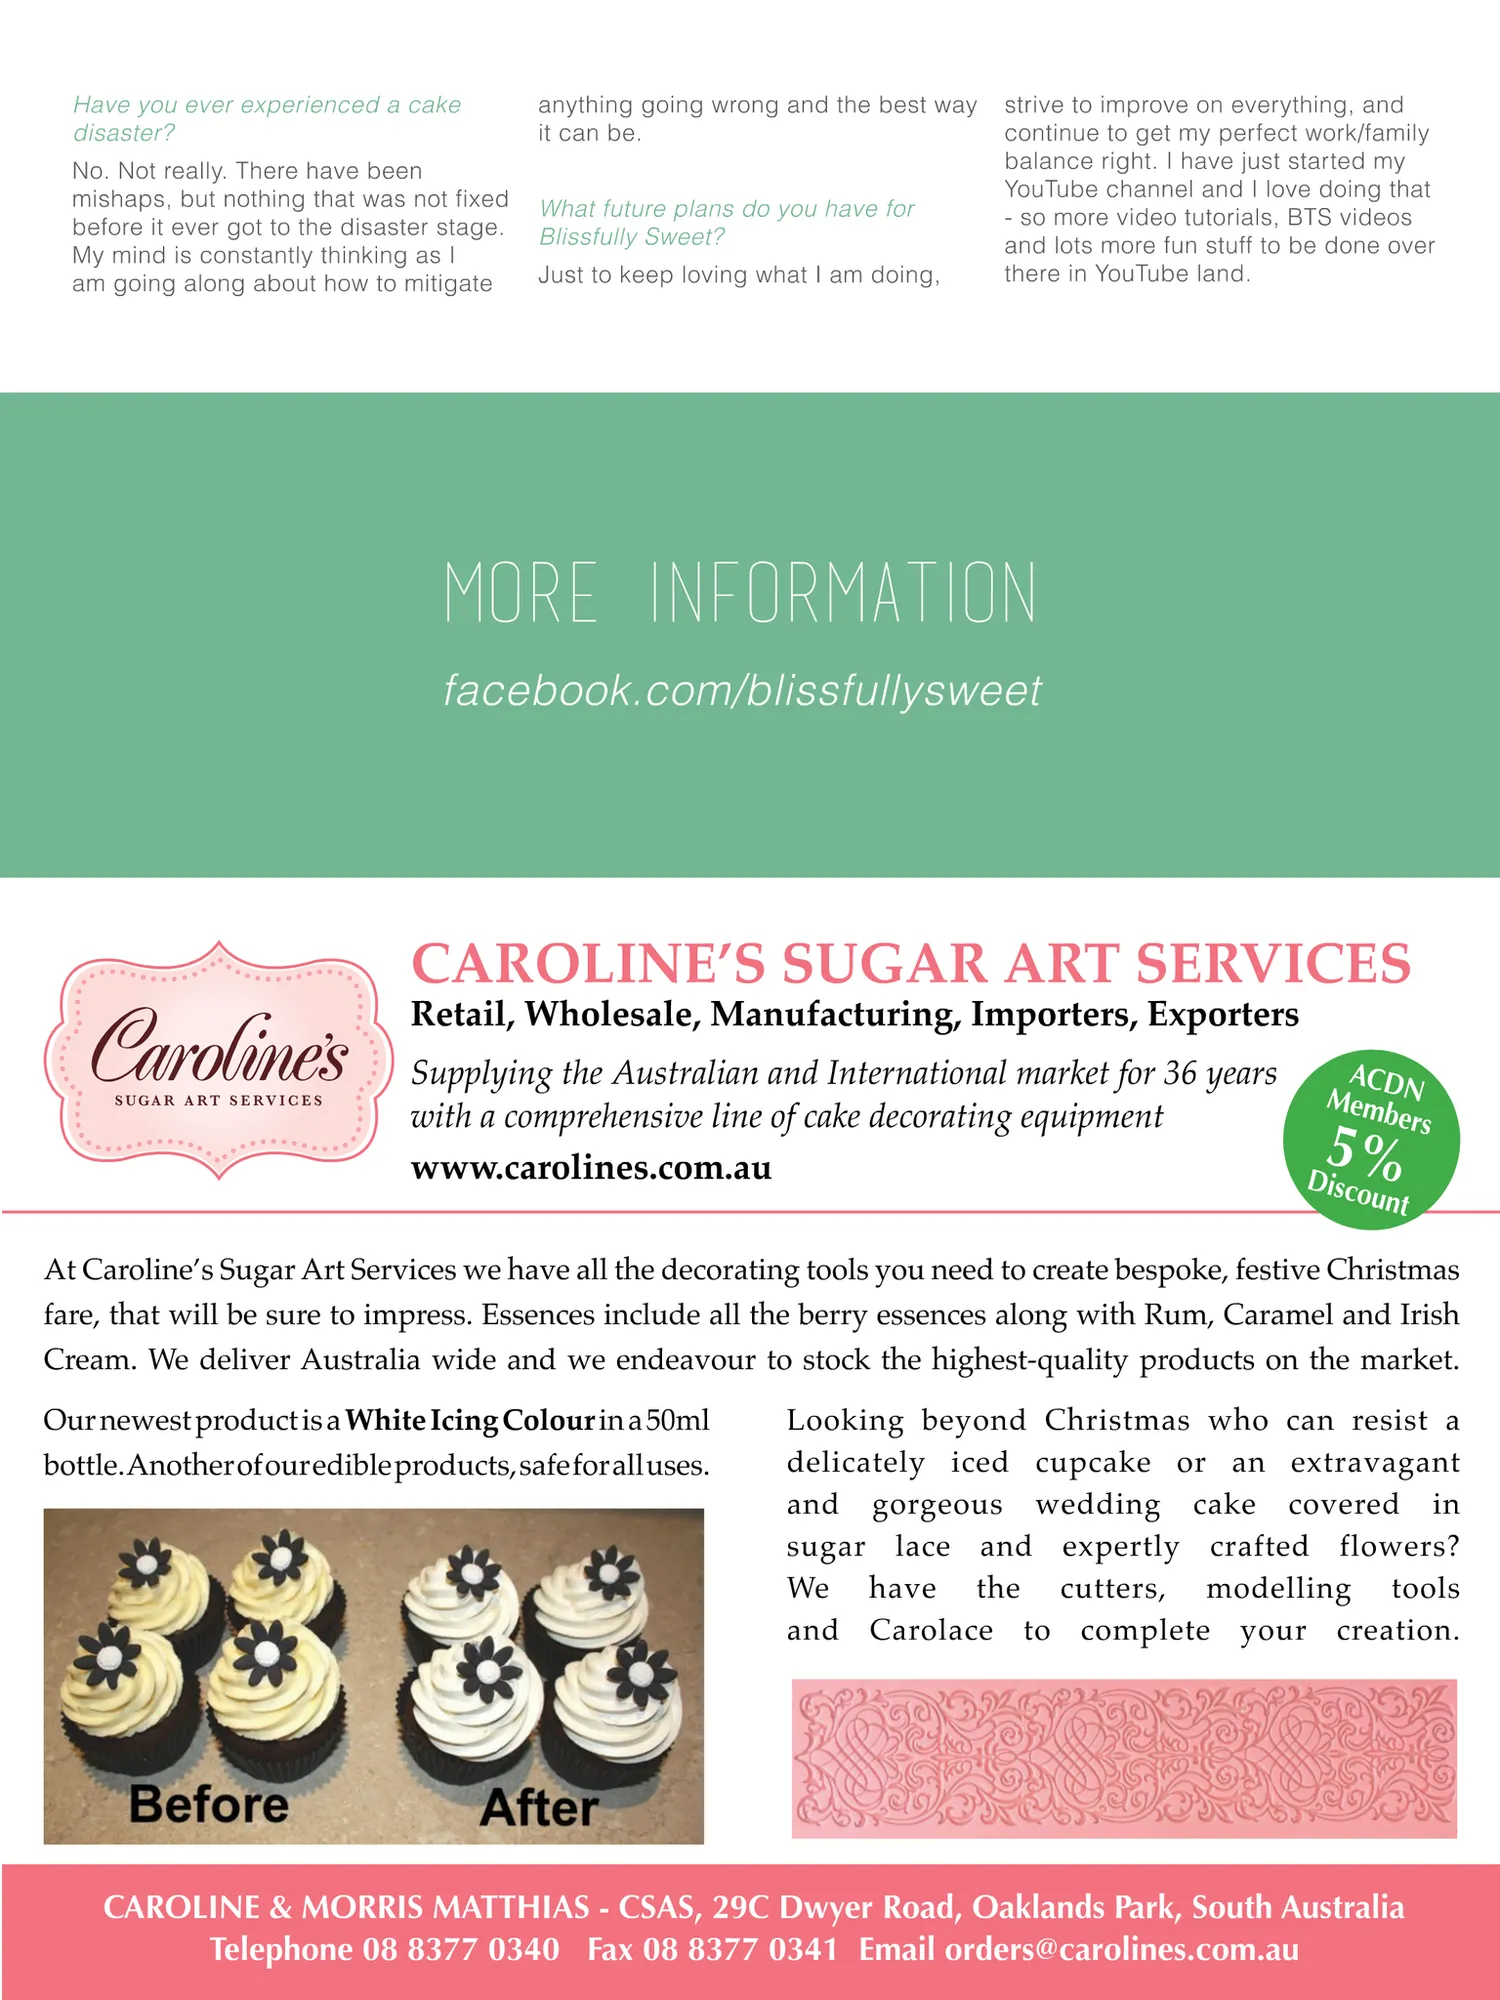
Have you ever experienced a cake disaster? anything going wrong and the best way it can be. No. Not really. There have been mishaps, but nothing that was not fixed before it ever got to the disaster stage. My mind is constantly thinking as I am going along about how to mitigate What future plans do you have for Blissfully Sweet? Just to keep loving what I am doing, strive to improve on everything, and continue to get my perfect work/family balance right. I have just started my YouTube channel and I love doing that - so more video tutorials, BTS videos and lots more fun stuff to be done over there in YouTube land. more information facebook.com/blissfullysweet CAROLINE’S SUGAR ART SERVICES Retail, Wholesale, Manufacturing, Importers, Exporters ACD Supplying the Australian and International market for 36 years Mem N bers with a comprehensive line of cake decorating equipment www.carolines.com.au Disco unt 5% At Caroline’s Sugar Art Services we have all the decorating tools you need to c reate bespoke, festive Christmas fare, that will be sure to impress. Essences include all the berry essences along with Rum, Caramel and Irish Cream. We deliver Australia wide and we endeavour to stock the highest-quality products on the market. Our newest product is a White Icing Colour in a 50ml bottle. Another of our edible products, safe for all uses. Looking beyond Christmas who can resist a delicately iced cupcake or an extravagant and gorgeous wedding cake covered in sugar lace and expertly crafted flowers? We have the cutters, modelling tools and Carolace to complete your creation. CAROLINE & MORRIS MATTHIAS - CSAS, 29C Dwyer Road, Oaklands Park, South Australia Telephone 08 8377 0340 Fax 08 8377 0341 Email [email protected]
Page 99 text
www.acdn.me JOIN US! BECOME A MEMBER TODAY! {CLICK HERE FOR MORE INFO!}
Page 100 text
Read Cake! magazine online or download & print for offline viewing HERE! f www.acdn.me [email protected] click here to join our mailing list! To advertise in Cake! magazine, contact [email protected]
Page 101 text
Let us help you find the right techology ingredients for the icing on your Cake! SPECIAL OFFER 30% OFF We love cake as much as we love technology and that’s why we want to help you. As a special treat for Cake! magazine readers, we’re offering a 30% discount on your first advice ticket. If you’re looking to buy a new piece of techology, we can provide you with expert advice for products within your budget and help you find a product that you’ll love. Simply register your email by visiting rahero.com.au/cake and we’ll send you your personalised code. Keep your code handy, it’s good for 12 months. rahero.com.au/cake PERSONAL TECHNOLOGY CONSULTANTS Terms & conditions apply, see website for details Offer to register for codes ends 31/12/2016
Page 102 text
ACDN Member gallery We invited our members to submit to our member gallery - take a look at what they've been creating! Want to submit to our member gallery? Join us HERE!
Page 103 text
f f
Page 104 text
f
Page 105 text
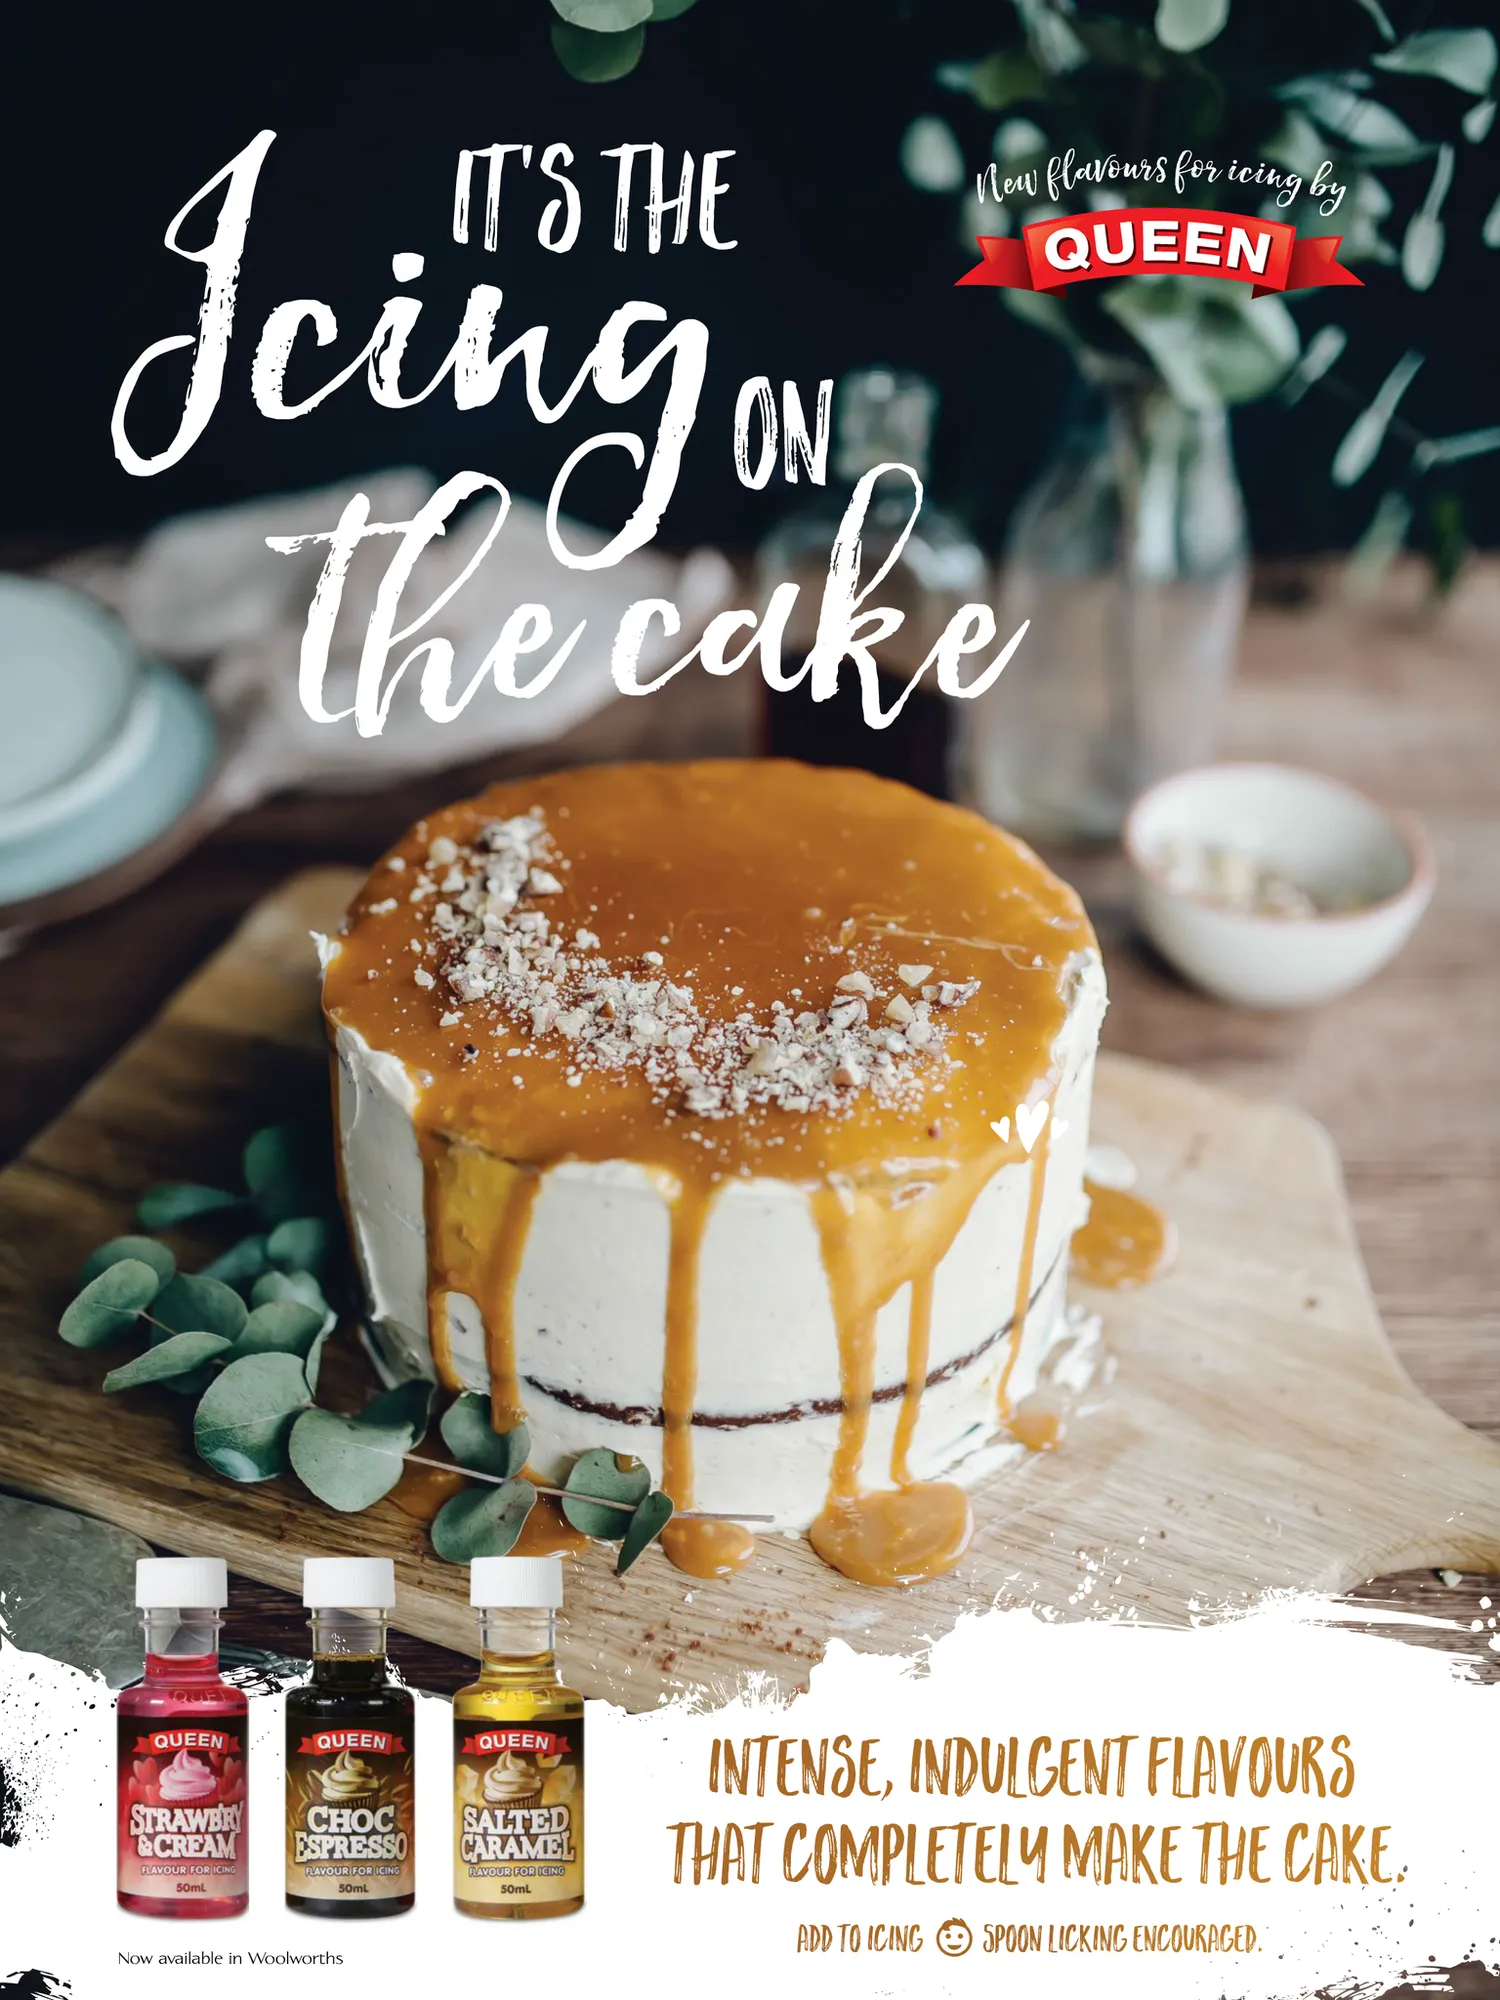
Icing IT’s THE New flavours for icing by ON the cake f V f Now available in Woolworths Intense, indulgent flavours that completely make the cake. Add to icing Spoon licking encouraged.
Page 106 text
f
Page 107 text
WE’VE GOT YOUR COLOURS COVERED Icing Colors Candy Melts Edible Paints Cupcake Glitters Candles Coloured Fonts Cake Sprinkles www.cakedecoratingcentral.com.au www.facebook.com/CakeDecoratingCentral
Page 108 text
f
Page 109 text
f
Page 110 text
f
Page 111 text
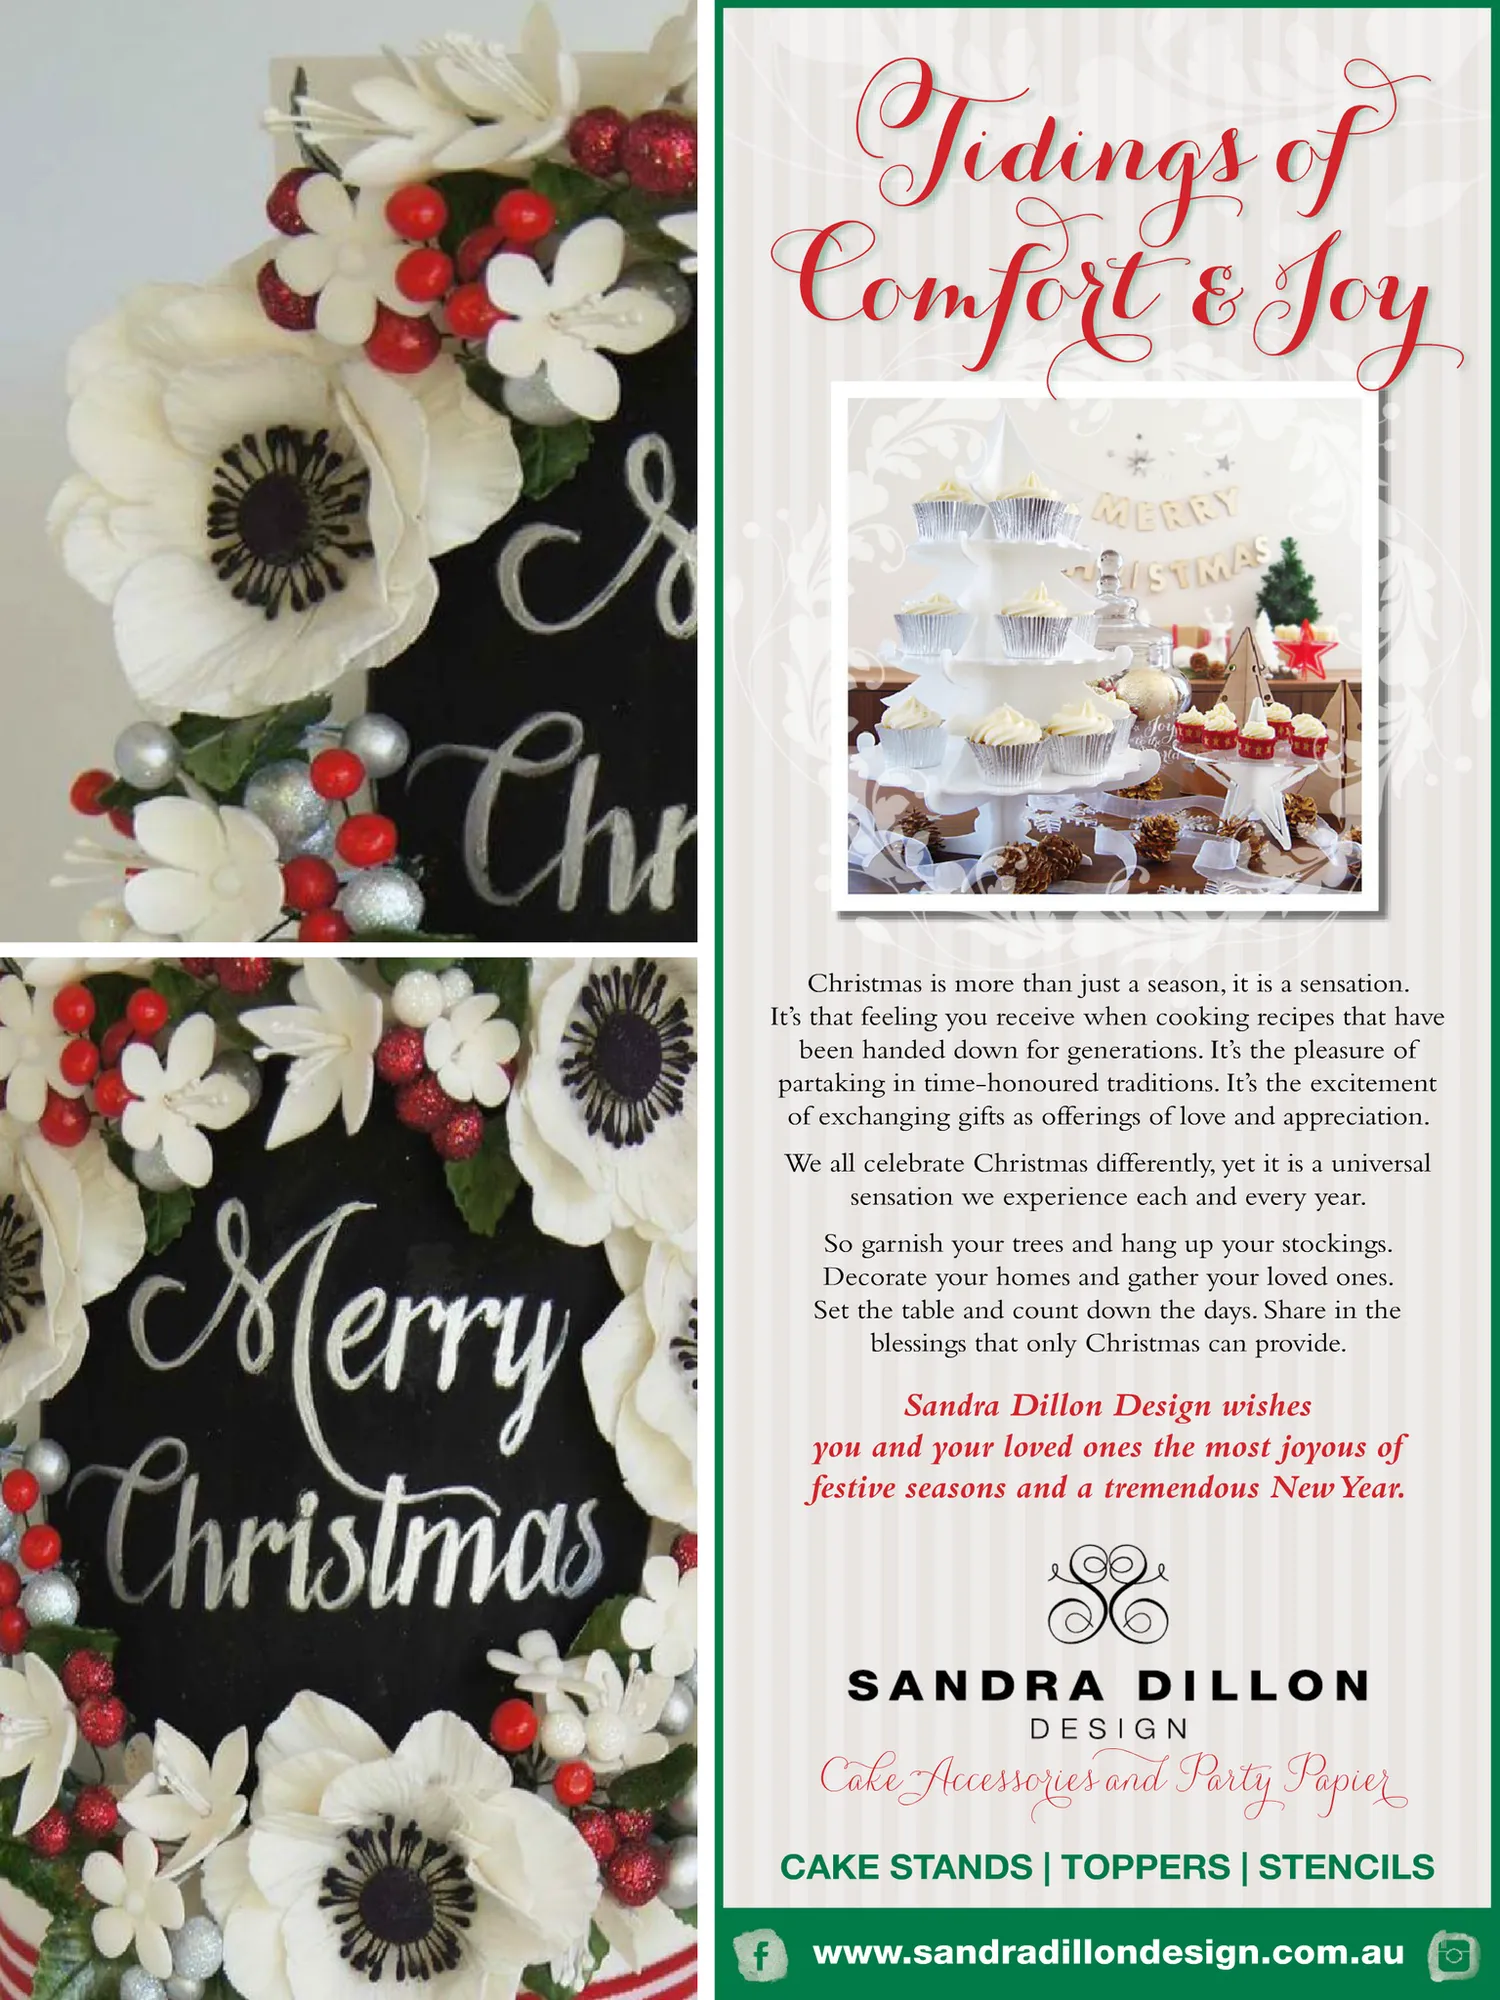
Tidings of Comfort &Joy Christmas is more than just a season, it is a sensation. It’s that feeling you receive when cooking recipes that have been handed down for generations. It’s the pleasure of partaking in time-honoured traditions. It’s the excitement of exchanging gifts as offerings of love and appreciation. We all celebrate Christmas differently, yet it is a universal sensation we experience each and every year. So garnish your trees and hang up your stockings. Decorate your homes and gather your loved ones. Set the table and count down the days. Share in the blessings that only Christmas can provide. Sandra Dillon Design wishes you and your loved ones the most joyous of festive seasons and a tremendous New Year. CakeAccessories and Party Papier CAKE STANDS | TOPPERS | STENCILS www.sandradillondesign.com.au
Page 112 text
f
Page 113 text
Supplying all of your cake decorating equipment SHOP ONLINE www.bakeanddeco.com.au & INSTORE 28 Laidlaw Drive, Ballarat
Page 114 text
ACDN members can get discounted cake decorating business insurance! ACDN members! Don't forget to submit to the member gallery for our next issue! Submissions close end April [email protected] Not a member? CLICK HERE TO JOIN US!


Page 115 text
ARE YOU INSURED? Get covered with Australia's leading cake decorating insurance broker $10m Public & Products Liability $380 PER YEAR FOR ACDN MEMBERS $450 per year for Non-ACDN Members (Insurance subject to acceptance criteria) www.redstarinsurance.com.au/cake Red Star Insurance Pty Ltd (AFSL 444803) T&C apply, see website for details. The Australian Cake Decorating Network Pty Ltd does not provide any advice regarding insurance matters. Please contact Red Star Insurance Brokers on the above contact details to discuss your insurance requirements. AFFILIATE ADVERTISEMENT
Page 116 text
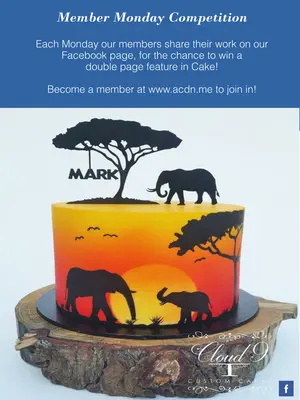
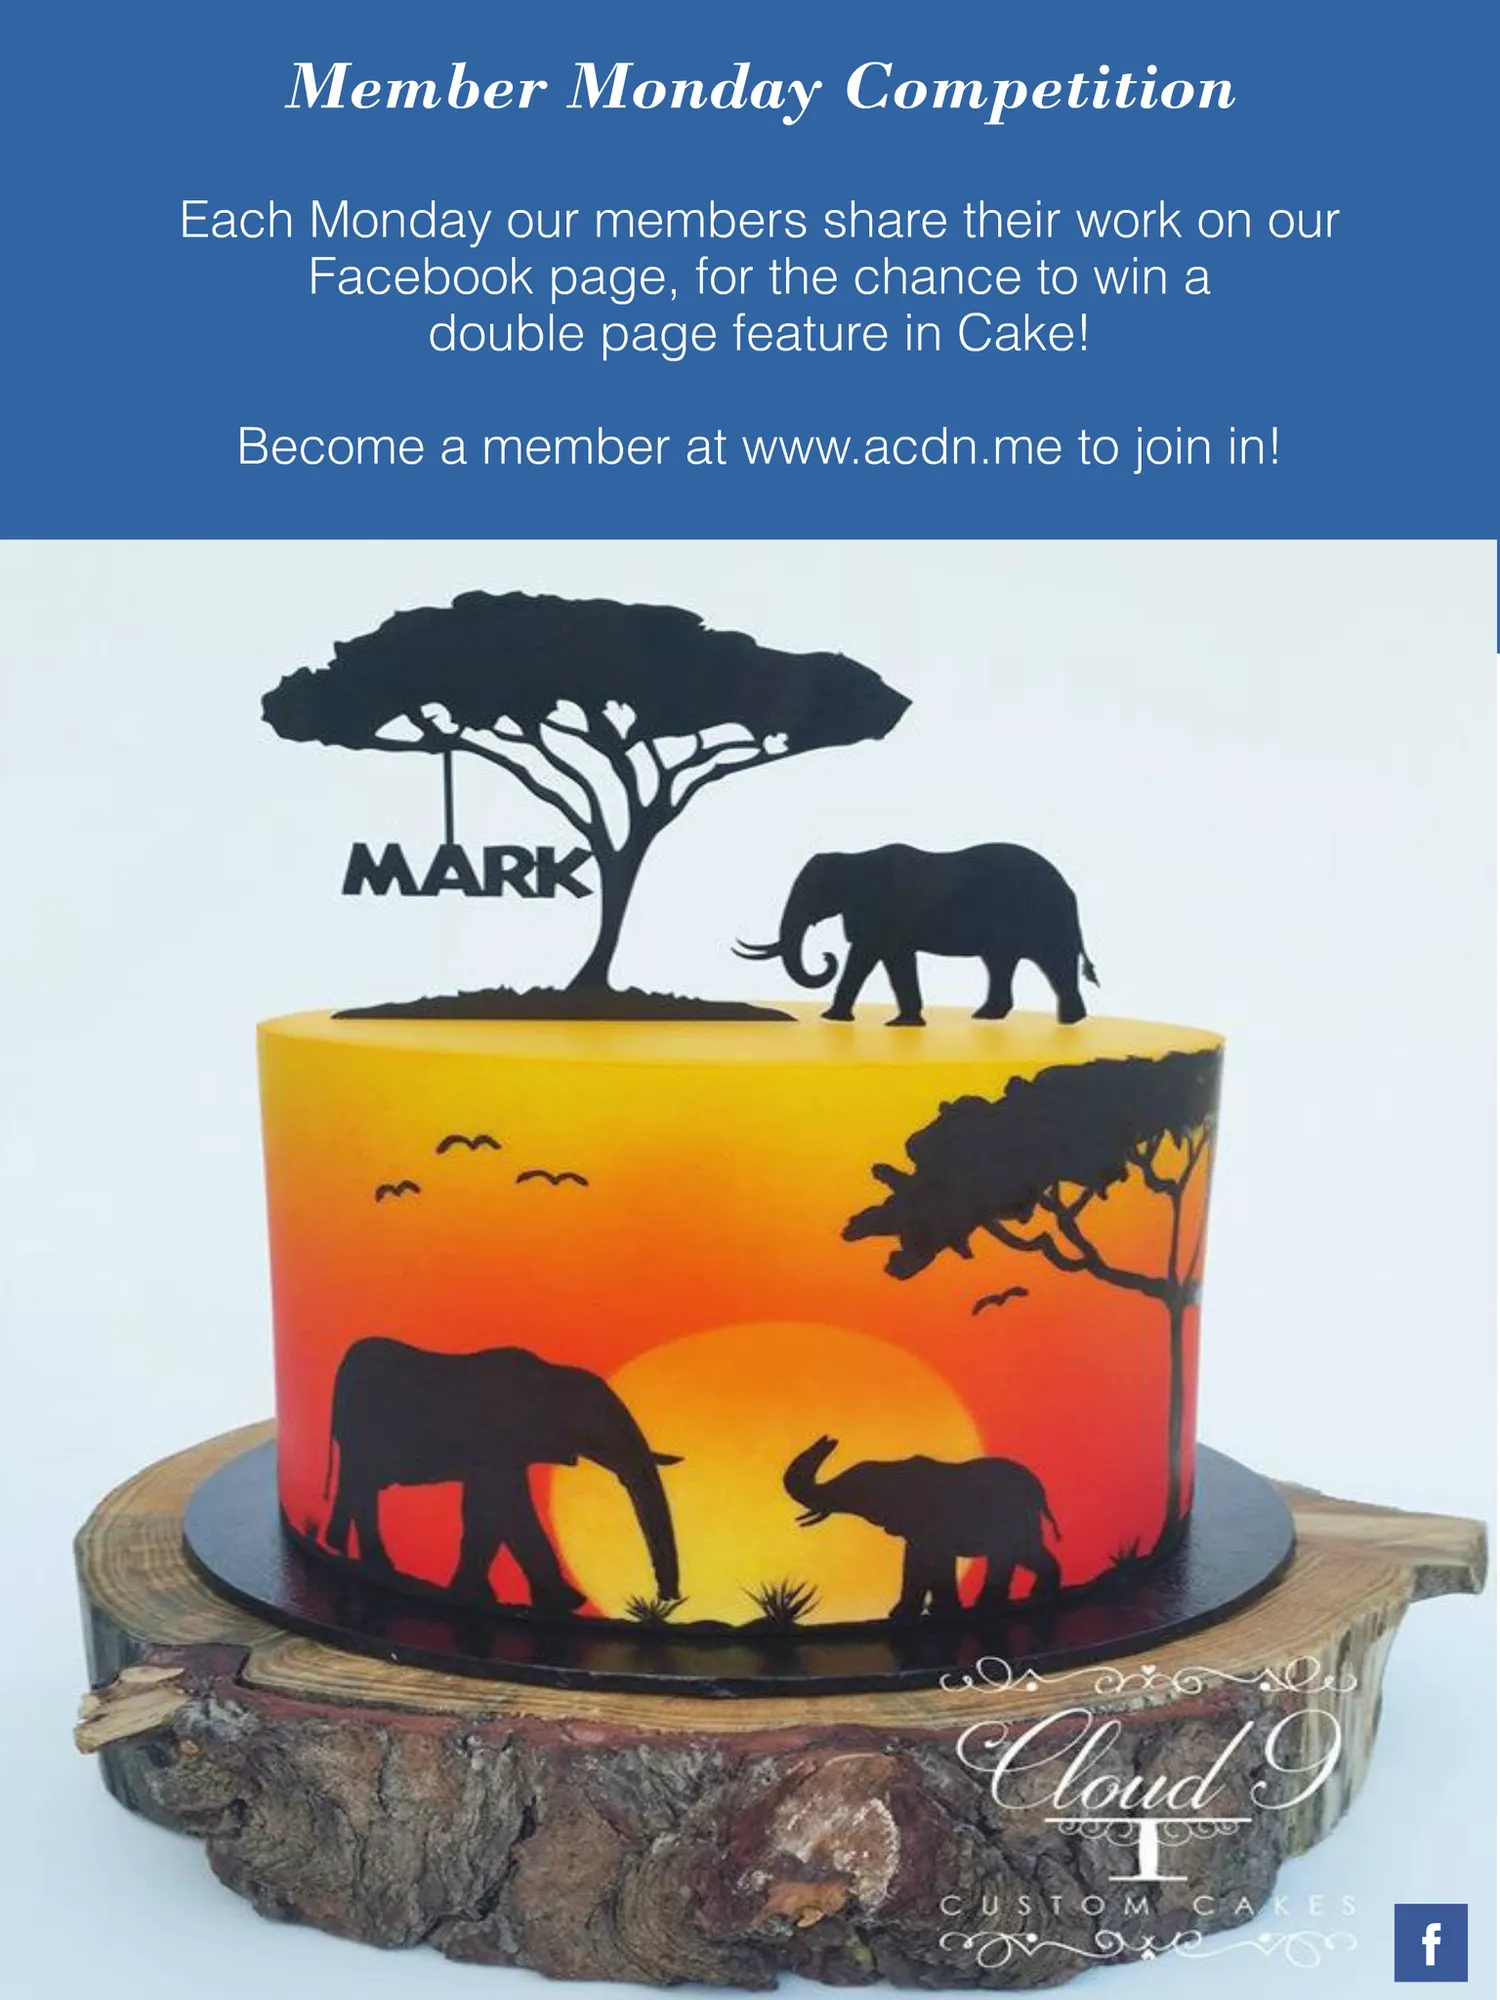
Member Monday Competition Each Monday our members share their work on our Facebook page, for the chance to win a double page feature in Cake! Become a member at www.acdn.me to join in! f
Page 117 text
f f f
Page 118 text
f
Page 119 text
www.acdn.me JOIN US! BECOME A MEMBER TODAY! {CLICK HERE FOR MORE INFO!}
Page 120 text
f
Page 121 text
f
Page 122 text
f f f f f
Page 123 text
f f f f ff
Page 124 text
f f
Page 125 text
f
Page 126 text
f f f f
Page 127 text
f
Page 128 text
f f
Page 129 text
f
Page 130 text
f
Page 132 text
f f f f
Page 133 text
f f f


Page 134 text
The winner for November is... Iced creations! f
Page 135 text
Congratulations Amanda! You've won a $250 voucher to spend at Bake & Deco Warehouse and a double page feature in our next issue of Cake! magazine! Member Monday is proudly sponsored by f Become a member to join in Member Monday! Join us online HERE Members can share a photo of their work each Monday on the Australian Cake Decorating Network facebook page. Each week we award a 'People's Choice' and 'ACDN Choice' award. The winners of the ACDN Choice award for 2016 will be featured in Cake! magazine and go in the draw to win the quarterly prize of a double page feature in Cake! magazine, as well as a $250 voucher thanks to Bake & Deco Warehouse! f Join in the fun on our FACEBOOK page!
Page 136 text
f Promote, network, shop & save with the Australian Cake Decorating Network! Join us today! Meet Katie! To learn about the benefits of being an ACDN member! Watch our video at www.acdn.me or view the online version of Cake! magazine at www.cakemagazine.me
Page 137 text
Read Cake! magazine online or download & print for offline viewing HERE! f www.acdn.me [email protected] click here to join our mailing list! To advertise in Cake! magazine, contact [email protected]
Page 138 text
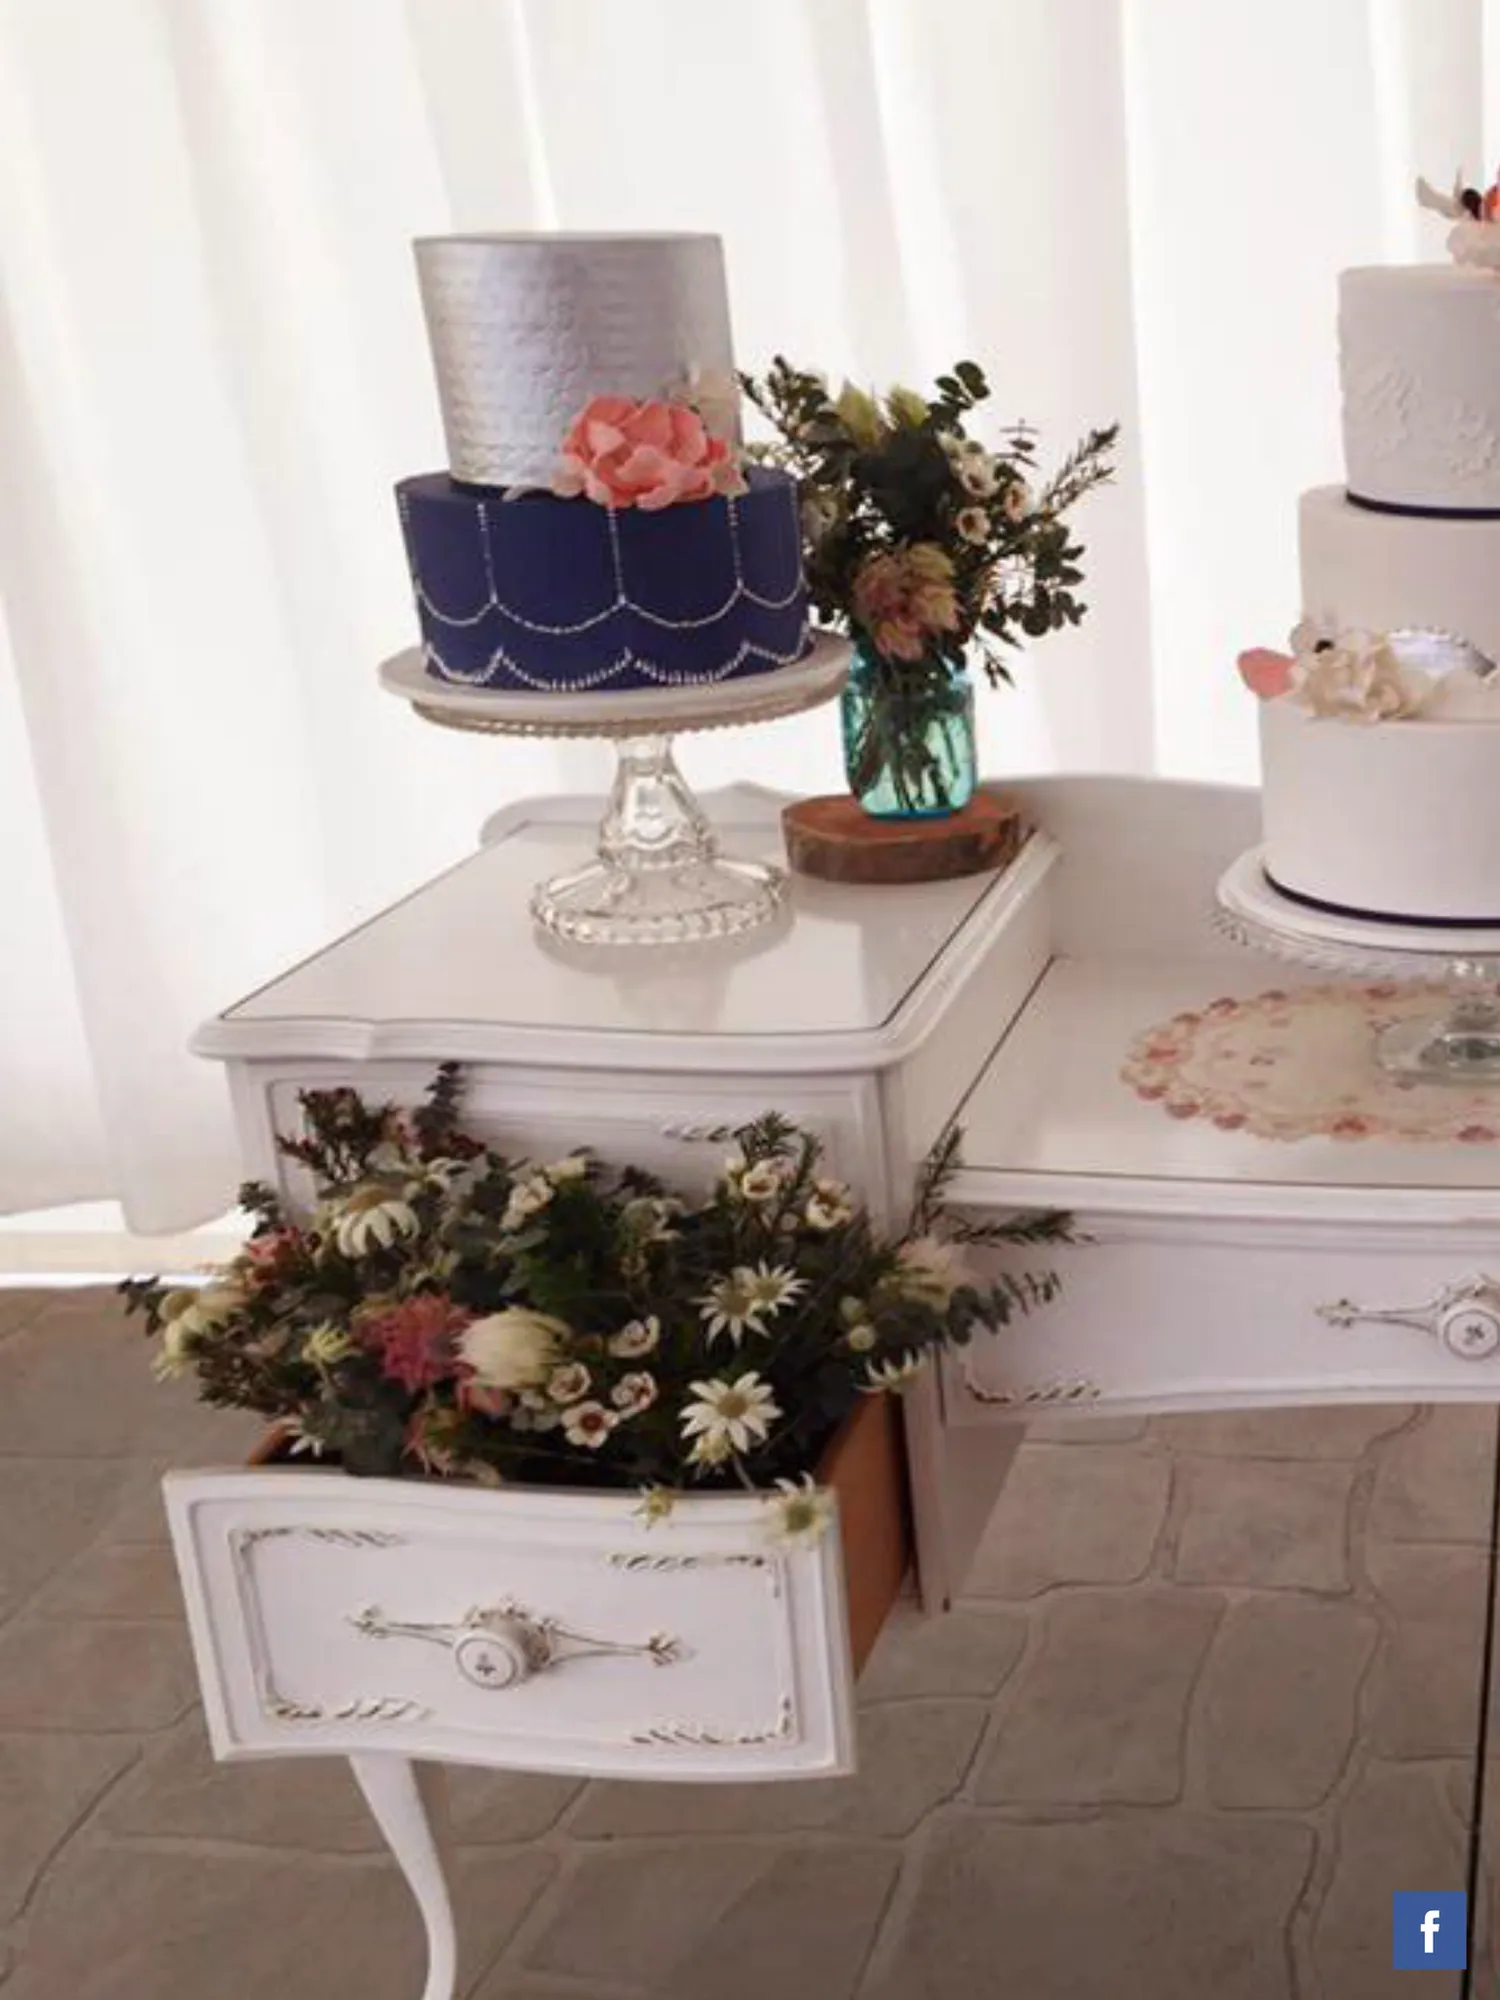
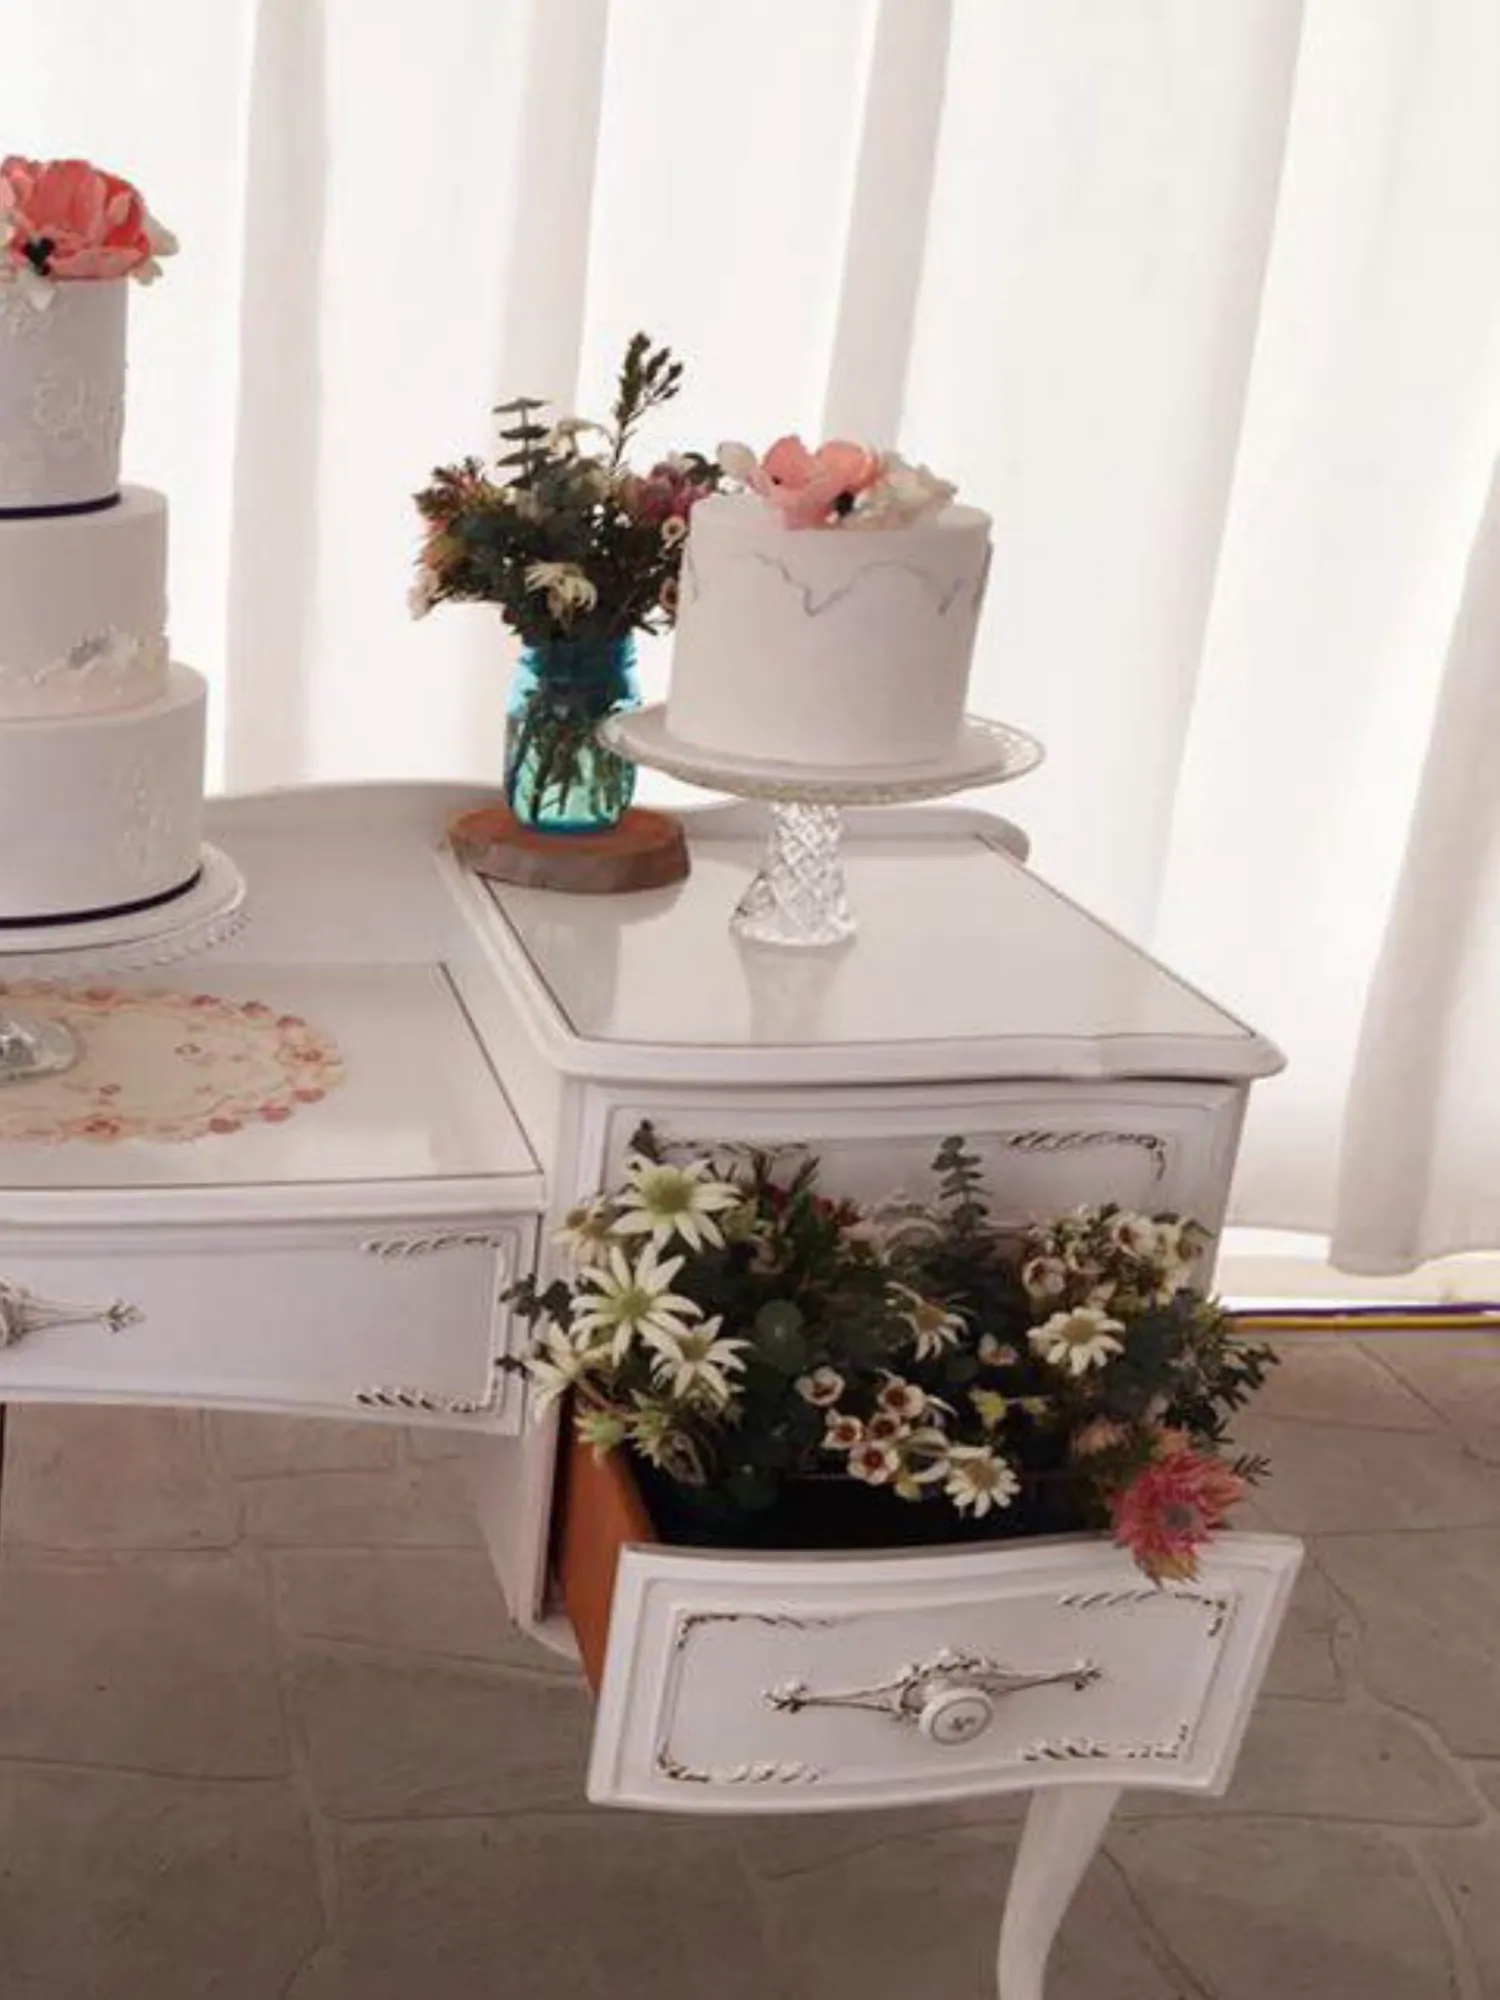
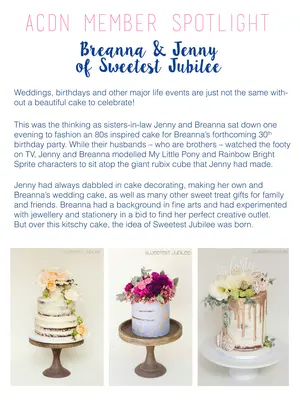
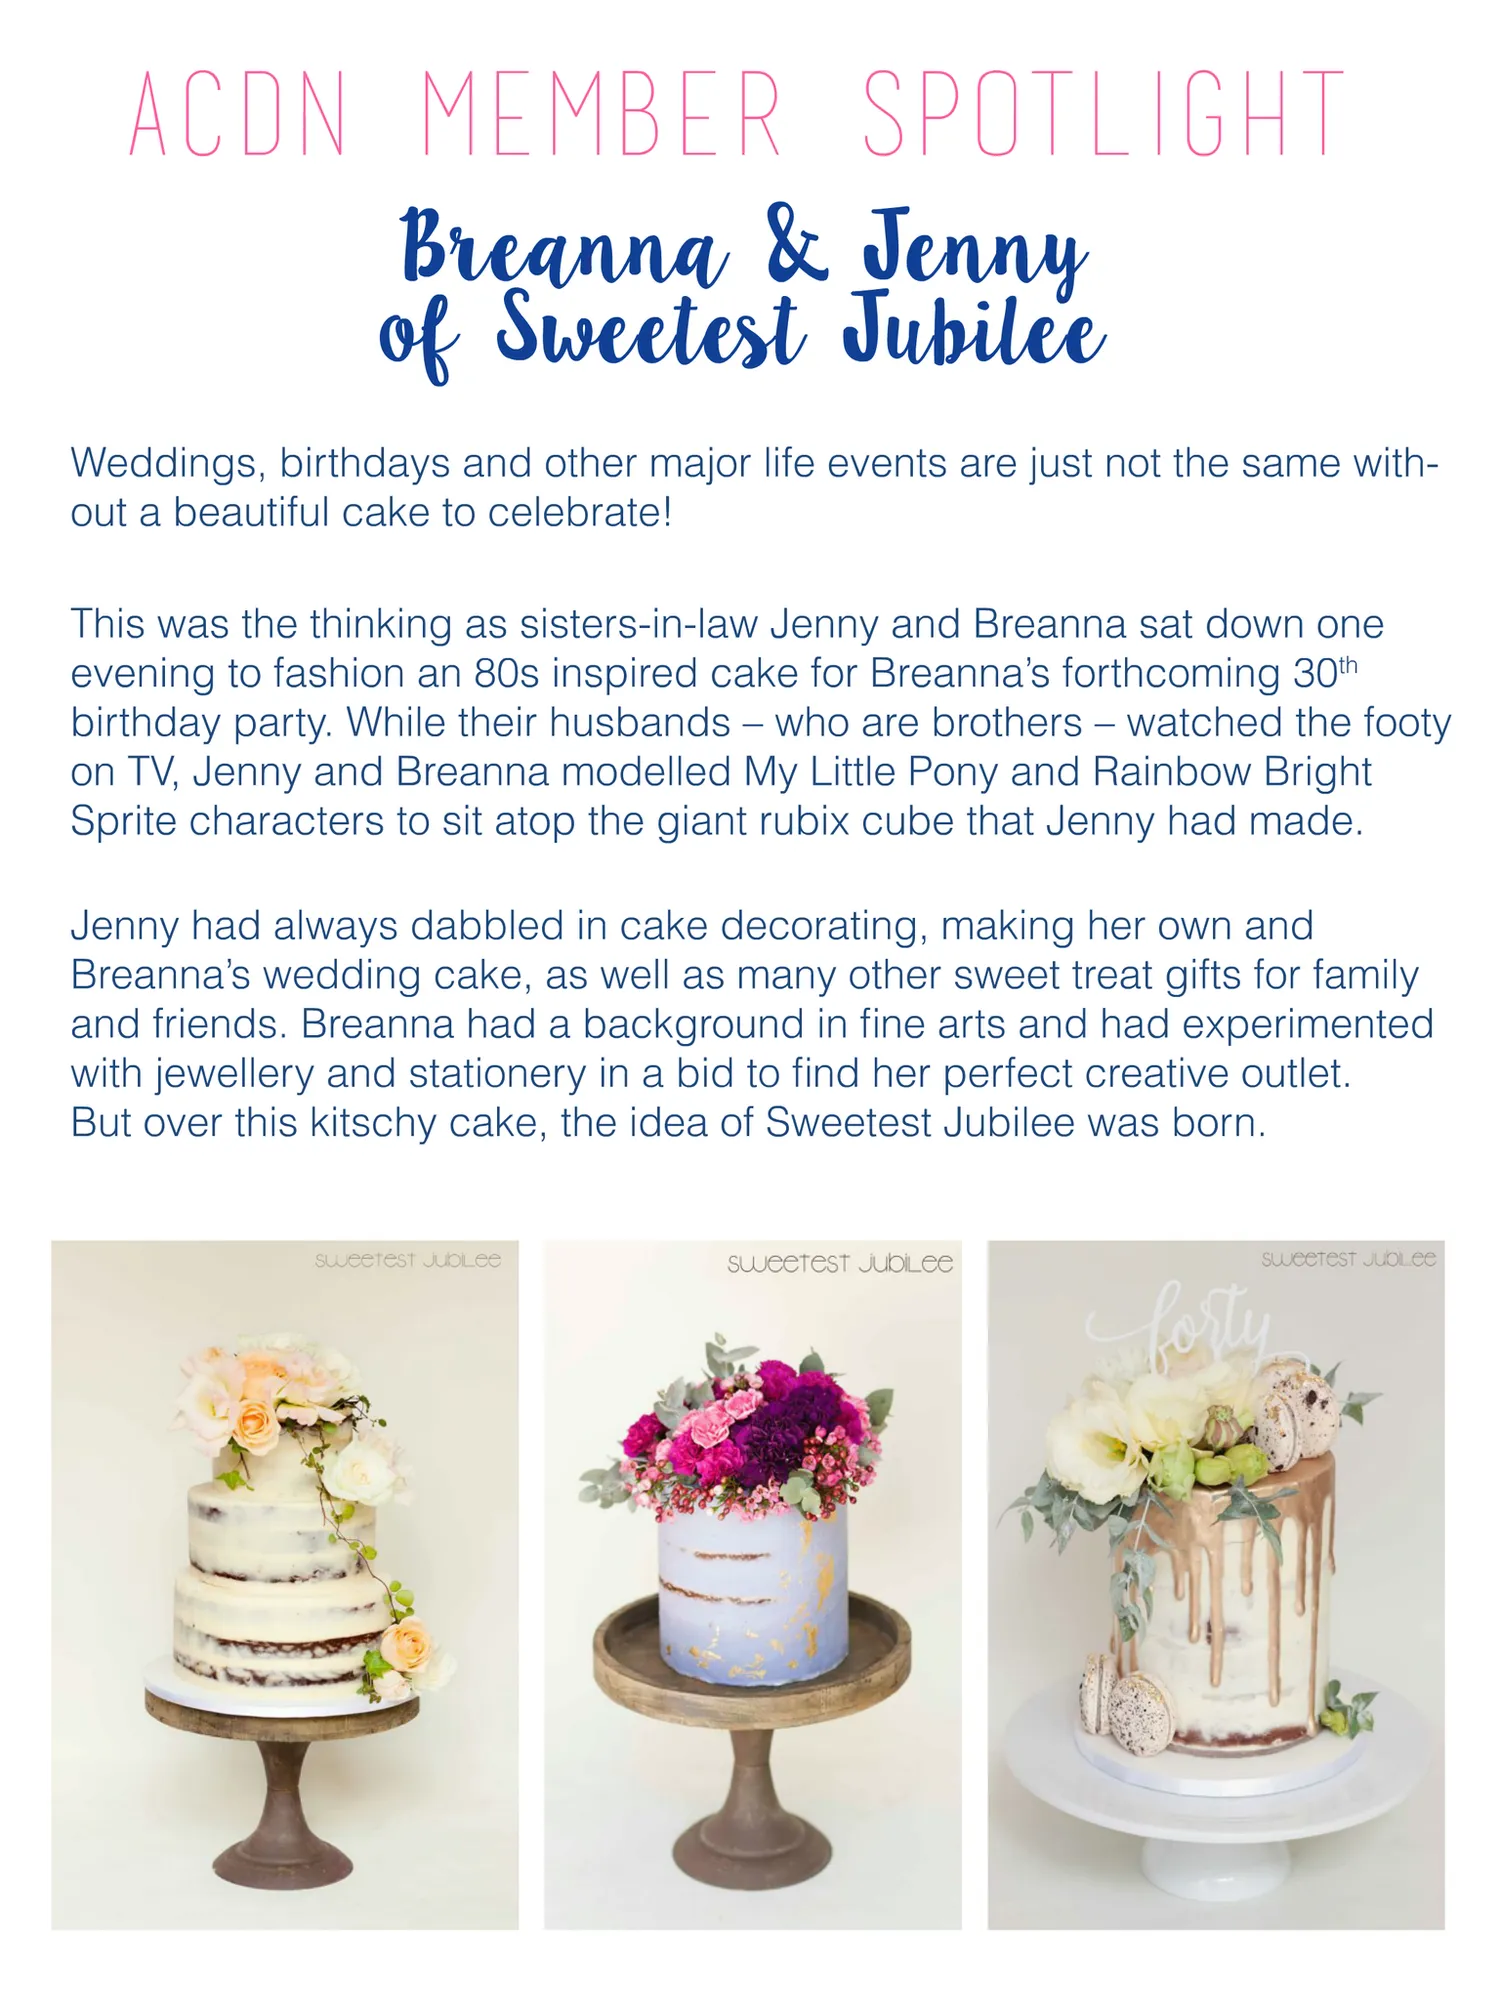
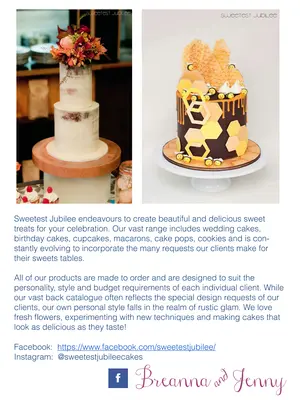
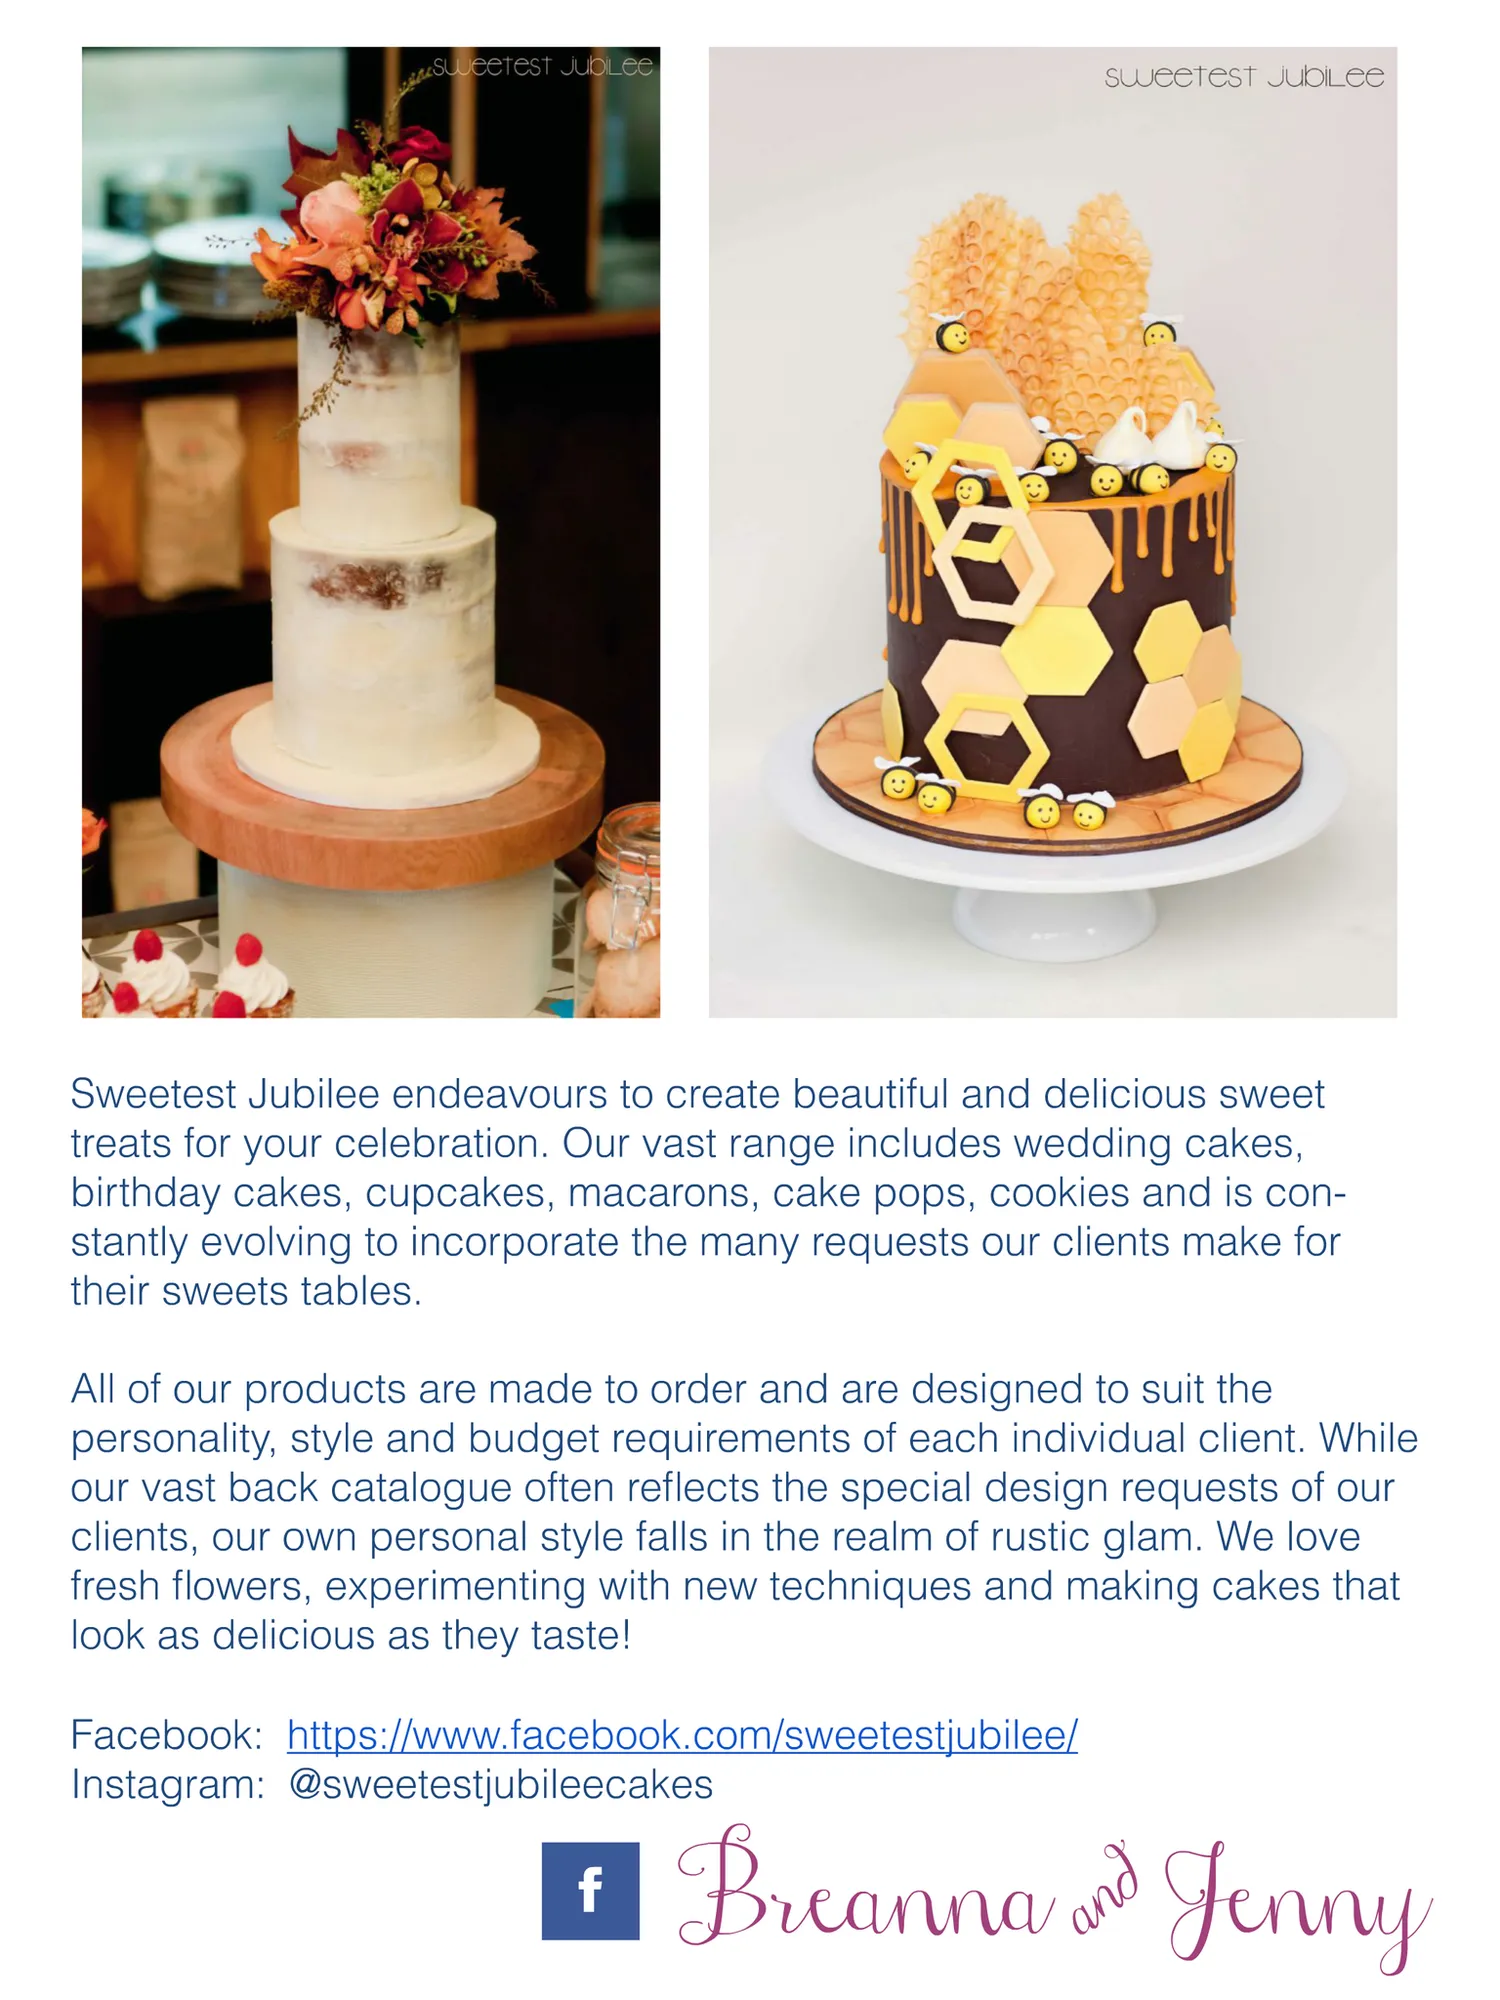
ACDN Member Spotlight Breanna & Jenny of Sweetest Jubilee Weddings, birthdays and other major life events are just not the same without a beautiful cake to celebrate! This was the thinking as sisters-in-law Jenny and Breanna sat down one evening to fashion an 80s inspired cake for Breanna’s forthcoming 30th birthday party. While their husbands – who are brothers – watched the footy on TV, Jenny and Breanna modelled My Little Pony and Rainbow Bright Sprite characters to sit atop the giant rubix cube that Jenny had made. Jenny had always dabbled in cake decorating, making her own and Breanna’s wedding cake, as well as many other sweet treat gifts for family and friends. Breanna had a background in fine arts and had experimented with jewellery and stationery in a bid to find her perfect creative outlet. But over this kitschy cake, the idea of Sweetest Jubilee was born.
Page 139 text
Sweetest Jubilee endeavours to create beautiful and delicious sweet treats for your celebration. Our vast range includes wedding cakes, birthday cakes, cupcakes, macarons, cake pops, cookies and is constantly evolving to incorporate the many requests our clients make for their sweets tables. All of our products are made to order and are designed to suit the personality, style and budget requirements of each individual client. While our vast back catalogue often reflects the special design requests of our clients, our own personal style falls in the realm of rustic glam. We love fresh flowers, experimenting with new techniques and making cakes that look as delicious as they taste! Facebook: https://www.facebook.com/sweetestjubilee/ Instagram: @sweetestjubileecakes f Breanna & Jenny
Page 140 text
ACDN Member Directory Decorators ACT Anita of Cake Canberra, ACT facebook.com/anitaofcake anitaofcake.com.au Occasional Cakes Canberra Canberra, ACT facebook.com/OccasionalCakesCanberra occasionalcakescanberra.com Surrender to Cake Queanbeyan, ACT facebook.com/surrendertocake The Sweet Baker Campbell, ACT facebook.com/TheSweetBakerCakes instagram.com/the.sweet.baker NSW BAKES & CAKES Sydney, NSW facebook.com/bakescakesnow Buds ‘n Petal Cakes Sydney, NSW facebook.com/BudsnPetalCakes?ref=hl Cake Animation Annangrove, NSW facebook.com/CakeAnimation cakeanimation.com.au Cupcakes by Corrie Sydney, NSW facebook.com/cupcakesbycorrie cupcakesbycorrie.com.au Sweet Perfection Cakes Newcastle, NSW facebook.com/sweetperfectioncakes sweetperfection.com.au Easy Bake Cakes Muswellbrook NSW facebook.com/EasyBakeCake.Julie/ the polished spoon Lane Cove NSW facebook.com/thepolishedspoon thepolishedspoon.com.au Frosted Sugar Cake Design Hills District, NSW facebook.com/frostedsugarcakedesign frostedsugarcakedesign.com.au facebook.com/toogoodtocut.CakeDecorating Gorgeous Cakes by Helen Pagewood, Sydney, NSW facebook.com/gorgeouscakesbyhelen gorgeouscakesbyhelen.com.au Wicked Cakes Frenchs Forest, NSW m.facebook.com/wickedcakes Hoopla Cakes & Bakes Orange, NSW facebook.com/hooplacakesandbakes hooplacakesandbakes.com.au QLD Kelly’s Treats Liverpool NSW facebook.com/kellystreats kellystreats.com.au Lavish Cakes Shoalhaven Heads, NSW facebook.com/LavishCakes-218540088178655/ lavishcakes.com/ Leanne’s Little Cakery Camden, NSW facebook.com/LeannesLittleCakery Pearl’s Creations Hornsby, NSW facebook.com/pearlscreations.com.au pearlscreations.com.au Cake FromThe Heart Sydney, Nsw facebook.com/cakefromtheheartbyalison cakefromtheheart.com.au Southin Style Cakes Woodcroft, NSW facebook.com/SouthinStyleCakes/ Christine's Cake Creations Kareela, New South Wales Christine's Cake Creations Sublime Cakes Blacktown, Nsw facebook.com/sublimecakesOZ sublimecakes.com.au/ Copy Cat Cakes Rozelle, Sydney, NSW facebook.com/copycatcakesaustralia copycatcakes.com.au Too Good to Cut - Cake Decorating Ungarie NSW Sugarpot Sydney, NSW facebook.com/sugarpot4me/ sugarpot.com.au A Nice Treat MAREEBA, Queensland facebook.com/anicetreat anicetreat.com Cakes by Paulie Redland Bay, Queensland facebook.com/Cakes-By-Paulie104737139616518/?ref=hl cakesbypaulie.com.au/ Dreamcakes by Dorita Gympie/Sunshine Coast, Queensland facebook.com/dreamcakesbydorita dreamcakesbydorita.com Flower & Fondant Gold Coast, QLD facebook.com/flowerandfondant flowerandfondant.com.au Frosted Kitchen Gold Coast, Queensland facebook.com/frostedkitchen15 Jackie’s Cakes by design Narangba, Qld facebook.com/JackiesCakesByDesign Marylou’s Custom Cake Creations Cashmere, QLD facebook.com/marylouscustomcakecreations jasomar.wix.com/creativecakes
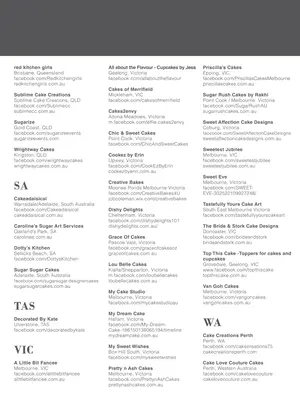
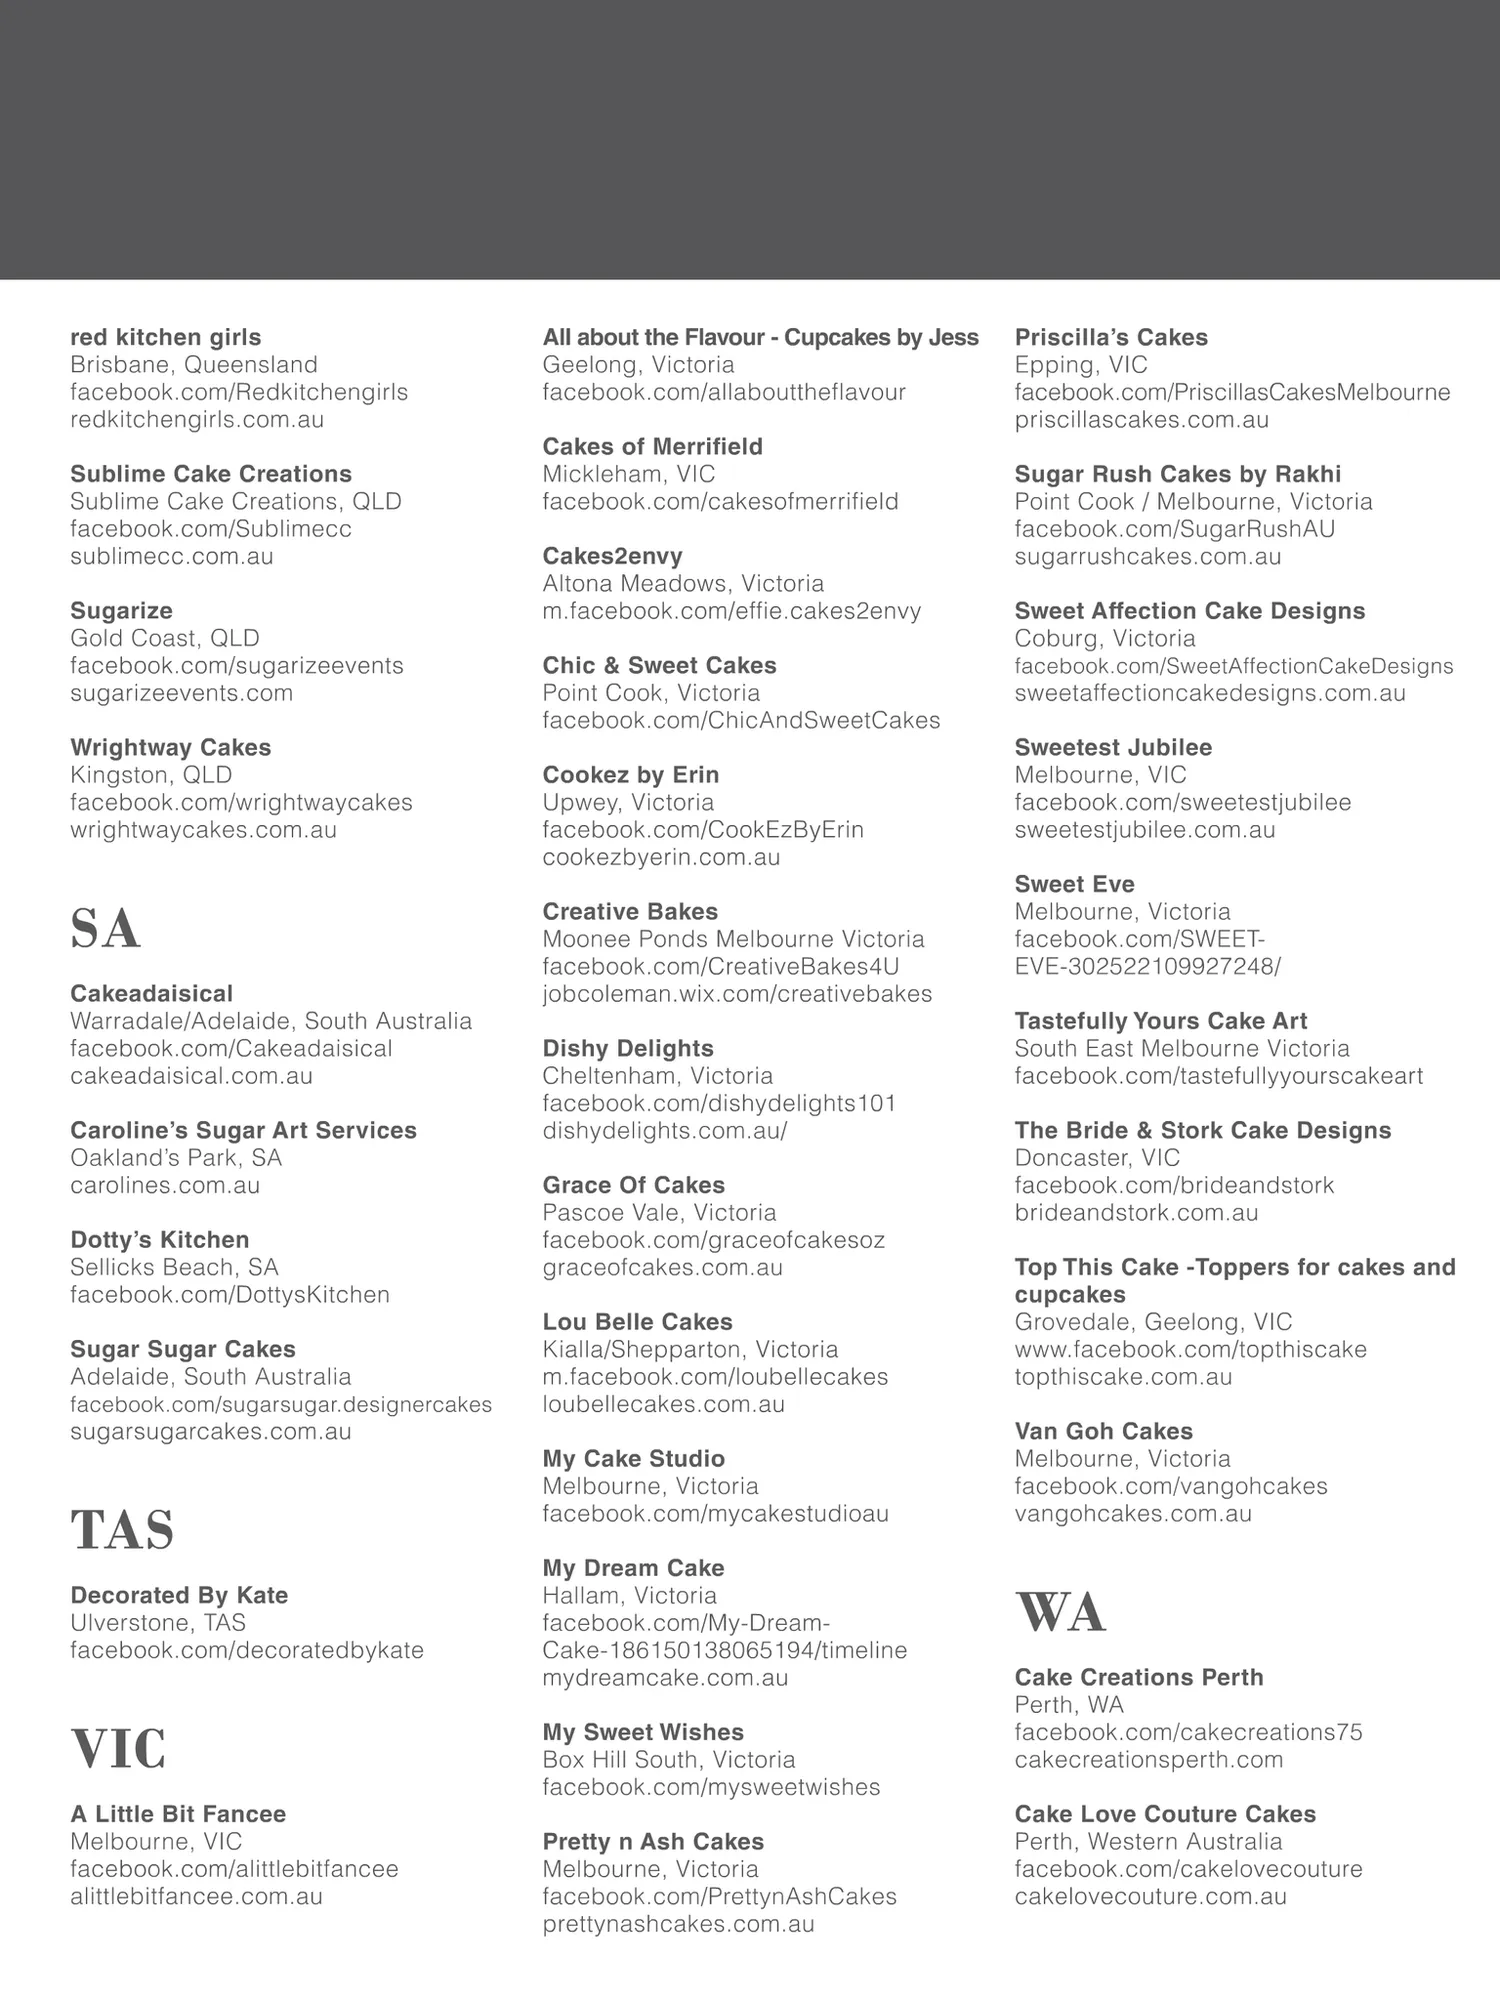
Page 141 text
red kitchen girls Brisbane, Queensland facebook.com/Redkitchengirls redkitchengirls.com.au Sublime Cake Creations Sublime Cake Creations, QLD facebook.com/Sublimecc sublimecc.com.au Sugarize Gold Coast, QLD facebook.com/sugarizeevents sugarizeevents.com Wrightway Cakes Kingston, QLD facebook.com/wrightwaycakes wrightwaycakes.com.au SA Cakeadaisical Warradale/Adelaide, South Australia facebook.com/Cakeadaisical cakeadaisical.com.au Caroline’s Sugar Art Services Oakland’s Park, SA carolines.com.au Dotty’s Kitchen Sellicks Beach, SA facebook.com/DottysKitchen Sugar Sugar Cakes Adelaide, South Australia facebook.com/sugarsugar.designercakes sugarsugarcakes.com.au TAS All about the Flavour - Cupcakes by Jess Geelong, Victoria facebook.com/allabouttheflavour Cakes of Merrifield Mickleham, VIC facebook.com/cakesofmerrifield Cakes2envy Altona Meadows, Victoria m.facebook.com/effie.cakes2envy Chic & Sweet Cakes Point Cook, Victoria facebook.com/ChicAndSweetCakes Cookez by Erin Upwey, Victoria facebook.com/CookEzByErin cookezbyerin.com.au Creative Bakes Moonee Ponds Melbourne Victoria facebook.com/CreativeBakes4U jobcoleman.wix.com/creativebakes Dishy Delights Cheltenham, Victoria facebook.com/dishydelights101 dishydelights.com.au/ Grace Of Cakes Pascoe Vale, Victoria facebook.com/graceofcakesoz graceofcakes.com.au Lou Belle Cakes Kialla/Shepparton, Victoria m.facebook.com/loubellecakes loubellecakes.com.au My Cake Studio Melbourne, Victoria facebook.com/mycakestudioau Decorated By Kate Ulverstone, TAS facebook.com/decoratedbykate My Dream Cake Hallam, Victoria facebook.com/My-DreamCake-186150138065194/timeline mydreamcake.com.au VIC My Sweet Wishes Box Hill South, Victoria facebook.com/mysweetwishes A Little Bit Fancee Melbourne, VIC facebook.com/alittlebitfancee alittlebitfancee.com.au Pretty n Ash Cakes Melbourne, Victoria facebook.com/PrettynAshCakes prettynashcakes.com.au Priscilla’s Cakes Epping, VIC facebook.com/PriscillasCakesMelbourne priscillascakes.com.au Sugar Rush Cakes by Rakhi Point Cook / Melbourne, Victoria facebook.com/SugarRushAU sugarrushcakes.com.au Sweet Affection Cake Designs Coburg, Victoria facebook.com/SweetAffectionCakeDesigns sweetaffectioncakedesigns.com.au Sweetest Jubilee Melbourne, VIC facebook.com/sweetestjubilee sweetestjubilee.com.au Sweet Eve Melbourne, Victoria facebook.com/SWEETEVE-302522109927248/ Tastefully Yours Cake Art South East Melbourne Victoria facebook.com/tastefullyyourscakeart The Bride & Stork Cake Designs Doncaster, VIC facebook.com/brideandstork brideandstork.com.au Top This Cake -Toppers for cakes and cupcakes Grovedale, Geelong, VIC www.facebook.com/topthiscake topthiscake.com.au Van Goh Cakes Melbourne, Victoria facebook.com/vangohcakes vangohcakes.com.au WA Cake Creations Perth Perth, WA facebook.com/cakecreations75 cakecreationsperth.com Cake Love Couture Cakes Perth, Western Australia facebook.com/cakelovecouture cakelovecouture.com.au

Page 142 text
Join us! ad full page Become a member of the Australian Cake Decorating Network to access a wide range of benefits. Start saving and networking today! f www.acdn.me [email protected] click here to join our mailing list! To advertise in Cake! magazine, contact [email protected]
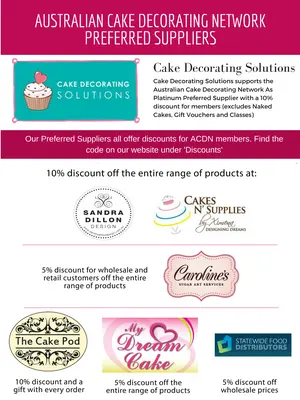
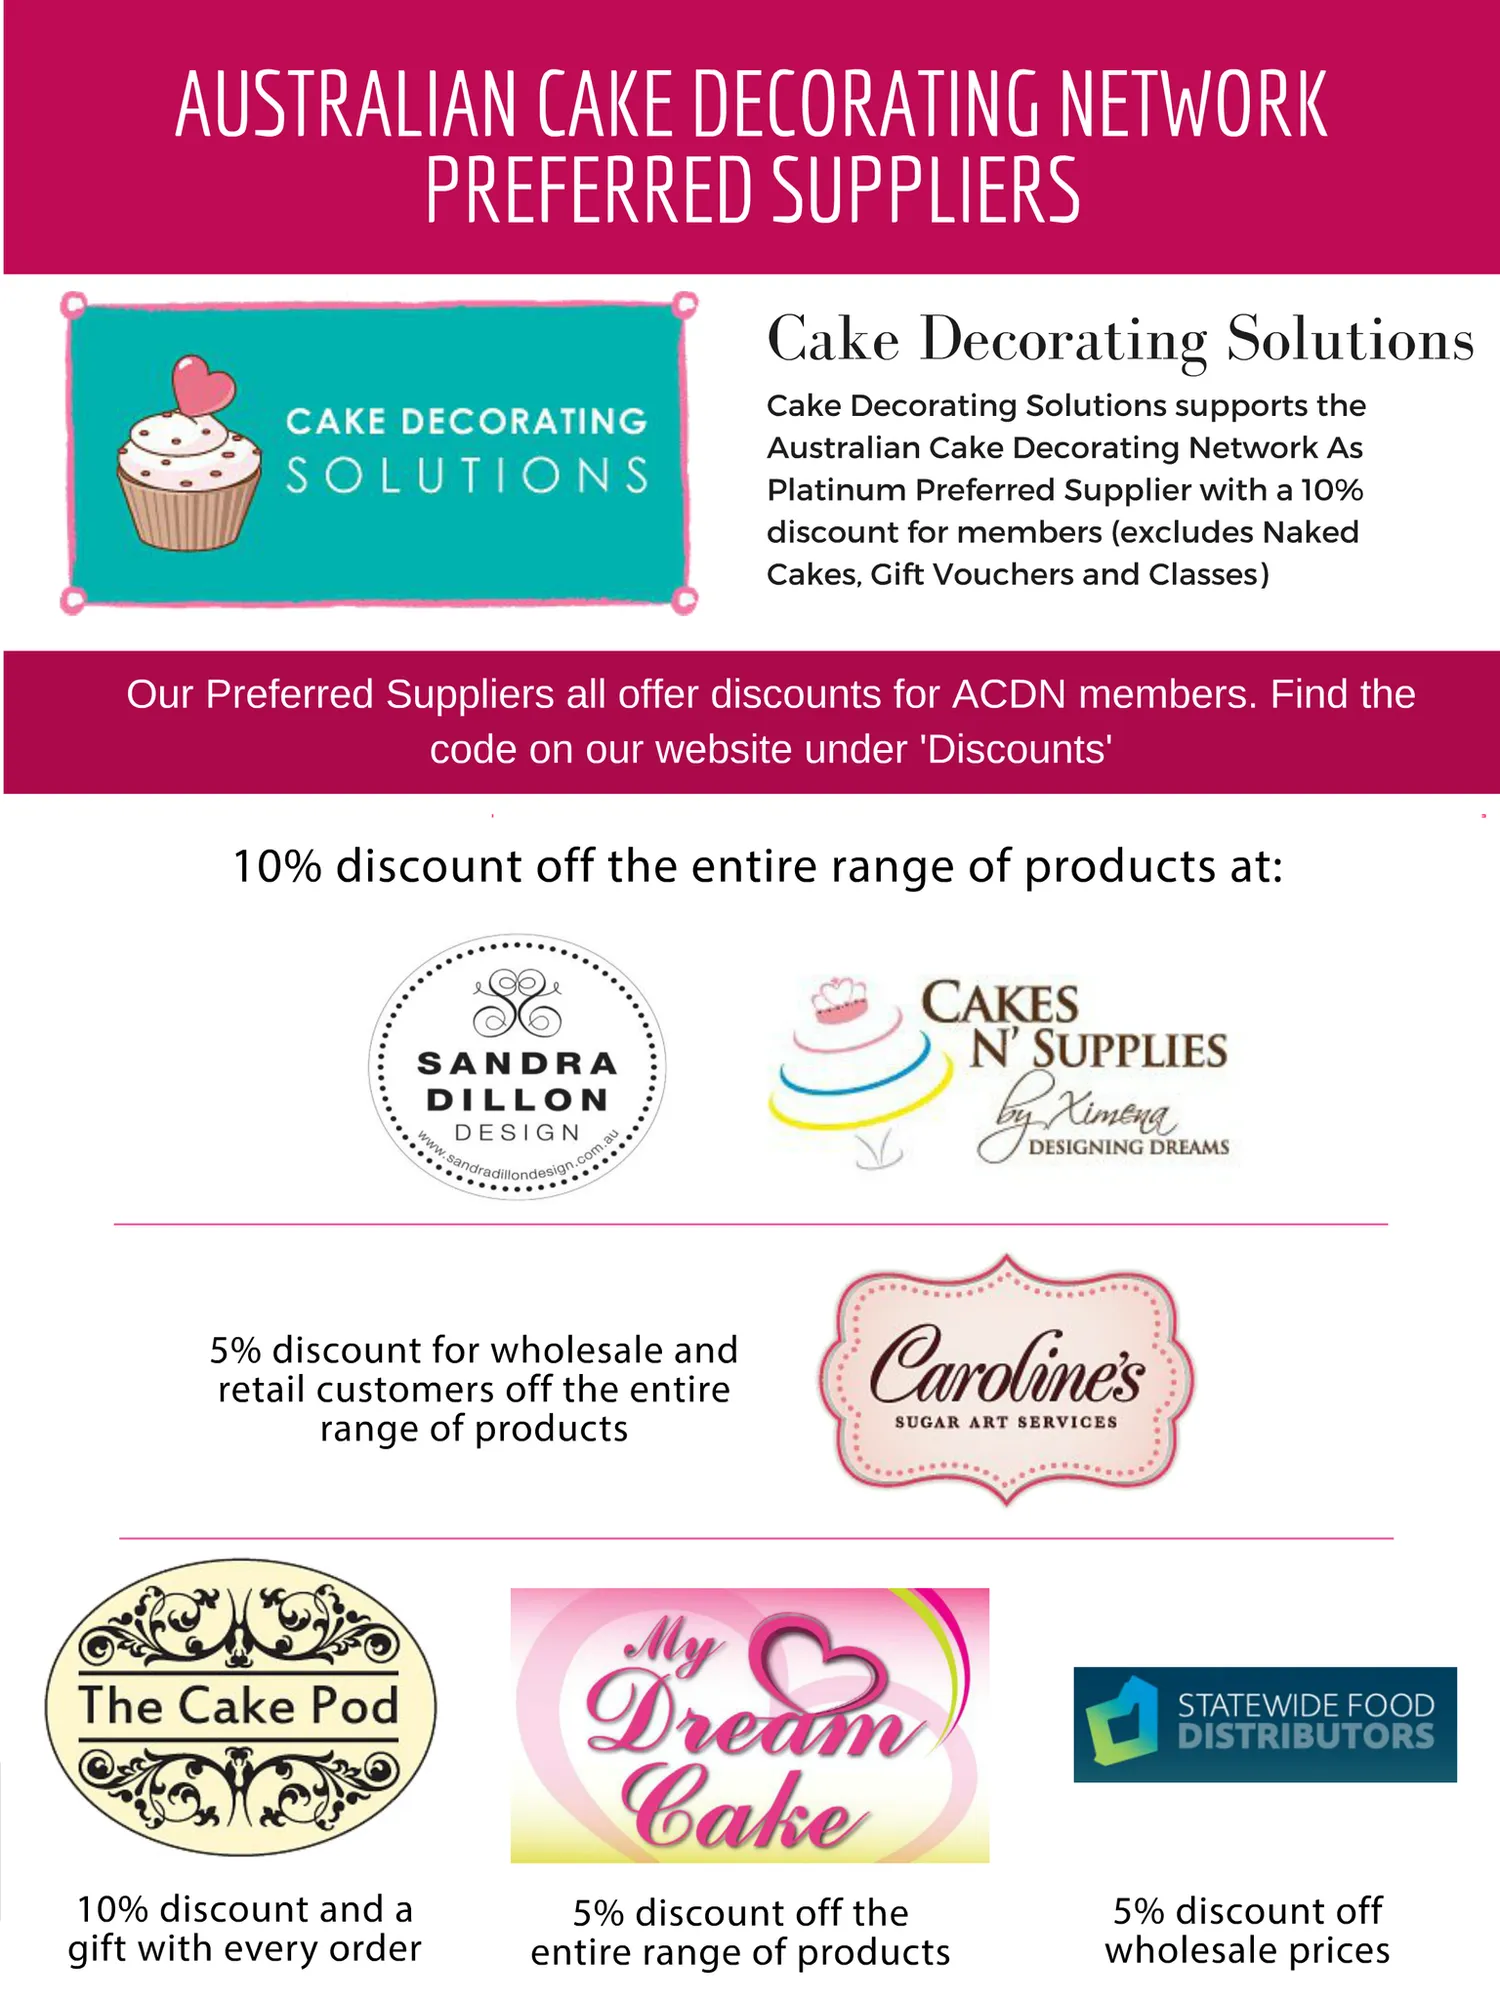
Page 143 text
AUSTRALIAN CAKE DECORATING NETWORK AUSTRALIAN CAKE DECORATING NETWORK PREFERRED SUPPLIERS PREFERRED SUPPLIERS Cake Decorating Solutions Cake Decorating Solutions AUSTRALIAN CAKE DECORATING NETWOR PREFERRED SUPPLIERS Cake Decorating So Our Preferred Suppliers all offer discounts for ACDN members. Find the code on our website under 'Discounts' Our Preferred Suppliers all offer discounts for ACDN members. Find the code on our website under 'Discounts' couture 10% discount cakes couture sugar art creative cakes off caroline's the entire range of products at: australia services caroline's sugar art services cakes creative cakes australia Our Preferred Suppliers all offer discounts for ACDN members. code on our website under 'Discounts' caroline's sugar art services couture cakes 5% discount for wholesale and retail customers off the entire the range of products my cake pod the cake pod statewide food distributors statewide food distributors dream cake my dream cake the cake pod 10% discount and a gift with every order creativ austr my dream cake 5% discount off the entire range of products statewid distrib 5% discount off wholesale prices
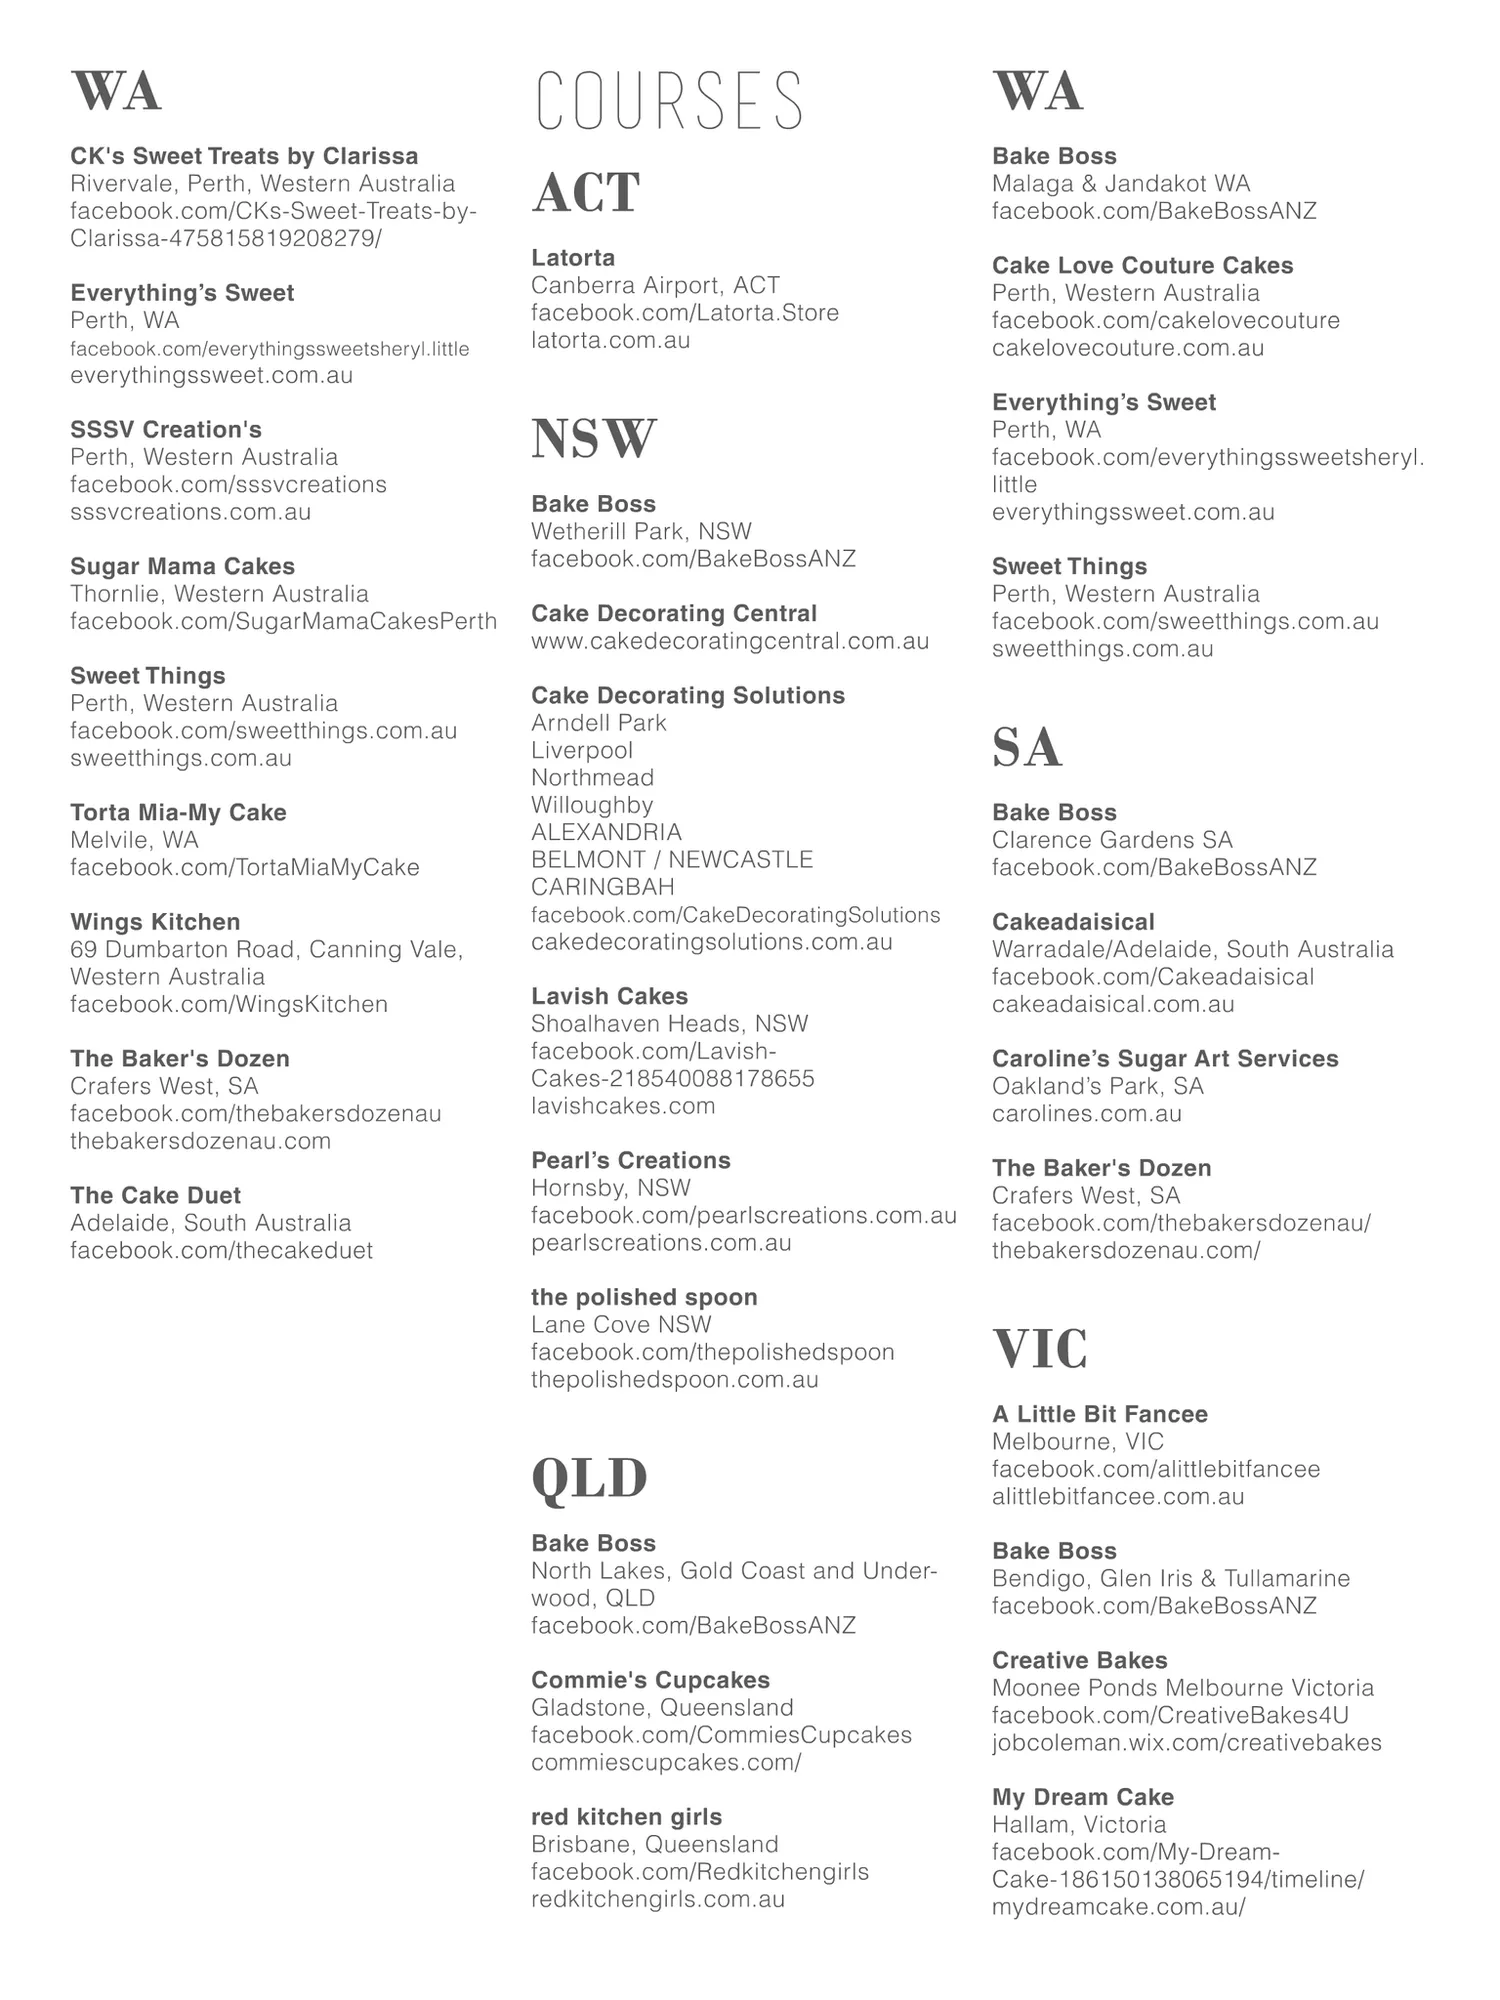
Page 144 text
WA CK's Sweet Treats by Clarissa Rivervale, Perth, Western Australia facebook.com/CKs-Sweet-Treats-byClarissa-475815819208279/ Everything’s Sweet Perth, WA facebook.com/everythingssweetsheryl.little Courses WA ACT Bake Boss Malaga & Jandakot WA facebook.com/BakeBossANZ Latorta Canberra Airport, ACT facebook.com/Latorta.Store latorta.com.au Cake Love Couture Cakes Perth, Western Australia facebook.com/cakelovecouture cakelovecouture.com.au everythingssweet.com.au SSSV Creation's Perth, Western Australia facebook.com/sssvcreations sssvcreations.com.au Sugar Mama Cakes Thornlie, Western Australia facebook.com/SugarMamaCakesPerth Sweet Things Perth, Western Australia facebook.com/sweetthings.com.au sweetthings.com.au Torta Mia-My Cake Melvile, WA facebook.com/TortaMiaMyCake Wings Kitchen 69 Dumbarton Road, Canning Vale, Western Australia facebook.com/WingsKitchen The Baker's Dozen Crafers West, SA facebook.com/thebakersdozenau thebakersdozenau.com The Cake Duet Adelaide, South Australia facebook.com/thecakeduet NSW Bake Boss Wetherill Park, NSW facebook.com/BakeBossANZ Cake Decorating Central www.cakedecoratingcentral.com.au Cake Decorating Solutions Arndell Park Liverpool Northmead Willoughby ALEXANDRIA BELMONT / NEWCASTLE CARINGBAH facebook.com/CakeDecoratingSolutions cakedecoratingsolutions.com.au Lavish Cakes Shoalhaven Heads, NSW facebook.com/LavishCakes-218540088178655 lavishcakes.com Everything’s Sweet Perth, WA facebook.com/everythingssweetsheryl. little everythingssweet.com.au Sweet Things Perth, Western Australia facebook.com/sweetthings.com.au sweetthings.com.au SA Bake Boss Clarence Gardens SA facebook.com/BakeBossANZ Cakeadaisical Warradale/Adelaide, South Australia facebook.com/Cakeadaisical cakeadaisical.com.au Caroline’s Sugar Art Services Oakland’s Park, SA carolines.com.au Pearl’s Creations Hornsby, NSW facebook.com/pearlscreations.com.au pearlscreations.com.au The Baker's Dozen Crafers West, SA facebook.com/thebakersdozenau/ thebakersdozenau.com/ the polished spoon Lane Cove NSW facebook.com/thepolishedspoon thepolishedspoon.com.au VIC QLD A Little Bit Fancee Melbourne, VIC facebook.com/alittlebitfancee alittlebitfancee.com.au Bake Boss North Lakes, Gold Coast and Underwood, QLD facebook.com/BakeBossANZ Commie's Cupcakes Gladstone, Queensland facebook.com/CommiesCupcakes commiescupcakes.com/ red kitchen girls Brisbane, Queensland facebook.com/Redkitchengirls redkitchengirls.com.au Bake Boss Bendigo, Glen Iris & Tullamarine facebook.com/BakeBossANZ Creative Bakes Moonee Ponds Melbourne Victoria facebook.com/CreativeBakes4U jobcoleman.wix.com/creativebakes My Dream Cake Hallam, Victoria facebook.com/My-DreamCake-186150138065194/timeline/ mydreamcake.com.au/
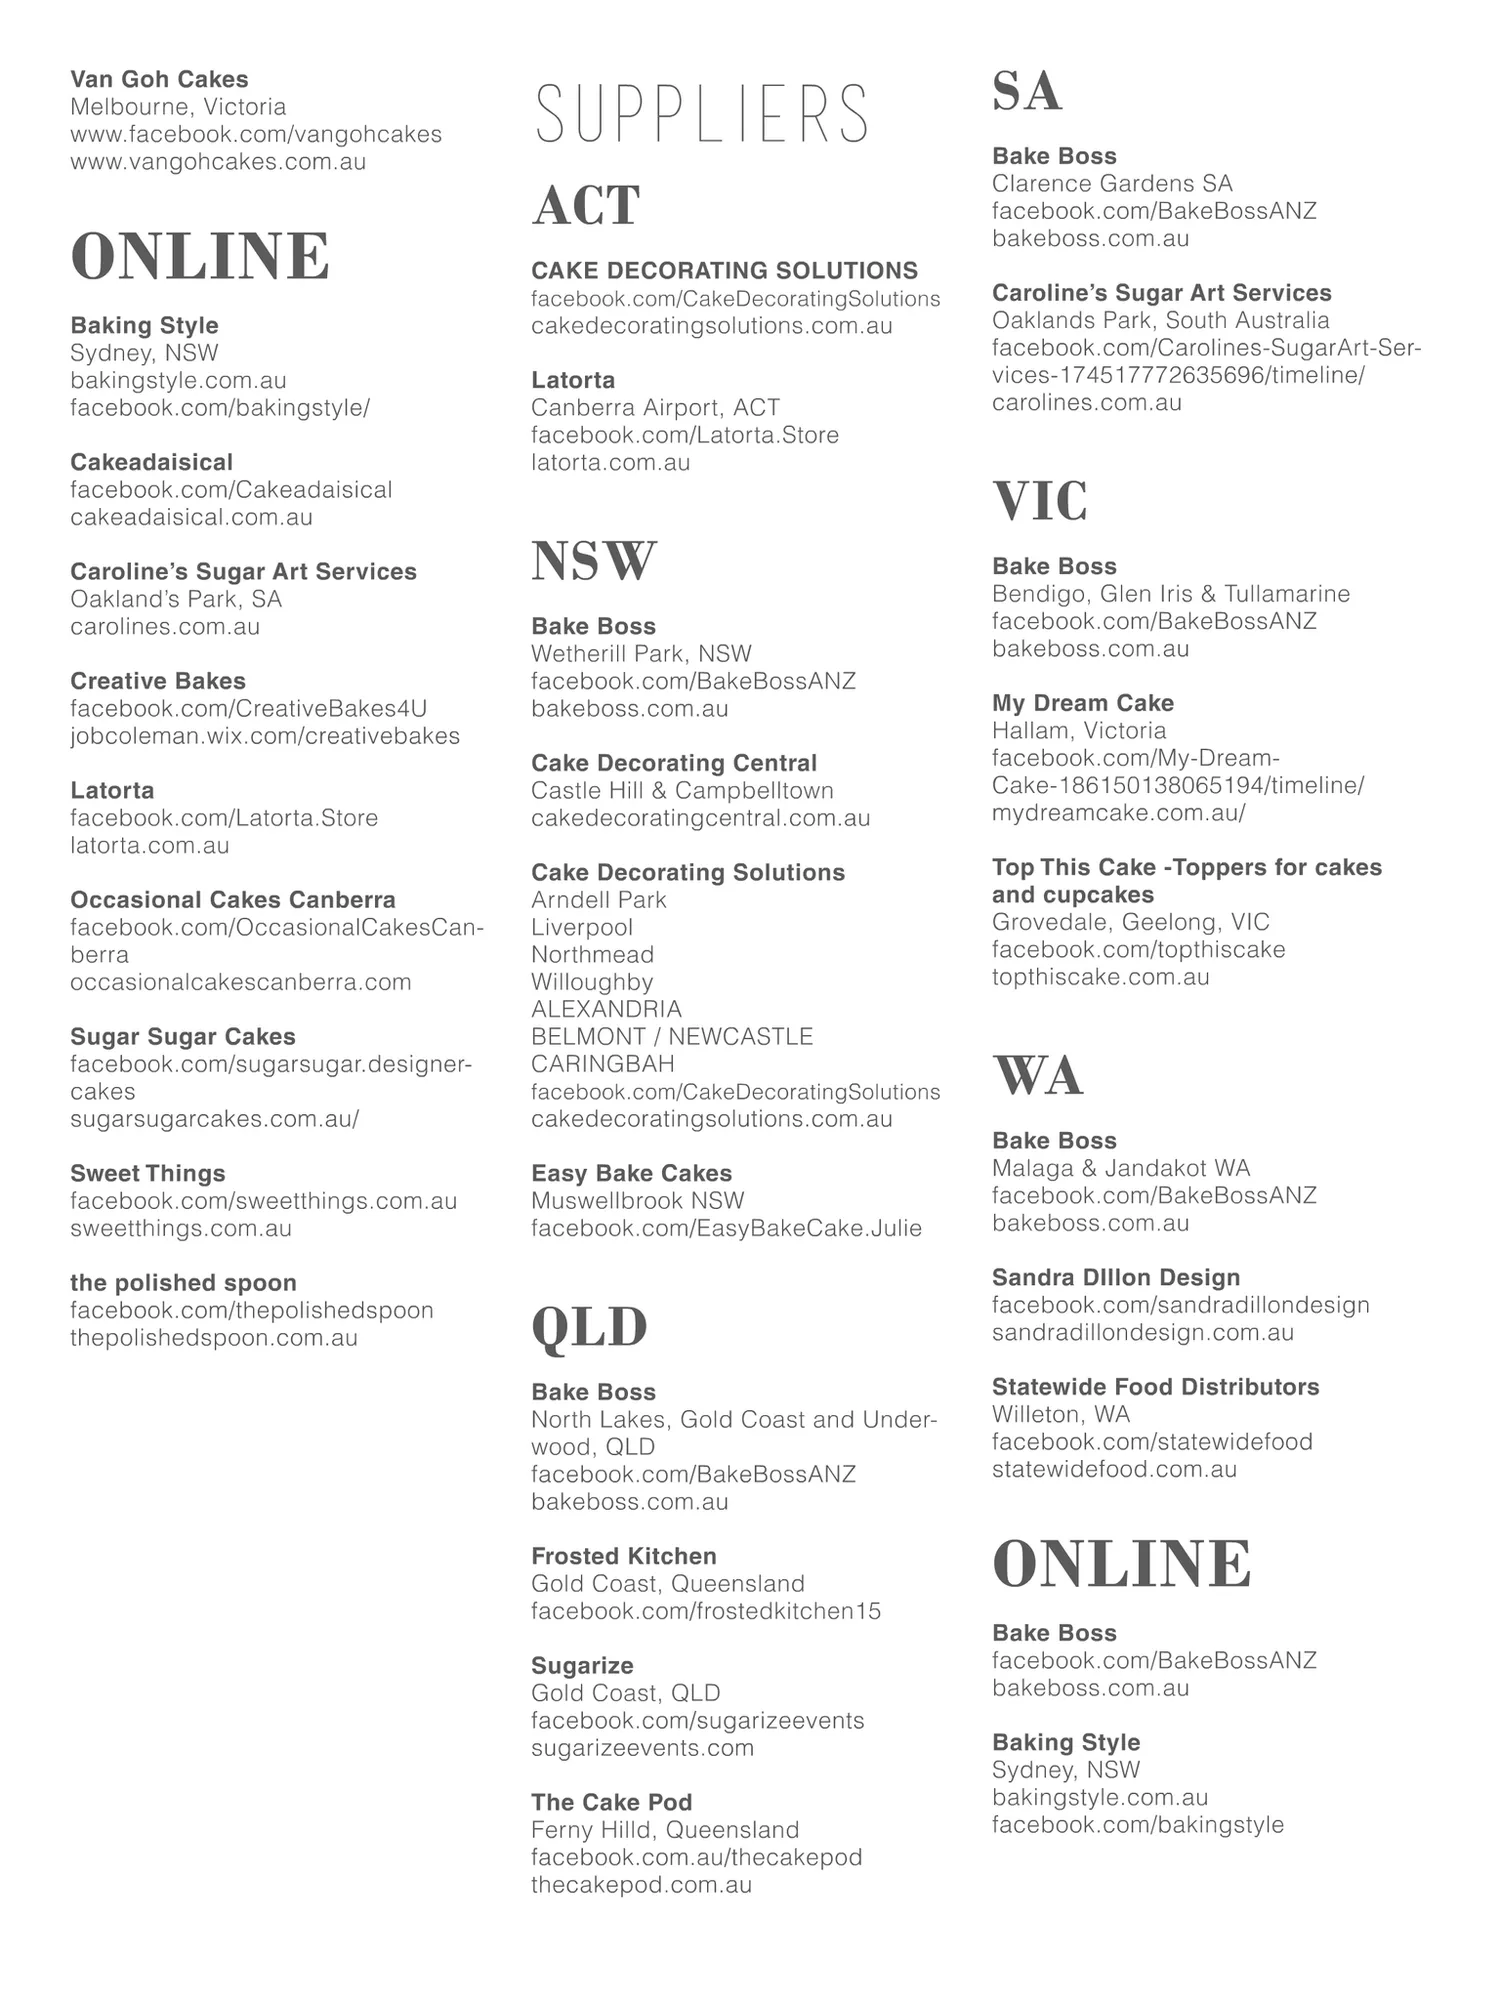
Page 145 text
Van Goh Cakes Melbourne, Victoria www.facebook.com/vangohcakes www.vangohcakes.com.au ONLINE Baking Style Sydney, NSW bakingstyle.com.au facebook.com/bakingstyle/ Cakeadaisical facebook.com/Cakeadaisical cakeadaisical.com.au Caroline’s Sugar Art Services Oakland’s Park, SA carolines.com.au Creative Bakes facebook.com/CreativeBakes4U jobcoleman.wix.com/creativebakes Latorta facebook.com/Latorta.Store latorta.com.au Occasional Cakes Canberra facebook.com/OccasionalCakesCanberra occasionalcakescanberra.com Sugar Sugar Cakes facebook.com/sugarsugar.designercakes sugarsugarcakes.com.au/ Sweet Things facebook.com/sweetthings.com.au sweetthings.com.au the polished spoon facebook.com/thepolishedspoon thepolishedspoon.com.au Suppliers ACT CAKE DECORATING SOLUTIONS facebook.com/CakeDecoratingSolutions cakedecoratingsolutions.com.au Latorta Canberra Airport, ACT facebook.com/Latorta.Store latorta.com.au NSW Bake Boss Wetherill Park, NSW facebook.com/BakeBossANZ bakeboss.com.au Cake Decorating Central Castle Hill & Campbelltown cakedecoratingcentral.com.au Cake Decorating Solutions Arndell Park Liverpool Northmead Willoughby ALEXANDRIA BELMONT / NEWCASTLE CARINGBAH SA Bake Boss Clarence Gardens SA facebook.com/BakeBossANZ bakeboss.com.au Caroline’s Sugar Art Services Oaklands Park, South Australia facebook.com/Carolines-SugarArt-Services-174517772635696/timeline/ carolines.com.au VIC Bake Boss Bendigo, Glen Iris & Tullamarine facebook.com/BakeBossANZ bakeboss.com.au My Dream Cake Hallam, Victoria facebook.com/My-DreamCake-186150138065194/timeline/ mydreamcake.com.au/ Top This Cake -Toppers for cakes and cupcakes Grovedale, Geelong, VIC facebook.com/topthiscake topthiscake.com.au facebook.com/CakeDecoratingSolutions WA Easy Bake Cakes Muswellbrook NSW facebook.com/EasyBakeCake.Julie Bake Boss Malaga & Jandakot WA facebook.com/BakeBossANZ bakeboss.com.au cakedecoratingsolutions.com.au QLD Bake Boss North Lakes, Gold Coast and Underwood, QLD facebook.com/BakeBossANZ bakeboss.com.au Frosted Kitchen Gold Coast, Queensland facebook.com/frostedkitchen15 Sugarize Gold Coast, QLD facebook.com/sugarizeevents sugarizeevents.com The Cake Pod Ferny Hilld, Queensland facebook.com.au/thecakepod thecakepod.com.au Sandra DIllon Design facebook.com/sandradillondesign sandradillondesign.com.au Statewide Food Distributors Willeton, WA facebook.com/statewidefood statewidefood.com.au ONLINE Bake Boss facebook.com/BakeBossANZ bakeboss.com.au Baking Style Sydney, NSW bakingstyle.com.au facebook.com/bakingstyle
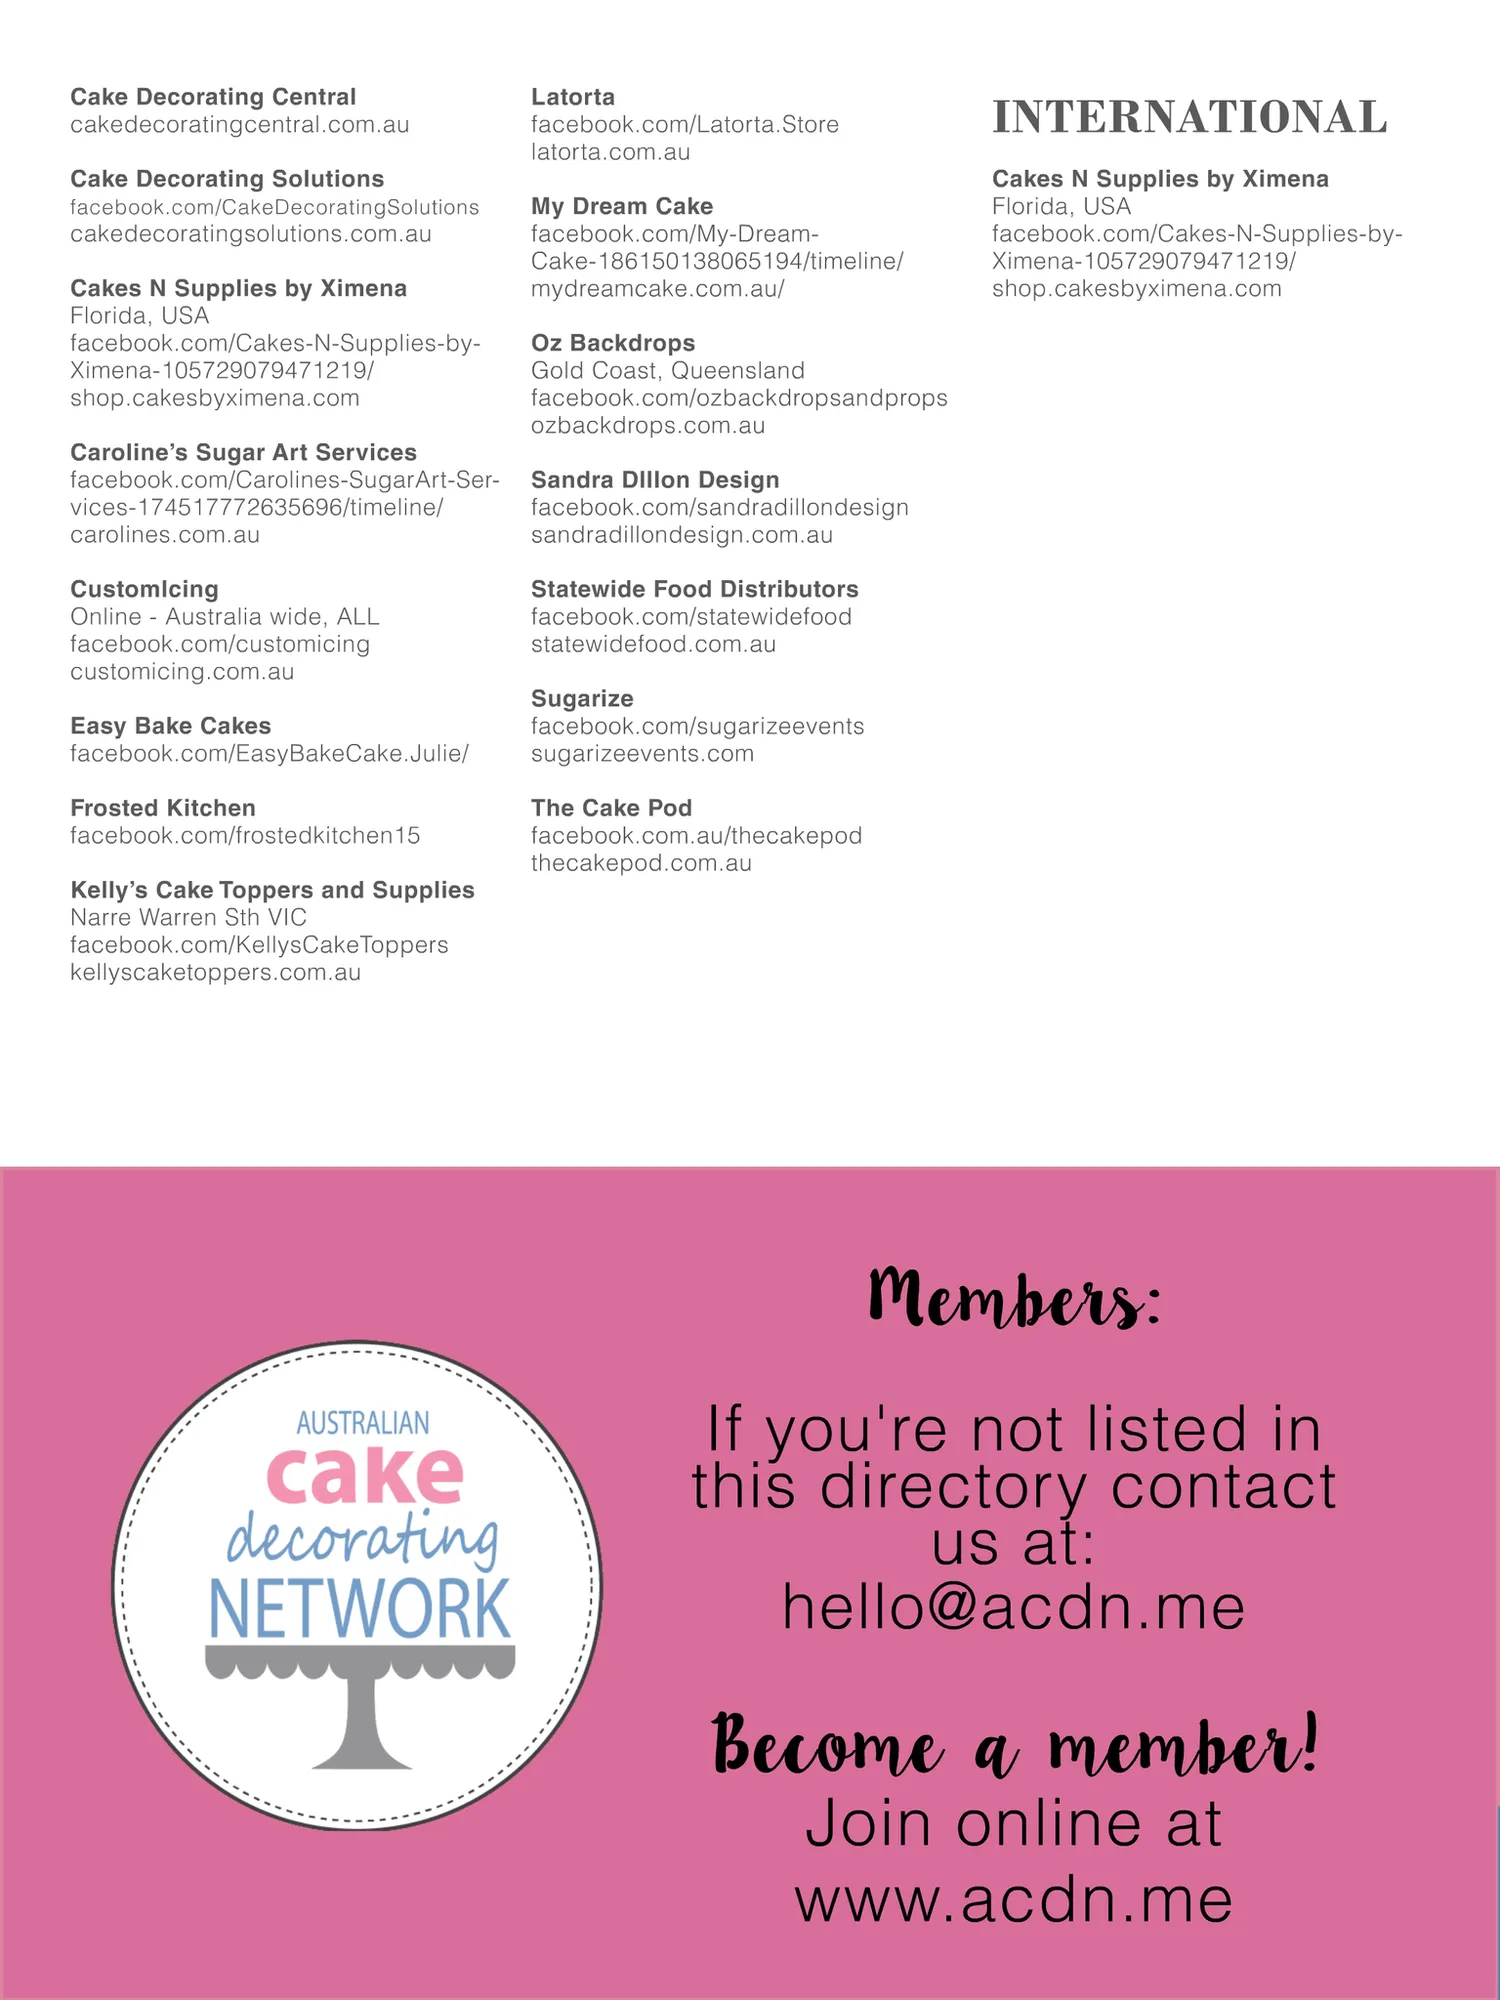
Page 146 text
Cake Decorating Central cakedecoratingcentral.com.au Cake Decorating Solutions facebook.com/CakeDecoratingSolutions cakedecoratingsolutions.com.au Cakes N Supplies by Ximena Florida, USA facebook.com/Cakes-N-Supplies-byXimena-105729079471219/ shop.cakesbyximena.com Caroline’s Sugar Art Services facebook.com/Carolines-SugarArt-Services-174517772635696/timeline/ carolines.com.au CustomIcing Online - Australia wide, ALL facebook.com/customicing customicing.com.au Easy Bake Cakes facebook.com/EasyBakeCake.Julie/ Frosted Kitchen facebook.com/frostedkitchen15 Kelly’s Cake Toppers and Supplies Narre Warren Sth VIC facebook.com/KellysCakeToppers kellyscaketoppers.com.au Latorta facebook.com/Latorta.Store latorta.com.au INTERNATIONAL My Dream Cake facebook.com/My-DreamCake-186150138065194/timeline/ mydreamcake.com.au/ Cakes N Supplies by Ximena Florida, USA facebook.com/Cakes-N-Supplies-byXimena-105729079471219/ shop.cakesbyximena.com Oz Backdrops Gold Coast, Queensland facebook.com/ozbackdropsandprops ozbackdrops.com.au Sandra DIllon Design facebook.com/sandradillondesign sandradillondesign.com.au Statewide Food Distributors facebook.com/statewidefood statewidefood.com.au Sugarize facebook.com/sugarizeevents sugarizeevents.com The Cake Pod facebook.com.au/thecakepod thecakepod.com.au Members: If you're not listed in this directory contact us at: [email protected] Become a member! Join online at www.acdn.me
Page 147 text
Cake! magazine f www.acdn.me [email protected] Don't miss future issues of Cake! Subscribe for FREE here! To advertise in Cake! magazine, contact: [email protected]