Page 13 of 153
Page 1 text
MAY 2017
Page 2 text
Cake! m a g a z i n e PUBLISHER: Cake! is published by the Australian Cake Decorating Network Pty Ltd. ACN: 91 164 927 584. © All content copyright 2017 Australian Cake Decorating Network Pty Ltd. All rights reserved. Reproduction any part of the magazine without written permission is prohibited. All prices included in Cake! are approximate and are in AUD unless otherwise stated. Prices quoted are correct at the time of publishing and may vary or be subject to change. The Australian Cake Decorating Network Pty Ltd accepts no responsibility for damage or loss as a result of material submitted for, published in or as a result of this publication. The Australian Cake Decorating Network does not have an affiliation with any other magazine. The views and opinions expressed within this publication are not necessarily the views of the publisher or it's affiliates. While every effort has been made to ensure the accuracy of the informtion contained within Cake! the publisher and Cake! hold no responsibility for any errors, omissions, or consequences subsequent or otherwise, including loss or damage arising from reliance on information in this publication. Content is supplied for publication in Cake! by parties external to the Australian Cake Decorating Network and it is the external party's responsibility to ensure content and credits are accurate. Cake! contains advertising through individual arrangements, which may include paid affiliate arrangements. Cake! may also contain affiliate links. The agreements are held between the advertiser or affiliate and the Australian Cake Decorating Network Ptd Ltd. To advertise in Cake! magazine, contact: [email protected] f www.acdn.me [email protected] click here to join our mailing list!
Page 3 text
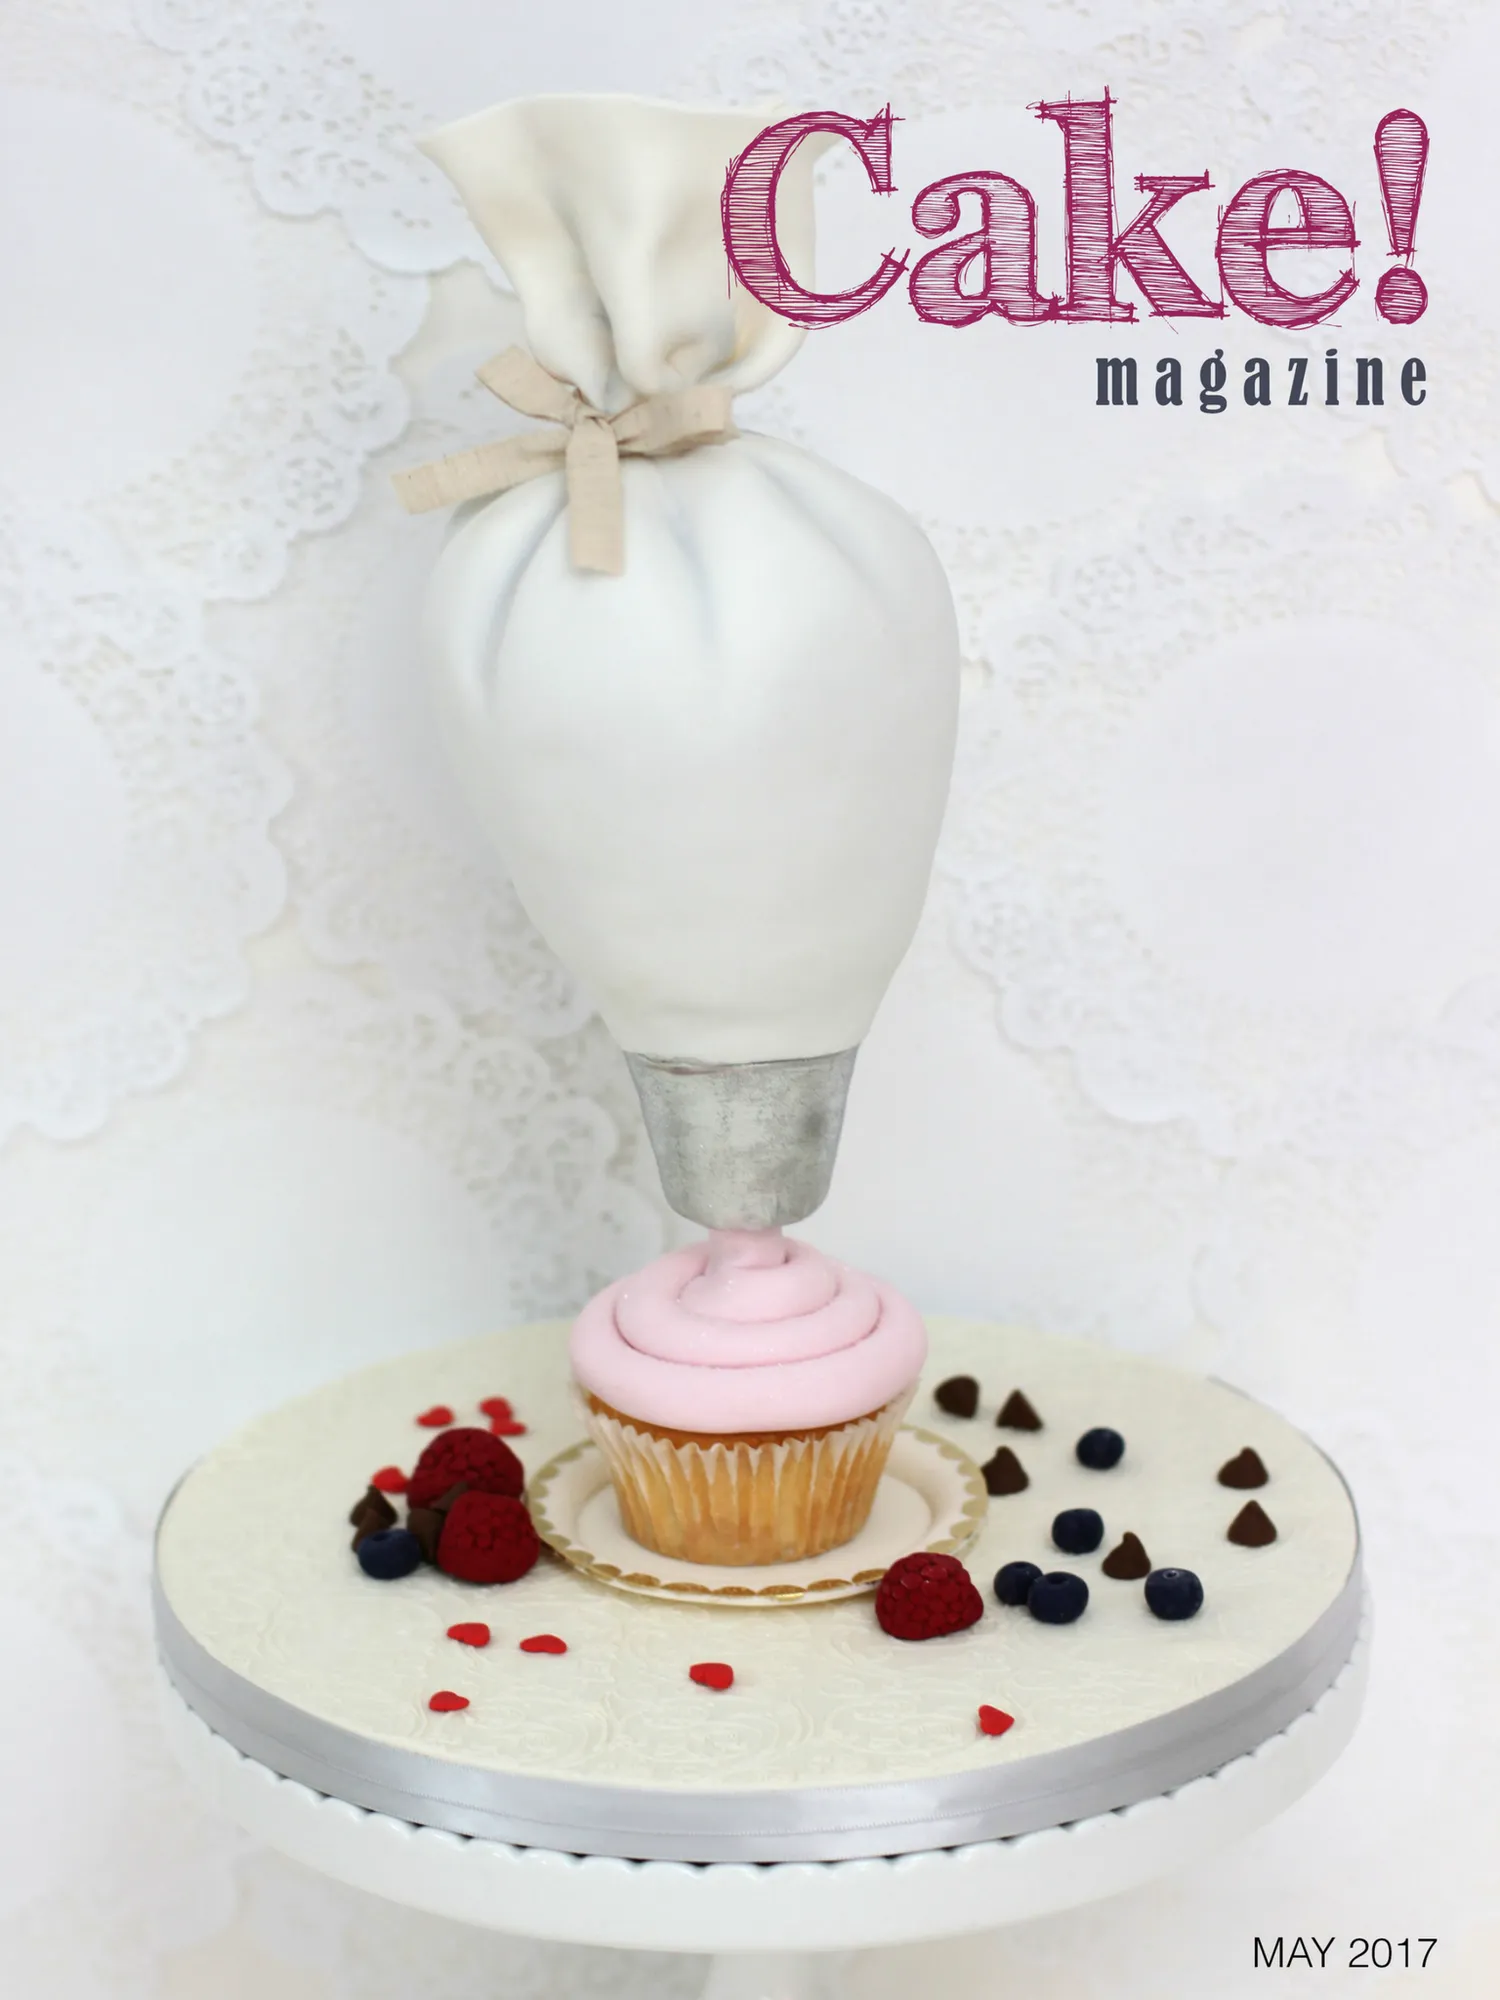
letter from the editor Well it has been a busy start to the year as usual and we can't believe it is May already! This week we'll be travelling to Melbourne for our 2017 VIC Cake Camp with a group of amazing teachers and students in the gorgeous Yarra Valley. It is always such a fun weekend, a great opportunity to catch up with cake friends, learn some new skills and even to catch some time to relax in the gorgeous surroundings. Thankyou to everyone who is able to join us on Cake Camp and to the rest of the team at ACDN who have helped to ensure that everyone has an amazing time. Our May 2017 issue is about centered on one of our favourite topics... Food! What could be better than cake than cake that is created to look like other food! There is so much work that goes in to creating life-like cake art, and we hope you enjoy the tutorials and images in this issue and that they inspire you to create your own edible cake-food-art! We're also SO excited to announce the release of UK Cake Crawl tickets! At the end of October 2017 a group of 30 of us will spend a week in the UK, touring London's best cake shops and studios, attending the Cake International Show in Birmingham, and then heading to Liverpool to visit the fabulous Renshaw academy. It's going to eb amazing and we hope you can join us! Liz Liz Wright editor Liz is the editor of Cake! magazine and founder and owner of the Australian Cake Decorating Network. Liz grew up surrounded by cake, spending hours upon hours watching her mum create stunning wedding cakes (in the days of intricate piping and extension work!). Liz is excited to have the opportunity to use Cake! magazine as well as the Australian Cake Decorating Network to showcase the incredbile talent of cake decorators in Australia and worldwide. COVER IMAGE: Kellie Rudland Kirsty Vierdag marketing & advertising administrative assistant Kellie discovered the world of cakes 8 years ago. Since then she has worked alongside pastry chefs as a head decorator for an established cake company. Kellie joined the ACDN team in 2013 and along with Contribution Manager for Cake! magazine, Kellie is also Social Media Manager for ACDN. WIth a background in marketing and a passion for baking, Kirsty has become an integral part of the ACDN team. Kirsty runs her own catering business creating delicious cakes and treats. Kirsty is Marketing and Advertising Manager for ACDN. Born in the Philippines, Aika is the Administrative Assistant for the ACDN. She was new to the cake world when she joined the ACDN team in 2015 and has since discovered her love for cakes & baking. She hopes to pursue her passion and enter into a professional culinary program in the future. contribution manager Aika Jeane
Page 4 text
contents 11 15 51 23 76 25
Page 5 text
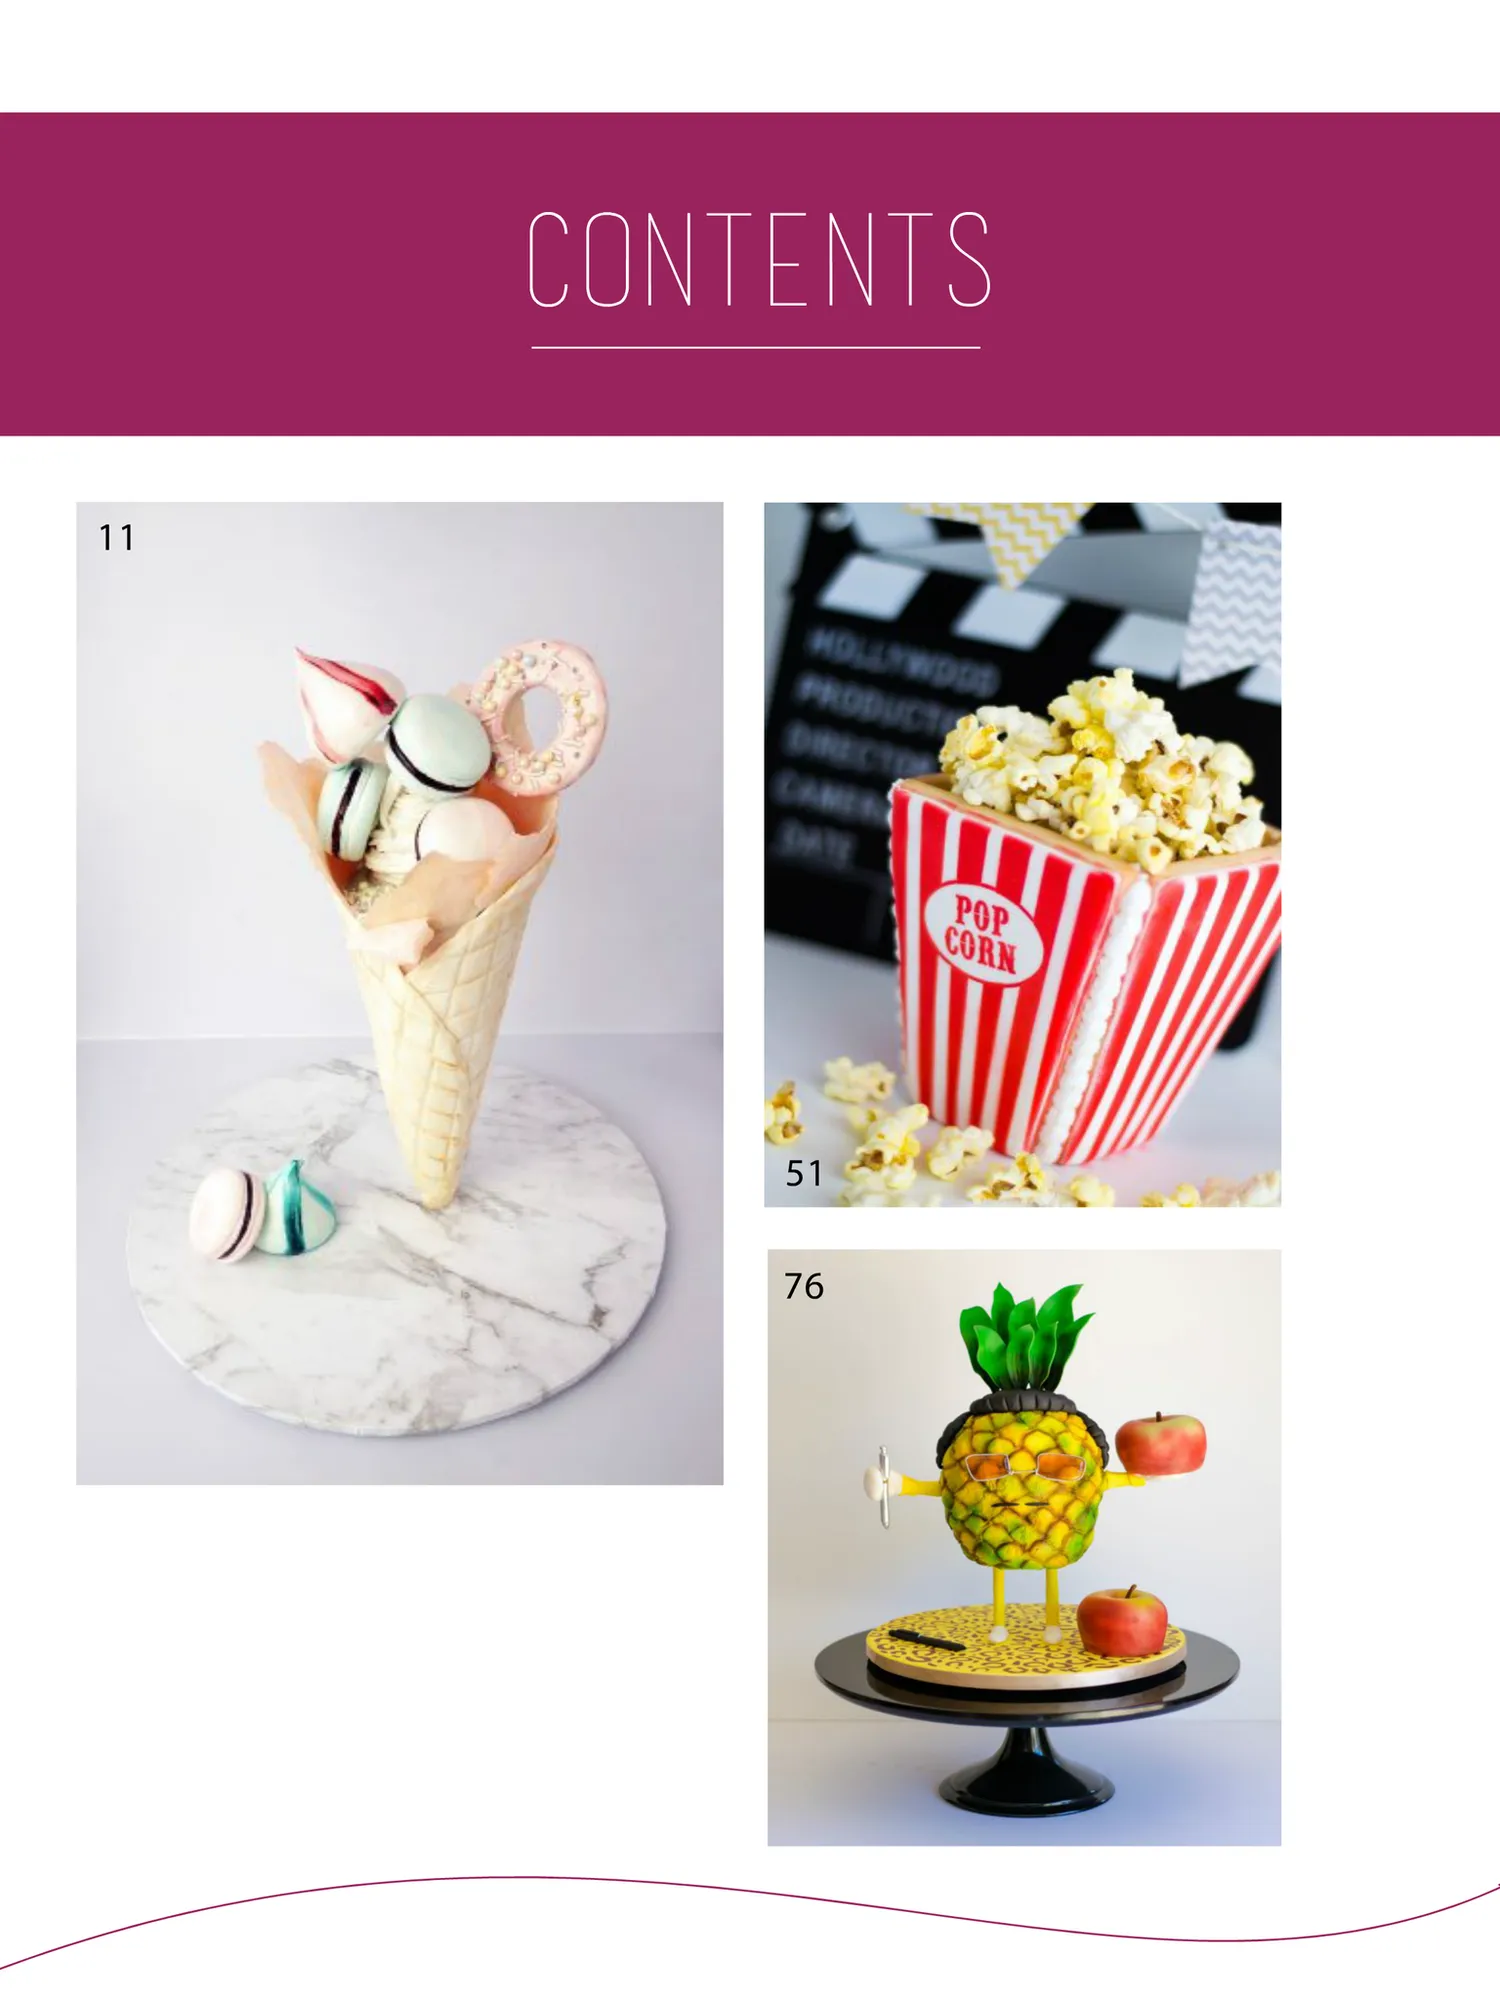
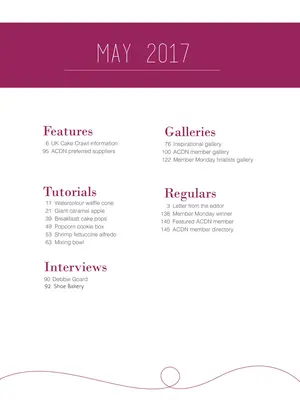
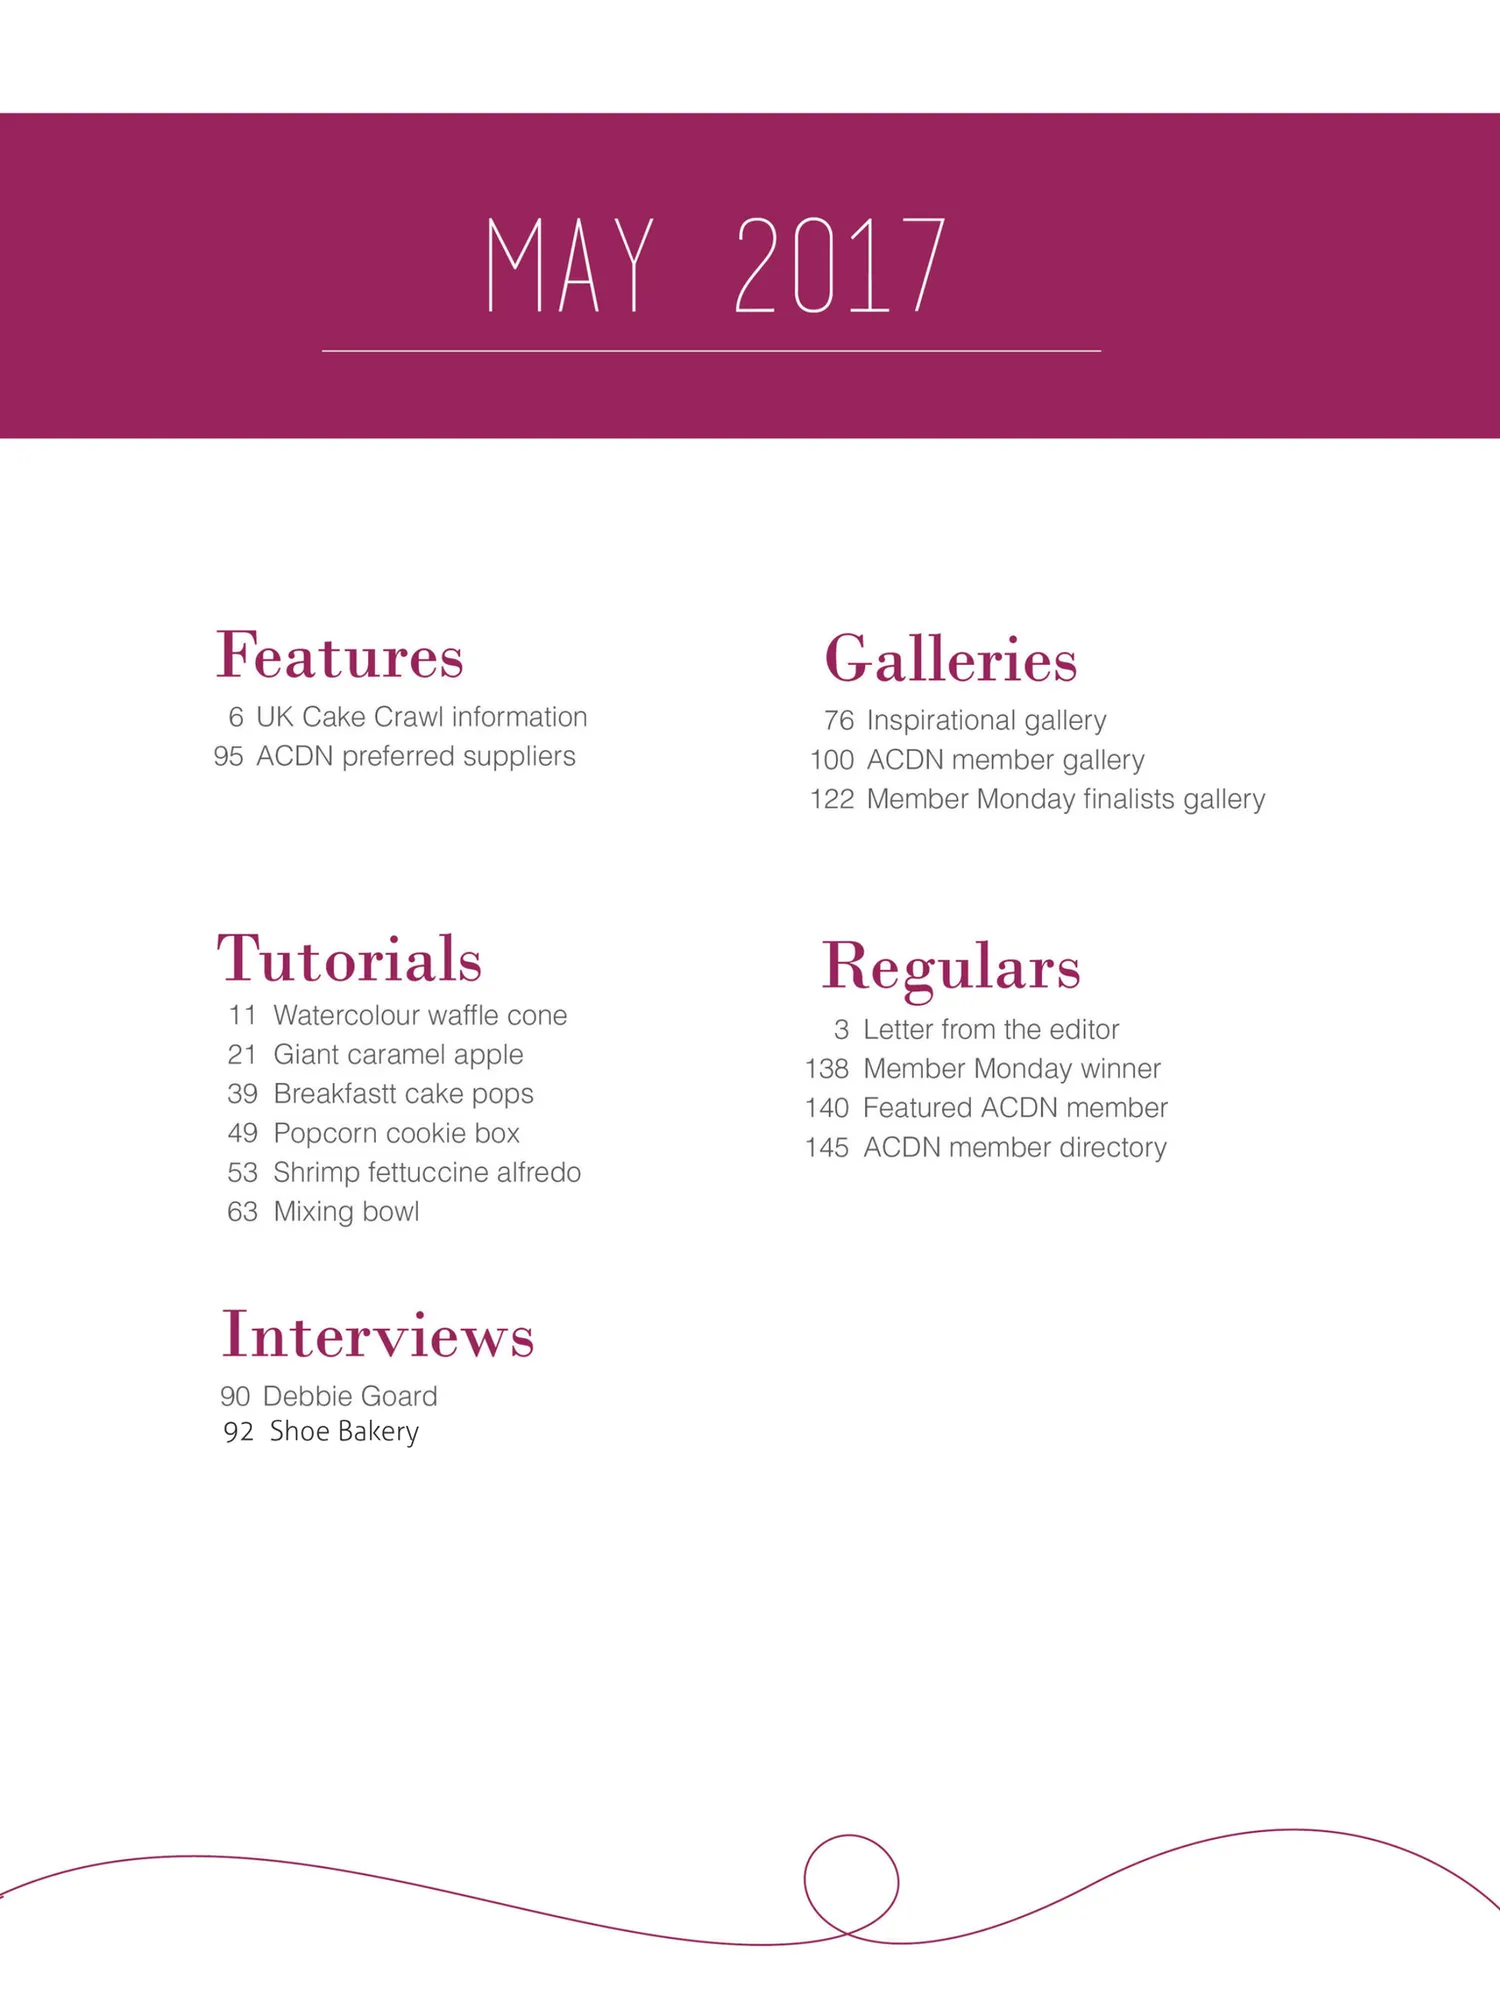
MAY 2017 84 Features 6 UK Cake Crawl information 95 ACDN preferred suppliers Tutorials 11 21 39 49 53 63 Watercolour waffle cone Giant caramel apple Breakfastt cake pops Popcorn cookie box Shrimp fettuccine alfredo Mixing bowl Interviews 90 Debbie Goard Galleries 76 Inspirational gallery 96 ACDN member gallery 118 Member Monday finalists gallery Regulars 3 134 138 141 Letter from the editor Member Monday winner Featured ACDN member ACDN member directory


Page 6 text
the cake crawl bus! Proudly sponsored by don't miss out on this once in a lifetime cake adventure! SECURE YOUR TICKET Here! ONLY 3 SPOTS REMAINING!
Page 7 text
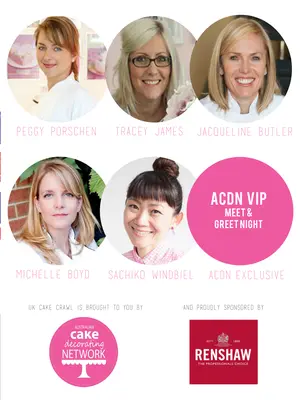
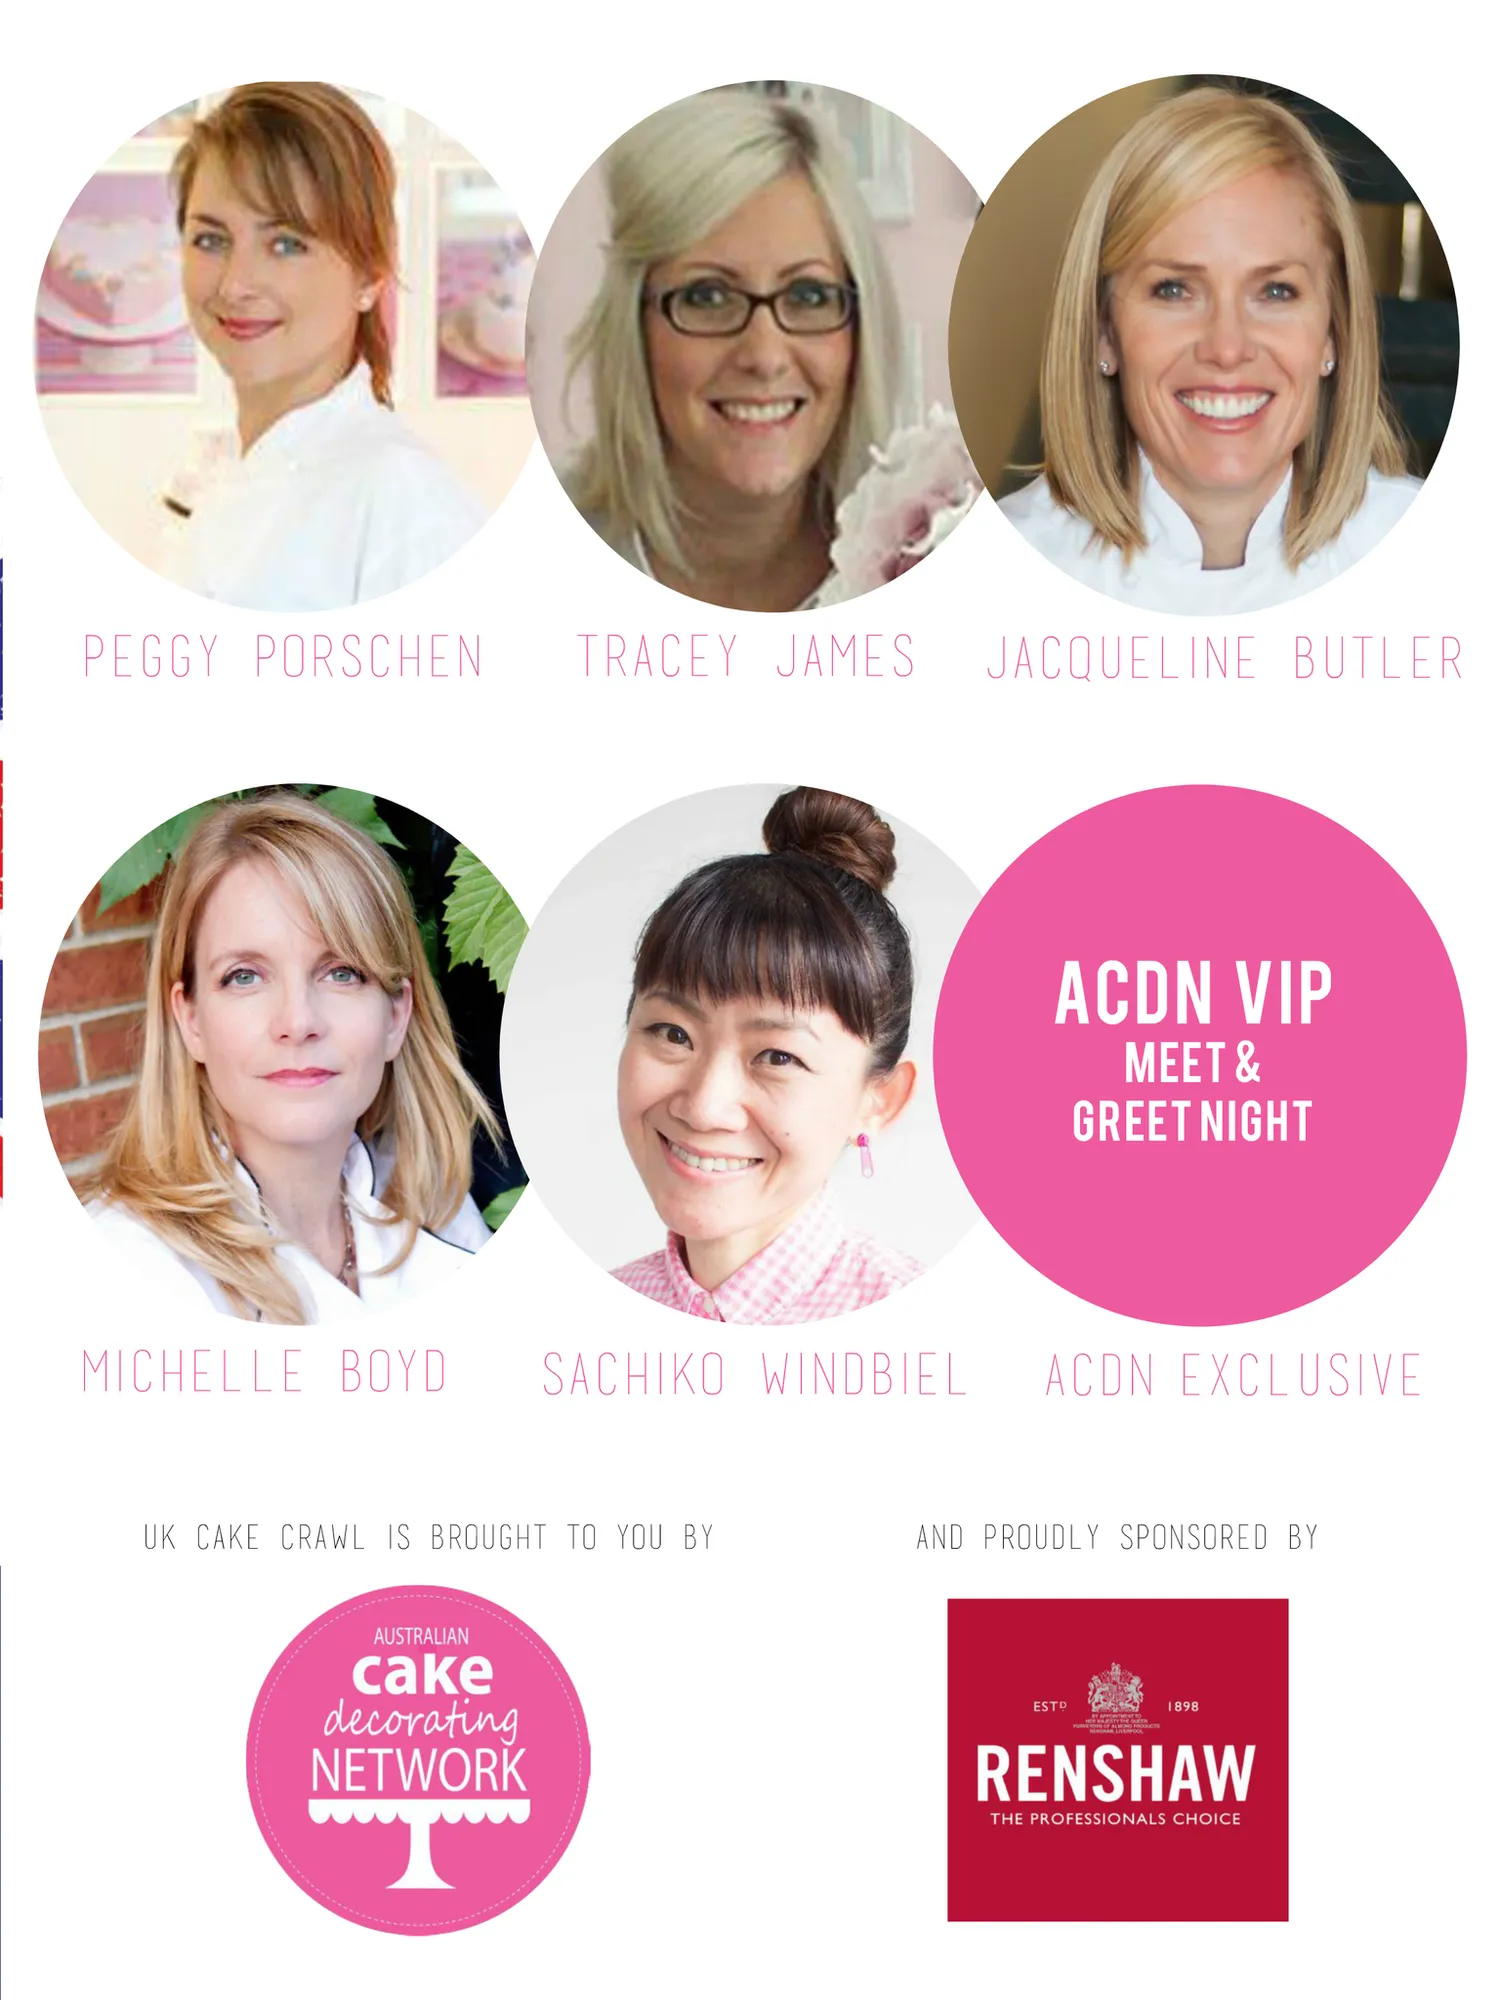
Peggy Porschen tracey james jacqueline butler ACDN VIP Meet & Greet night michelle boyd sachiko windbiel UK Cake Crawl is brought to you by acdn exclusive and proudly sponsored by
Page 8 text
Read Cake! magazine online or download & print for offline viewing HERE! f www.acdn.me [email protected] click here to join our mailing list! To advertise in Cake! magazine, contact [email protected]

Page 9 text
The food issue A collection of tutorials to help you make your own life-like food inspired cakes
Page 10 text
FULL PAGE AD
Page 11 text
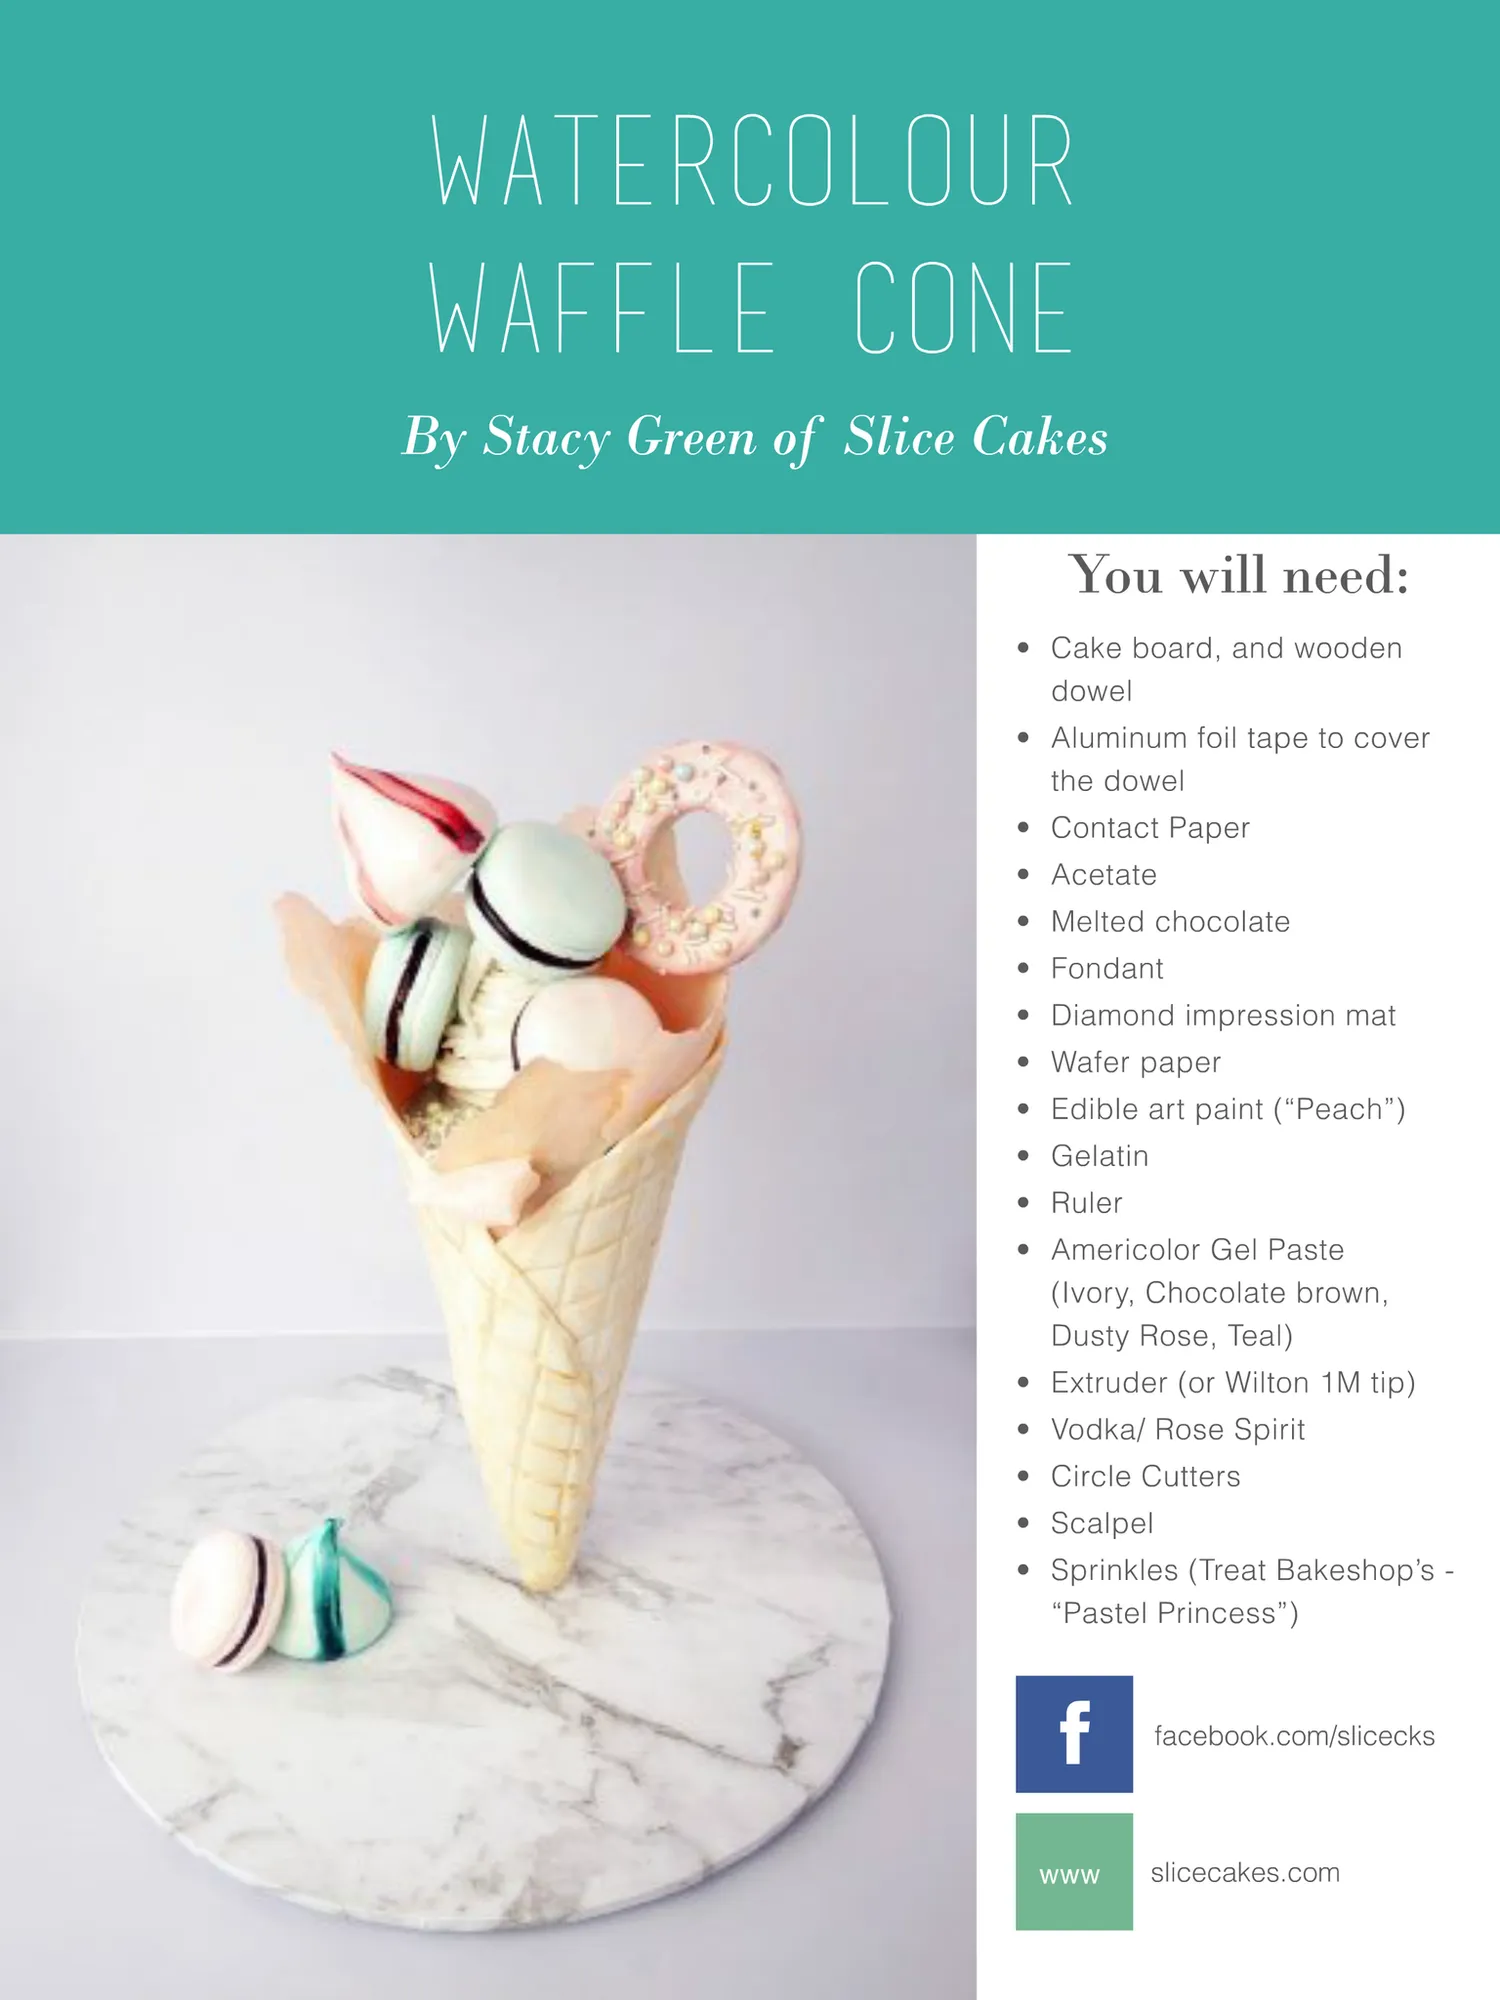
Watercolour Waffle Cone By Stacy Green of Slice Cakes You will need: • Cake board, and wooden dowel • Aluminum foil tape to cover the dowel • Contact Paper • Acetate • Melted chocolate • Fondant • Diamond impression mat • Wafer paper • Edible art paint (“Peach”) • Gelatin • Ruler • Americolor Gel Paste (Ivory, Chocolate brown, Dusty Rose, Teal) • Extruder (or Wilton 1M tip) • Vodka/ Rose Spirit • Circle Cutters • Scalpel • Sprinkles (Treat Bakeshop’s - “Pastel Princess”) f www facebook.com/slicecks slicecakes.com
Page 12 text
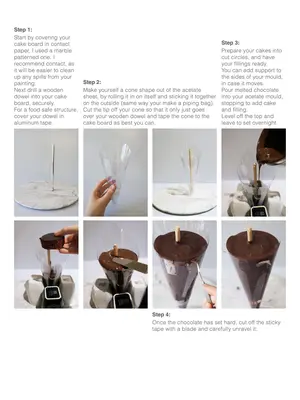
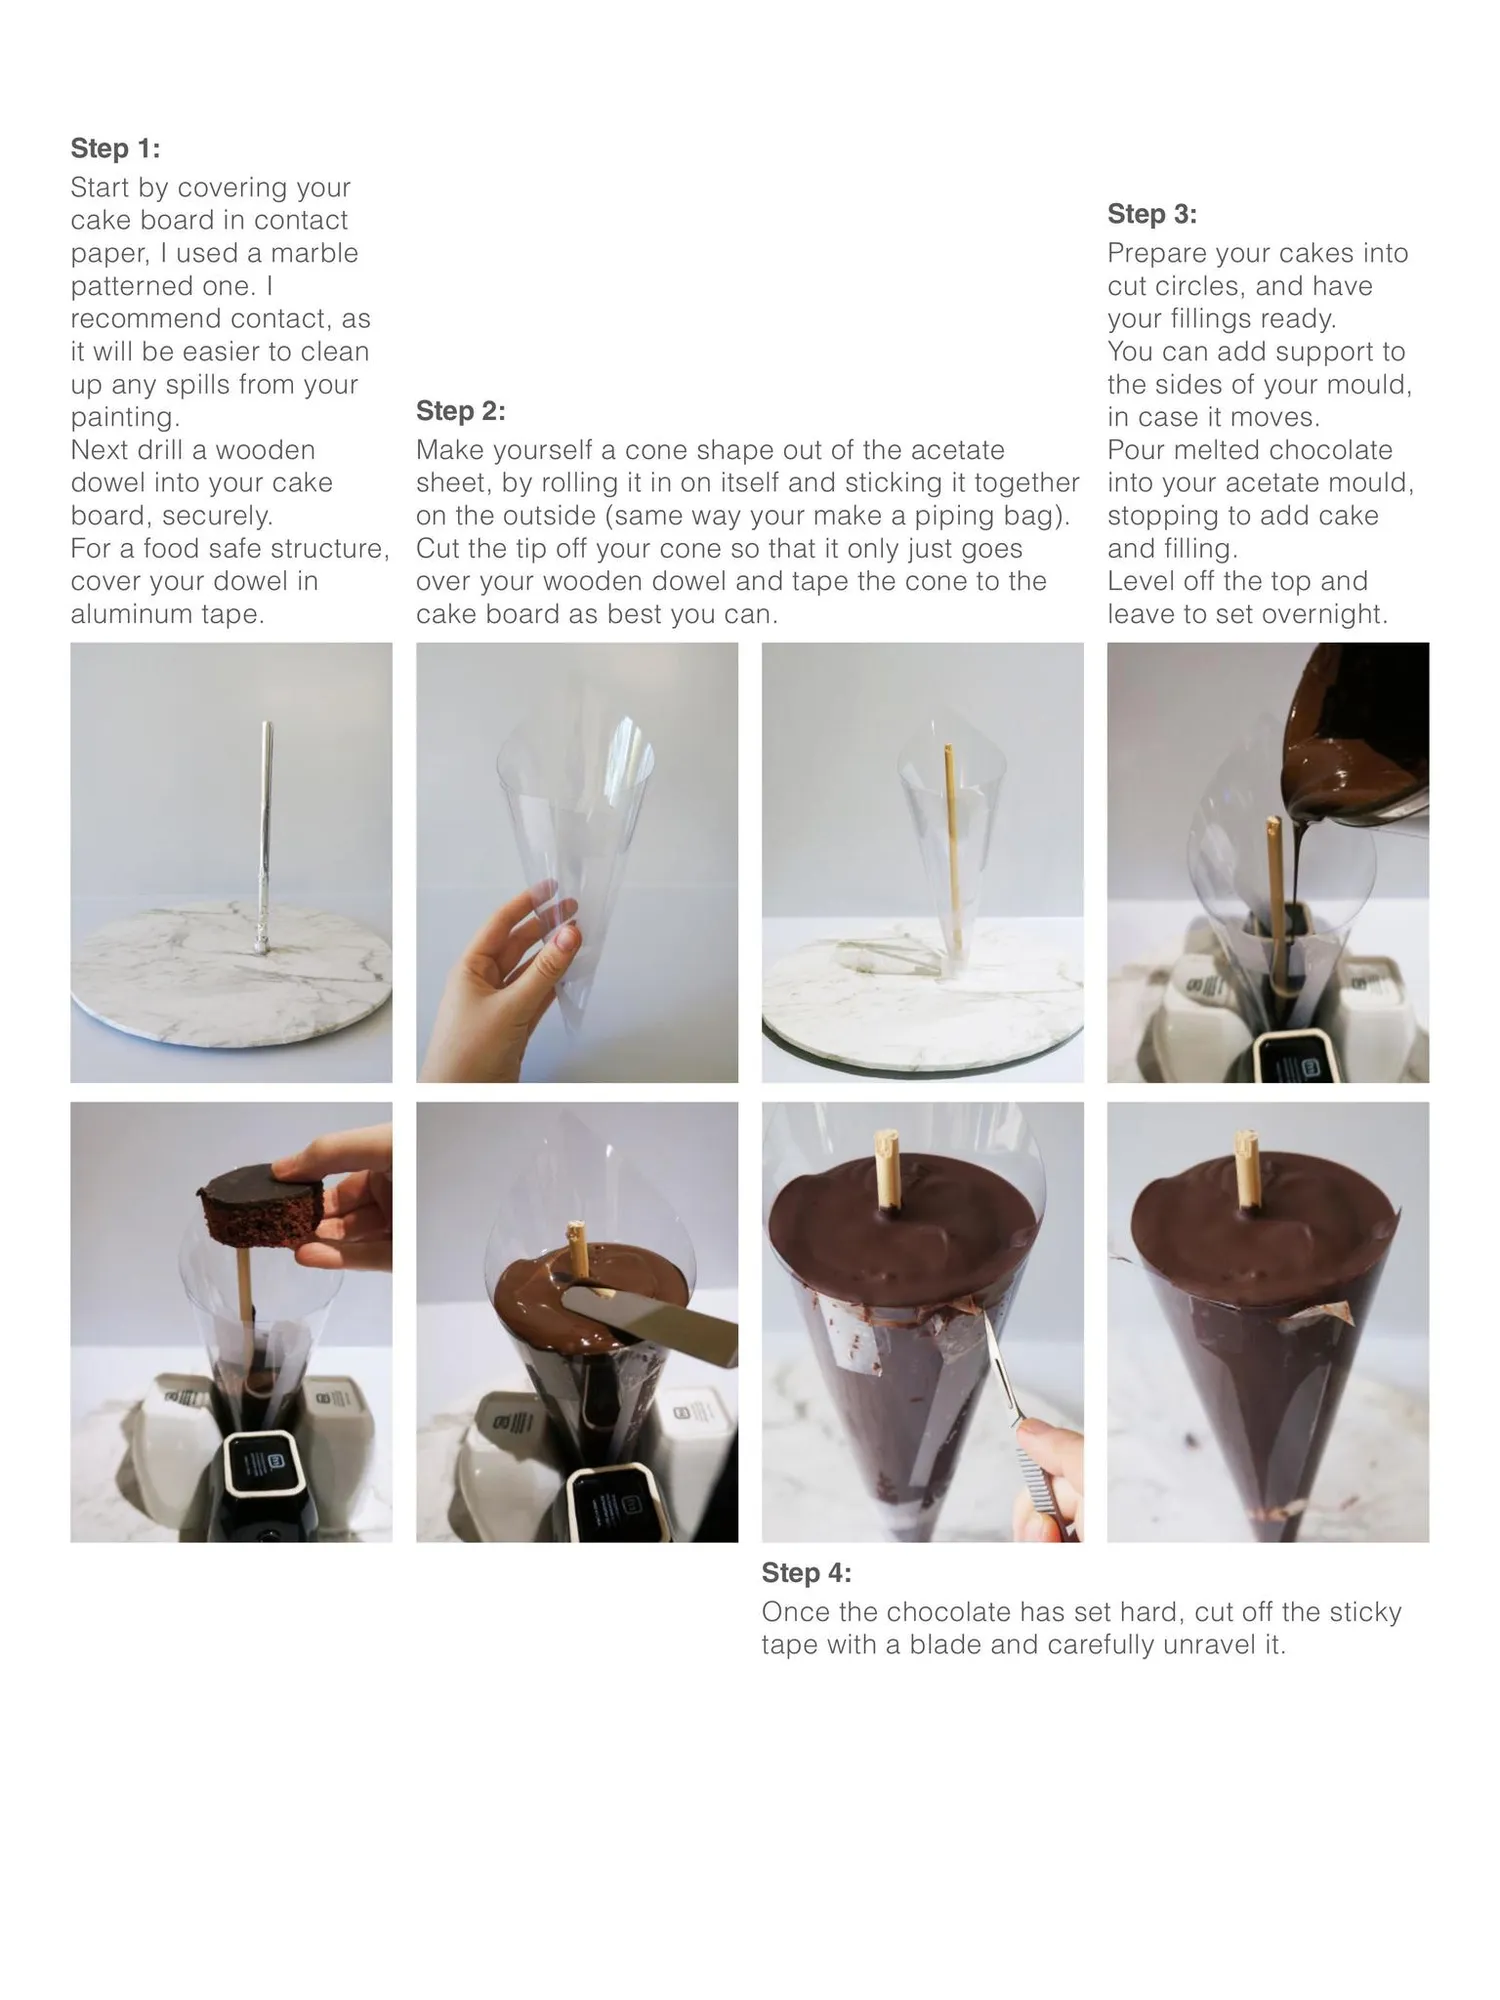
Step 1: Start by covering your cake board in contact paper, I used a marble patterned one. I recommend contact, as it will be easier to clean up any spills from your painting. Next drill a wooden dowel into your cake board, securely. For a food safe structure, cover your dowel in aluminum tape. Step 3: Prepare your cakes into cut circles, and have your fillings ready. You can add support to the sides of your mould, Step 2: in case it moves. Make yourself a cone shape out of the acetate Pour melted chocolate sheet, by rolling it in on itself and sticking it together into your acetate mould, on the outside (same way your make a piping bag). stopping to add cake Cut the tip off your cone so that it only just goes and filling. over your wooden dowel and tape the cone to the Level off the top and cake board as best you can. leave to set overnight. Step 4: Once the chocolate has set hard, cut off the sticky tape with a blade and carefully unravel it.
Page 13 text
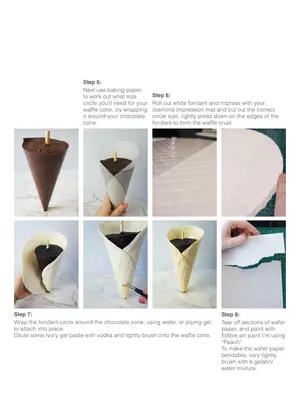
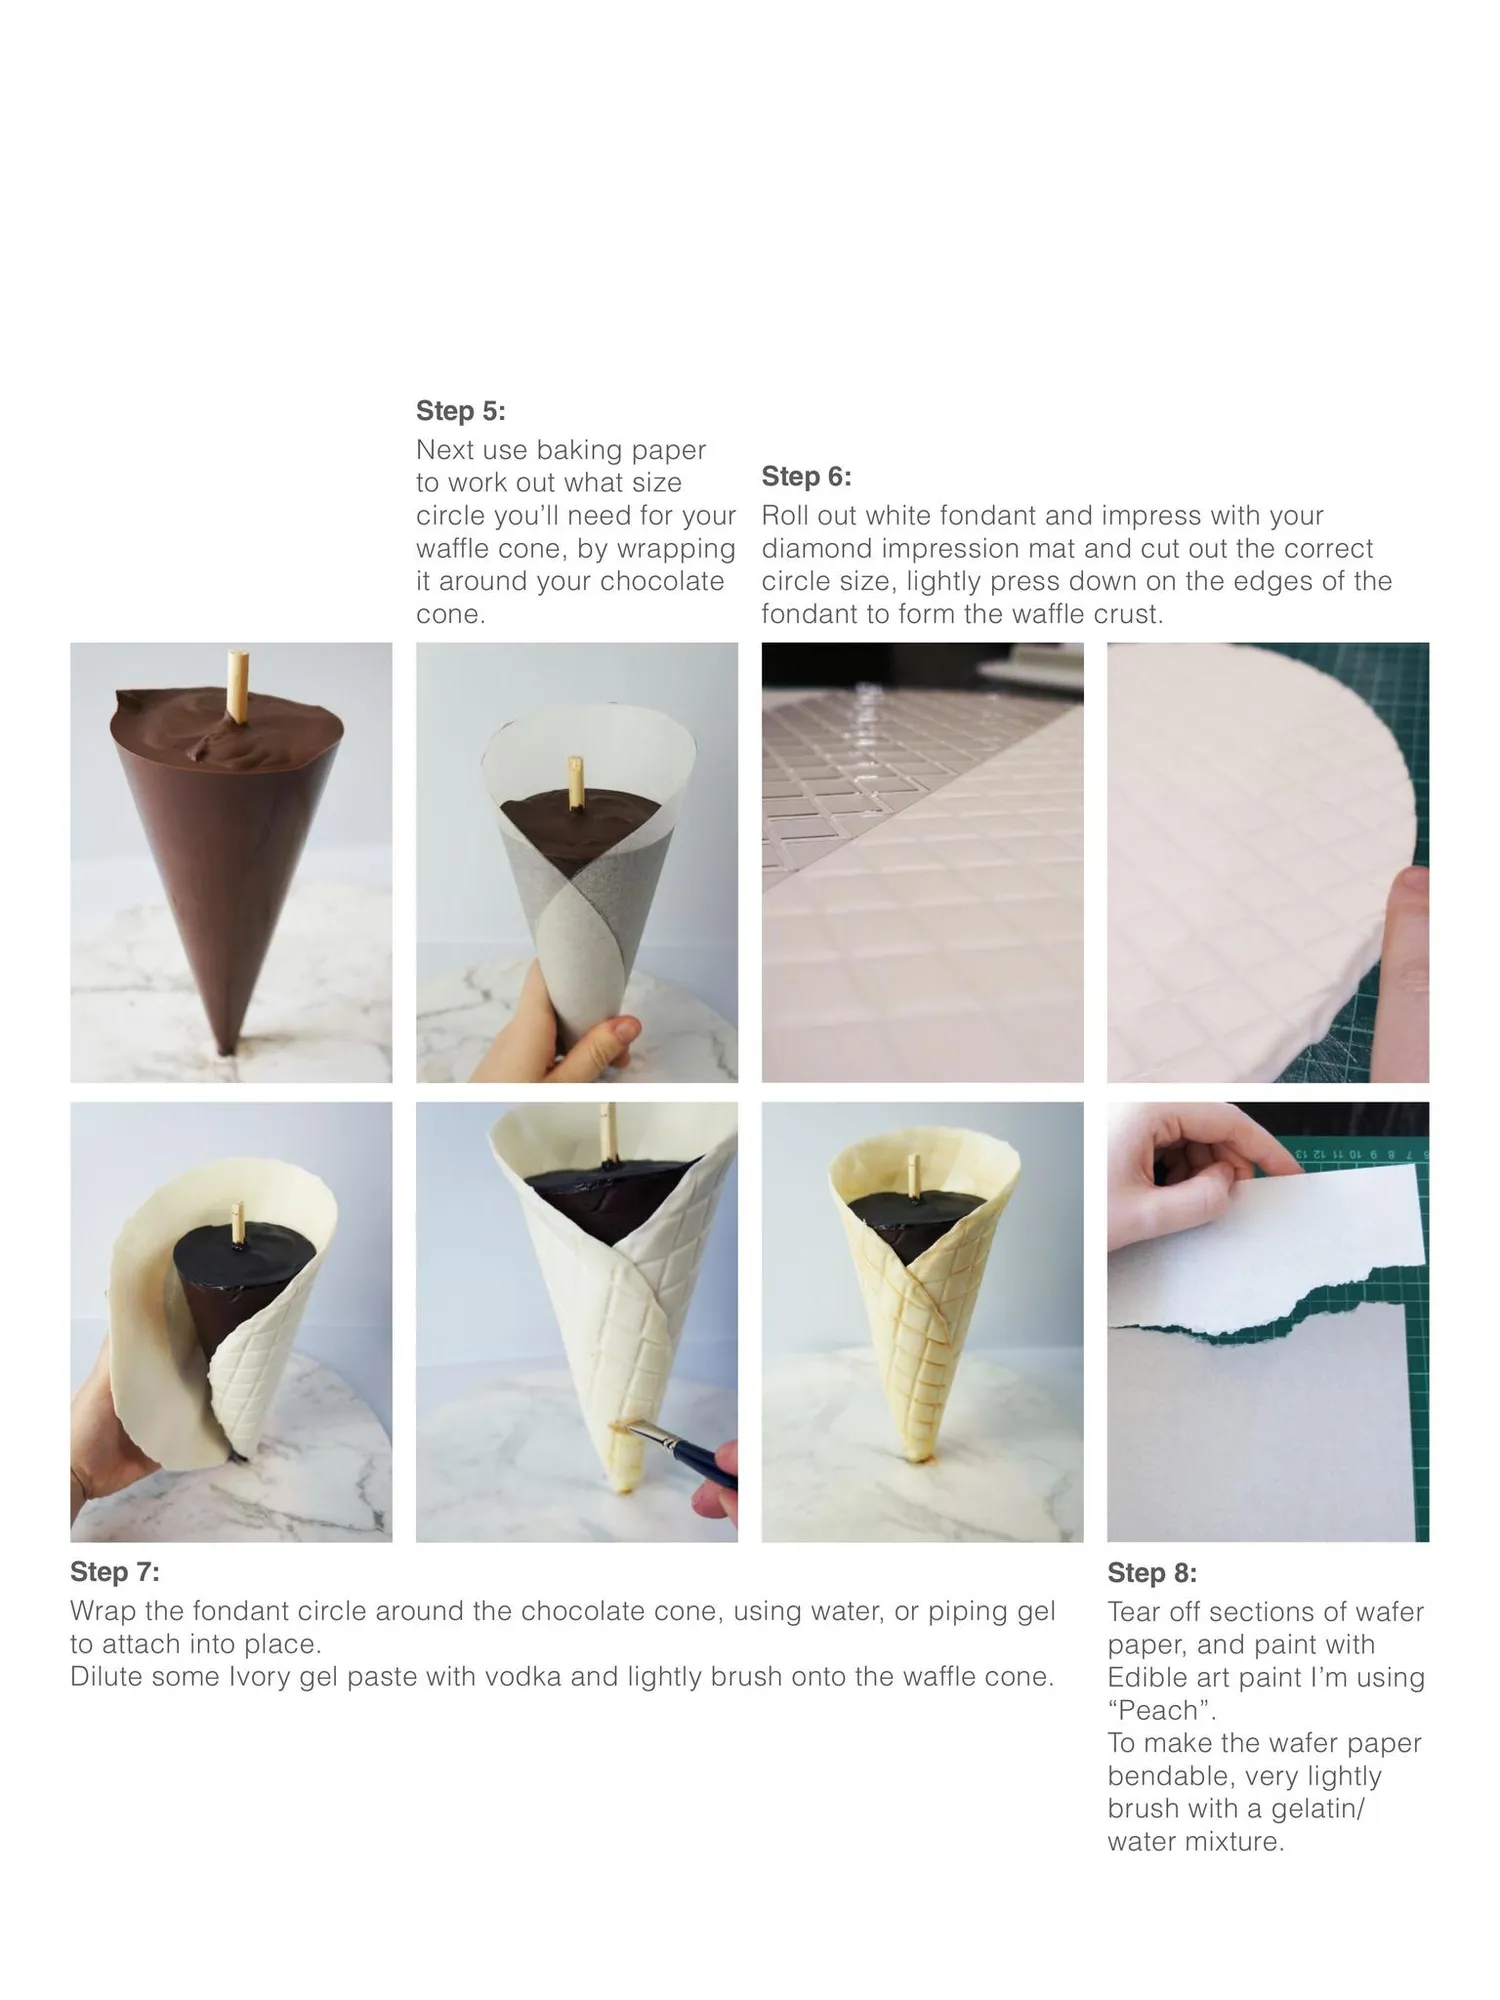
Step 5: Next use baking paper to work out what size circle you’ll need for your waffle cone, by wrapping it around your chocolate cone. Step 6: Roll out white fondant and impress with your diamond impression mat and cut out the correct circle size, lightly press down on the edges of the fondant to form the waffle crust. Step 7: Wrap the fondant circle around the chocolate cone, using water, or piping gel to attach into place. Dilute some Ivory gel paste with vodka and lightly brush onto the waffle cone. Step 8: Tear off sections of wafer paper, and paint with Edible art paint I’m using “Peach”. To make the wafer paper bendable, very lightly brush with a gelatin/ water mixture.
Page 14 text
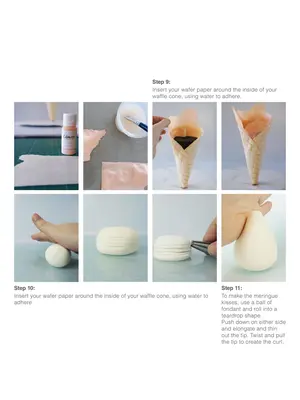
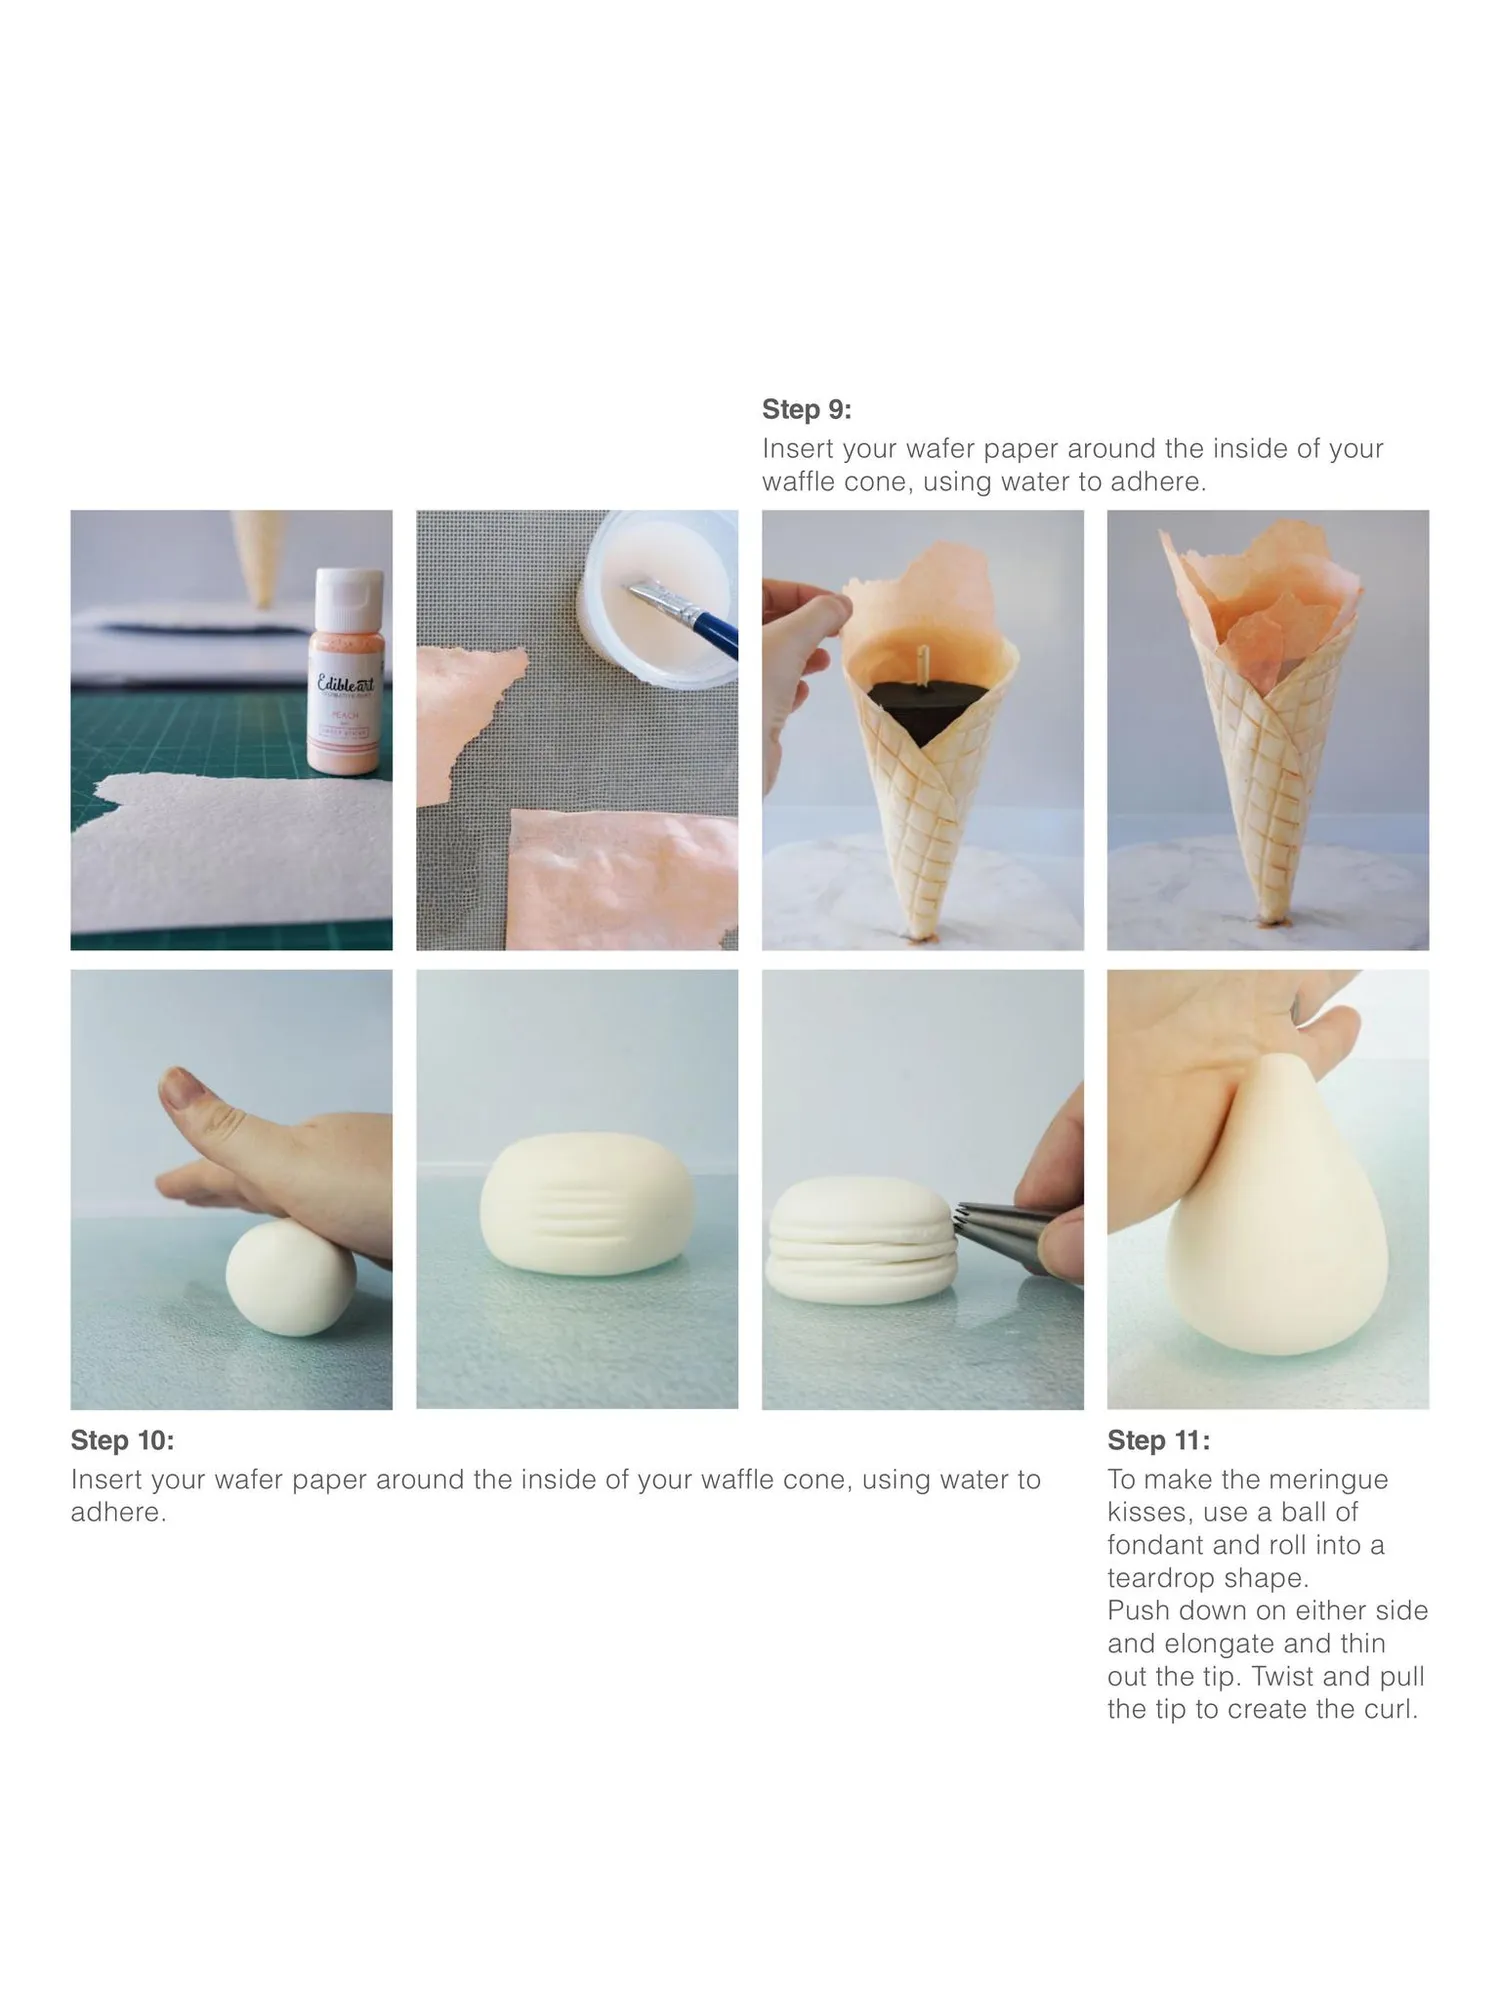
Step 9: Insert your wafer paper around the inside of your waffle cone, using water to adhere. Step 10: Insert your wafer paper around the inside of your waffle cone, using water to adhere. Step 11: To make the meringue kisses, use a ball of fondant and roll into a teardrop shape. Push down on either side and elongate and thin out the tip. Twist and pull the tip to create the curl.
Page 15 text
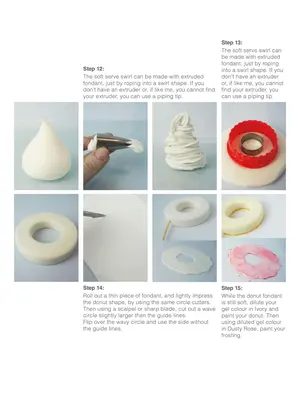
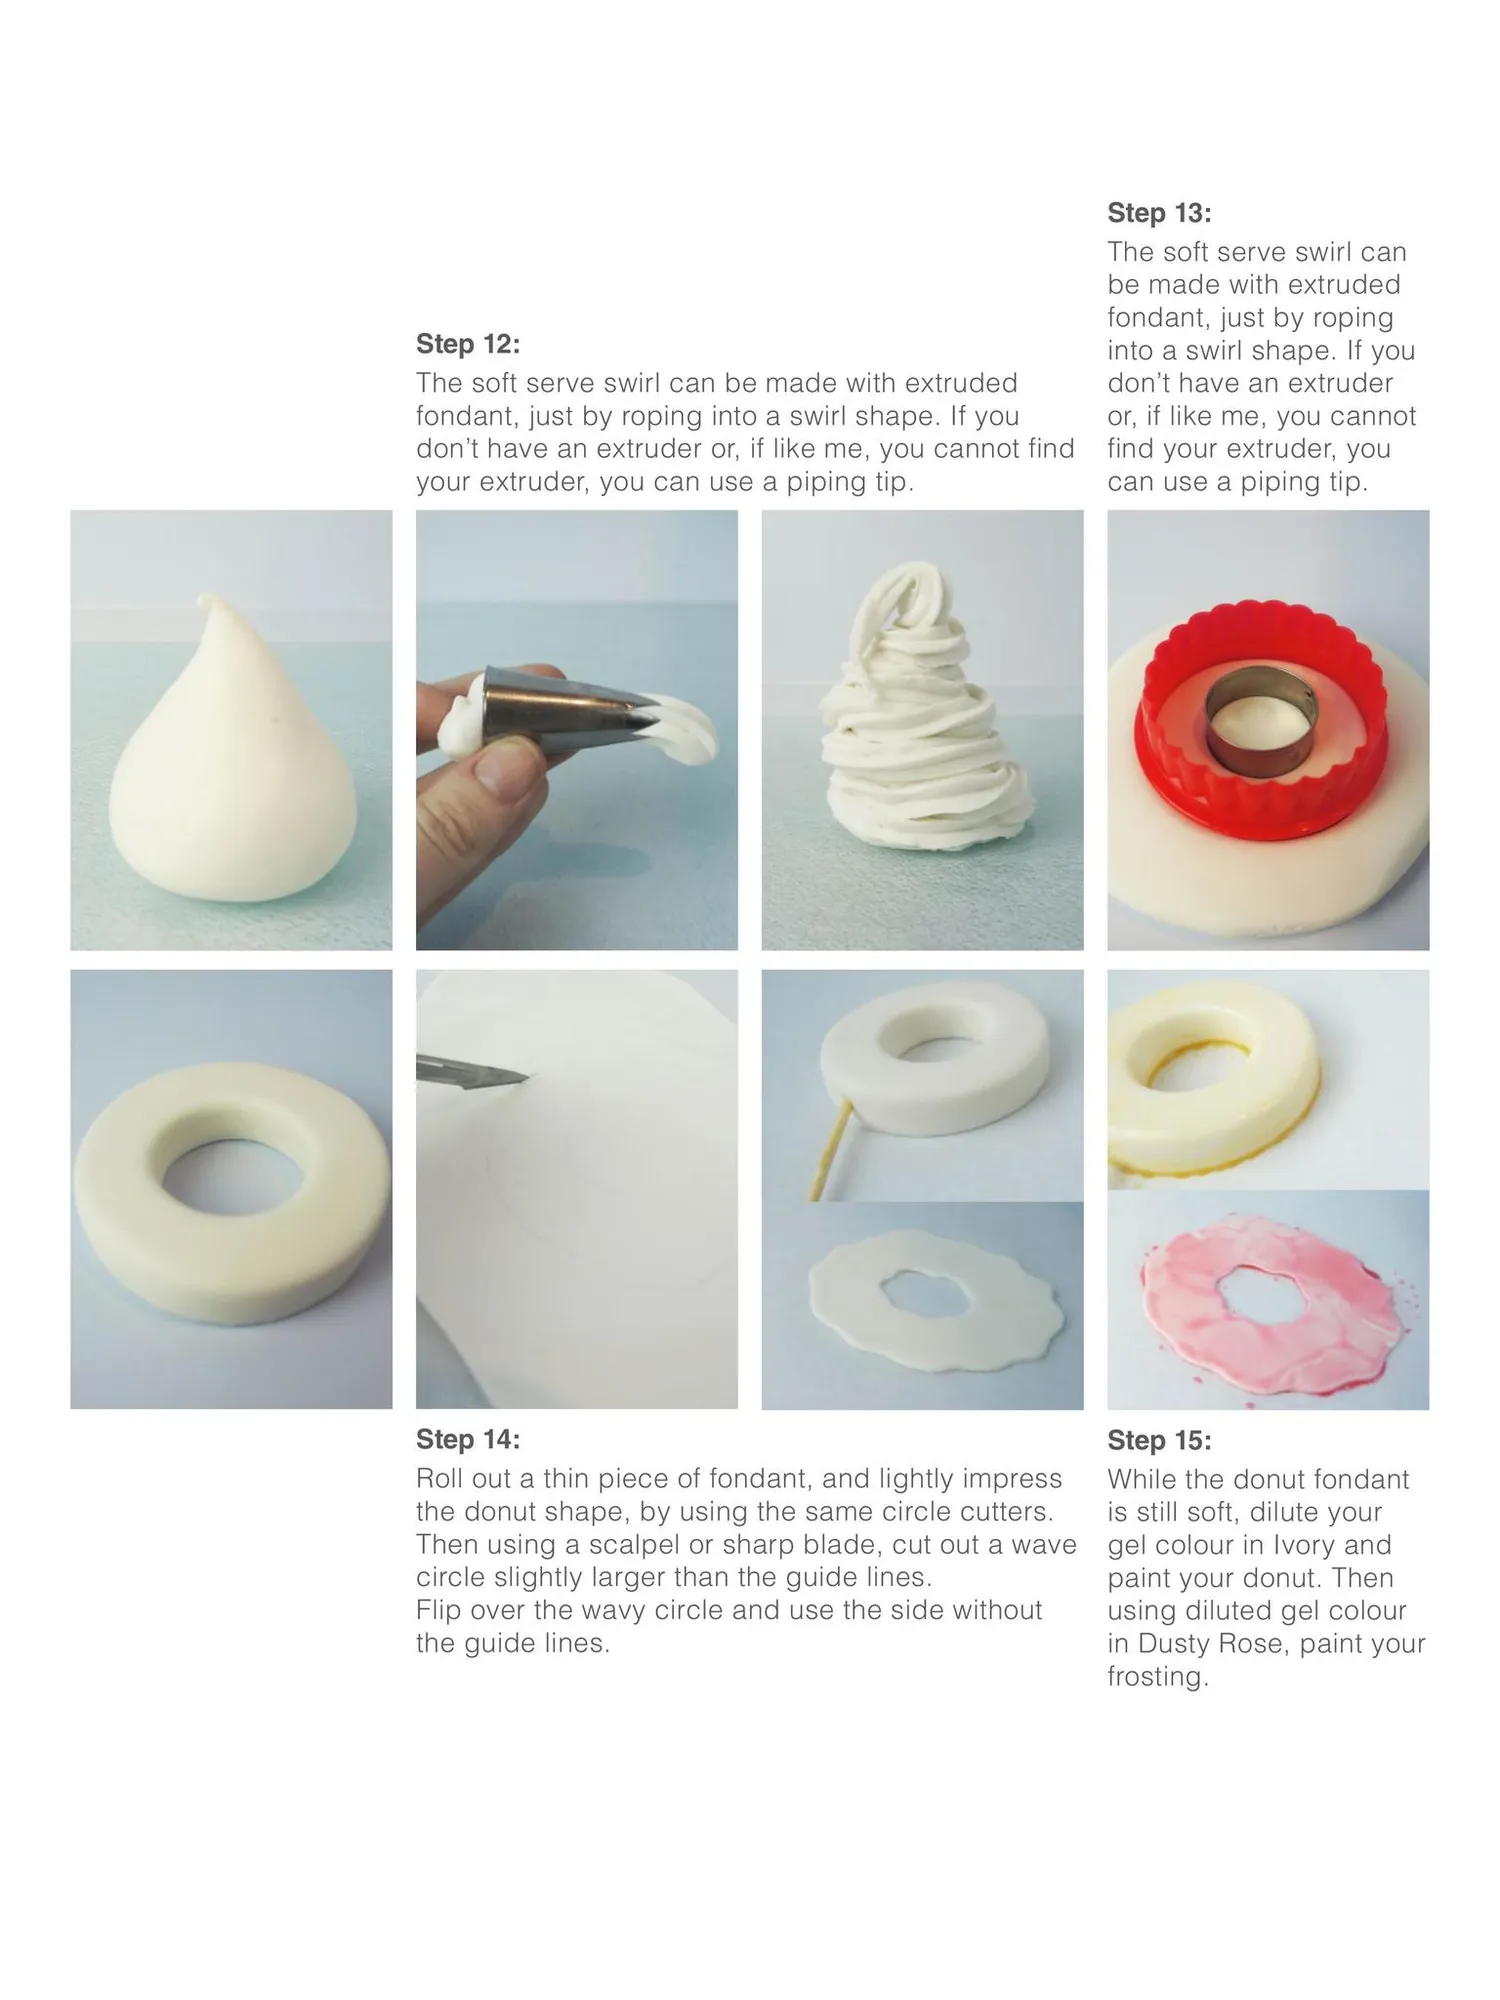
Step 12: The soft serve swirl can be made with extruded fondant, just by roping into a swirl shape. If you don’t have an extruder or, if like me, you cannot find your extruder, you can use a piping tip. Step 14: Roll out a thin piece of fondant, and lightly impress the donut shape, by using the same circle cutters. Then using a scalpel or sharp blade, cut out a wave circle slightly larger than the guide lines. Flip over the wavy circle and use the side without the guide lines. Step 13: The soft serve swirl can be made with extruded fondant, just by roping into a swirl shape. If you don’t have an extruder or, if like me, you cannot find your extruder, you can use a piping tip. Step 15: While the donut fondant is still soft, dilute your gel colour in Ivory and paint your donut. Then using diluted gel colour in Dusty Rose, paint your frosting.
Page 16 text
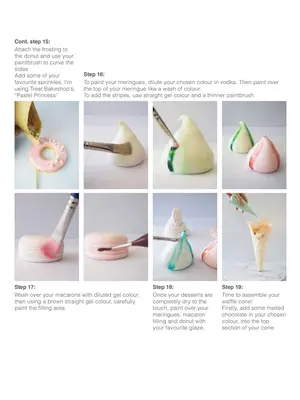
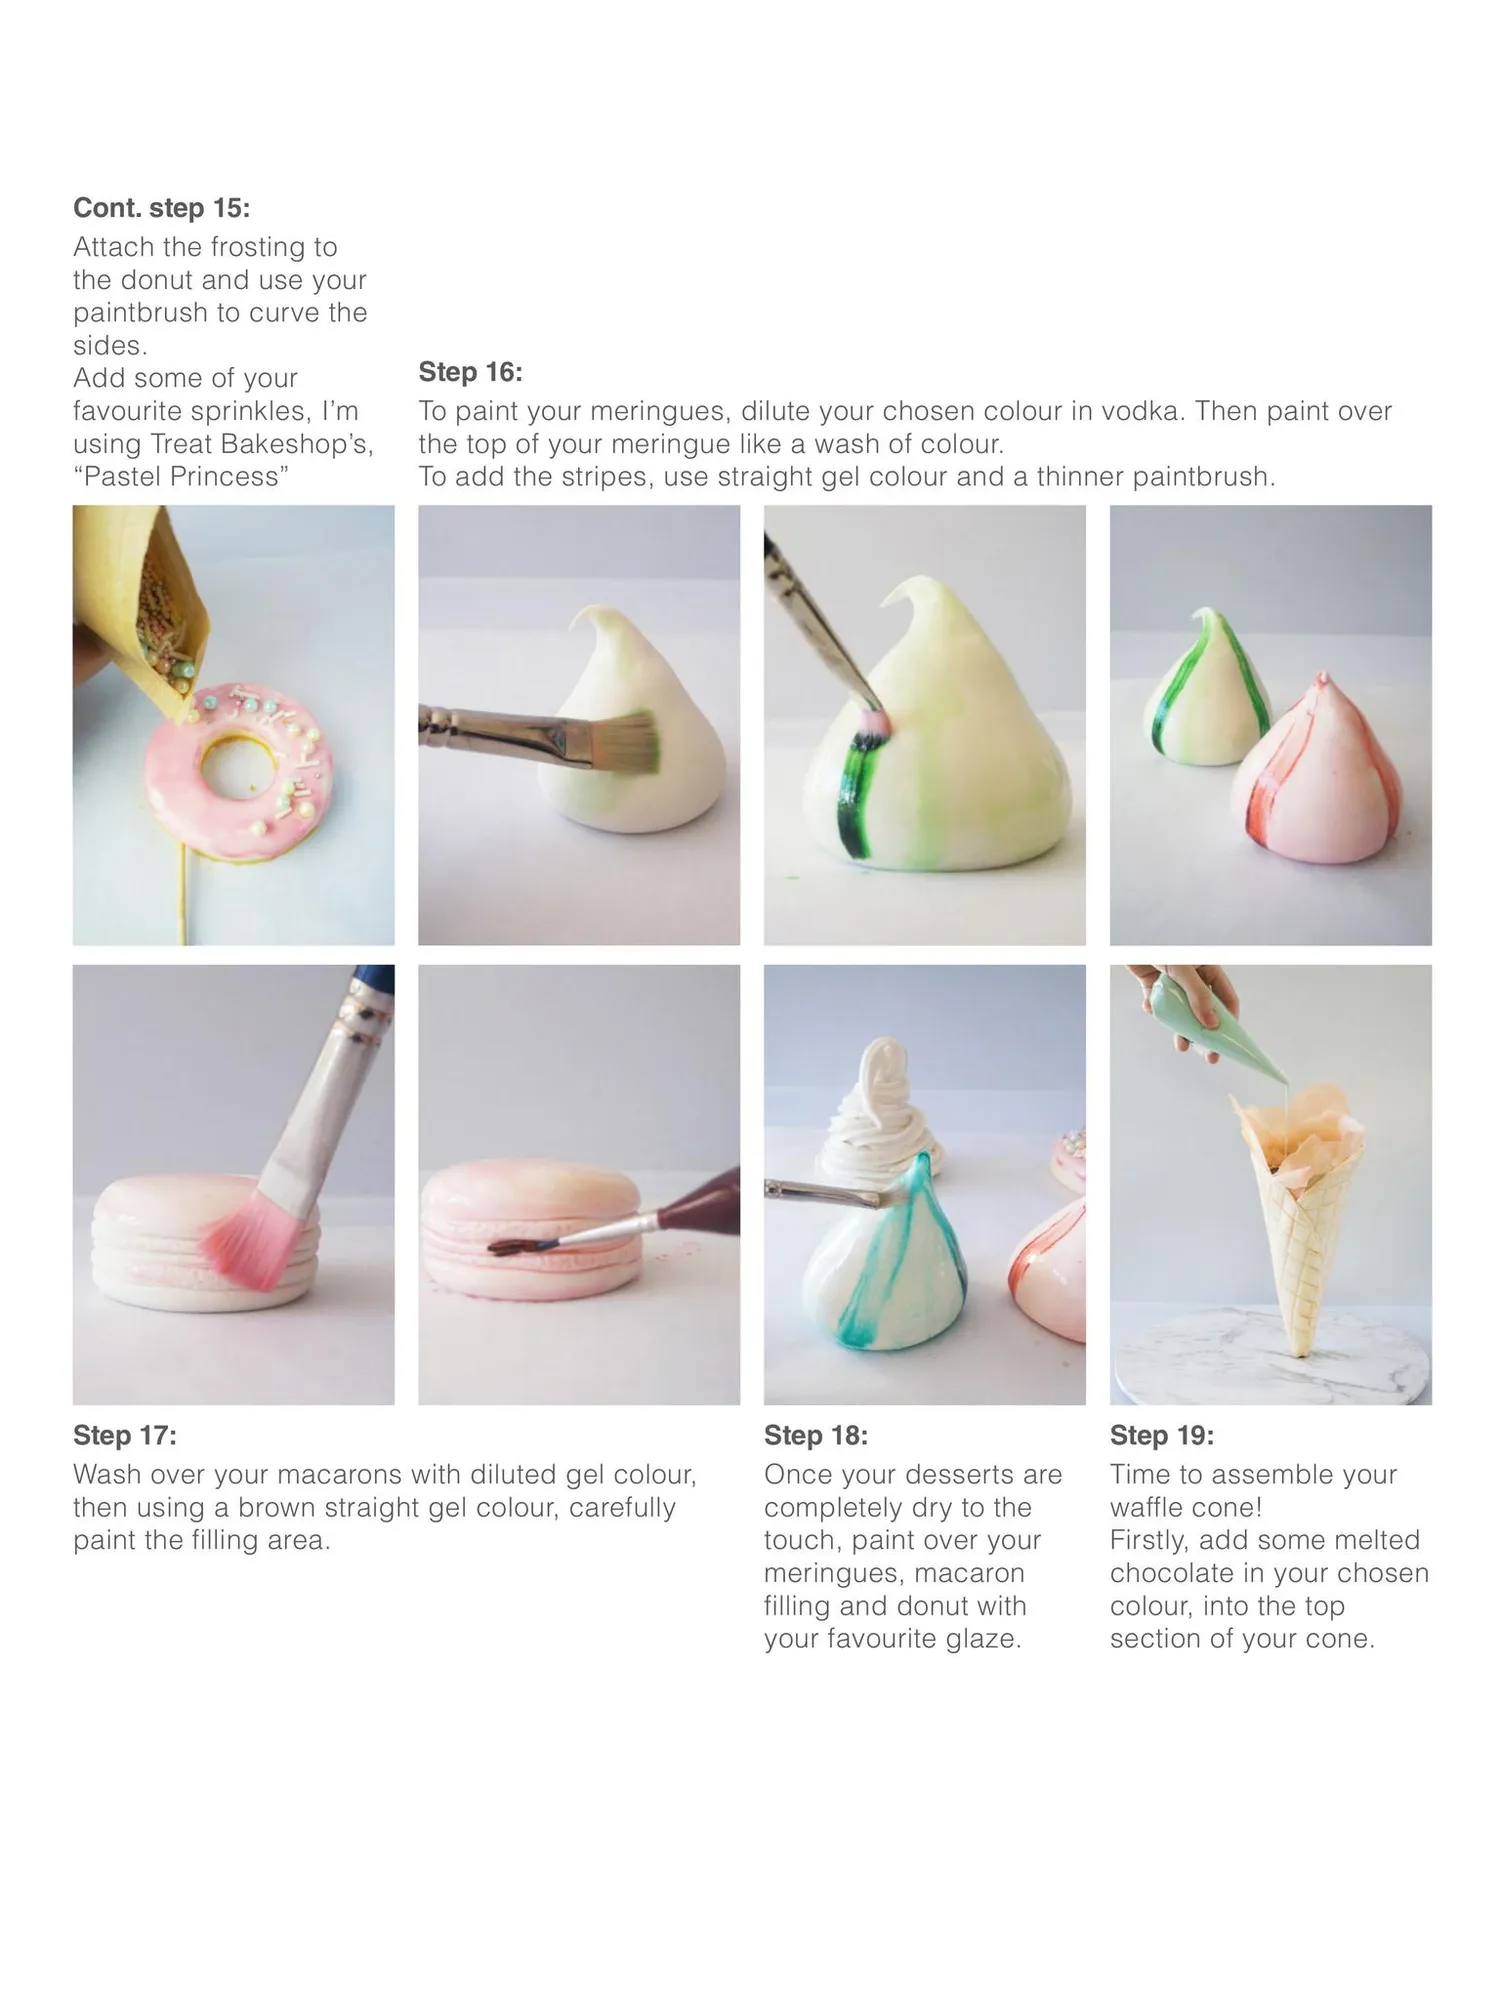
Cont. step 15: Attach the frosting to the donut and use your paintbrush to curve the sides. Add some of your favourite sprinkles, I’m using Treat Bakeshop’s, “Pastel Princess” Step 16: To paint your meringues, dilute your chosen colour in vodka. Then paint over the top of your meringue like a wash of colour. To add the stripes, use straight gel colour and a thinner paintbrush. Step 17: Wash over your macarons with diluted gel colour, then using a brown straight gel colour, carefully paint the filling area. Step 18: Once your desserts are completely dry to the touch, paint over your meringues, macaron filling and donut with your favourite glaze. Step 19: Time to assemble your waffle cone! Firstly, add some melted chocolate in your chosen colour, into the top section of your cone.
Page 17 text
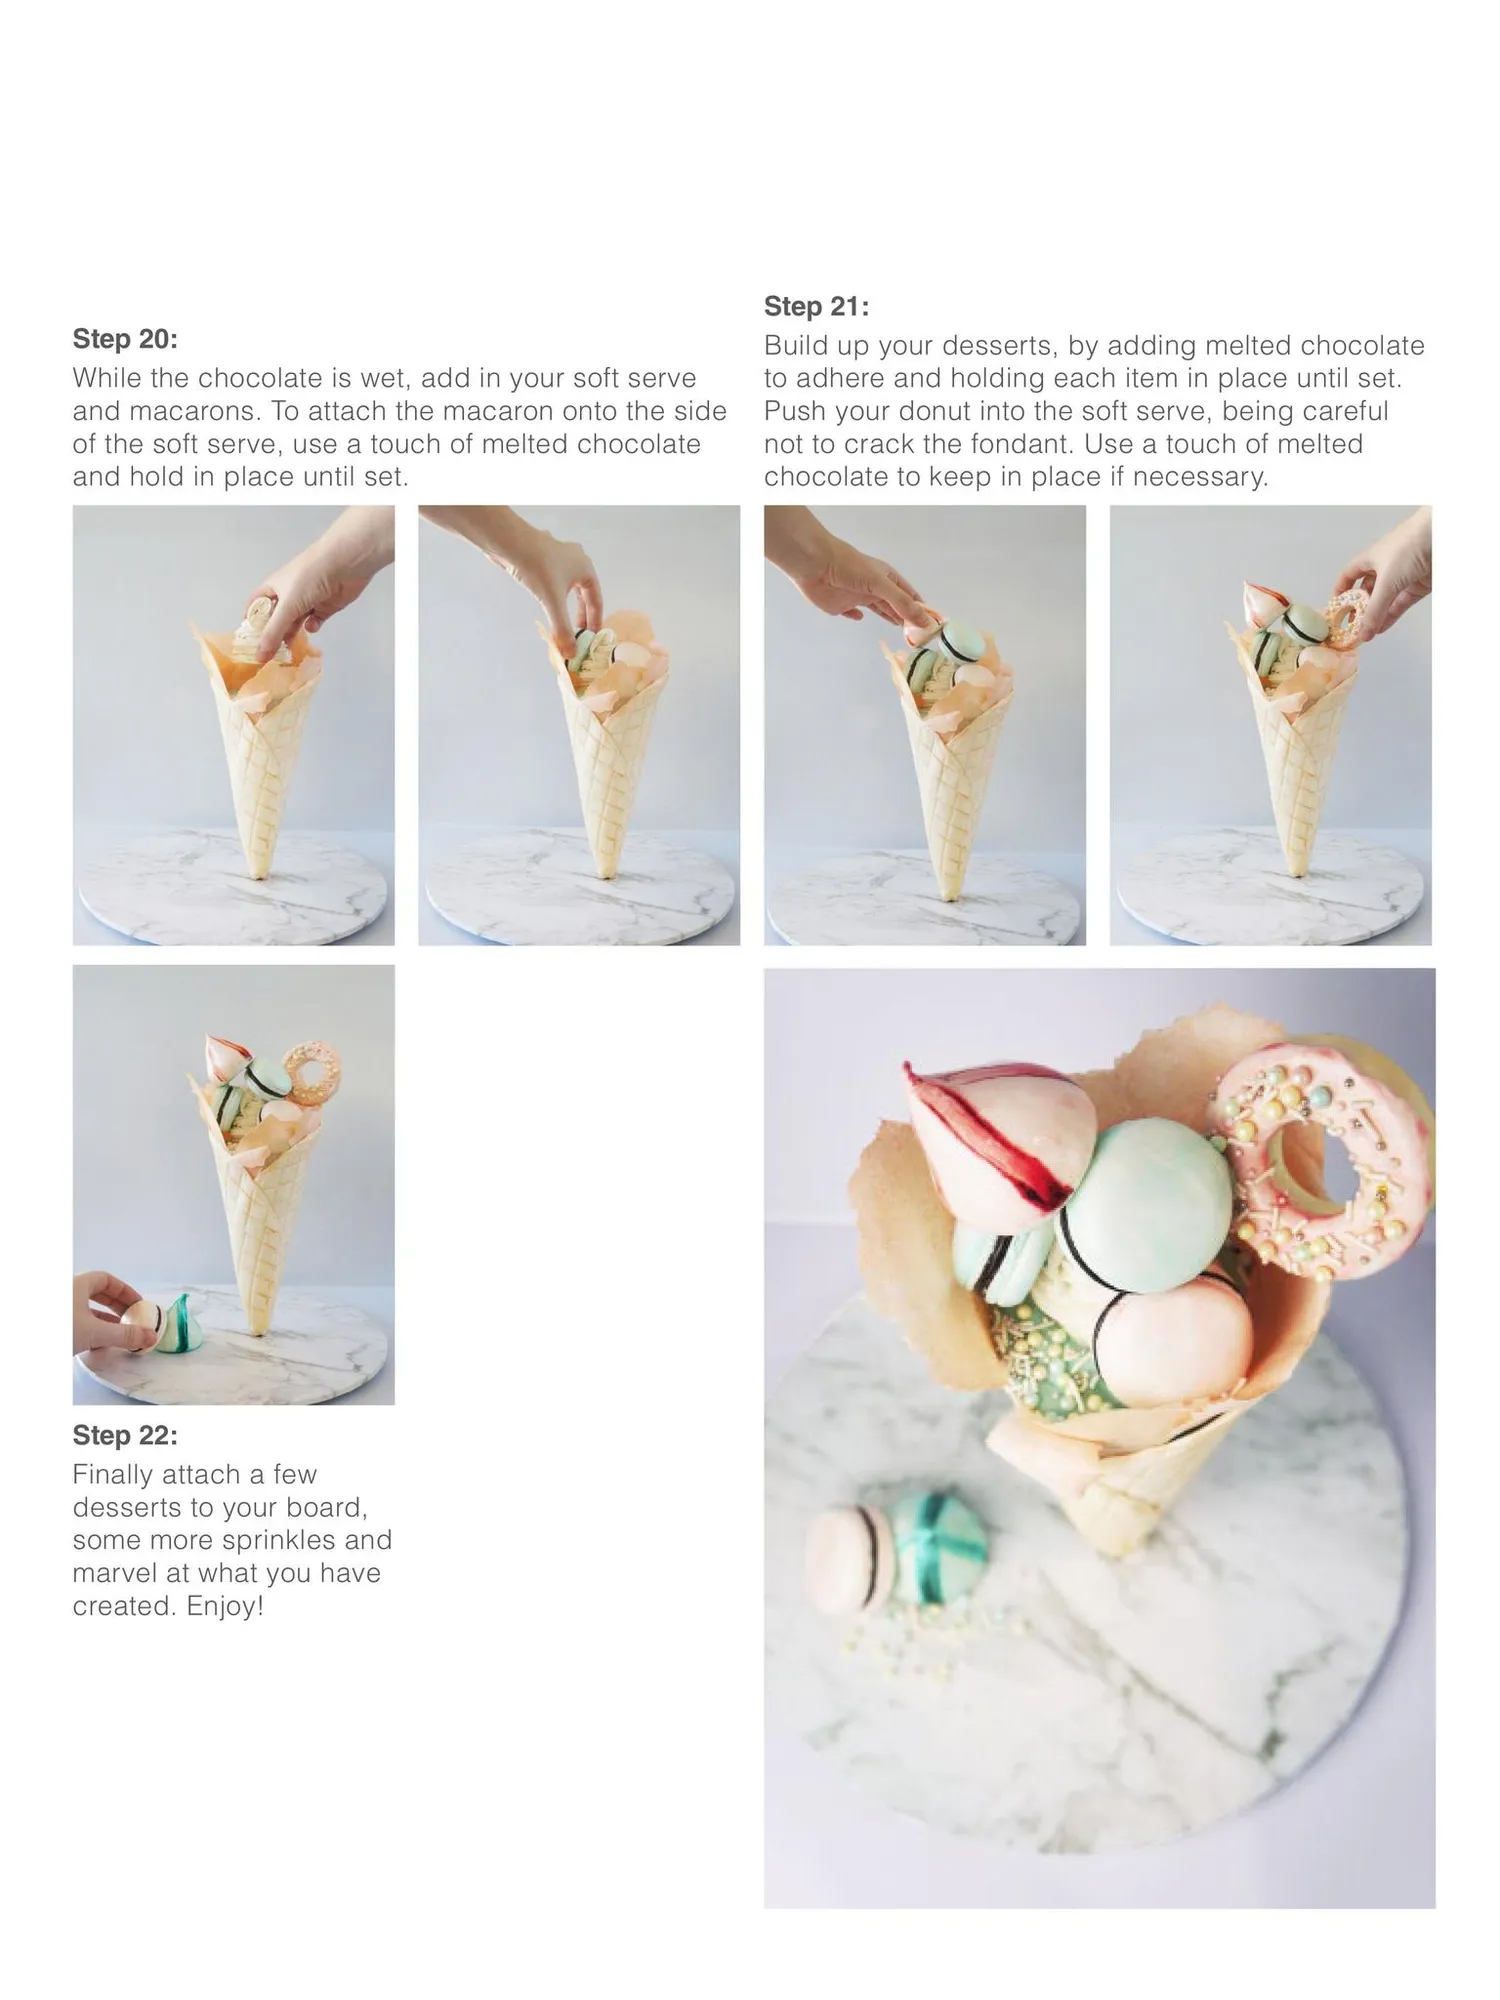
Step 20: While the chocolate is wet, add in your soft serve and macarons. To attach the macaron onto the side of the soft serve, use a touch of melted chocolate and hold in place until set. Step 22: Finally attach a few desserts to your board, some more sprinkles and marvel at what you have created. Enjoy! Step 21: Build up your desserts, by adding melted chocolate to adhere and holding each item in place until set. Push your donut into the soft serve, being careful not to crack the fondant. Use a touch of melted chocolate to keep in place if necessary.
Page 18 text
New Classes Coming....... ZOE HOPKINSON APRIL/MAY 2017 MAGGIE AUSTIN OCTOBER 2017 email @[email protected] to register your interest ARNDELL PARK WILLOUGHBY NORTHMEAD LIVERPOOL ALEXANDRIA BELMONT CARINGBAH CANBERRA - NOW O
Page 19 text
New Classes Coming....... DAWN BUTLER JUNE 2017 SYDNEY, NEWCASTLE, CANBERRA QUEEN OF HEARTS JUNE 2017 LIMITED SYDNEY CLASSES email @[email protected] to register your interest ARNDELL PARK WILLOUGHBY NORTHMEAD LIVERPOOL ALEXANDRIA BELMONT CARINGBAH CANBERRA - NOW OPEN www.cakedecoratingsolutions.com.au www.cakedecoratingsolutions.com.au
Page 20 text
Over 8000 Cake Decorating SuppliesTop Leading Brands -5pm 9 n Mo pm 6 - 9 i -Fr Tues 9-5pm Sat OFF TO ACDN MEMBERS U2, 261 Princes Hwy, Hallam, Vic 3803 in [email protected] www.mydreamcake.com.au DOWNLOAD & PRINT Cake! magazine is now available for download and print. You can read offline or print your favourite tutorials- no more fondant on your ipad! CLICK HERE f To advertise in Cake! magazine, contact: [email protected]
Page 21 text
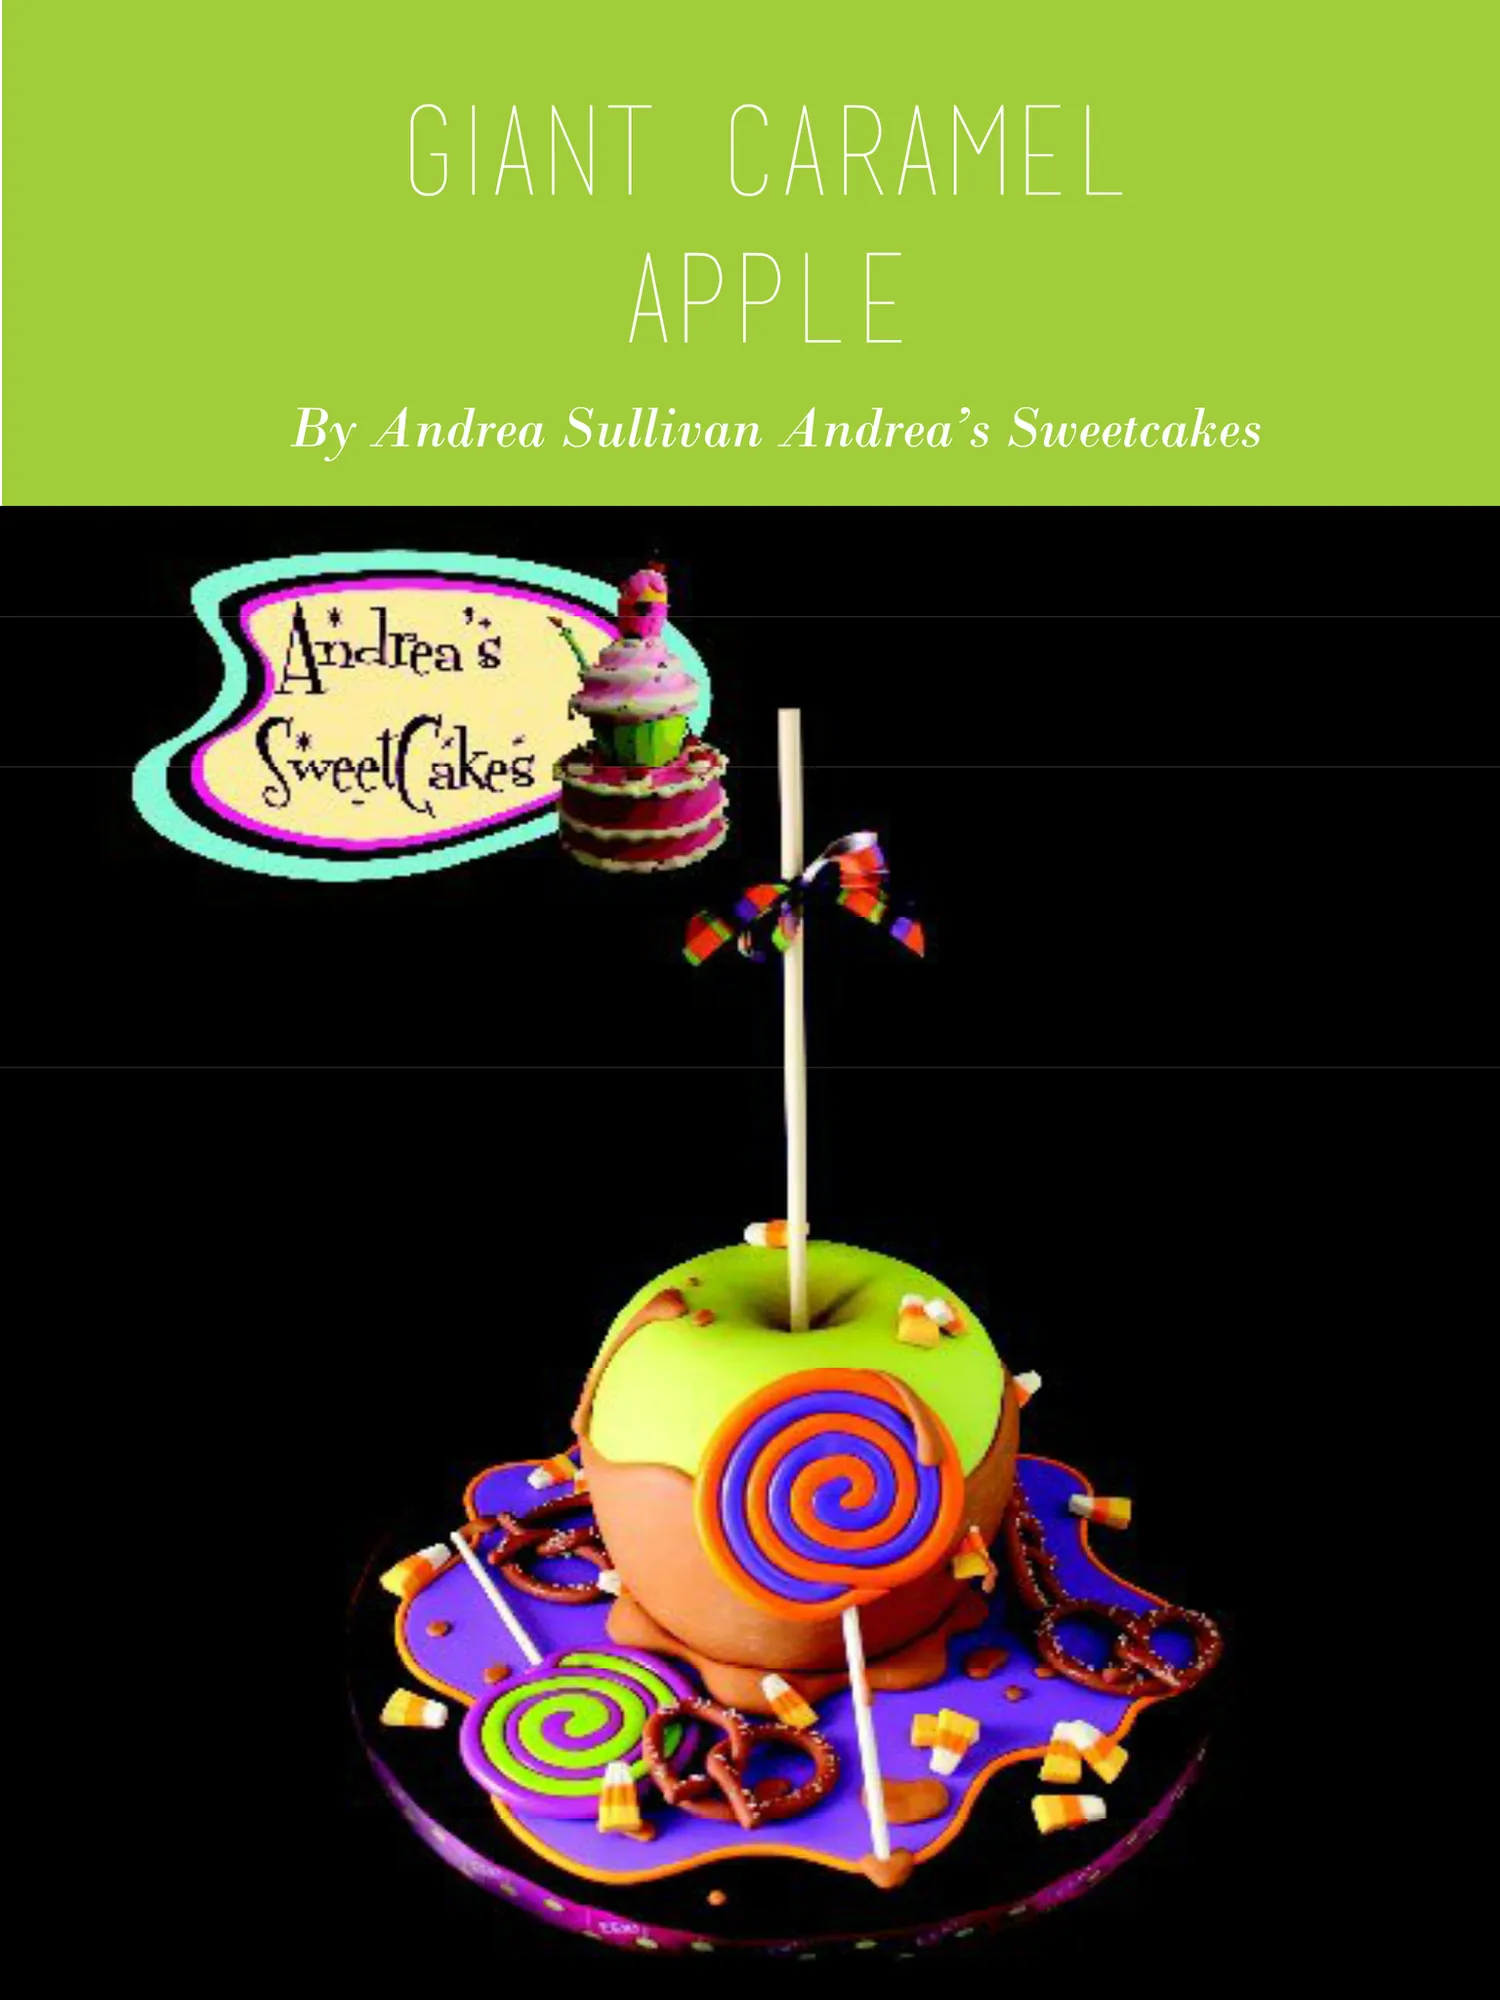
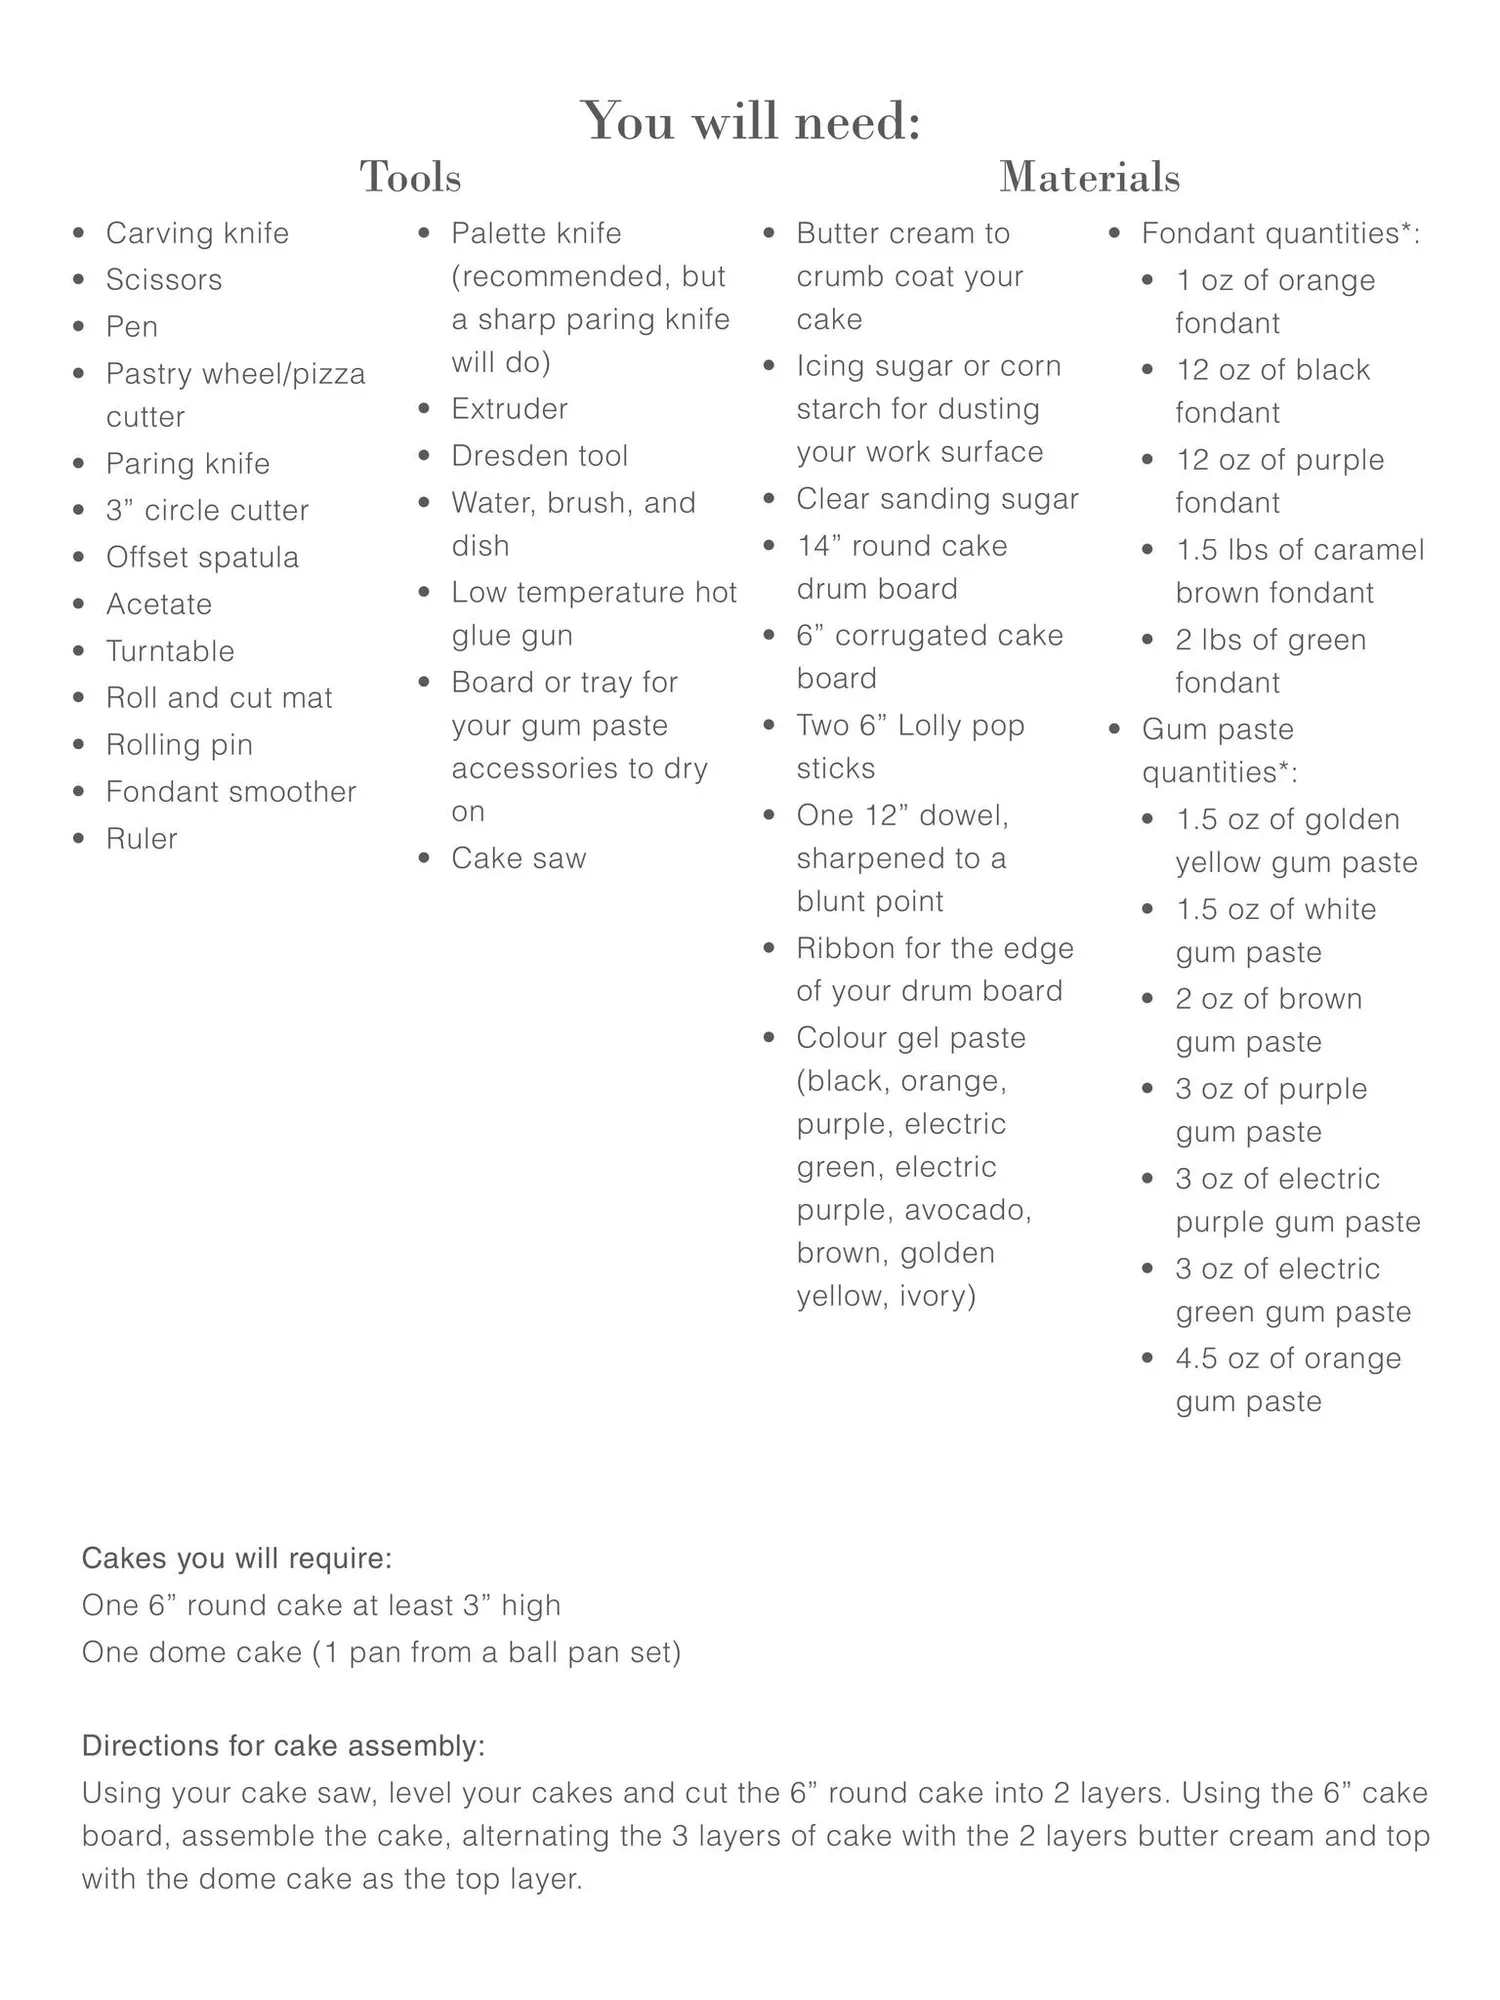
Giant Caramel Apple By Andrea Sullivan Andrea’s Sweetcakes
Page 22 text
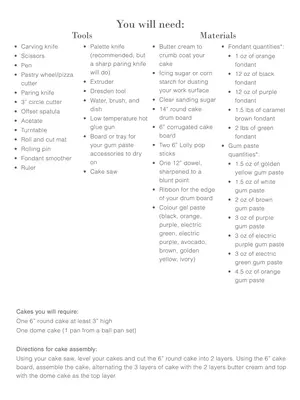
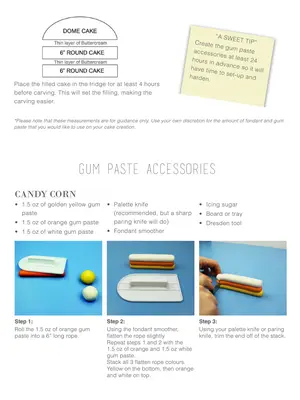
Tools • Carving knife • Scissors • Pen You will need: • Palette knife (recommended, but a sharp paring knife will do) • Pastry wheel/pizza cutter • Extruder • Paring knife • Dresden tool • 3” circle cutter • Water, brush, and dish • Offset spatula • Acetate • Turntable • Roll and cut mat • Rolling pin • Fondant smoother • Ruler Materials • Butter cream to crumb coat your cake • Icing sugar or corn starch for dusting your work surface • Clear sanding sugar • 14” round cake drum board • Low temperature hot • 6” corrugated cake glue gun board • Board or tray for • Two 6” Lolly pop your gum paste sticks accessories to dry on • One 12” dowel, • Cake saw sharpened to a blunt point • Ribbon for the edge of your drum board • Colour gel paste (black, orange, purple, electric green, electric purple, avocado, brown, golden yellow, ivory) • Fondant quantities*: • 1 oz of orange fondant • 12 oz of black fondant • 12 oz of purple fondant • 1.5 lbs of caramel brown fondant • 2 lbs of green fondant • Gum paste quantities*: • 1.5 oz of golden yellow gum paste • 1.5 oz of white gum paste • 2 oz of brown gum paste • 3 oz of purple gum paste • 3 oz of electric purple gum paste • 3 oz of electric green gum paste • 4.5 oz of orange gum paste Cakes you will require: One 6” round cake at least 3” high One dome cake (1 pan from a ball pan set) Directions for cake assembly: Using your cake saw, level your cakes and cut the 6” round cake into 2 layers. Using the 6” cake board, assemble the cake, alternating the 3 layers of cake with the 2 layers butter cream and top with the dome cake as the top layer.
Page 23 text
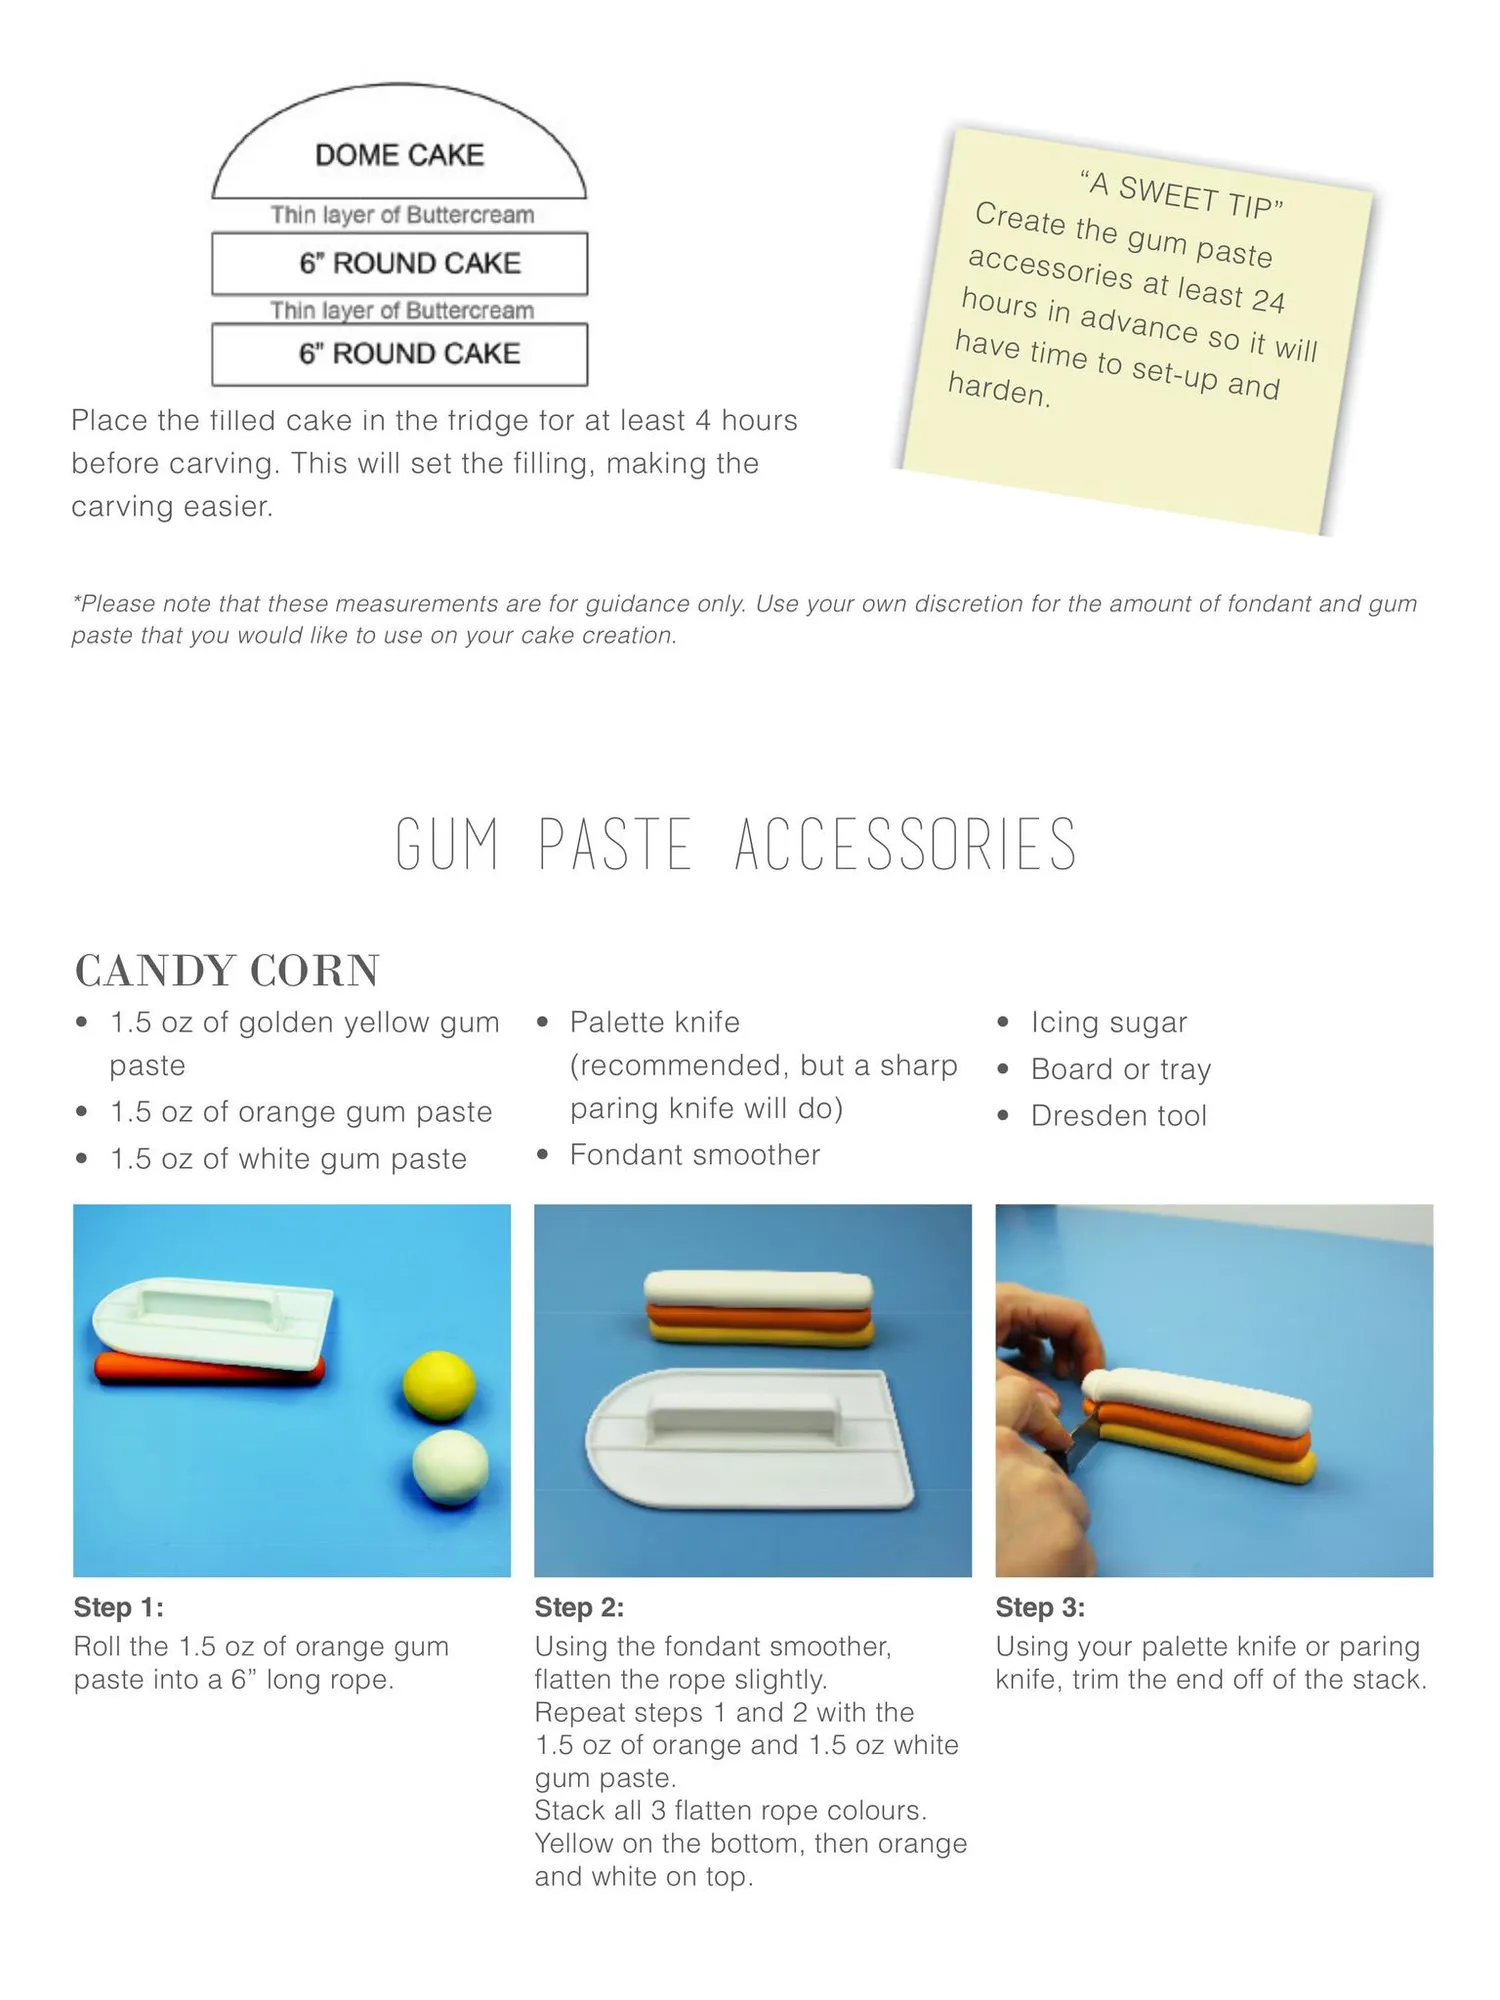
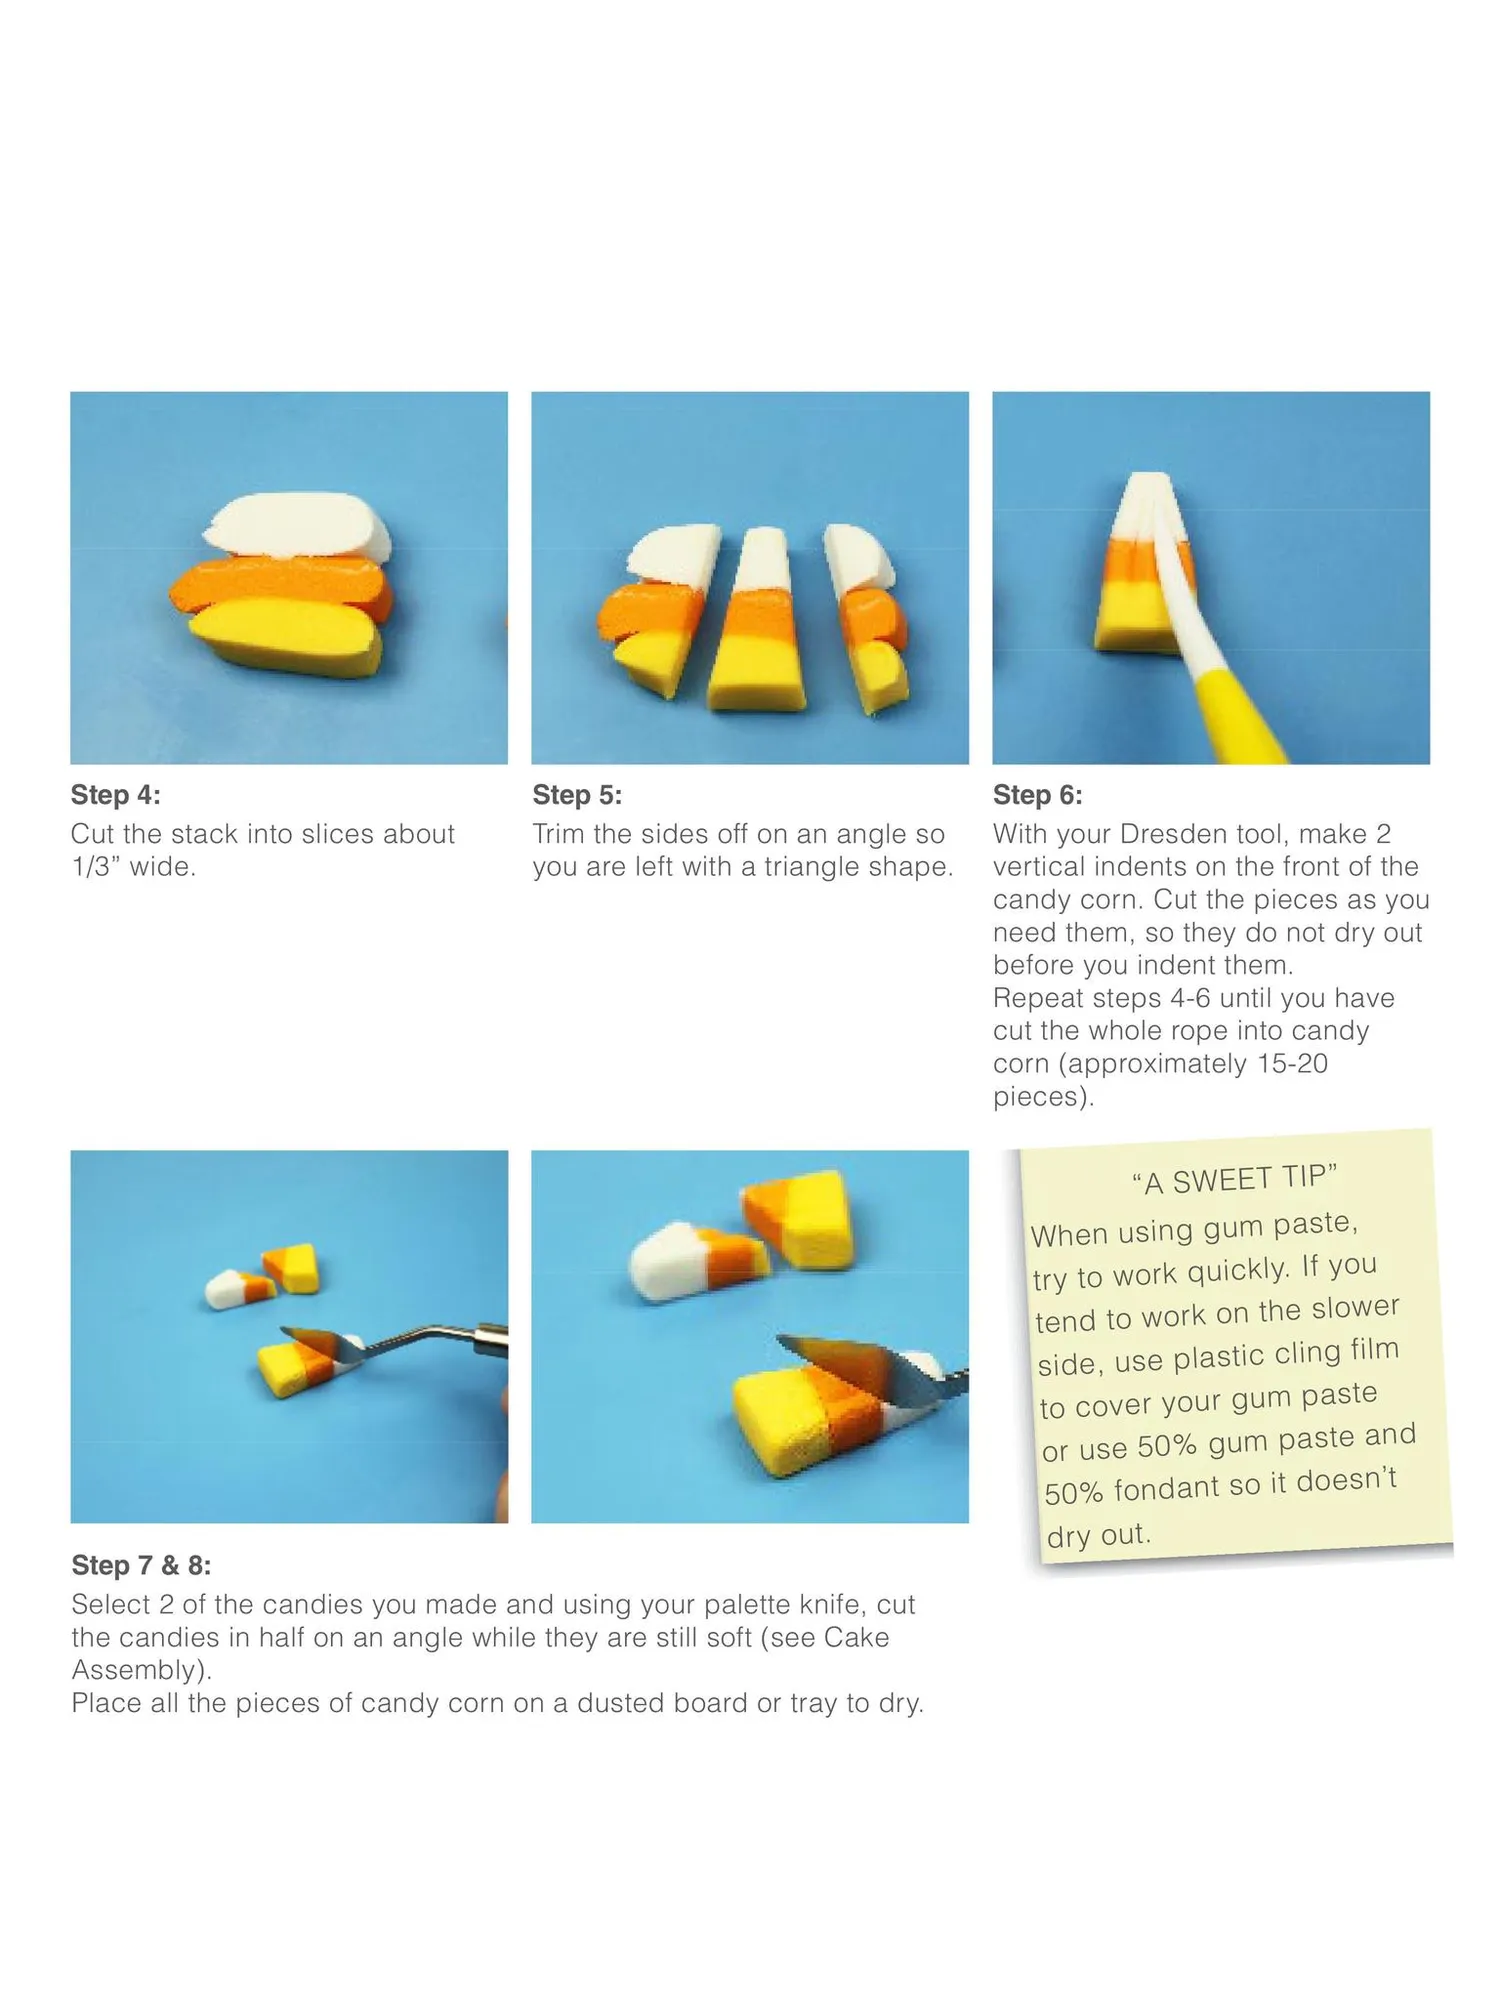
Place the filled cake in the fridge for at least 4 hours before carving. This will set the filling, making the carving easier. “A SWE ET TIP” C re a t e the gum paste access ories a t least 2 hours i 4 n adva n ce so it have tim will e to se t -up and h a rd e n . *Please note that these measurements are for guidance only. Use your own discretion for the amount of fondant and gum paste that you would like to use on your cake creation. Gum Paste Accessories CANDY CORN • 1.5 oz of golden yellow gum paste • 1.5 oz of orange gum paste • Palette knife (recommended, but a sharp paring knife will do) • 1.5 oz of white gum paste • Fondant smoother Step 1: Roll the 1.5 oz of orange gum paste into a 6” long rope. Step 2: Using the fondant smoother, flatten the rope slightly. Repeat steps 1 and 2 with the 1.5 oz of orange and 1.5 oz white gum paste. Stack all 3 flatten rope colours. Yellow on the bottom, then orange and white on top. • Icing sugar • Board or tray • Dresden tool Step 3: Using your palette knife or paring knife, trim the end off of the stack.
Page 24 text
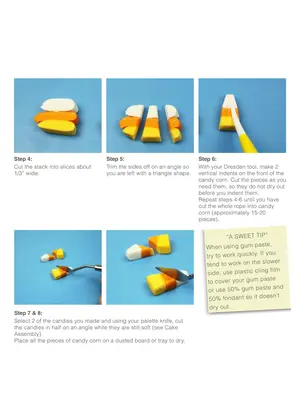
Step 4: Cut the stack into slices about 1/3” wide. Step 5: Trim the sides off on an angle so you are left with a triangle shape. Step 6: With your Dresden tool, make 2 vertical indents on the front of the candy corn. Cut the pieces as you need them, so they do not dry out before you indent them. Repeat steps 4-6 until you have cut the whole rope into candy corn (approximately 15-20 pieces). “A SWEET TIP” te, When using gum pas you tr y to work quickly. If ower tend to work on the sl g film side, use plastic clin aste to cover your gum p te and or use 50% gum pas sn’t 50% fondant so it doe Step 7 & 8: Select 2 of the candies you made and using your palette knife, cut the candies in half on an angle while they are still soft (see Cake Assembly). Place all the pieces of candy corn on a dusted board or tray to dry. dry out.
Page 25 text
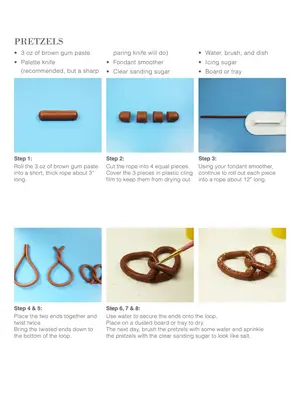
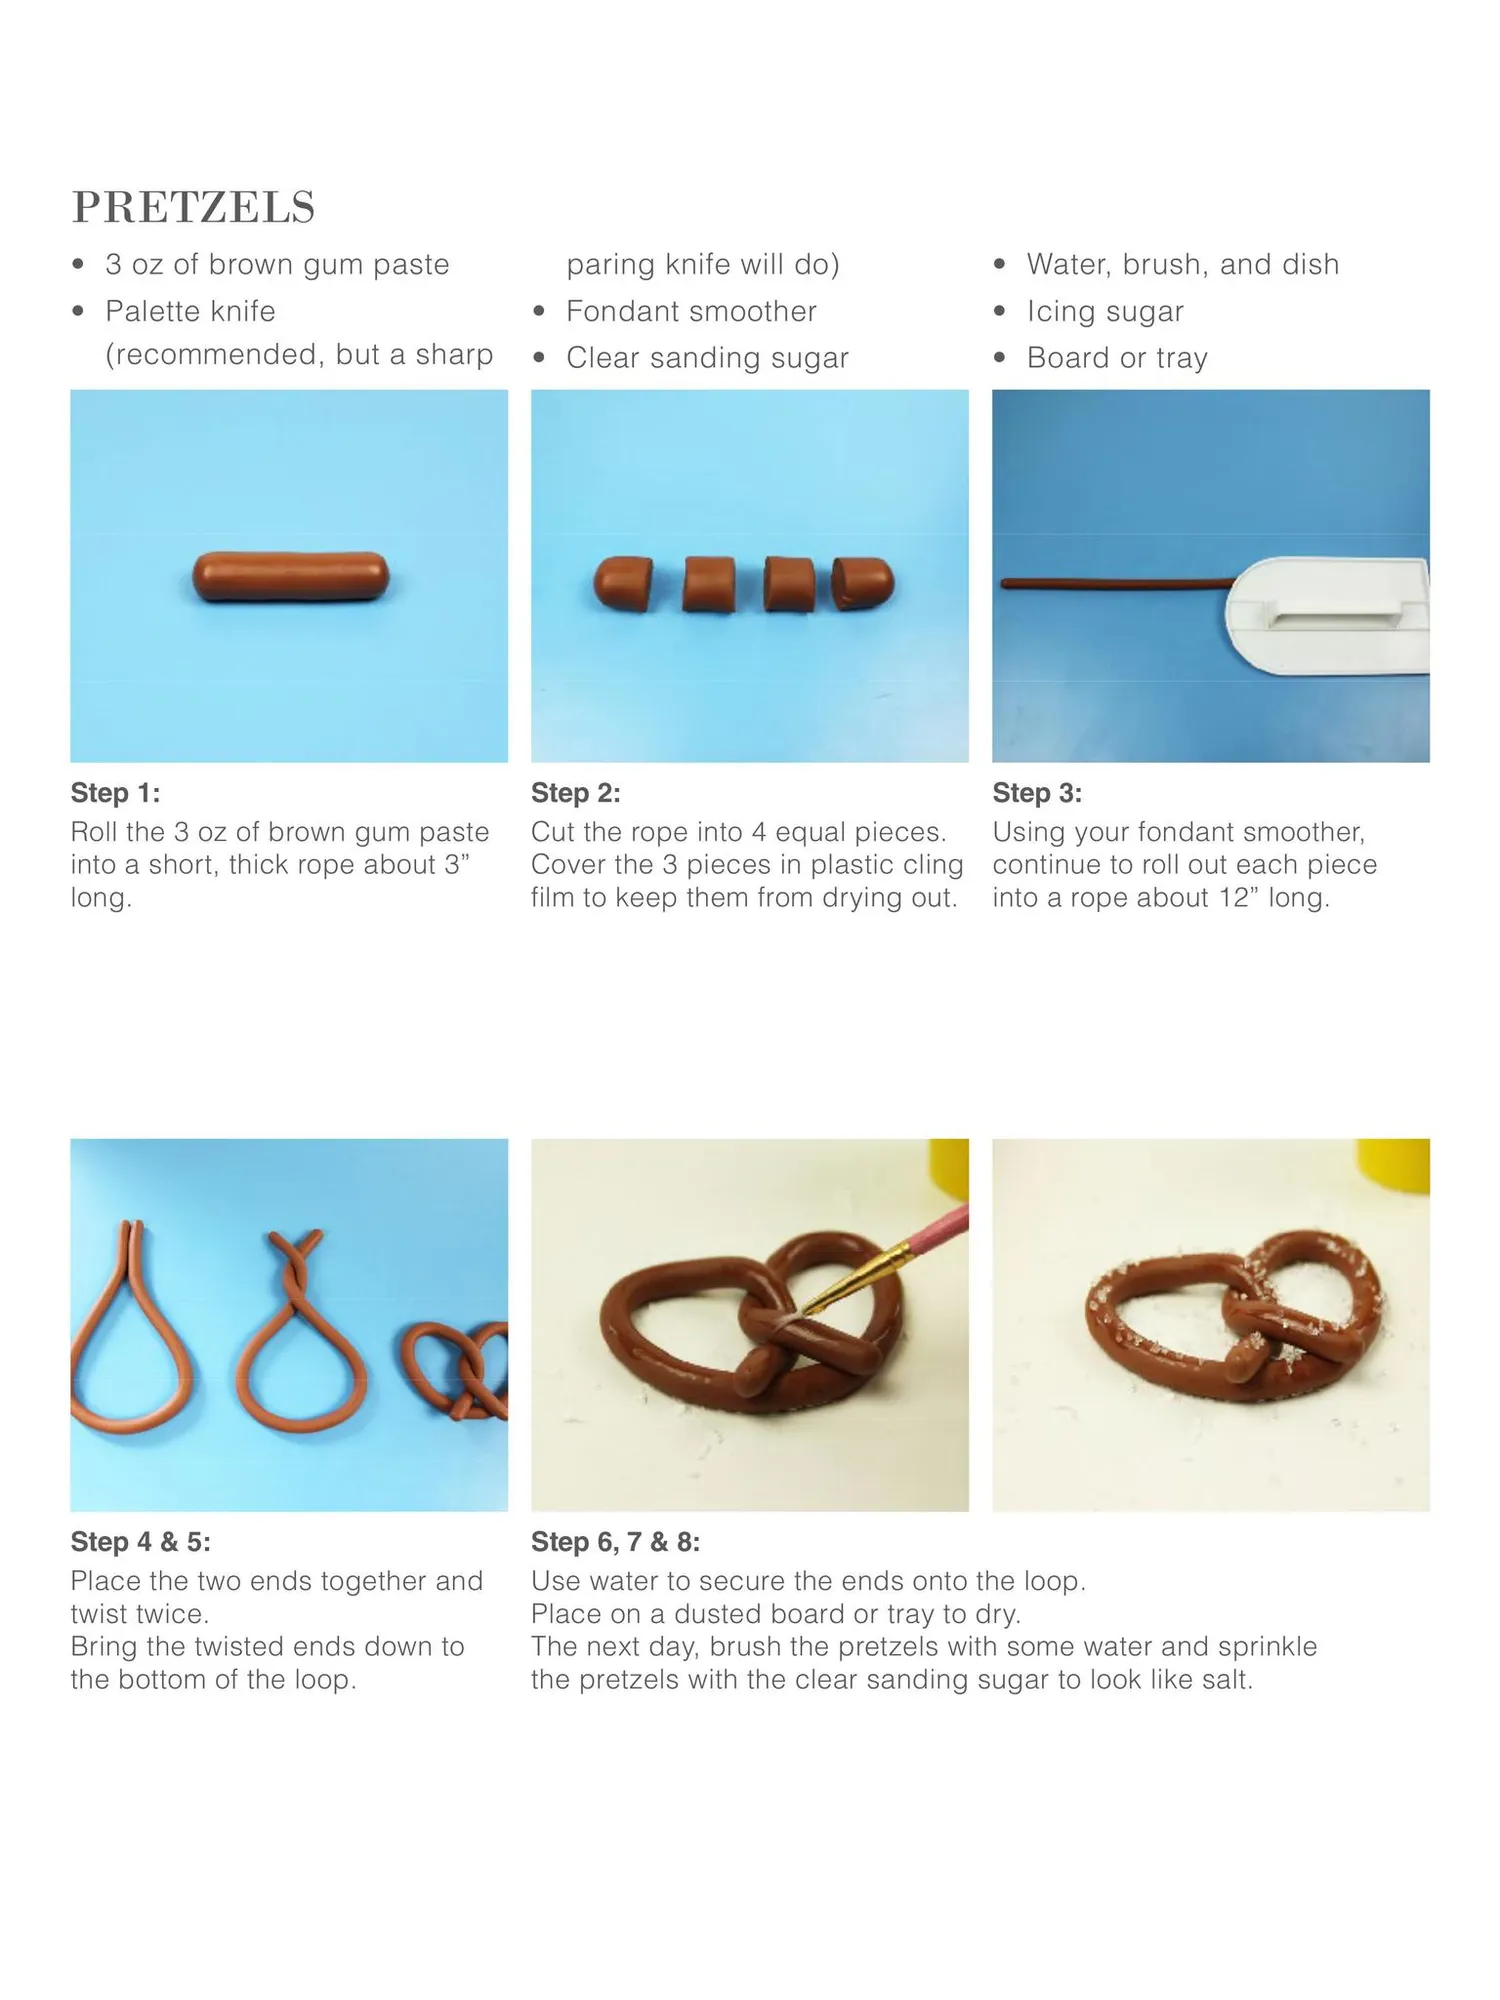
PRETZELS • 3 oz of brown gum paste paring knife will do) • Water, brush, and dish • Palette knife (recommended, but a sharp • Fondant smoother • Icing sugar • Clear sanding sugar • Board or tray Step 1: Roll the 3 oz of brown gum paste into a short, thick rope about 3” long. Step 2: Cut the rope into 4 equal pieces. Cover the 3 pieces in plastic cling film to keep them from drying out. Step 3: Using your fondant smoother, continue to roll out each piece into a rope about 12” long. Step 4 & 5: Place the two ends together and twist twice. Bring the twisted ends down to the bottom of the loop. Step 6, 7 & 8: Use water to secure the ends onto the loop. Place on a dusted board or tray to dry. The next day, brush the pretzels with some water and sprinkle the pretzels with the clear sanding sugar to look like salt.
Page 26 text
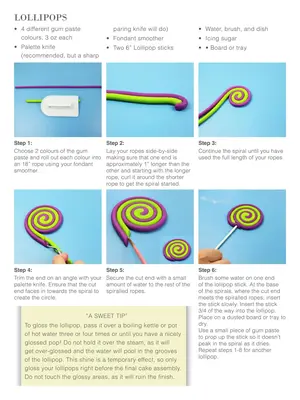
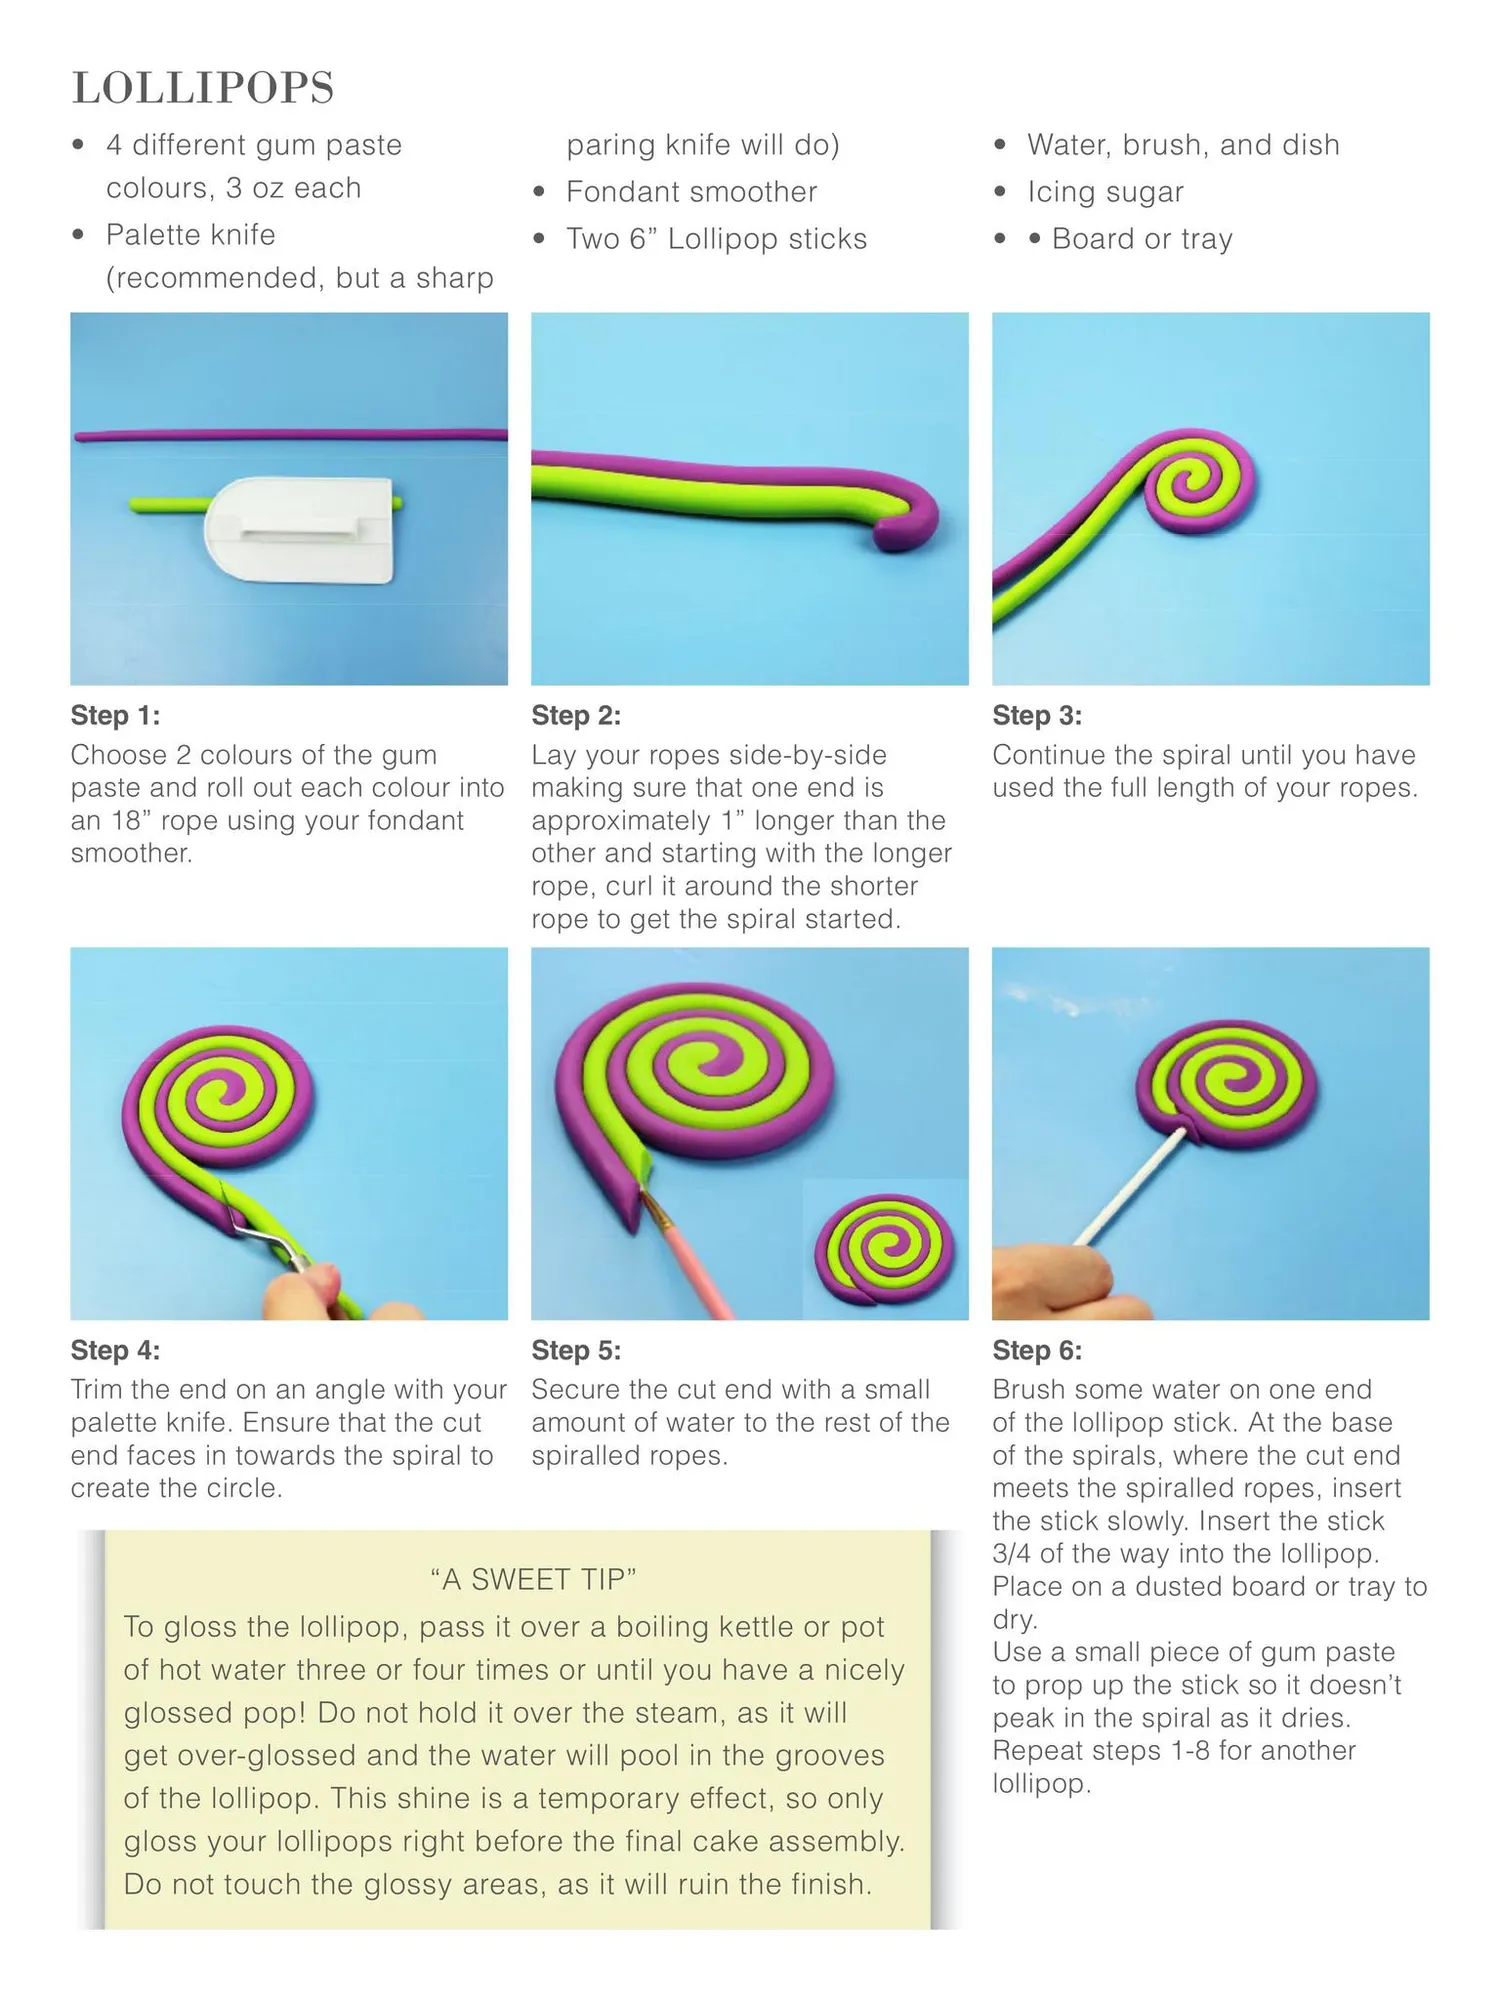
LOLLIPOPS • 4 different gum paste colours, 3 oz each paring knife will do) • Water, brush, and dish • Fondant smoother • Icing sugar • Palette knife (recommended, but a sharp • Two 6” Lollipop sticks • • Board or tray Step 1: Choose 2 colours of the gum paste and roll out each colour into an 18” rope using your fondant smoother. Step 2: Lay your ropes side-by-side making sure that one end is approximately 1” longer than the other and starting with the longer rope, curl it around the shorter rope to get the spiral started. Step 3: Continue the spiral until you have used the full length of your ropes. Step 4: Trim the end on an angle with your palette knife. Ensure that the cut end faces in towards the spiral to create the circle. Step 5: Secure the cut end with a small amount of water to the rest of the spiralled ropes. Step 6: Brush some water on one end of the lollipop stick. At the base of the spirals, where the cut end meets the spiralled ropes, insert the stick slowly. Insert the stick 3/4 of the way into the lollipop. Place on a dusted board or tray to dry. Use a small piece of gum paste to prop up the stick so it doesn’t peak in the spiral as it dries. Repeat steps 1-8 for another lollipop. “A SWEET TIP” To gloss the lollipop, pass it over a boiling kettle or pot of hot water three or four times or until you have a nicely glossed pop! Do not hold it over the steam, as it will get over-glossed and the water will pool in the grooves of the lollipop. This shine is a temporary effect, so only gloss your lollipops right before the final cake assembly. Do not touch the glossy areas, as it will ruin the finish.
Page 27 text
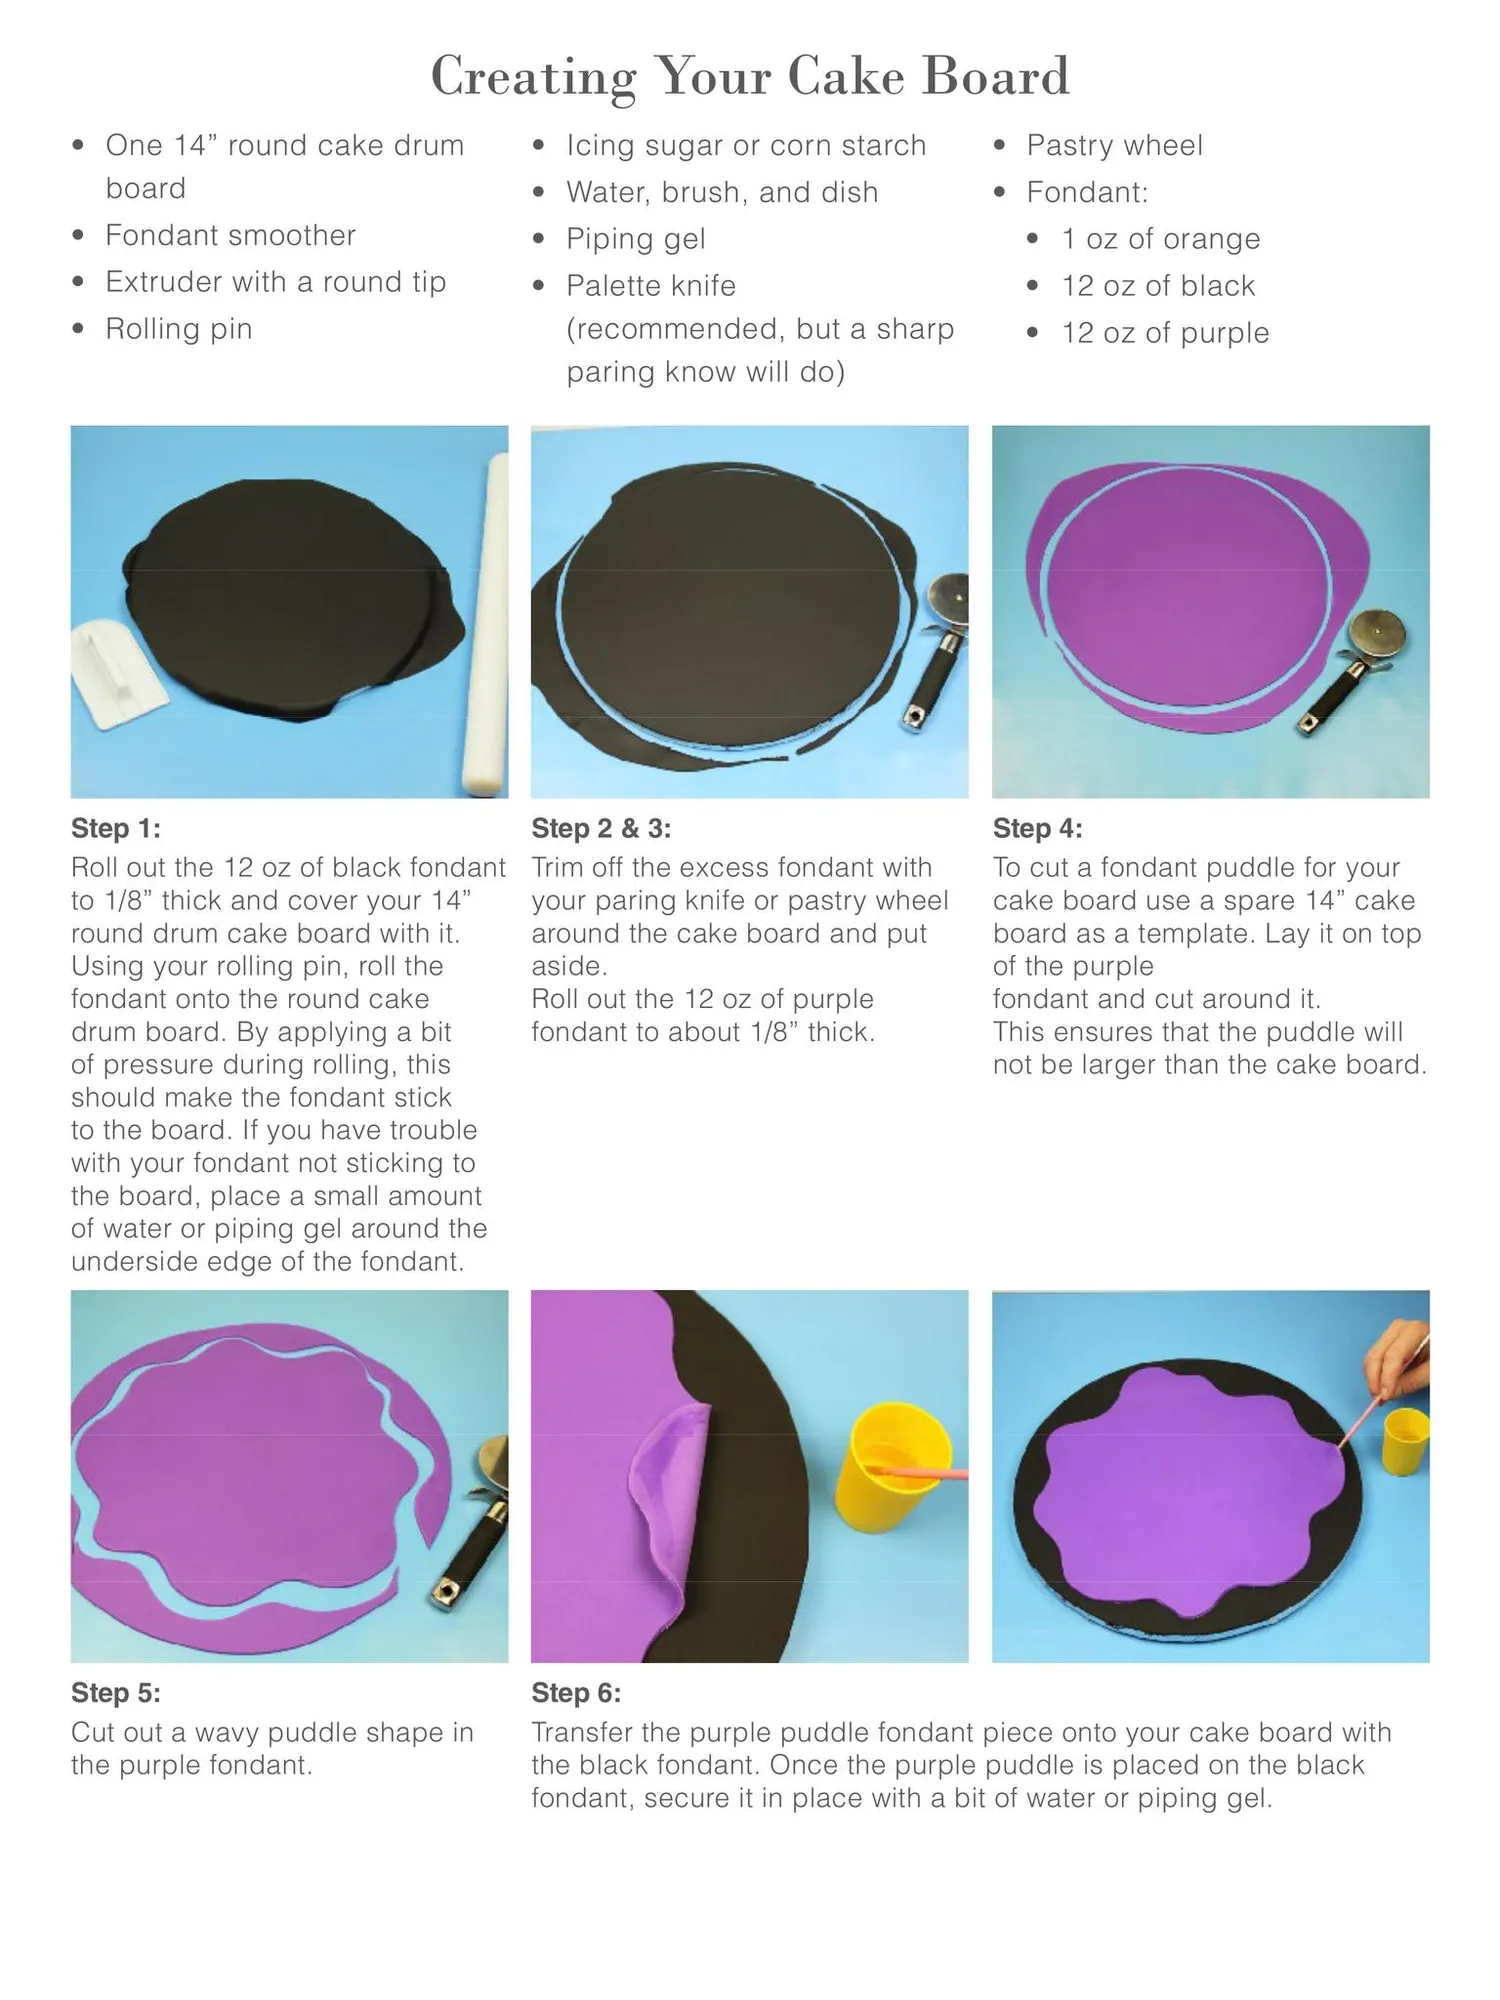
Creating Your Cake Board • One 14” round cake drum board • Icing sugar or corn starch • Pastry wheel • Water, brush, and dish • Fondant: • Fondant smoother • Piping gel • 1 oz of orange • Extruder with a round tip • Palette knife (recommended, but a sharp paring know will do) • 12 oz of black • Rolling pin • 12 oz of purple Step 1: Roll out the 12 oz of black fondant to 1/8” thick and cover your 14” round drum cake board with it. Using your rolling pin, roll the fondant onto the round cake drum board. By applying a bit of pressure during rolling, this should make the fondant stick to the board. If you have trouble with your fondant not sticking to the board, place a small amount of water or piping gel around the underside edge of the fondant. Step 2 & 3: Trim off the excess fondant with your paring knife or pastry wheel around the cake board and put aside. Roll out the 12 oz of purple fondant to about 1/8” thick. Step 4: To cut a fondant puddle for your cake board use a spare 14” cake board as a template. Lay it on top of the purple fondant and cut around it. This ensures that the puddle will not be larger than the cake board. Step 5: Cut out a wavy puddle shape in the purple fondant. Step 6: Transfer the purple puddle fondant piece onto your cake board with the black fondant. Once the purple puddle is placed on the black fondant, secure it in place with a bit of water or piping gel.
Page 28 text
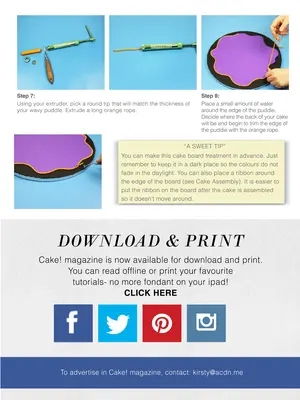
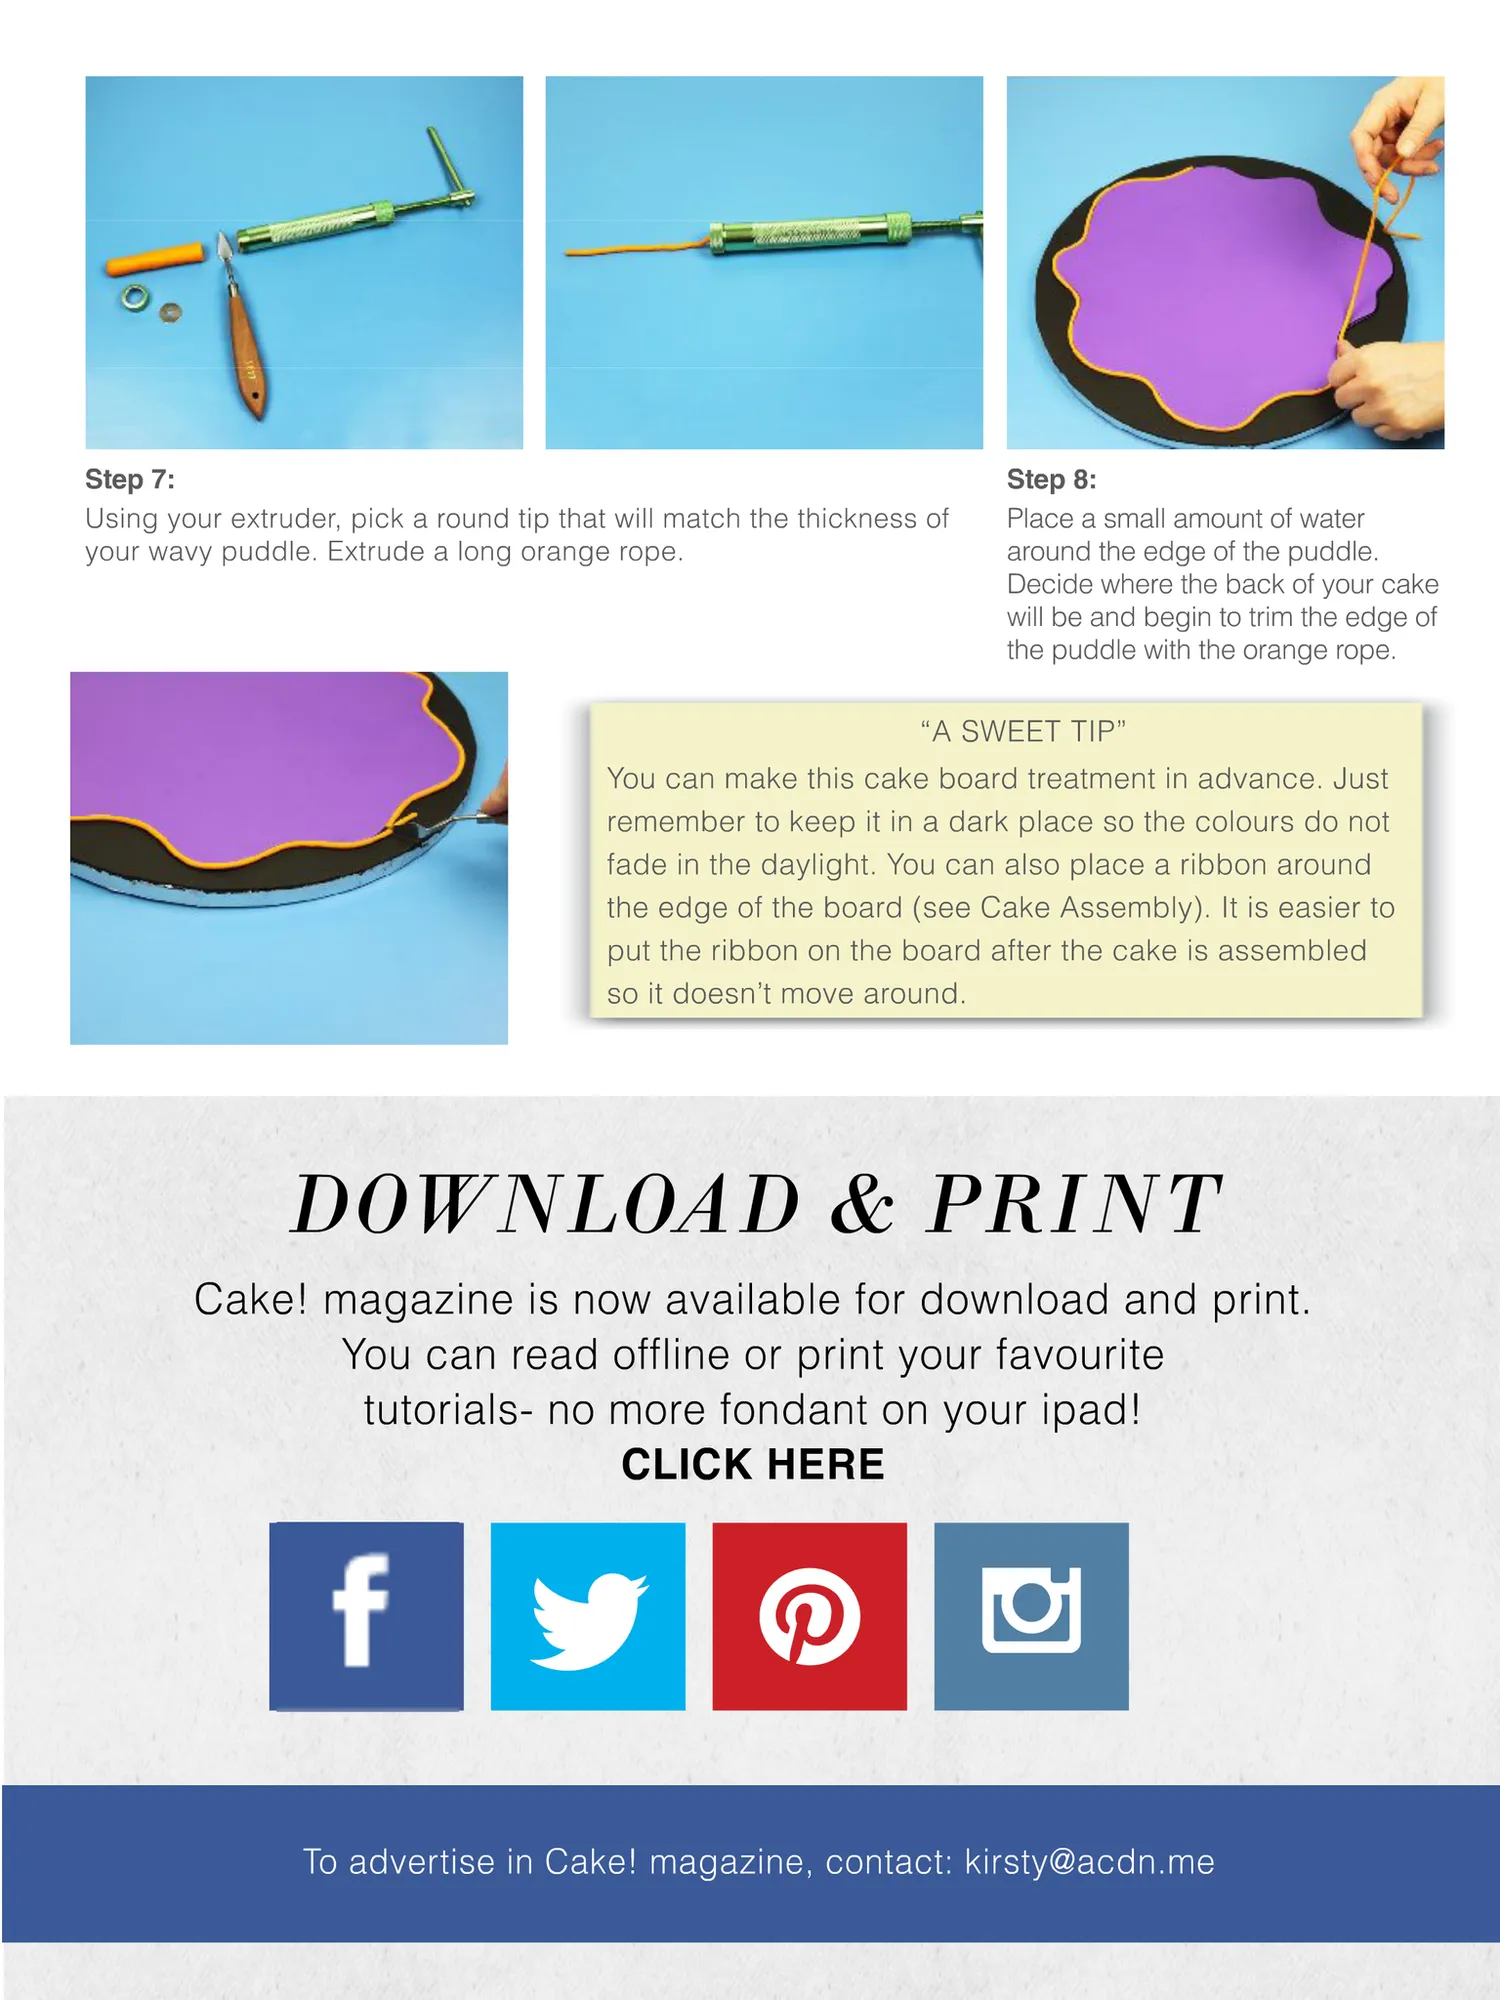
Step 7: Using your extruder, pick a round tip that will match the thickness of your wavy puddle. Extrude a long orange rope. Step 8: Place a small amount of water around the edge of the puddle. Decide where the back of your cake will be and begin to trim the edge of the puddle with the orange rope. “A SWEET TIP” You can make this cake board treatment in advance. Just remember to keep it in a dark place so the colours do not fade in the daylight. You can also place a ribbon around the edge of the board (see Cake Assembly). It is easier to put the ribbon on the board after the cake is assembled so it doesn’t move around. DOWNLOAD & PRINT Cake! magazine is now available for download and print. You can read offline or print your favourite tutorials- no more fondant on your ipad! CLICK HERE To advertise in Cake! magazine, contact: [email protected]
Page 29 text
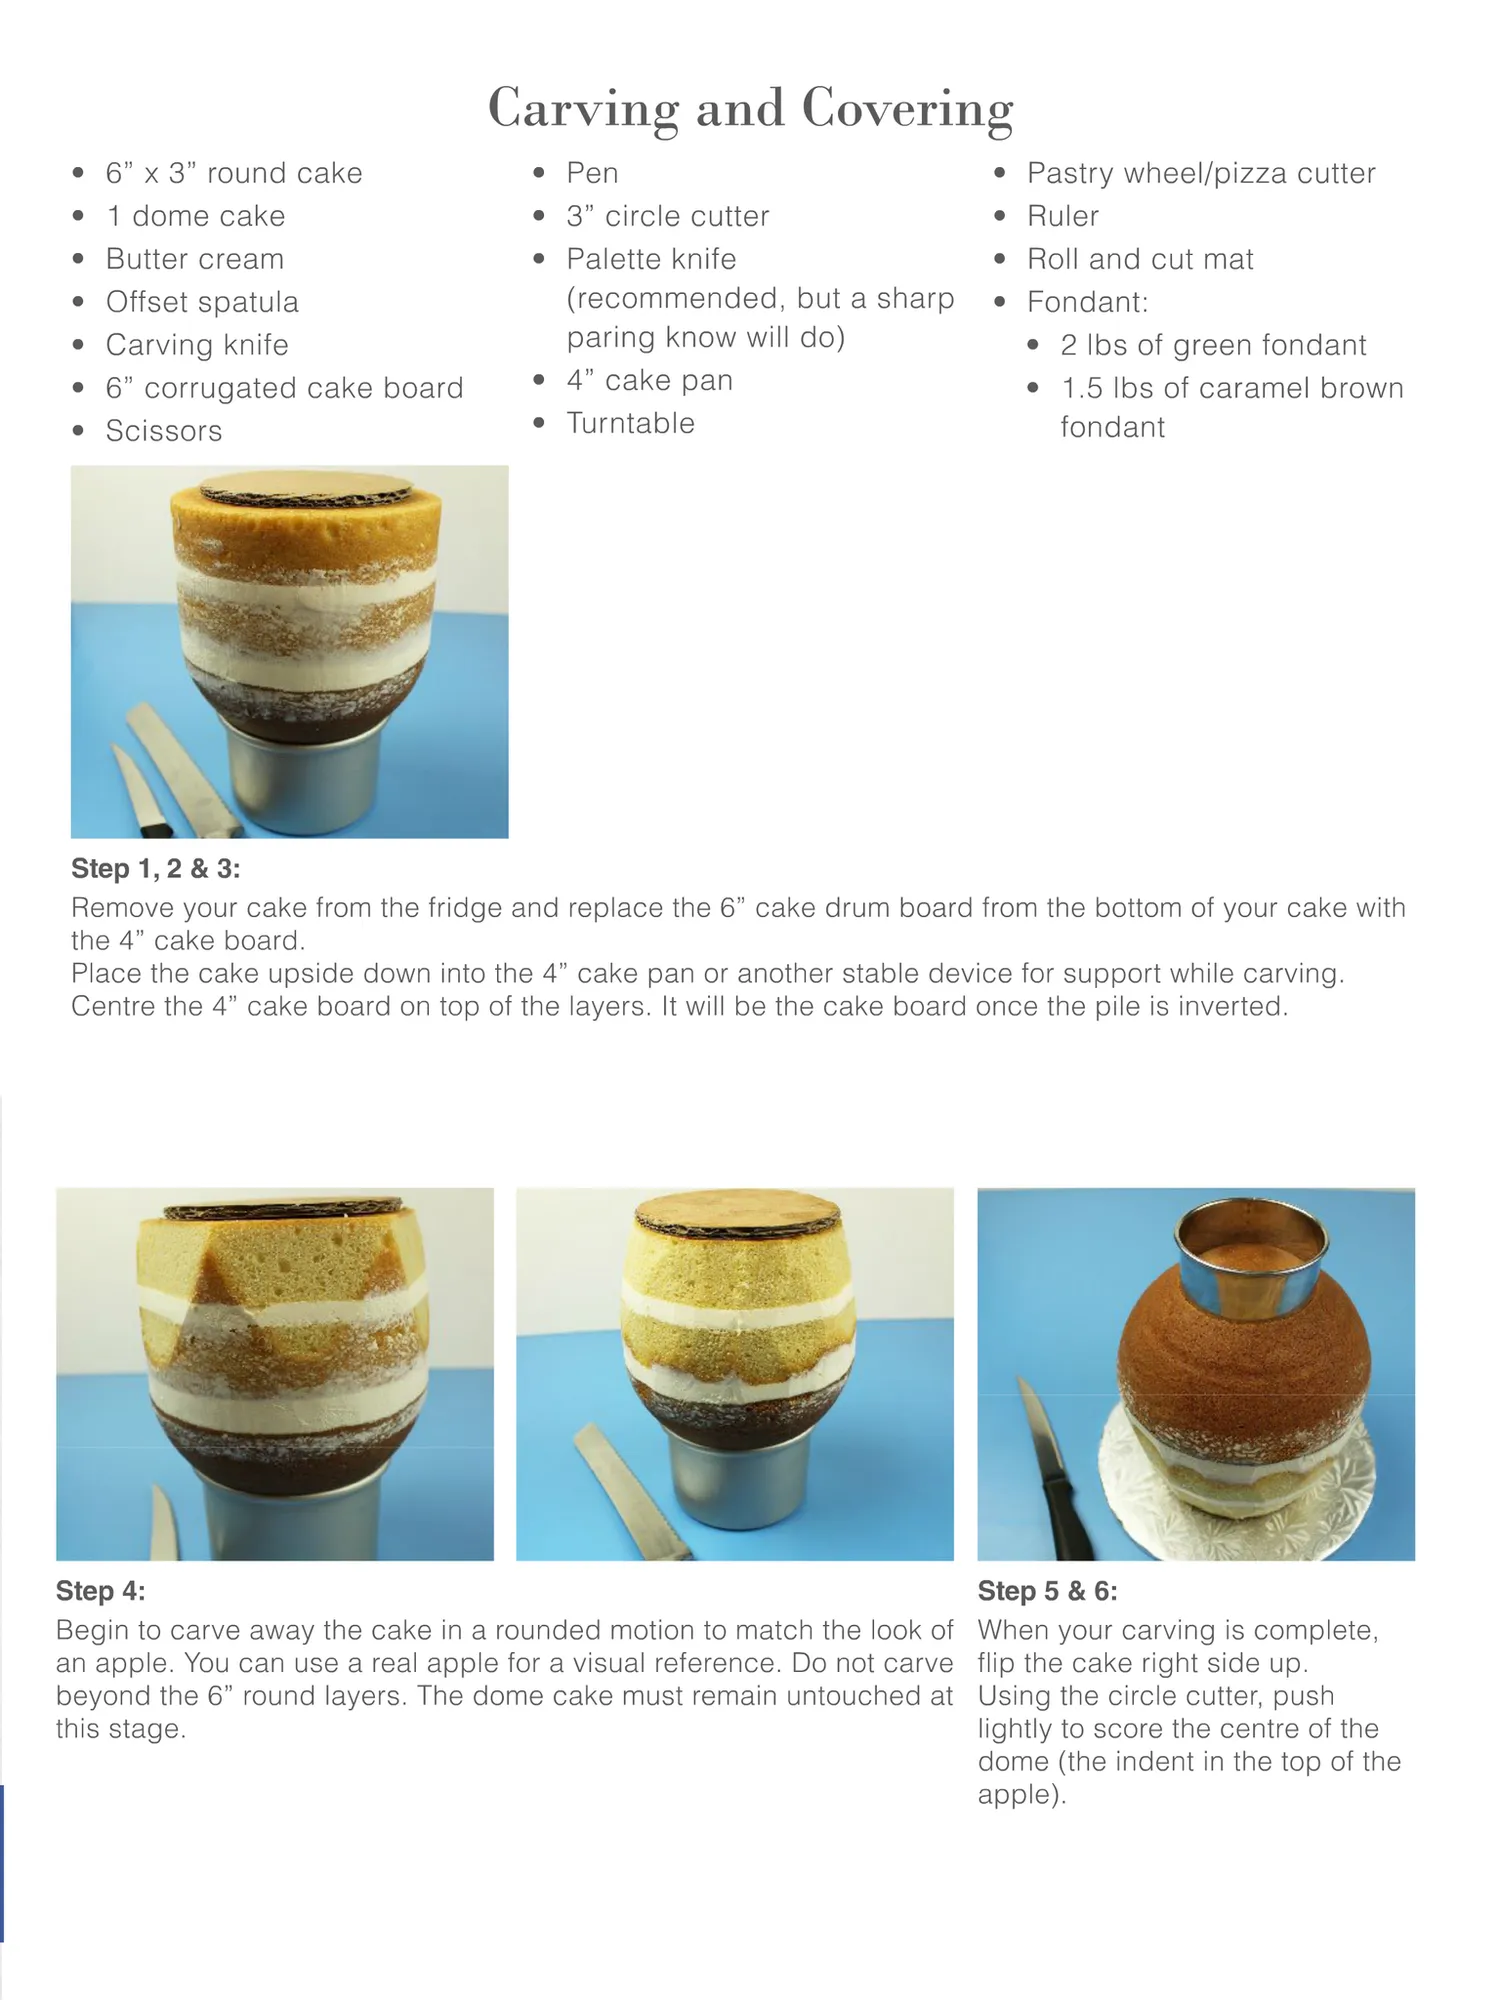
Carving and Covering • • • • • • • 6” x 3” round cake 1 dome cake Butter cream Offset spatula Carving knife 6” corrugated cake board Scissors • Pen • 3” circle cutter • Palette knife (recommended, but a sharp paring know will do) • 4” cake pan • Turntable • • • • Pastry wheel/pizza cutter Ruler Roll and cut mat Fondant: • 2 lbs of green fondant • 1.5 lbs of caramel brown fondant Step 1, 2 & 3: Remove your cake from the fridge and replace the 6” cake drum board from the bottom of your cake with the 4” cake board. Place the cake upside down into the 4” cake pan or another stable device for support while carving. Centre the 4” cake board on top of the layers. It will be the cake board once the pile is inverted. Step 4: Begin to carve away the cake in a rounded motion to match the look of an apple. You can use a real apple for a visual reference. Do not carve beyond the 6” round layers. The dome cake must remain untouched at this stage. Step 5 & 6: When your carving is complete, flip the cake right side up. Using the circle cutter, push lightly to score the centre of the dome (the indent in the top of the apple).
Page 30 text
Sne Cake Decorating Classes&Demo's BARCO Cake Boards & Boxes WideRangeof Quality Decorating Ingredients Tools & +MORE! Equipment DECORATING CAKE SUPPLIES& CLASSES
Page 31 text
ABOUT US Dak BakeBossisAustralia'slargestCake Decoratingsupplierandiscommittedto providingyou with quality products at competitivepricesandextraordinaryservice thatgoesbeyondyourpurchase, toensure culinaryandbakingsuccess. Wearestaffedbyexperienced&knowledgeableCake DecoratorsandCustomerServiceSpecialiststohelpwithyourevery need - so feel free to ask us anything. Inadditiontoourhugeproductrange, wealsoofferCake DecoratingClasses&Demonstrationsforalllevels,aimedtoassist you with the never-ending new & exciting techniques and cake decorating styles withinthebaking-sphere. Forall your Cake Decorating and Bakingneeds.. Bahe Boss has you covened! WealsoofferBuLKINGREDIENTSsUchasCakeMixes, Chocolate Fondant,Buttercream,plusmore. GLENIRISVIC TULLAMARINEVIC BENDIGOVIC 59HighStreet,GlenIrisVI 17/217MicklehamRoad 97MitchellStreet,BendigoVIC 3146 TullamarineVIC3049 3550 UNDERWOODQLD GOLDCOASTQLD NORTHLAKESQLD 9 Ferguson Street, Underwood 21UptonStreet,BundallQLD 14BurkeCrescent,NorthLakes QLD4119 4217 BusinessParkQLD4509 MALAGA WA JANDAKOTWA CLARENCEGARDENSSA 2/2BusinessWay,MalagaWA 14/233BerriganDrive,Jandakot 897SouthRoad 6090 WA6164 ClarenceGardensSA5039 TAURANGANZ WETHERILLPARKNSW AUCKLANDNZ 198NewtonRoad 113NewtonStreet,MtMaunganui 7/13EnterpriseStreet WetherillParkNSW2164 TaurangaNz3116 Birkenhead,AucklandNz0626 +61298280700 bakeboss.com.au bakebossANz
Page 32 text
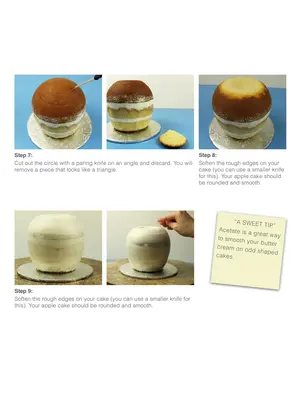
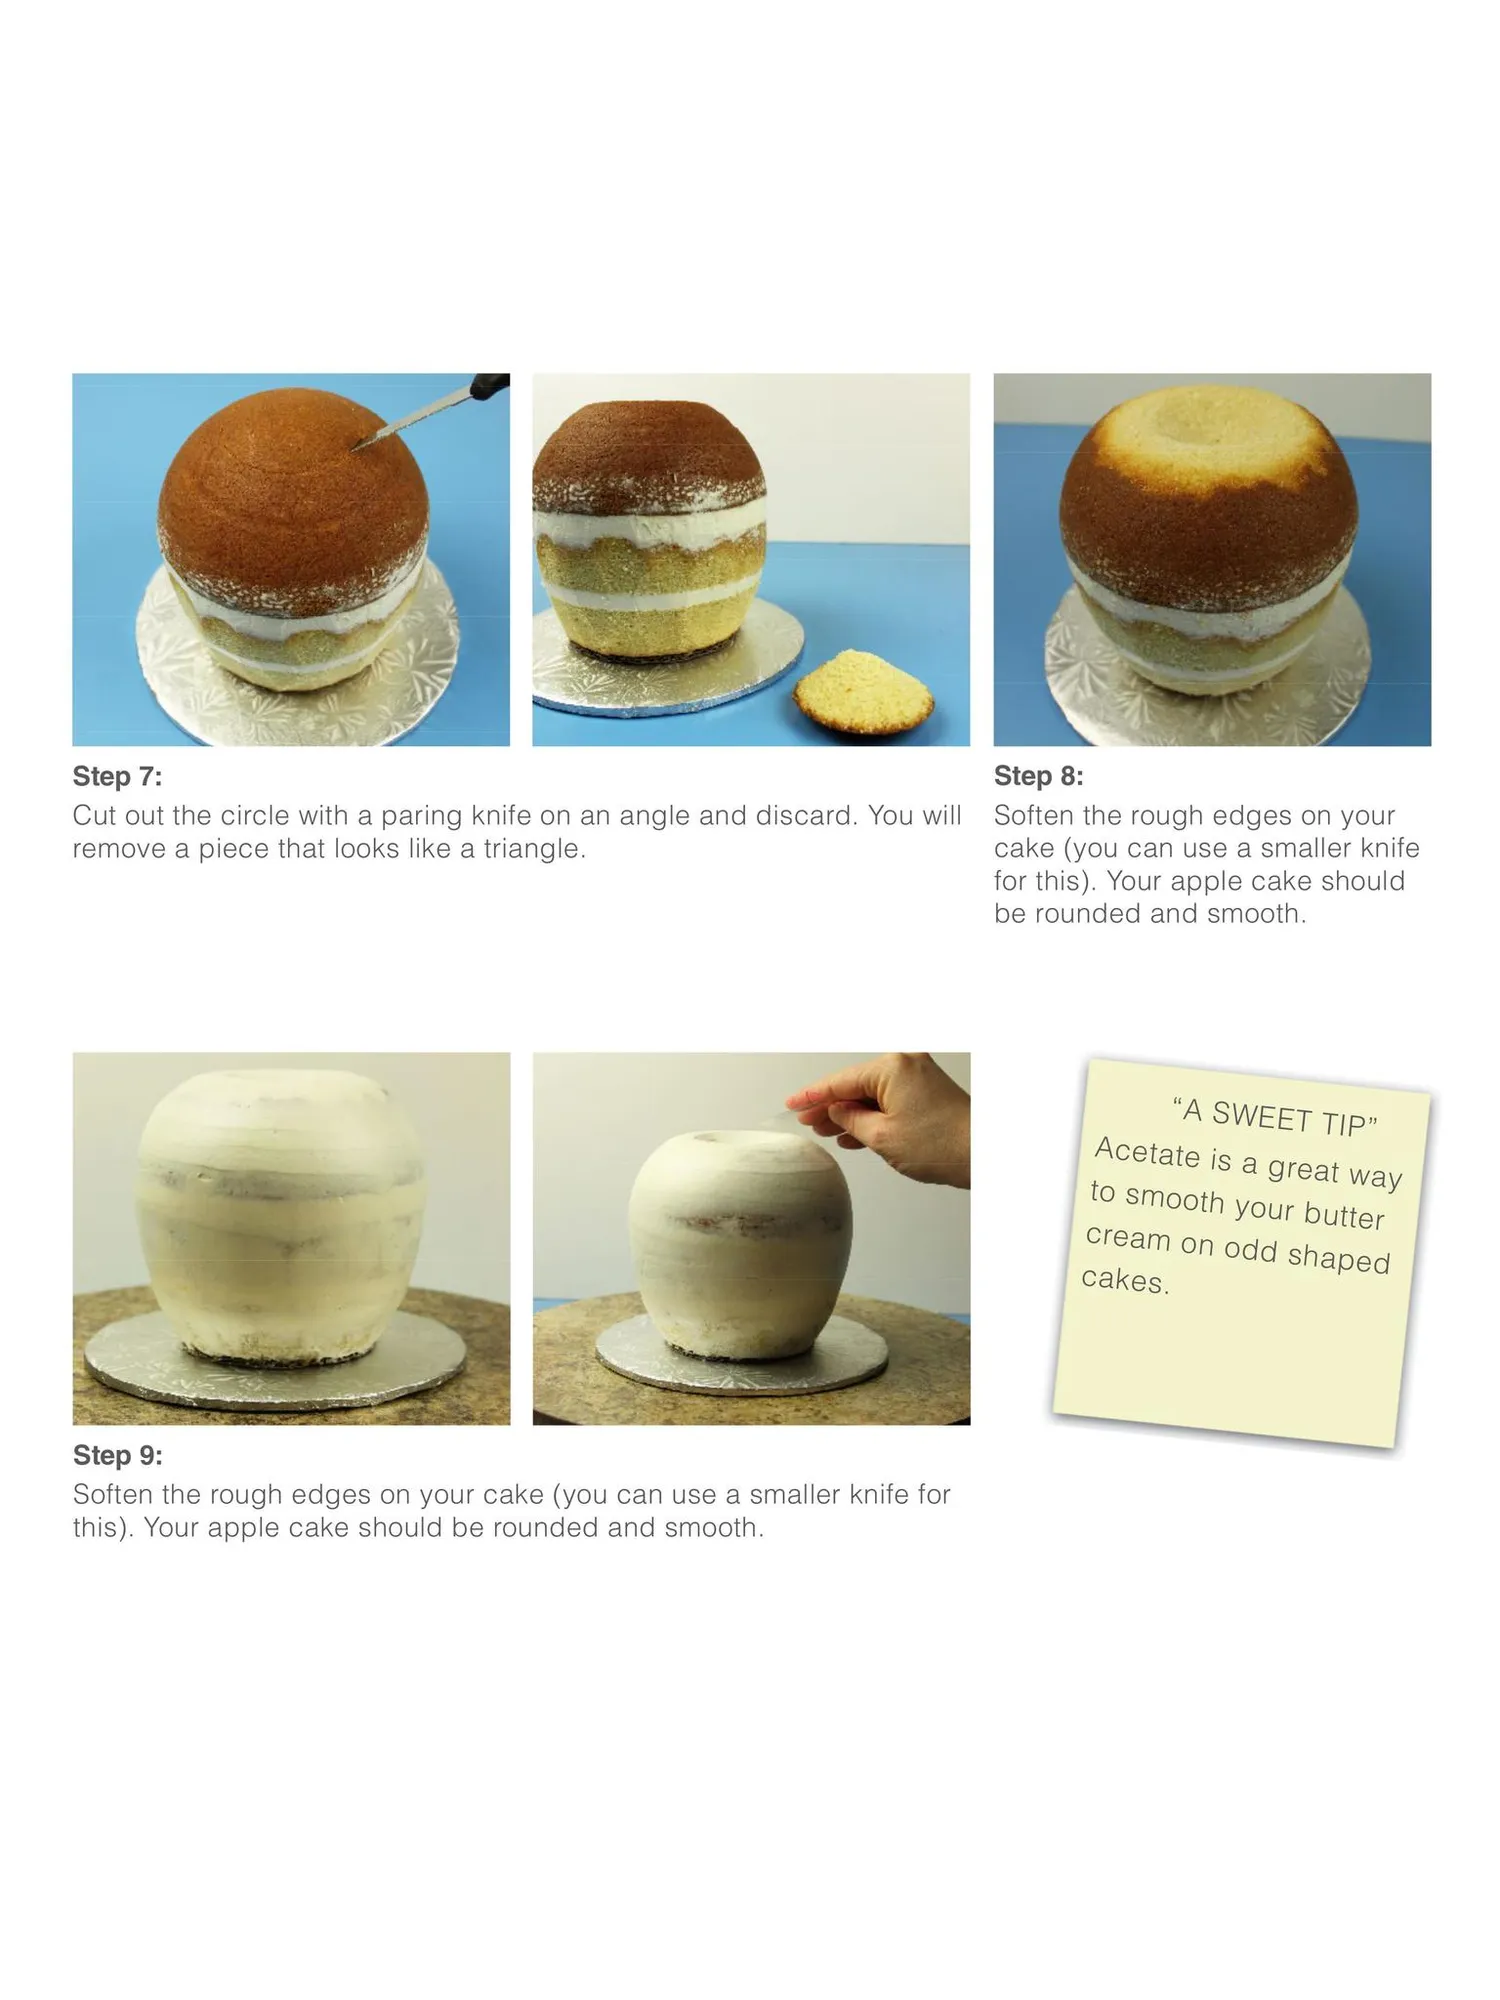
Step 7: Cut out the circle with a paring knife on an angle and discard. You will remove a piece that looks like a triangle. Step 8: Soften the rough edges on your cake (you can use a smaller knife for this). Your apple cake should be rounded and smooth. “A SWEET TIP” Acetate is a g re a t w a y to smooth your butte r c re a m o n o dd shaped cakes. Step 9: Soften the rough edges on your cake (you can use a smaller knife for this). Your apple cake should be rounded and smooth.
Page 33 text
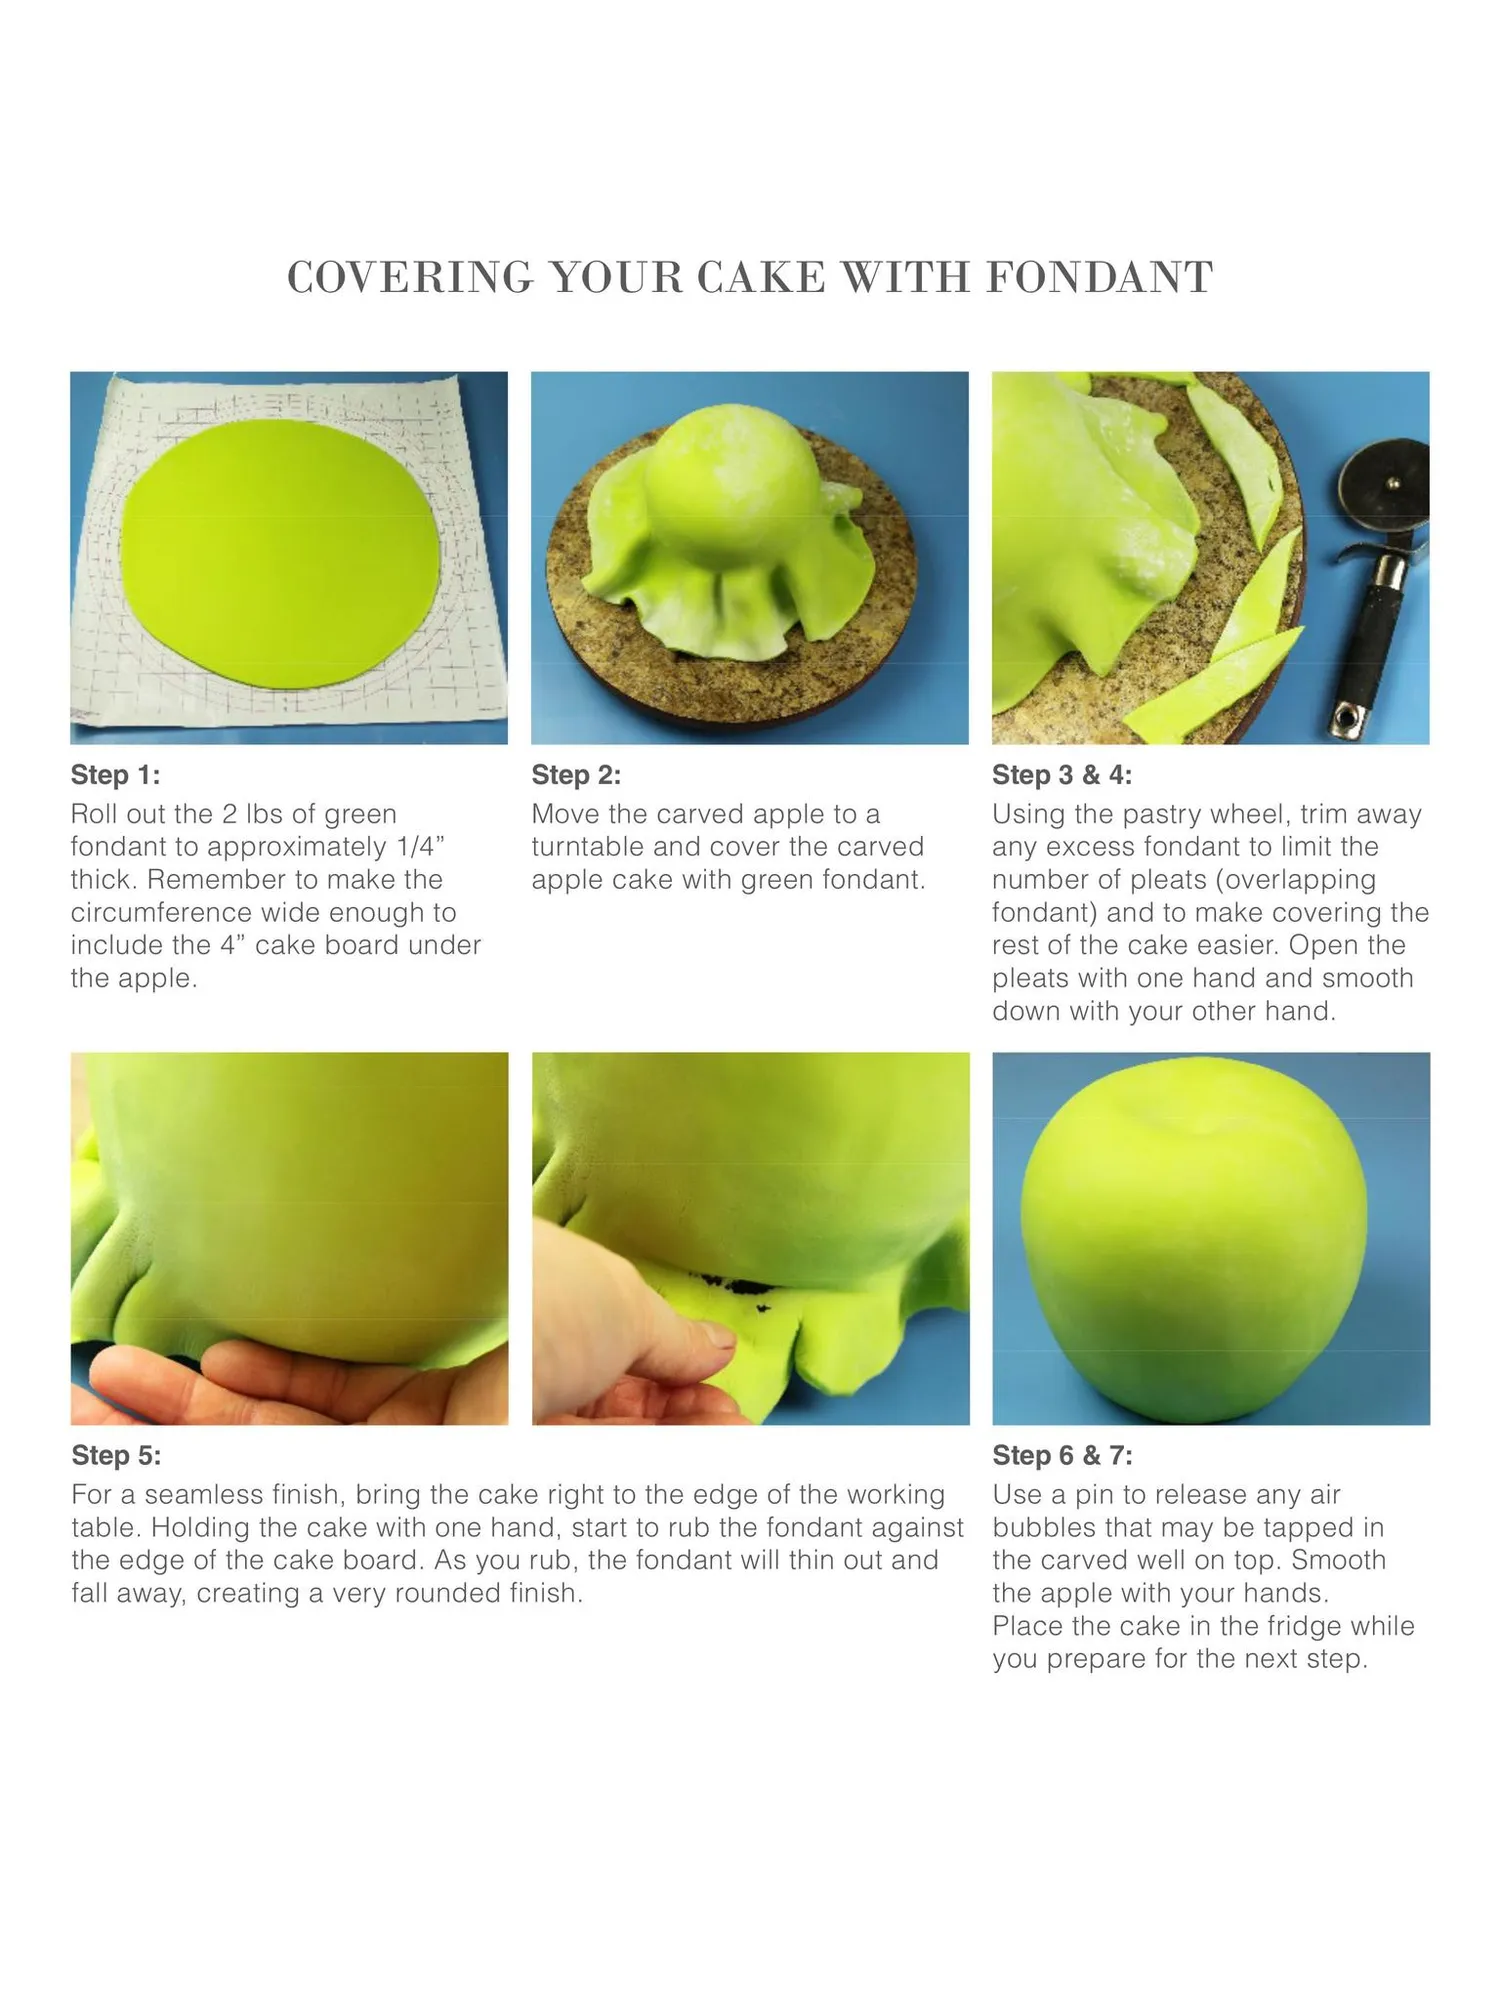
COVERING YOUR CAKE WITH FONDANT Step 1: Roll out the 2 lbs of green fondant to approximately 1/4” thick. Remember to make the circumference wide enough to include the 4” cake board under the apple. Step 2: Move the carved apple to a turntable and cover the carved apple cake with green fondant. Step 5: For a seamless finish, bring the cake right to the edge of the working table. Holding the cake with one hand, start to rub the fondant against the edge of the cake board. As you rub, the fondant will thin out and fall away, creating a very rounded finish. Step 3 & 4: Using the pastry wheel, trim away any excess fondant to limit the number of pleats (overlapping fondant) and to make covering the rest of the cake easier. Open the pleats with one hand and smooth down with your other hand. Step 6 & 7: Use a pin to release any air bubbles that may be tapped in the carved well on top. Smooth the apple with your hands. Place the cake in the fridge while you prepare for the next step.
Page 34 text
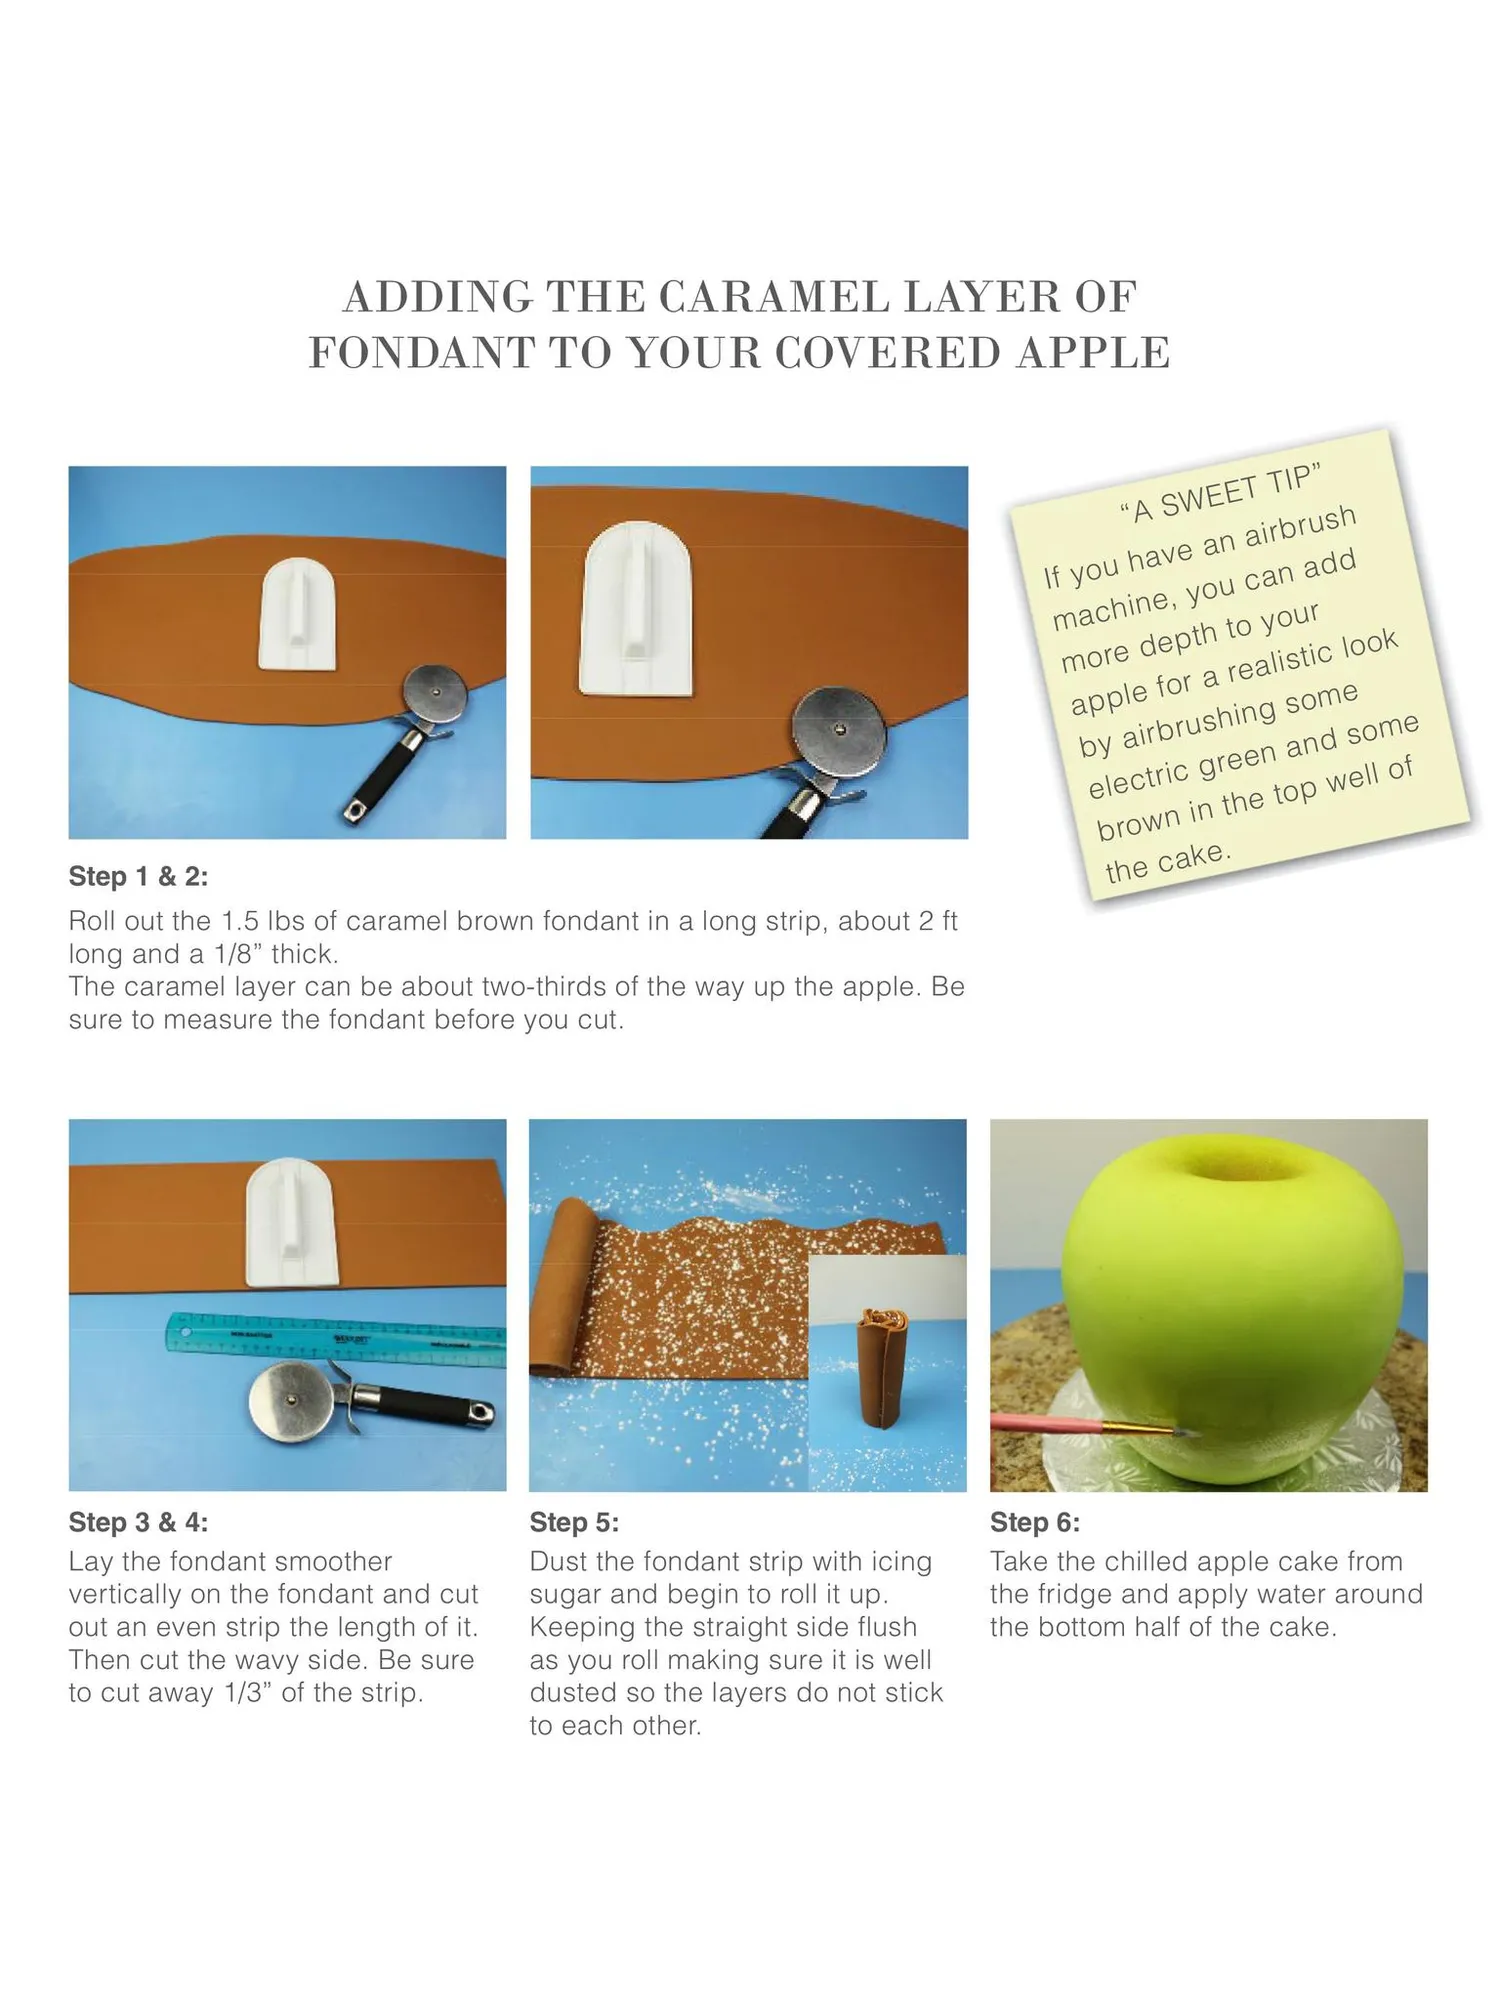
ADDING THE CARAMEL LAYER OF FONDANT TO YOUR COVERED APPLE ” T TIP E E W “A S brush r i a n a d have u o y an ad If c u o ine, y your mach o t h t k dep ic loo t s i l m o re a re for a e l p ome s ap g n i brush ome s d n by air a re e n f g c i r t well o p elec o t in the n w o br ke. a c e h t Step 1 & 2: Roll out the 1.5 lbs of caramel brown fondant in a long strip, about 2 ft long and a 1/8” thick. The caramel layer can be about two-thirds of the way up the apple. Be sure to measure the fondant before you cut. Step 3 & 4: Lay the fondant smoother vertically on the fondant and cut out an even strip the length of it. Then cut the wavy side. Be sure to cut away 1/3” of the strip. Step 5: Dust the fondant strip with icing sugar and begin to roll it up. Keeping the straight side flush as you roll making sure it is well dusted so the layers do not stick to each other. Step 6: Take the chilled apple cake from the fridge and apply water around the bottom half of the cake.
Page 35 text
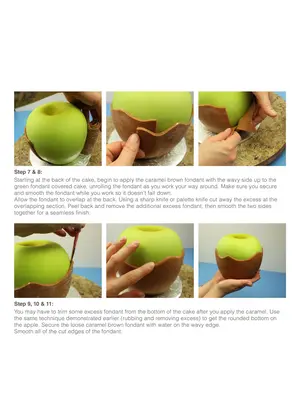
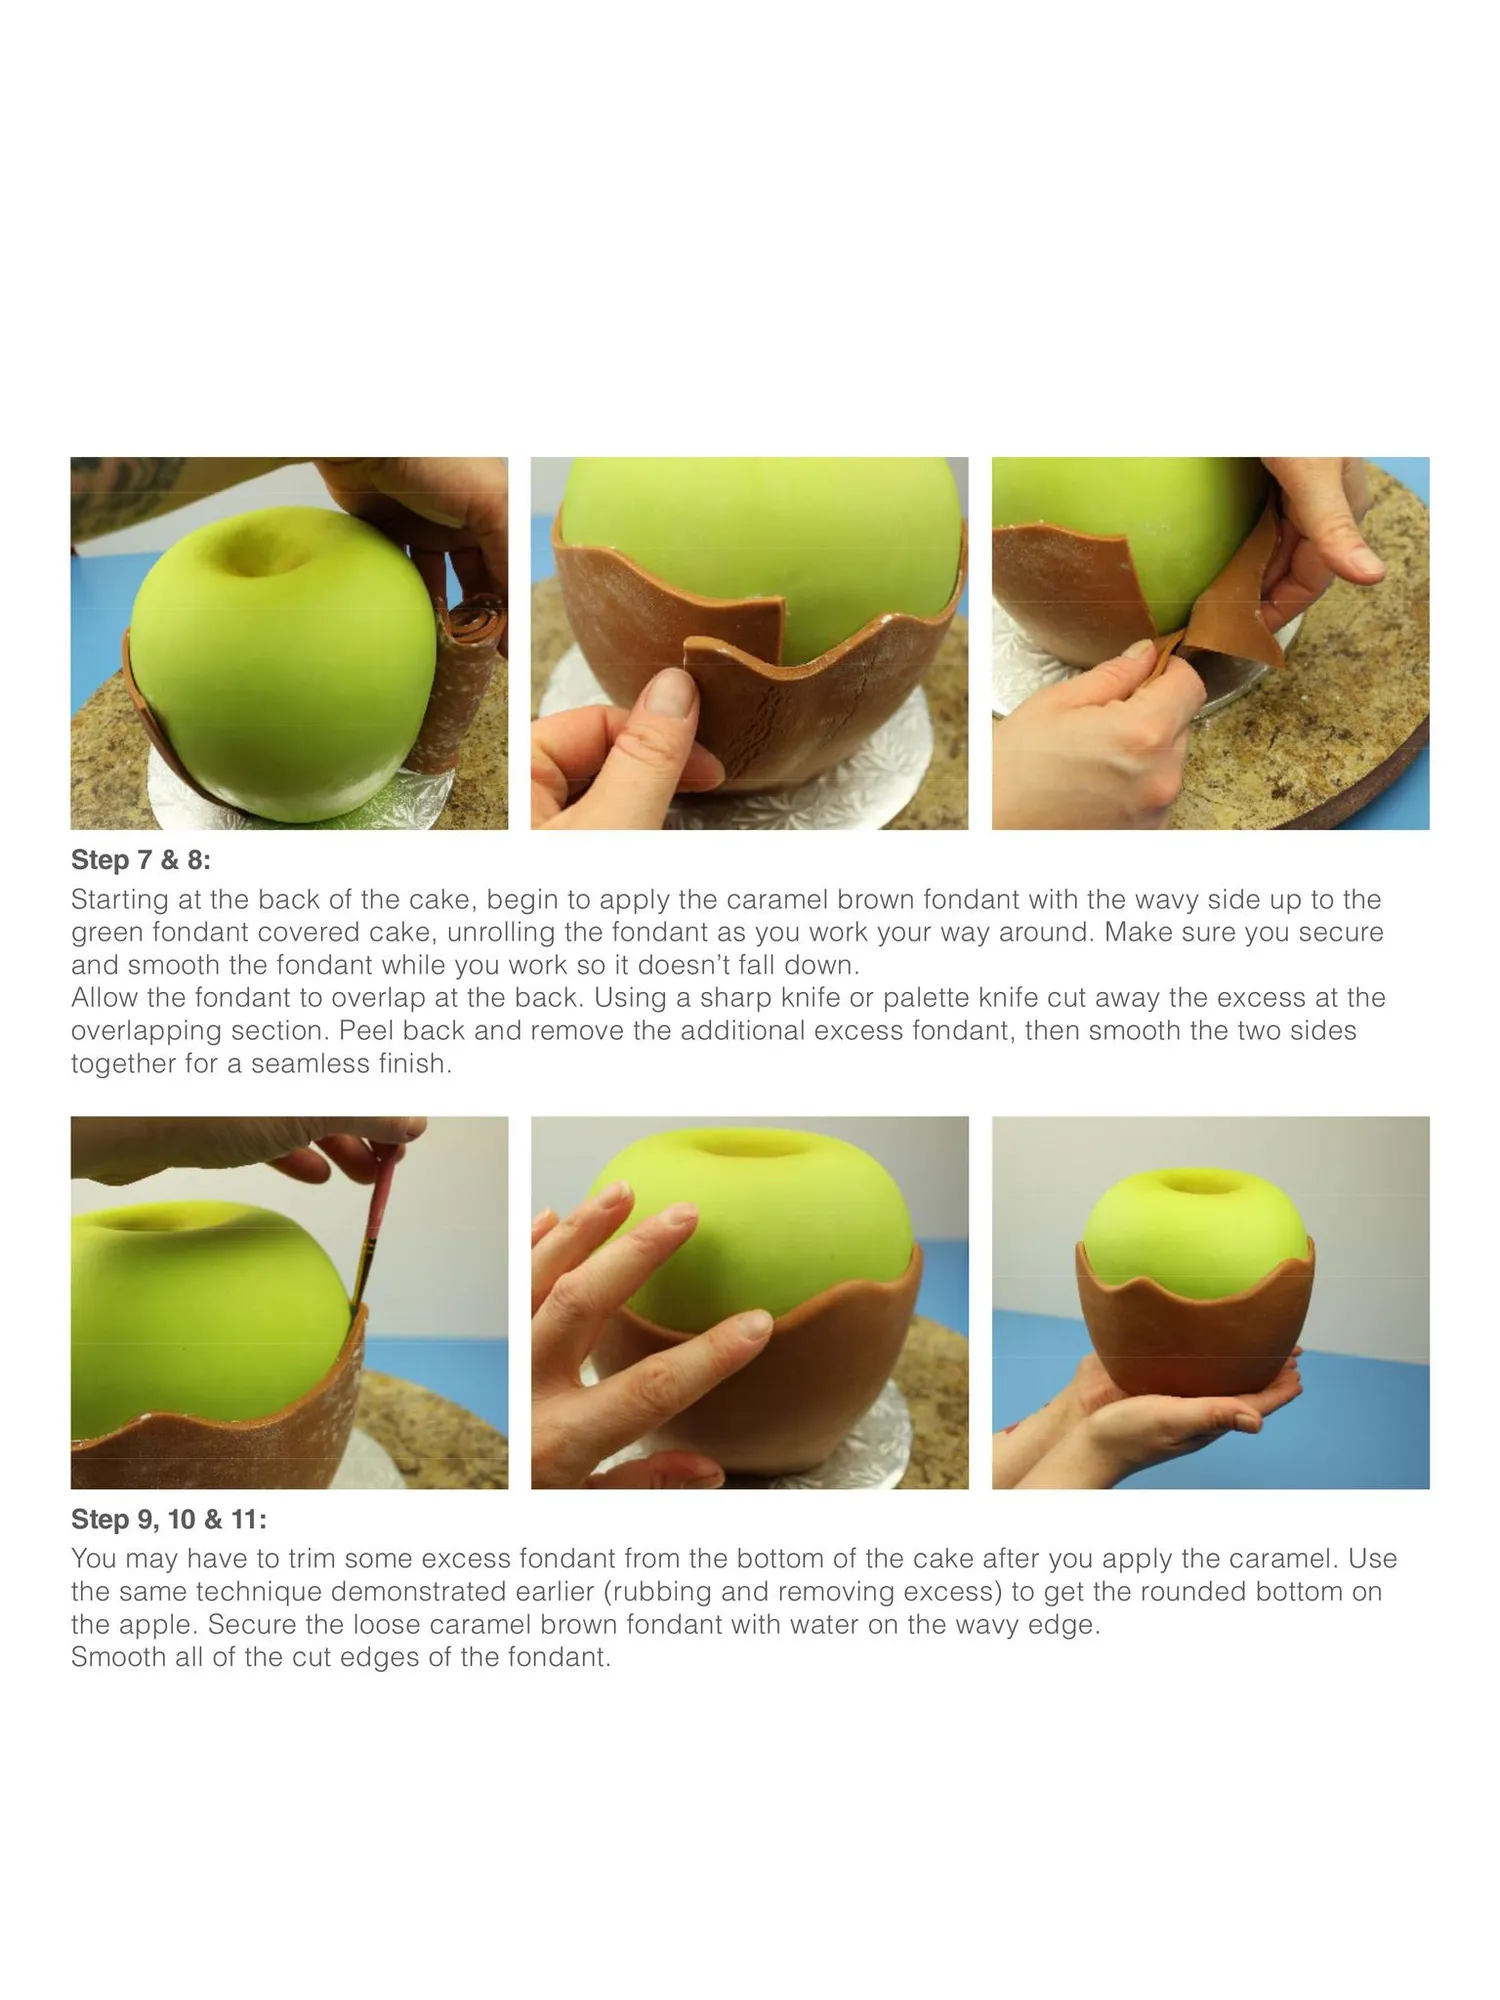
Step 7 & 8: Starting at the back of the cake, begin to apply the caramel brown fondant with the wavy side up to the green fondant covered cake, unrolling the fondant as you work your way around. Make sure you secure and smooth the fondant while you work so it doesn’t fall down. Allow the fondant to overlap at the back. Using a sharp knife or palette knife cut away the excess at the overlapping section. Peel back and remove the additional excess fondant, then smooth the two sides together for a seamless finish. Step 9, 10 & 11: You may have to trim some excess fondant from the bottom of the cake after you apply the caramel. Use the same technique demonstrated earlier (rubbing and removing excess) to get the rounded bottom on the apple. Secure the loose caramel brown fondant with water on the wavy edge. Smooth all of the cut edges of the fondant.
Page 36 text
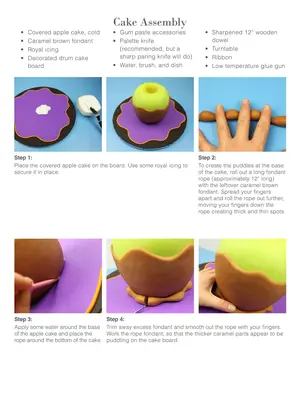
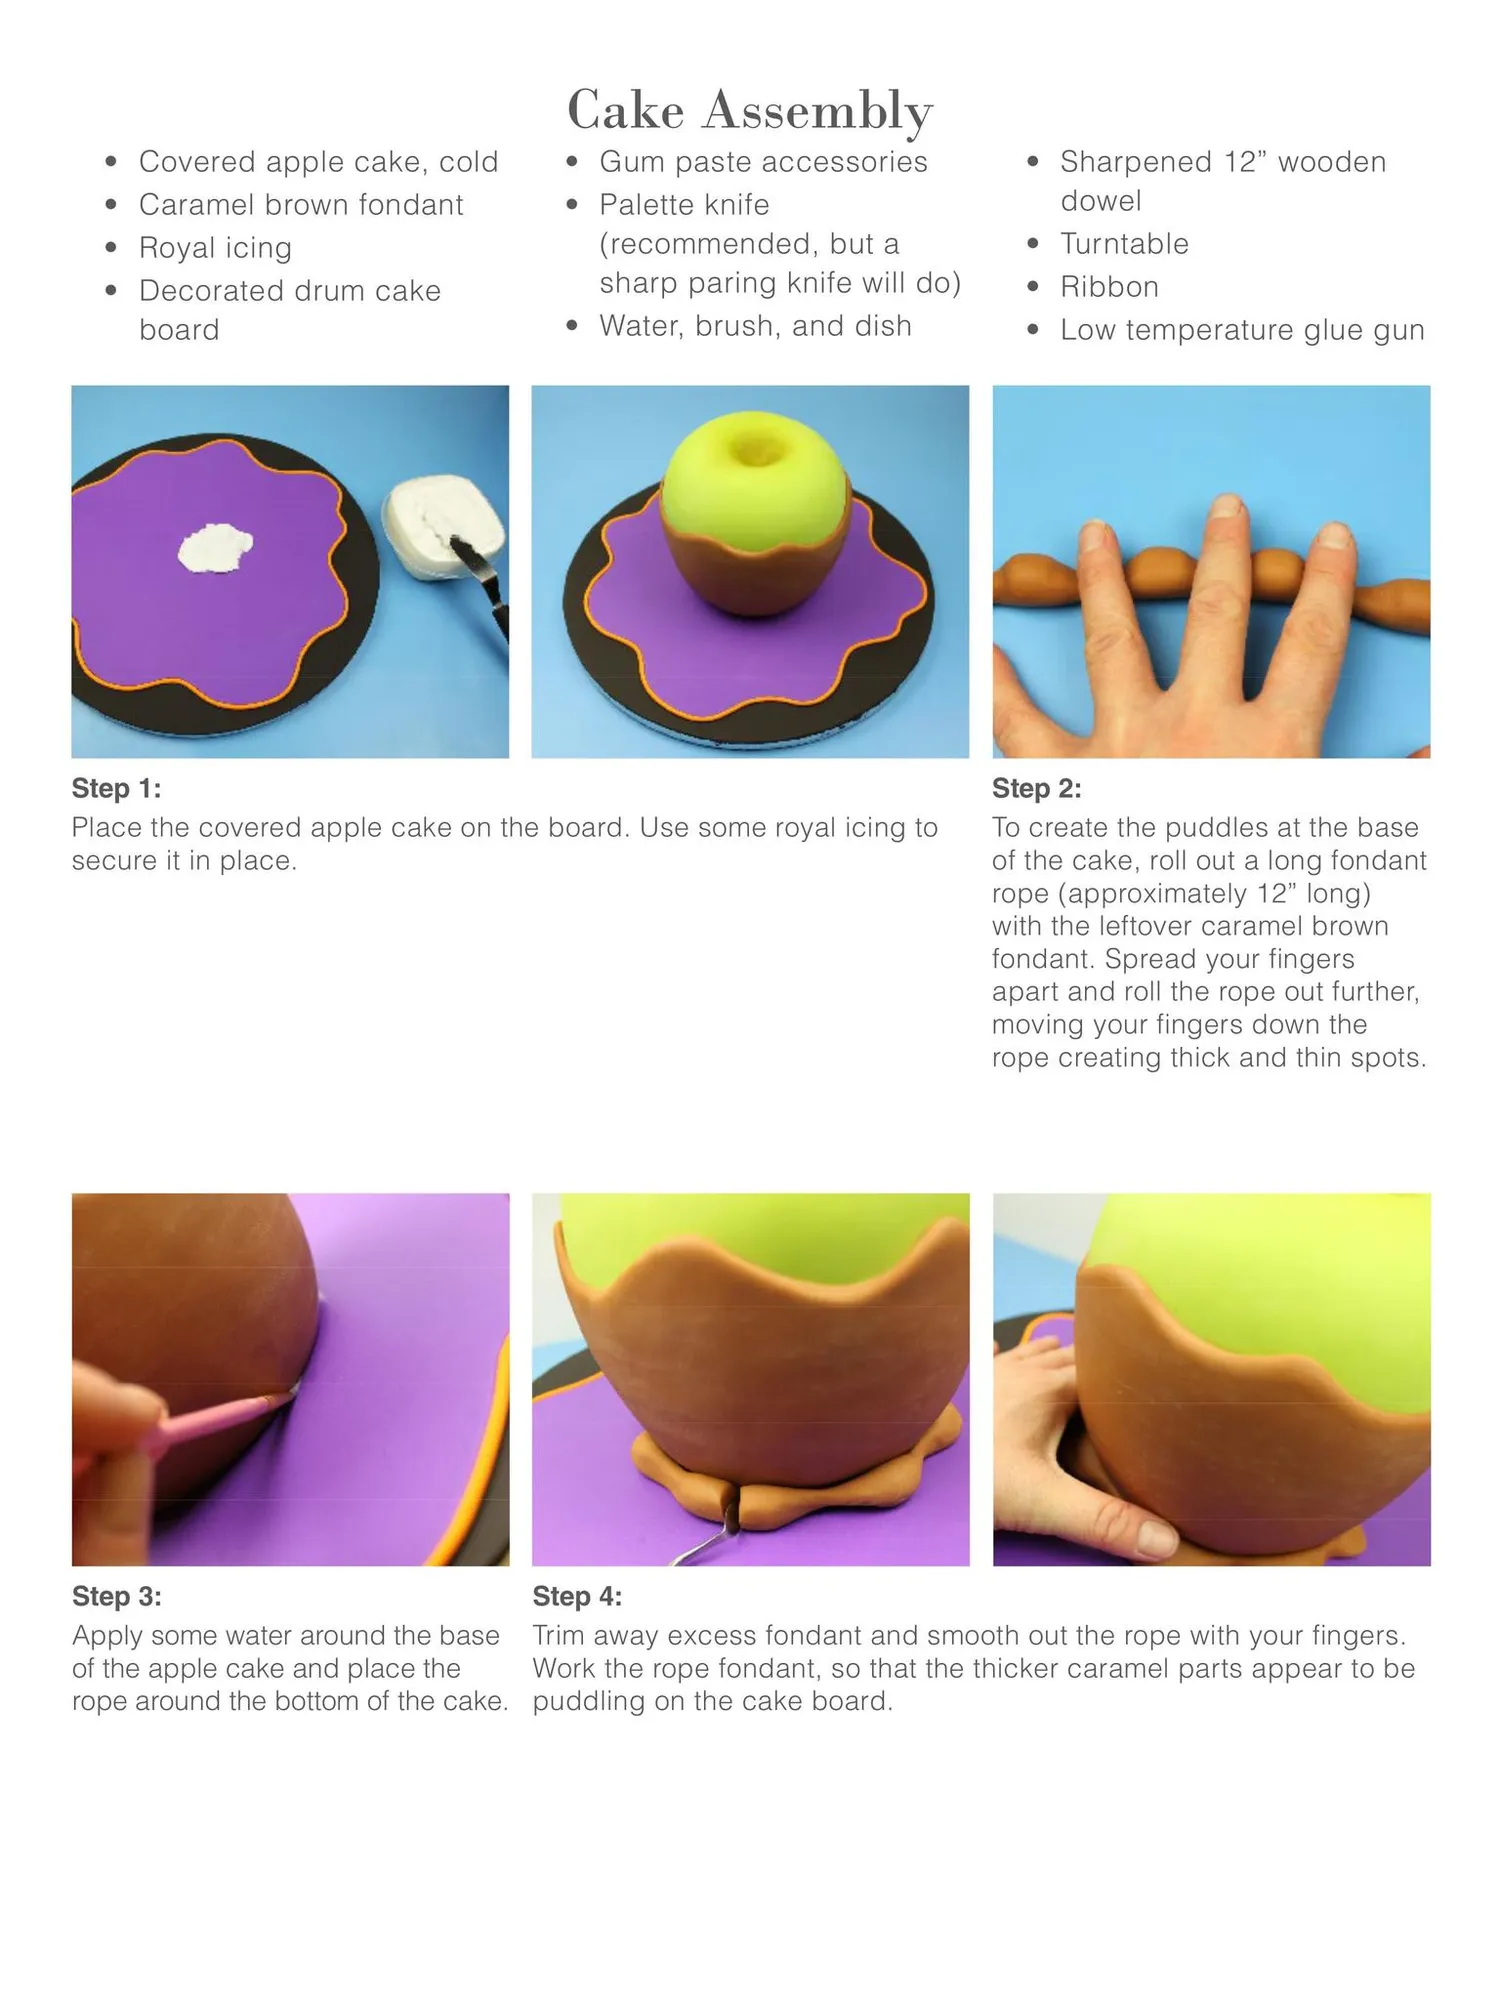
• • • • Covered apple cake, cold Caramel brown fondant Royal icing Decorated drum cake board Cake Assembly • Gum paste accessories • Palette knife (recommended, but a sharp paring knife will do) • Water, brush, and dish Step 1: Place the covered apple cake on the board. Use some royal icing to secure it in place. Step 3: Apply some water around the base of the apple cake and place the rope around the bottom of the cake. • Sharpened 12” wooden dowel • Turntable • Ribbon • Low temperature glue gun Step 2: To create the puddles at the base of the cake, roll out a long fondant rope (approximately 12” long) with the leftover caramel brown fondant. Spread your fingers apart and roll the rope out further, moving your fingers down the rope creating thick and thin spots. Step 4: Trim away excess fondant and smooth out the rope with your fingers. Work the rope fondant, so that the thicker caramel parts appear to be puddling on the cake board.
Page 37 text
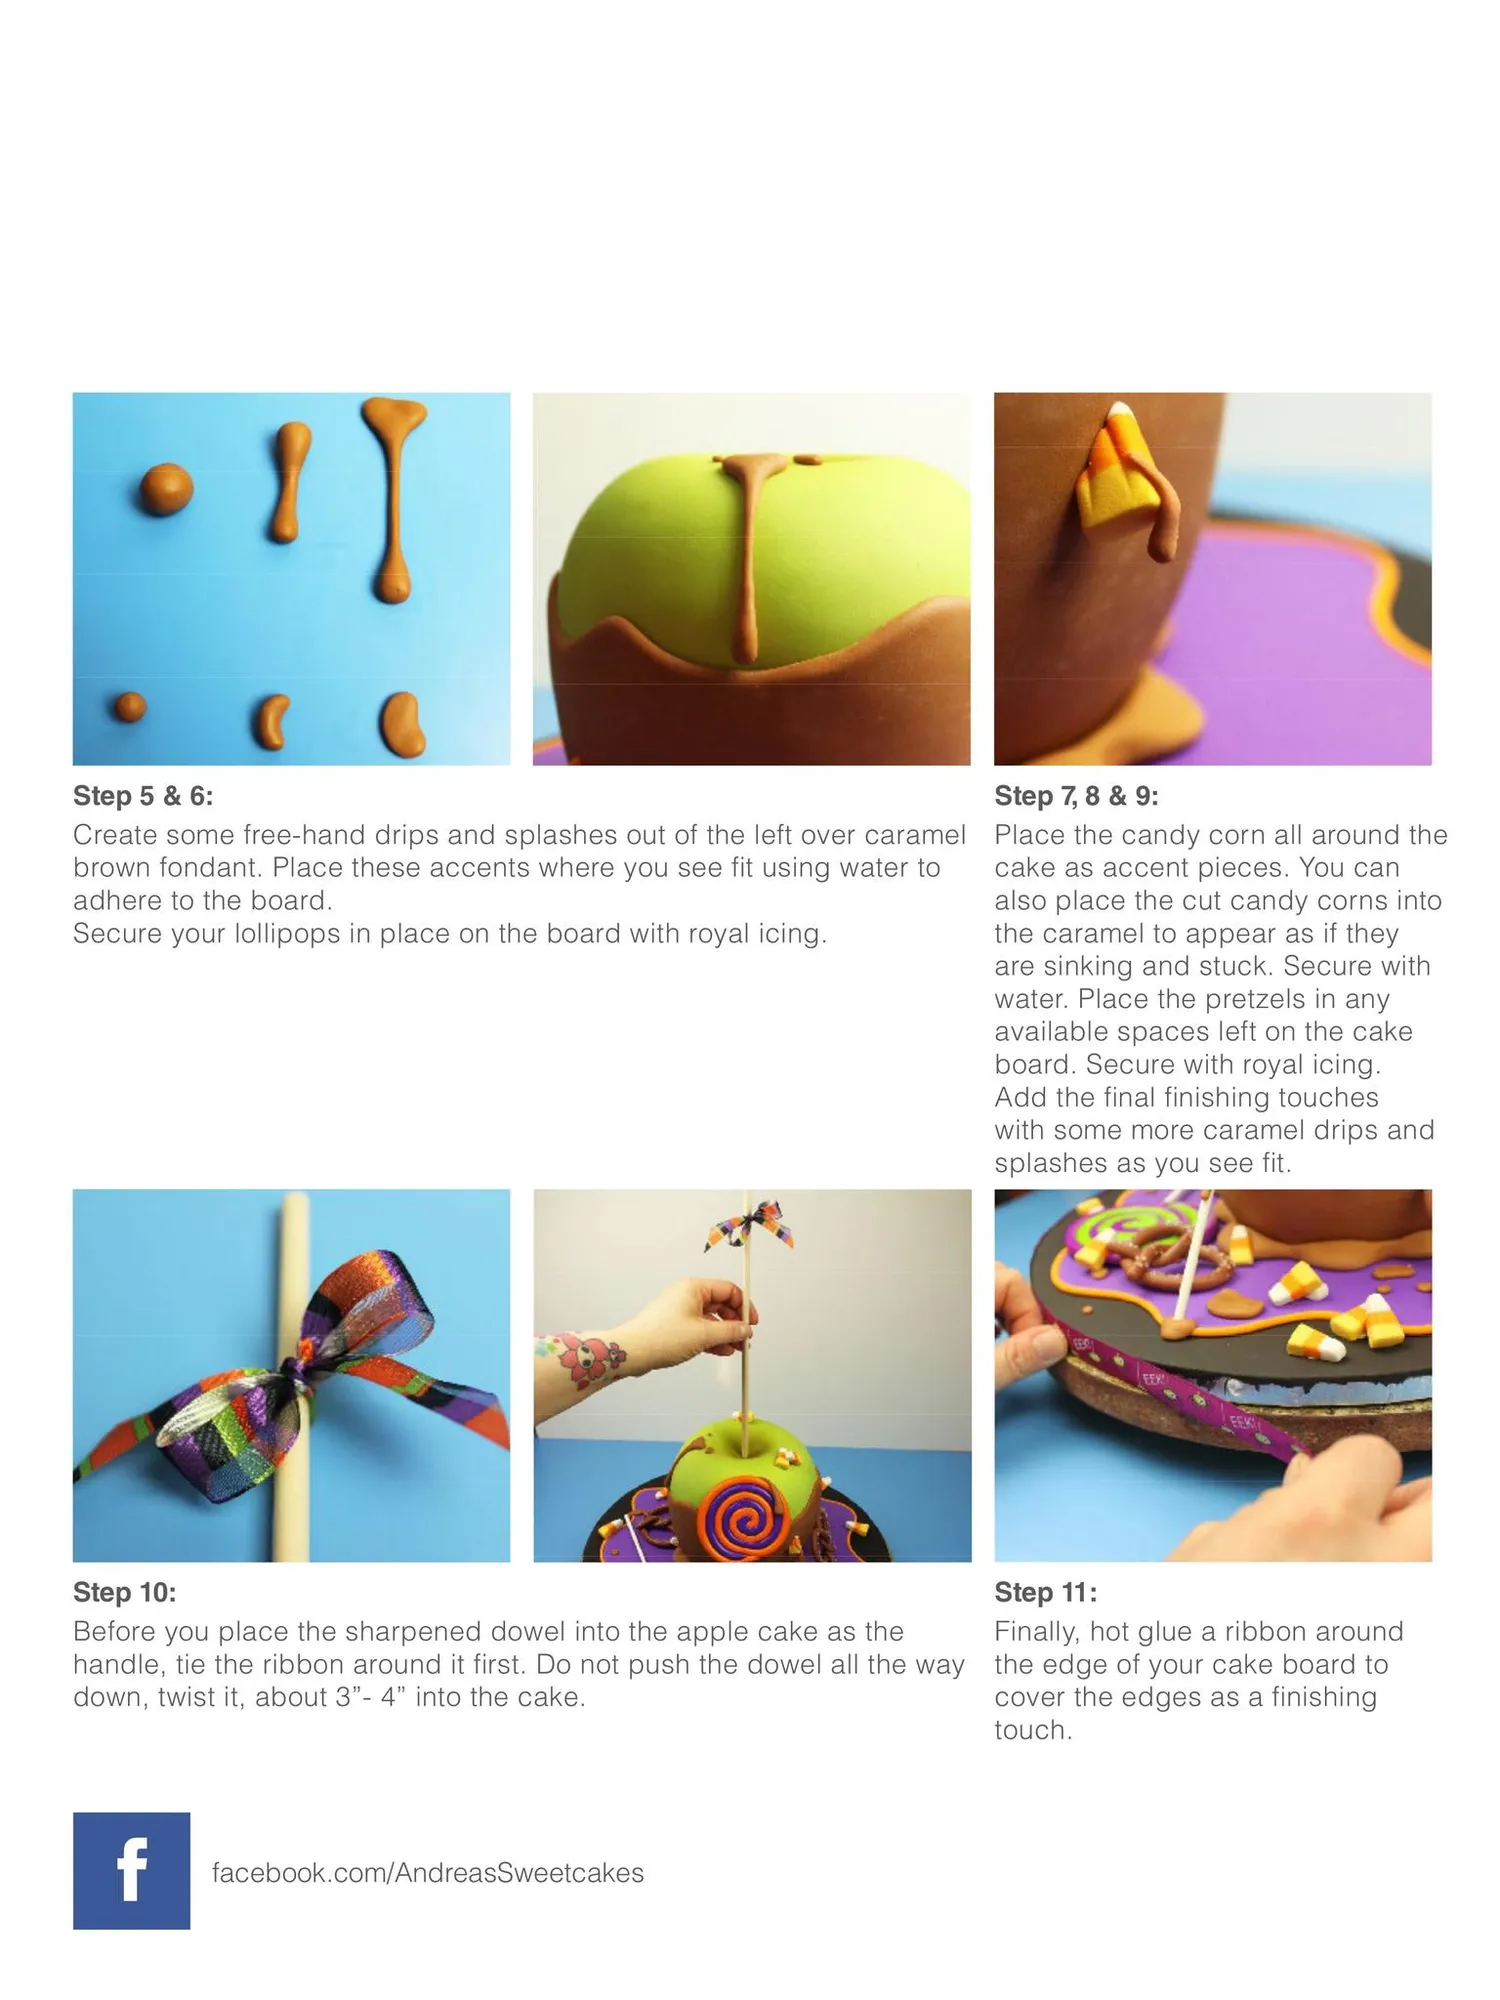
Step 5 & 6: Create some free-hand drips and splashes out of the left over caramel brown fondant. Place these accents where you see fit using water to adhere to the board. Secure your lollipops in place on the board with royal icing. Step 7, 8 & 9: Place the candy corn all around the cake as accent pieces. You can also place the cut candy corns into the caramel to appear as if they are sinking and stuck. Secure with water. Place the pretzels in any available spaces left on the cake board. Secure with royal icing. Add the final finishing touches with some more caramel drips and splashes as you see fit. Step 10: Before you place the sharpened dowel into the apple cake as the handle, tie the ribbon around it first. Do not push the dowel all the way down, twist it, about 3”- 4” into the cake. Step 11: Finally, hot glue a ribbon around the edge of your cake board to cover the edges as a finishing touch. f facebook.com/AndreasSweetcakes
Page 38 text
Flour VIP lasses at BaheBoss 2017 BEGINNER INTERMEDIATE ADVANCED Stay tuned uia oun website FORDATES,TIMES&MORECLASSES +61298280700 bakeboss.com.au bakebossANz
Page 39 text
www.acdn.me JOIN US! BECOME A MEMBER TODAY! {CLICK HERE FOR MORE INFO!}
Page 40 text
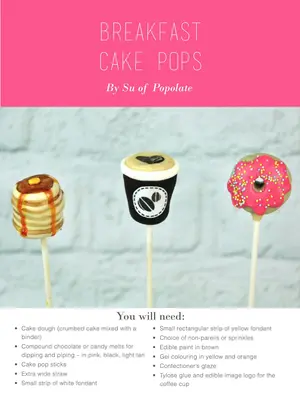
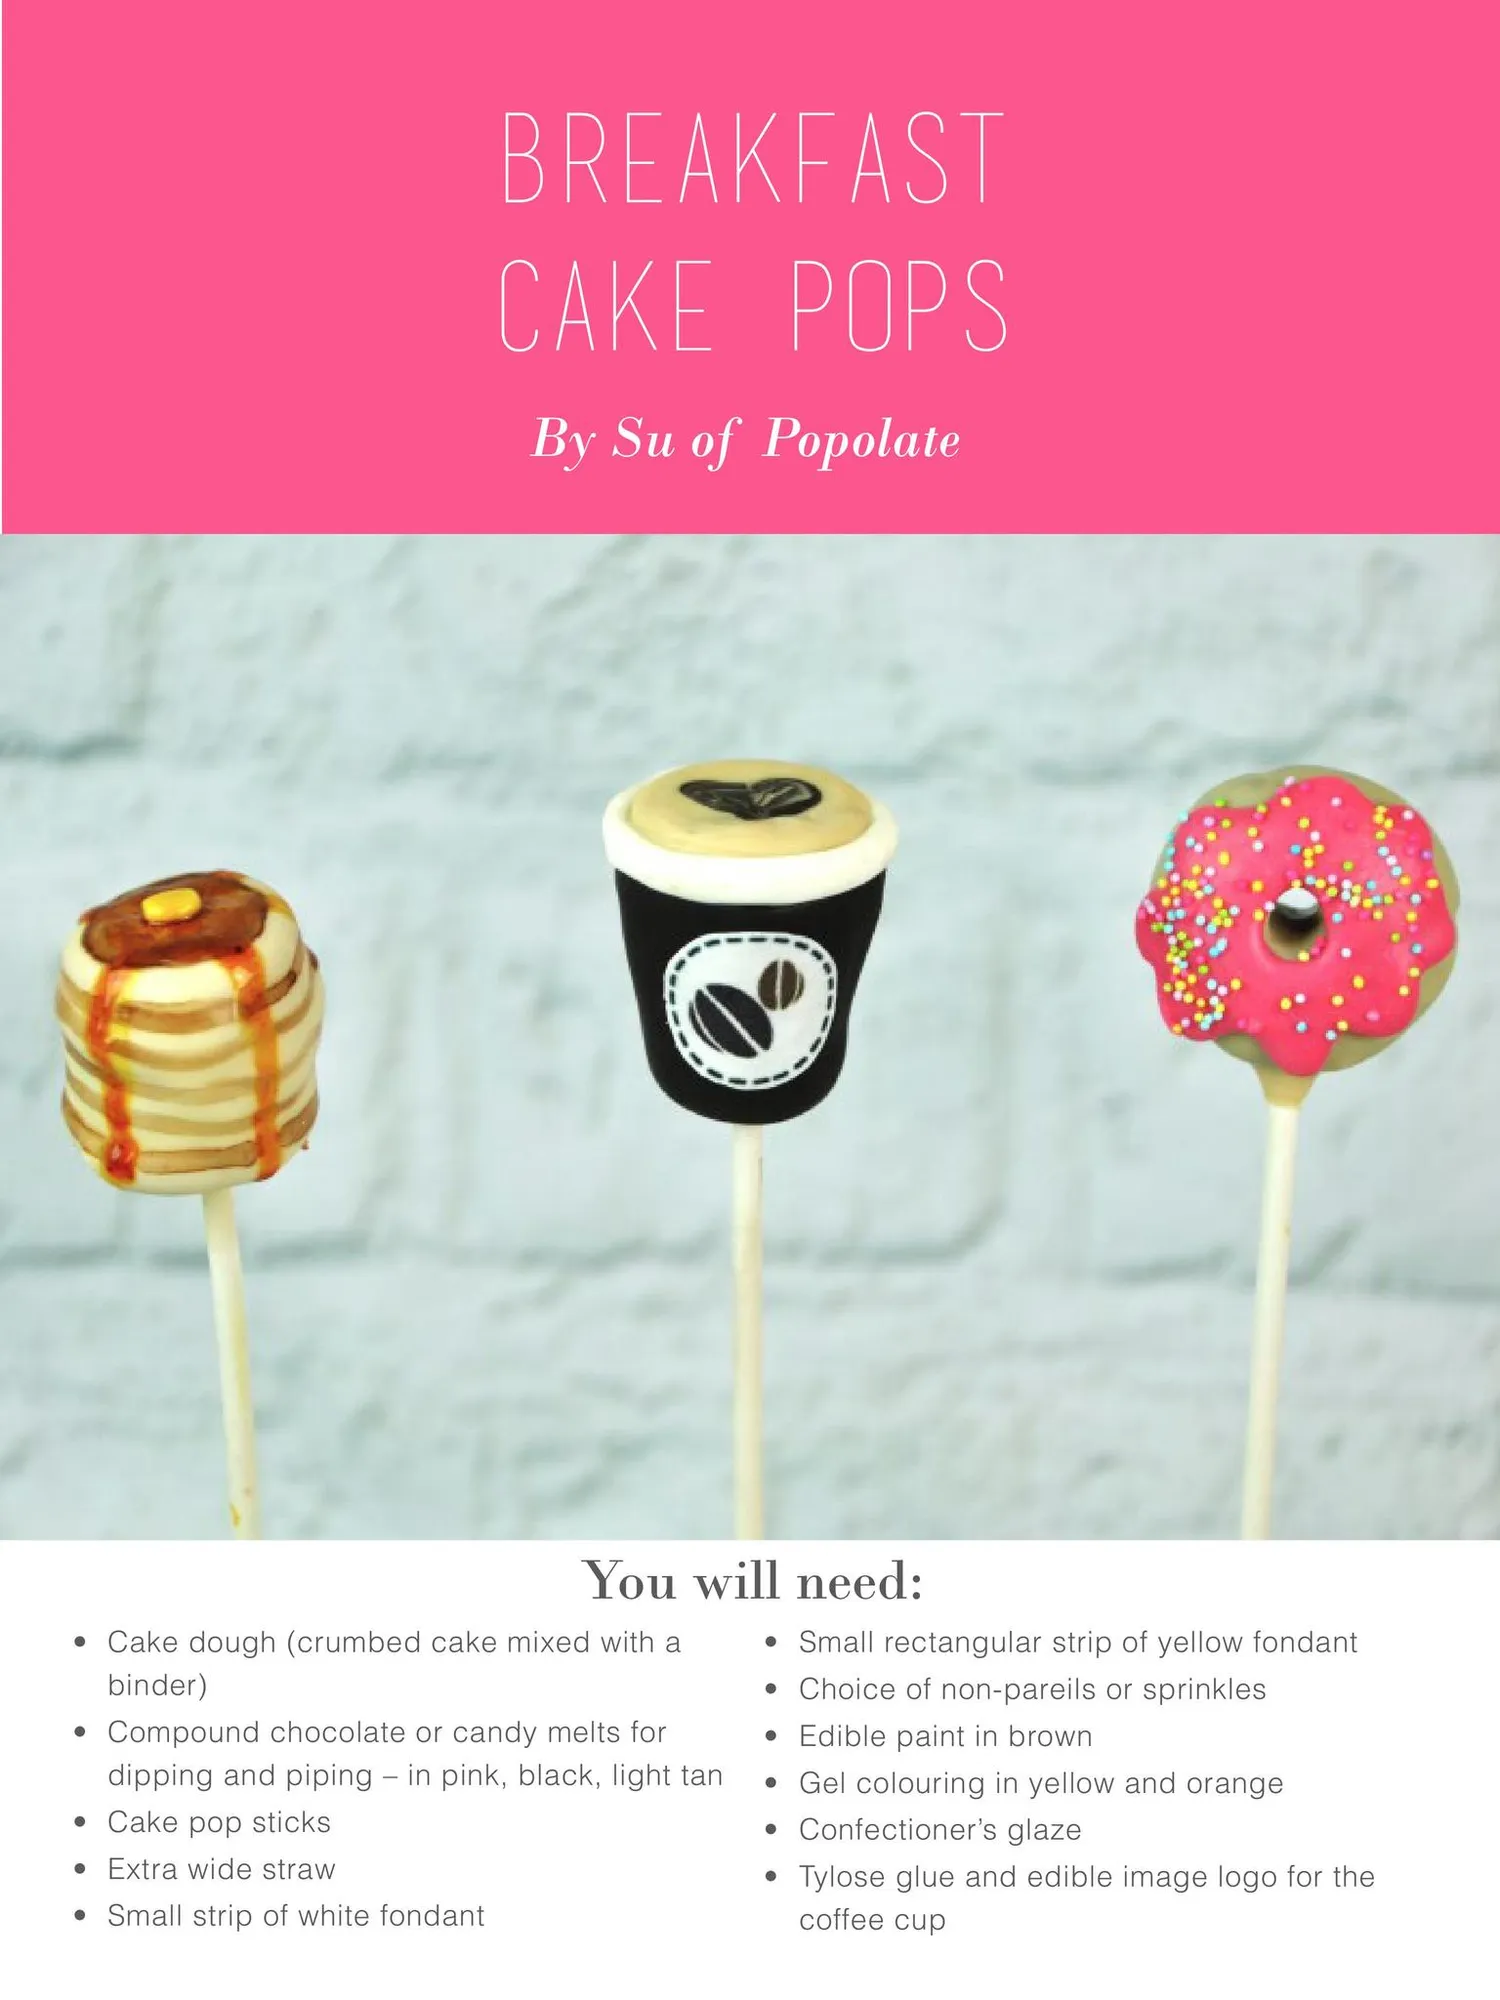
Breakfast Cake Pops By Su of Popolate You will need: • Cake dough (crumbed cake mixed with a binder) • Small rectangular strip of yellow fondant • Compound chocolate or candy melts for dipping and piping – in pink, black, light tan • Edible paint in brown • Cake pop sticks • Confectioner’s glaze • Extra wide straw • Tylose glue and edible image logo for the coffee cup • Small strip of white fondant • Choice of non-pareils or sprinkles • Gel colouring in yellow and orange
Page 41 text
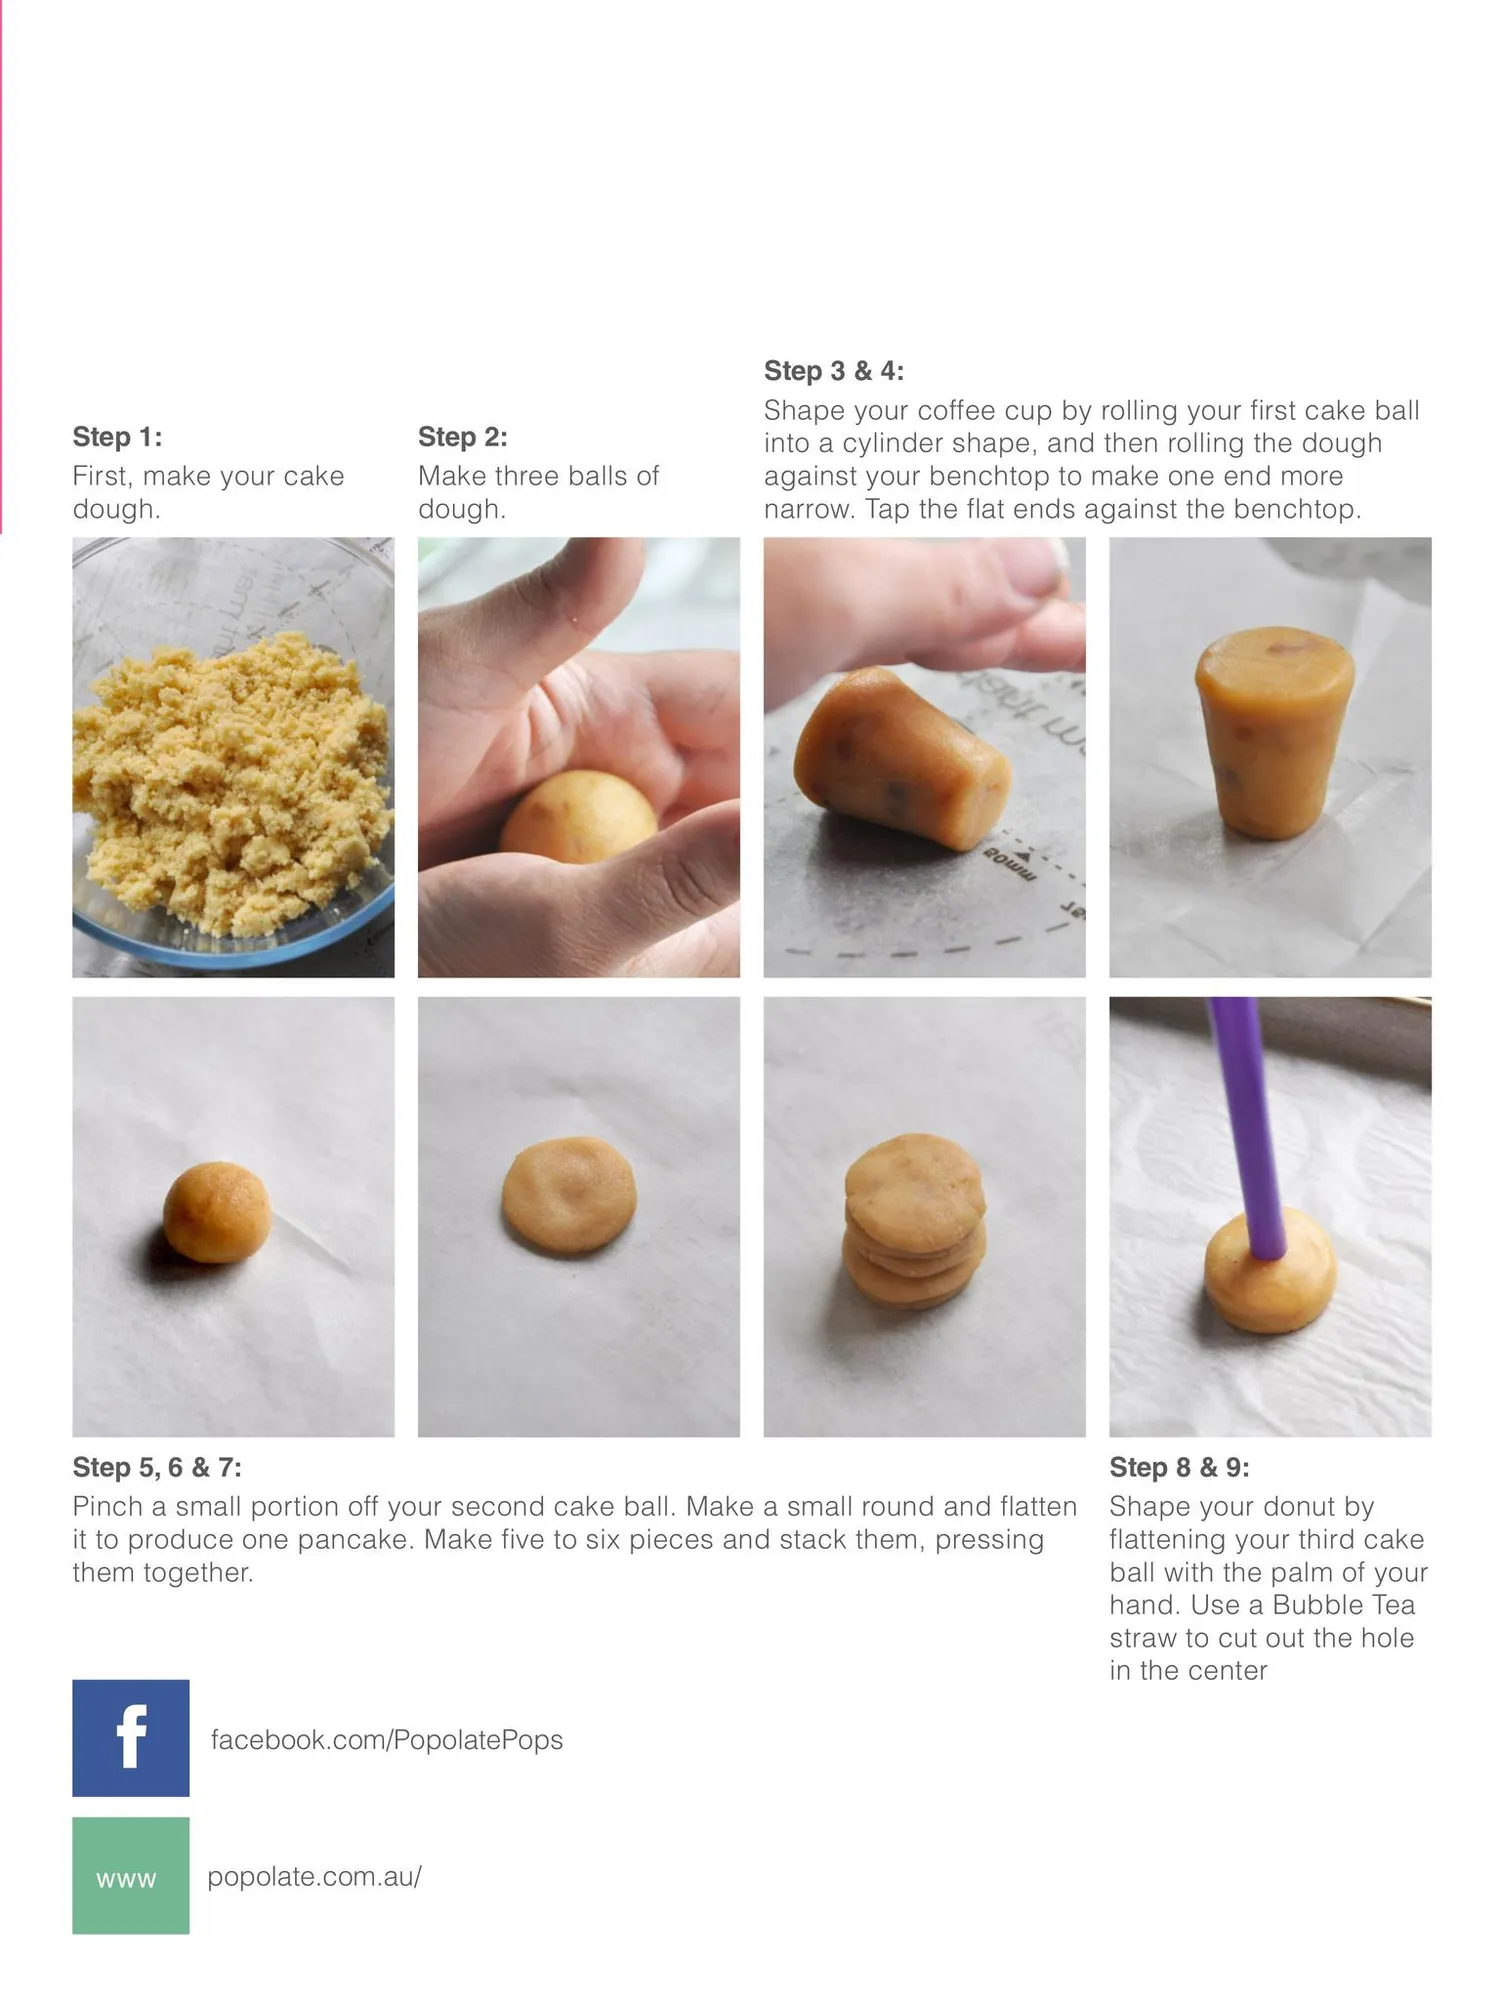
Step 1: First, make your cake dough. Step 2: Make three balls of dough. Step 3 & 4: Shape your coffee cup by rolling your first cake ball into a cylinder shape, and then rolling the dough against your benchtop to make one end more narrow. Tap the flat ends against the benchtop. Step 5, 6 & 7: Pinch a small portion off your second cake ball. Make a small round and flatten it to produce one pancake. Make five to six pieces and stack them, pressing them together. f www facebook.com/PopolatePops popolate.com.au/ Step 8 & 9: Shape your donut by flattening your third cake ball with the palm of your hand. Use a Bubble Tea straw to cut out the hole in the center
Page 42 text
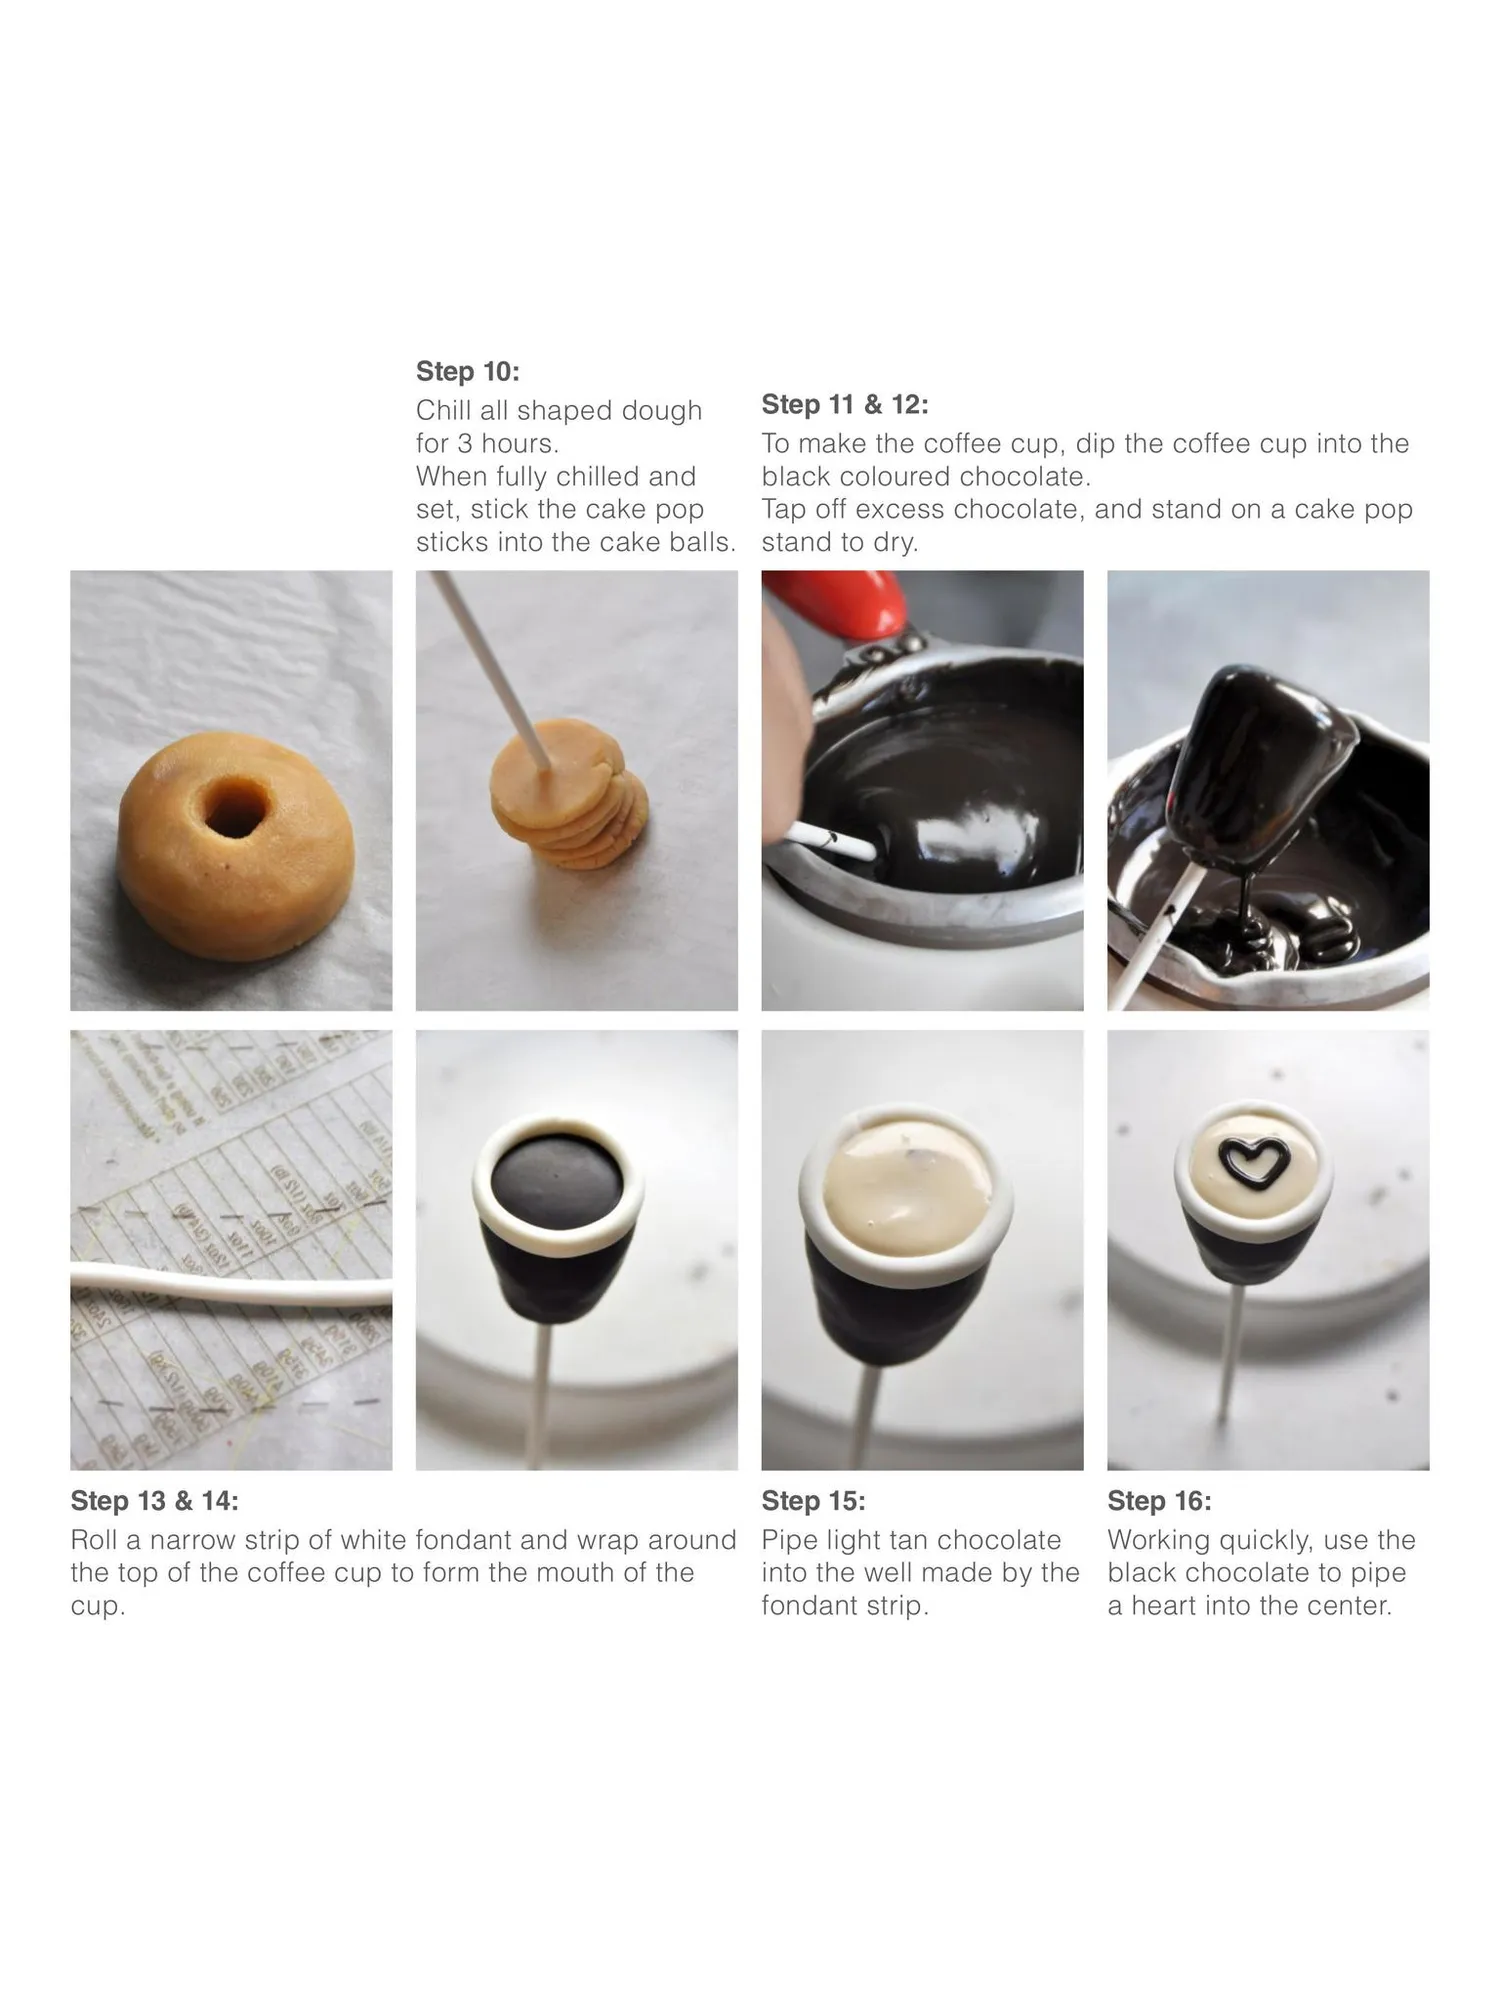
Step 10: Chill all shaped dough for 3 hours. When fully chilled and set, stick the cake pop sticks into the cake balls. Step 13 & 14: Roll a narrow strip of white fondant and wrap around the top of the coffee cup to form the mouth of the cup. Step 11 & 12: To make the coffee cup, dip the coffee cup into the black coloured chocolate. Tap off excess chocolate, and stand on a cake pop stand to dry. Step 15: Pipe light tan chocolate into the well made by the fondant strip. Step 16: Working quickly, use the black chocolate to pipe a heart into the center.
Page 43 text
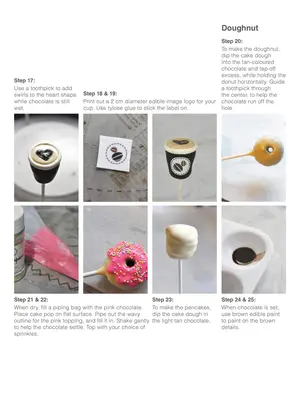
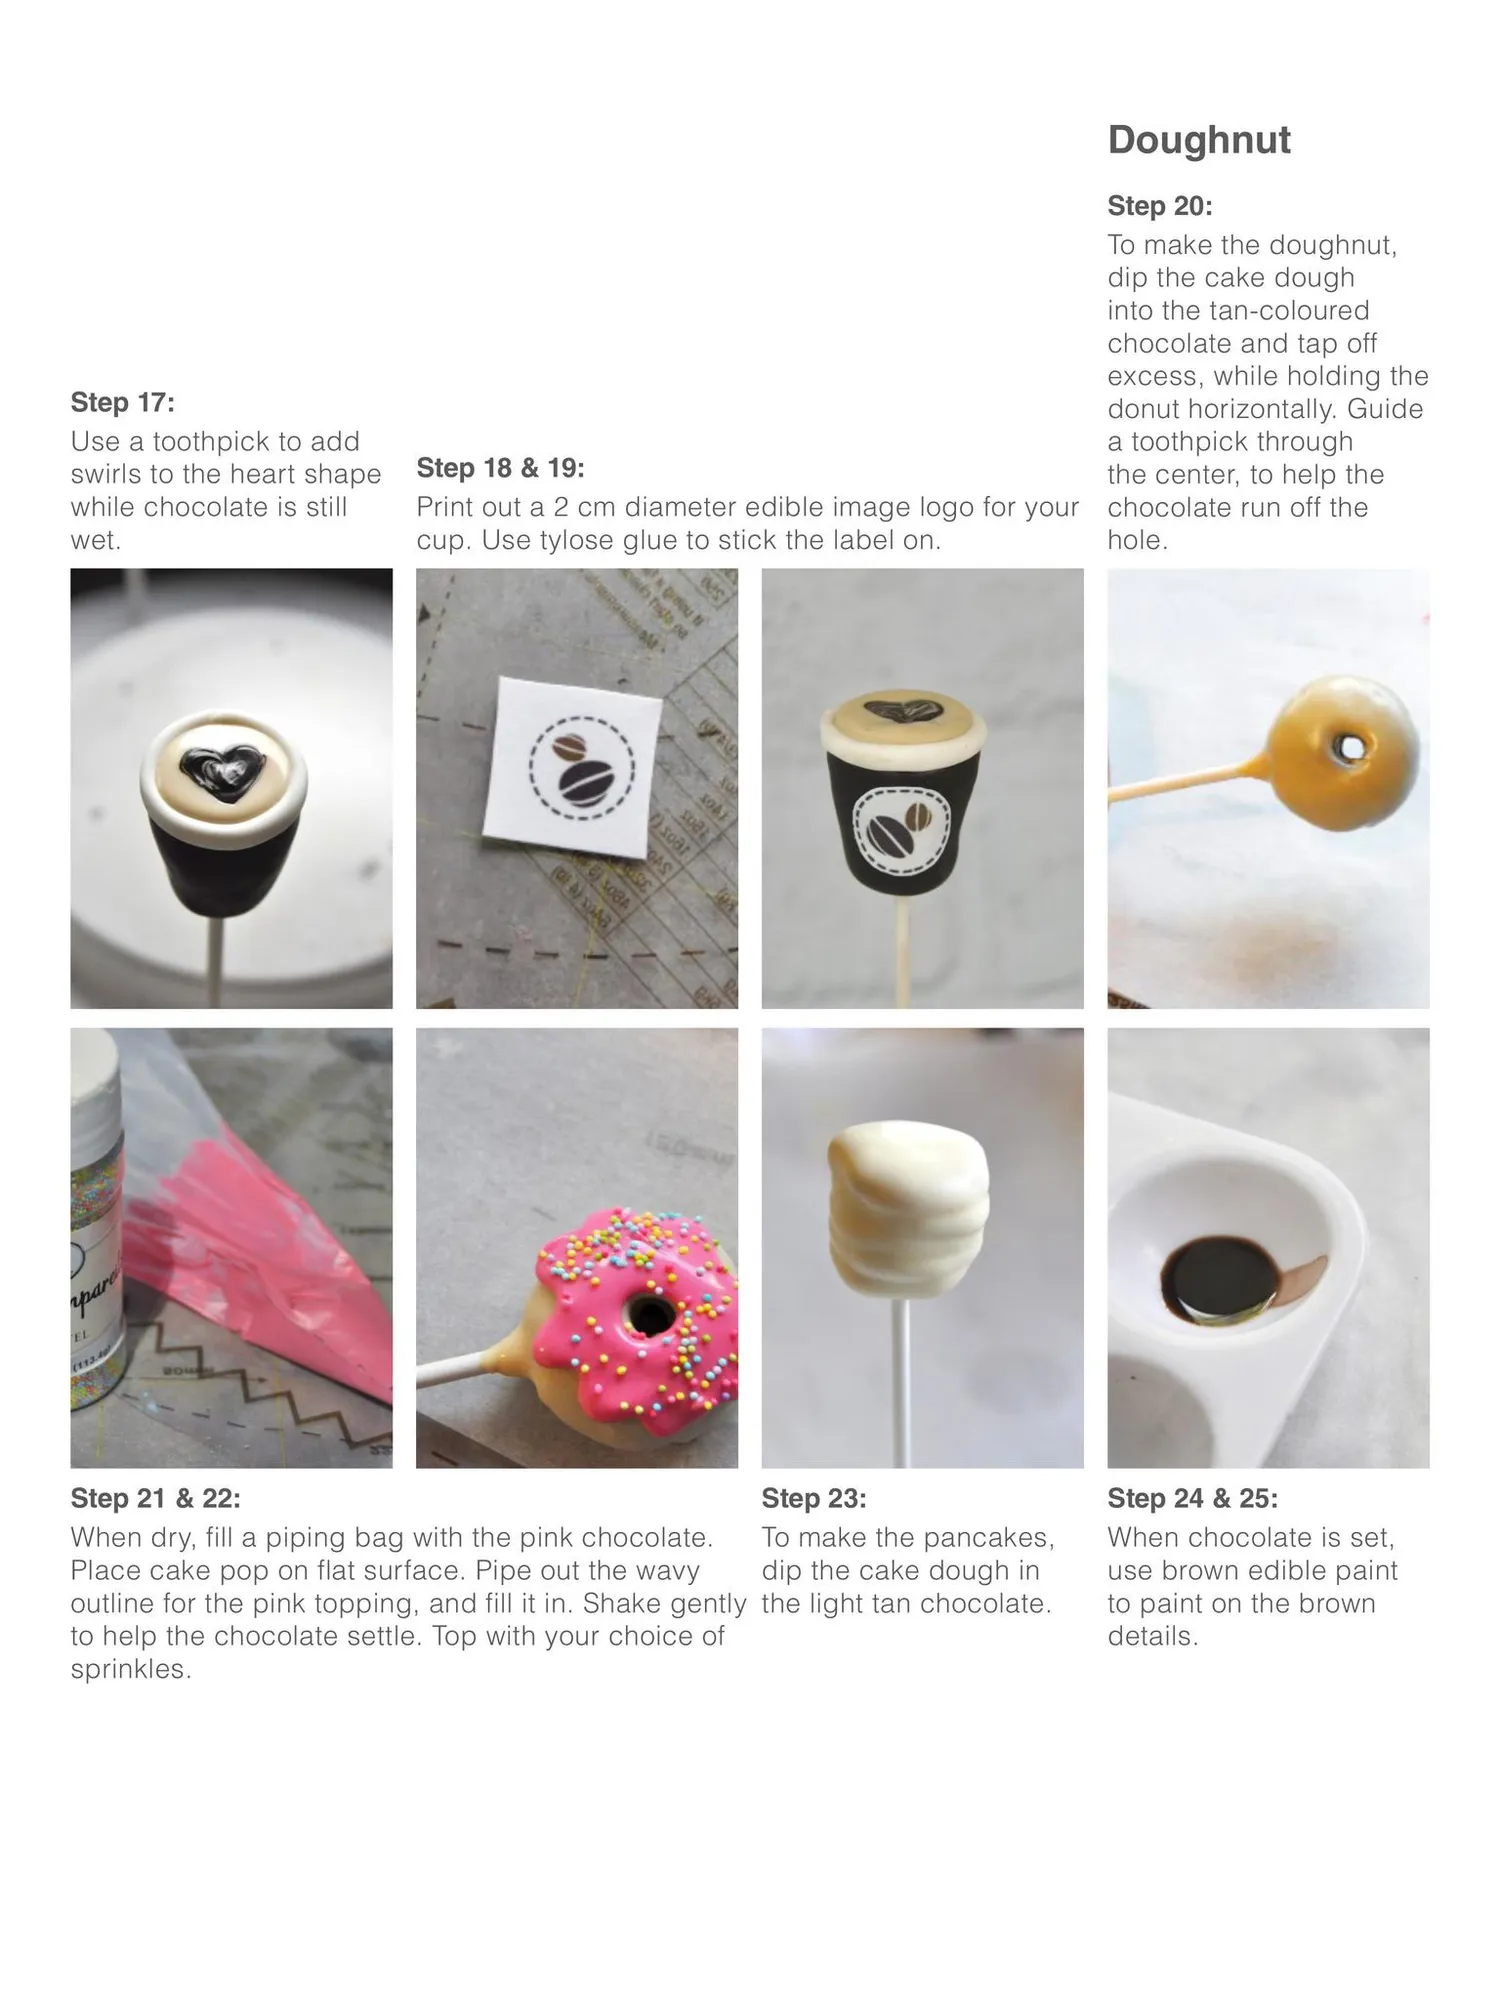
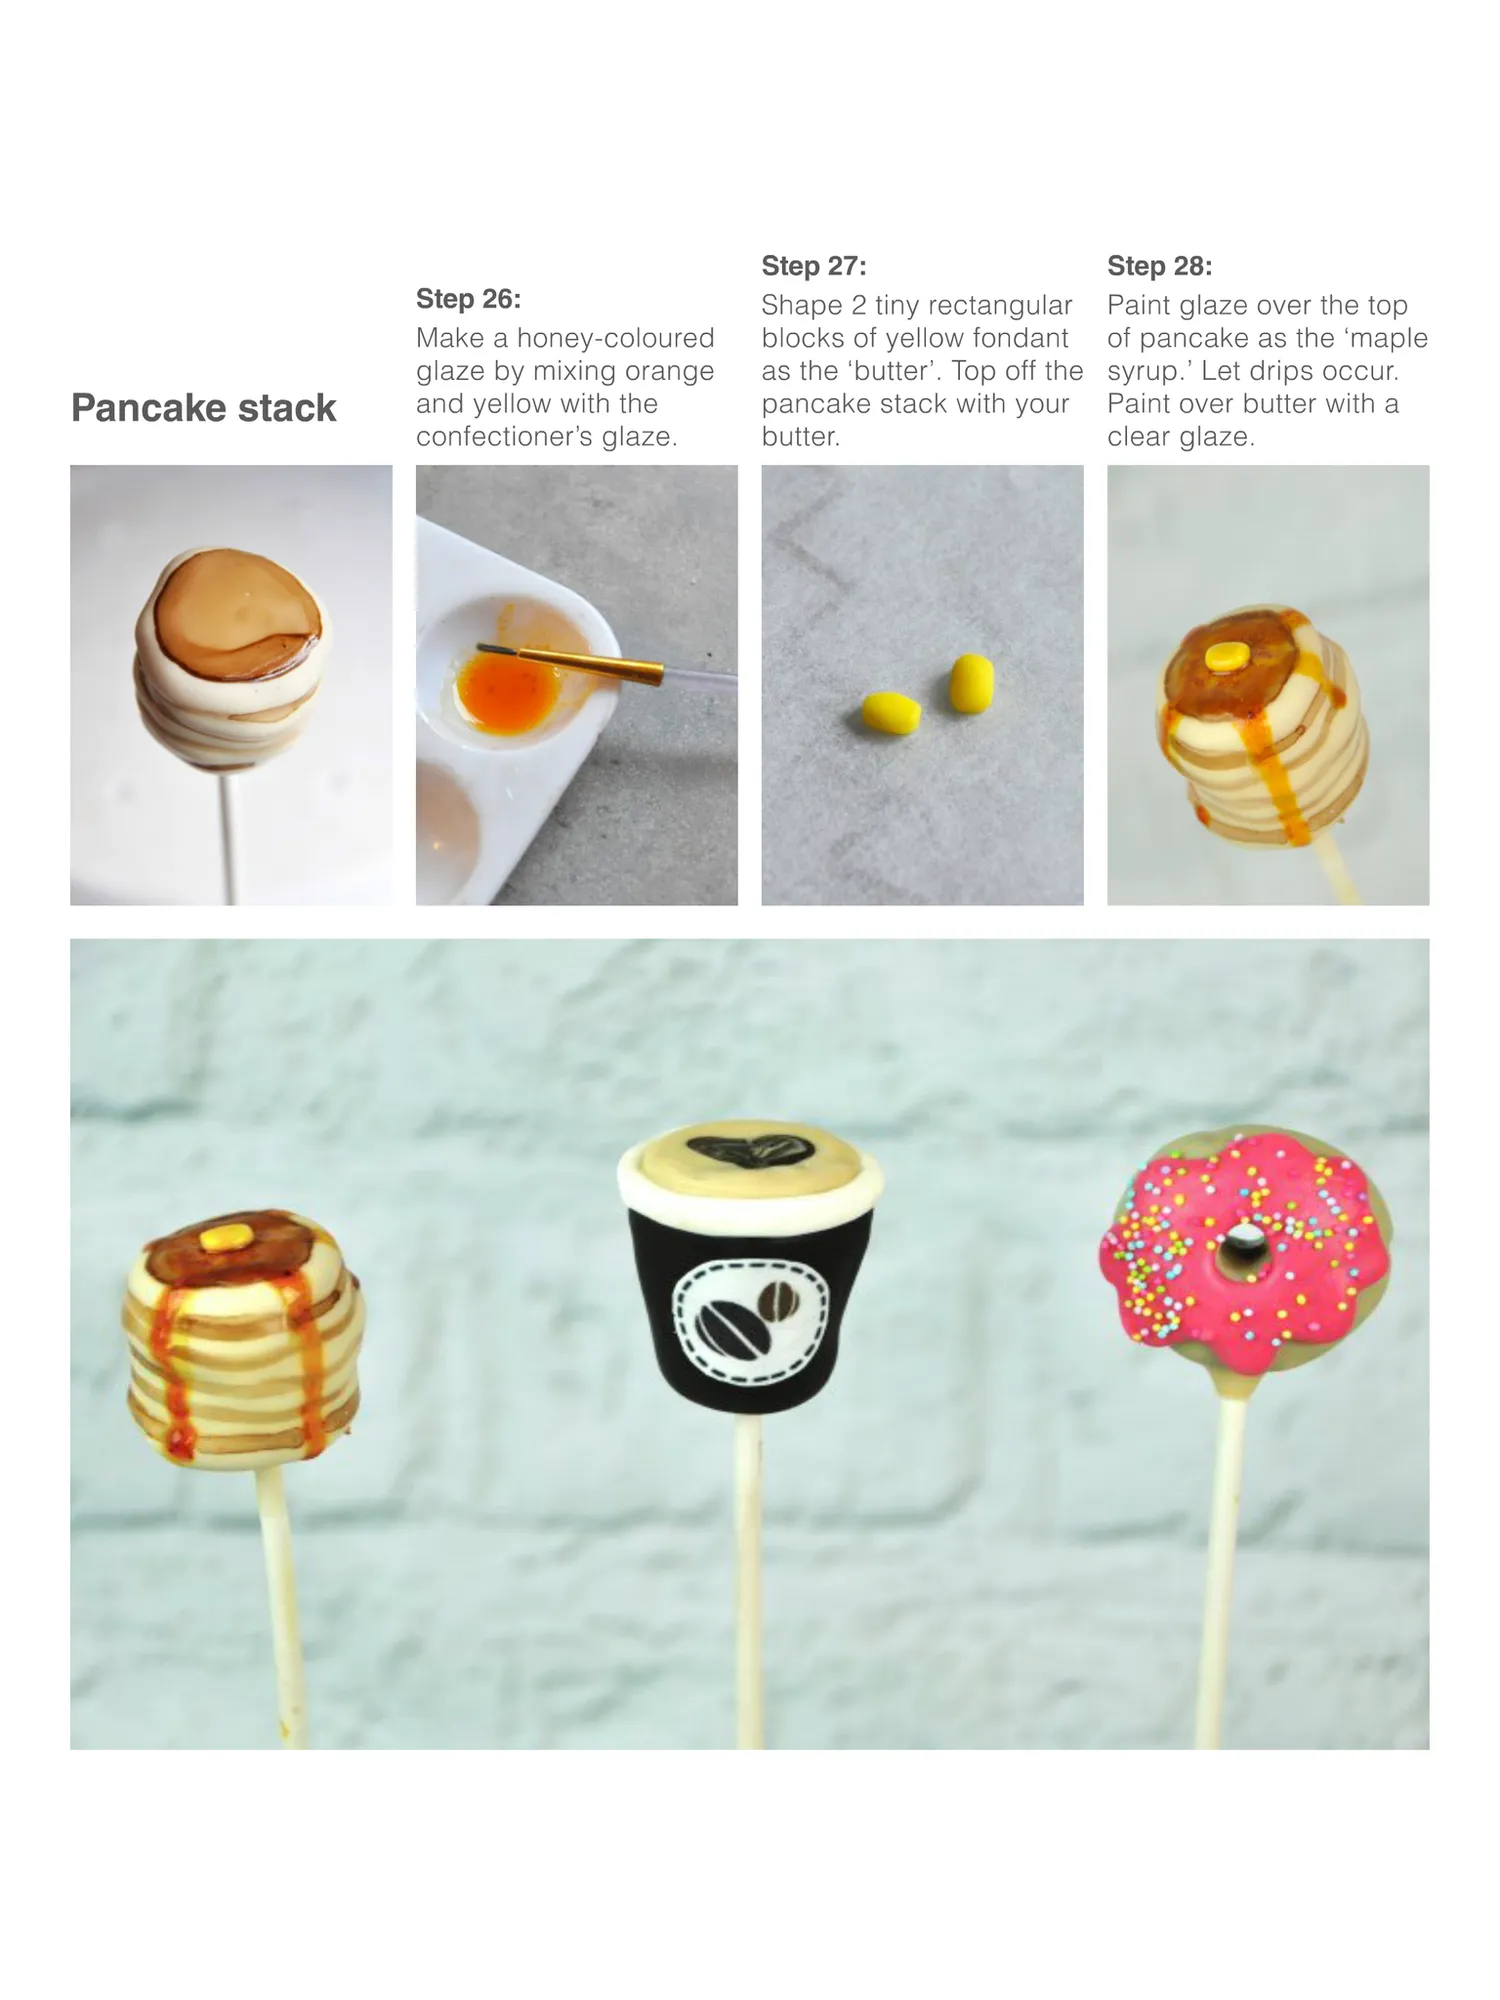
Doughnut Step 17: Use a toothpick to add swirls to the heart shape while chocolate is still wet. Step 18 & 19: Print out a 2 cm diameter edible image logo for your cup. Use tylose glue to stick the label on. Step 21 & 22: When dry, fill a piping bag with the pink chocolate. Place cake pop on flat surface. Pipe out the wavy outline for the pink topping, and fill it in. Shake gently to help the chocolate settle. Top with your choice of sprinkles. Step 23: To make the pancakes, dip the cake dough in the light tan chocolate. Step 20: To make the doughnut, dip the cake dough into the tan-coloured chocolate and tap off excess, while holding the donut horizontally. Guide a toothpick through the center, to help the chocolate run off the hole. Step 24 & 25: When chocolate is set, use brown edible paint to paint on the brown details.
Page 44 text
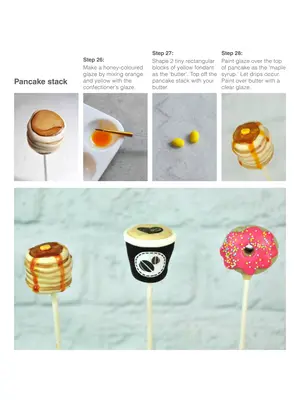
Pancake stack Step 26: Make a honey-coloured glaze by mixing orange and yellow with the confectioner’s glaze. Step 27: Shape 2 tiny rectangular blocks of yellow fondant as the ‘butter’. Top off the pancake stack with your butter. Step 28: Paint glaze over the top of pancake as the ‘maple syrup.’ Let drips occur. Paint over butter with a clear glaze.
Page 45 text
Read Cake! magazine online or download & print for offline viewing HERE! f www.acdn.me [email protected] click here to join our mailing list! To advertise in Cake! magazine, contact [email protected]
Page 46 text
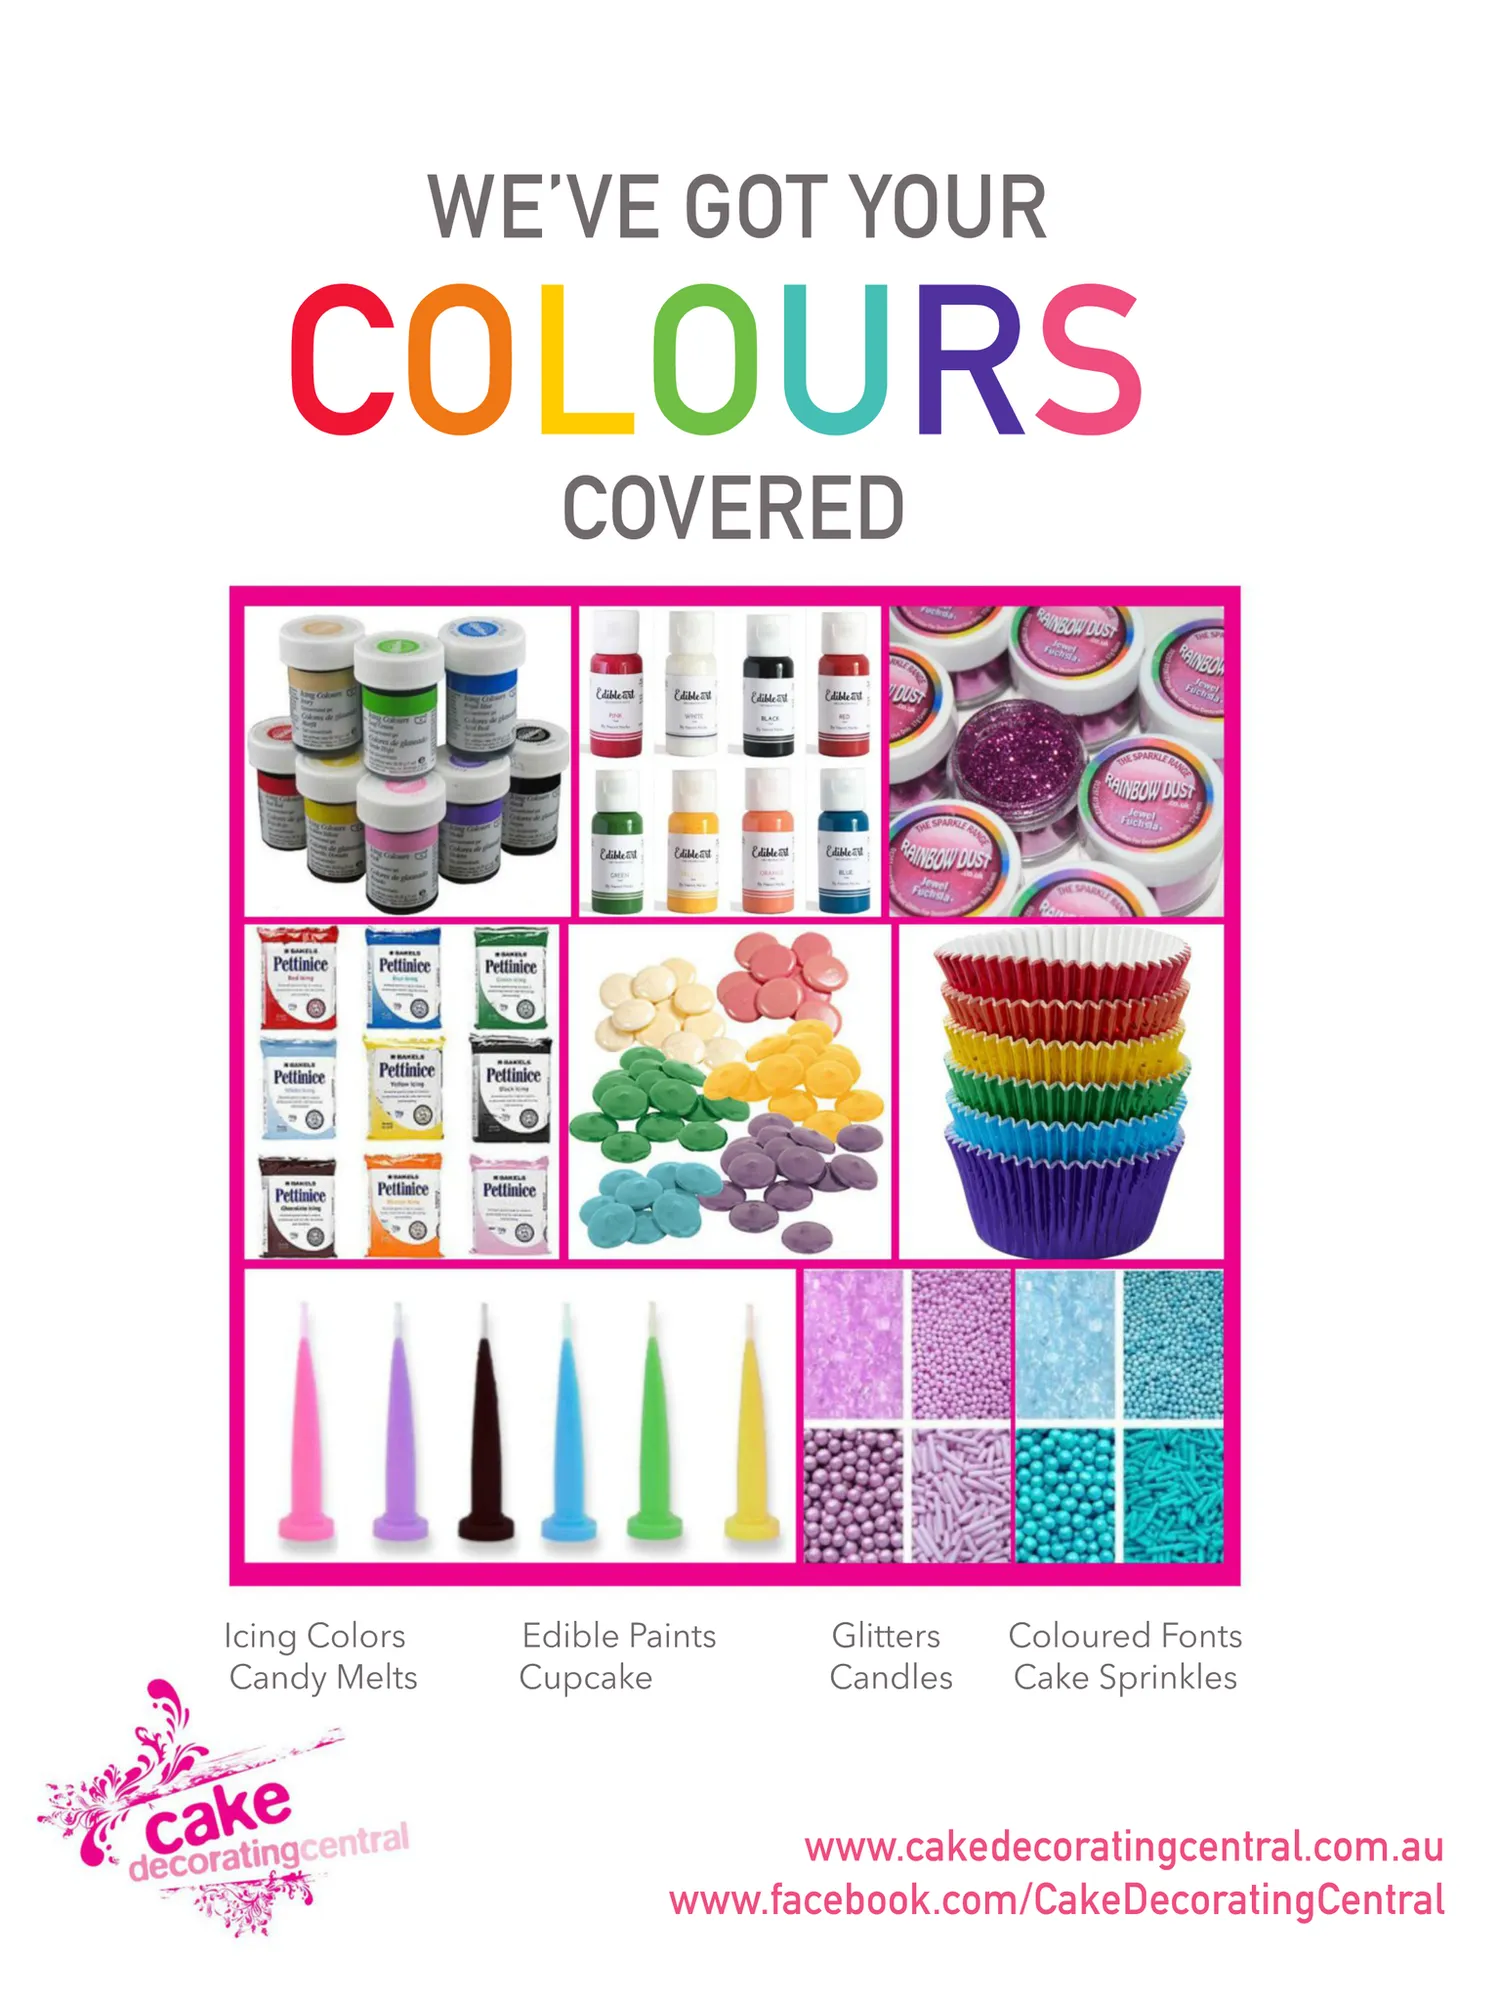
WE’VE GOT YOUR COLOURS COVERED Icing Colors Candy Melts Edible Paints Cupcake Glitters Candles Coloured Fonts Cake Sprinkles www.cakedecoratingcentral.com.au www.facebook.com/CakeDecoratingCentral
Page 47 text
cake decoratingcentral www.cakedecoratingcentral.com CAKEDECORATING WEKNOWCAKEDECORATING, BECAUSEWELOVECAKEDECORATING DECORATING COURSES COURSESDESIGNEDTOSUITALLLEVELS, FROMBEGINNERSTOADVANCED EXPERT ADVICE & SERVICE WETAKETHETIMETOHELPYOUDESIGN, ANDCREATEYOURMASTERPIECE OURSTAFFLOVEDECORATING AMAZING PRODUCTS 5000+ GENUINEPRODUCTSINSTOREGONLINEWESUPPORTGENUINECAKEDECORATORS DESIGNEDTOOLSNOTRIPOFFS EDIBLEIMAGES CAMPBELLTOWN CASTLEHILL TINHIRE Unit2/5HarbordRoad Unit31/9HoyleAvenue READYBAKEDCAKES WoodbineNSW2560 CastleHillNSW2154 GANACHEDCAKES P:0246265526 P:0298993065 E:[email protected] CUSTOMFLOWERS&TOPPERS E:[email protected]
Page 48 text
CAKE KIT OF THE MONTH AUSTRALIAN cake decorafing NETWORK cake decoratingcentral Subscribe to our Cake Kit of the Month at www.acdn.me www.cakedecoratingcentral.com.au
Page 49 text
We are very excited to have partnered with Cake Decorating Central, to bring you a monthly cake kit subscription with world class guest decorators! What is included? All the cutters, colours, materials & full colour instructions required are provided for you each month. Some tools and ingredients may be required to be provided by you to complete the project. COST Each kit will cost $52.00 per month plus postage. 6 month and 12 month subscriptions available. Only 150 subscriptions available! Colour hard copy notes are supplied for an additional $2.00 each month or you can download & print them yourself. Kits can be collected for FREE from Cake Decorating Central stores in Castle Hill and Campbelltown. Postage in Australia is in addition to the kit cost: $8.00 to the Sydney Metro area, $14.00 for all other capital cities (excl. Perth) and $16.00 for any areas outside of capital cities (Excl. WA). Postage to all areas in WA is $18. Please email us at [email protected] for international postage quote SUBSCRIBE here!

Page 50 text
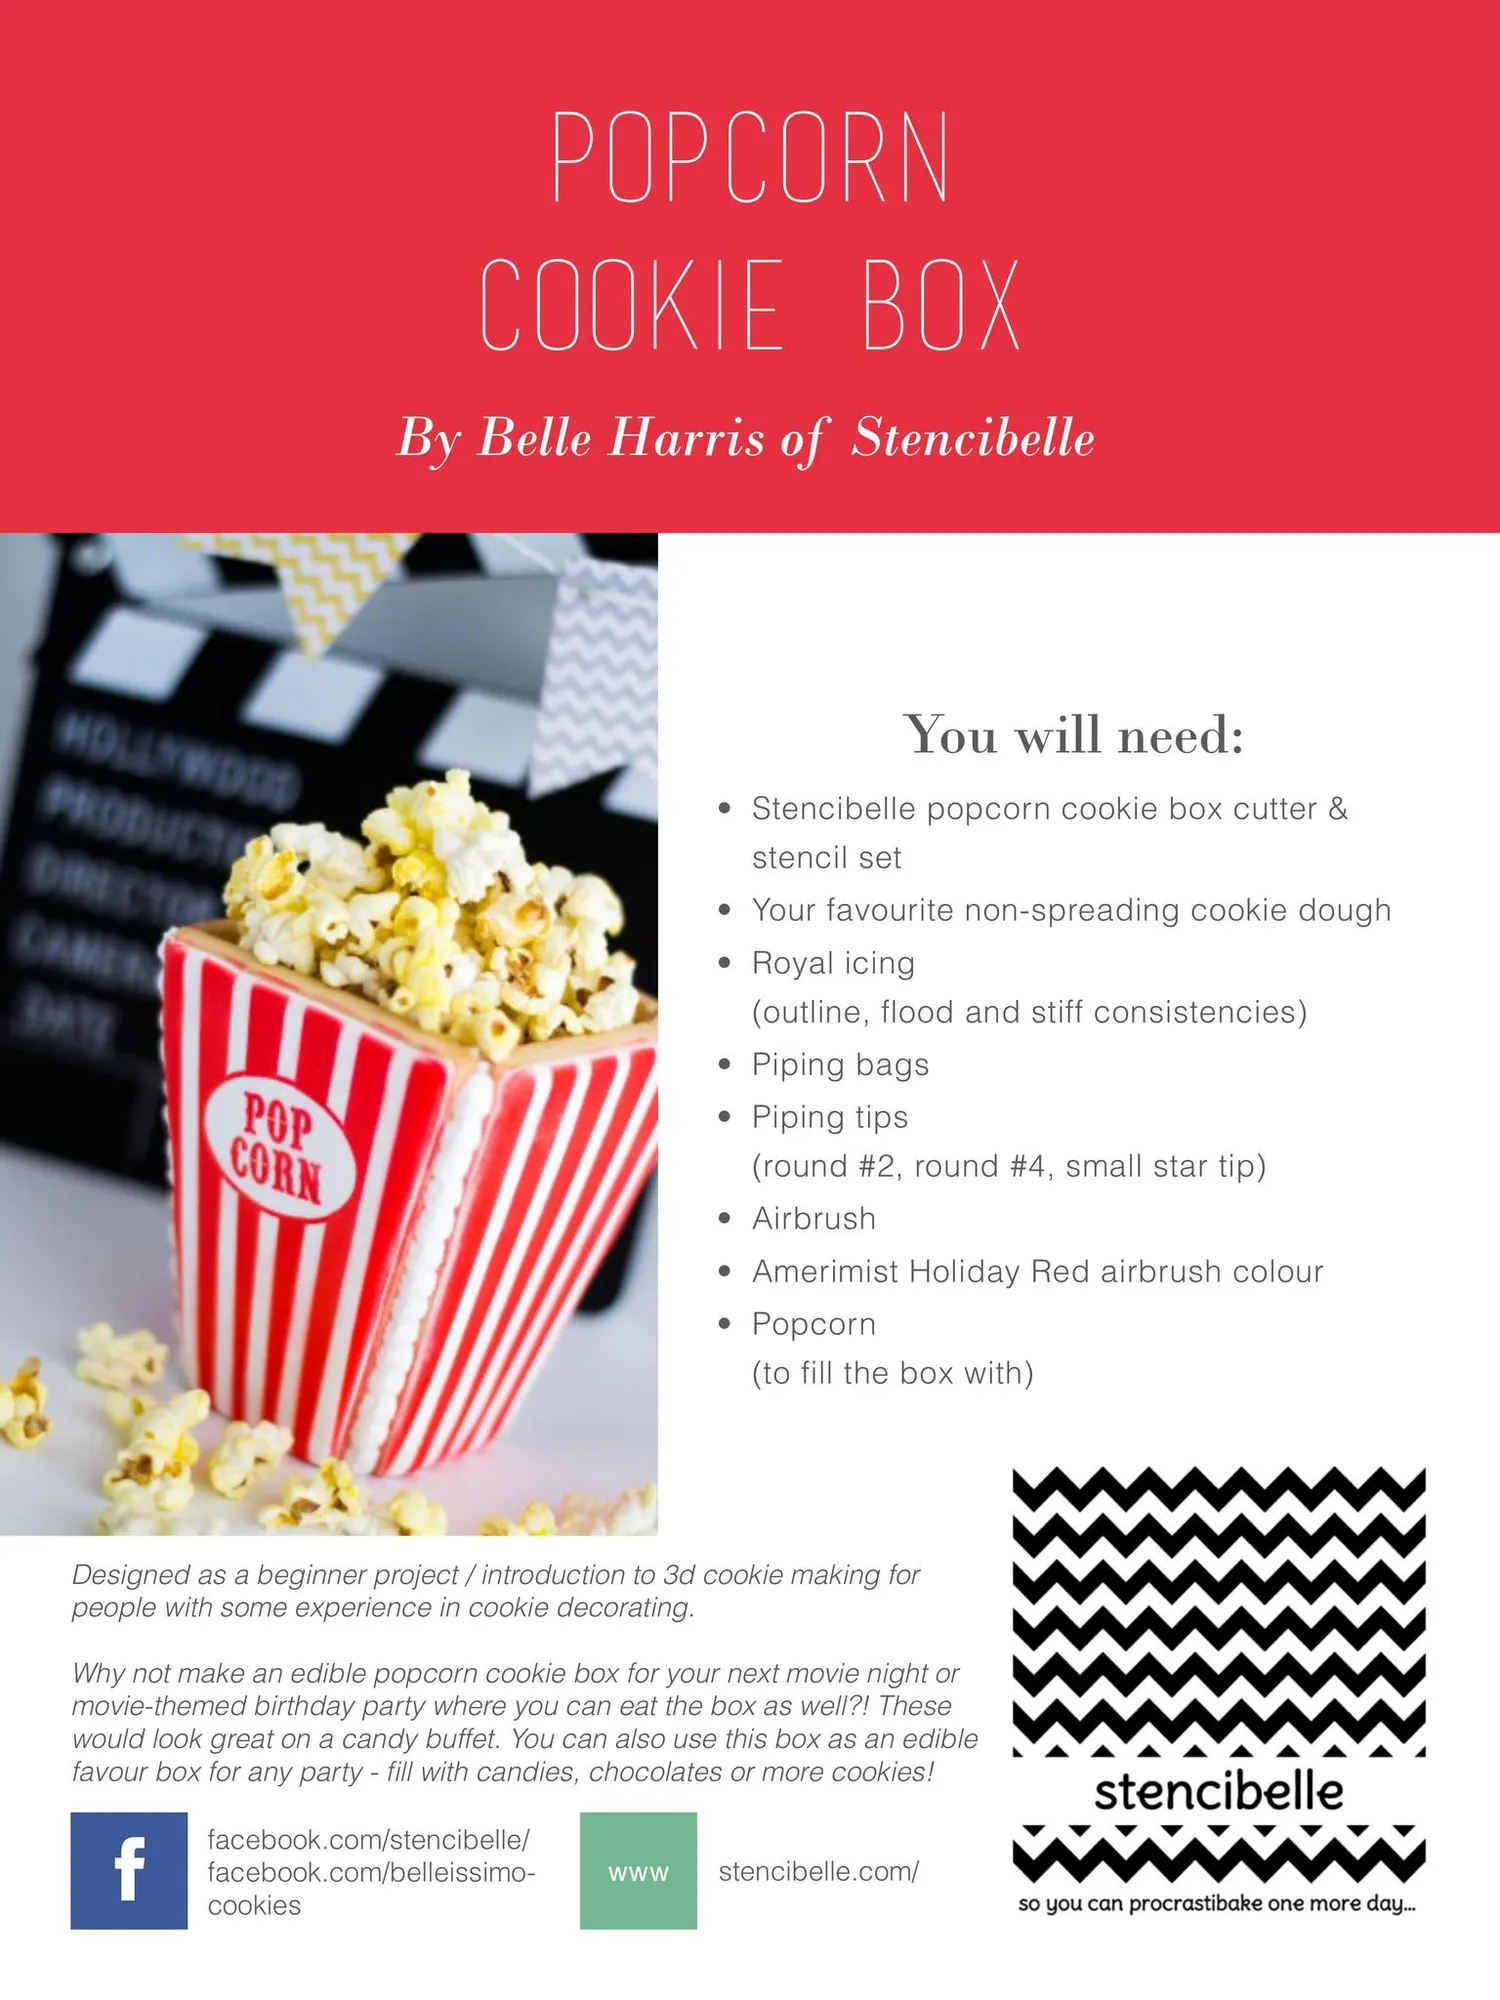
Popcorn Cookie Box By Belle Harris of Stencibelle You will need: • Stencibelle popcorn cookie box cutter & stencil set • Your favourite non-spreading cookie dough • Royal icing (outline, flood and stiff consistencies) • Piping bags • Piping tips (round #2, round #4, small star tip) • Airbrush • Amerimist Holiday Red airbrush colour • Popcorn (to fill the box with) Designed as a beginner project / introduction to 3d cookie making for people with some experience in cookie decorating. Why not make an edible popcorn cookie box for your next movie night or movie-themed birthday party where you can eat the box as well?! These would look great on a candy buffet. You can also use this box as an edible favour box for any party - fill with candies, chocolates or more cookies! f facebook.com/stencibelle/ facebook.com/belleissimo- cookies www stencibelle.com/
Page 51 text
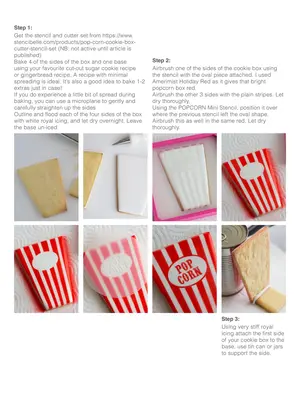
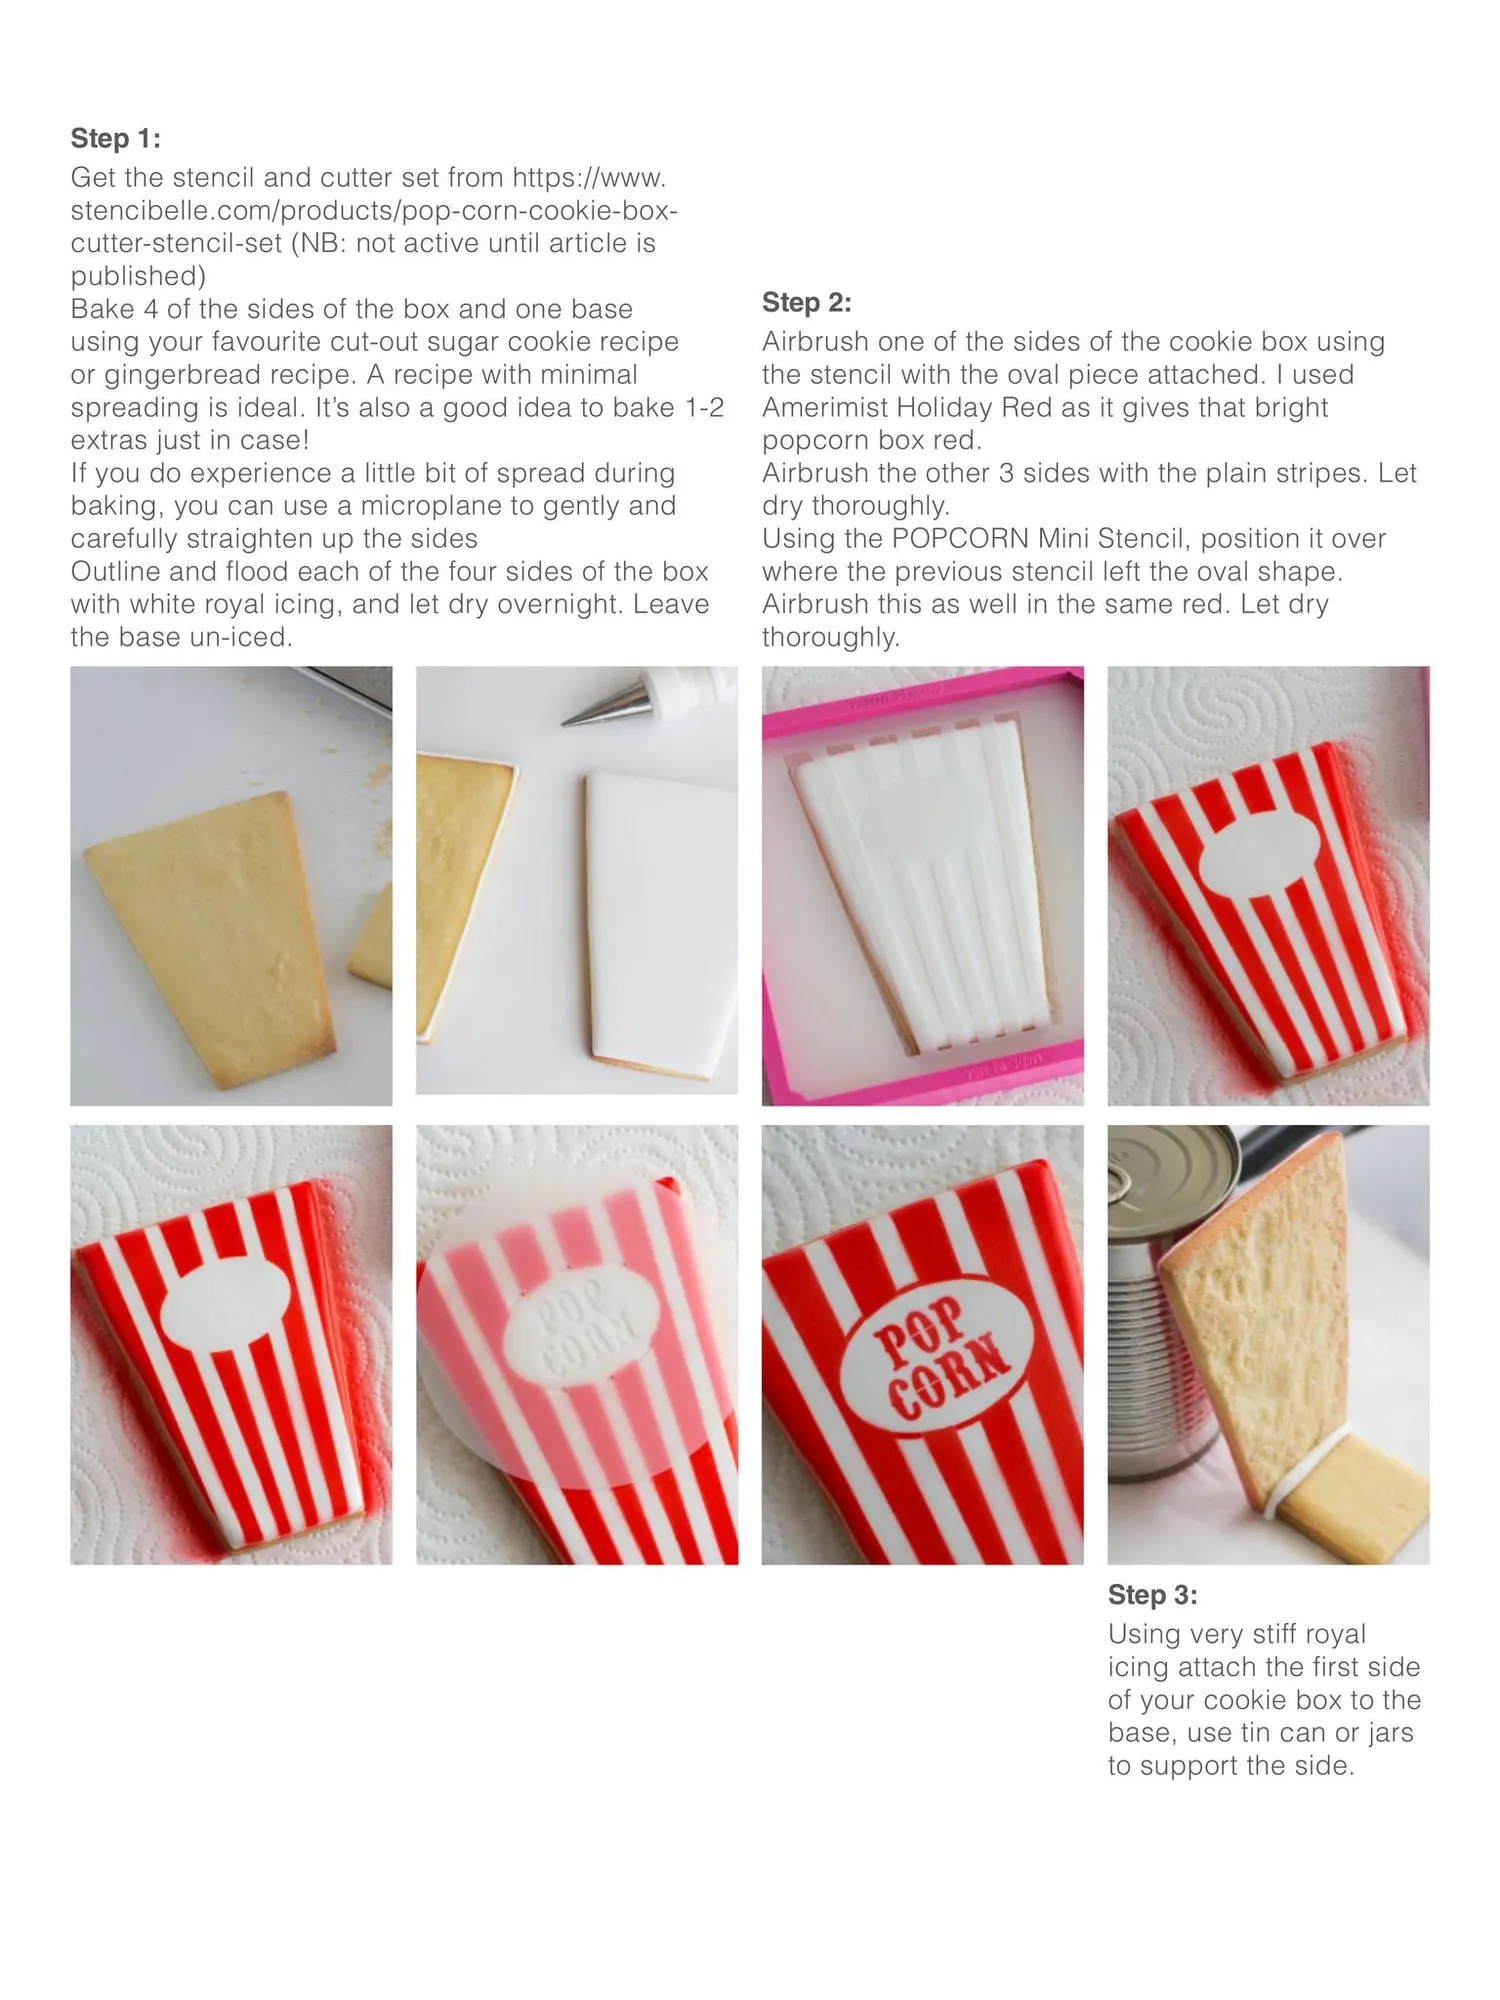
Step 1: Get the stencil and cutter set from https://www. stencibelle.com/products/pop-corn-cookie-box- cutter-stencil-set (NB:not active until article is published) Bake 4 of the sides of the box and onebase Step 2: using yourfavourite cut-out sugar cookie recipe Airbrush one of the sides of the cookie box using or gingerbread recipe.A recipe with minimal the stencil with the oval piece attached.I used spreading is ideal. It's also a good idea to bake 1-2 Amerimist Holiday Red as it gives that bright extras just in case! popcorn box red. If you do experience a little bit of spread during Airbrush the other 3 sides with the plain stripes. Let baking, you can use a microplane to gently and dry thoroughly. carefully straightenupthe sides UsingthePOPCORNMiniStencil,positionitover Outline and flood each of the four sides of the box where the previous stencil left the oval shape. with white royal icing, and let dry overnight. Leave Airbrush this as well in the same red. Let dry the base un-iced. thoroughly. POP CORN Step 3: Using very stiff royal icing attach the first side ofyourcookieboxtothe base,usetincanorjars to support the side.
Page 52 text
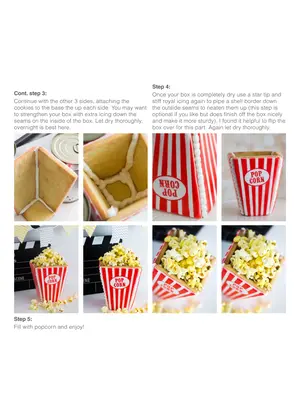
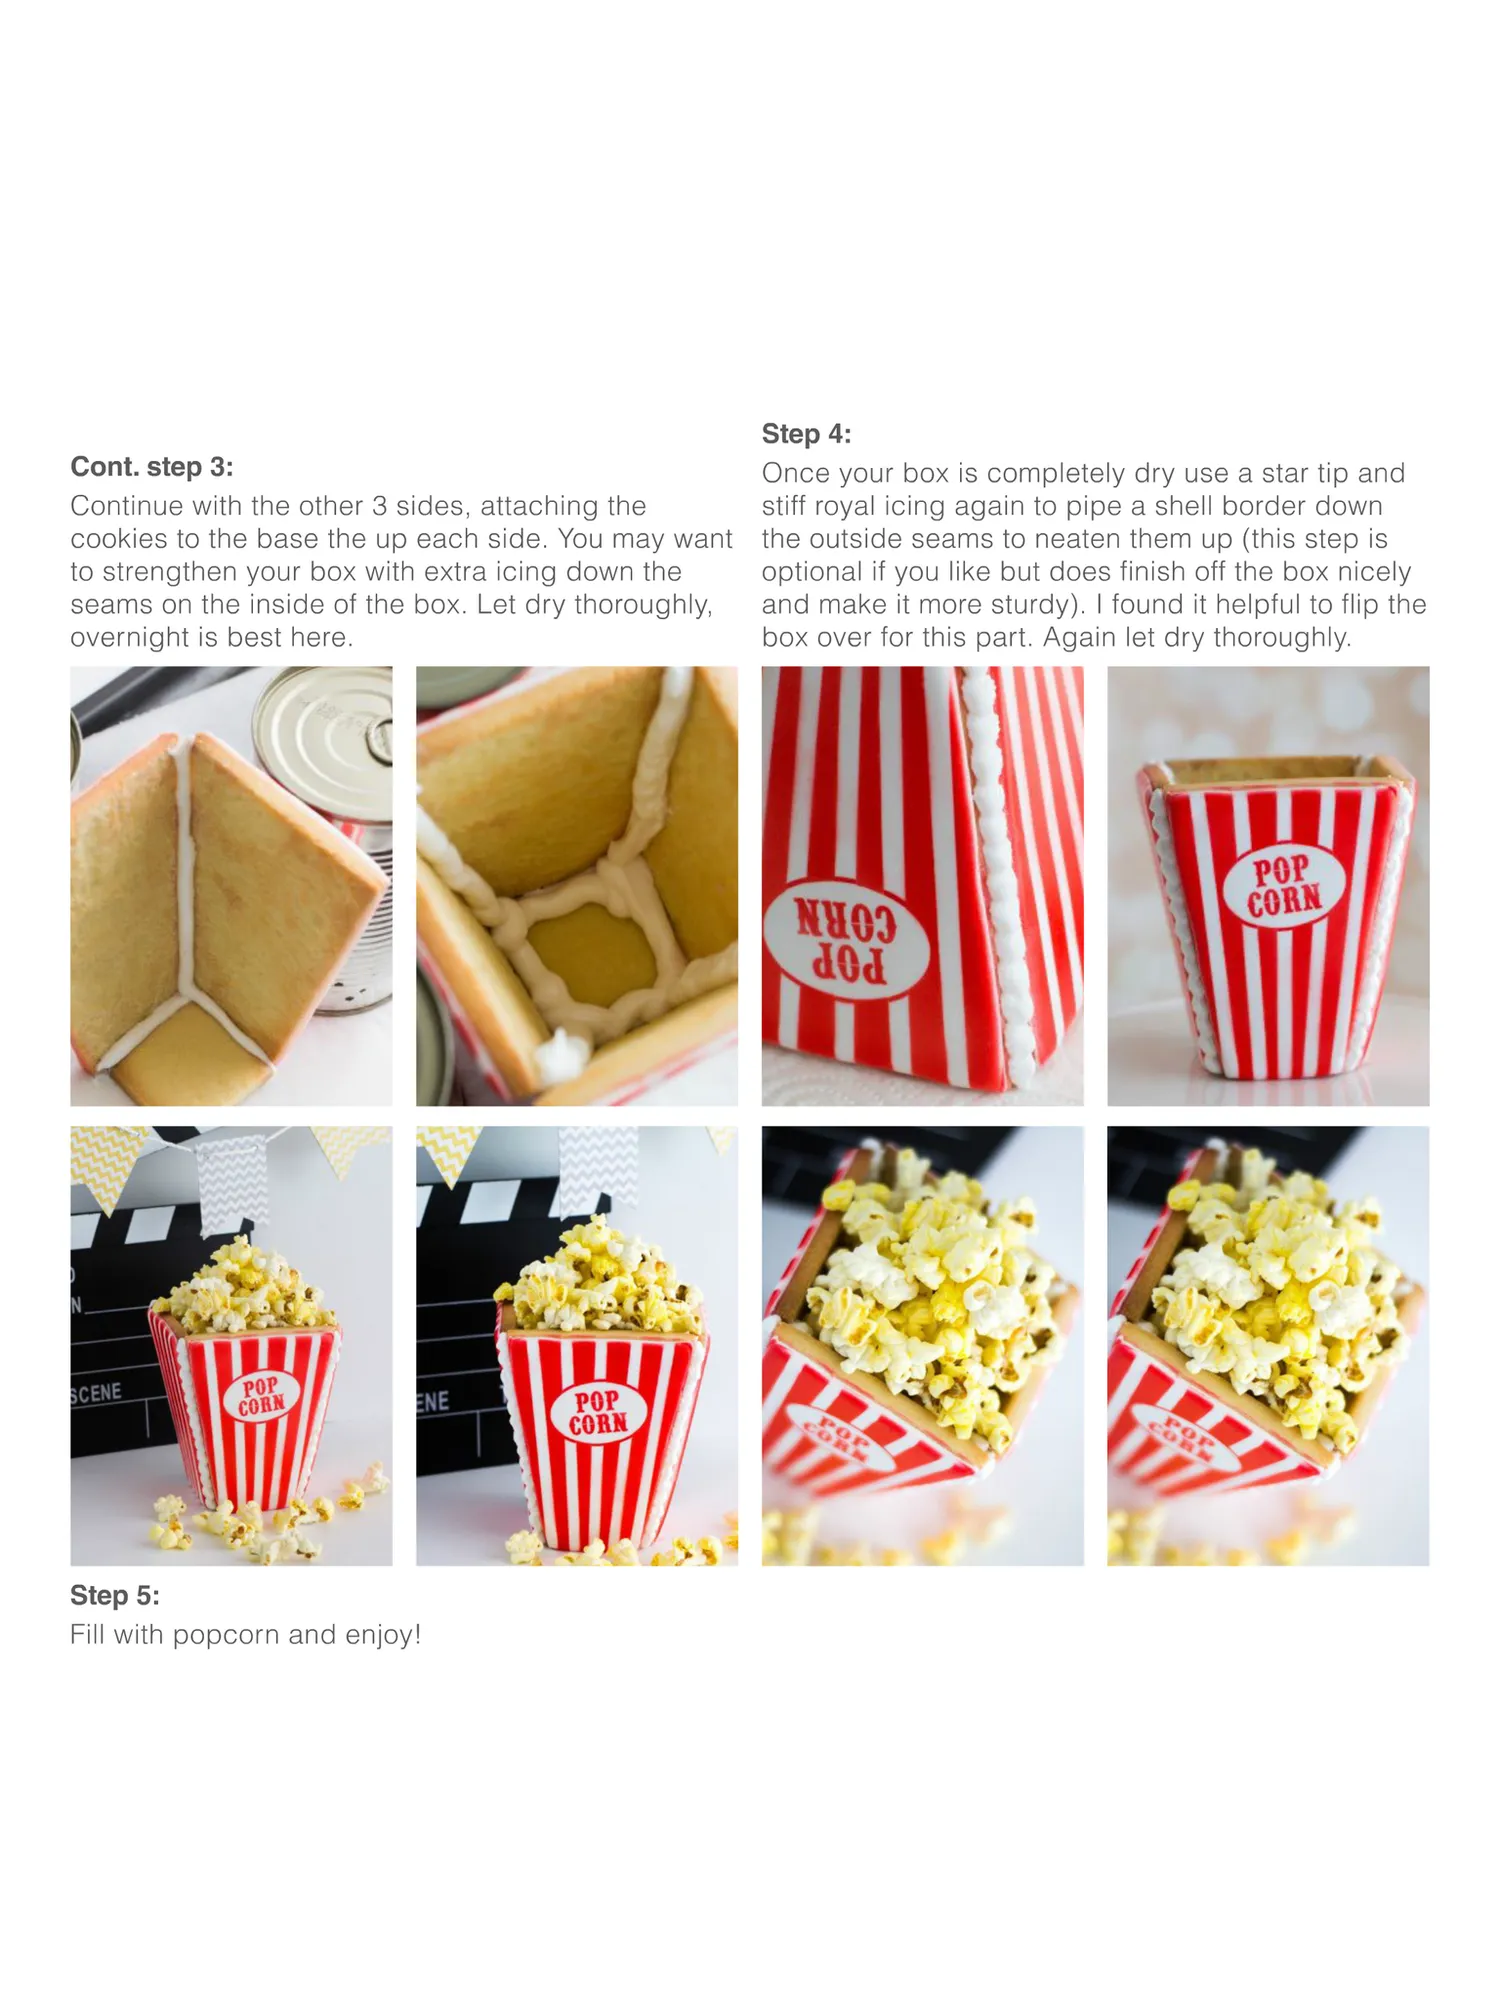
Cont. step 3: Continue with the other 3 sides, attaching the cookies to the base the up each side. You may want to strengthen your box with extra icing down the seams on the inside of the box. Let dry thoroughly, overnight is best here. Step 5: Fill with popcorn and enjoy! Step 4: Once your box is completely dry use a star tip and stiff royal icing again to pipe a shell border down the outside seams to neaten them up (this step is optional if you like but does finish off the box nicely and make it more sturdy). I found it helpful to flip the box over for this part. Again let dry thoroughly.
Page 53 text
FULL PAGE AD
Page 54 text
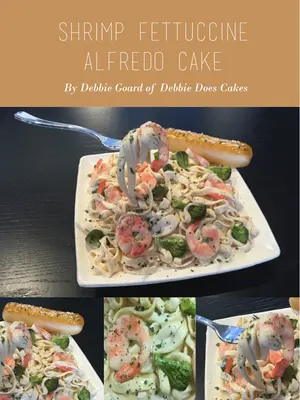
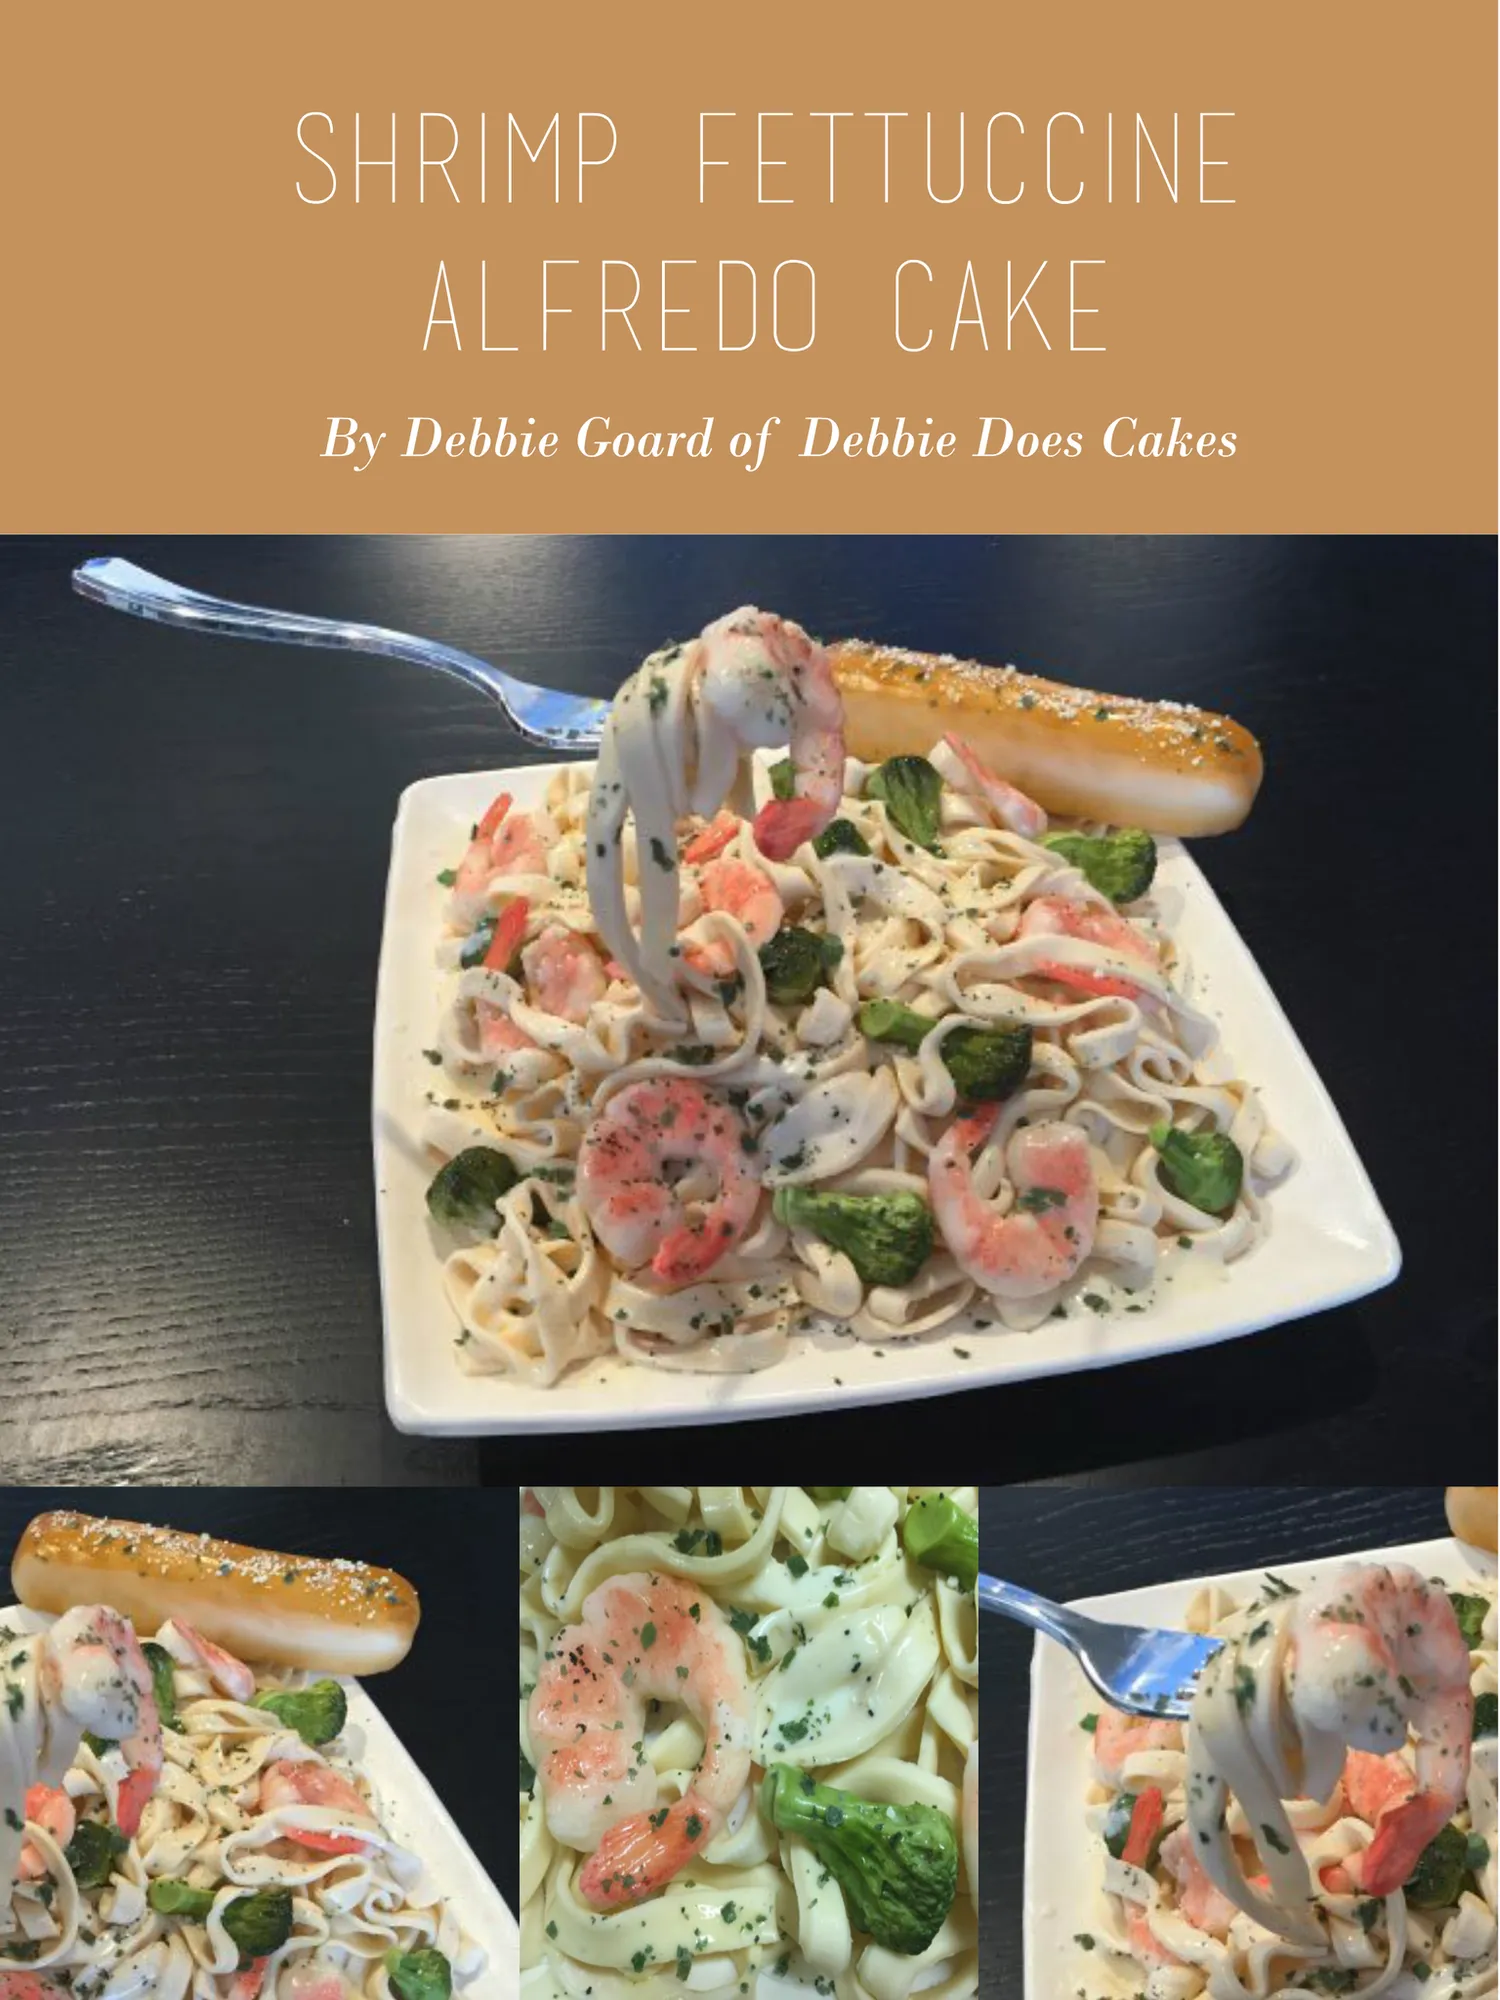
Shrimp Fettuccine Alfredo Cake By Debbie Goard of Debbie Does Cakes
Page 55 text
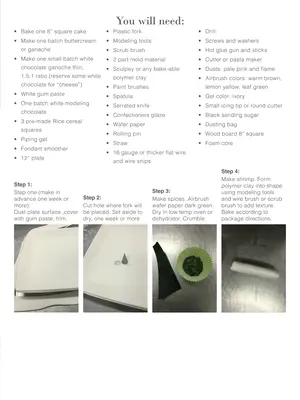
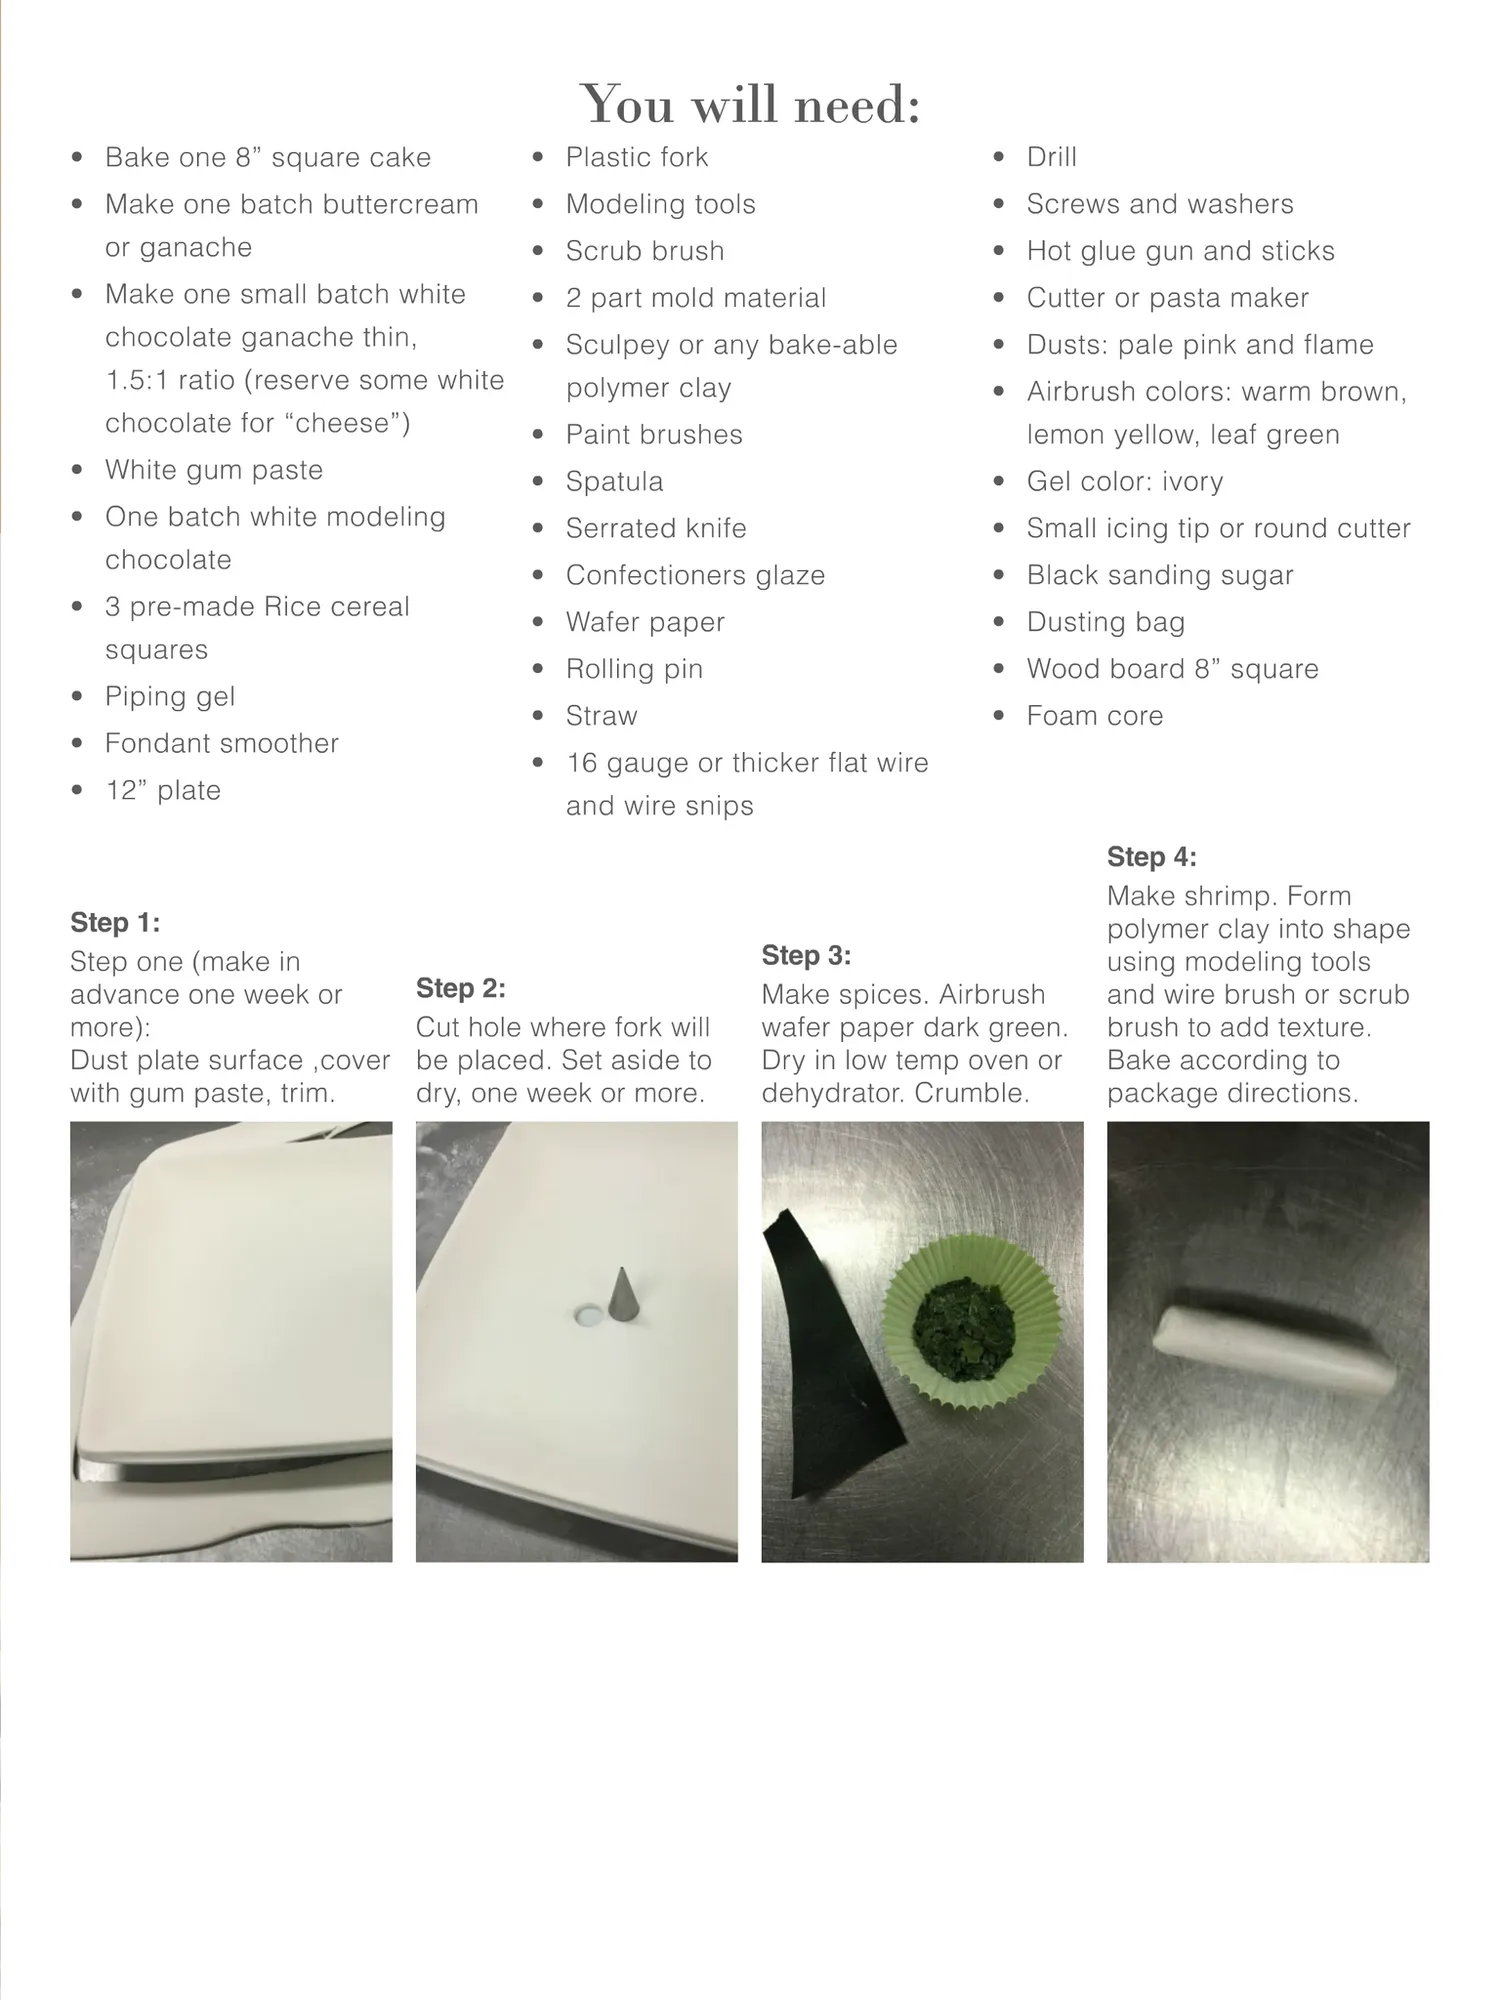
You will need: • Bake one 8” square cake • Plastic fork • Drill • Make one batch buttercream • Modeling tools • Screws and washers • Scrub brush • Hot glue gun and sticks • 2 part mold material • Cutter or pasta maker • Sculpey or any bake-able • Dusts: pale pink and flame or ganache • Make one small batch white chocolate ganache thin, 1.5:1 ratio (reserve some white chocolate for “cheese”) polymer clay • Airbrush colors: warm brown, lemon yellow, leaf green • Paint brushes • White gum paste • Spatula • Gel color: ivory • One batch white modeling • Serrated knife • Small icing tip or round cutter • Confectioners glaze • Black sanding sugar • Wafer paper • Dusting bag • Rolling pin • Wood board 8” square • Straw • Foam core chocolate • 3 pre-made Rice cereal squares • Piping gel • Fondant smoother • 12” plate Step 1: Step one (make in advance one week or more): Dust plate surface ,cover with gum paste, trim. • 16 gauge or thicker flat wire and wire snips Step 2: Cut hole where fork will be placed. Set aside to dry, one week or more. Step 3: Make spices. Airbrush wafer paper dark green. Dry in low temp oven or dehydrator. Crumble. Step 4: Make shrimp. Form polymer clay into shape using modeling tools and wire brush or scrub brush to add texture. Bake according to package directions.
Page 56 text
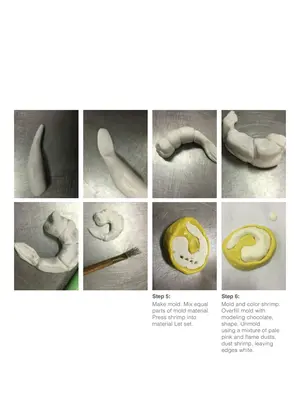
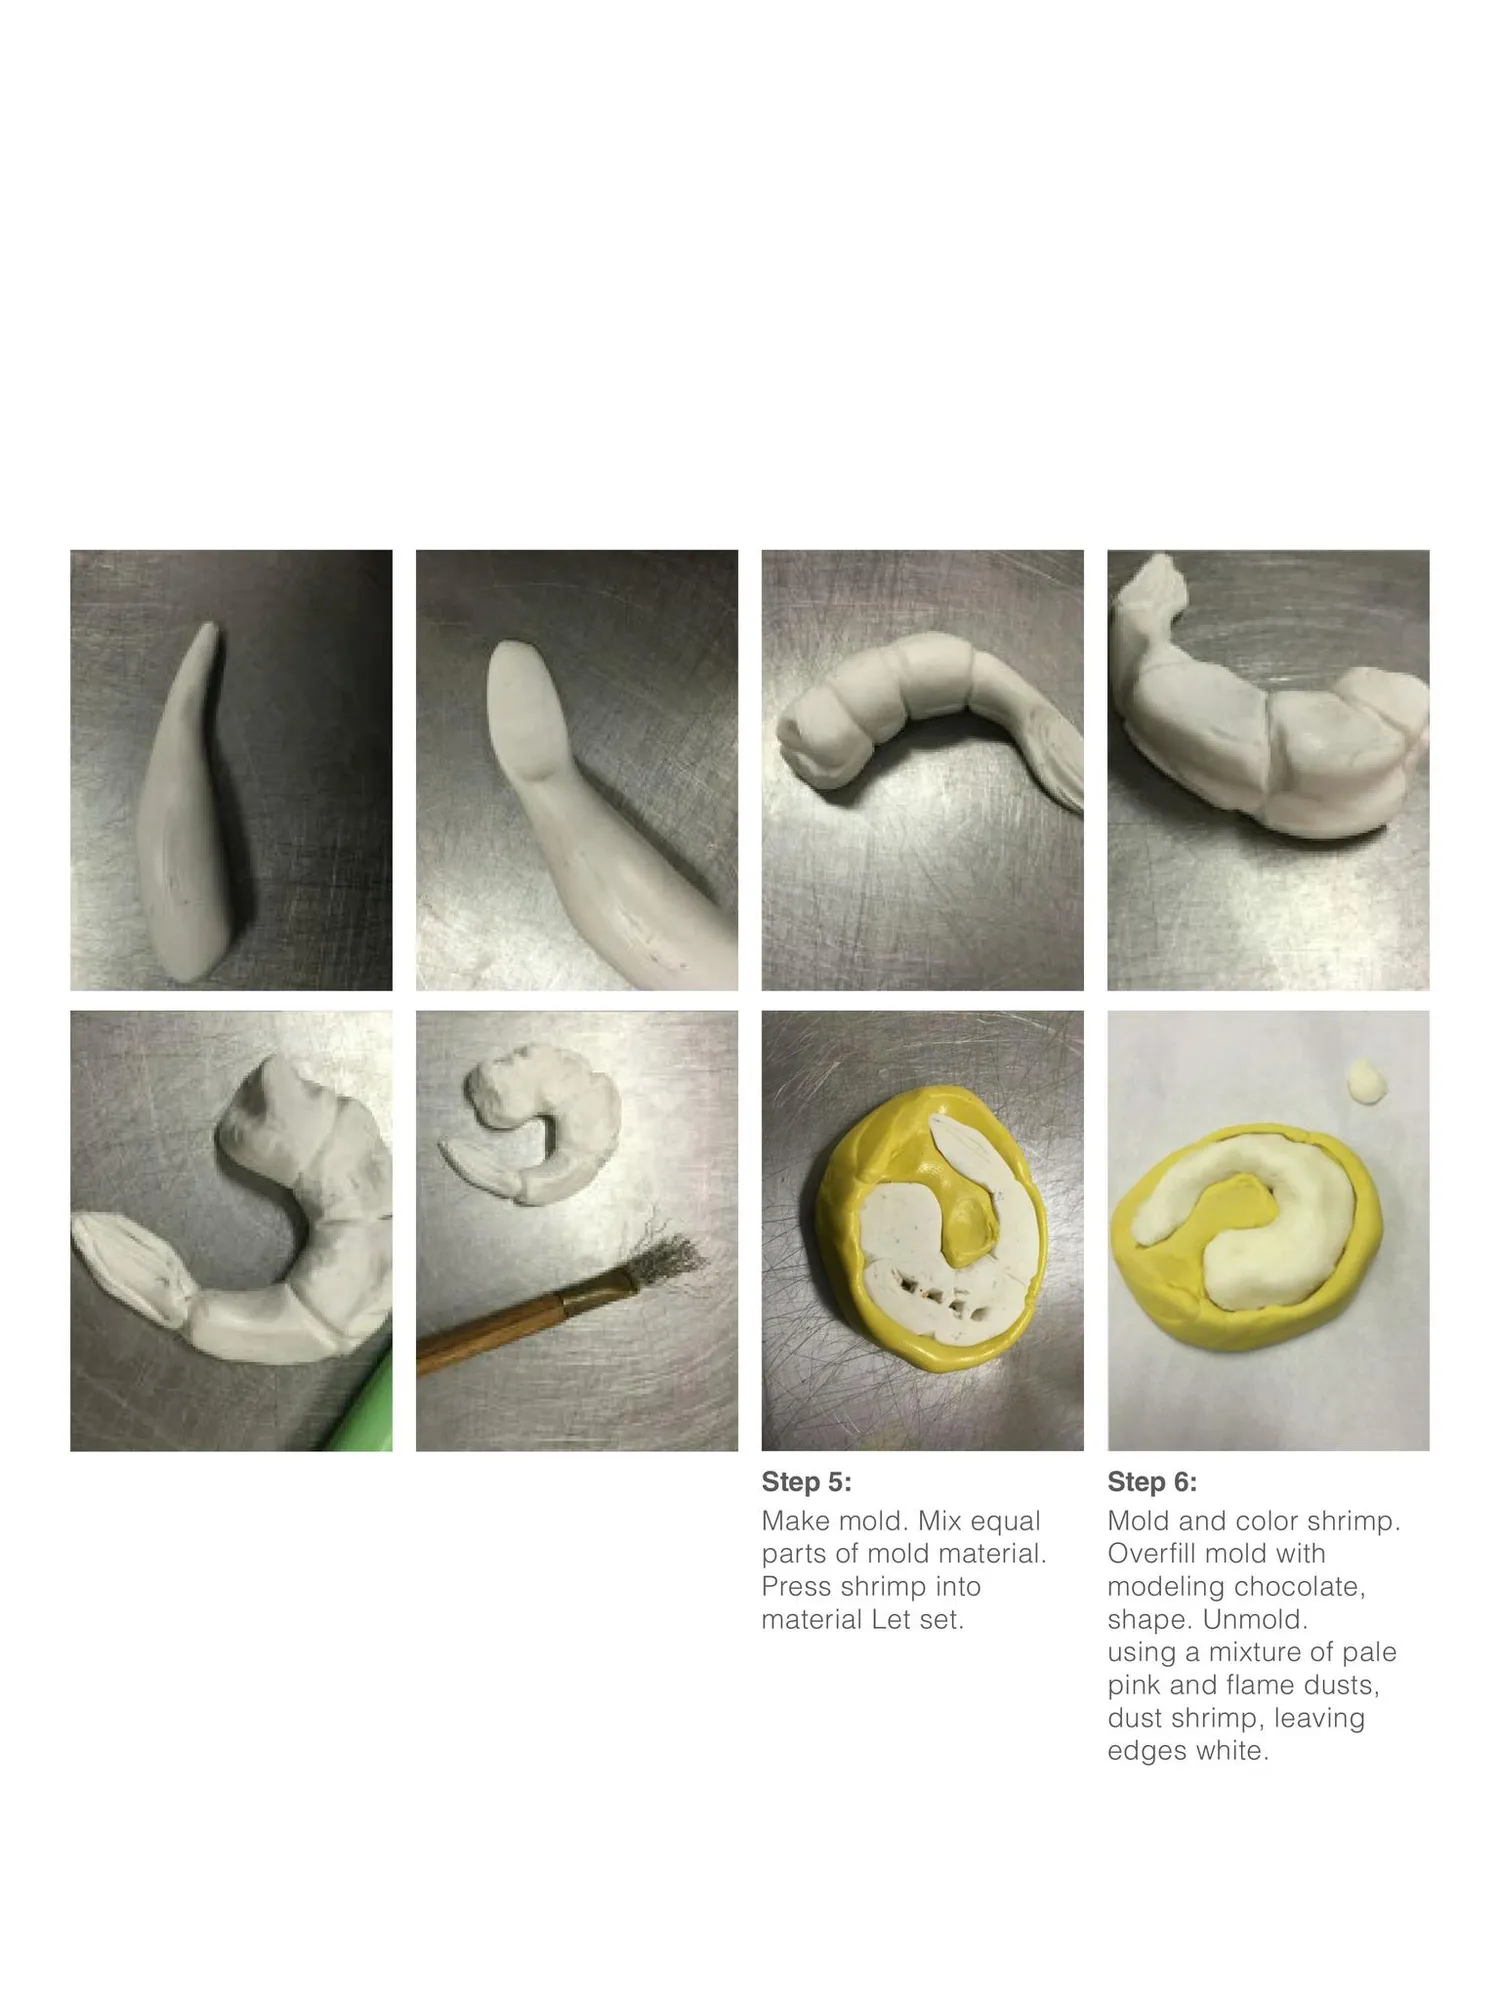
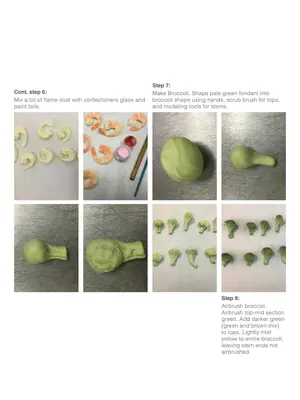
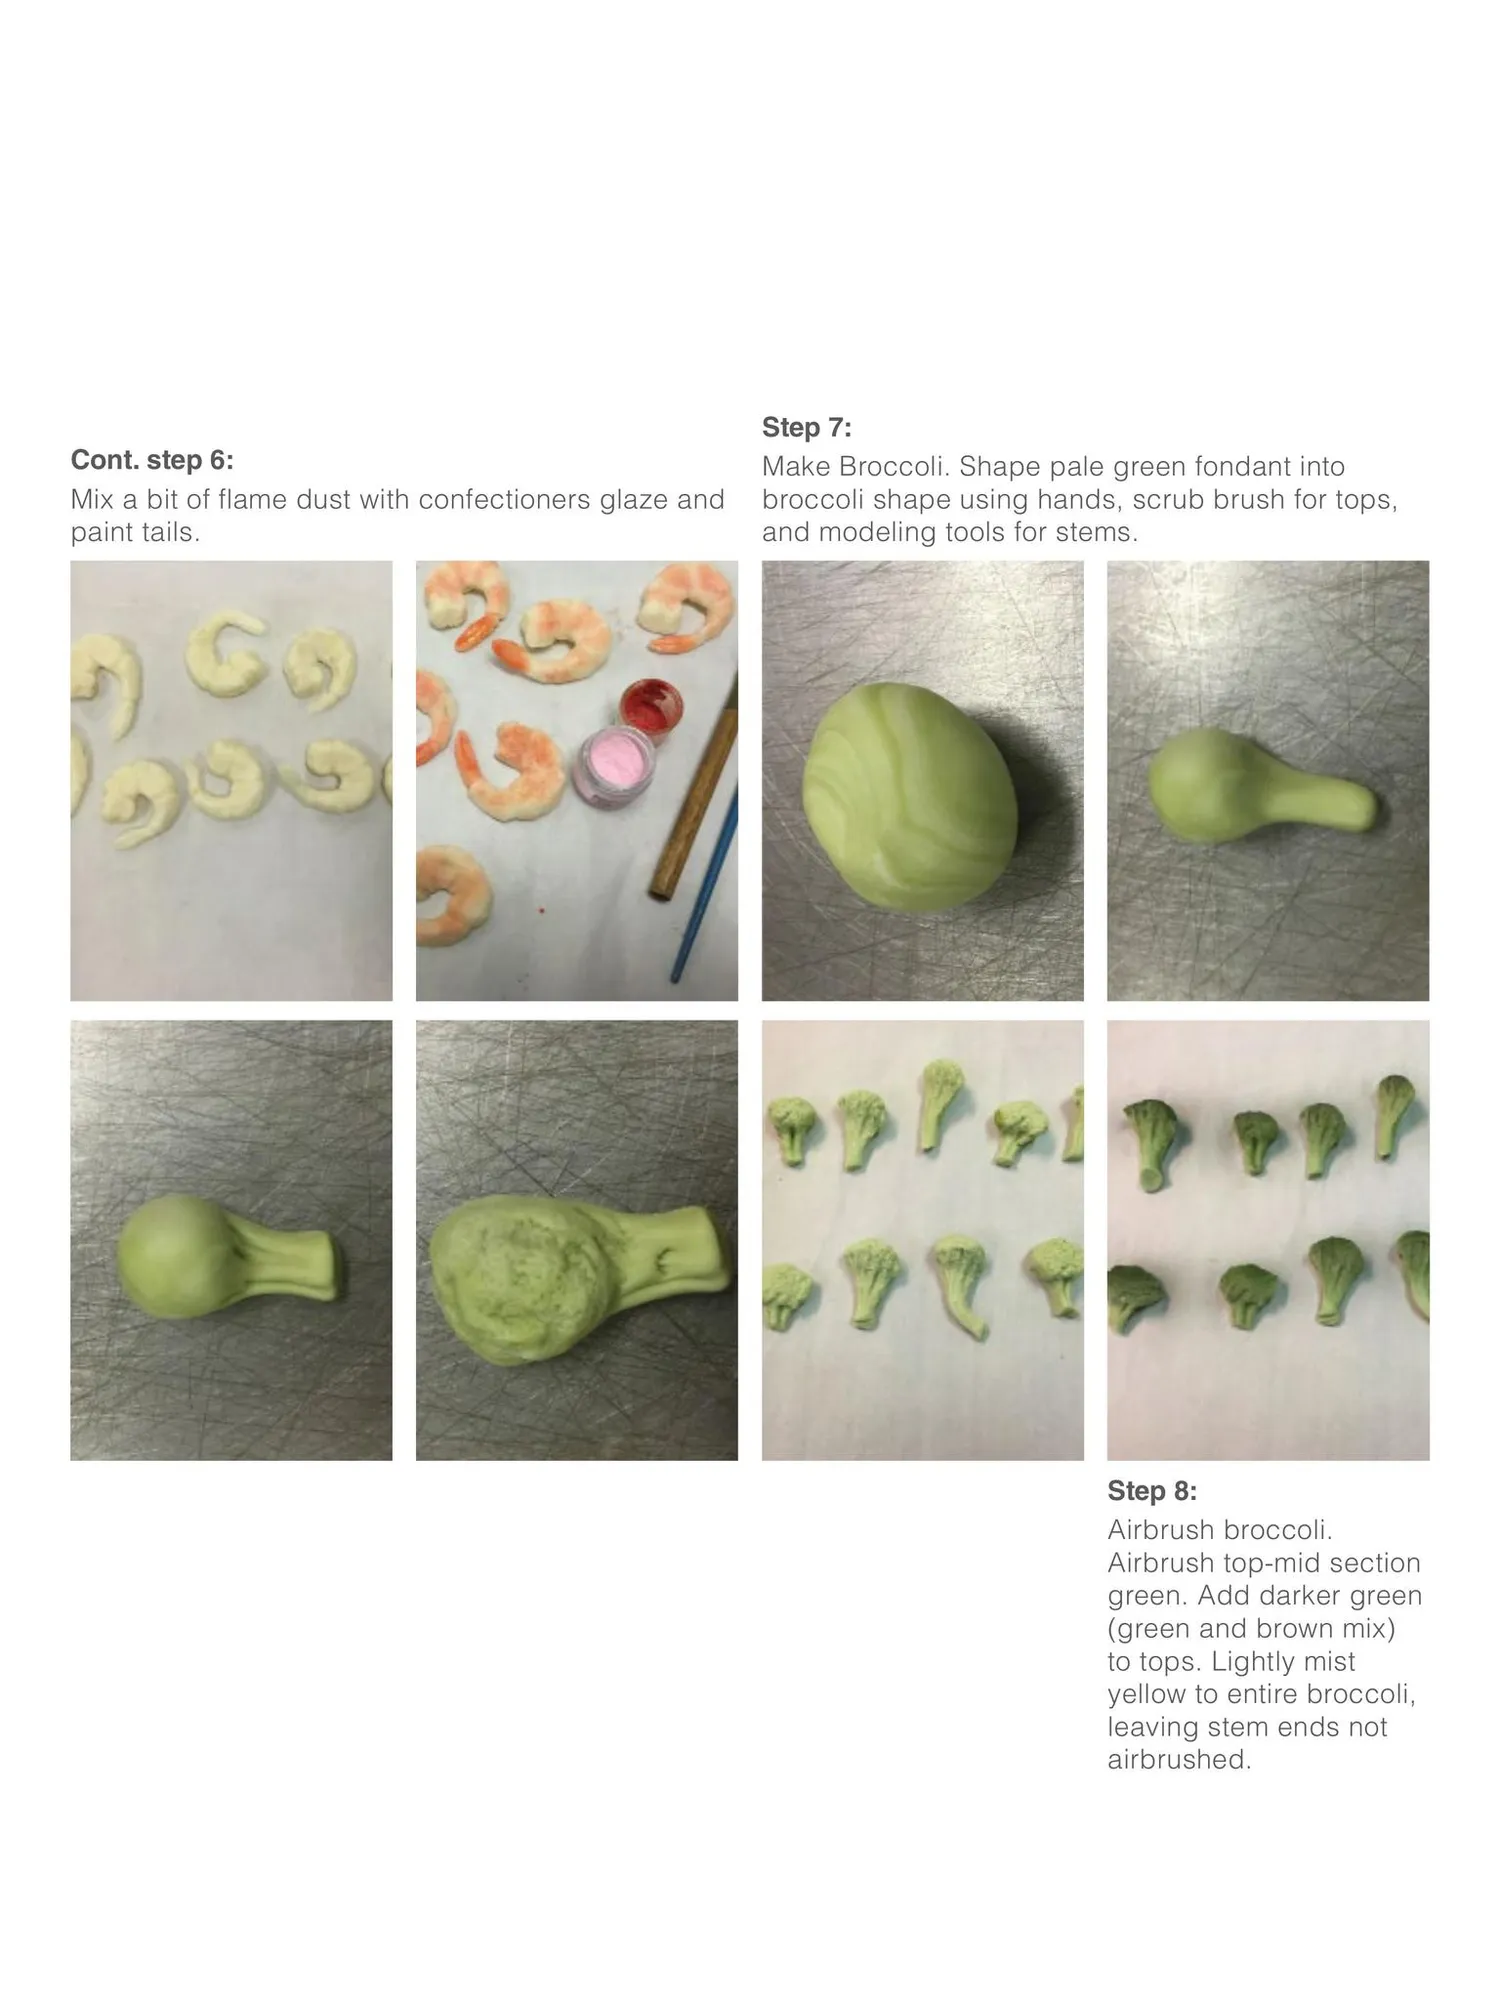
Step 5: Make mold. Mix equal parts of mold material. Press shrimp into material Let set. Step 6: Mold and color shrimp. Overfill mold with modeling chocolate, shape. Unmold. using a mixture of pale pink and flame dusts, dust shrimp, leaving edges white.
Page 57 text
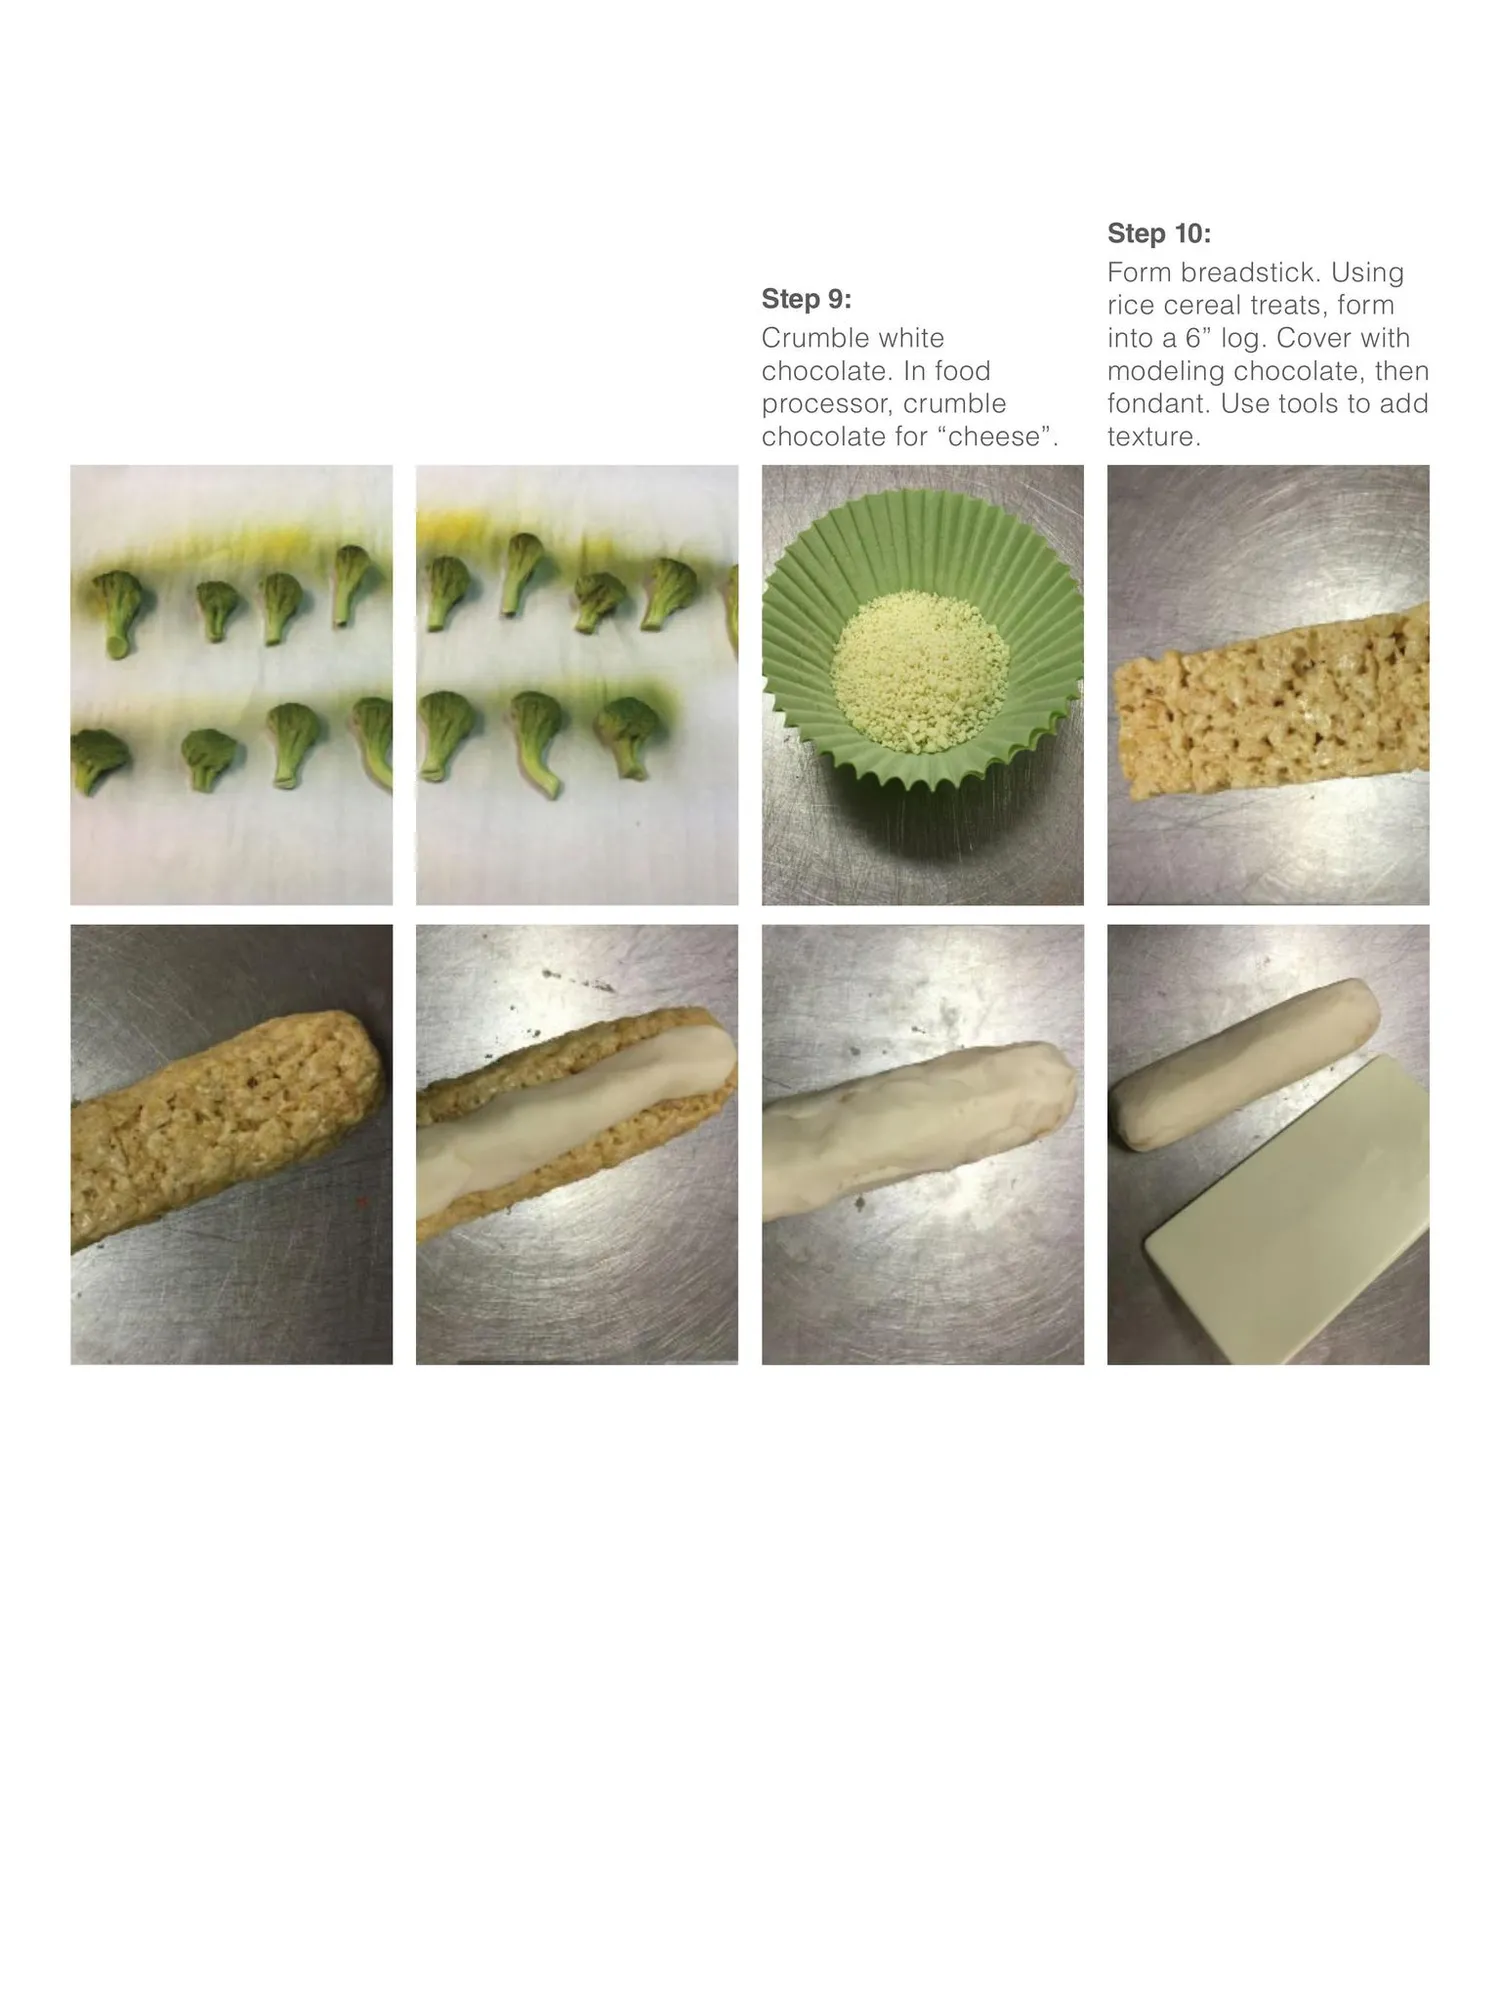
Cont. step 6: Mix a bit of flame dust with confectioners glaze and paint tails. Step 7: Make Broccoli. Shape pale green fondant into broccoli shape using hands, scrub brush for tops, and modeling tools for stems. Step 8: Airbrush broccoli. Airbrush top-mid section green. Add darker green (green and brown mix) to tops. Lightly mist yellow to entire broccoli, leaving stem ends not airbrushed.
Page 58 text
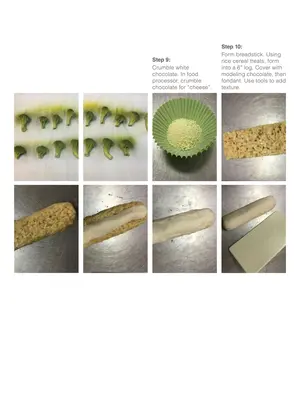
Step 9: Crumble white chocolate. In food processor, crumble chocolate for “cheese”. Step 10: Form breadstick. Using rice cereal treats, form into a 6” log. Cover with modeling chocolate, then fondant. Use tools to add texture.
Page 59 text
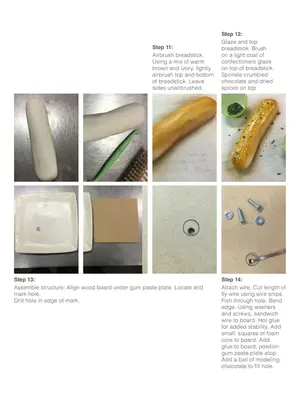
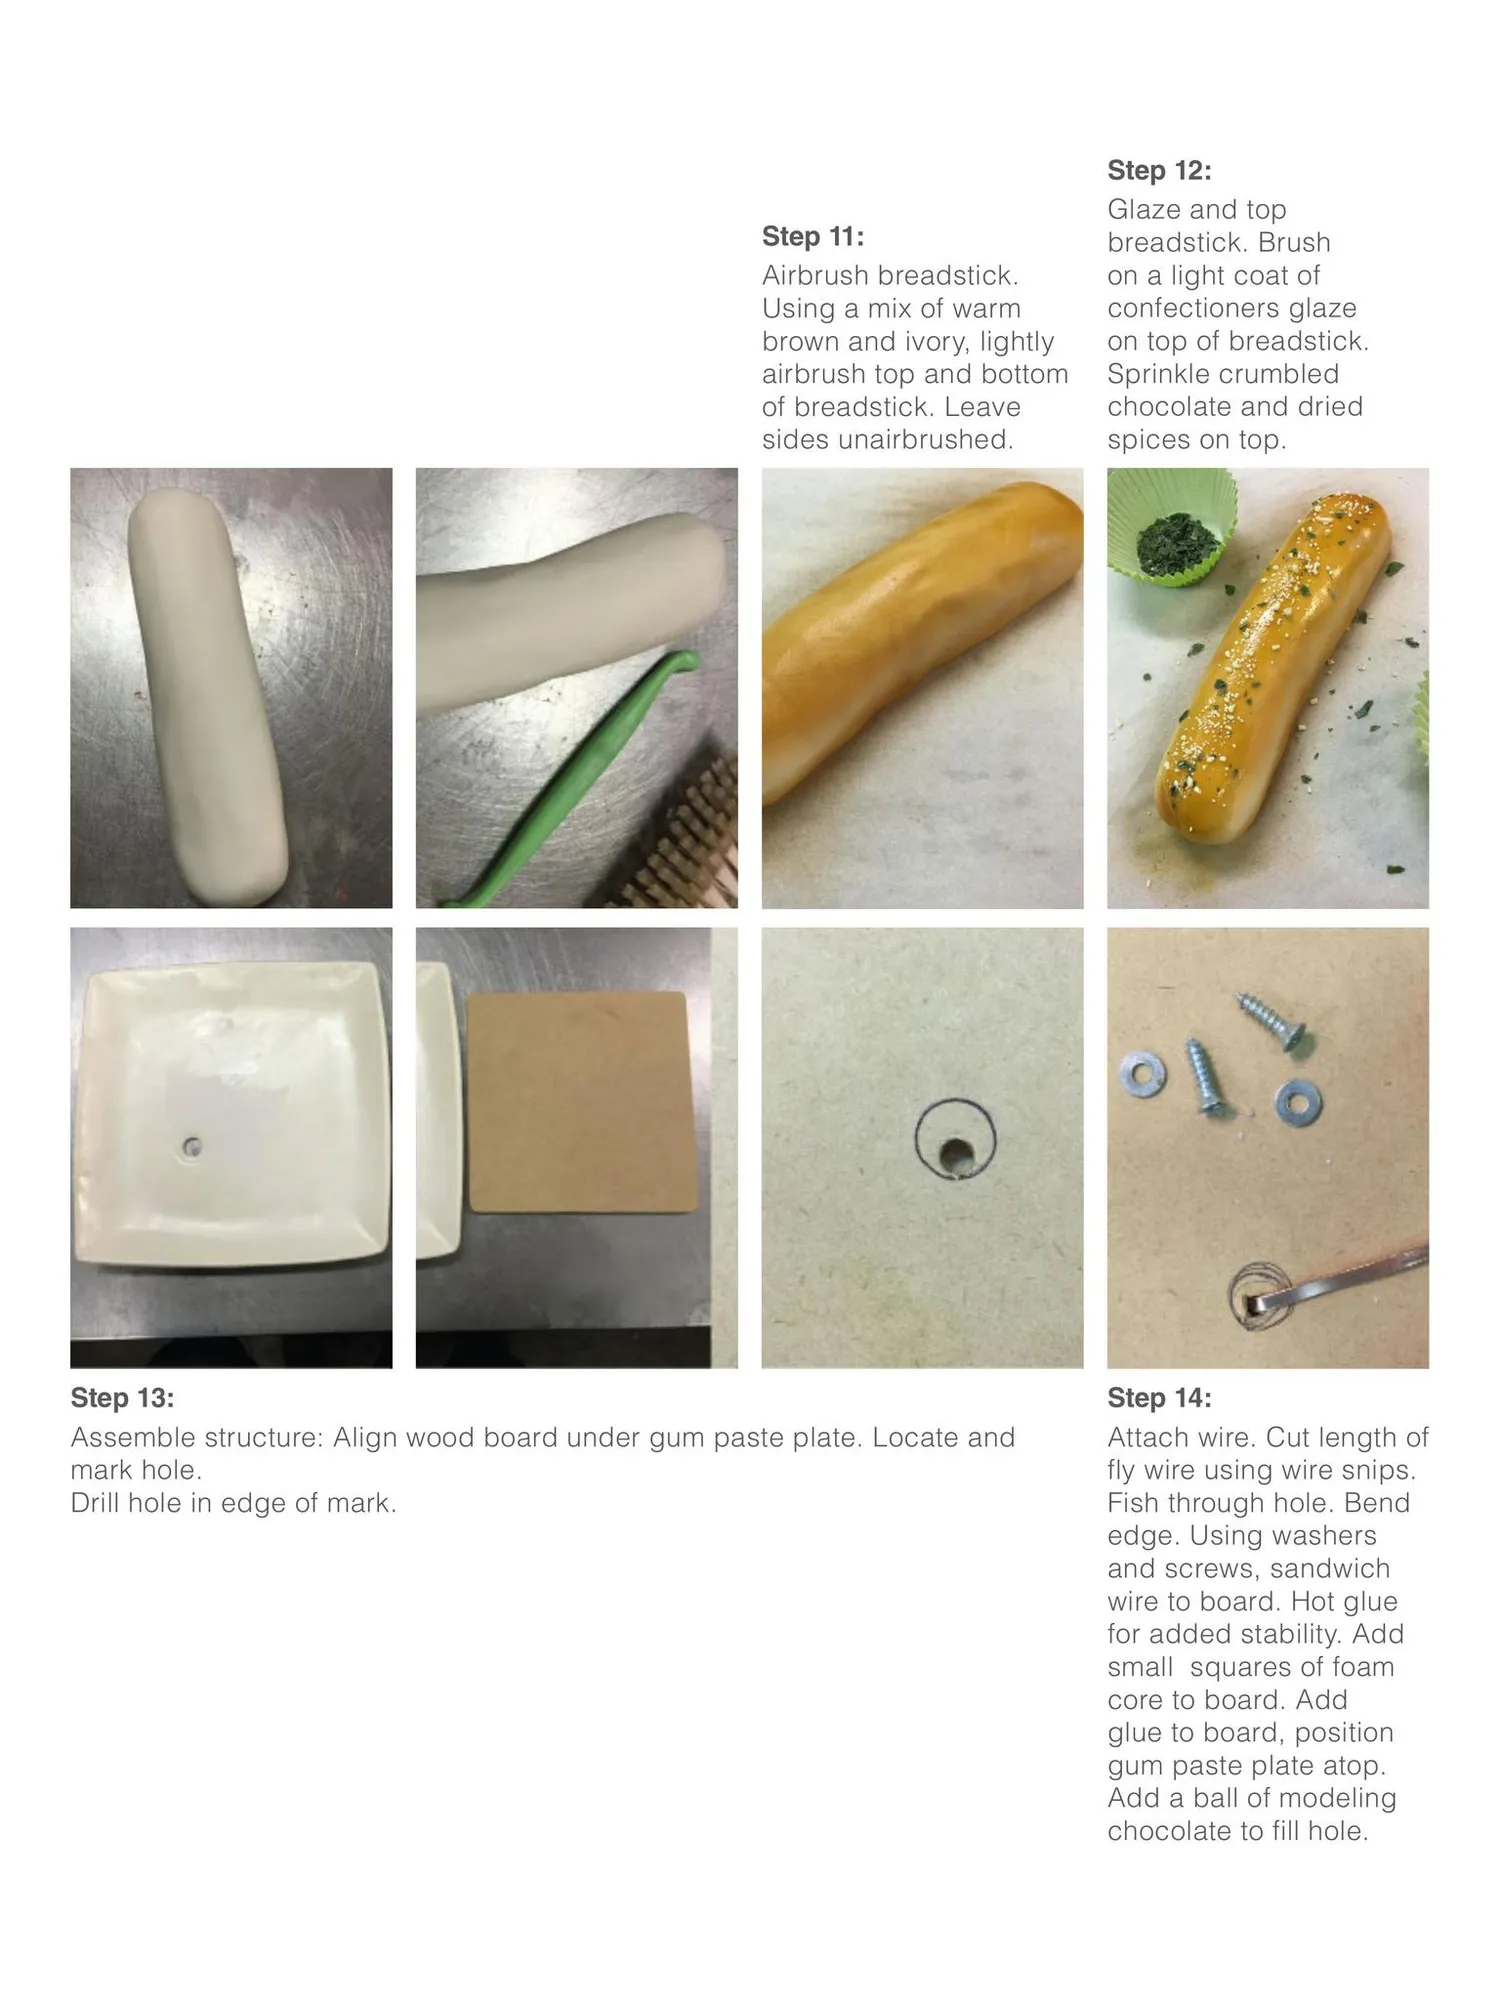
Step 11: Airbrush breadstick. Using a mix of warm brown and ivory, lightly airbrush top and bottom of breadstick. Leave sides unairbrushed. Step 13: Assemble structure: Align wood board under gum paste plate. Locate and mark hole. Drill hole in edge of mark. Step 12: Glaze and top breadstick. Brush on a light coat of confectioners glaze on top of breadstick. Sprinkle crumbled chocolate and dried spices on top. Step 14: Attach wire. Cut length of fly wire using wire snips. Fish through hole. Bend edge. Using washers and screws, sandwich wire to board. Hot glue for added stability. Add small squares of foam core to board. Add glue to board, position gum paste plate atop. Add a ball of modeling chocolate to fill hole.
Page 60 text
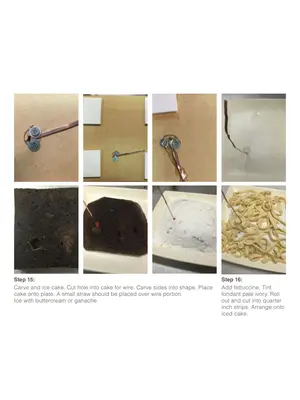
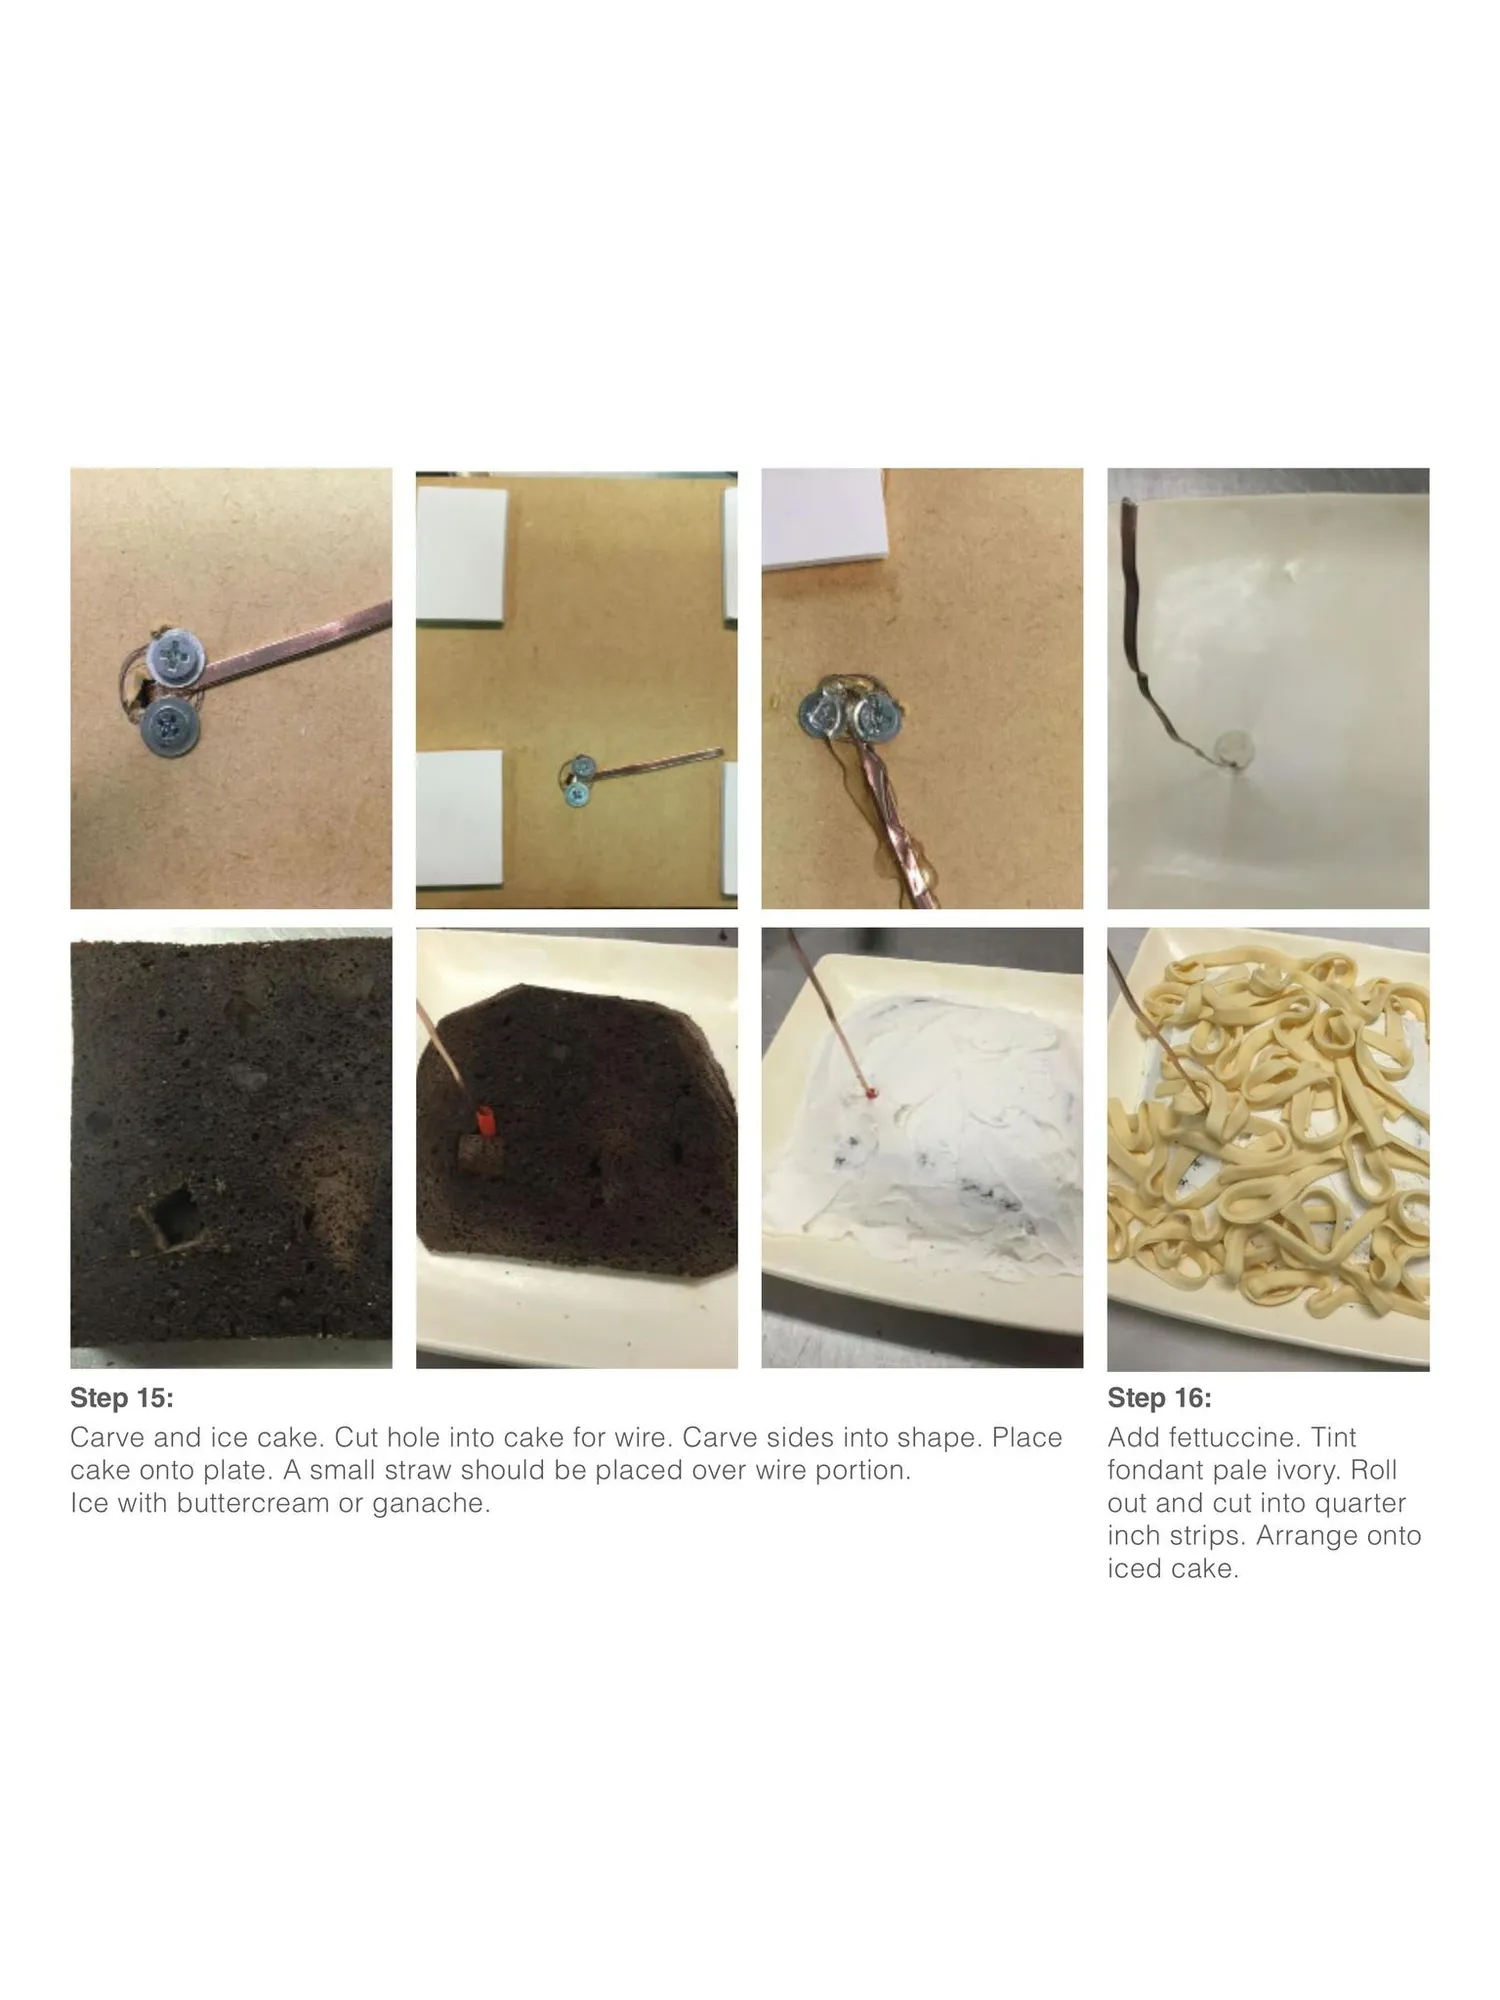
Step 15: Carve and ice cake. Cut hole into cake for wire. Carve sides into shape. Place cake onto plate. A small straw should be placed over wire portion. Ice with buttercream or ganache. Step 16: Add fettuccine. Tint fondant pale ivory. Roll out and cut into quarter inch strips. Arrange onto iced cake.
Page 61 text
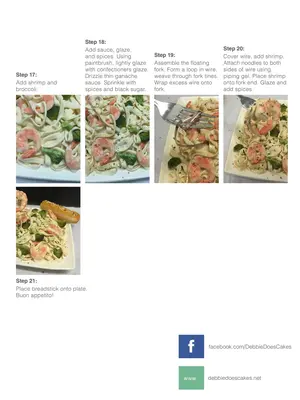
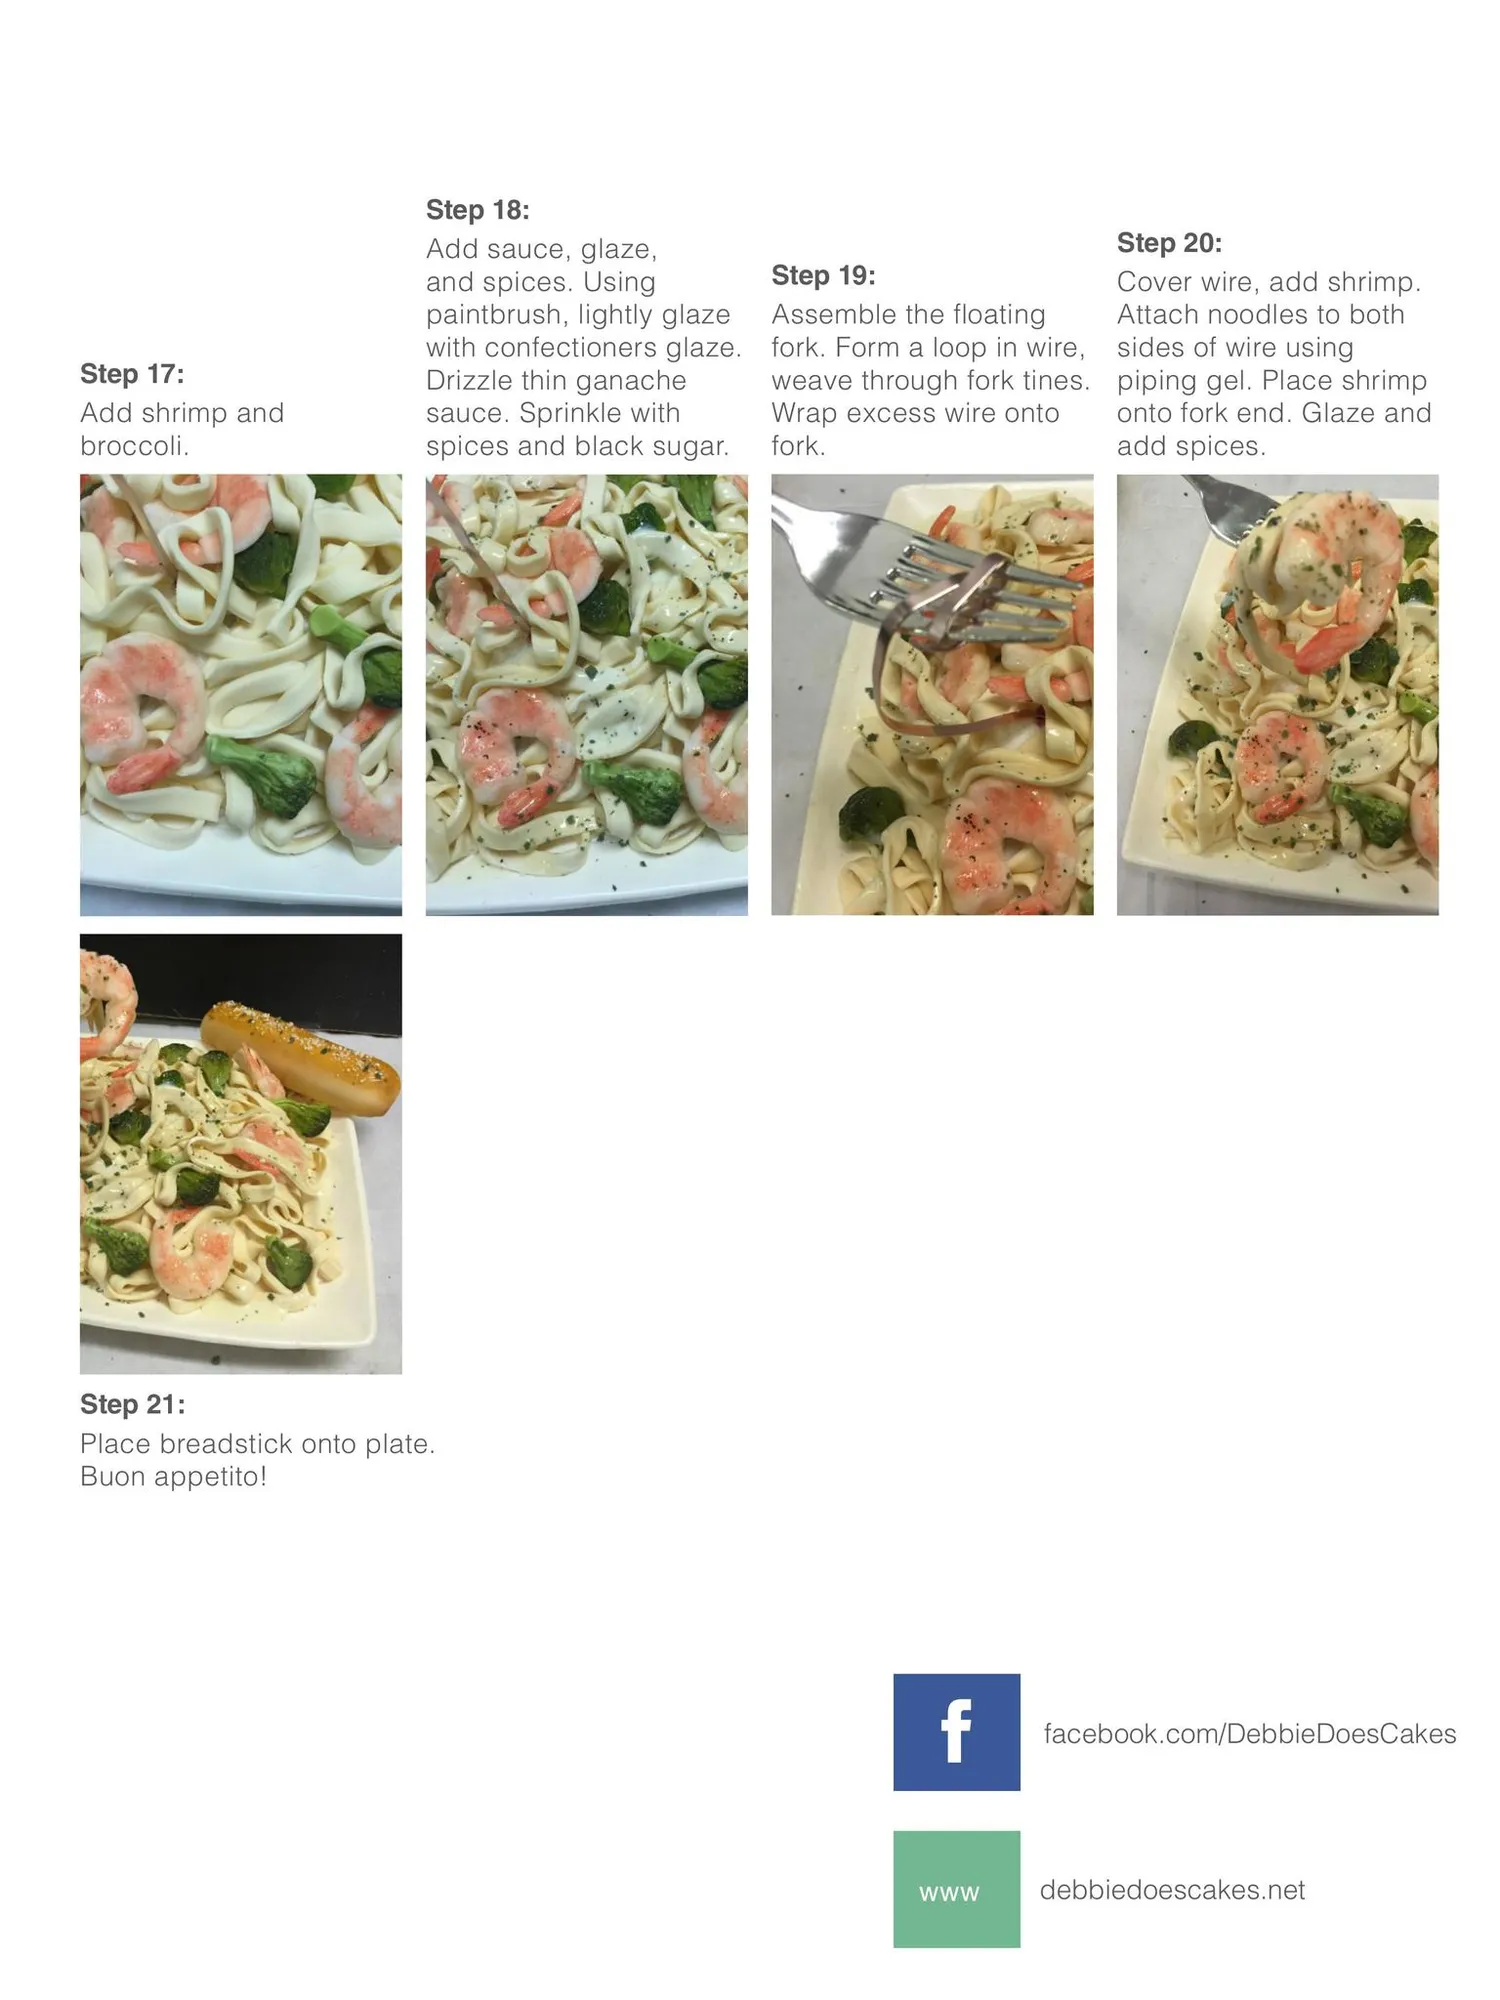
Step 17: Add shrimp and broccoli. Step 18: Add sauce, glaze, and spices. Using paintbrush, lightly glaze with confectioners glaze. Drizzle thin ganache sauce. Sprinkle with spices and black sugar. Step 20: Step 19: Cover wire, add shrimp. Assemble the floating Attach noodles to both fork. Form a loop in wire, sides of wire using weave through fork tines. piping gel. Place shrimp Wrap excess wire onto onto fork end. Glaze and fork. add spices. Step 21: Place breadstick onto plate. Buon appetito! f www facebook.com/DebbieDoesCakes debbiedoescakes.net
Page 62 text
CAKE DECORATOR INSURANCE $10m Public & Products Liability $380 PER YEAR FOR ACDN MEMBERS $450 per year for Non-ACDN Members (Insurance subject to acceptance criteria) To arrange cover or for more information visit www.redstar


Page 63 text
REDSTAR insurancebrokers CAKEDECORATORINSURANCE $1Om Public & Products Liability $38O PER YEAR FOR ACDN MEMBERS $450 per year for Non-ACDN Members (Insurance subject to acceptance criteria) To arrange cover or for more information visit www.redstarinsurance.com.au/cake Red Star Insurance Pty Ltd (AFSL 444803) T&C apply, see website for details. The Australian Cake Decorating Network Pty Ltd does not provide any advice regarding insurance matters. Please contact Red Star Insurance Brokers on the above contact details to discuss your insurance requirements. REDSTAR insurancebroker PEDSTAR REDSTAR Affiliate Advertisement - see website for details www.austcakedecoratingnetwork.com/insurance
Page 64 text
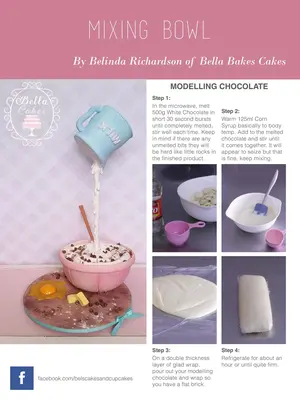
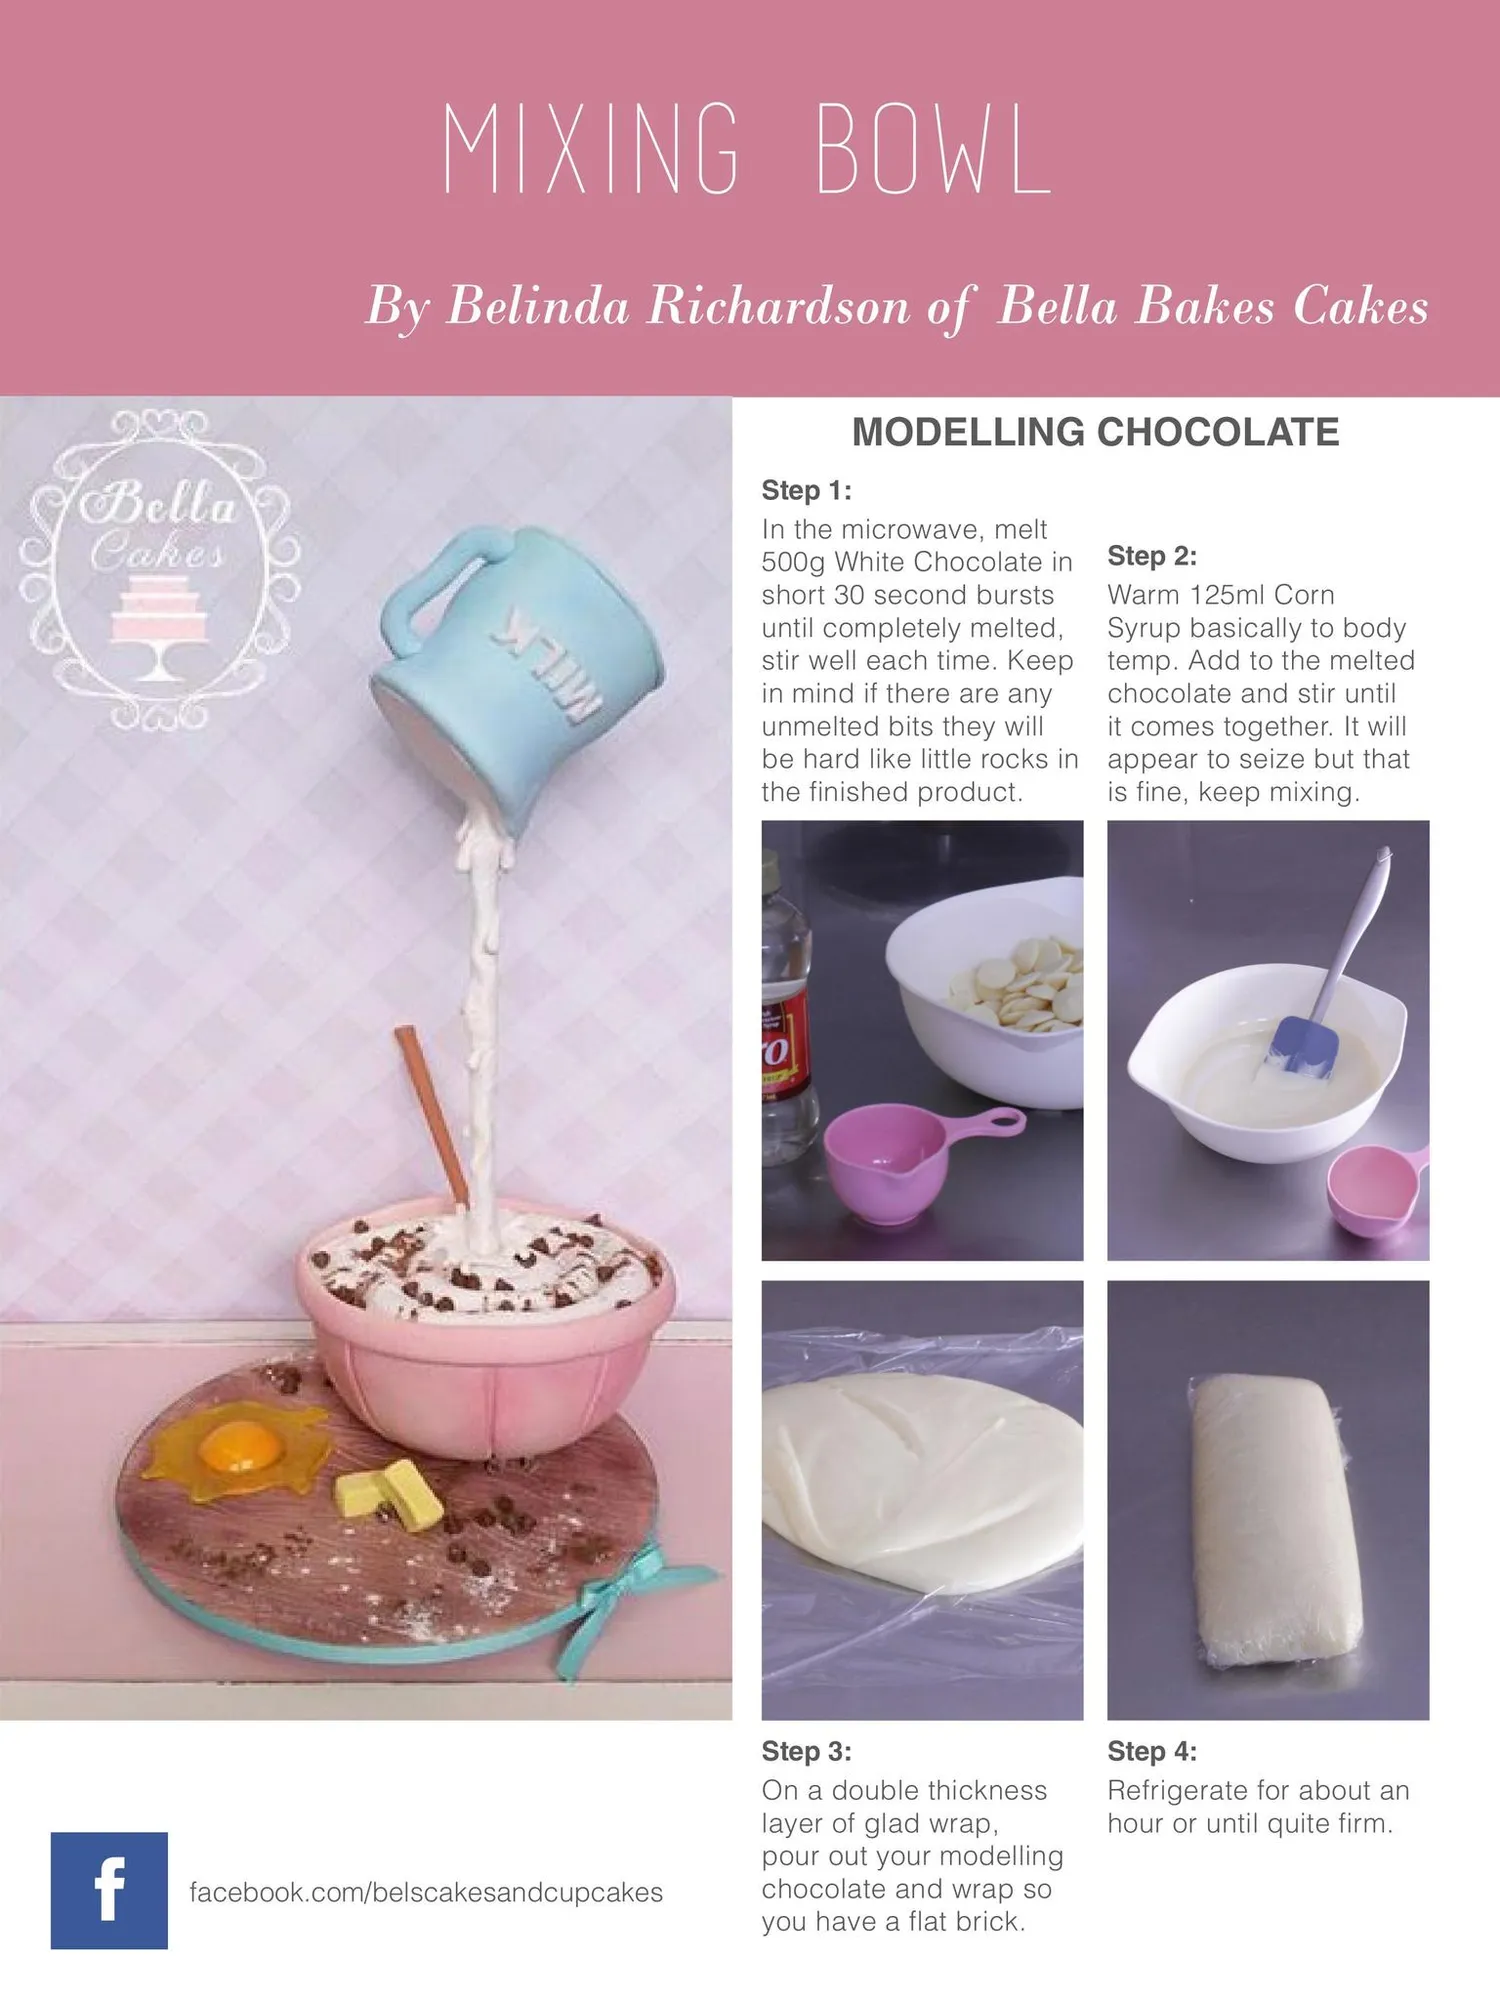
Mixing Bowl By Belinda Richardson of Bella Bakes Cakes MODELLING CHOCOLATE Step 1: In the microwave, melt 500g White Chocolate in short 30 second bursts until completely melted, stir well each time. Keep in mind if there are any unmelted bits they will be hard like little rocks in the finished product. f facebook.com/belscakesandcupcakes Step 3: On a double thickness layer of glad wrap, pour out your modelling chocolate and wrap so you have a flat brick. Step 2: Warm 125ml Corn Syrup basically to body temp. Add to the melted chocolate and stir until it comes together. It will appear to seize but that is fine, keep mixing. Step 4: Refrigerate for about an hour or until quite firm.
Page 65 text
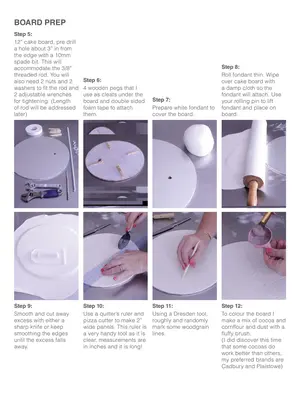
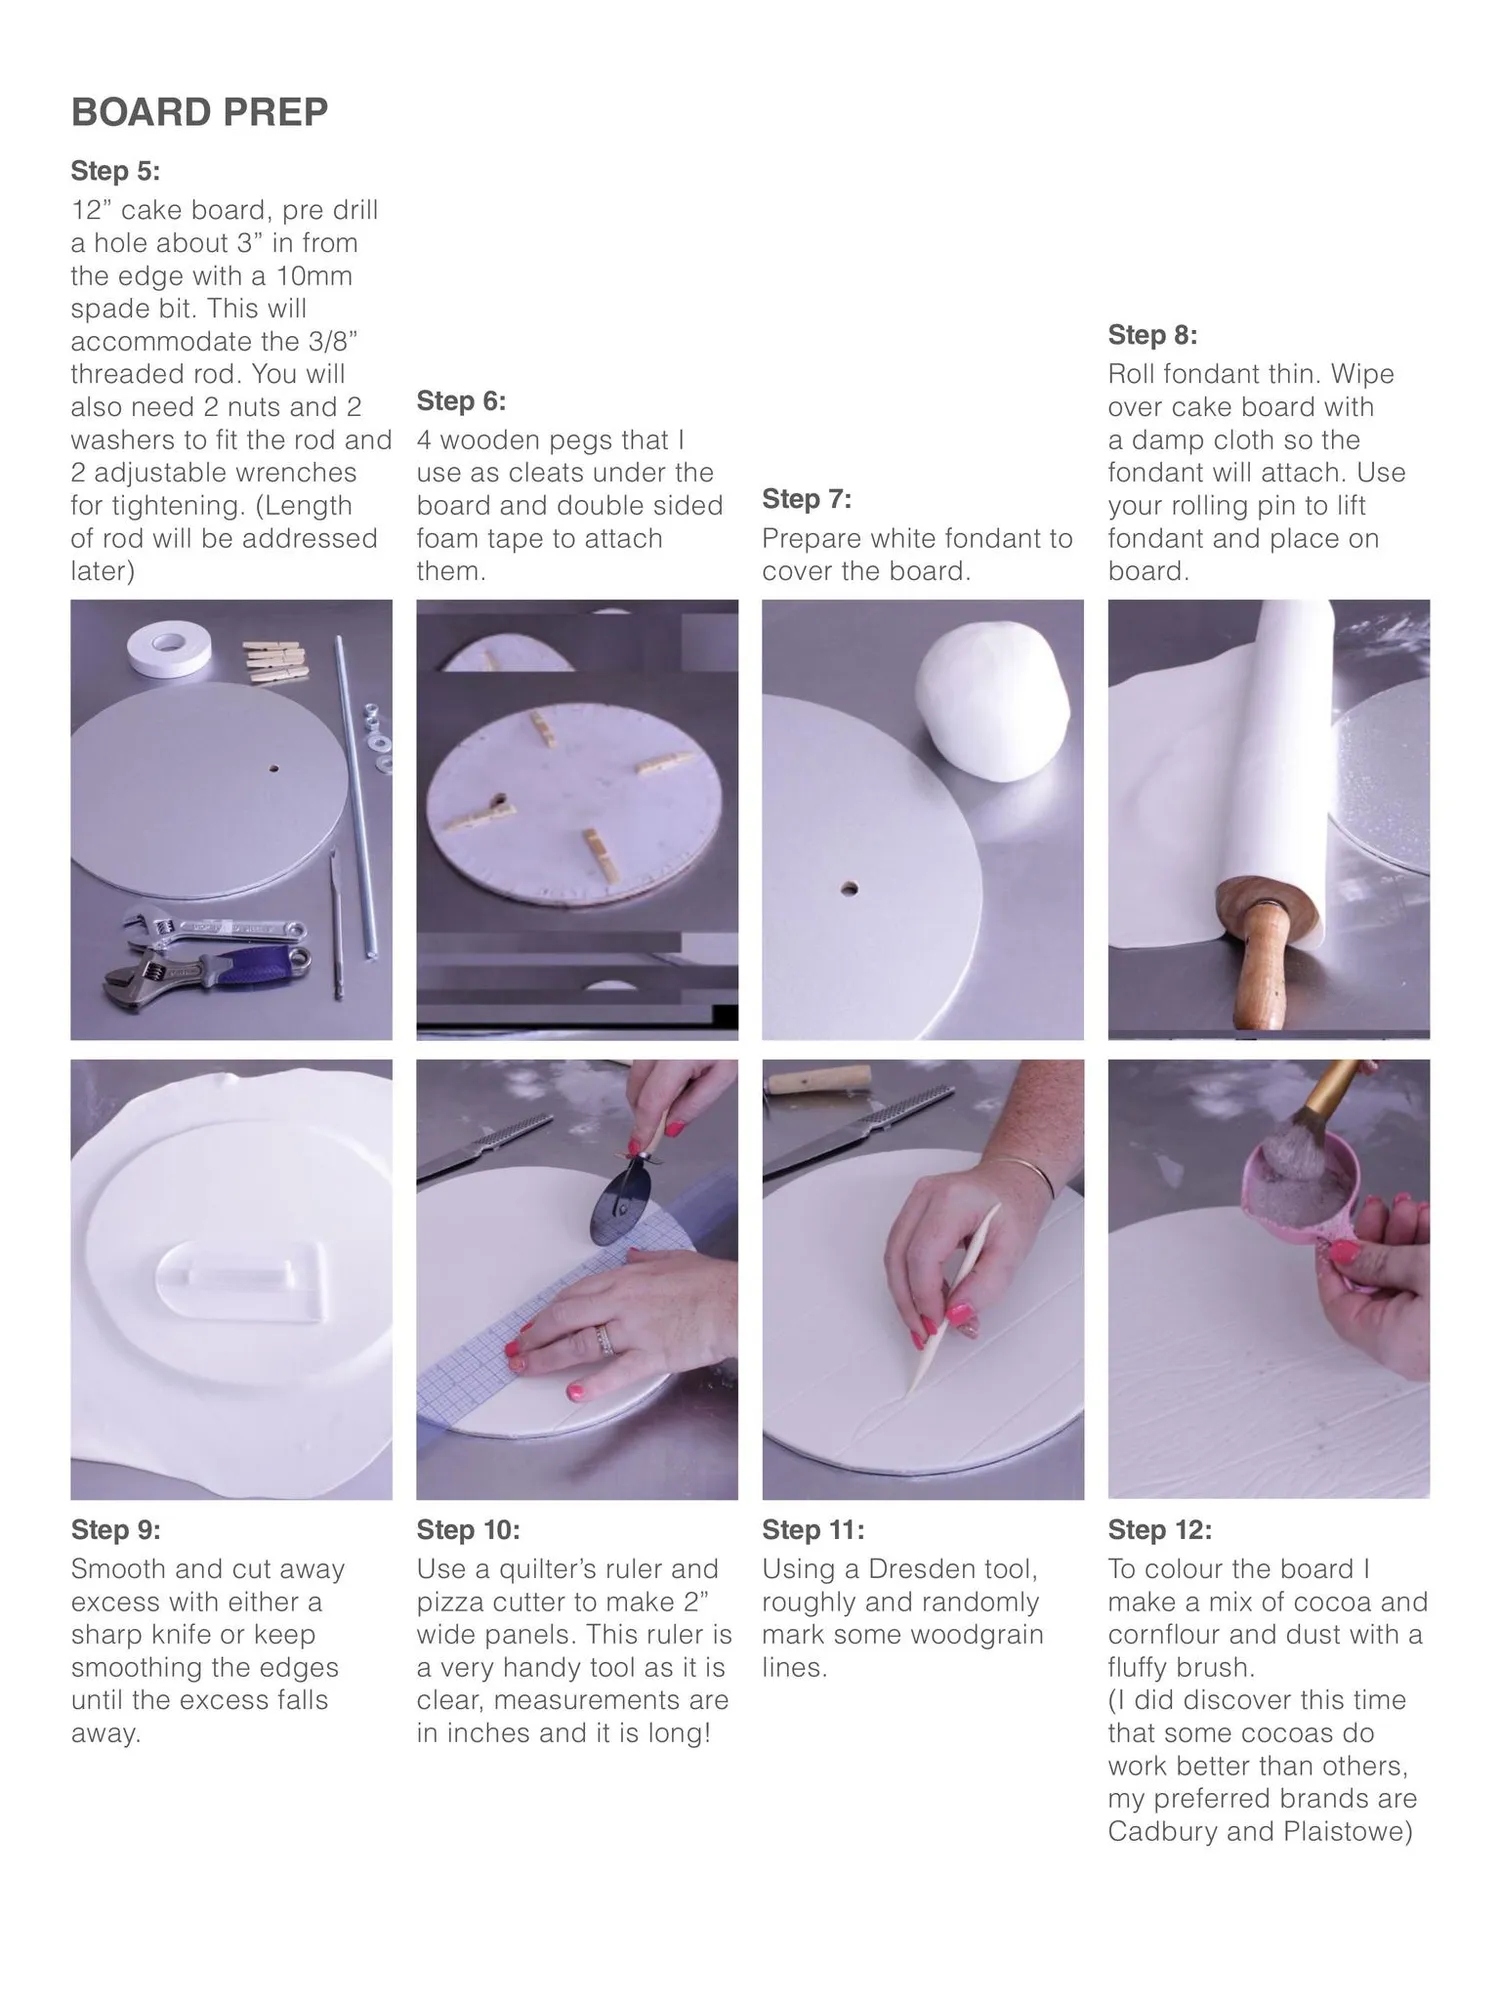
BOARD PREP Step 5: 12” cake board, pre drill a hole about 3” in from the edge with a 10mm spade bit. This will accommodate the 3/8” threaded rod. You will also need 2 nuts and 2 washers to fit the rod and 2 adjustable wrenches for tightening. (Length of rod will be addressed later) Step 6: 4 wooden pegs that I use as cleats under the board and double sided foam tape to attach them. Step 9: Smooth and cut away excess with either a sharp knife or keep smoothing the edges until the excess falls away. Step 10: Use a quilter’s ruler and pizza cutter to make 2” wide panels. This ruler is a very handy tool as it is clear, measurements are in inches and it is long! Step 7: Prepare white fondant to cover the board. Step 11: Using a Dresden tool, roughly and randomly mark some woodgrain lines. Step 8: Roll fondant thin. Wipe over cake board with a damp cloth so the fondant will attach. Use your rolling pin to lift fondant and place on board. Step 12: To colour the board I make a mix of cocoa and cornflour and dust with a fluffy brush. (I did discover this time that some cocoas do work better than others, my preferred brands are Cadbury and Plaistowe)
Page 66 text
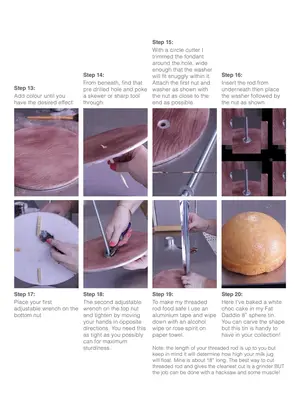
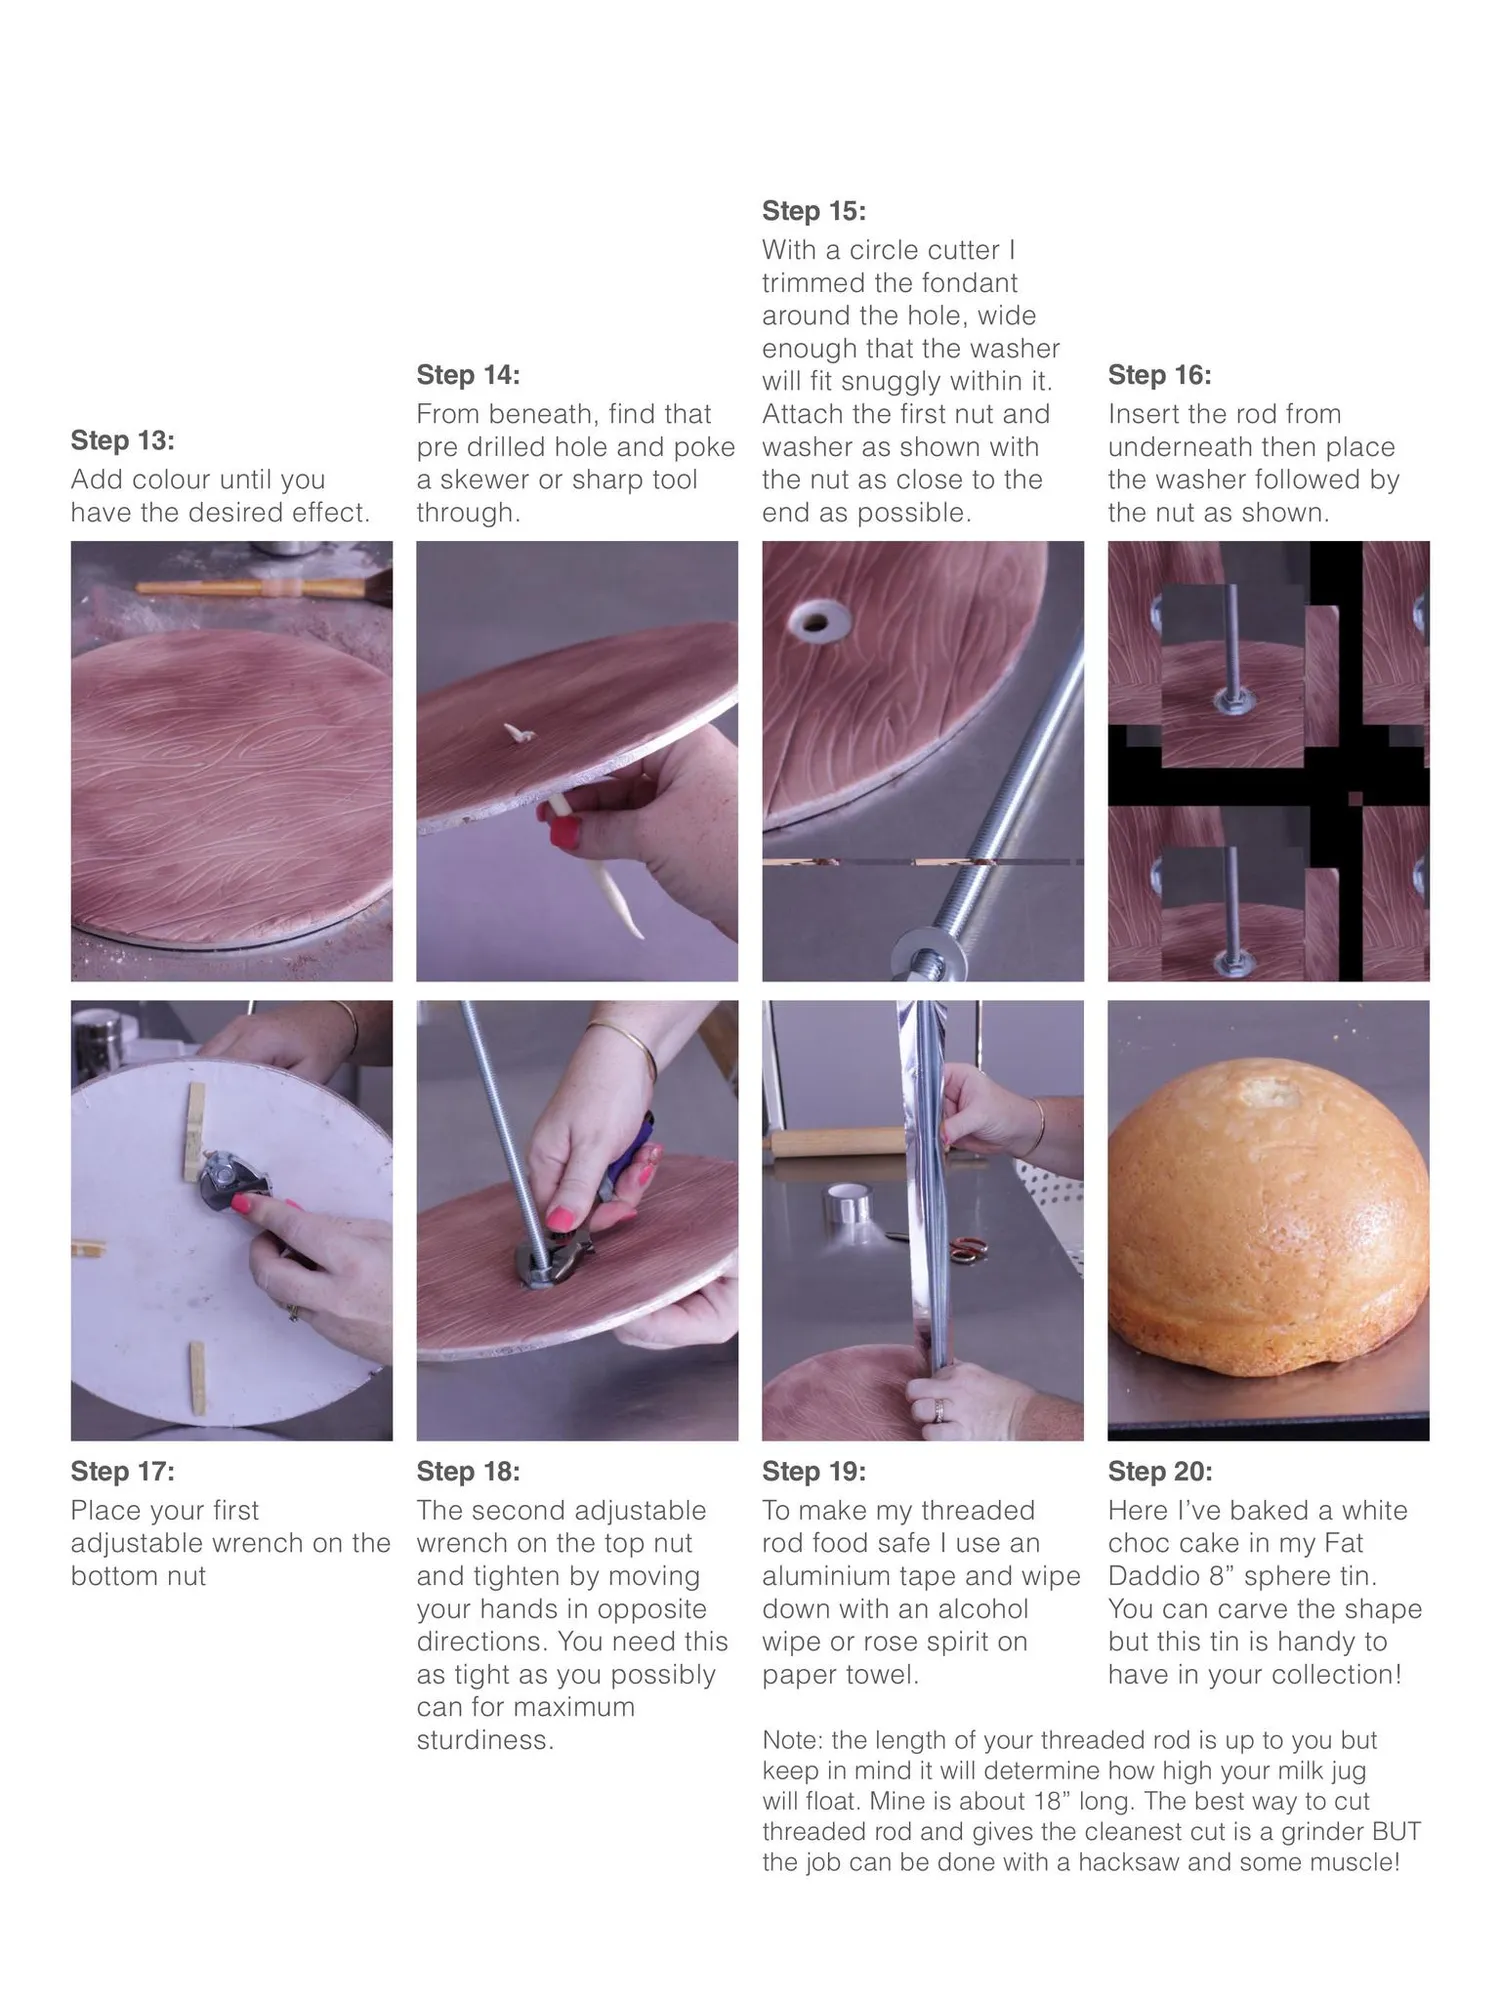
Step 13: Add colour until you have the desired effect. Step 15: With a circle cutter I trimmed the fondant around the hole, wide enough that the washer Step 14: will fit snuggly within it. From beneath, find that Attach the first nut and pre drilled hole and poke washer as shown with a skewer or sharp tool the nut as close to the through. end as possible. Step 17: Step 18: Place your first The second adjustable adjustable wrench on the wrench on the top nut bottom nut and tighten by moving your hands in opposite directions. You need this as tight as you possibly can for maximum sturdiness. Step 19: To make my threaded rod food safe I use an aluminium tape and wipe down with an alcohol wipe or rose spirit on paper towel. Step 16: Insert the rod from underneath then place the washer followed by the nut as shown. Step 20: Here I’ve baked a white choc cake in my Fat Daddio 8” sphere tin. You can carve the shape but this tin is handy to have in your collection! Note: the length of your threaded rod is up to you but keep in mind it will determine how high your milk jug will float. Mine is about 18” long. The best way to cut threaded rod and gives the cleanest cut is a grinder BUT the job can be done with a hacksaw and some muscle!
Page 67 text
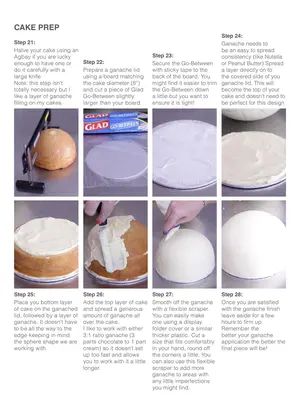
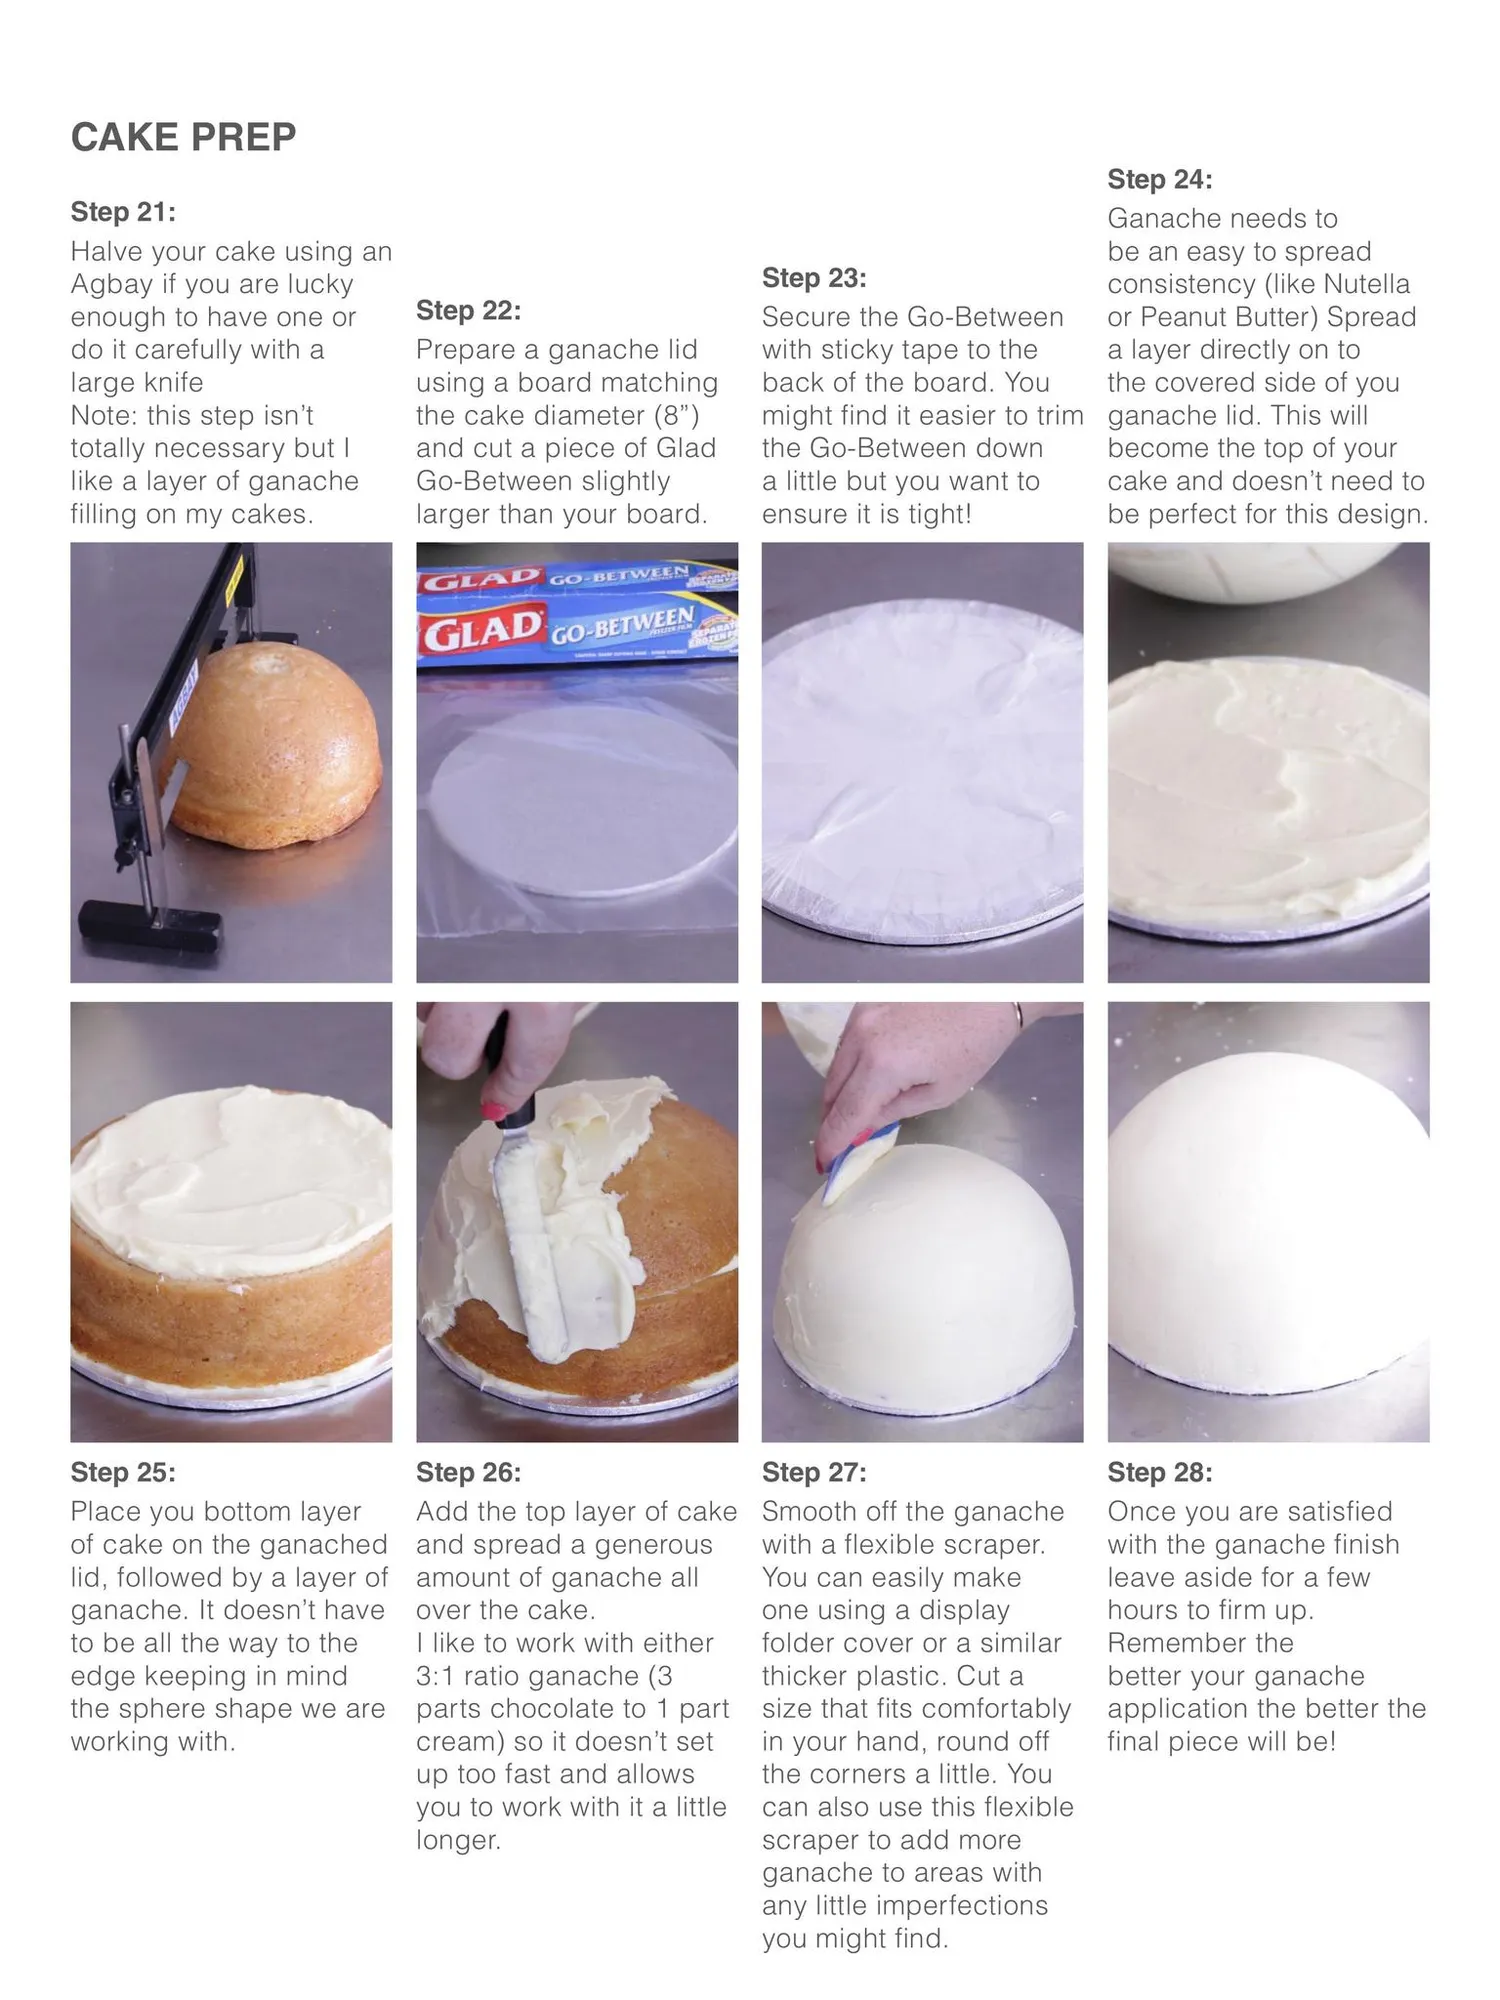
CAKE PREP Step 21: Halve your cake using an Agbay if you are lucky enough to have one or do it carefully with a large knife Note: this step isn’t totally necessary but I like a layer of ganache filling on my cakes. Step 25: Place you bottom layer of cake on the ganached lid, followed by a layer of ganache. It doesn’t have to be all the way to the edge keeping in mind the sphere shape we are working with. Step 22: Prepare a ganache lid using a board matching the cake diameter (8”) and cut a piece of Glad Go-Between slightly larger than your board. Step 26: Add the top layer of cake and spread a generous amount of ganache all over the cake. I like to work with either 3:1 ratio ganache (3 parts chocolate to 1 part cream) so it doesn’t set up too fast and allows you to work with it a little longer. Step 24: Ganache needs to be an easy to spread Step 23: consistency (like Nutella Secure the Go-Between or Peanut Butter) Spread with sticky tape to the a layer directly on to the covered side of you back of the board. You might find it easier to trim ganache lid. This will the Go-Between down become the top of your a little but you want to cake and doesn’t need to ensure it is tight! be perfect for this design. Step 27: Smooth off the ganache with a flexible scraper. You can easily make one using a display folder cover or a similar thicker plastic. Cut a size that fits comfortably in your hand, round off the corners a little. You can also use this flexible scraper to add more ganache to areas with any little imperfections you might find. Step 28: Once you are satisfied with the ganache finish leave aside for a few hours to firm up. Remember the better your ganache application the better the final piece will be!
Page 68 text
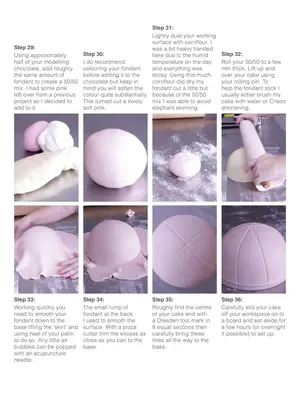
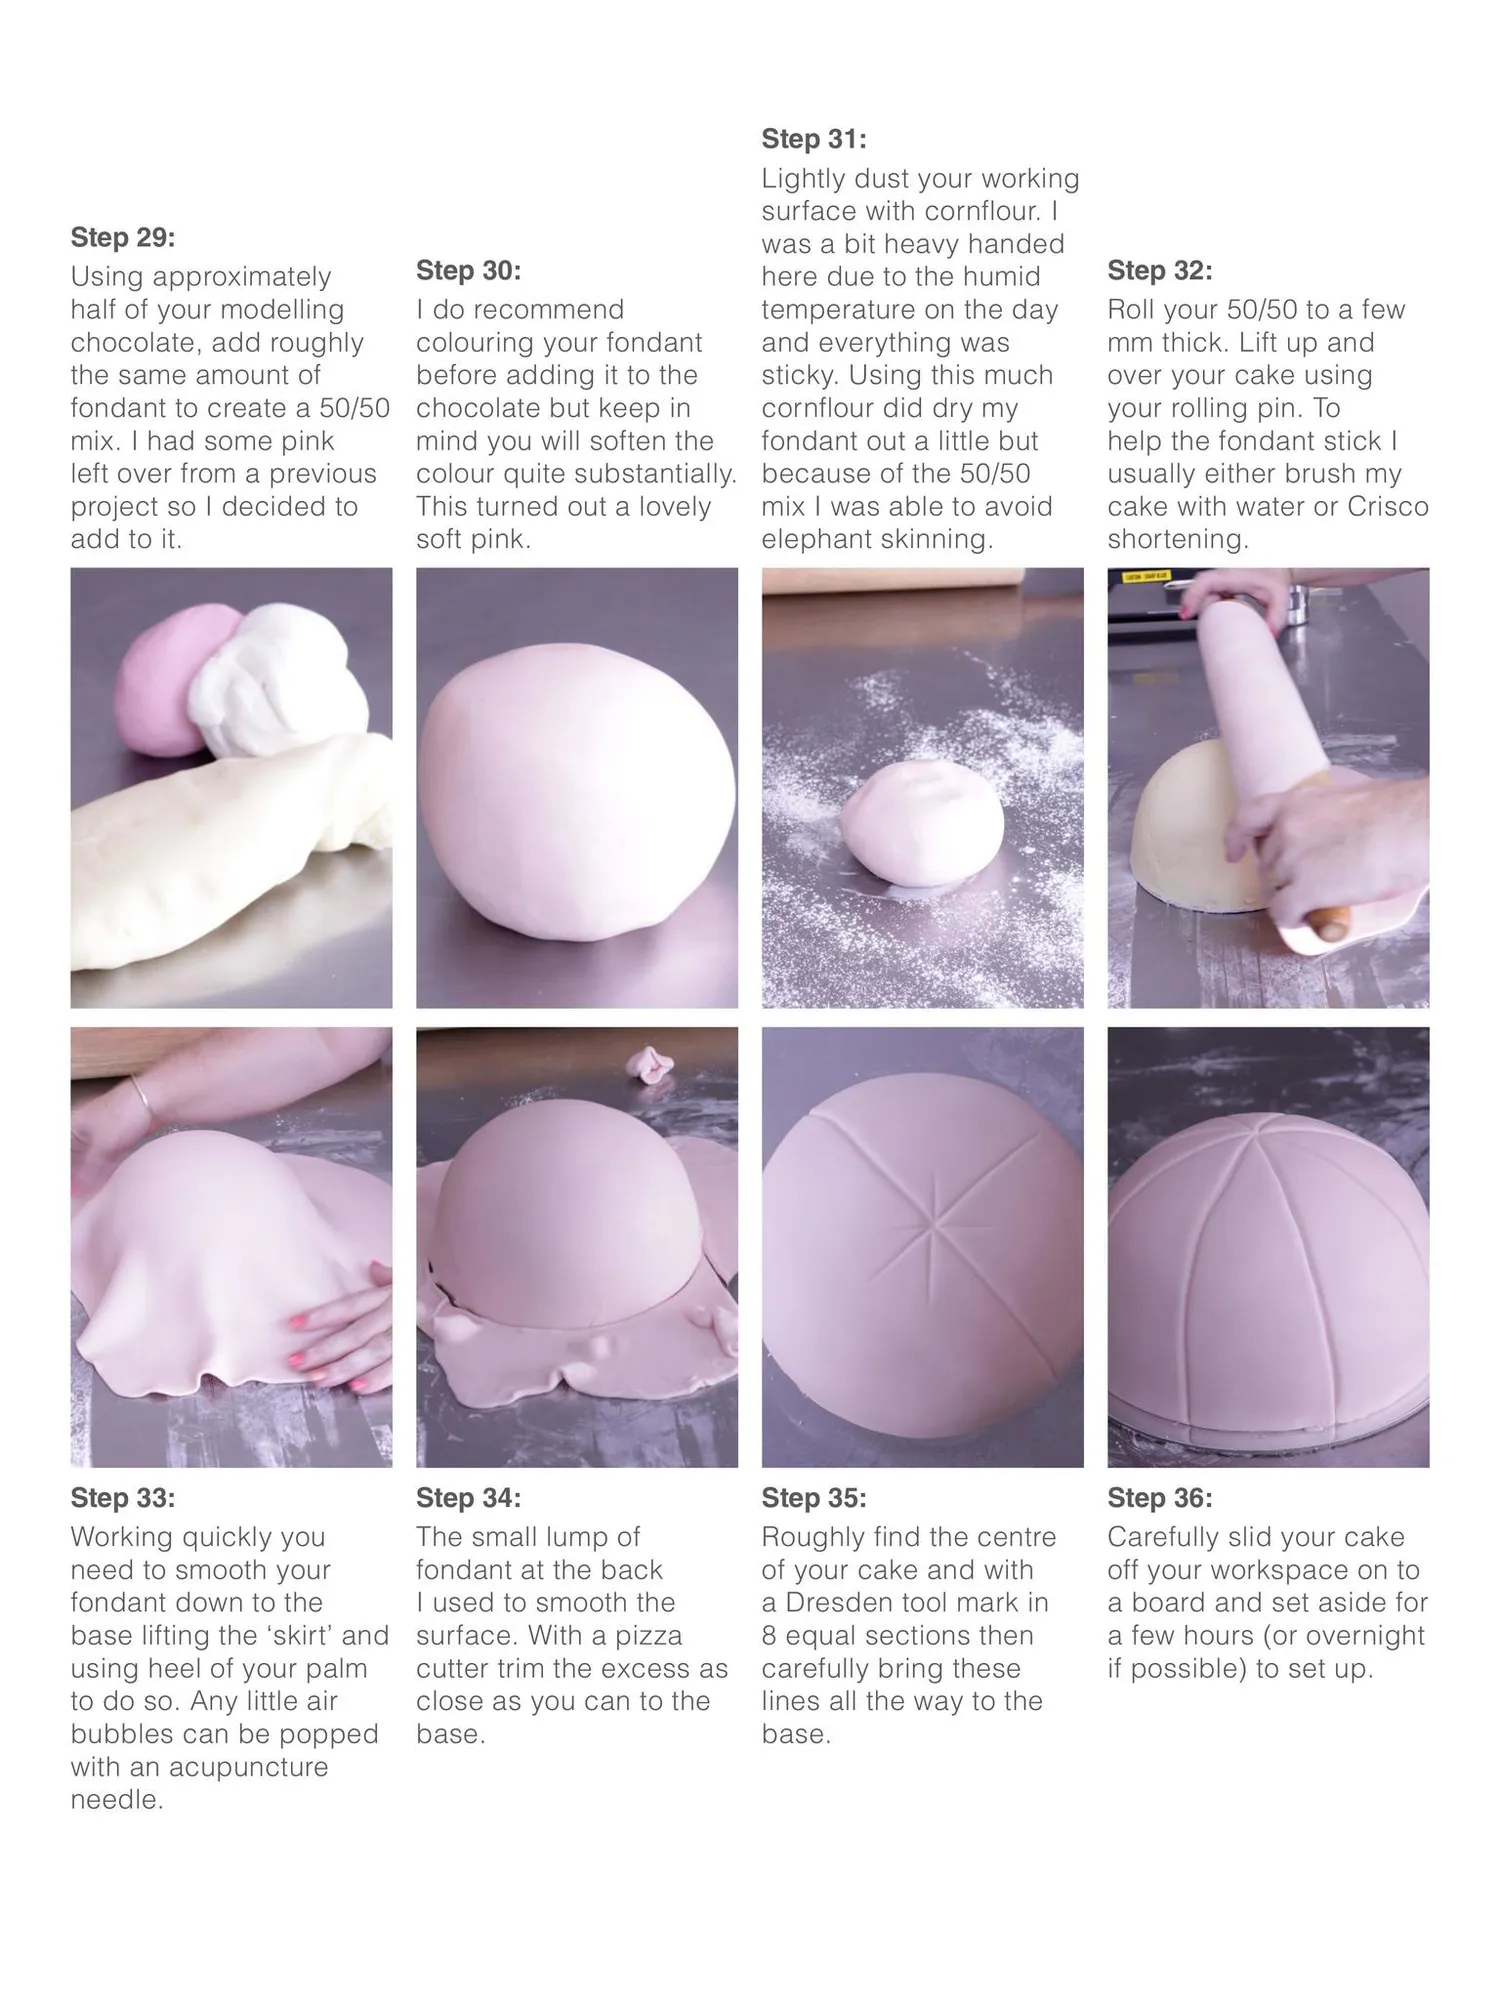
Step 31: Lightly dust your working surface with cornflour. 1 Step 29: was a bit heavy handed Step 30: here due to the humid Step 32: Using approximately half of your modelling I dorecommend temperature on the day Roll your50/50toafew chocolate, add roughly colouring your fondant and everything was mm thick. Lift up and the same amount of before adding it tothe sticky. Using this much over your cake using fondantto create a 50/50 chocolate but keep in cornflour did dry my your rolling pin. To mix.I had some pink mind you will soften the fondant out a little but help thefondant stickI leftoverfrom aprevious becauseofthe50/50 colour quite substantially. usually either brush my project so I decided to This turned out a lovely mix I was able to avoid cake with water or Crisco elephant skinning. soft pink. add to it. shortening. Step 33: Step 34: Step 35: Step 36: Working quickly you The small lump of Roughly find the centre Carefully slidyourcake fondant at the back need to smooth your of yourcake and with off your workspace onto fondant down to the I used to smooth the a Dresden toolmarkin a board and set aside for base lifting the 'skirt'and surface. With a pizza 8 equal sections then a few hours (or overnight cuttertrim the excess as usingheel ofyourpalm carefully bring these if possible) to set up. to do so. Any little air close asyou cantothe lines all the way to the bubbles can bepopped base. base. with an acupuncture needle.
Page 69 text
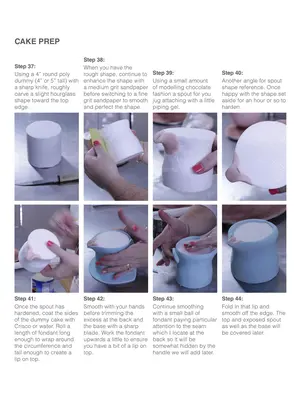
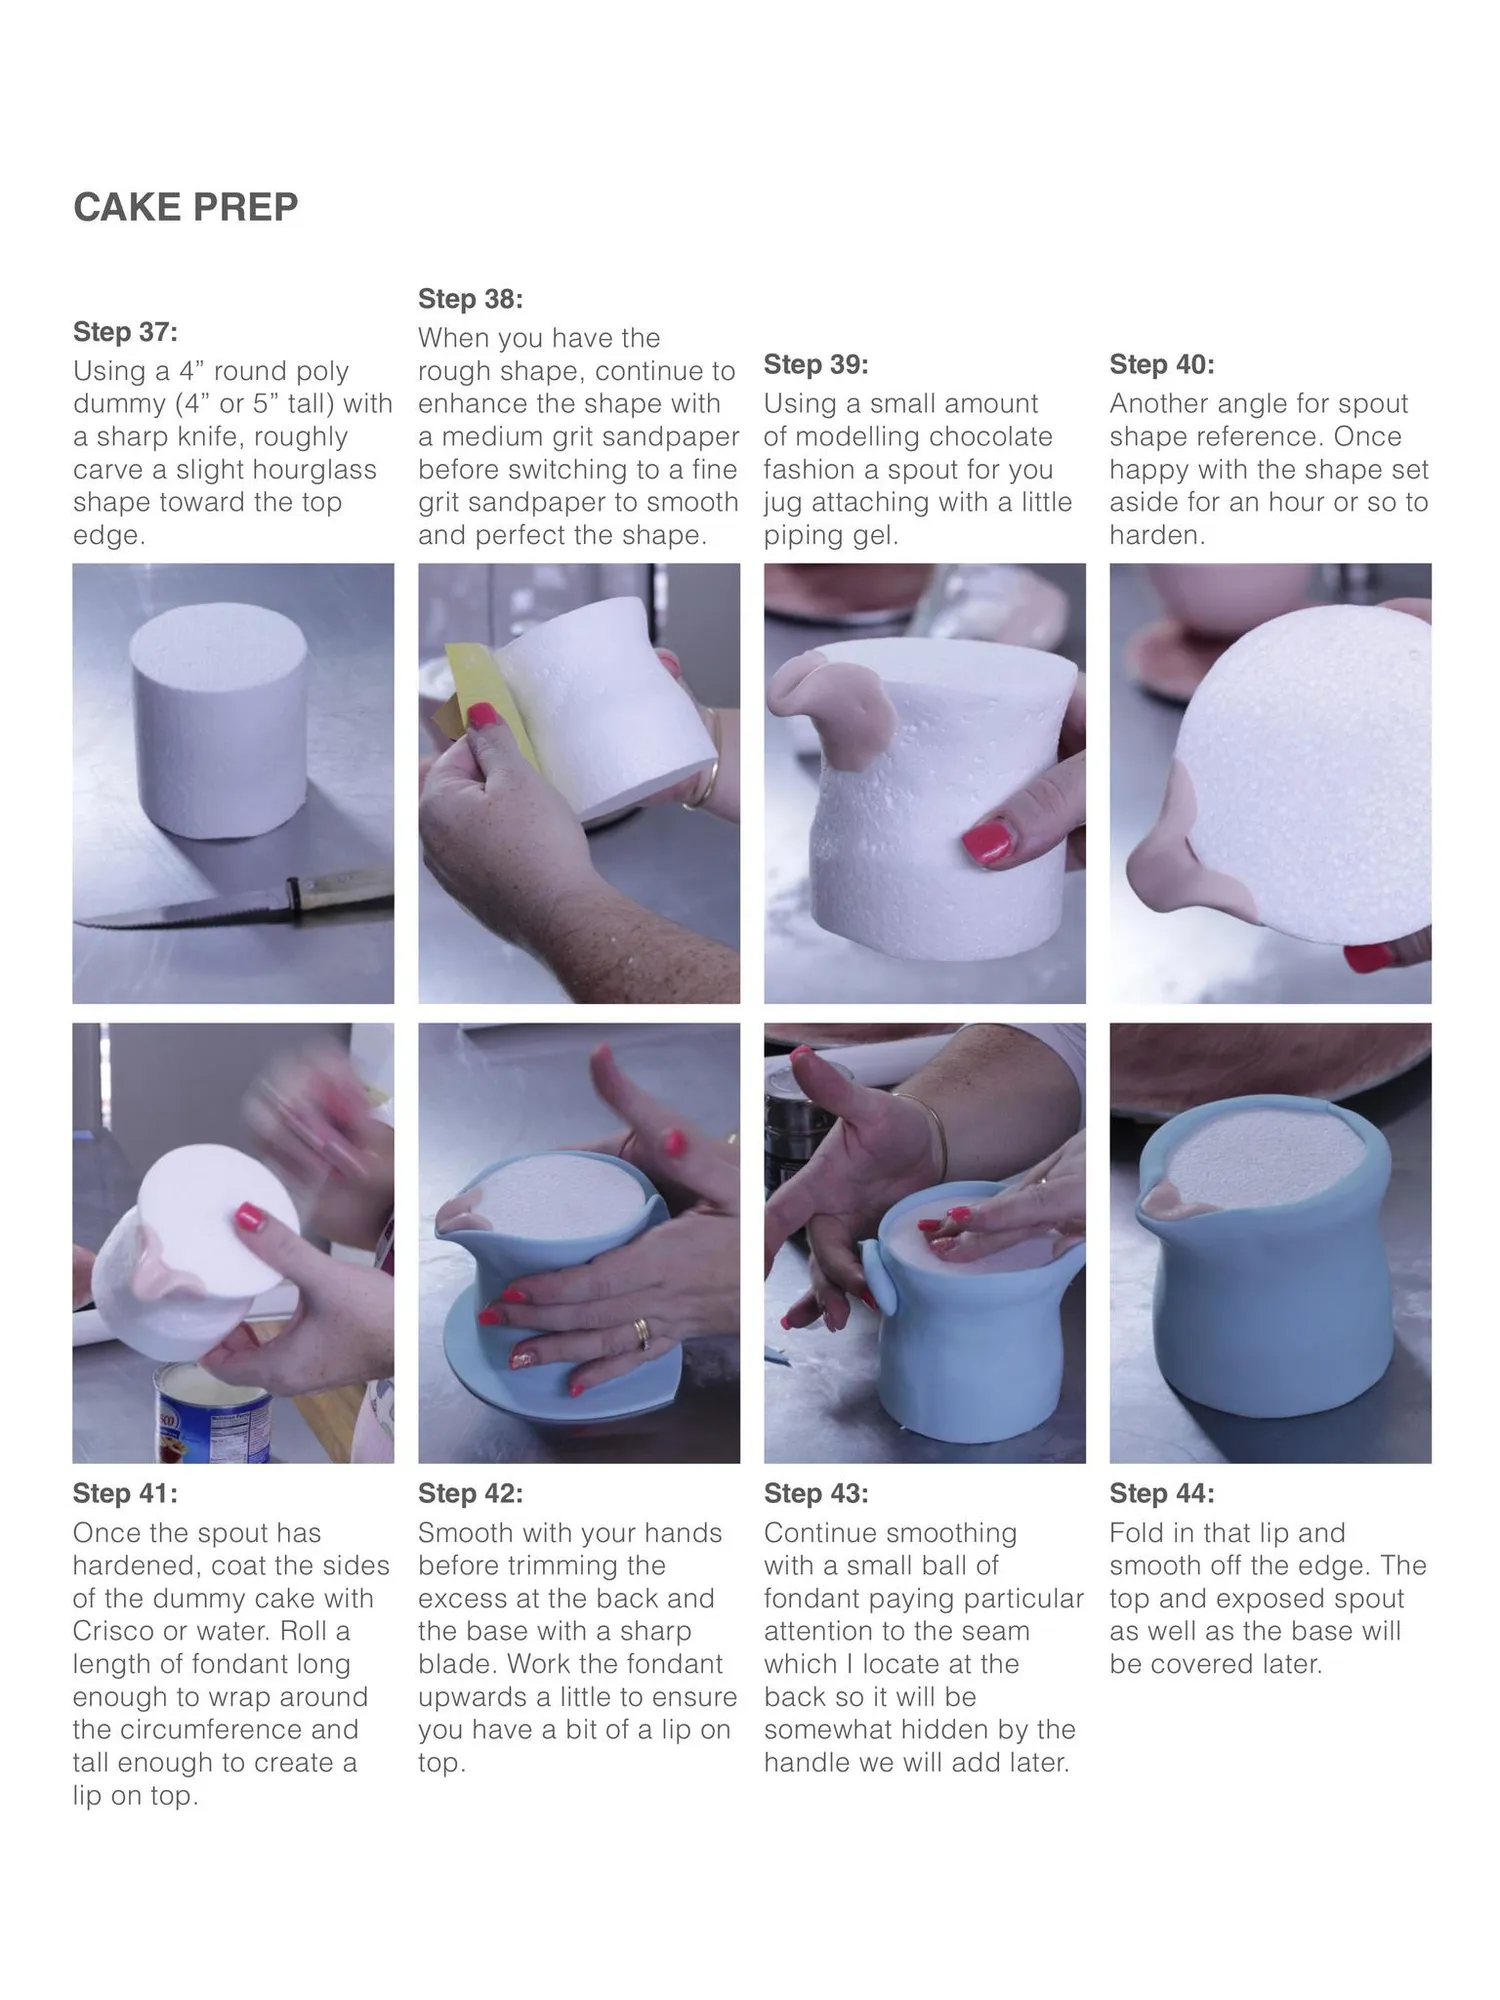
CAKE PREP Step 38: Step 37: When you have the Using a 4” round poly rough shape, continue to dummy (4” or 5” tall) with enhance the shape with a sharp knife, roughly a medium grit sandpaper carve a slight hourglass before switching to a fine shape toward the top grit sandpaper to smooth edge. and perfect the shape. Step 41: Once the spout has hardened, coat the sides of the dummy cake with Crisco or water. Roll a length of fondant long enough to wrap around the circumference and tall enough to create a lip on top. Step 42: Smooth with your hands before trimming the excess at the back and the base with a sharp blade. Work the fondant upwards a little to ensure you have a bit of a lip on top. Step 39: Using a small amount of modelling chocolate fashion a spout for you jug attaching with a little piping gel. Step 40: Another angle for spout shape reference. Once happy with the shape set aside for an hour or so to harden. Step 43: Continue smoothing with a small ball of fondant paying particular attention to the seam which I locate at the back so it will be somewhat hidden by the handle we will add later. Step 44: Fold in that lip and smooth off the edge. The top and exposed spout as well as the base will be covered later.
Page 70 text
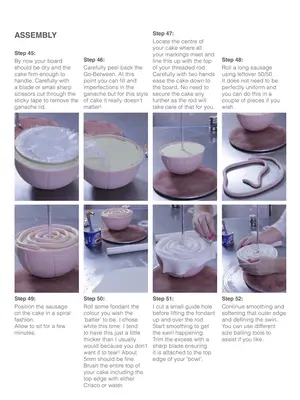
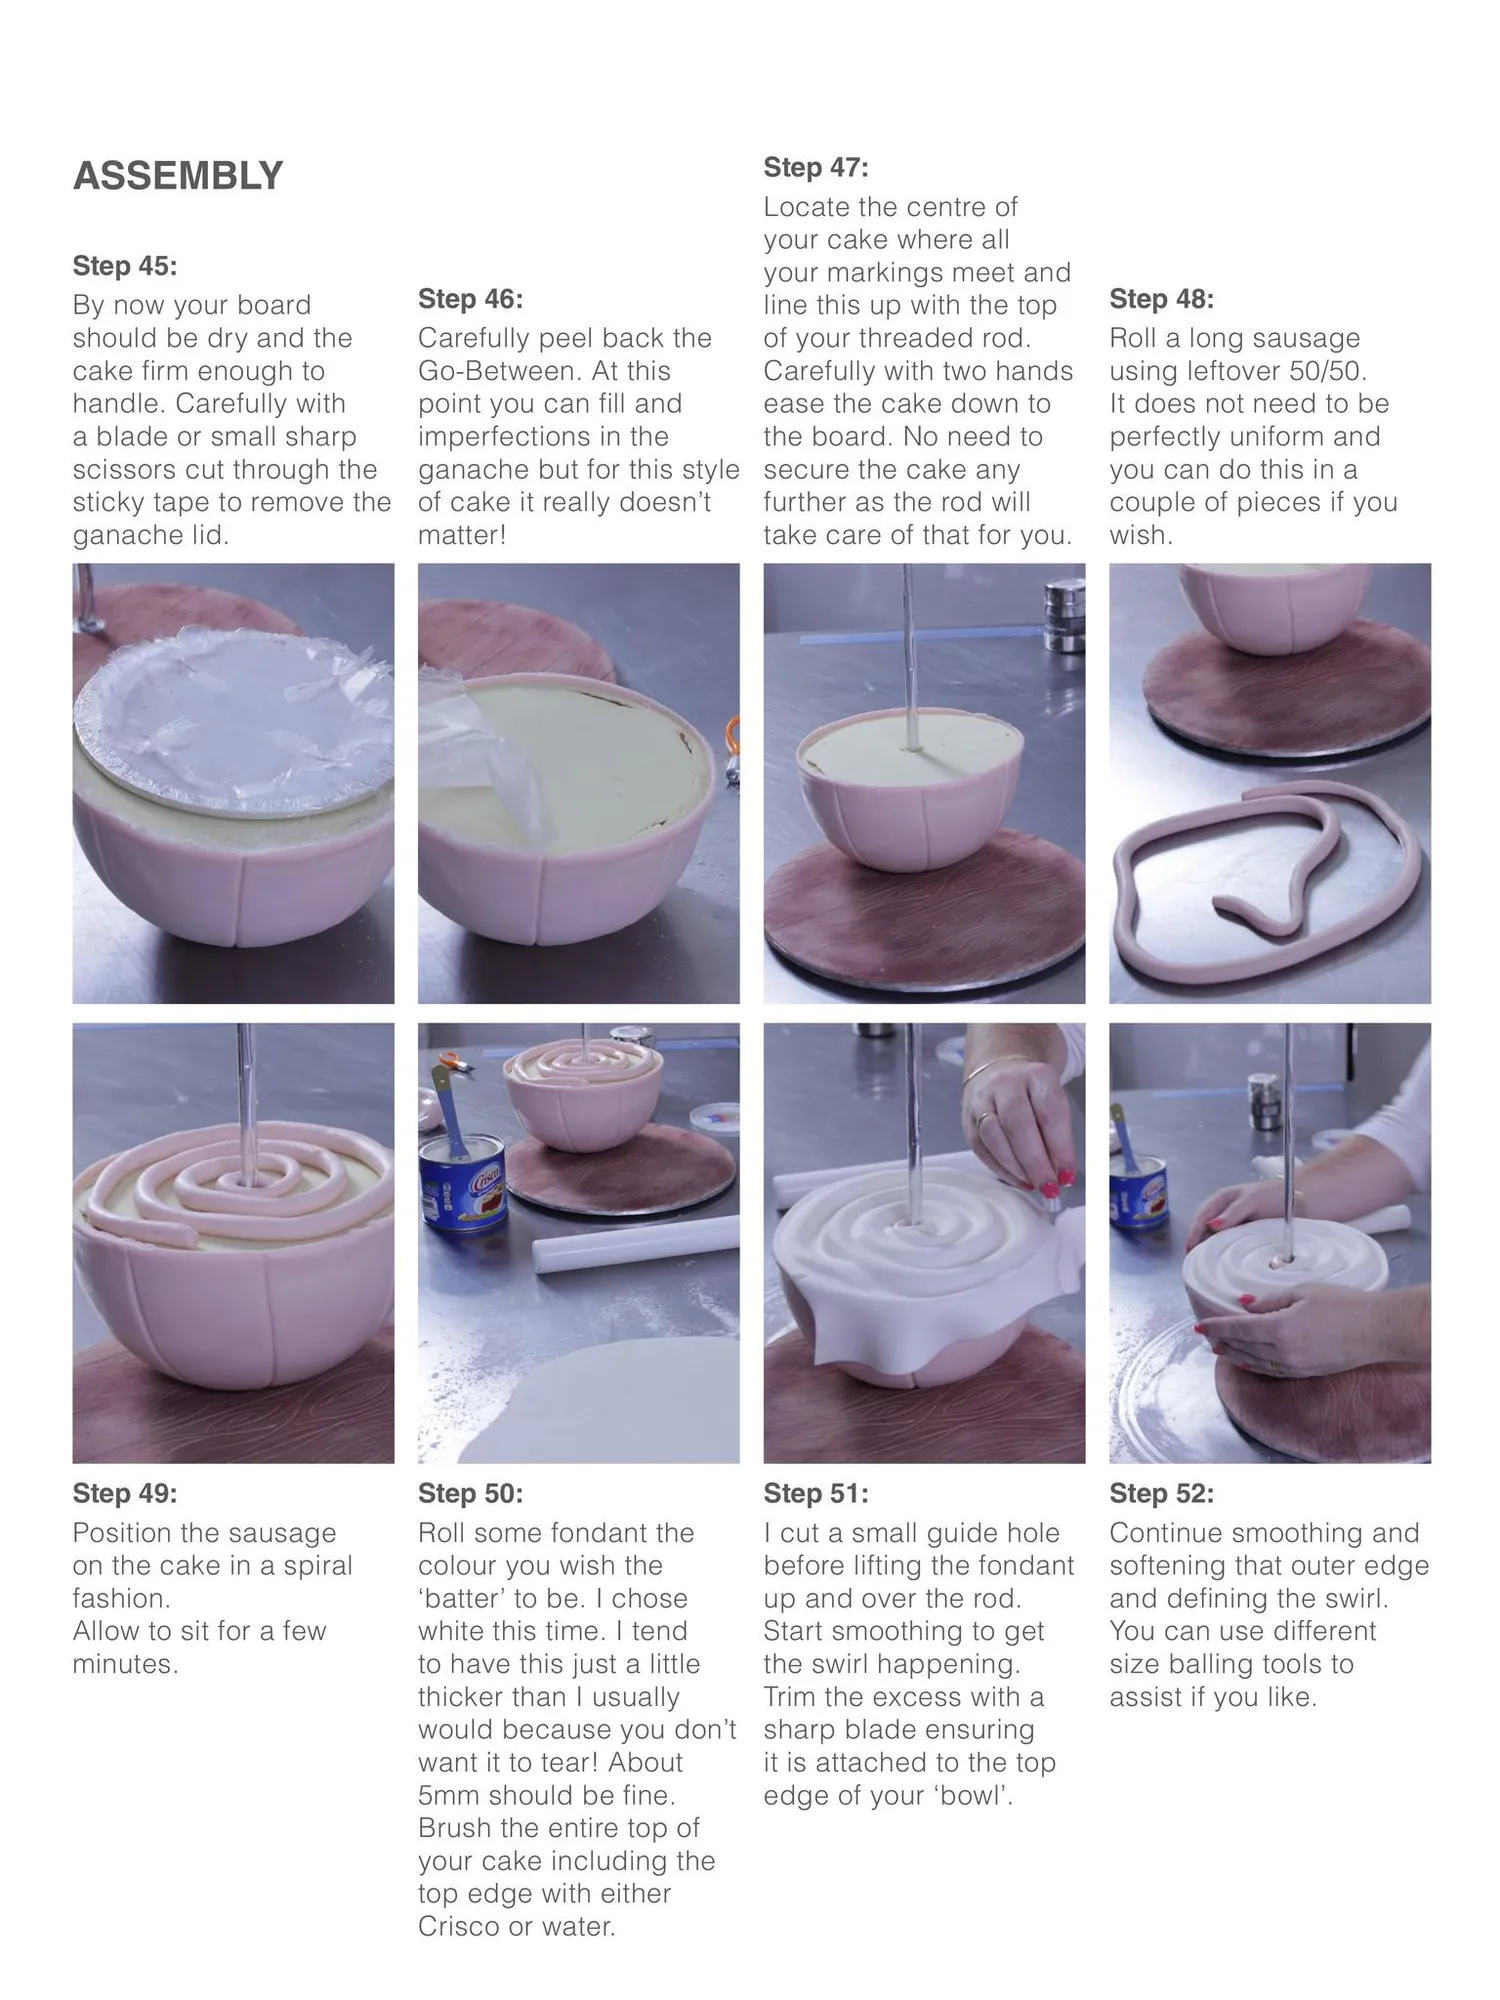
Step 47: Locate the centre of your cake where all Step 45: your markings meet and Step 46: By now your board line this up with the top should be dry and the Carefully peel back the of your threaded rod. cake firm enough to Go-Between. At this Carefully with two hands handle. Carefully with point you can fill and ease the cake down to a blade or small sharp imperfections in the the board. No need to scissors cut through the ganache but for this style secure the cake any sticky tape to remove the of cake it really doesn’t further as the rod will ganache lid. matter! take care of that for you. ASSEMBLY Step 49: Position the sausage on the cake in a spiral fashion. Allow to sit for a few minutes. Step 50: Roll some fondant the colour you wish the ‘batter’ to be. I chose white this time. I tend to have this just a little thicker than I usually would because you don’t want it to tear! About 5mm should be fine. Brush the entire top of your cake including the top edge with either Crisco or water. Step 51: I cut a small guide hole before lifting the fondant up and over the rod. Start smoothing to get the swirl happening. Trim the excess with a sharp blade ensuring it is attached to the top edge of your ‘bowl’. Step 48: Roll a long sausage using leftover 50/50. It does not need to be perfectly uniform and you can do this in a couple of pieces if you wish. Step 52: Continue smoothing and softening that outer edge and defining the swirl. You can use different size balling tools to assist if you like.
Page 71 text
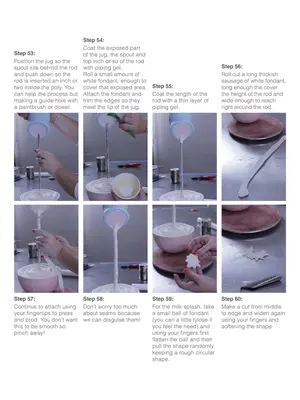
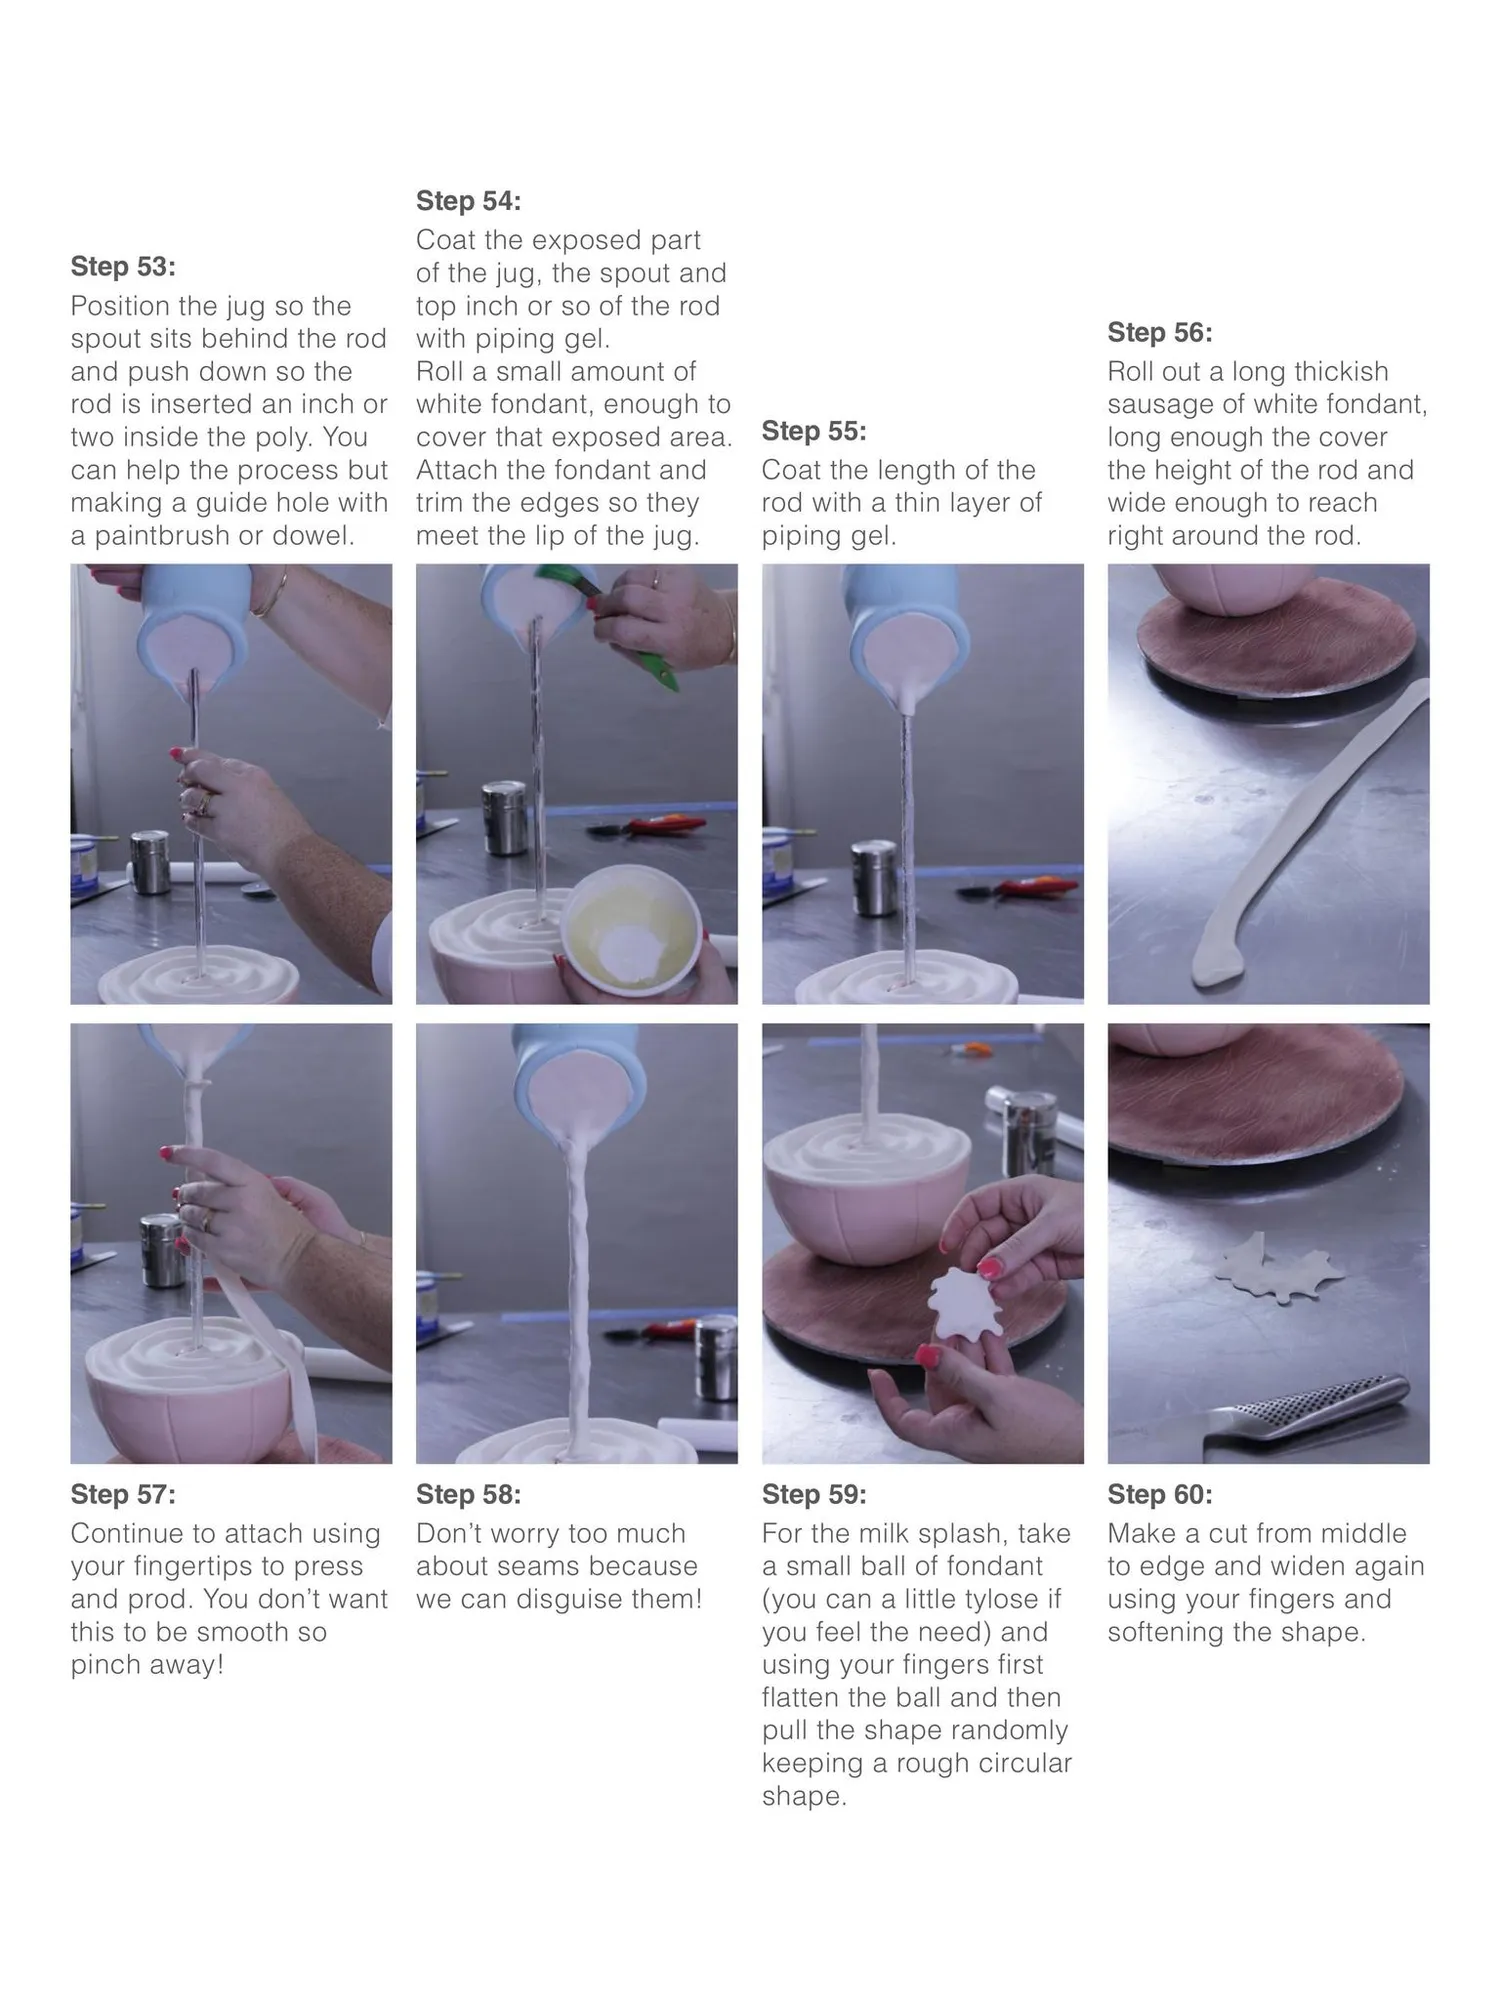
Step 53: Position the jug so the spout sits behind the rod and push down so the rod is inserted an inch or two inside the poly. You can help the process but making a guide hole with a paintbrush or dowel. Step 57: Continue to attach using your fingertips to press and prod. You don’t want this to be smooth so pinch away! Step 54: Coat the exposed part of the jug, the spout and top inch or so of the rod with piping gel. Roll a small amount of white fondant, enough to cover that exposed area. Attach the fondant and trim the edges so they meet the lip of the jug. Step 58: Don’t worry too much about seams because we can disguise them! Step 55: Coat the length of the rod with a thin layer of piping gel. Step 59: For the milk splash, take a small ball of fondant (you can a little tylose if you feel the need) and using your fingers first flatten the ball and then pull the shape randomly keeping a rough circular shape. Step 56: Roll out a long thickish sausage of white fondant, long enough the cover the height of the rod and wide enough to reach right around the rod. Step 60: Make a cut from middle to edge and widen again using your fingers and softening the shape.
Page 72 text
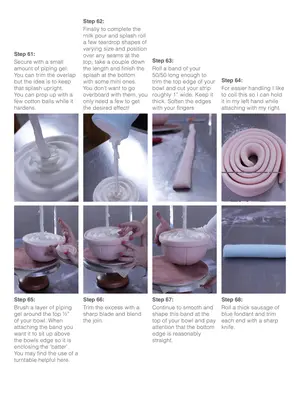
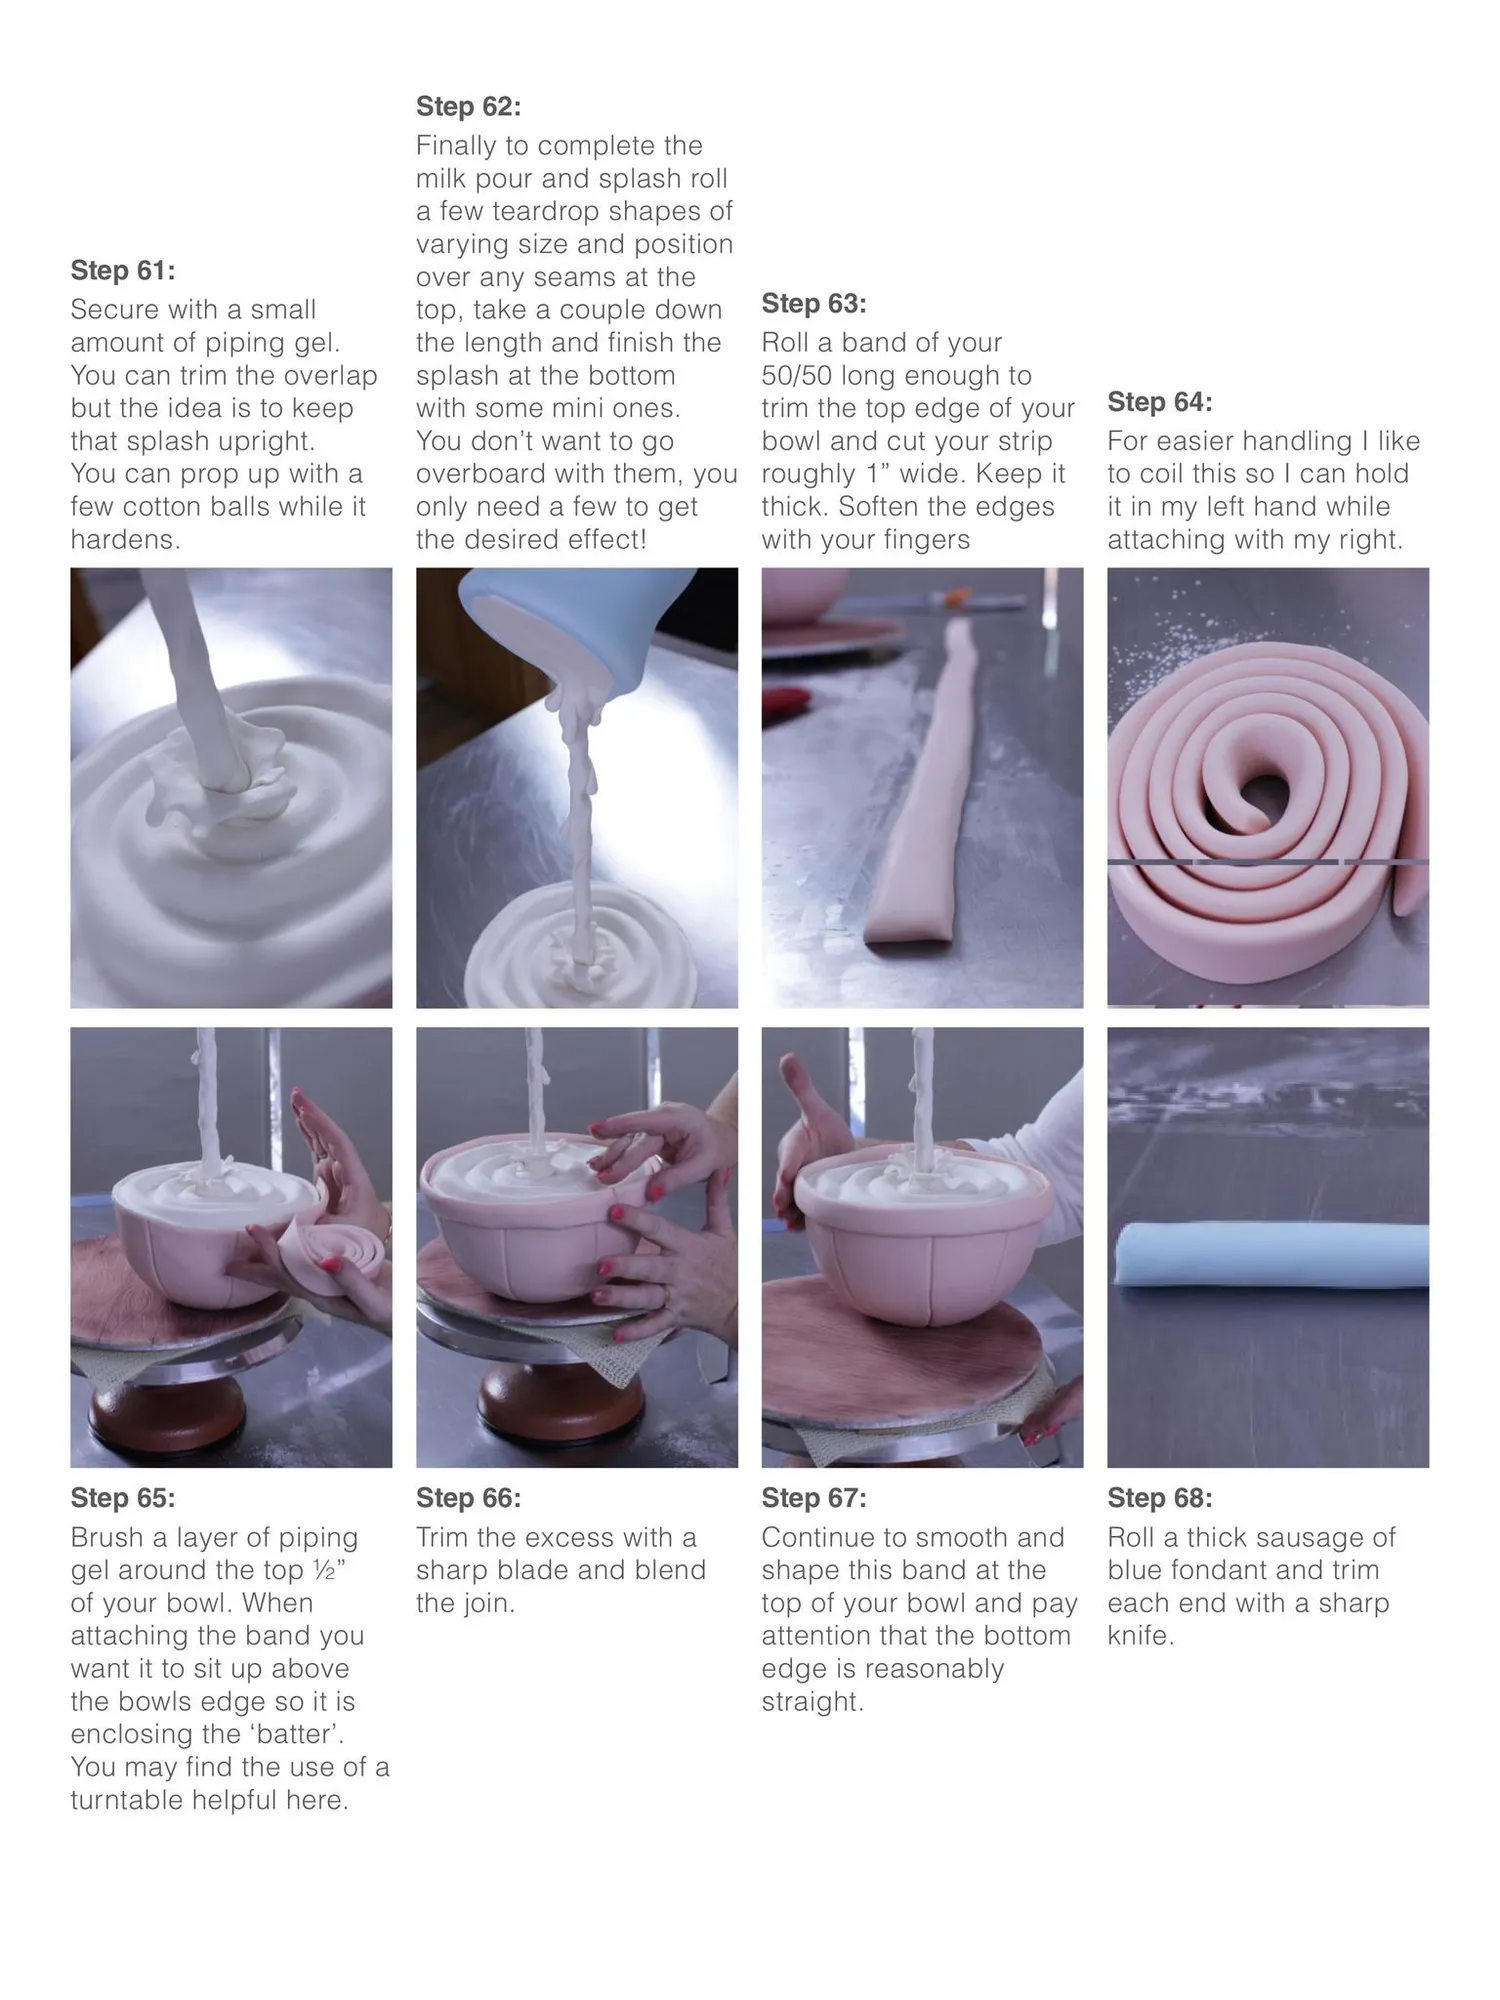
Step 62: Finallyto complete the milk pour and splash roll afew teardrop shapesof varying size and position Step 61: over any seams at the Secure with a small Step 63: top, take a couple down amount of piping gel. the length and finish the Roll a band of your You can trim the overlap splash at the bottom 50/50long enough to but the idea is to keep with some mini ones. trim the top edge of your Step 64: You don't want to go bowl and cut your strip that splash upright For easier handling I like Youcanprop upwitha overboard withthem,you. roughly 1"wide.Keep it to coil this soI can hold few cotton balls whileit thick. Soften the edges onlyneed afew to get it in my left hand while the desired effect! hardens. with your fingers attaching with my right. Step 65: Step 66: Step 67: Step 68: Brush a layer of piping Trim the excess with a Continue to smooth and Roll a thick sausage of gel around the top V2" sharp blade and blend shape this band at the blue fondant and trim the join. of your bowl. When top of your bowl and pay each end with a sharp attaching the band you attention that the bottom knife. want it to sit up above edge is reasonably thebowls edge so it is straight. enclosing the‘batter. You may find the use of a turntable helpful here.
Page 73 text
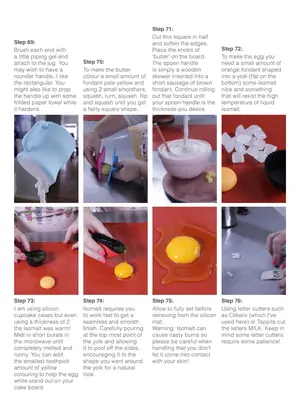
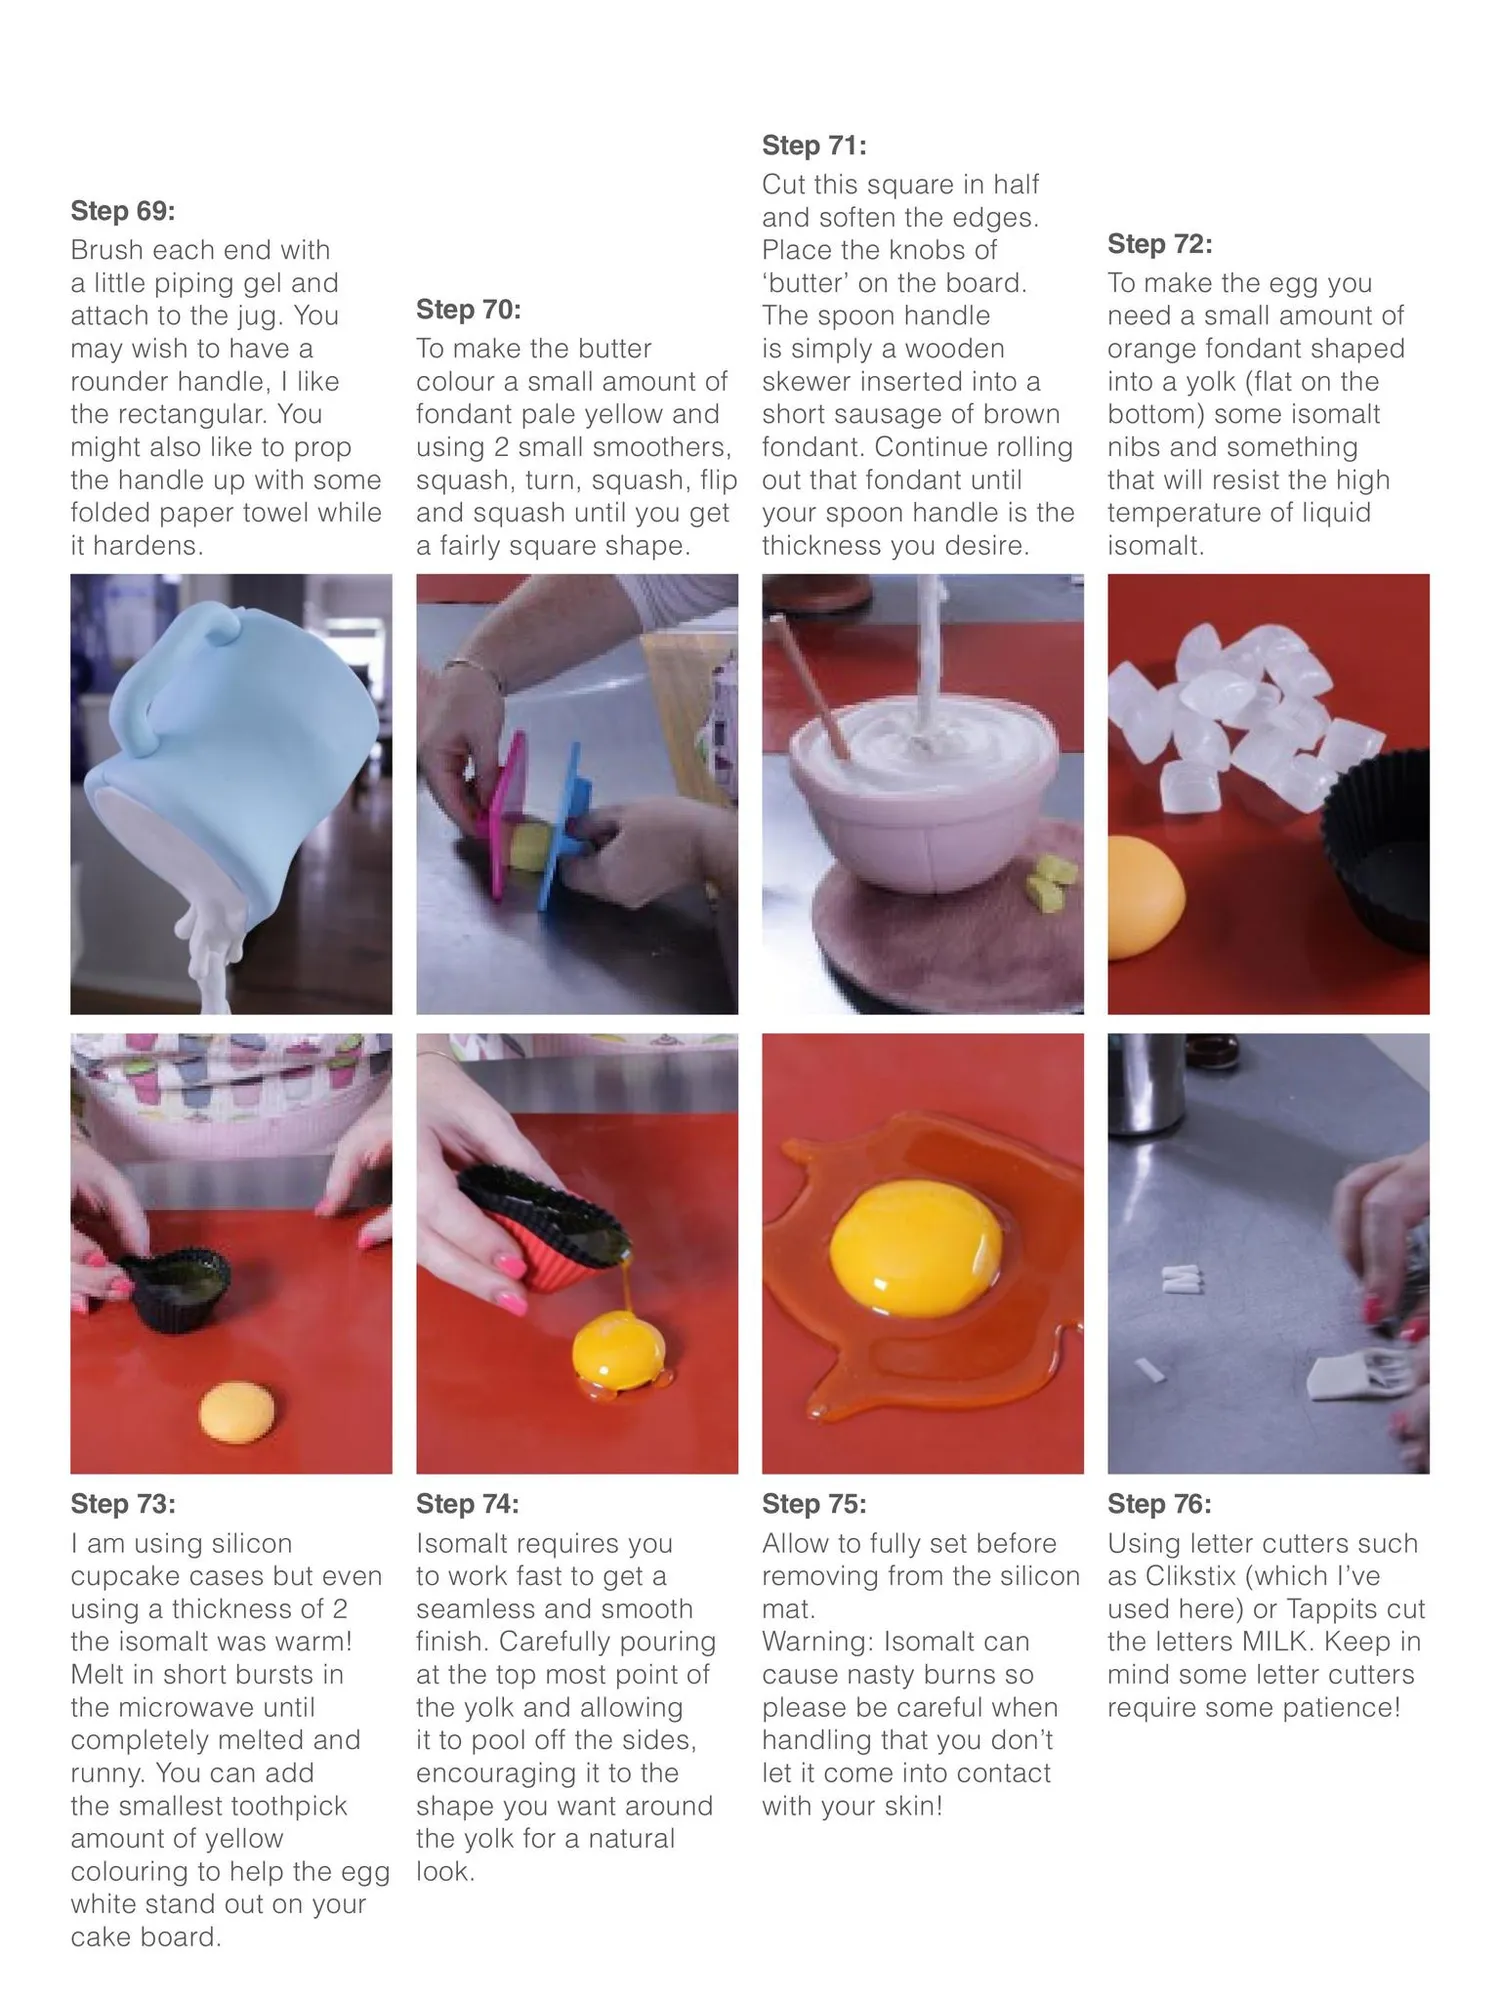
Step 69: Brush each end with a little piping gel and attach to the jug. You may wish to have a rounder handle, I like the rectangular. You might also like to prop the handle up with some folded paper towel while it hardens. Step 73: I am using silicon cupcake cases but even using a thickness of 2 the isomalt was warm! Melt in short bursts in the microwave until completely melted and runny. You can add the smallest toothpick amount of yellow colouring to help the egg white stand out on your cake board. Step 71: Cut this square in half and soften the edges. Place the knobs of ‘butter’ on the board. Step 70: The spoon handle To make the butter is simply a wooden colour a small amount of skewer inserted into a fondant pale yellow and short sausage of brown using 2 small smoothers, fondant. Continue rolling squash, turn, squash, flip out that fondant until and squash until you get your spoon handle is the a fairly square shape. thickness you desire. Step 74: Isomalt requires you to work fast to get a seamless and smooth finish. Carefully pouring at the top most point of the yolk and allowing it to pool off the sides, encouraging it to the shape you want around the yolk for a natural look. Step 75: Allow to fully set before removing from the silicon mat. Warning: Isomalt can cause nasty burns so please be careful when handling that you don’t let it come into contact with your skin! Step 72: To make the egg you need a small amount of orange fondant shaped into a yolk (flat on the bottom) some isomalt nibs and something that will resist the high temperature of liquid isomalt. Step 76: Using letter cutters such as Clikstix (which I’ve used here) or Tappits cut the letters MILK. Keep in mind some letter cutters require some patience!
Page 74 text
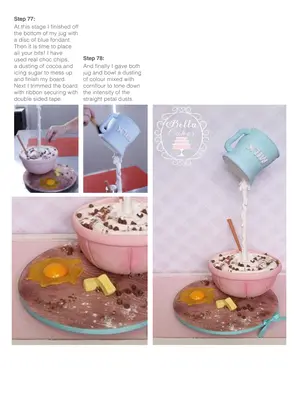
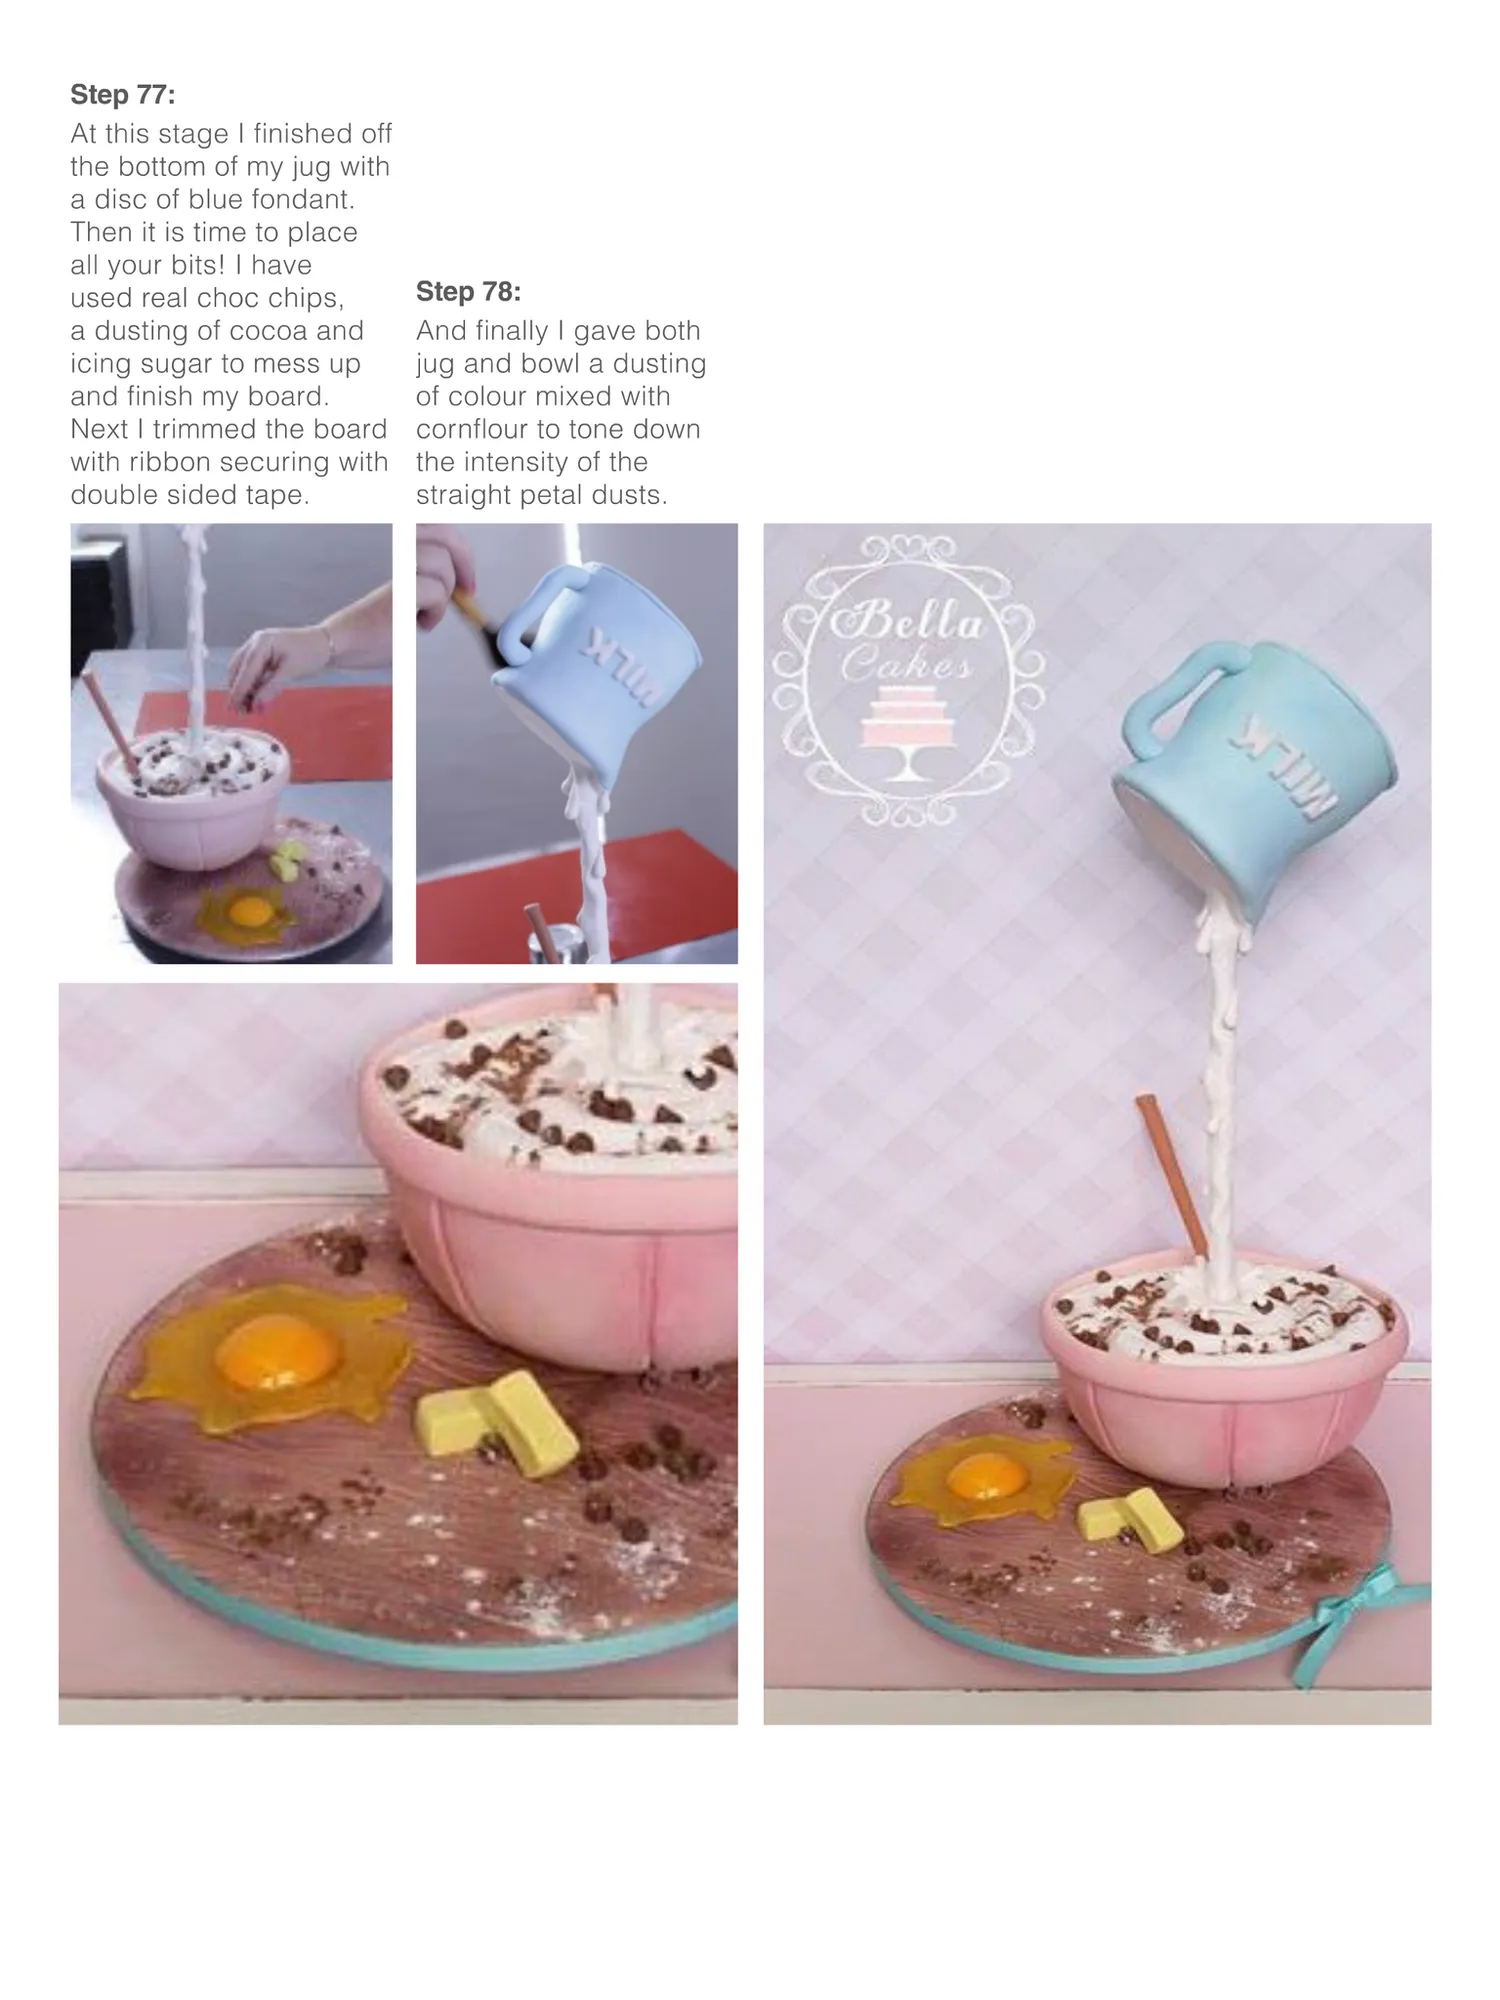
Step 77: At this stage I finished off the bottom of my jug with a disc of blue fondant. Then it is time to place all your bits! I have used real choc chips, a dusting of cocoa and icing sugar to mess up and finish my board. Next I trimmed the board with ribbon securing with double sided tape. Step 78: And finally I gave both jug and bowl a dusting of colour mixed with cornflour to tone down the intensity of the straight petal dusts.
Page 75 text
full page ad


Page 76 text
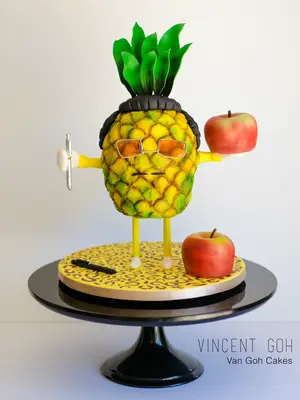
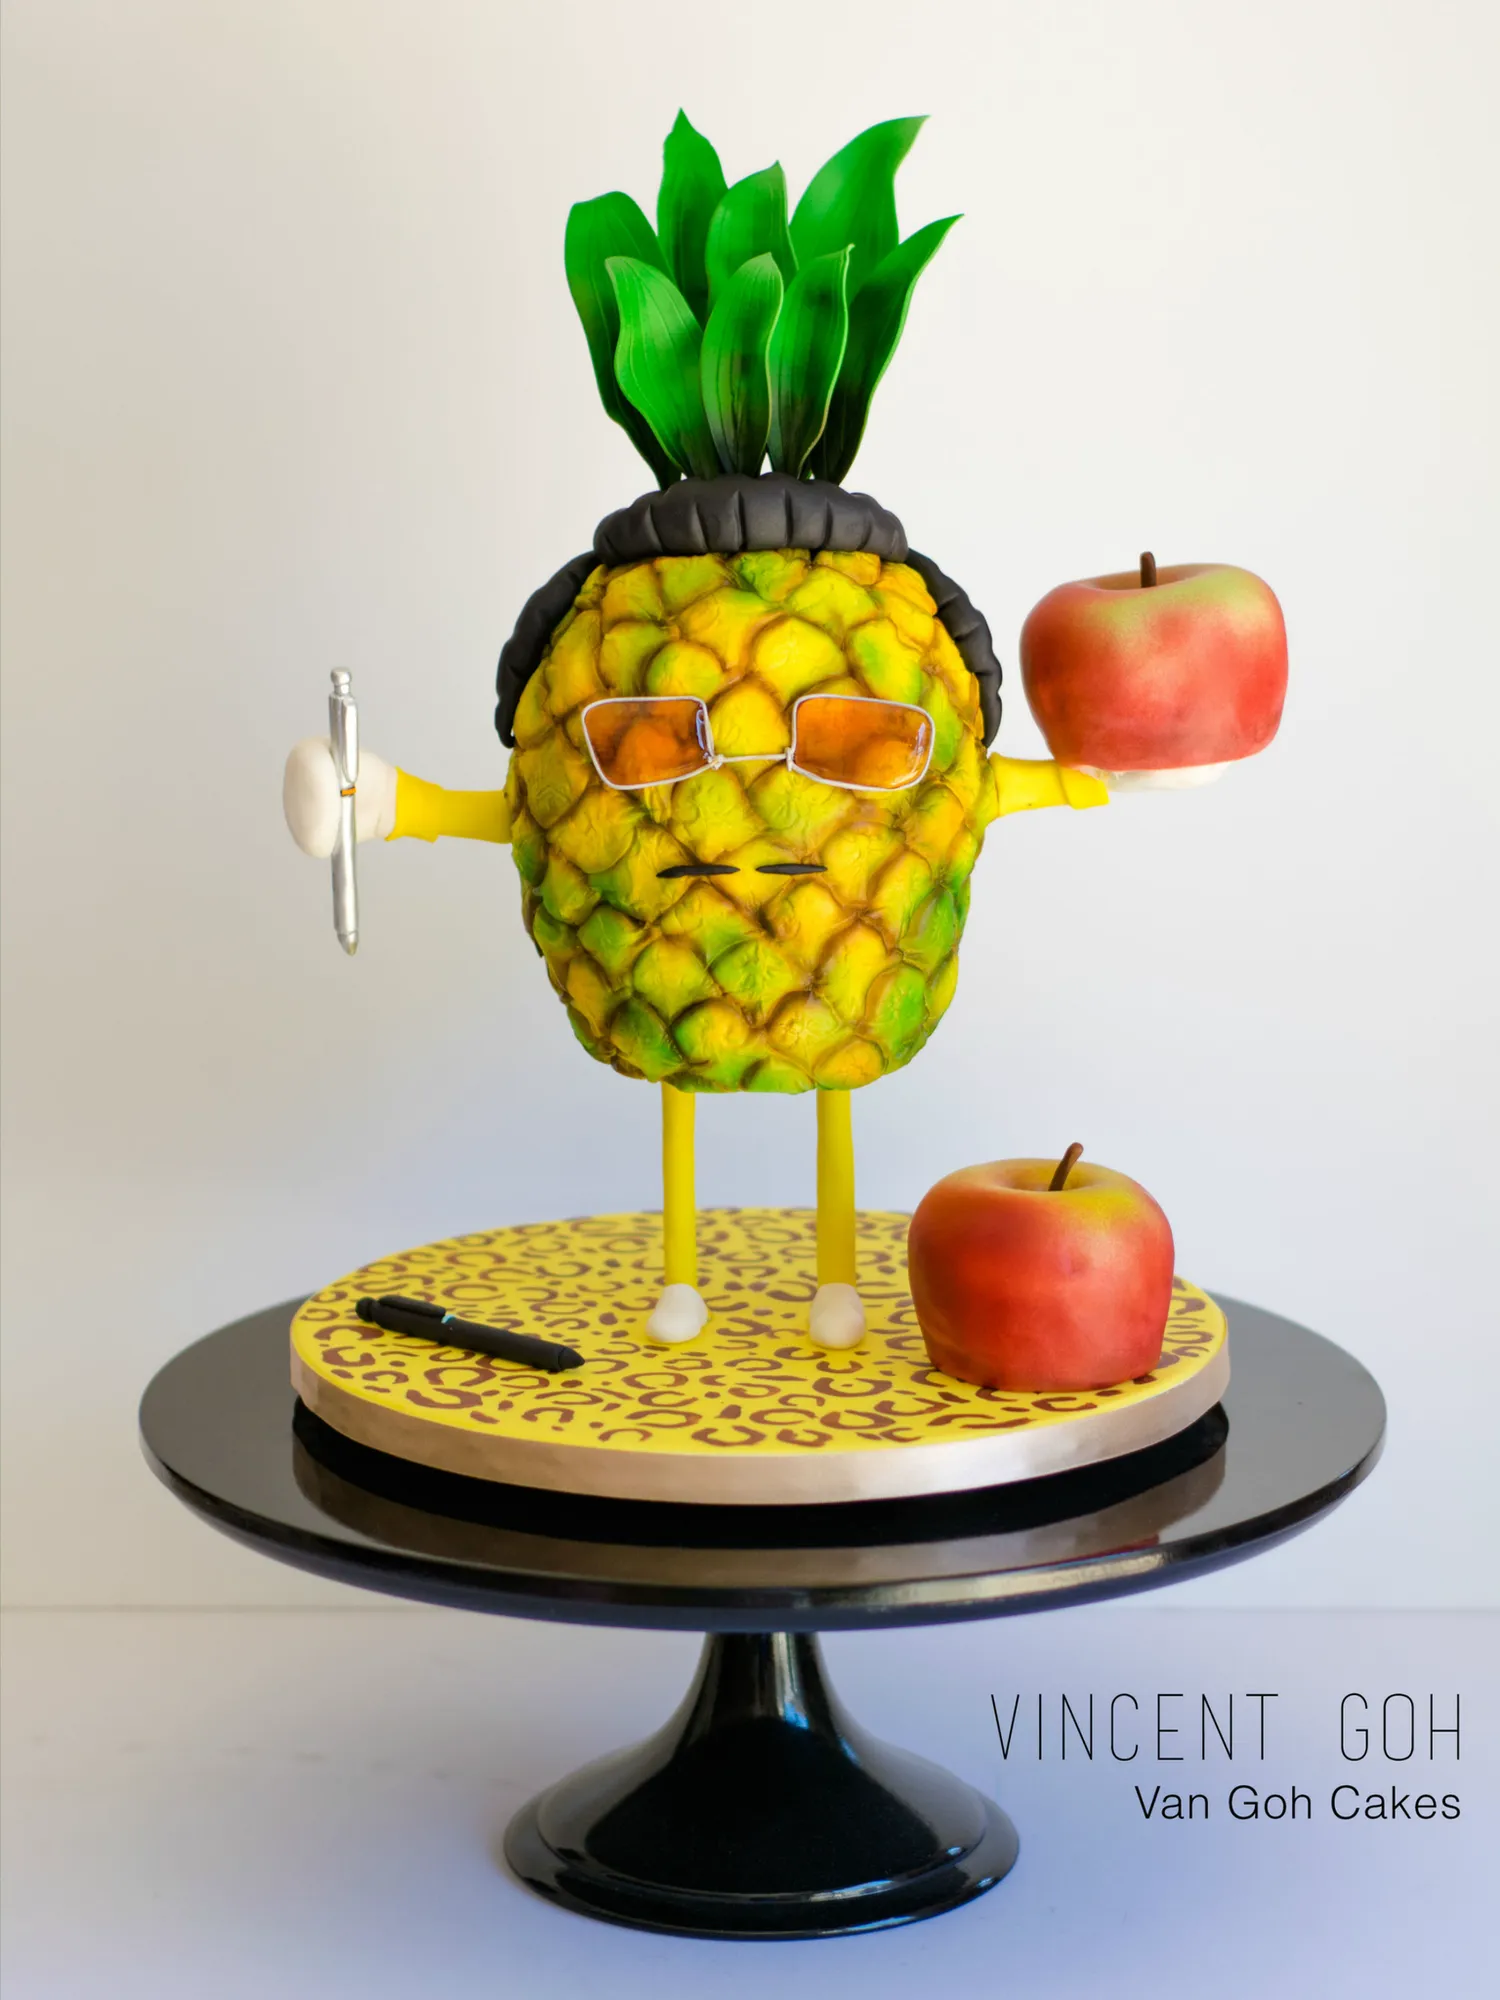
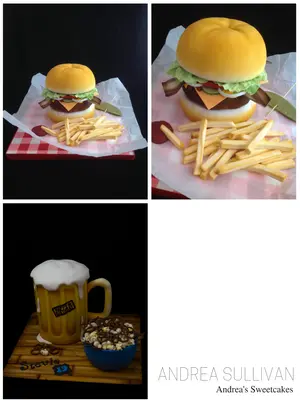
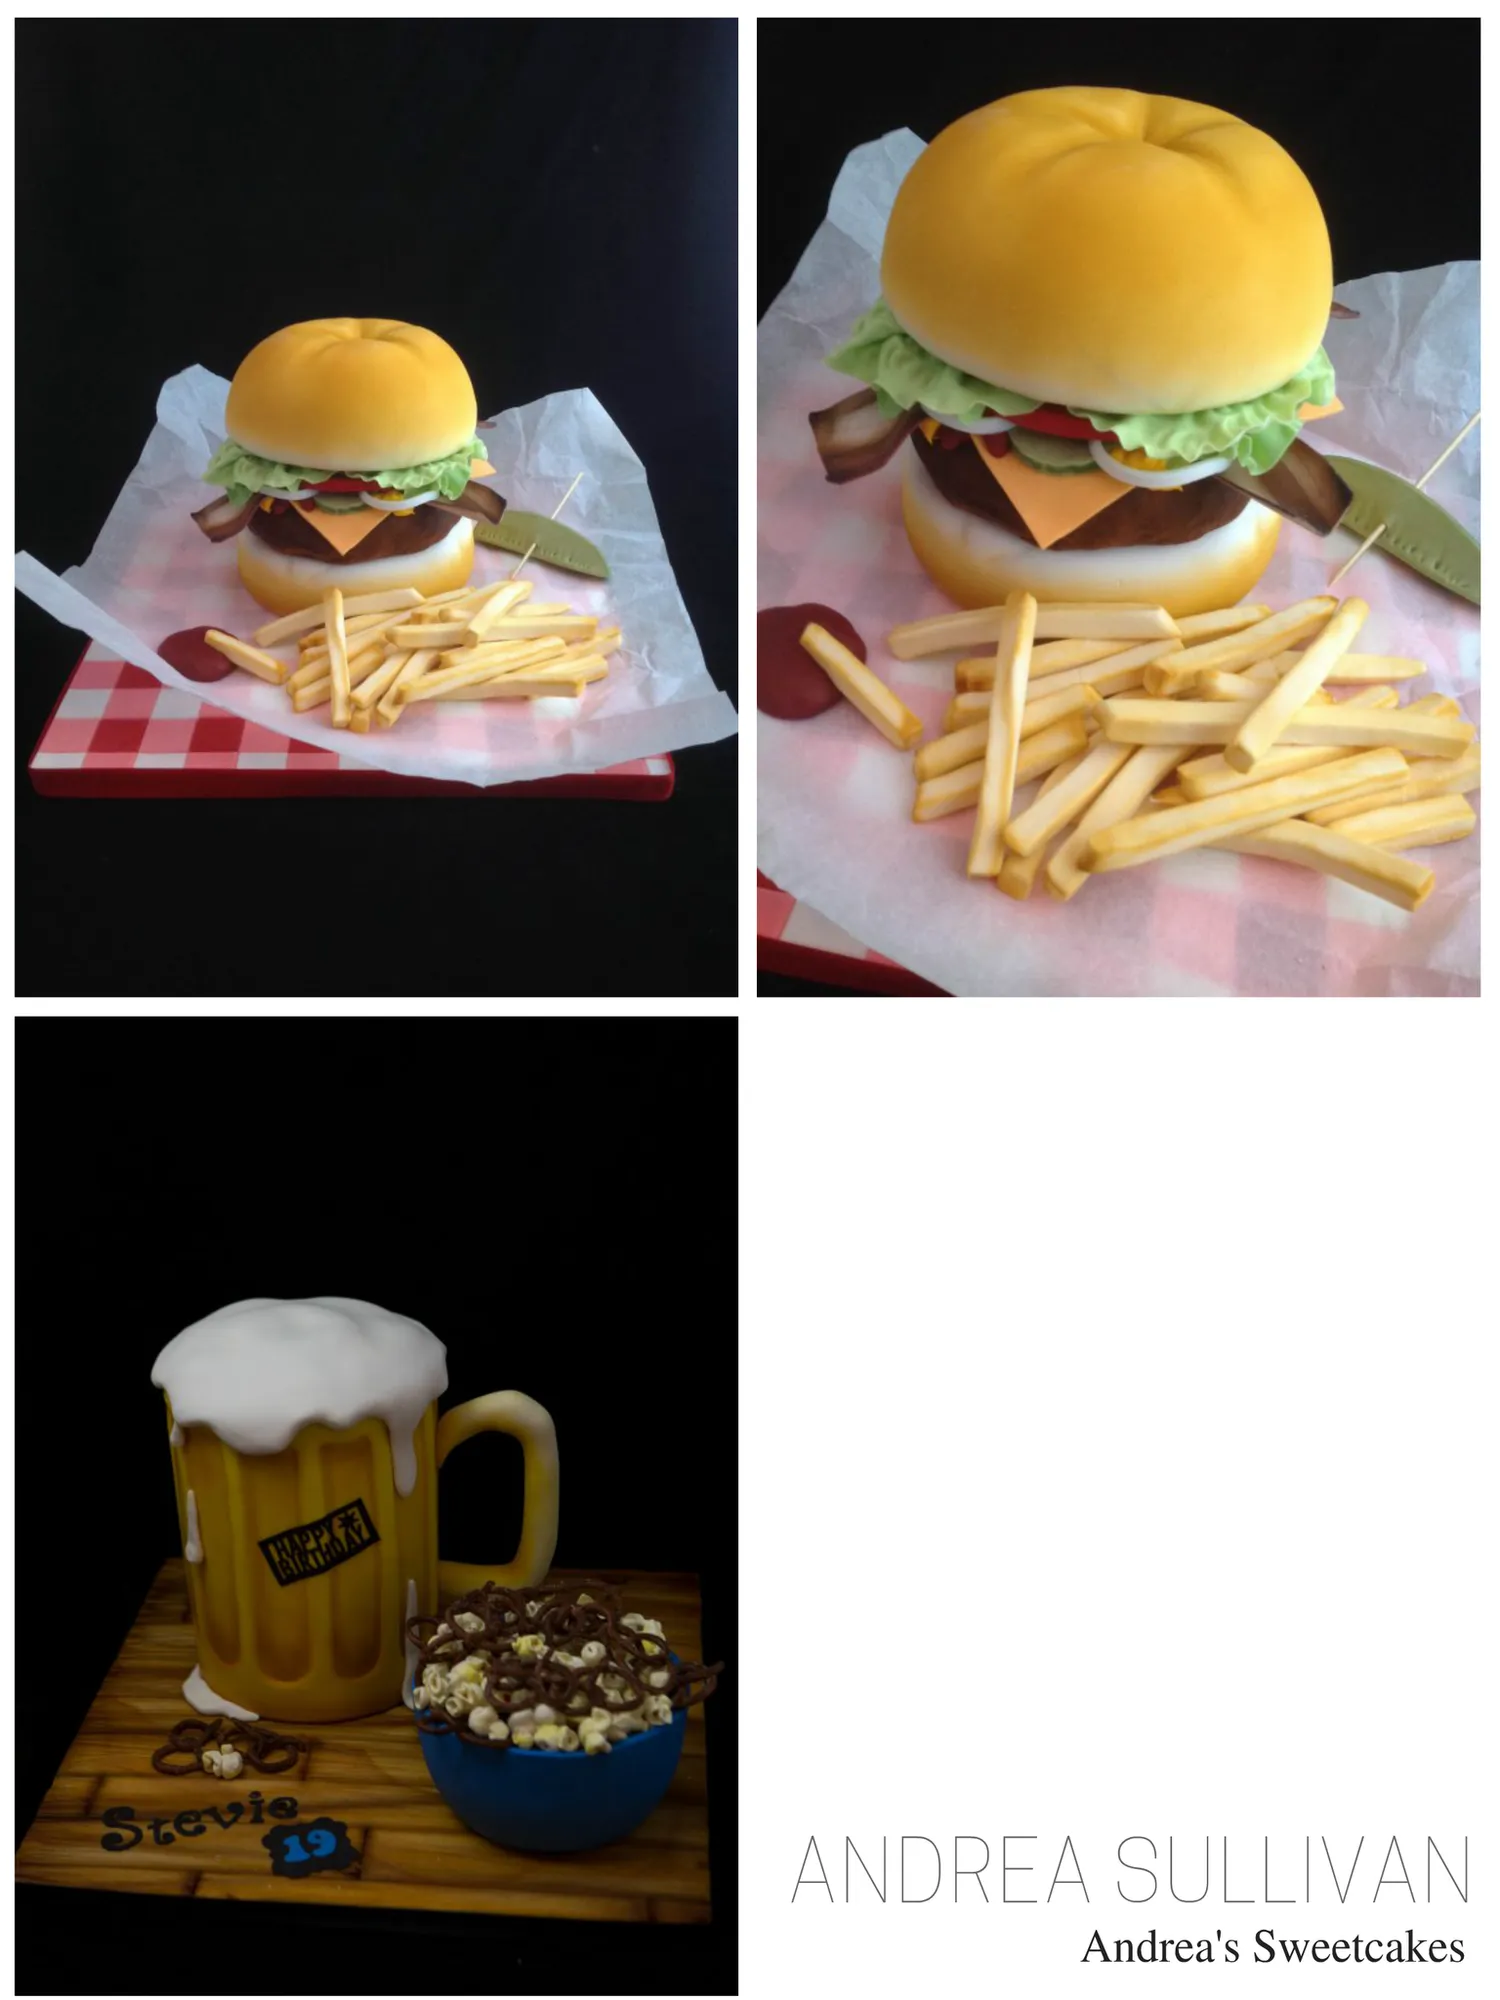
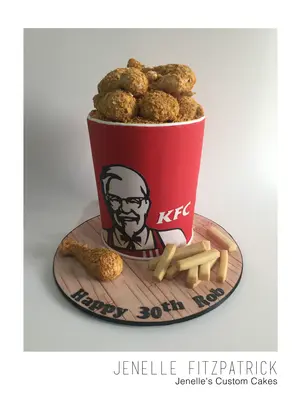
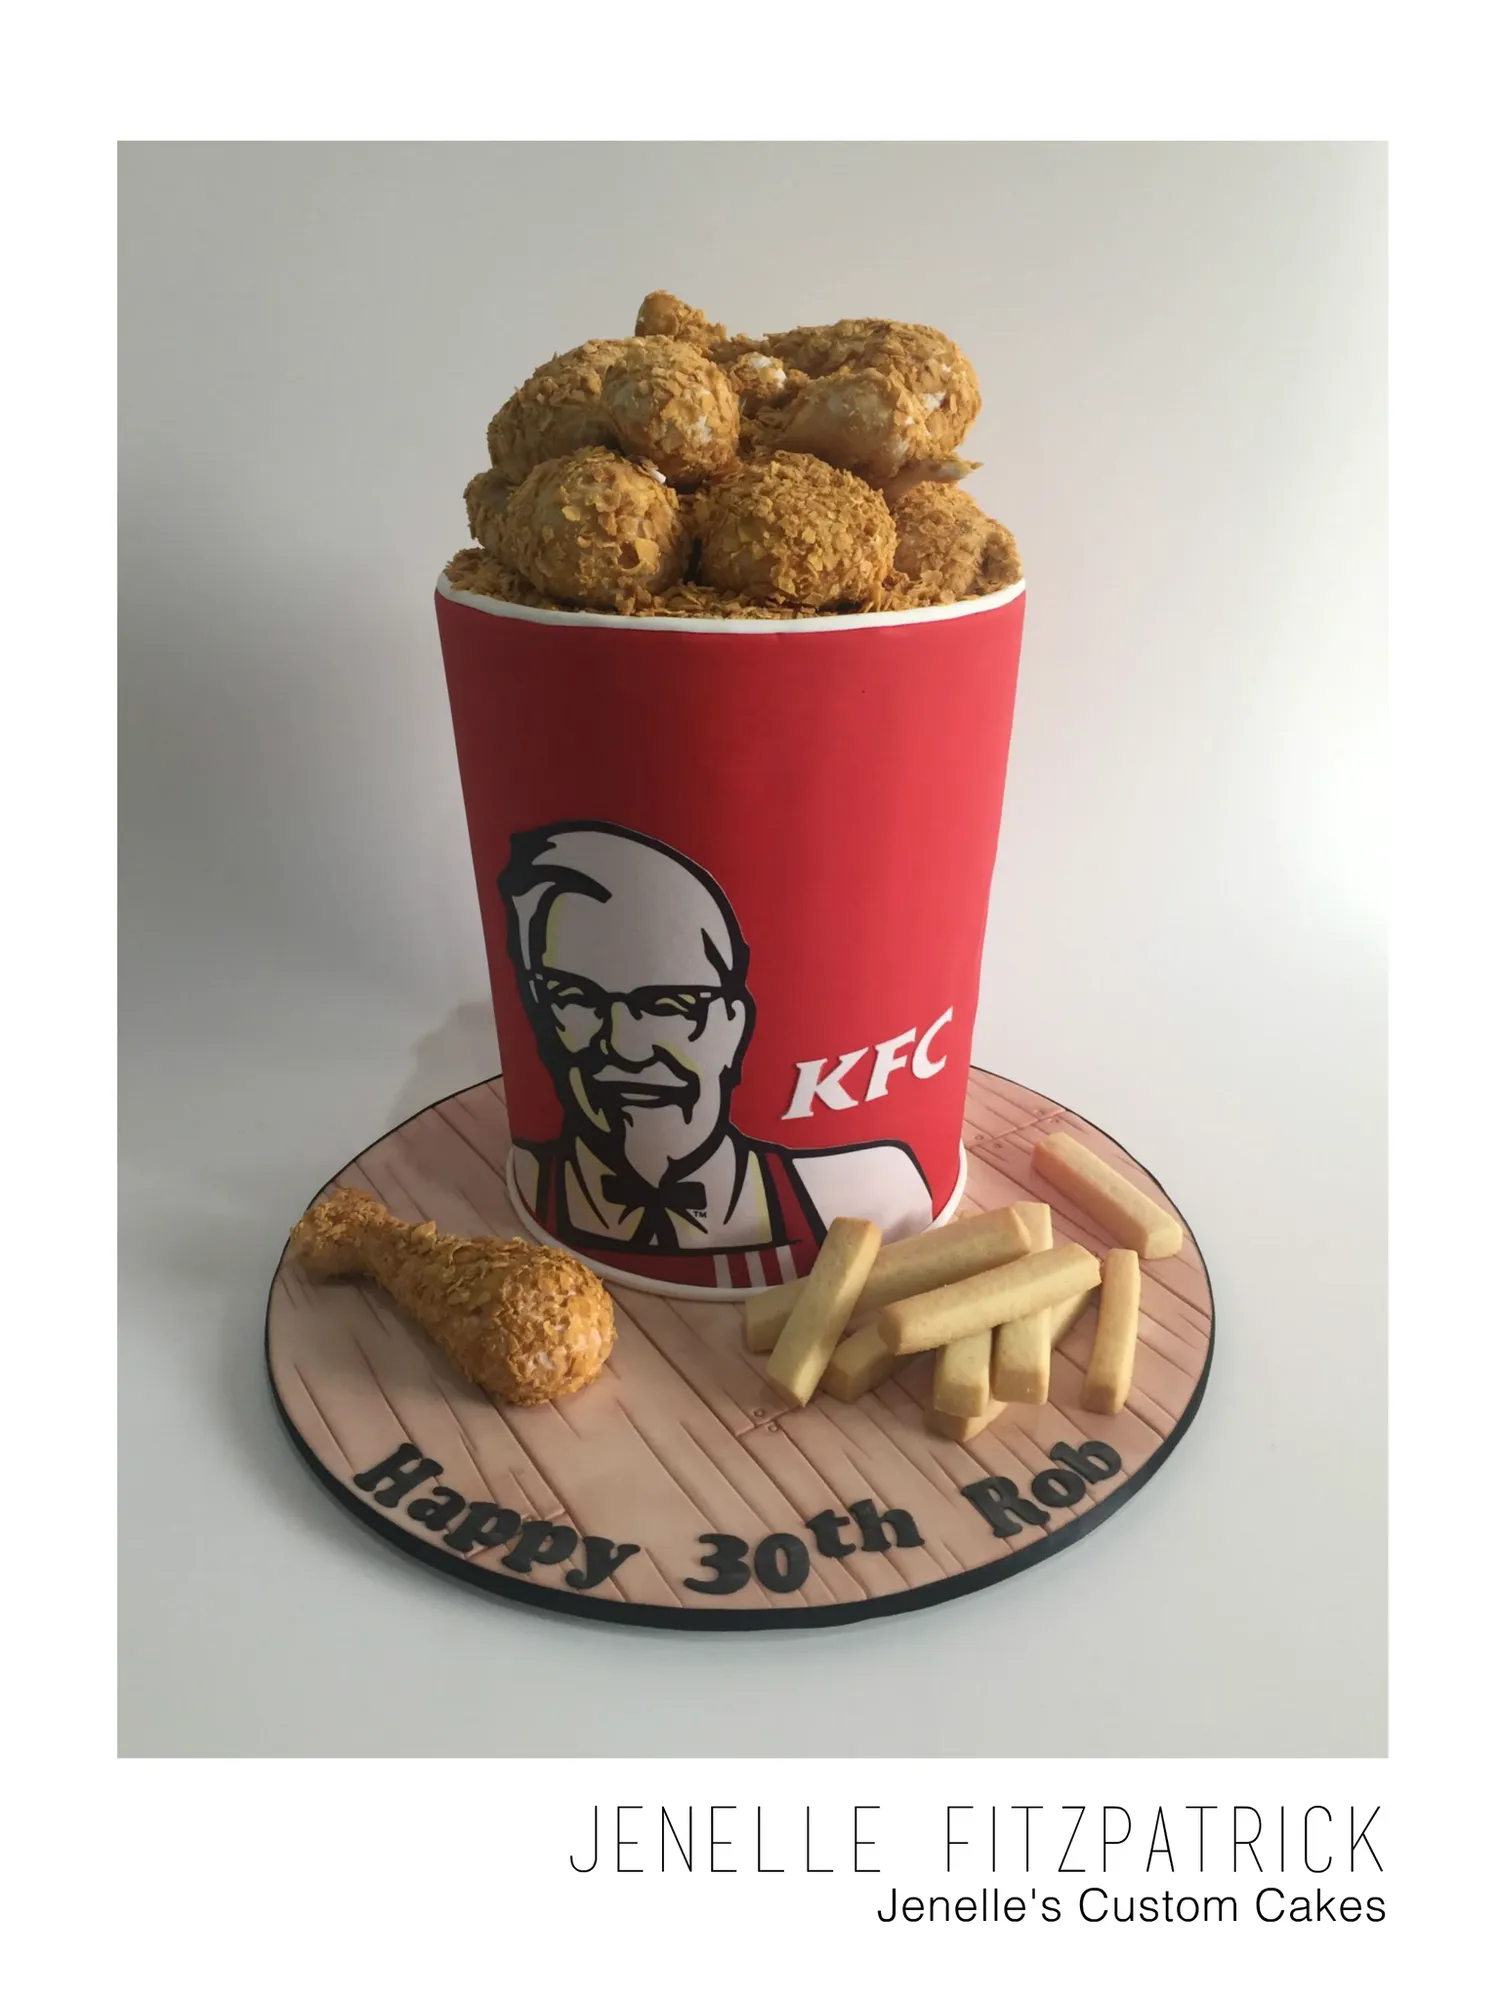
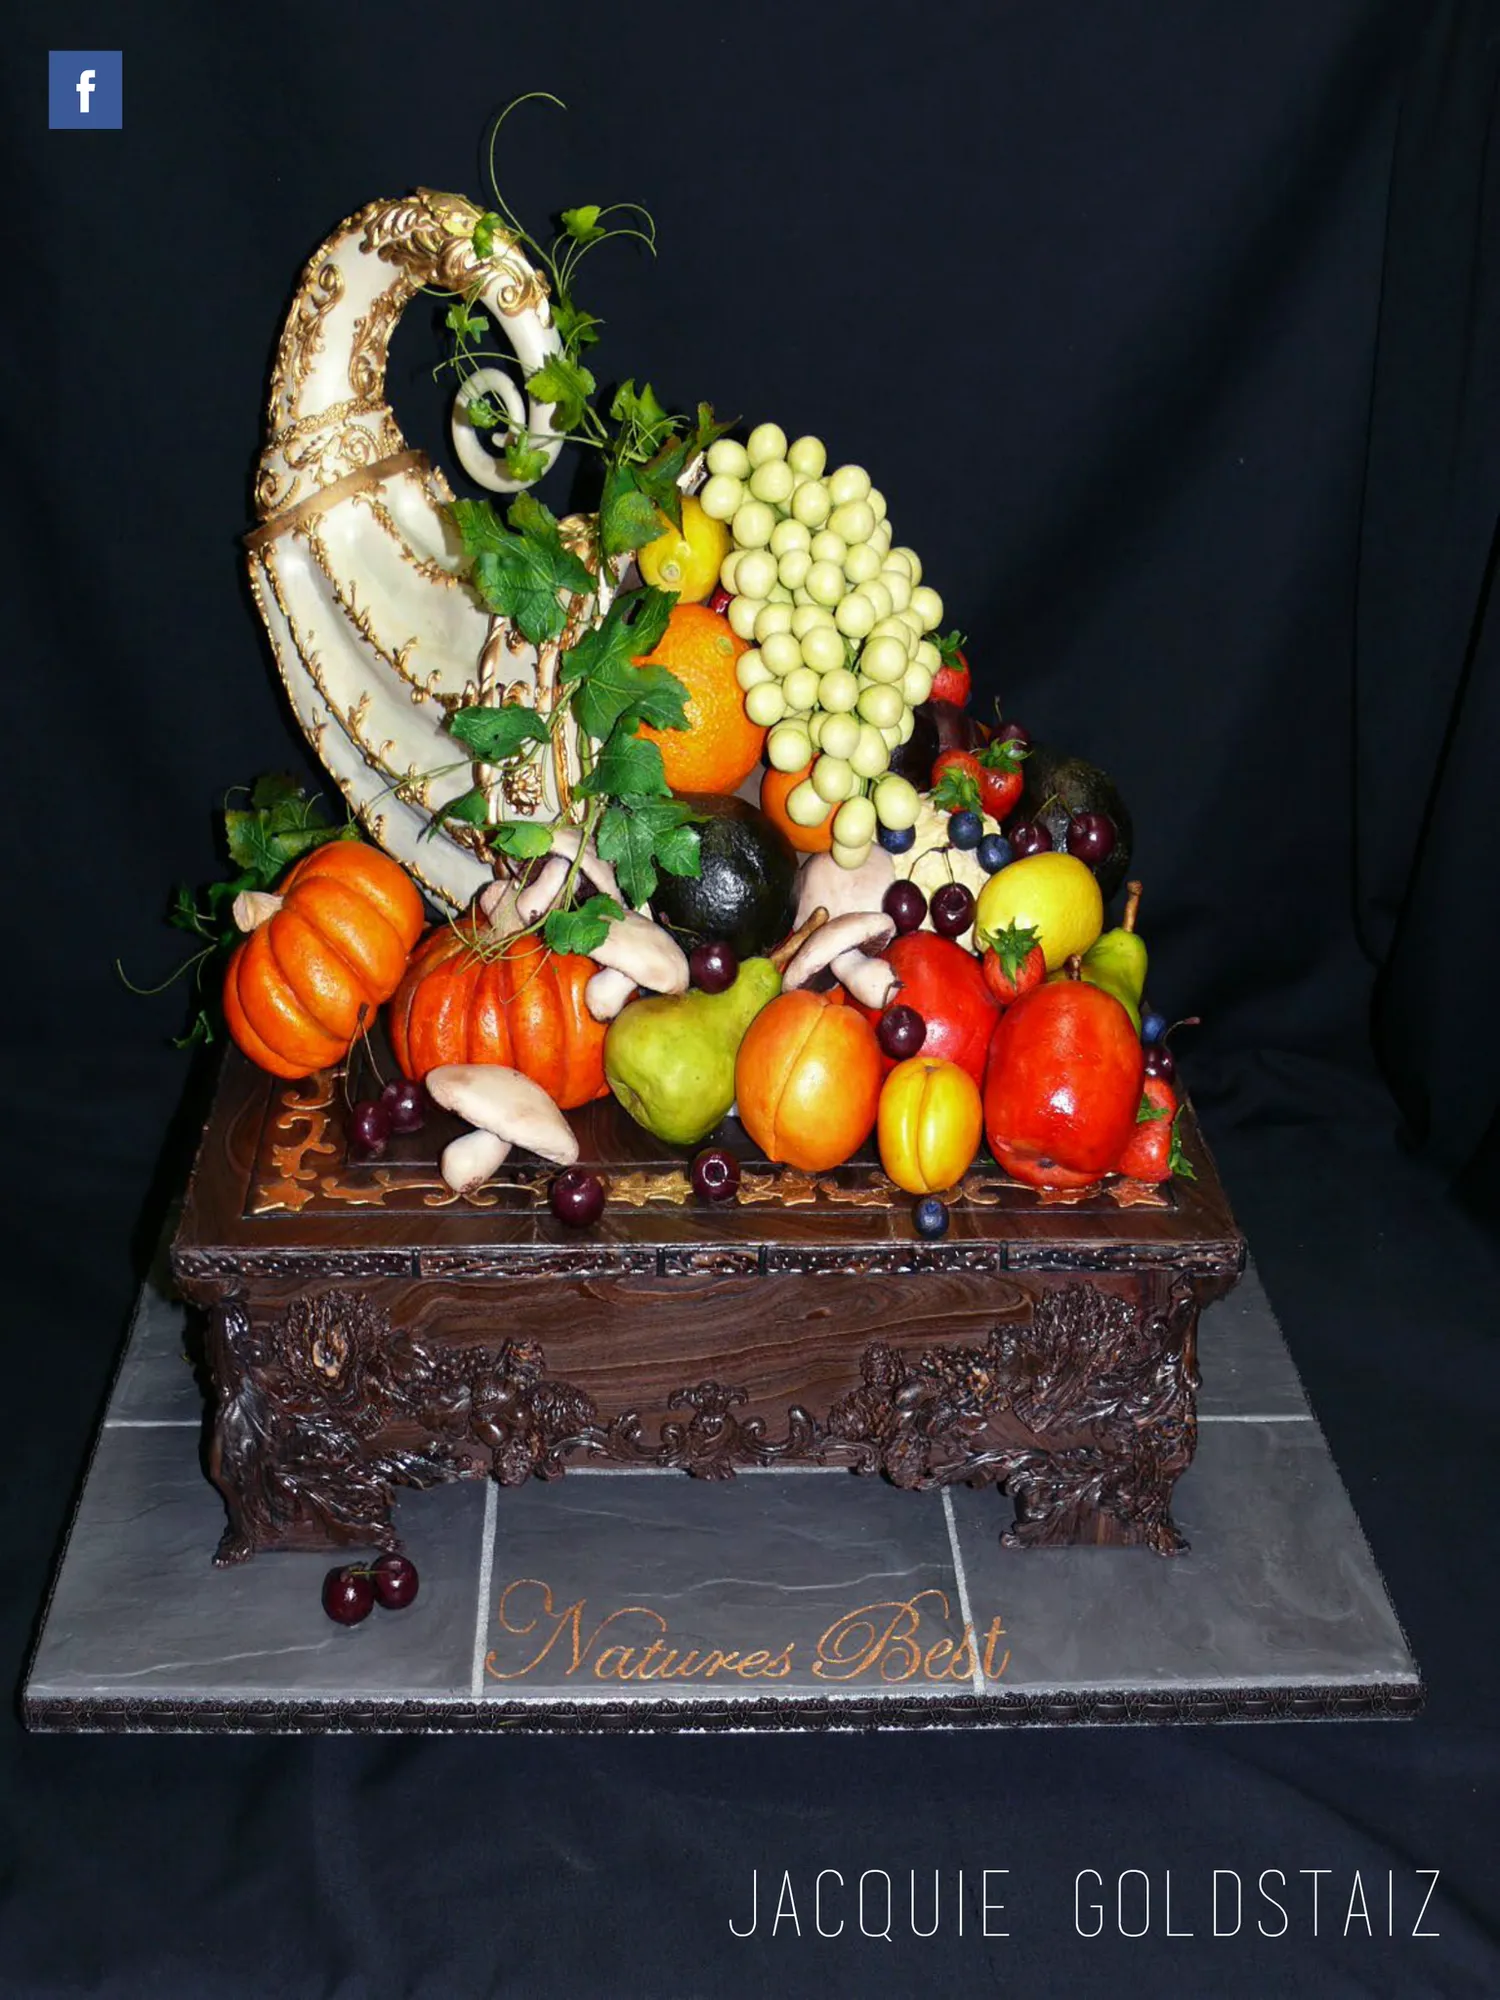
Food inspiration Be inspired with a range of food inspired sugar art with some amazing designs by decorators from around the globe
Page 77 text
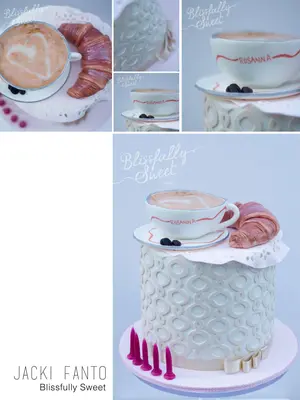
JACKI FANTO Blissfully Sweet
Page 78 text
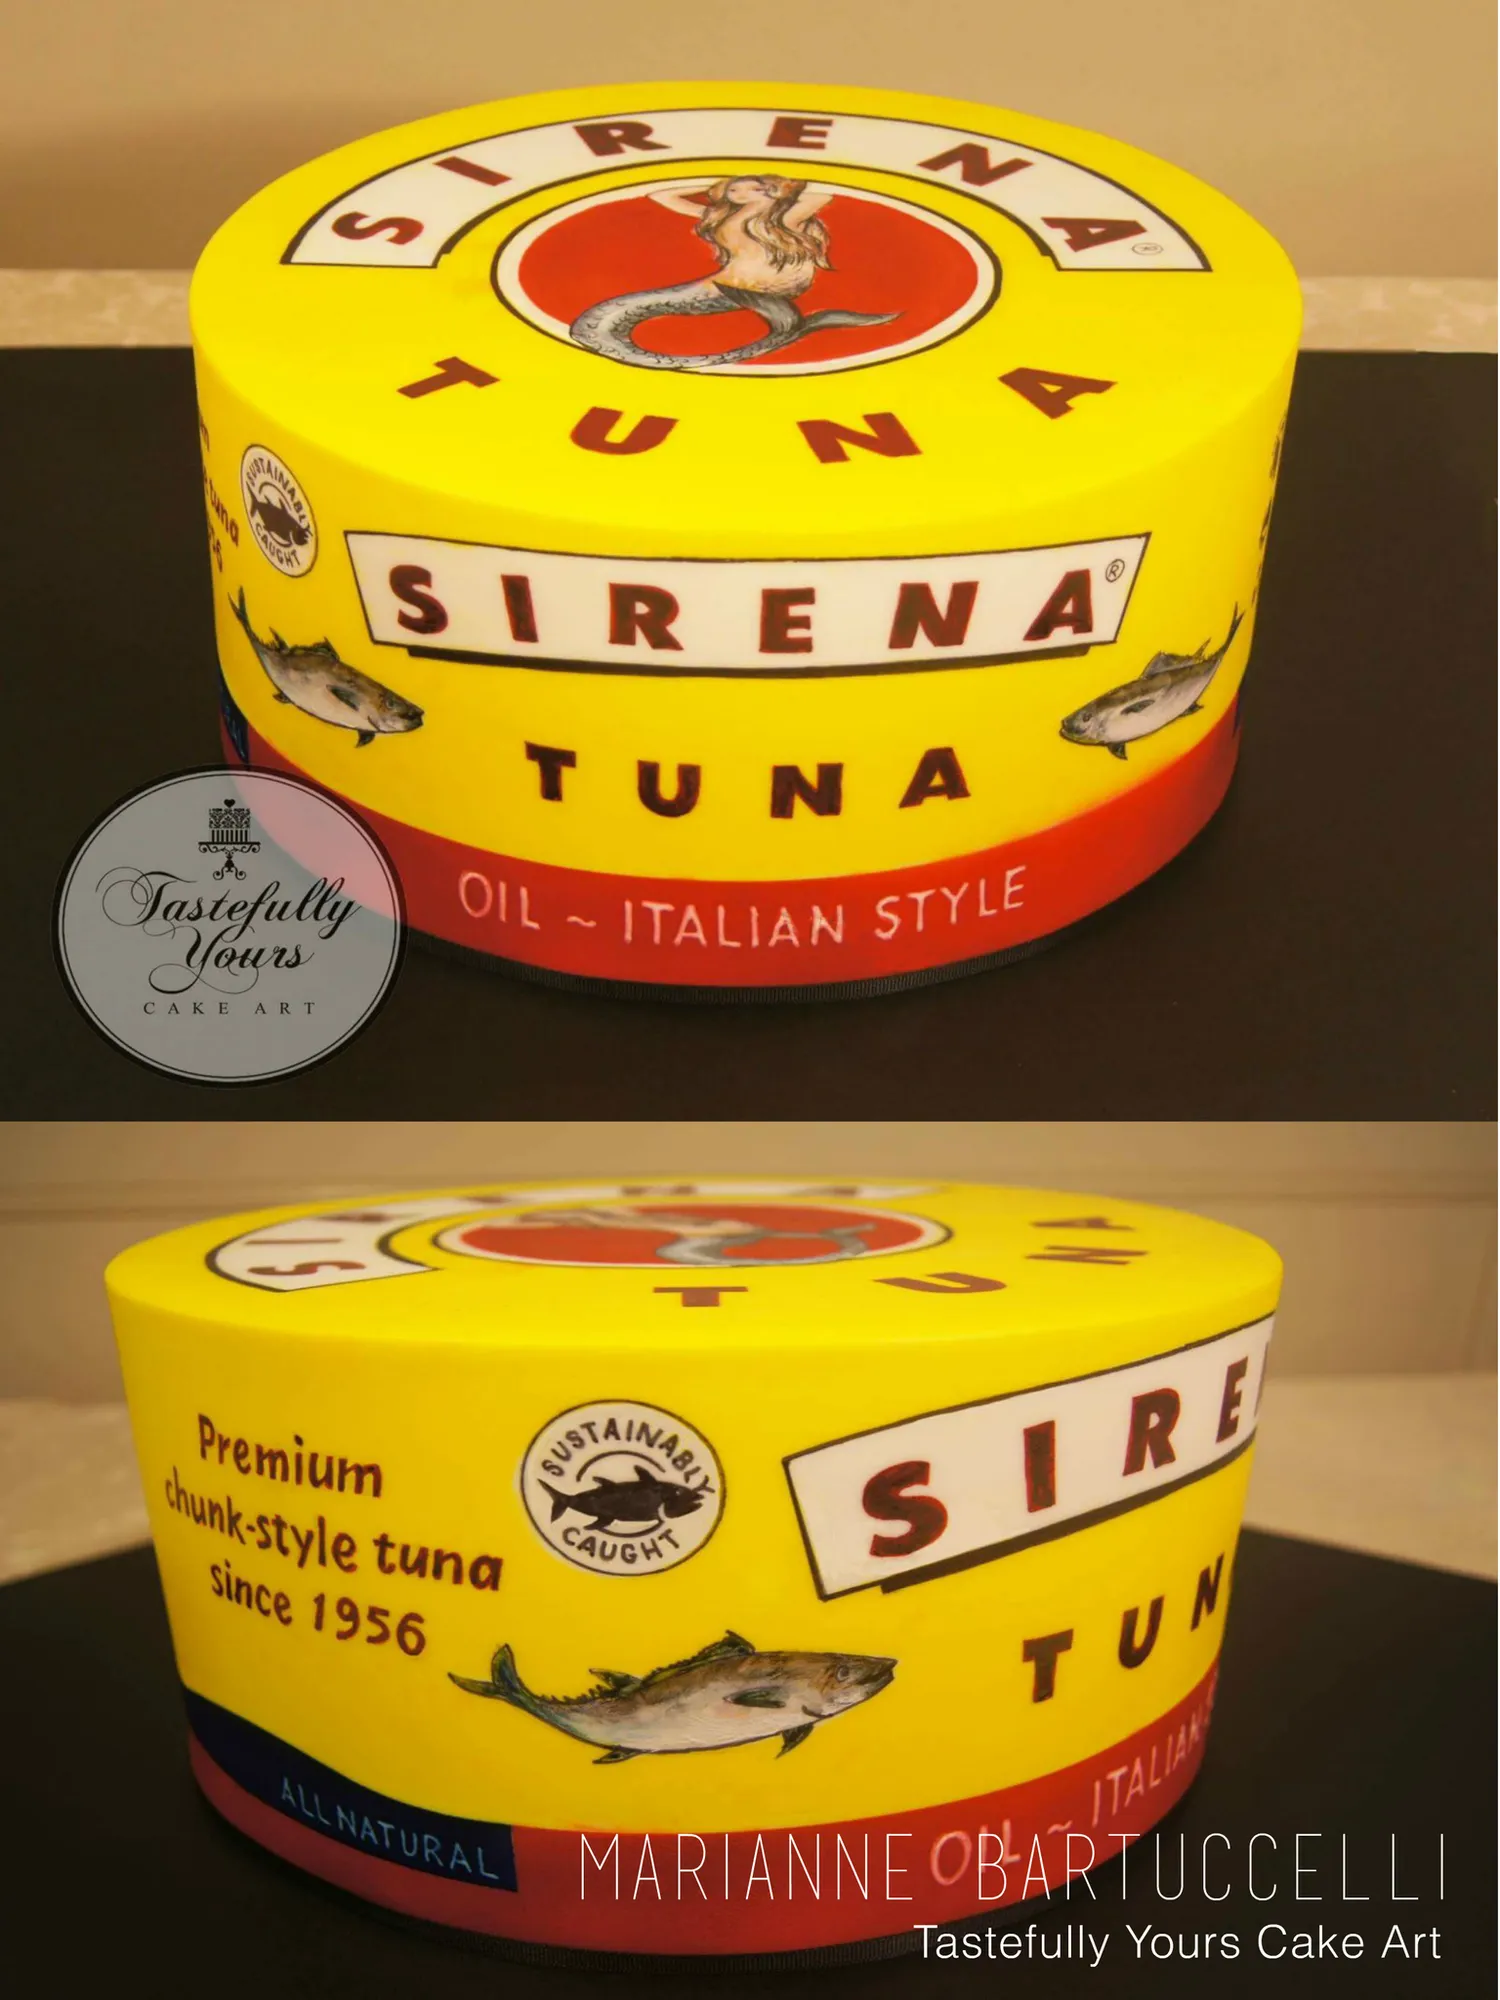
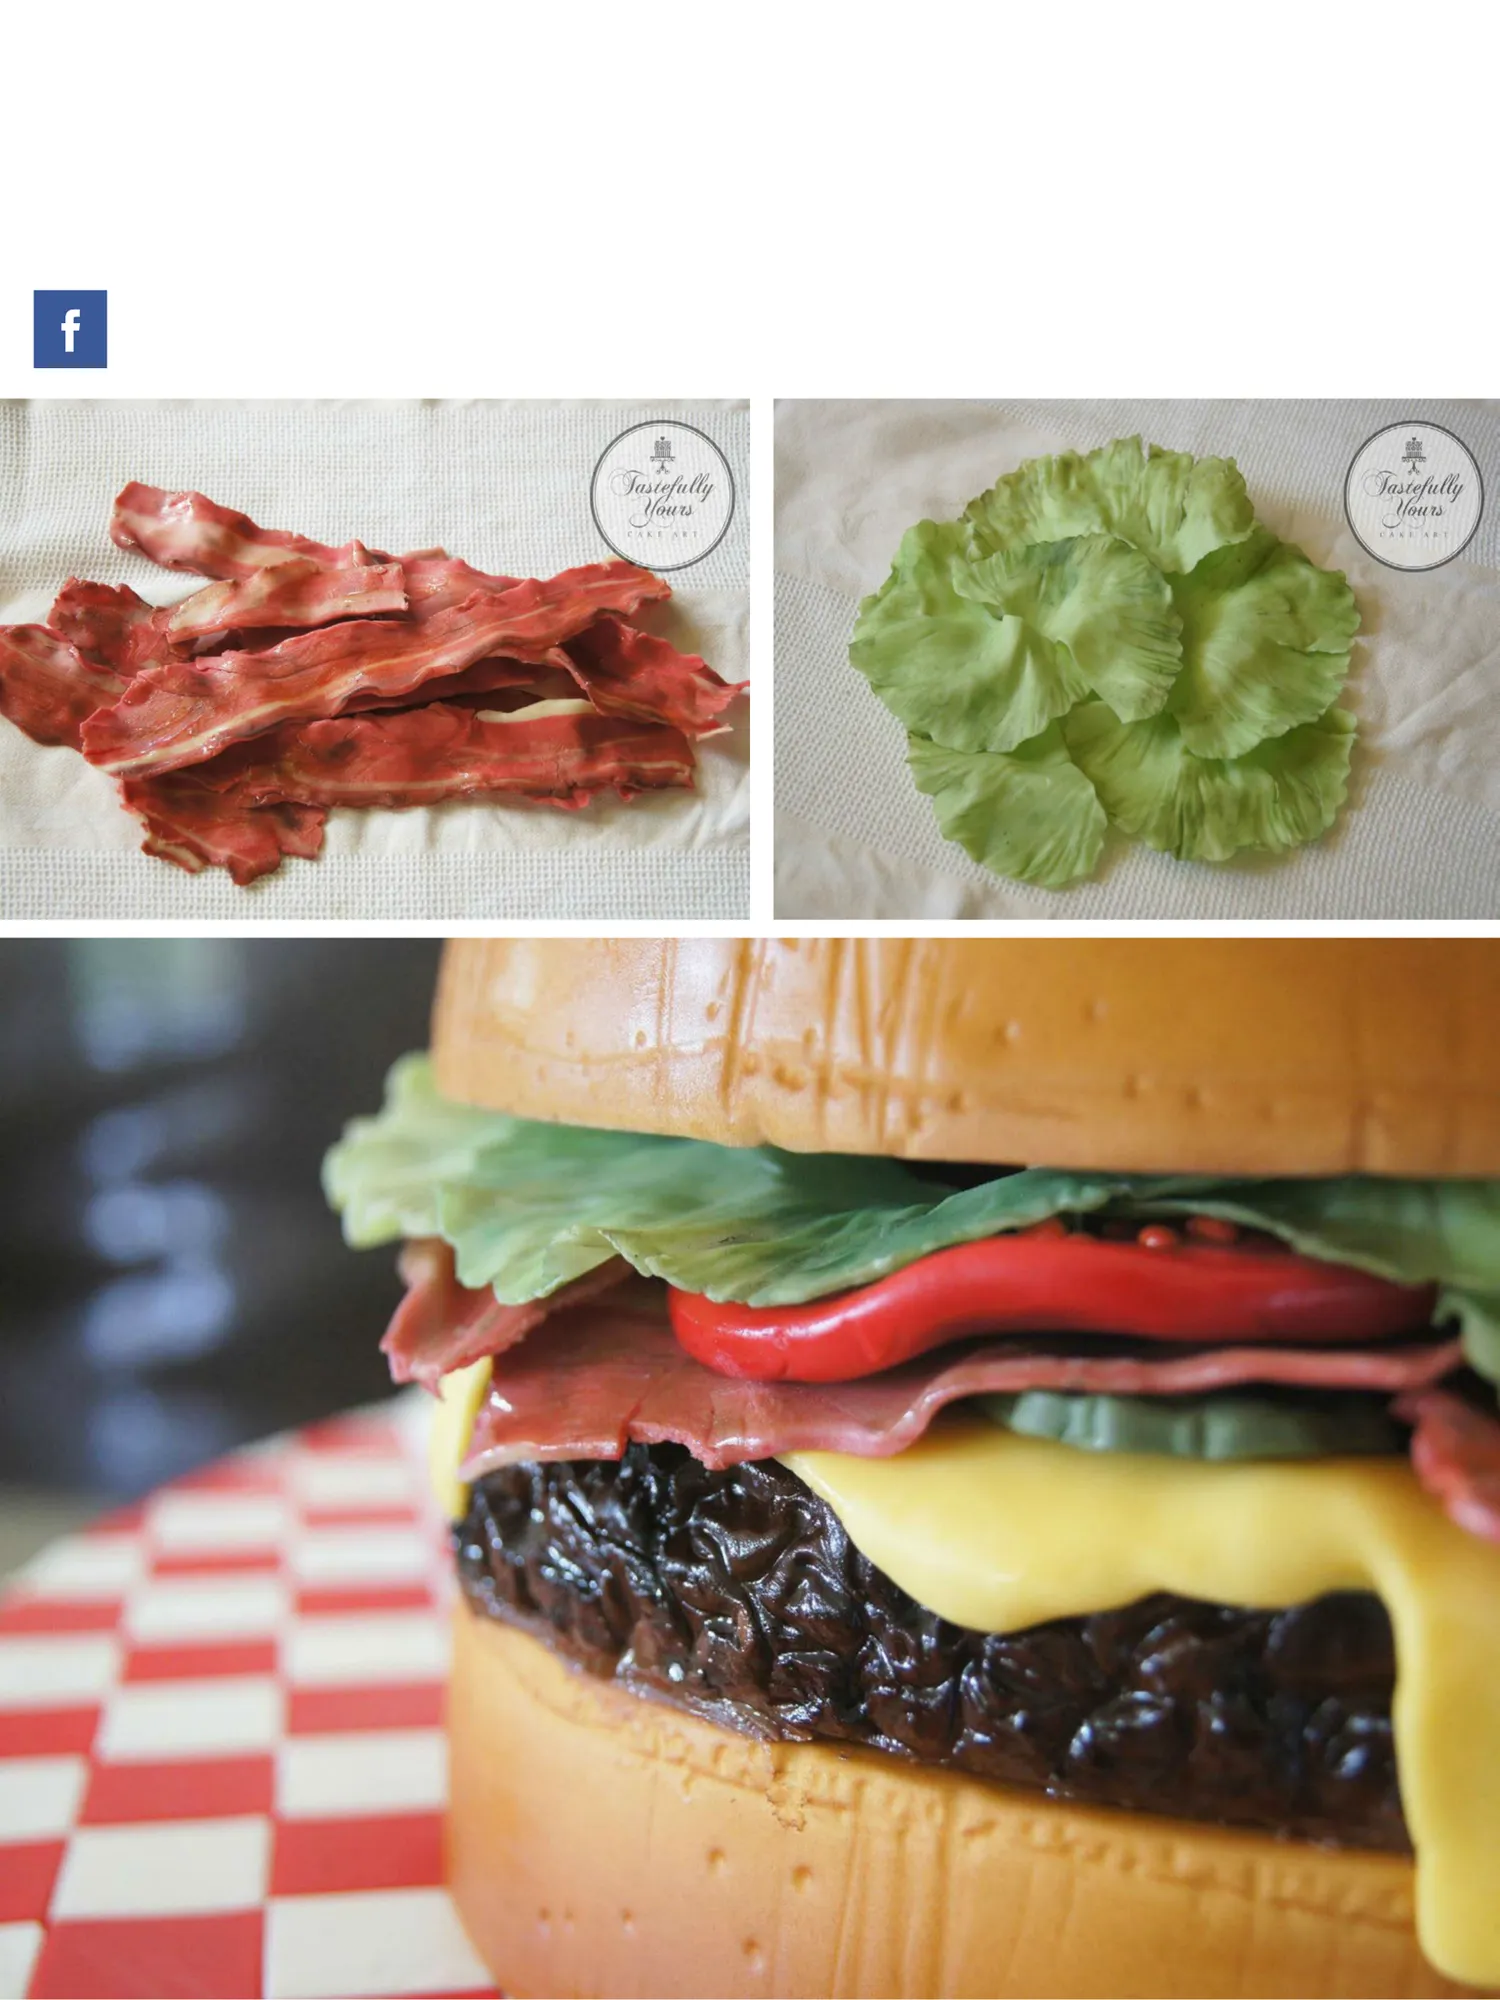
MARIANNE BARTUCCELLI Tastefully Yours Cake Art
Page 79 text
ANDREA SULLIVAN ANDREA SULLIVAN Andrea's Sweetcakes
Page 80 text
JENELLE FITZPATRICK Jenelle's Custom Cakes
Page 81 text
cakesbyximena.com ~ ACDN members receive a discount! (ACDN members, log on to the ACDN website for discount code) DOWNLOAD & PRINT Cake! magazine is now available for download and print. You can read offline or print your favourite tutorials- no more fondant on your ipad! CLICK HERE f To advertise in Cake! magazine, contact: [email protected]
Page 82 text
f
Page 83 text
f JACQUIE GOLDSTAIZ f
Page 84 text
Karen stack image
Page 85 text
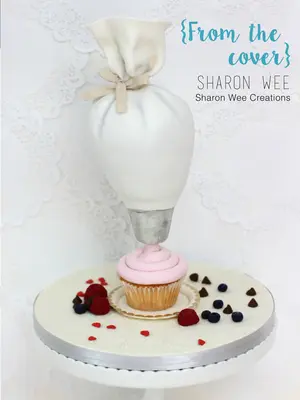
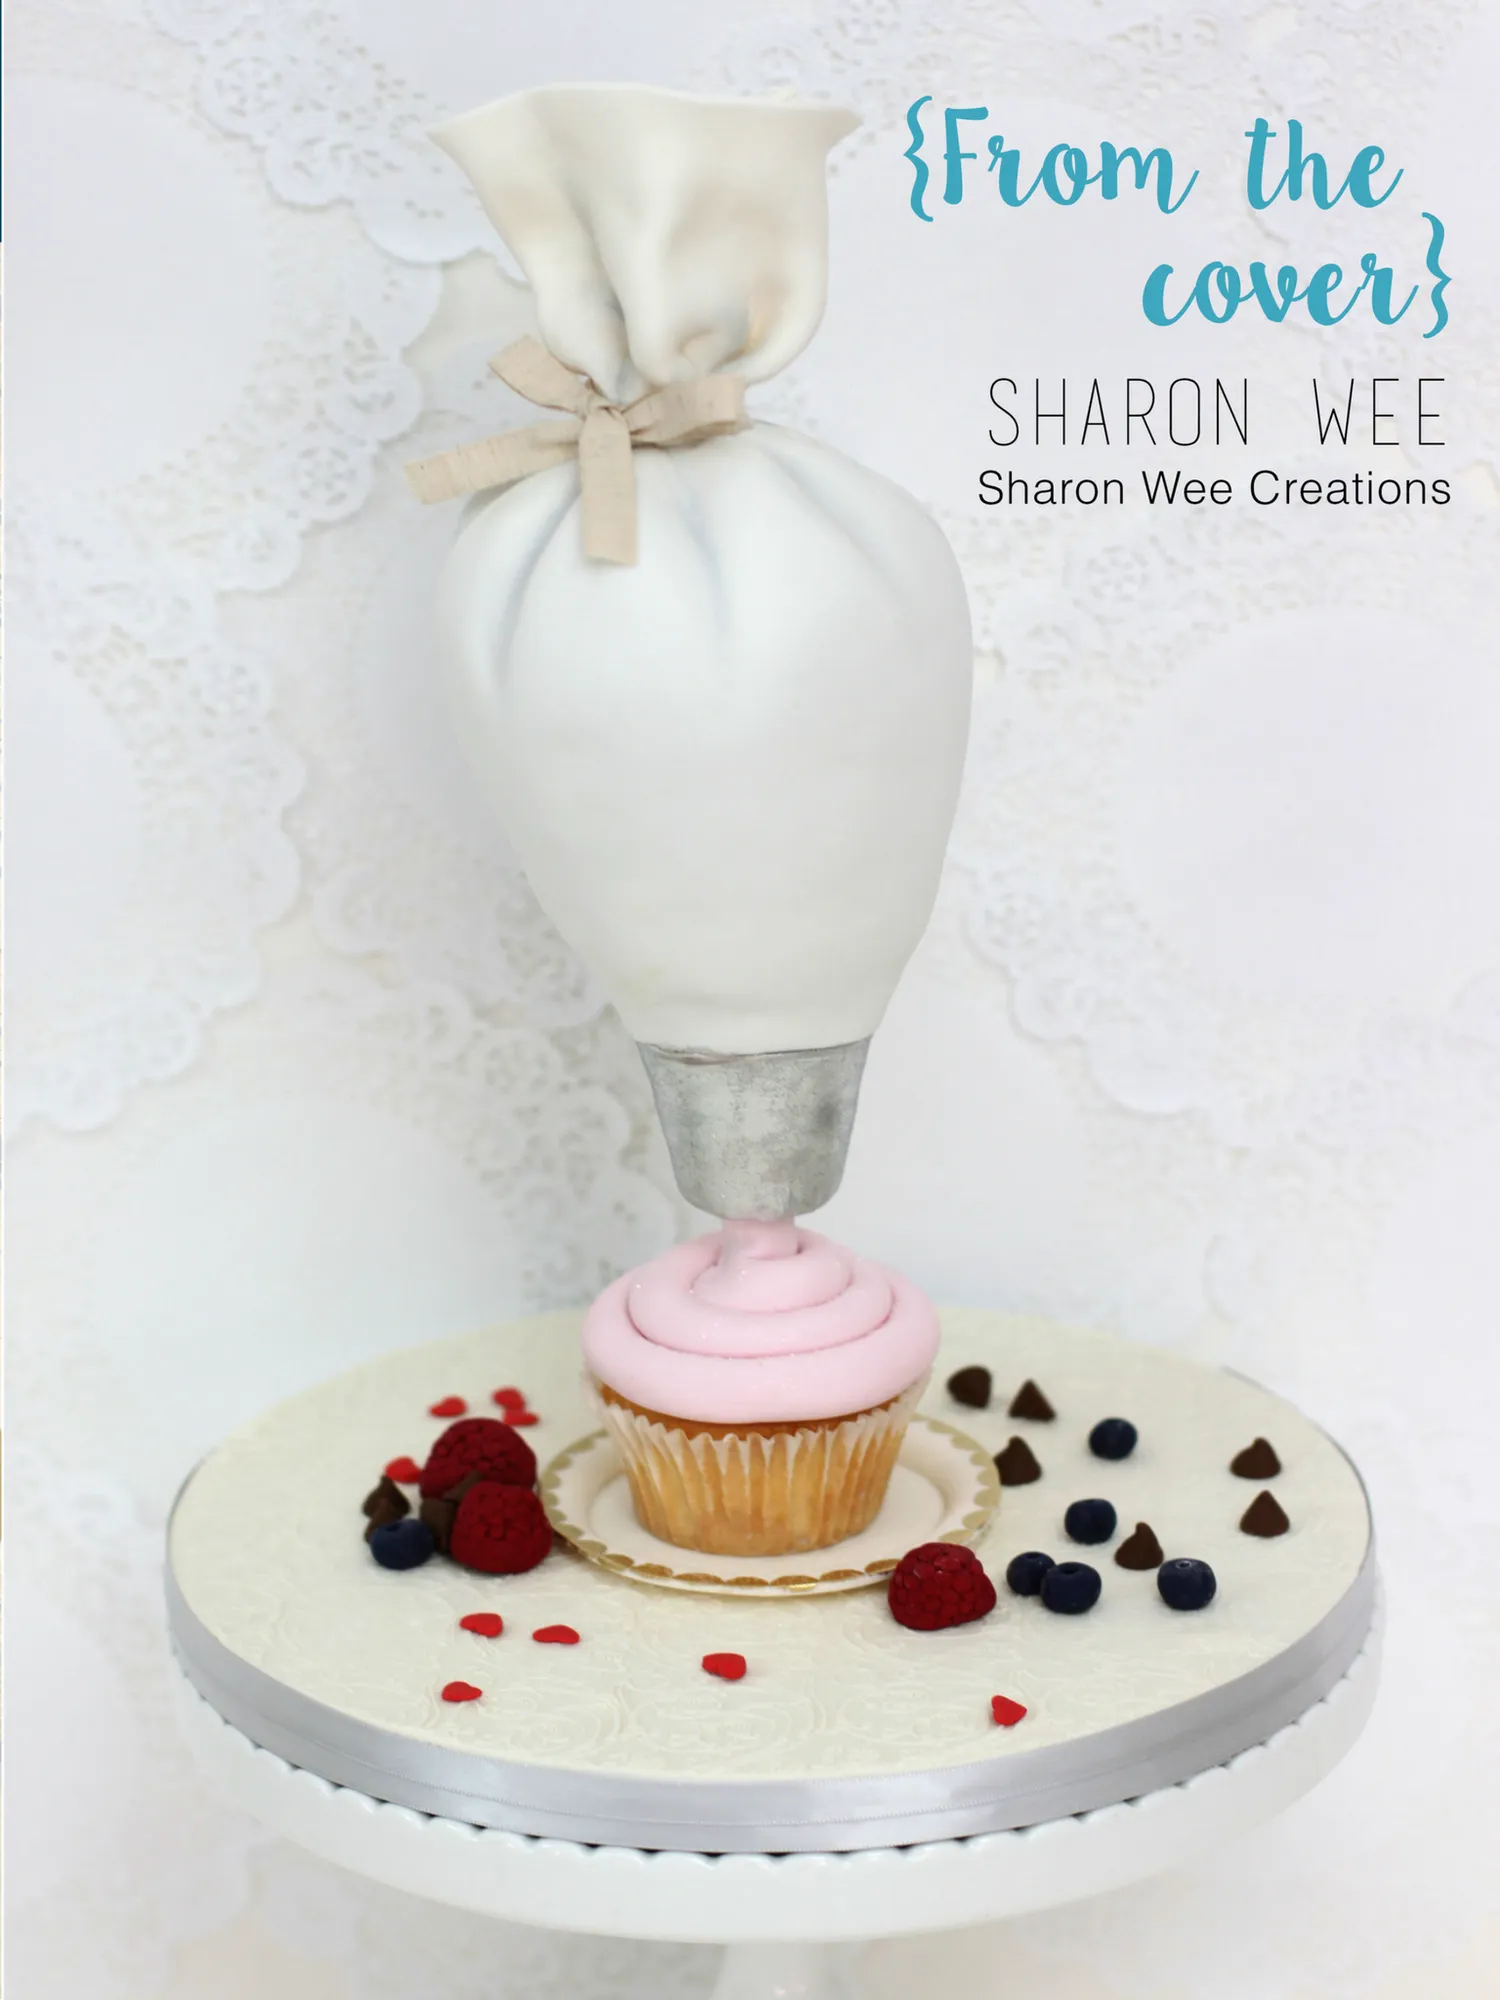
{From the cover}
Page 86 text
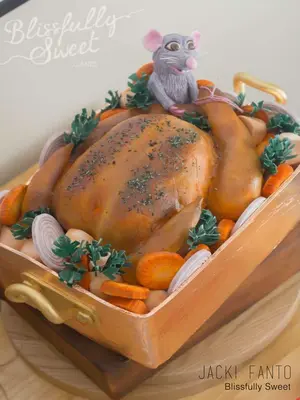
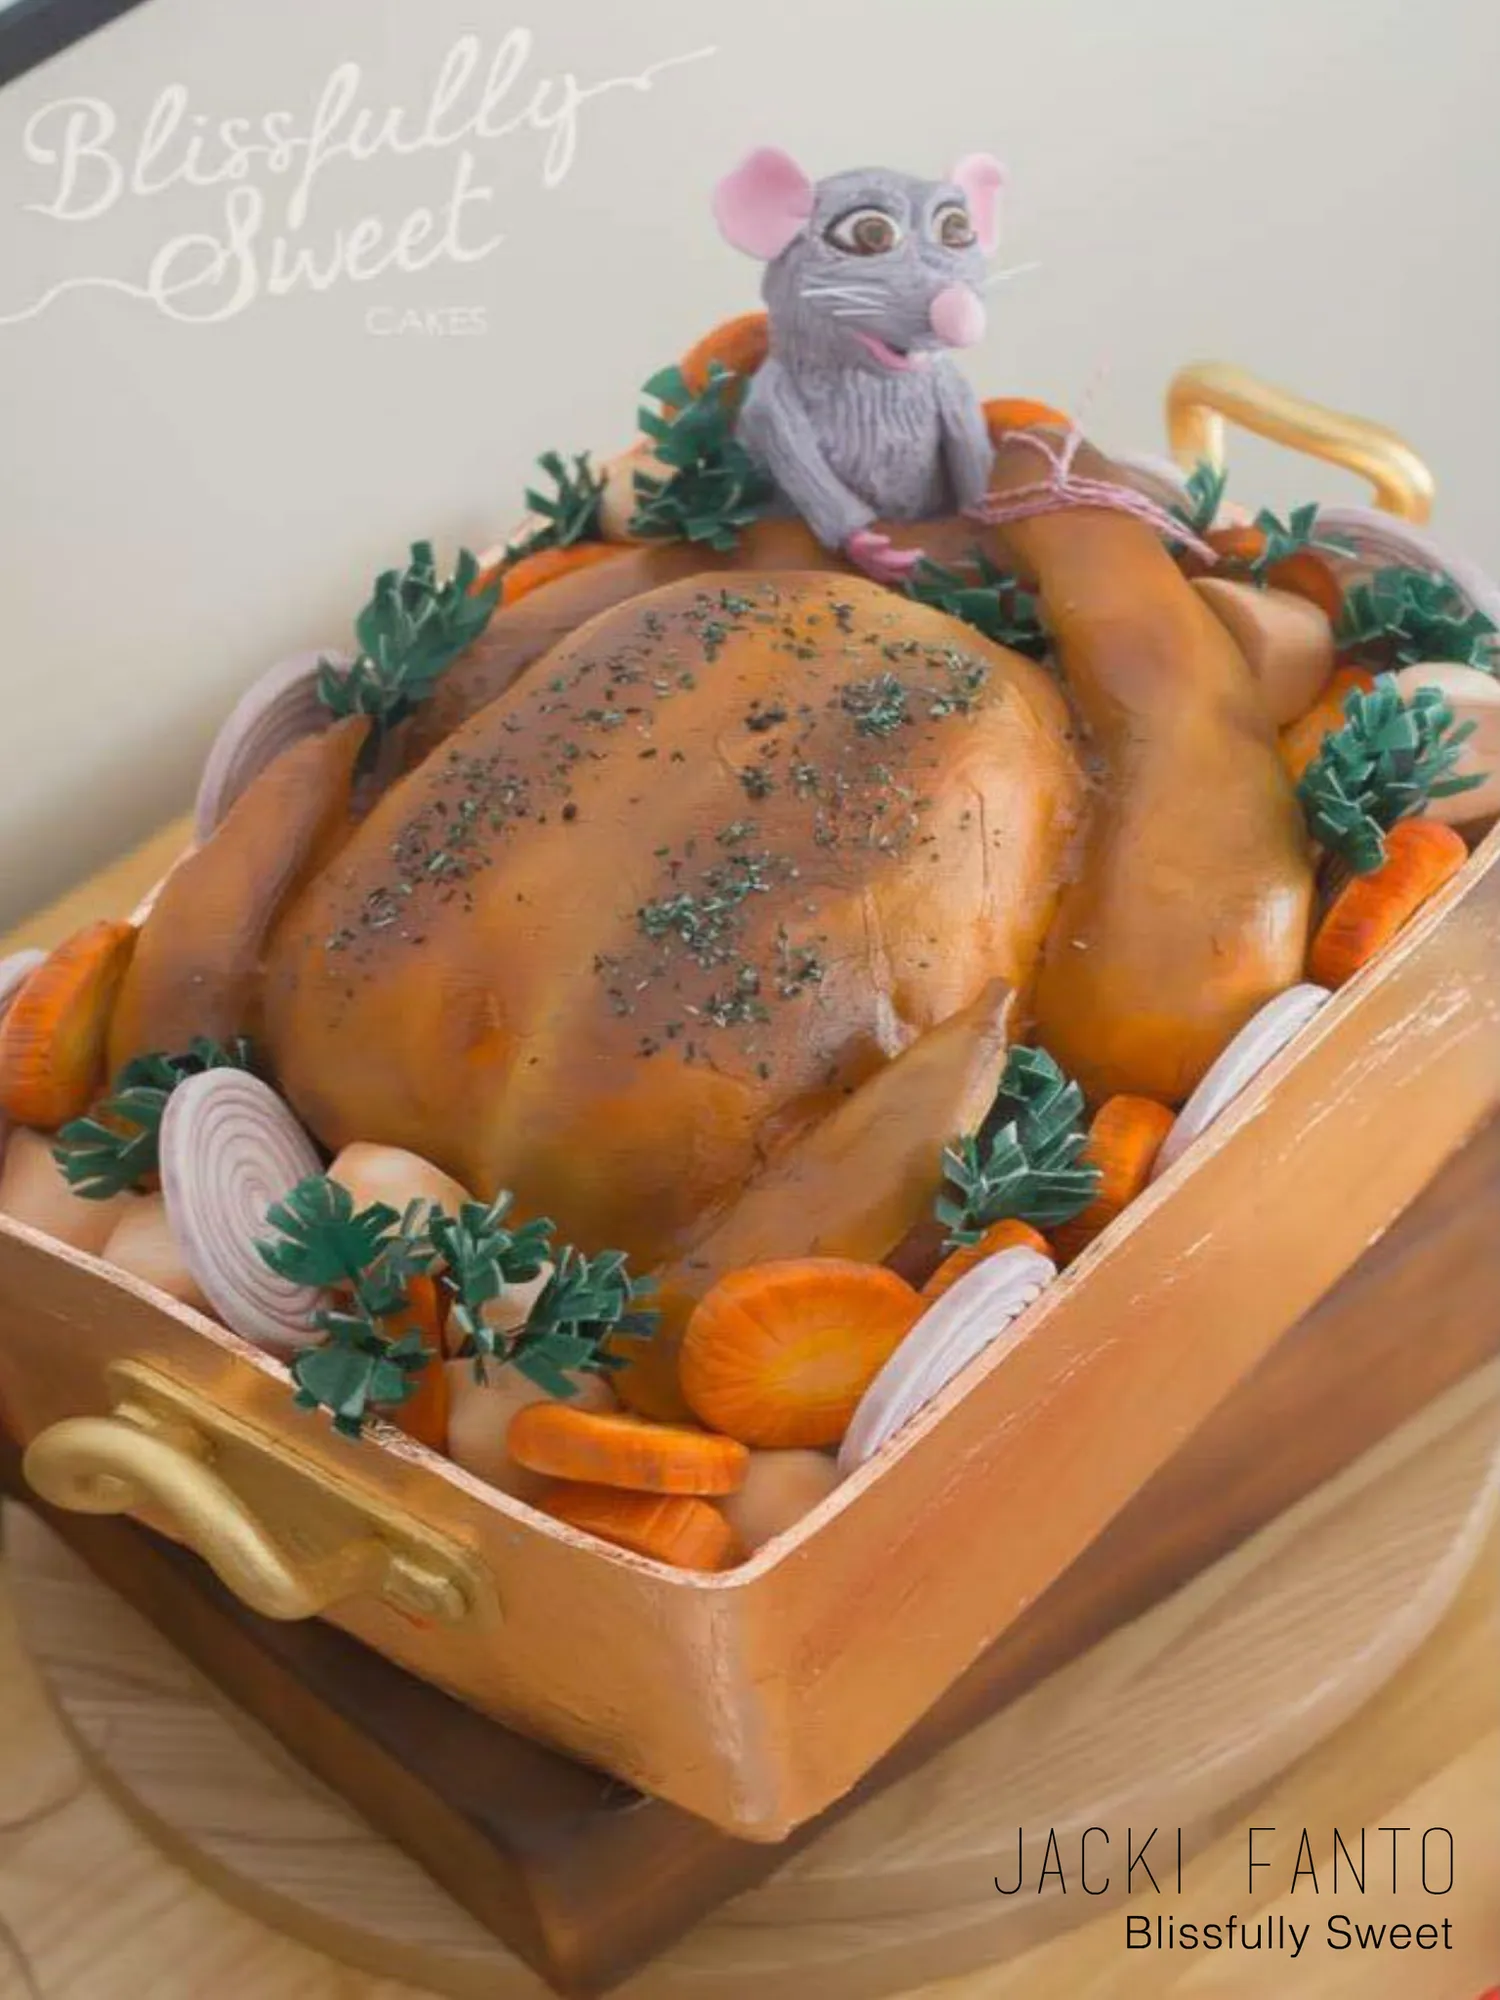
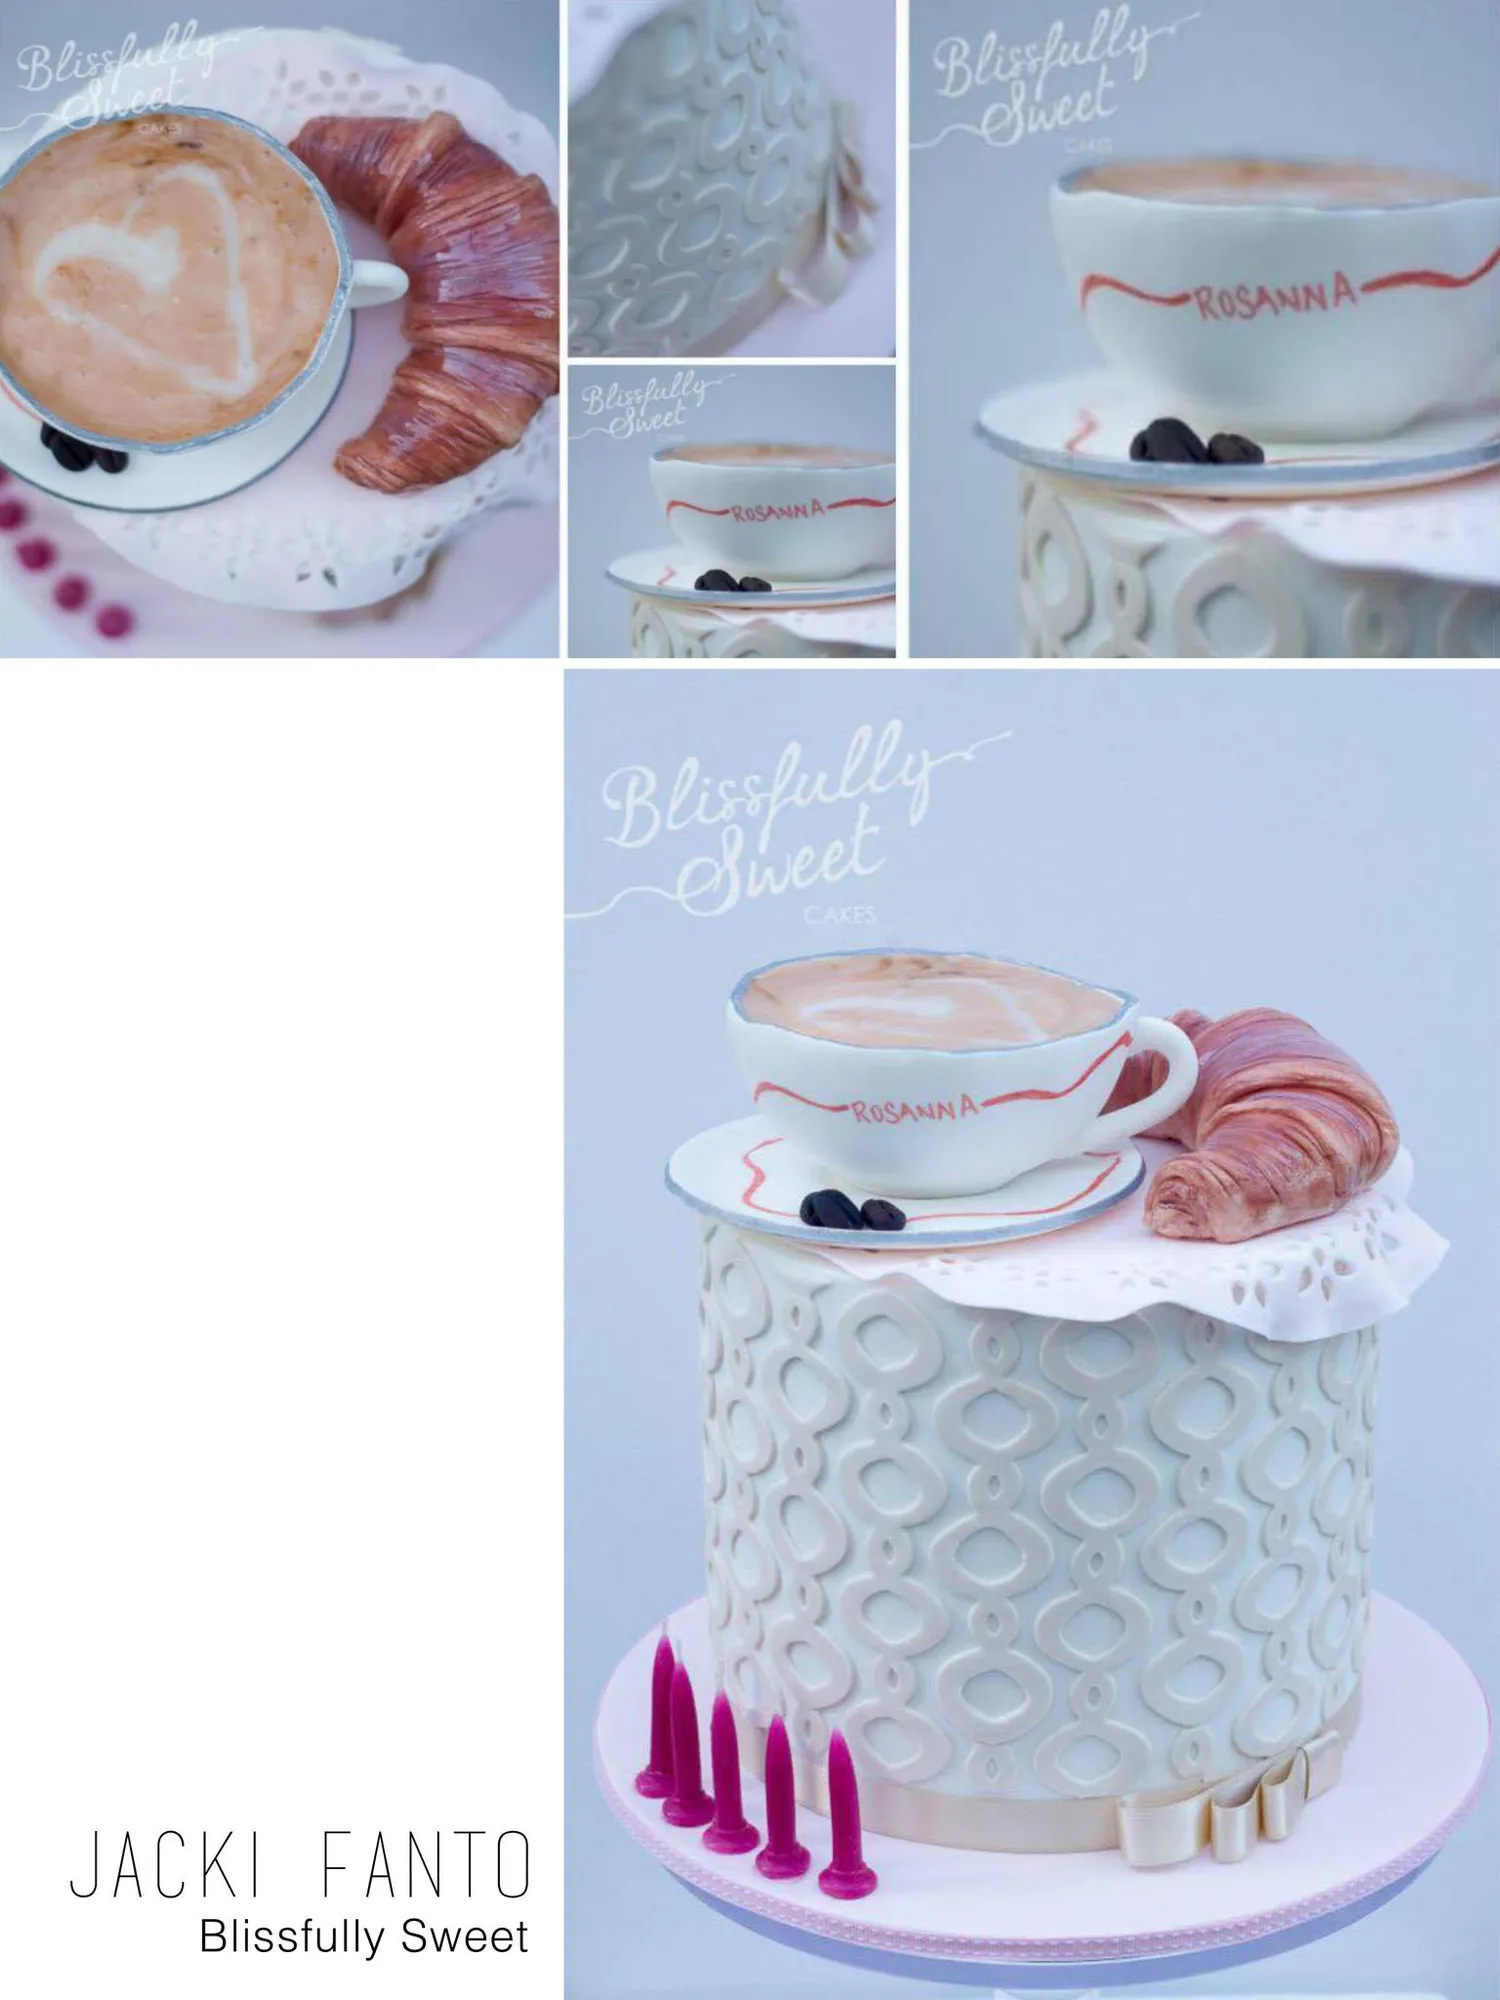
JACKI FANTO Blissfully Sweet


Page 87 text
Halal Kosher Vegetarians YES! YES! SPRINKLES No Gluten No GMO YES! YES! No Hydrogenated Fat No Dairy Products YES! YES! No Preservatives No ArtificialSweeteners YES! YES! No Artificial Colours No Artificial Flavours Go Healthy NATURAL COLOURS: Go SPRINKLES Carotenes Turmeric Chlorophylls Anthocyanins BeetrootRed Paprika Extract SUGARCRYSTALS Zosonkle Dolights Buinkld Dolights BULKSPRINKLES Golden Glamour HUNDREDS& THOUSANDS 6CELLJARS 4CELLJARS [email protected] www.qualitysprinkles.com.au
Page 88 text
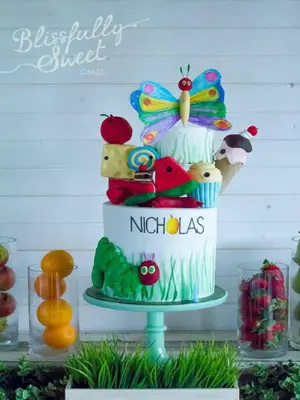
JACKI FANTO Blissfully Sweet
Page 89 text
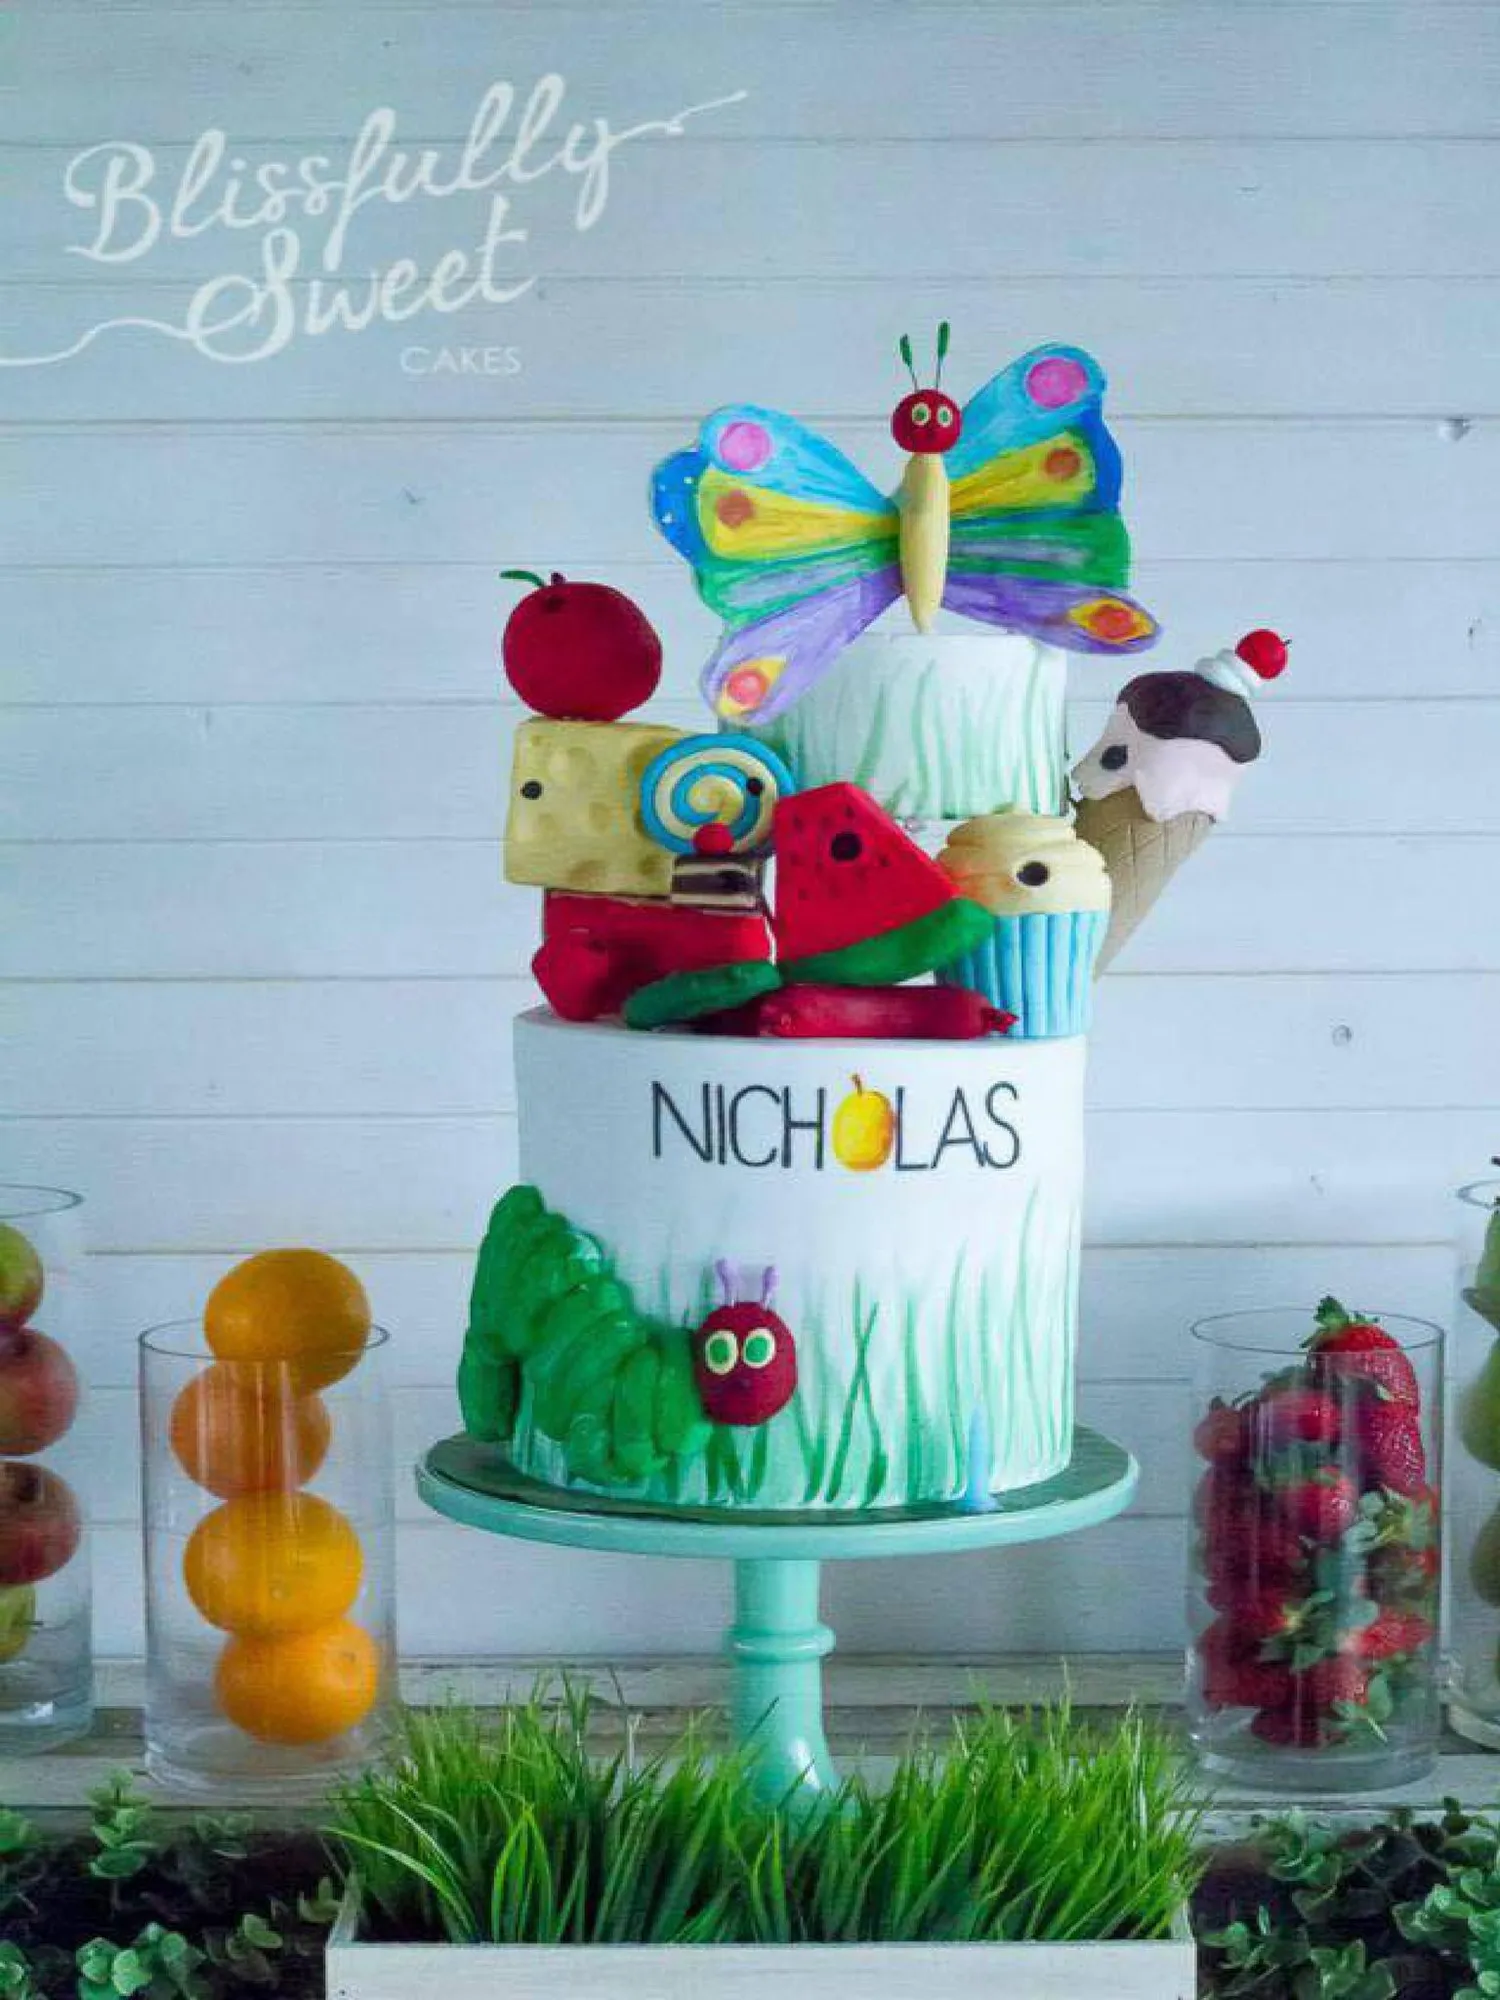
Blispully weet CAKES NICHLAS
Page 90 text
DOWNLOAD & PRINT Cake! magazine is now available for download and print. You can read offline or print your favourite tutorials- no more fondant on your ipad! CLICK HERE f To advertise in Cake! magazine, contact: [email protected]


Page 91 text
Interviews
Page 92 text
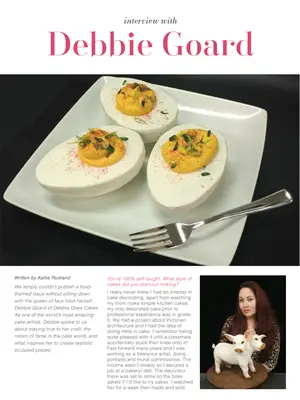
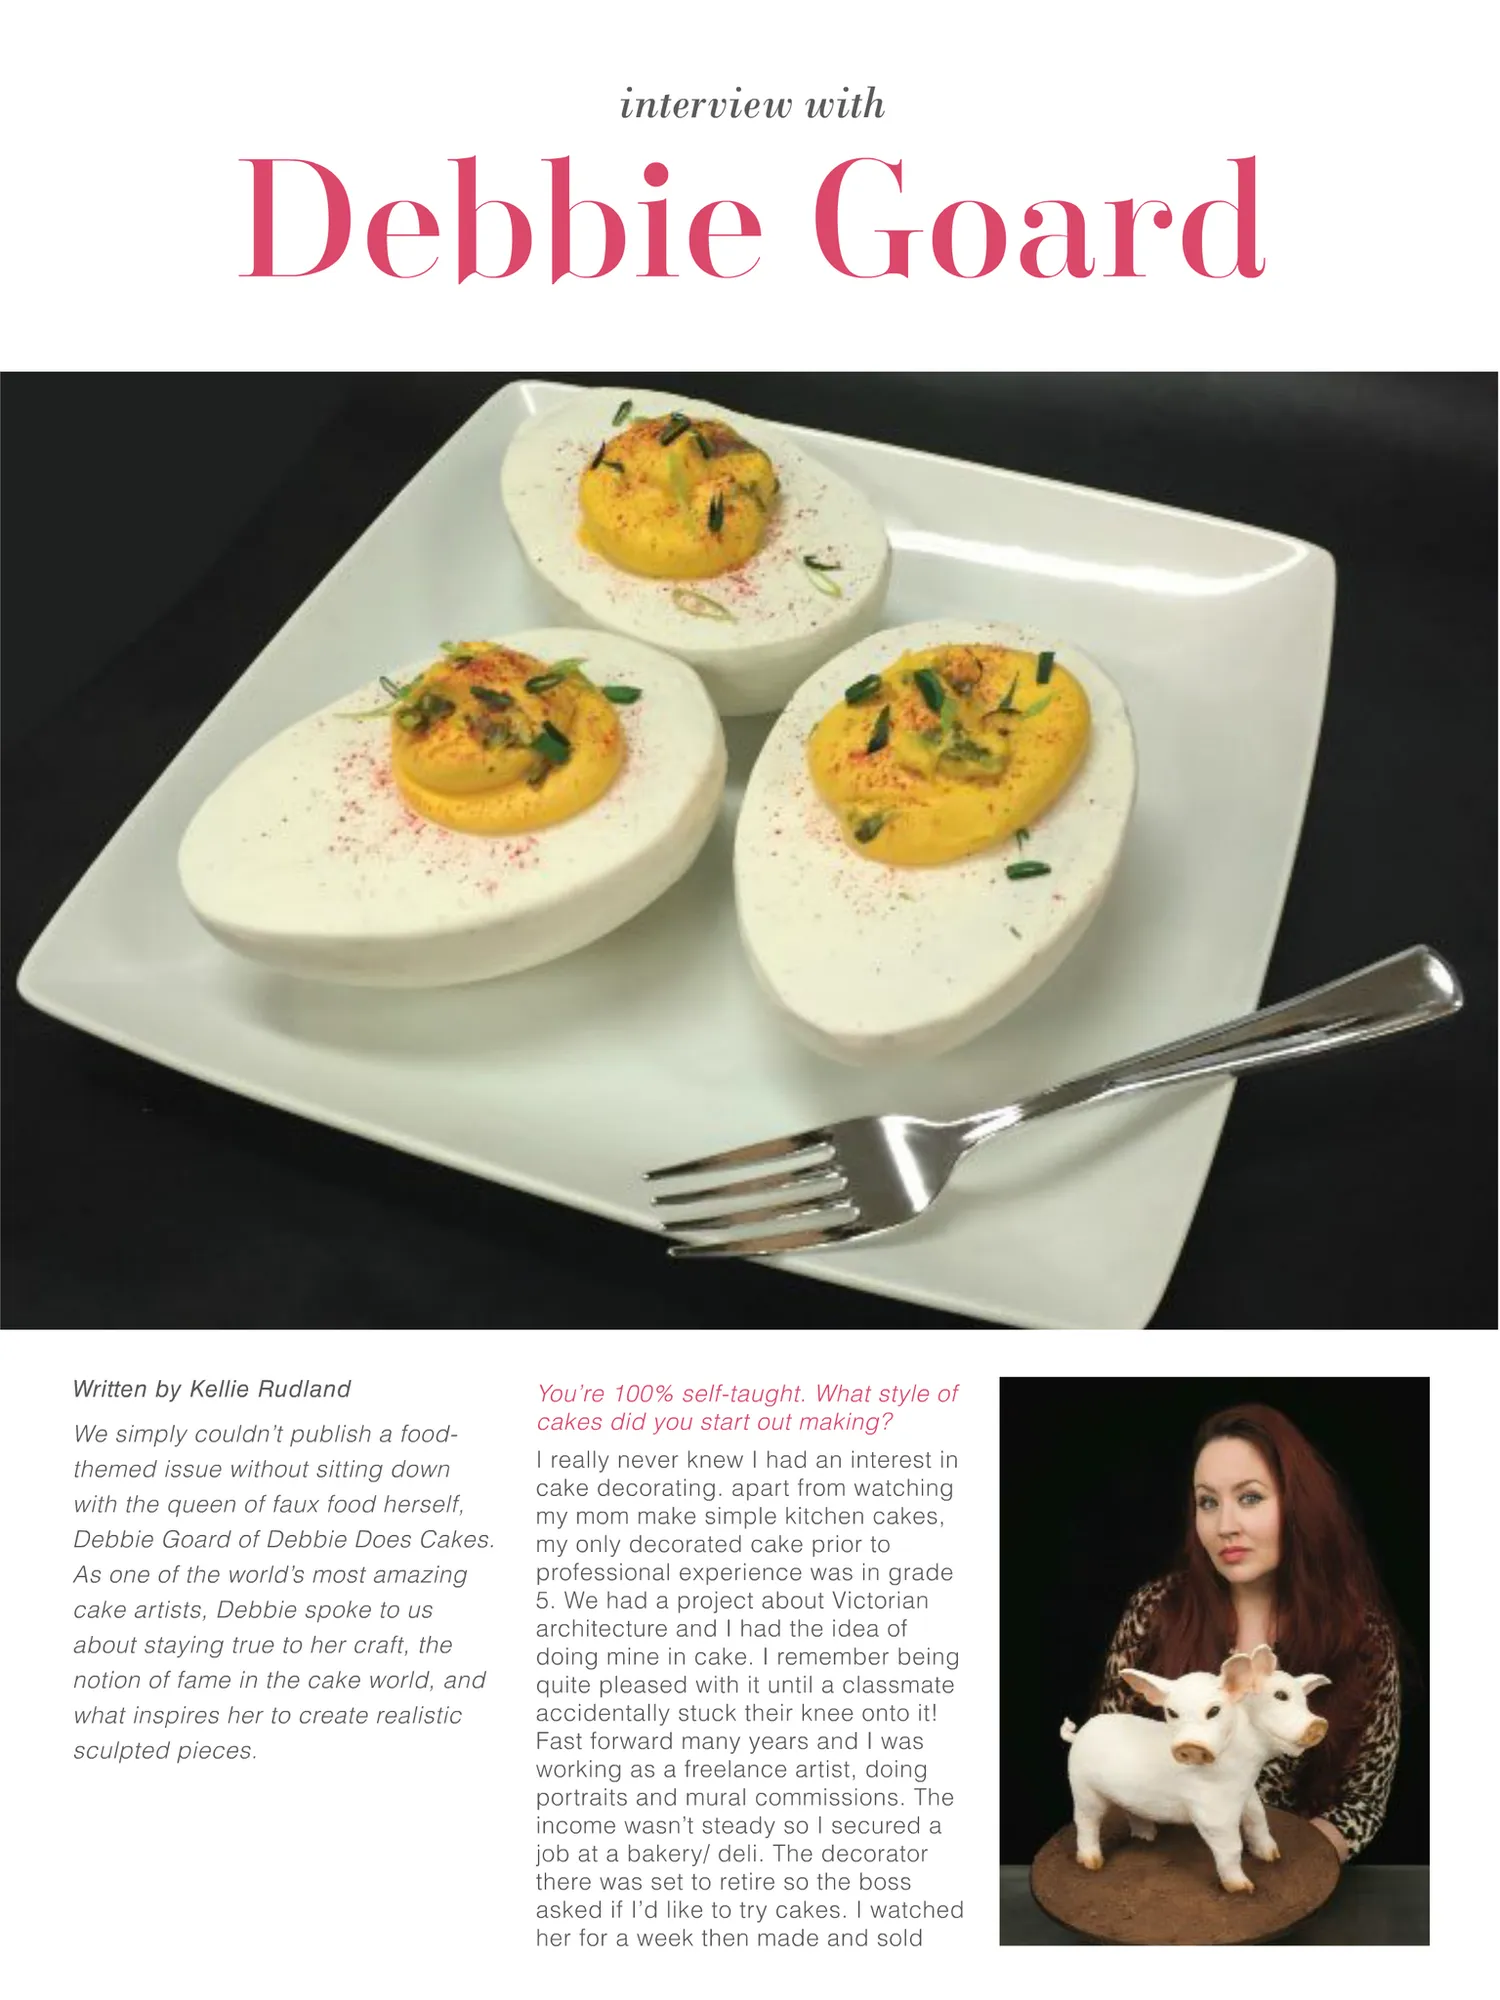
interview with Debbie Goard WrittenbyKellieRudland You're 100% self-taught. What style of cakes did you start out making? We simply couldn't publish a food- I really never knew I had an interest in themed issue without sitting down cake decorating. apart from watching with the queen of fauxfoodherself, my mom make simple kitchen cakes, Debbie Goard of Debbie Does Cakes. my only decorated cake prior to As one of the world's most amazing professional experience was in grade cake artists, Debbie spoke to us 5. We had a project about Victorian architecture and i had the idea of about staying true to her craft, the doing mine in cake. I remember being notion of fame in the cake world, and quite pleased with it until a classmate what inspires herto create realistic accidentally stuck their knee onto it! sculpted pieces. Fast forward many years and I was working as a freelance artist, doing portraits and mural commissions. The income wasn't steady so I secured a job at a bakery/ deli. The decorator there was set to retire so the boss asked if I'd like to try cakes. I watched her for a week then made and sold
Page 93 text
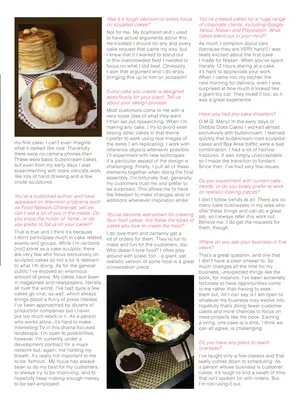
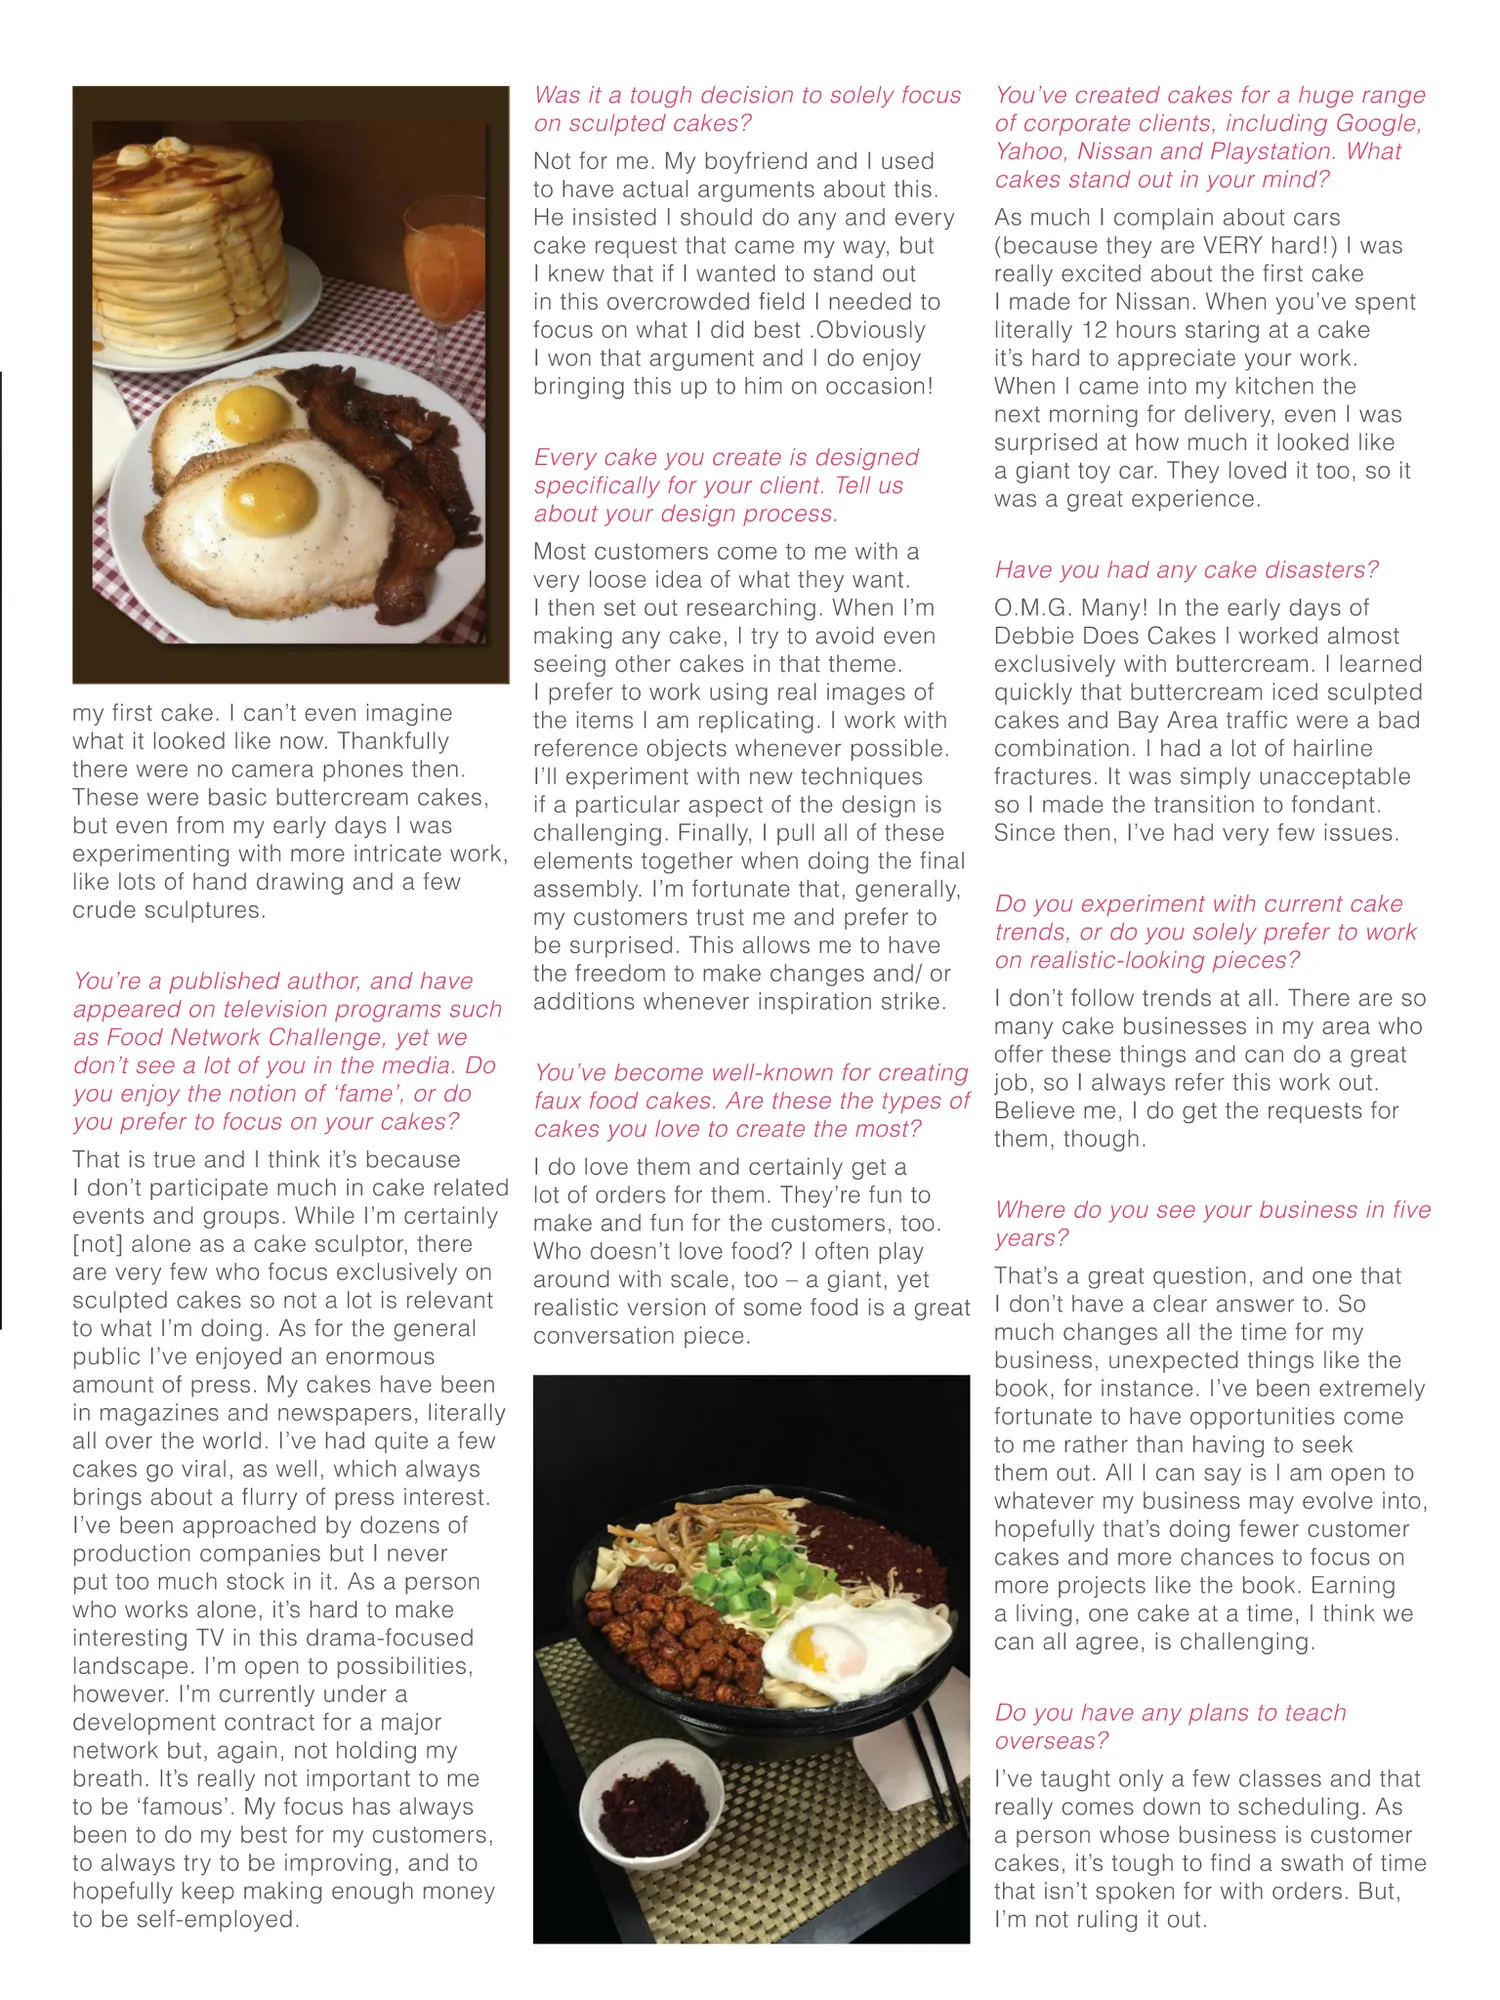
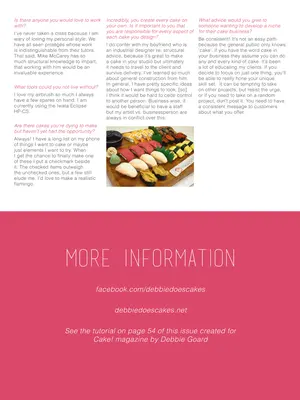
Was it a tough decision to solely focus on sculpted cakes? Not for me. My boyfriend and I used to have actual arguments about this. He insisted I should do any and every cake request that came my way, but I knew that if I wanted to stand out in this overcrowded field I needed to focus on what I did best .Obviously I won that argument and I do enjoy bringing this up to him on occasion! Every cake you create is designed specifically for your client. Tell us about your design process. my first cake. I can’t even imagine what it looked like now. Thankfully there were no camera phones then. These were basic buttercream cakes, but even from my early days I was experimenting with more intricate work, like lots of hand drawing and a few crude sculptures. You’re a published author, and have appeared on television programs such as Food Network Challenge, yet we don’t see a lot of you in the media. Do you enjoy the notion of ‘fame’, or do you prefer to focus on your cakes? That is true and I think it’s because I don’t participate much in cake related events and groups. While I’m certainly [not] alone as a cake sculptor, there are very few who focus exclusively on sculpted cakes so not a lot is relevant to what I’m doing. As for the general public I’ve enjoyed an enormous amount of press. My cakes have been in magazines and newspapers, literally all over the world. I’ve had quite a few cakes go viral, as well, which always brings about a flurry of press interest. I’ve been approached by dozens of production companies but I never put too much stock in it. As a person who works alone, it’s hard to make interesting TV in this drama-focused landscape. I’m open to possibilities, however. I’m currently under a development contract for a major network but, again, not holding my breath. It’s really not important to me to be ‘famous’. My focus has always been to do my best for my customers, to always try to be improving, and to hopefully keep making enough money to be self-employed. Most customers come to me with a very loose idea of what they want. I then set out researching. When I’m making any cake, I try to avoid even seeing other cakes in that theme. I prefer to work using real images of the items I am replicating. I work with reference objects whenever possible. I’ll experiment with new techniques if a particular aspect of the design is challenging. Finally, I pull all of these elements together when doing the final assembly. I’m fortunate that, generally, my customers trust me and prefer to be surprised. This allows me to have the freedom to make changes and/ or additions whenever inspiration strike. You’ve become well-known for creating faux food cakes. Are these the types of cakes you love to create the most? I do love them and certainly get a lot of orders for them. They’re fun to make and fun for the customers, too. Who doesn’t love food? I often play around with scale, too – a giant, yet realistic version of some food is a great conversation piece. You’ve created cakes for a huge range of corporate clients, including Google, Yahoo, Nissan and Playstation. What cakes stand out in your mind? As much I complain about cars (because they are VERY hard!) I was really excited about the first cake I made for Nissan. When you’ve spent literally 12 hours staring at a cake it’s hard to appreciate your work. When I came into my kitchen the next morning for delivery, even I was surprised at how much it looked like a giant toy car. They loved it too, so it was a great experience. Have you had any cake disasters? O.M.G. Many! In the early days of Debbie Does Cakes I worked almost exclusively with buttercream. I learned quickly that buttercream iced sculpted cakes and Bay Area traffic were a bad combination. I had a lot of hairline fractures. It was simply unacceptable so I made the transition to fondant. Since then, I’ve had very few issues. Do you experiment with current cake trends, or do you solely prefer to work on realistic-looking pieces? I don’t follow trends at all. There are so many cake businesses in my area who offer these things and can do a great job, so I always refer this work out. Believe me, I do get the requests for them, though. Where do you see your business in five years? That’s a great question, and one that I don’t have a clear answer to. So much changes all the time for my business, unexpected things like the book, for instance. I’ve been extremely fortunate to have opportunities come to me rather than having to seek them out. All I can say is I am open to whatever my business may evolve into, hopefully that’s doing fewer customer cakes and more chances to focus on more projects like the book. Earning a living, one cake at a time, I think we can all agree, is challenging. Do you have any plans to teach overseas? I’ve taught only a few classes and that really comes down to scheduling. As a person whose business is customer cakes, it’s tough to find a swath of time that isn’t spoken for with orders. But, I’m not ruling it out.
Page 94 text
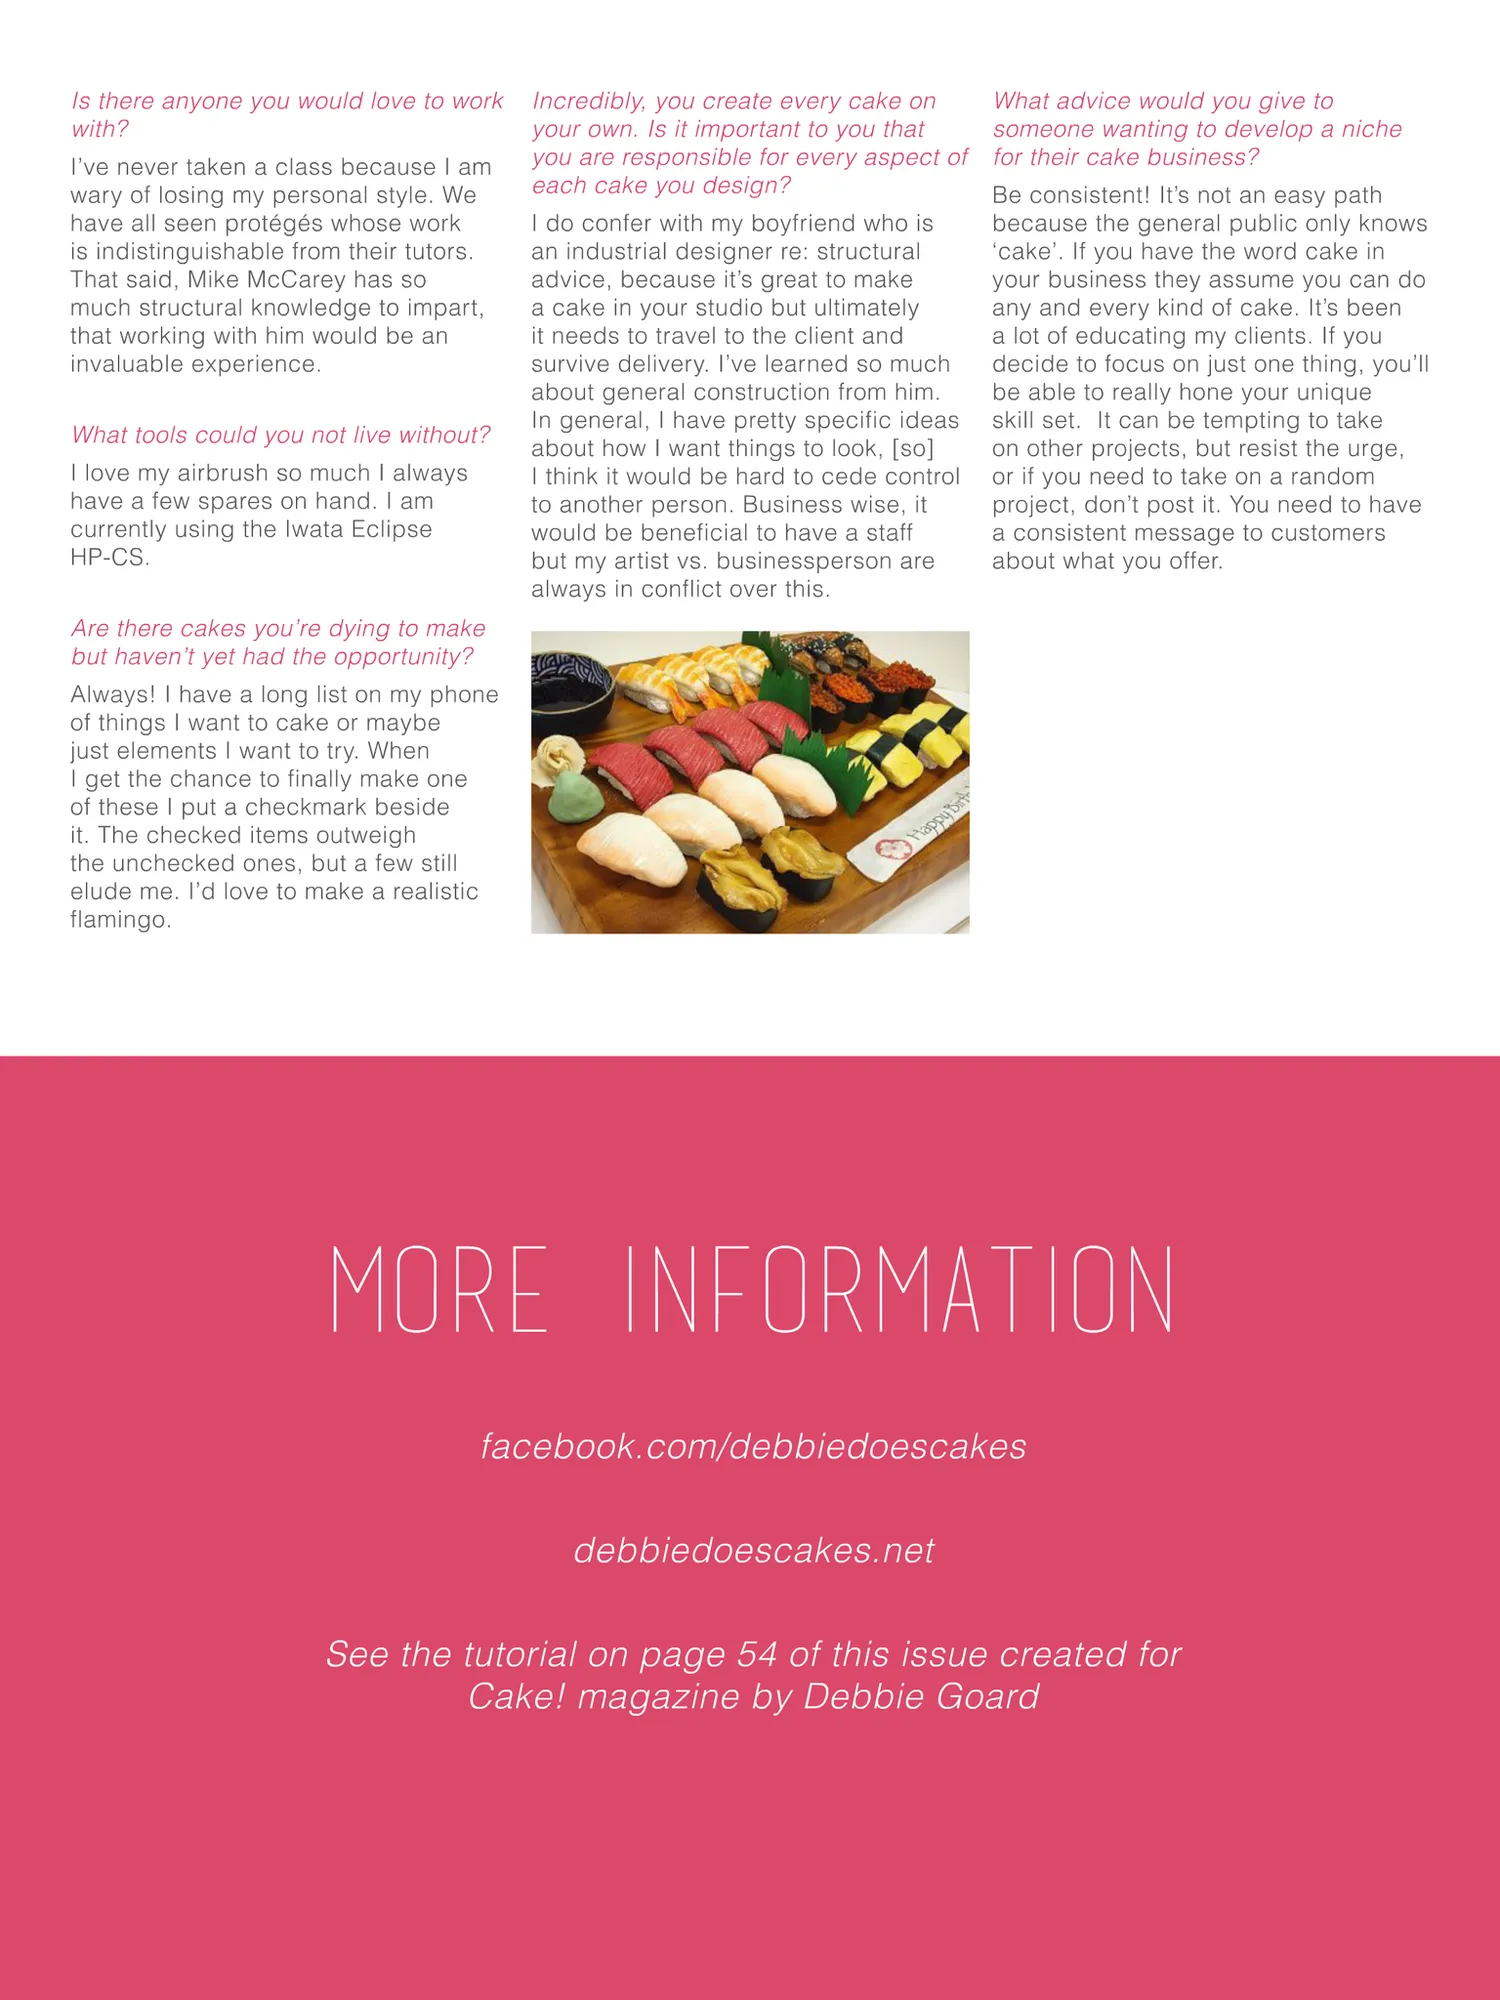
Is there anyone you would love to work Incredibly, you create every cake on What advice would you give to with? your own. Is it important to you that someone wanting to develop a niche you are responsible for every aspect of I've never taken a class because I am for their cake business? each cake you design? wary of losing my personal style. We Be consistent! It's not an easy path have all seen protéegés whose work I do confer with my boyfriend who is because the general public only knows is indistinguishable from their tutors. an industrial designer re: structural ‘cake'.If you have the word cake in That said, Mike McCarey has so advice, because it's great to make your business they assume you can do a cake in your studio but ultimately much structural knowledge to impart, any and every kind of cake. It's been that working with him would be an it needs to travel to the client and a lot of educating my clients. If you invaluable experience. survive delivery. I've learned so much decide to focus on just one thing, you'll about general construction from him. be able to really hone your unique In general, I have pretty specific ideas skill set. It can be tempting to take What tools could you not live without? about how I want things to look, [so] on other projects, but resist the urge, I love my airbrush so much I always I think it would be hard to cede control or if you need to take on a random have a few spares on hand. I am to another person. Business wise, it project, don't post it. You need to have currently using the Iwata Eclipse would be beneficial to have a staff a consistent message to customers HP-CS. but my artist vs. businessperson are about what you offer. always in conflict over this. Are there cakes you're dying to make but haven't yet had the opportunity? Always! i have a long list on my phone of things I want to cake or maybe just elements I want to try. When I get the chance to finally make one of these I put a checkmark beside it. The checked items outweigh the unchecked ones, but a few still elude me. I'd love to make a realistic flamingo. MORE INFORMATION facebook.com/debbiedoescakes debbiedoescakes.net See the tutorial on page 54 of this issue created for Cake! magazine by Debbie Goard
Page 95 text
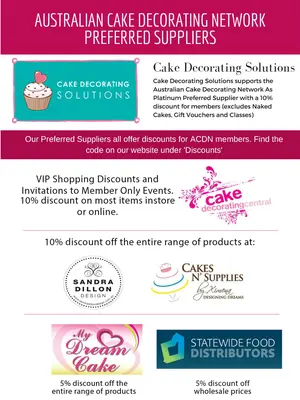
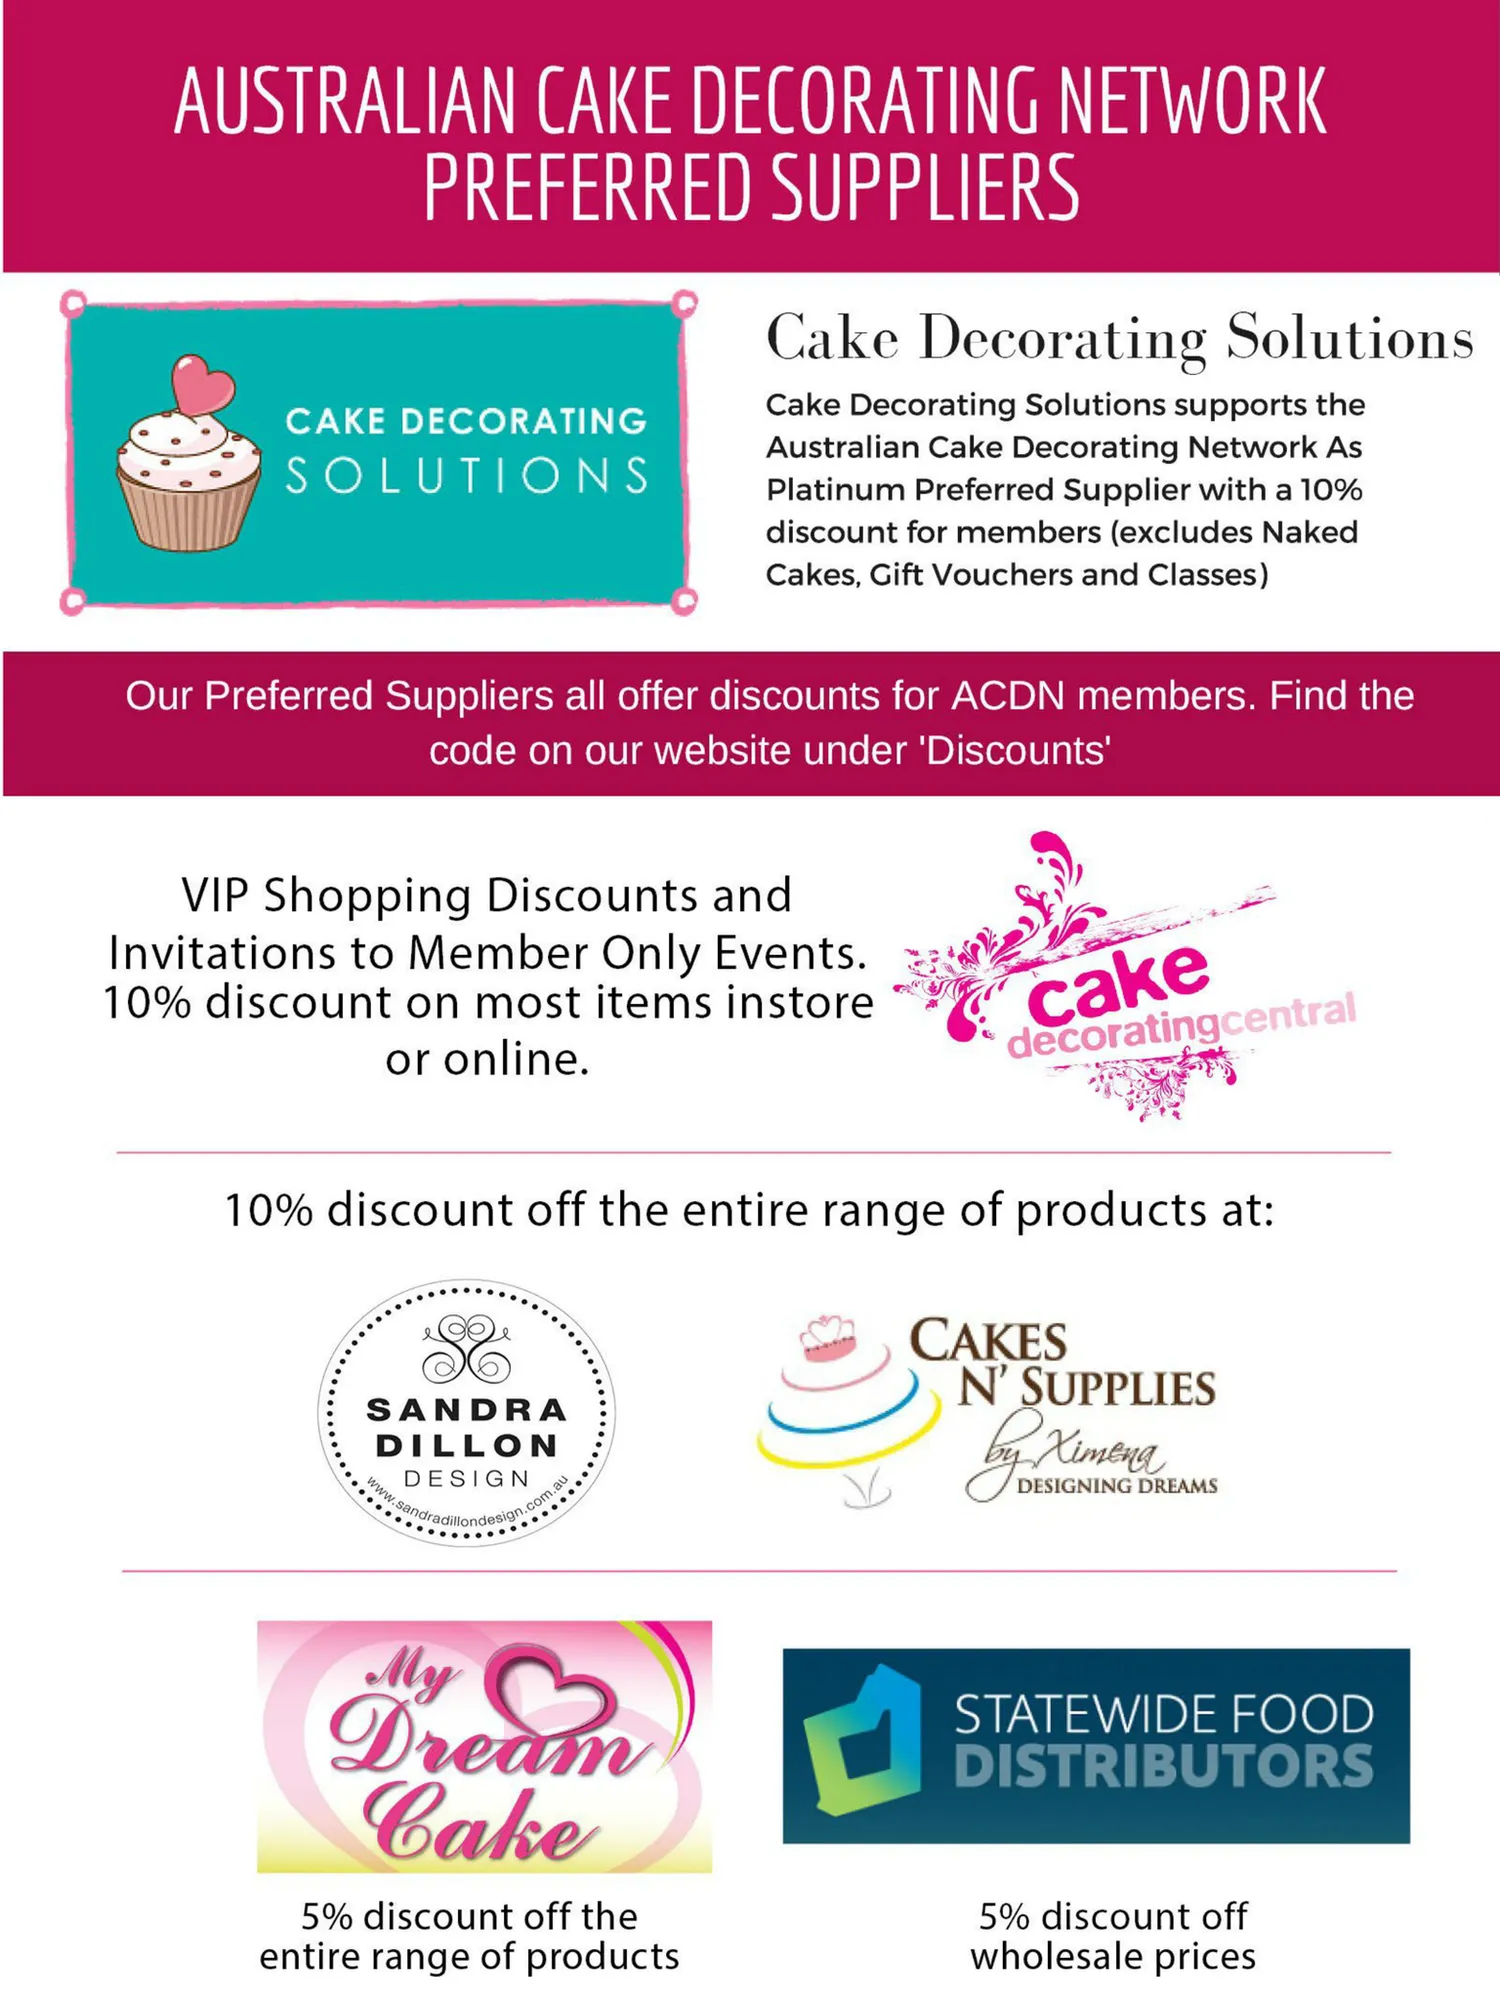
AUSTRALIAN CAKE DECORATING NETWORK PREFERRED SUPPLIERS Cake Decorating Solutions Cake Decorating Solutions supports the CAKEDECORATING AustralianCakeDecoratingNetworkAs SOLUTIONS PlatinumPreferred Supplier with a10% discountformembers(excludesNaked Cakes, Gift Vouchersand Classes) Our Preferred Suppliers all offer discounts for ACDN members. Find the code on our website under 'Discounts' ViP Shopping Discounts and Invitations to Member Only Events. 10% discount on most items instore cake decoratingcentral or online. 1o% discount off the entire range of products at: CAKES N'SUPPLIES SANDRA DILLON Ximena DESIGN DESIGNINGDREAMS STATEWIDEFOOD emm DISTRIBUTORS Cake 5% discount off the 5% discount off entire range of products wholesale prices
Page 96 text
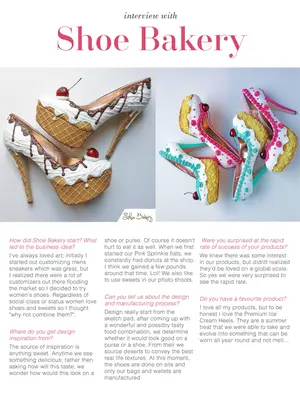
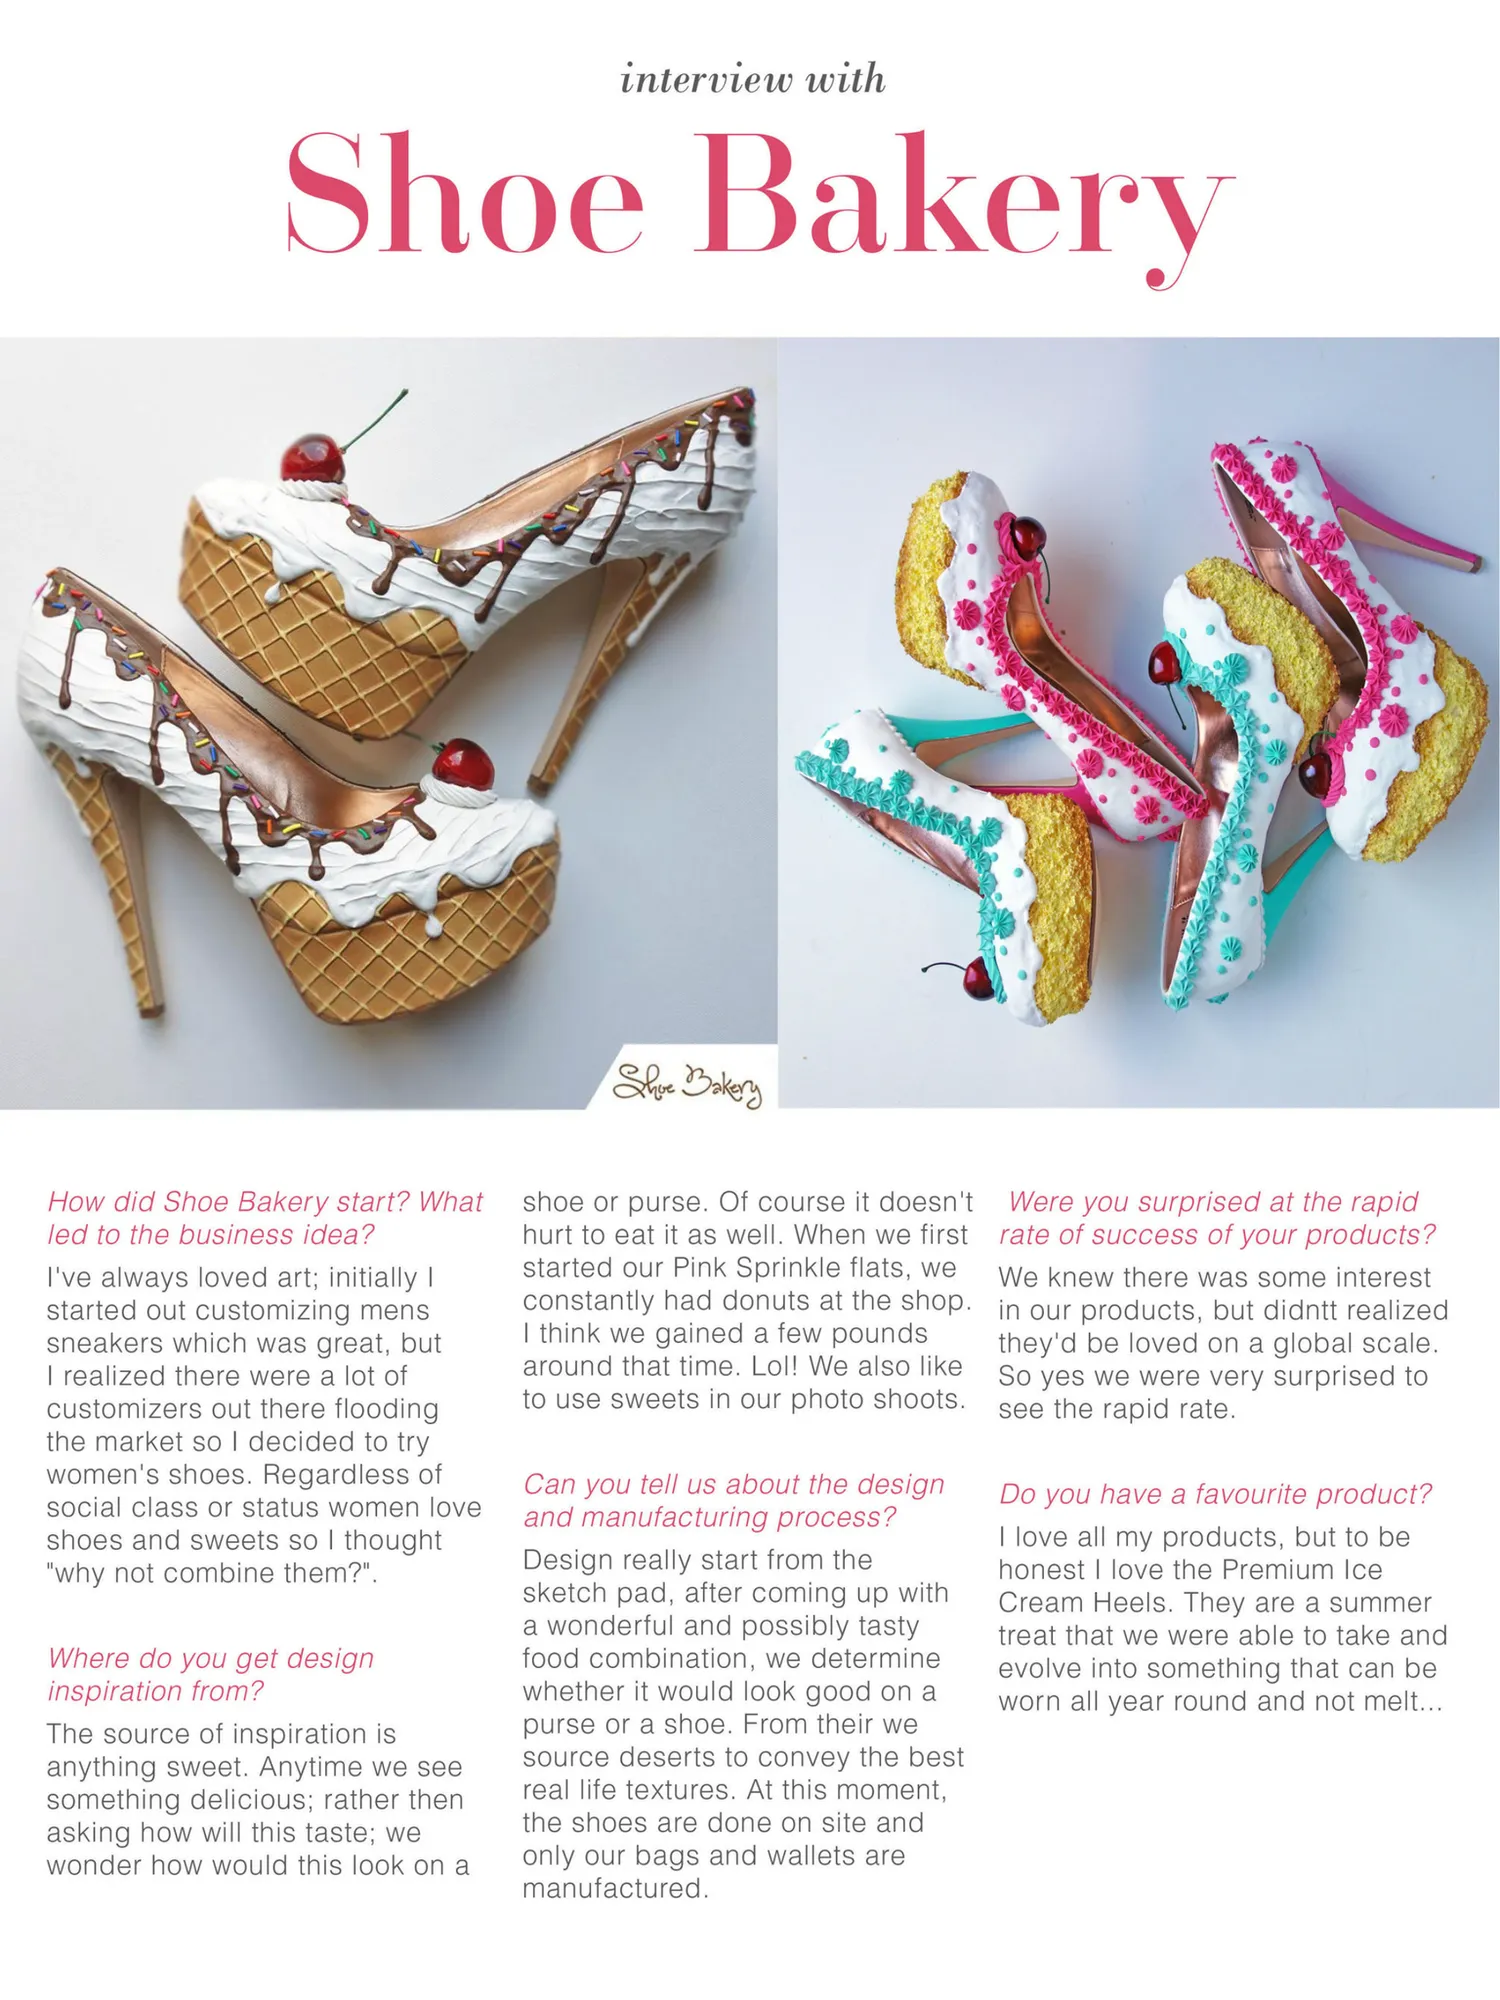
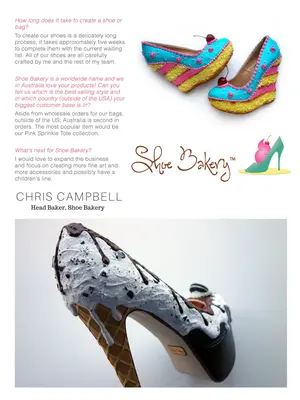
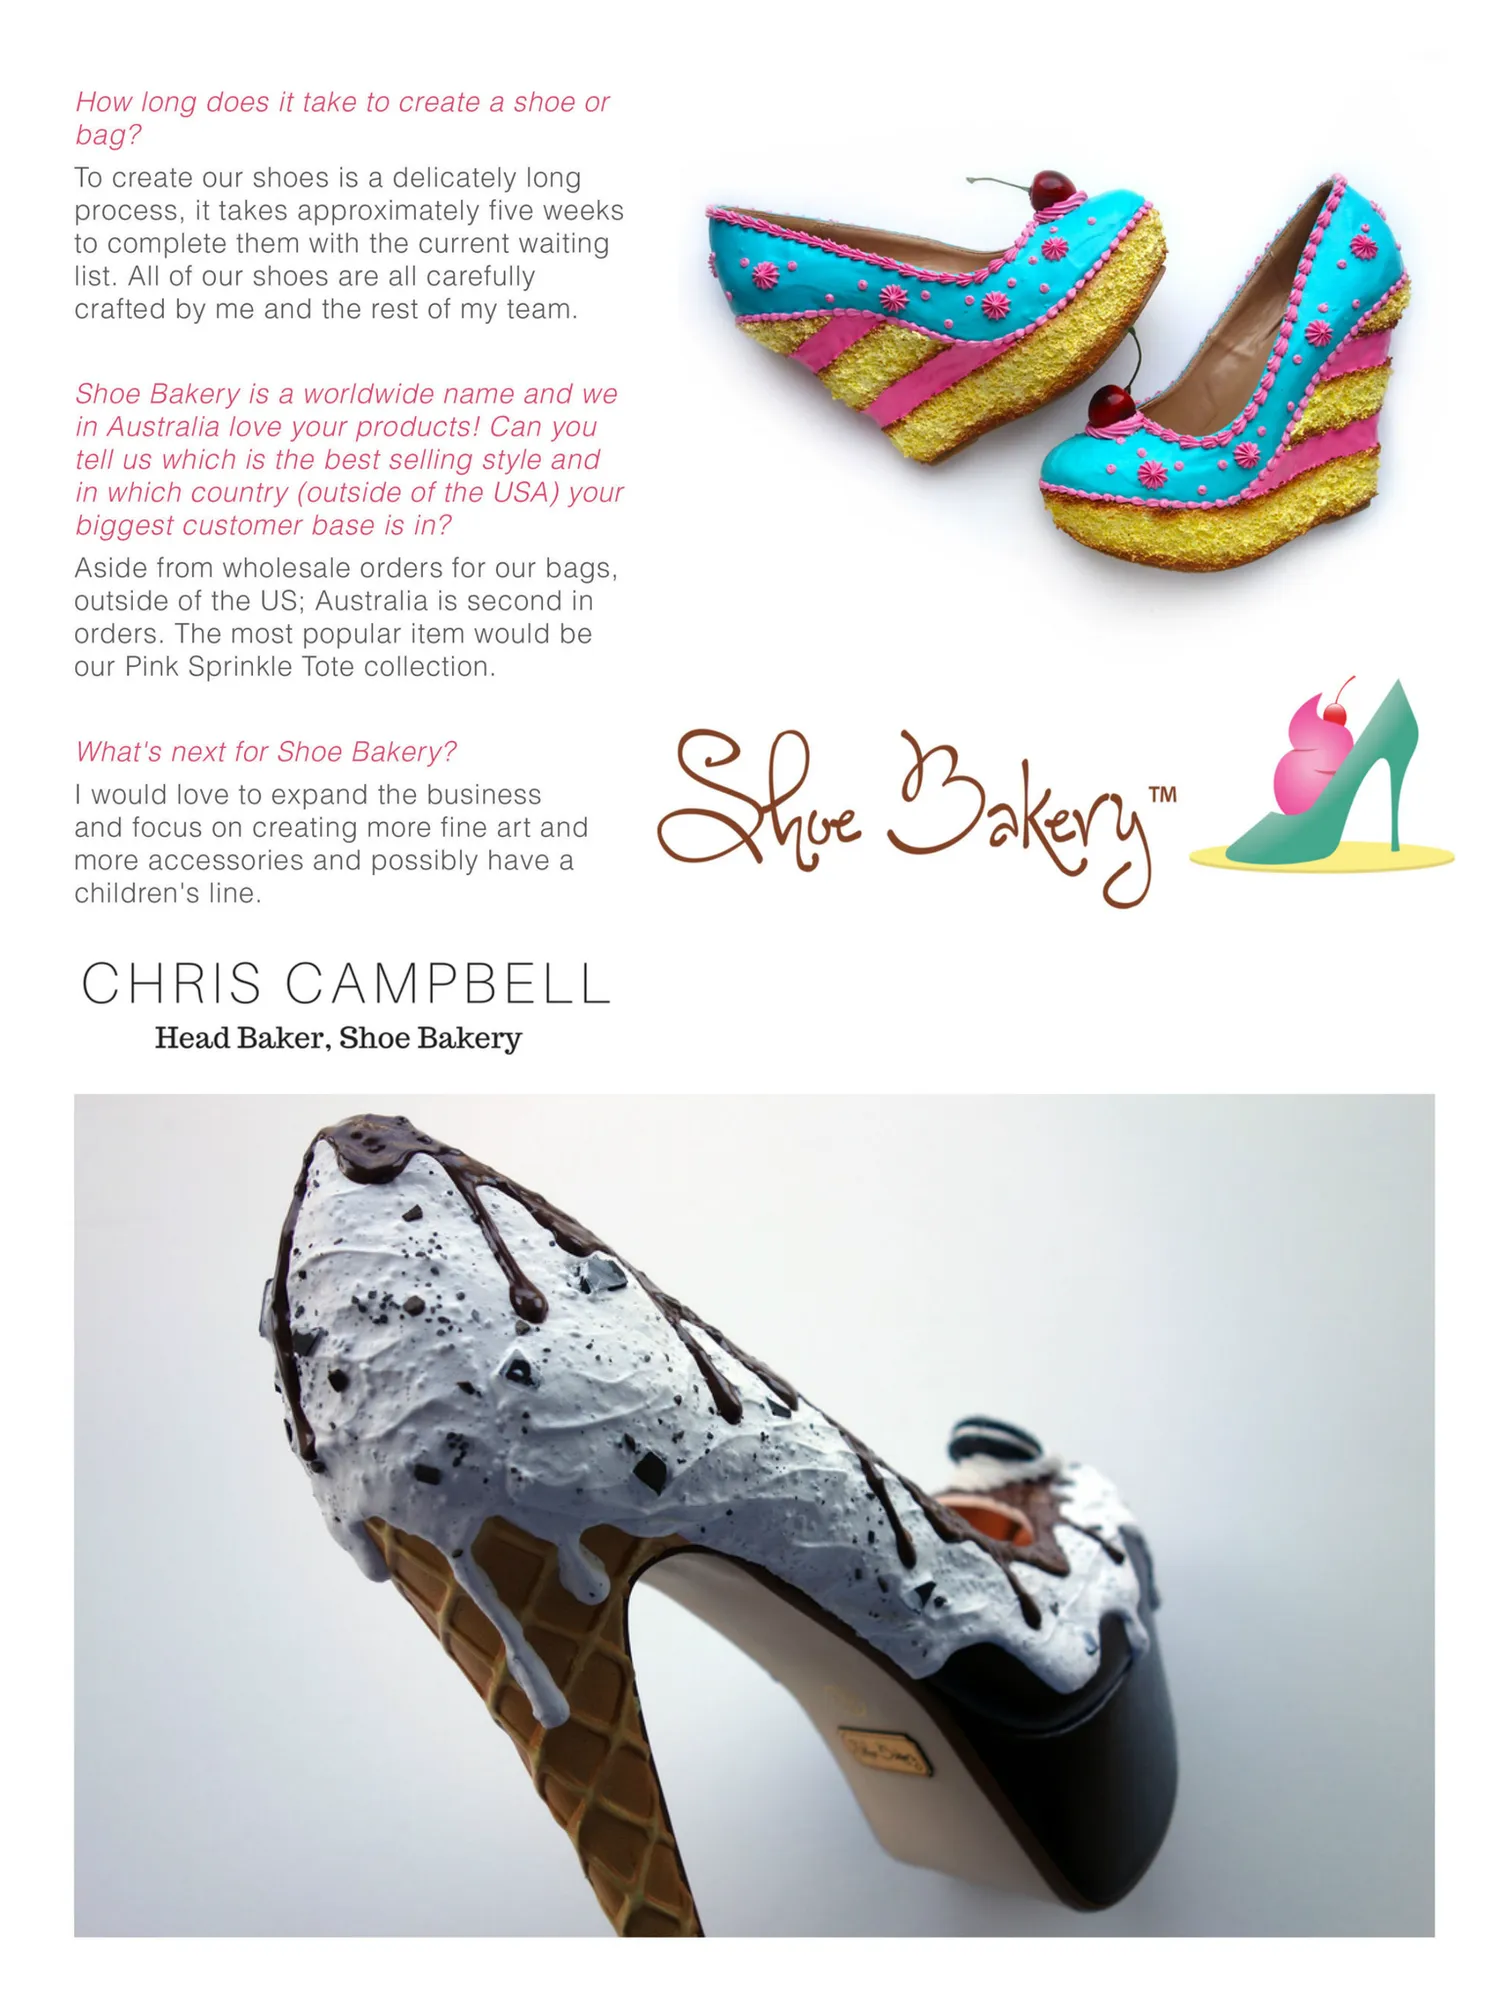
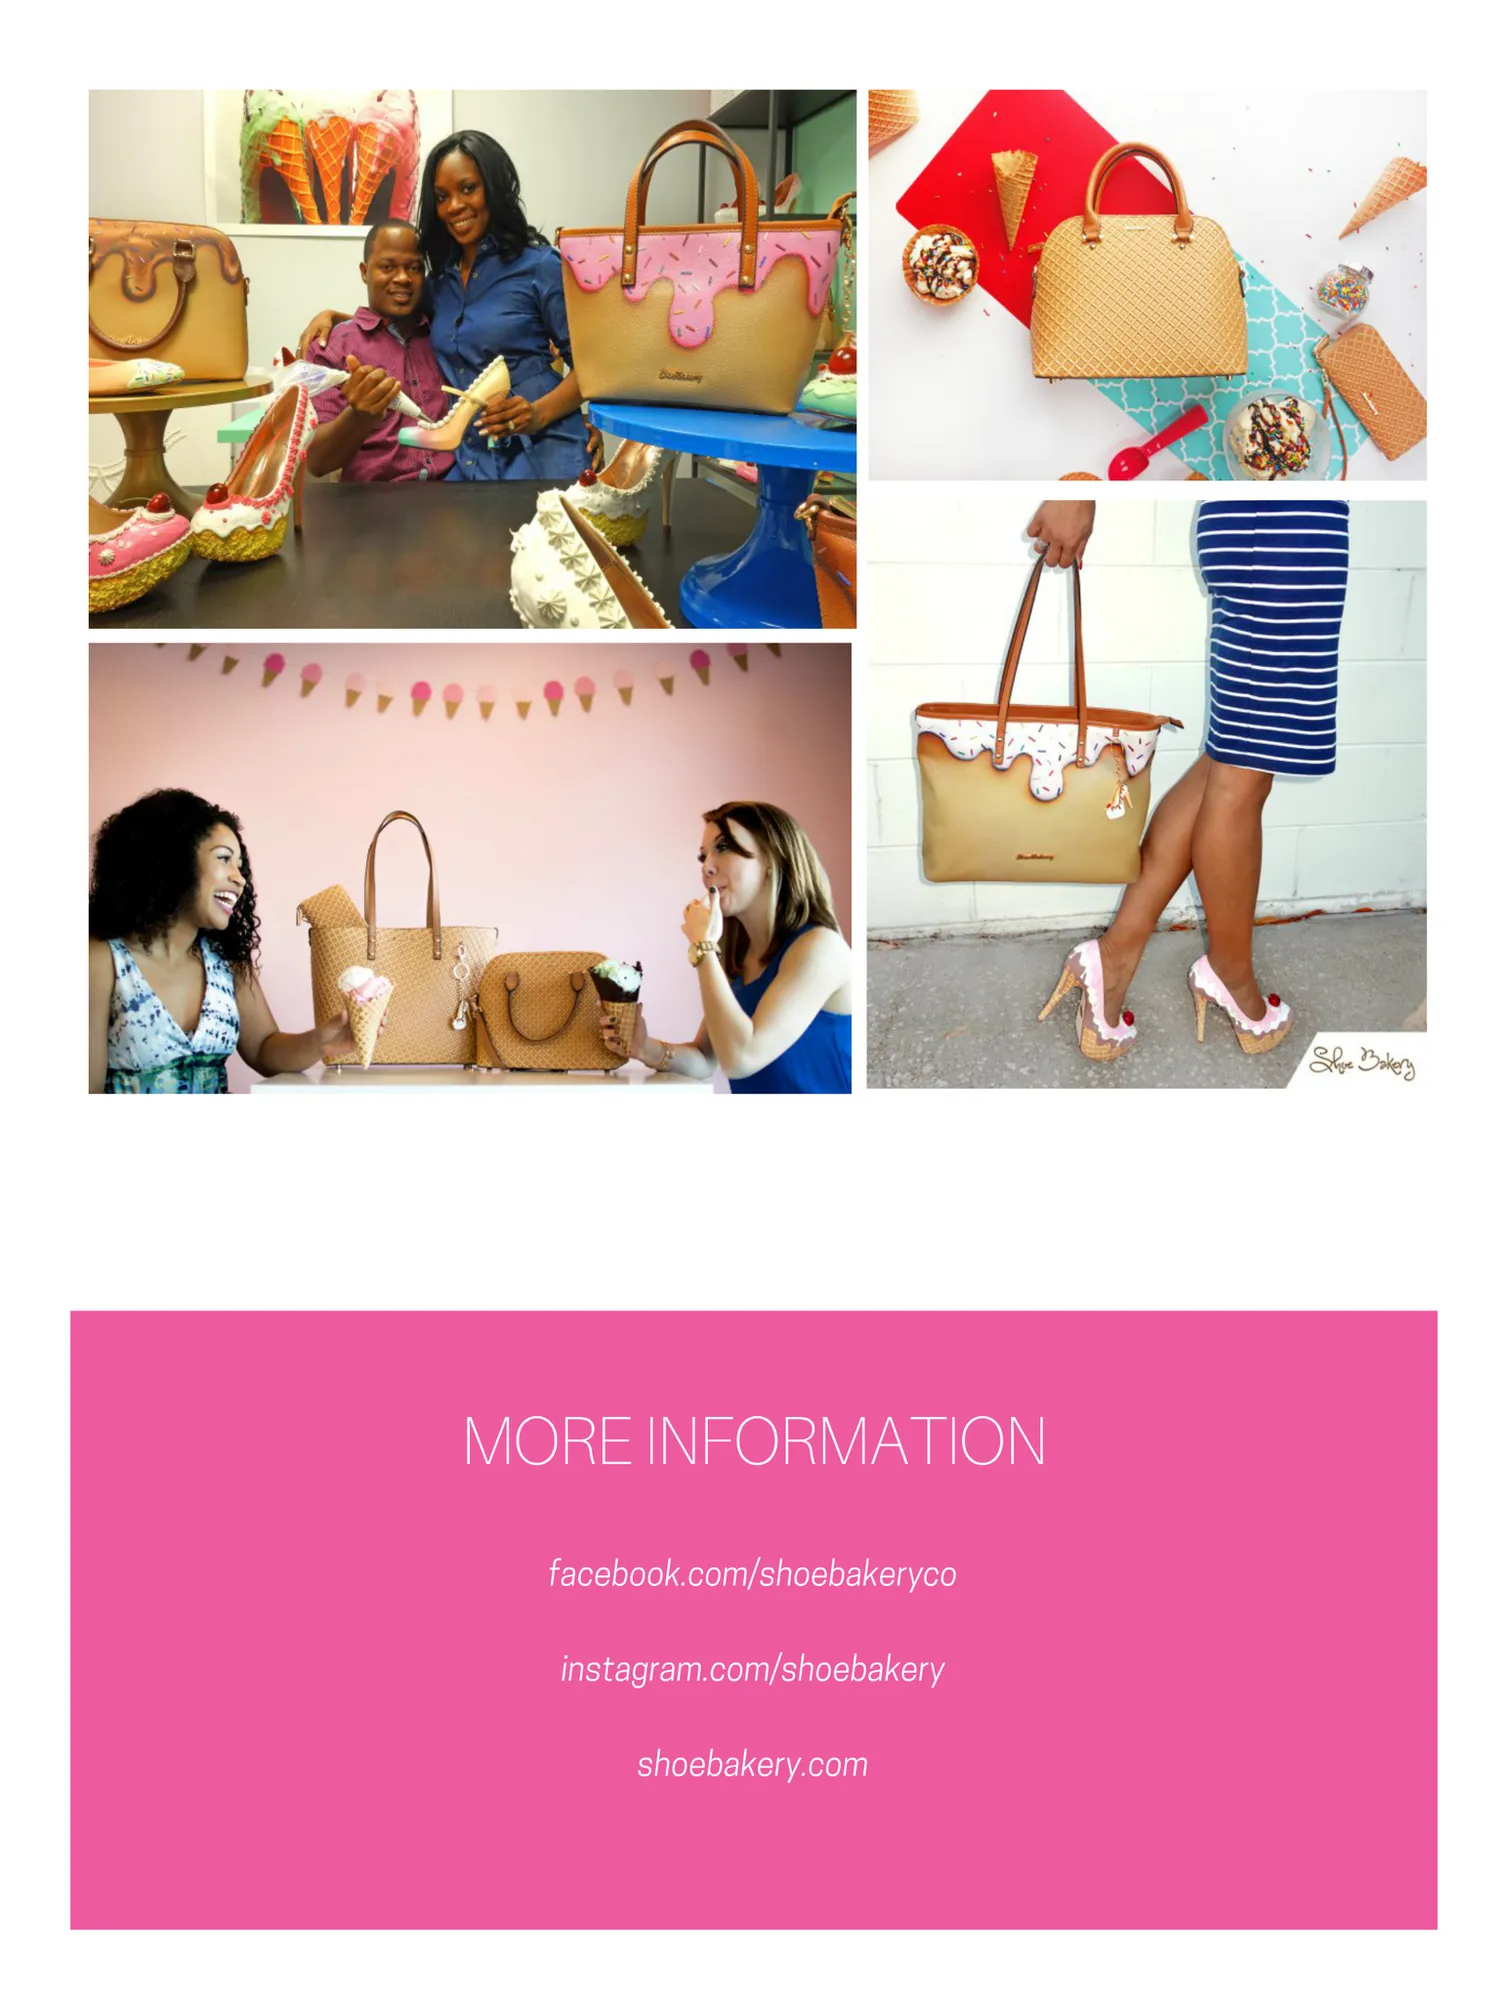
interview with Shoe Bakery How did Shoe Bakery start? What shoe or purse. Of course it doesn't Were you surprised at the rapid led to the business idea? hurt to eat it as well. When we first rate of success of your products? started our Pink Sprinkle flats, we I've always loved art; initially I We knew there was some interest constantly had donuts at the shop. started out customizing mens in our products, but didntt realized sneakers which was great, but I think we gained a few pounds they'd be loved on a global scale. I realized there were a lot of around that time. Lol! We also like So yes we were very surprised to customizers out there flooding to use sweets in our photo shoots see the rapid rate. the market so I decided to try women's shoes. Regardless of Can you tell us about the design Do you have a favourite product? social class or status women love and manufacturing process? shoes and sweets so I thought I love all my products, but to be Design really start from the "why not combine them?". honest I love thePremium lce sketch pad, after coming up with Cream Heels. They are a summer a wonderful and possibly tasty treat that we were ableto take and Where do you get design food combination, we determine evolve into something that can be inspiration from? whether it would look good on a worn all year round and not melt.. purse or a shoe. From their we The source of inspiration is source desertsto conveythe best anything sweet. Anytime we see real life textures. At this moment, something delicious; rather then the shoes are done on site and asking how will this taste; we wonderhow would this look on a onlyourbagsandwallets are manufactured.
Page 97 text
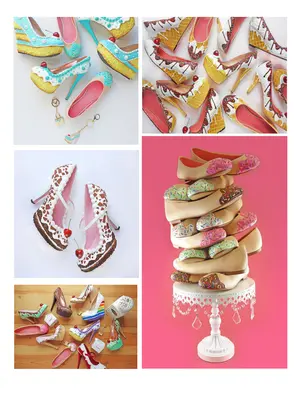
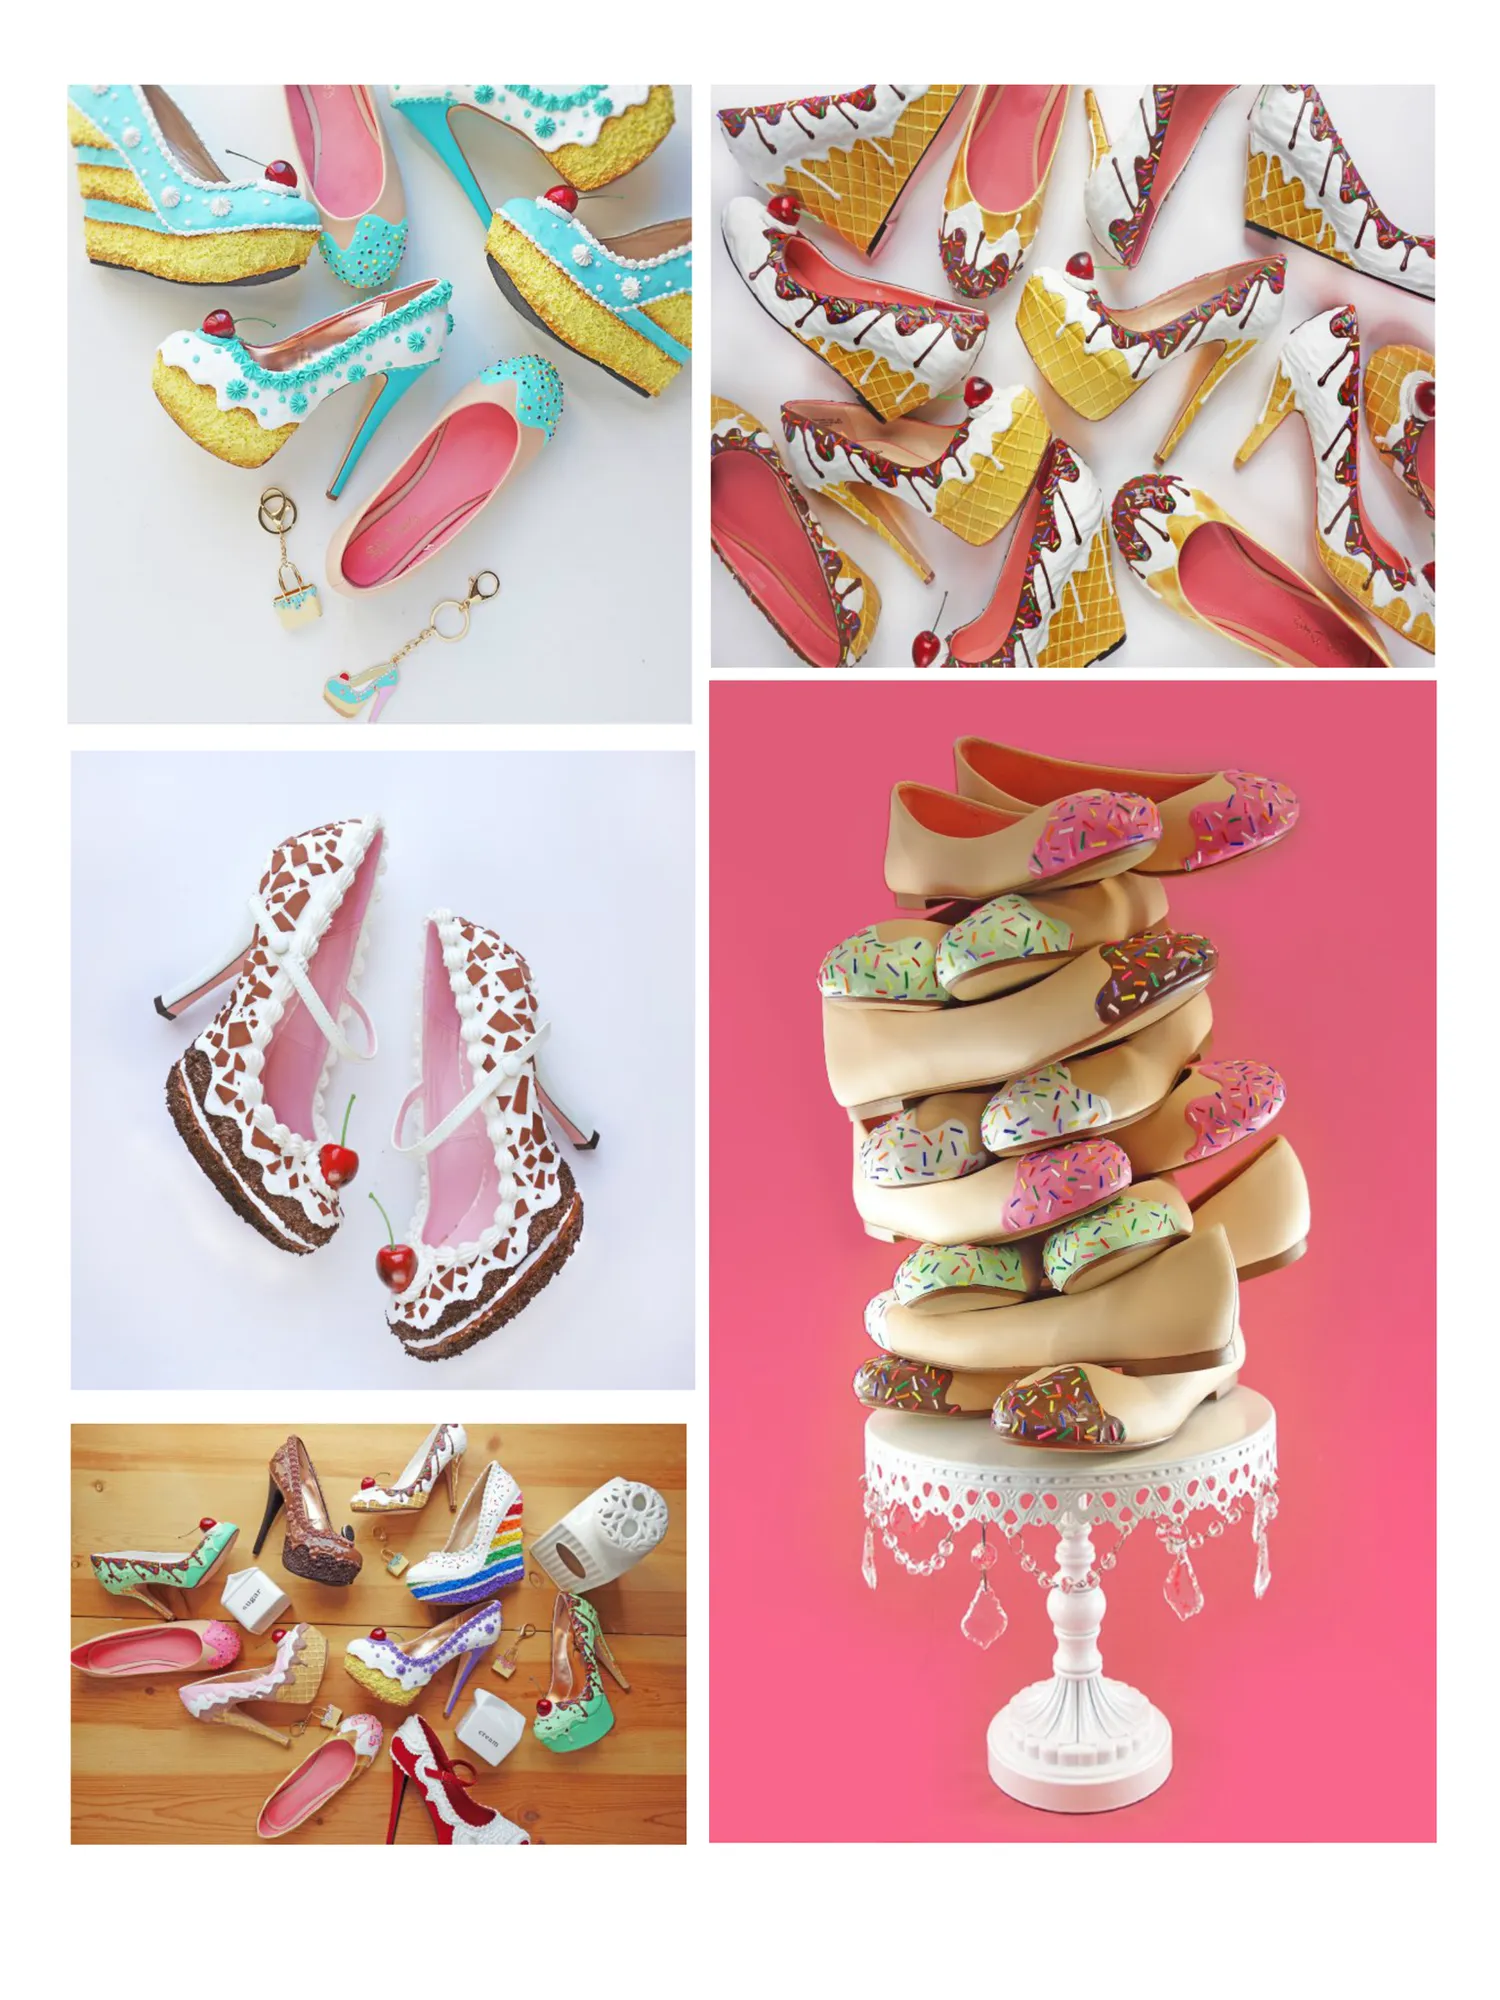
How long does it take to create a shoe or bag? To create our shoes is a delicately long process, it takes approximately five weeks to complete them with the current waiting list. All of our shoes are all carefully crafted by me and the rest of my team. Shoe Bakery is a worldwide name and we in Australia love your products! Can you tell us which is the best selling style and in which country (outside of the USA) your biggest customer base is in? Aside from wholesale orders for our bags, outside of the US; Australia is second in orders. The most popular item would be ourPink SprinkleTote collection. What's next for Shoe Bakery? I would loveto expand the business TM and focus on creating more fine art and more accessories and possibly have a children's line. CHRIS CAMPBELL Head Baker, Shoe Bakery

Page 99 text
MORE INFORMATION facebook.com/shoebakeryco instagram.com/shoebakery shoebakery.com
Page 100 text
ACDN Member gallery We invited our members to submit to our member gallery - take a look at what they've been creating! Want to submit to our member gallery? Join us HERE!
Page 101 text
f
Page 102 text
www.acdn.me JOIN US! BECOME A MEMBER TODAY! {CLICK HERE FOR MORE INFO!}
Page 103 text
f
Page 104 text
f
Page 105 text
f f f
Page 106 text
ff
Page 107 text
f
Page 108 text
f
Page 109 text
Supplying all of your cake decorating equipment SHOP ONLINE www.bakeanddeco.com.au & INSTORE 28 Laidlaw Drive, Ballarat
Page 110 text
ACDN members can get discounted cake decorating business insurance! ACDN members! Don't forget to submit to the member gallery for our next issue! Submissions close end April [email protected] Not a member? CLICK HERE TO JOIN US!


Page 111 text
ARE YOU INSURED? Get covered with Australia's leading cake decorating insurance broker $10m Public & Products Liability $380 PER YEAR FOR ACDN MEMBERS $450 per year for Non-ACDN Members (Insurance subject to acceptance criteria) www.redstarinsurance.com.au/cake Red Star Insurance Pty Ltd (AFSL 444803) T&C apply, see website for details. The Australian Cake Decorating Network Pty Ltd does not provide any advice regarding insurance matters. Please contact Red Star Insurance Brokers on the above contact details to discuss your insurance requirements.
Page 112 text
f
Page 113 text
f
Page 114 text
f
Page 115 text
f
Page 116 text
f f f
Page 117 text
f
Page 118 text
f f
Page 119 text
www.acdn.me JOIN US! BECOME A MEMBER TODAY! {CLICK HERE FOR MORE INFO!}
Page 120 text
f
Page 121 text
f

Page 122 text
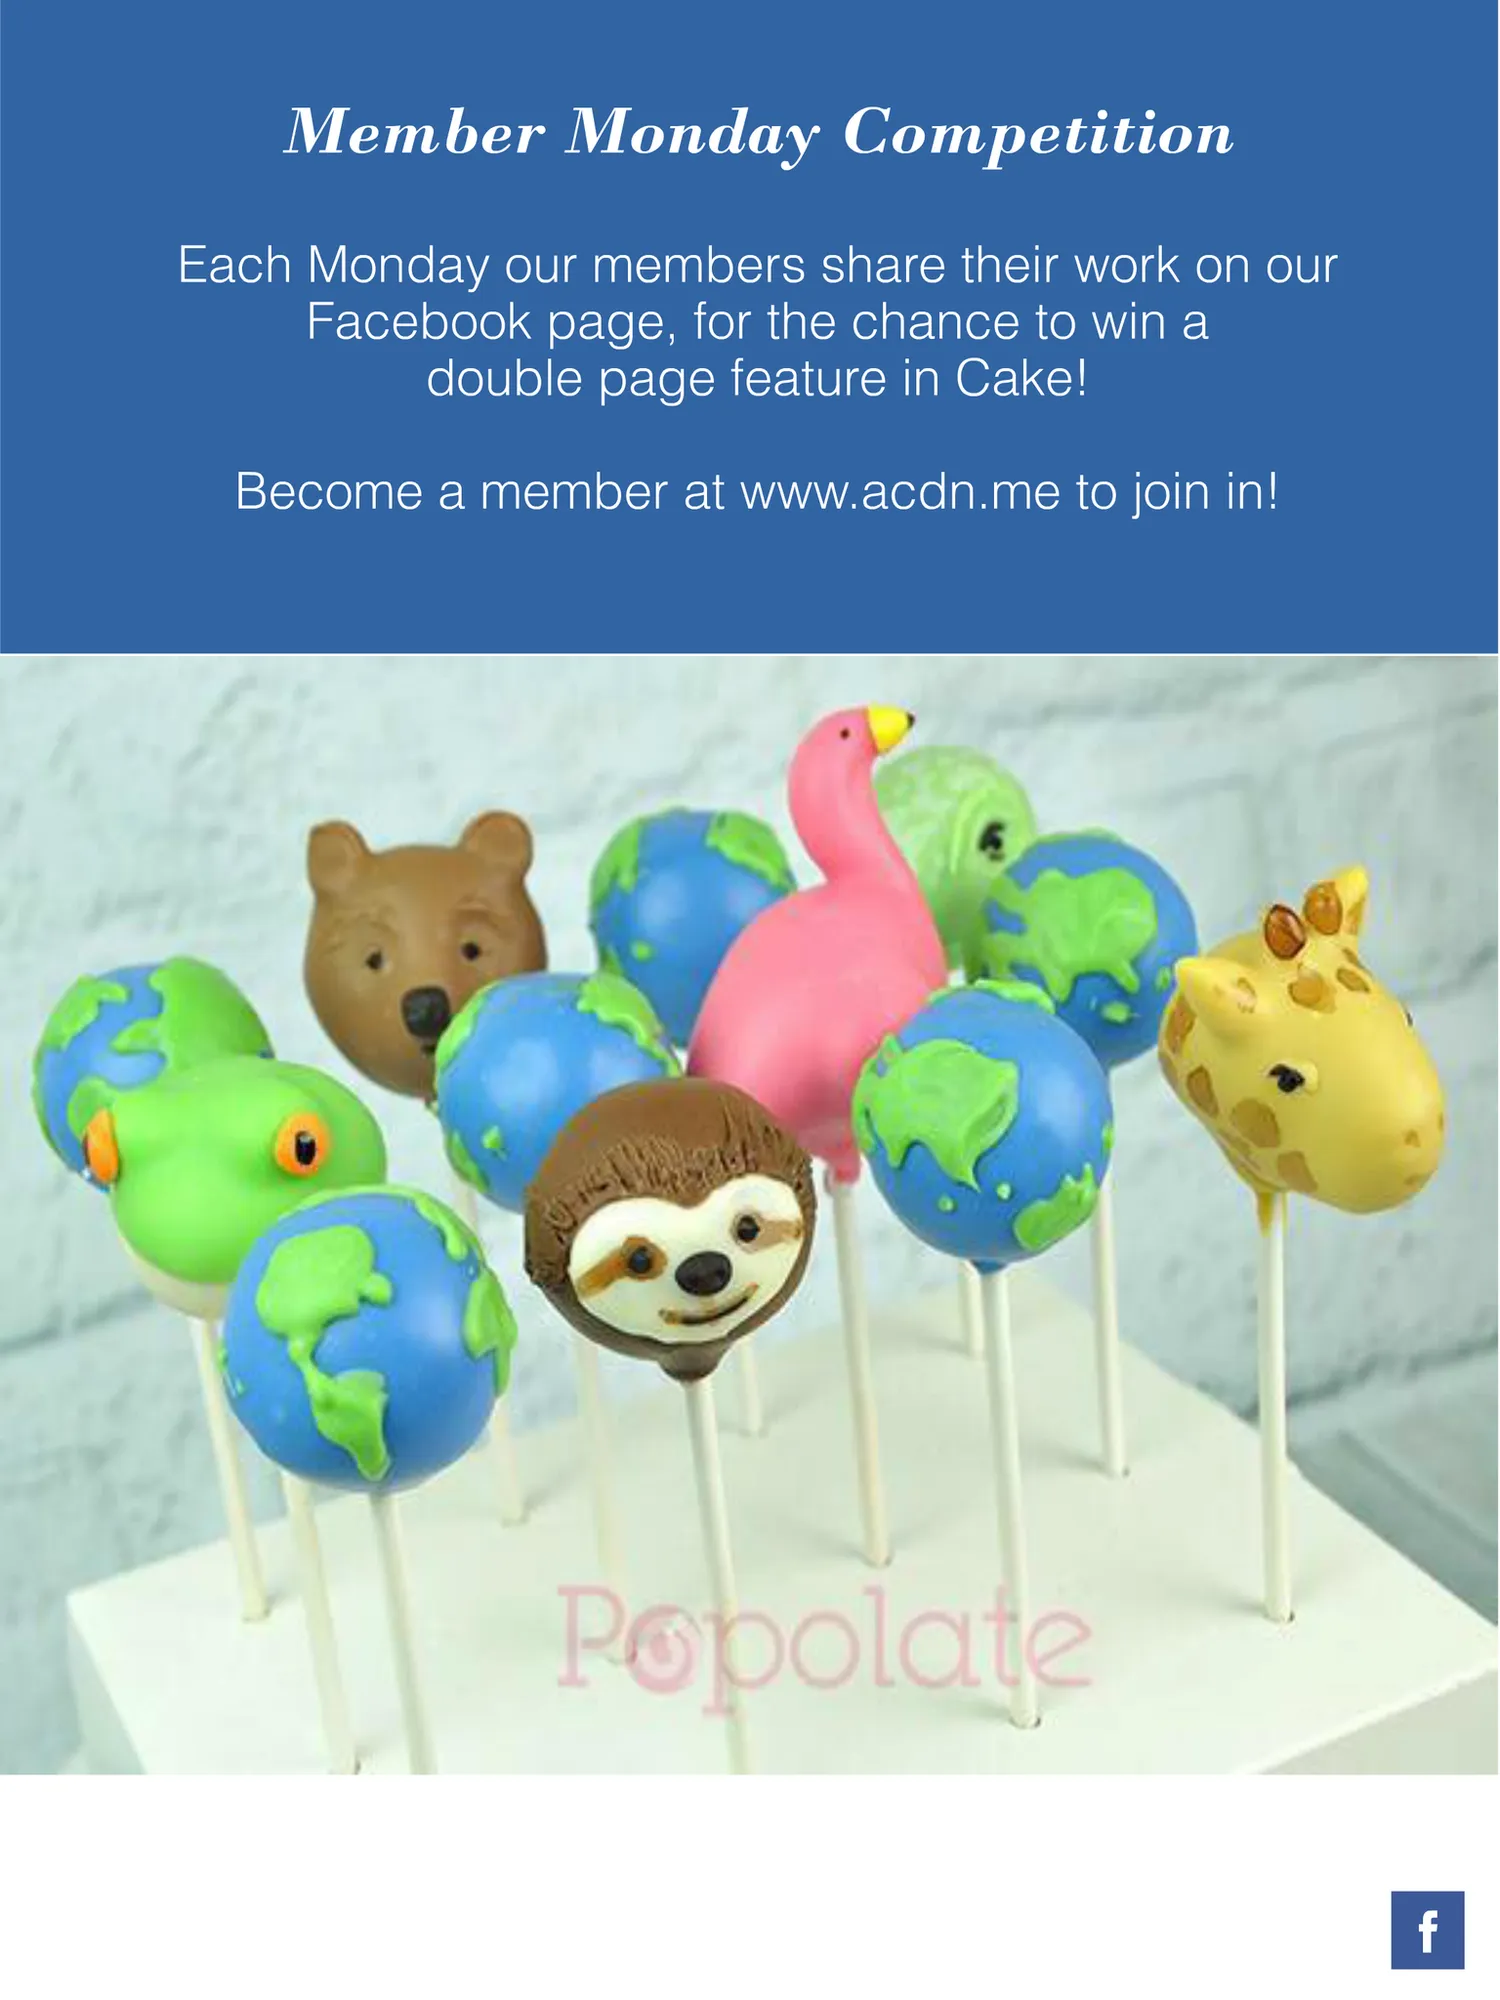
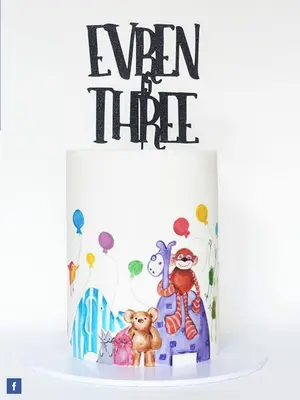
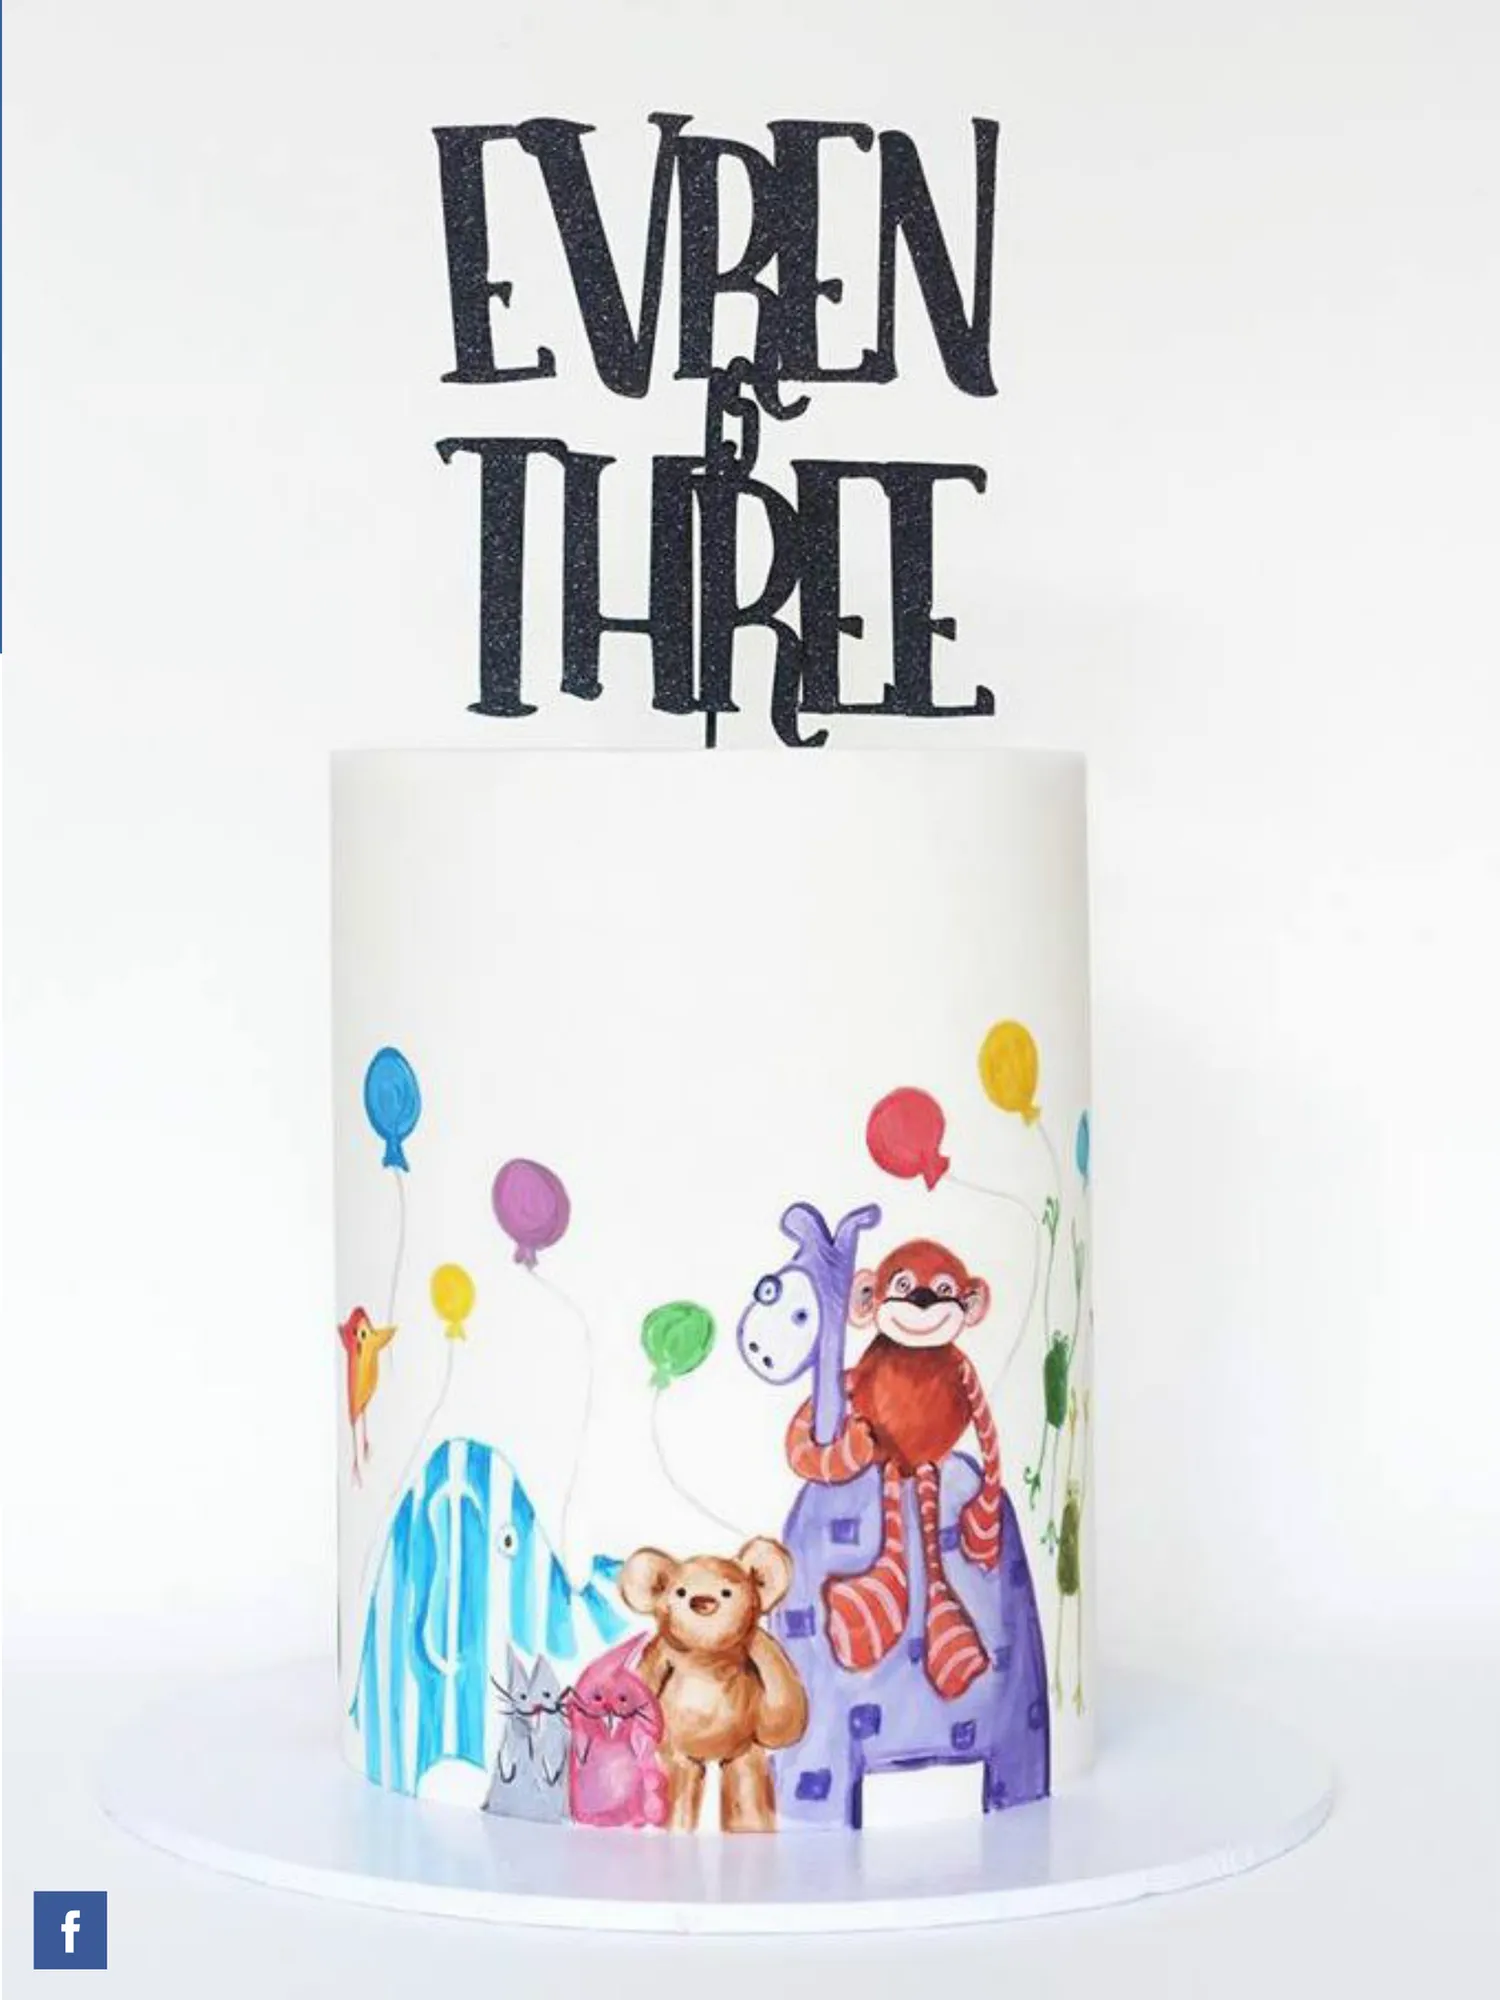
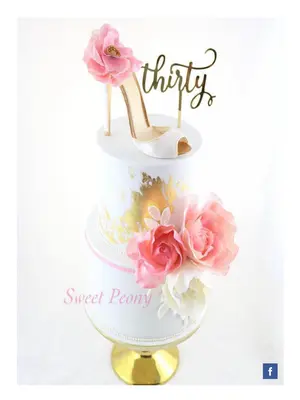
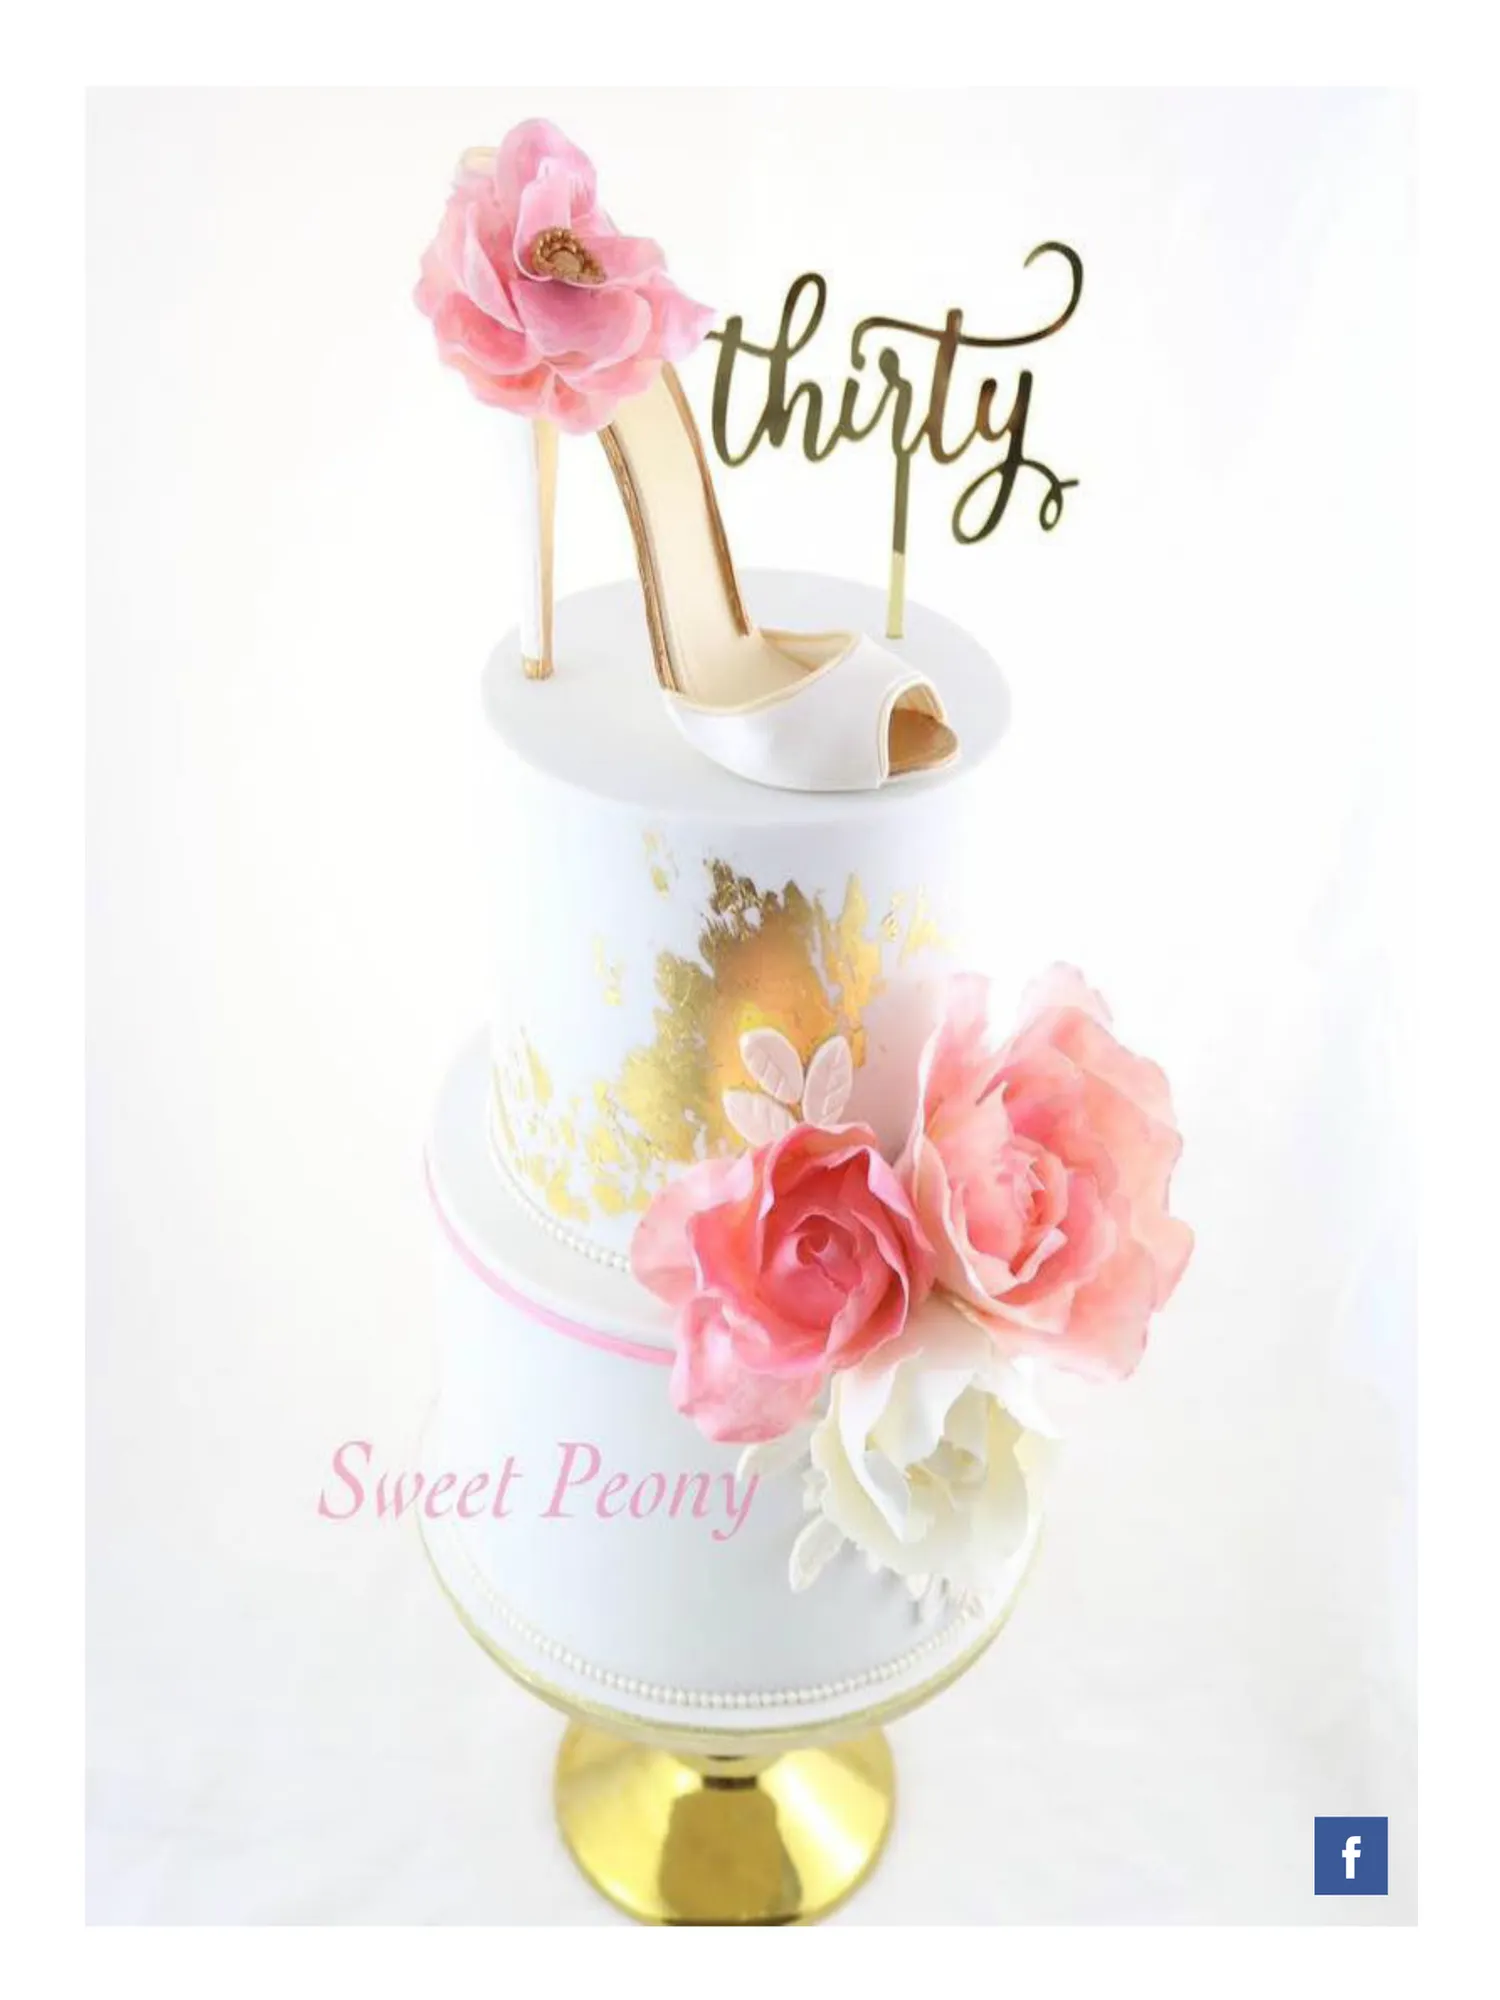
Member Monday Competition Each Monday our members share their work on our Facebook page, for the chance to win a double page feature in Cake! Become a member at www.acdn.me to join in! f
Page 123 text
f f ff
Page 124 text
f
Page 125 text
f
Page 126 text
www.acdn.me JOIN US! BECOME A MEMBER TODAY! {CLICK HERE FOR MORE INFO!} f
Page 127 text
f
Page 128 text
f
Page 129 text
f f
Page 130 text
f
Page 131 text
f f
Page 132 text
f f f
Page 133 text
f
Page 134 text
f


Page 135 text
f
Page 136 text
f f f
Page 137 text
f f
Page 138 text
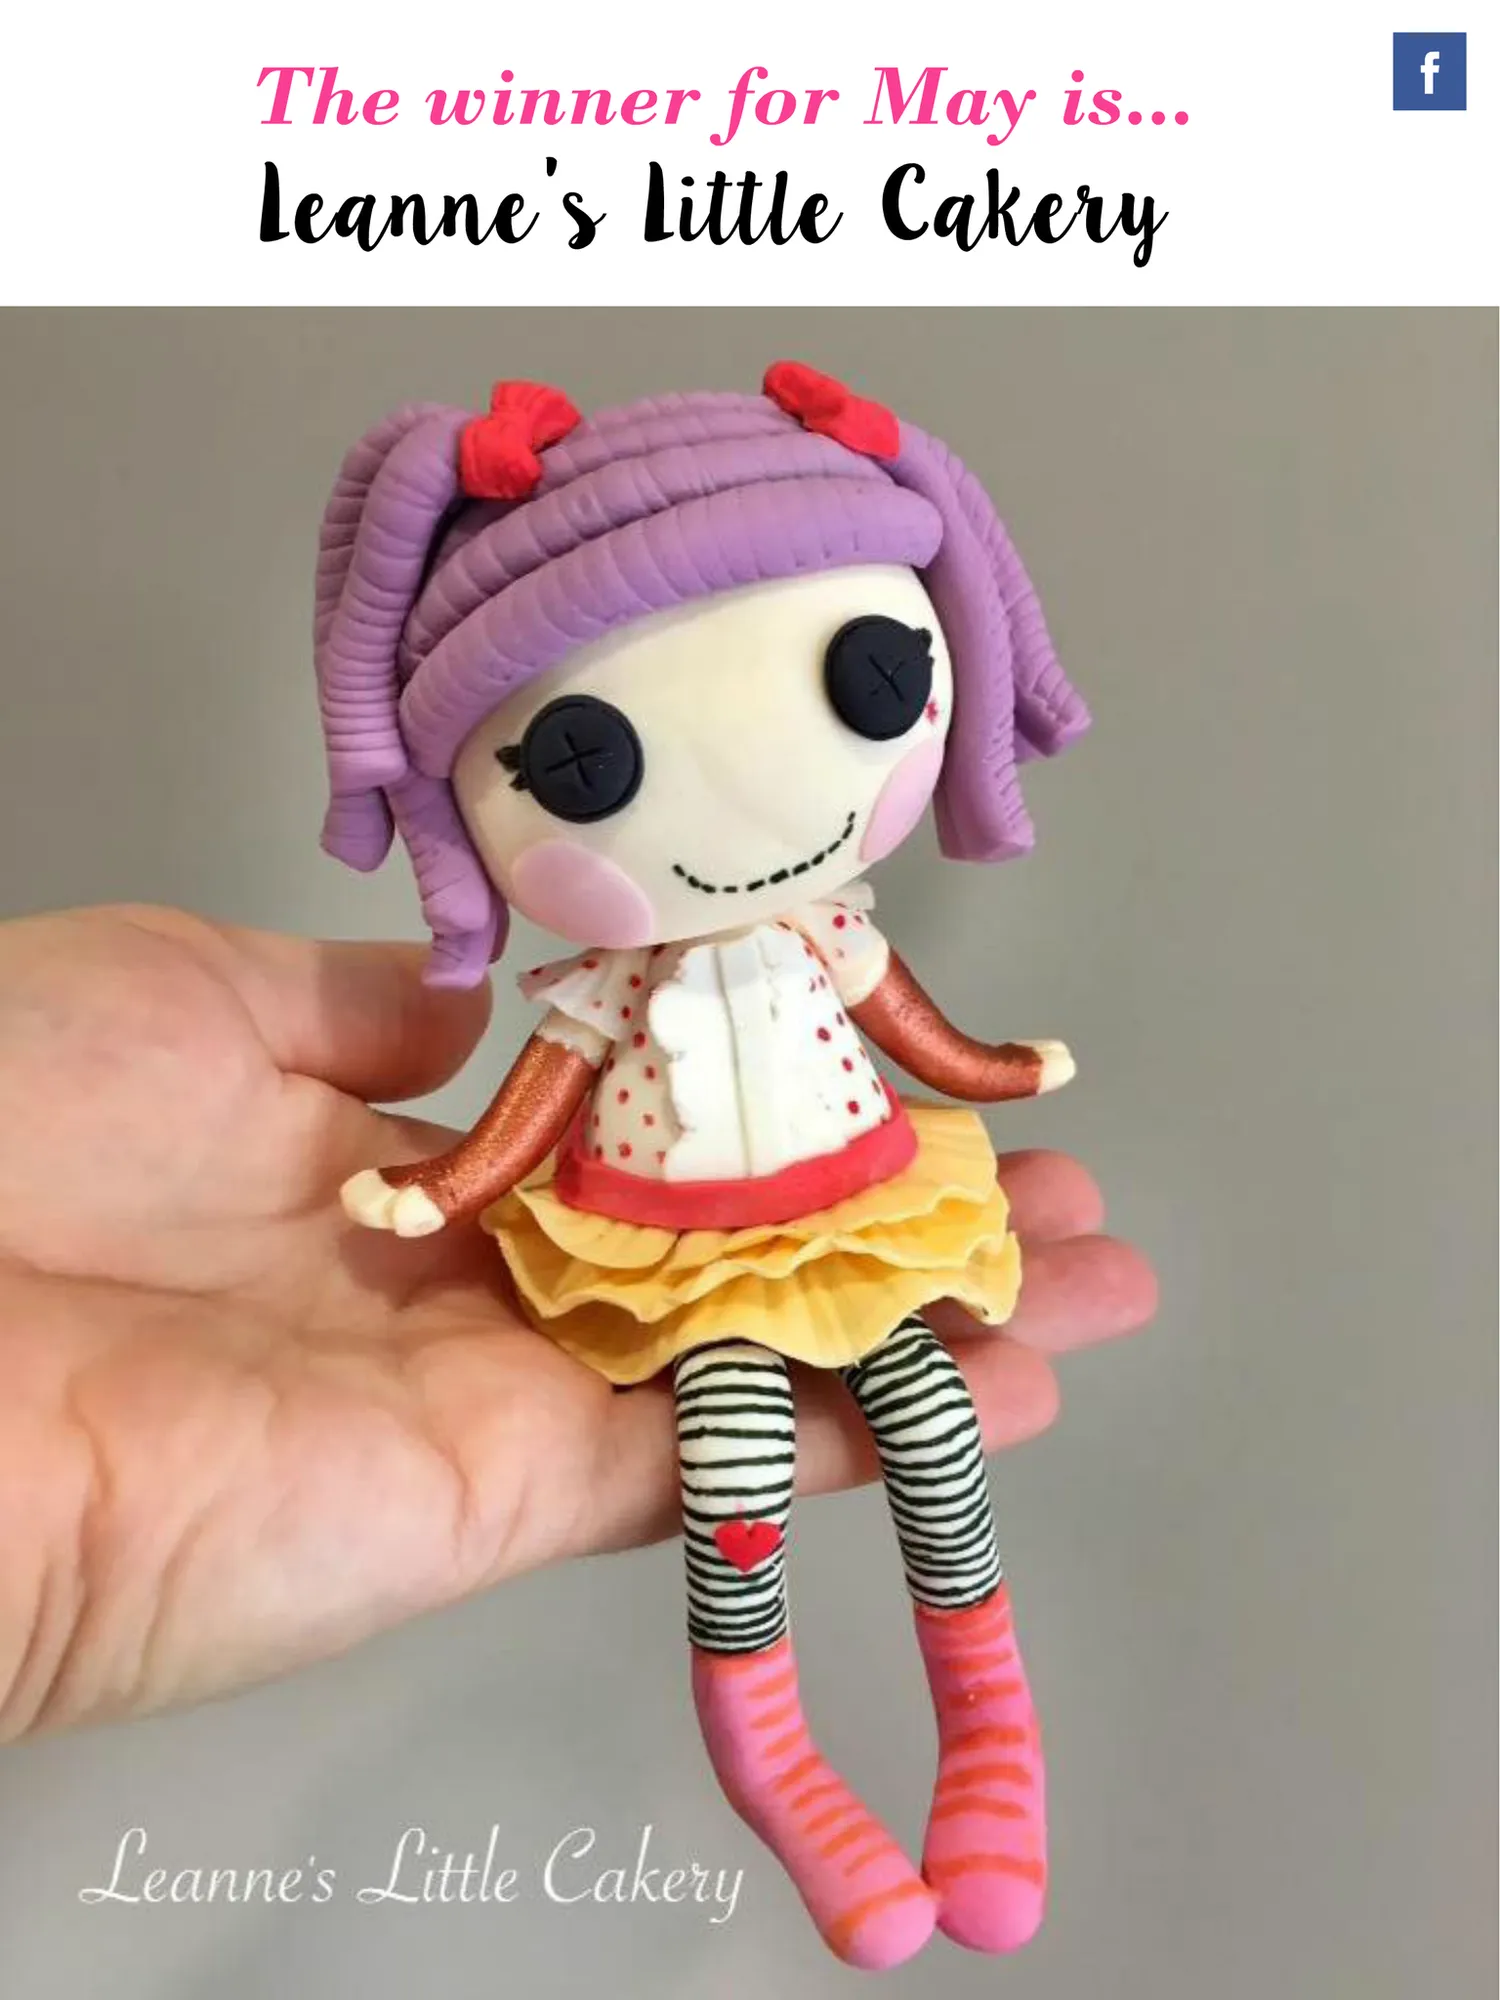
f The winner for May is... Leanne's Little Cakery f
Page 139 text
Congratulations! Member Monday is proudly sponsored by You've won a $250 voucher to spend at Bake & Deco Warehouse and a double page feature in our next issue of Cake! magazine! f Become a member to join in Member Monday! Join us online HERE Members can share a photo of their work each Monday on the Australian Cake Decorating Network facebook page. Each week we award a 'People's Choice' and 'ACDN Choice' award. The winners of the ACDN Choice award for 2016 will be featured in Cake! magazine and go in the draw to win the quarterly prize of a double page feature in Cake! magazine, as well as a $250 voucher thanks to Bake & Deco Warehouse! f Join in the fun on our FACEBOOK page!
Page 140 text
f Promote, network, shop & save with the Australian Cake Decorating Network! Join us today! Meet Katie! To learn about the benefits of being an ACDN member! Watch our video at www.acdn.me or view the online version of Cake! magazine at www.cakemagazine.me
Page 141 text
Read Cake! magazine online or download & print for offline viewing HERE! f www.acdn.me [email protected] click here to join our mailing list! To advertise in Cake! magazine, contact [email protected]
Page 142 text
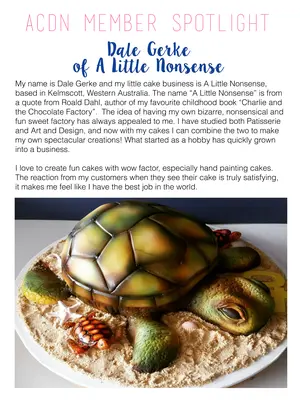
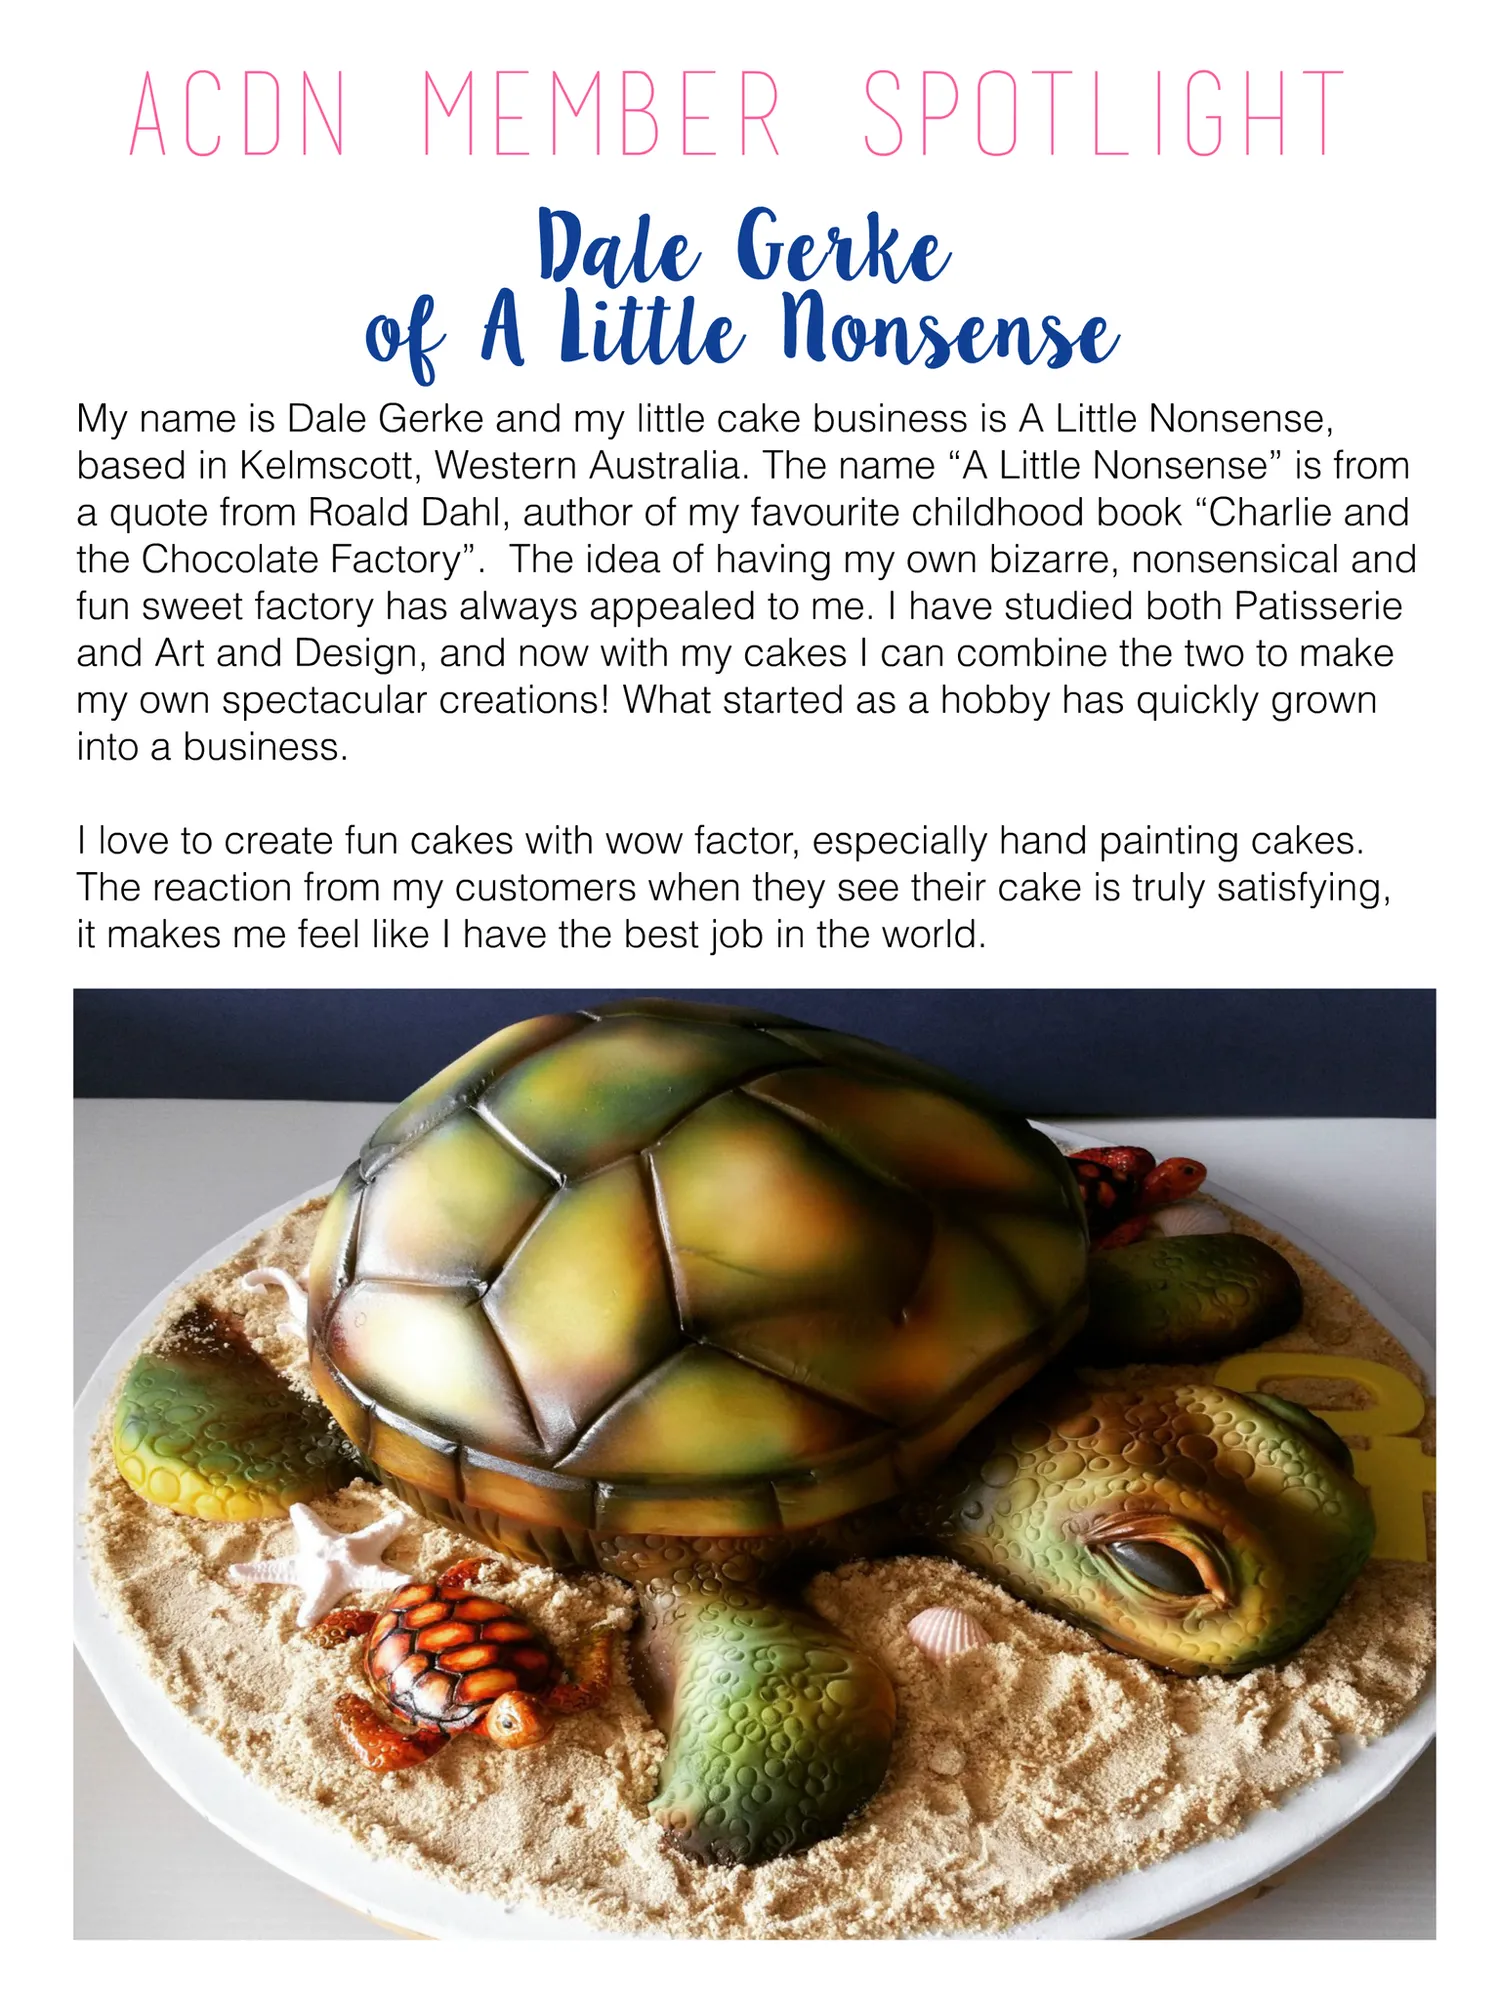
ACDN Member Spotlight Dale Gerke of A Little Nonsense My name is Dale Gerke and my little cake business is A Little Nonsense, based in Kelmscott, Western Australia. The name “A Little Nonsense” is from a quote from Roald Dahl, author of my favourite childhood book “Charlie and the Chocolate Factory”. The idea of having my own bizarre, nonsensical and fun sweet factory has always appealed to me. I have studied both Patisserie and Art and Design, and now with my cakes I can combine the two to make my own spectacular creations! What started as a hobby has quickly grown into a business. I love to create fun cakes with wow factor, especially hand painting cakes. The reaction from my customers when they see their cake is truly satisfying, it makes me feel like I have the best job in the world.
Page 143 text
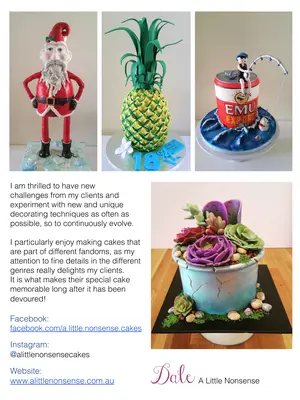
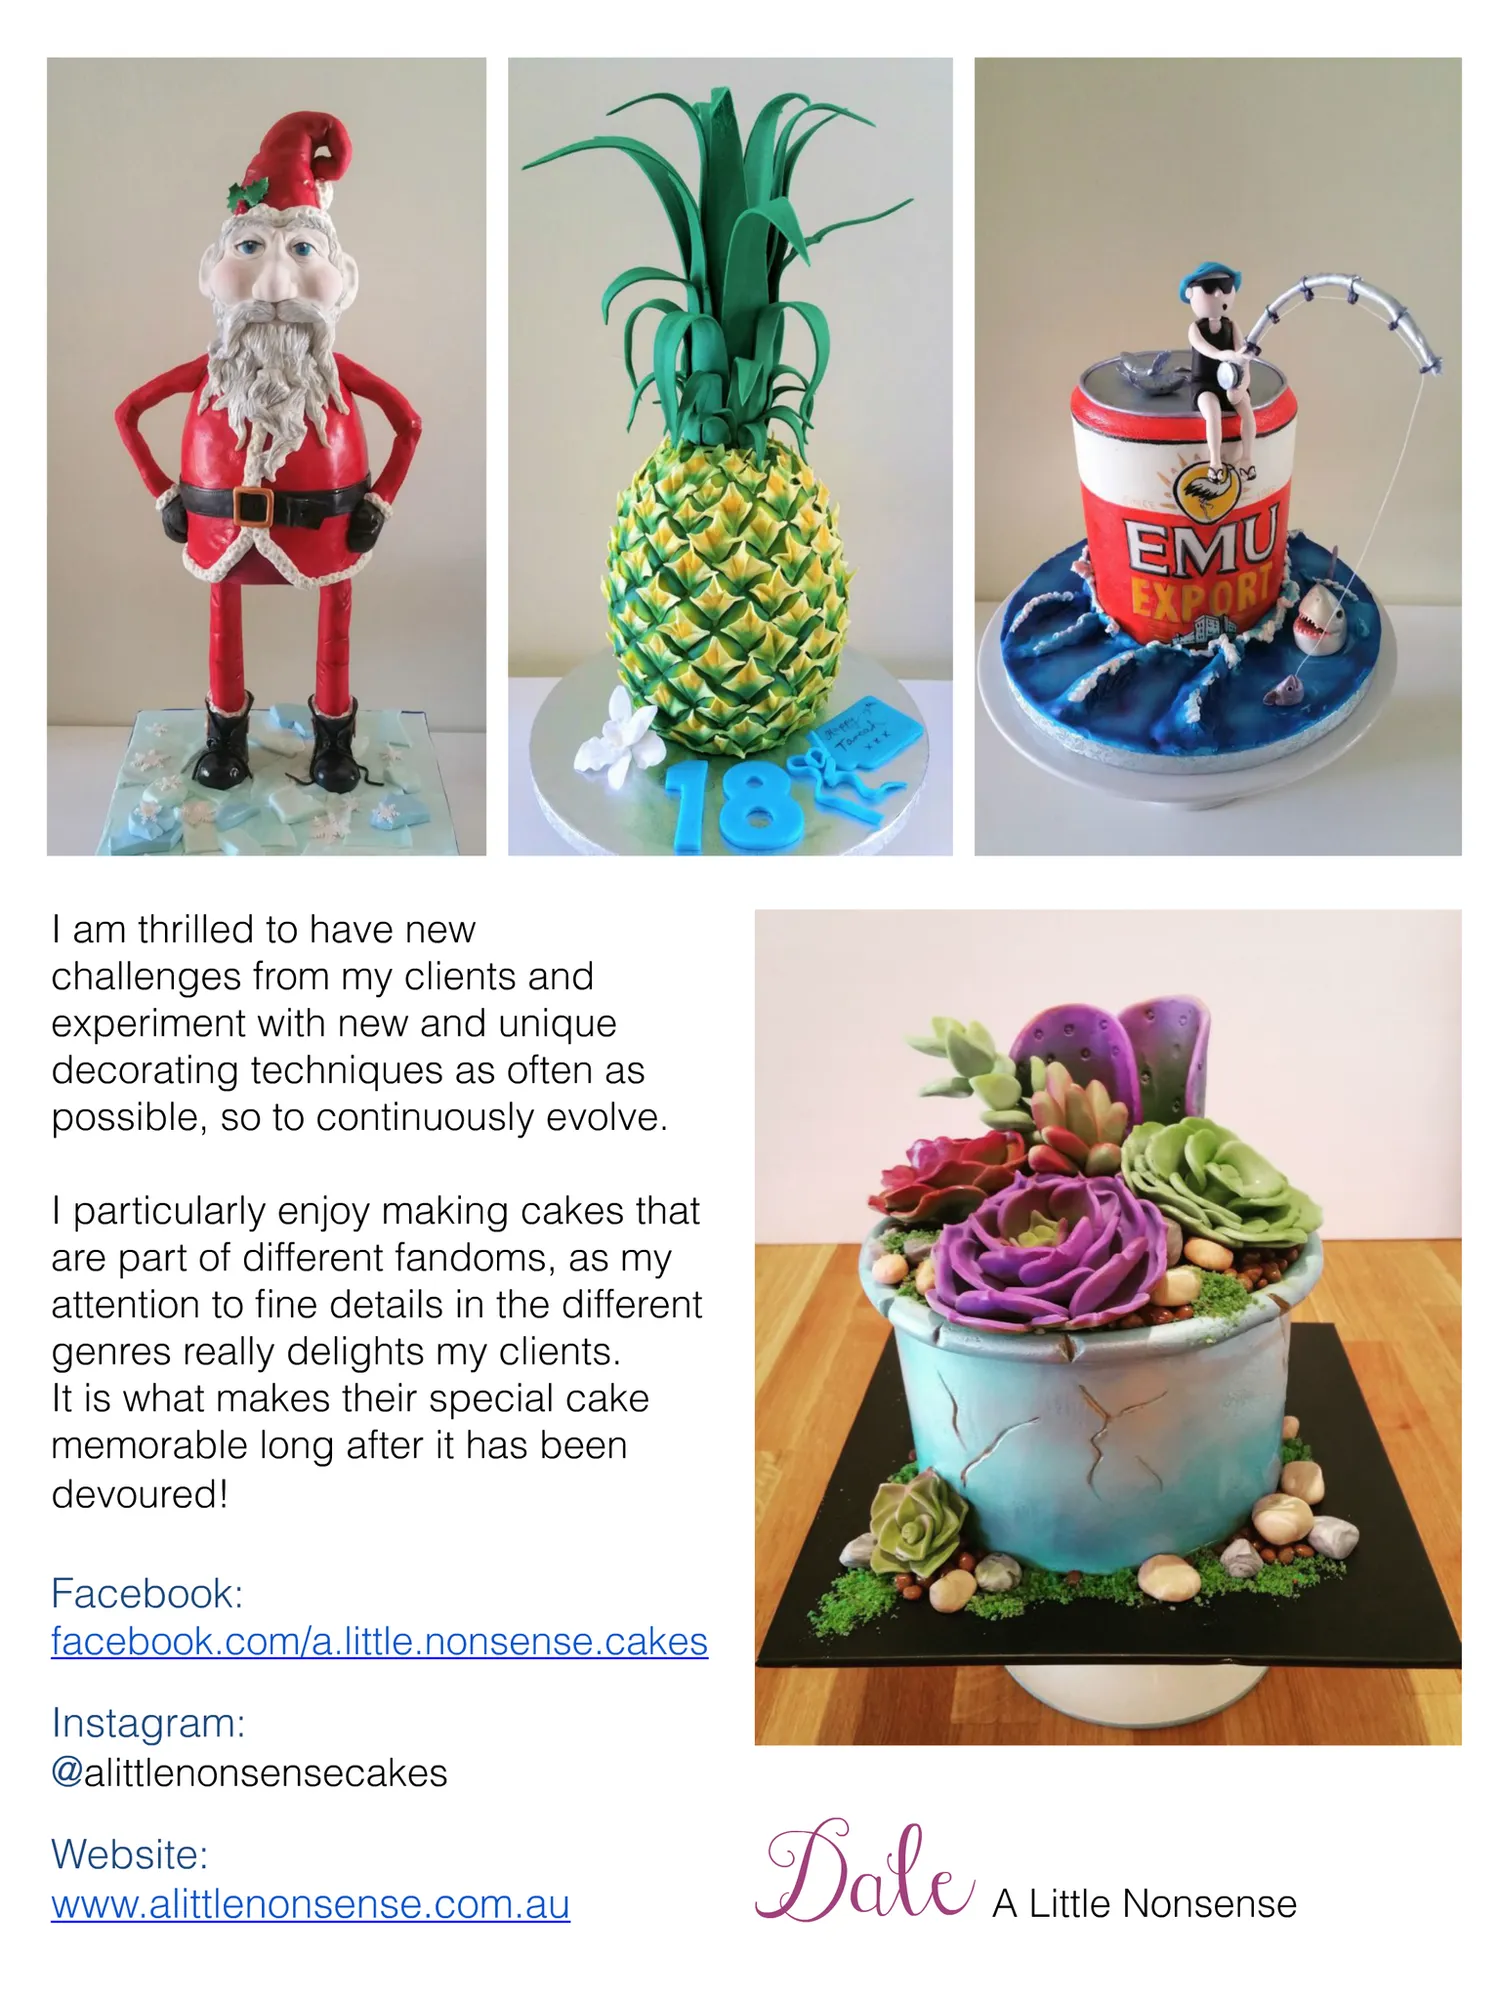
I am thrilled to have new challenges from my clients and experiment with new and unique decorating techniques as often as possible, so to continuously evolve. I particularly enjoy making cakes that are part of different fandoms, as my attention to fine details in the different genres really delights my clients. It is what makes their special cake memorable long after it has been devoured! Facebook: facebook.com/a.little.nonsense.cakes Instagram: @a little nonsense cakes Website: www.alittlenonsense.com.au Dale A Little Nonsense
Page 144 text
AUSTRALIAN CAKE DECORATING NETWORK PREFERRED SUPPLIERS Cake Decorating Solutions Cake Decorating Solutions supports the CAKE DECORATING AustralianCakeDecoratingNetworkAs SOLUTIONS PlatinumPreferredSupplierwitha1o% discountformembers(excludesNaked Cakes, Gift Vouchers and Classes) Our Preferred Suppliers all offer discounts for ACDN members. Find the code on our website under'Discounts' ViP Shopping Discounts and Invitations to Member Only Events. 10% discount on most items instore cake decoratingcentral or online. 1o% discount off the entire range of products at: CAKES NSUPPLIES SANDRA Ximena DILLON DESIGN DESIGNINGDREAMS STATEWIDEFOOD DISTRIBUTORS Cake 5% discount off the 5% discount off entire range of products wholesale prices
Page 145 text
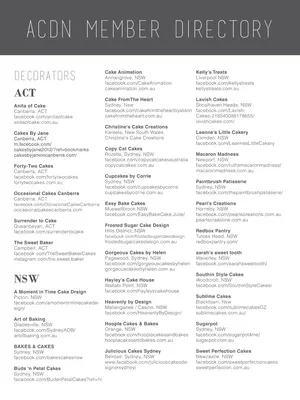
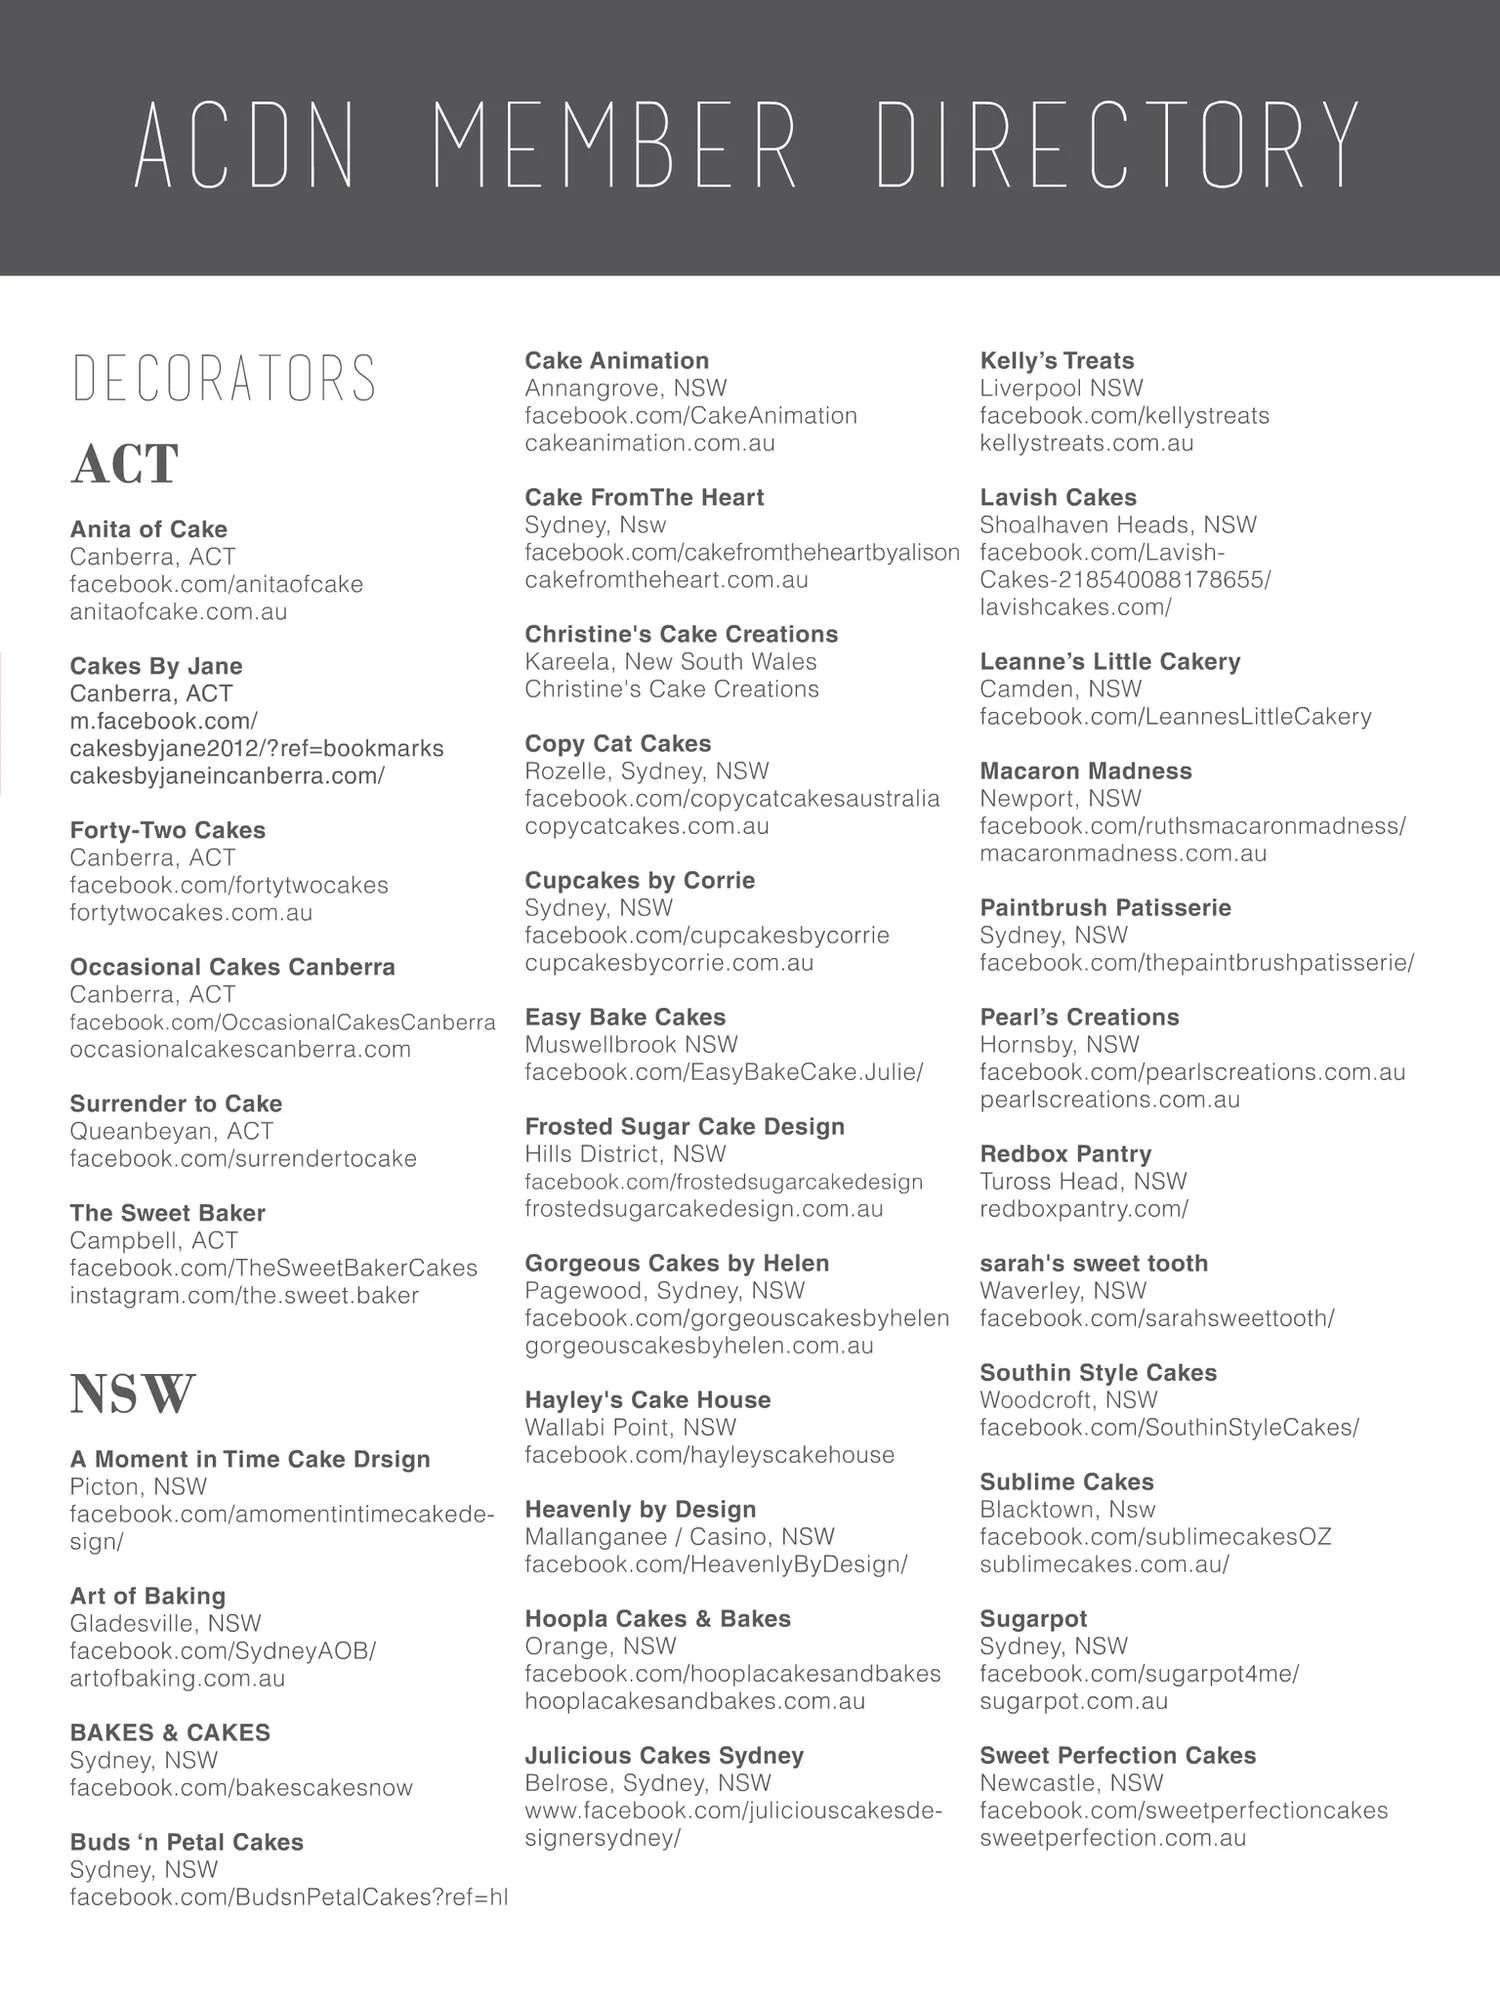
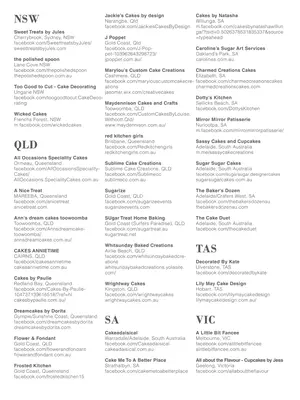
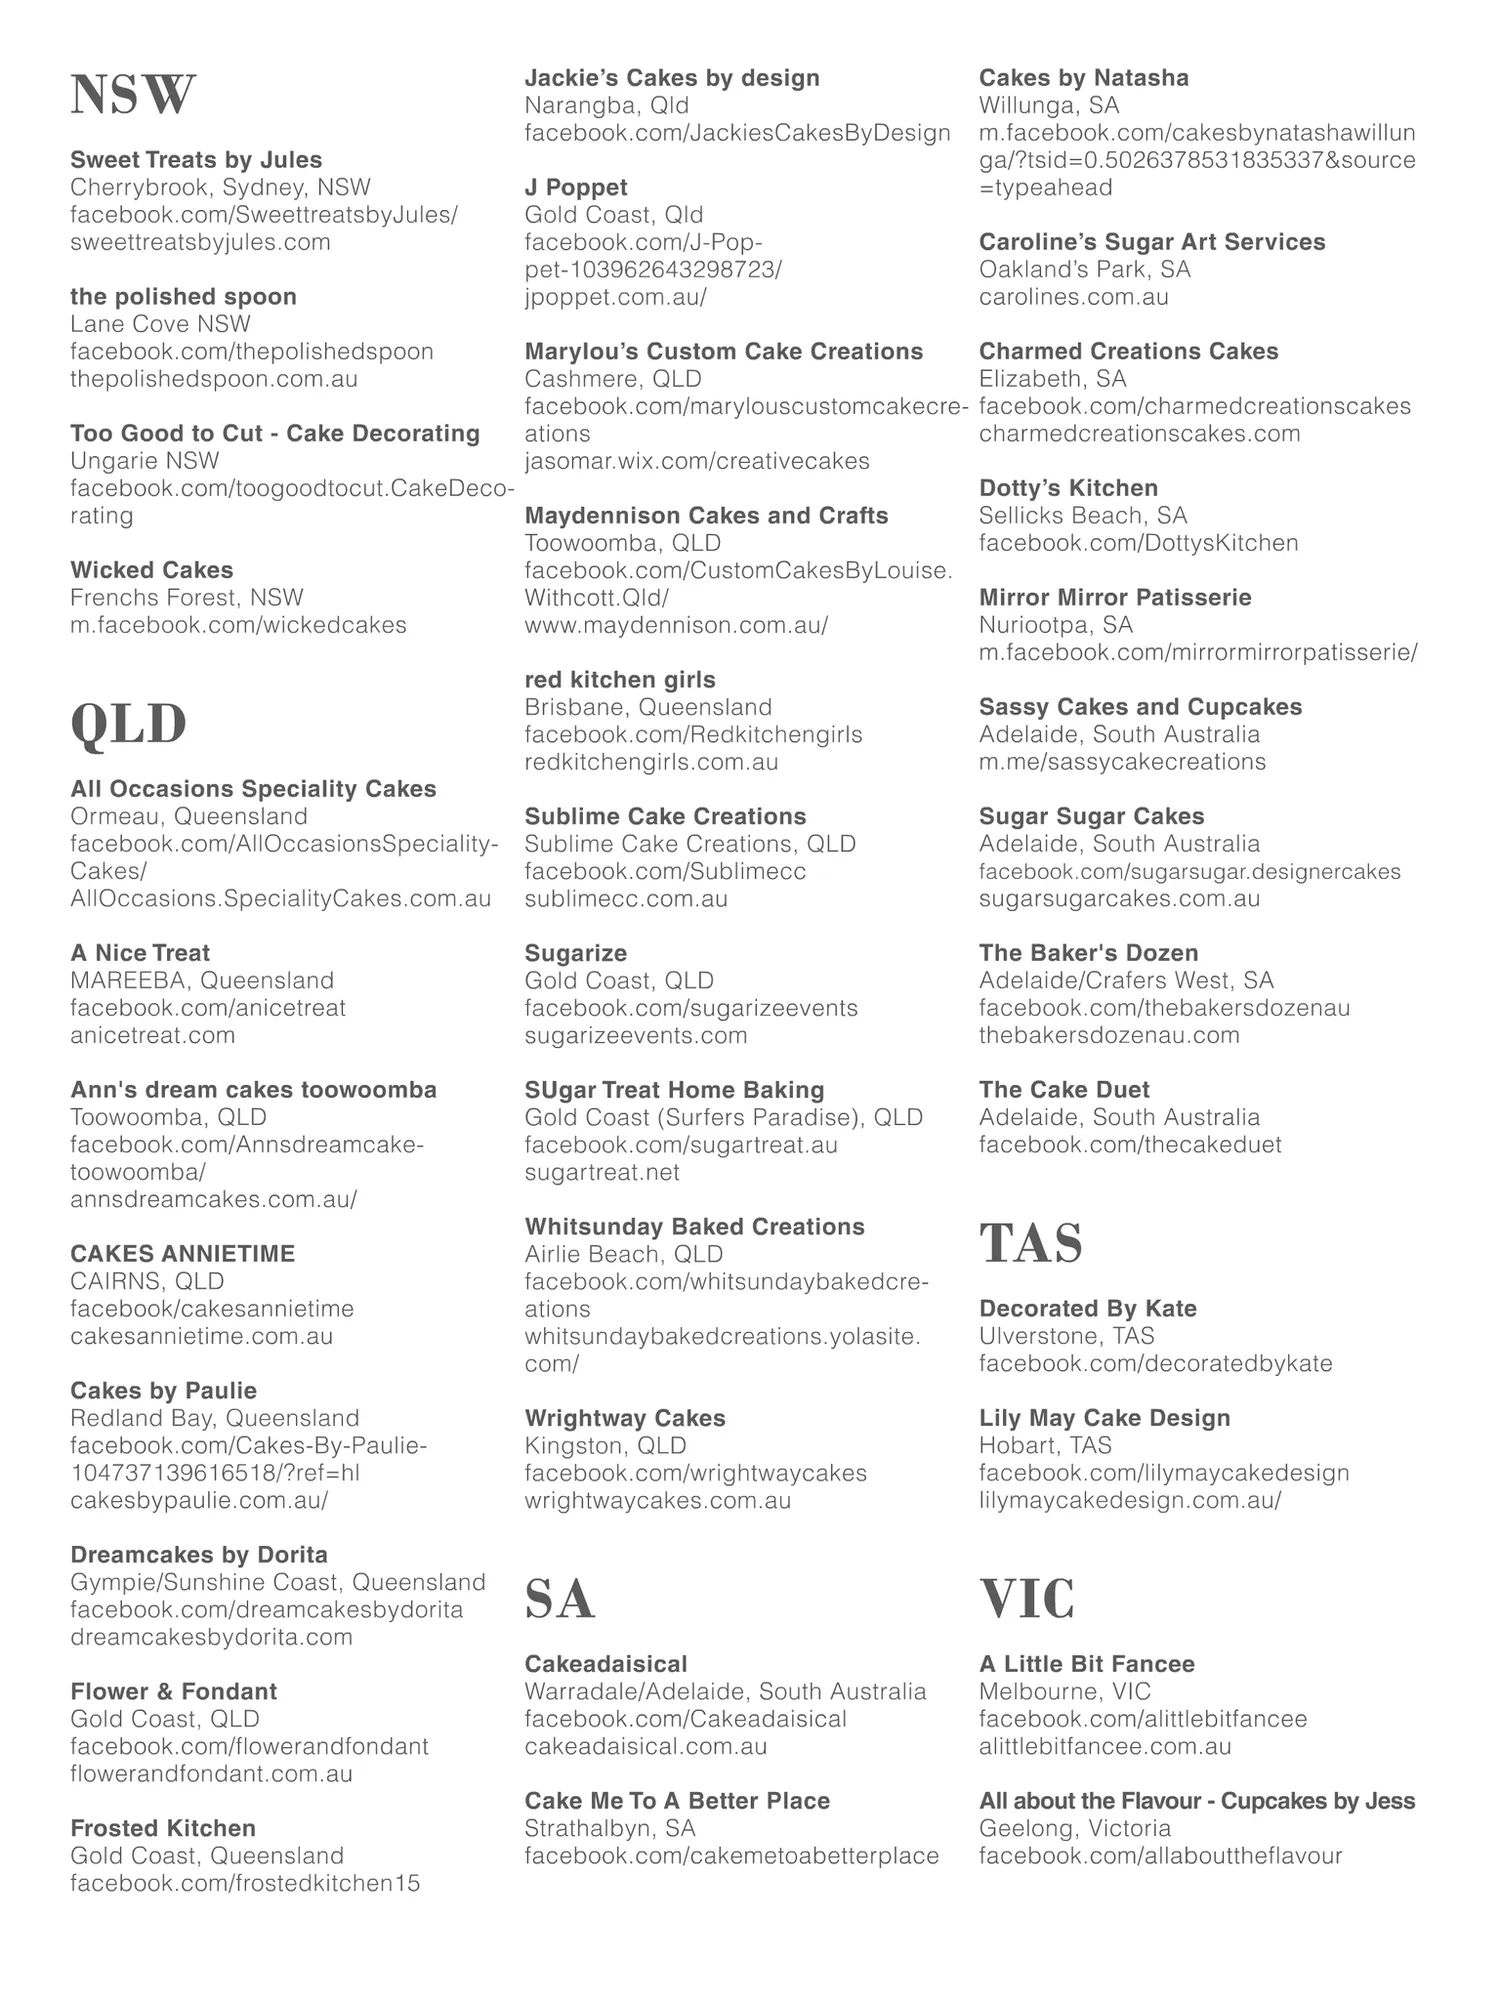
ACDN MEMBER DIRECTORY Cake Animation DECORATORS Kelly's Treats Annangrove, Nsw Liverpool NSw facebook.com/CakeAnimation facebook.com/kellystreats cakeanimation.com.au ACT kellystreats.com.au Cake FromThe Heart Lavish Cakes Sydney, Nsw Anita of Cake Shoalhaven Heads, NSw facebook.com/cakefromtheheartbyalison Canberra, ACT facebook.com/Lavish- cakefromtheheart.com.au facebook.com/anitaofcake Cakes-218540088178655/ anitaofcake.com.au lavishcakes.com/ Christine's Cake Creations Kareela, New South Wales Cakes By Jane Leanne's Little Cakery Christine's Cake Creations Canberra, ACT Camden, NSw m.facebook.com/ facebook.com/LeannesLittleCakery cakesbyjane2012/?ref=bookmarks Copy Cat Cakes Rozelle, Sydney, NSw cakesbyjaneincanberra.com/ Macaron Madness facebook.com/copycatcakesaustralia Newport, Nsw copycatcakes.com.au Forty-Two Cakes facebook.com/ruthsmacaronmadness/ Canberra, ACT macaronmadness.com.au facebook.com/fortytwocakes Cupcakes by Corrie Sydney, NSw fortytwocakes.com.au Paintbrush Patisserie facebook.com/cupcakesbycorrie Sydney, NSw Occasional Cakes Canberra cupcakesbycorrie.com.au facebook.com/thepaintbrushpatisserie/ Canberra, ACT EasyBakeCakes facebook.com/OccasionalCakesCanberra Pearl's Creations Muswellbrook Nsw occasionalcakescanberra.com Hornsby, Nsw facebook.com/EasyBakeCake.Julie/ facebook.com/pearlscreations.com.au Surrender to Cake pearlscreations.com.au Queanbeyan, ACT Frosted Sugar Cake Design Hills District, NSW facebook.com/surrendertocake Redbox Pantry facebook.com/frostedsugarcakedesign Tuross Head, Nsw frostedsugarcakedesign.com.au The Sweet Baker redboxpantry.com/ Campbell, ACT Gorgeous Cakes by Helen facebook.com/TheSweetBakerCakes sarah's sweet tooth Pagewood, Sydney, Nsw instagram.com/the.sweet.baker Waverley, Nsw facebook.com/gorgeouscakesbyhelen facebook.com/sarahsweettooth/ gorgeouscakesbyhelen.com.au NSW Southin Style Cakes Hayley's Cake House Woodcroft, NSw Wallabi Point, NSW facebook.com/SouthinStyleCakes/ A Moment in Time Cake Drsign facebook.com/hayleyscakehouse Picton, NSw Sublime Cakes Heavenly by Design facebook.com/amomentintimecakede- Blacktown, Nsw Mallanganee / Casino, Nsw sign/ facebook.com/sublimecakesOz facebook.com/HeavenlyByDesign/ sublimecakes.com.au/ Art of Baking Hoopla Cakes & Bakes Gladesville, NSw Sugarpot Orange, Nsw facebook.com/SydneyAOB/ Sydney, NSw facebook.com/hooplacakesandbakes artofbaking.com.au facebook.com/sugarpot4me/ hooplacakesandbakes.com.au sugarpot.com.au BAKES&CAKES Julicious Cakes Sydney Sydney, Nsw SweetPerfectionCakes Belrose, Sydney, NSw facebook.com/bakescakesnow Newcastle, Nsw www.facebook.com/juliciouscakesde- facebook.com/sweetperfectioncakes signersydneyl Buds‘n Petal Cakes sweetperfection.com.au Sydney, Nsw facebook.com/BudsnPetalCakes?ref=hl
Page 146 text
NSW Sweet Treats by Jules Cherrybrook, Sydney, NSW facebook.com/SweettreatsbyJules/ sweettreatsbyjules.com the polished spoon Lane Cove NSW facebook.com/thepolishedspoon thepolishedspoon.com.au Jackie’s Cakes by design Narangba, Qld facebook.com/JackiesCakesByDesign J Poppet Gold Coast, Qld facebook.com/J-Pop- pet-103962643298723/ jpoppet.com.au/ Marylou’s Custom Cake Creations Cashmere, QLD facebook.com/marylouscustomcakecre- ations jasomar.wix.com/creativecakes Too Good to Cut - Cake Decorating Ungarie NSW facebook.com/toogoodtocut.CakeDeco- rating Maydennison Cakes and Crafts Toowoomba, QLD Wicked Cakes facebook.com/CustomCakesByLouise. Frenchs Forest, NSW Withcott.Qld/ m.facebook.com/wickedcakes www.maydennison.com.au/ QLD All Occasions Speciality Cakes Ormeau, Queensland facebook.com/AllOccasionsSpeciality- Cakes/ AllOccasions.SpecialityCakes.com.au red kitchen girls Brisbane, Queensland facebook.com/Redkitchengirls redkitchengirls.com.au Cakes by Natasha Willunga, SA m.facebook.com/cakesbynatashawillun ga/?tsid=0.5026378531835337&source =typeahead Caroline’s Sugar Art Services Oakland’s Park, SA carolines.com.au Charmed Creations Cakes Elizabeth, SA facebook.com/charmedcreationscakes charmedcreationscakes.com Dotty’s Kitchen Sellicks Beach, SA facebook.com/DottysKitchen Mirror Mirror Patisserie Nuriootpa, SA m.facebook.com/mirrormirrorpatisserie/ Sassy Cakes and Cupcakes Adelaide, South Australia m.me/sassycakecreations Sublime Cake Creations Sublime Cake Creations, QLD facebook.com/Sublimecc sublimecc.com.au Sugar Sugar Cakes Adelaide, South Australia A Nice Treat MAREEBA, Queensland facebook.com/anicetreat anicetreat.com Sugarize Gold Coast, QLD facebook.com/sugarizeevents sugarizeevents.com The Baker's Dozen Adelaide/Crafers West, SA facebook.com/thebakersdozenau thebakersdozenau.com Ann's dream cakes toowoomba Toowoomba, QLD facebook.com/Annsdreamcake- toowoomba/ annsdreamcakes.com.au/ SUgar Treat Home Baking Gold Coast (Surfers Paradise), QLD facebook.com/sugartreat.au sugartreat.net The Cake Duet Adelaide, South Australia facebook.com/thecakeduet Whitsunday Baked Creations Airlie Beach, QLD facebook.com/whitsundaybakedcre- ations whitsundaybakedcreations.yolasite. com/ TAS Wrightway Cakes Kingston, QLD facebook.com/wrightwaycakes wrightwaycakes.com.au Lily May Cake Design Hobart, TAS facebook.com/lilymaycakedesign lilymaycakedesign.com.au/ SA VIC Cakeadaisical Warradale/Adelaide, South Australia facebook.com/Cakeadaisical cakeadaisical.com.au A Little Bit Fancee Melbourne, VIC facebook.com/alittlebitfancee alittlebitfancee.com.au Cake Me To A Better Place Strathalbyn, SA facebook.com/cakemetoabetterplace All about the Flavour - Cupcakes by Jess Geelong, Victoria facebook.com/allabouttheflavour CAKES ANNIETIME CAIRNS, QLD facebook/cakesannietime cakesannietime.com.au Cakes by Paulie Redland Bay, Queensland facebook.com/Cakes-By-Paulie- 104737139616518/?ref=hl cakesbypaulie.com.au/ Dreamcakes by Dorita Gympie/Sunshine Coast, Queensland facebook.com/dreamcakesbydorita dreamcakesbydorita.com Flower & Fondant Gold Coast, QLD facebook.com/flowerandfondant flowerandfondant.com.au Frosted Kitchen Gold Coast, Queensland facebook.com/frostedkitchen15 facebook.com/sugarsugar.designercakes sugarsugarcakes.com.au Decorated By Kate Ulverstone, TAS facebook.com/decoratedbykate

Page 147 text
Join us! ad full page Become a member of the Australian Cake Decorating Network to access a wide range of benefits. Start saving and networking today! f www.acdn.me [email protected] click here to join our mailing list! To advertise in Cake! magazine, contact [email protected]
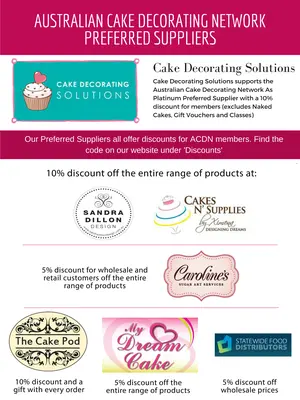
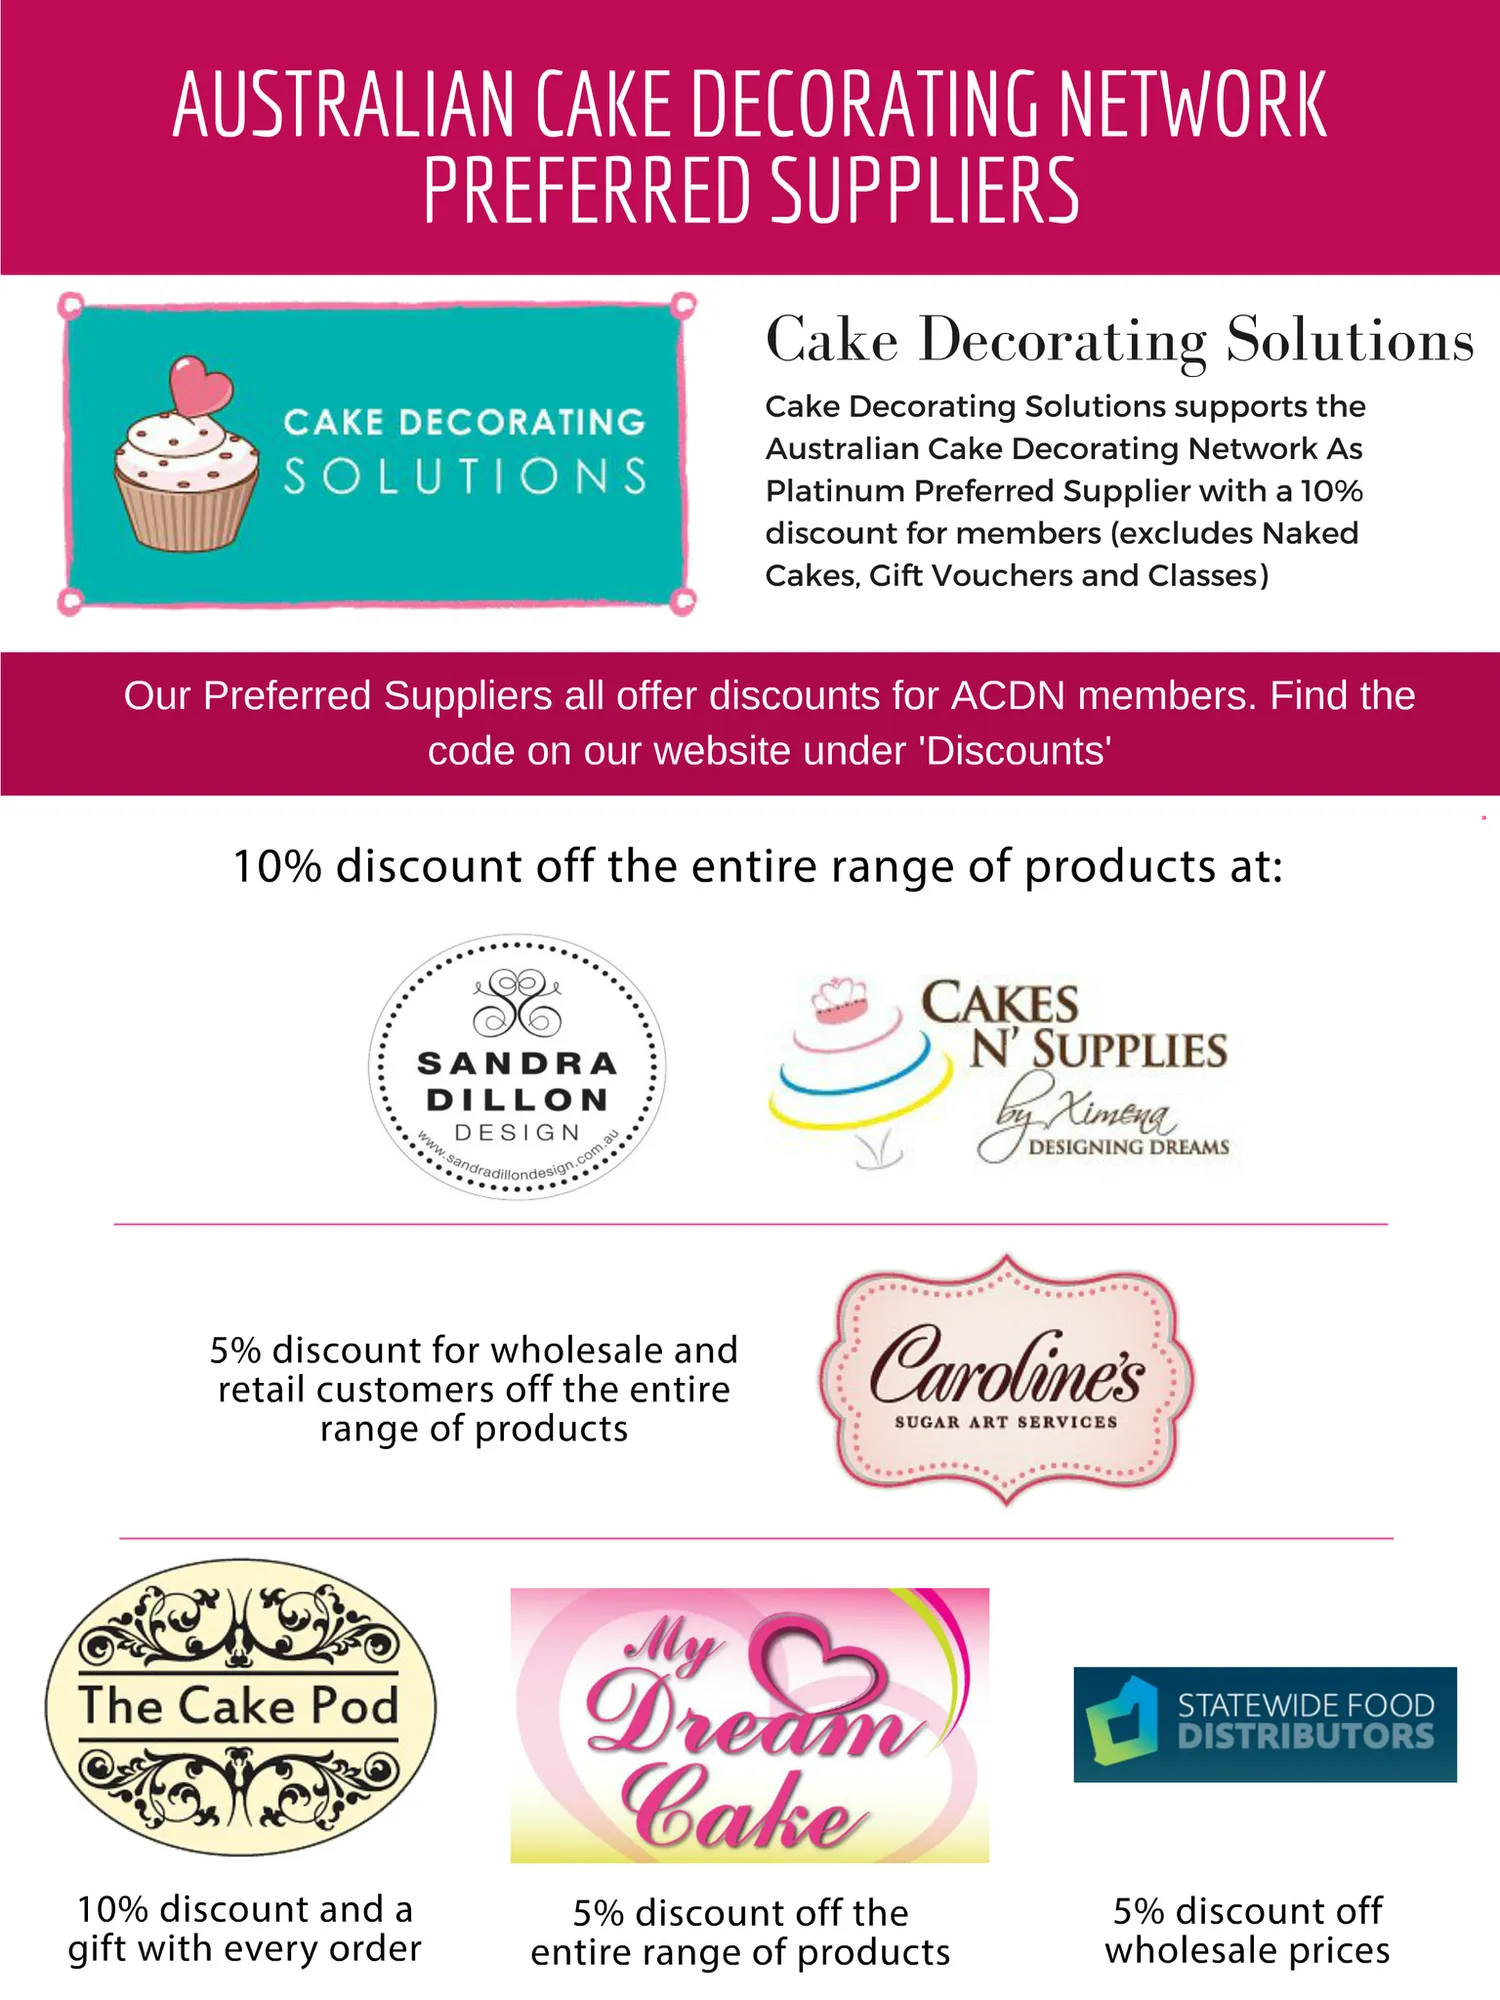
Page 148 text
AUSTRALIAN CAKE DECORATING NETWORK AUSTRALIAN CAKE DECORATING NETWORK PREFERRED SUPPLIERS PREFERRED SUPPLIERS Cake Decorating Solutions Cake Decorating Solutions AUSTRALIAN CAKE DECORATING NETWOR PREFERRED SUPPLIERS Cake Decorating So Our Preferred Suppliers all offer discounts for ACDN members. Find the Our Preferred Suppliers all offer discounts for ACDN members. Find the code on our website under 'Discounts' code on our website under 'Discounts' couture 10% discount cakes couture sugar art creative cakes off caroline's the entire range of products at: australia services caroline's sugar art services cakes creative cakes australia Our Preferred Suppliers all offer discounts for ACDN members. code on our website under 'Discounts' caroline's sugar art services couture cakes 5% discount for wholesale and retail customers off the entire the range of products my cake the pod cake pod statewide food distributors statewide food dream my cake dream cake the cake pod 10% discount and a gift with every order creativ austr distributors my dream cake 5% discount off the entire range of products statewid distrib 5% discount off wholesale prices
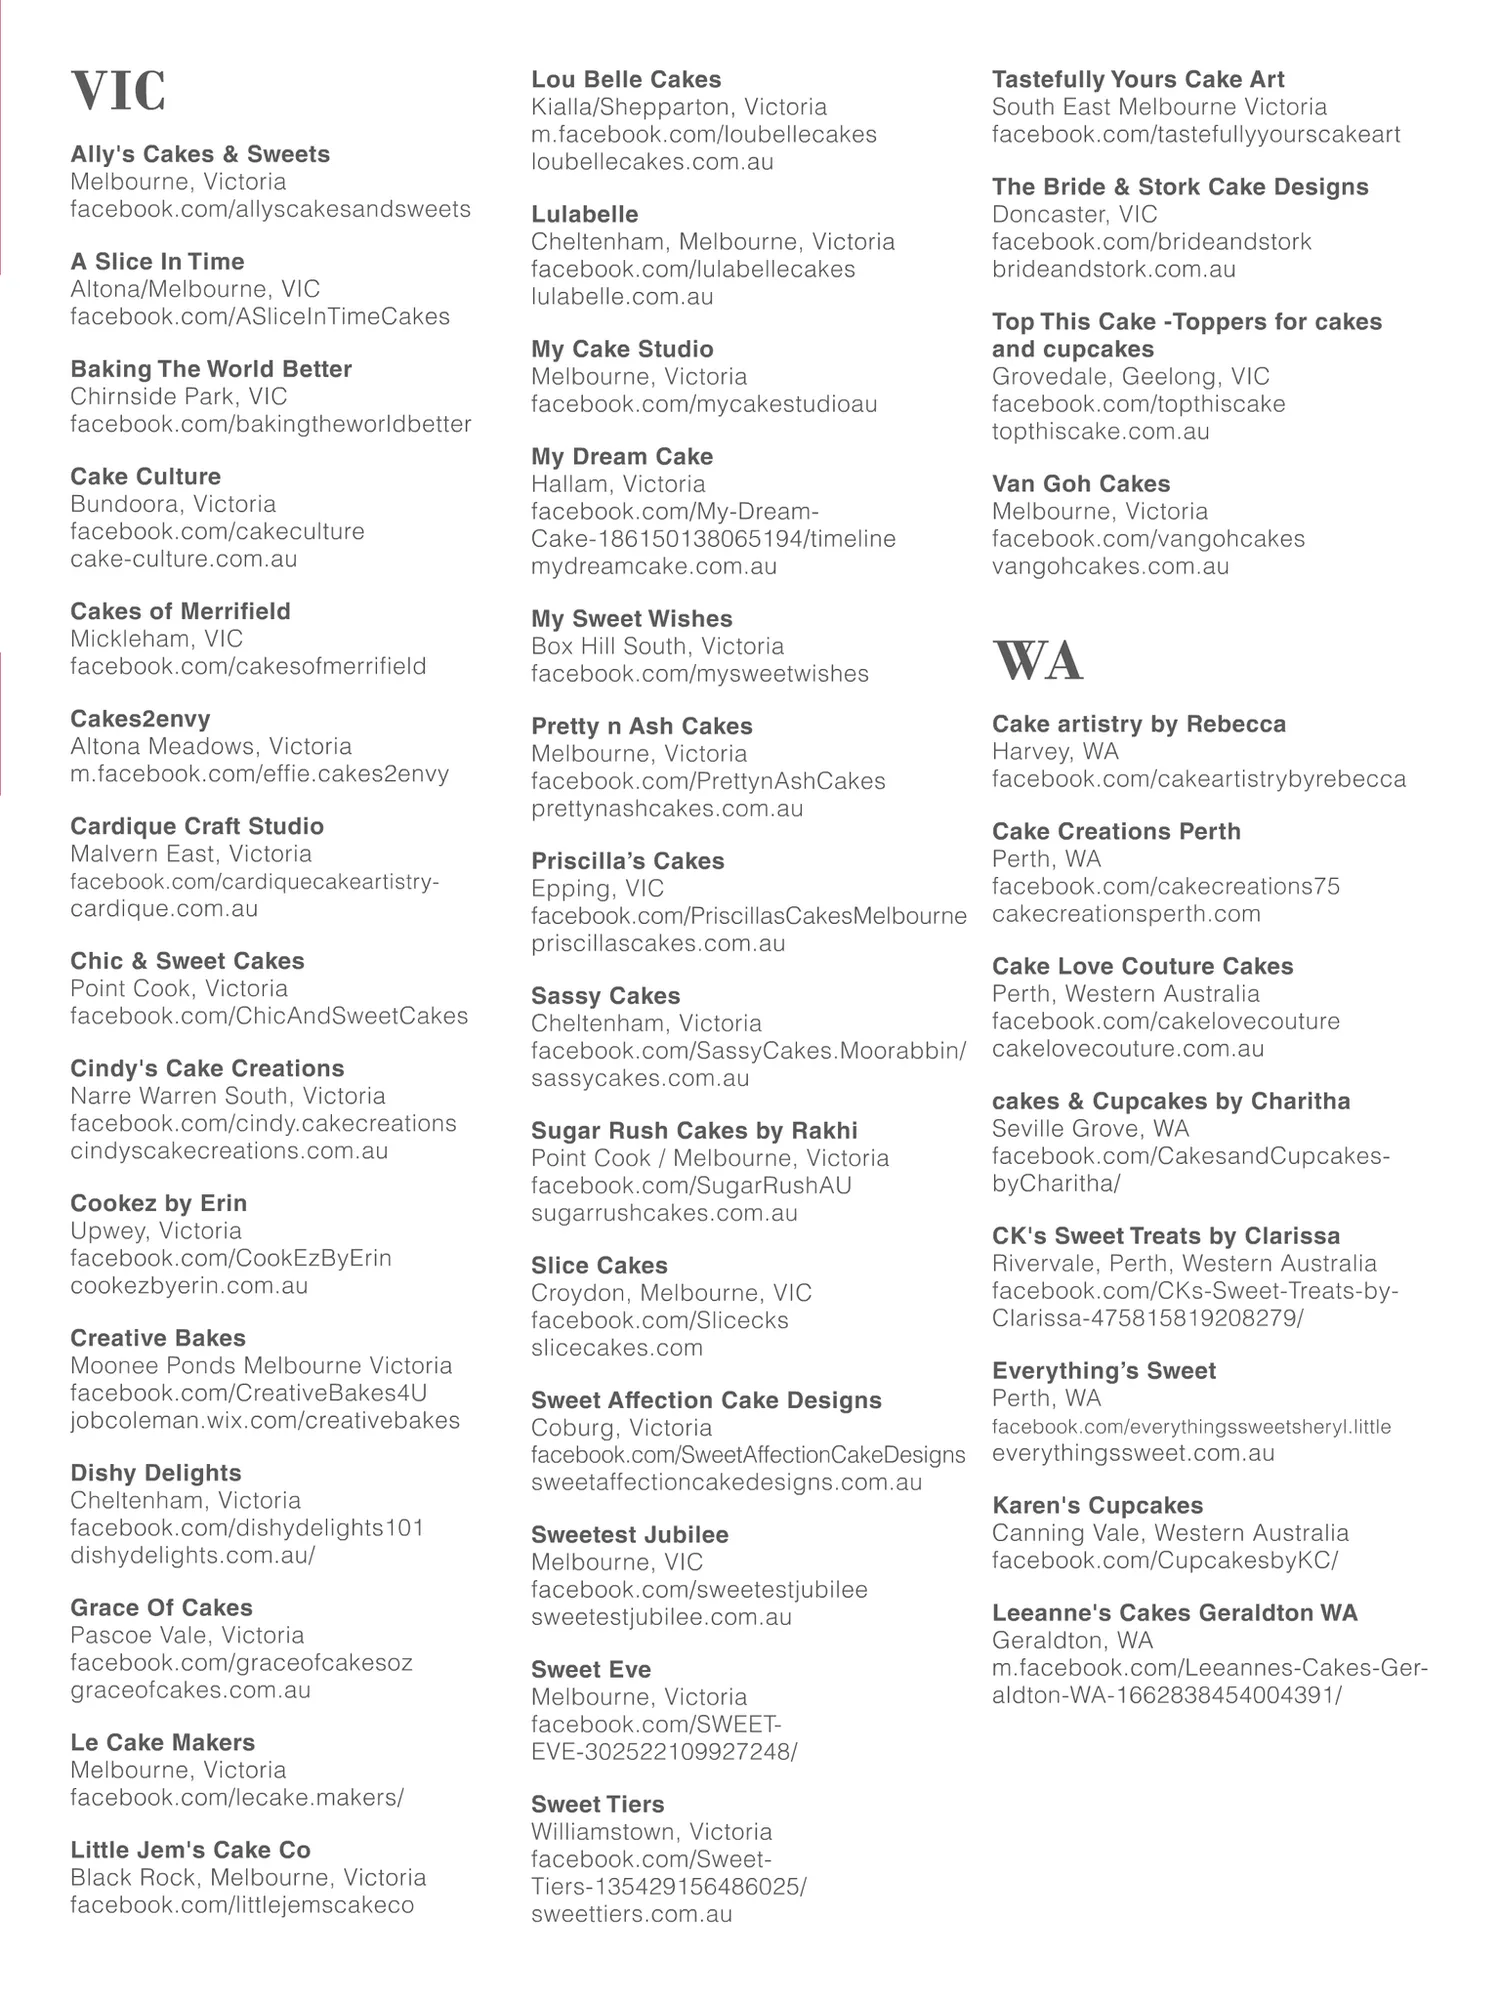
Page 149 text
VIC Ally's Cakes & Sweets Melbourne, Victoria facebook.com/allyscakesandsweets A Slice In Time Altona/Melbourne, VIC facebook.com/ASliceInTimeCakes Baking The World Better Chirnside Park, VIC facebook.com/bakingtheworldbetter Lou Belle Cakes Kialla/Shepparton, Victoria m.facebook.com/loubellecakes loubellecakes.com.au Lulabelle Cheltenham, Melbourne, Victoria facebook.com/lulabellecakes lulabelle.com.au My Cake Studio Melbourne, Victoria facebook.com/mycakestudioau Cake Culture Bundoora, Victoria facebook.com/cakeculture cake-culture.com.au My Dream Cake Hallam, Victoria facebook.com/My-Dream- Cake-186150138065194/timeline mydreamcake.com.au Cakes of Merrifield Mickleham, VIC facebook.com/cakesofmerrifield My Sweet Wishes Box Hill South, Victoria facebook.com/mysweetwishes Cakes2envy Altona Meadows, Victoria m.facebook.com/effie.cakes2envy Pretty n Ash Cakes Melbourne, Victoria facebook.com/PrettynAshCakes prettynashcakes.com.au Cardique Craft Studio Malvern East, Victoria facebook.com/cardiquecakeartistry- cardique.com.au Chic & Sweet Cakes Point Cook, Victoria facebook.com/ChicAndSweetCakes Cindy's Cake Creations Narre Warren South, Victoria facebook.com/cindy.cakecreations cindyscakecreations.com.au Cookez by Erin Upwey, Victoria facebook.com/CookEzByErin cookezbyerin.com.au Creative Bakes Moonee Ponds Melbourne Victoria facebook.com/CreativeBakes4U jobcoleman.wix.com/creativebakes Dishy Delights Cheltenham, Victoria facebook.com/dishydelights101 dishydelights.com.au/ Grace Of Cakes Pascoe Vale, Victoria facebook.com/graceofcakesoz graceofcakes.com.au Le Cake Makers Melbourne, Victoria facebook.com/lecake.makers/ Little Jem's Cake Co Black Rock, Melbourne, Victoria facebook.com/littlejemscakeco Priscilla’s Cakes Epping, VIC facebook.com/PriscillasCakesMelbourne priscillascakes.com.au Sassy Cakes Cheltenham, Victoria facebook.com/SassyCakes.Moorabbin/ sassycakes.com.au Sugar Rush Cakes by Rakhi Point Cook / Melbourne, Victoria facebook.com/SugarRushAU sugarrushcakes.com.au Slice Cakes Croydon, Melbourne, VIC facebook.com/Slicecks slicecakes.com Sweet Affection Cake Designs Coburg, Victoria facebook.com/SweetAffectionCakeDesigns sweetaffectioncakedesigns.com.au Sweetest Jubilee Melbourne, VIC facebook.com/sweetestjubilee sweetestjubilee.com.au Sweet Eve Melbourne, Victoria facebook.com/SWEET- EVE-302522109927248/ Sweet Tiers Williamstown, Victoria facebook.com/Sweet- Tiers-135429156486025/ sweettiers.com.au Tastefully Yours Cake Art South East Melbourne Victoria facebook.com/tastefullyyourscakeart The Bride & Stork Cake Designs Doncaster, VIC facebook.com/brideandstork brideandstork.com.au Top This Cake -Toppers for cakes and cupcakes Grovedale, Geelong, VIC facebook.com/topthiscake topthiscake.com.au Van Goh Cakes Melbourne, Victoria facebook.com/vangohcakes vangohcakes.com.au WA Cake artistry by Rebecca Harvey, WA facebook.com/cakeartistrybyrebecca Cake Creations Perth Perth, WA facebook.com/cakecreations75 cakecreationsperth.com Cake Love Couture Cakes Perth, Western Australia facebook.com/cakelovecouture cakelovecouture.com.au cakes & Cupcakes by Charitha Seville Grove, WA facebook.com/CakesandCupcakes- byCharitha/ CK's Sweet Treats by Clarissa Rivervale, Perth, Western Australia facebook.com/CKs-Sweet-Treats-by- Clarissa-475815819208279/ Everything’s Sweet Perth, WA facebook.com/everythingssweetsheryl.little everythingssweet.com.au Karen's Cupcakes Canning Vale, Western Australia facebook.com/CupcakesbyKC/ Leeanne's Cakes Geraldton WA Geraldton, WA m.facebook.com/Leeannes-Cakes-Ger- aldton-WA-1662838454004391/
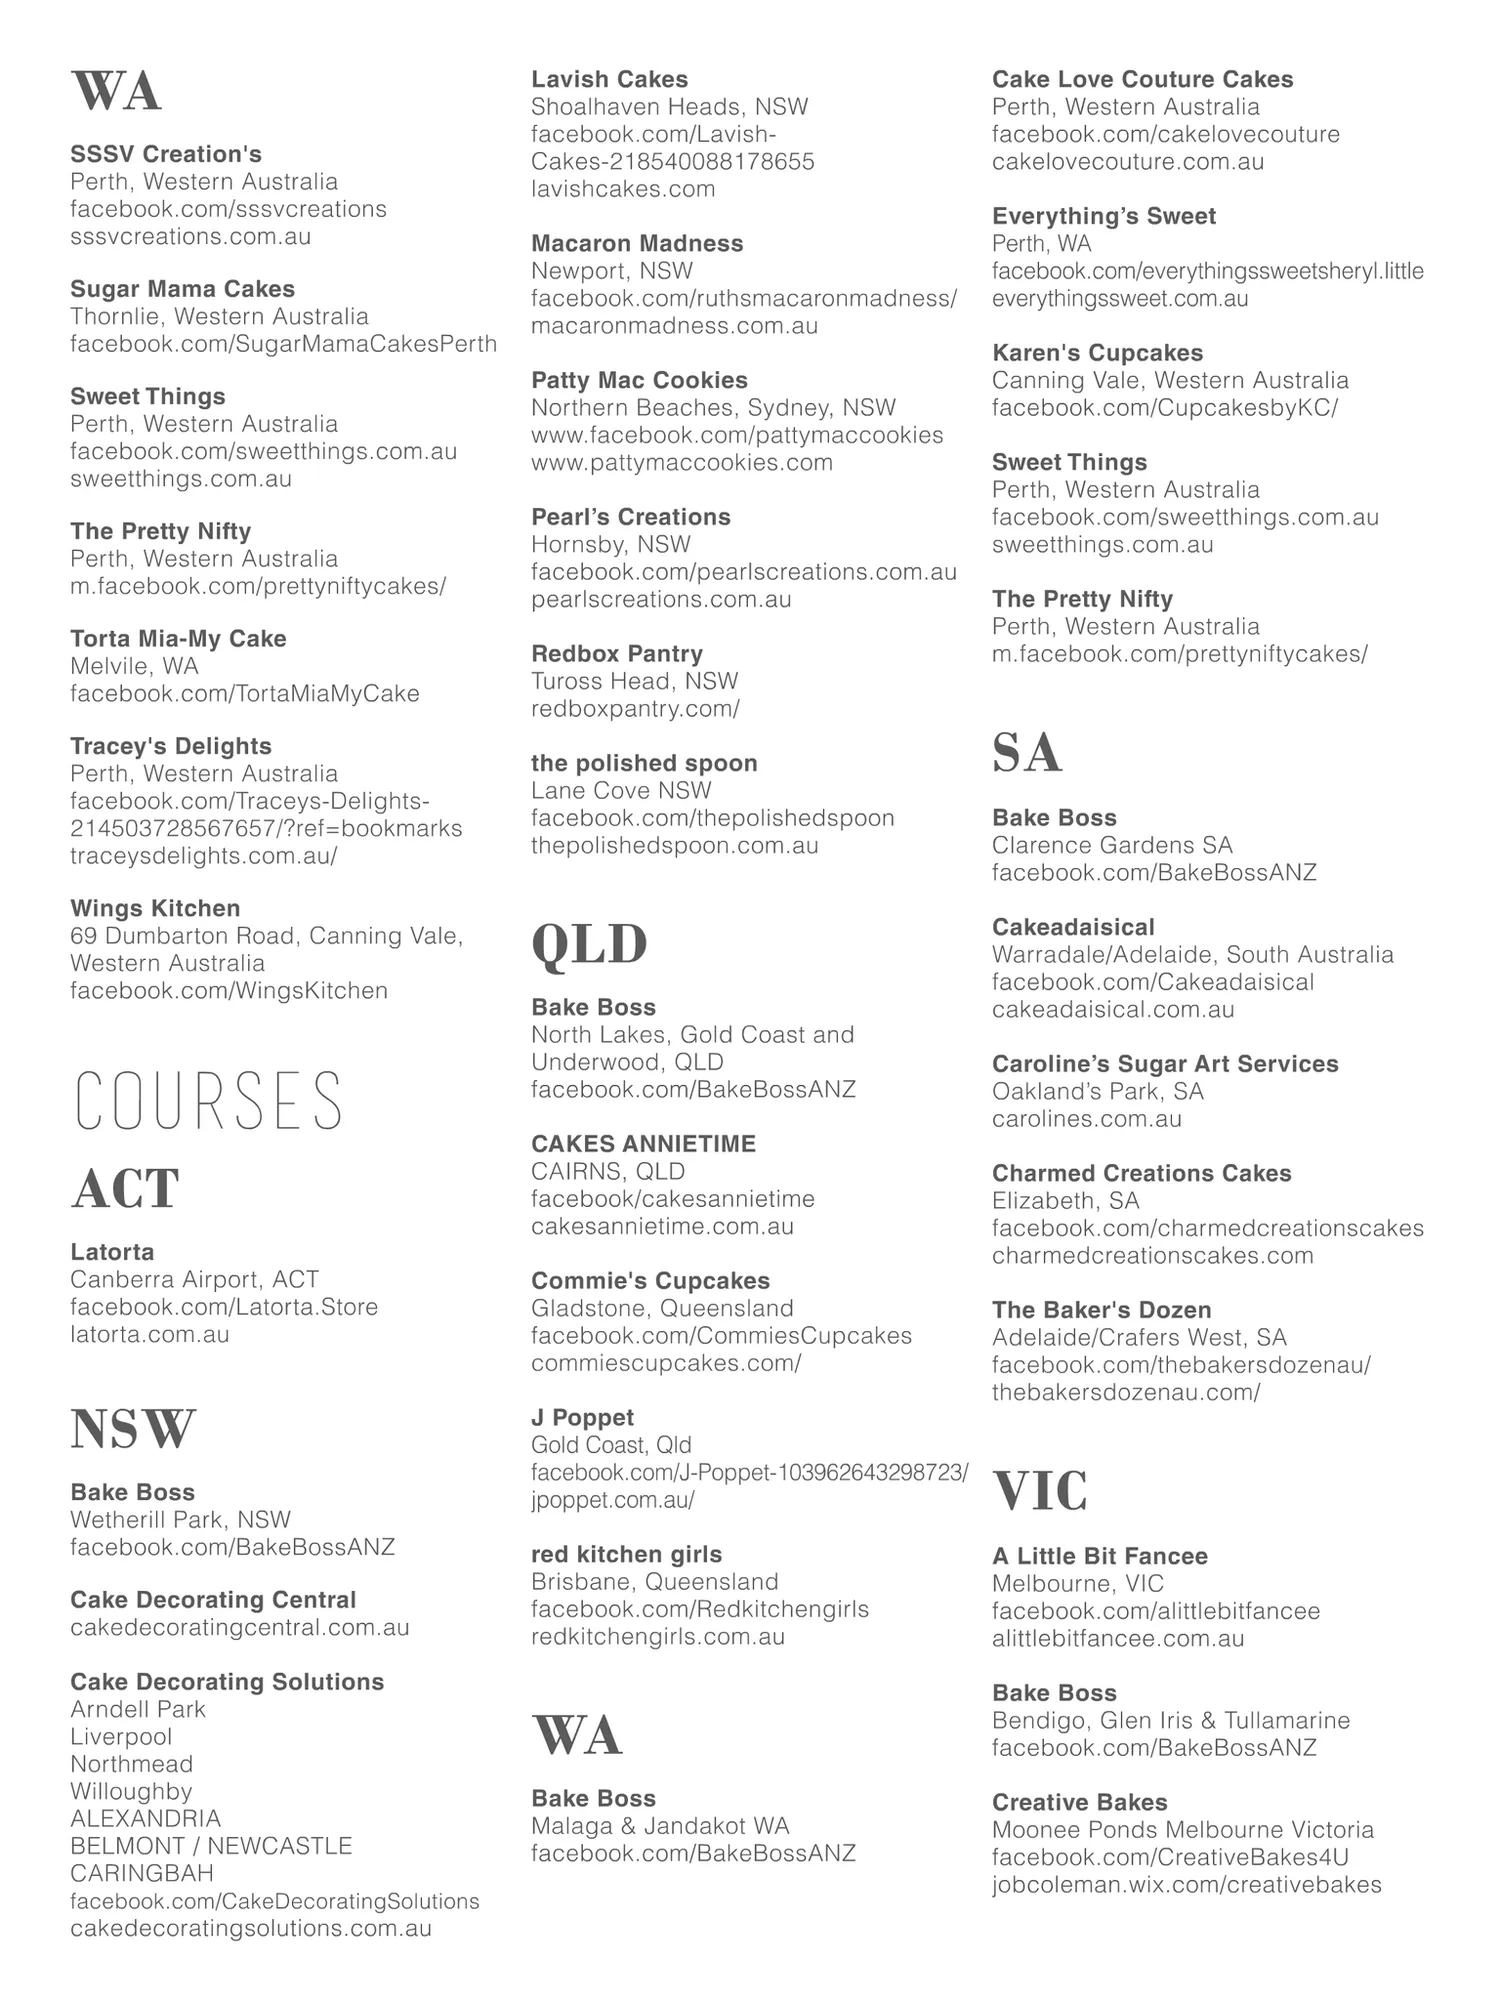
Page 150 text
WA SSSV Creation's Perth, Western Australia facebook.com/sssvcreations sssvcreations.com.au Sugar Mama Cakes Thornlie, Western Australia facebook.com/SugarMamaCakesPerth Sweet Things Perth, Western Australia facebook.com/sweetthings.com.au sweetthings.com.au The Pretty Nifty Perth, Western Australia m.facebook.com/prettyniftycakes/ Torta Mia-My Cake Melvile, WA facebook.com/TortaMiaMyCake Lavish Cakes Shoalhaven Heads, NSW facebook.com/Lavish- Cakes-218540088178655 lavishcakes.com Macaron Madness Newport, NSW facebook.com/ruthsmacaronmadness/ macaronmadness.com.au Patty Mac Cookies Northern Beaches, Sydney, NSW www.facebook.com/pattymaccookies www.pattymaccookies.com Pearl’s Creations Hornsby, NSW facebook.com/pearlscreations.com.au pearlscreations.com.au Redbox Pantry Tuross Head, NSW redboxpantry.com/ Tracey's Delights Perth, Western Australia facebook.com/Traceys-Delights- 214503728567657/?ref=bookmarks traceysdelights.com.au/ the polished spoon Lane Cove NSW facebook.com/thepolishedspoon thepolishedspoon.com.au Wings Kitchen 69 Dumbarton Road, Canning Vale, Western Australia facebook.com/WingsKitchen QLD Courses ACT Latorta Canberra Airport, ACT facebook.com/Latorta.Store latorta.com.au NSW Bake Boss Wetherill Park, NSW facebook.com/BakeBossANZ Cake Decorating Central cakedecoratingcentral.com.au Cake Decorating Solutions Arndell Park Liverpool Northmead Willoughby ALEXANDRIA BELMONT / NEWCASTLE CARINGBAH facebook.com/CakeDecoratingSolutions cakedecoratingsolutions.com.au Bake Boss North Lakes, Gold Coast and Underwood, QLD facebook.com/BakeBossANZ CAKES ANNIETIME CAIRNS, QLD facebook/cakesannietime cakesannietime.com.au Commie's Cupcakes Gladstone, Queensland facebook.com/CommiesCupcakes commiescupcakes.com/ J Poppet Gold Coast, Qld facebook.com/J-Poppet-103962643298723/ jpoppet.com.au/ Cake Love Couture Cakes Perth, Western Australia facebook.com/cakelovecouture cakelovecouture.com.au Everything’s Sweet Perth, WA facebook.com/everythingssweetsheryl.little everythingssweet.com.au Karen's Cupcakes Canning Vale, Western Australia facebook.com/CupcakesbyKC/ Sweet Things Perth, Western Australia facebook.com/sweetthings.com.au sweetthings.com.au The Pretty Nifty Perth, Western Australia m.facebook.com/prettyniftycakes/ SA Bake Boss Clarence Gardens SA facebook.com/BakeBossANZ Cakeadaisical Warradale/Adelaide, South Australia facebook.com/Cakeadaisical cakeadaisical.com.au Caroline’s Sugar Art Services Oakland’s Park, SA carolines.com.au Charmed Creations Cakes Elizabeth, SA facebook.com/charmedcreationscakes charmedcreationscakes.com The Baker's Dozen Adelaide/Crafers West, SA facebook.com/thebakersdozenau/ thebakersdozenau.com/ VIC red kitchen girls Brisbane, Queensland facebook.com/Redkitchengirls redkitchengirls.com.au A Little Bit Fancee Melbourne, VIC facebook.com/alittlebitfancee alittlebitfancee.com.au WA Bake Boss Bendigo, Glen Iris & Tullamarine facebook.com/BakeBossANZ Bake Boss Malaga & Jandakot WA facebook.com/BakeBossANZ Creative Bakes Moonee Ponds Melbourne Victoria facebook.com/CreativeBakes4U jobcoleman.wix.com/creativebakes
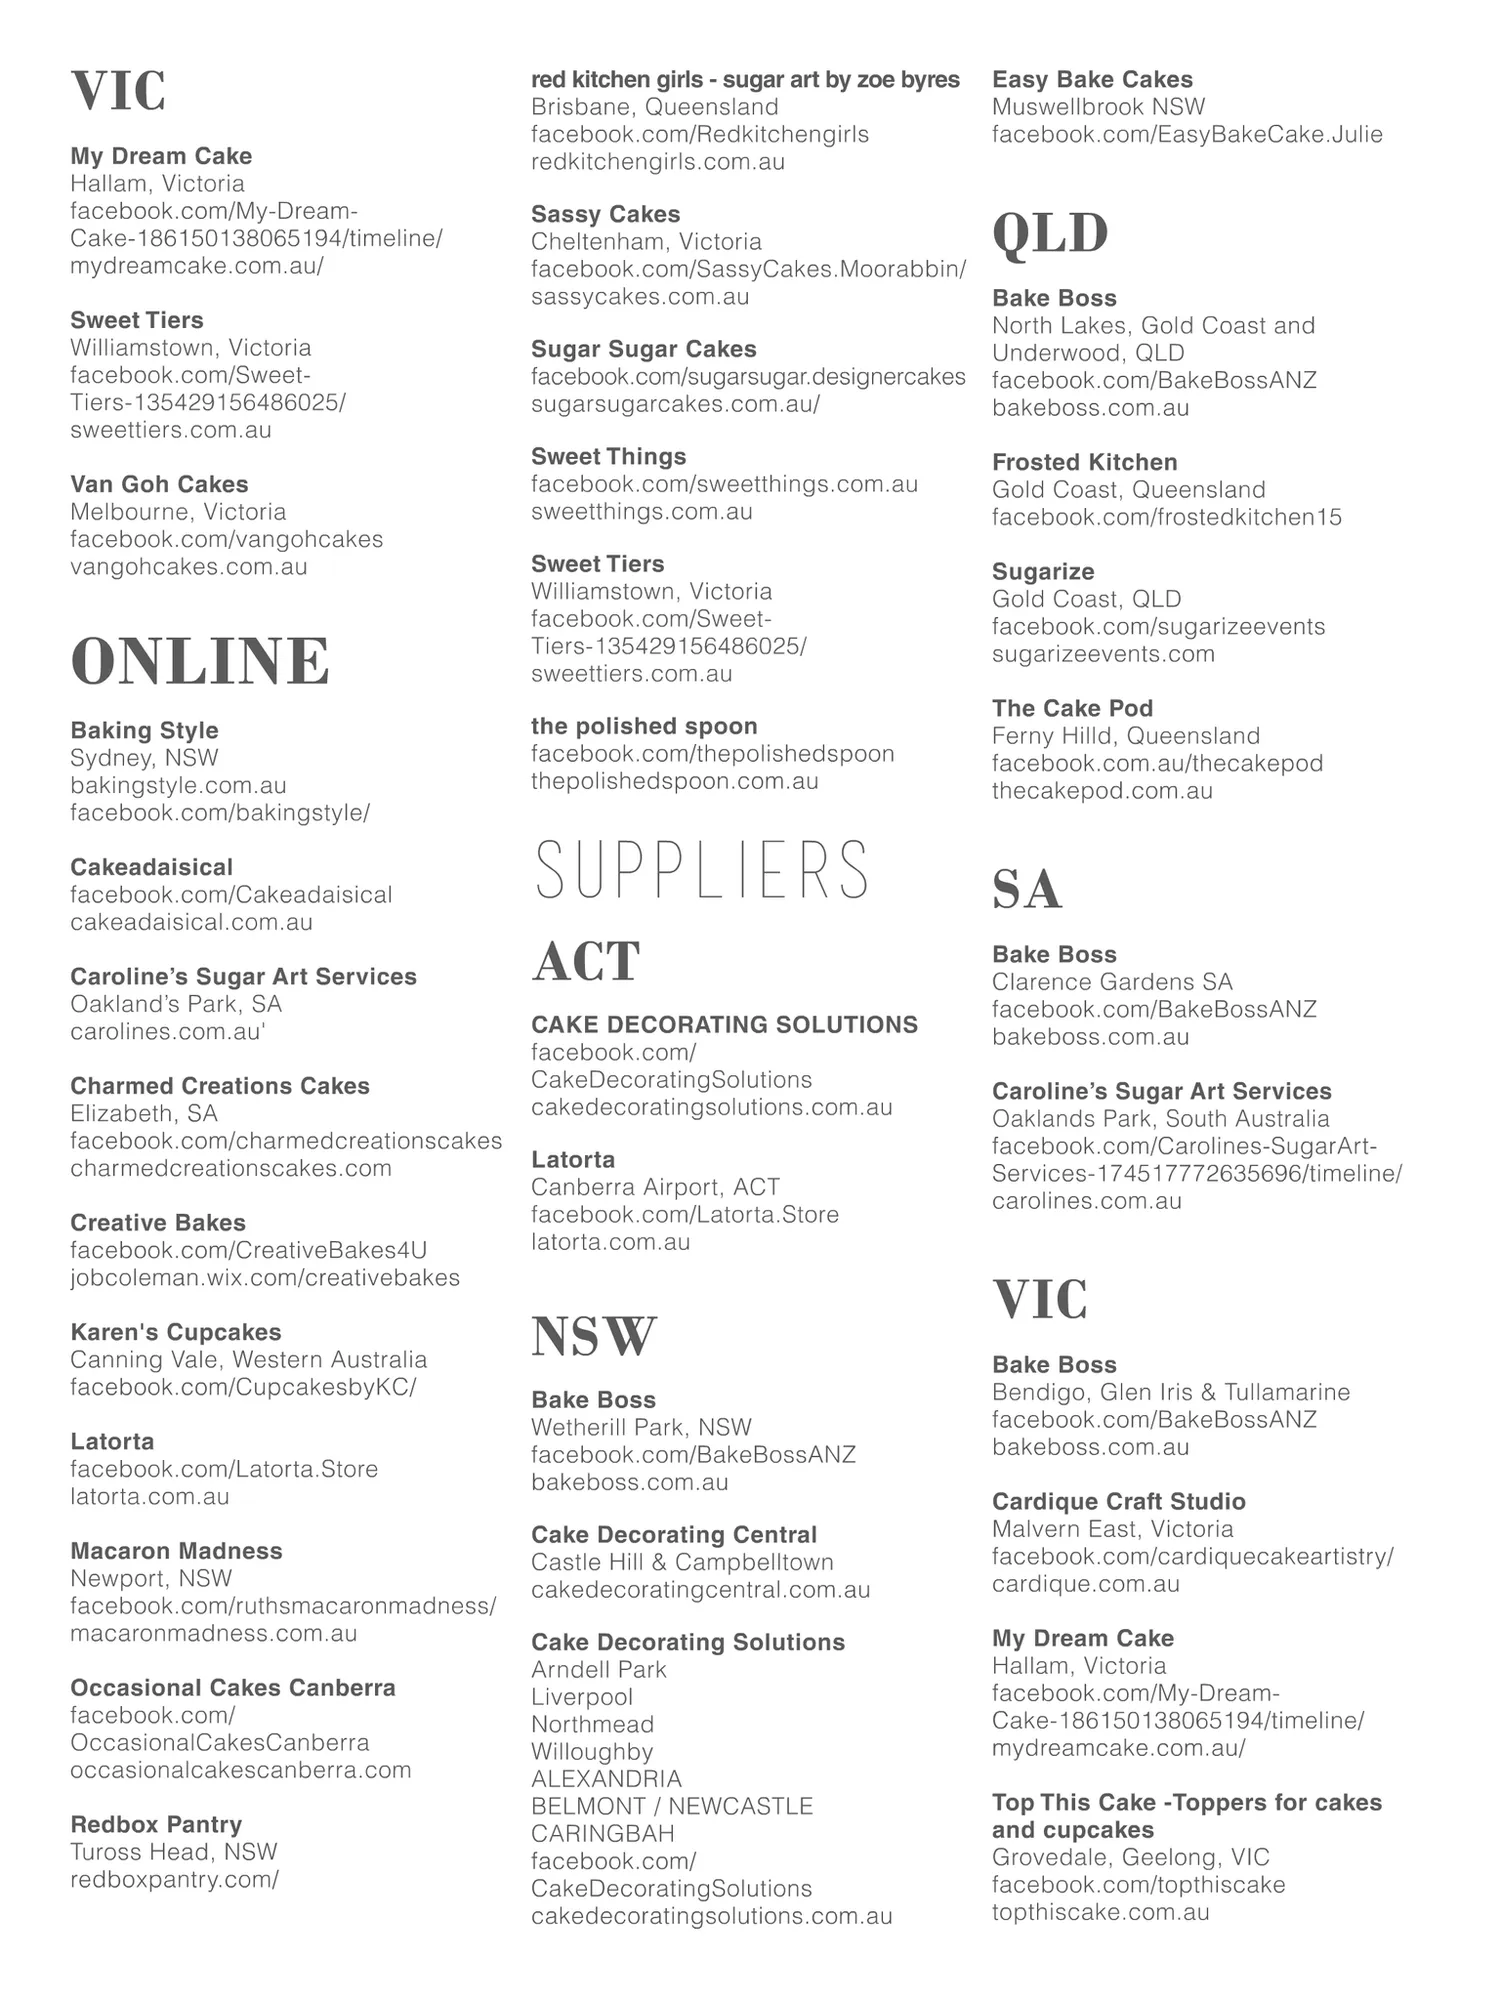
Page 151 text
VIC red kitchen girls - sugar art by zoe byres Easy Bake Cakes Brisbane, Queensland MuswellbrookNsw facebook.com/Redkitchengirls facebook.com/EasyBakeCake.Julie My Dream Cake redkitchengirls.com.au Hallam, Victoria facebook.com/My-Dream- Sassy Cakes QLD Cake-186150138065194/timeline/ Cheltenham, Victoria mydreamcake.com.au/ facebook.com/SassyCakes.Moorabbin/ sassycakes.com.au Bake Boss Sweet Tiers North Lakes, Gold Coast and Williamstown, Victoria Sugar Sugar Cakes Underwood, QLD facebook.com/Sweet- facebook.com/sugarsugar.designercakes facebook.com/BakeBossANz Tiers-135429156486025/ sugarsugarcakes.com.au/ bakeboss.com.au sweettiers.com.au Sweet Things Frosted Kitchen Van Goh Cakes facebook.com/sweetthings.com.au Gold Coast, Queensland Melbourne, Victoria sweetthings.com.au facebook.com/frostedkitchen15 facebook.com/vangohcakes vangohcakes.com.au Sweet Tiers Sugarize Williamstown, Victoria Gold Coast, QLD facebook.com/Sweet- facebook.com/sugarizeevents ONLINE Tiers-135429156486025/ sugarizeevents.com sweettiers.com.au The Cake Pod Baking Style the polished spoon FernyHilld,Queensland Sydney, NSw facebook.com/thepolishedspoon facebook.com.au/thecakepod bakingstyle.com.au thepolishedspoon.com.au thecakepod.com.au facebook.com/bakingstyle/ SUPPLIERS Cakeadaisical SA facebook.com/Cakeadaisical cakeadaisical.com.au ACT Bake Boss Caroline's Sugar Art Services Clarence Gardens SA Oakland's Park, SA facebook.com/BakeBossANz carolines.com.au' CAKEDECORATING SOLUTIONS bakeboss.com.au facebook.com/ Charmed Creations Cakes CakeDecoratingSolutions Caroline's Sugar Art Services Elizabeth, SA cakedecoratingsolutions.com.au Oaklands Park, South Australia facebook.com/charmedcreationscakes facebook.com/Carolines-SugarArt- Latorta charmedcreationscakes.com Services-174517772635696/timeline/ Canberra Airport, ACT carolines.com.au Creative Bakes facebook.com/Latorta.Store facebook.com/CreativeBakes4U latorta.com.au jobcoleman.wix.com/creativebakes VIC Karen's Cupcakes NSW Canning Vale, Western Australia Bake Boss facebook.com/CupcakesbykC/ Bake Boss Bendigo, Glen Iris & Tullamarine Wetherill Park, NSW facebook.com/BakeBossANz Latorta facebook.com/BakeBossANz bakeboss.com.au facebook.com/Latorta.Store bakeboss.com.au latorta.com.au Cardique Craft Studio Cake Decorating Central Malvern East, Victoria Macaron Madness CastleHill&Campbelltown facebook.com/cardiquecakeartistryl Newport, Nsw cakedecoratingcentral.com.au cardique.com.au facebook.com/ruthsmacaronmadness/ macaronmadness.com.au Cake Decorating Solutions My Dream Cake Arndell Park Hallam, Victoria Occasional Cakes Canberra Liverpool facebook.com/My-Dream- facebook.com/ Northmead Cake-186150138065194/timeline/ OccasionalCakesCanberra Willoughby mydreamcake.com.au/ occasionalcakescanberra.com ALEXANDRIA BELMONT/NEWCASTLE TopThisCake-Toppersforcakes Redbox Pantry CARINGBAH and cupcakes Tuross Head, Nsw facebook.com/ Grovedale, Geelong, ViC redboxpantry.com/ CakeDecoratingSolutions facebook.com/topthiscake cakedecoratingsolutions.com.au topthiscake.com.au
Page 152 text
WA Bake Boss Malaga & Jandakot WA facebook.com/BakeBossANZ bakeboss.com.au Sandra DIllon Design facebook.com/sandradillondesign sandradillondesign.com.au Statewide Food Distributors Willeton, WA facebook.com/statewidefood statewidefood.com.au ONLINE Bake Boss facebook.com/BakeBossANZ bakeboss.com.au Baking Style bakingstyle.com.au facebook.com/bakingstyle Cake Decorating Central cakedecoratingcentral.com.au Cake Decorating Solutions facebook.com/CakeDecoratingSolutions cakedecoratingsolutions.com.au Cakes N Supplies by Ximena Florida, USA facebook.com/Cakes-N-Supplies-by- Ximena-105729079471219/ shop.cakesbyximena.com Caroline’s Sugar Art Services facebook.com/Carolines-SugarArt-Ser- vices-174517772635696/timeline/ carolines.com.au CustomIcing Online - Australia wide, ALL facebook.com/customicing customicing.com.au Easy Bake Cakes facebook.com/EasyBakeCake.Julie/ Statewide Food Distributors facebook.com/statewidefood statewidefood.com.au Sugarize facebook.com/sugarizeevents sugarizeevents.com Sugarlicious Parties sugarlicious.com.au m.facebook.com/SugarliciousParties Frosted Ki

Page 153 text
Cake! m a g a z i n e f www.acdn.me [email protected] Don't miss future issues of Cake! Subscribe for FREE here! To advertise in Cake! magazine, contact: [email protected]