Page 59 of 84

Page 1 text
AUGUST 2020
Page 2 text
Cake! m a g a z i n e PUBLISHER: Cake! Magazine is published by the Australian Cake Decorating Network Pty Ltd. ACN: 91 164 927 584. © All content copyright 2020 Australian Cake Decorating Network Pty Ltd. All rights reserved. Reproduction any part of the magazine without written permission is prohibited. All prices included in Cake! Magazine are approximate and are in AUD unless otherwise stated. Prices quoted are correct at the time of publishing and may vary or be subject to change. The Australian Cake Decorating Network Pty Ltd accepts no responsibility for damage or loss as a result of material submitted for, published in or as a result of this publication. The Australian Cake Decorating Network does not have an affiliation with any other magazine. The views and opinions expressed within this publication are not necessarily the views of the publisher or it's affiliates. While every effort has been made to ensure the accuracy of the informtion contained within Cake! Magazine the publisher and Cake! Magazine hold no responsibility for any errors, omissions, or consequences subsequent or otherwise, including loss or damage arising from reliance on information in this publication. Content is supplied for publication in Cake! Magazine by parties external to the Australian Cake Decorating Network and it is the external party's responsibility to ensure content and credits are accurate. To advertise in Cake! magazine, contact: [email protected] f www.acdn.me [email protected] click here to join our mailing list!
Page 3 text
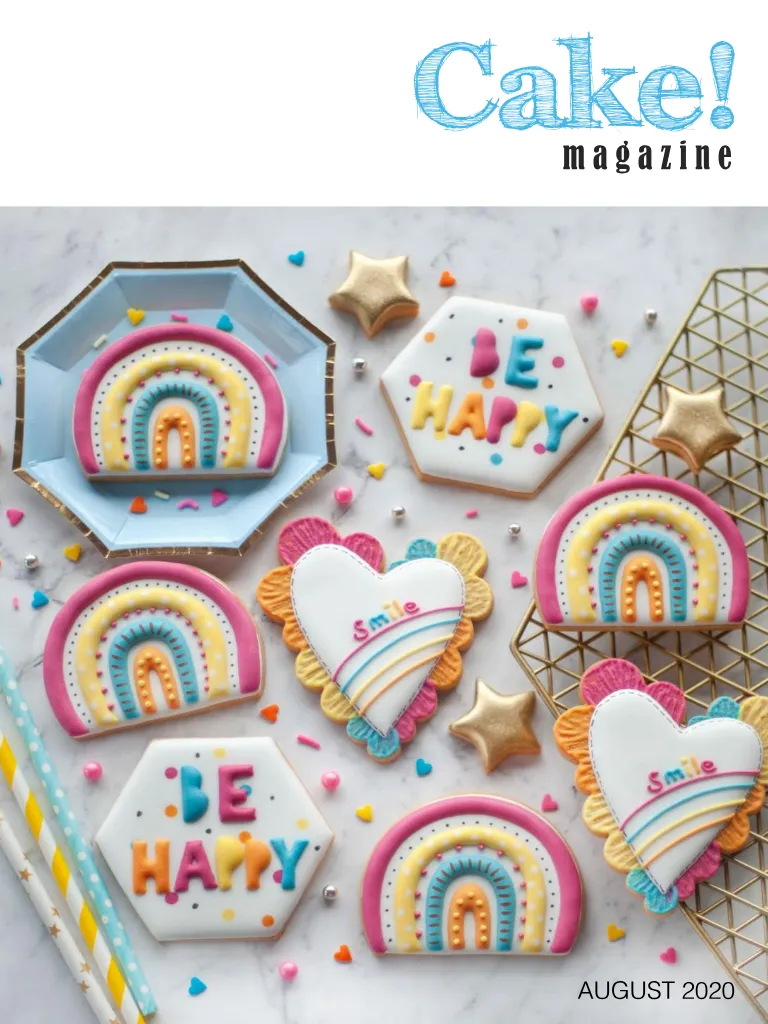
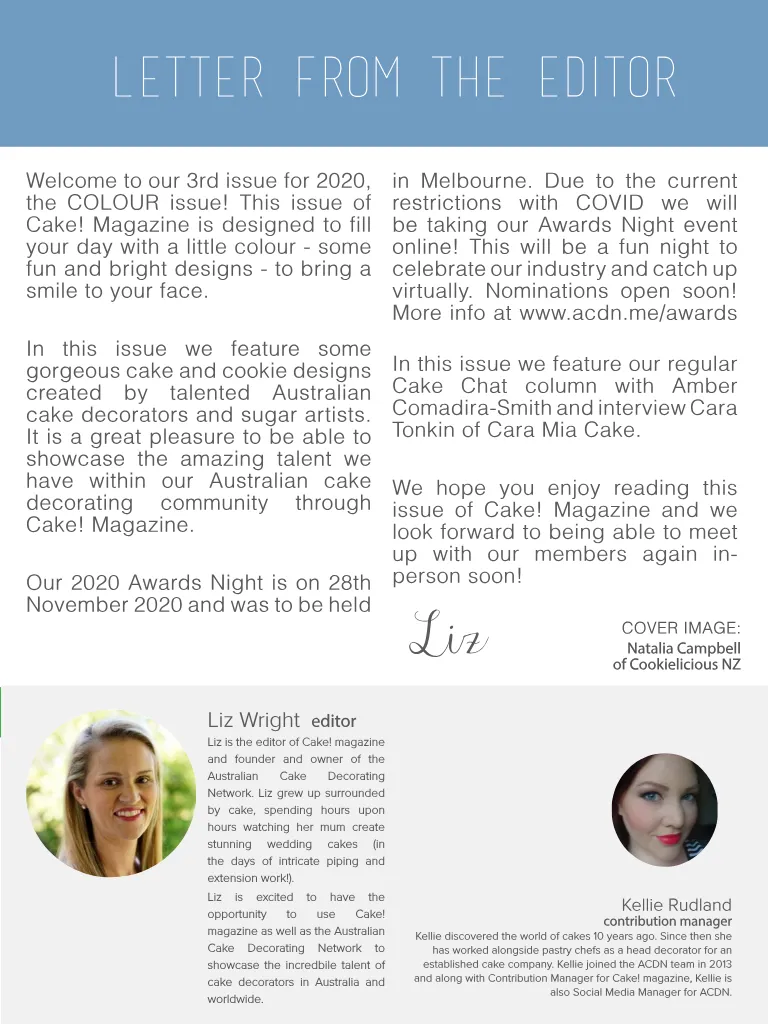
letter from the editor Welcome to our 3rd issue for 2020, the COLOUR issue! This issue of Cake! Magazine is designed to fill your day with a little colour - some fun and bright designs - to bring a smile to your face. In this issue we feature some gorgeous cake and cookie designs created by talented Australian cake decorators and sugar artists. It is a great pleasure to be able to showcase the amazing talent we have within our Australian cake decorating community through Cake! Magazine. Our 2020 Awards Night is on 28th November 2020 and was to be held in Melbourne. Due to the current restrictions with COVID we will be taking our Awards Night event online! This will be a fun night to celebrate our industry and catch up virtually. Nominations open soon! More info at www.acdn.me/awards In this issue we feature our regular Cake Chat column with Amber Comadira-Smith and interview Cara Tonkin of Cara Mia Cake. We hope you enjoy reading this issue of Cake! Magazine and we look forward to being able to meet up with our members again inperson soon! Liz COVER IMAGE: Natalia Campbell of Cookielicious NZ Liz Wright editor Liz is the editor of Cake! magazine and founder and owner of the Australian Cake Decorating Network. Liz grew up surrounded by cake, spending hours upon hours watching her mum create stunning wedding cakes (in the days of intricate piping and extension work!). Liz is excited to have the opportunity to use Cake! magazine as well as the Australian Cake Decorating Network to showcase the incredbile talent of cake decorators in Australia and worldwide. Kellie Rudland contribution manager Kellie discovered the world of cakes 10 years ago. Since then she has worked alongside pastry chefs as a head decorator for an established cake company. Kellie joined the ACDN team in 2013 and along with Contribution Manager for Cake! magazine, Kellie is also Social Media Manager for ACDN.
Page 4 text
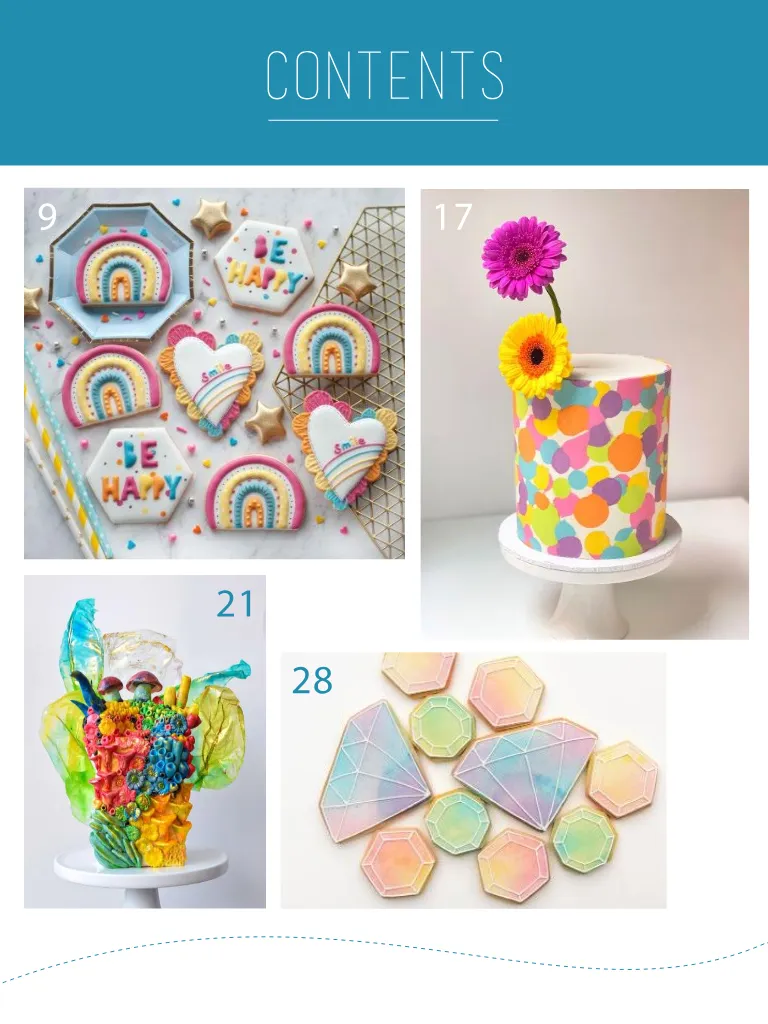
contents contents 9 17 21 28 25
Page 5 text
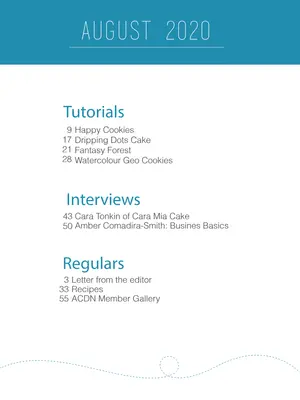
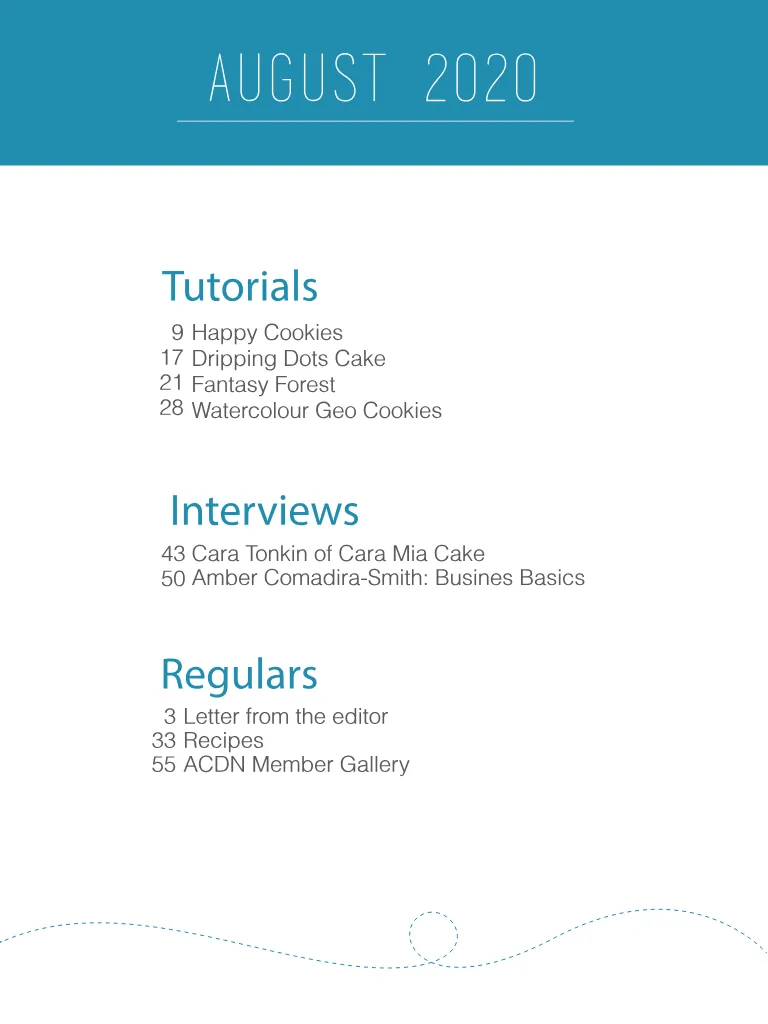
AUGUST 2020 84 Tutorials 9 17 21 28 Happy Cookies Dripping Dots Cake Fantasy Forest Watercolour Geo Cookies Interviews 43 50 Cara Tonkin of Cara Mia Cake Amber Comadira-Smith: Busines Basics Regulars 3 33 55 Letter from the editor Recipes ACDN Member Gallery
Page 6 text
SUBSCRIBE FOR FREE to have each issue of Cake! magazine sent straight to your inbox! f www.acdn.me [email protected] click here to join our mailing list! To advertise in Cake! magazine, contact [email protected]
Page 7 text
Colour! A collection of gorgeous, bright and fun tutorials to help bring some colour to your day!

Page 9 text
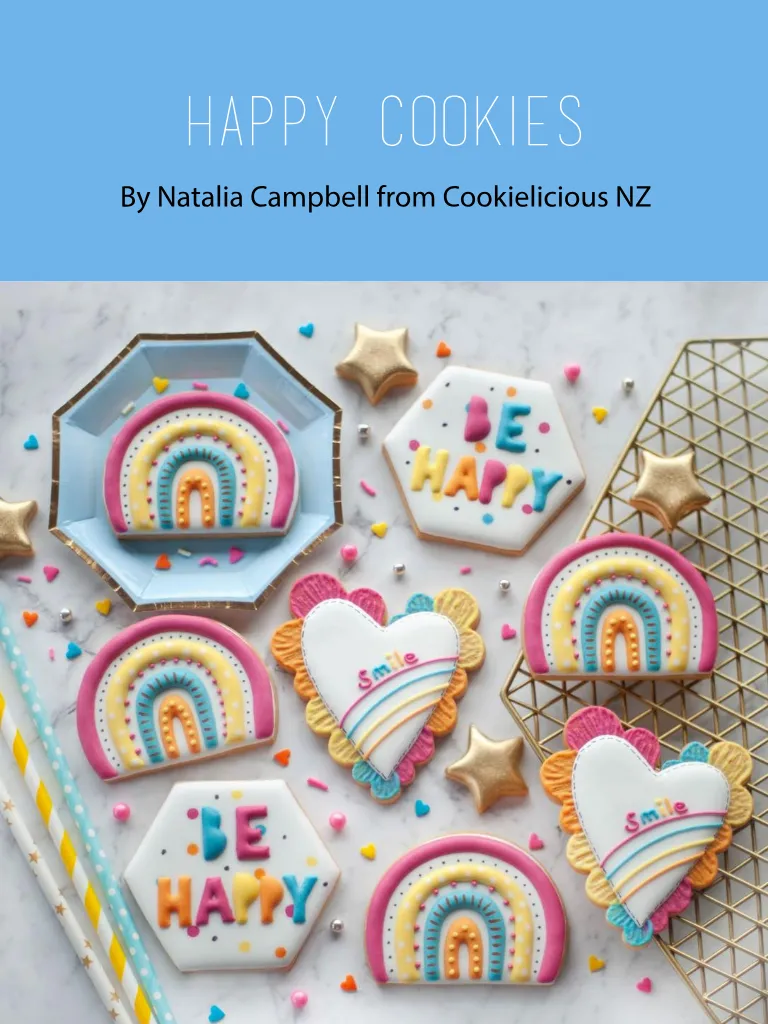
HAPPY COOKIES By Natalia Campbell from Cookielicious NZ
Page 10 text
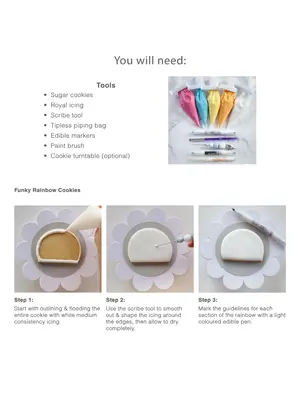
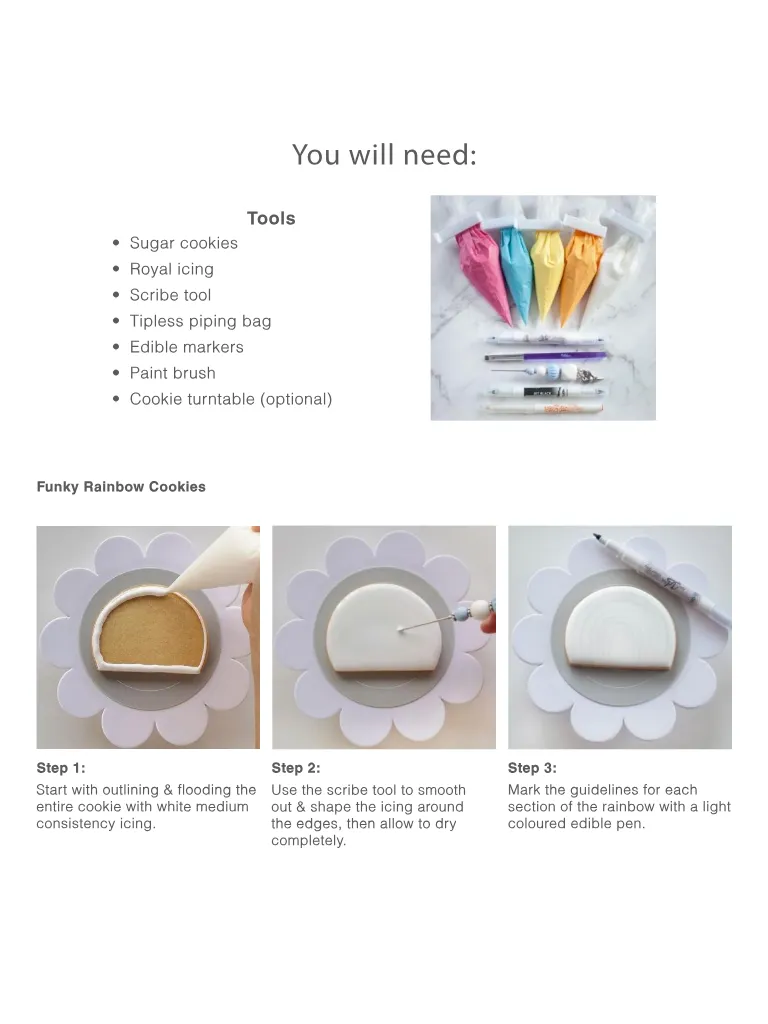
You will need: Tools • Sugar cookies • Royal icing • Scribe tool • Tipless piping bag • Edible markers • Paint brush • Cookie turntable (optional) Funky Rainbow Cookies Step 1: Start with outlining & flooding the entire cookie with white medium consistency icing. Step 2: Use the scribe tool to smooth out & shape the icing around the edges, then allow to dry completely. Step 3: Mark the guidelines for each section of the rainbow with a light coloured edible pen.
Page 11 text
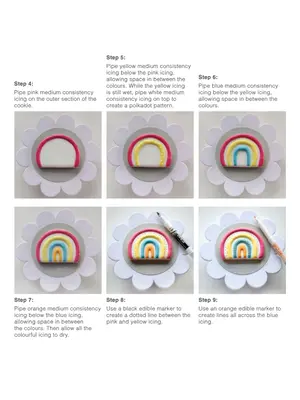
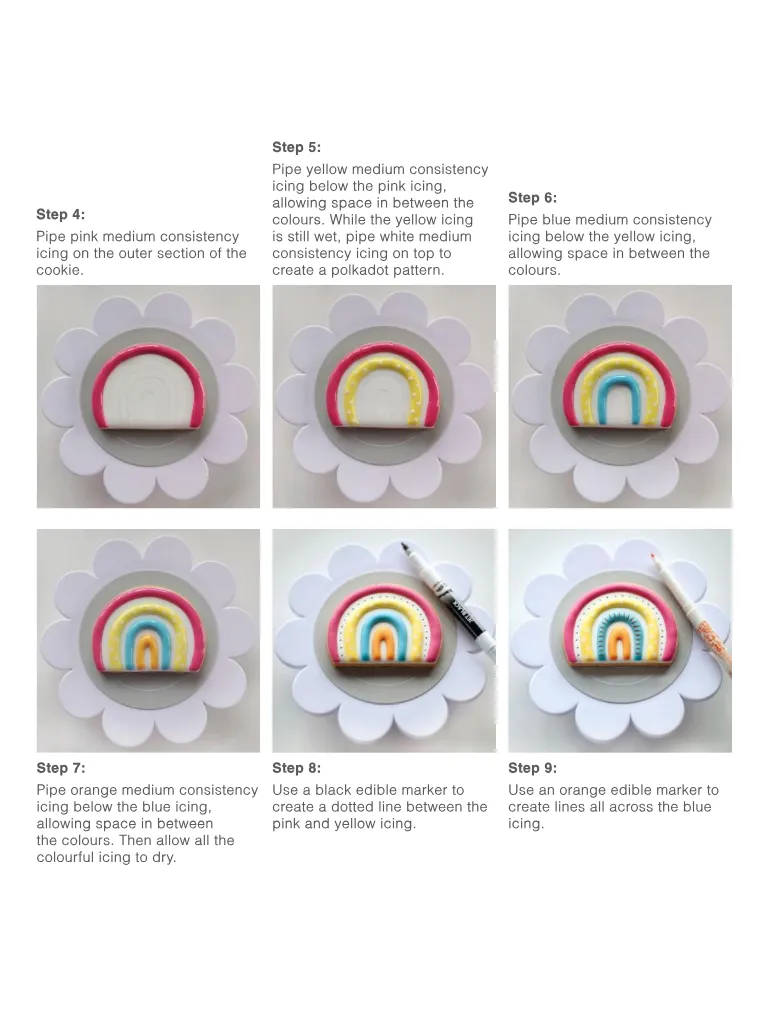
Step 4: Pipe pink medium consistency icing on the outer section of the cookie. Step 5: Pipe yellow medium consistency icing below the pink icing, allowing space in between the colours. While the yellow icing is still wet, pipe white medium consistency icing on top to create a polkadot pattern. Step 6: Pipe blue medium consistency icing below the yellow icing, allowing space in between the colours. Step 7: Step 8: Step 9: Pipe orange medium consistency icing below the blue icing, allowing space in between the colours. Then allow all the colourful icing to dry. Use a black edible marker to create a dotted line between the pink and yellow icing. Use an orange edible marker to create lines all across the blue icing.
Page 12 text
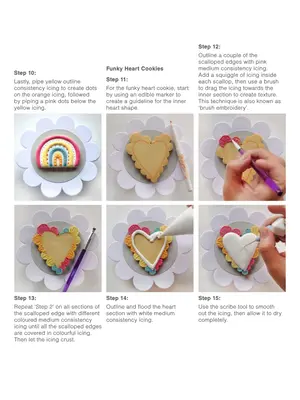
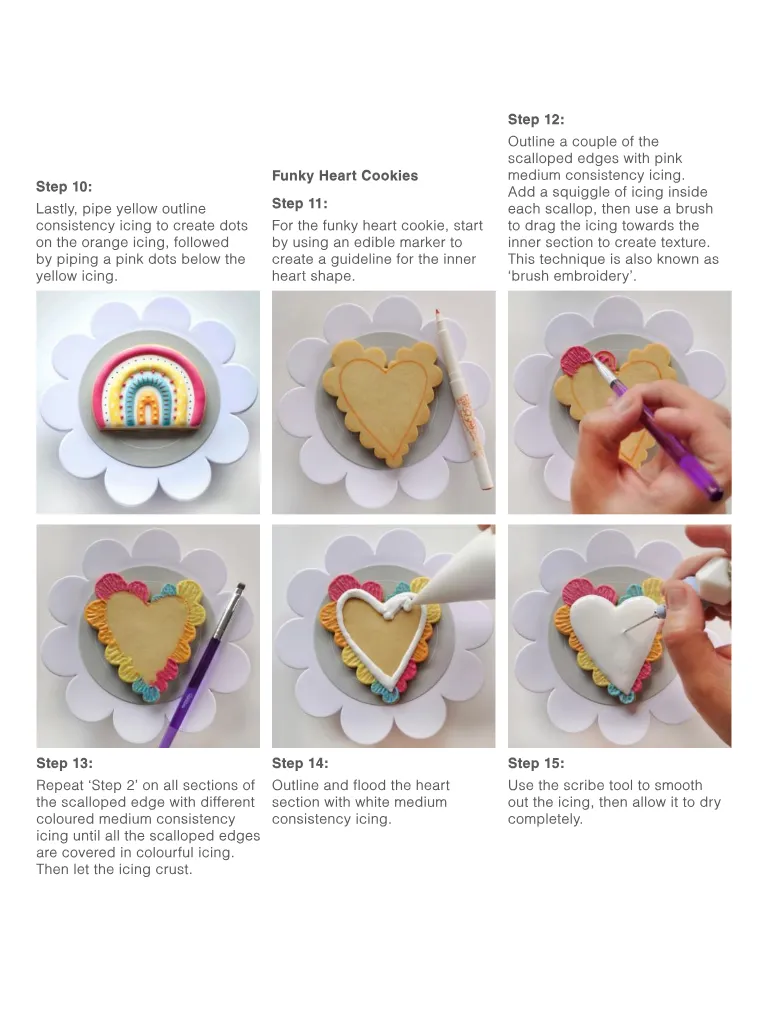
Step 10: Lastly, pipe yellow outline consistency icing to create dots on the orange icing, followed by piping a pink dots below the yellow icing. Funky Heart Cookies Step 11: For the funky heart cookie, start by using an edible marker to create a guideline for the inner heart shape. Step 12: Outline a couple of the scalloped edges with pink medium consistency icing. Add a squiggle of icing inside each scallop, then use a brush to drag the icing towards the inner section to create texture. This technique is also known as ‘brush embroidery’. Step 13: Step 14: Step 15: Repeat ‘Step 2’ on all sections of the scalloped edge with different coloured medium consistency icing until all the scalloped edges are covered in colourful icing. Then let the icing crust. Outline and flood the heart section with white medium consistency icing. Use the scribe tool to smooth out the icing, then allow it to dry completely.
Page 13 text
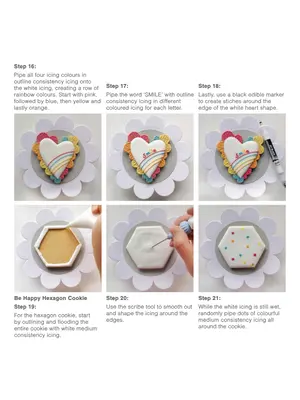
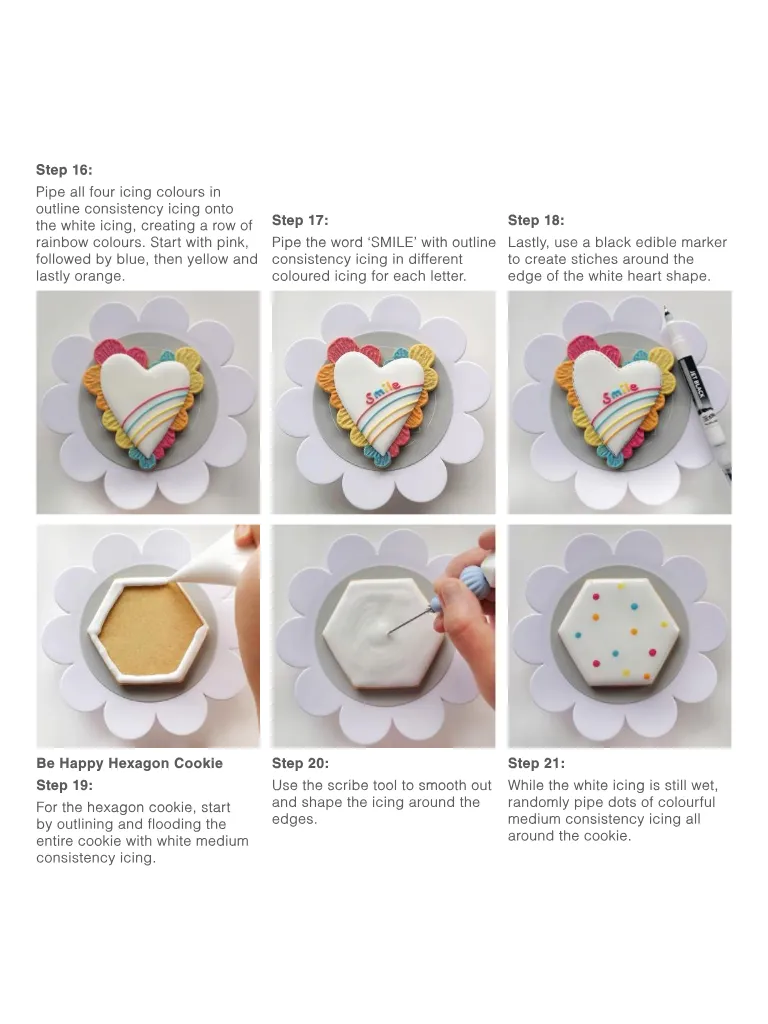
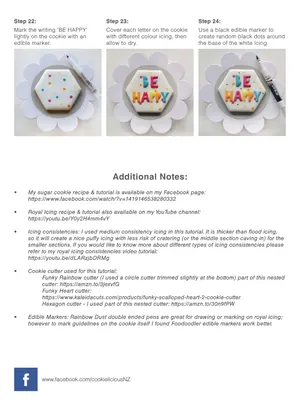
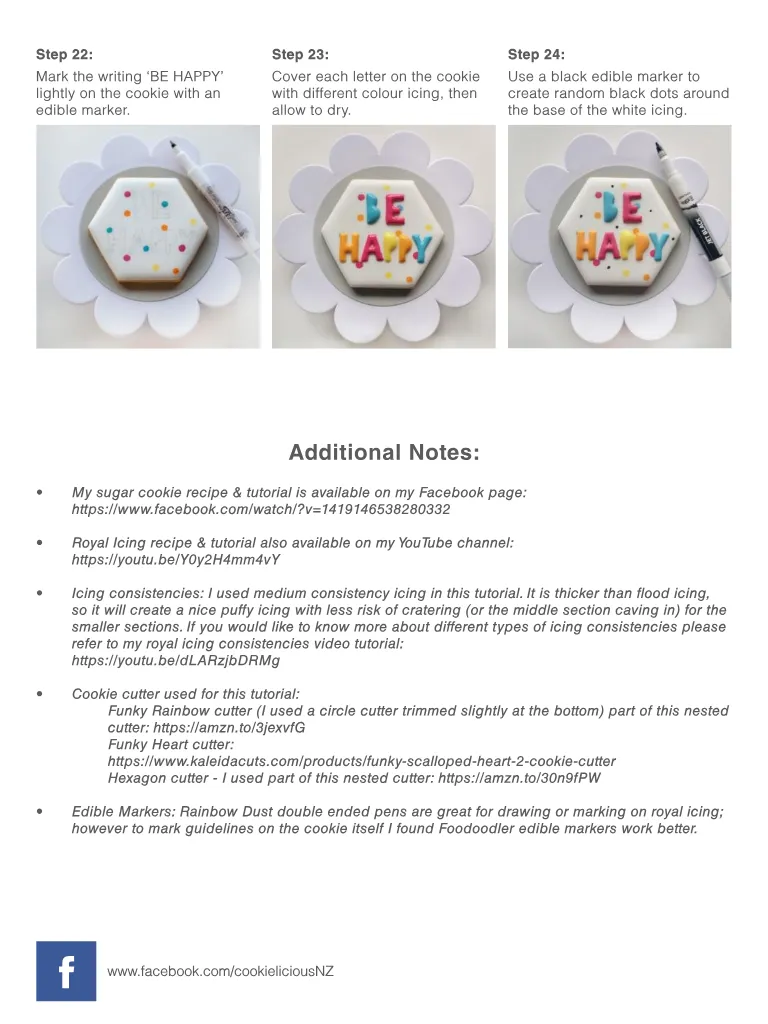
Step 16: Pipe all four icing colours in outline consistency icing onto the white icing, creating a row of rainbow colours. Start with pink, followed by blue, then yellow and lastly orange. Step 17: Pipe the word ‘SMILE’ with outline consistency icing in different coloured icing for each letter. Step 18: Lastly, use a black edible marker to create stiches around the edge of the white heart shape. Be Happy Hexagon Cookie Step 19: For the hexagon cookie, start by outlining and flooding the entire cookie with white medium consistency icing. Step 20: Step 21: Use the scribe tool to smooth out and shape the icing around the edges. While the white icing is still wet, randomly pipe dots of colourful medium consistency icing all around the cookie.
Page 14 text
Step 22: Step 23: Mark the writing ‘BE HAPPY’ lightly on the cookie with an edible marker. Cover each letter on the cookie with different colour icing, then allow to dry. Step 24: Use a black edible marker to create random black dots around the base of the white icing. Additional Notes: • My sugar cookie recipe & tutorial is available on my Facebook page: https://www.facebook.com/watch/?v=1419146538280332 • Royal Icing recipe & tutorial also available on my YouTube channel: https://youtu.be/Y0y2H4mm4vY • Icing consistencies: I used medium consistency icing in this tutorial. It is thicker than flood icing, so it will create a nice puffy icing with less risk of cratering (or the middle section caving in) for the smaller sections. If you would like to know more about different types of icing consistencies please refer to my royal icing consistencies video tutorial: https://youtu.be/dLARzjbDRMg • Cookie cutter used for this tutorial: Funky Rainbow cutter (I used a circle cutter trimmed slightly at the bottom) part of this nested cutter: https://amzn.to/3jexvfG Funky Heart cutter: https://www.kaleidacuts.com/products/funky-scalloped-heart-2-cookie-cutter Hexagon cutter - I used part of this nested cutter: https://amzn.to/30n9fPW • Edible Markers: Rainbow Dust double ended pens are great for drawing or marking on royal icing; however to mark guidelines on the cookie itself I found Foodoodler edible markers work better. f www.facebook.com/cookieliciousNZ
Page 15 text
D O Y O U F O L L O W C A K E R S ? W e f e a t u r e c u s t o m e r s c a k e s d a i l y w i t h l i n k s t o t h e p r o d u c t s t h e y u s e d . F i n d y o u r i n s p i r a t i o n o n o u r s o c i a l s ! W E L O V E T O S E E Y O U R A M A Z I N G W O R K ! F O L L O W & T A G U S I N Y O U R P H O T O S F O R A C H A N C E T O B E F E A T U R E D O N O U R F E E D ! # C A K E R S W A R E H O U S E # C A K E R S
Page 16 text
Monthly focus topics include: - Social Media - Pricing for profit - Photography & editing - Quoting & invoicing - Marketing & more! Build a successful baking business with the support of the ACDN Business Lounge! Doors open on 1st October Join the waiting list to receive your invite!
Page 17 text
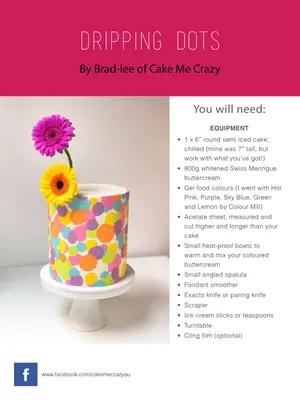
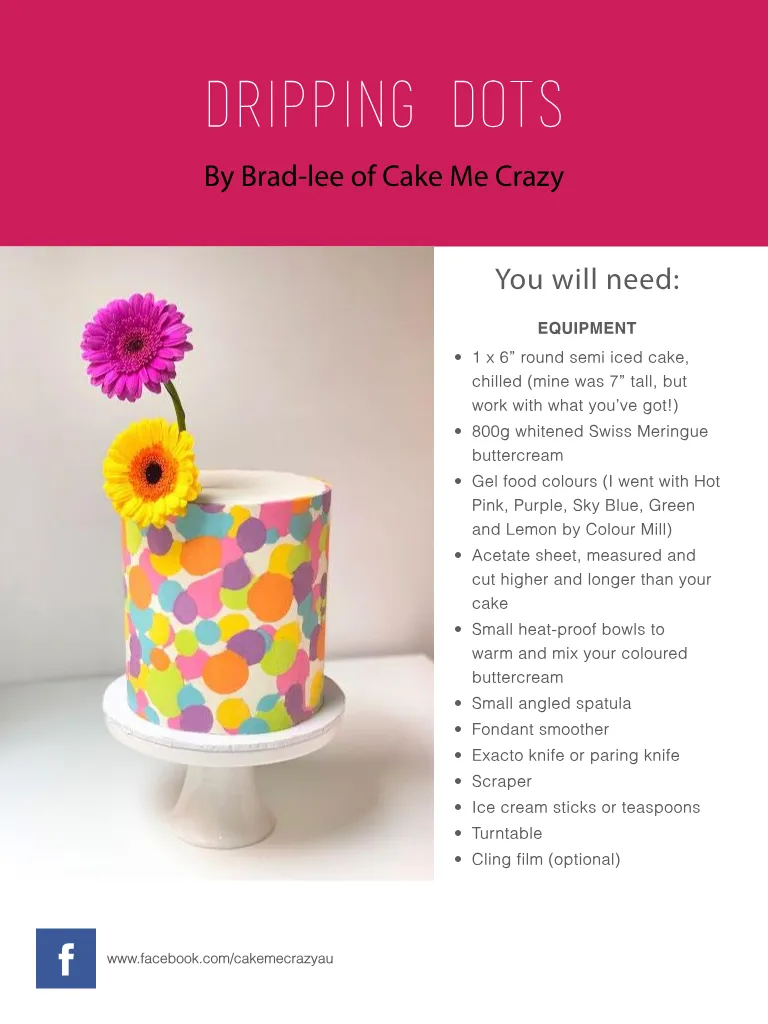
DRIPPING DOTS By Brad-lee of Cake Me Crazy You will need: EQUIPMENT • 1 x 6” round semi iced cake, chilled (mine was 7” tall, but work with what you’ve got!) • 800g whitened Swiss Meringue buttercream • Gel food colours (I went with Hot Pink, Purple, Sky Blue, Green and Lemon by Colour Mill) • Acetate sheet, measured and cut higher and longer than your cake • Small heat-proof bowls to warm and mix your coloured buttercream • Small angled spatula • Fondant smoother • Exacto knife or paring knife • Scraper • Ice cream sticks or teaspoons • Turntable • Cling film (optional) f www.facebook.com/cakemecrazyau
Page 18 text
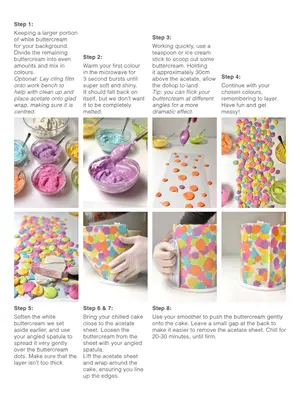
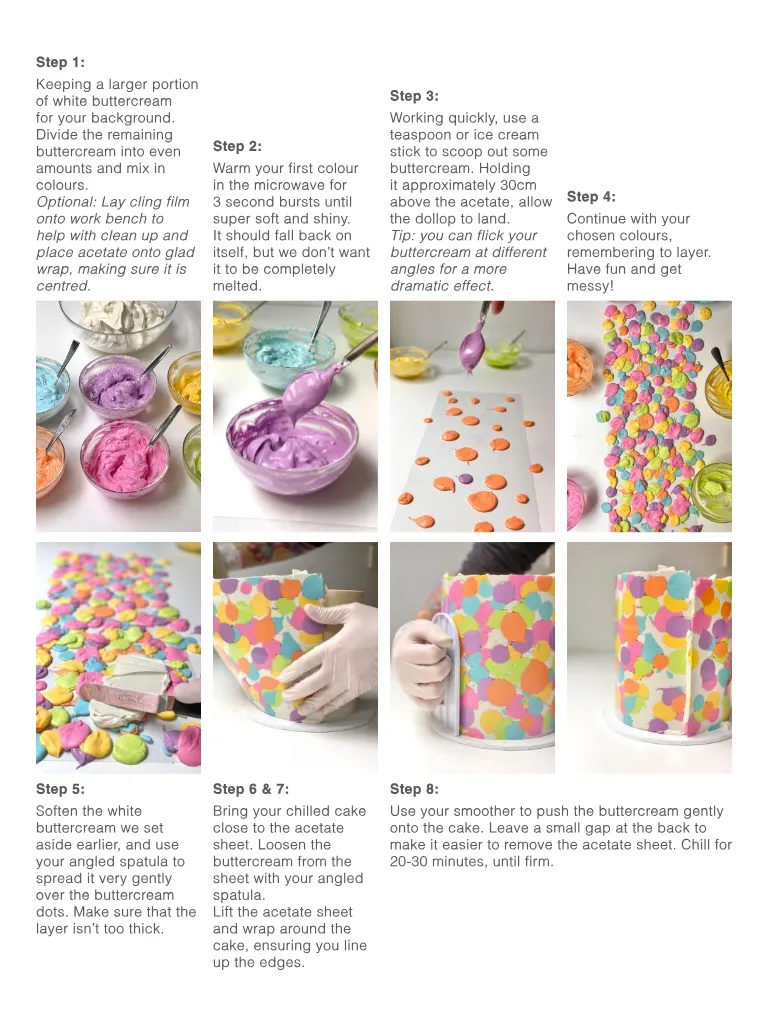
Step 1: Keeping a larger portion of white buttercream for your background. Divide the remaining buttercream into even amounts and mix in colours. Optional: Lay cling film onto work bench to help with clean up and place acetate onto glad wrap, making sure it is centred. Step 2: Warm your first colour in the microwave for 3 second bursts until super soft and shiny. It should fall back on itself, but we don’t want it to be completely melted. Step 3: Working quickly, use a teaspoon or ice cream stick to scoop out some buttercream. Holding it approximately 30cm above the acetate, allow the dollop to land. Tip: you can flick your buttercream at different angles for a more dramatic effect. Step 4: Continue with your chosen colours, remembering to layer. Have fun and get messy! Step 5: Step 6 & 7: Soften the white buttercream we set aside earlier, and use your angled spatula to spread it very gently over the buttercream dots. Make sure that the layer isn’t too thick. Bring your chilled cake close to the acetate sheet. Loosen the buttercream from the sheet with your angled spatula. Lift the acetate sheet and wrap around the cake, ensuring you line up the edges. Step 8: Use your smoother to push the buttercream gently onto the cake. Leave a small gap at the back to make it easier to remove the acetate sheet. Chill for 20-30 minutes, until firm.
Page 19 text
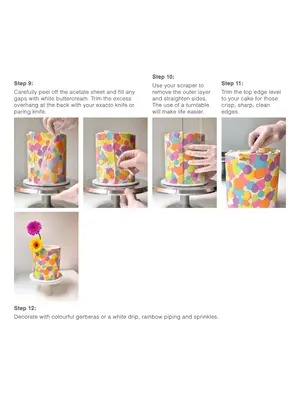
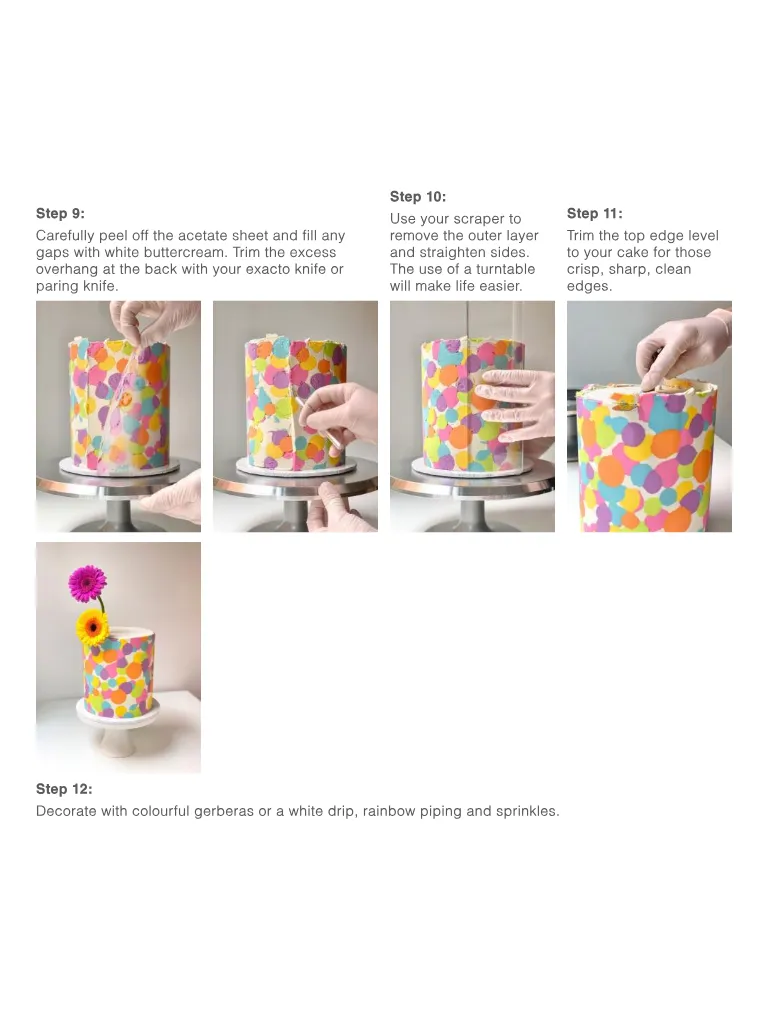
Step 9: Carefully peel off the acetate sheet and fill any gaps with white buttercream. Trim the excess overhang at the back with your exacto knife or paring knife. Step 10: Use your scraper to remove the outer layer and straighten sides. The use of a turntable will make life easier. Step 11: Trim the top edge level to your cake for those crisp, sharp, clean edges. Step 12: Decorate with colourful gerberas or a white drip, rainbow piping and sprinkles.
Page 20 text
Just some of our intimate COVID Complying Classes Book Your Class Now www.cakedecoratingsolutions.com.au
Page 21 text
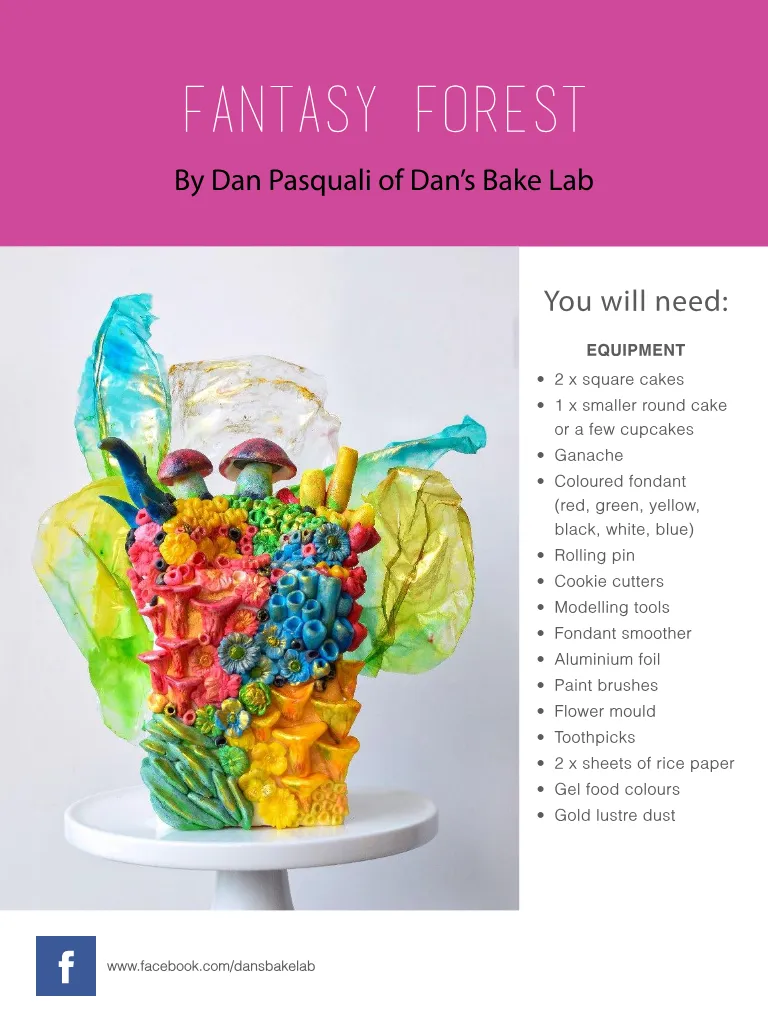
FANTASY FOREST By Dan Pasquali of Dan’s Bake Lab You will need: EQUIPMENT • 2 x square cakes • 1 x smaller round cake or a few cupcakes • Ganache • Coloured fondant (red, green, yellow, black, white, blue) • Rolling pin • Cookie cutters • Modelling tools • Fondant smoother • Aluminium foil • Paint brushes • Flower mould • Toothpicks • 2 x sheets of rice paper • Gel food colours • Gold lustre dust f www.facebook.com/dansbakelab
Page 22 text
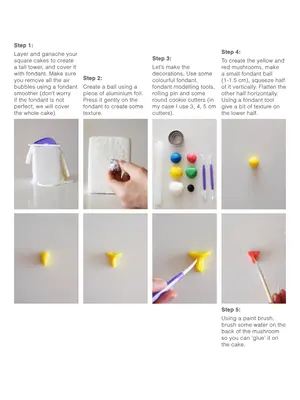
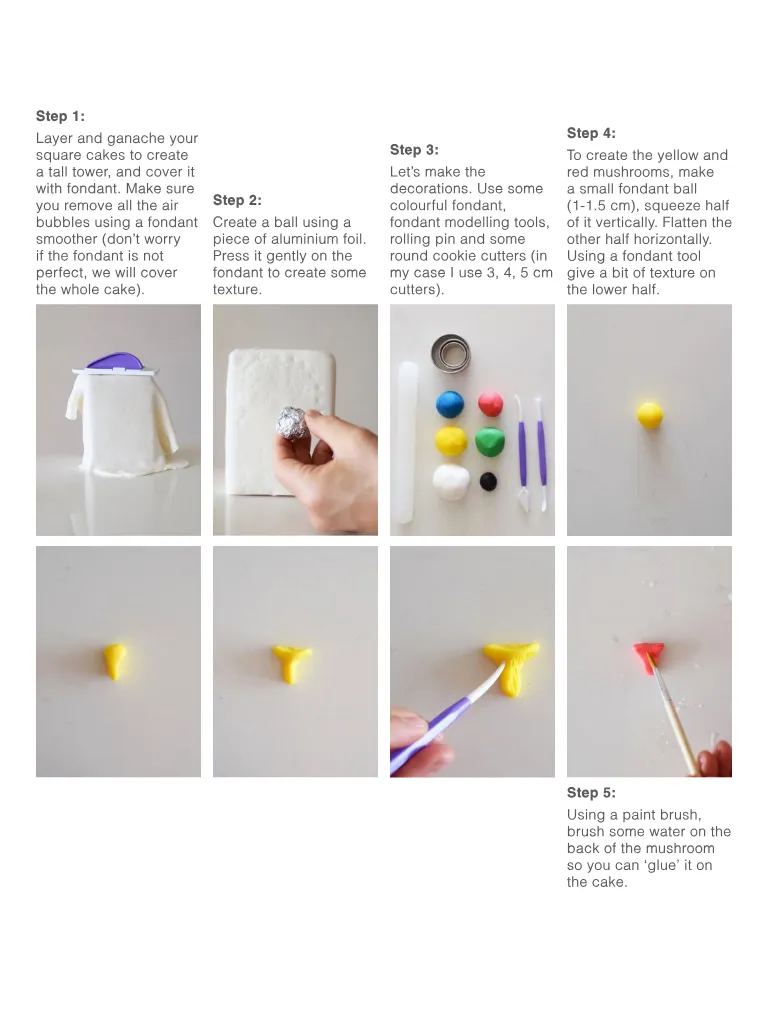
Step 1: Layer and ganache your square cakes to create a tall tower, and cover it with fondant. Make sure you remove all the air bubbles using a fondant smoother (don’t worry if the fondant is not perfect, we will cover the whole cake). Step 2: Create a ball using a piece of aluminium foil. Press it gently on the fondant to create some texture. Step 3: Let’s make the decorations. Use some colourful fondant, fondant modelling tools, rolling pin and some round cookie cutters (in my case I use 3, 4, 5 cm cutters). Step 4: To create the yellow and red mushrooms, make a small fondant ball (1-1.5 cm), squeeze half of it vertically. Flatten the other half horizontally. Using a fondant tool give a bit of texture on the lower half. Step 5: Using a paint brush, brush some water on the back of the mushroom so you can ‘glue’ it on the cake.
Page 23 text
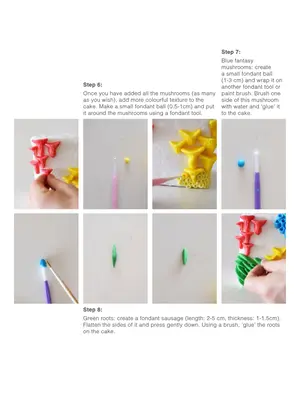
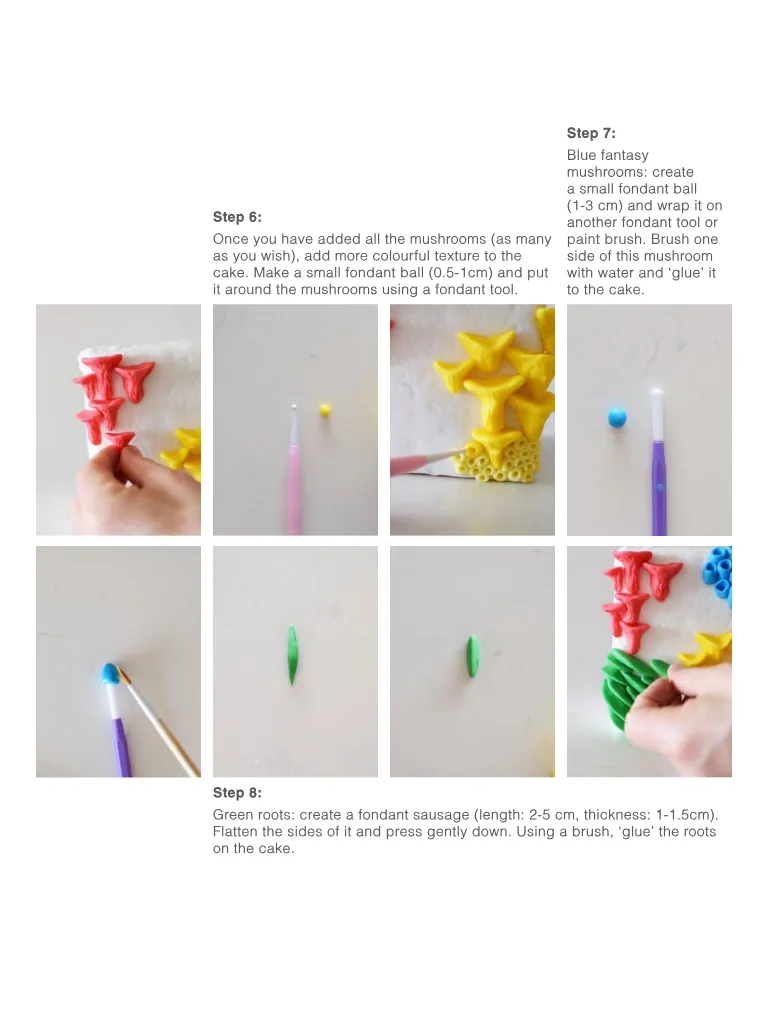
Step 6: Once you have added all the mushrooms (as many as you wish), add more colourful texture to the cake. Make a small fondant ball (0.5-1cm) and put it around the mushrooms using a fondant tool. Step 7: Blue fantasy mushrooms: create a small fondant ball (1-3 cm) and wrap it on another fondant tool or paint brush. Brush one side of this mushroom with water and ‘glue’ it to the cake. Step 8: Green roots: create a fondant sausage (length: 2-5 cm, thickness: 1-1.5cm). Flatten the sides of it and press gently down. Using a brush, ‘glue’ the roots on the cake.
Page 25 text
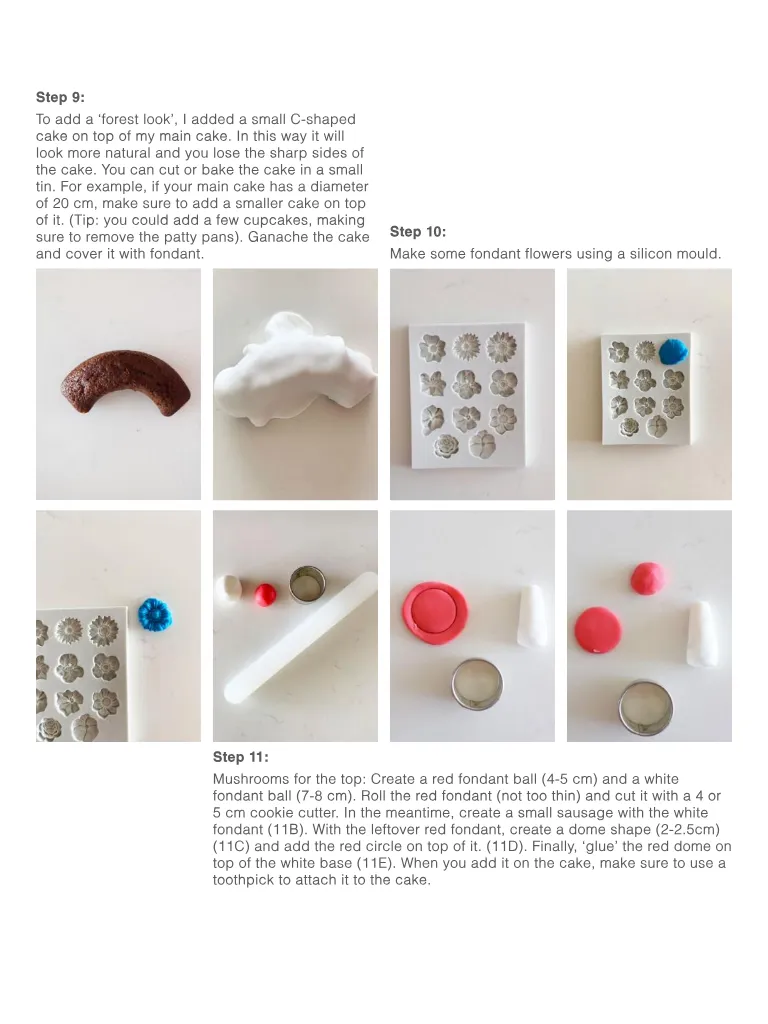
Step 9: To add a ‘forest look’, I added a small C-shaped cake on top of my main cake. In this way it will look more natural and you lose the sharp sides of the cake. You can cut or bake the cake in a small tin. For example, if your main cake has a diameter of 20 cm, make sure to add a smaller cake on top of it. (Tip: you could add a few cupcakes, making sure to remove the patty pans). Ganache the cake and cover it with fondant. Step 10: Make some fondant flowers using a silicon mould. Step 11: Mushrooms for the top: Create a red fondant ball (4-5 cm) and a white fondant ball (7-8 cm). Roll the red fondant (not too thin) and cut it with a 4 or 5 cm cookie cutter. In the meantime, create a small sausage with the white fondant (11B). With the leftover red fondant, create a dome shape (2-2.5cm) (11C) and add the red circle on top of it. (11D). Finally, ‘glue’ the red dome on top of the white base (11E). When you add it on the cake, make sure to use a toothpick to attach it to the cake.
Page 26 text
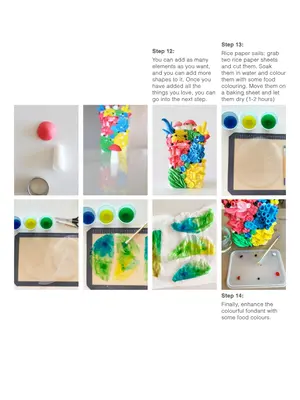
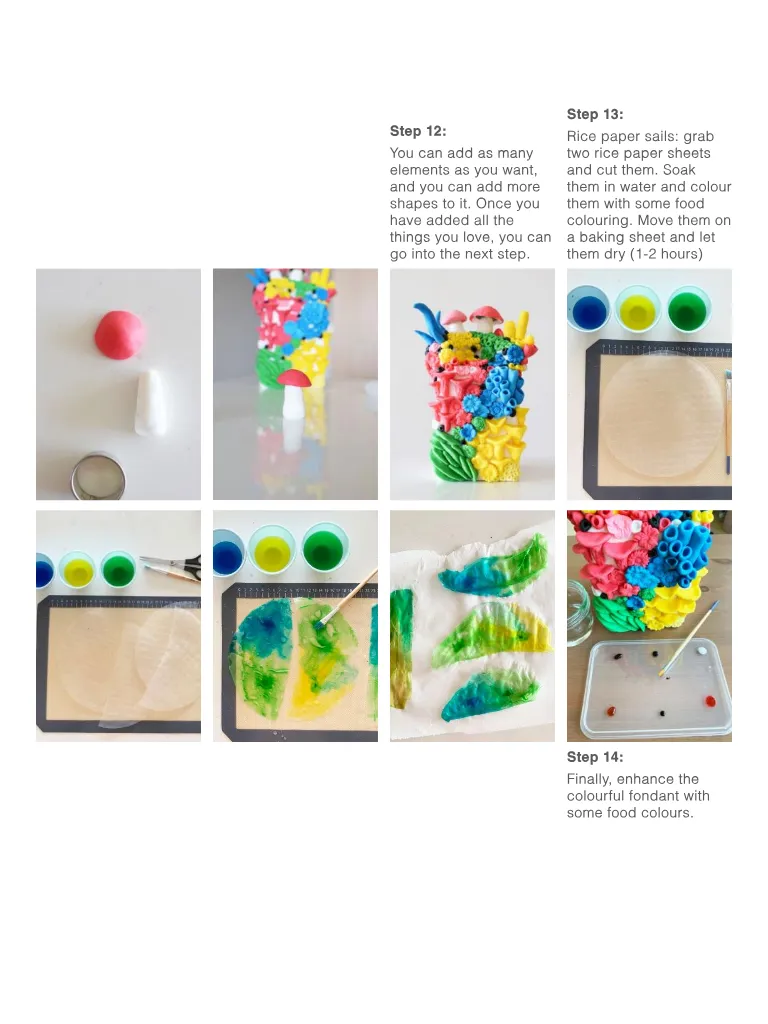
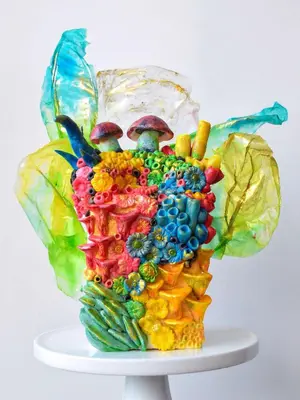
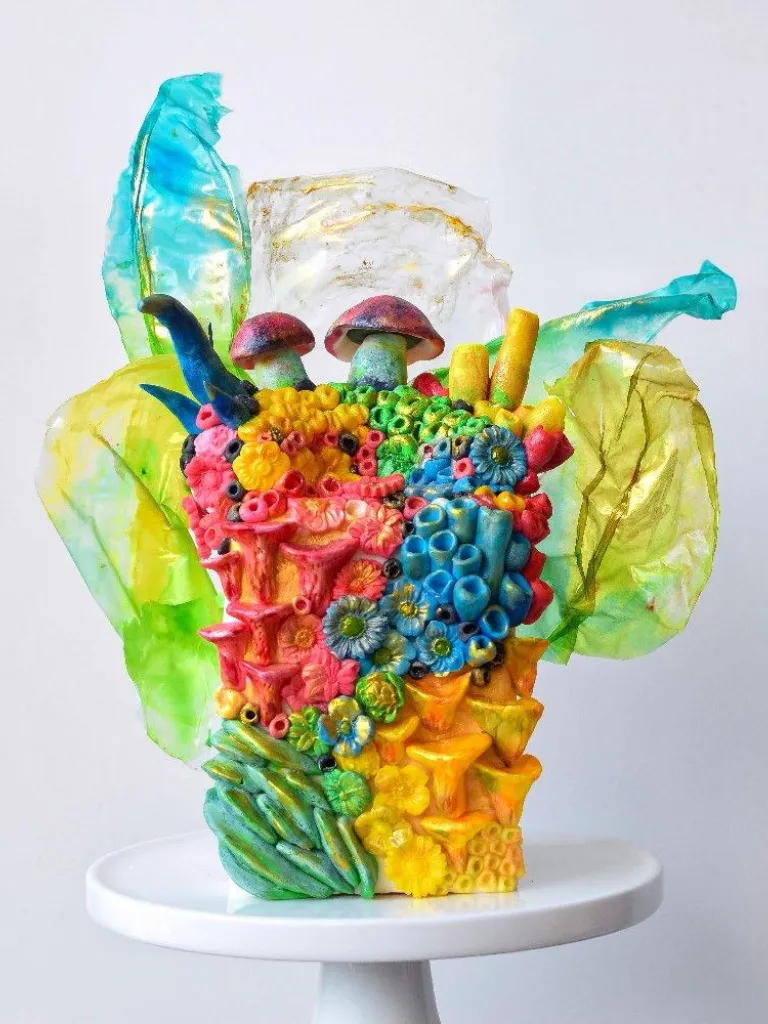
Step 12: You can add as many elements as you want, and you can add more shapes to it. Once you have added all the things you love, you can go into the next step. Step 13: Rice paper sails: grab two rice paper sheets and cut them. Soak them in water and colour them with some food colouring. Move them on a baking sheet and let them dry (1-2 hours) Step 14: Finally, enhance the colourful fondant with some food colours.
Page 28 text
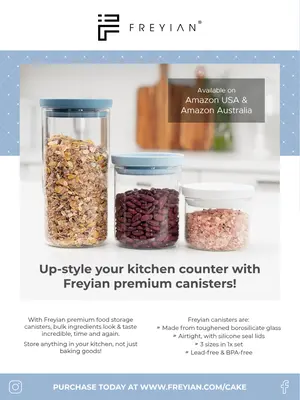
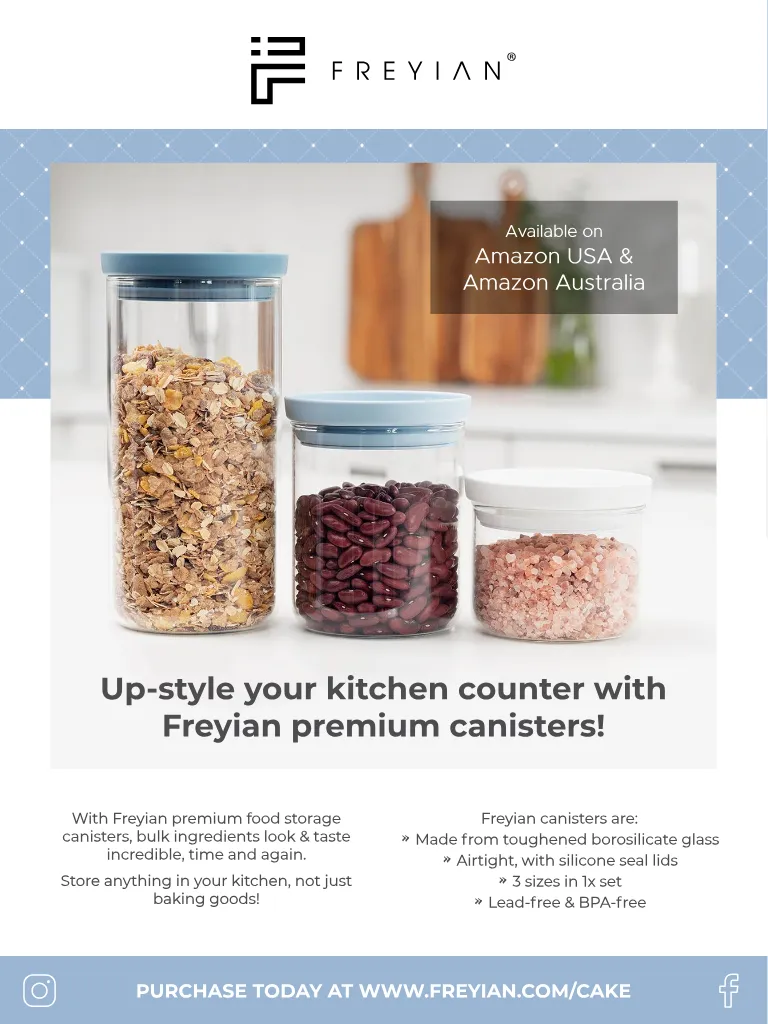
Available on Amazon USA & Amazon Australia Up-style your kitchen counter with Freyian premium canisters! With Freyian premium food storage canisters, bulk ingredients look & taste incredible, time and again. Store anything in your kitchen, not just baking goods! Freyian canisters are: » Made from toughened borosilicate glass » Airtight, with silicone seal lids » 3 sizes in 1x set » Lead-free & BPA-free PURCHASE TODAY AT WWW.FREYIAN.COM/CAKE
Page 29 text
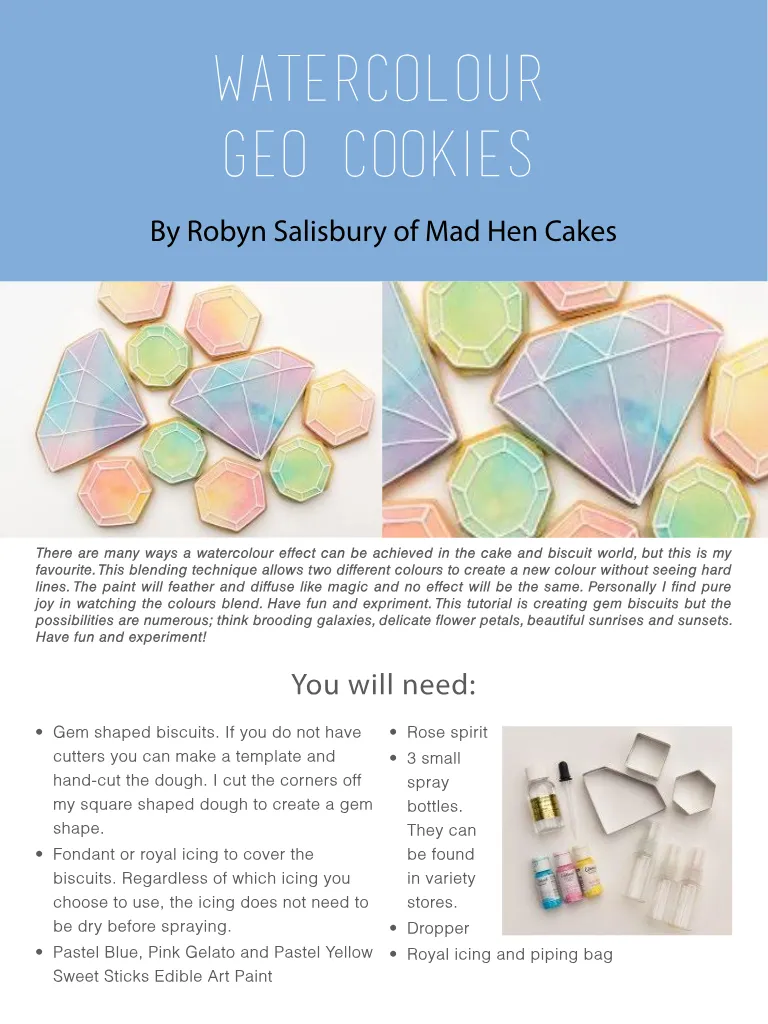
WATERCOLOUR GEO COOKIES By Robyn Salisbury of Mad Hen Cakes There are many ways a watercolour effect can be achieved in the cake and biscuit world, but this is my favourite. This blending technique allows two different colours to create a new colour without seeing hard lines. The paint will feather and diffuse like magic and no effect will be the same. Personally I find pure joy in watching the colours blend. Have fun and expriment. This tutorial is creating gem biscuits but the possibilities are numerous; think brooding galaxies, delicate flower petals, beautiful sunrises and sunsets. Have fun and experiment! You will need: • Gem shaped biscuits. If you do not have cutters you can make a template and hand-cut the dough. I cut the corners off my square shaped dough to create a gem shape. • Fondant or royal icing to cover the biscuits. Regardless of which icing you choose to use, the icing does not need to be dry before spraying. • Pastel Blue, Pink Gelato and Pastel Yellow Sweet Sticks Edible Art Paint • Rose spirit • 3 small spray bottles. They can be found in variety stores. • Dropper • Royal icing and piping bag
Page 30 text
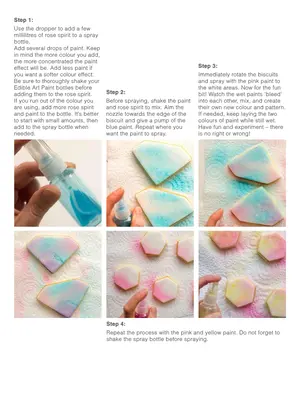
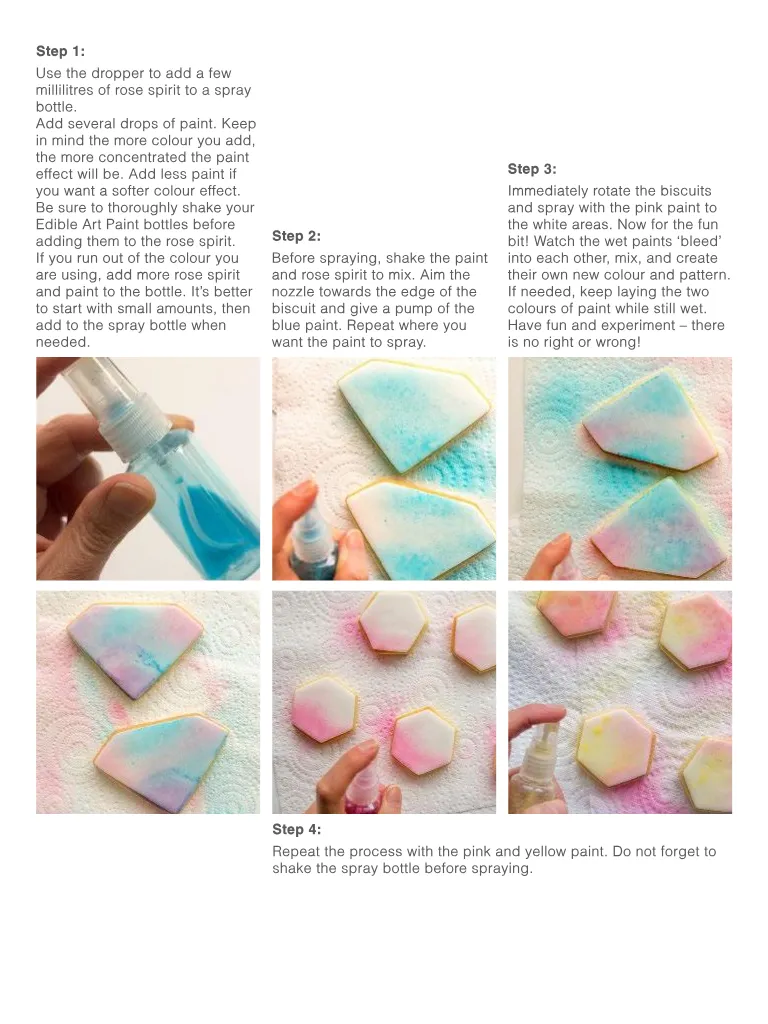
Step 1: Use the dropper to add a few millilitres of rose spirit to a spray bottle. Add several drops of paint. Keep in mind the more colour you add, the more concentrated the paint effect will be. Add less paint if you want a softer colour effect. Be sure to thoroughly shake your Edible Art Paint bottles before adding them to the rose spirit. If you run out of the colour you are using, add more rose spirit and paint to the bottle. It’s better to start with small amounts, then add to the spray bottle when needed. Step 2: Before spraying, shake the paint and rose spirit to mix. Aim the nozzle towards the edge of the biscuit and give a pump of the blue paint. Repeat where you want the paint to spray. Step 3: Immediately rotate the biscuits and spray with the pink paint to the white areas. Now for the fun bit! Watch the wet paints ‘bleed’ into each other, mix, and create their own new colour and pattern. If needed, keep laying the two colours of paint while still wet. Have fun and experiment – there is no right or wrong! Step 4: Repeat the process with the pink and yellow paint. Do not forget to shake the spray bottle before spraying.
Page 31 text
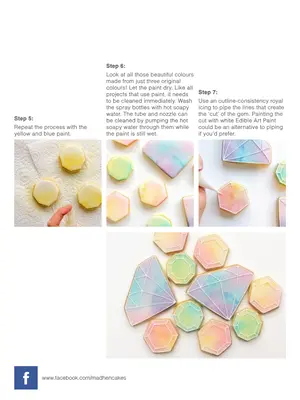
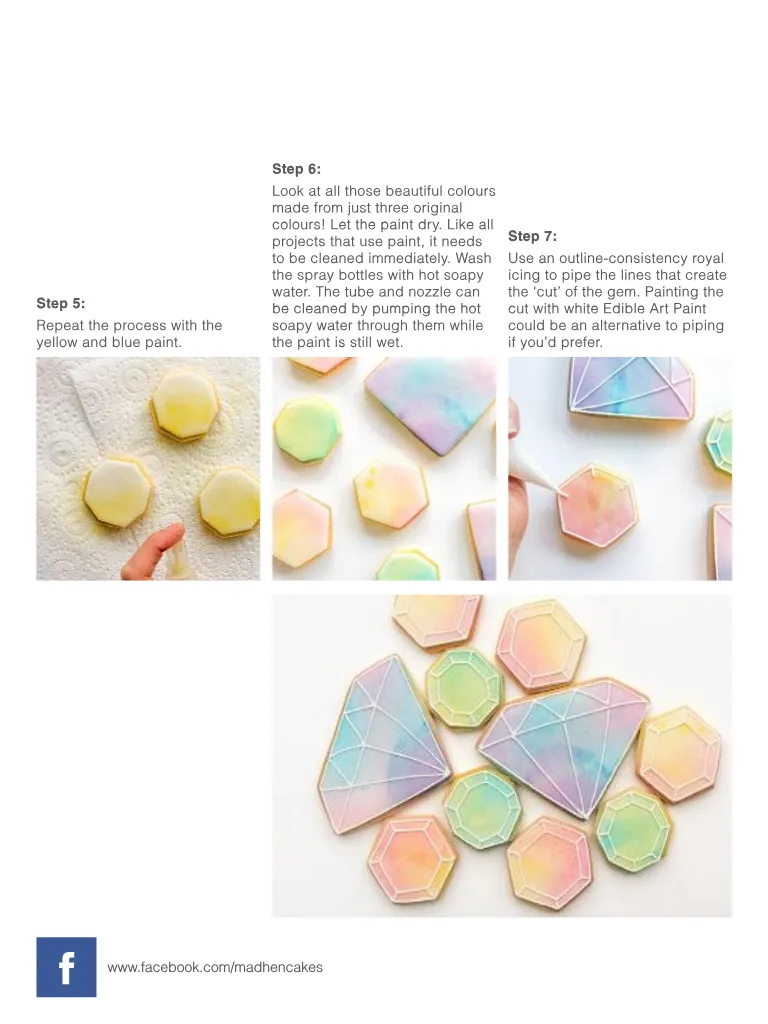
Step 5: Repeat the process with the yellow and blue paint. Step 6: Look at all those beautiful colours made from just three original colours! Let the paint dry. Like all projects that use paint, it needs to be cleaned immediately. Wash the spray bottles with hot soapy water. The tube and nozzle can be cleaned by pumping the hot soapy water through them while the paint is still wet. Step 7: Use an outline-consistency royal icing to pipe the lines that create the ‘cut’ of the gem. Painting the cut with white Edible Art Paint could be an alternative to piping if you’d prefer. f www.facebook.com/madhencakes
Page 32 text
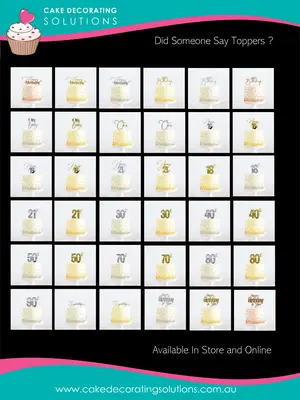
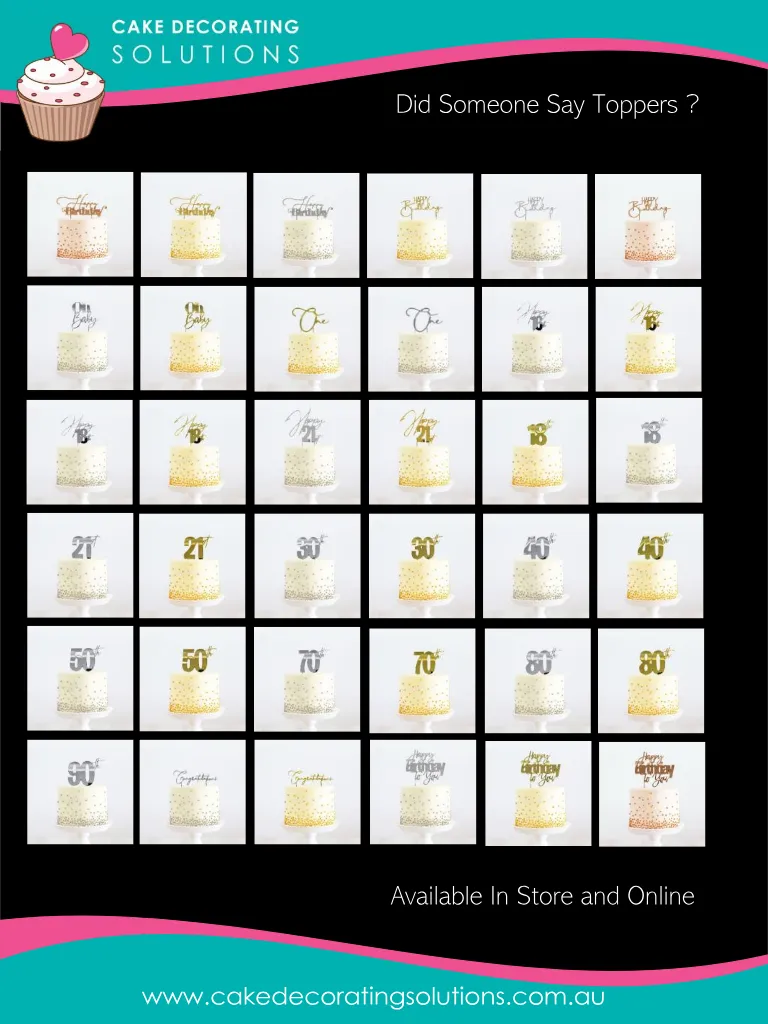
Did Someone Say Toppers ? Available In Store and Online www.cakedecoratingsolutions.com.au
Page 33 text
Recipes Some delicious recipes for you to bake for your next celebration!
Page 35 text
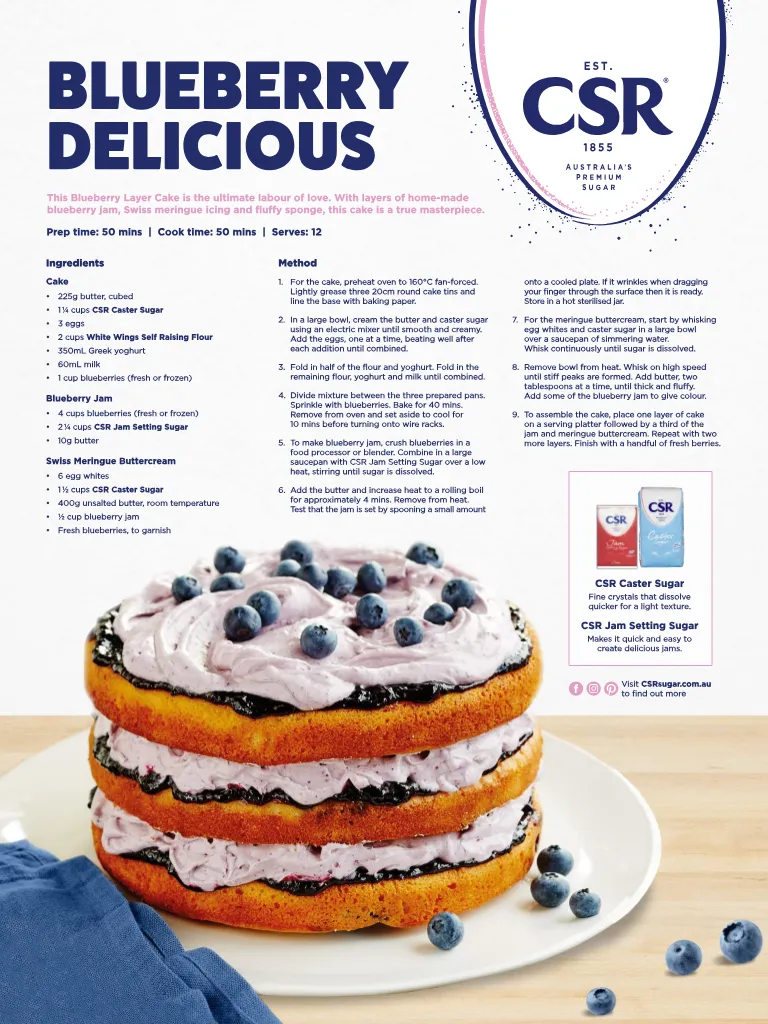
BLUEBERRY DELICIOUS This Blueberry Layer Cake is the ultimate labour of love. With layers of home-made blueberry jam, Swiss meringue icing and fluffy sponge, this cake is a true masterpiece. Prep time: 50 mins | Cook time: 50 mins | Serves: 12 Ingredients Cake • 225g butter, cubed • 1 ¼ cups CSR Caster Sugar • 3 eggs • 2 cups White Wings Self Raising Flour • 350mL Greek yoghurt • 60mL milk • 1 cup blueberries (fresh or frozen) Blueberry Jam • 4 cups blueberries (fresh or frozen) • 2 ¼ cups CSR Jam Setting Sugar • 10g butter Swiss Meringue Buttercream • 6 egg whites • 1 ½ cups CSR Caster Sugar • 400g unsalted butter, room temperature • ½ cup blueberry jam • Fresh blueberries, to garnish Method 1. For the cake, preheat oven to 160°C fan-forced. Lightly grease three 20cm round cake tins and line the base with baking paper. 2. In a large bowl, cream the butter and caster sugar using an electric mixer until smooth and creamy. Add the eggs, one at a time, beating well after each addition until combined. 3. Fold in half of the flour and yoghurt. Fold in the remaining flour, yoghurt and milk until combined. 4. Divide mixture between the three prepared pans. Sprinkle with blueberries. Bake for 40 mins. Remove from oven and set aside to cool for 10 mins before turning onto wire racks. 5. To make blueberry jam, crush blueberries in a food processor or blender. Combine in a large saucepan with CSR Jam Setting Sugar over a low heat, stirring until sugar is dissolved. 6. Add the butter and increase heat to a rolling boil for approximately 4 mins. Remove from heat. Test that the jam is set by spooning a small amount onto a cooled plate. If it wrinkles when dragging your finger through the surface then it is ready. Store in a hot sterilised jar. 7. For the meringue buttercream, start by whisking egg whites and caster sugar in a large bowl over a saucepan of simmering water. Whisk continuously until sugar is dissolved. 8. Remove bowl from heat. Whisk on high speed until stiff peaks are formed. Add butter, two tablespoons at a time, until thick and fluffy. Add some of the blueberry jam to give colour. 9. To assemble the cake, place one layer of cake on a serving platter followed by a third of the jam and meringue buttercream. Repeat with two more layers. Finish with a handful of fresh berries. CSR Caster Sugar Fine crystals that dissolve quicker for a light texture. CSR Jam Setting Sugar Makes it quick and easy to create delicious jams. Visit CSRsugar.com.au to find out more
Page 36 text
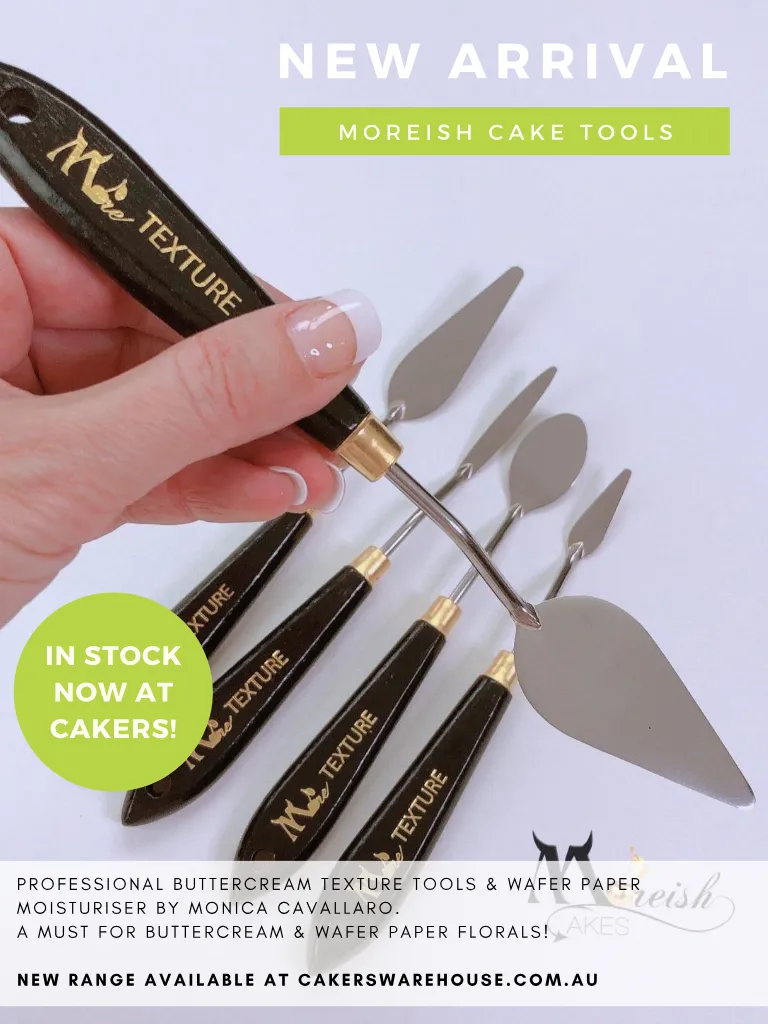
N E W A R R I V A L M O R E I S H C A K E T O O L S IN STOCK NOW AT CAKERS! P R O F E S S I O N A L B U T T E R C R E A M T E X T U R E T O O L S & W A F E R P A P E R M O I S T U R I S E R B Y M O N I C A C A V A L L A R O . A M U S T F O R B U T T E R C R E A M & W A F E R P A P E R F L O R A L S ! N E W R A N G E A V A I L A B L E A T C A K E R S W A R E H O U S E . C O M . A U

Page 39 text
Interviews In this issue we interview Cara Tonkin of Cara Mia Cake and Amber Comadira-Smith in her regular 'Cake Chat' column


Page 40 text
CAKE TRIMMING RINGS Offer Exclusive to ACDN Cake magazine readers To create your wonderful Spring time cakes and save time in the kitchen FREE SHIPPING when you purchase 2 or more cake trim rings online at cuttercraft.com.au COUPON CODE ACDNFREE Valid month of September expires 30/09/20 Share your creations with us. Tag us #cuttercraft @cuttercraft cuttercraft.com.au cuttercraft cuttercraft
Page 41 text
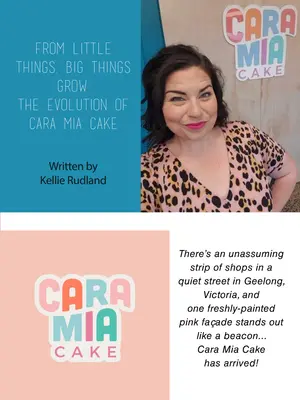
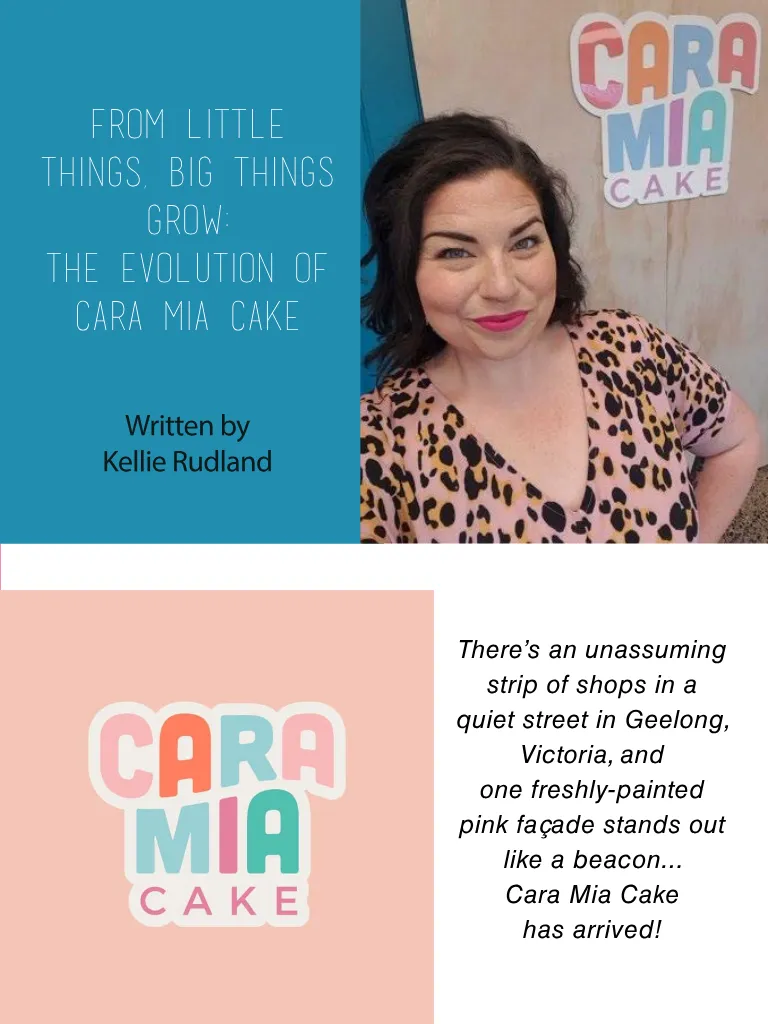
From little things, big things grow: the evolution of Cara Mia Cake Written by Kellie Rudland There’s an unassuming strip of shops in a quiet street in Geelong, Victoria, and one freshly-painted pink façade stands out like a beacon... Cara Mia Cake has arrived!
Page 42 text
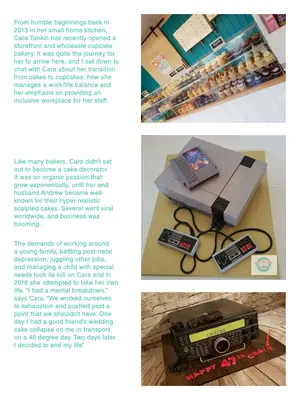
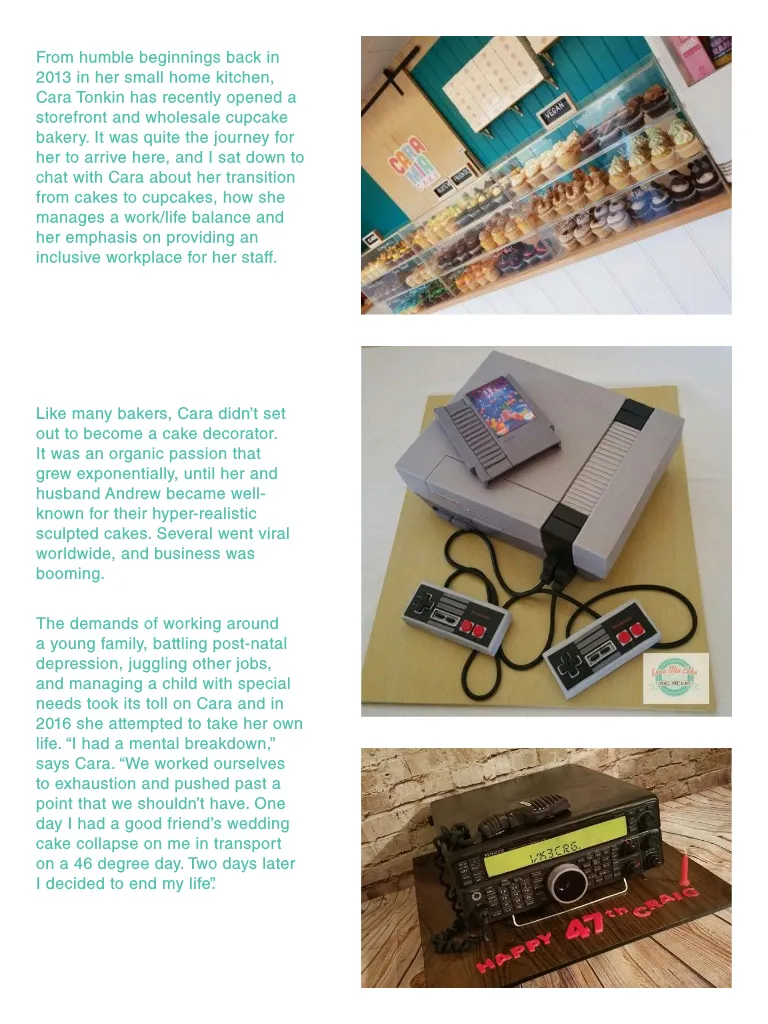
From humble beginnings back in 2013 in her small home kitchen, Cara Tonkin has recently opened a storefront and wholesale cupcake bakery. It was quite the journey for her to arrive here, and I sat down to chat with Cara about her transition from cakes to cupcakes, how she manages a work/life balance and her emphasis on providing an inclusive workplace for her staff. Like many bakers, Cara didn’t set out to become a cake decorator. It was an organic passion that grew exponentially, until her and husband Andrew became wellknown for their hyper-realistic sculpted cakes. Several went viral worldwide, and business was booming. The demands of working around a young family, battling post-natal depression, juggling other jobs, and managing a child with special needs took its toll on Cara and in 2016 she attempted to take her own life. “I had a mental breakdown,” says Cara. “We worked ourselves to exhaustion and pushed past a point that we shouldn’t have. One day I had a good friend’s wedding cake collapse on me in transport on a 46 degree day. Two days later I decided to end my life”.


Page 44 text
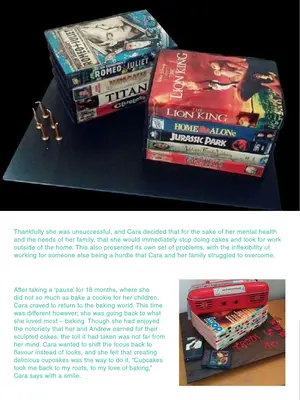
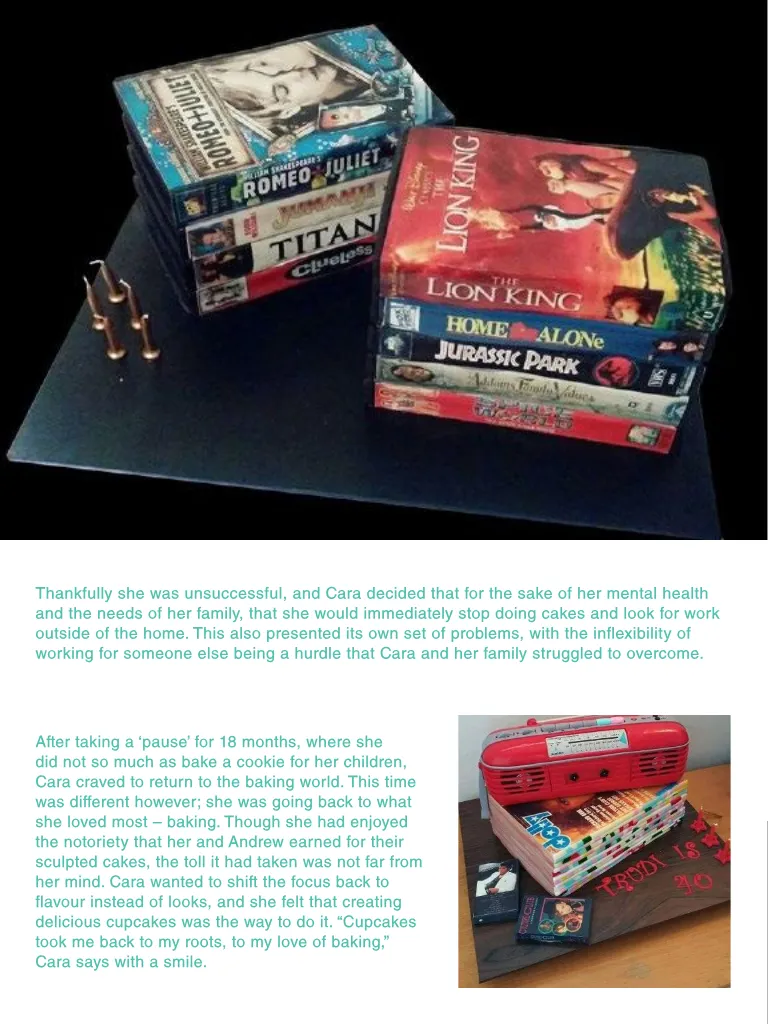
Thankfully she was unsuccessful, and Cara decided that for the sake of her mental health and the needs of her family, that she would immediately stop doing cakes and look for work outside of the home. This also presented its own set of problems, with the inflexibility of working for someone else being a hurdle that Cara and her family struggled to overcome. After taking a ‘pause’ for 18 months, where she did not so much as bake a cookie for her children, Cara craved to return to the baking world. This time was different however; she was going back to what she loved most – baking. Though she had enjoyed the notoriety that her and Andrew earned for their sculpted cakes, the toll it had taken was not far from her mind. Cara wanted to shift the focus back to flavour instead of looks, and she felt that creating delicious cupcakes was the way to do it. “Cupcakes took me back to my roots, to my love of baking,” Cara says with a smile.
Page 45 text
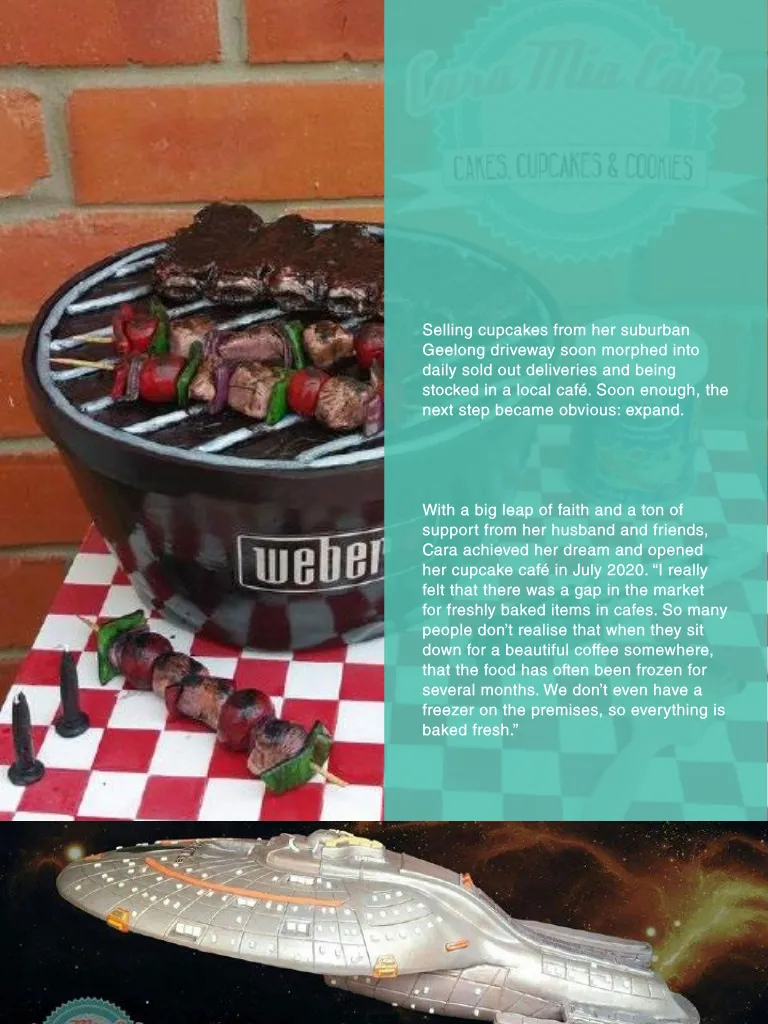
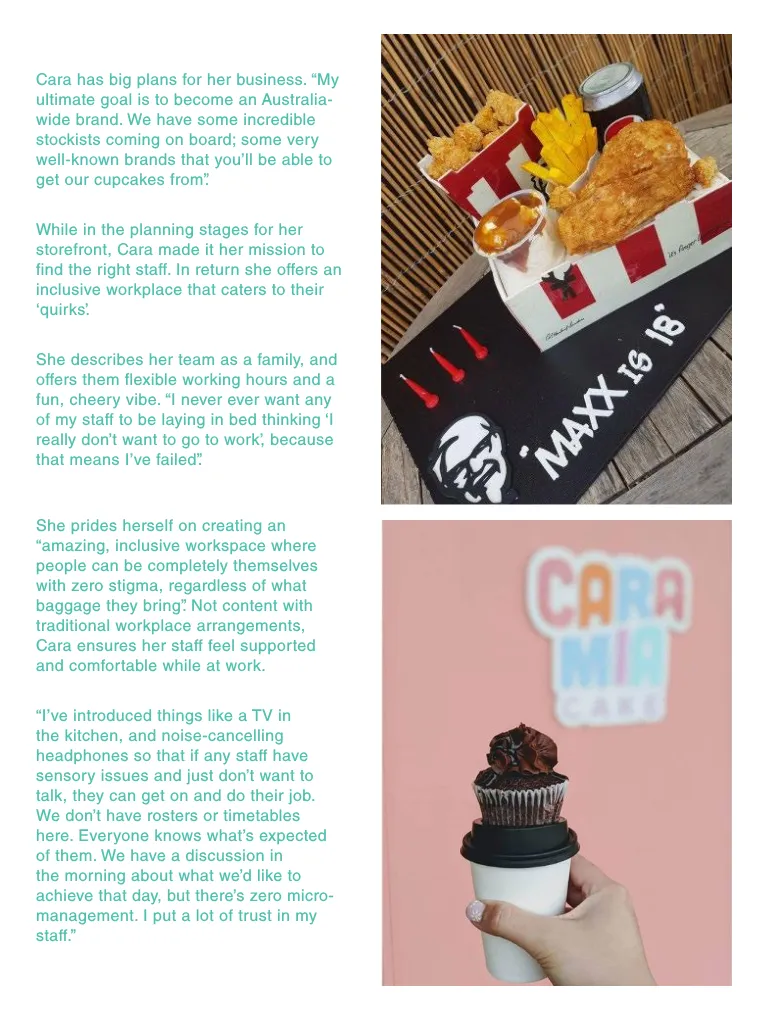
Selling cupcakes from her suburban Geelong driveway soon morphed into daily sold out deliveries and being stocked in a local café. Soon enough, the next step became obvious: expand. With a big leap of faith and a ton of support from her husband and friends, Cara achieved her dream and opened her cupcake café in July 2020. “I really felt that there was a gap in the market for freshly baked items in cafes. So many people don’t realise that when they sit down for a beautiful coffee somewhere, that the food has often been frozen for several months. We don’t even have a freezer on the premises, so everything is baked fresh.”
Page 46 text
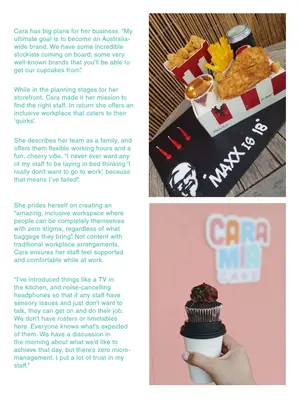
Cara has big plans for her business. “My ultimate goal is to become an Australiawide brand. We have some incredible stockists coming on board; some very well-known brands that you’ll be able to get our cupcakes from”. While in the planning stages for her storefront, Cara made it her mission to find the right staff. In return she offers an inclusive workplace that caters to their ‘quirks’. She describes her team as a family, and offers them flexible working hours and a fun, cheery vibe. “I never ever want any of my staff to be laying in bed thinking ‘I really don’t want to go to work’, because that means I’ve failed”. She prides herself on creating an “amazing, inclusive workspace where people can be completely themselves with zero stigma, regardless of what baggage they bring”. Not content with traditional workplace arrangements, Cara ensures her staff feel supported and comfortable while at work. “I’ve introduced things like a TV in the kitchen, and noise-cancelling headphones so that if any staff have sensory issues and just don’t want to talk, they can get on and do their job. We don’t have rosters or timetables here. Everyone knows what’s expected of them. We have a discussion in the morning about what we’d like to achieve that day, but there’s zero micromanagement. I put a lot of trust in my staff.”
Page 47 text
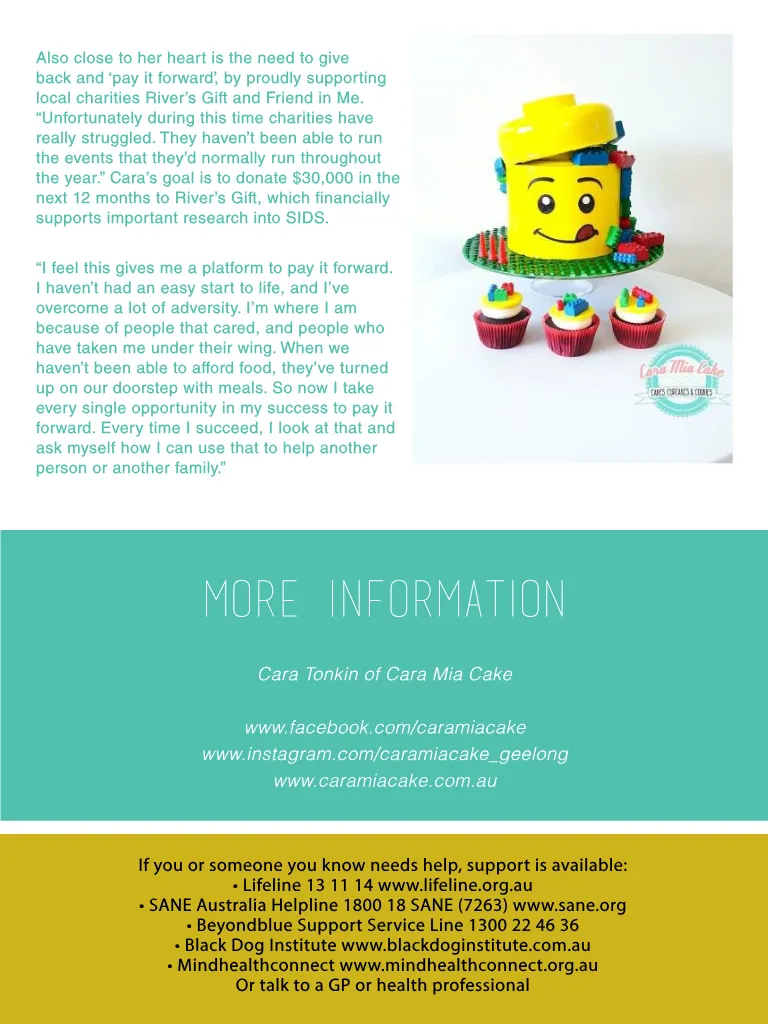
Also close to her heart is the need to give back and ‘pay it forward’, by proudly supporting local charities River’s Gift and Friend in Me. “Unfortunately during this time charities have really struggled. They haven’t been able to run the events that they’d normally run throughout the year.” Cara’s goal is to donate $30,000 in the next 12 months to River’s Gift, which financially supports important research into SIDS. “I feel this gives me a platform to pay it forward. I haven’t had an easy start to life, and I’ve overcome a lot of adversity. I’m where I am because of people that cared, and people who have taken me under their wing. When we haven’t been able to afford food, they’ve turned up on our doorstep with meals. So now I take every single opportunity in my success to pay it forward. Every time I succeed, I look at that and ask myself how I can use that to help another person or another family.” MORE INFORMATION Cara Tonkin of Cara Mia Cake www.facebook.com/caramiacake www.instagram.com/caramiacake_geelong www.caramiacake.com.au If you or someone you know needs help, support is available: • Lifeline 13 11 14 www.lifeline.org.au • SANE Australia Helpline 1800 18 SANE (7263) www.sane.org • Beyondblue Support Service Line 1300 22 46 36 • Black Dog Institute www.blackdoginstitute.com.au • Mind health connect www.mindhealthconnect.org.au Or talk to a GP or health professional
Page 48 text
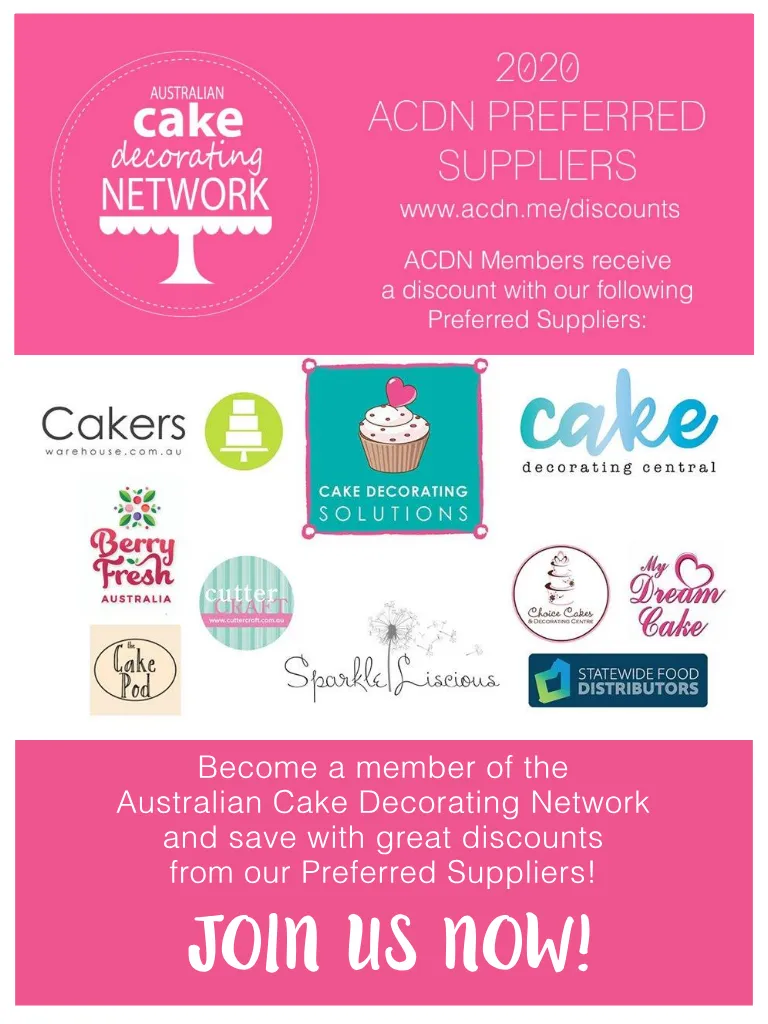
Become a member of the Australian Cake Decorating Network and save with great discounts from our Preferred Suppliers! JOIN US NOW!
Page 50 text
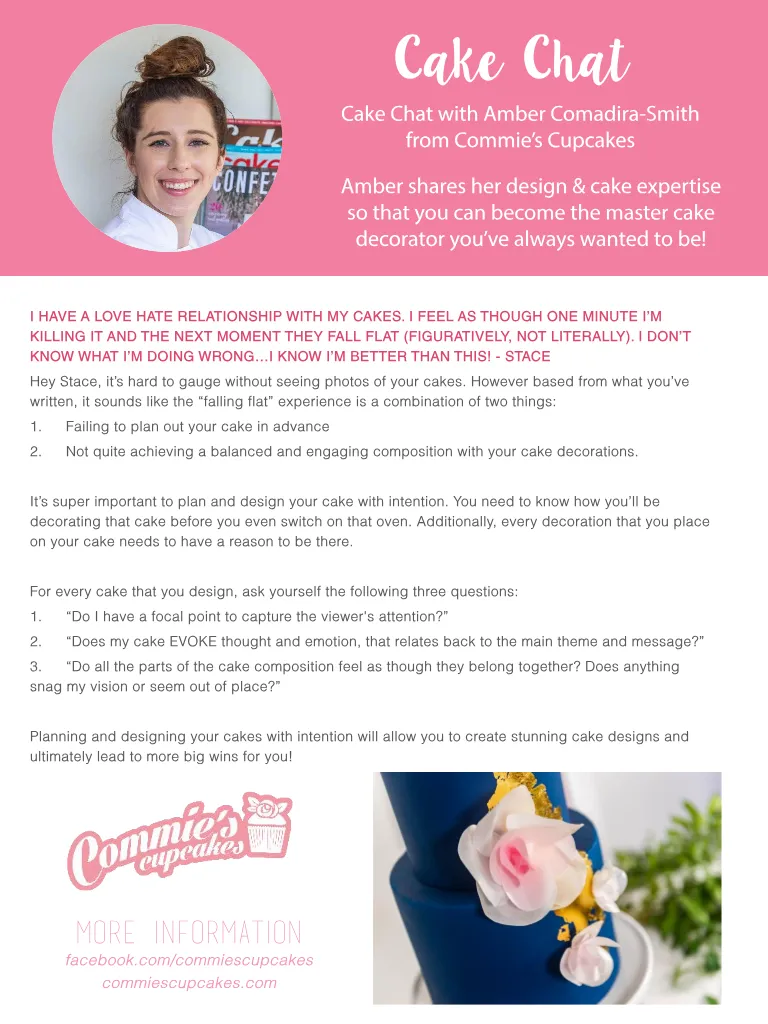
Cake Chat Cake Chat with Amber Comadira-Smith from Commie’s Cupcakes Amber shares her design & cake expertise so that you can become the master cake decorator you’ve always wanted to be! I HAVE A LOVE HATE RELATIONSHIP WITH MY CAKES. I FEEL AS THOUGH ONE MINUTE I’M KILLING IT AND THE NEXT MOMENT THEY FALL FLAT (FIGURATIVELY, NOT LITERALLY). I DON’T KNOW WHAT I’M DOING WRONG…I KNOW I’M BETTER THAN THIS! - STACE Hey Stace, it’s hard to gauge without seeing photos of your cakes. However based from what you’ve written, it sounds like the “falling flat” experience is a combination of two things: 1. Failing to plan out your cake in advance 2. Not quite achieving a balanced and engaging composition with your cake decorations. It’s super important to plan and design your cake with intention. You need to know how you’ll be decorating that cake before you even switch on that oven. Additionally, every decoration that you place on your cake needs to have a reason to be there. For every cake that you design, ask yourself the following three questions: 1. “Do I have a focal point to capture the viewer's attention?” 2. “Does my cake EVOKE thought and emotion, that relates back to the main theme and message?” 3. “Do all the parts of the cake composition feel as though they belong together? Does anything snag my vision or seem out of place?” Planning and designing your cakes with intention will allow you to create stunning cake designs and ultimately lead to more big wins for you! MORE INFORMATION facebook.com/commiescupcakes commiescupcakes.com
Page 51 text
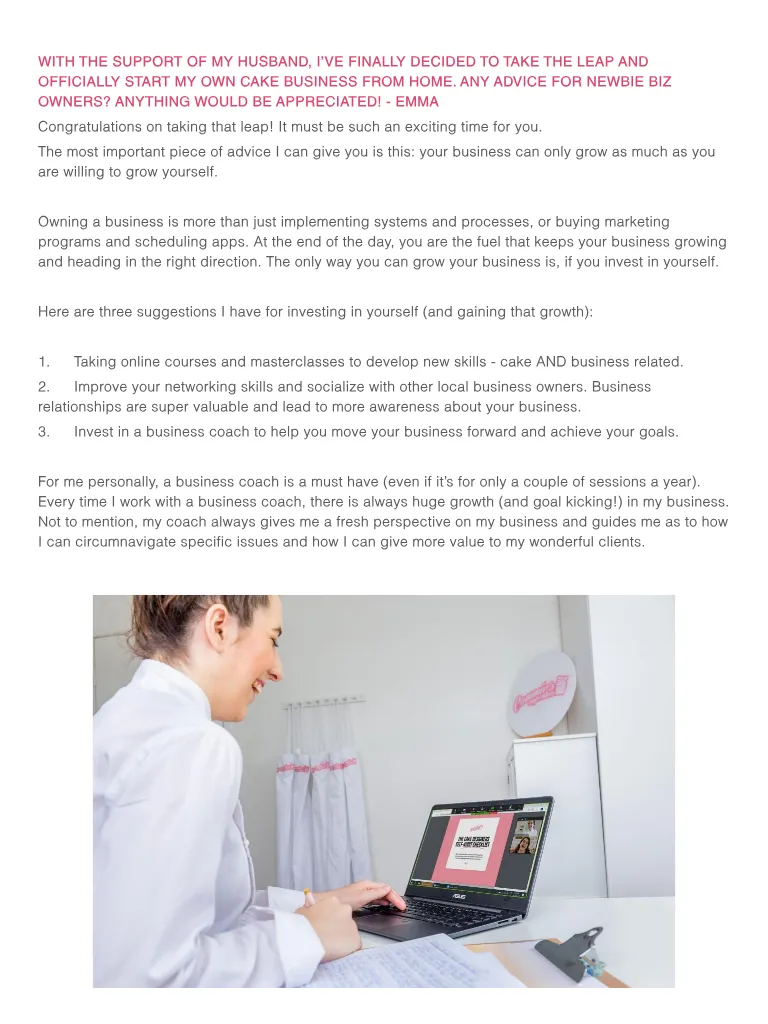
WITH THE SUPPORT OF MY HUSBAND, I’VE FINALLY DECIDED TO TAKE THE LEAP AND OFFICIALLY START MY OWN CAKE BUSINESS FROM HOME. ANY ADVICE FOR NEWBIE BIZ OWNERS? ANYTHING WOULD BE APPRECIATED! - EMMA Congratulations on taking that leap! It must be such an exciting time for you. The most important piece of advice I can give you is this: your business can only grow as much as you are willing to grow yourself. Owning a business is more than just implementing systems and processes, or buying marketing programs and scheduling apps. At the end of the day, you are the fuel that keeps your business growing and heading in the right direction. The only way you can grow your business is, if you invest in yourself. Here are three suggestions I have for investing in yourself (and gaining that growth): 1. Taking online courses and masterclasses to develop new skills - cake AND business related. 2. Improve your networking skills and socialize with other local business owners. Business relationships are super valuable and lead to more awareness about your business. 3. Invest in a business coach to help you move your business forward and achieve your goals. For me personally, a business coach is a must have (even if it’s for only a couple of sessions a year). Every time I work with a business coach, there is always huge growth (and goal kicking!) in my business. Not to mention, my coach always gives me a fresh perspective on my business and guides me as to how I can circumnavigate specific issues and how I can give more value to my wonderful clients.


Page 52 text
Save the date... ONLINE EVENT! 28 NOV 2020


Page 53 text
Online event

Page 54 text
SUBCSRIBE HERE FOR FREE! to have each issue of Cake! magazine sent straight to your inbox! To advertise in Cake! magazine, contact [email protected]
Page 55 text
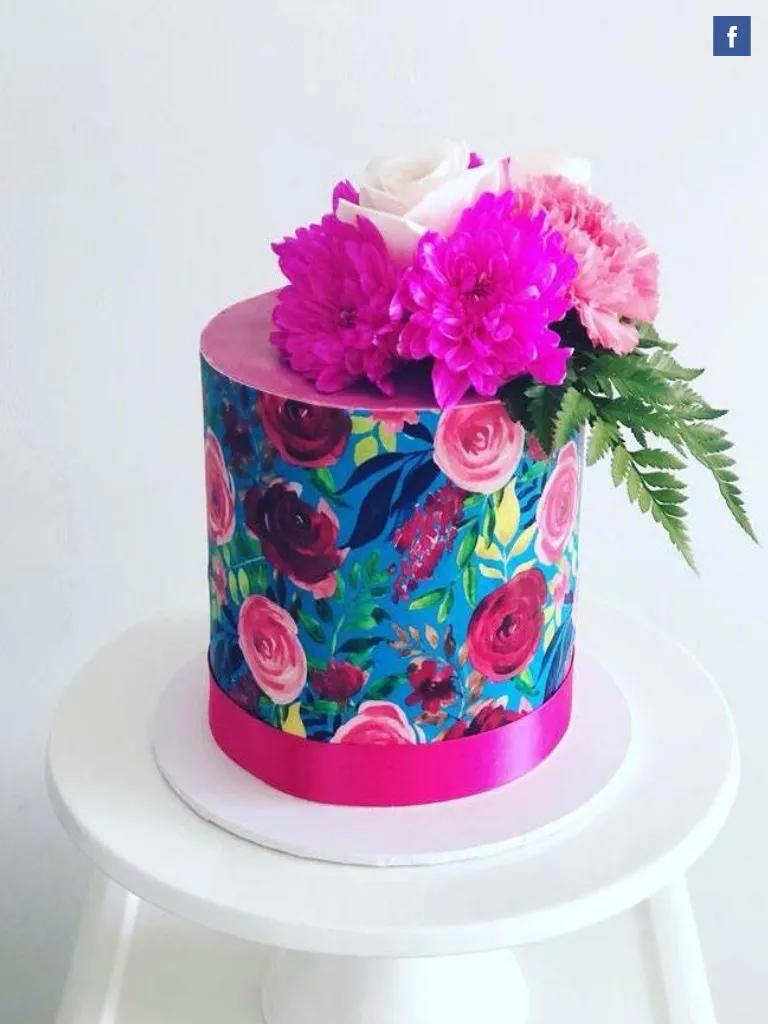
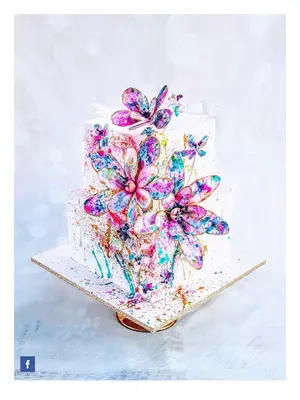
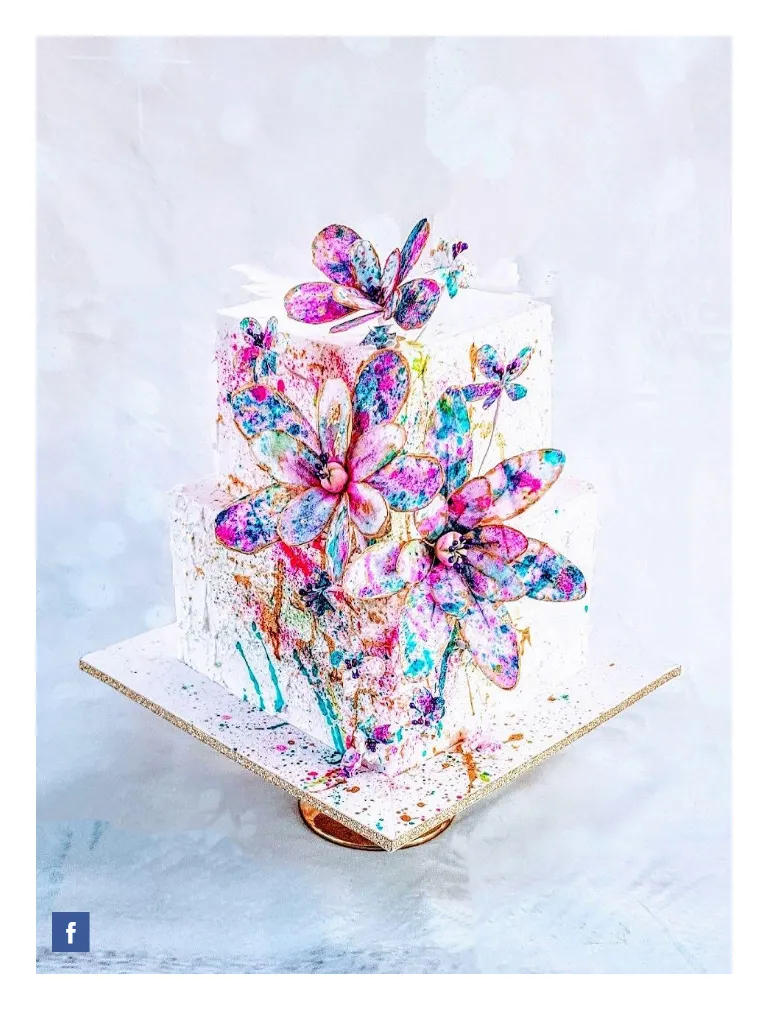
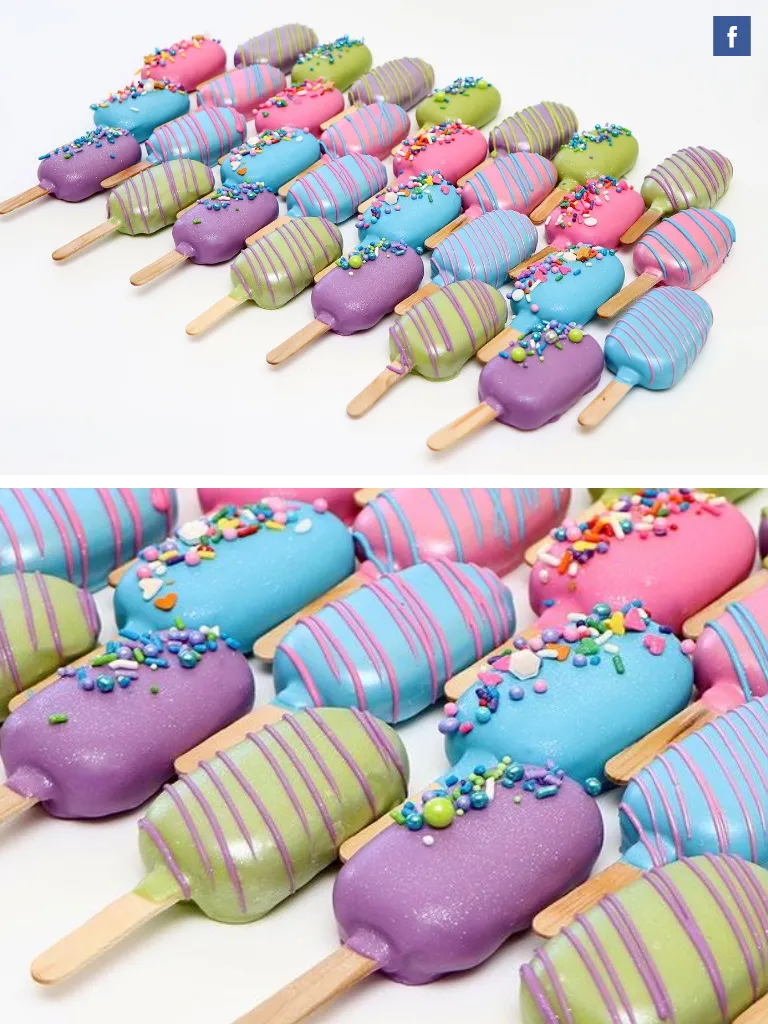
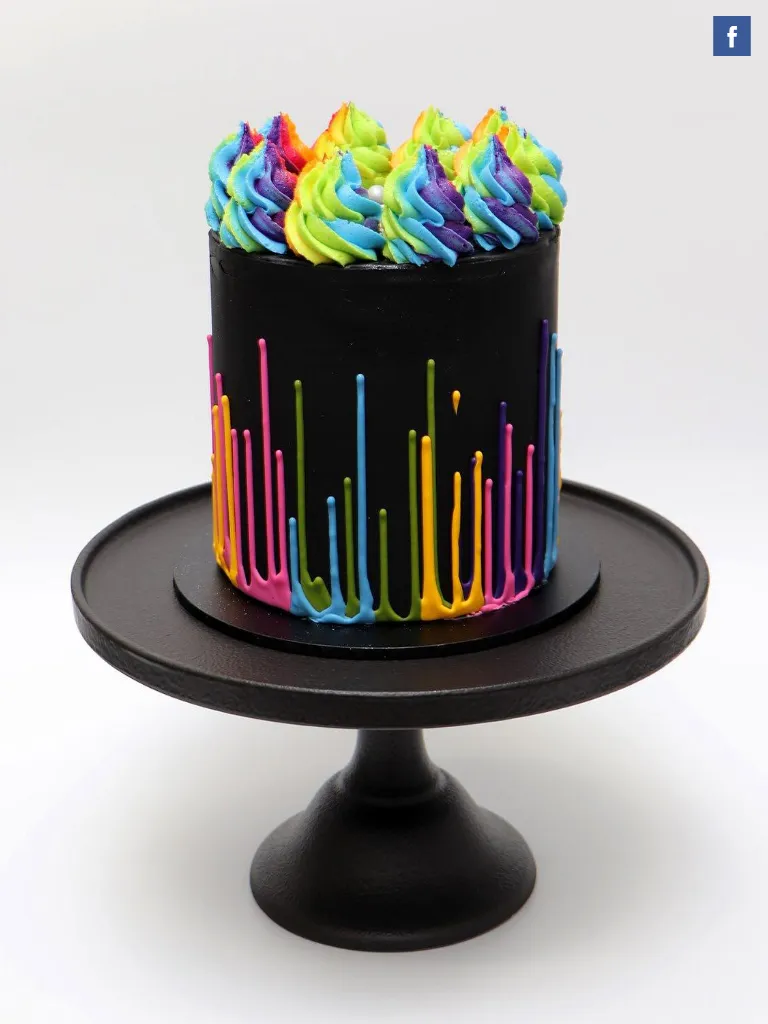
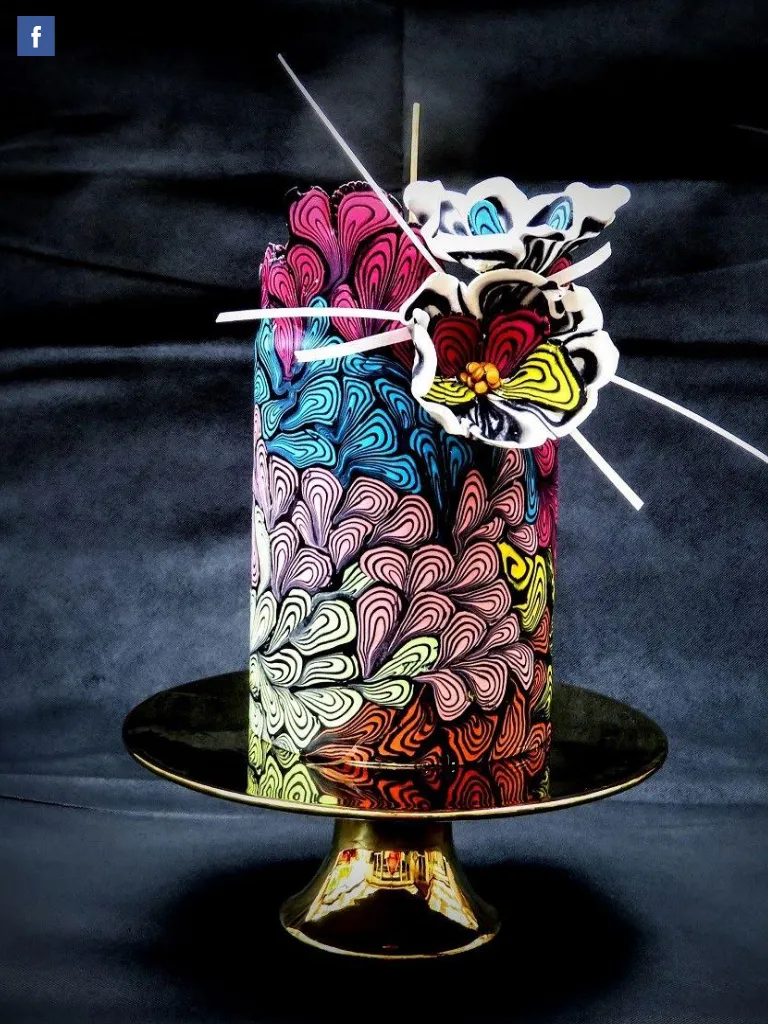
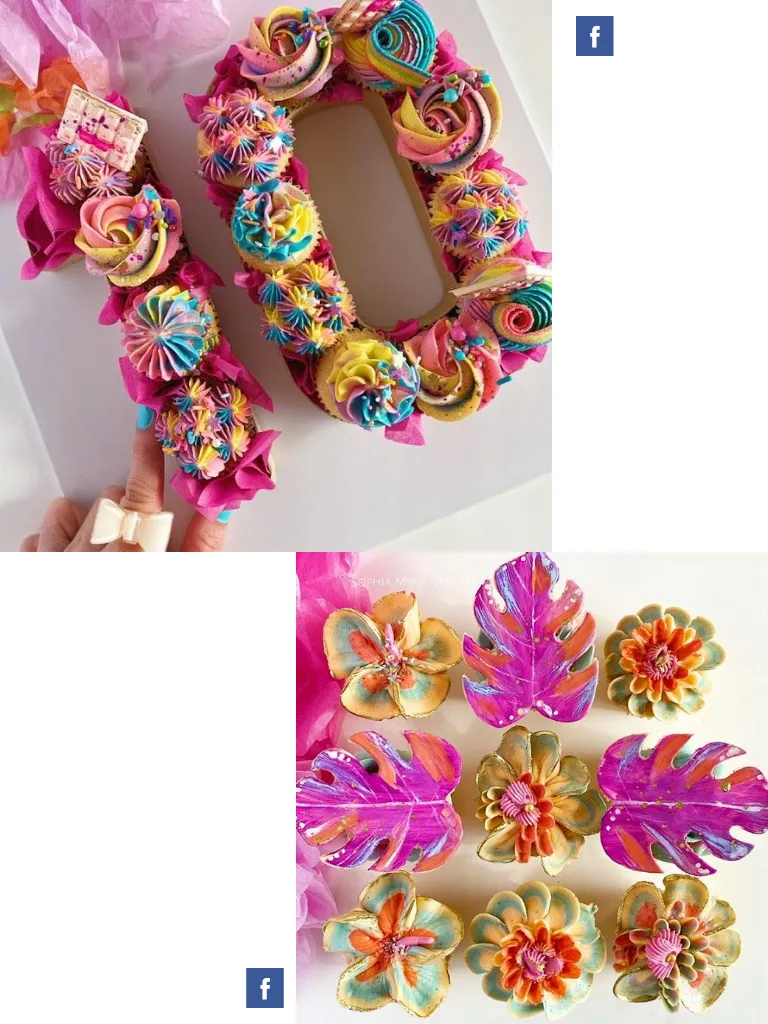
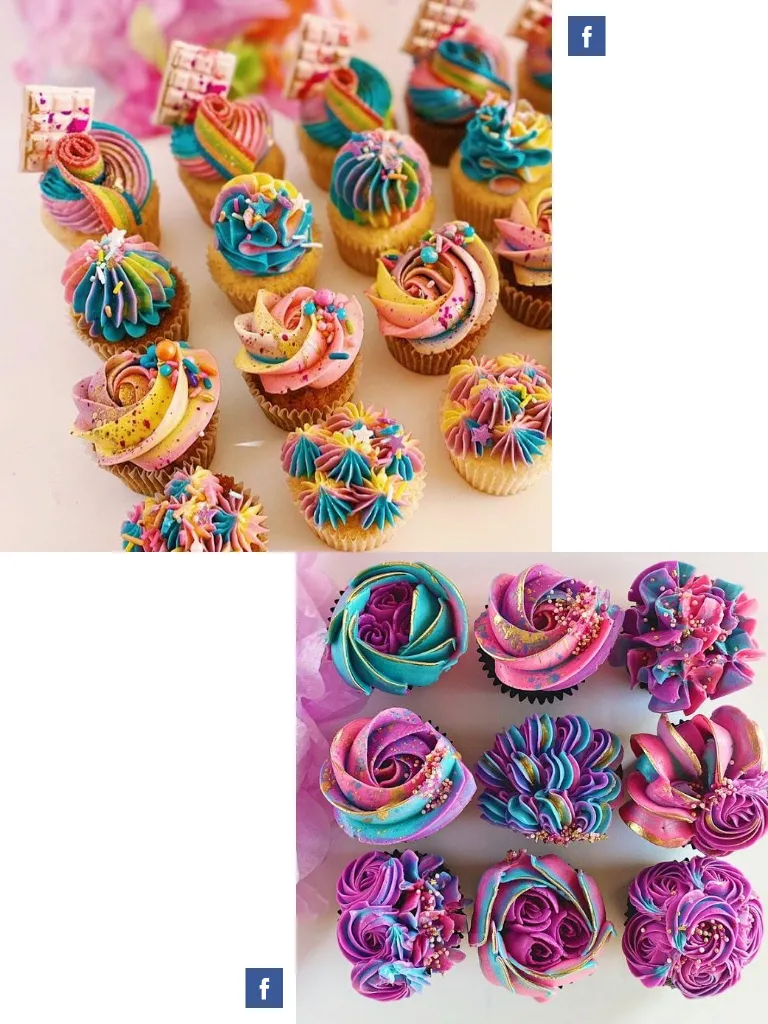
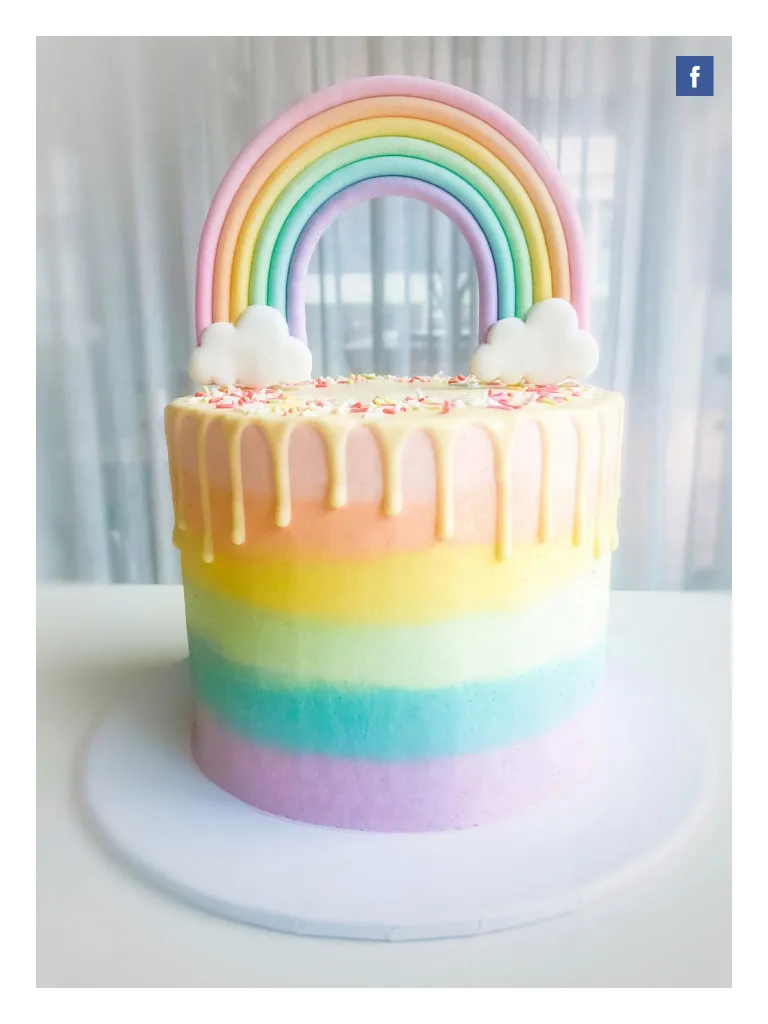
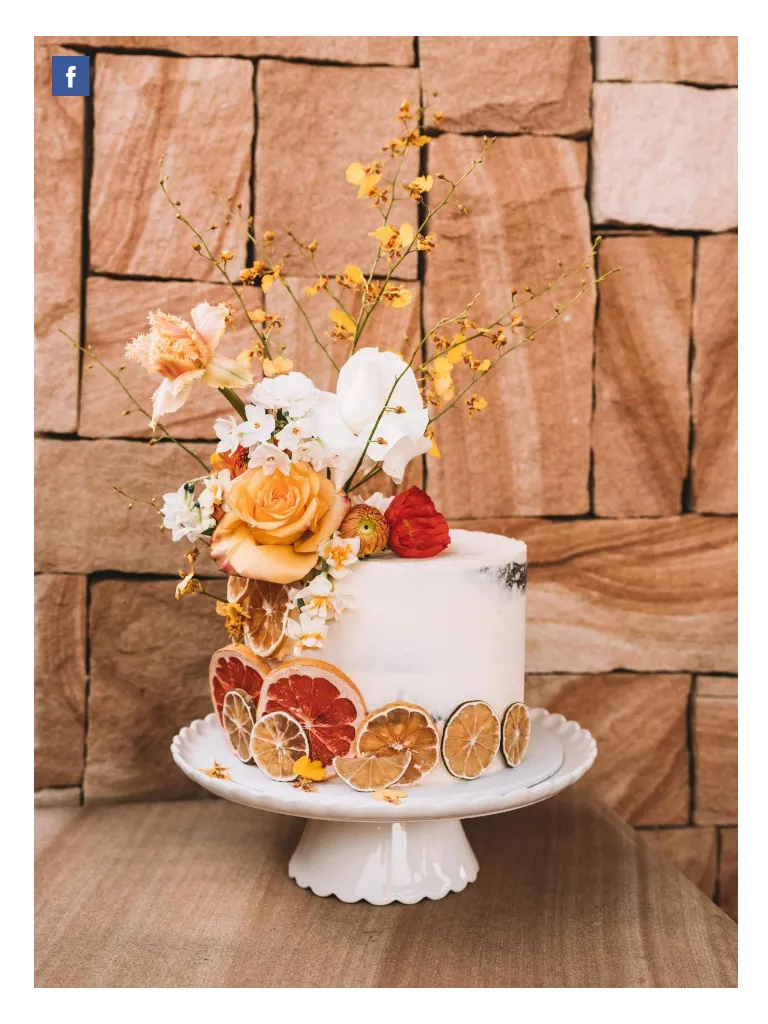
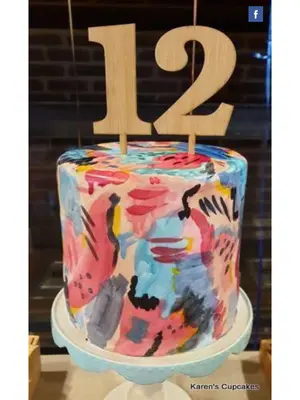
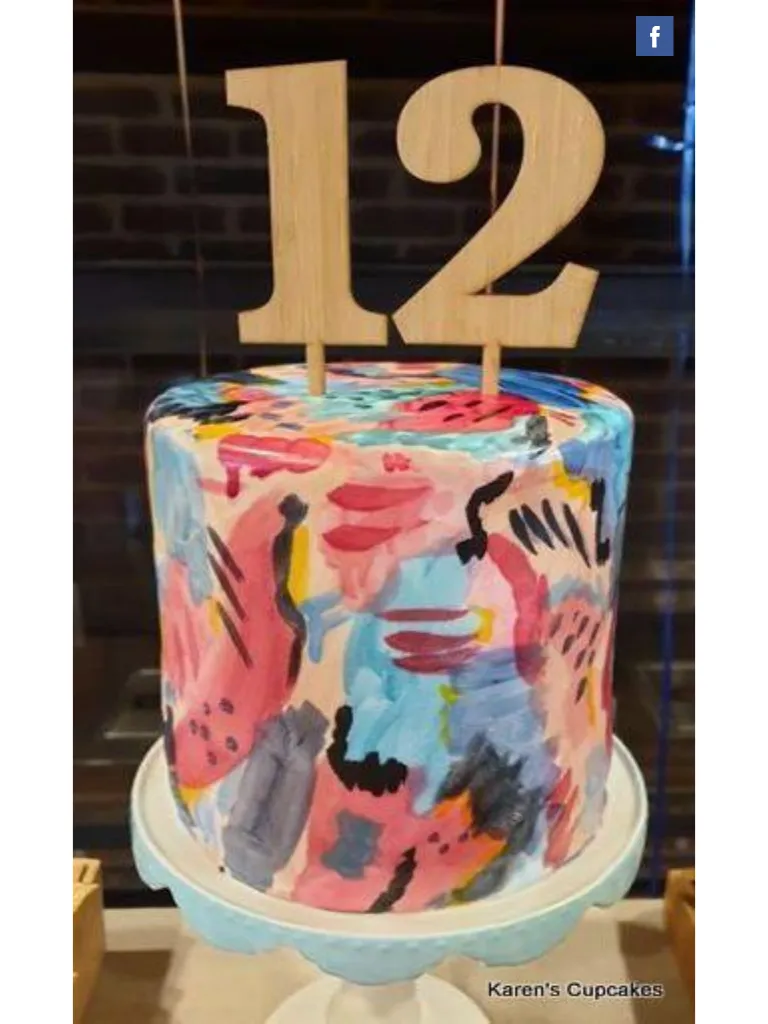
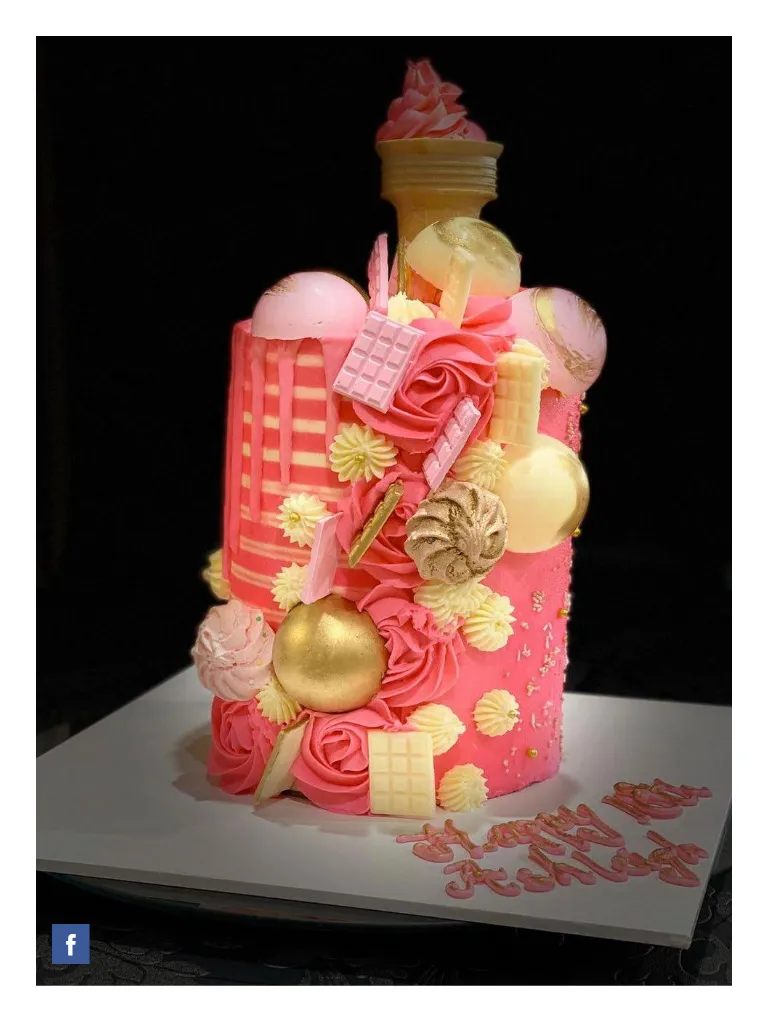
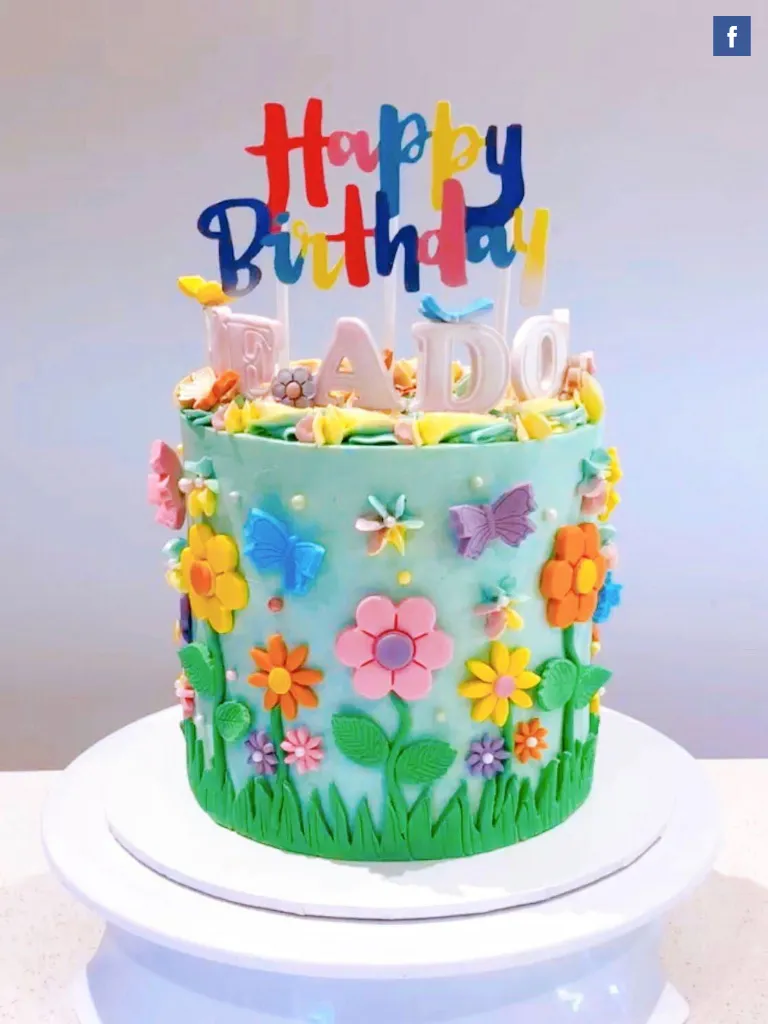
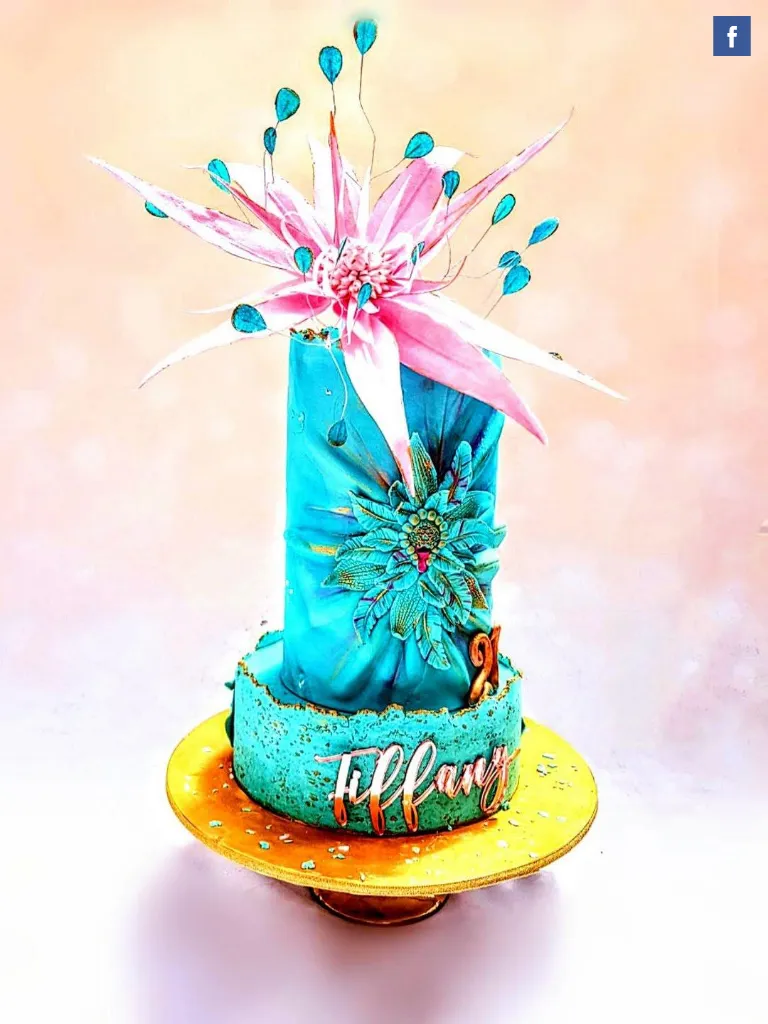
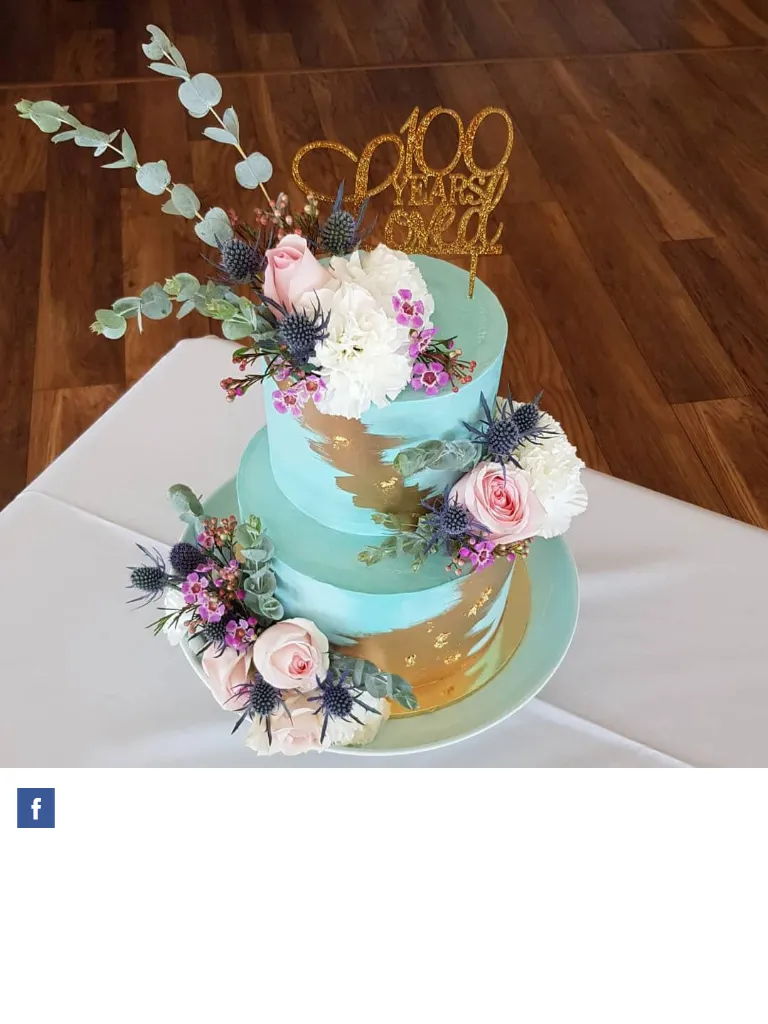
ACDN Member gallery We invited our members to submit to our member gallery - take a look at what they've been creating! Want to submit to our member gallery? Join us HERE!


Page 64 text
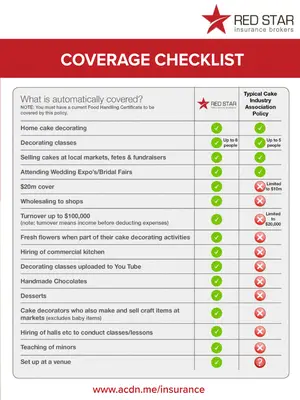
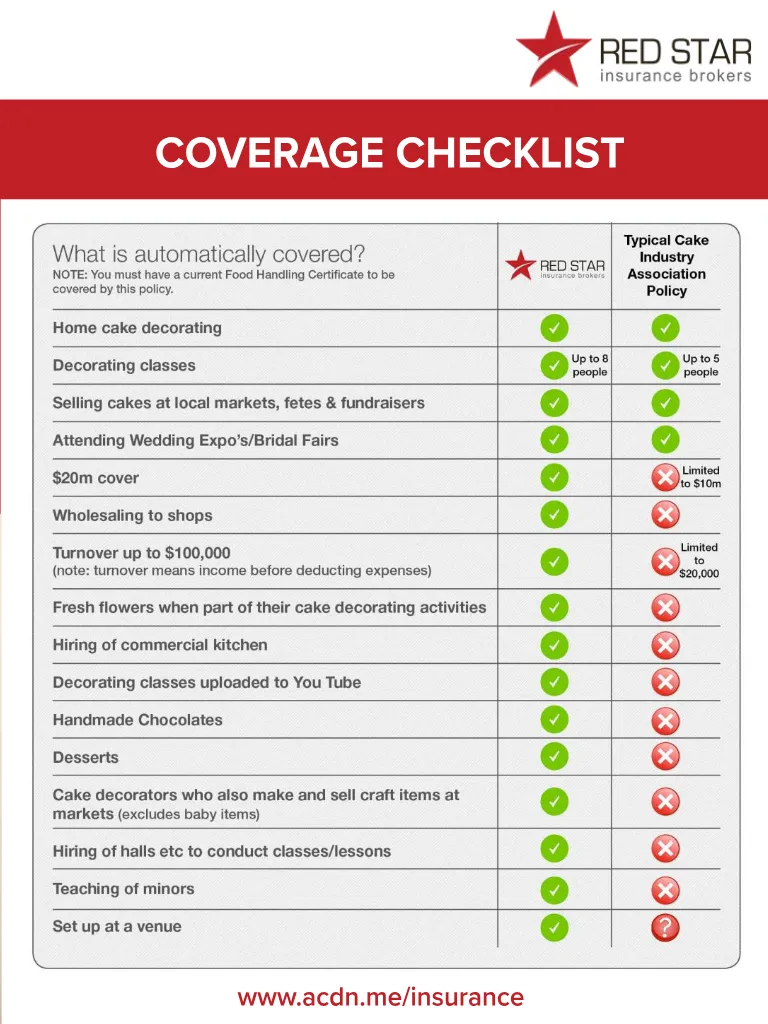
COMPREHENSIVE CAKE DECORATING INSURANCE $20m Public & Products Liability $189 PER YEAR FOR ACDN MEMBERS $289 per year for Non-ACDN Members (Insurance subject to acceptance criteria) To arrange cover or for more information visit www.acdn.me/insurance Red Star Insurance Pty Ltd (AFSL 444803) T&C apply, see website for details. The Australian Cake Decorating Network Pty Ltd does not provide any advice regarding insurance matters. Please contact Red Star Insurance Brokers on the above contact details to discuss your insurance requirements. Referral advertisement. For information see www.acdn.me/insurance
Page 65 text
COVERAGE CHECKLIST Typical Cake Decorating Association Policy www.acdn.me/insurance
Page 67 text
Monthly focus topics include: - Social Media - Pricing for profit - Photography & editing - Quoting & invoicing - Marketing & more! Build a successful baking business with the support of the ACDN Business Lounge! Doors open on 1st October Join the waiting list to receive your invite!




Page 77 text
Become a member of the Australian Cake Decorating Network and save with great discounts from our Preferred Suppliers! JOIN US NOW!



Page 82 text
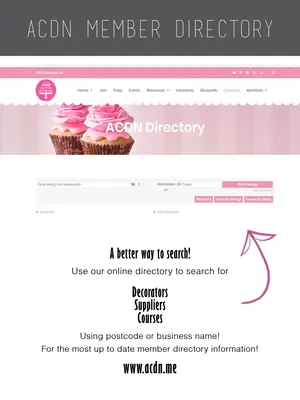
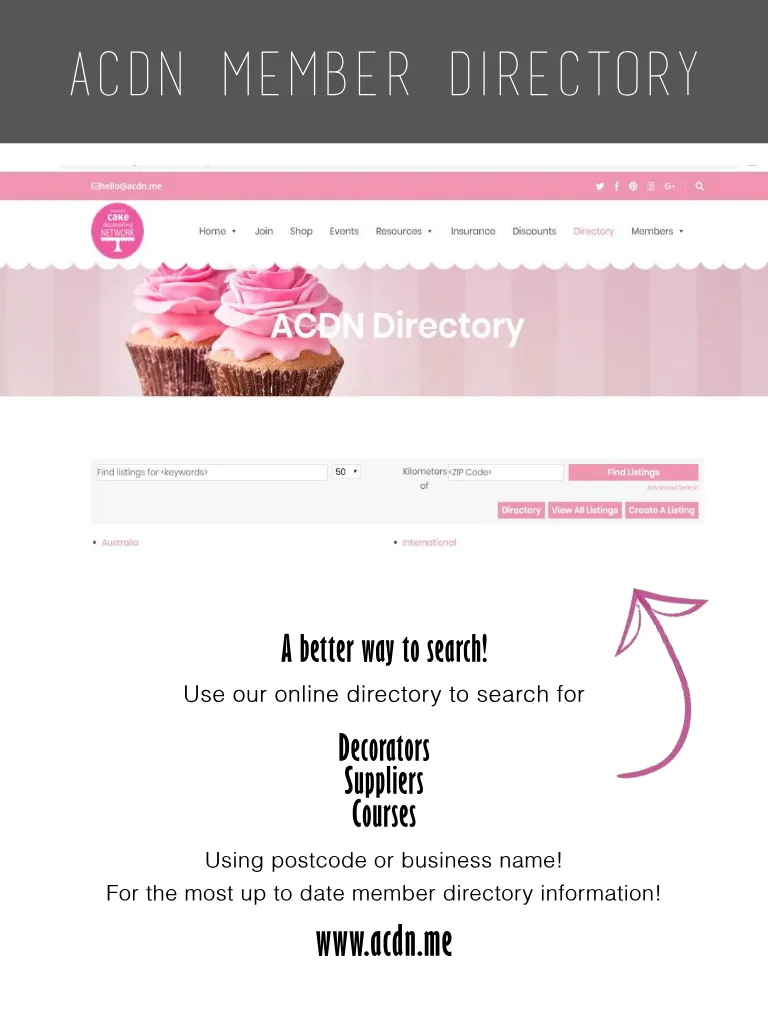
ACDN Member Directory A better way to search! Use our online directory to search for Decorators Suppliers Courses Using postcode or business name! For the most up to date member directory information! www.acdn.me


Page 83 text
Members: If you're not listed in the website online directory, please login to the Member's Lounge at www.acdn.me to add or update your listing Become a member! Join online at www.acdn.me/join
Page 84 text
THANKYOU FOR READING ANOTHER ISSUE OF Cake! m a g a z i n e f www.acdn.me [email protected] Don't miss future issues of Cake! Subscribe for FREE here! To advertise in Cake! magazine, contact: [email protected]