Page 54 of 136
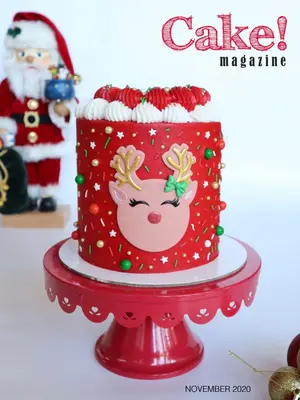
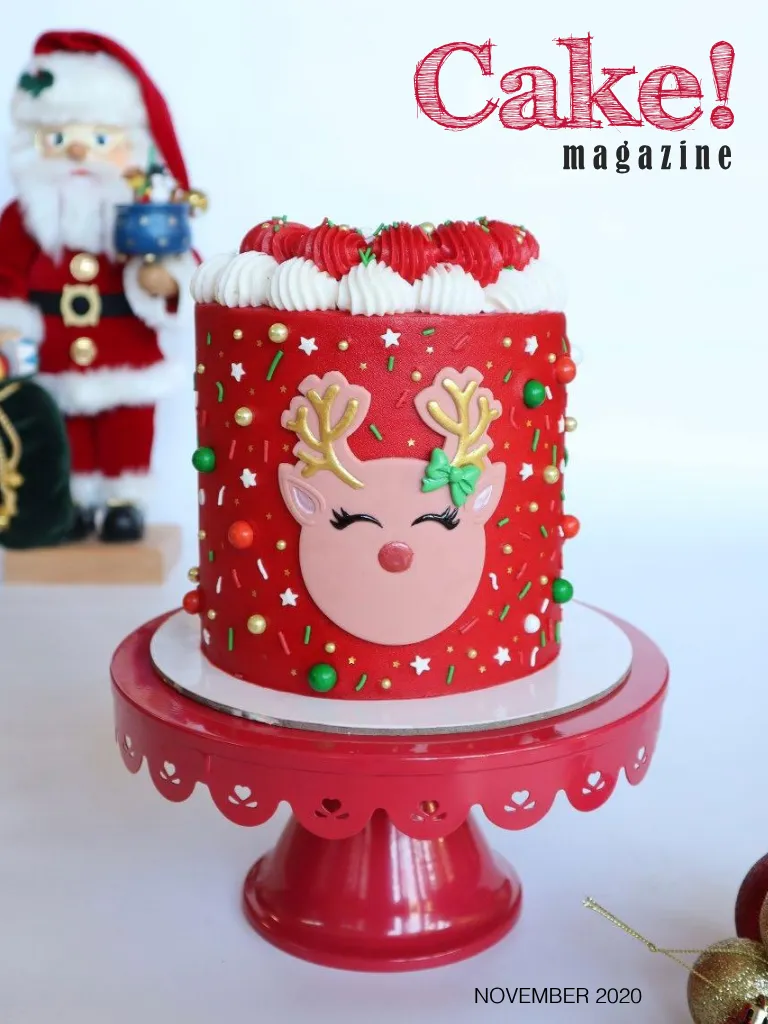
Page 1 text
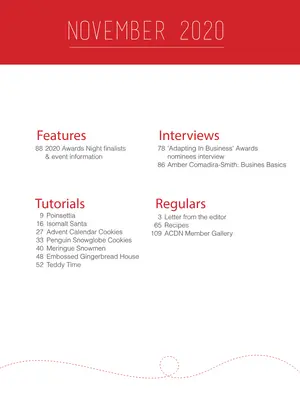
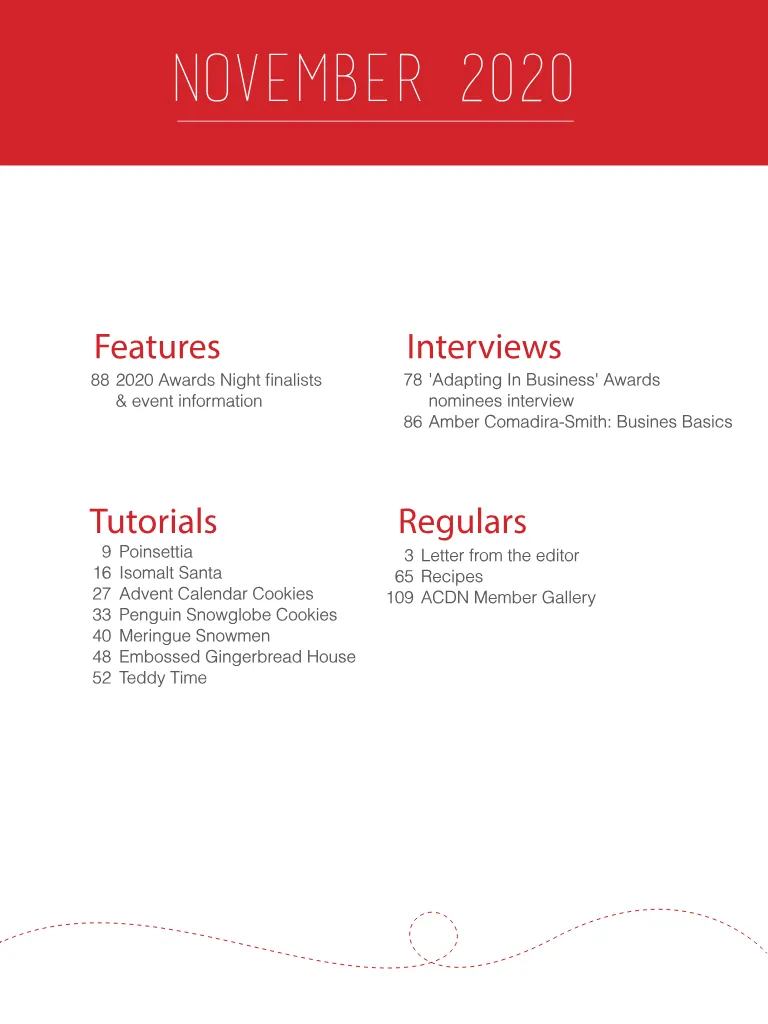
NOVEMBER 2020
Page 2 text
To advertise in Cake ! magazine , contact : liz @ acdn . me f www . acdn . me hello @ acdn . me click here to join our mailing list ! Cake ! m a g a z i n e PUBLISHER : Cake ! Magazine is published by the Australian Cake Decorating Network Pty Ltd . ACN : 91 164 927 584 . © All content copyright 2020 Australian Cake Decorating Network Pty Ltd . All rights reserved . Reproduction any part of the magazine without written permission is prohibited . All prices included in Cake ! Magazine are approximate and are in AUD unless otherwise stated . Prices quoted are correct at the time of publishing and may vary or be subject to change . The Australian Cake Decorating Network Pty Ltd accepts no responsibility for damage or loss as a result of material submitted for , published in or as a result of this publication . The Australian Cake Decorating Network does not have an affiliation with any other magazine . The views and opinions expressed within this publication are not necessarily the views of the publisher or it ' s affiliates . While every effort has been made to ensure the accuracy of the informtion contained within Cake ! Magazine the publisher and Cake ! Magazine hold no responsibility for any errors , omissions , or consequences subsequent or otherwise , including loss or damage arising from reliance on information in this publication . Content is supplied for publication in Cake ! Magazine by parties external to the Australian Cake Decorating Network and it is the external party ' s responsibility to ensure content and credits are accurate . Cake ! Magazine contains advertising through individual arrangements , which may include paid affiliate arrangements . Cake ! Magazine may also contain affiliate links . The agreements are held between the advertiser or affiliate and the Australian Cake Decorating Network Ptd Ltd . To advertise in Cake ! magazine , contact : liz @ acdn . me f www . acdn . me hello @ acdn . me click here to join our mailing list !
Page 3 text
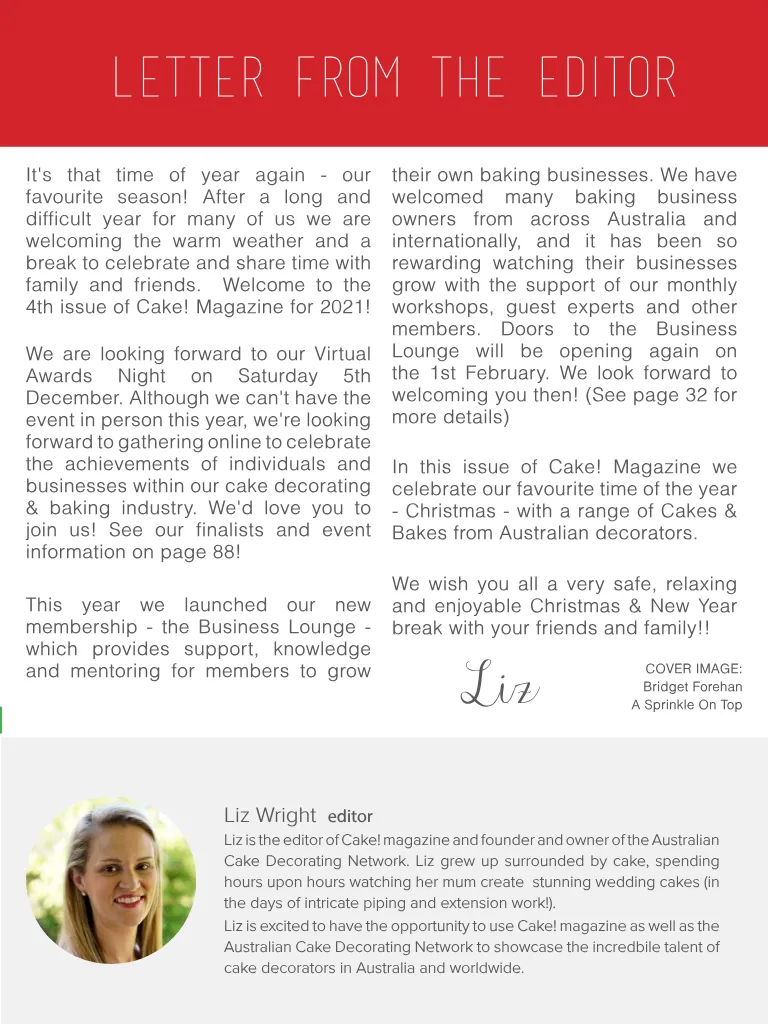
Liz Wright editor letter from the editor It ' s that time of year again - our favourite season ! After a long and difficult year for many of us we are welcoming the warm weather and a break to celebrate and share time with family and friends . Welcome to the 4th issue of Cake ! Magazine for 2021 ! We are looking forward to our Virtual Awards Night on Saturday 5th December . Although we can ' t have the event in person this year , we ' re looking forward to gathering online to celebrate the achievements of individuals and businesses within our cake decorating & baking industry . We ' d love you to join us ! See our finalists and event information on page 88 ! This year we launched our new membership - the Business Lounge - which provides support , knowledge and mentoring for members to grow their own baking businesses . We have welcomed many baking business owners from across Australia and internationally , and it has been so rewarding watching their businesses grow with the support of our monthly workshops , guest experts and other members . Doors to the Business Lounge will be opening again on the 1st February . We look forward to welcoming you then ! ( See page 32 for more details ) In this issue of Cake ! Magazine we celebrate our favourite time of the year - Christmas - with a range of Cakes & Bakes from Australian decorators . We wish you all a very safe , relaxing and enjoyable Christmas & New Year break with your friends and family !! Liz COVER IMAGE : Bridget Forehan A Sprinkle On Top Liz Wright editor Liz is the editor of Cake ! magazine and founder and owner of the Australian Cake Decorating Network . Liz grew up surrounded by cake , spending hours upon hours watching her mum create stunning wedding cakes ( in the days of intricate piping and extension work !). Liz is excited to have the opportunity to use Cake ! magazine as well as the Australian Cake Decorating Network to showcase the incredbile talent of cake decorators in Australia and worldwide .
Page 6 text
www . acdn . me hello @ acdn . me To advertise in Cake ! magazine , contact liz @ acdn . me SUBSCRIBE FOR FREE to have each issue of Cake ! magazine sent straight to your inbox ! f www . acdn . me hello @ acdn . me click here to join our mailing list ! To advertise in Cake ! magazine , contact liz @ acdn . me


Page 7 text
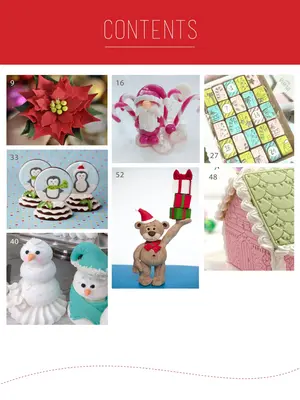
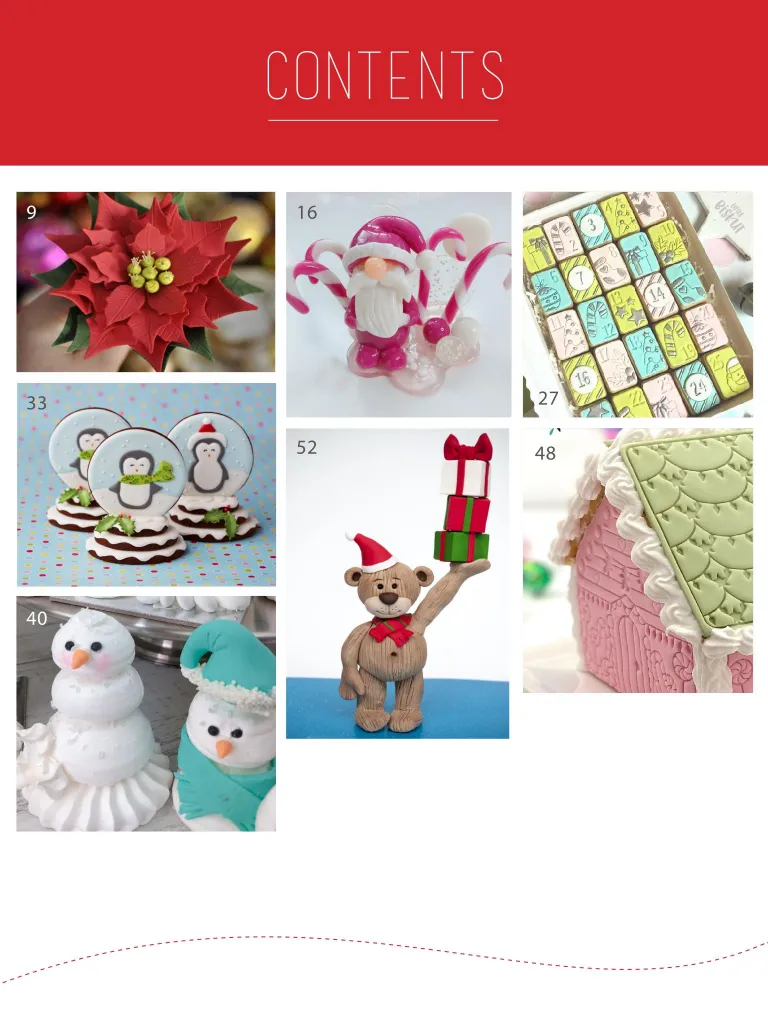
Festive Fun ! A collection of tutorials to help you make your own stunning creations this festive season


Page 8 text
NEW ` www . cakedecoratingsolutions . com . au
Page 9 text
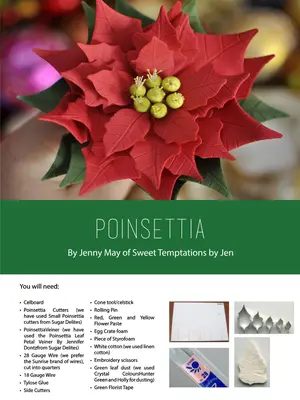
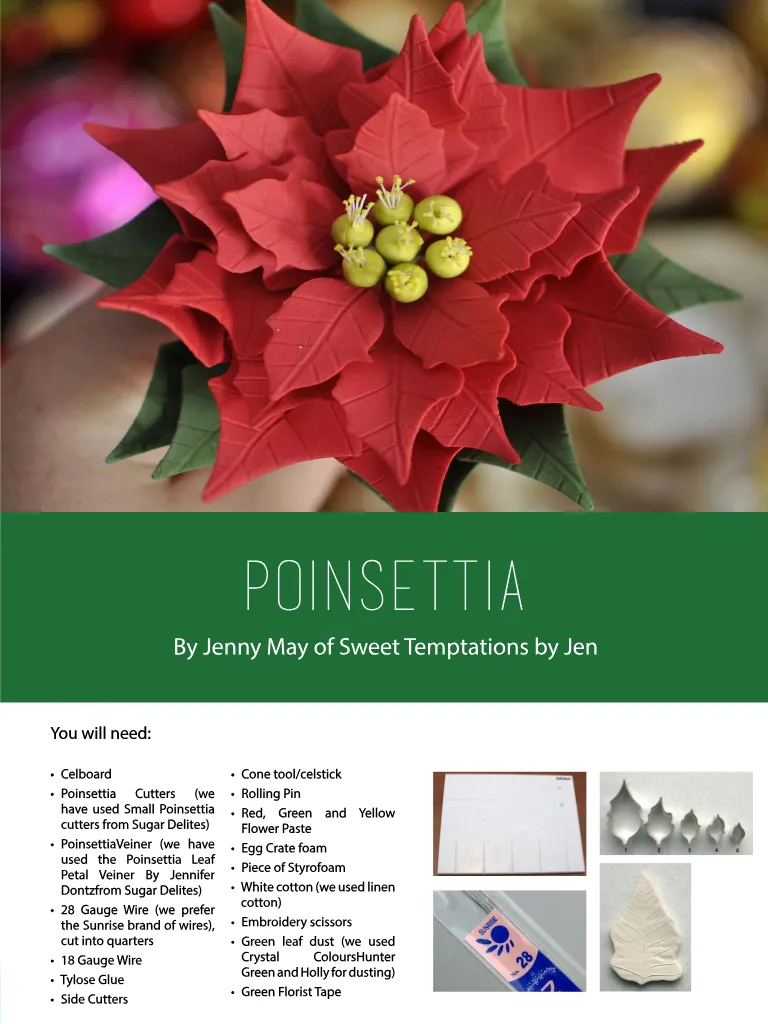
You will need : POINSETTIA By Jenny May of Sweet Temptations by Jen You will need : • Celboard • Poinsettia Cutters ( we have used Small Poinsettia cutters from Sugar Delites ) • PoinsettiaVeiner ( we have used the Poinsettia Leaf Petal Veiner By Jennifer Dontzfrom Sugar Delites ) • 28 Gauge Wire ( we prefer the Sunrise brand of wires ), cut into quarters • 18 Gauge Wire • Tylose Glue • Side Cutters • Cone tool / celstick • Rolling Pin • Red , Green and Yellow Flower Paste • Egg Crate foam • Piece of Styrofoam • White cotton ( we used linen cotton ) • Embroidery scissors • Green leaf dust ( we used Crystal ColoursHunter Green and Holly for dusting ) • Green Florist Tape
Page 10 text
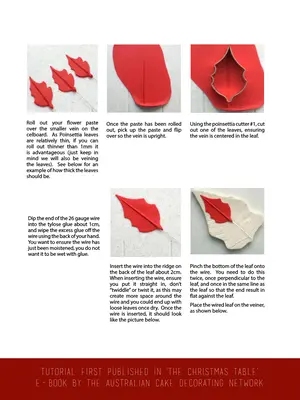
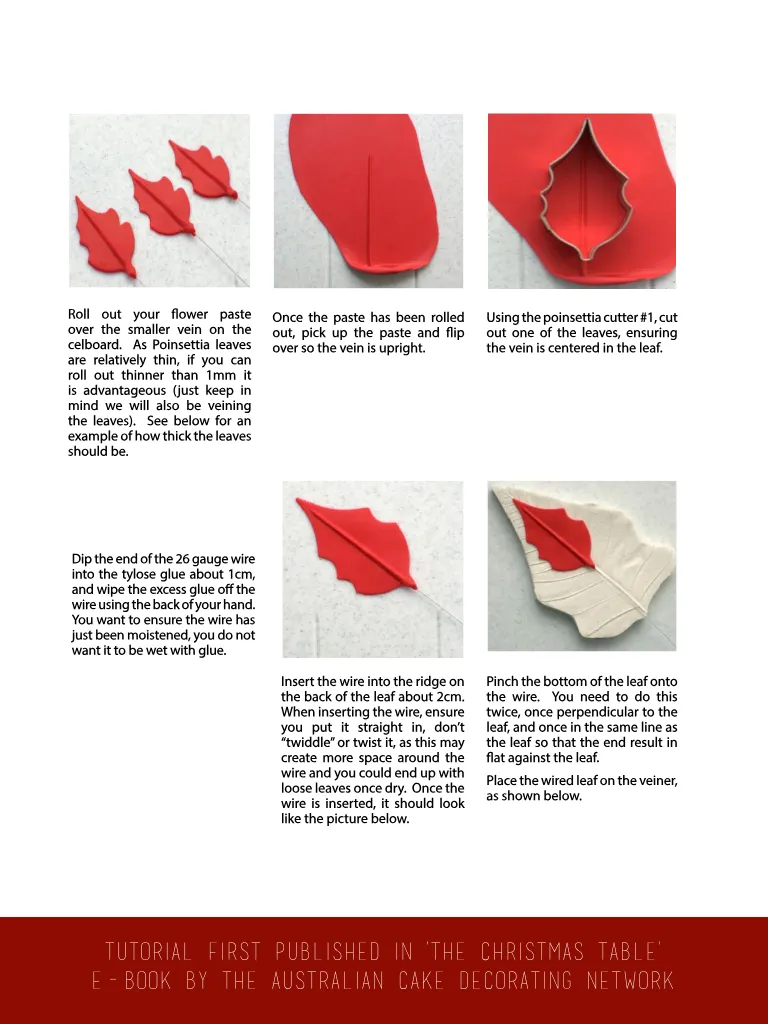
Roll out your flower paste over the smaller vein on the celboard . As Poinsettia leaves are relatively thin , if you can roll out thinner than 1mm it is advantageous ( just keep in mind we will also be veining the leaves ). See below for an example of how thick the leaves should be . Once the paste has been rolled out , pick up the paste and flip over so the vein is upright . Using the poinsettia cutter # 1 , cut out one of the leaves , ensuring the vein is centered in the leaf . Dip the end of the 26 gauge wire into the tylose glue about 1cm , and wipe the excess glue off the wire using the back of your hand . You want to ensure the wire has just been moistened , you do not want it to be wet with glue . Insert the wire into the ridge on the back of the leaf about 2cm . When inserting the wire , ensure you put it straight in , don ’ t “ twiddle ” or twist it , as this may create more space around the wire and you could end up with loose leaves once dry . Once the wire is inserted , it should look like the picture below . Pinch the bottom of the leaf onto the wire . You need to do this twice , once perpendicular to the leaf , and once in the same line as the leaf so that the end result in flat against the leaf . Place the wired leaf on the veiner , as shown below . Tutorial first published in ' the Christmas Table ' e-book by the Australian Cake Decorating Network
Page 11 text
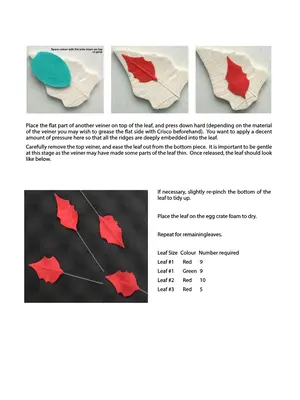
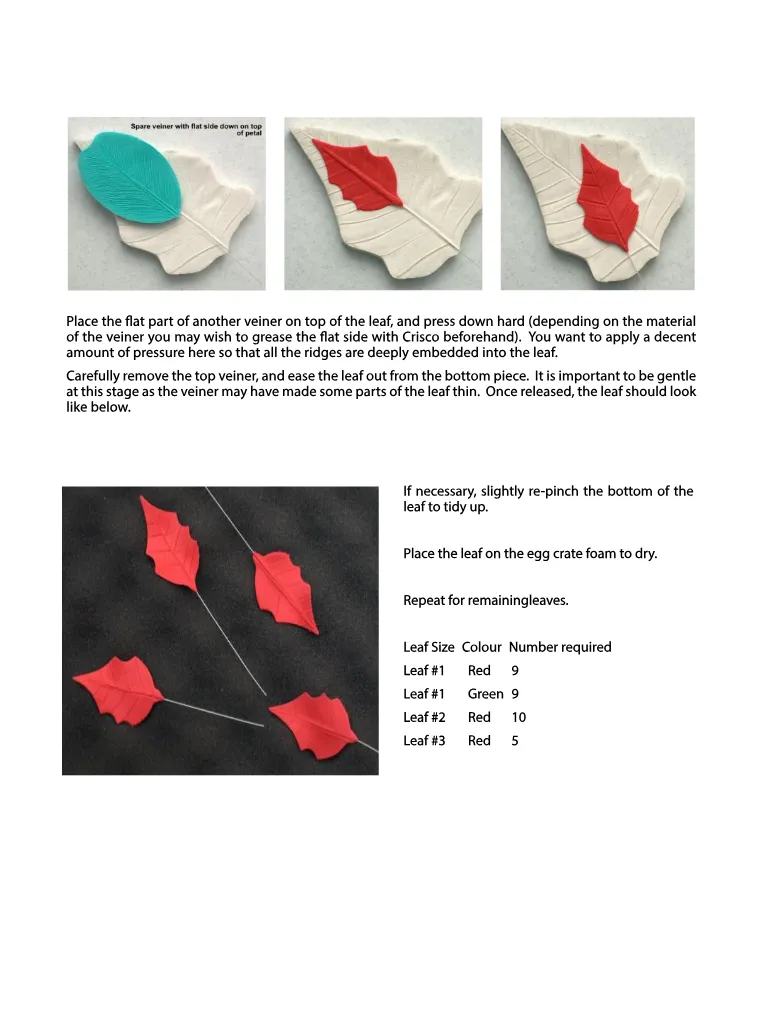
Place the flat part of another veiner on top of the leaf , and press down hard ( depending on the material of the veiner you may wish to grease the flat side with Crisco beforehand ). You want to apply a decent amount of pressure here so that all the ridges are deeply embedded into the leaf . Carefully remove the top veiner , and ease the leaf out from the bottom piece . It is important to be gentle at this stage as the veiner may have made some parts of the leaf thin . Once released , the leaf should look like below . If necessary , slightly re-pinch the bottom of the leaf to tidy up . Place the leaf on the egg crate foam to dry . Repeat for remainingleaves . Leaf Size Colour Number required Leaf # 1 Red 9 Leaf # 1 Green 9 Leaf # 2 Red 10 Leaf # 3 Red 5
Page 12 text
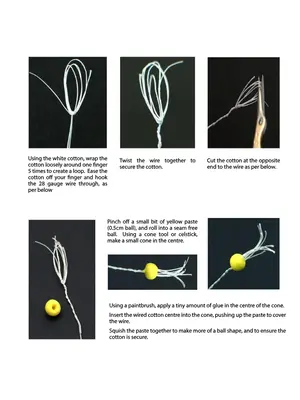
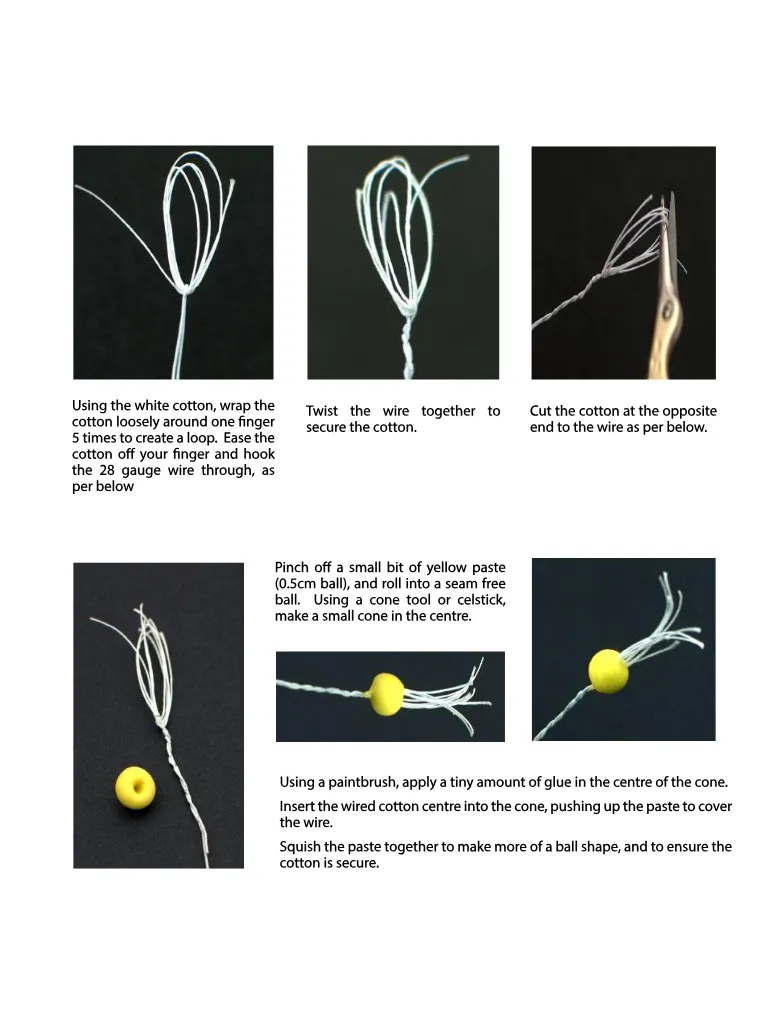
Using the white cotton , wrap the cotton loosely around one finger 5 times to create a loop . Ease the cotton off your finger and hook the 28 gauge wire through , as per below Twist the wire together to secure the cotton . Cut the cotton at the opposite end to the wire as per below . Pinch off a small bit of yellow paste ( 0.5cm ball ), and roll into a seam free ball . Using a cone tool or celstick , make a small cone in the centre . Using a paintbrush , apply a tiny amount of glue in the centre of the cone . Insert the wired cotton centre into the cone , pushing up the paste to cover the wire . Squish the paste together to make more of a ball shape , and to ensure the cotton is secure .
Page 13 text
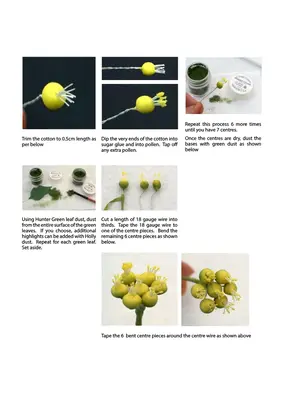
Trim the cotton to 0.5cm length as per below Dip the very ends of the cotton into sugar glue and into pollen . Tap off any extra pollen . Repeat this process 6 more times until you have 7 centres . Once the centres are dry , dust the bases with green dust as shown below Using Hunter Green leaf dust , dust from the entire surface of the green leaves . If you choose , additional highlights can be added with Holly dust . Repeat for each green leaf . Set aside . Cut a length of 18 gauge wire into thirds . Tape the 18 gauge wire to one of the centre pieces . Bend the remaining 6 centre pieces as shown below . Tape the 6 bent centre pieces around the centre wire as shown above

Page 14 text
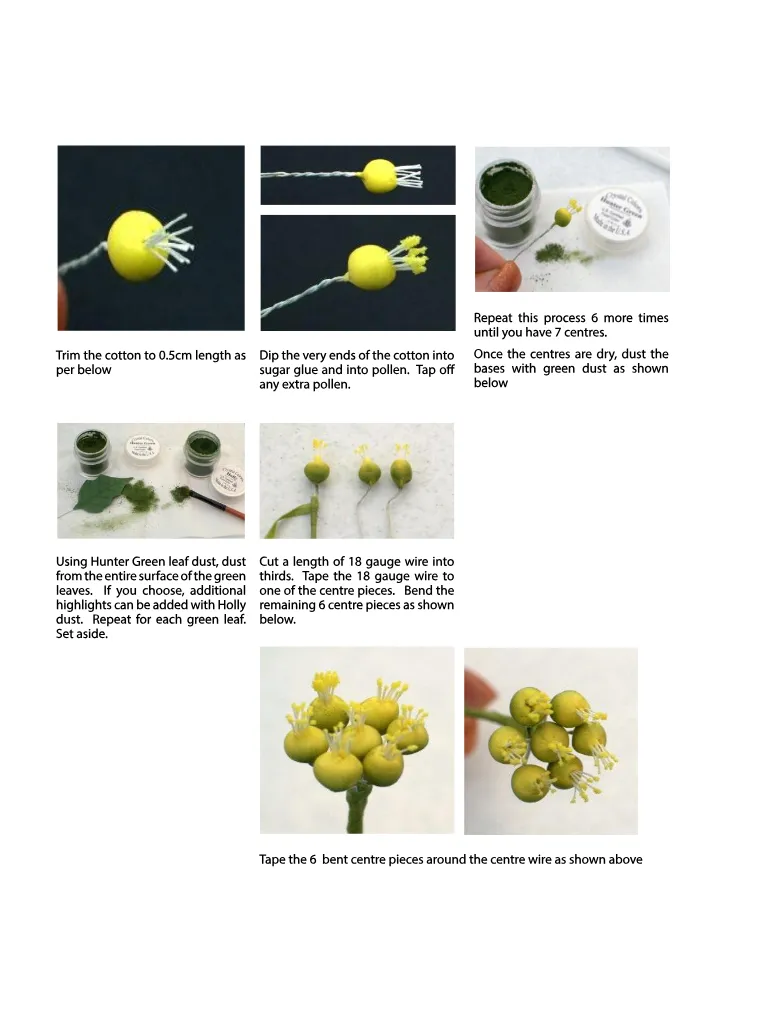
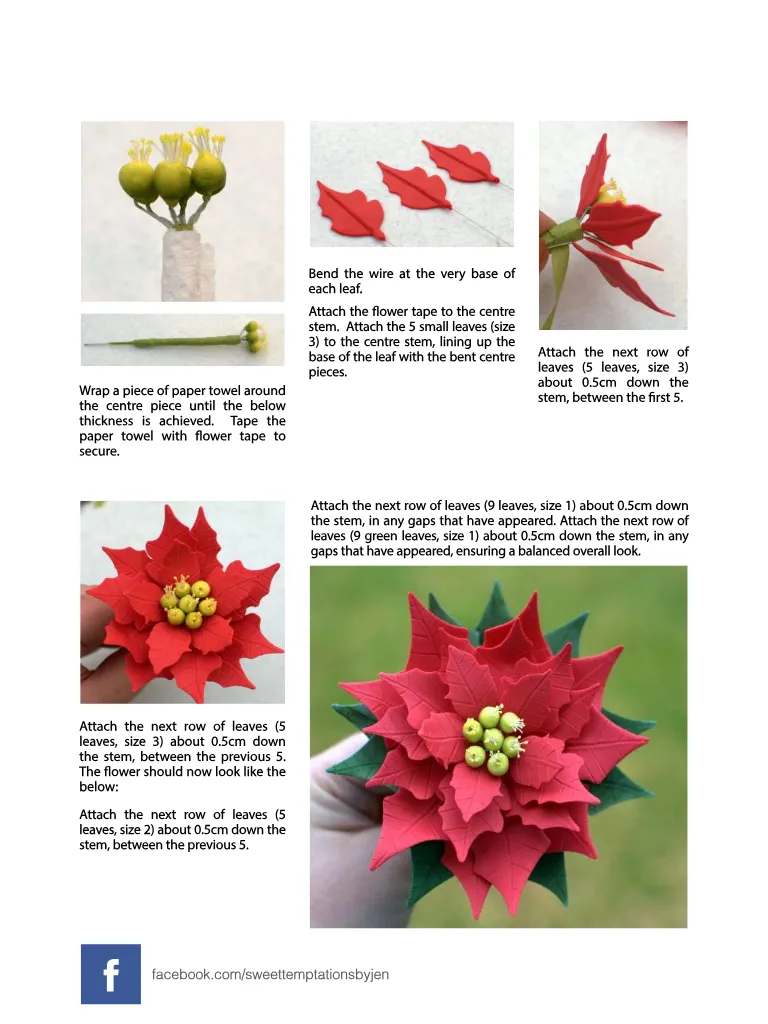
Wrap a piece of paper towel around the centre piece until the below thickness is achieved . Tape the paper towel with flower tape to secure . Bend the wire at the very base of each leaf . Attach the flower tape to the centre stem . Attach the 5 small leaves ( size 3 ) to the centre stem , lining up the base of the leaf with the bent centre pieces . Attach the next row of leaves ( 5 leaves , size 3 ) about 0.5cm down the stem , between the first 5 . Attach the next row of leaves ( 9 leaves , size 1 ) about 0.5cm down the stem , in any gaps that have appeared . Attach the next row of leaves ( 9 green leaves , size 1 ) about 0.5cm down the stem , in any gaps that have appeared , ensuring a balanced overall look . Attach the next row of leaves ( 5 leaves , size 3 ) about 0.5cm down the stem , between the previous 5 . The flower should now look like the below : Attach the next row of leaves ( 5 leaves , size 2 ) about 0.5cm down the stem , between the previous 5 . f facebook . com / sweettemptationsbyjen


Page 15 text
colour mill . new range out now
Page 16 text
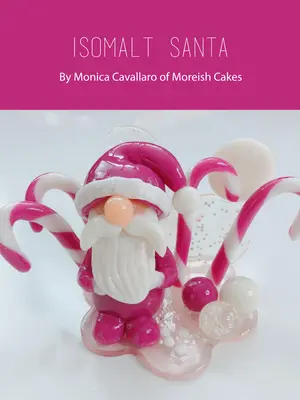
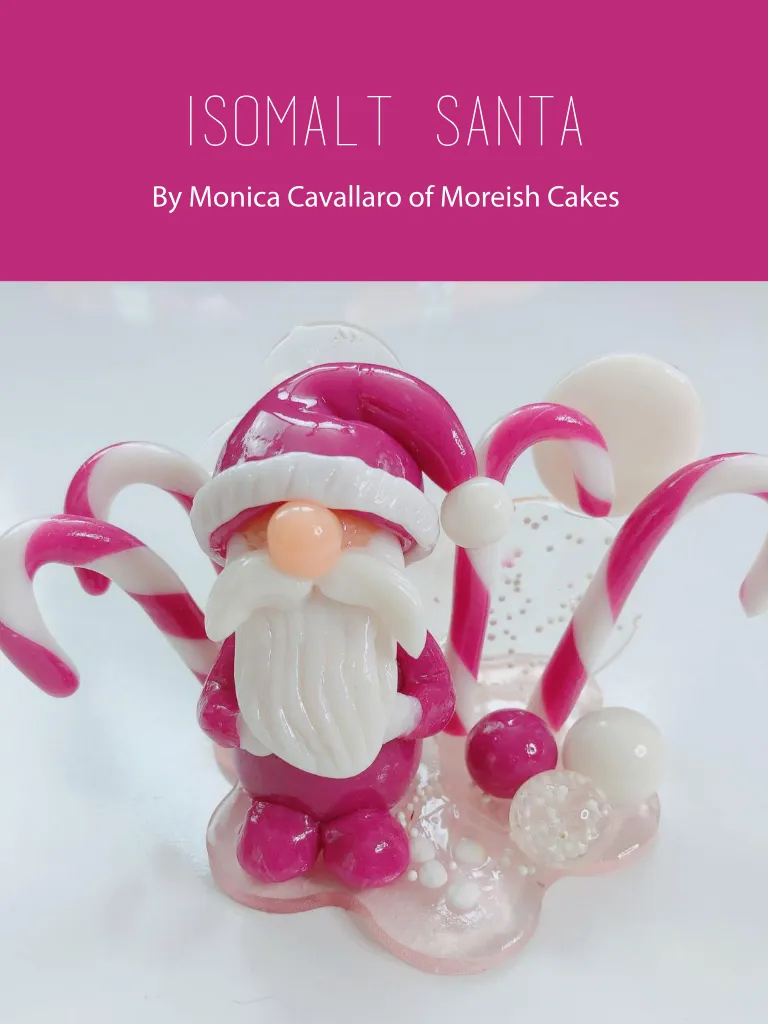
ISOMALT SANTA By Monica Cavallaro of Moreish Cakes
Page 17 text
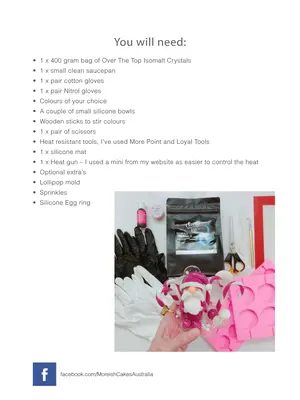
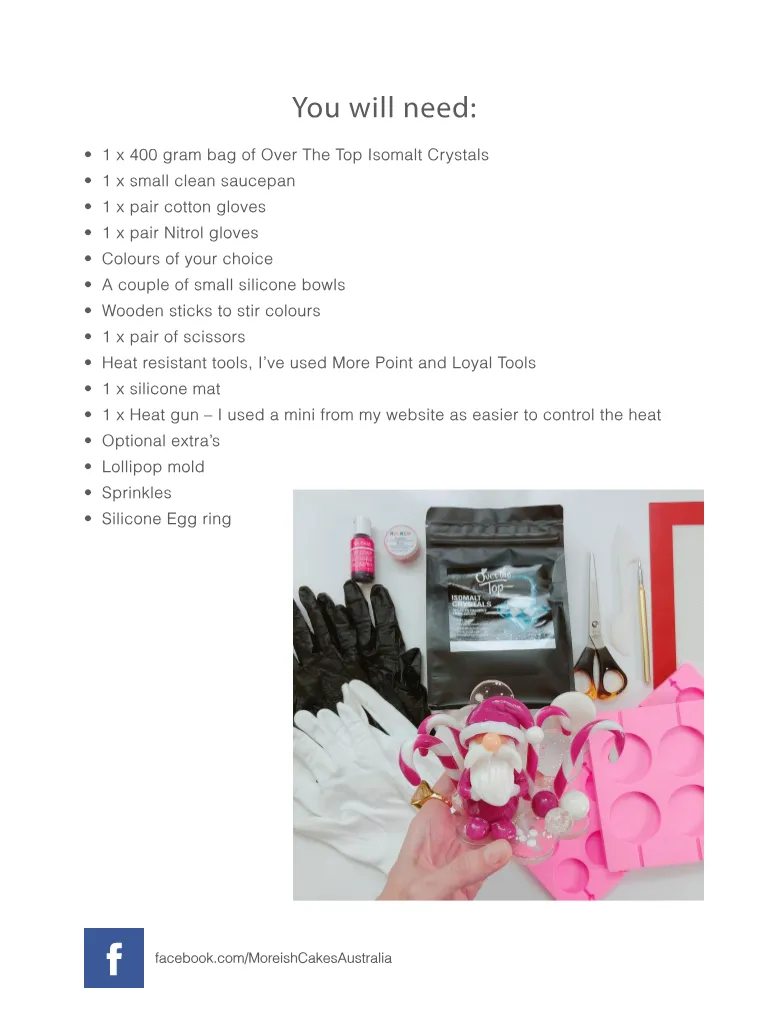
You will need : • 1 x 400 gram bag of Over The Top Isomalt Crystals • 1 x small clean saucepan • 1 x pair cotton gloves • 1 x pair Nitrol gloves • Colours of your choice • A couple of small silicone bowls • Wooden sticks to stir colours • 1 x pair of scissors • Heat resistant tools , I ’ ve used More Point and Loyal Tools • 1 x silicone mat • 1 x Heat gun – I used a mini from my website as easier to control the heat • Optional extra ’ s • Lollipop mold • Sprinkles • Silicone Egg ring f facebook . com / MoreishCakesAustralia
Page 18 text
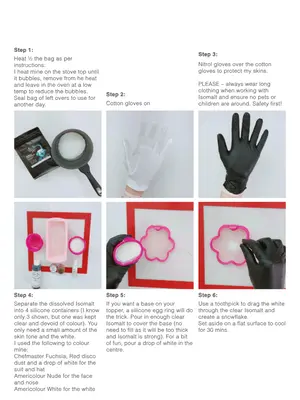
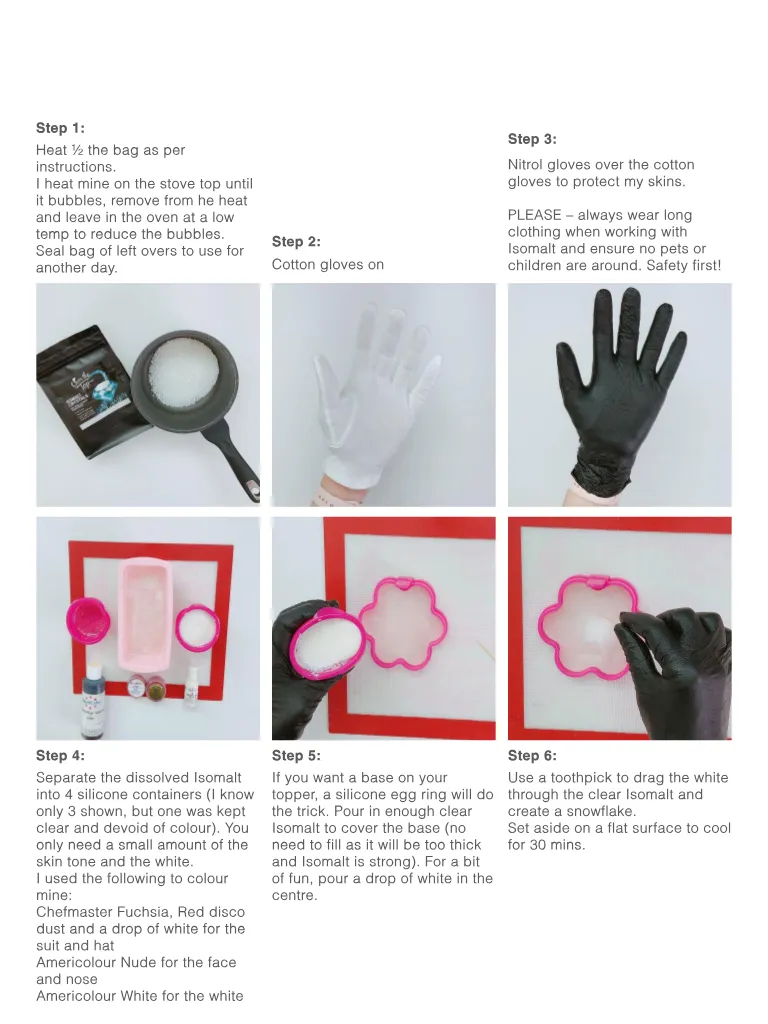
Step 1 : Heat ½ the bag as per instructions . I heat mine on the stove top until it bubbles , remove from he heat and leave in the oven at a low temp to reduce the bubbles . Seal bag of left overs to use for another day . Step 2 : Cotton gloves on Step 3 : Nitrol gloves over the cotton gloves to protect my skins . PLEASE – always wear long clothing when working with Isomalt and ensure no pets or children are around . Safety first ! Step 4 : Step 5 : Step 6 : Separate the dissolved Isomalt into 4 silicone containers ( I know only 3 shown , but one was kept clear and devoid of colour ). You only need a small amount of the skin tone and the white . I used the following to colour mine : Chefmaster Fuchsia , Red disco dust and a drop of white for the suit and hat Americolour Nude for the face and nose Americolour White for the white If you want a base on your topper , a silicone egg ring will do the trick . Pour in enough clear Isomalt to cover the base ( no need to fill as it will be too thick and Isomalt is strong ). For a bit of fun , pour a drop of white in the centre . Use a toothpick to drag the white through the clear Isomalt and create a snowflake . Set aside on a flat surface to cool for 30 mins .
Page 19 text
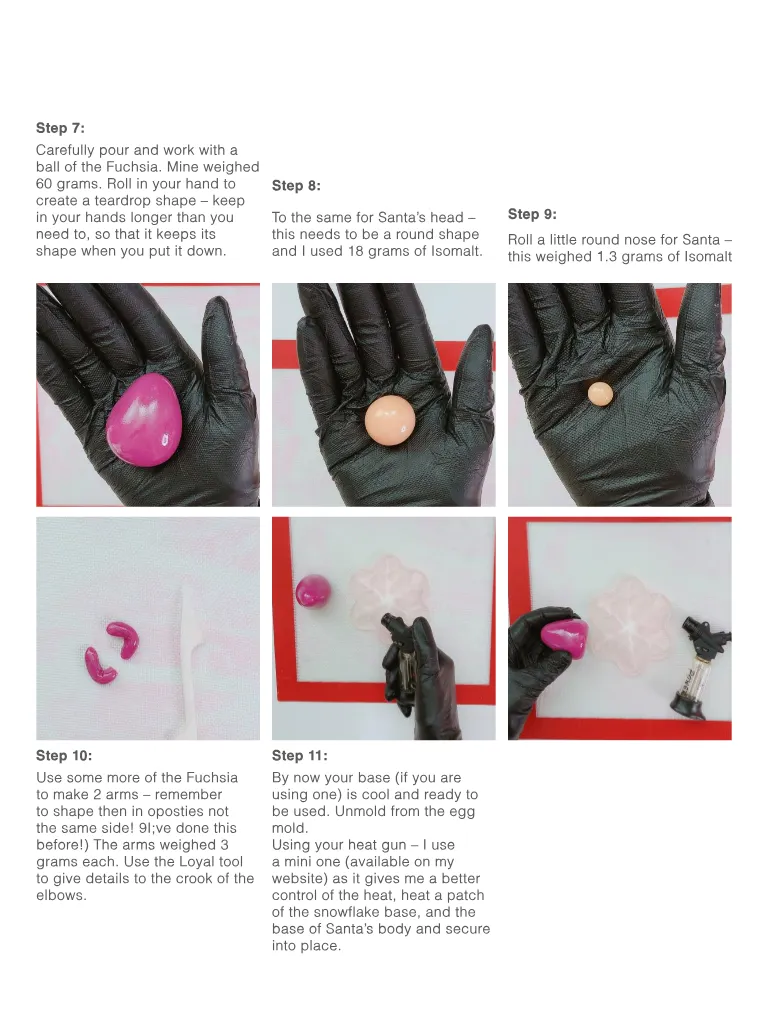
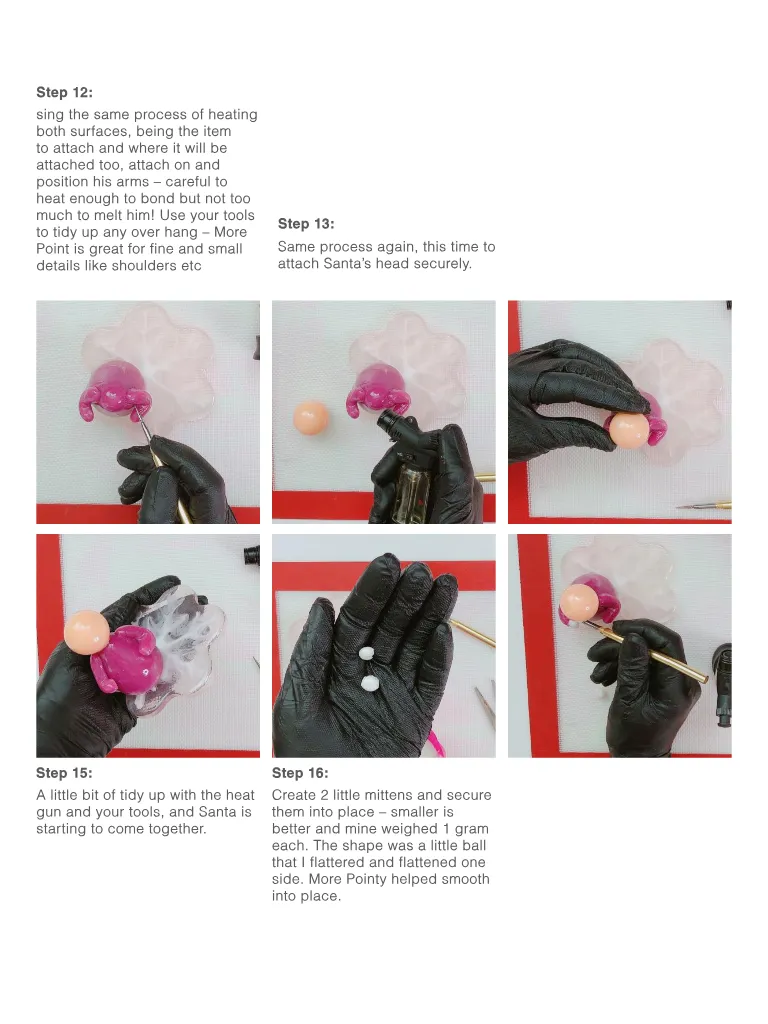
Step 7 : Carefully pour and work with a ball of the Fuchsia . Mine weighed 60 grams . Roll in your hand to create a teardrop shape – keep in your hands longer than you need to , so that it keeps its shape when you put it down . Step 8 : To the same for Santa ’ s head – this needs to be a round shape and I used 18 grams of Isomalt . Step 9 : Roll a little round nose for Santa – this weighed 1.3 grams of Isomalt Step 10 : Step 11 : Use some more of the Fuchsia to make 2 arms – remember to shape then in oposties not the same side ! 9I ; ve done this before !) The arms weighed 3 grams each . Use the Loyal tool to give details to the crook of the elbows . By now your base ( if you are using one ) is cool and ready to be used . Unmold from the egg mold . Using your heat gun – I use a mini one ( available on my website ) as it gives me a better control of the heat , heat a patch of the snowflake base , and the base of Santa ’ s body and secure into place .
Page 20 text
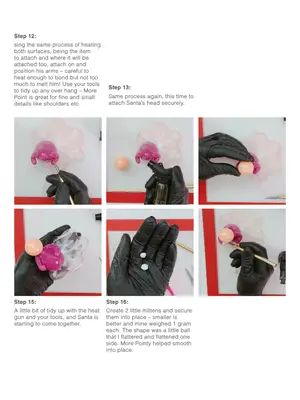
Step 12 : sing the same process of heating both surfaces , being the item to attach and where it will be attached too , attach on and position his arms – careful to heat enough to bond but not too much to melt him ! Use your tools to tidy up any over hang – More Point is great for fine and small details like shoulders etc Step 13 : Same process again , this time to attach Santa ’ s head securely . Step 15 : Step 16 : A little bit of tidy up with the heat gun and your tools , and Santa is starting to come together . Create 2 little mittens and secure them into place – smaller is better and mine weighed 1 gram each . The shape was a little ball that I flattered and flattened one side . More Pointy helped smooth into place .
Page 21 text
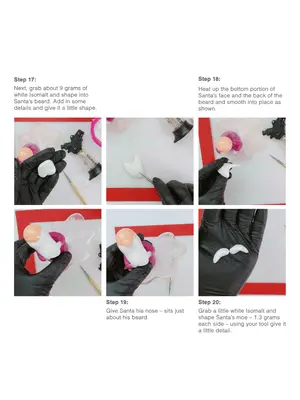
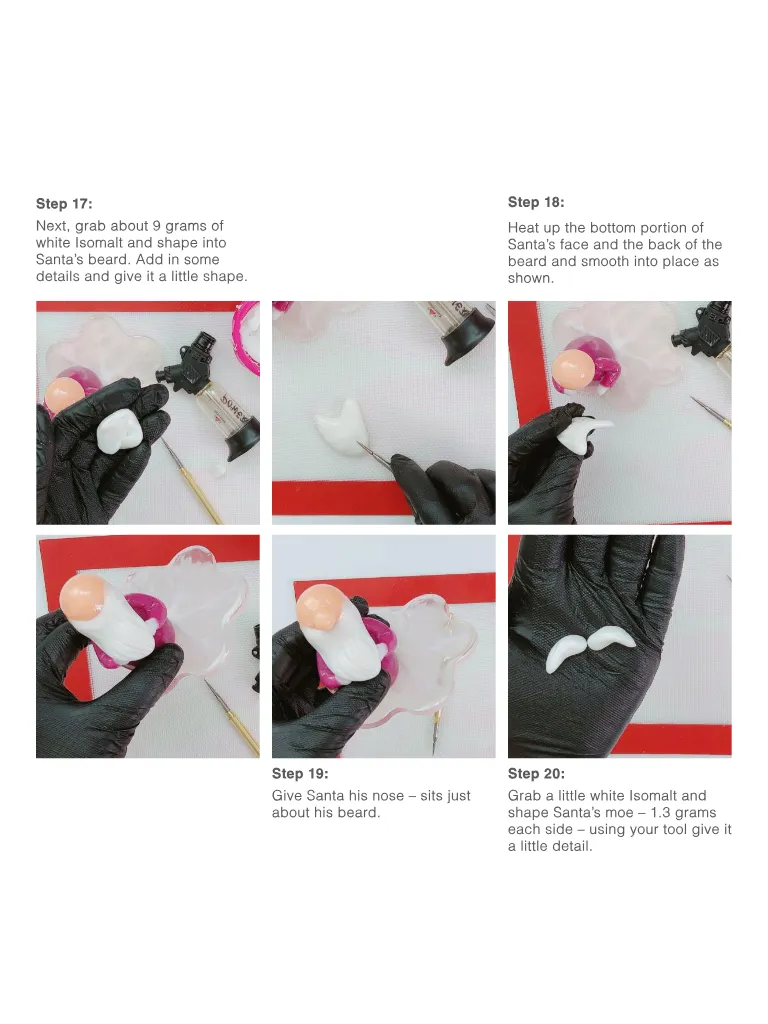
Step 17 : Next , grab about 9 grams of white Isomalt and shape into Santa ’ s beard . Add in some details and give it a little shape . Step 18 : Heat up the bottom portion of Santa ’ s face and the back of the beard and smooth into place as shown . Step 19 : Give Santa his nose – sits just about his beard . Step 20 : Grab a little white Isomalt and shape Santa ’ s moe – 1.3 grams each side – using your tool give it a little detail .
Page 22 text
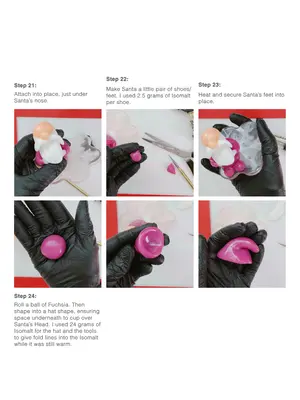
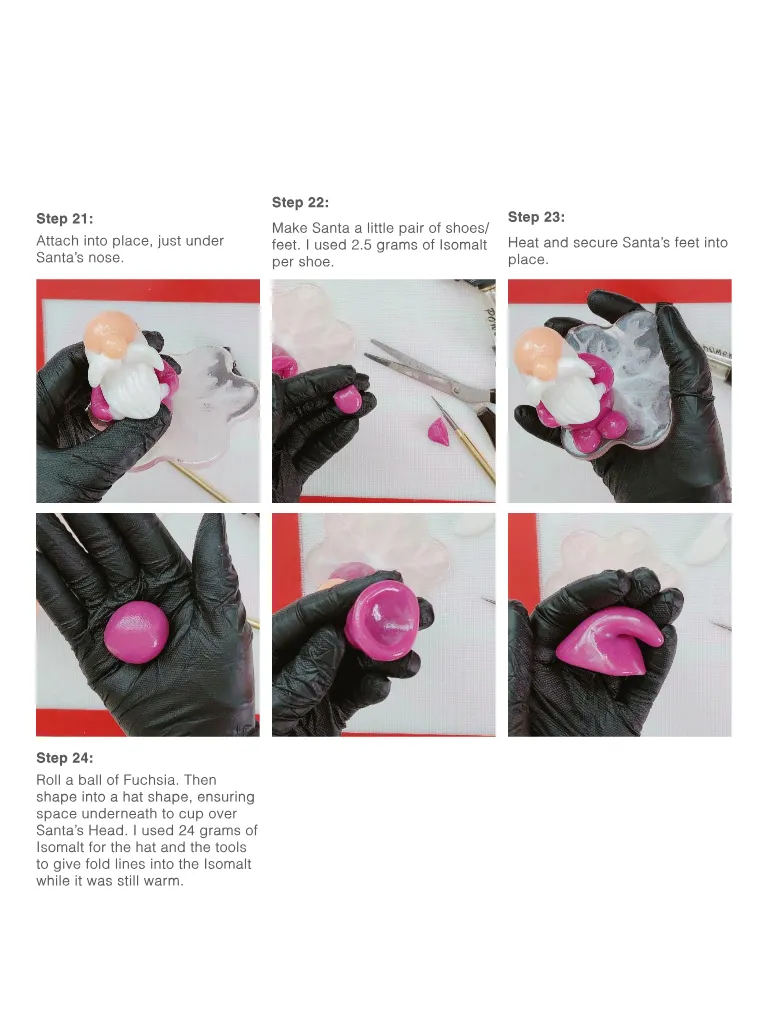
Step 21 : Attach into place , just under Santa ’ s nose . Step 22 : Make Santa a little pair of shoes / feet . I used 2.5 grams of Isomalt per shoe . Step 23 : Heat and secure Santa ’ s feet into place . Step 24 : Roll a ball of Fuchsia . Then shape into a hat shape , ensuring space underneath to cup over Santa ’ s Head . I used 24 grams of Isomalt for the hat and the tools to give fold lines into the Isomalt while it was still warm .
Page 23 text
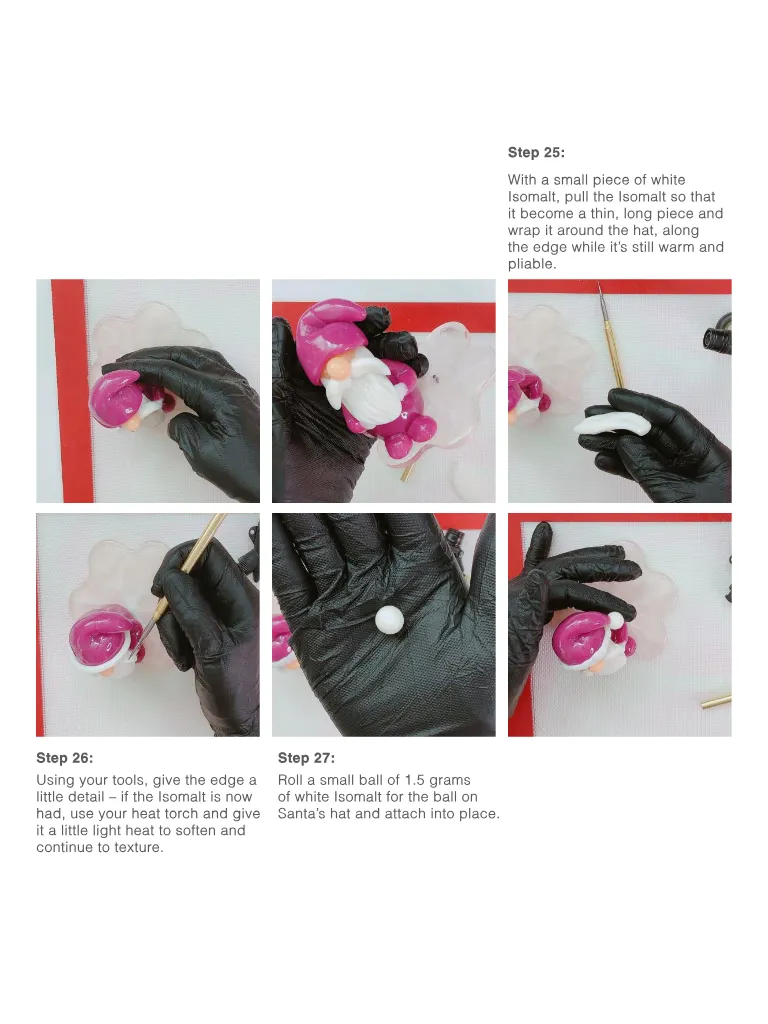
Step 25 : With a small piece of white Isomalt , pull the Isomalt so that it become a thin , long piece and wrap it around the hat , along the edge while it ’ s still warm and pliable . Step 26 : Using your tools , give the edge a little detail – if the Isomalt is now had , use your heat torch and give it a little light heat to soften and continue to texture . Step 27 : Roll a small ball of 1.5 grams of white Isomalt for the ball on Santa ’ s hat and attach into place .
Page 24 text
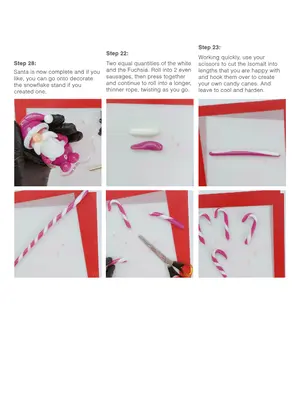
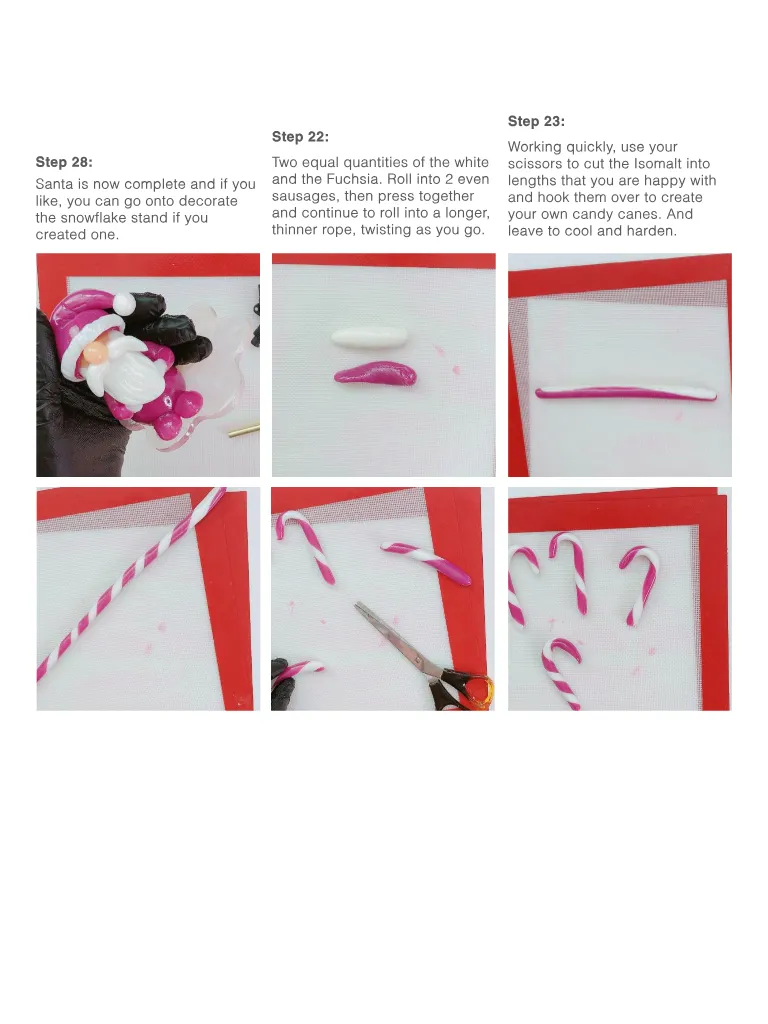
Step 28 : Santa is now complete and if you like , you can go onto decorate the snowflake stand if you created one . Step 22 : Two equal quantities of the white and the Fuchsia . Roll into 2 even sausages , then press together and continue to roll into a longer , thinner rope , twisting as you go . Step 23 : Working quickly , use your scissors to cut the Isomalt into lengths that you are happy with and hook them over to create your own candy canes . And leave to cool and harden .
Page 25 text
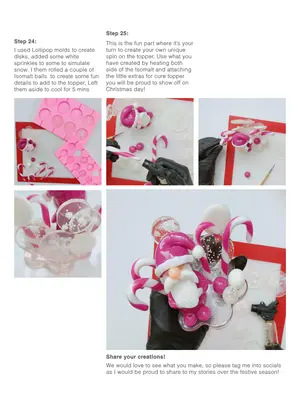
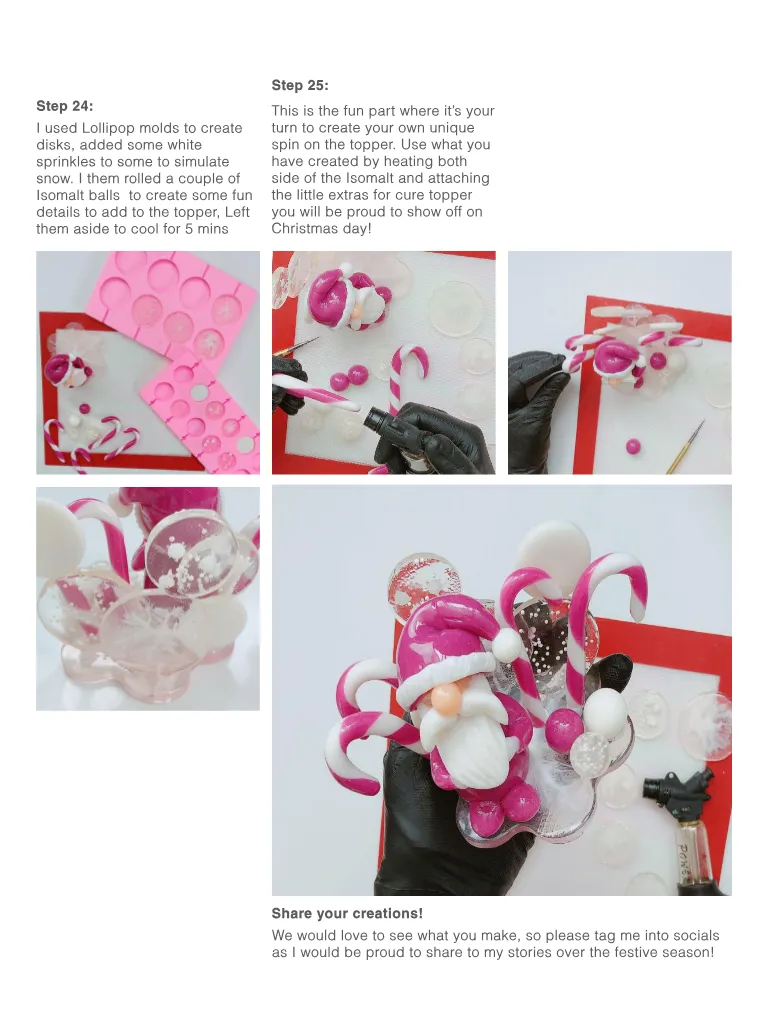
Step 24 : I used Lollipop molds to create disks , added some white sprinkles to some to simulate snow . I them rolled a couple of Isomalt balls to create some fun details to add to the topper , Left them aside to cool for 5 mins Step 25 : This is the fun part where it ’ s your turn to create your own unique spin on the topper . Use what you have created by heating both side of the Isomalt and attaching the little extras for cure topper you will be proud to show off on Christmas day ! Share your creations ! We would love to see what you make , so please tag me into socials as I would be proud to share to my stories over the festive season !


Page 26 text
CHRISTMAS COLLECTION IN STORE OR ONLINE OUT NOW CASTLE HILL CAMPBELLTOWN NUNAWADING Unit 31 / 9 Hoyle Avenue Castle Hill NSW 2154 02 9899 3065 Mon-Fri : 9am - 5pm Sat : 9am - 3pm UNIT 2 / 5 Harbord Road Woodbine NSW 2560 02 4626 5526 Mon-Fri : 9am - 5pm Sat : 9am - 3pm 4 Lindsay Avenue Nunawading VIC 03 9894 1981 Mon-Fri : 9am - 5pm Sat : 9am - 3pm cakedecoratingcentral . com . au
Page 27 text
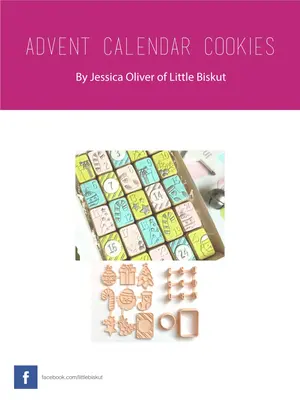
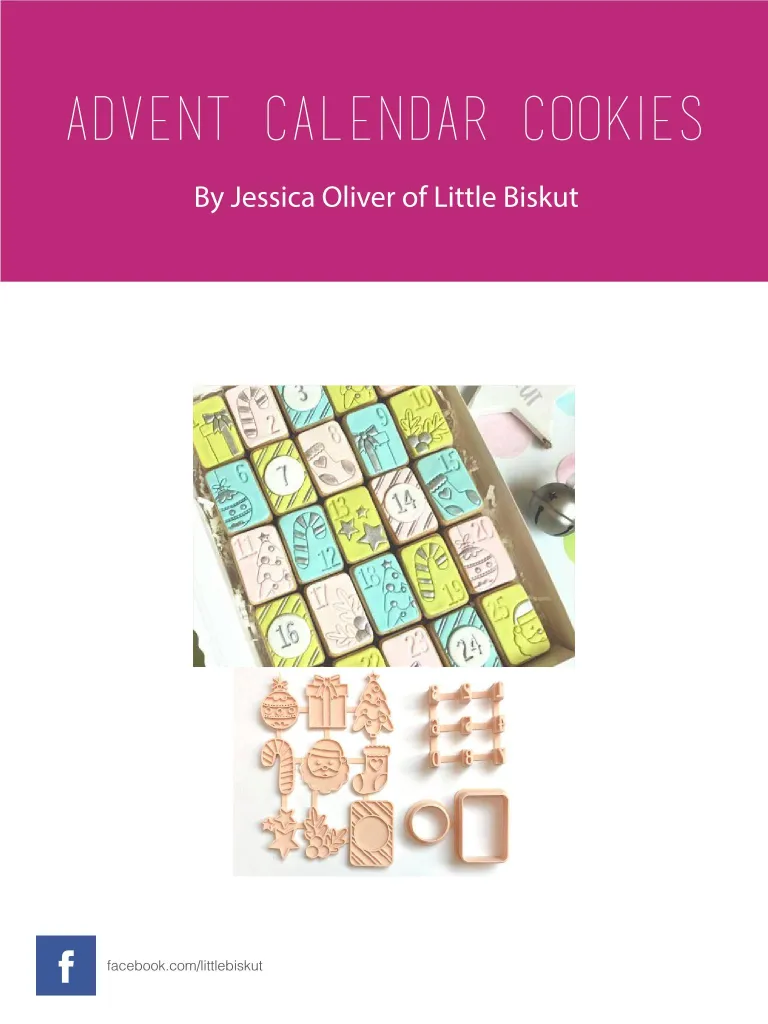
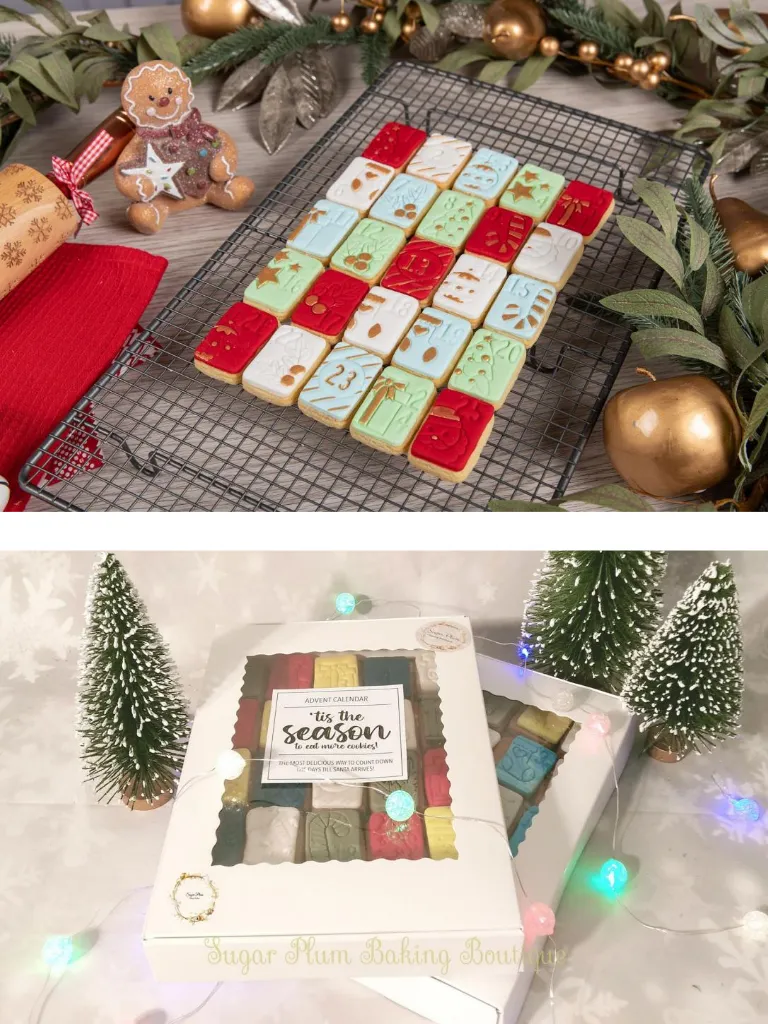
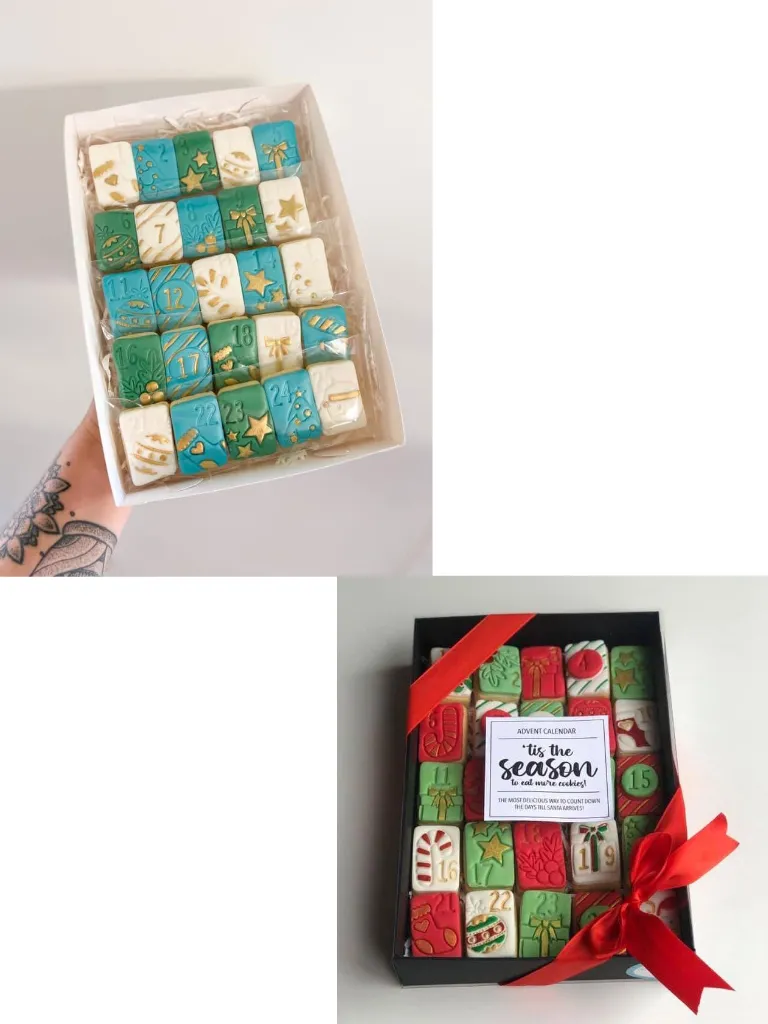
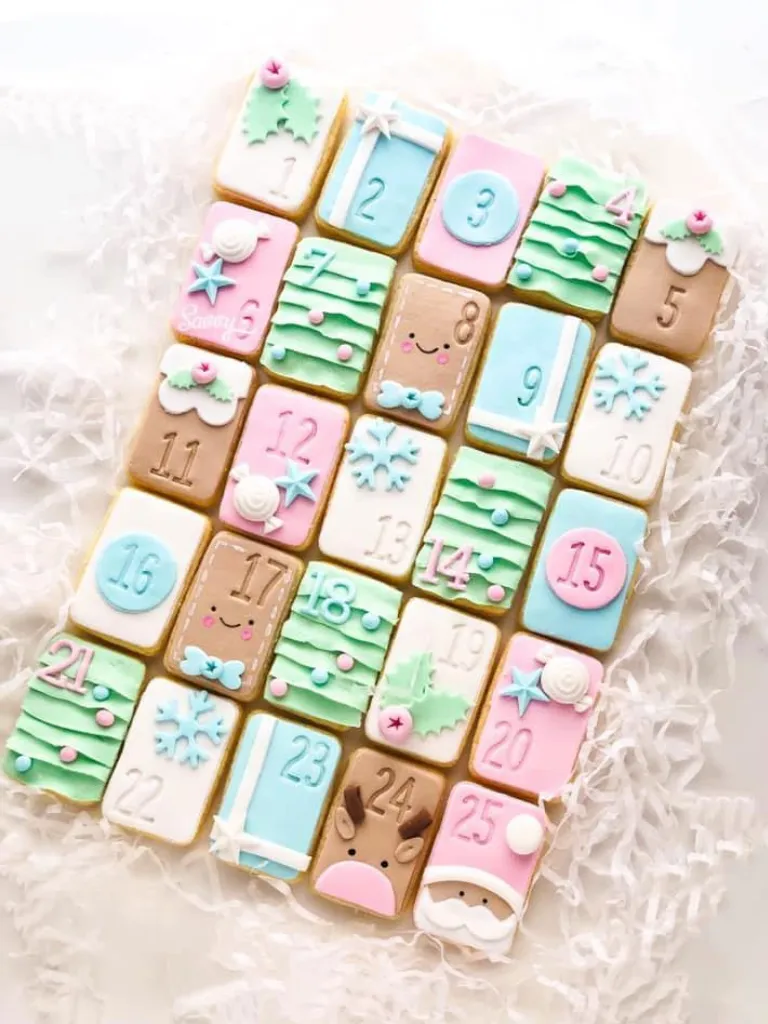
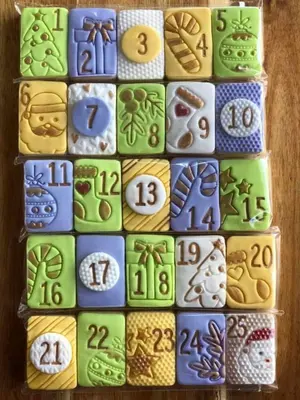
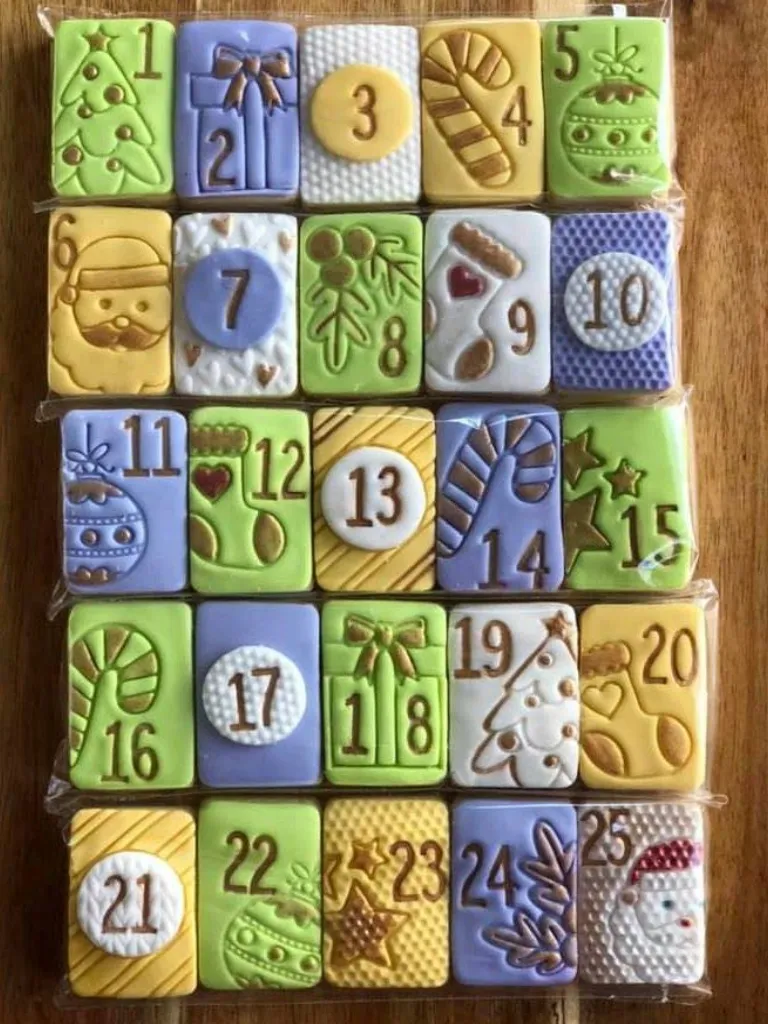
ADVENT CALENDAR COOKIES By Jessica Oliver of Little Biskut f facebook . com / littlebiskut
Page 28 text
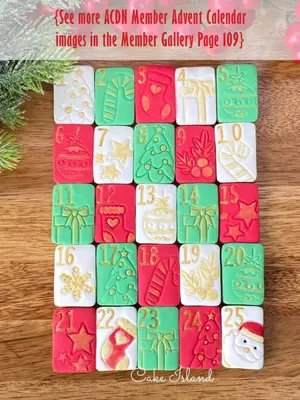
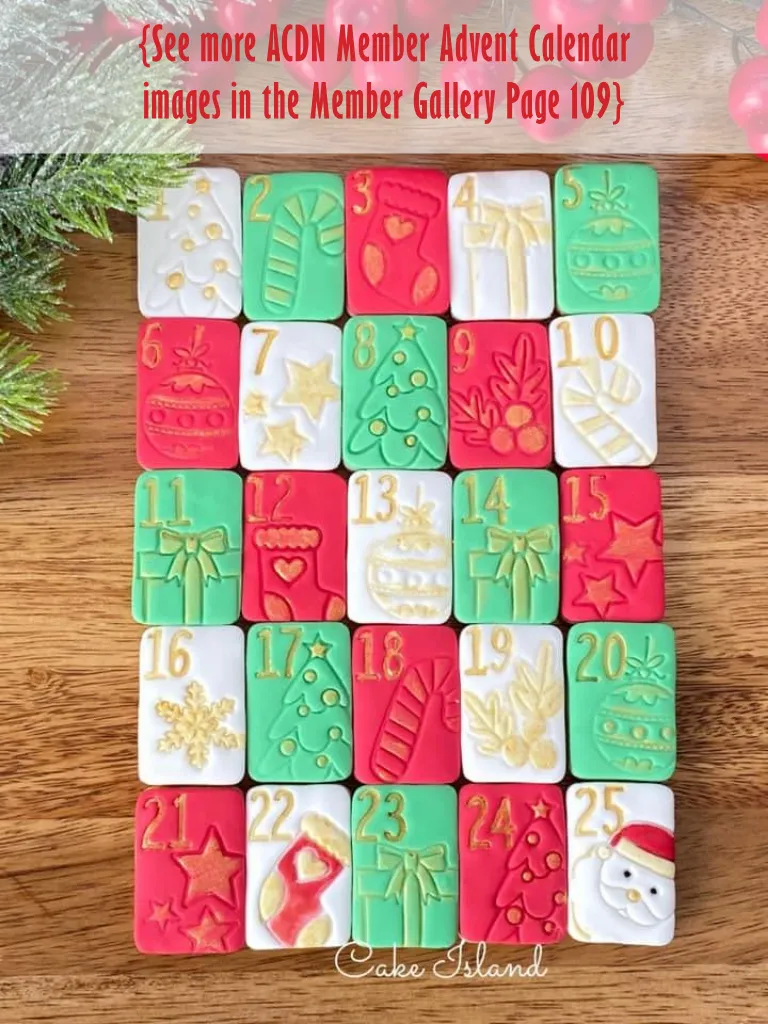
{ See more ACDN Member Advent Calendar images in the Member Gallery Page 109 }


Page 31 text
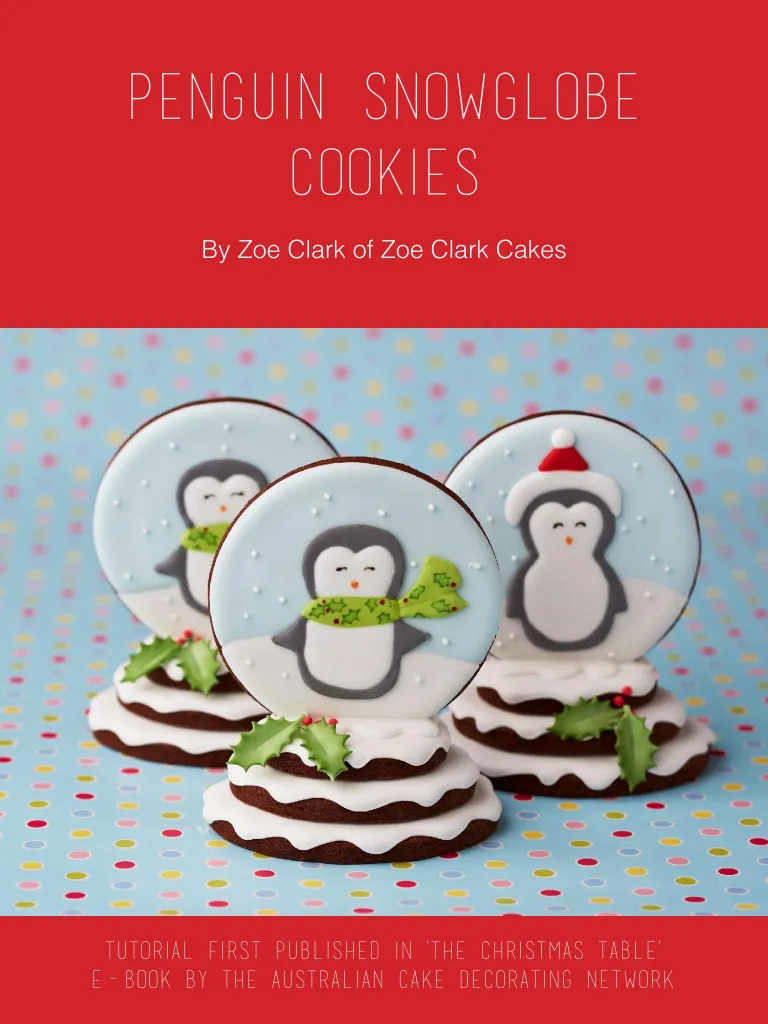
PENGUIN SNOWGLOBE COOKIES By Zoe Clark of Zoe Clark Cakes Tutorial first published in ' the Christmas Table ' e-book by the Australian Cake Decorating Network
Page 32 text
Chocolate Cookie Dough T he cookie dough can be made a few days ahead or stored in the freezer until ready to use . The baked cookies will keep for up to 1 month . Ingredients : 250g ( 9oz ) unsalted butter 250g ( 9oz ) caster ( superfine ) sugar 1 – 2 medium eggs 1 tsp ( 5ml ) vanilla extract 425g ( 1lb 2oz ) plain ( all-purpose ) flour , plus extra for dusting 75g cocoa powder Directions 1 . In a large electric mixer , beat the butter and sugar together until creamy and quite fluffy . 2 . Add the eggs and vanilla and mix until they are well combined . 3 . Sift the flour and cocoa together and add to the bowl of the mixer and mix until all the ingredients just come together . You may need to do this in two stages – don ’ t overmix . 4 . Tip the dough into a container lined with cling film ( plastic wrap ) and press down firmly . Cover with cling film and refrigerate for at least 30 minutes . 5 . On a work surface lightly dusted with flour , roll out the cookie dough to about 4mm ( 3 / 16in ) thick . Sprinkle a little extra flour on top of the dough as you roll to prevent it from sticking to the rolling pin . 6 . Cut out your shapes either with cutters or using templates and a sharp knife . Place on baking trays lined with greaseproof or baking paper and return to the fridge to rest for at least 30 minutes . Meanwhile , preheat your oven to 180 ° C / 350 ° F / Gas Mark 4 . 7 . Bake the cookies for about 10 minutes , depending on their size , or until they are golden brown . Leave them to cool completely before storing them in an airtight container until you are ready to decorate them .
Page 33 text
Royal Icing T ips for making the perfect royal icing , both for soft-peak royal icing and run-out icing . Ingredients : 2 medium egg whites or 15g ( ½oz ) dried egg albumen powder mixed with 75ml ( 2½fl oz ) water 500g ( 1lb 2oz ) icing ( confectioners ’) sugar Directions If using dried egg powder , soak it in the water for at least 30 minutes in advance , but ideally overnight in the fridge . Sift the icing sugar into the bowl of a large electric mixer and add the egg whites or strained reconstituted egg mixture . Mix together on a low speed for about 3 – 4 minutes until the icing has reached a stiff-peak consistency , which is what you need for sticking on decorations and gluing cakes together . Store the icing in an airtight container covered with a damp , clean cloth to prevent it from drying out . Soft-peak royal icing To pipe decorations easily , you may need to add a tiny amount of water to your royal icing to soften it slightly . Run-out icing Royal icing is thinned down with water to ‘ flood ’ cookies ( see Royal-Iced Cookies ). Test for consistency by lifting your spoon and letting the icing drip back into the bowl – it should remain on the surface for 5 seconds before disappearing . If it ’ s too runny it will run over the outlines and sides of the cookies , but if it ’ s too stiff it won ’ t spread very well . Store the icing in an airtight container covered with a damp , clean cloth to prevent it from drying out .
Page 34 text
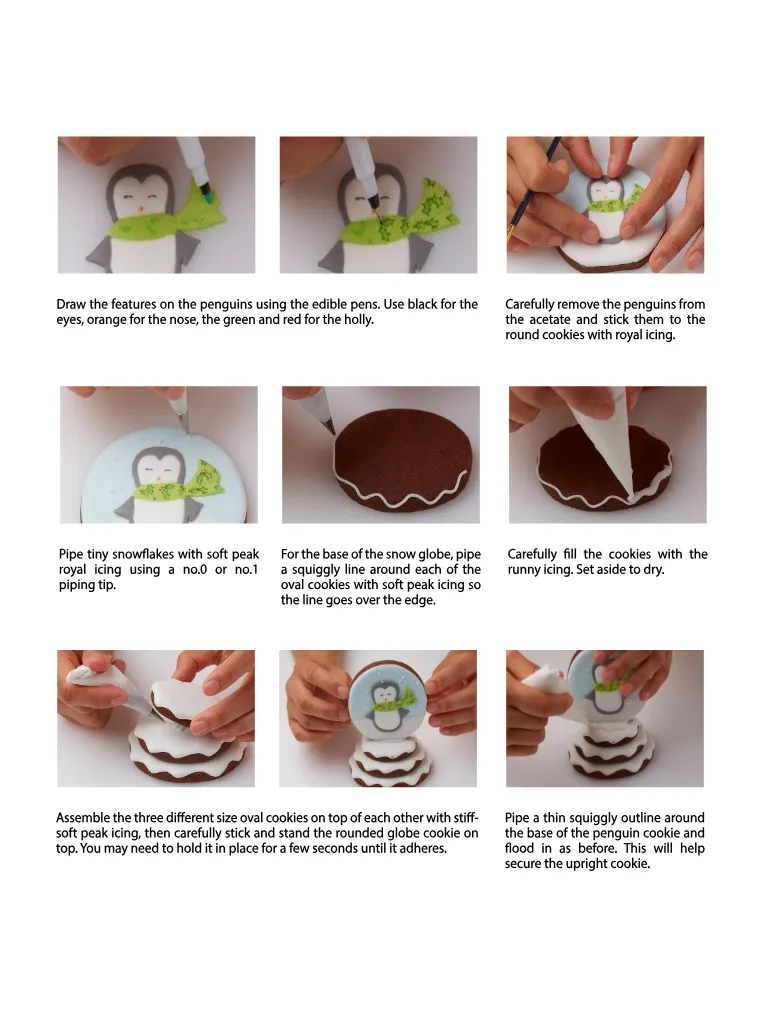
8.5cm round cookie cutter ( you will need to cut a thin piece off one side so they sit flat ) 5.5cm , 7cm and 8.5cm oval shaped cookies ( see recipe ) Royal icing ( see recipe ) Food paste colours : baby blue , mint green , red , black Edible pens : black , orange , light and dark green , red Green flower / gum paste Edible green dust Small and large piping bags Four no . 0 or no . 1 piping tips and two no . 1.5 or no . 2 Acetate Penguin Template Fine paintbrush Holly cutter 1 . First prepare the icing for the run-out penguins . You will need four small bags with no . 0 or no . 1 piping tips , one with white icing , one , dark grey ( coloured with black ), one green and one red . The consistency for these should be of soft peak . Whilst making each colour , make enough to water down for the ‘ flooding ’ icing and put the ‘ flooding ’ icing into the larger bags . There is no need for a piping tip for these . You will need : 8.5cm round cookie cutter ( you will need to cut a thin piece off one side so they sit flat ) 5.5cm , 7cm and 8.5cm oval shaped cookies ( see recipe ) Royal icing ( see recipe ) Food paste colours : baby blue , mint green , red , black Edible pens : black , orange , light and dark green , red Green flower / gum paste Edible green dust Small and large piping bags Four no . 0 or no . 1 piping tips and two no . 1.5 or no . 2 Acetate Penguin Template Fine paintbrush Holly cutter 1 . First prepare the icing for the run-out penguins . You will need four small bags with no . 0 or no . 1 piping tips , one with white icing , one , dark grey ( coloured with black ), one green and one red . The consistency for these should be of soft peak . Whilst making each colour , make enough to water down for the ‘ flooding ’ icing and put the ‘ flooding ’ icing into the larger bags . There is no need for a piping tip for these .
Page 35 text
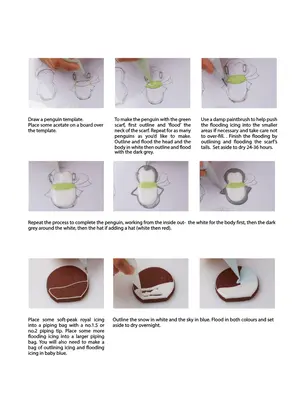
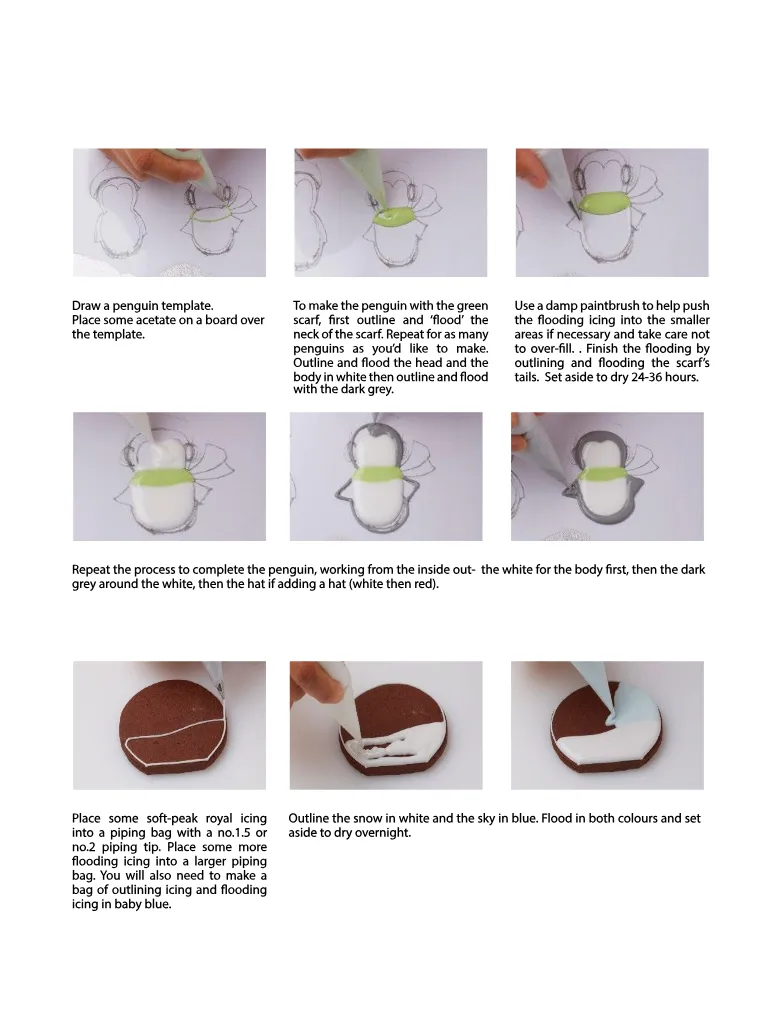
Draw a penguin template . Place some acetate on a board over the template . To make the penguin with the green scarf , first outline and ‘ flood ’ the neck of the scarf . Repeat for as many penguins as you ’ d like to make . Outline and flood the head and the body in white then outline and flood with the dark grey . Use a damp paintbrush to help push the flooding icing into the smaller areas if necessary and take care not to over-fill . . Finish the flooding by outlining and flooding the scarf ’ s tails . Set aside to dry 24-36 hours . Repeat the process to complete the penguin , working from the inside out- the white for the body first , then the dark grey around the white , then the hat if adding a hat ( white then red ). Place some soft-peak royal icing into a piping bag with a no . 1.5 or no . 2 piping tip . Place some more flooding icing into a larger piping bag . You will also need to make a bag of outlining icing and flooding icing in baby blue . Outline the snow in white and the sky in blue . Flood in both colours and set aside to dry overnight .
Page 36 text
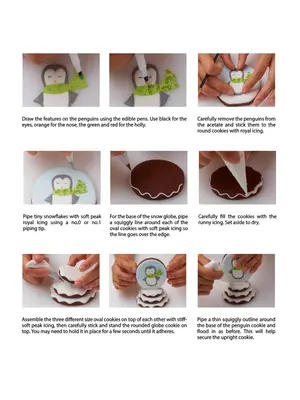
Draw the features on the penguins using the edible pens . Use black for the eyes , orange for the nose , the green and red for the holly . Carefully remove the penguins from the acetate and stick them to the round cookies with royal icing . Pipe tiny snowflakes with soft peak royal icing using a no . 0 or no . 1 piping tip . For the base of the snow globe , pipe a squiggly line around each of the oval cookies with soft peak icing so the line goes over the edge . Carefully fill the cookies with the runny icing . Set aside to dry . Assemble the three different size oval cookies on top of each other with stiffsoft peak icing , then carefully stick and stand the rounded globe cookie on top . You may need to hold it in place for a few seconds until it adheres . Pipe a thin squiggly outline around the base of the penguin cookie and flood in as before . This will help secure the upright cookie .
Page 37 text
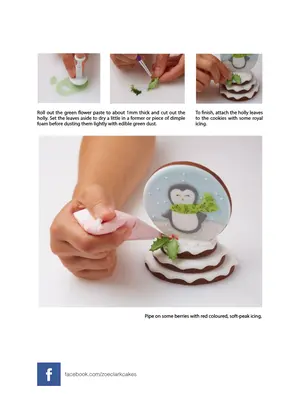
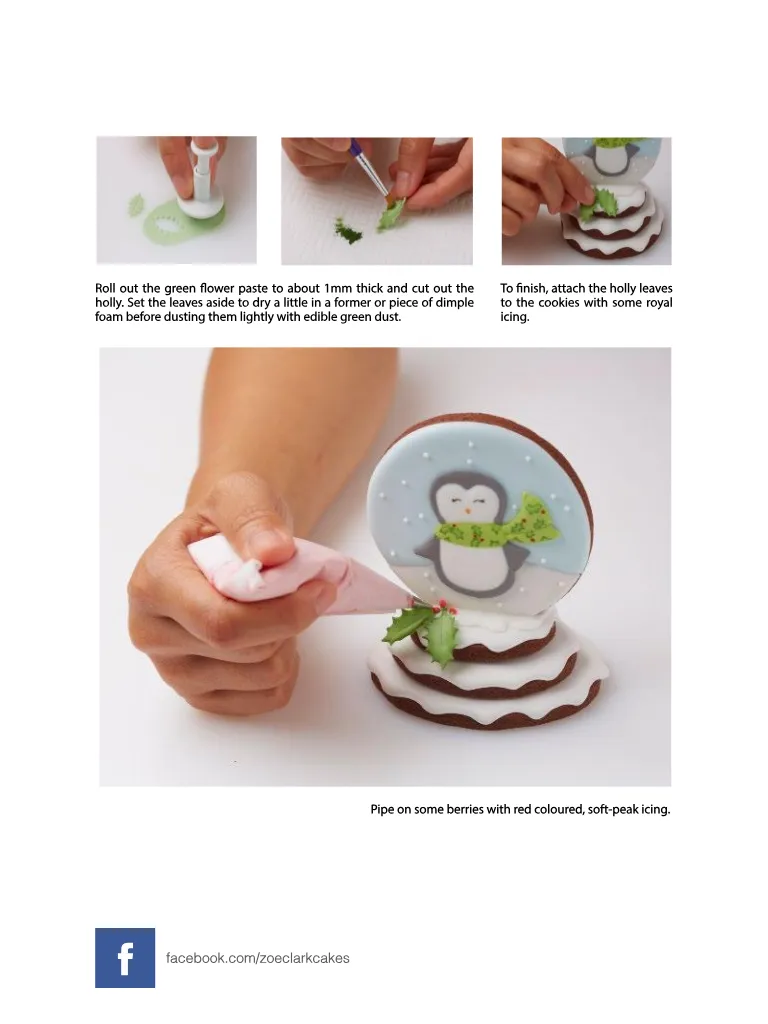
Roll out the green flower paste to about 1mm thick and cut out the holly . Set the leaves aside to dry a little in a former or piece of dimple foam before dusting them lightly with edible green dust . To finish , attach the holly leaves to the cookies with some royal icing . Pipe on some berries with red coloured , soft-peak icing . f facebook . com / zoeclarkcakes


Page 38 text
C H R I S T M A S A T C A K E R S W A R E H O U S E S H O P H E R E


Page 40 text
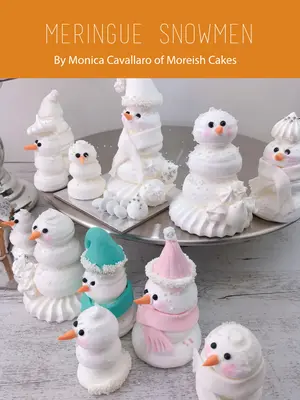
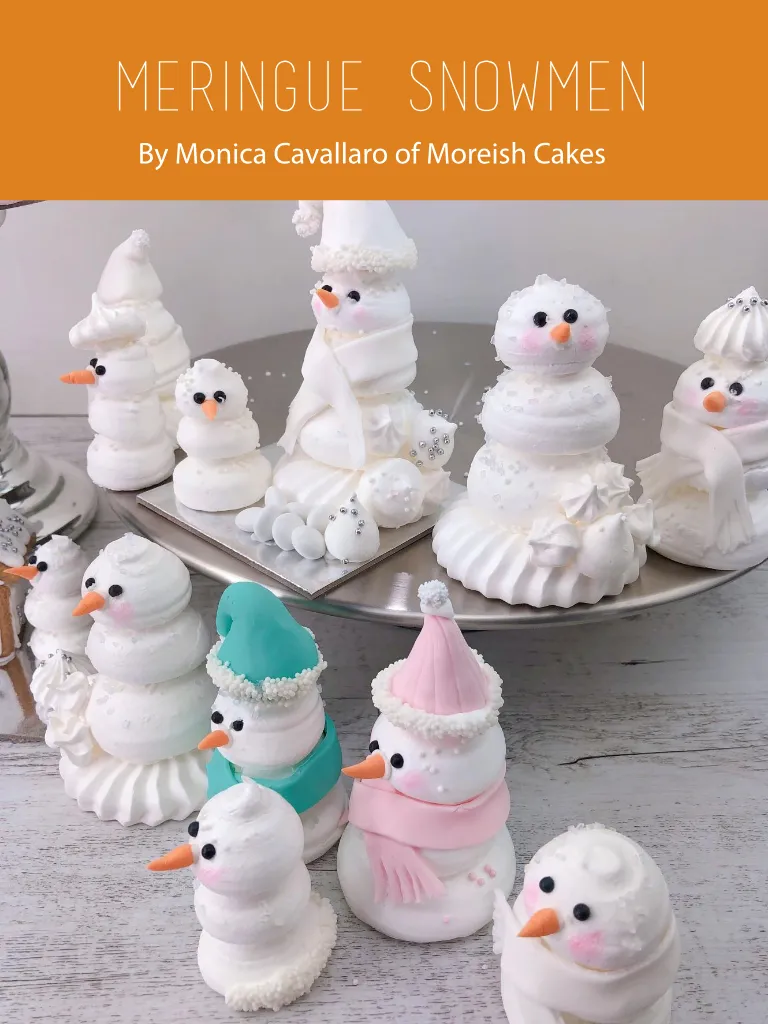
MERINGUE SNOWMEN By Monica Cavallaro of Moreish Cakes
Page 42 text
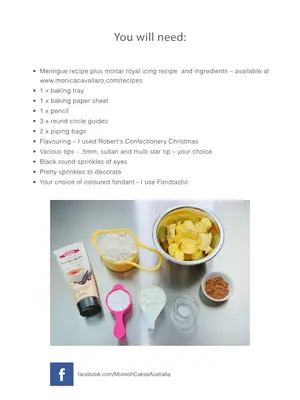
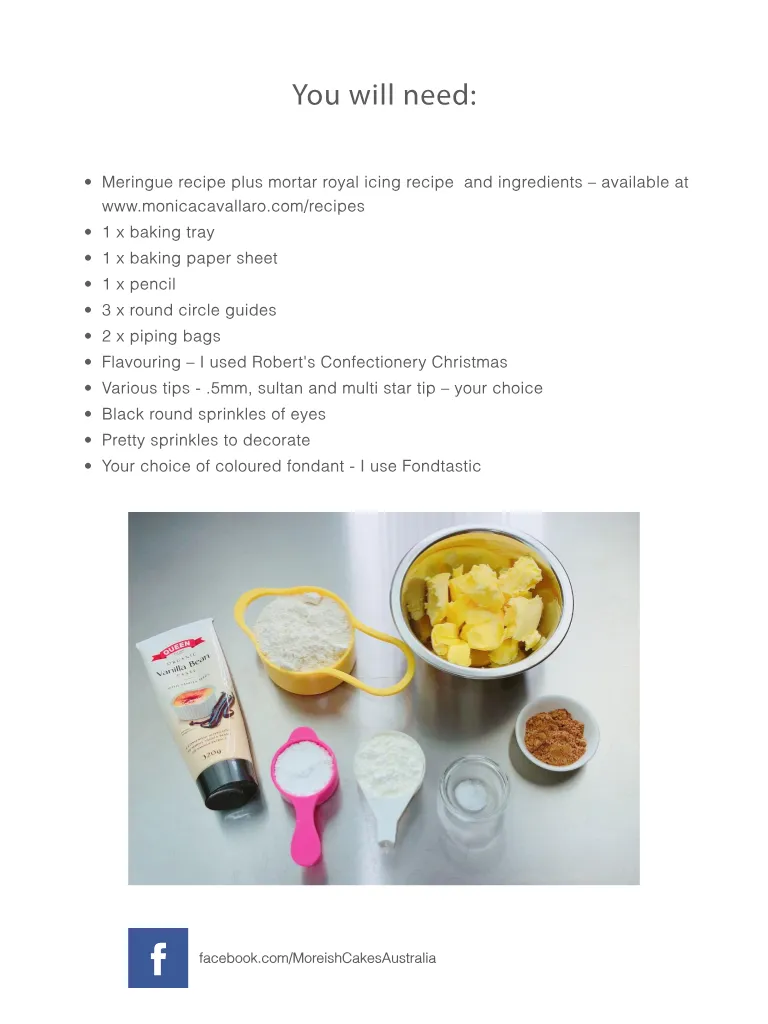
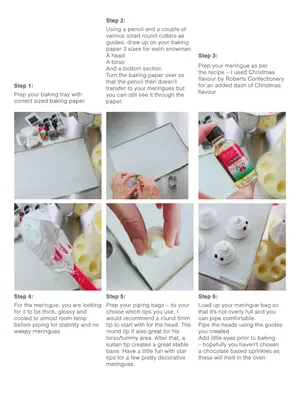
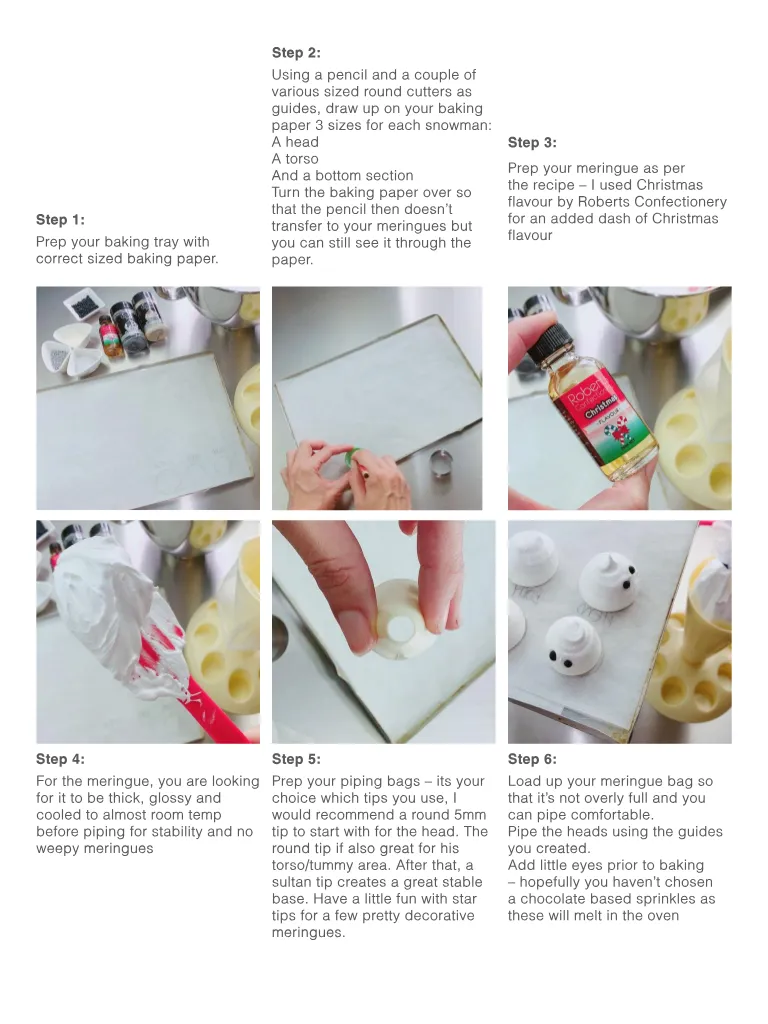
Step 1 : Prep your baking tray with correct sized baking paper . Step 2 : Using a pencil and a couple of various sized round cutters as guides , draw up on your baking paper 3 sizes for each snowman : A head A torso And a bottom section Turn the baking paper over so that the pencil then doesn ’ t transfer to your meringues but you can still see it through the paper . Step 3 : Prep your meringue as per the recipe – I used Christmas flavour by Roberts Confectionery for an added dash of Christmas flavour Step 4 : Step 5 : Step 6 : For the meringue , you are looking for it to be thick , glossy and cooled to almost room temp before piping for stability and no weepy meringues Prep your piping bags – its your choice which tips you use , I would recommend a round 5mm tip to start with for the head . The round tip if also great for his torso / tummy area . After that , a sultan tip creates a great stable base . Have a little fun with star tips for a few pretty decorative meringues . Load up your meringue bag so that it ’ s not overly full and you can pipe comfortable . Pipe the heads using the guides you created . Add little eyes prior to baking – hopefully you haven ’ t chosen a chocolate based sprinkles as these will melt in the oven
Page 43 text
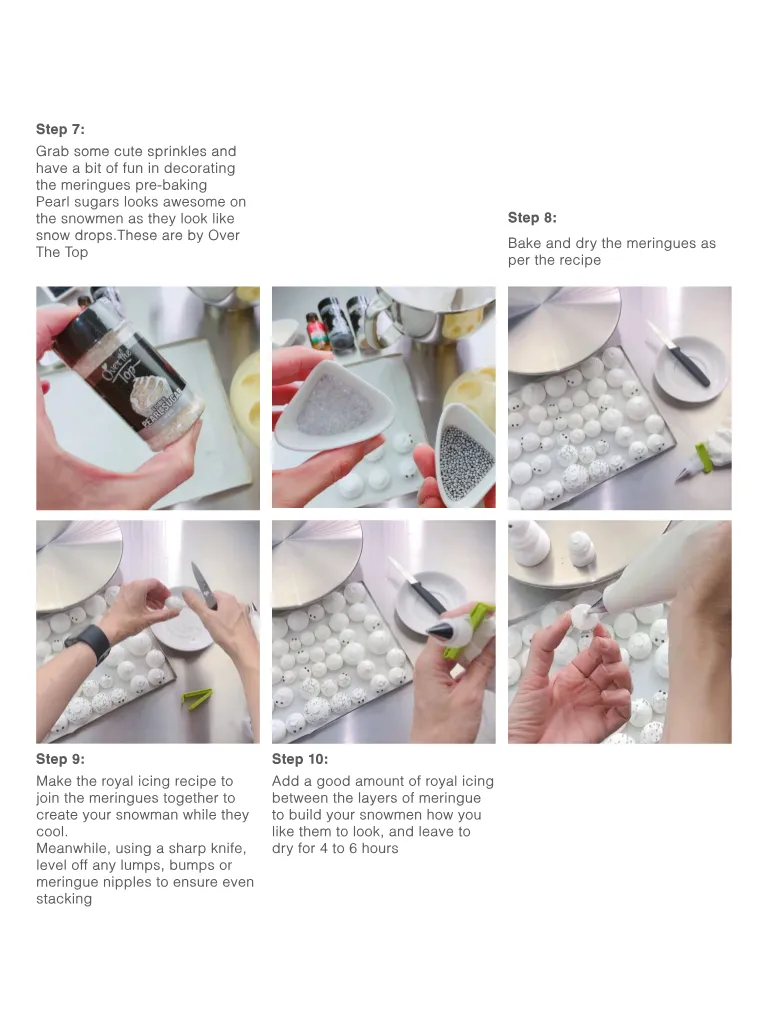
Step 7 : Grab some cute sprinkles and have a bit of fun in decorating the meringues pre-baking Pearl sugars looks awesome on the snowmen as they look like snow drops . These are by Over The Top Step 8 : Bake and dry the meringues as per the recipe Step 9 : Step 10 : Make the royal icing recipe to join the meringues together to create your snowman while they cool . Meanwhile , using a sharp knife , level off any lumps , bumps or meringue nipples to ensure even stacking Add a good amount of royal icing between the layers of meringue to build your snowmen how you like them to look , and leave to dry for 4 to 6 hours
Page 44 text
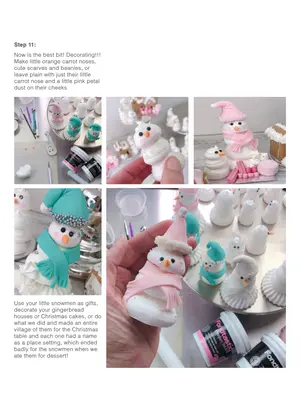
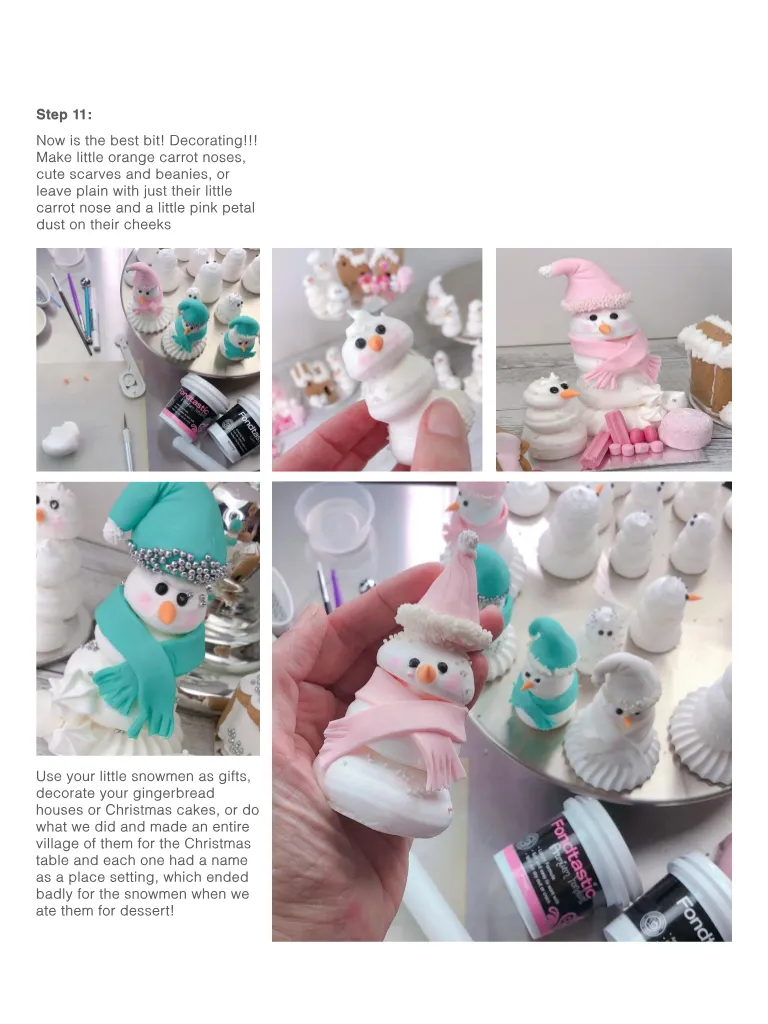
Step 11 : Now is the best bit ! Decorating !!! Make little orange carrot noses , cute scarves and beanies , or leave plain with just their little carrot nose and a little pink petal dust on their cheeks Use your little snowmen as gifts , decorate your gingerbread houses or Christmas cakes , or do what we did and made an entire village of them for the Christmas table and each one had a name as a place setting , which ended badly for the snowmen when we ate them for dessert !


Page 46 text
Available on Amazon USA & Amazon Australia Available on Amazon USA & Amazon Australia Up-style your kitchen counter with Freyian premium canisters ! With Freyian premium food storage canisters , bulk ingredients look & taste incredible , time and again . Store anything in your kitchen , not just baking goods ! Freyian canisters are : » Made from toughened borosilicate glass » Airtight , with silicone seal lids » 3 sizes in 1x set » Lead-free & BPA-free PURCHASE TODAY AT WWW . FREYIAN . COM / CAKE


Page 47 text
ACDN Members save 7.5 % with Berry Fresh See discounts page at www . acdn . me / discounts Quality freeze dried berry crumble and berry powders , made in Australia from 100 % Australian Berries . No preservatives , no additives – just natural Strawberries , Raspberries and Blueberries . Buy online for delivery to anywhere in Australia . www . berryfresh . com . au
Page 48 text
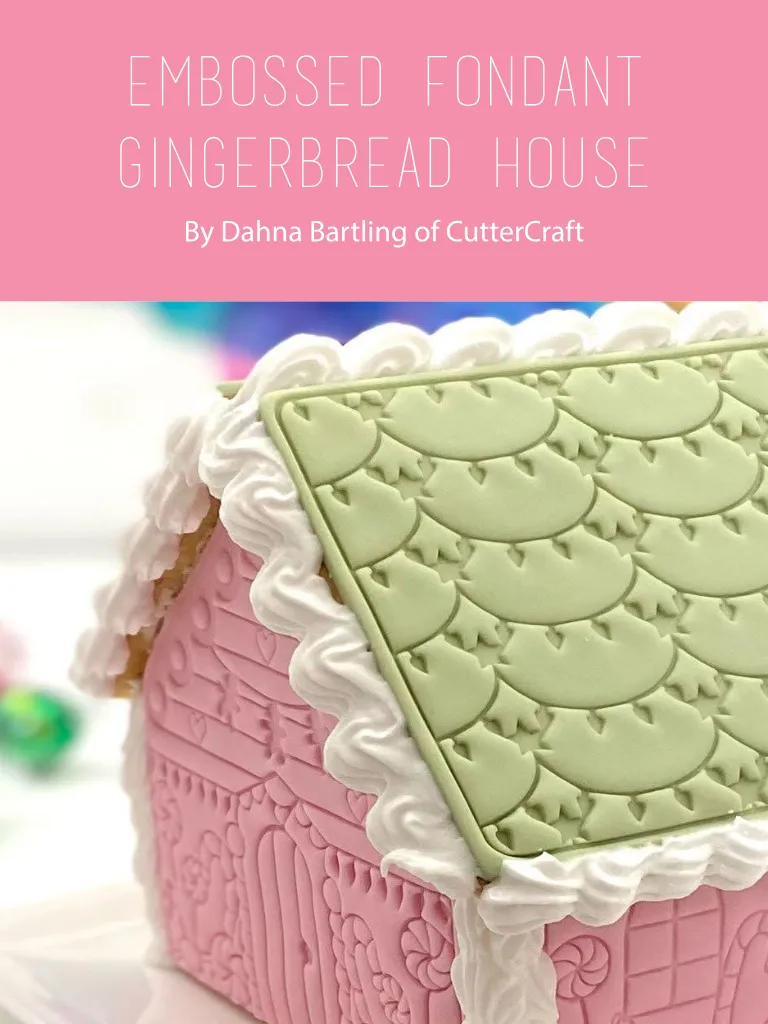
EMBOSSED FONDANT GINGERBREAD HOUSE By Dahna Bartling of CutterCraft
Page 49 text
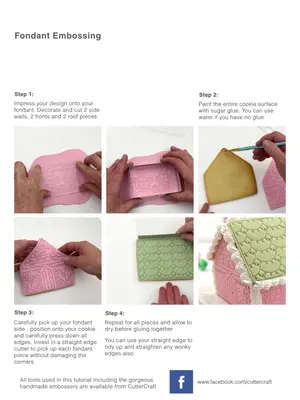
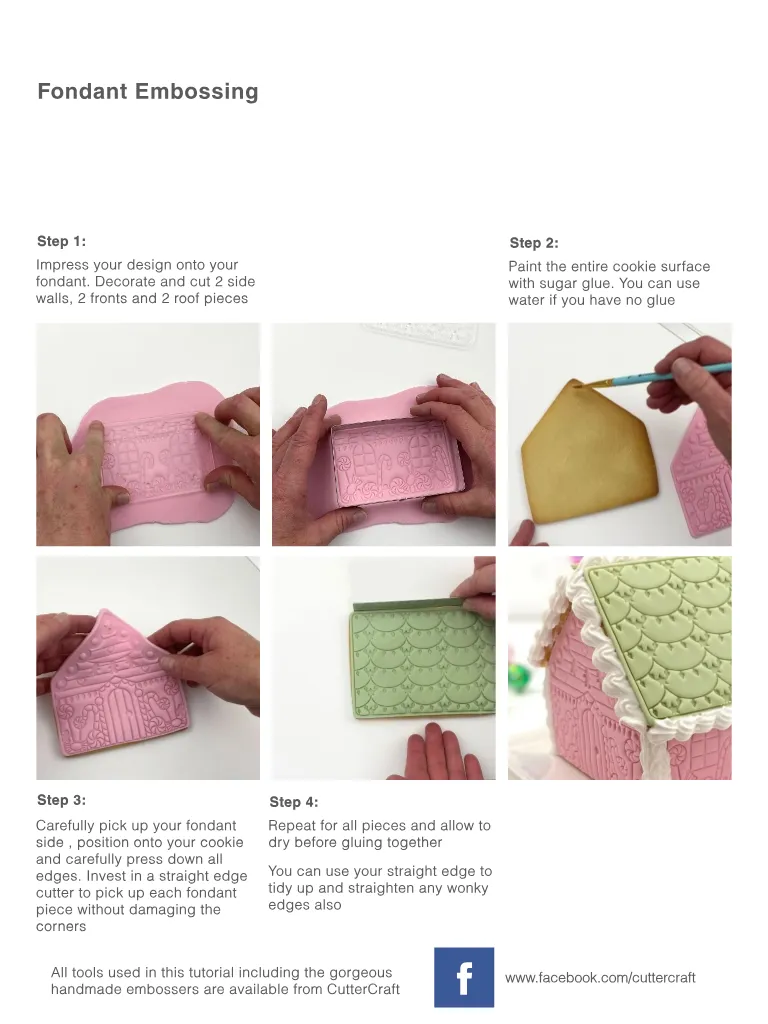
Fondant Embossing Step 1 : Impress your design onto your fondant . Decorate and cut 2 side walls , 2 fronts and 2 roof pieces Step 2 : Paint the entire cookie surface with sugar glue . You can use water if you have no glue Step 3 : Carefully pick up your fondant side , position onto your cookie and carefully press down all edges . Invest in a straight edge cutter to pick up each fondant piece without damaging the corners Step 4 : Repeat for all pieces and allow to dry before gluing together You can use your straight edge to tidy up and straighten any wonky edges also All tools used in this tutorial including the gorgeous f handmade embossers are available from CutterCraft www . facebook . com / cuttercraft
Page 50 text
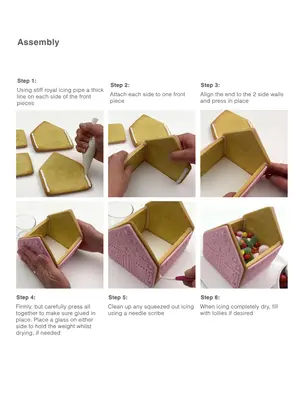
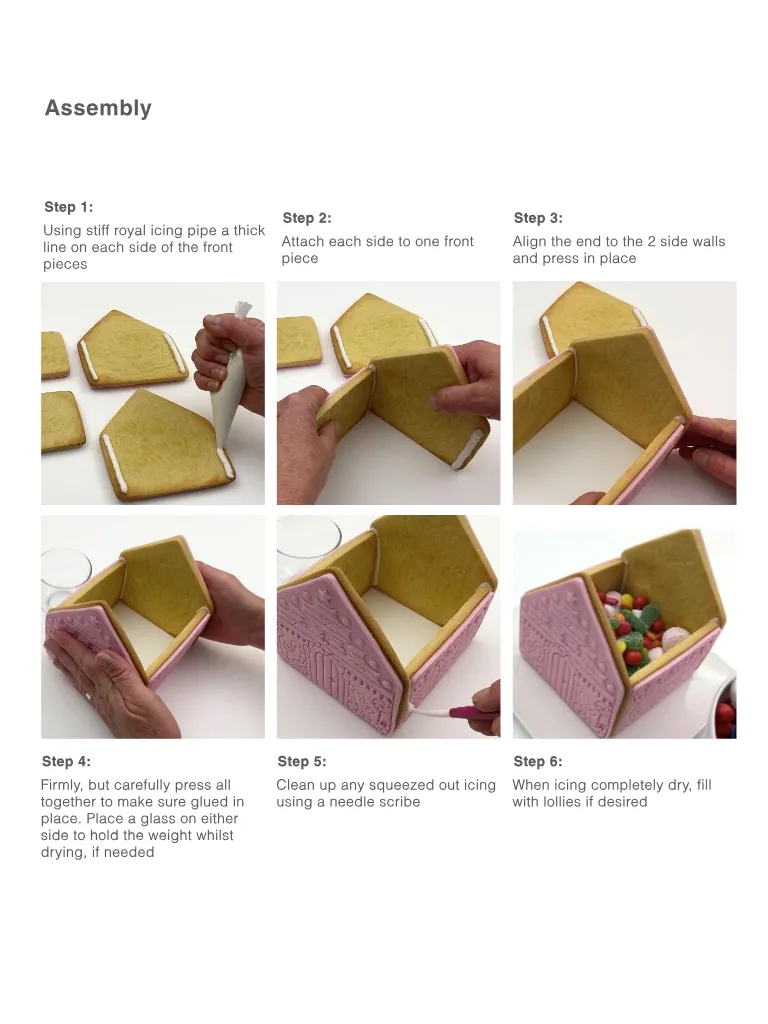
Assembly Step 1 : Using stiff royal icing pipe a thick line on each side of the front pieces Step 2 : Attach each side to one front piece Step 3 : Align the end to the 2 side walls and press in place Step 4 : Firmly , but carefully press all together to make sure glued in place . Place a glass on either side to hold the weight whilst drying , if needed Step 5 : Clean up any squeezed out icing using a needle scribe Step 6 : When icing completely dry , fill with lollies if desired
Page 51 text
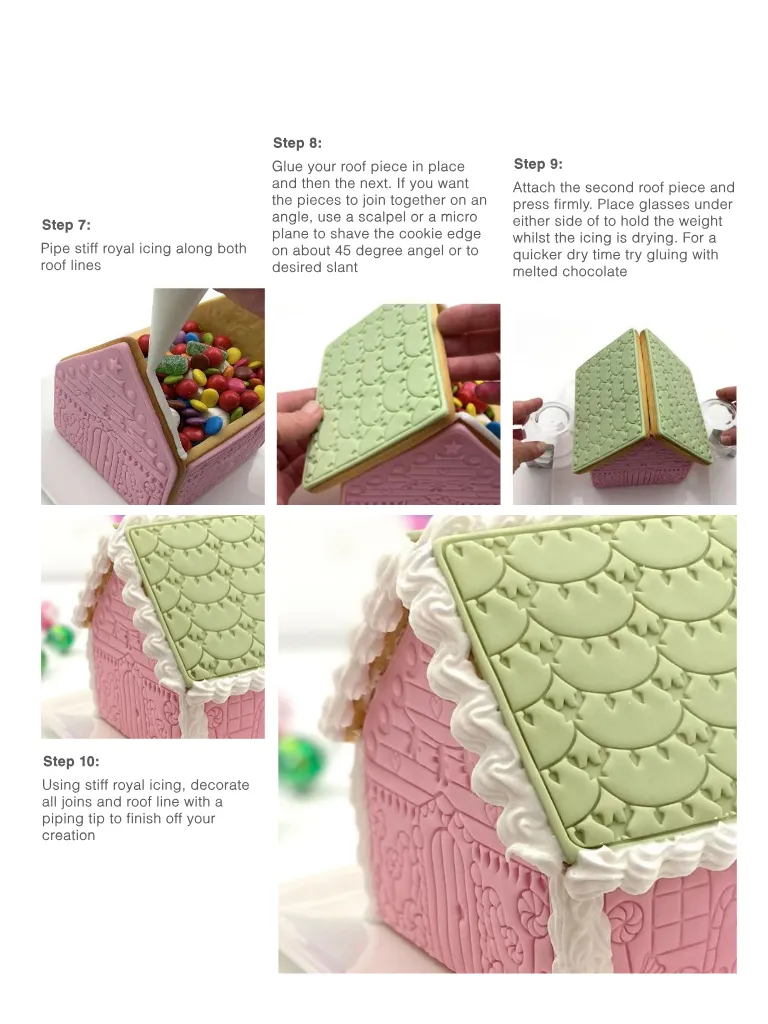
Step 7 : Pipe stiff royal icing along both roof lines Step 8 : Glue your roof piece in place and then the next . If you want the pieces to join together on an angle , use a scalpel or a micro plane to shave the cookie edge on about 45 degree angel or to desired slant Step 9 : Attach the second roof piece and press firmly . Place glasses under either side of to hold the weight whilst the icing is drying . For a quicker dry time try gluing with melted chocolate Step 10 : Using stiff royal icing , decorate all joins and roof line with a piping tip to finish off your creation


Page 53 text
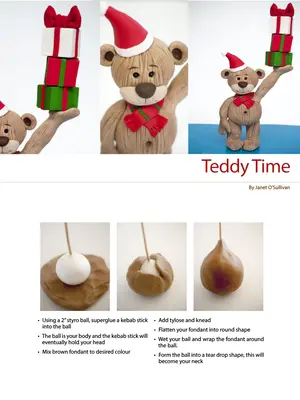
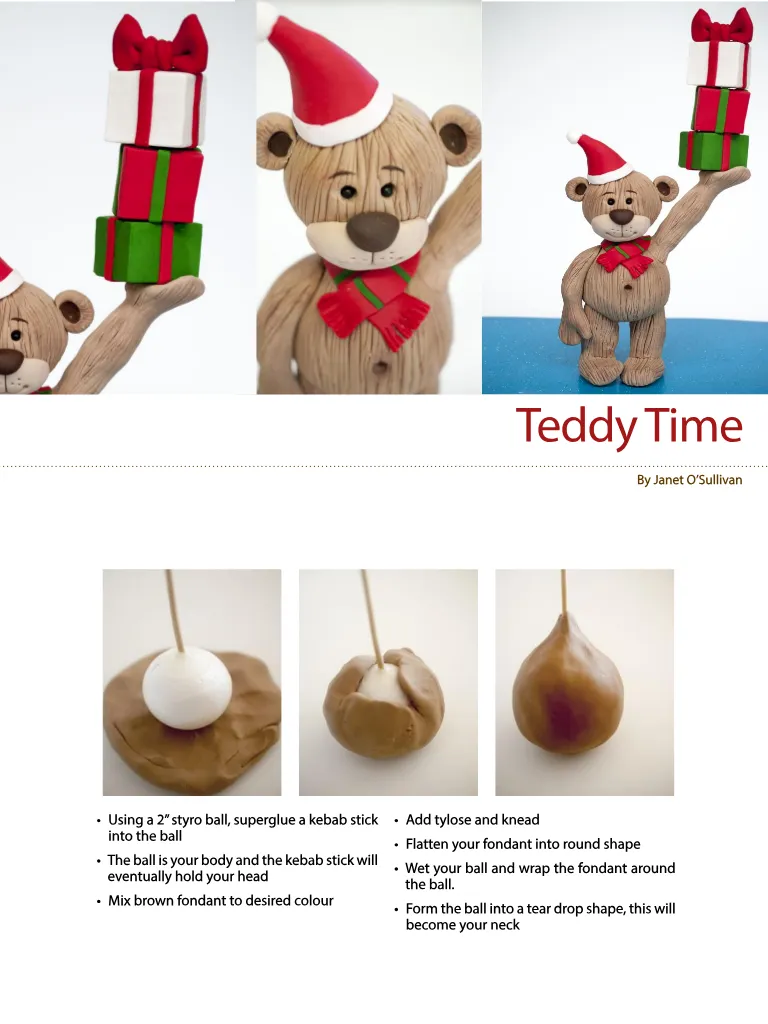
Teddy Time By Janet O ’ Sullivan • Using a 2 ” styro ball , superglue a kebab stick into the ball • The ball is your body and the kebab stick will eventually hold your head • Mix brown fondant to desired colour • Add tylose and knead • Flatten your fondant into round shape • Wet your ball and wrap the fondant around the ball . • Form the ball into a tear drop shape , this will become your neck
Page 54 text
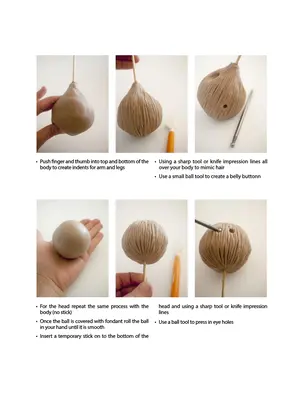
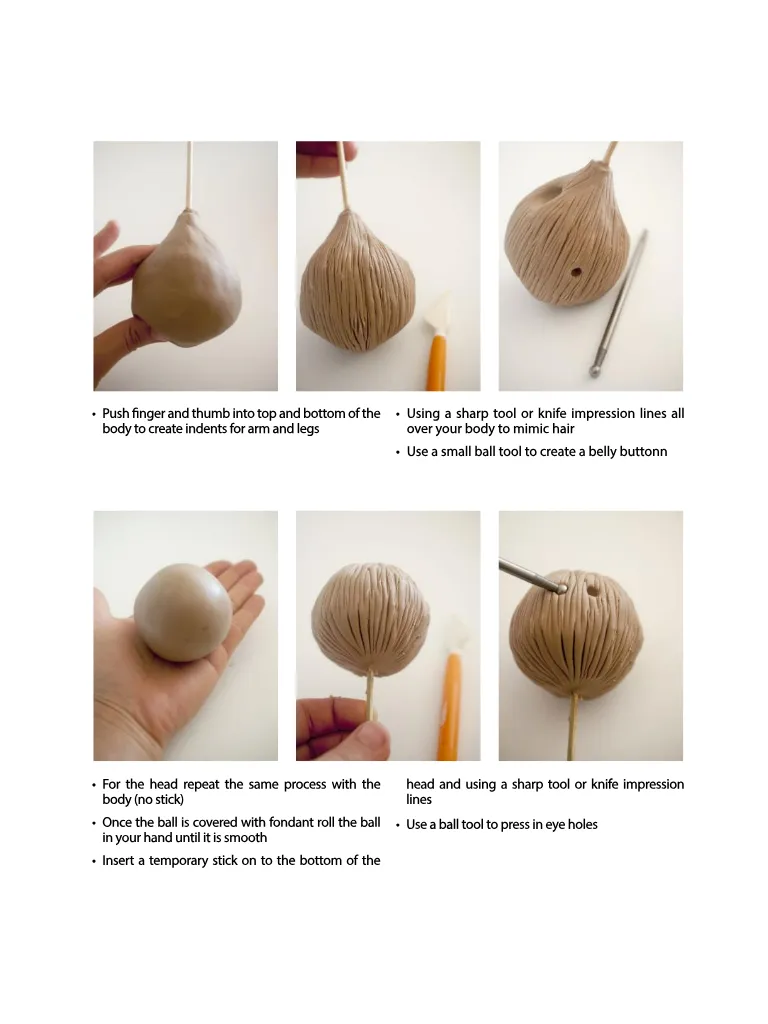
• Push finger and thumb into top and bottom of the body to create indents for arm and legs • Using a sharp tool or knife impression lines all over your body to mimic hair • Use a small ball tool to create a belly buttonn • For the head repeat the same process with the body ( no stick ) • Once the ball is covered with fondant roll the ball in your hand until it is smooth • Insert a temporary stick on to the bottom of the head and using a sharp tool or knife impression lines • Use a ball tool to press in eye holes
Page 55 text
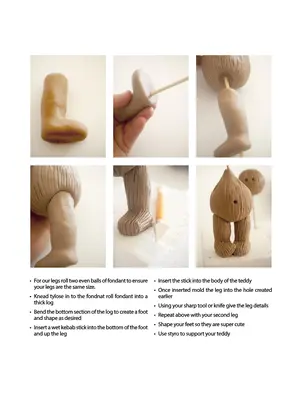
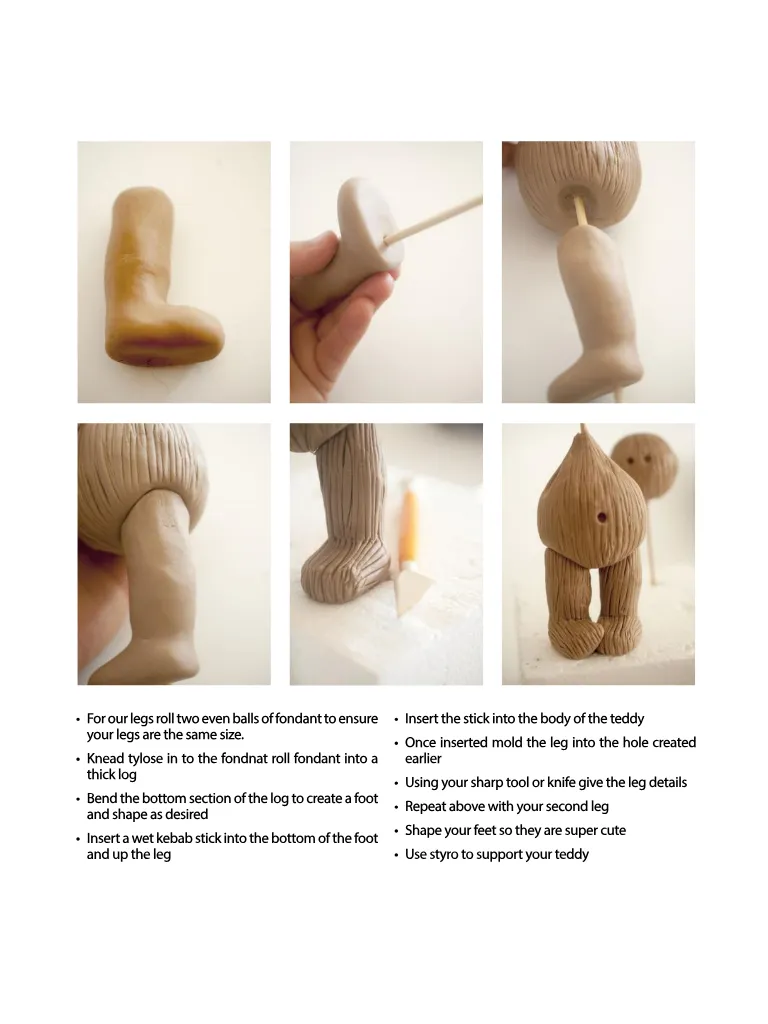
• For our legs roll two even balls of fondant to ensure your legs are the same size . • Knead tylose in to the fondnat roll fondant into a thick log • Bend the bottom section of the log to create a foot and shape as desired • Insert a wet kebab stick into the bottom of the foot and up the leg • Insert the stick into the body of the teddy • Once inserted mold the leg into the hole created earlier • Using your sharp tool or knife give the leg details • Repeat above with your second leg • Shape your feet so they are super cute • Use styro to support your teddy
Page 56 text
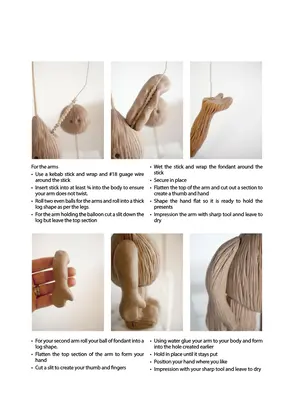
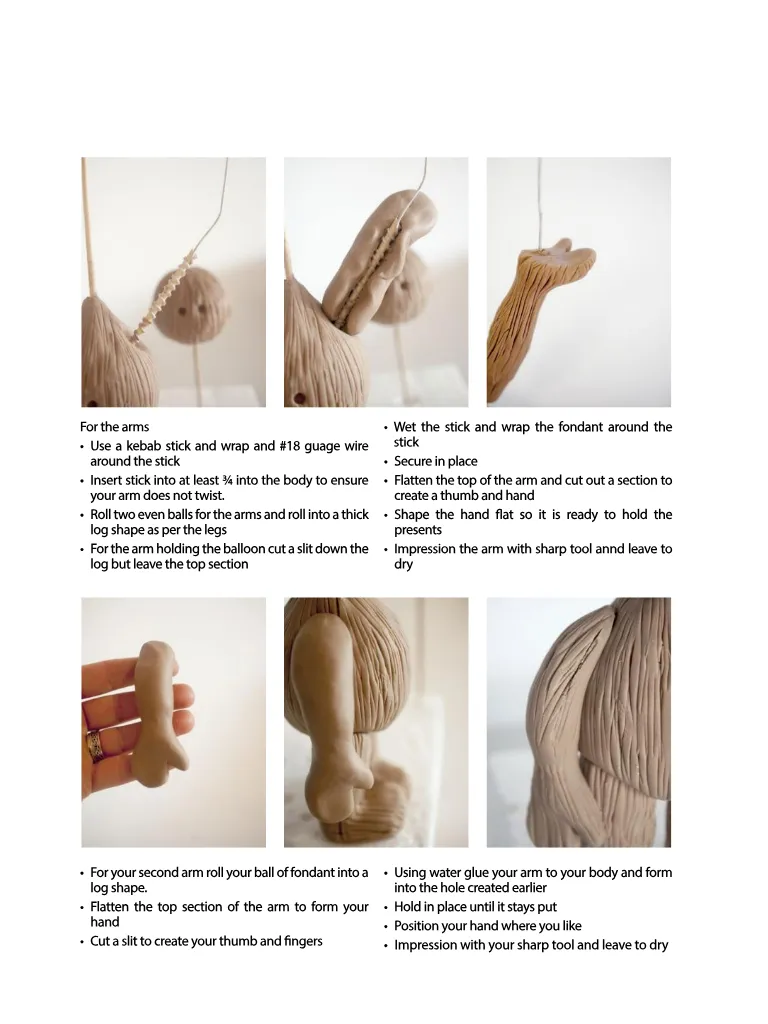
For the arms • Use a kebab stick and wrap and # 18 guage wire around the stick • Insert stick into at least ¾ into the body to ensure your arm does not twist . • Roll two even balls for the arms and roll into a thick log shape as per the legs • For the arm holding the balloon cut a slit down the log but leave the top section • Wet the stick and wrap the fondant around the stick • Secure in place • Flatten the top of the arm and cut out a section to create a thumb and hand • Shape the hand flat so it is ready to hold the presents • Impression the arm with sharp tool annd leave to dry • For your second arm roll your ball of fondant into a log shape . • Flatten the top section of the arm to form your hand • Cut a slit to create your thumb and fingers • Using water glue your arm to your body and form into the hole created earlier • Hold in place until it stays put • Position your hand where you like • Impression with your sharp tool and leave to dry
Page 57 text
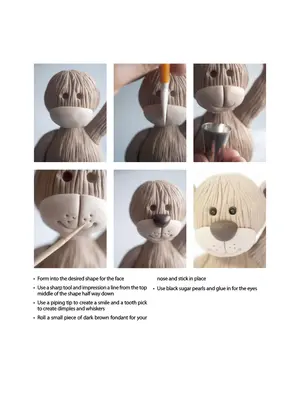
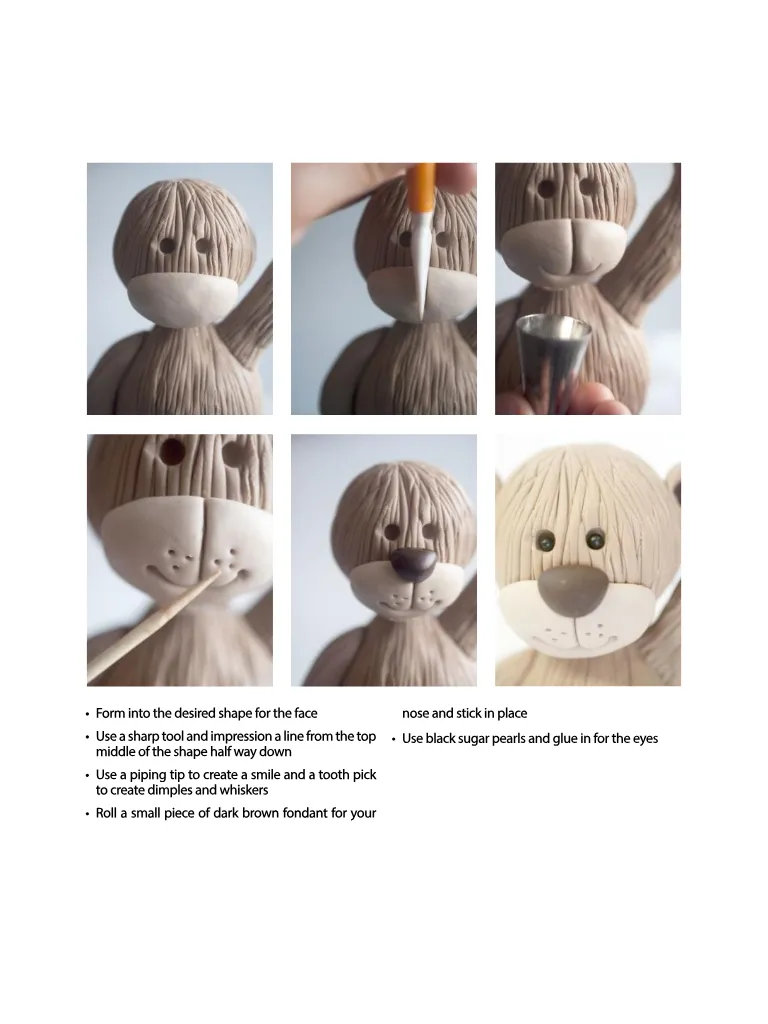
• Form into the desired shape for the face • Use a sharp tool and impression a line from the top middle of the shape half way down • Use a piping tip to create a smile and a tooth pick to create dimples and whiskers • Roll a small piece of dark brown fondant for your nose and stick in place • Use black sugar pearls and glue in for the eyes
Page 58 text
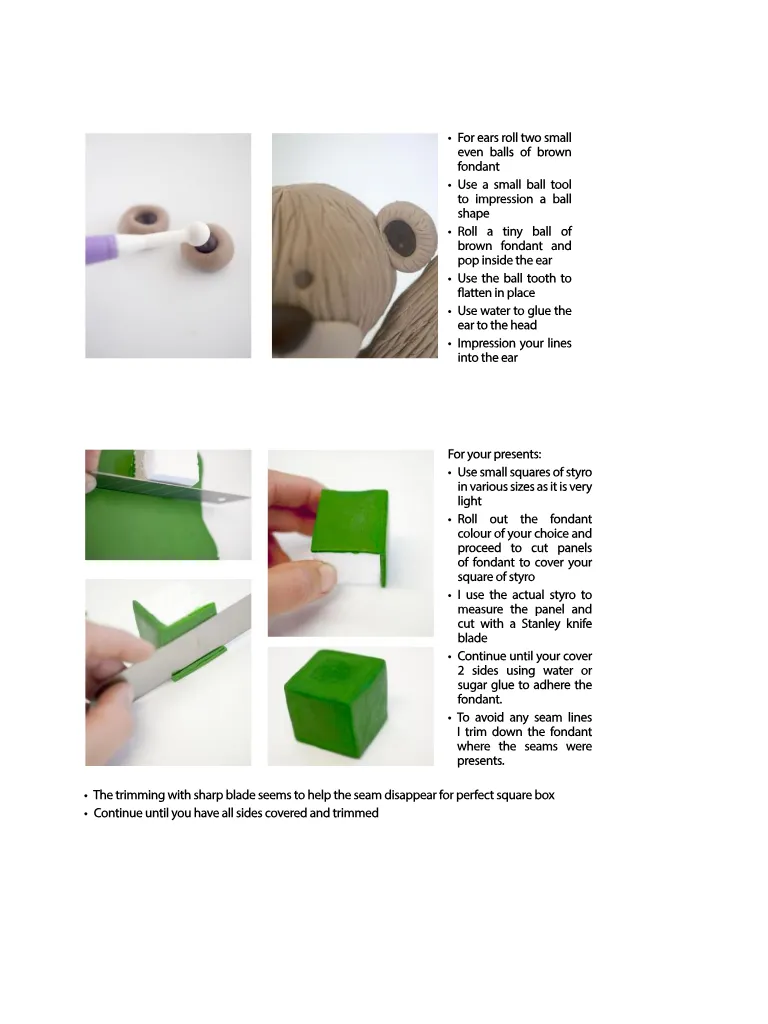
• For ears roll two small even balls of brown fondant • Use a small ball tool to impression a ball shape • Roll a tiny ball of brown fondant and pop inside the ear • Use the ball tooth to flatten in place • Use water to glue the ear to the head • Impression your lines into the ear For your presents : • Use small squares of styro in various sizes as it is very light • Roll out the fondant colour of your choice and proceed to cut panels of fondant to cover your square of styro • I use the actual styro to measure the panel and cut with a Stanley knife blade • Continue until your cover 2 sides using water or sugar glue to adhere the fondant . • To avoid any seam lines I trim down the fondant where the seams were presents . • The trimming with sharp blade seems to help the seam disappear for perfect square box • Continue until you have all sides covered and trimmed
Page 59 text
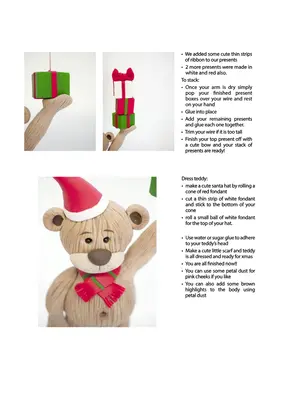
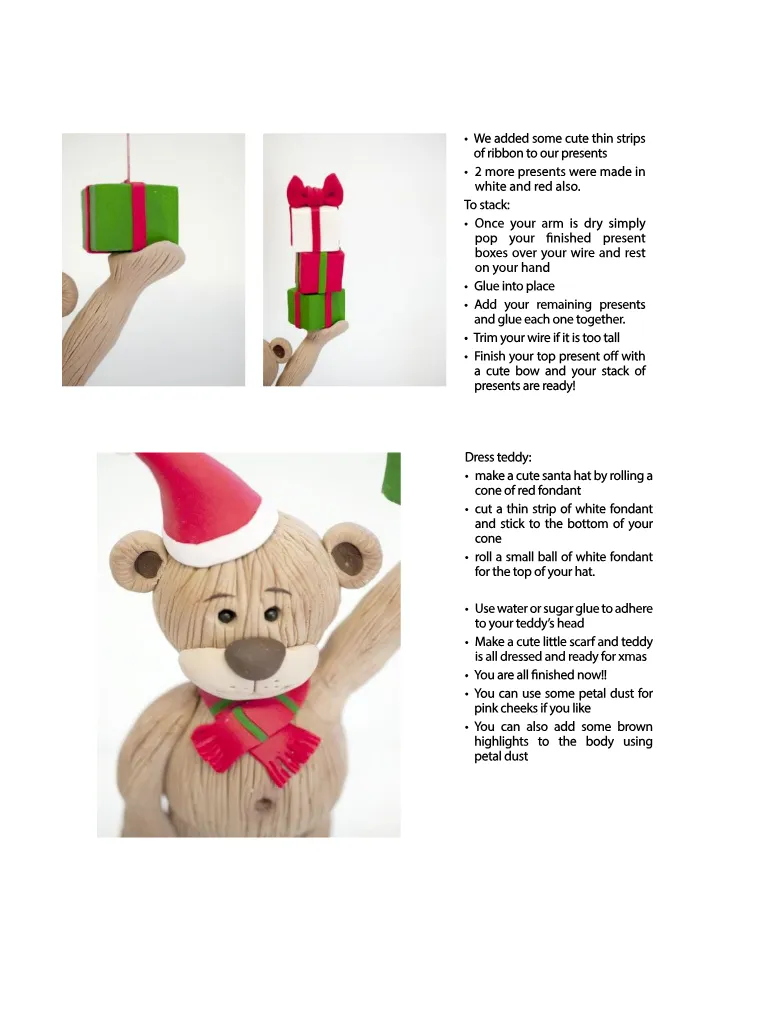
• We added some cute thin strips of ribbon to our presents • 2 more presents were made in white and red also . To stack : • Once your arm is dry simply pop your finished present boxes over your wire and rest on your hand • Glue into place • Add your remaining presents and glue each one together . • Trim your wire if it is too tall • Finish your top present off with a cute bow and your stack of presents are ready ! Dress teddy : • make a cute santa hat by rolling a cone of red fondant • cut a thin strip of white fondant and stick to the bottom of your cone • roll a small ball of white fondant for the top of your hat . • Use water or sugar glue to adhere to your teddy ’ s head • Make a cute little scarf and teddy is all dressed and ready for xmas • You are all finished now !! • You can use some petal dust for pink cheeks if you like • You can also add some brown highlights to the body using petal dust




Page 61 text
`` www . cakedecoratingsolutions . com . au
Page 62 text
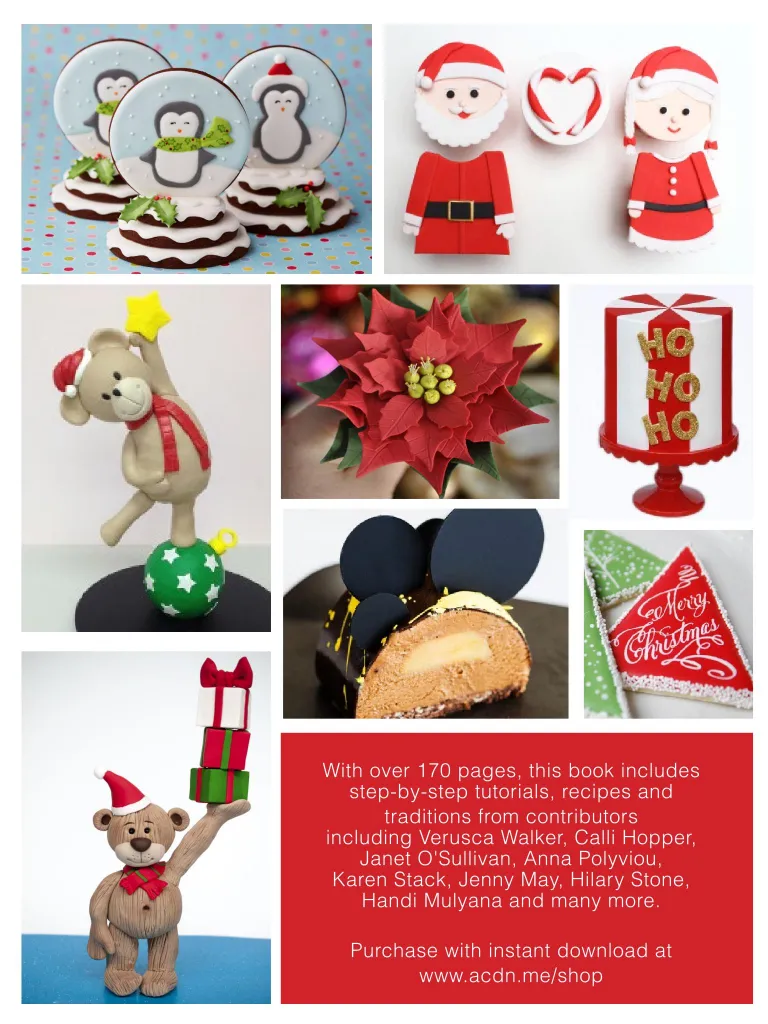
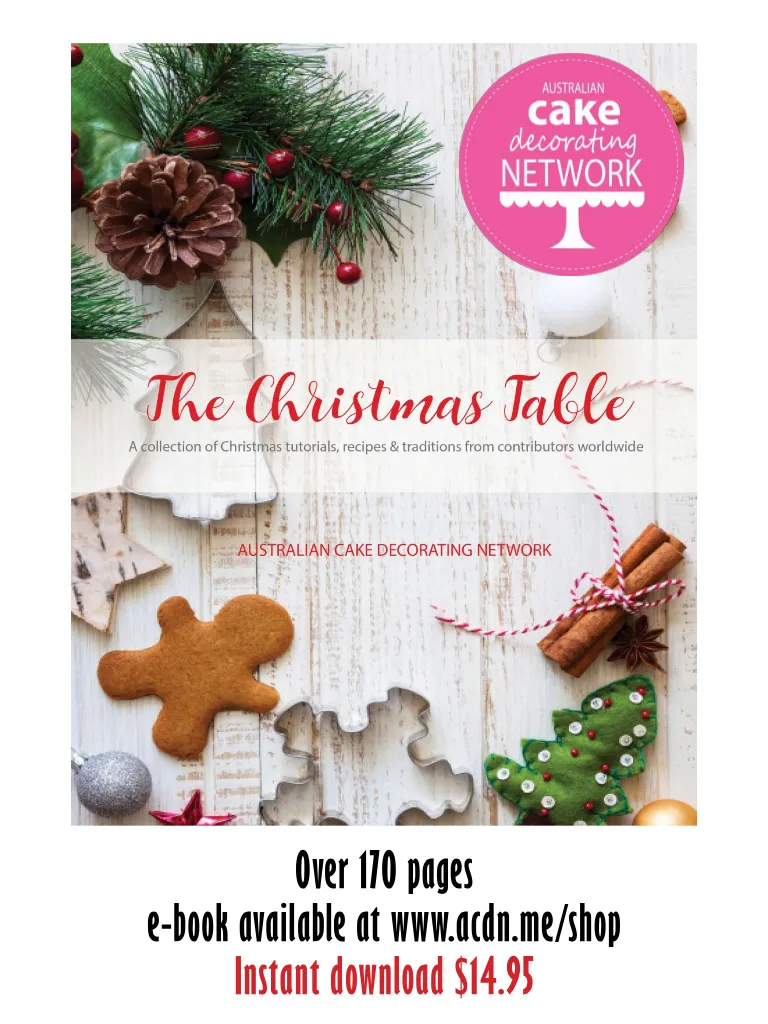
With over 170 pages , this book includes step-by-step tutorials , recipes and traditions from contributors including Verusca Walker , Calli Hopper , Janet O ' Sullivan , Anna Polyviou , Karen Stack , Jenny May , Hilary Stone , Handi Mulyana and many more . Purchase with instant download at www . acdn . me / shop
Page 63 text
Over 170 pages e-book available at www . acdn . me / shop Instant download $ 14.95
Page 64 text
Monthly focus topics include : - Social Media - Pricing for profit - Photography & editing - Quoting & invoicing - Marketing & more ! Build a successful baking business with the support of the ACDN Business Lounge ! Doors opening soon ! Join the waiting list to receive your invite !

Page 65 text
Recipes A collection of delicious recipes for you to bake this festive season


Page 68 text
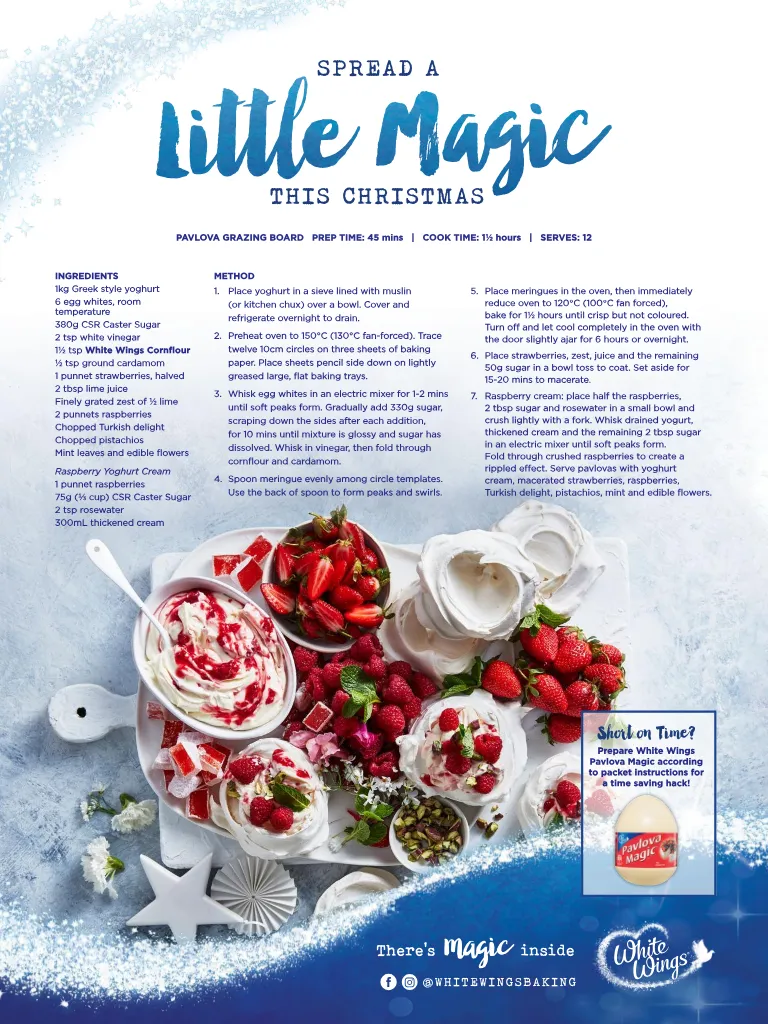
SPREAD A THIS CHRISTMAS PAVLOVA GRAZING BOARD PREP TIME : 45 mins | COOK TIME : 1½ hours | SERVES : 12 INGREDIENTS 1kg Greek style yoghurt 6 egg whites , room temperature 380g CSR Caster Sugar 2 tsp white vinegar 1½ tsp White Wings Cornflour ½ tsp ground cardamom 1 punnet strawberries , halved 2 tbsp lime juice Finely grated zest of ½ lime 2 punnets raspberries Chopped Turkish delight Chopped pistachios Mint leaves and edible flowers Raspberry Yoghurt Cream 1 punnet raspberries 75g ( ⅓ cup ) CSR Caster Sugar 2 tsp rosewater 300mL thickened cream METHOD 1 . Place yoghurt in a sieve lined with muslin ( or kitchen chux ) over a bowl . Cover and refrigerate overnight to drain . 2 . Preheat oven to 150 ° C ( 130 ° C fan-forced ). Trace twelve 10cm circles on three sheets of baking paper . Place sheets pencil side down on lightly greased large , flat baking trays . 3 . Whisk egg whites in an electric mixer for 1-2 mins until soft peaks form . Gradually add 330g sugar , scraping down the sides after each addition , for 10 mins until mixture is glossy and sugar has dissolved . Whisk in vinegar , then fold through cornflour and cardamom . 4 . Spoon meringue evenly among circle templates . Use the back of spoon to form peaks and swirls . 5 . Place meringues in the oven , then immediately reduce oven to 120 ° C ( 100 ° C fan forced ), bake for 1½ hours until crisp but not coloured . Turn off and let cool completely in the oven with the door slightly ajar for 6 hours or overnight . 6 . Place strawberries , zest , juice and the remaining 50g sugar in a bowl toss to coat . Set aside for 15-20 mins to macerate . 7 . Raspberry cream : place half the raspberries , 2 tbsp sugar and rosewater in a small bowl and crush lightly with a fork . Whisk drained yogurt , thickened cream and the remaining 2 tbsp sugar in an electric mixer until soft peaks form . Fold through crushed raspberries to create a rippled effect . Serve pavlovas with yoghurt cream , macerated strawberries , raspberries , Turkish delight , pistachios , mint and edible flowers . Short on Time ? Prepare White Wings Pavlova Magic according to packet instructions for a time saving hack ! There ’ s inside @ WHITEWINGSBAKING


Page 70 text
GIFTS THAT WILL GET YOU Brownie Points ! These Fudgy Choc Chunk Brownies with Raspberry and White Chocolate make a perfect Christmas gift and you can even get the kids involved ! Prep : 45 mins | Cook : 35 mins | Makes : 8 trees and 16 presents INGREDIENTS 200g 70 % dark chocolate , coarsely chopped 400g milk chocolate , coarsely chopped 160g unsalted butter , chopped 330g ( 1½ cups ) CSR Brown Sugar 4 eggs 100g ( ⅔ cup ) White Wings Plain Flour , sifted 40g Dutch-process cocoa , sifted 250g ( 2 punnets ) raspberries 100g white chocolate , melted Sprinkles , sugar stars , chocolate stars to decorate METHOD 1 . Preheat oven to 180 ° C fan forced . Grease and line a 22cm round cake pan and a 20cm square cake pan with baking paper . 2 . Combine 200g dark chocolate , 200g milk chocolate and butter in a heatproof bowl over a saucepan of simmering water , stir until smooth . Set aside for 10 mins . 3 . Whisk sugar , eggs and a large pinch of salt in an electric mixer on high for 5 mins until fluffy . Add cooled chocolate mixture and stir until combined . Fold in flour and cocoa . 4 . Divide mixture evenly among prepared tins . Scatter raspberries and rest of milk chocolate chunks . Bake for 25-30 mins , cool completely in tins . 5 . Place brownies on a clean work surface . Cut round brownie into 8 wedges and square brownie into 16 portions , place on a lined baking tray . 6 . Drizzle with melted white chocolate , top with white chocolate stars and scatter with sprinkles to decorate . Place in fridge to set . Tie each brownie square with decorative ribbon to form a present . Divide brownie trees and brownie presents among gift boxes . CSR Brown Sugar has a dark caramel colour and unique rich flavour , making it suitable for both savoury and sweet recipes , toppings & sauces .

Page 71 text
` The CDS Willoughby store has moved to new premises . Our new address is : 4 / 56 Frenchs Road WILLOUGHBY ( 5 MINUTES DRIVE AWAY FROM OLD SHOP ) Phone : 9417 5666 www . cakedecoratingsolutions . com . au


Page 73 text
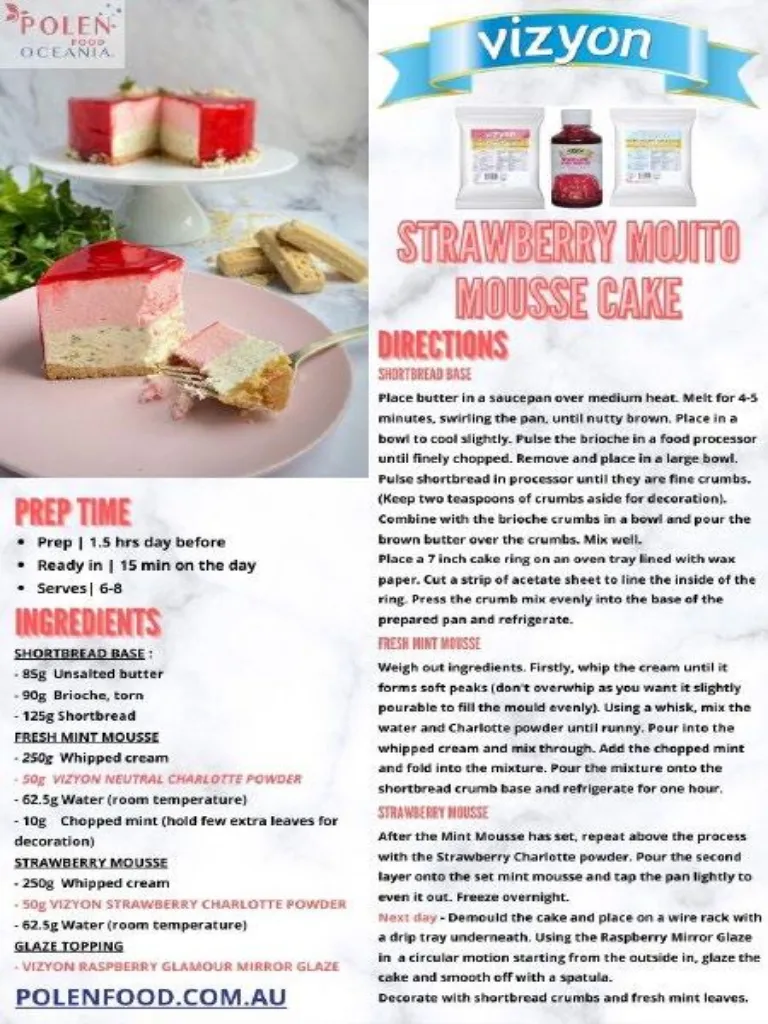
SHAKE & POUR GREAT FOR DRIPS STAYS SOFT RETAINS SHINE NO HEATING REQUIRED READY TO USE SHAKE & POUR GREAT FOR DRIPS STAYS SOFT RETAINS SHINE NO HEATING REQUIRED


Page 74 text
gift idea ! FREE POSTAGE cake decorating central kit of the month Join by 30th November and get your first three months postage for free . It ’ s the cake decorating workshop that comes to you . All the decorating products that you need to make the project are included in your box , add a few kitchen and house supplies and you have a workshop right in your home . Always exciting new products that can be used more than once . Full colour instructions emailed straight to you . $ 55 plus postage , extra $ 5 for colour instructions to be included in the box . Store pick ups also available from CASTLE HILL , CAMPBELLTOWN & NUNAWADING . Limited subscriptions available . cakedecoratingcentral . com . au




Page 76 text
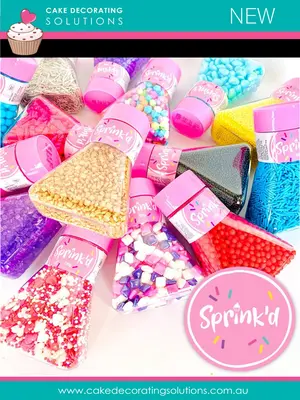
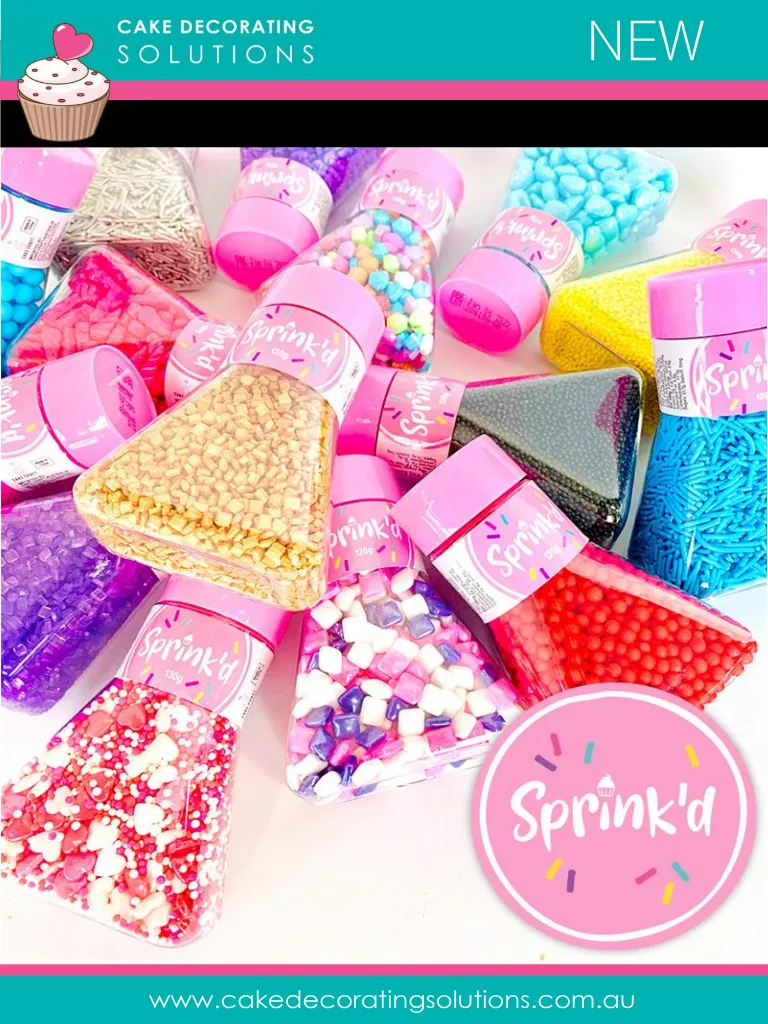
No one bakes brighter than you and SPRINKS
Page 77 text
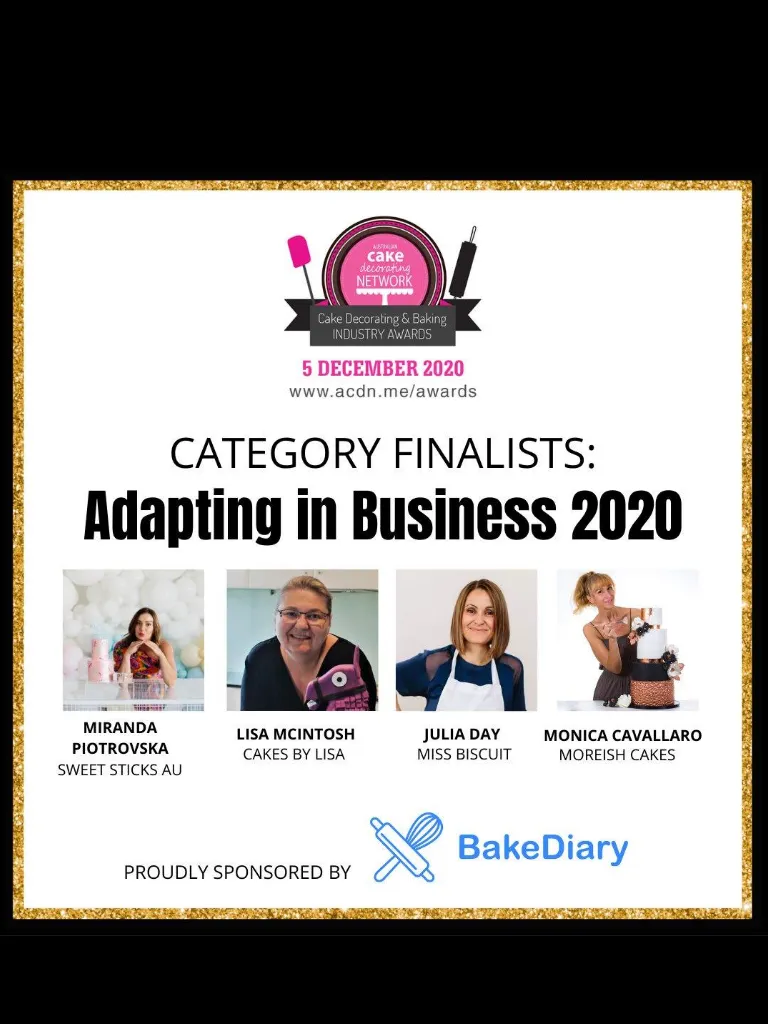
Interviews In this issue we interview our four finalists of our 2020 ' Adapting In Business ' Award , and Amber Comadira-Smith in her regular ' Cake Chat ' column

Page 78 text
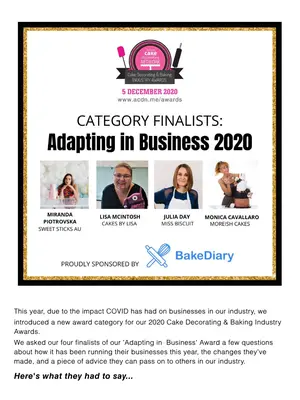
This year , due to the impact COVID has had on businesses in our industry , we introduced a new award category for our 2020 Cake Decorating & Baking Industry Awards . We asked our four finalists of our ' Adapting in Business ' Award a few questions about how it has been running their businesses this year , the changes they ' ve made , and a piece of advice they can pass on to others in our industry . This year , due to the impact COVID has had on businesses in our industry , we introduced a new award category for our 2020 Cake Decorating & Baking Industry Awards . We asked our four finalists of our ' Adapting in Business ' Award a few questions about how it has been running their businesses this year , the changes they ' ve made , and a piece of advice they can pass on to others in our industry . Here ' s what they had to say ...
Page 79 text
JULIA : When COVID initially hit I was devastated . I did not think Miss Biscuit would survive . I immediately closed my Sydney store and kept my Melbourne store operating for online shopping . Both my Melbourne and Sydney stores at the time were heavily reliant on classes for income and so I was very worried that I would not be able to keep my staff and the stores operating without classes . they had to say ... MIRANDA : It was really scary from a business point of view because sadly we were already effected quite badly as we export our products globally . We felt the sales decreasing back in January . This year we never quite picked up sales after Christmas so when it hit Australia it was in the thick of it globally and we were already down in sales by 85 %. As a small business we rely heavily on our monthly sales as I ’ m completely self funded and there is only a certain amount of cashflow in the bank to sustain the business with no income coming through . Paying 12 wages with very little sales was really , really hard . There were a lot of hours spent trying to quickly diversify and find ways to stay ahead . No one knew what was happening and how long for so almost everyday the plan was changing . LISA : As COVID started to take hold early March , and being located in Melbourne , this is typically still peak season . By late March every wedding , engagement and birthday function was wiped from my calendar . Postponements of dates and total cancellation of events started to flood in . I made the difficult decision to offer full refunds where possible - after all these are my clients many of whom have been with me from when I started out 12 years ago . MONICA : As we all know , Covid had a dramatic effect on the cake industry and my orders took a hit just like everyone else ’ s . By March 2020 , everything had ground to a halt . My customers and my business were my first priority . I was so grateful that these incredible clients asked to postpone instead of cancelling orders . Or asked to hold the money for another function , which I was really happy to do without any penalty . This was all about supporting each other through a very uncertain time . And I wanted to support my clients as much as they were supporting me . CAN YOU TELL US ABOUT THE IMPACT THAT THE NEWS OF COVID HITTING THE SHORES OF AUSTRALIA HAD ON YOUR BUSINESS ? JULIA : When COVID initially hit I was devastated . I did not think Miss Biscuit would survive . I immediately closed my Sydney store and kept my Melbourne store operating for online shopping . Both my Melbourne and Sydney stores at the time were heavily reliant on classes for income and so I was very worried that I would not be able to keep my staff and the stores operating without classes . they had to say ... MIRANDA : It was really scary from a business point of view because sadly we were already effected quite badly as we export our products globally . We felt the sales decreasing back in January . This year we never quite picked up sales after Christmas so when it hit Australia it was in the thick of it globally and we were already down in sales by 85 %. As a small business we rely heavily on our monthly sales as I ’ m completely self funded and there is only a certain amount of cashflow in the bank to sustain the business with no income coming through . Paying 12 wages with very little sales was really , really hard . There were a lot of hours spent trying to quickly diversify and find ways to stay ahead . No one knew what was happening and how long for so almost everyday the plan was changing . LISA : As COVID started to take hold early March , and being located in Melbourne , this is typically still peak season . By late March every wedding , engagement and birthday function was wiped from my calendar . Postponements of dates and total cancellation of events started to flood in . I made the difficult decision to offer full refunds where possible - after all these are my clients many of whom have been with me from when I started out 12 years ago . MONICA : As we all know , Covid had a dramatic effect on the cake industry and my orders took a hit just like everyone else ’ s . By March 2020 , everything had ground to a halt . My customers and my business were my first priority . I was so grateful that these incredible clients asked to postpone instead of cancelling orders . Or asked to hold the money for another function , which I was really happy to do without any penalty . This was all about supporting each other through a very uncertain time . And I wanted to support my clients as much as they were supporting me .
Page 80 text
JULIA : I had been in New York in February this year just before Covid and had been fascinated by the number of stores selling home ' kits ' for knitting , birthday cakes , embroidery and craft . I had already thought this was something we might be able to bring to the store but thought it would be in development for a year . Not long after Covid hit we decided to take the plunge because we could no longer run classes and we launched our ' Class in a Box ' concept in time for Mother ' s Day . We also added webinars in place of in store demonstrations and then launched virtual Christmas classes recently where customers are sent a product box and participate in the class via zoom . Both of these have had a strong uptake . We have loved that our customers have taken to our online concepts so readily . MIRANDA : At first I took the sales decreasing very personally . Other businesses I knew in Australia initially were no where near as effected as we were and It felt like in a blink of an eye everything I worked for was just slowly fizzling away and I just couldn ’ t accept that . I worked so hard to get my business where it is today and I ’ m really proud of it . Knowing what we were up against what felt like the whole world shutting down my main focus was to be able to keep my staff on . Alisha Henderson at that time was my little positive rock , my angel . She could see what was happening to me and the business and was such a support for me - I ’ ll never forget her unconditional support . I came up with this crazy idea of a DIY Cookie kit . A couple of cookies with a printed icing sheet and a one off paint card . Literally overnight there was a whole new category made and sales were coming through - thank god ! Alisha made all the cookies for me without any question . Unfortunately it wasn ’ t enough to keep my staff on . The need for adapting and changing the plan was happening almost daily at that point . From there a whole category of DIY products were created . From icing sheets , to DIY Cookie Kits to PIY Tabs and more . Although now it was only me in manufacturing .. HOW HAVE YOU ADAPTED YOUR BUSINESS TO OVERCOME THESE UNPRECEDENTED CHALLENGES YOU WERE FACED WITH ? JULIA : I had been in New York in February this year just before Covid and had been fascinated by the number of stores selling home ' kits ' for knitting , birthday cakes , embroidery and craft . I had already thought this was something we might be able to bring to the store but thought it would be in development for a year . Not long after Covid hit we decided to take the plunge because we could no longer run classes and we launched our ' Class in a Box ' concept in time for Mother ' s Day . We also added webinars in place of in store demonstrations and then launched virtual Christmas classes recently where customers are sent a product box and participate in the class via zoom . Both of these have had a strong uptake . We have loved that our customers have taken to our online concepts so readily . MIRANDA : At first I took the sales decreasing very personally . Other businesses I knew in Australia initially were no where near as effected as we were and It felt like in a blink of an eye everything I worked for was just slowly fizzling away and I just couldn ’ t accept that . I worked so hard to get my business where it is today and I ’ m really proud of it . Knowing what we were up against what felt like the whole world shutting down my main focus was to be able to keep my staff on . Alisha Henderson at that time was my little positive rock , my angel . She could see what was happening to me and the business and was such a support for me - I ’ ll never forget her unconditional support . I came up with this crazy idea of a DIY Cookie kit . A couple of cookies with a printed icing sheet and a one off paint card . Literally overnight there was a whole new category made and sales were coming through - thank god ! Alisha made all the cookies for me without any question . Unfortunately it wasn ’ t enough to keep my staff on . The need for adapting and changing the plan was happening almost daily at that point . From there a whole category of DIY products were created . From icing sheets , to DIY Cookie Kits to PIY Tabs and more . Although now it was only me in manufacturing ..
Page 81 text
MONICA : This really took a lot of soul searching , forecasting and networking to get my head into gear . I spent a lot of time thinking about my business , the brand , the objective and my definitions of success . I came to the conclusion that my business had many arms and many revenue streams . Effectively I needed a really excellent marketing plan – and that ’ s what I set about achieving . Firstly , I worked on the minimum income that I needed to come through to door to stay afloat . Then , I faced the fact there was no income for the foreseeable future , so , what were my options ? What did I have at my disposal that I could use to help me ? Thankfully I had a lot . These included a network and following , a full equipped studio with lights and cameras , a name and brand . I focused on several key areas . Building my brand internationally , designing online workshops , so if I couldn ’ t be there in person , I was going to be there on their screens ! I focused on social media , plus I collaborated intensively with products , videos for suppliers , interviews , cake groups , guilds , retailer hubs , sponsoring awards and competitions , judging etc . I threw my net wide and established what was working for me and what wasn ’ t . I also developed a new product line , which I ’ m pleased to say is now doing very well . All of this was an investment into my future , establishing myself as a brand and I feel it has paid off . Plus , to keep relevant in Australia I created small packs of sweet goodies that could be posted Australia wide . For this idea , I thank Alisha Henderson for coming up with concept and getting many of us out of our comfort zone . MIRANDA : DONT GIVE UP ! Be okay with changing the plan . Diversify . Learn to adapt to change on the spot . Don ’ t let doubt or fear override your solution mode . You fight and you fight hard . When the time comes and the dust has settled you can deal with the emotional side of it then . Now when I look back there also has to be an element of trust in the bigger picture . No matter what , you need to know deep down in your core that you will be okay . You will be okay and you are only given situations in life that you will be able to deal with . MONICA : This really took a lot of soul searching , forecasting and networking to get my head into gear . I spent a lot of time thinking about my business , the brand , the objective and my definitions of success . I came to the conclusion that my business had many arms and many revenue streams . Effectively I needed a really excellent marketing plan – and that ’ s what I set about achieving . Firstly , I worked on the minimum income that I needed to come through to door to stay afloat . Then , I faced the fact there was no income for the foreseeable future , so , what were my options ? What did I have at my disposal that I could use to help me ? Thankfully I had a lot . These included a network and following , a full equipped studio with lights and cameras , a name and brand . I focused on several key areas . Building my brand internationally , designing online workshops , so if I couldn ’ t be there in person , I was going to be there on their screens ! I focused on social media , plus I collaborated intensively with products , videos for suppliers , interviews , cake groups , guilds , retailer hubs , sponsoring awards and competitions , judging etc . I threw my net wide and established what was working for me and what wasn ’ t . I also developed a new product line , which I ’ m pleased to say is now doing very well . All of this was an investment into my future , establishing myself as a brand and I feel it has paid off . Plus , to keep relevant in Australia I created small packs of sweet goodies that could be posted Australia wide . For this idea , I thank Alisha Henderson for coming up with concept and getting many of us out of our comfort zone . WHAT IS YOUR KEY PIECE OF ADVICE FOR KEEPING YOUR BUSINESS AFLOAT DURING THE COVID-19 PANDEMIC ? MIRANDA : DONT GIVE UP ! Be okay with changing the plan . Diversify . Learn to adapt to change on the spot . Don ’ t let doubt or fear override your solution mode . You fight and you fight hard . When the time comes and the dust has settled you can deal with the emotional side of it then . Now when I look back there also has to be an element of trust in the bigger picture . No matter what , you need to know deep down in your core that you will be okay . You will be okay and you are only given situations in life that you will be able to deal with .
Page 82 text
JULIA : The first positive is that Covid-19 has allowed me to take a step back and look at the way we were running and I realised that I didn ' t need to work crazy hours in order to have a successful business . All of a sudden I was eating dinner every night with my family and I took up a hobby and reclaimed my weekends . The second positive has been my amazing teams in both Melbourne and Sydney who took all of this in their stride . My Sydney team kept the store operating without me during Melbourne ' s Stage 4 lockdown and my Melbourne team coped with every setback we had along the way ( including having to go through a second round of cancellations and refunds when we should have been opening up again ). Miss Biscuit would not be where it is today without them and I ' m incredibly grateful to have them on board . The third positive and one that I ' m also very thankful for is the wider Miss Biscuit customer community who have been so understanding , so supportive and very kind to us during this time . Our customers sent us flowers , cards , chocolates and messages and I will never forget what they did for us when we were stressed and unsure about the future . MONICA : I could list a hundred positives Covid has had on my business . I was only chatting about this with some industry friends in recent weeks , but to save your reading it all , here is a couple in point form : • Planning . I now plan a year in advance . • I have learnt the importance of making marketing a priority . • Use the tools you have at your disposal first before you look elsewhere . • International branding was on my list for 2020 . I still achieved this , but I needed to change my perspective on how to get there . Anything is possible when you are determined . • Networking , communication and support – all vital ingredients to success and becoming known . WHAT ARE 3 KEY POSITIVES COVID-19 HAS HAD ON YOUR BUSINESS ? JULIA : The first positive is that Covid-19 has allowed me to take a step back and look at the way we were running and I realised that I didn ' t need to work crazy hours in order to have a successful business . All of a sudden I was eating dinner every night with my family and I took up a hobby and reclaimed my weekends . The second positive has been my amazing teams in both Melbourne and Sydney who took all of this in their stride . My Sydney team kept the store operating without me during Melbourne ' s Stage 4 lockdown and my Melbourne team coped with every setback we had along the way ( including having to go through a second round of cancellations and refunds when we should have been opening up again ). Miss Biscuit would not be where it is today without them and I ' m incredibly grateful to have them on board . The third positive and one that I ' m also very thankful for is the wider Miss Biscuit customer community who have been so understanding , so supportive and very kind to us during this time . Our customers sent us flowers , cards , chocolates and messages and I will never forget what they did for us when we were stressed and unsure about the future . MONICA : I could list a hundred positives Covid has had on my business . I was only chatting about this with some industry friends in recent weeks , but to save your reading it all , here is a couple in point form : • Planning . I now plan a year in advance . • I have learnt the importance of making marketing a priority . • Use the tools you have at your disposal first before you look elsewhere . • International branding was on my list for 2020 . I still achieved this , but I needed to change my perspective on how to get there . Anything is possible when you are determined . • Networking , communication and support – all vital ingredients to success and becoming known .
Page 83 text
LISA : 1 . Learning to adapt what products I offer . By changing the direction of my business from Custom Cakes to the simplicity of a Bake at home box . I was then able to cater to the needs of the members of my local community , who were looking for activities to do at home with their children . 2 . Making the most from supplies on hand . I was blown away by the success of my first Bake at home box which was a simple cupcake kit , with clients asking what else can I offer them . This then lead to a Bake at home - Cake pop kit / Cookie Kit / Mothers Day cake / Fathers Day Cookie Cake / And an up coming XMAS Line all with access to a Video tutorial 3 . Contentedness with community - I listened to what the Mum ' s in my local community wanted , and successfully delivered a product that suited their stay at home needs . MIRANDA : By far it was having to stand down my staff . That was probably one of the hardest things I have had to deal with in my whole working life . By then my cashflow couldn ’ t sustain paying wages anymore so I had to accept that I had to let go of everyone . I had 12 staff at the time . This was before knowing job keeper was even going to happen . It was such an awful feeling . I love my team . I love what I have created in a business and I felt like I had let them down . The grief you experience as a business owner and feeling like you had failed your team is like no other . I took it very personally . In all honestly looking back now it was very hard to deal with but at the time you didn ’ t have time to deal with the emotionally side of things - you just had to keep going . The other thing would be the uncertainty it brought as a business owner . What next ? The grief that came with those changes was a lot . Dealing with all business related changes along with personal was very overwhelming at times . LISA : The hardest thing has been uncertainty - not knowing when we would be able to have gatherings to celebrate special occasions . Not knowing if my thriving business of 12 years will bounce back to where it was . LISA : 1 . Learning to adapt what products I offer . By changing the direction of my business from Custom Cakes to the simplicity of a Bake at home box . I was then able to cater to the needs of the members of my local community , who were looking for activities to do at home with their children . 2 . Making the most from supplies on hand . I was blown away by the success of my first Bake at home box which was a simple cupcake kit , with clients asking what else can I offer them . This then lead to a Bake at home - Cake pop kit / Cookie Kit / Mothers Day cake / Fathers Day Cookie Cake / And an up coming XMAS Line all with access to a Video tutorial 3 . Contentedness with community - I listened to what the Mum ' s in my local community wanted , and successfully delivered a product that suited their stay at home needs . WHAT WAS THE HARDEST PART ABOUT DEALING WITH THE CHANGES COVID BROUGHT TO YOUR BUSINESS ? MIRANDA : By far it was having to stand down my staff . That was probably one of the hardest things I have had to deal with in my whole working life . By then my cashflow couldn ’ t sustain paying wages anymore so I had to accept that I had to let go of everyone . I had 12 staff at the time . This was before knowing job keeper was even going to happen . It was such an awful feeling . I love my team . I love what I have created in a business and I felt like I had let them down . The grief you experience as a business owner and feeling like you had failed your team is like no other . I took it very personally . In all honestly looking back now it was very hard to deal with but at the time you didn ’ t have time to deal with the emotionally side of things - you just had to keep going . The other thing would be the uncertainty it brought as a business owner . What next ? The grief that came with those changes was a lot . Dealing with all business related changes along with personal was very overwhelming at times . LISA : The hardest thing has been uncertainty - not knowing when we would be able to have gatherings to celebrate special occasions . Not knowing if my thriving business of 12 years will bounce back to where it was .
Page 84 text
NEW ` www . cakedecoratingsolutions . com . au


Page 85 text
Become a member of the Australian Cake Decorating Network and save with great discounts from our Preferred Suppliers ! JOIN US NOW !
Page 86 text
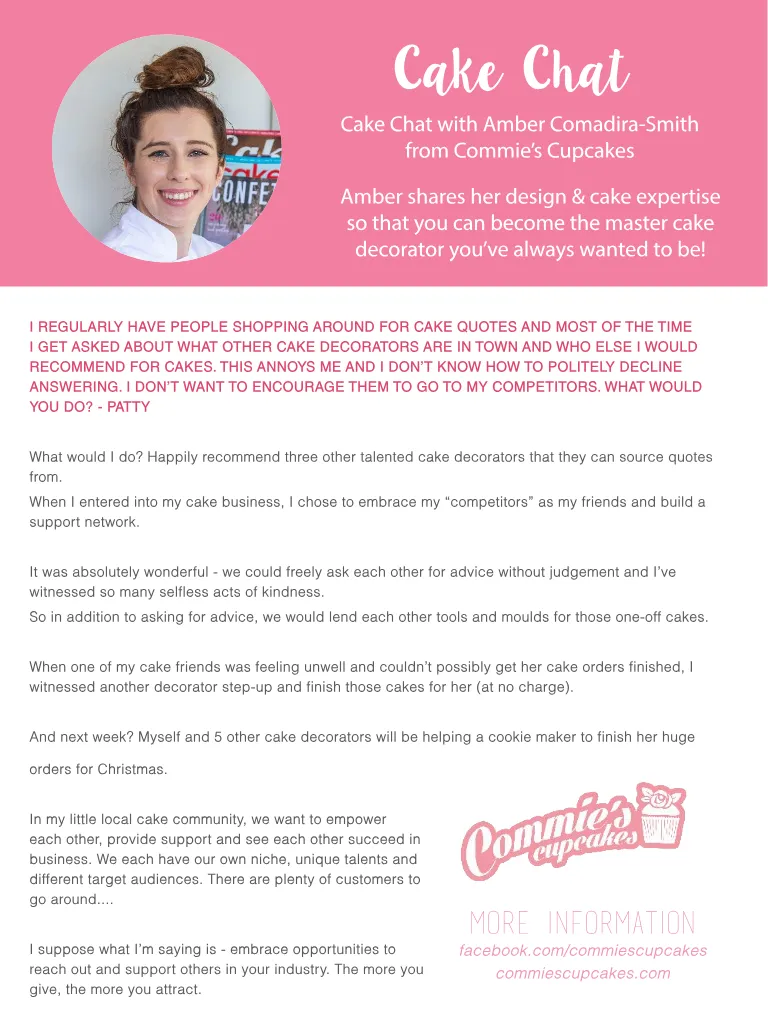
Cake Chat Cake Chat with Amber Comadira-Smith from Commie ’ s Cupcakes Amber shares her design & cake expertise so that you can become the master cake decorator you ’ ve always wanted to be ! I REGULARLY HAVE PEOPLE SHOPPING AROUND FOR CAKE QUOTES AND MOST OF THE TIME I GET ASKED ABOUT WHAT OTHER CAKE DECORATORS ARE IN TOWN AND WHO ELSE I WOULD RECOMMEND FOR CAKES . THIS ANNOYS ME AND I DON ’ T KNOW HOW TO POLITELY DECLINE ANSWERING . I DON ’ T WANT TO ENCOURAGE THEM TO GO TO MY COMPETITORS . WHAT WOULD YOU DO ? - PATTY What would I do ? Happily recommend three other talented cake decorators that they can source quotes from . When I entered into my cake business , I chose to embrace my “ competitors ” as my friends and build a support network . It was absolutely wonderful - we could freely ask each other for advice without judgement and I ’ ve witnessed so many selfless acts of kindness . So in addition to asking for advice , we would lend each other tools and moulds for those one-off cakes . When one of my cake friends was feeling unwell and couldn ’ t possibly get her cake orders finished , I witnessed another decorator step-up and finish those cakes for her ( at no charge ). And next week ? Myself and 5 other cake decorators will be helping a cookie maker to finish her huge orders for Christmas . In my little local cake community , we want to empower each other , provide support and see each other succeed in business . We each have our own niche , unique talents and different target audiences . There are plenty of customers to go around .... I suppose what I ’ m saying is - embrace opportunities to reach out and support others in your industry . The more you give , the more you attract . MORE INFORMATION facebook . com / commiescupcakes commiescupcakes . com
Page 87 text
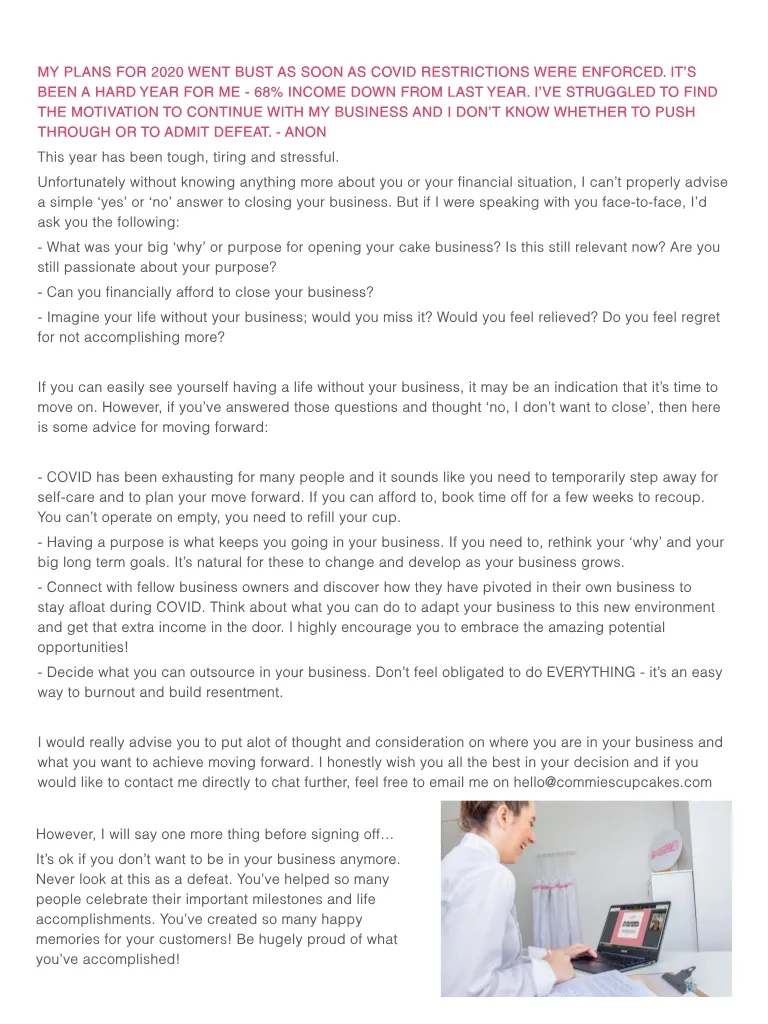
MY PLANS FOR 2020 WENT BUST AS SOON AS COVID RESTRICTIONS WERE ENFORCED . IT ’ S BEEN A HARD YEAR FOR ME - 68 % INCOME DOWN FROM LAST YEAR . I ’ VE STRUGGLED TO FIND THE MOTIVATION TO CONTINUE WITH MY BUSINESS AND I DON ’ T KNOW WHETHER TO PUSH THROUGH OR TO ADMIT DEFEAT . - ANON This year has been tough , tiring and stressful . Unfortunately without knowing anything more about you or your financial situation , I can ’ t properly advise a simple ‘ yes ’ or ‘ no ’ answer to closing your business . But if I were speaking with you face-to-face , I ’ d ask you the following : - What was your big ‘ why ’ or purpose for opening your cake business ? Is this still relevant now ? Are you still passionate about your purpose ? - Can you financially afford to close your business ? - Imagine your life without your business ; would you miss it ? Would you feel relieved ? Do you feel regret for not accomplishing more ? If you can easily see yourself having a life without your business , it may be an indication that it ’ s time to move on . However , if you ’ ve answered those questions and thought ‘ no , I don ’ t want to close ’, then here is some advice for moving forward : - COVID has been exhausting for many people and it sounds like you need to temporarily step away for self-care and to plan your move forward . If you can afford to , book time off for a few weeks to recoup . You can ’ t operate on empty , you need to refill your cup . - Having a purpose is what keeps you going in your business . If you need to , rethink your ‘ why ’ and your big long term goals . It ’ s natural for these to change and develop as your business grows . - Connect with fellow business owners and discover how they have pivoted in their own business to stay afloat during COVID . Think about what you can do to adapt your business to this new environment and get that extra income in the door . I highly encourage you to embrace the amazing potential opportunities ! - Decide what you can outsource in your business . Don ’ t feel obligated to do EVERYTHING - it ’ s an easy way to burnout and build resentment . I would really advise you to put alot of thought and consideration on where you are in your business and what you want to achieve moving forward . I honestly wish you all the best in your decision and if you would like to contact me directly to chat further , feel free to email me on hello @ commiescupcakes . com However , I will say one more thing before signing off … It ’ s ok if you don ’ t want to be in your business anymore . Never look at this as a defeat . You ’ ve helped so many people celebrate their important milestones and life accomplishments . You ’ ve created so many happy memories for your customers ! Be hugely proud of what you ’ ve accomplished !


Page 88 text
ONLINE EVENT SATURDAY 5TH DEC 2020 Tickets : www . acdn . me / awards


Page 89 text
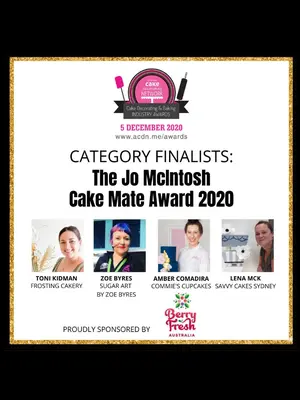
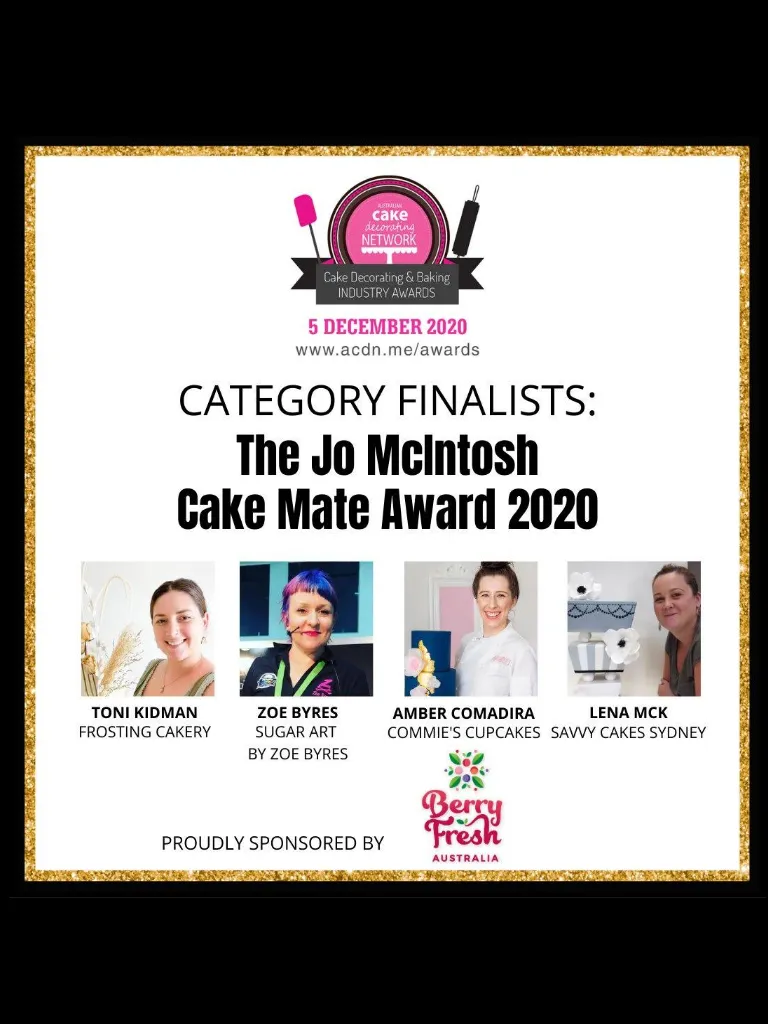
AND THE 2020 FINALISTS ARE ... www . acdn . me / events



































Page 109 text
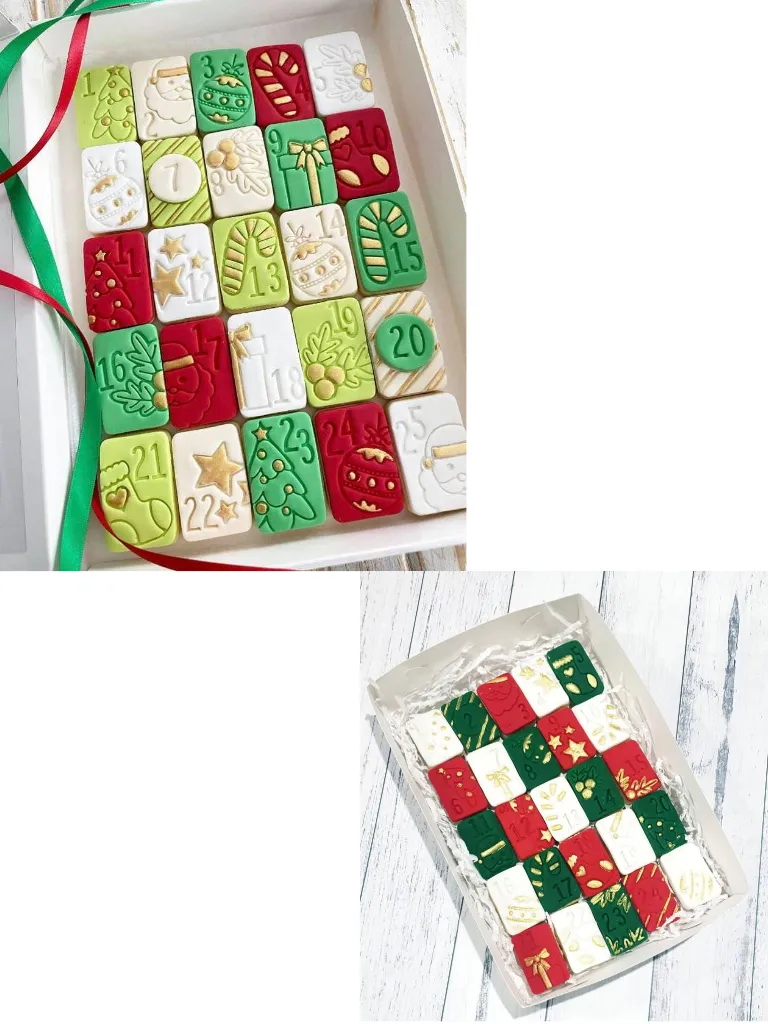
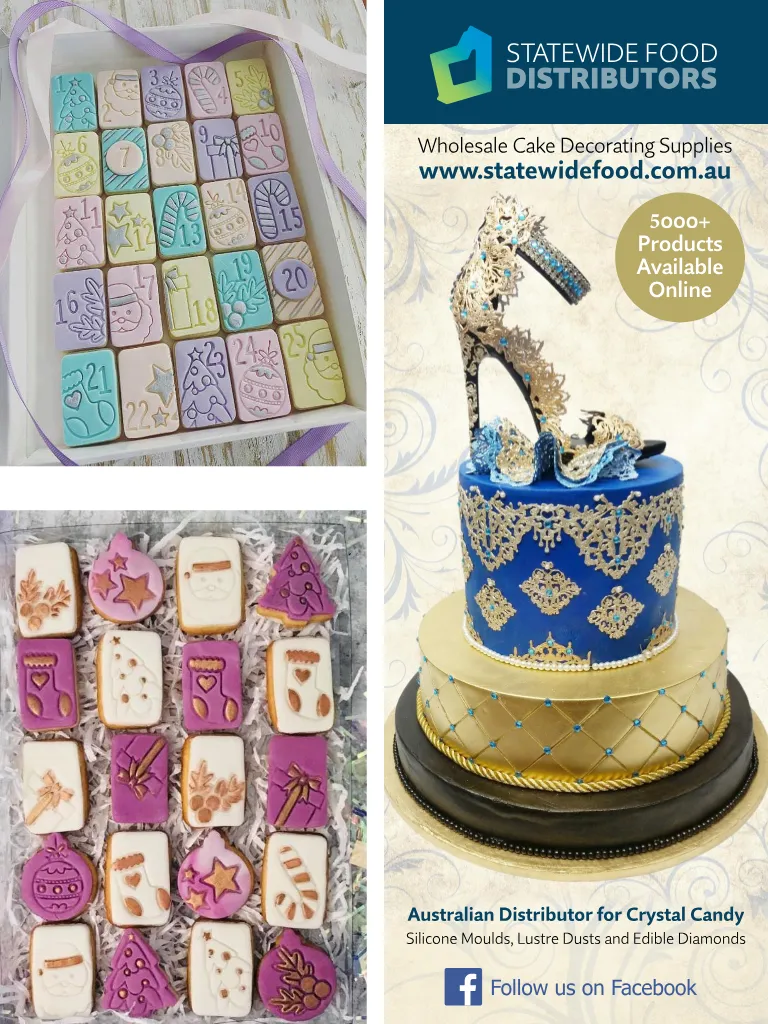
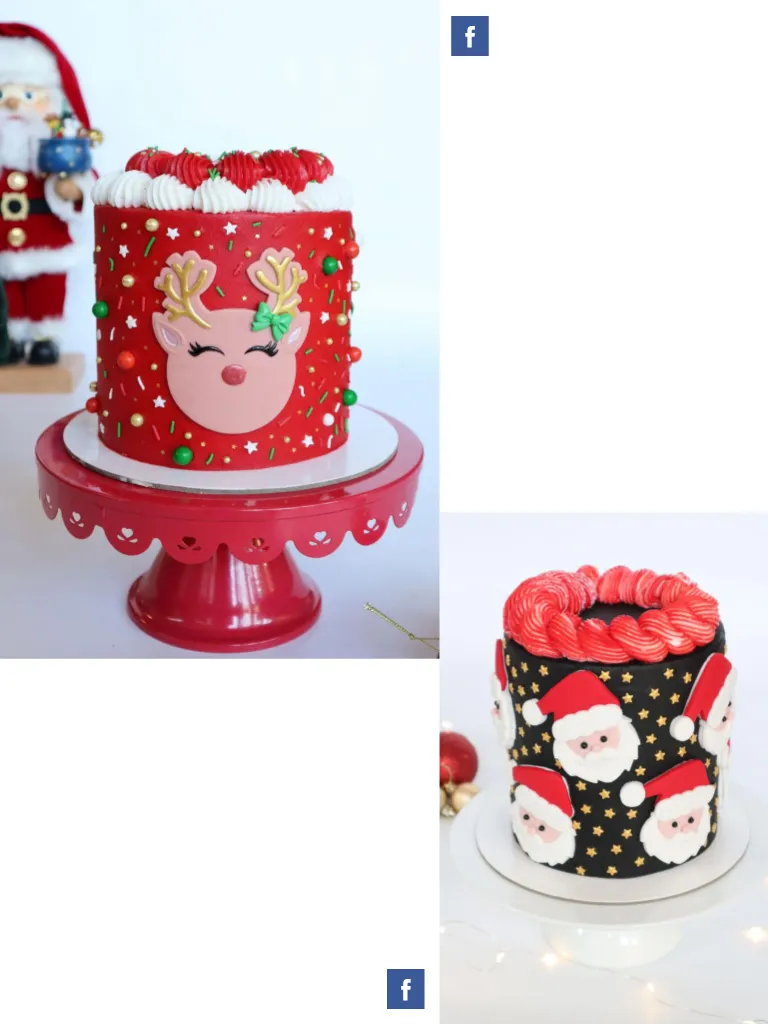
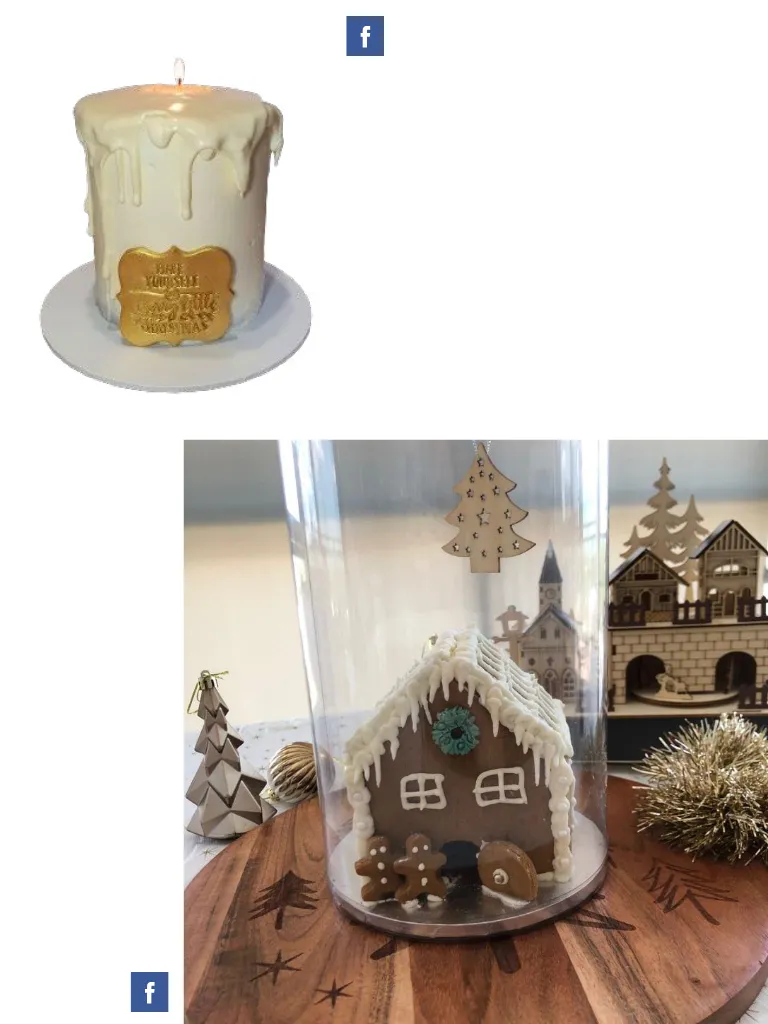
ACDN Member gallery We invited our members to submit to our member gallery - take a look at what they ' ve been creating ! Want to submit to our member gallery ? Join us HERE !
Page 111 text
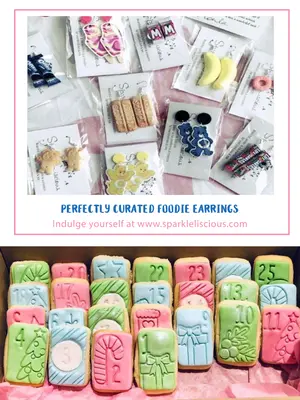
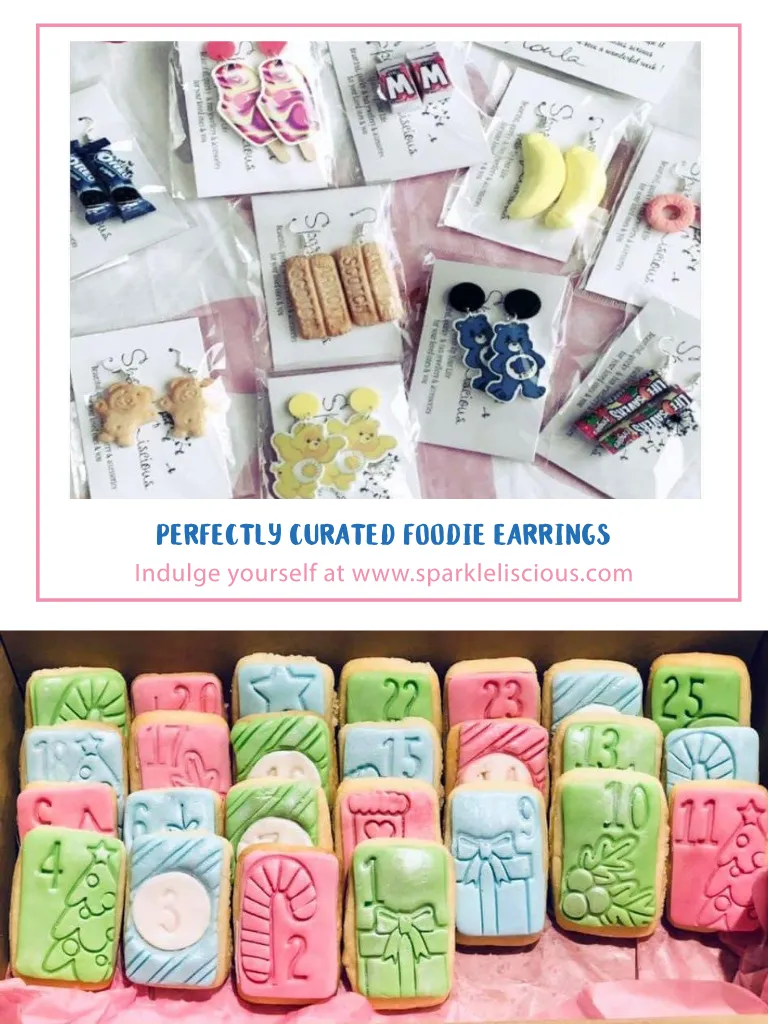
Perfectly curated foodie earrings Indulge yourself at www . sparkleliscious . com

Page 115 text
Wholesale Cake Decorating Supplies www . statewidefood . com . au 5000 + Products Available Online Australian Distributor for Crystal Candy Silicone Moulds , Lustre Dusts and Edible Diamonds Follow us on Facebook
Page 117 text
Monthly focus topics include : - Social Media - Pricing for profit - Photography & editing - Quoting & invoicing - Marketing & more ! Build a successful baking business with the support of the ACDN Business Lounge ! Doors opening soon ! Join the waiting list to receive your invite !


Page 118 text
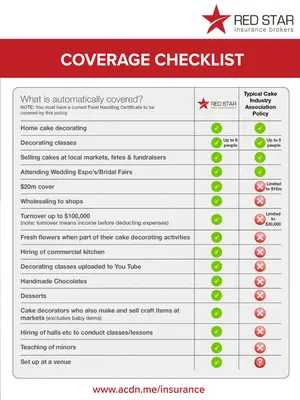
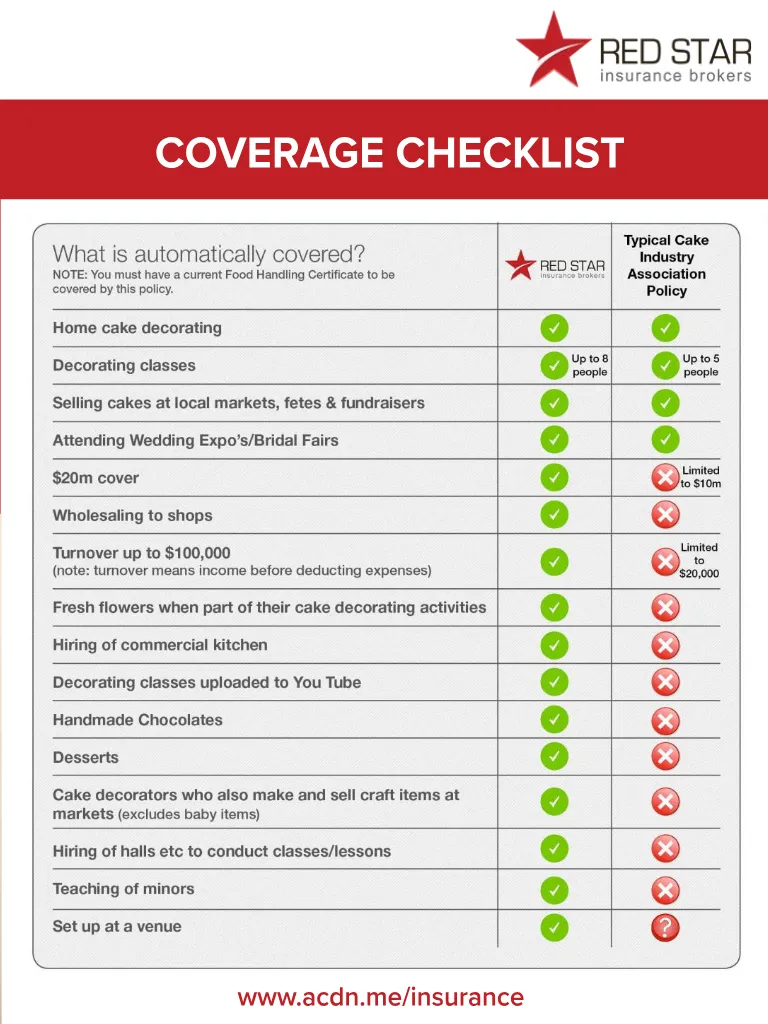
COMPREHENSIVE CAKE DECORATING INSURANCE $ 20m Public & Products Liability $ 189 PER YEAR FOR ACDN MEMBERS $ 289 per year for Non-ACDN Members ( Insurance subject to acceptance criteria ) To arrange cover or for more information visit www . acdn . me / insurance Red Star Insurance Pty Ltd ( AFSL 444803 ) T & C apply , see website for details . The Australian Cake Decorating Network Pty Ltd does not provide any advice regarding insurance matters . Please contact Red Star Insurance Brokers on the above contact details to discuss your insurance requirements . Referral advertisement . For information see www . acdn . me / insurance
Page 119 text
COVERAGE CHECKLIST Typical Cake Decorating Association Policy www . acdn . me / insurance



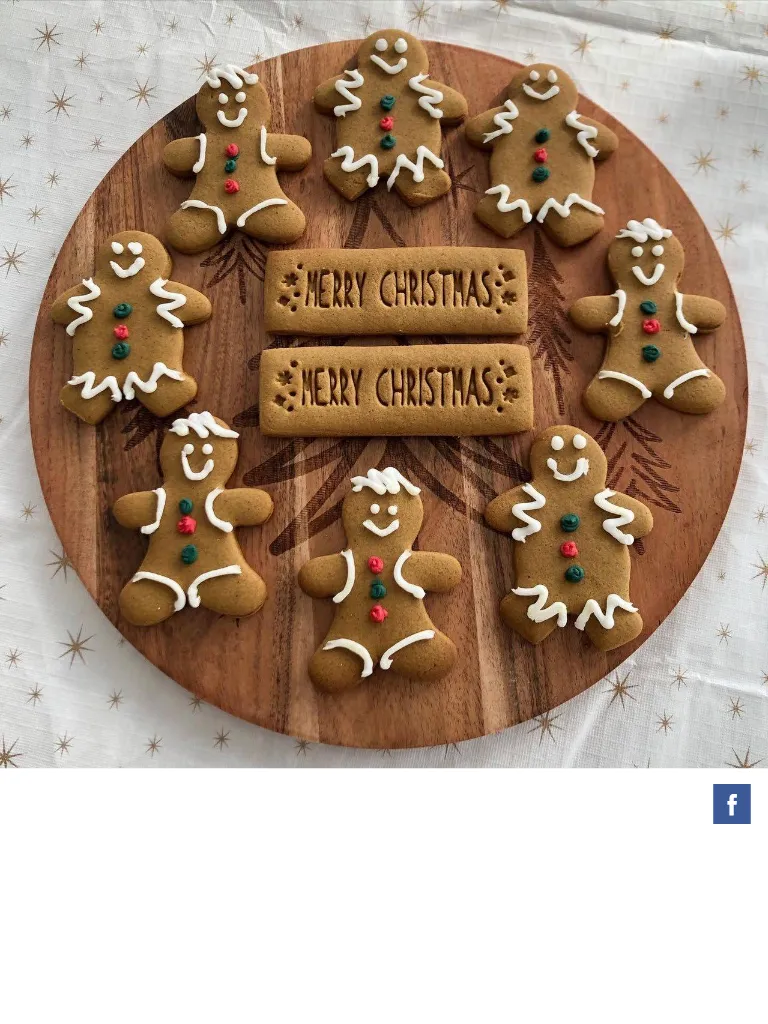


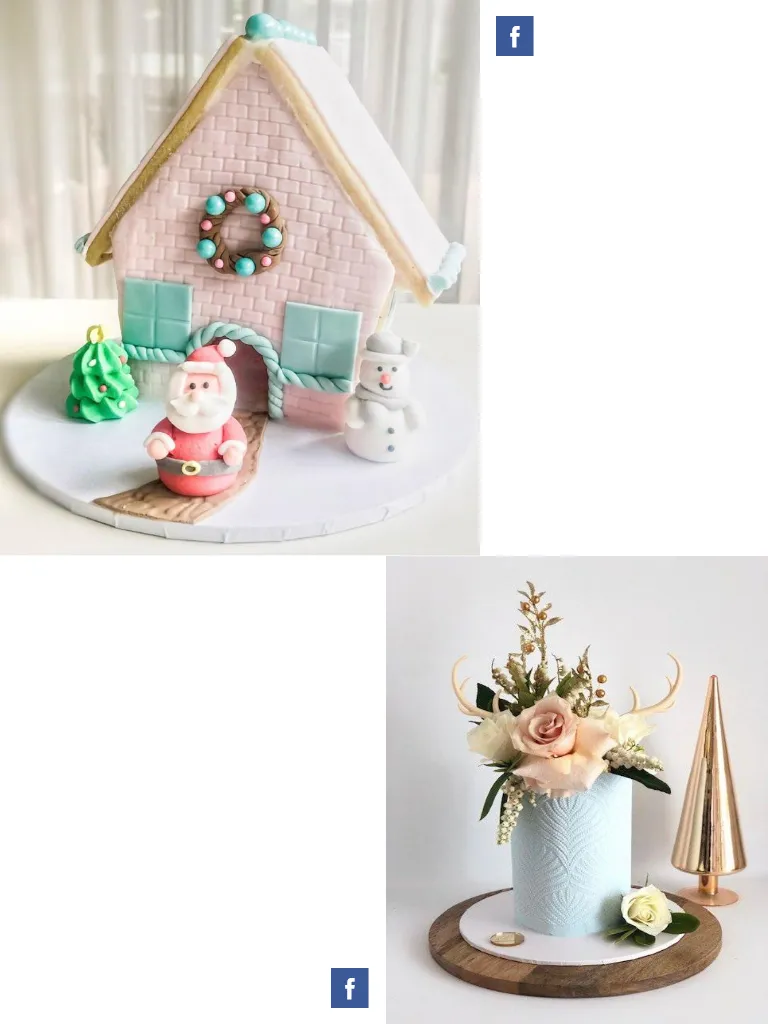

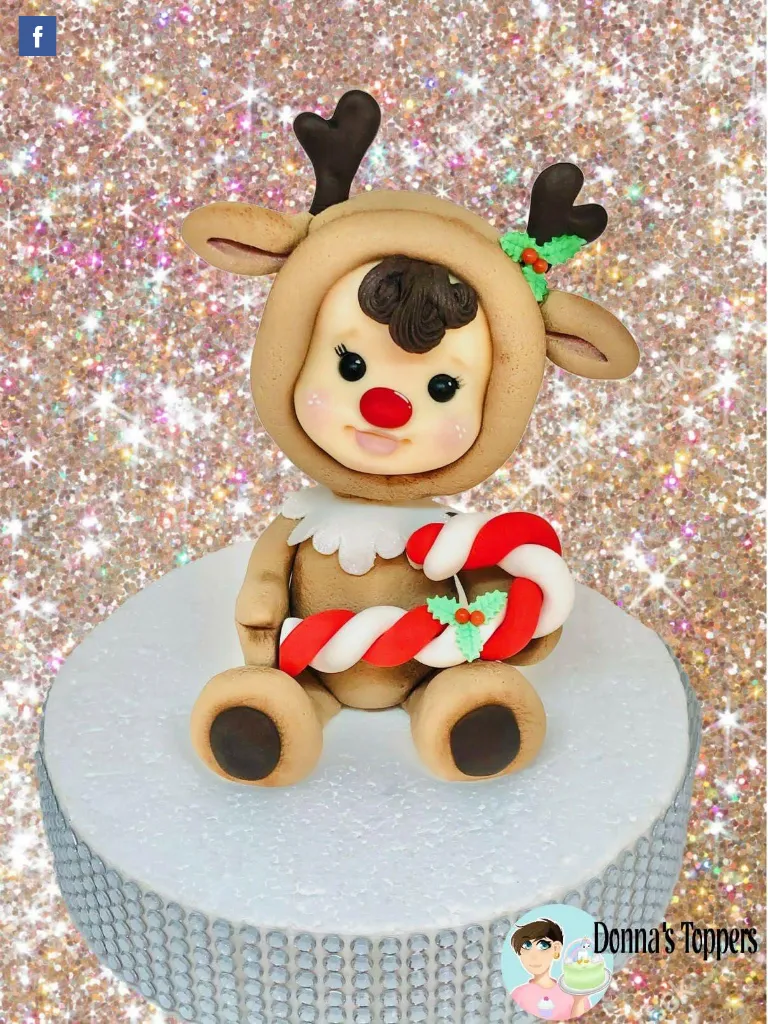





Page 134 text
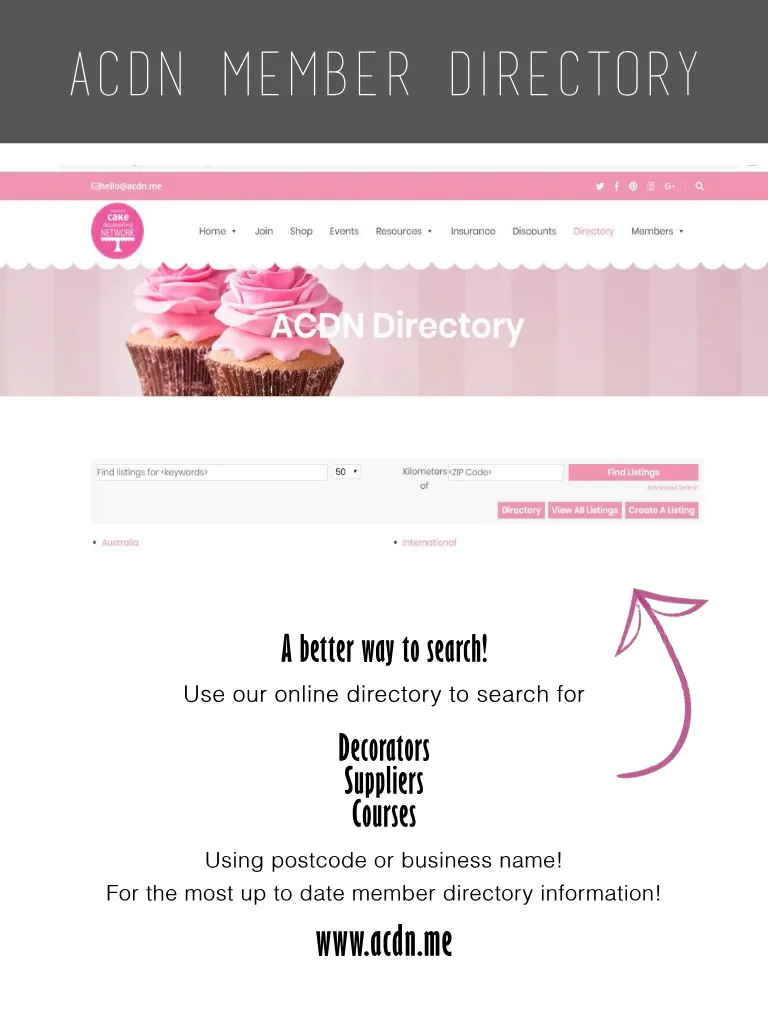
ACDN Member Directory A better way to search ! Use our online directory to search for Decorators Suppliers Courses Using postcode or business name ! For the most up to date member directory information ! www . acdn . me


Page 135 text
Members : If you ' re not listed in the website online directory , please login to the Member ' s Lounge at www . acdn . me to add or update your listing Become a member ! Join online at www . acdn . me / join
Page 136 text
THANKYOU FOR READING ANOTHER ISSUE OF Cake ! m a g a z i n e f www . acdn . me hello @ acdn . me To advertise in Cake ! magazine , contact : liz @ acdn . me THANKYOU FOR READING ANOTHER ISSUE OF www . acdn . me hello @ acdn . me Don ' t miss future issues of Cake ! Subscribe for FREE here ! To advertise in Cake ! magazine , contact : liz @ acdn . me