Page 81 of 91

Page 1 text
MAY 2021
Page 2 text
To advertise in Cake ! magazine , contact : liz @ acdn . me f www . acdn . me hello @ acdn . me click here to join our mailing list ! Cake ! m a g a z i n e PUBLISHER : Cake ! Magazine is published by the Australian Cake Decorating Network Pty Ltd . ACN : 91 164 927 584 . © All content copyright 2020 Australian Cake Decorating Network Pty Ltd . All rights reserved . Reproduction any part of the magazine without written permission is prohibited . All prices included in Cake ! Magazine are approximate and are in AUD unless otherwise stated . Prices quoted are correct at the time of publishing and may vary or be subject to change . The Australian Cake Decorating Network Pty Ltd accepts no responsibility for damage or loss as a result of material submitted for , published in or as a result of this publication . The Australian Cake Decorating Network does not have an affiliation with any other magazine . The views and opinions expressed within this publication are not necessarily the views of the publisher or it ' s affiliates . While every effort has been made to ensure the accuracy of the informtion contained within Cake ! Magazine the publisher and Cake ! Magazine hold no responsibility for any errors , omissions , or consequences subsequent or otherwise , including loss or damage arising from reliance on information in this publication . Content is supplied for publication in Cake ! Magazine by parties external to the Australian Cake Decorating Network and it is the external party ' s responsibility to ensure content and credits are accurate . Cake ! Magazine contains advertising through individual arrangements , which may include paid affiliate arrangements . Cake ! Magazine may also contain affiliate links . The agreements are held between the advertiser or affiliate and the Australian Cake Decorating Network Ptd Ltd . To advertise in Cake ! magazine , contact : liz @ acdn . me f www . acdn . me hello @ acdn . me click here to join our mailing list !
Page 3 text
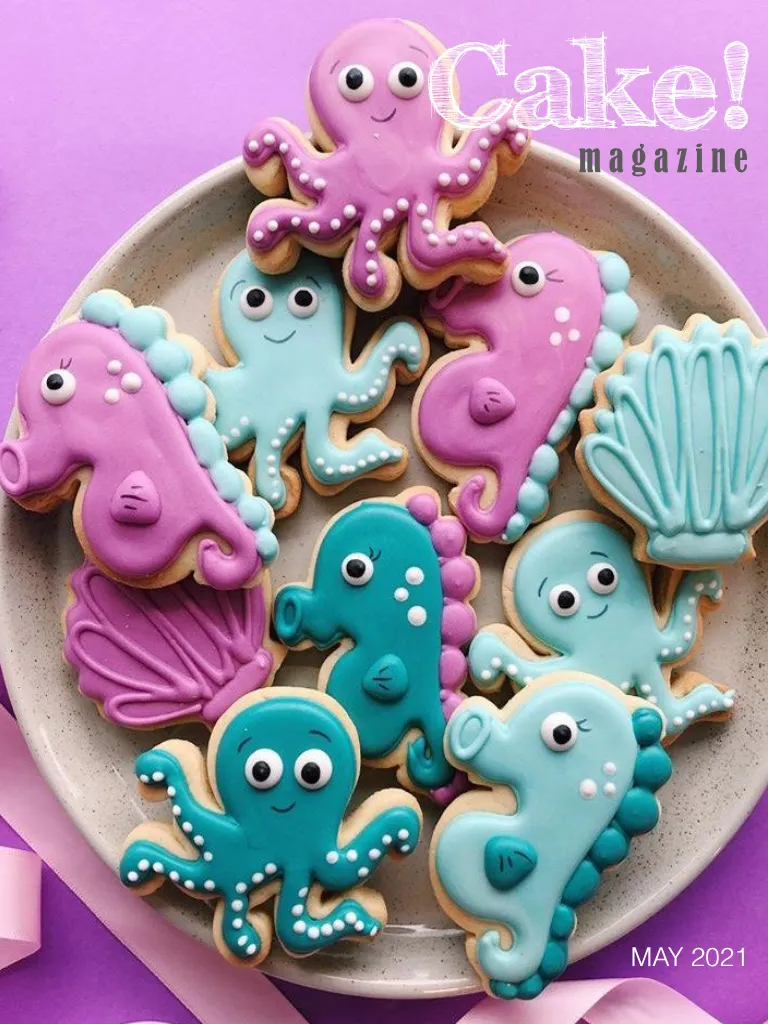
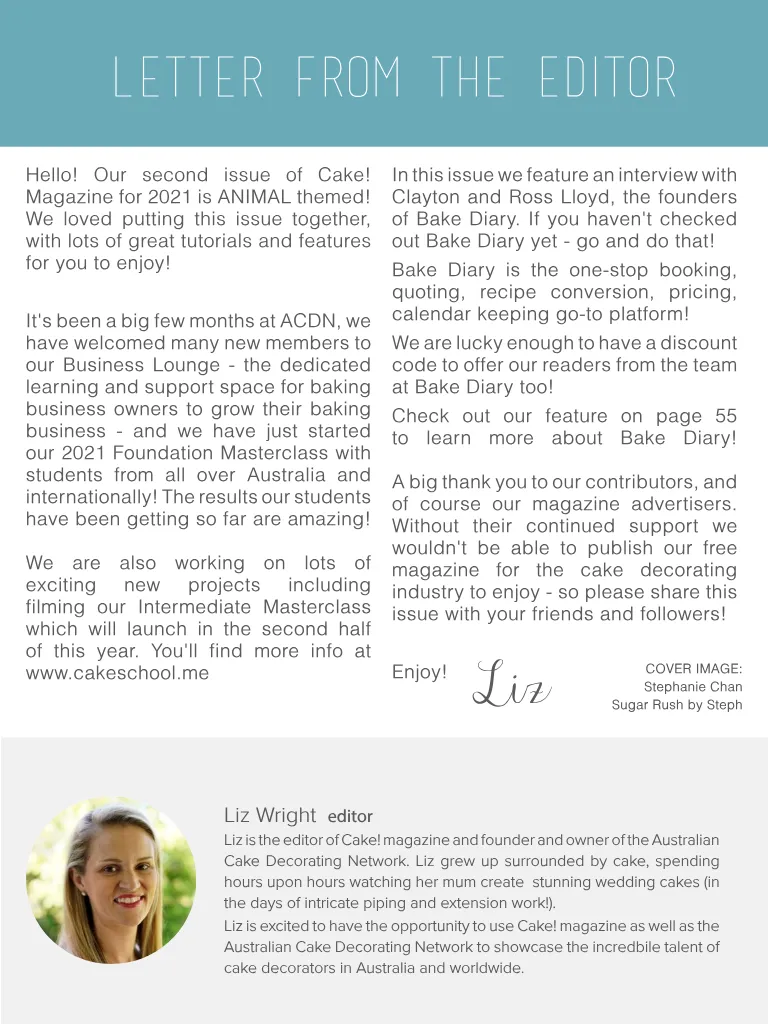
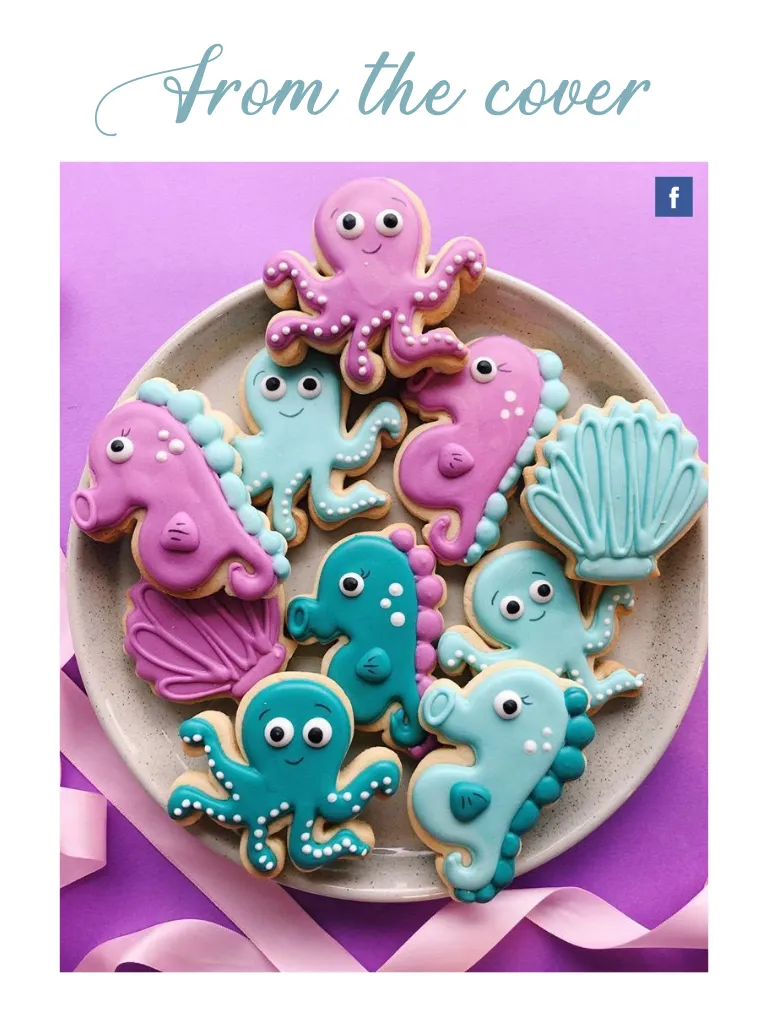
Liz Wright editor letter from the editor Hello ! Our second issue of Cake ! Magazine for 2021 is ANIMAL themed ! We loved putting this issue together , with lots of great tutorials and features for you to enjoy ! It ' s been a big few months at ACDN , we have welcomed many new members to our Business Lounge - the dedicated learning and support space for baking business owners to grow their baking business - and we have just started our 2021 Foundation Masterclass with students from all over Australia and internationally ! The results our students have been getting so far are amazing ! We are also working on lots of exciting new projects including filming our Intermediate Masterclass which will launch in the second half of this year . You ' ll find more info at www . cakeschool . me In this issue we feature an interview with Clayton and Ross Lloyd , the founders of Bake Diary . If you haven ' t checked out Bake Diary yet - go and do that ! Bake Diary is the one-stop booking , quoting , recipe conversion , pricing , calendar keeping go-to platform ! We are lucky enough to have a discount code to offer our readers from the team at Bake Diary too ! Check out our feature on page 55 to learn more about Bake Diary ! A big thank you to our contributors , and of course our magazine advertisers . Without their continued support we wouldn ' t be able to publish our free magazine for the cake decorating industry to enjoy - so please share this issue with your friends and followers ! Enjoy ! Liz COVER IMAGE : Stephanie Chan Sugar Rush by Steph Liz Wright editor Liz is the editor of Cake ! magazine and founder and owner of the Australian Cake Decorating Network . Liz grew up surrounded by cake , spending hours upon hours watching her mum create stunning wedding cakes ( in the days of intricate piping and extension work !). Liz is excited to have the opportunity to use Cake ! magazine as well as the Australian Cake Decorating Network to showcase the incredbile talent of cake decorators in Australia and worldwide .
Page 4 text
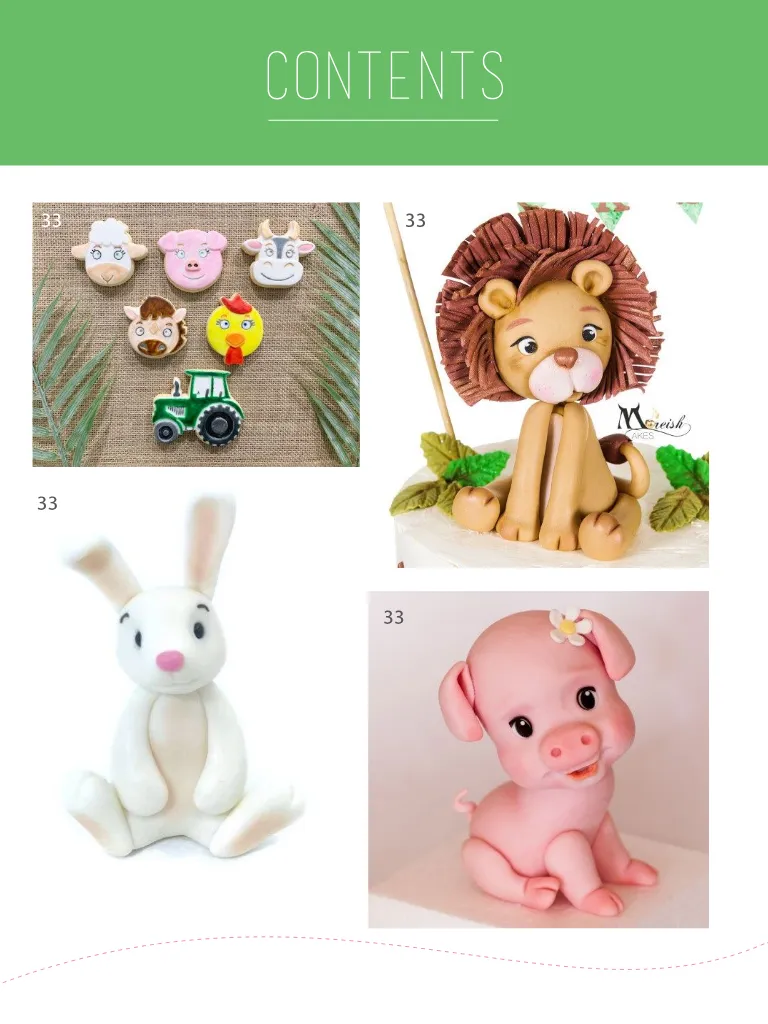
contents 33 33 8 16 26 28 40 33 22 24 33 25 17
Page 5 text
21 Features 50 55 Amber Comadira-Smith : Business Basics Interview with Ross & Clayton Lloyd from Bake Diary 9 15 23 35 Paint Your Own Farm Animal Cookies Bunny Topper Roarsome Lion Cake Topper Pig Topper 3 45 65 Letter from the editor Recipes ACDN Member Gallery MAY 2021 Tutorials Regulars 21 Features 50 55 Amber Comadira-Smith : Business Basics Interview with Ross & Clayton Lloyd from Bake Diary 9 15 23 35 Paint Your Own Farm Animal Cookies Bunny Topper Roarsome Lion Cake Topper Pig Topper 3 45 65 Letter from the editor Recipes ACDN Member Gallery MAY 2021 Tutorials Regulars

Page 6 text
www . acdn . me hello @ acdn . me click here to join our mailing list ! To advertise in Cake ! magazine , contact liz @ acdn . me SUBSCRIBE FOR FREE to have each issue of Cake ! magzine sent straight to your inbox ! f www . acdn . me hello @ acdn . me click here to join our mailing list ! To advertise in Cake ! magazine , contact liz @ acdn . me


Page 7 text
Animal Love ! A collection of tutorials to help you make your own sweet animal themed creations


Page 9 text
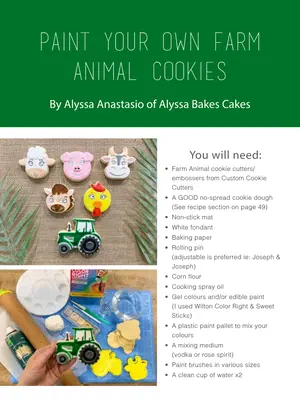
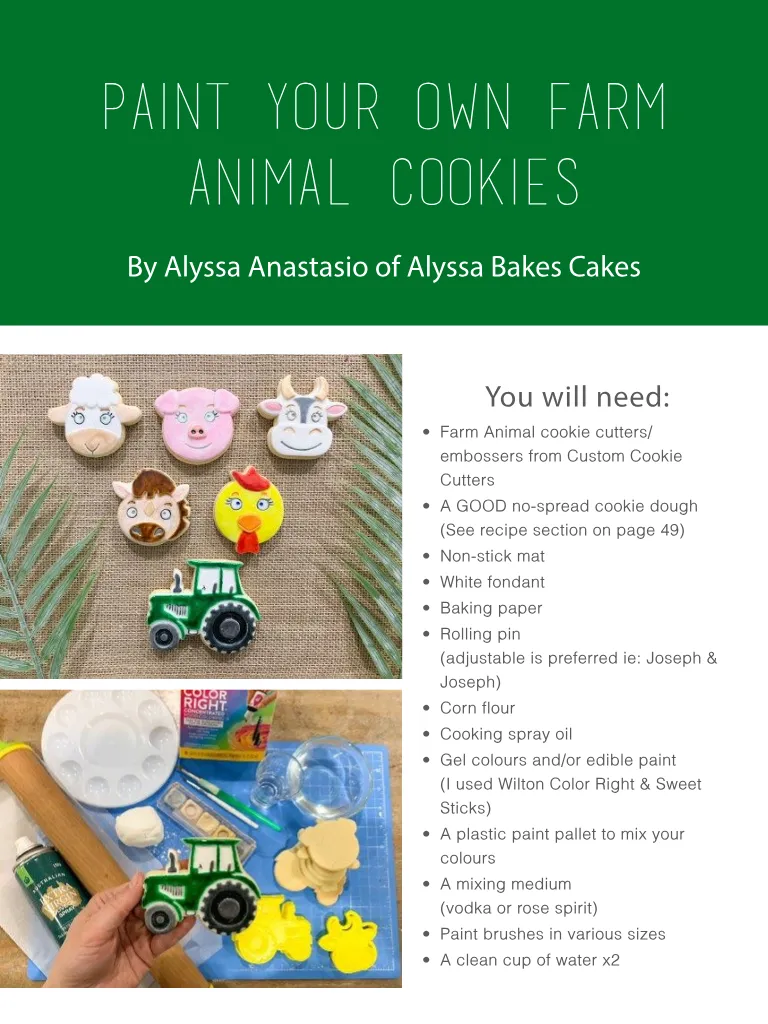
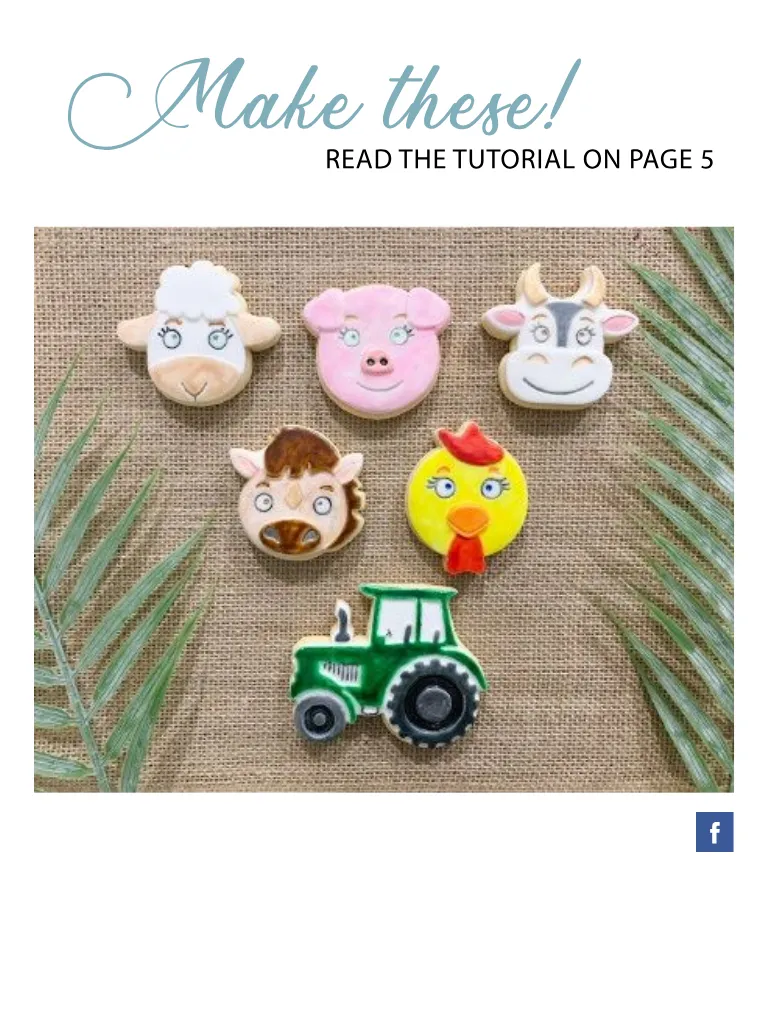
PAINT YOUR OWN FARM ANIMAL COOKIES By Alyssa Anastasio of Alyssa Bakes Cakes You will need : • Farm Animal cookie cutters / embossers from Custom Cookie Cutters • A GOOD no-spread cookie dough ( See recipe section on page 49 ) • Non-stick mat • White fondant • Baking paper • Rolling pin ( adjustable is preferred ie : Joseph & Joseph ) • Corn flour • Cooking spray oil • Gel colours and / or edible paint ( I used Wilton Color Right & Sweet Sticks ) • A plastic paint pallet to mix your colours • A mixing medium ( vodka or rose spirit ) • Paint brushes in various sizes • A clean cup of water x2
Page 10 text
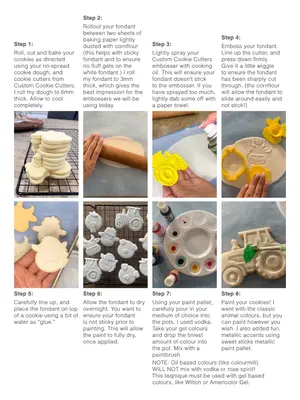
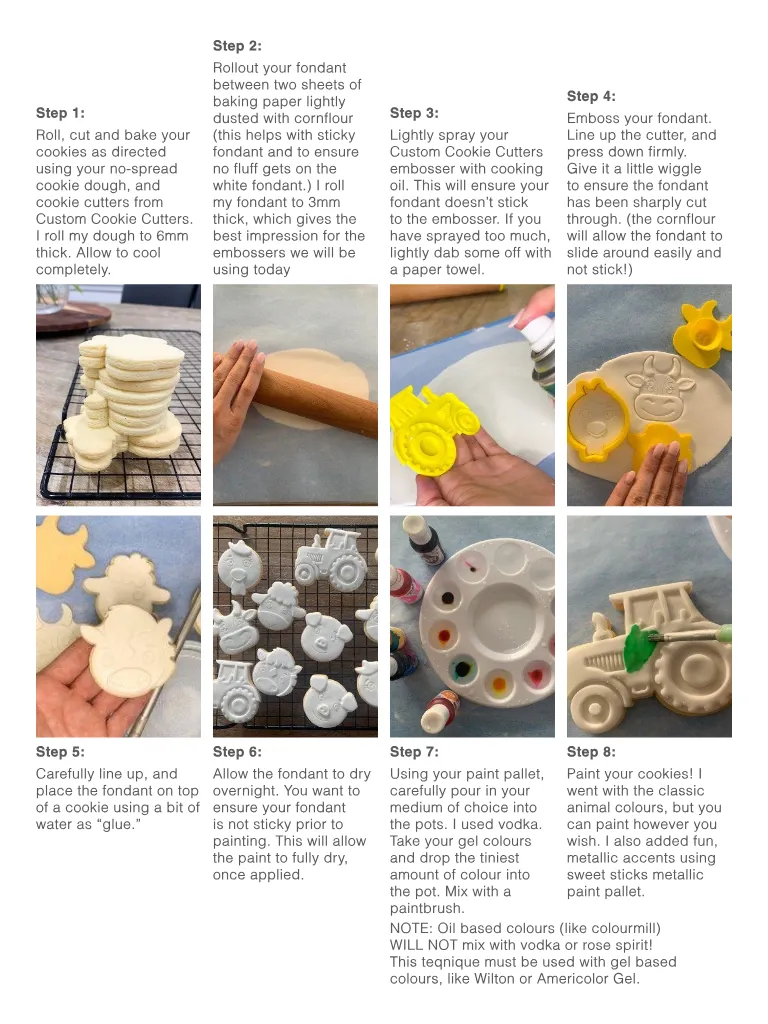
Step 2 : Step 1 : Roll , cut and bake your cookies as directed using your no-spread cookie dough , and cookie cutters from Custom Cookie Cutters . I roll my dough to 6mm thick . Allow to cool completely . Rollout your fondant between two sheets of baking paper lightly dusted with cornflour ( this helps with sticky fondant and to ensure no fluff gets on the white fondant .) I roll my fondant to 3mm thick , which gives the best impression for the embossers we will be using today Step 3 : Lightly spray your Custom Cookie Cutters embosser with cooking oil . This will ensure your fondant doesn ’ t stick to the embosser . If you have sprayed too much , lightly dab some off with a paper towel . Step 4 : Emboss your fondant . Line up the cutter , and press down firmly . Give it a little wiggle to ensure the fondant has been sharply cut through . ( the cornflour will allow the fondant to slide around easily and not stick !) Step 5 : Carefully line up , and place the fondant on top of a cookie using a bit of water as “ glue .” Step 6 : Allow the fondant to dry overnight . You want to ensure your fondant is not sticky prior to painting . This will allow the paint to fully dry , once applied . Step 7 : Using your paint pallet , carefully pour in your medium of choice into the pots . I used vodka . Take your gel colours and drop the tiniest amount of colour into the pot . Mix with a paintbrush . Step 8 : Paint your cookies ! I went with the classic animal colours , but you can paint however you wish . I also added fun , metallic accents using sweet sticks metallic paint pallet . NOTE : Oil based colours ( like colourmill ) WILL NOT mix with vodka or rose spirit ! This teqnique must be used with gel based colours , like Wilton or Americolor Gel .
Page 11 text
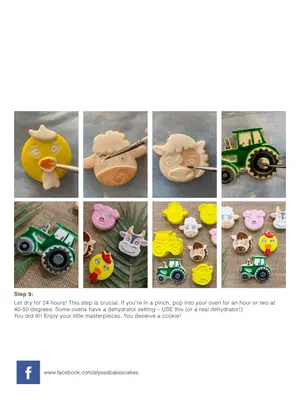
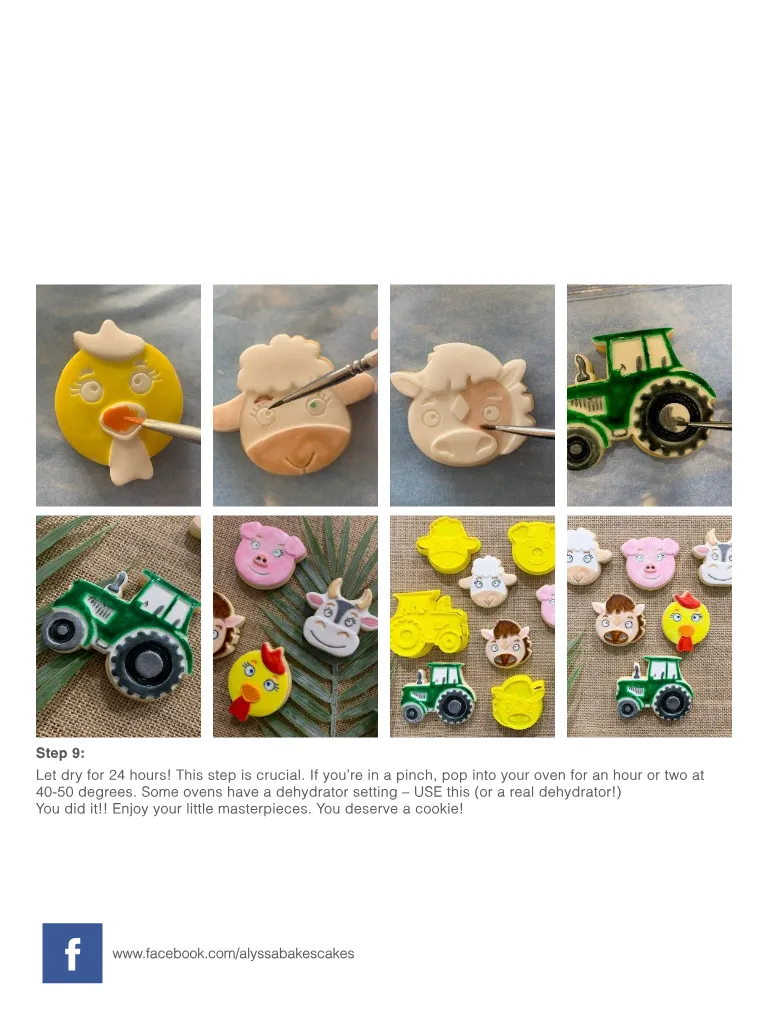
Step 9 : Let dry for 24 hours ! This step is crucial . If you ’ re in a pinch , pop into your oven for an hour or two at 40-50 degrees . Some ovens have a dehydrator setting – USE this ( or a real dehydrator !) You did it !! Enjoy your little masterpieces . You deserve a cookie ! f www . facebook . com / alyssa bakes cakes


Page 12 text
colour mill .
Page 13 text
10 beautiful designs Available now !


Page 14 text
` df PIECES www . cakedecoratingsolutions . com . au
Page 15 text
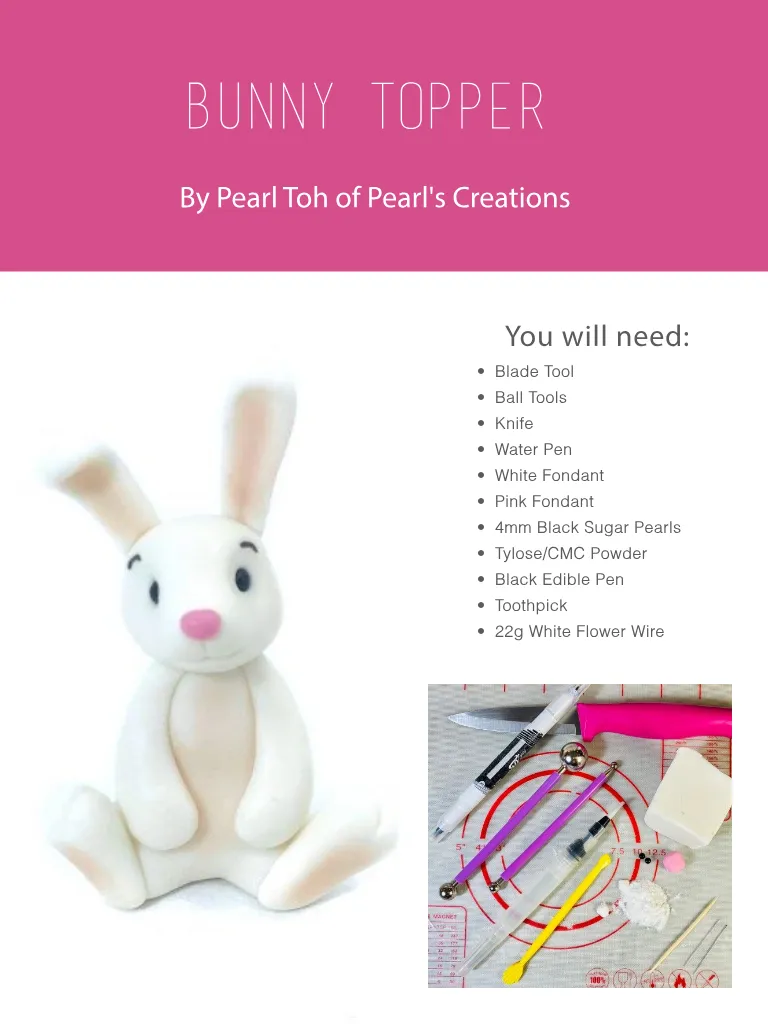
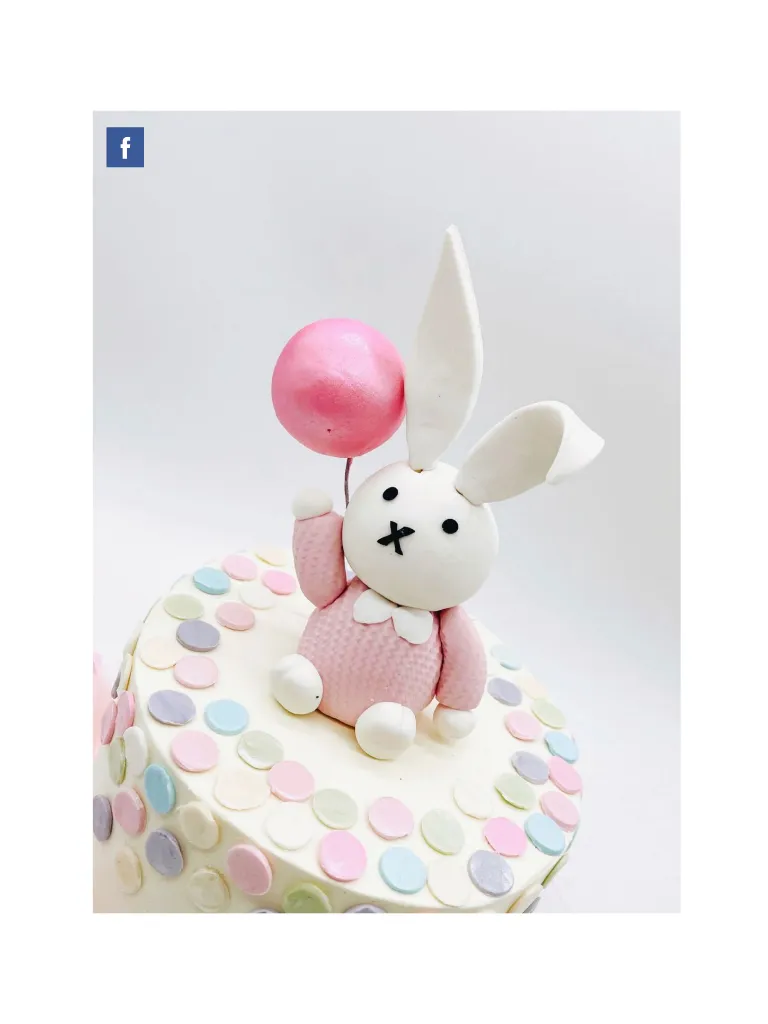
BUNNY TOPPER By Pearl Toh of Pearl ' s Creations You will need : • Blade Tool • Ball Tools • Knife • Water Pen • White Fondant • Pink Fondant • 4mm Black Sugar Pearls • Tylose / CMC Powder • Black Edible Pen • Toothpick • 22g White Flower Wire
Page 16 text
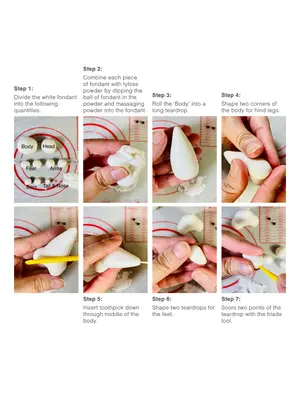
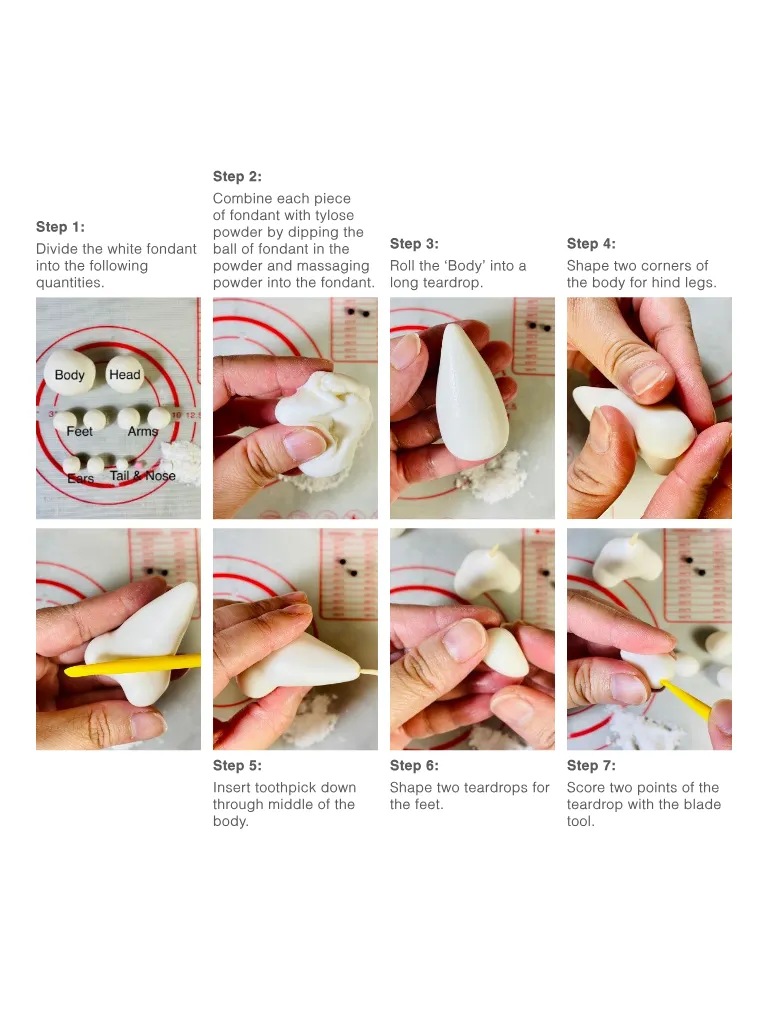
Step 2 : Step 1 : Divide the white fondant into the following quantities . Combine each piece of fondant with tylose powder by dipping the ball of fondant in the powder and massaging powder into the fondant . Step 3 : Roll the ‘ Body ’ into a long teardrop . Step 4 : Shape two corners of the body for hind legs . Step 5 : Step 6 : Step 7 : Insert toothpick down through middle of the body . Shape two teardrops for the feet . Score two points of the teardrop with the blade tool .
Page 17 text
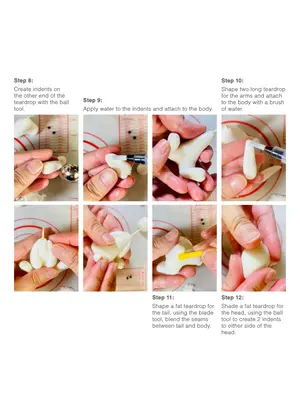
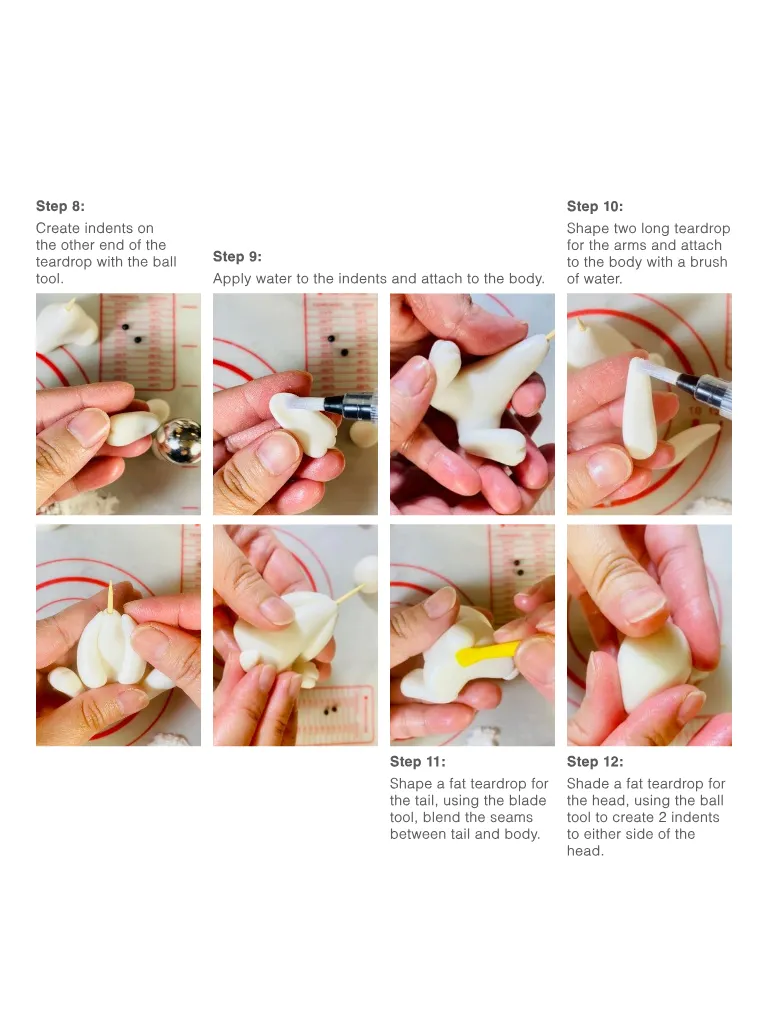
Step 8 : Create indents on the other end of the teardrop with the ball Step 9 : tool . Apply water to the indents and attach to the body . Step 10 : Shape two long teardrop for the arms and attach to the body with a brush of water . Step 11 : Shape a fat teardrop for the tail , using the blade tool , blend the seams between tail and body . Step 12 : Shade a fat teardrop for the head , using the ball tool to create 2 indents to either side of the head .
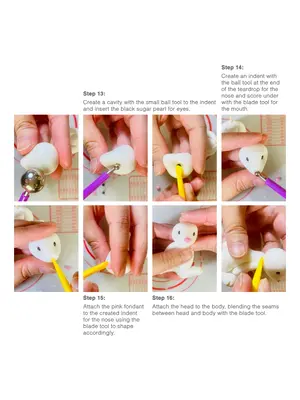
Page 18 text
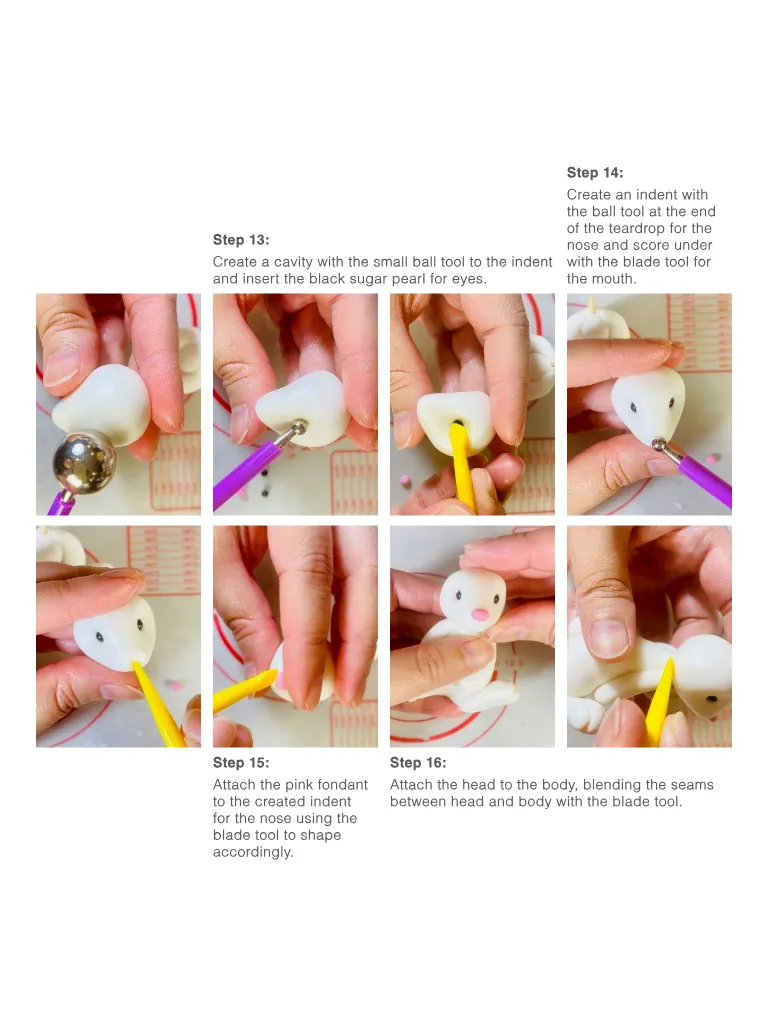
Step 13 : Create a cavity with the small ball tool to the indent and insert the black sugar pearl for eyes . Step 14 : Create an indent with the ball tool at the end of the teardrop for the nose and score under with the blade tool for the mouth . Step 15 : Step 16 : Attach the pink fondant to the created indent for the nose using the blade tool to shape accordingly . Attach the head to the body , blending the seams between head and body with the blade tool .
Page 19 text
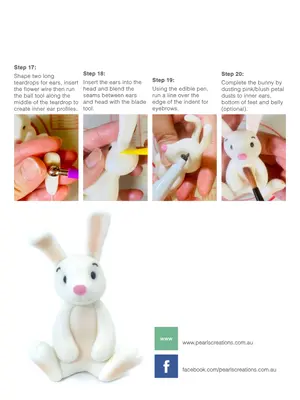
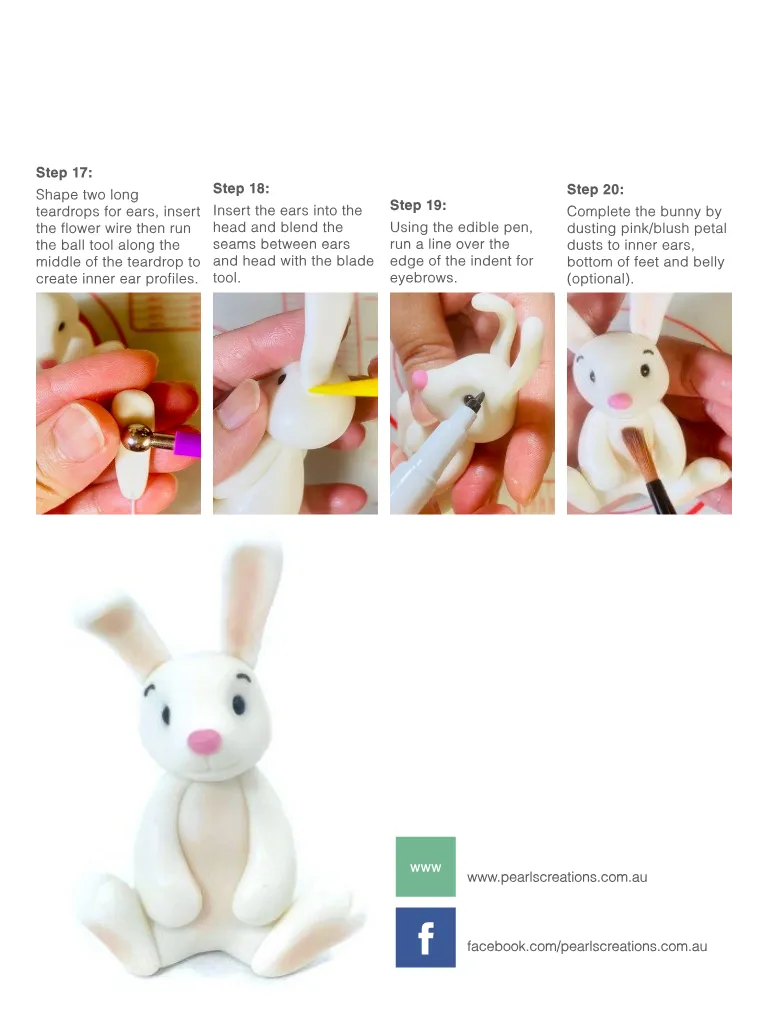
Step 17 : Shape two long teardrops for ears , insert the flower wire then run the ball tool along the middle of the teardrop to create inner ear profiles . Step 18 : Insert the ears into the head and blend the seams between ears and head with the blade tool . Step 19 : Using the edible pen , run a line over the edge of the indent for eyebrows . Step 20 : Complete the bunny by dusting pink / blush petal dusts to inner ears , bottom of feet and belly ( optional ). www www . pearlscreations . com . au f facebook . com / pearlscreations . com . au



Page 22 text
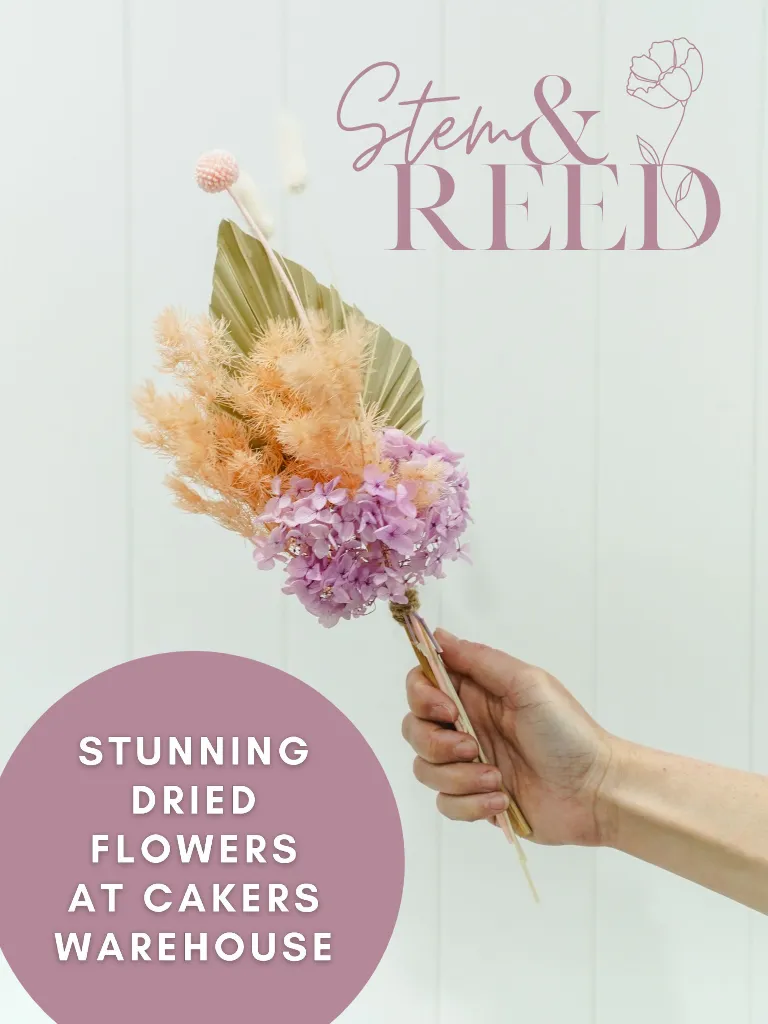
Stem & REED
Page 23 text
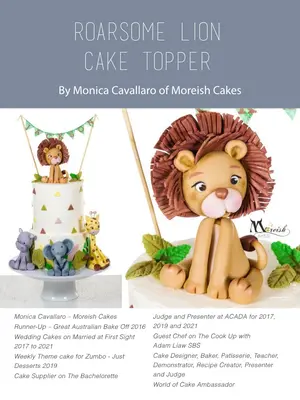
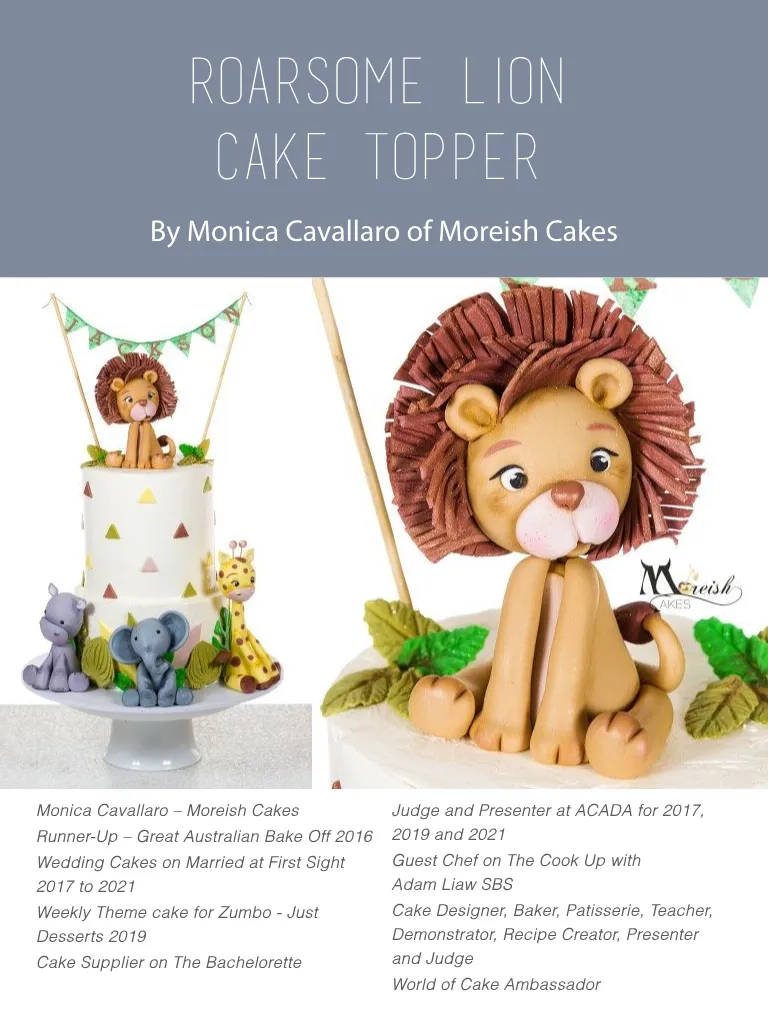
ROARSOME LION CAKE TOPPER By Monica Cavallaro of Moreish Cakes Monica Cavallaro – Moreish Cakes Runner-Up – Great Australian Bake Off 2016 Wedding Cakes on Married at First Sight 2017 to 2021 Weekly Theme cake for Zumbo - Just Desserts 2019 Cake Supplier on The Bachelorette Judge and Presenter at ACADA for 2017 , 2019 and 2021 Guest Chef on The Cook Up with Adam Liaw SBS Cake Designer , Baker , Patisserie , Teacher , Demonstrator , Recipe Creator , Presenter and Judge World of Cake Ambassador
Page 24 text
You will need : Weights : • Body – 50 grams • Tummy – 3 grams • Head – 45 grams • Back Legs – 12 grams each • Front Legs – 9 grams each • Tail – 4 Grams • Tail end – 3 grams • Maine – 35 grams • Ears 1.25 grams each • Muzzle / face – 5 grams • Nose - . 25 grams • Eyes - . 2 grams each Edible Glue Recipe • ¼ teaspoon of More Hard Tylose • 2 tablespoons of water • Mix together , leave to develop for an hour . • Mix again , leave for an hour • Mix again and use when clear • Store in an airtight container for a week or in the fridge for up to a month . Additional Materials • More Hard Tylose • 9 cm Bamboo skewer • Modeling tools – I am using More Pointy and More Modeling Tool set . • Embosser wheel • Edible Glue ( recipe = ¼ teaspoon More Hard Tylose + 2 table spoons of warm water . Mix , leave to develop , stir in a hour , repeat hourly until it ’ s thick and semi clear gloop – store in an air tight container on the bench for a week or in the fridge for a month ) • Small paint brush x 2 • Pink petal dust • Ivory or cream petal dust • Colours of your choice for the body , face etc to mix in the fondant • Monica used Over The Top Fondant for this tutorial Handy tip – add Tylose only to the piece of fondant you are working with , as it will avoid drying out and cracking as the developing of the Tylose can take several hours . Leaving your fondant soft to work with and will set hard over time . f facebook . com / MoreishCakesAustralia www www . MoreishCakes . com . au
Page 25 text
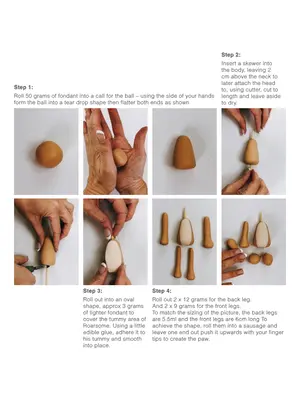
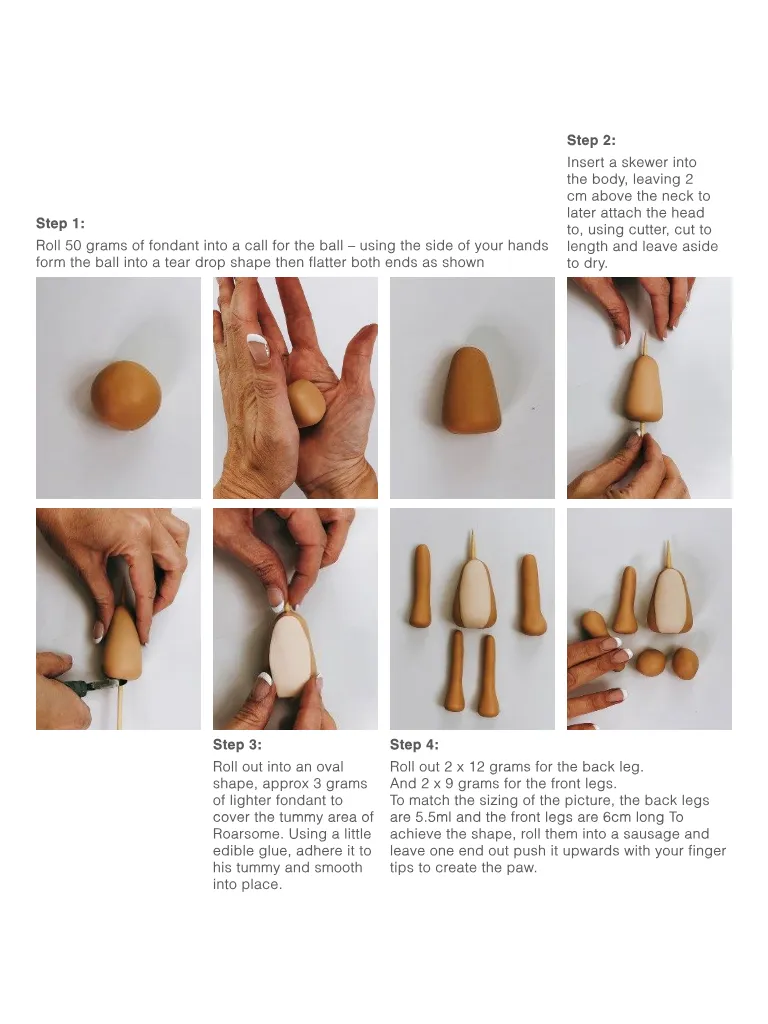
Step 1 : Roll 50 grams of fondant into a call for the ball – using the side of your hands form the ball into a tear drop shape then flatter both ends as shown Step 2 : Insert a skewer into the body , leaving 2 cm above the neck to later attach the head to , using cutter , cut to length and leave aside to dry . Step 3 : Roll out into an oval shape , approx 3 grams of lighter fondant to cover the tummy area of Roarsome . Using a little edible glue , adhere it to his tummy and smooth into place . Step 4 : Roll out 2 x 12 grams for the back leg . And 2 x 9 grams for the front legs . To match the sizing of the picture , the back legs are 5.5ml and the front legs are 6cm long To achieve the shape , roll them into a sausage and leave one end out push it upwards with your finger tips to create the paw .
Page 26 text
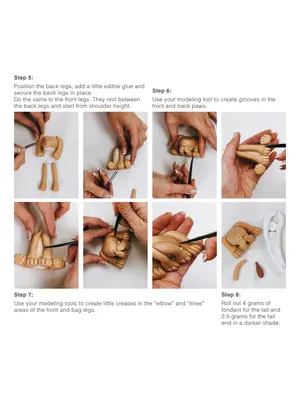
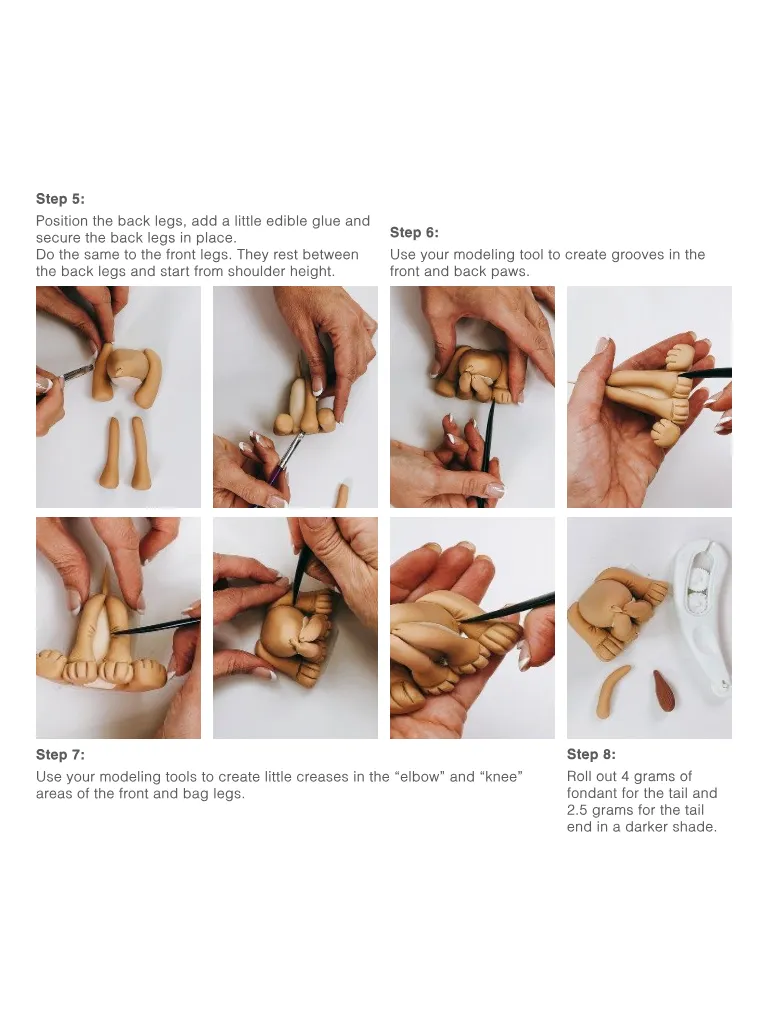
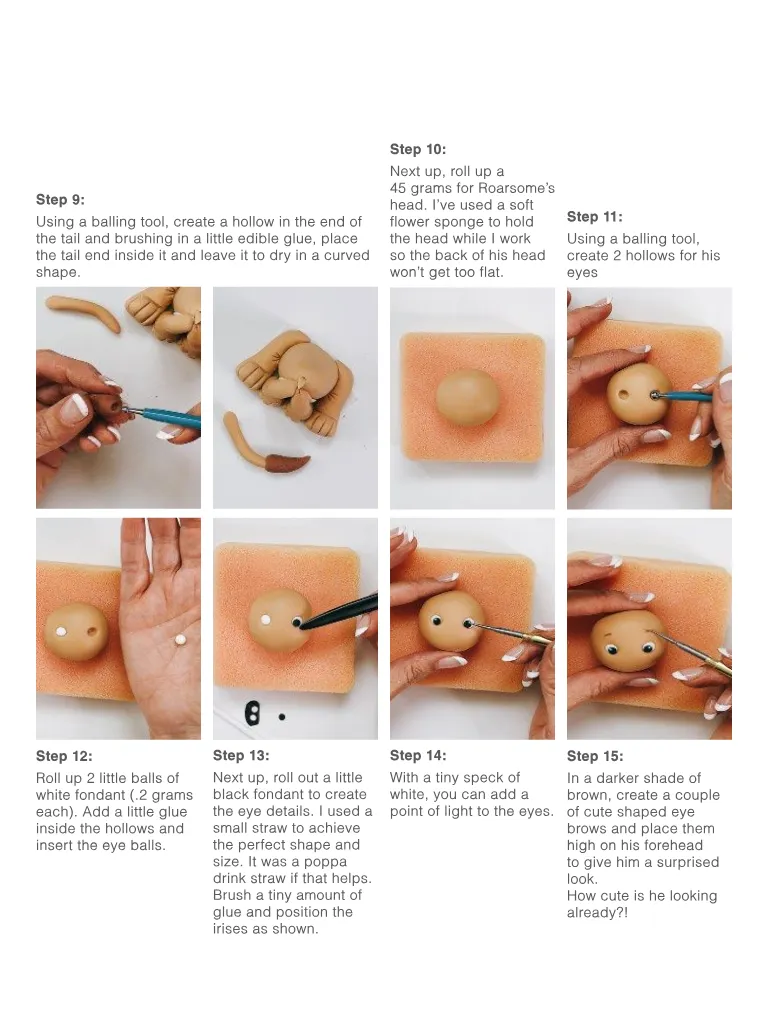
Step 5 : Position the back legs , add a little edible glue and secure the back legs in place . Do the same to the front legs . They rest between the back legs and start from shoulder height . Step 6 : Use your modeling tool to create grooves in the front and back paws . Step 7 : Use your modeling tools to create little creases in the “ elbow ” and “ knee ” areas of the front and bag legs . Step 8 : Roll out 4 grams of fondant for the tail and 2.5 grams for the tail end in a darker shade .
Page 27 text
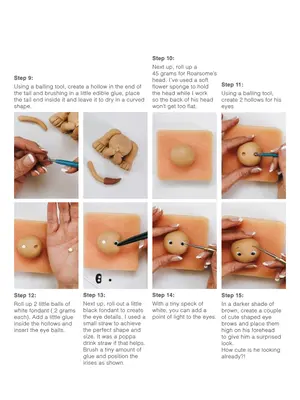
Step 9 : Using a balling tool , create a hollow in the end of the tail and brushing in a little edible glue , place the tail end inside it and leave it to dry in a curved shape . Step 10 : Next up , roll up a 45 grams for Roarsome ’ s head . I ’ ve used a soft flower sponge to hold the head while I work so the back of his head won ’ t get too flat . Step 11 : Using a balling tool , create 2 hollows for his eyes Step 12 : Roll up 2 little balls of white fondant (. 2 grams each ). Add a little glue inside the hollows and insert the eye balls . Step 13 : Next up , roll out a little black fondant to create the eye details . I used a small straw to achieve the perfect shape and size . It was a poppa drink straw if that helps . Brush a tiny amount of glue and position the irises as shown . Step 14 : With a tiny speck of white , you can add a point of light to the eyes . Step 15 : In a darker shade of brown , create a couple of cute shaped eye brows and place them high on his forehead to give him a surprised look . How cute is he looking already ?!
Page 28 text
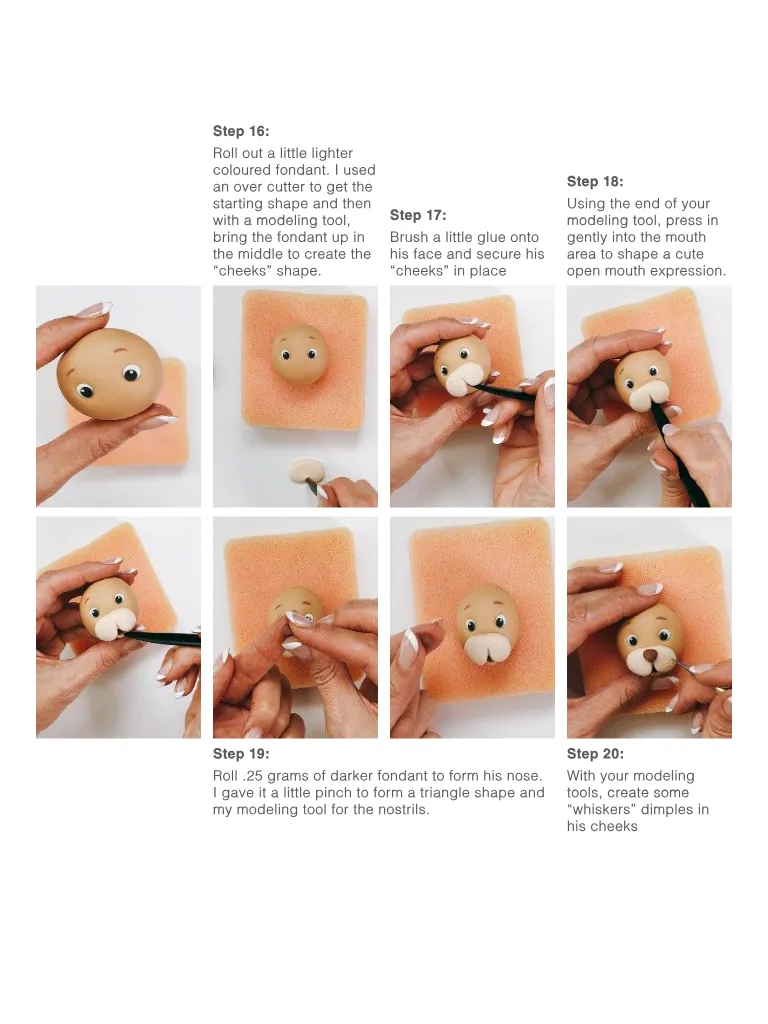
Step 16 : Roll out a little lighter coloured fondant . I used an over cutter to get the starting shape and then with a modeling tool , bring the fondant up in the middle to create the “ cheeks ” shape . Step 17 : Brush a little glue onto his face and secure his “ cheeks ” in place Step 18 : Using the end of your modeling tool , press in gently into the mouth area to shape a cute open mouth expression . Step 19 : Roll . 25 grams of darker fondant to form his nose . I gave it a little pinch to form a triangle shape and my modeling tool for the nostrils . Step 20 : With your modeling tools , create some “ whiskers ” dimples in his cheeks
Page 29 text
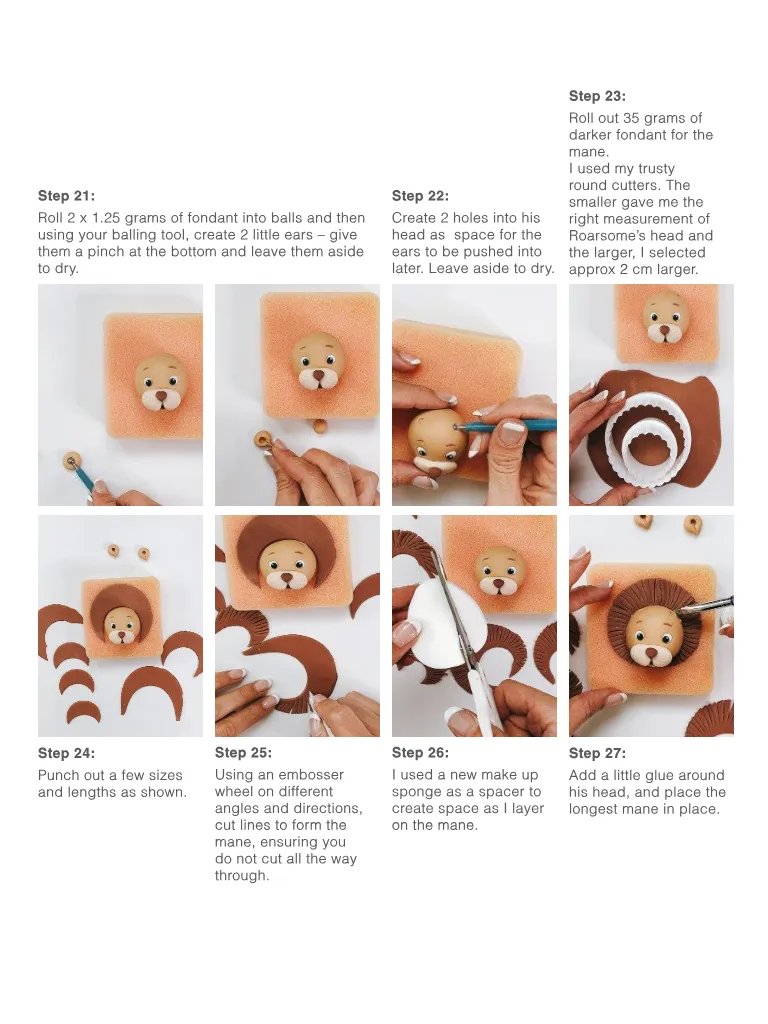
Step 21 : Roll 2 x 1.25 grams of fondant into balls and then using your balling tool , create 2 little ears – give them a pinch at the bottom and leave them aside to dry . Step 22 : Create 2 holes into his head as space for the ears to be pushed into later . Leave aside to dry . Step 23 : Roll out 35 grams of darker fondant for the mane . I used my trusty round cutters . The smaller gave me the right measurement of Roarsome ’ s head and the larger , I selected approx 2 cm larger . Step 24 : Punch out a few sizes and lengths as shown . Step 25 : Using an embosser wheel on different angles and directions , cut lines to form the mane , ensuring you do not cut all the way through . Step 26 : I used a new make up sponge as a spacer to create space as I layer on the mane . Step 27 : Add a little glue around his head , and place the longest mane in place .
Page 30 text
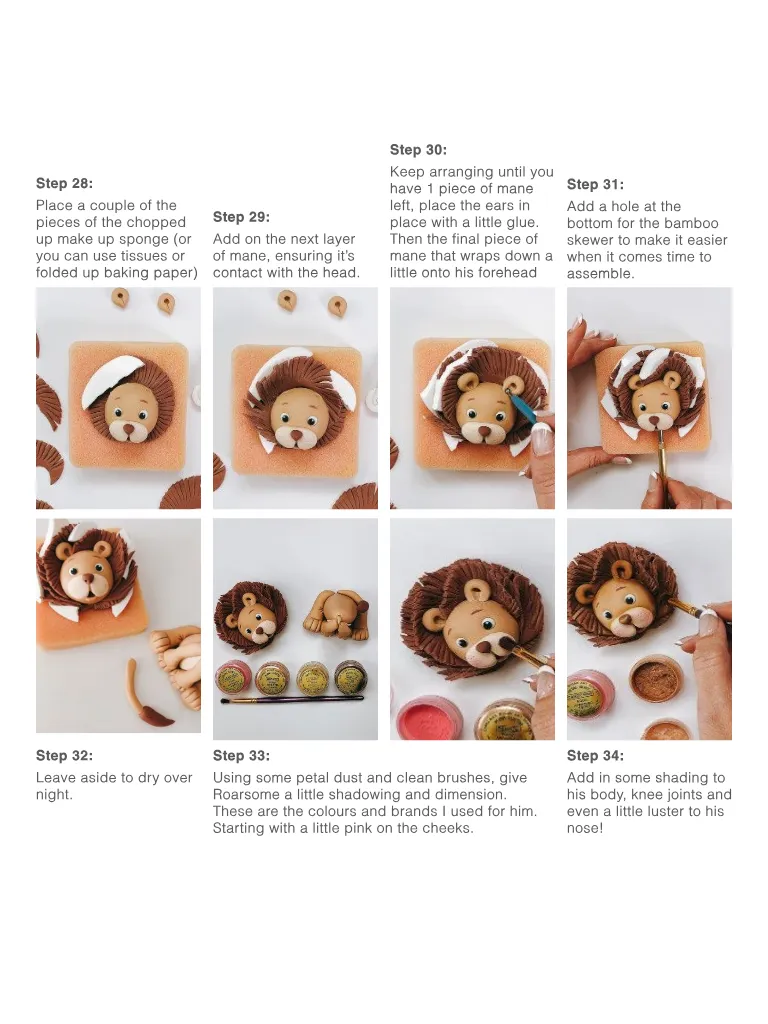
Step 30 : Step 28 : Place a couple of the pieces of the chopped up make up sponge ( or you can use tissues or folded up baking paper ) Step 29 : Add on the next layer of mane , ensuring it ’ s contact with the head . Keep arranging until you have 1 piece of mane left , place the ears in place with a little glue . Then the final piece of mane that wraps down a little onto his forehead Step 31 : Add a hole at the bottom for the bamboo skewer to make it easier when it comes time to assemble . Step 32 : Leave aside to dry over night . Step 33 : Using some petal dust and clean brushes , give Roarsome a little shadowing and dimension . These are the colours and brands I used for him . Starting with a little pink on the cheeks . Step 34 : Add in some shading to his body , knee joints and even a little luster to his nose !
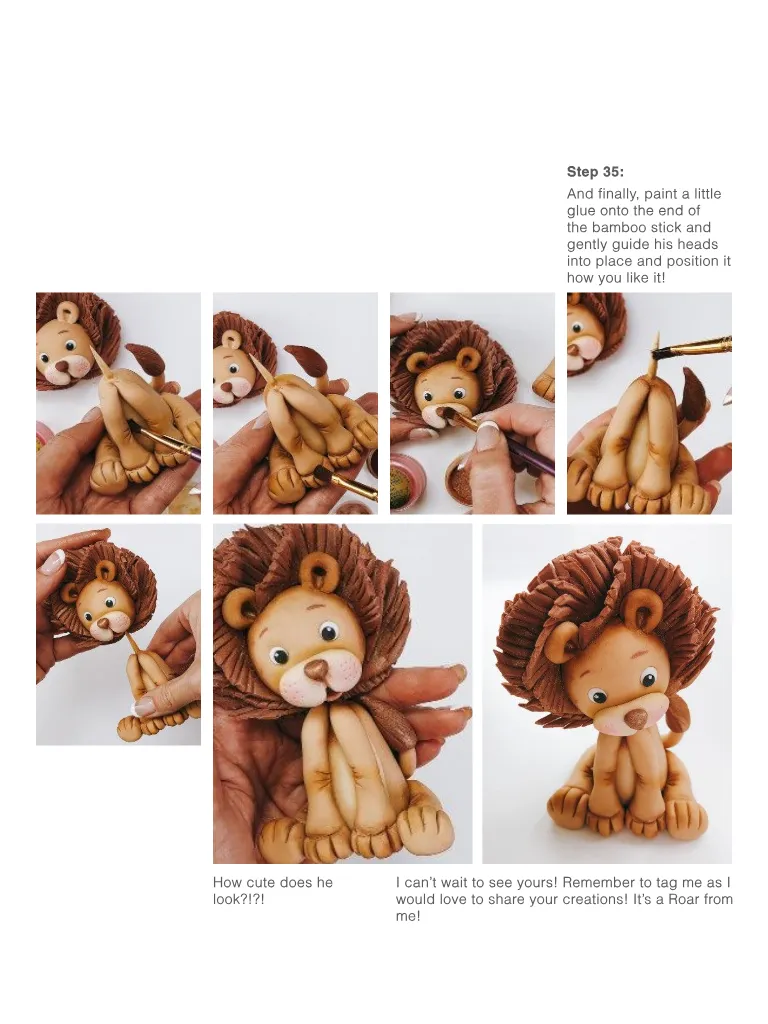
Page 31 text
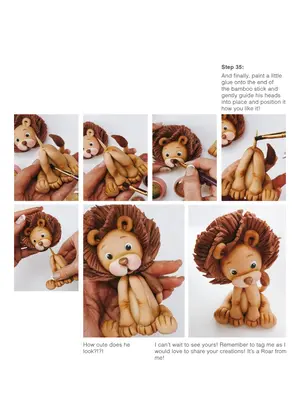
Step 35 : And finally , paint a little glue onto the end of the bamboo stick and gently guide his heads into place and position it how you like it ! How cute does he look ?!?! I can ’ t wait to see yours ! Remember to tag me as I would love to share your creations ! It ’ s a Roar from me !
Page 32 text
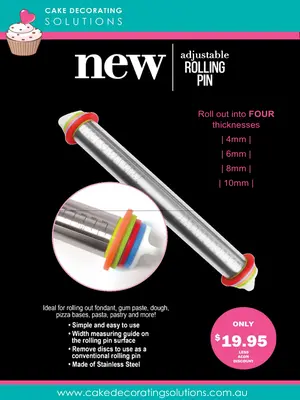
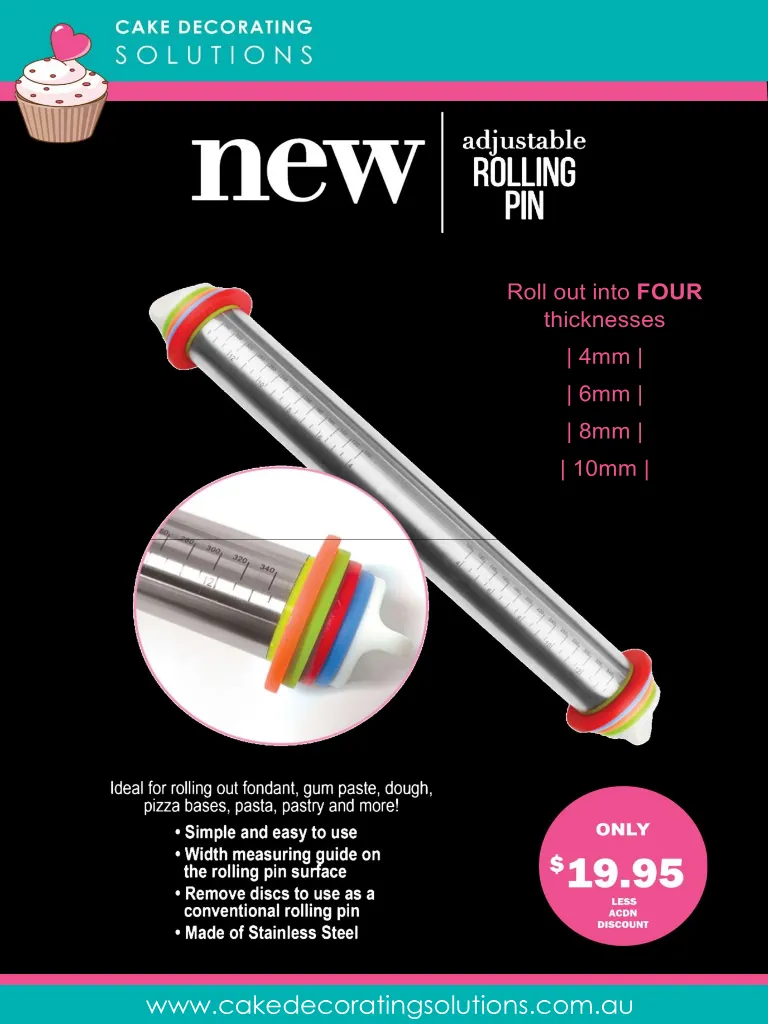
` df Roll out into FOUR thicknesses | 4mm | | 6mm | | 8mm | | 10mm | www . cakedecoratingsolutions . com . au


Page 34 text
Baking Box Subscription A MONTHLY SUBSCRIPTION OF CAKE AND BAKING GOODIES DELIVERED TO YOUR DOOR ! FIND OUT MORE AT WWW . BAKINGBOX . ME Subscribe at www . bakingbox . me
Page 35 text
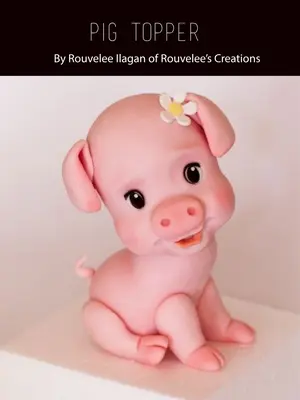
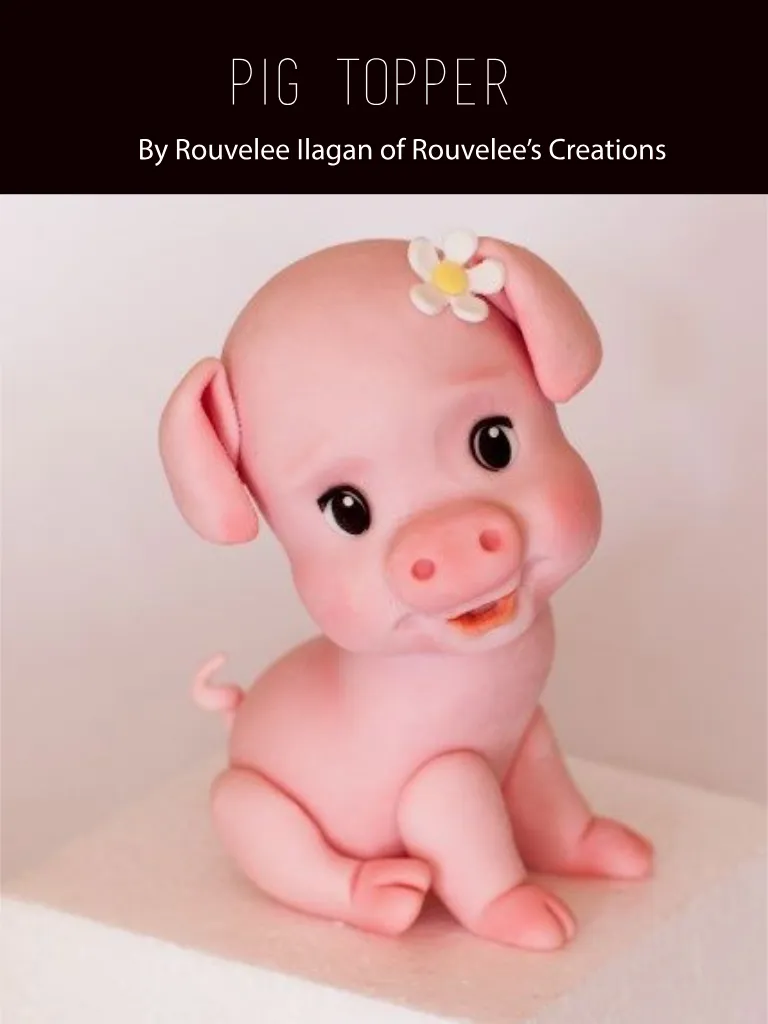
Pig Topper By Rouvelee Ilagan of Rouvelee ’ s Creations
Page 36 text
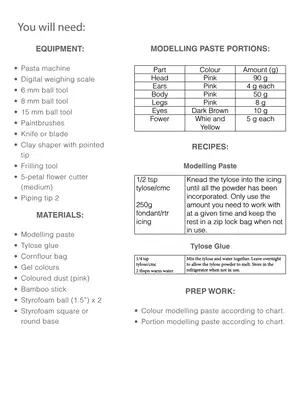
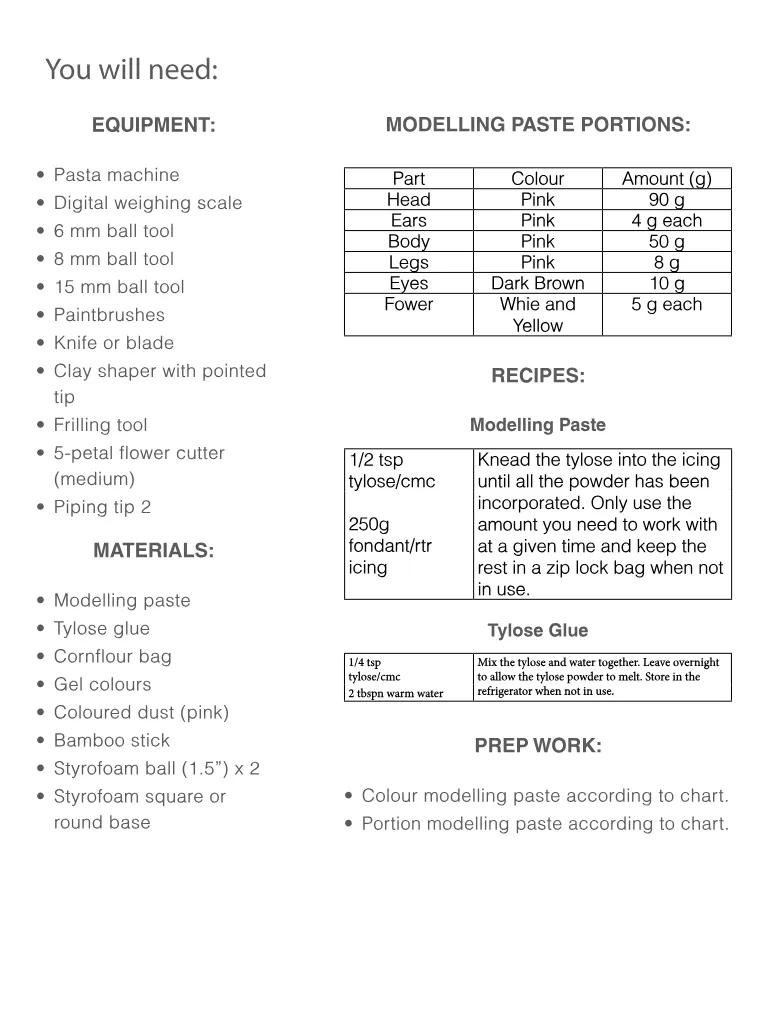
• Pasta machine • Digital weighing scale • 6 mm ball tool • 8 mm ball tool • 15 mm ball tool • Paintbrushes • Knife or blade • Clay shaper with pointed tip • Frilling tool • 5-petal flower cutter ( medium ) • Piping tip 2 • Modelling paste • Tylose glue • Cornflour bag • Gel colours • Coloured dust ( pink ) • Bamboo stick • Styrofoam ball ( 1.5 ”) x 2 • Styrofoam square or round base 1 / 2 tsp tylose / cmc 250g fondant / rtr icing Modelling Paste Knead the tylose into the icing until all the powder has been incorporated . Only use the amount you need to work with at a given time and keep the rest in a zip lock bag when not in use . Tylose Glue • Colour modelling paste according to chart . • Portion modelling paste according to chart . You will need : EQUIPMENT : • Pasta machine • Digital weighing scale • 6 mm ball tool • 8 mm ball tool • 15 mm ball tool • Paintbrushes • Knife or blade • Clay shaper with pointed tip • Frilling tool • 5-petal flower cutter ( medium ) • Piping tip 2 MATERIALS : • Modelling paste • Tylose glue • Cornflour bag • Gel colours • Coloured dust ( pink ) • Bamboo stick • Styrofoam ball ( 1.5 ”) x 2 • Styrofoam square or round base MODELLING PASTE PORTIONS : Part Colour Amount ( g ) Head Pink 90 g Ears Pink 4 g each Body Pink 50 g Legs Pink 8 g Eyes Dark Brown 10 g Fower Whie and Yellow 5 g each 1 / 2 tsp tylose / cmc 250g fondant / rtr icing 1 / 4 tsp tylose / cmc 2 tbspn warm water RECIPES : Modelling Paste Knead the tylose into the icing until all the powder has been incorporated . Only use the amount you need to work with at a given time and keep the rest in a zip lock bag when not in use . Tylose Glue Mix the tylose and water together . Leave overnight to allow the tylose powder to melt . Store in the refrigerator when not in use . PREP WORK : • Colour modelling paste according to chart . • Portion modelling paste according to chart .
Page 37 text
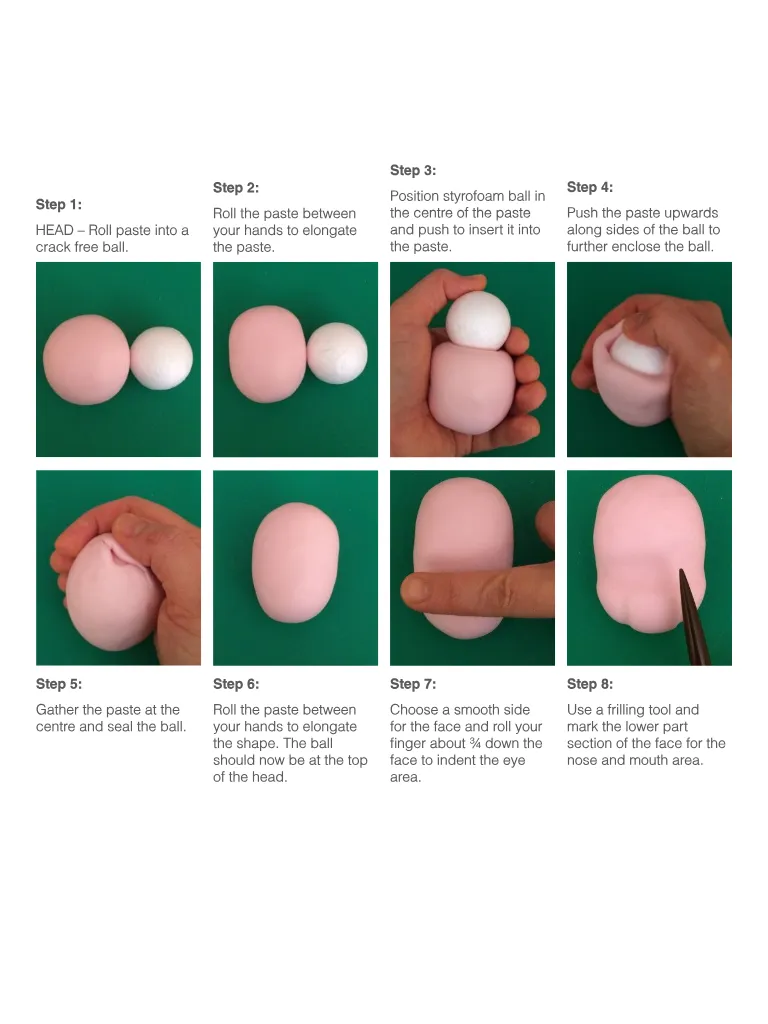
Step 1 : HEAD – Roll paste into a crack free ball . Step 2 : Roll the paste between your hands to elongate the paste . Step 3 : Position styrofoam ball in the centre of the paste and push to insert it into the paste . Step 4 : Push the paste upwards along sides of the ball to further enclose the ball . Step 5 : Step 6 : Step 7 : Step 8 : Gather the paste at the centre and seal the ball . Roll the paste between your hands to elongate the shape . The ball should now be at the top of the head . Choose a smooth side for the face and roll your finger about ¾ down the face to indent the eye area . Use a frilling tool and mark the lower part section of the face for the nose and mouth area .
Page 38 text
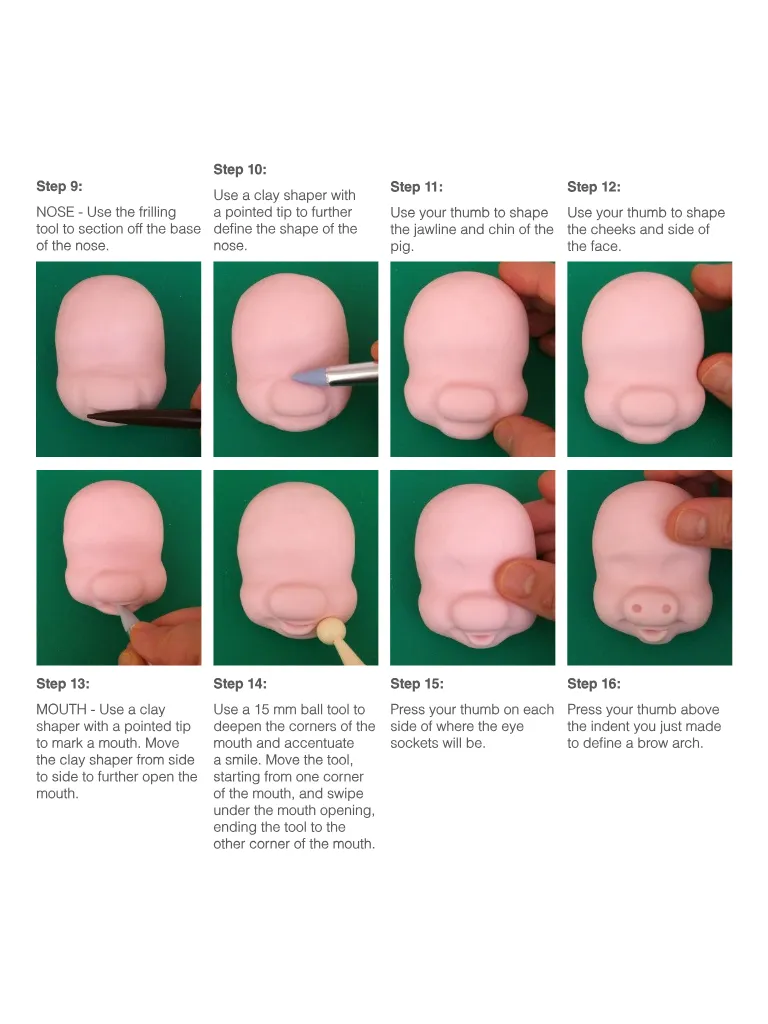
Step 9 : NOSE - Use the frilling tool to section off the base of the nose . Step 10 : Use a clay shaper with a pointed tip to further define the shape of the nose . Step 11 : Use your thumb to shape the jawline and chin of the pig . Step 12 : Use your thumb to shape the cheeks and side of the face . Step 13 : Step 14 : Step 15 : Step 16 : MOUTH - Use a clay shaper with a pointed tip to mark a mouth . Move the clay shaper from side to side to further open the mouth . Use a 15 mm ball tool to deepen the corners of the mouth and accentuate a smile . Move the tool , starting from one corner of the mouth , and swipe under the mouth opening , ending the tool to the other corner of the mouth . Press your thumb on each side of where the eye sockets will be . Press your thumb above the indent you just made to define a brow arch .
Page 39 text
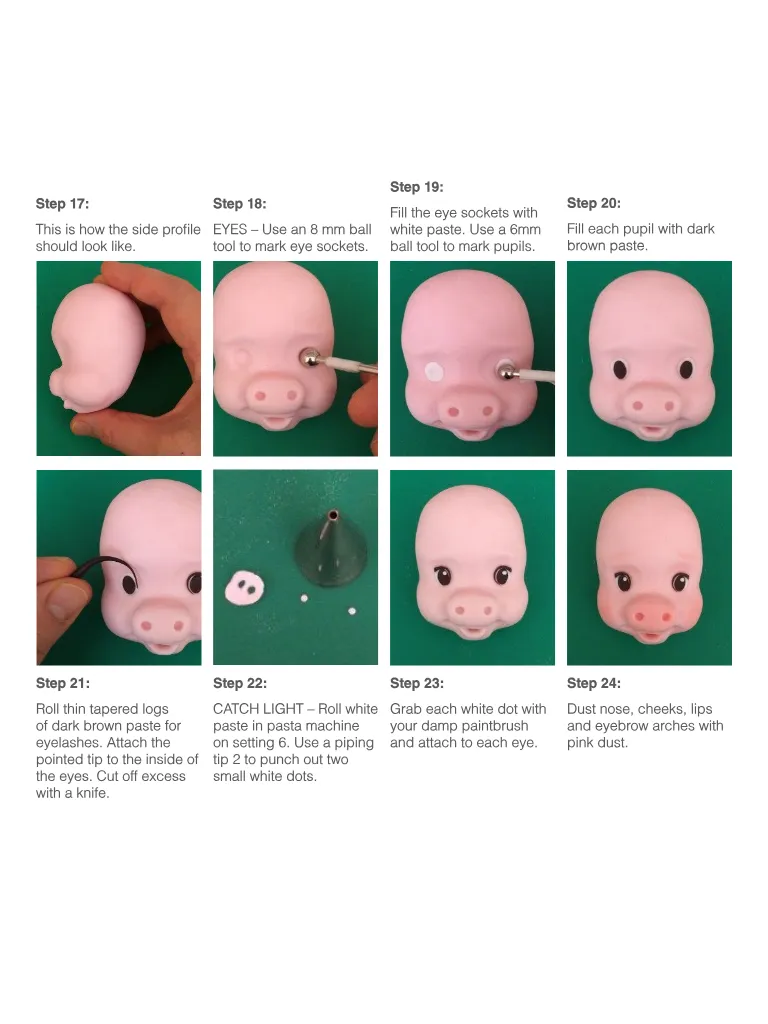
Step 17 : This is how the side profile should look like . Step 18 : EYES – Use an 8 mm ball tool to mark eye sockets . Step 19 : Fill the eye sockets with white paste . Use a 6mm ball tool to mark pupils . Step 20 : Fill each pupil with dark brown paste . Step 21 : Step 22 : Step 23 : Step 24 : Roll thin tapered logs of dark brown paste for eyelashes . Attach the pointed tip to the inside of the eyes . Cut off excess with a knife . CATCH LIGHT – Roll white paste in pasta machine on setting 6 . Use a piping tip 2 to punch out two small white dots . Grab each white dot with your damp paintbrush and attach to each eye . Dust nose , cheeks , lips and eyebrow arches with pink dust .
Page 40 text
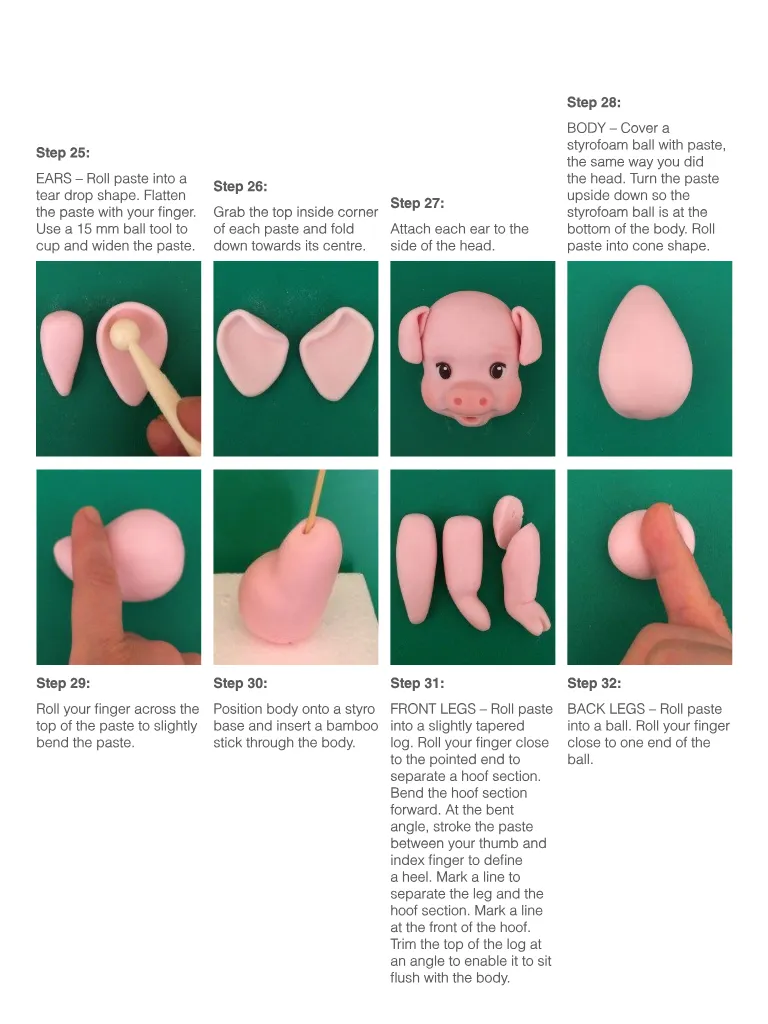
Step 28 : Step 25 : EARS – Roll paste into a tear drop shape . Flatten the paste with your finger . Use a 15 mm ball tool to cup and widen the paste . Step 26 : Grab the top inside corner of each paste and fold down towards its centre . Step 27 : Attach each ear to the side of the head . BODY – Cover a styrofoam ball with paste , the same way you did the head . Turn the paste upside down so the styrofoam ball is at the bottom of the body . Roll paste into cone shape . Step 29 : Step 30 : Step 31 : Step 32 : Roll your finger across the top of the paste to slightly bend the paste . Position body onto a styro base and insert a bamboo stick through the body . FRONT LEGS – Roll paste into a slightly tapered log . Roll your finger close to the pointed end to separate a hoof section . Bend the hoof section forward . At the bent angle , stroke the paste between your thumb and index finger to define a heel . Mark a line to separate the leg and the hoof section . Mark a line at the front of the hoof . Trim the top of the log at an angle to enable it to sit flush with the body . BACK LEGS – Roll paste into a ball . Roll your finger close to one end of the ball .
Page 41 text
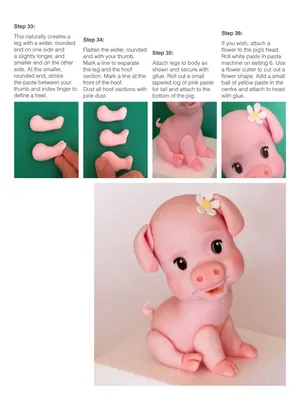
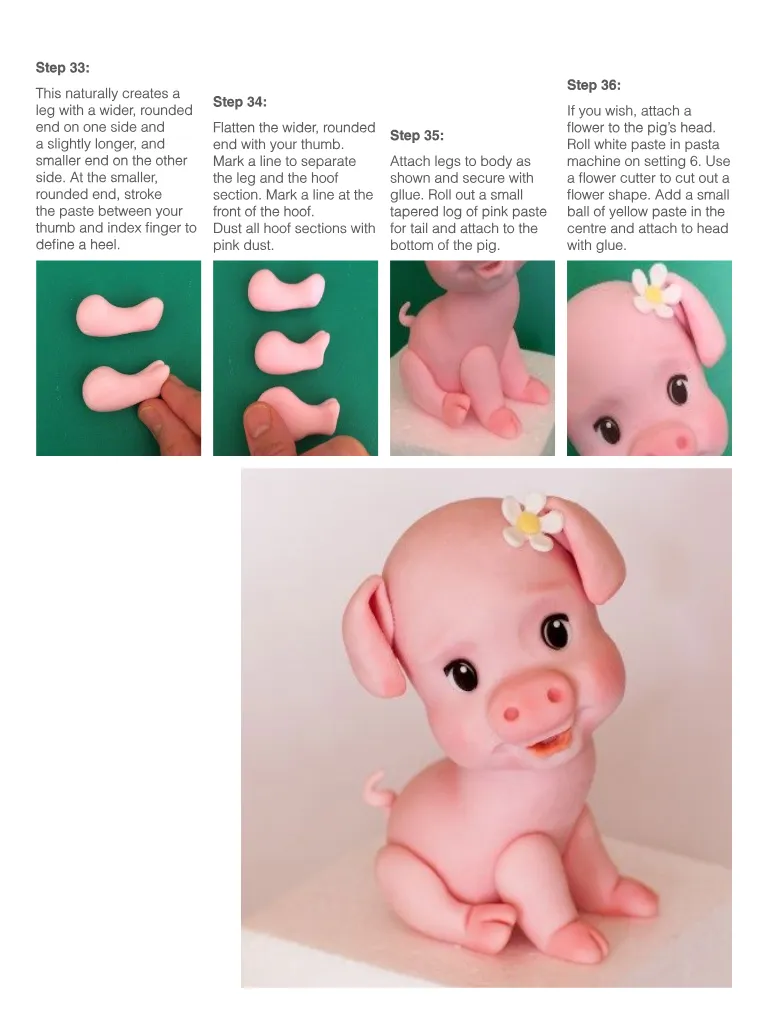
Step 33 : This naturally creates a leg with a wider , rounded end on one side and a slightly longer , and smaller end on the other side . At the smaller , rounded end , stroke the paste between your thumb and index finger to define a heel . Step 34 : Flatten the wider , rounded end with your thumb . Mark a line to separate the leg and the hoof section . Mark a line at the front of the hoof . Dust all hoof sections with pink dust . Step 35 : Attach legs to body as shown and secure with gllue . Roll out a small tapered log of pink paste for tail and attach to the bottom of the pig . Step 36 : If you wish , attach a flower to the pig ’ s head . Roll white paste in pasta machine on setting 6 . Use a flower cutter to cut out a flower shape . Add a small ball of yellow paste in the centre and attach to head with glue .


Page 43 text
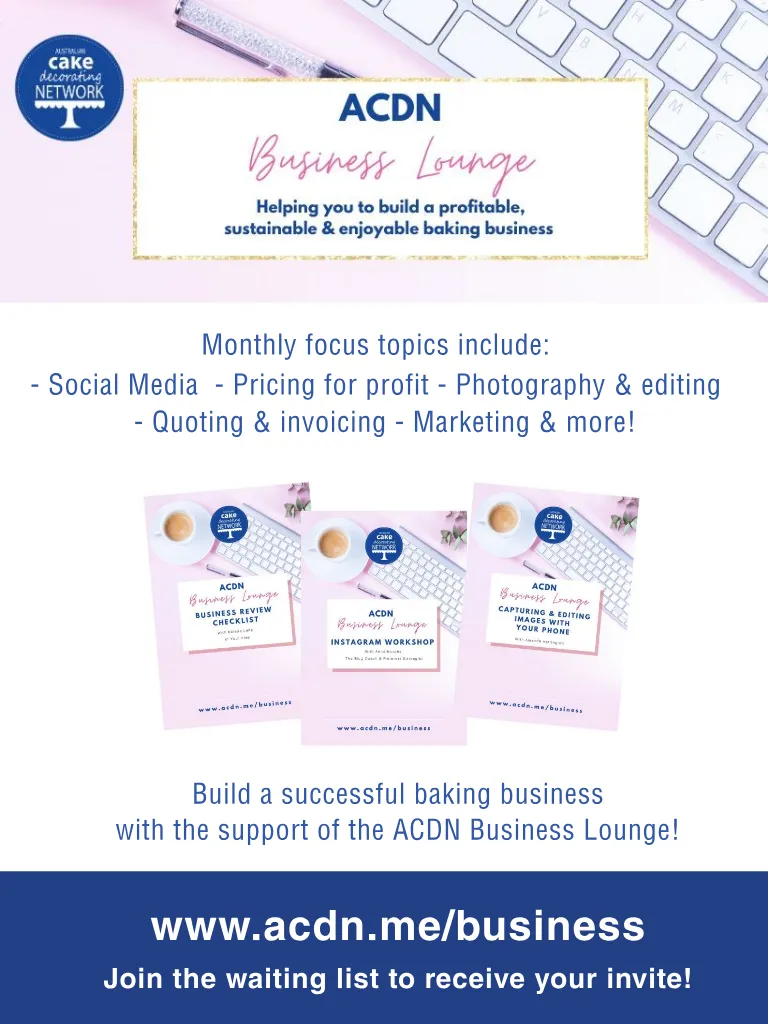
Monthly focus topics include : - Social Media - Pricing for profit - Photography & editing - Quoting & invoicing - Marketing & more ! Build a successful baking business with the support of the ACDN Business Lounge ! www . acdn . me / business Join the waiting list to receive your invite !
Page 44 text
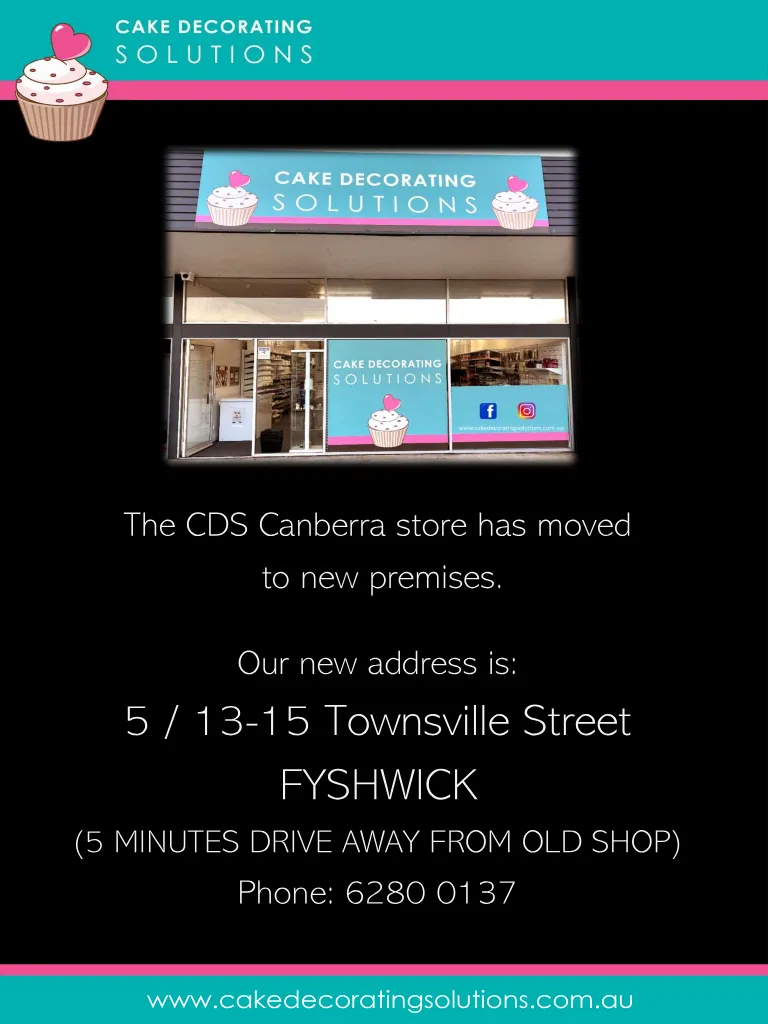
` The CDS Canberra store has moved to new premises . Our new address is : 5 / 13-15 Townsville Street FYSHWICK ( 5 MINUTES DRIVE AWAY FROM OLD SHOP ) Phone : 6280 0137 www . cakedecoratingsolutions . com . au

Page 45 text
Recipes A collection of delicious recipes for you to bake


Page 46 text
Become a member of the Australian Cake Decorating Network and SAVE with great DISCOUNTS from our Preferred Suppliers ! JOIN US HERE !
Page 47 text
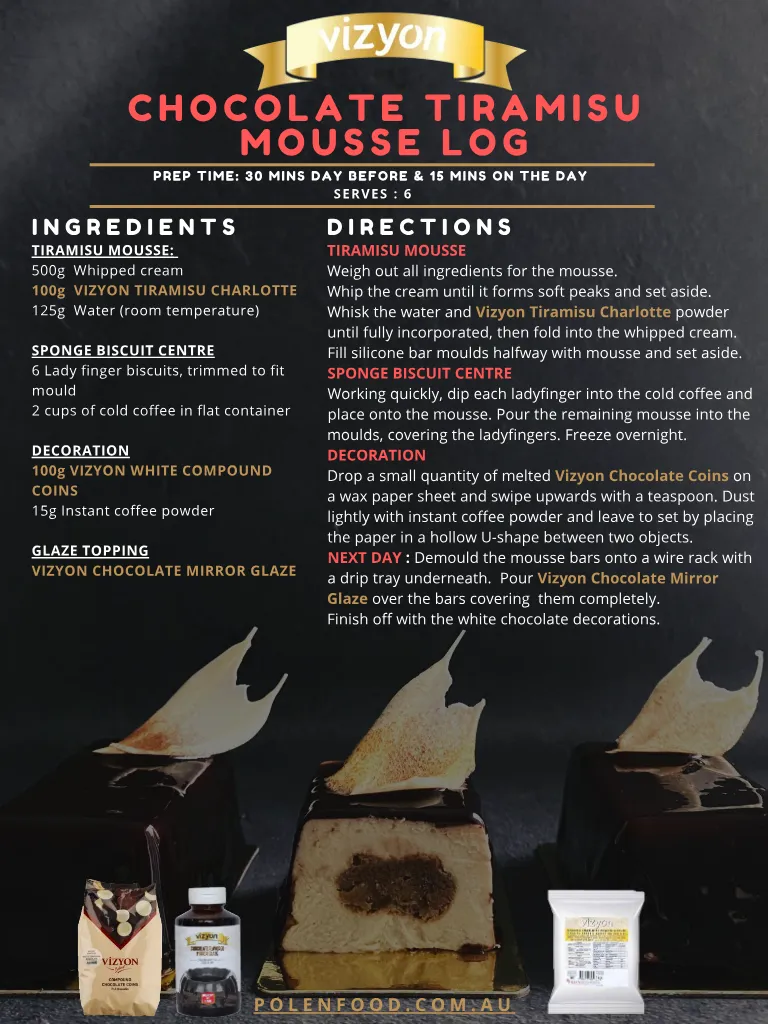
P O L E N F O O D . C O M . A U C H O C O L A T E T I R A M I S U M O U S S E L O G I N G R E D I E N T S TIRAMISU MOUSSE : 500g Whipped cream 100g VIZYON TIRAMISU CHARLOTTE 125g Water ( room temperature ) SPONGE BISCUIT CENTRE 6 Lady finger biscuits , trimmed to fit mould 2 cups of cold coffee in flat container DECORATION 100g VIZYON WHITE COMPOUND COINS 15g Instant coffee powder P R E P T I M E : 3 0 M I N S D A Y B E F O R E & 1 5 M I N S O N T H E D A Y S E R V E S : 6 GLAZE TOPPING VIZYON CHOCOLATE MIRROR GLAZE D I R E C T I O N S TIRAMISU MOUSSE Weigh out all ingredients for the mousse . Whip the cream until it forms soft peaks and set aside . Whisk the water and Vizyon Tiramisu Charlotte powder until fully incorporated , then fold into the whipped cream . Fill silicone bar moulds halfway with mousse and set aside . SPONGE BISCUIT CENTRE Working quickly , dip each ladyfinger into the cold coffee and place onto the mousse . Pour the remaining mousse into the moulds , covering the ladyfingers . Freeze overnight . DECORATION Drop a small quantity of melted Vizyon Chocolate Coins on a wax paper sheet and swipe upwards with a teaspoon . Dust lightly with instant coffee powder and leave to set by placing the paper in a hollow U-shape between two objects . NEXT DAY : Demould the mousse bars onto a wire rack with a drip tray underneath . Pour Vizyon Chocolate Mirror Glaze over the bars covering them completely . Finish off with the white chocolate decorations . P O L E N F O O D . C O M . A U
Page 48 text
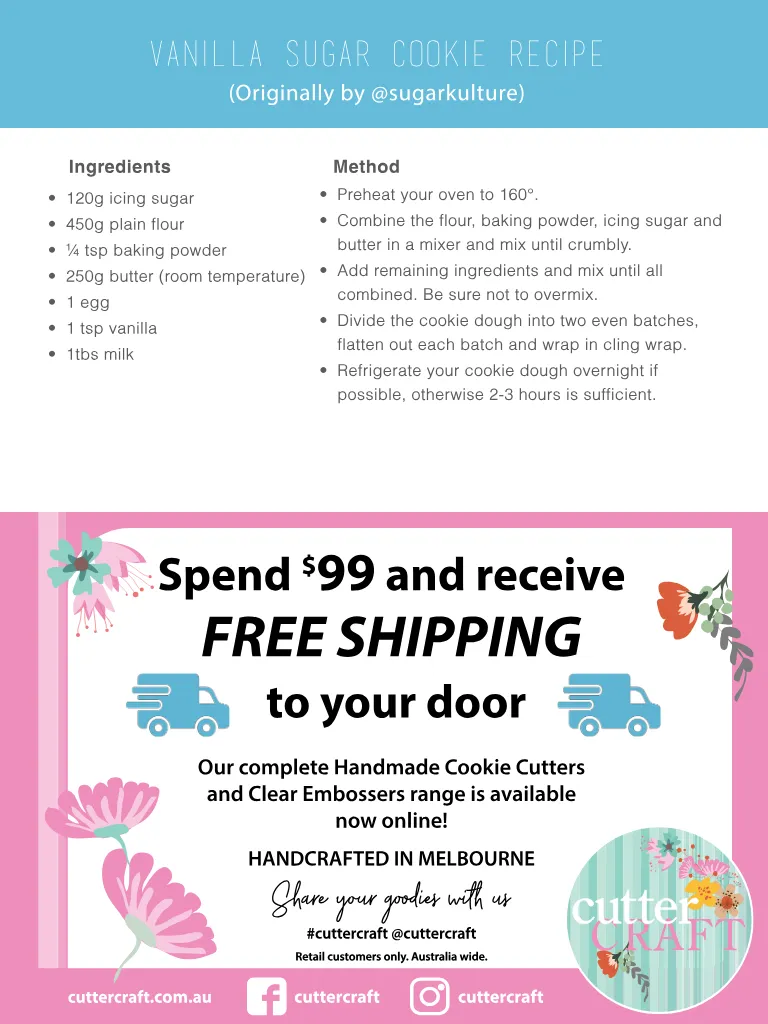
Ingredients Method cuttercraft . com . au cuttercraft cuttercraft Vanilla Sugar Cookie Recipe ( Originally by @ sugarkulture ) Ingredients • 120g icing sugar • 450g plain flour • ¼ tsp baking powder • 250g butter ( room temperature ) • 1 egg • 1 tsp vanilla • 1tbs milk Method • Preheat your oven to 160 °. • Combine the flour , baking powder , icing sugar and butter in a mixer and mix until crumbly . • Add remaining ingredients and mix until all combined . Be sure not to overmix . • Divide the cookie dough into two even batches , flatten out each batch and wrap in cling wrap . • Refrigerate your cookie dough overnight if possible , otherwise 2-3 hours is sufficient . Spend $ 99 and receive FREE SHIPPING to your door Our complete Handmade Cookie Cutters and Clear Embossers range is available now online ! HANDCRAFTED IN MELBOURNE Share your goodies with us # cuttercraft @ cuttercraft Retail customers only . Australia wide . cuttercraft . com . au cuttercraft cuttercraft


Page 49 text
ACDN Members save 7.5 % with Berry Fresh See discounts page at www . acdn . me / discounts Quality freeze dried berry crumble and berry powders , made in Australia from 100 % Australian Berries . No preservatives , no additives – just natural Strawberries , Raspberries and Blueberries . Buy online for delivery to anywhere in Australia . www . berryfresh . com . au




Page 51 text
Interview time !


Page 53 text
an interview with clayton and ross lloyd of bake diary
Page 54 text
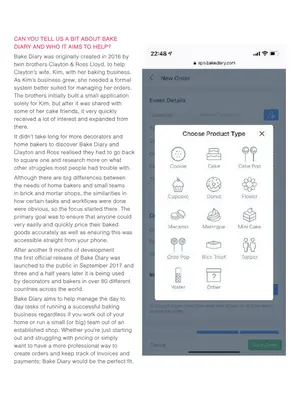
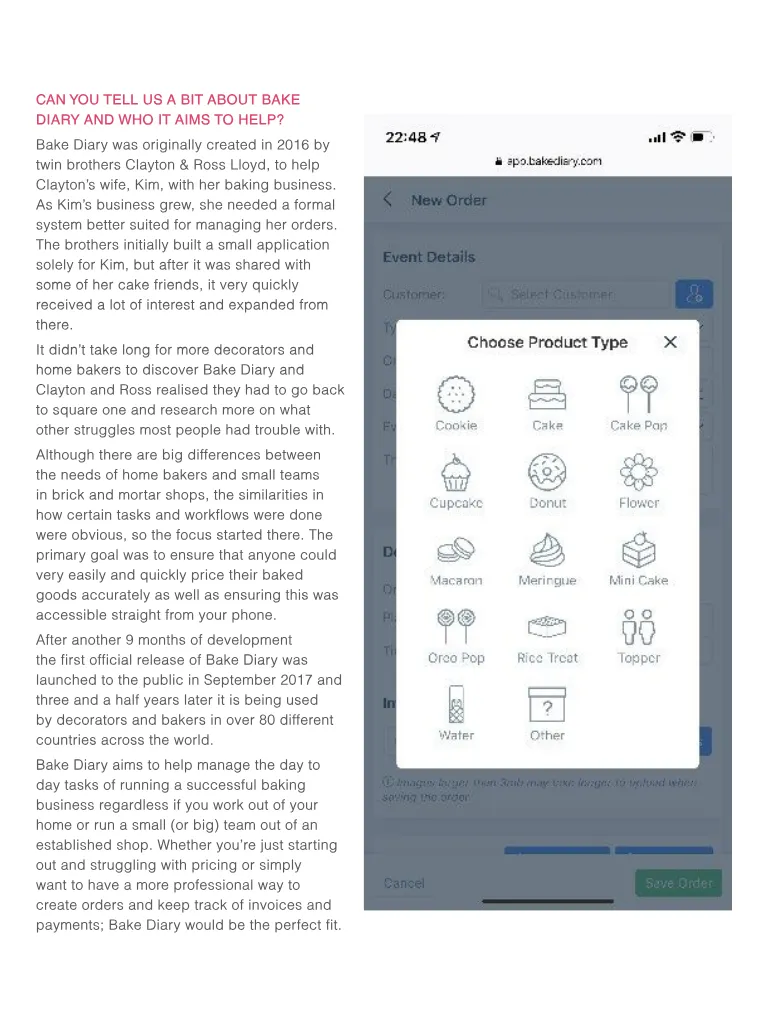
CAN YOU TELL US A BIT ABOUT BAKE DIARY AND WHO IT AIMS TO HELP ? Bake Diary was originally created in 2016 by twin brothers Clayton & Ross Lloyd , to help Clayton ’ s wife , Kim , with her baking business . As Kim ’ s business grew , she needed a formal system better suited for managing her orders . The brothers initially built a small application solely for Kim , but after it was shared with some of her cake friends , it very quickly received a lot of interest and expanded from there . It didn ’ t take long for more decorators and home bakers to discover Bake Diary and Clayton and Ross realised they had to go back to square one and research more on what other struggles most people had trouble with . Although there are big differences between the needs of home bakers and small teams in brick and mortar shops , the similarities in how certain tasks and workflows were done were obvious , so the focus started there . The primary goal was to ensure that anyone could very easily and quickly price their baked goods accurately as well as ensuring this was accessible straight from your phone . After another 9 months of development the first official release of Bake Diary was launched to the public in September 2017 and three and a half years later it is being used by decorators and bakers in over 80 different countries across the world . Bake Diary aims to help manage the day to day tasks of running a successful baking business regardless if you work out of your home or run a small ( or big ) team out of an established shop . Whether you ’ re just starting out and struggling with pricing or simply want to have a more professional way to create orders and keep track of invoices and payments ; Bake Diary would be the perfect fit .
Page 55 text
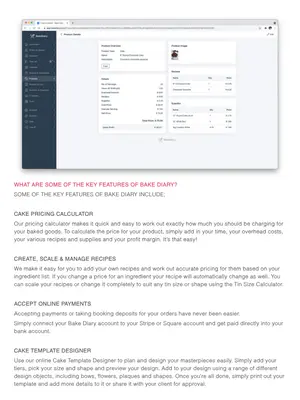
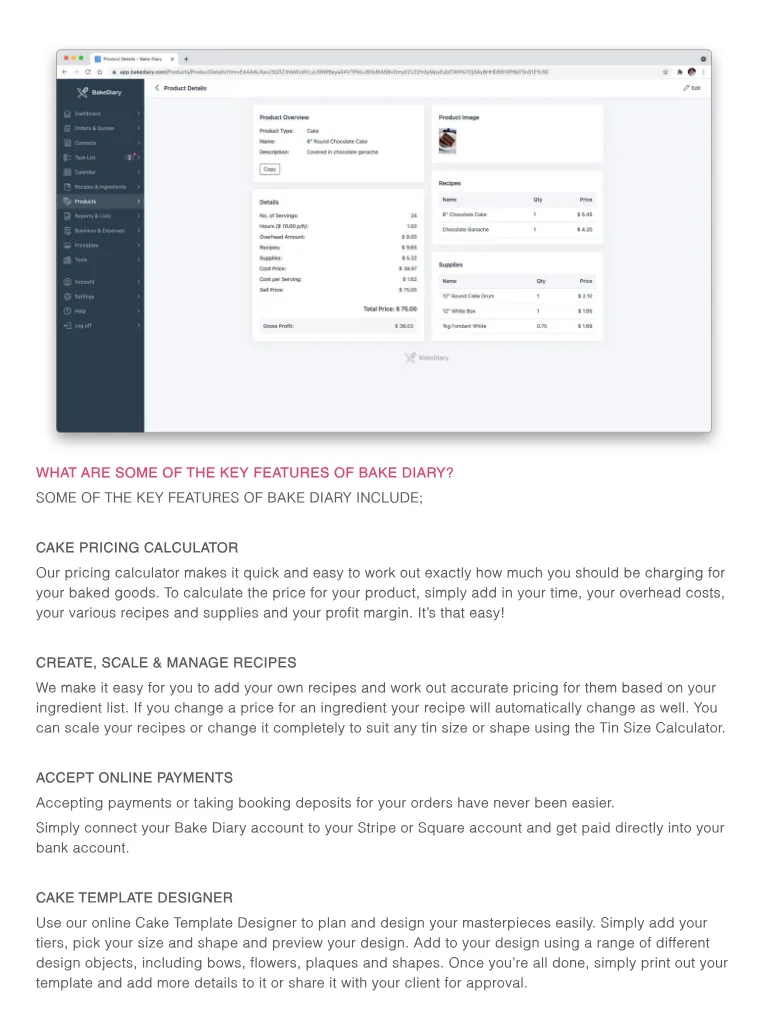
WHAT ARE SOME OF THE KEY FEATURES OF BAKE DIARY ? SOME OF THE KEY FEATURES OF BAKE DIARY INCLUDE ; CAKE PRICING CALCULATOR Our pricing calculator makes it quick and easy to work out exactly how much you should be charging for your baked goods . To calculate the price for your product , simply add in your time , your overhead costs , your various recipes and supplies and your profit margin . It ’ s that easy ! CREATE , SCALE & MANAGE RECIPES We make it easy for you to add your own recipes and work out accurate pricing for them based on your ingredient list . If you change a price for an ingredient your recipe will automatically change as well . You can scale your recipes or change it completely to suit any tin size or shape using the Tin Size Calculator . ACCEPT ONLINE PAYMENTS Accepting payments or taking booking deposits for your orders have never been easier . Simply connect your Bake Diary account to your Stripe or Square account and get paid directly into your bank account . CAKE TEMPLATE DESIGNER Use our online Cake Template Designer to plan and design your masterpieces easily . Simply add your tiers , pick your size and shape and preview your design . Add to your design using a range of different design objects , including bows , flowers , plaques and shapes . Once you ’ re all done , simply print out your template and add more details to it or share it with your client for approval .


Page 56 text
TRACK EVERYTHING ON YOUR CALENDAR Your events calendar is the simplest way to view your availability . Calendar events such as appointments , consultations and holidays can be easily added . You can also block out dates for when you need to free up some preparation or family time . All orders and important customer dates are automatically added to your event calendar so you always know how busy you are . TRACK EXPENSES & MILEAGE Record business expenses quickly and effortlessly and track your mileage for your trips out to the grocery store directly onto your mobile . Perfect for your end of year accounts . SET REMINDERS & CREATE TASKS Use the task manager to create and set reminders for yourself to do those all important tasks , such as sending out wedding cake design sketches , ordering specific cake supplies or simply as a shopping cart list for when you put your next stock order in . You will also receive an automatic email with all your orders and tasks in as a reminder at the start of each week .


Page 57 text
BUSINESS REPORTING TOOLS Choose from a range of different reports and lists to help you keep on top of your business . These include Income Statements , Expense Reports , Cake Order Breakdowns , Baking Lists and so much more . Having access to all of this information is vital to make sure your business is as successful as it can be . ‘ QUICK ADD ’ OPTION FOR EXPERIENCED CAKERS We know there are many cakers who already have a good idea of their prices and just want to create and schedule their orders . With the “ Quick Add ” option , you can add items to your order in no time and create your first order without ever having to add a single ingredient or recipe . CUSTOMISED TO SUIT YOU & YOUR BUSINESS Every cake decorator is different and unique . Bake Diary allows you to fully customise your experience while using it . You have the ability to create your own cake and cupcake types , add your “ secret ” fillings and frostings as well as choose which products you offer .
Page 58 text
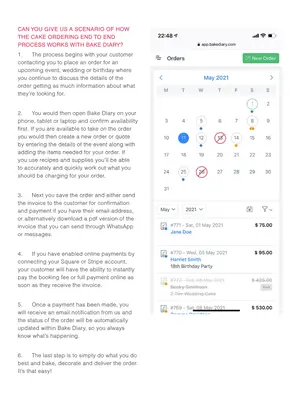
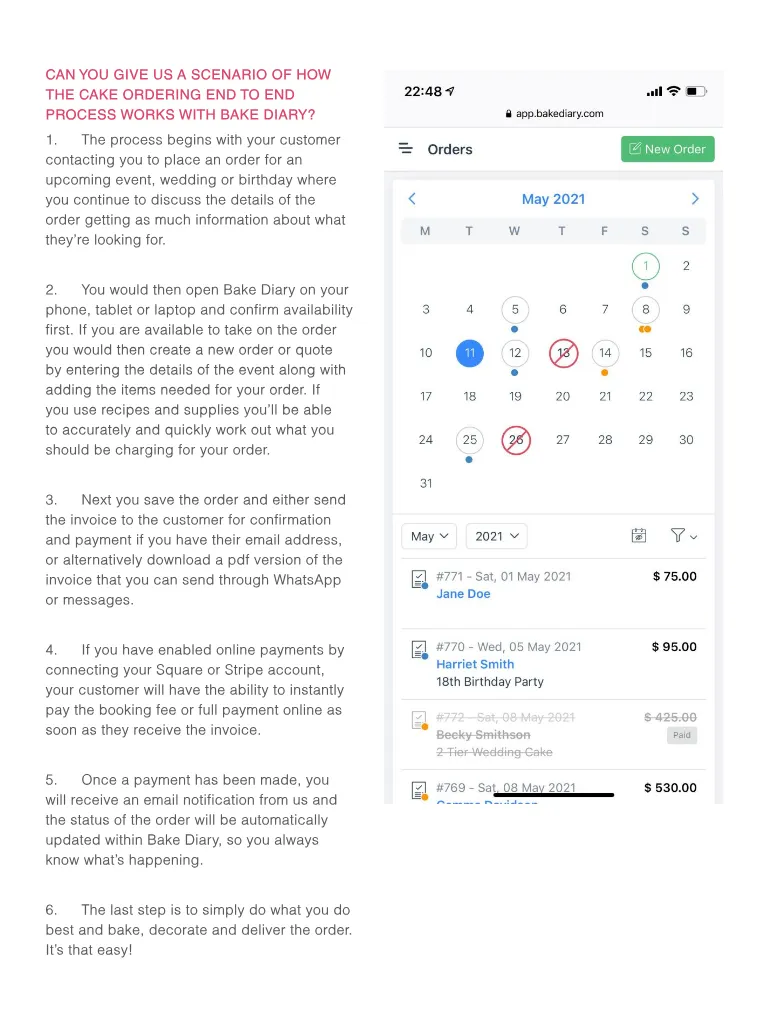
CAN YOU GIVE US A SCENARIO OF HOW THE CAKE ORDERING END TO END PROCESS WORKS WITH BAKE DIARY ? 1 . The process begins with your customer contacting you to place an order for an upcoming event , wedding or birthday where you continue to discuss the details of the order getting as much information about what they ’ re looking for . 2 . You would then open Bake Diary on your phone , tablet or laptop and confirm availability first . If you are available to take on the order you would then create a new order or quote by entering the details of the event along with adding the items needed for your order . If you use recipes and supplies you ’ ll be able to accurately and quickly work out what you should be charging for your order . 3 . Next you save the order and either send the invoice to the customer for confirmation and payment if you have their email address , or alternatively download a pdf version of the invoice that you can send through WhatsApp or messages . 4 . If you have enabled online payments by connecting your Square or Stripe account , your customer will have the ability to instantly pay the booking fee or full payment online as soon as they receive the invoice . 5 . Once a payment has been made , you will receive an email notification from us and the status of the order will be automatically updated within Bake Diary , so you always know what ’ s happening . 6 . The last step is to simply do what you do best and bake , decorate and deliver the order . It ’ s that easy !
Page 59 text
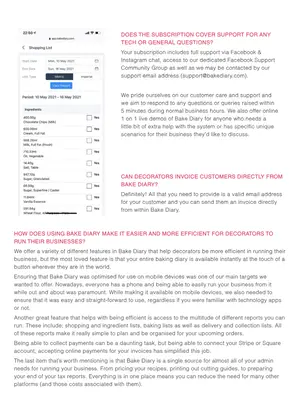
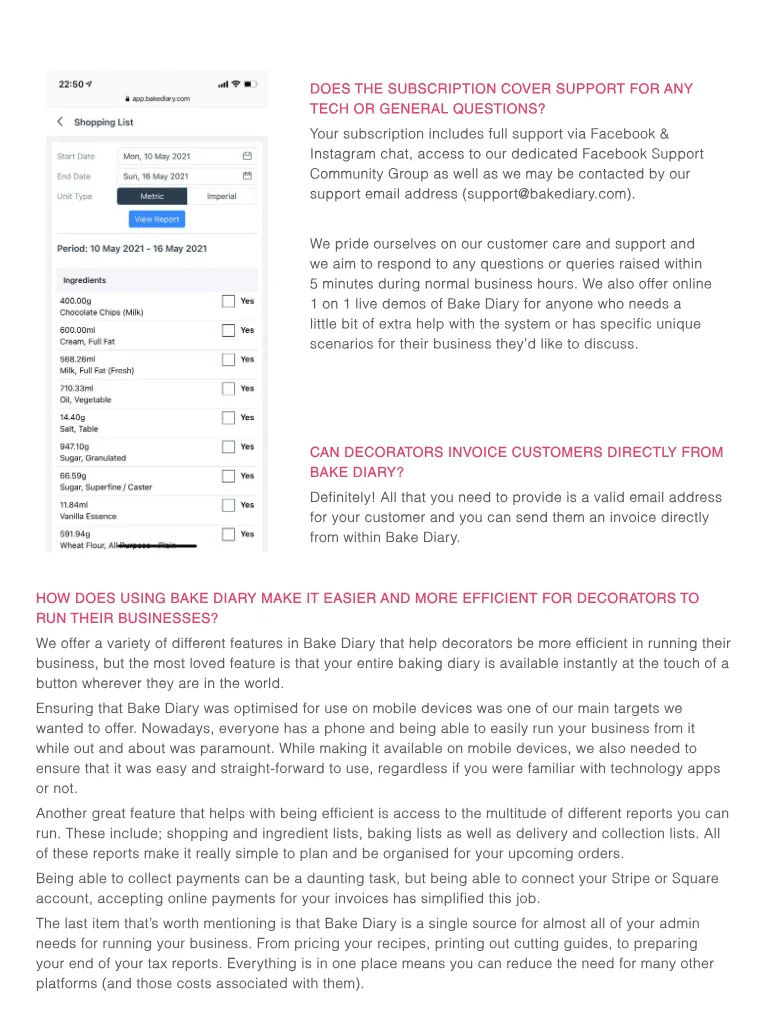
DOES THE SUBSCRIPTION COVER SUPPORT FOR ANY TECH OR GENERAL QUESTIONS ? Your subscription includes full support via Facebook & Instagram chat , access to our dedicated Facebook Support Community Group as well as we may be contacted by our support email address ( support @ bakediary . com ). We pride ourselves on our customer care and support and we aim to respond to any questions or queries raised within 5 minutes during normal business hours . We also offer online 1 on 1 live demos of Bake Diary for anyone who needs a little bit of extra help with the system or has specific unique scenarios for their business they ’ d like to discuss . CAN DECORATORS INVOICE CUSTOMERS DIRECTLY FROM BAKE DIARY ? Definitely ! All that you need to provide is a valid email address for your customer and you can send them an invoice directly from within Bake Diary . HOW DOES USING BAKE DIARY MAKE IT EASIER AND MORE EFFICIENT FOR DECORATORS TO RUN THEIR BUSINESSES ? We offer a variety of different features in Bake Diary that help decorators be more efficient in running their business , but the most loved feature is that your entire baking diary is available instantly at the touch of a button wherever they are in the world . Ensuring that Bake Diary was optimised for use on mobile devices was one of our main targets we wanted to offer . Nowadays , everyone has a phone and being able to easily run your business from it while out and about was paramount . While making it available on mobile devices , we also needed to ensure that it was easy and straight-forward to use , regardless if you were familiar with technology apps or not . Another great feature that helps with being efficient is access to the multitude of different reports you can run . These include ; shopping and ingredient lists , baking lists as well as delivery and collection lists . All of these reports make it really simple to plan and be organised for your upcoming orders . Being able to collect payments can be a daunting task , but being able to connect your Stripe or Square account , accepting online payments for your invoices has simplified this job . The last item that ’ s worth mentioning is that Bake Diary is a single source for almost all of your admin needs for running your business . From pricing your recipes , printing out cutting guides , to preparing your end of your tax reports . Everything is in one place means you can reduce the need for many other platforms ( and those costs associated with them ).


Page 60 text
WHAT NEW FEATURES HAVE YOU ADDED OR ARE LOOKING TO ADD TO BAKE DIARY IN THE FUTURE ? We are currently developing an integrated online enquiry and ordering system that we are very excited about . This new feature will provide a single channel that you can direct your customers to when they order from you and would reduce the time it takes for you to enter any details into Bake Diary . MORE INFORMATION Save 15 % off your first Bake Diary subscription with our ACDN discount code ! Info at : www . acdn . me / discounts


Page 61 text
Become a member of the Australian Cake Decorating Network and SAVE with great DISCOUNTS from our Preferred Suppliers ! JOIN US HERE !
Page 62 text
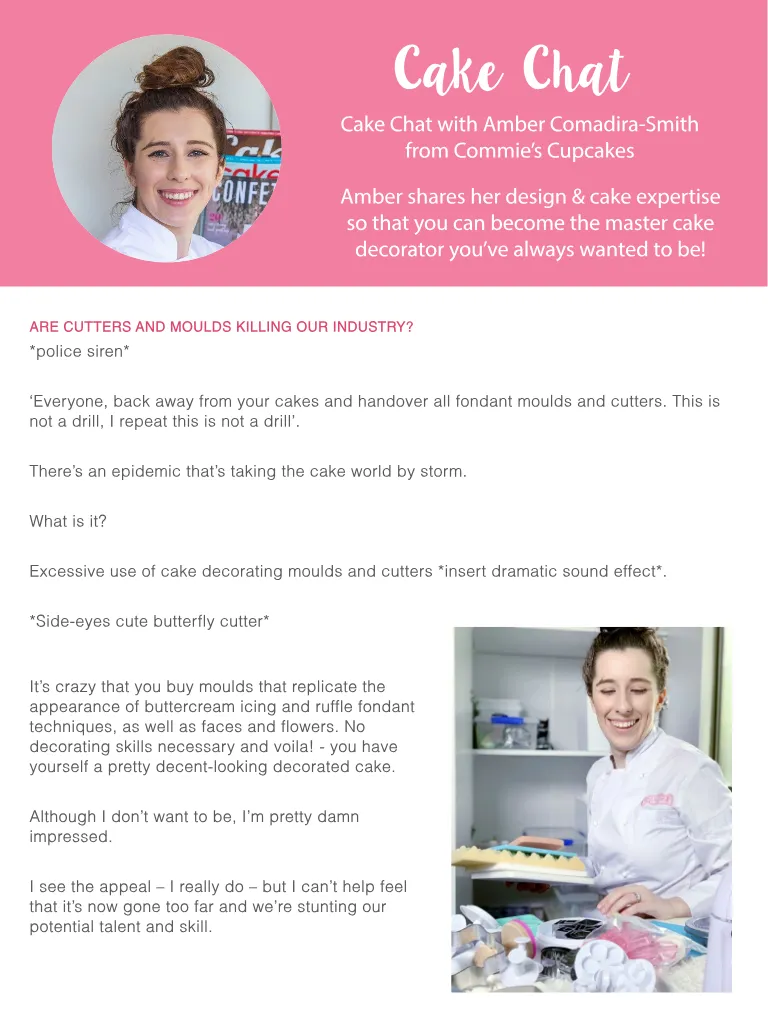
Cake Chat Cake Chat with Amber Comadira-Smith from Commie ’ s Cupcakes Amber shares her design & cake expertise so that you can become the master cake decorator you ’ ve always wanted to be ! ARE CUTTERS AND MOULDS KILLING OUR INDUSTRY ? * police siren * ‘ Everyone , back away from your cakes and handover all fondant moulds and cutters . This is not a drill , I repeat this is not a drill ’. There ’ s an epidemic that ’ s taking the cake world by storm . What is it ? Excessive use of cake decorating moulds and cutters * insert dramatic sound effect *. * Side-eyes cute butterfly cutter * It ’ s crazy that you buy moulds that replicate the appearance of buttercream icing and ruffle fondant techniques , as well as faces and flowers . No decorating skills necessary and voila ! - you have yourself a pretty decent-looking decorated cake . Although I don ’ t want to be , I ’ m pretty damn impressed . I see the appeal – I really do – but I can ’ t help feel that it ’ s now gone too far and we ’ re stunting our potential talent and skill .
Page 63 text
Here ’ s my main three points against excessive mould and cutter use : 1 . Each cake looks like they ’ ve come out of a factory – everything is too perfect and sterile . The magic of handcrafted cakes are those human touches and “ flaws ” that give your cake character and personality . If you want people to feel connected with what you ’ re creating , you have to put in some good old fashioned TLC . 2 . It kills the need for actual skill and creativity When everyone ’ s using the same cutters and moulds , a majority of cakes look very generic and similar . There ’ s no inventiveness or creative flair to the design – nothing that ‘ wow ’ s ’ people … You just blend in with the sea of other ‘ mould & cutter ’ mainstream cakes . 3 . It cheapens our industry Now , that ’ s not to say I ’ m completely against using cutters and moulds - there ’ s definitely a time and place for it . You won ’ t see me free-handing a fondant star anytime soon ... ... but we definitely need to be more mindful and stop relying on these tools for our talent . It ’ s time to ditch the moulds , step away from mainstream cake trends and learn to embrace your creativity and style ! Here ’ s what I recommend : - Start designing original cake concepts for your clients - Seek inspiration from other industries , such as ; fashion , jewellery , interior decor , etc - Nurture your creativity in other aspects of your life ( this will flow into your cake work ) - Take the time to work on your hand modeling skills ! The more you practice , the quicker your natural abilities will develop . - Use dummy cakes to practice and experiment with new ideas . It gives you the freedom of trial and error without the anxiety of practicing on a real cake . - Still gotta use moulds and cutters ? Only use them sparingly or in a creative way . MORE INFORMATION facebook . com / commiescupcakes commiescupcakes . com
Page 64 text
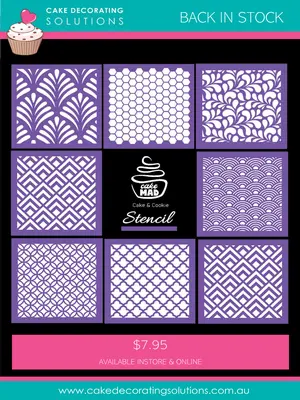
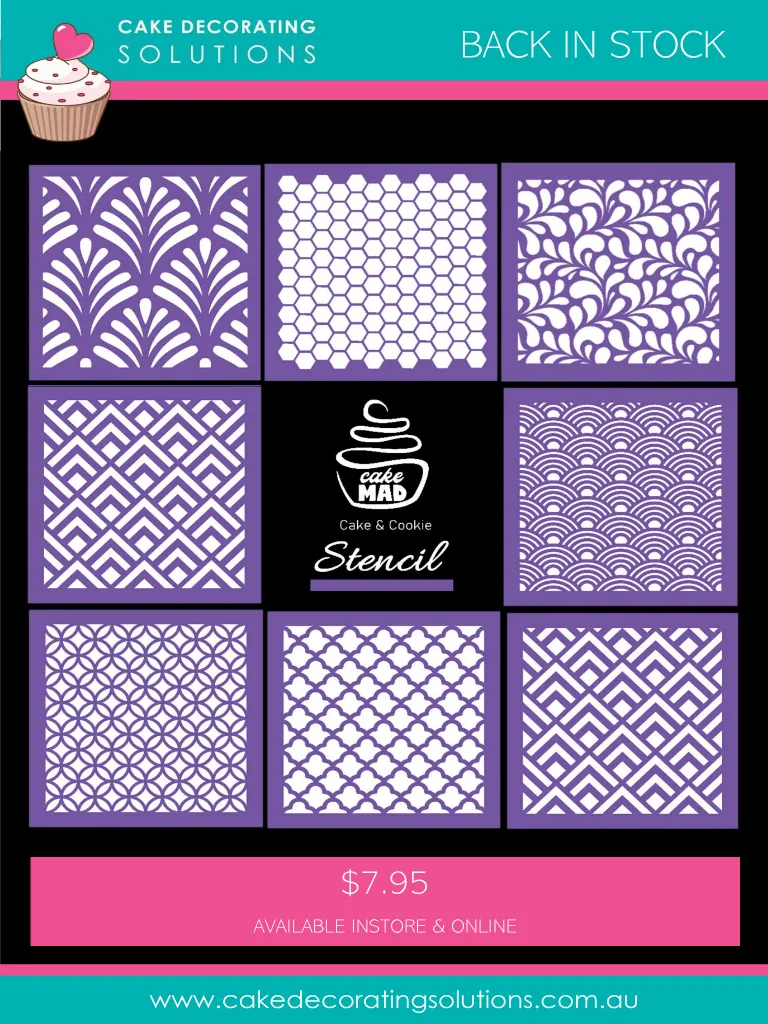
BACK IN STOCK ` $ 7.95 AVAILABLE INSTORE & ONLINE www . cakedecoratingsolutions . com . au
Page 65 text
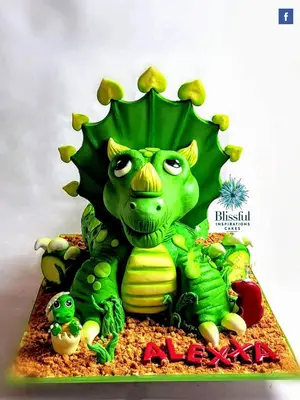
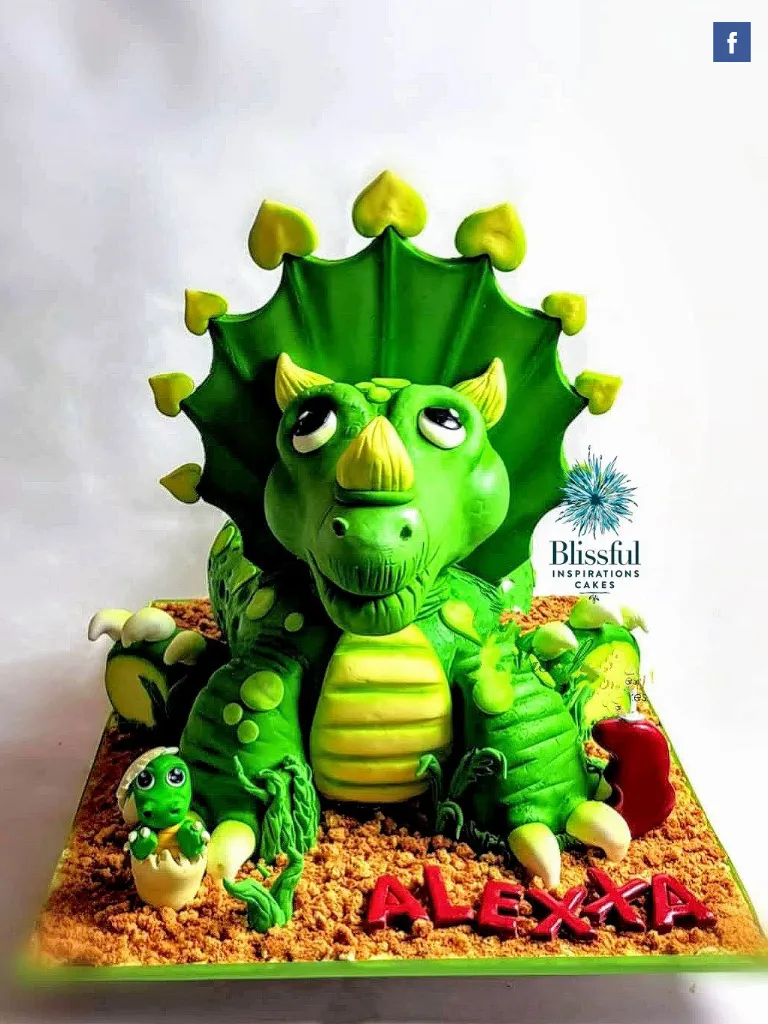
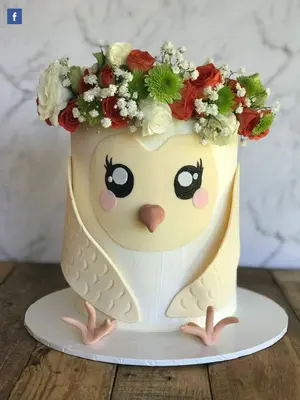
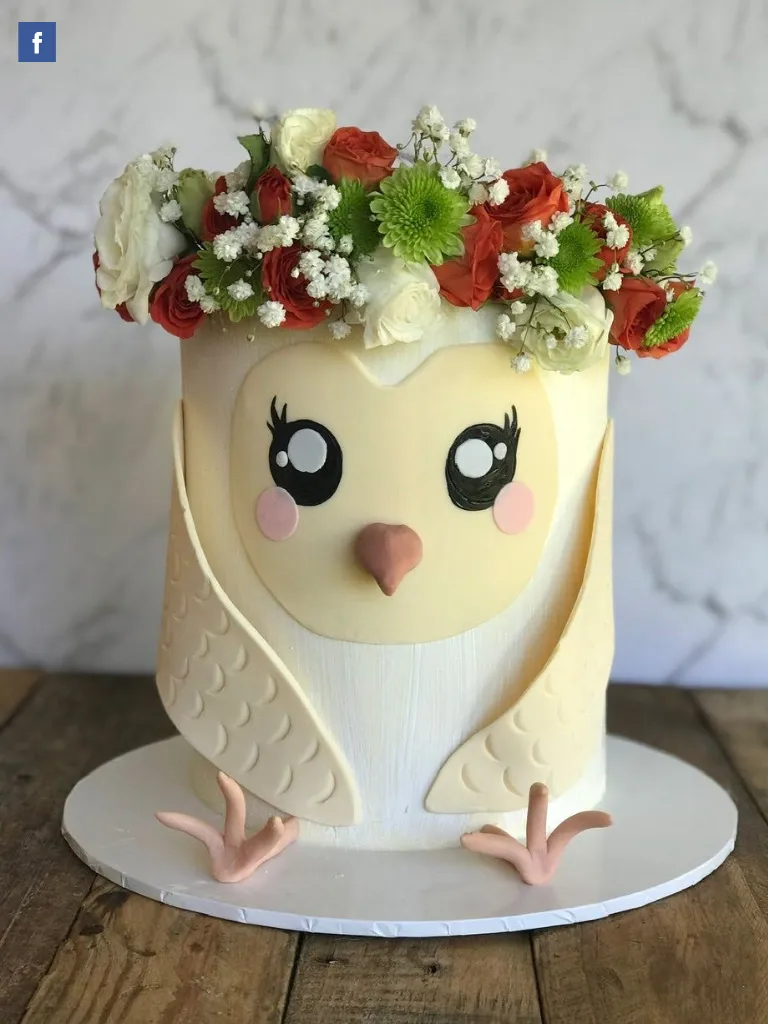
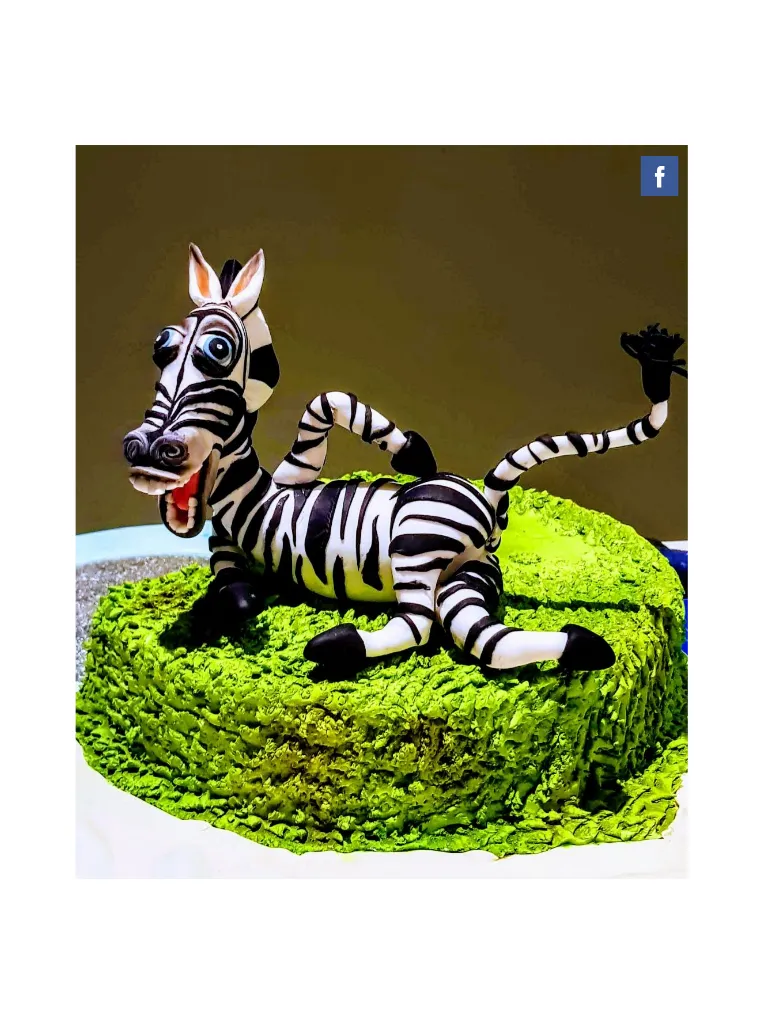
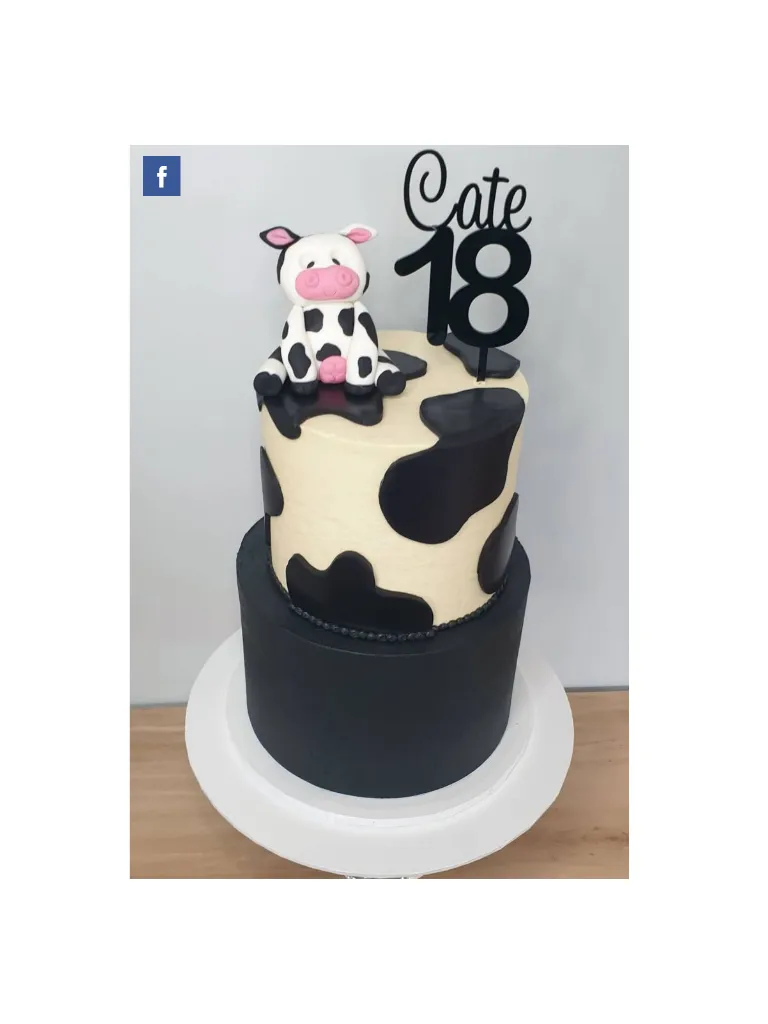
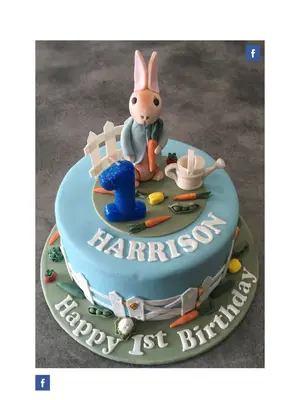
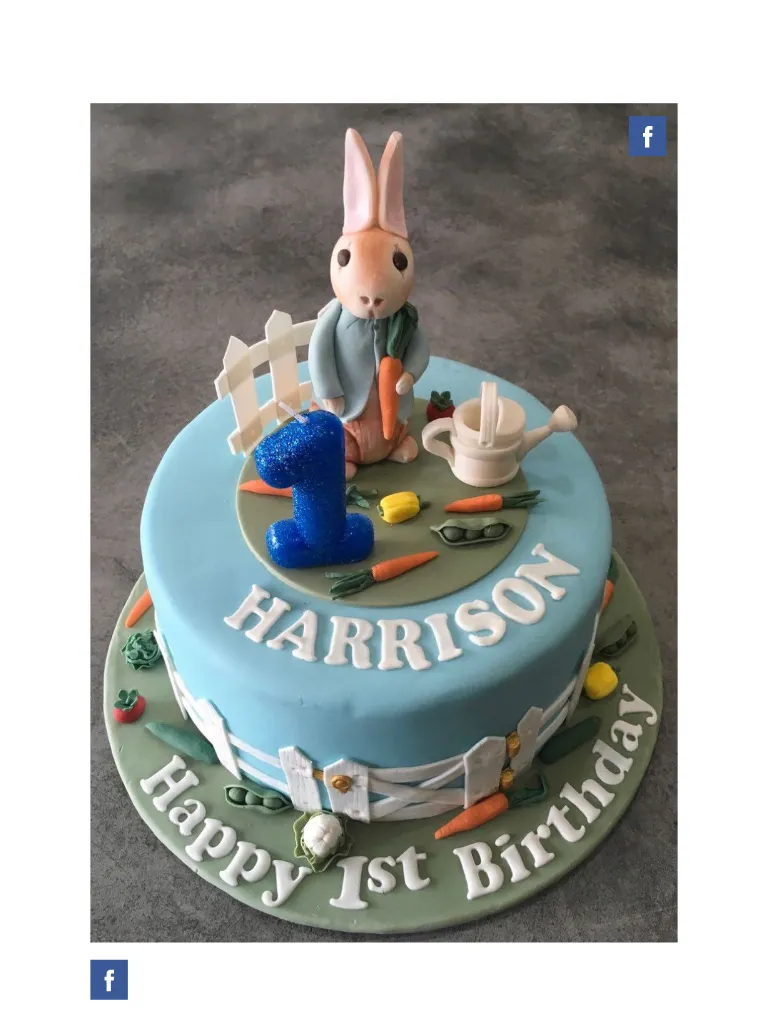
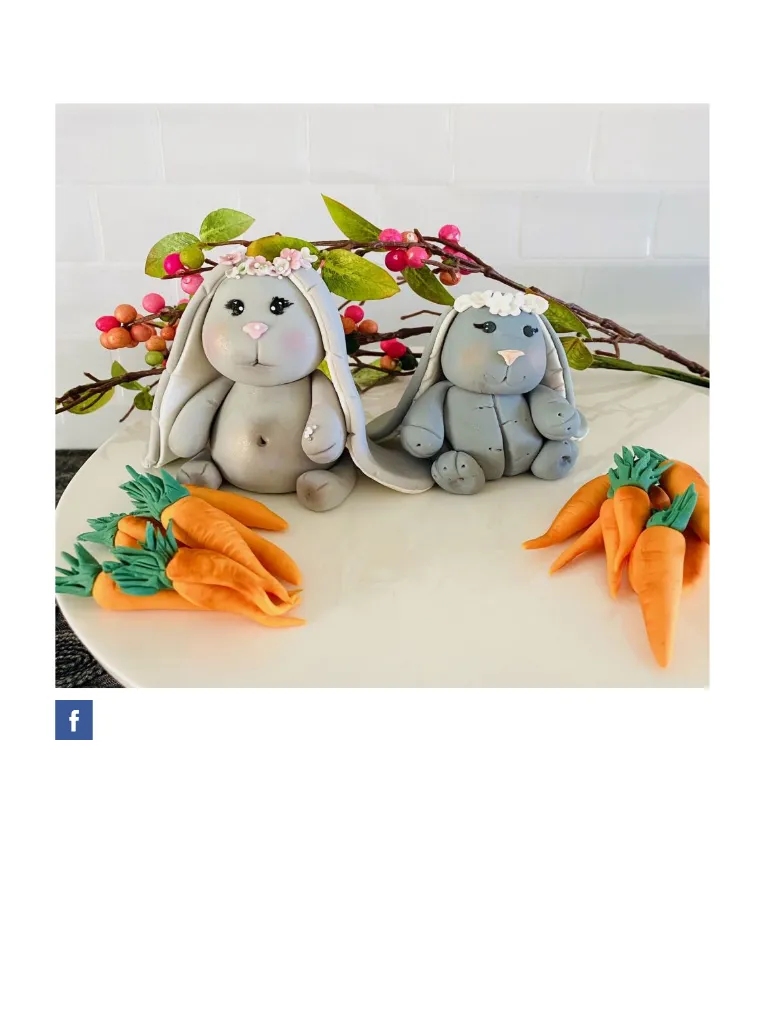
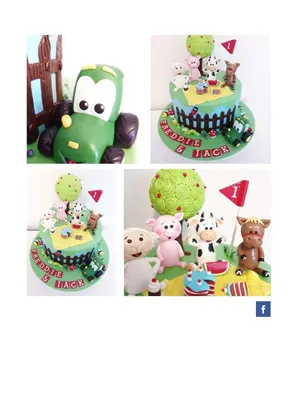
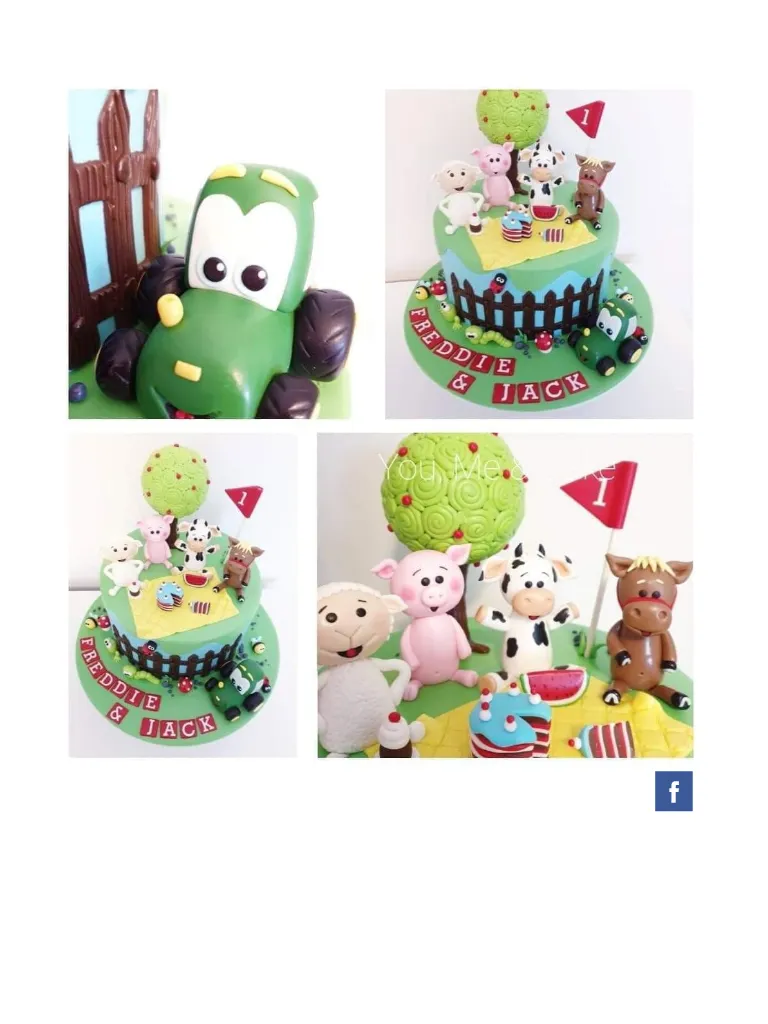
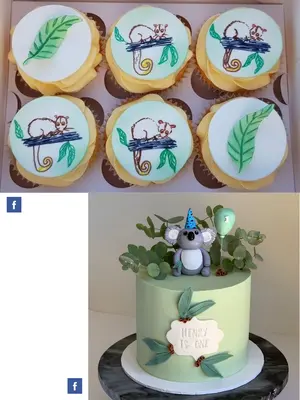
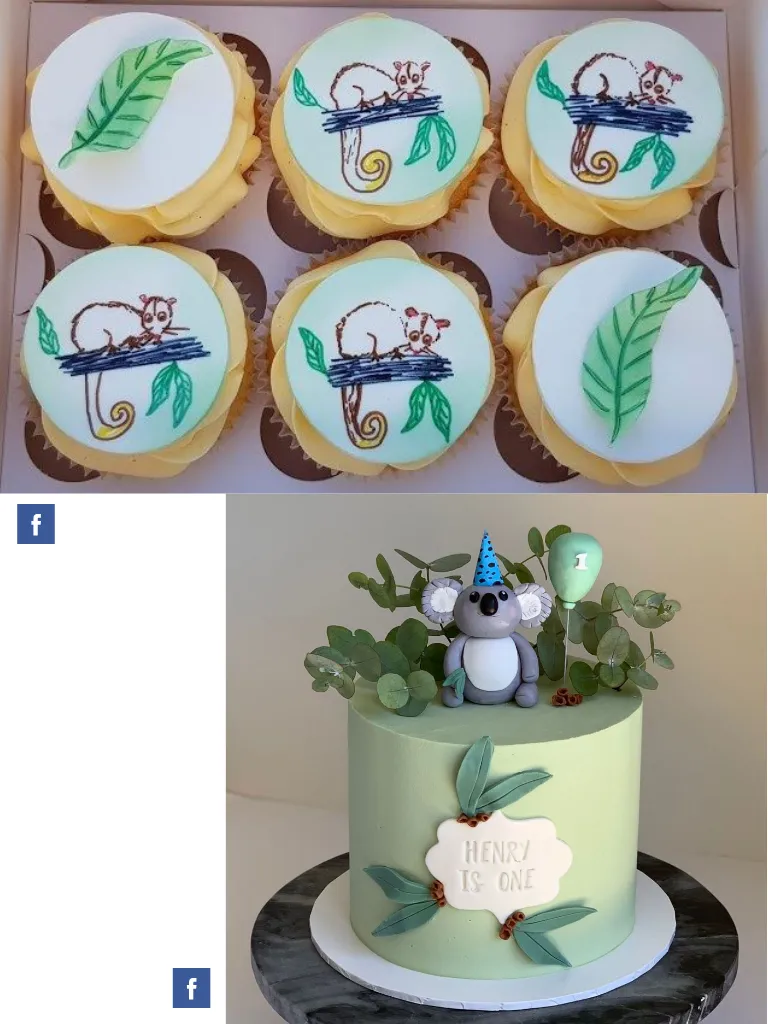
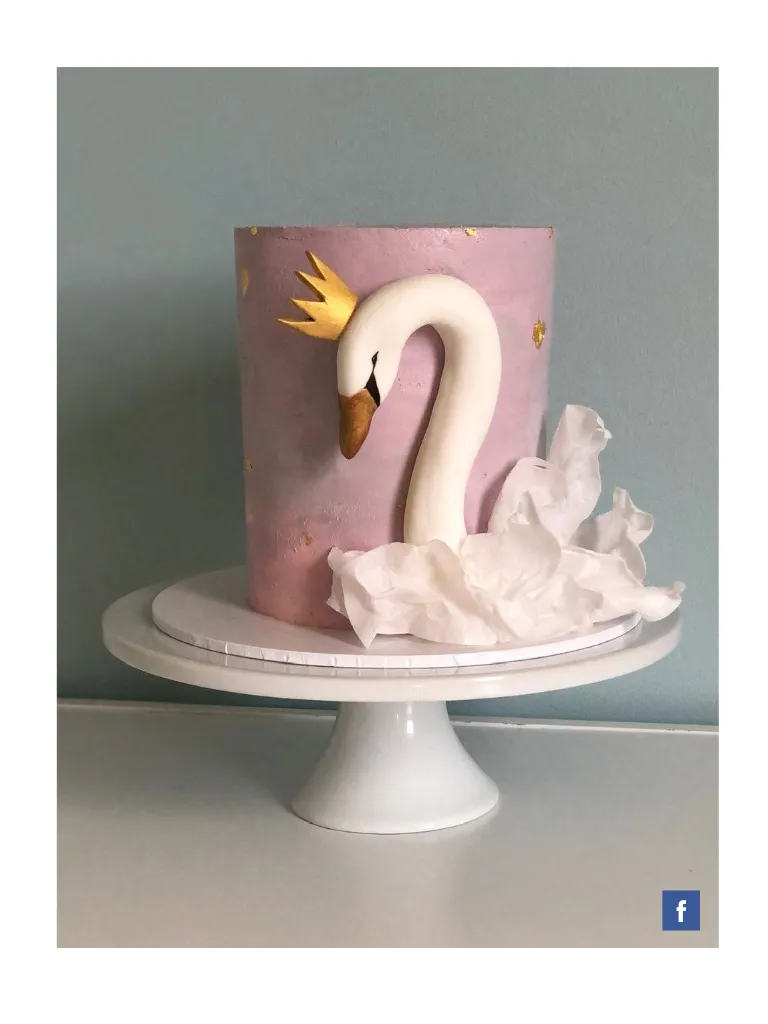
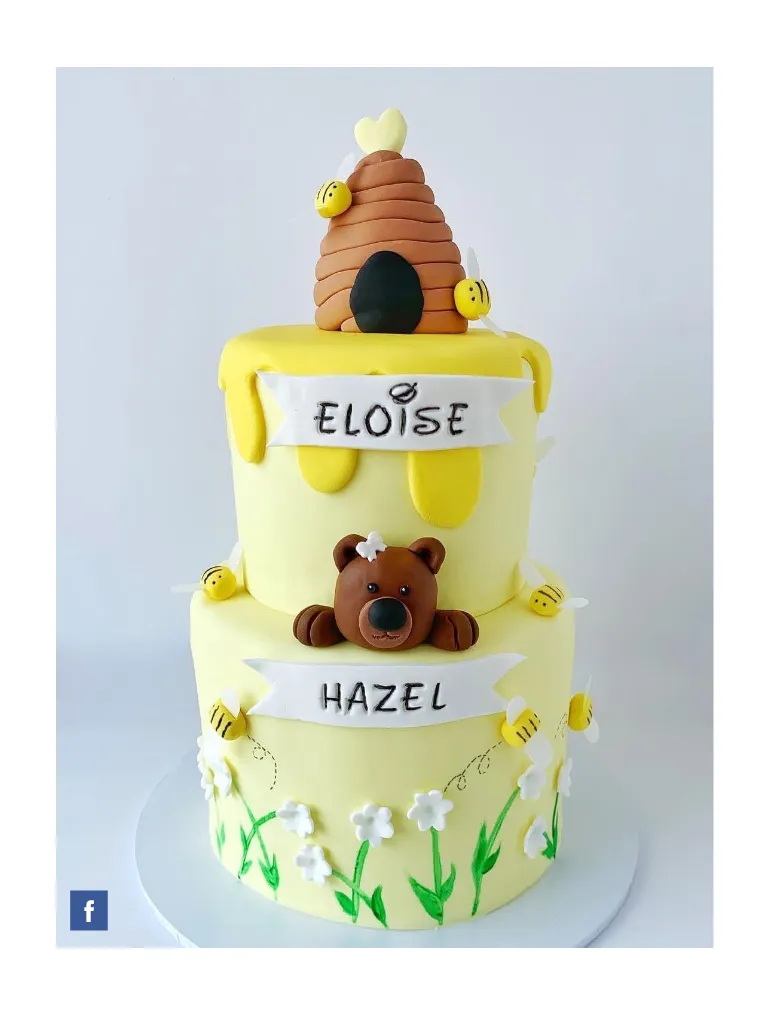
ACDN Member gallery We invited our members to submit to our member gallery - take a look at what they ' ve been creating ! Want to submit to our member gallery ? Join us HERE !


Page 68 text
Great gift idea ! cake decorating central kit of the month New FREE POSTAGE project every month Join by 30th November and get your first three months postage for free . It ’ s the cake decorating workshop that comes to you . All the decorating products that you need to make the project are included in your box , add a few kitchen and house supplies and you have a workshop right in your home . Always exciting new products that can be used more than once . Full colour instructions emailed straight to you . $ 55 plus postage , extra $ 5 for colour instructions to be included in the box . Store pick ups also available from CASTLE HILL , CAMPBELLTOWN & NUNAWADING . Limited subscriptions available . cakedecoratingcentral . com . au
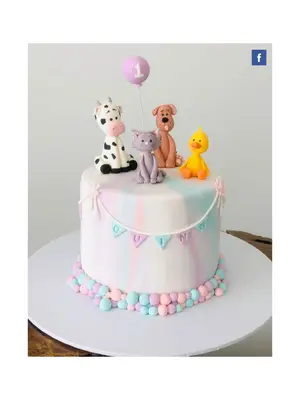
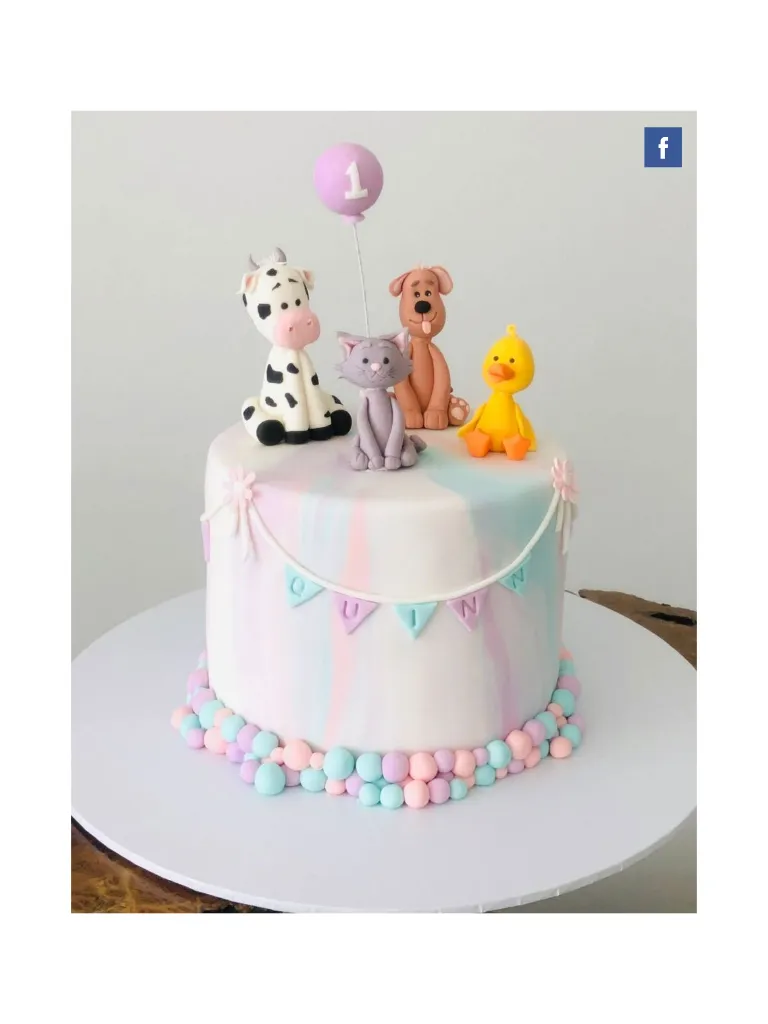
Page 78 text
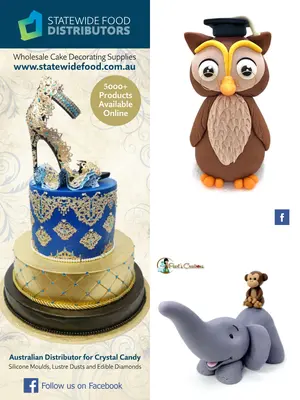
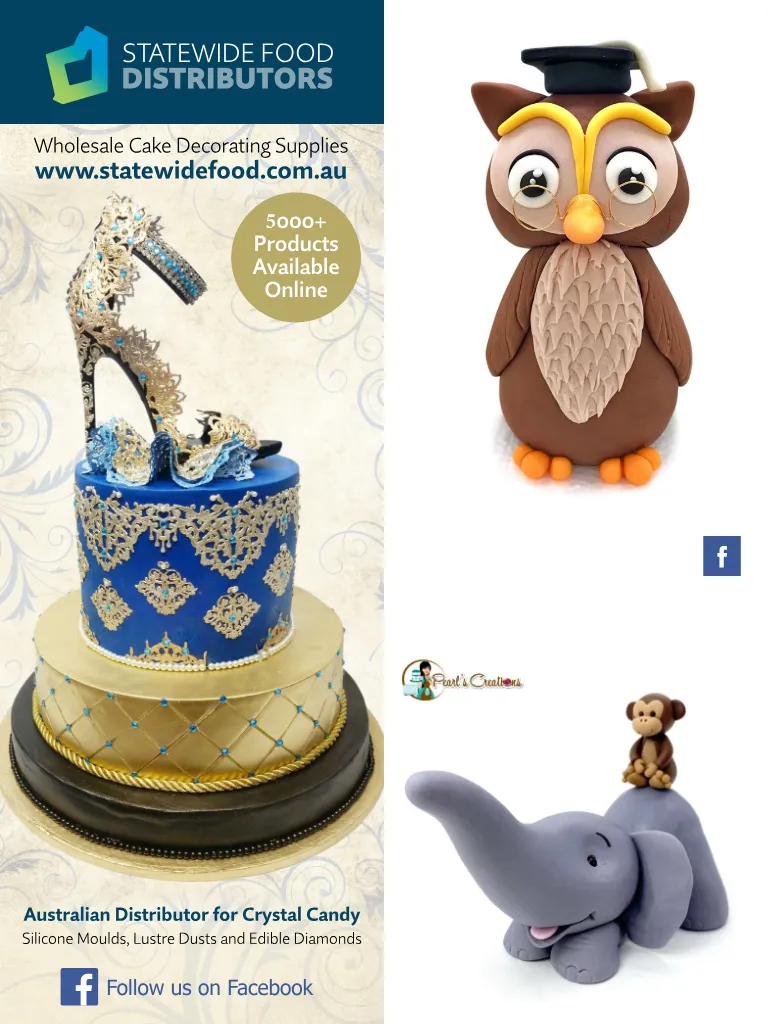
Wholesale Cake Decorating Supplies www . statewidefood . com . au 5000 + Products Available Online f Australian Distributor for Crystal Candy Silicone Moulds , Lustre Dusts and Edible Diamonds Follow us on Facebook



Page 82 text
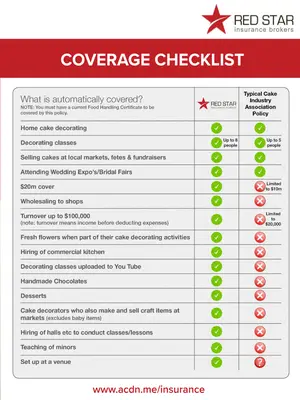
COMPREHENSIVE CAKE DECORATING INSURANCE $ 20m Public & Products Liability $ 189 PER YEAR FOR ACDN MEMBERS $ 289 per year for Non-ACDN Members ( Insurance subject to acceptance criteria ) To arrange cover or for more information visit www . acdn . me / insurance Red Star Insurance Pty Ltd ( AFSL 444803 ) T & C apply , see website for details . The Australian Cake Decorating Network Pty Ltd does not provide any advice regarding insurance matters . Please contact Red Star Insurance Brokers on the above contact details to discuss your insurance requirements . Referral advertisement . For information see www . acdn . me / insurance

Page 83 text
COVERAGE CHECKLIST Typical Cake Decorating Association Policy www . acdn . me / insurance

Page 86 text
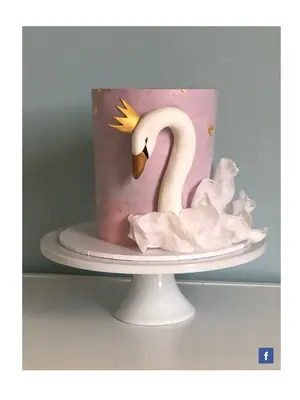
From the cover f


Page 87 text
Baking Box Subscription A MONTHLY SUBSCRIPTION OF CAKE AND BAKING GOODIES DELIVERED TO YOUR DOOR ! FIND OUT MORE AT WWW . BAKINGBOX . ME Subscribe at www . bakingbox . me
Page 88 text
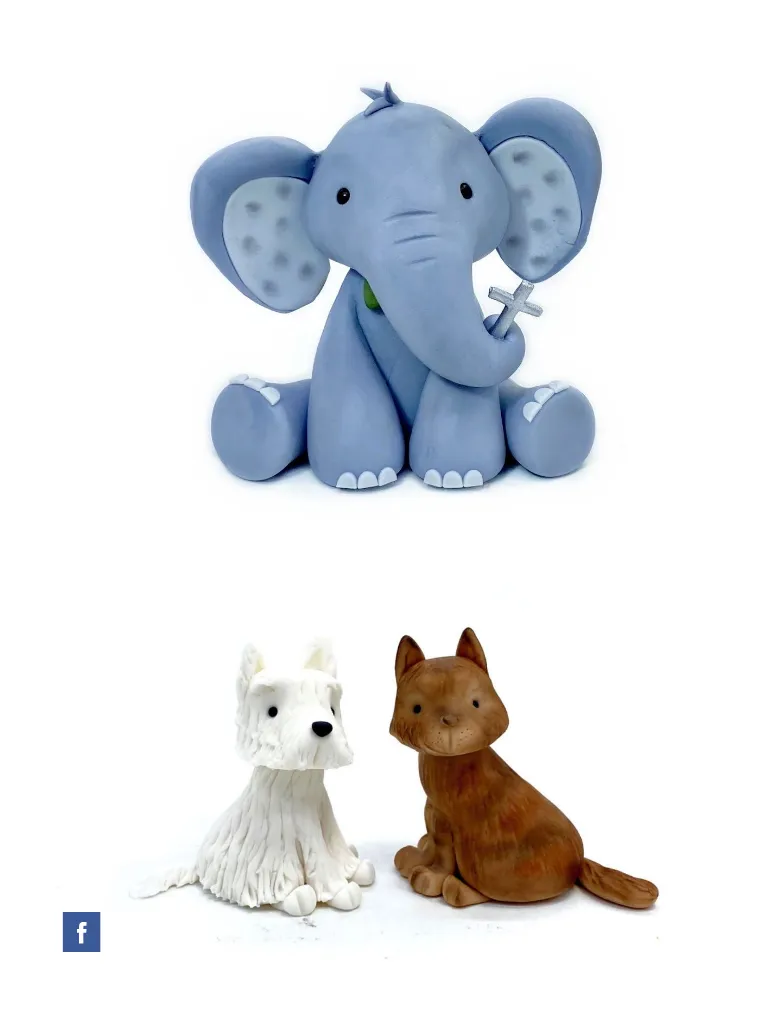
Make these ! READ THE TUTORIAL ON PAGE 5 f

Page 89 text
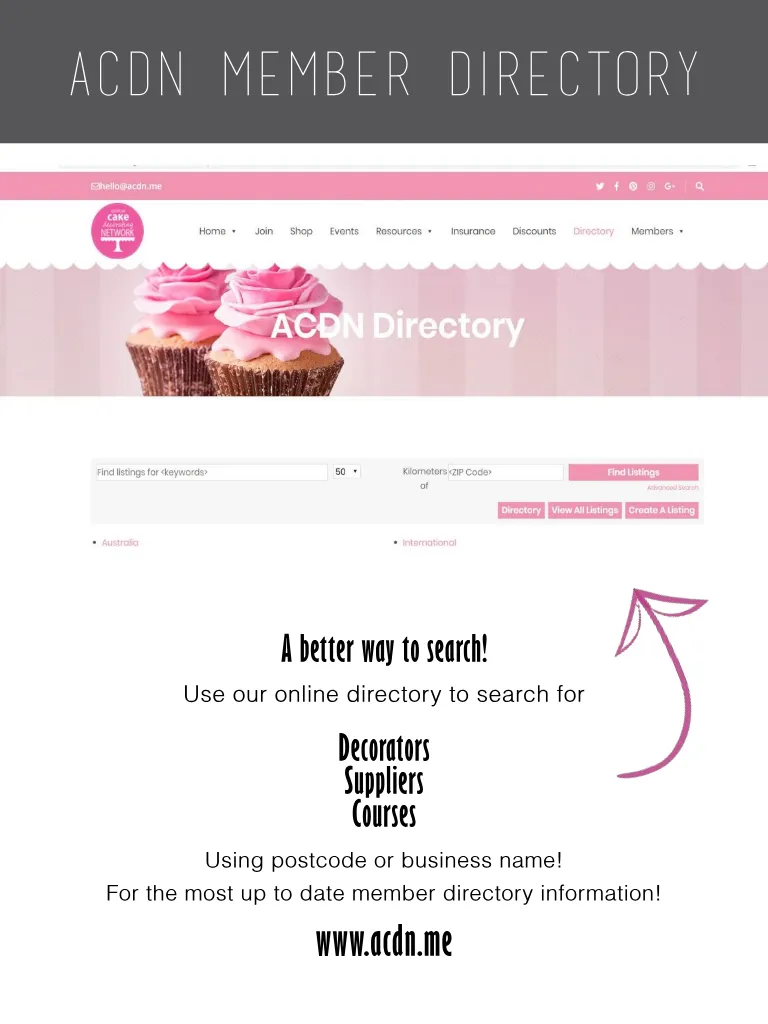
ACDN Member Directory A better way to search ! Use our online directory to search for Decorators Suppliers Courses Using postcode or business name ! For the most up to date member directory information ! www . acdn . me


Page 90 text
Members : If you ' re not listed in the website online directory , please login to the Member ' s Lounge at www . acdn . me to add or update your listing Become a member ! Join online at www . acdn . me / join
Page 91 text
THANKYOU FOR READING ANOTHER ISSUE OF Cake ! m a g a z i n e f www . acdn . me hello @ acdn . me To advertise in Cake ! magazine , contact : liz @ acdn . me THANKYOU FOR READING ANOTHER ISSUE OF www . acdn . me hello @ acdn . me Don ' t miss future issues of Cake ! Subscribe for FREE here ! To advertise in Cake ! magazine , contact : liz @ acdn . me