Page 35 of 101
Page 1 text
SEPTEMBER 2021
Page 2 text
To advertise in Cake ! magazine , contact : liz @ acdn . me f www . acdn . me hello @ acdn . me click here to join our mailing list ! Cake ! m a g a z i n e PUBLISHER : Cake ! Magazine is published by the Australian Cake Decorating Network Pty Ltd . ACN : 91 164 927 584 . © All content copyright 2020 Australian Cake Decorating Network Pty Ltd . All rights reserved . Reproduction any part of the magazine without written permission is prohibited . All prices included in Cake ! Magazine are approximate and are in AUD unless otherwise stated . Prices quoted are correct at the time of publishing and may vary or be subject to change . The Australian Cake Decorating Network Pty Ltd accepts no responsibility for damage or loss as a result of material submitted for , published in or as a result of this publication . The Australian Cake Decorating Network does not have an affiliation with any other magazine . The views and opinions expressed within this publication are not necessarily the views of the publisher or it ' s affiliates . While every effort has been made to ensure the accuracy of the informtion contained within Cake ! Magazine the publisher and Cake ! Magazine hold no responsibility for any errors , omissions , or consequences subsequent or otherwise , including loss or damage arising from reliance on information in this publication . Content is supplied for publication in Cake ! Magazine by parties external to the Australian Cake Decorating Network and it is the external party ' s responsibility to ensure content and credits are accurate . Cake ! Magazine contains advertising through individual arrangements , which may include paid affiliate arrangements . Cake ! Magazine may also contain affiliate links . The agreements are held between the advertiser or affiliate and the Australian Cake Decorating Network Ptd Ltd . To advertise in Cake ! magazine , contact : liz @ acdn . me f www . acdn . me hello @ acdn . me click here to join our mailing list !
Page 3 text
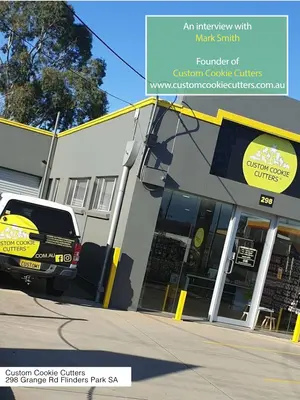
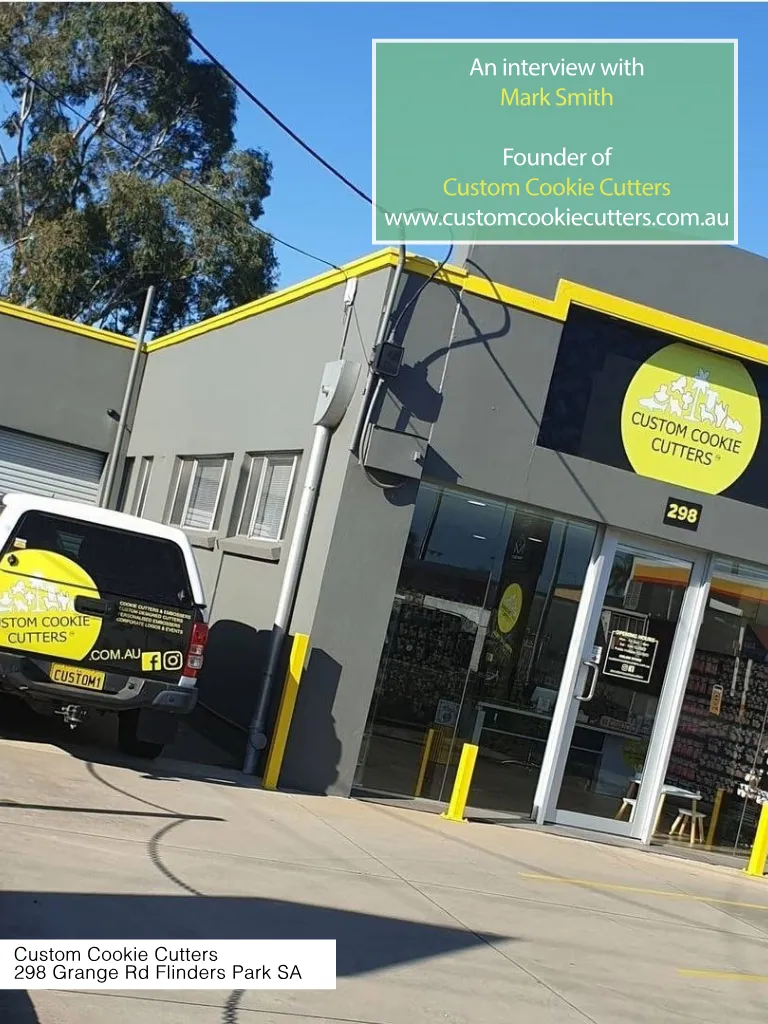
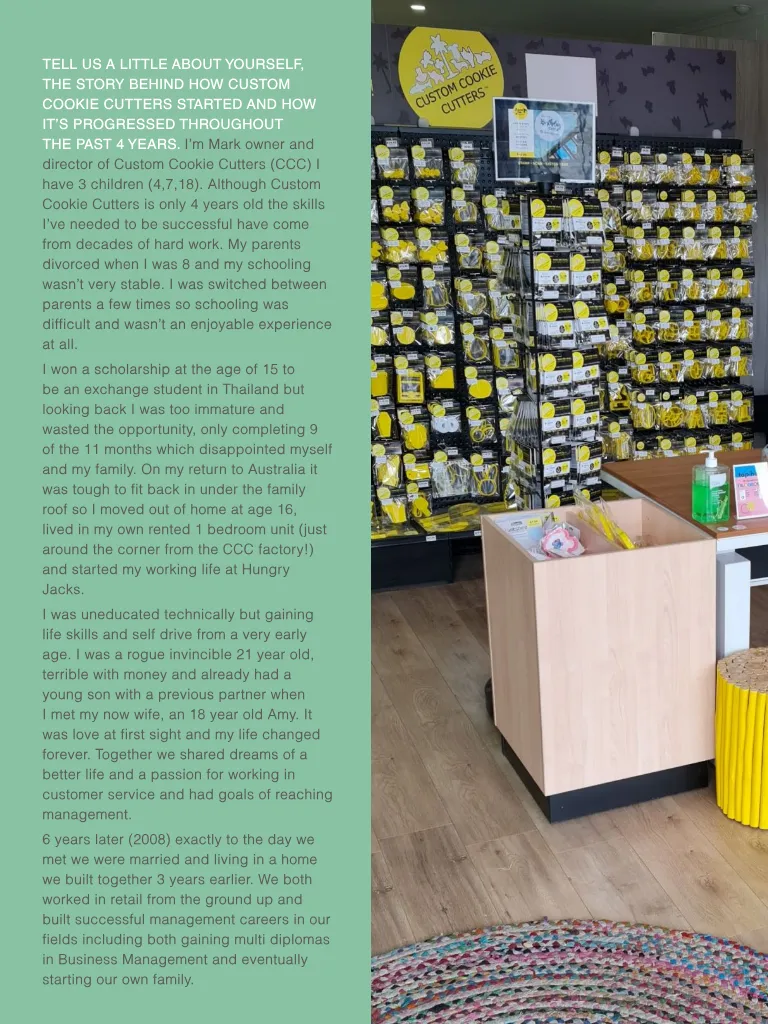
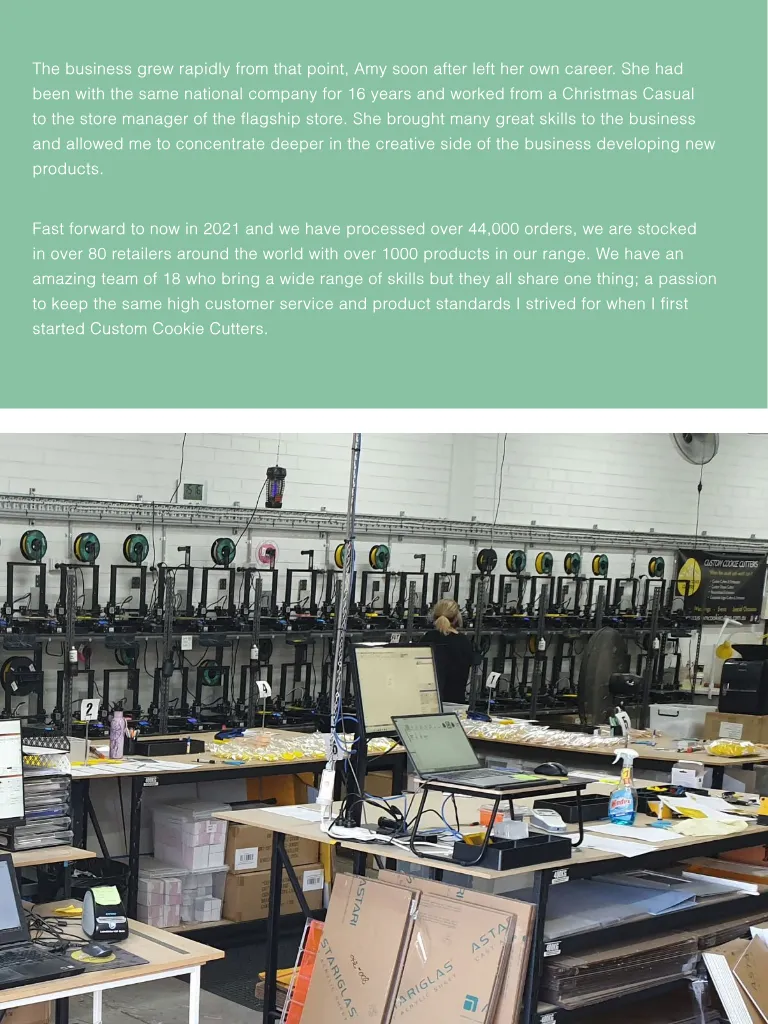
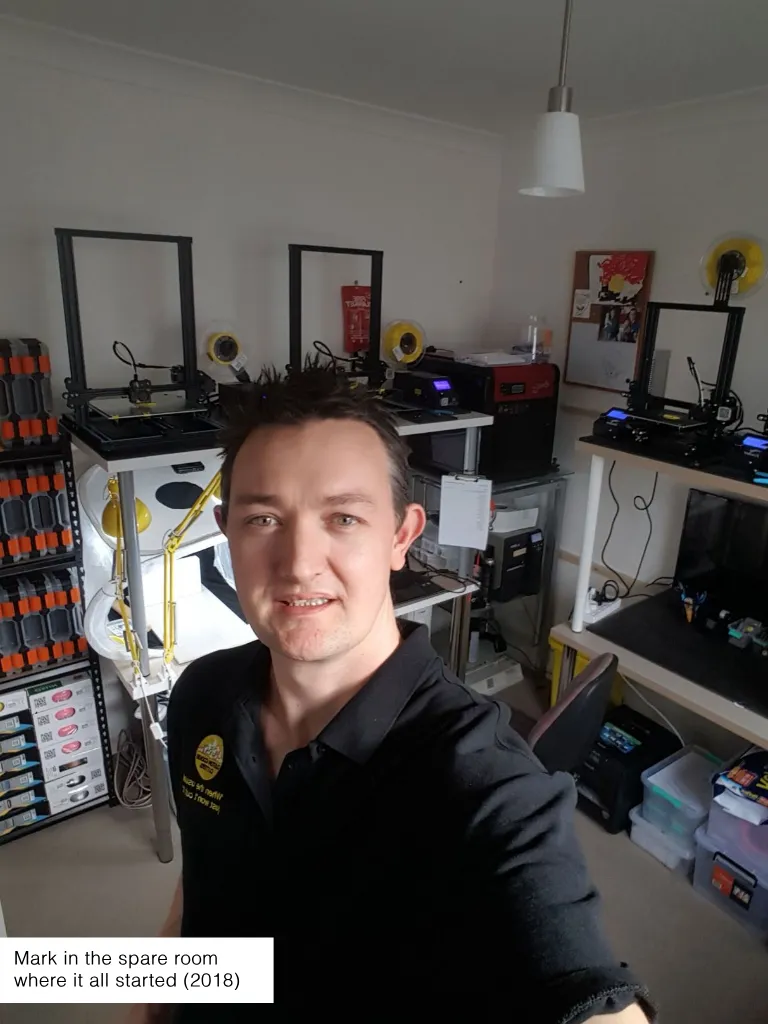
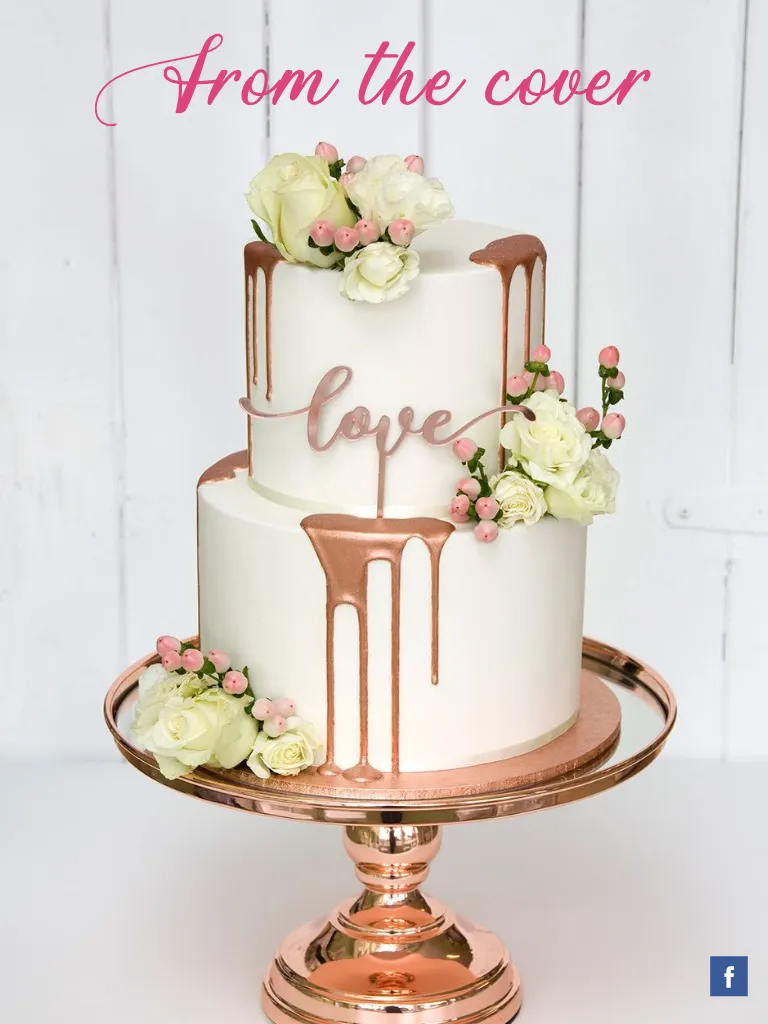
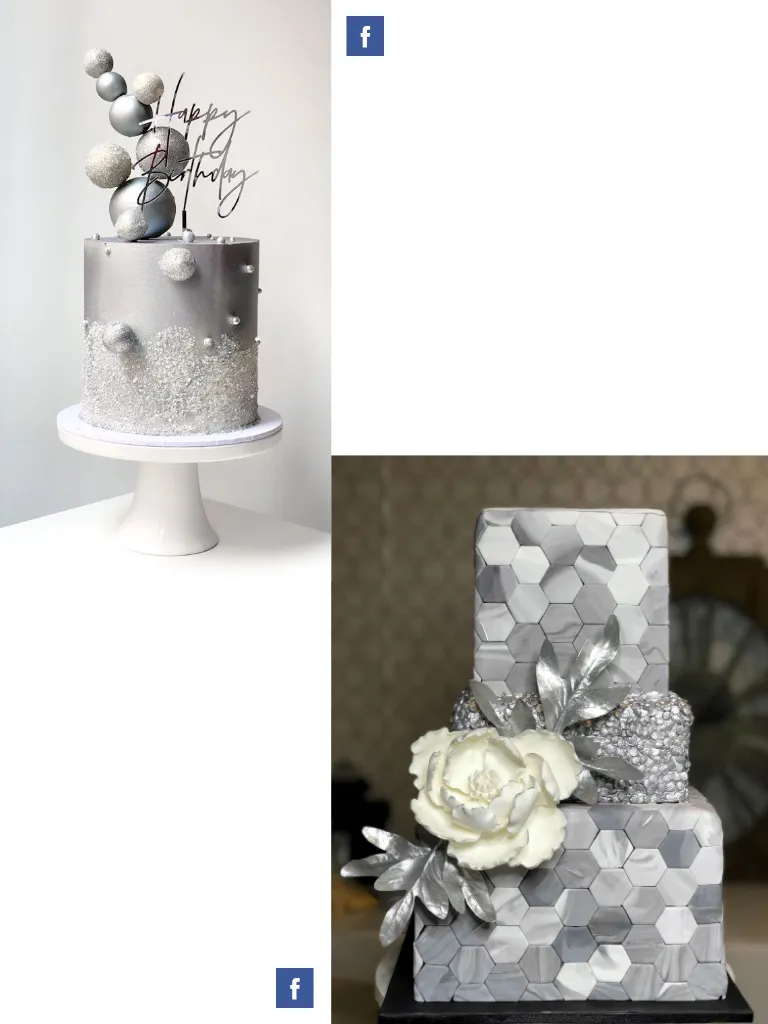
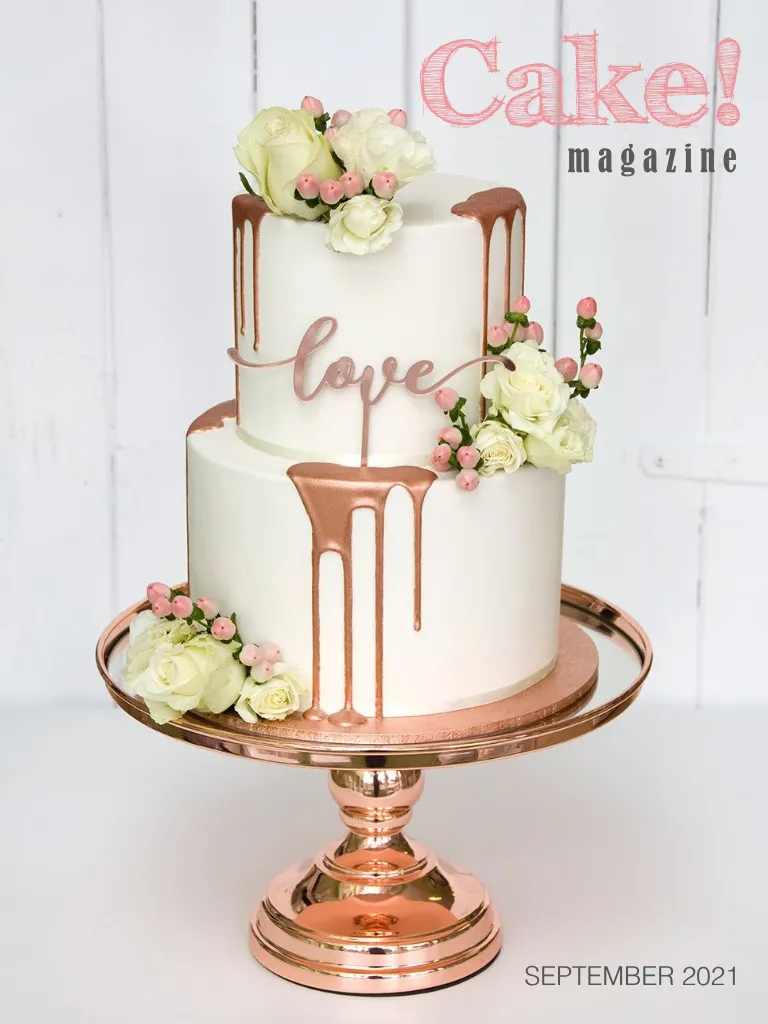
Liz Wright editor letter from the editor Welcome to our third issue of Cake ! Magazine for 2021 ! This theme is all about METALLICS , featuring many great tutorials and inspirational images to help you create your next metallic creation . In this issue with interview Mark Smith of Custom Cookie Cutters ( page 53 ), who shares his story of how he started the business from a spare bedroom in his house , to now having grown to a team of 18 staff and moved into their own factory . We also feature a gorgeous tutorial with cutters by Hattie & Mouse , a talented cookie cutter designer , working in collaboration with Mark and his team from Custom Cookie Cutters . We love these new cutters and it is a pleasure to feature them in our magazine ( see page 29 for tutorial ). Amber Comadira-Smith joins us with her regular Cake ! Magazine column on page 62 , discussing how to use the KISS method with your designs ! Save the date for our next Industry Awards Night ! We are busy planning our 2021 event which will be held online in November . See page 62 for details ! We hope you enjoy this issue of Cake ! Magazine , and to all of you who are being affected by COVID and restrictions , may this issue bring a little metallic sparkle to your day ! Enjoy ! Liz COVER IMAGE : Tanja Kober Choice Cakes & Decorating Centre Liz Wright editor Liz is the editor of Cake ! magazine and founder and owner of the Australian Cake Decorating Network . Liz grew up surrounded by cake , spending hours upon hours watching her mum create stunning wedding cakes ( in the days of intricate piping and extension work !). Liz is excited to have the opportunity to use Cake ! magazine as well as the Australian Cake Decorating Network to showcase the incredbile talent of cake decorators in Australia and worldwide .
Page 4 text
contents 33 33 8 16 26 28 40 25 17
Page 5 text
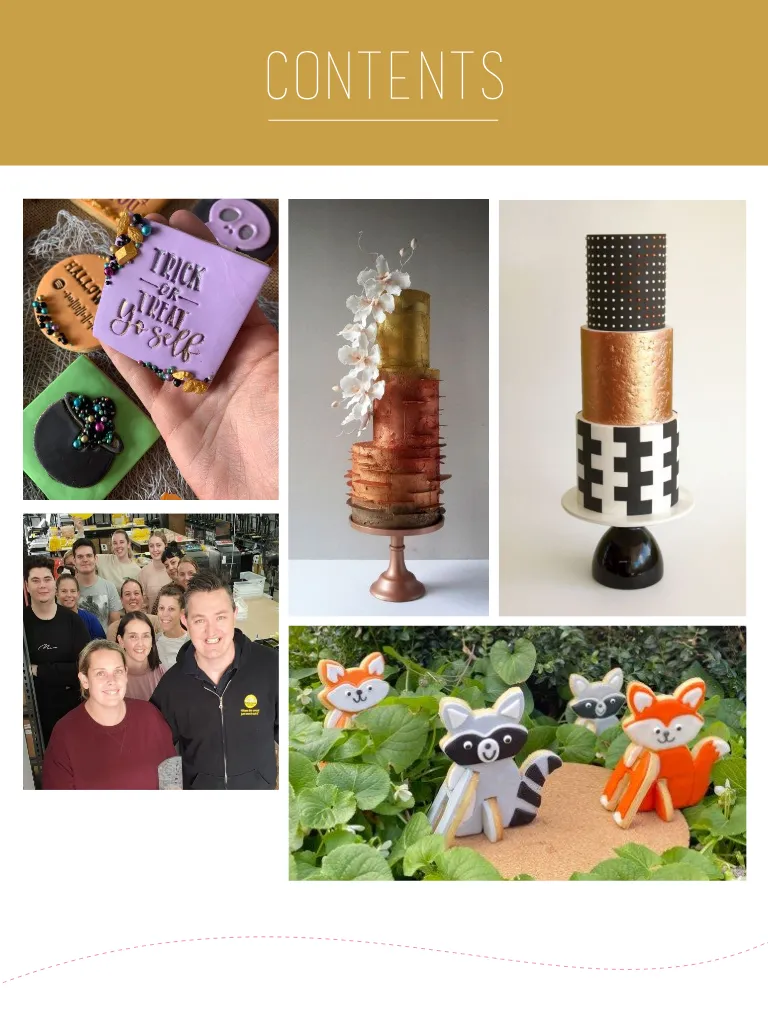
Interview with Mark Smith of Custom Cookie Cutters 2021 ACDN Cake Decorating & Baking Industry Awards Night - Save the date ! Amber Comadira-Smith : Business Basics Metallic Tiered Cake Halloween Lustre Stamped Cookies Fox and Raccoon Standing Cookies Metallic Beauty Letter from the editor ACDN Member Gallery september 2021 Features 53 64 62 Interview with Mark Smith of Custom Cookie Cutters 2021 ACDN Cake Decorating & Baking Industry Awards Night - Save the date ! Amber Comadira-Smith : Business Basics Tutorials 9 21 29 41 Metallic Tiered Cake Halloween Lustre Stamped Cookies Fox and Raccoon Standing Cookies Metallic Beauty Regulars 3 67 Letter from the editor ACDN Member Gallery 21


Page 6 text
www . acdn . me hello @ acdn . me click here to join our mailing list ! To advertise in Cake ! magazine , contact liz @ acdn . me SUBSCRIBE FOR FREE to have each issue of Cake ! magzine sent straight to your inbox ! f www . acdn . me hello @ acdn . me click here to join our mailing list ! To advertise in Cake ! magazine , contact liz @ acdn . me


Page 7 text
Metallics A collection of tutorials to help you make your own metallic themed creations


Page 9 text
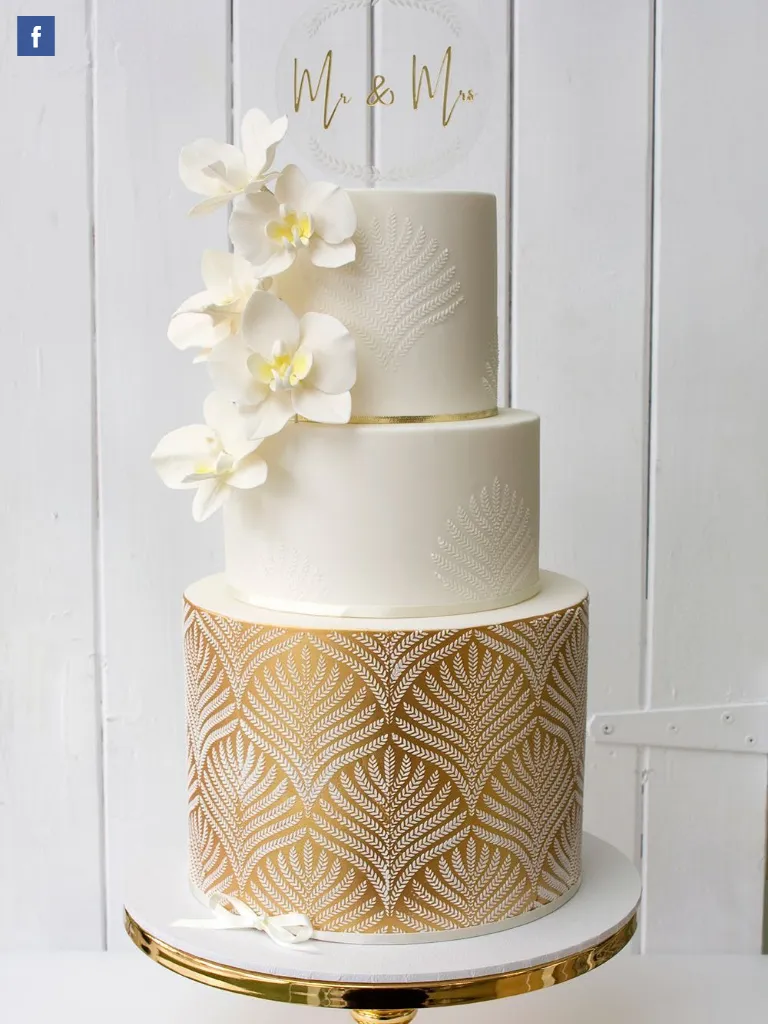
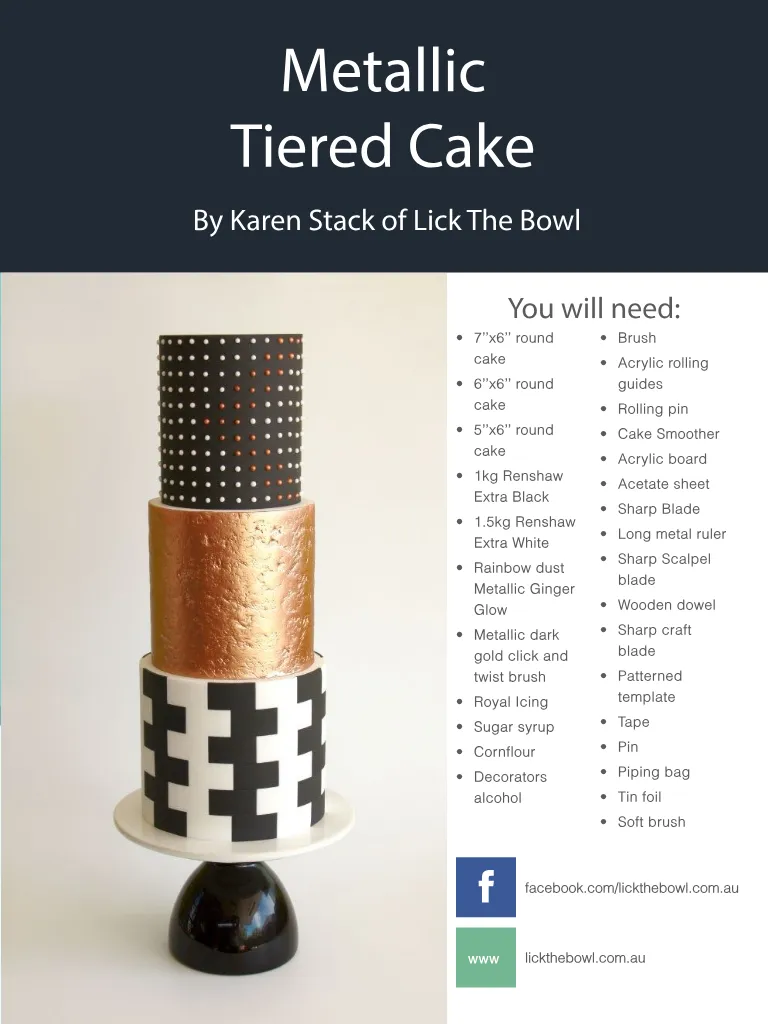
Metallic Tiered Cake By Karen Stack of Lick The Bowl You will need : • 7 ’’ x6 ’’ round • Brush cake • Acrylic rolling • 6 ’’ x6 ’’ round guides cake • Rolling pin • 5 ’’ x6 ’’ round • Cake Smoother cake • Acrylic board • 1kg Renshaw • Acetate sheet Extra Black • Sharp Blade • 1.5kg Renshaw • Long metal ruler Extra White • Sharp Scalpel • Rainbow dust blade Metallic Ginger Glow • Wooden dowel • Metallic dark • Sharp craft gold click and blade twist brush • Patterned • Royal Icing template • Sugar syrup • Tape • Cornflour • Pin • Decorators • Piping bag alcohol • Tin foil • Soft brush f facebook . com / lickthebowl . com . au www lickthebowl . com . au
Page 10 text
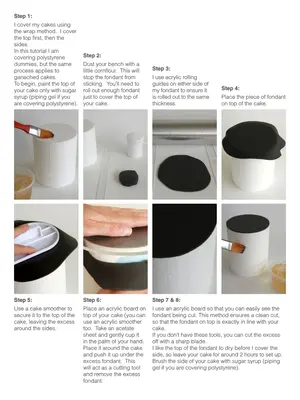
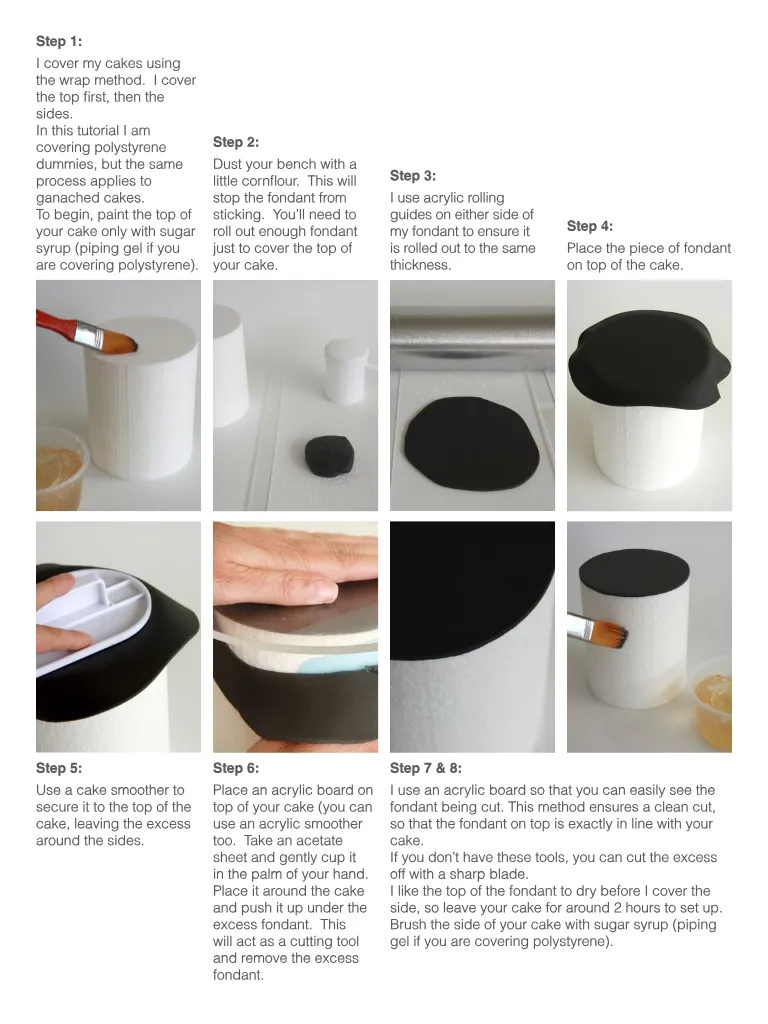
Step 1 : I cover my cakes using the wrap method . I cover the top first , then the sides . In this tutorial I am covering polystyrene dummies , but the same process applies to ganached cakes . To begin , paint the top of your cake only with sugar syrup ( piping gel if you are covering polystyrene ). Step 2 : Dust your bench with a little cornflour . This will stop the fondant from sticking . You ’ ll need to roll out enough fondant just to cover the top of your cake . Step 3 : I use acrylic rolling guides on either side of my fondant to ensure it is rolled out to the same thickness . Step 4 : Place the piece of fondant on top of the cake . Step 5 : Step 6 : Step 7 & 8 : Use a cake smoother to secure it to the top of the cake , leaving the excess around the sides . Place an acrylic board on top of your cake ( you can use an acrylic smoother too . Take an acetate sheet and gently cup it in the palm of your hand . Place it around the cake and push it up under the excess fondant . This will act as a cutting tool and remove the excess fondant . I use an acrylic board so that you can easily see the fondant being cut . This method ensures a clean cut , so that the fondant on top is exactly in line with your cake . If you don ’ t have these tools , you can cut the excess off with a sharp blade . I like the top of the fondant to dry before I cover the side , so leave your cake for around 2 hours to set up . Brush the side of your cake with sugar syrup ( piping gel if you are covering polystyrene ).
Page 11 text
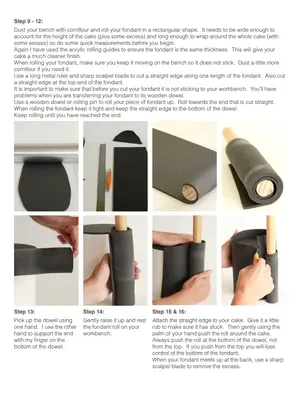
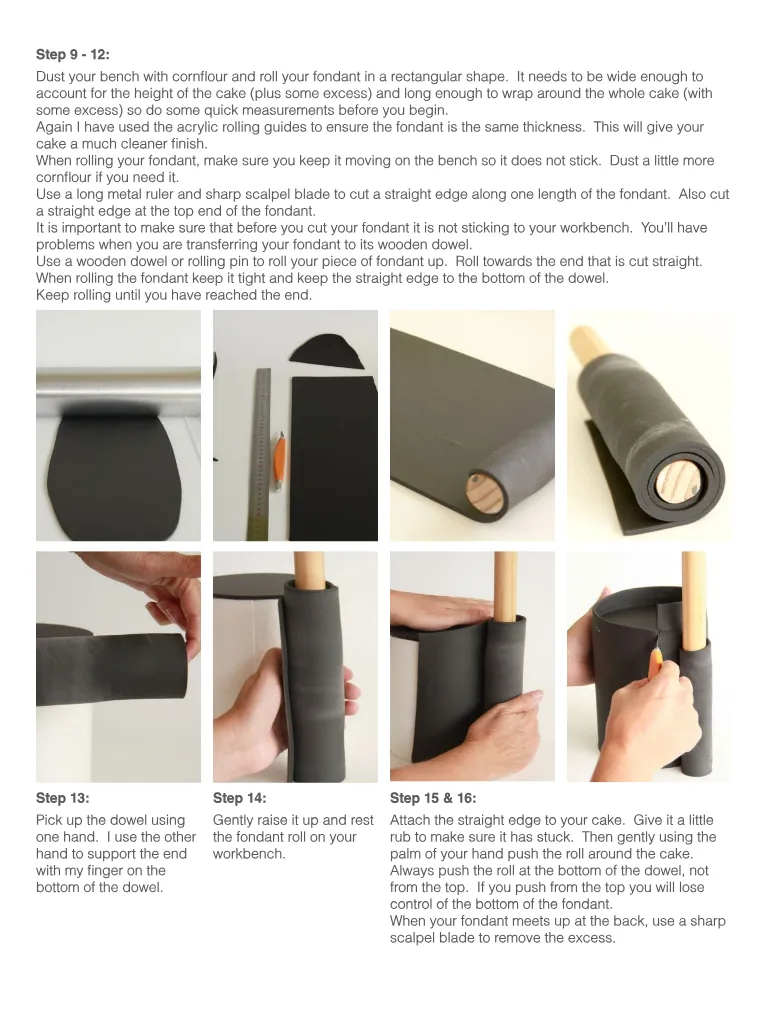
Step 9 - 12 : Dust your bench with cornflour and roll your fondant in a rectangular shape . It needs to be wide enough to account for the height of the cake ( plus some excess ) and long enough to wrap around the whole cake ( with some excess ) so do some quick measurements before you begin . Again I have used the acrylic rolling guides to ensure the fondant is the same thickness . This will give your cake a much cleaner finish . When rolling your fondant , make sure you keep it moving on the bench so it does not stick . Dust a little more cornflour if you need it . Use a long metal ruler and sharp scalpel blade to cut a straight edge along one length of the fondant . Also cut a straight edge at the top end of the fondant . It is important to make sure that before you cut your fondant it is not sticking to your workbench . You ’ ll have problems when you are transferring your fondant to its wooden dowel . Use a wooden dowel or rolling pin to roll your piece of fondant up . Roll towards the end that is cut straight . When rolling the fondant keep it tight and keep the straight edge to the bottom of the dowel . Keep rolling until you have reached the end . Step 13 : Step 14 : Step 15 & 16 : Pick up the dowel using one hand . I use the other hand to support the end with my finger on the bottom of the dowel . Gently raise it up and rest the fondant roll on your workbench . Attach the straight edge to your cake . Give it a little rub to make sure it has stuck . Then gently using the palm of your hand push the roll around the cake . Always push the roll at the bottom of the dowel , not from the top . If you push from the top you will lose control of the bottom of the fondant . When your fondant meets up at the back , use a sharp scalpel blade to remove the excess .
Page 12 text
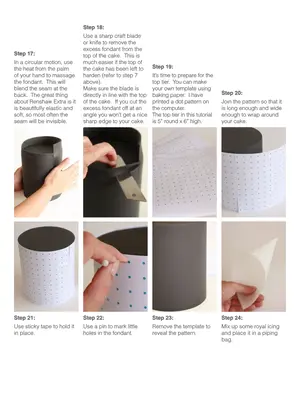
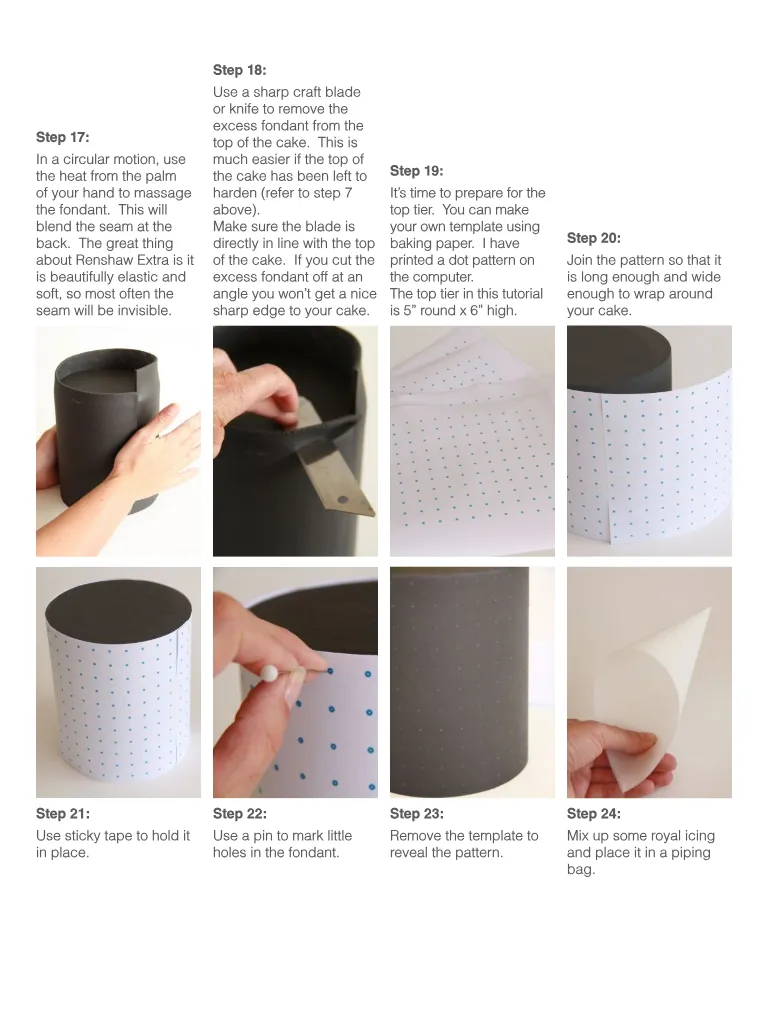
Step 18 : Step 17 : In a circular motion , use the heat from the palm of your hand to massage the fondant . This will blend the seam at the back . The great thing about Renshaw Extra is it is beautifully elastic and soft , so most often the seam will be invisible . Use a sharp craft blade or knife to remove the excess fondant from the top of the cake . This is much easier if the top of the cake has been left to harden ( refer to step 7 above ). Make sure the blade is directly in line with the top of the cake . If you cut the excess fondant off at an angle you won ’ t get a nice sharp edge to your cake . Step 19 : It ’ s time to prepare for the top tier . You can make your own template using baking paper . I have printed a dot pattern on the computer . The top tier in this tutorial is 5 ” round x 6 ” high . Step 20 : Join the pattern so that it is long enough and wide enough to wrap around your cake . Step 21 : Step 22 : Step 23 : Step 24 : Use sticky tape to hold it in place . Use a pin to mark little holes in the fondant . Remove the template to reveal the pattern . Mix up some royal icing and place it in a piping bag .
Page 13 text
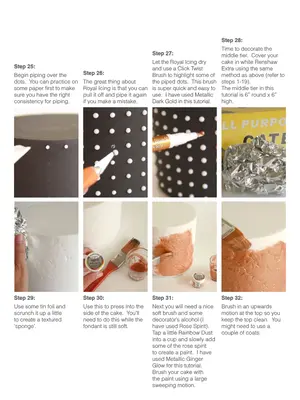
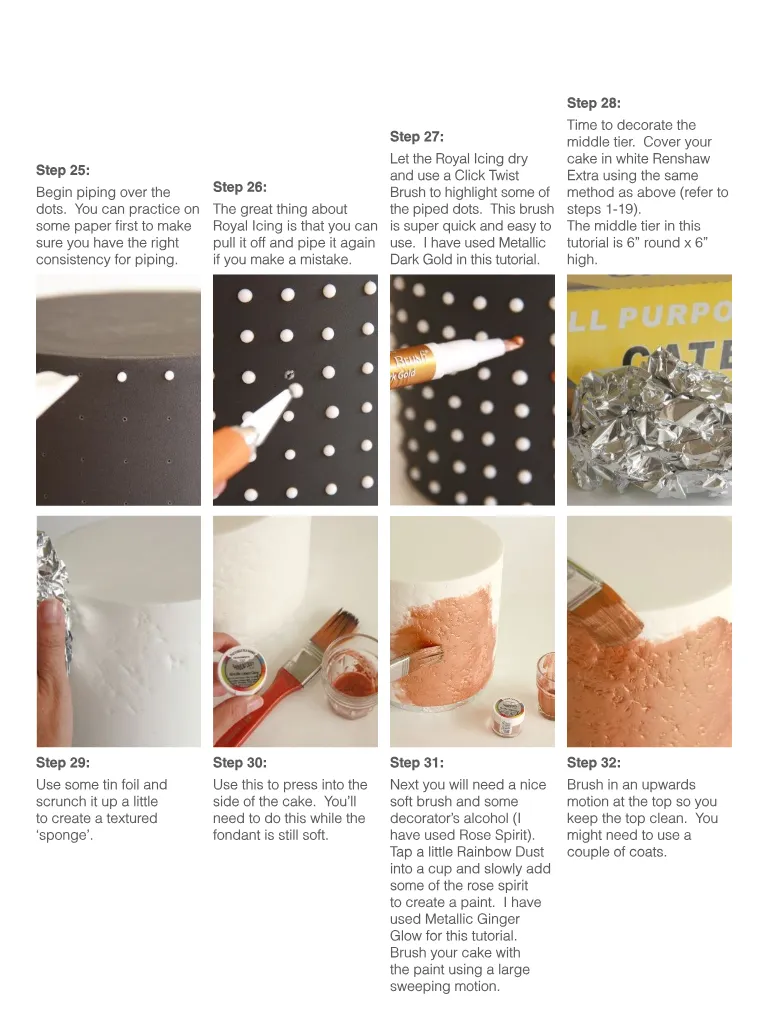
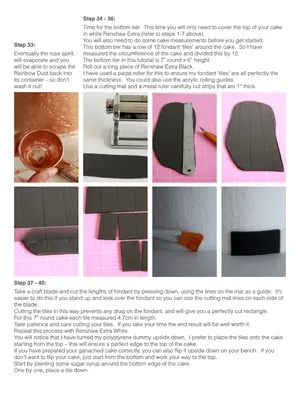
Step 28 : Step 25 : Begin piping over the dots . You can practice on some paper first to make sure you have the right consistency for piping . Step 26 : The great thing about Royal Icing is that you can pull it off and pipe it again if you make a mistake . Step 27 : Let the Royal Icing dry and use a Click Twist Brush to highlight some of the piped dots . This brush is super quick and easy to use . I have used Metallic Dark Gold in this tutorial . Time to decorate the middle tier . Cover your cake in white Renshaw Extra using the same method as above ( refer to steps 1-19 ). The middle tier in this tutorial is 6 ” round x 6 ” high . Step 29 : Step 30 : Step 31 : Step 32 : Use some tin foil and scrunch it up a little to create a textured ‘ sponge ’. Use this to press into the side of the cake . You ’ ll need to do this while the fondant is still soft . Next you will need a nice soft brush and some decorator ’ s alcohol ( I have used Rose Spirit ). Tap a little Rainbow Dust into a cup and slowly add some of the rose spirit to create a paint . I have used Metallic Ginger Glow for this tutorial . Brush your cake with the paint using a large sweeping motion . Brush in an upwards motion at the top so you keep the top clean . You might need to use a couple of coats .
Page 14 text
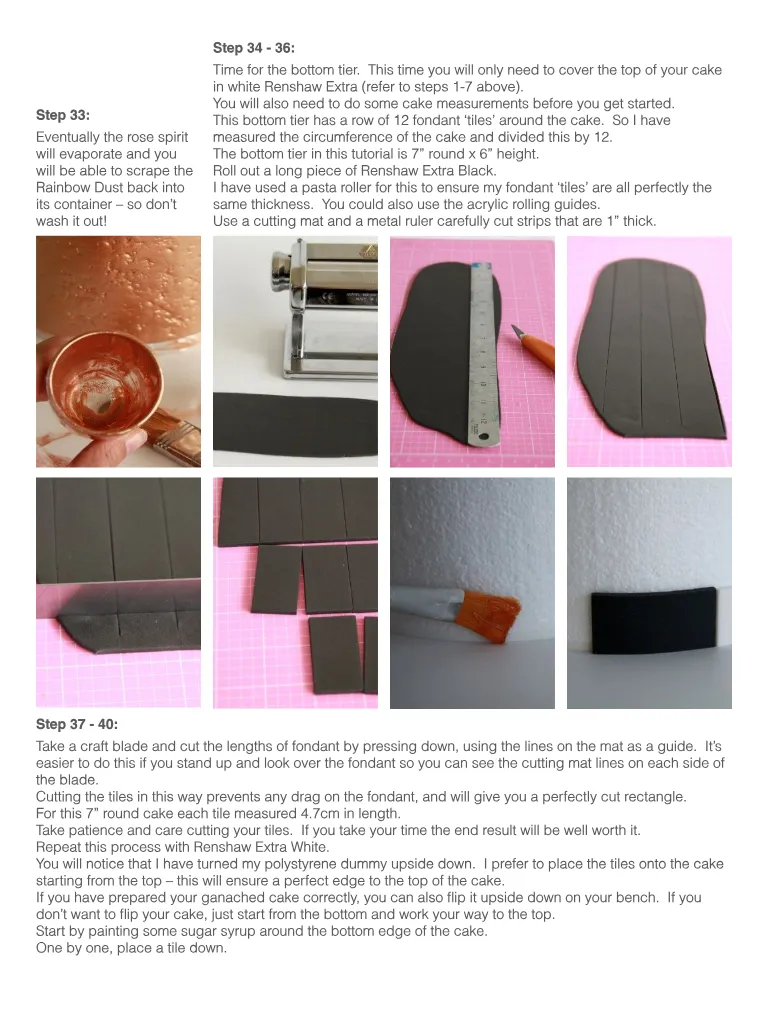
Step 33 : Eventually the rose spirit will evaporate and you will be able to scrape the Rainbow Dust back into its container – so don ’ t wash it out ! Step 34 - 36 : Time for the bottom tier . This time you will only need to cover the top of your cake in white Renshaw Extra ( refer to steps 1-7 above ). You will also need to do some cake measurements before you get started . This bottom tier has a row of 12 fondant ‘ tiles ’ around the cake . So I have measured the circumference of the cake and divided this by 12 . The bottom tier in this tutorial is 7 ” round x 6 ” height . Roll out a long piece of Renshaw Extra Black . I have used a pasta roller for this to ensure my fondant ‘ tiles ’ are all perfectly the same thickness . You could also use the acrylic rolling guides . Use a cutting mat and a metal ruler carefully cut strips that are 1 ” thick . Step 37 - 40 : Take a craft blade and cut the lengths of fondant by pressing down , using the lines on the mat as a guide . It ’ s easier to do this if you stand up and look over the fondant so you can see the cutting mat lines on each side of the blade . Cutting the tiles in this way prevents any drag on the fondant , and will give you a perfectly cut rectangle . For this 7 ” round cake each tile measured 4.7cm in length . Take patience and care cutting your tiles . If you take your time the end result will be well worth it . Repeat this process with Renshaw Extra White . You will notice that I have turned my polystyrene dummy upside down . I prefer to place the tiles onto the cake starting from the top – this will ensure a perfect edge to the top of the cake . If you have prepared your ganached cake correctly , you can also flip it upside down on your bench . If you don ’ t want to flip your cake , just start from the bottom and work your way to the top . Start by painting some sugar syrup around the bottom edge of the cake . One by one , place a tile down .
Page 15 text
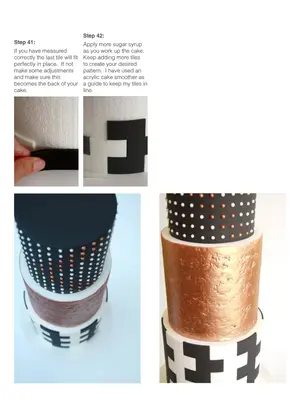
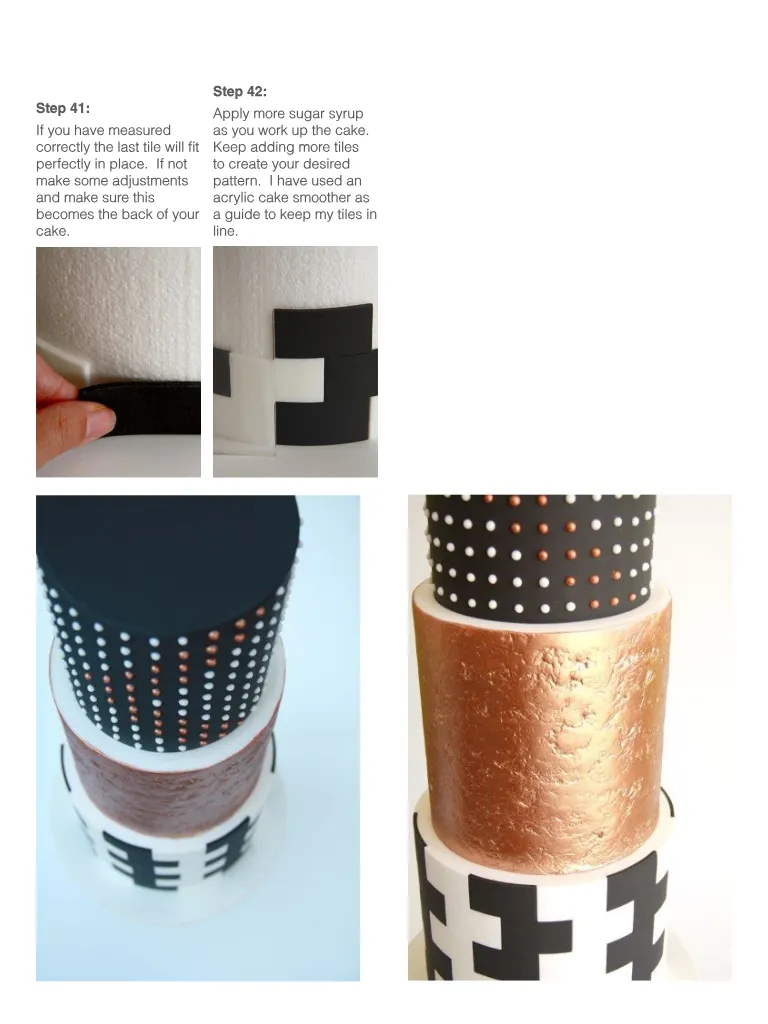
Step 41 : If you have measured correctly the last tile will fit perfectly in place . If not make some adjustments and make sure this becomes the back of your cake . Step 42 : Apply more sugar syrup as you work up the cake . Keep adding more tiles to create your desired pattern . I have used an acrylic cake smoother as a guide to keep my tiles in line .




Page 17 text
FREE EXPRESS SHIPPING FULL 40PC SET $ 274 . 95 S H O P H E R E


Page 18 text
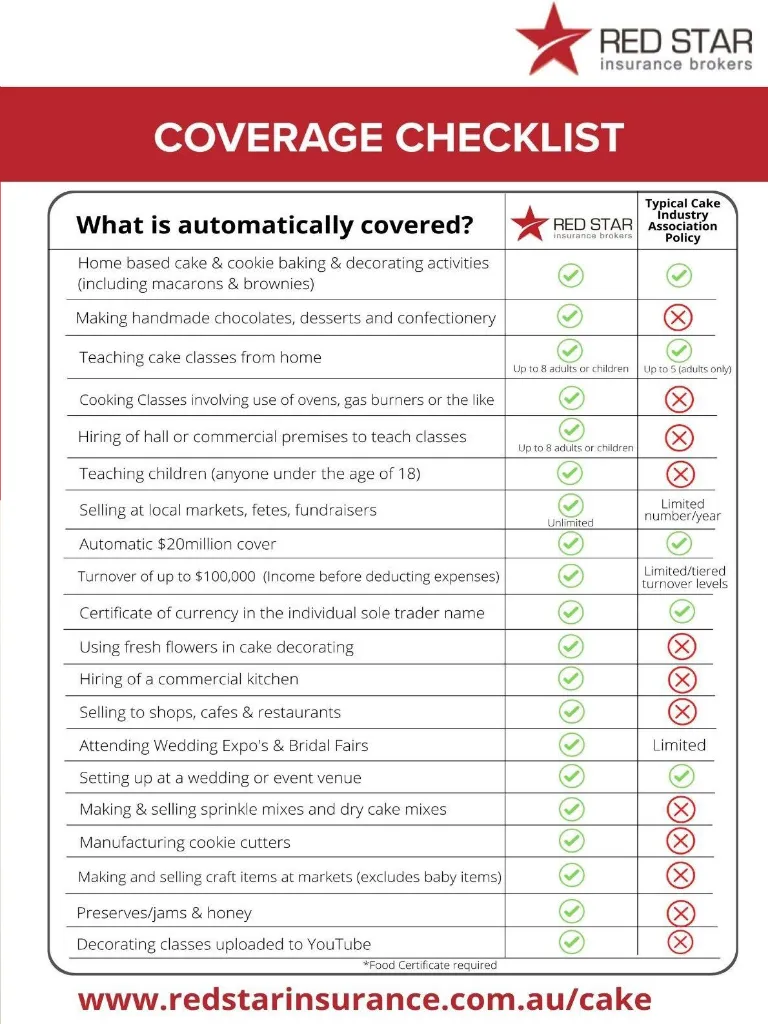
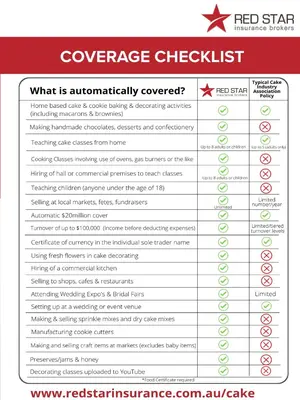
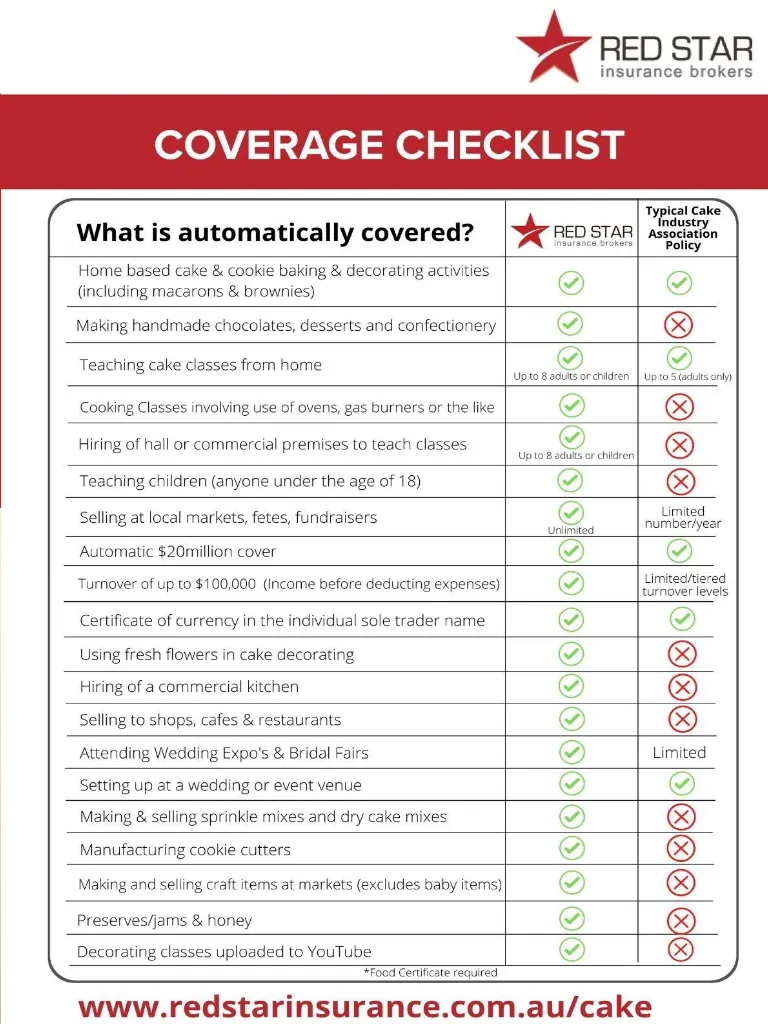
COMPREHENSIVE CAKE DECORATING INSURANCE $ 20m Public & Products Liability $ 189 PER YEAR FOR ACDN MEMBERS $ 289 per year for Non-ACDN Members ( Insurance subject to acceptance criteria ) To arrange cover or for more information visit www . acdn . me / insurance Red Star Insurance Pty Ltd ( AFSL 444803 ) T & C apply , see website for details . The Australian Cake Decorating Network Pty Ltd does not provide any advice regarding insurance matters . Please contact Red Star Insurance Brokers on the above contact details to discuss your insurance requirements . Referral advertisement . For information see www . acdn . me / insurance
Page 20 text
GOLD LEAF E D I B L E T R A N S F E R S H E E T S S H O P H E R E
Page 21 text
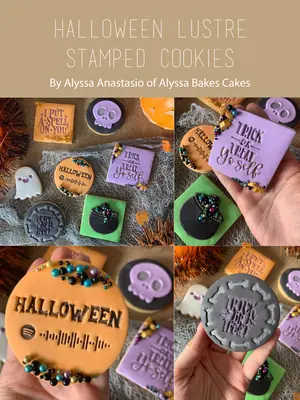
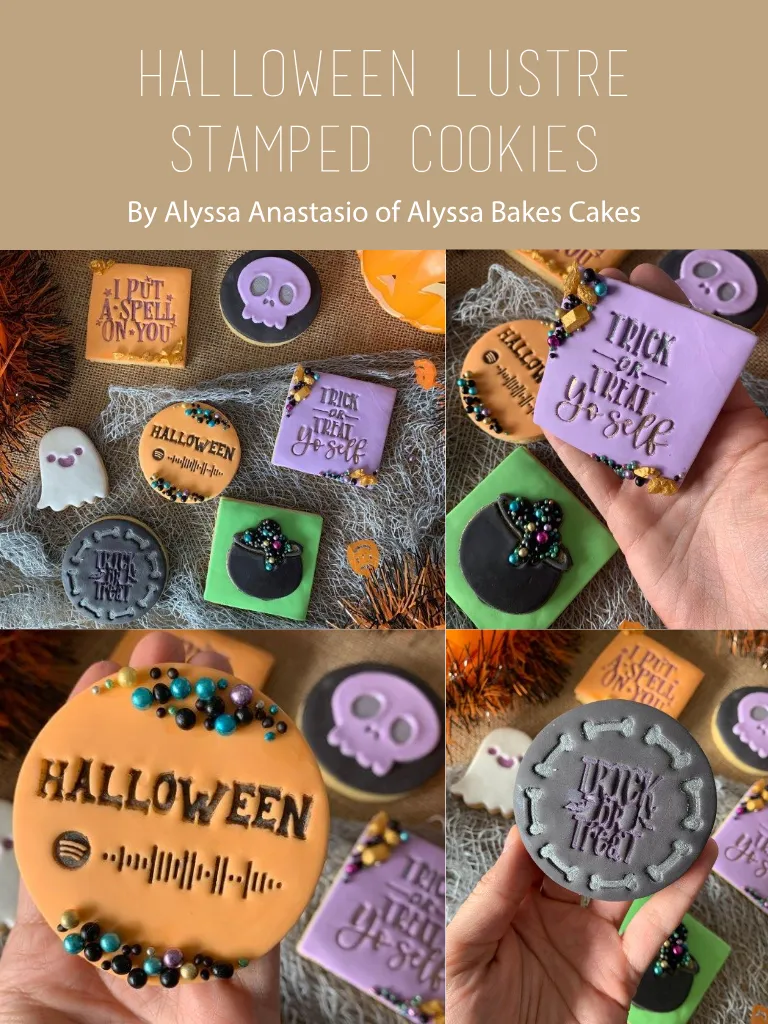
HALLOWEEN LUSTRE STAMPED COOKIES By Alyssa Anastasio of Alyssa Bakes Cakes
Page 22 text
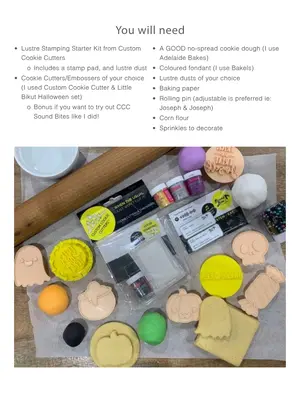
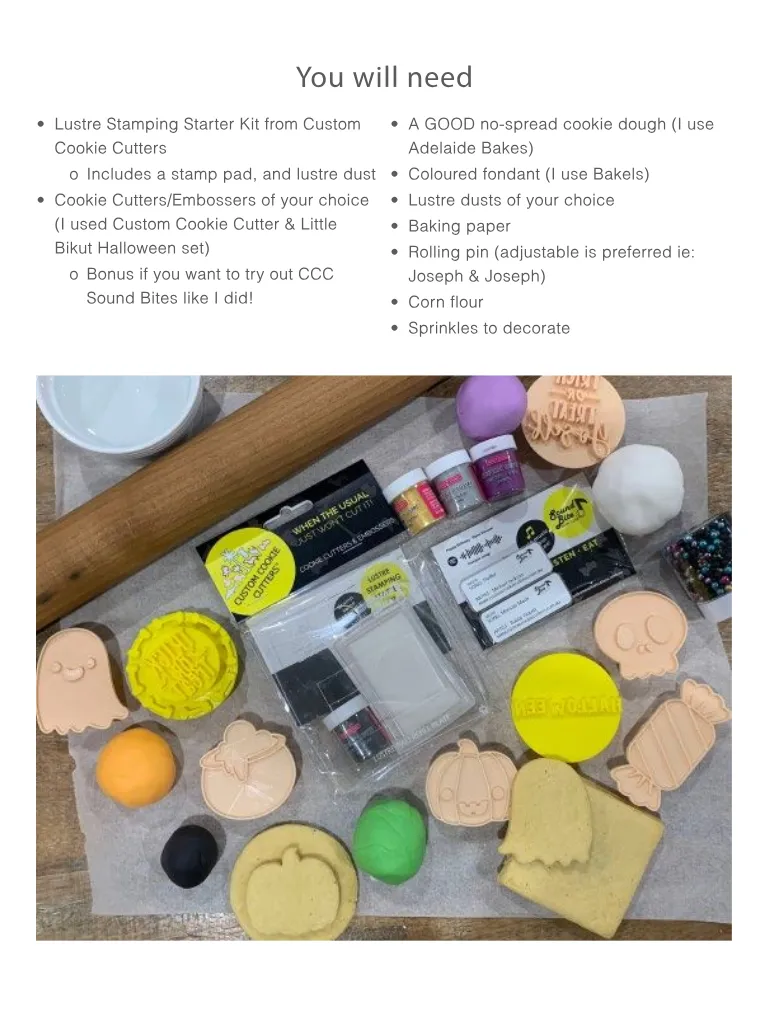
You will need • Lustre Stamping Starter Kit from Custom Cookie Cutters o Includes a stamp pad , and lustre dust • Cookie Cutters / Embossers of your choice ( I used Custom Cookie Cutter & Little Bikut Halloween set ) o Bonus if you want to try out CCC Sound Bites like I did ! • A GOOD no-spread cookie dough ( I use Adelaide Bakes ) • Coloured fondant ( I use Bakels ) • Lustre dusts of your choice • Baking paper • Rolling pin ( adjustable is preferred ie : Joseph & Joseph ) • Corn flour • Sprinkles to decorate
Page 23 text
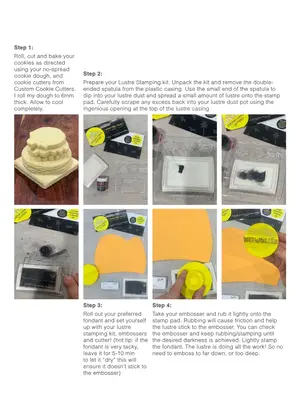
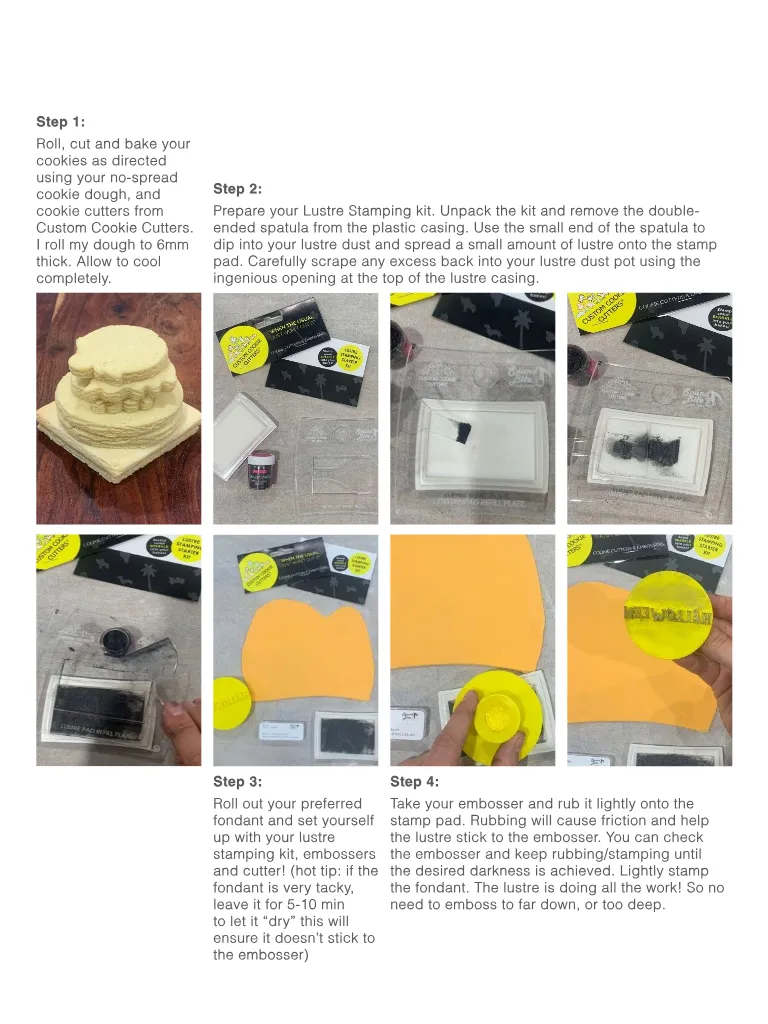
Step 1 : Roll , cut and bake your cookies as directed using your no-spread cookie dough , and cookie cutters from Custom Cookie Cutters . I roll my dough to 6mm thick . Allow to cool completely . Step 2 : Prepare your Lustre Stamping kit . Unpack the kit and remove the doubleended spatula from the plastic casing . Use the small end of the spatula to dip into your lustre dust and spread a small amount of lustre onto the stamp pad . Carefully scrape any excess back into your lustre dust pot using the ingenious opening at the top of the lustre casing . Step 3 : Step 4 : Roll out your preferred fondant and set yourself up with your lustre stamping kit , embossers and cutter ! ( hot tip : if the fondant is very tacky , leave it for 5-10 min to let it “ dry ” this will ensure it doesn ’ t stick to the embosser ) Take your embosser and rub it lightly onto the stamp pad . Rubbing will cause friction and help the lustre stick to the embosser . You can check the embosser and keep rubbing / stamping until the desired darkness is achieved . Lightly stamp the fondant . The lustre is doing all the work ! So no need to emboss to far down , or too deep .
Page 24 text
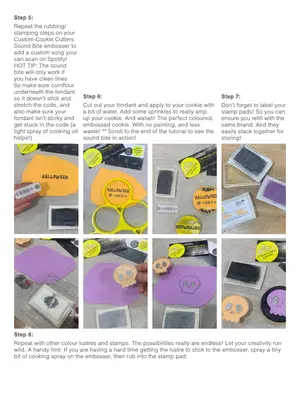
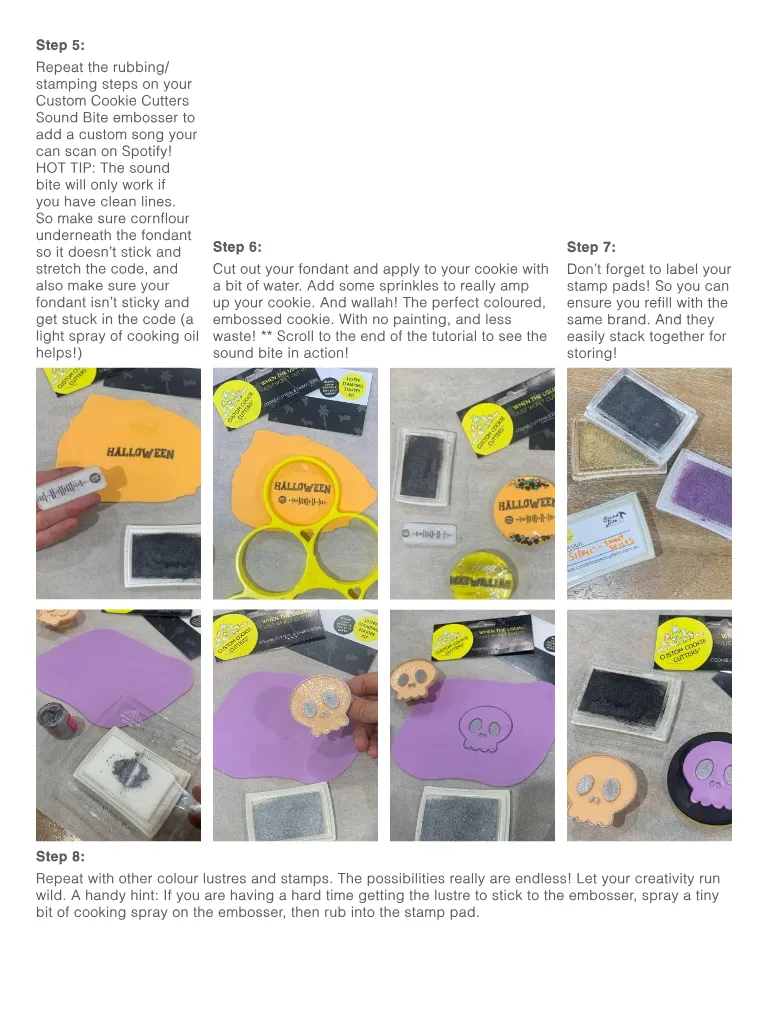
Step 5 : Repeat the rubbing / stamping steps on your Custom Cookie Cutters Sound Bite embosser to add a custom song your can scan on Spotify ! HOT TIP : The sound bite will only work if you have clean lines . So make sure cornflour underneath the fondant so it doesn ’ t stick and stretch the code , and also make sure your fondant isn ’ t sticky and get stuck in the code ( a light spray of cooking oil helps !) Step 6 : Cut out your fondant and apply to your cookie with a bit of water . Add some sprinkles to really amp up your cookie . And wallah ! The perfect coloured , embossed cookie . With no painting , and less waste ! ** Scroll to the end of the tutorial to see the sound bite in action ! Step 7 : Don ’ t forget to label your stamp pads ! So you can ensure you refill with the same brand . And they easily stack together for storing ! Step 8 : Repeat with other colour lustres and stamps . The possibilities really are endless ! Let your creativity run wild . A handy hint : If you are having a hard time getting the lustre to stick to the embosser , spray a tiny bit of cooking spray on the embosser , then rub into the stamp pad .
Page 25 text
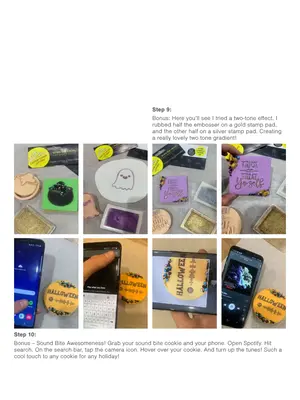
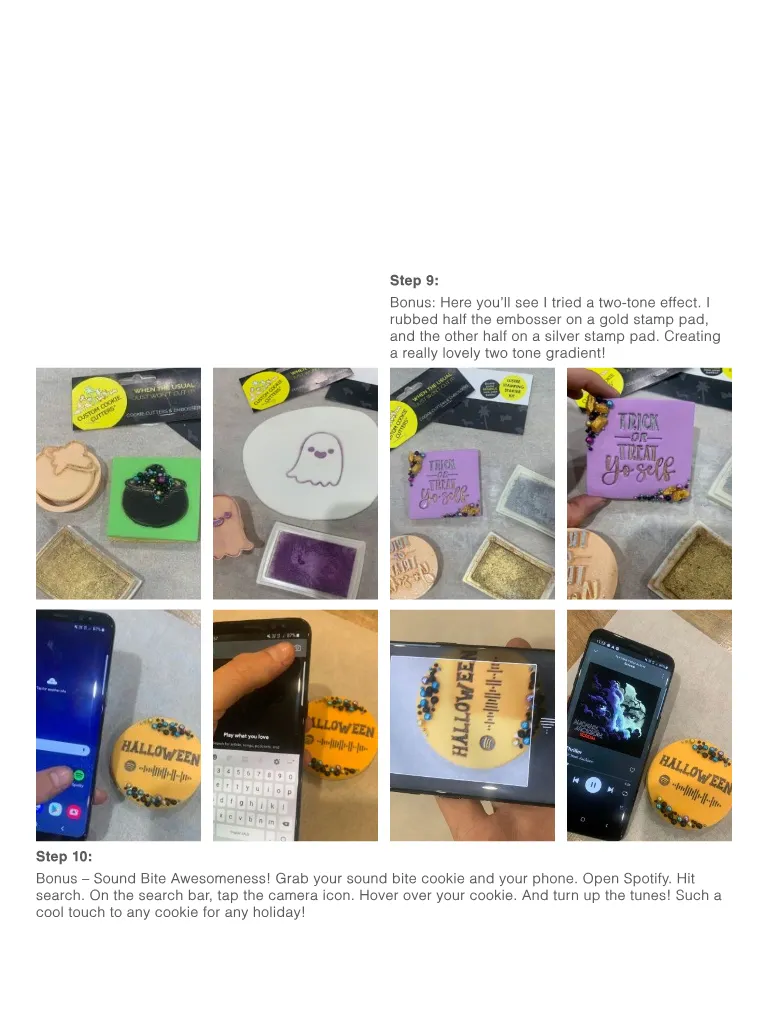
Step 9 : Bonus : Here you ’ ll see I tried a two-tone effect . I rubbed half the embosser on a gold stamp pad , and the other half on a silver stamp pad . Creating a really lovely two tone gradient ! Step 10 : Bonus – Sound Bite Awesomeness ! Grab your sound bite cookie and your phone . Open Spotify . Hit search . On the search bar , tap the camera icon . Hover over your cookie . And turn up the tunes ! Such a cool touch to any cookie for any holiday !
Page 26 text
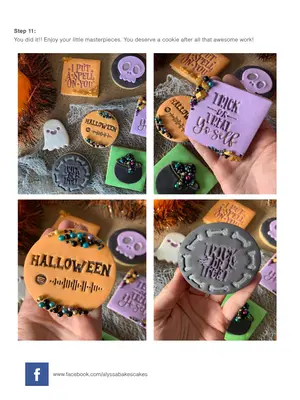
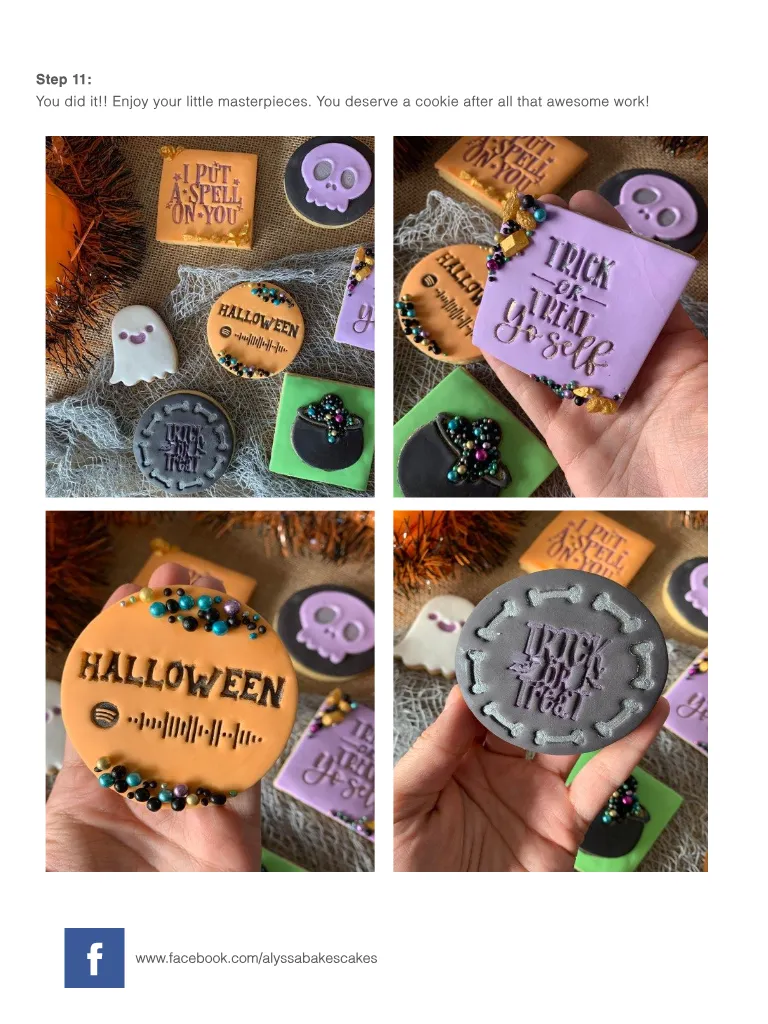
Step 11 : You did it !! Enjoy your little masterpieces . You deserve a cookie after all that awesome work ! f www . facebook . com / alyssa bakes cakes
Page 27 text
www . cakedecoratingsolutions . com . au `
Page 29 text
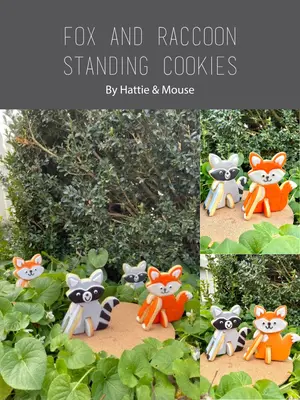
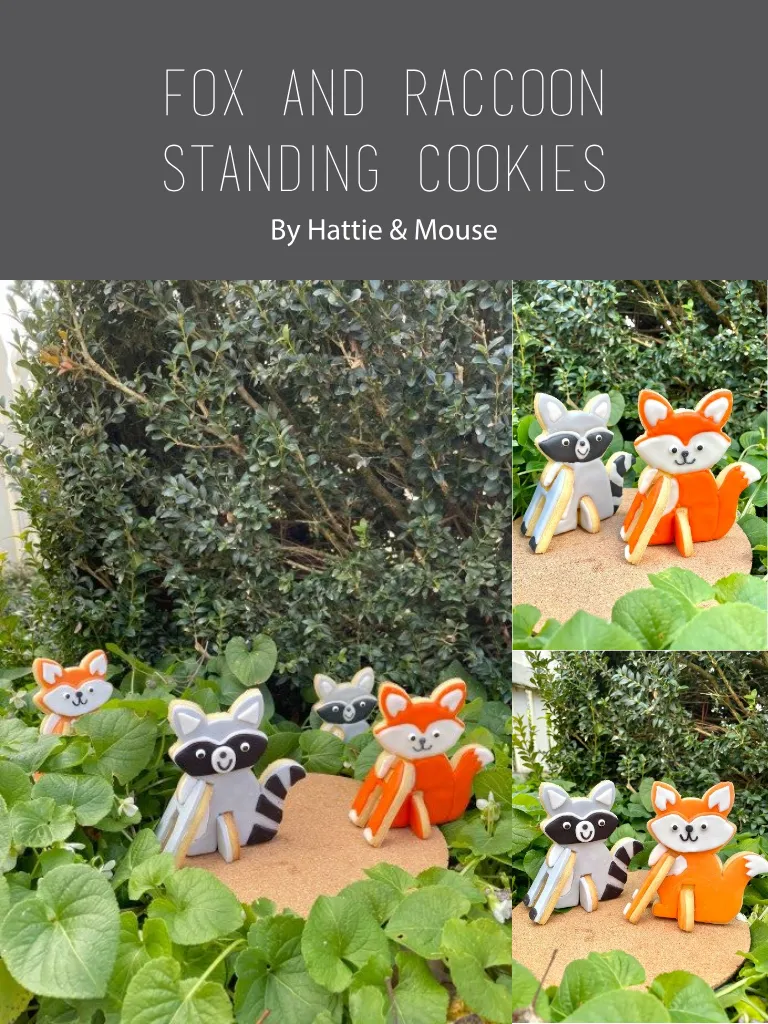
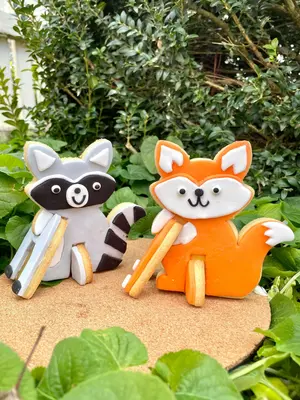
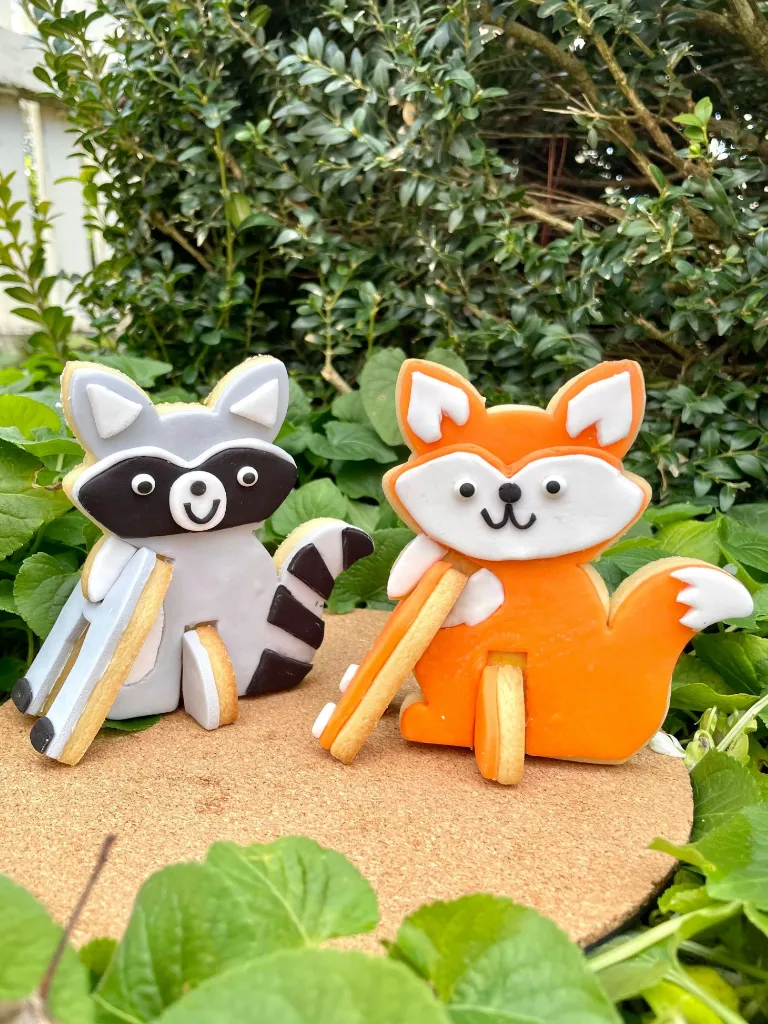
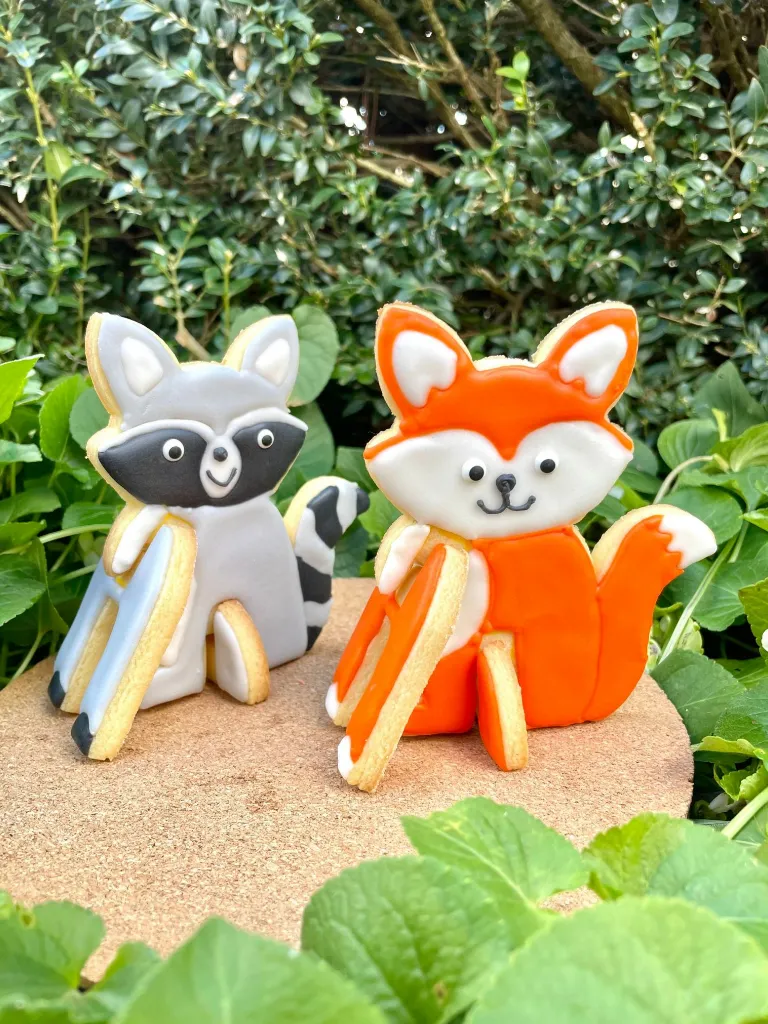
FOX AND RACCOON STANDING COOKIES By Hattie & Mouse
Page 30 text
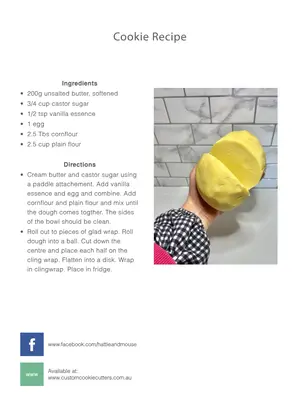
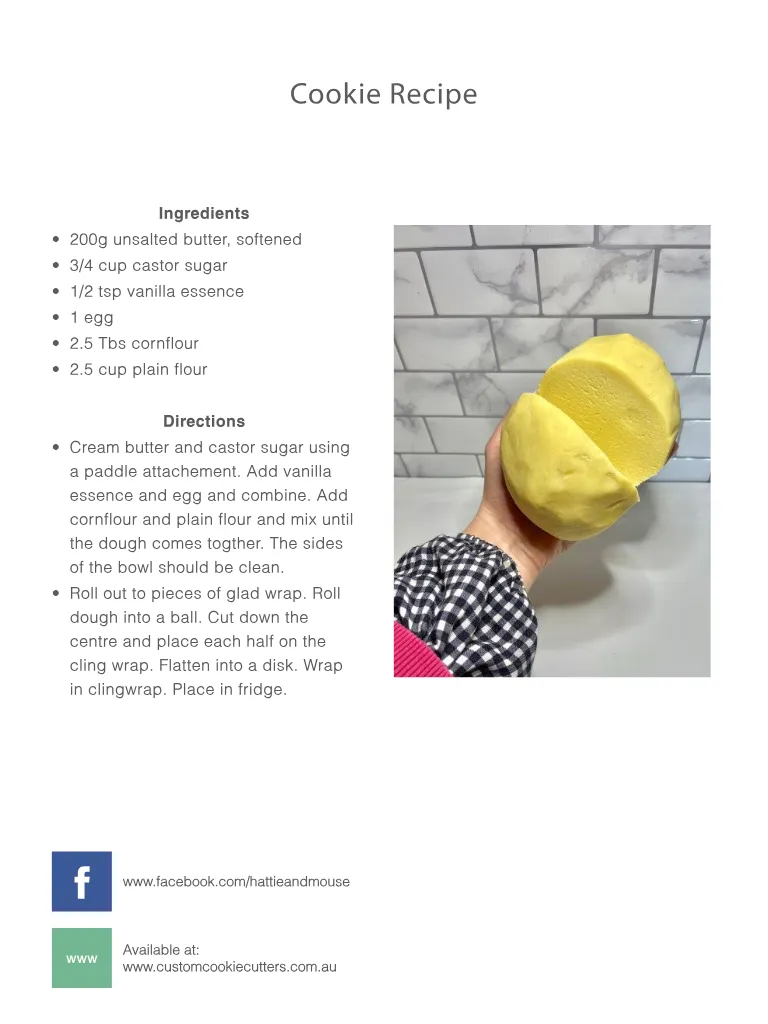
Cookie Recipe Ingredients • 200g unsalted butter , softened • 3 / 4 cup castor sugar • 1 / 2 tsp vanilla essence • 1 egg • 2.5 Tbs cornflour • 2.5 cup plain flour Directions • Cream butter and castor sugar using a paddle attachement . Add vanilla essence and egg and combine . Add cornflour and plain flour and mix until the dough comes togther . The sides of the bowl should be clean . • Roll out to pieces of glad wrap . Roll dough into a ball . Cut down the centre and place each half on the cling wrap . Flatten into a disk . Wrap in clingwrap . Place in fridge . f www . facebook . com / hattieandmouse www Available at : www . customcookiecutters . com . au
Page 31 text
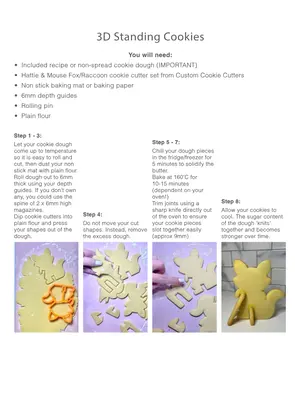
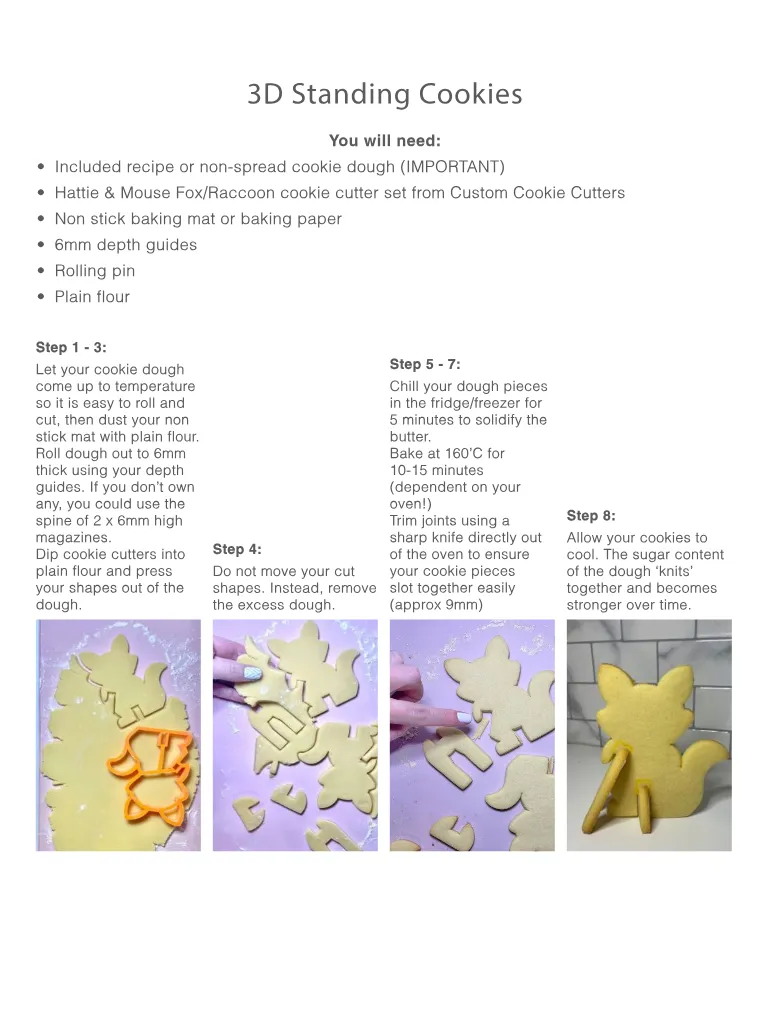
3D Standing Cookies You will need : • Included recipe or non-spread cookie dough ( IMPORTANT ) • Hattie & Mouse Fox / Raccoon cookie cutter set from Custom Cookie Cutters • Non stick baking mat or baking paper • 6mm depth guides • Rolling pin • Plain flour Step 1 - 3 : Let your cookie dough come up to temperature so it is easy to roll and cut , then dust your non stick mat with plain flour . Roll dough out to 6mm thick using your depth guides . If you don ’ t own any , you could use the spine of 2 x 6mm high magazines . Dip cookie cutters into plain flour and press your shapes out of the dough . Step 4 : Do not move your cut shapes . Instead , remove the excess dough . Step 5 - 7 : Chill your dough pieces in the fridge / freezer for 5 minutes to solidify the butter . Bake at 160 ’ C for 10-15 minutes ( dependent on your oven !) Trim joints using a sharp knife directly out of the oven to ensure your cookie pieces slot together easily ( approx 9mm ) Step 8 : Allow your cookies to cool . The sugar content of the dough ‘ knits ’ together and becomes stronger over time .
Page 33 text
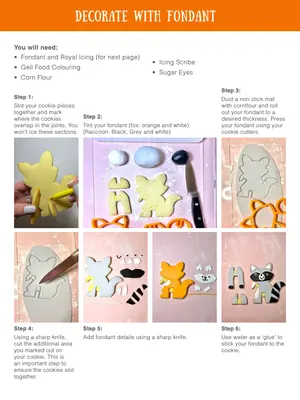
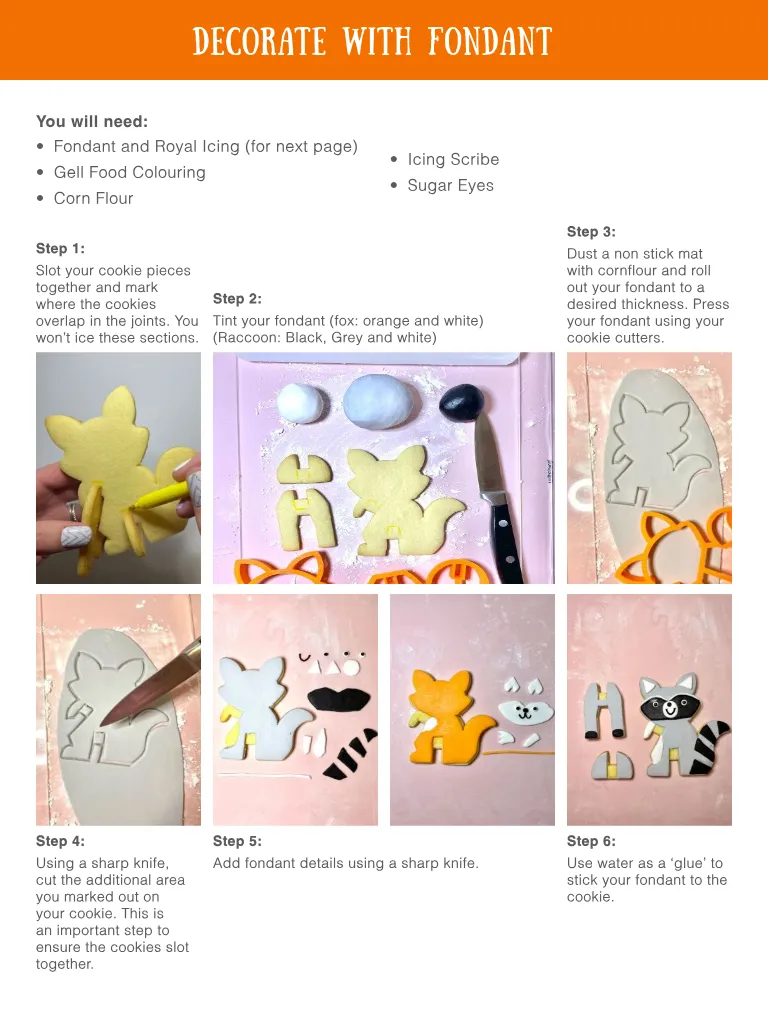
decorate with Fondant You will need : • Fondant and Royal Icing ( for next page ) • Gell Food Colouring • Corn Flour • Icing Scribe • Sugar Eyes Step 1 : Slot your cookie pieces together and mark where the cookies overlap in the joints . You won ’ t ice these sections . Step 2 : Tint your fondant ( fox : orange and white ) ( Raccoon : Black , Grey and white ) Step 3 : Dust a non stick mat with cornflour and roll out your fondant to a desired thickness . Press your fondant using your cookie cutters . Step 4 : Step 5 : Step 6 : Using a sharp knife , cut the additional area you marked out on your cookie . This is an important step to ensure the cookies slot together . Add fondant details using a sharp knife . Use water as a ‘ glue ’ to stick your fondant to the cookie .

Page 35 text
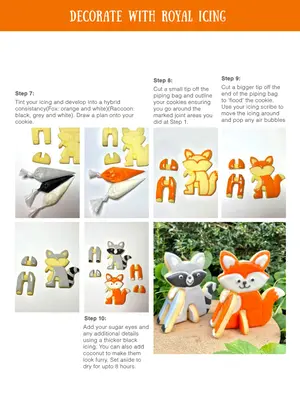
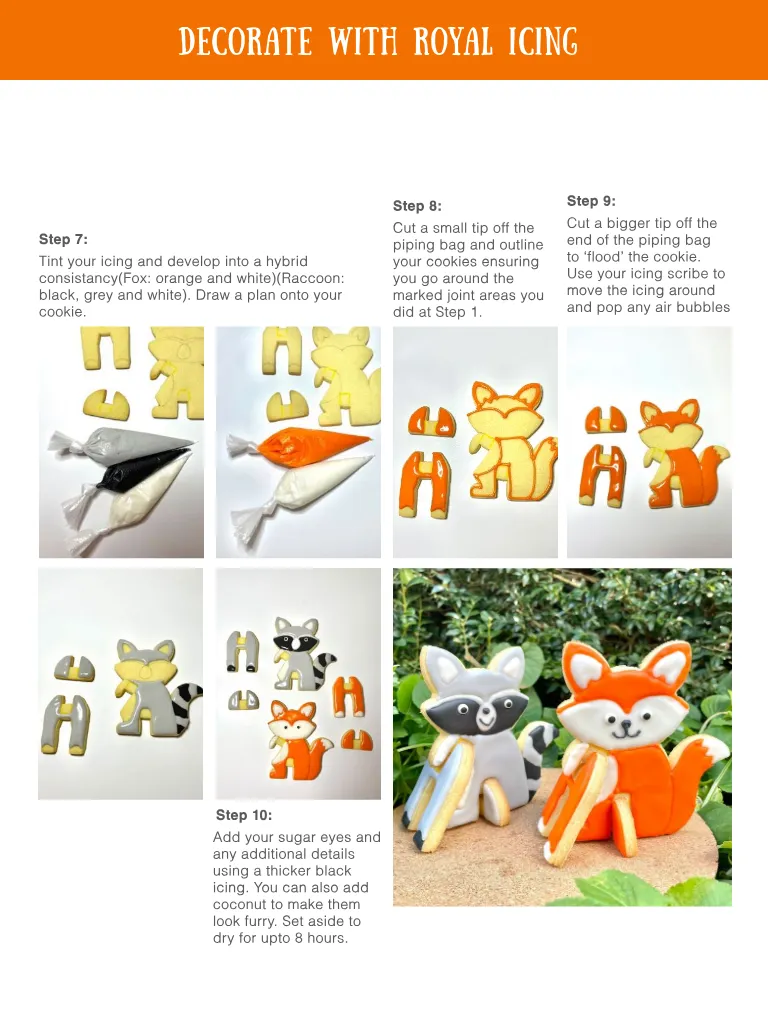
decorate with royal icing Step 7 : Tint your icing and develop into a hybrid consistancy ( Fox : orange and white )( Raccoon : black , grey and white ). Draw a plan onto your cookie . Step 8 : Cut a small tip off the piping bag and outline your cookies ensuring you go around the marked joint areas you did at Step 1 . Step 9 : Cut a bigger tip off the end of the piping bag to ‘ flood ’ the cookie . Use your icing scribe to move the icing around and pop any air bubbles Step 10 : Add your sugar eyes and any additional details using a thicker black icing . You can also add coconut to make them look furry . Set aside to dry for upto 8 hours .
Page 36 text
` www . cakedecoratingsolutions . com . au


Page 37 text
ACDN Members save 7.5 % with Berry Fresh See discounts page at www . acdn . me / discounts Quality freeze dried berry crumble and berry powders , made in Australia from 100 % Australian Berries . No preservatives , no additives – just natural Strawberries , Raspberries and Blueberries . Buy online for delivery to anywhere in Australia . www . berryfresh . com . au
Page 38 text
Australia ' s Largest Cake Decorating Superstore 2 LOCATIONS - HALLAM & PAKENHAM ! 5 % DISCOUNT FOR ALL ACDN MEMBERS mydreamcake . com . au | 03 8759 1788 | 2 / 261 Princess Hwy , Hallam Vic | 2 / 895 Princess Hwy , Pakenham Vic
Page 39 text
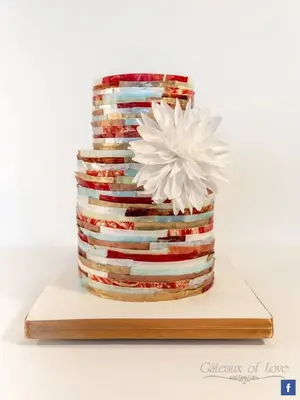
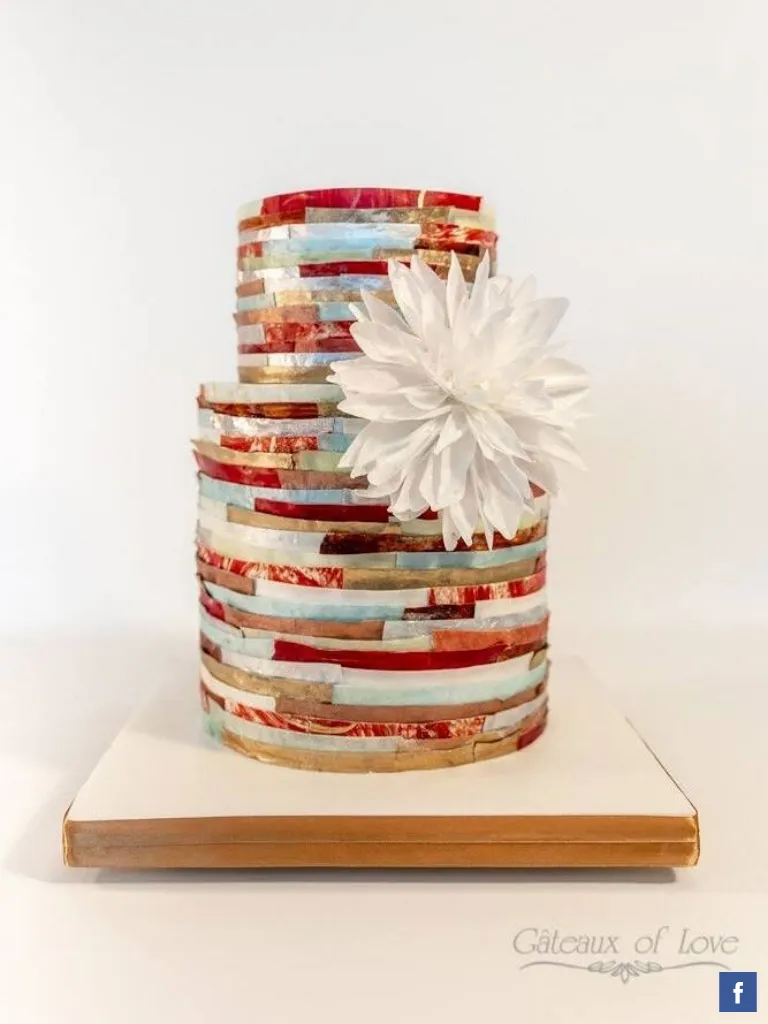
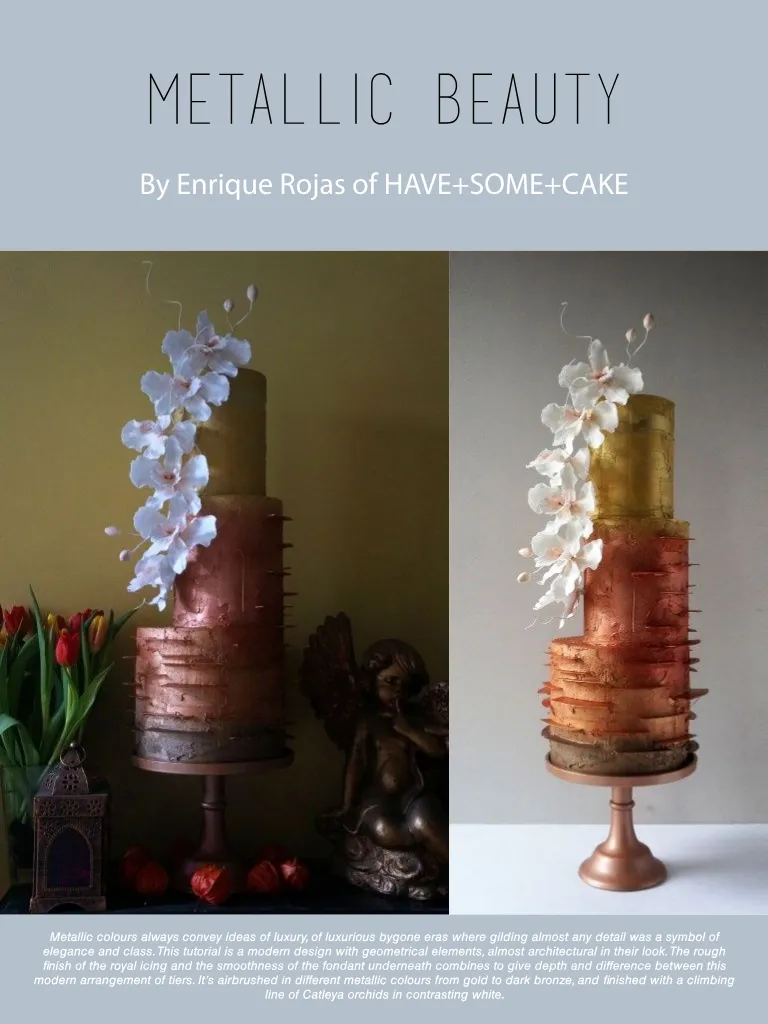
Metallic Beauty By Enrique Rojas of HAVE + SOME + CAKE Metallic colours always convey ideas of luxury , of luxurious bygone eras where gilding almost any detail was a symbol of elegance and class . This tutorial is a modern design with geometrical elements , almost architectural in their look . The rough finish of the royal icing and the smoothness of the fondant underneath combines to give depth and difference between this modern arrangement of tiers . It ’ s airbrushed in different metallic colours from gold to dark bronze , and finished with a climbing line of Catleya orchids in contrasting white .
Page 40 text
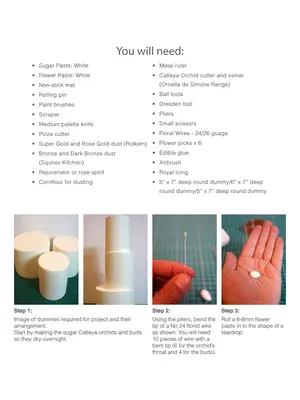
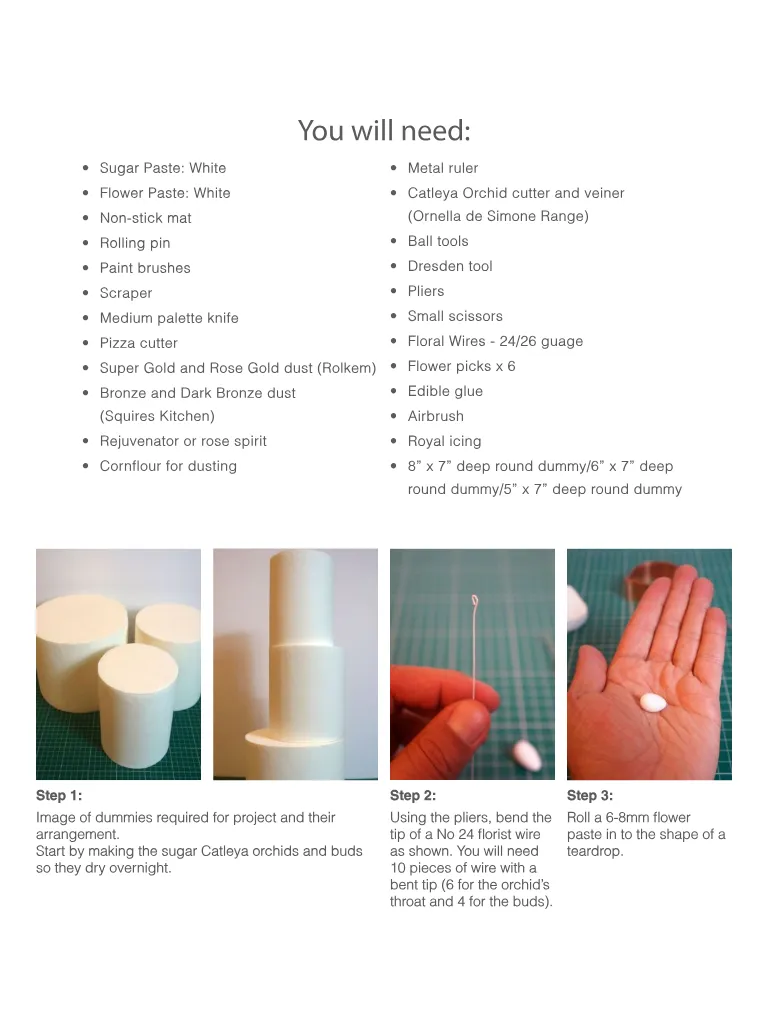
You will need : • Sugar Paste : White • Flower Paste : White • Non-stick mat • Rolling pin • Paint brushes • Scraper • Medium palette knife • Pizza cutter • Super Gold and Rose Gold dust ( Rolkem ) • Bronze and Dark Bronze dust ( Squires Kitchen ) • Rejuvenator or rose spirit • Cornflour for dusting • Metal ruler • Catleya Orchid cutter and veiner ( Ornella de Simone Range ) • Ball tools • Dresden tool • Pliers • Small scissors • Floral Wires - 24 / 26 guage • Flower picks x 6 • Edible glue • Airbrush • Royal icing • 8 ” x 7 ” deep round dummy / 6 ” x 7 ” deep round dummy / 5 ” x 7 ” deep round dummy Step 1 : Step 2 : Step 3 : Image of dummies required for project and their arrangement . Start by making the sugar Catleya orchids and buds so they dry overnight . Using the pliers , bend the tip of a No 24 florist wire as shown . You will need 10 pieces of wire with a bent tip ( 6 for the orchid ’ s throat and 4 for the buds ). Roll a 6-8mm flower paste in to the shape of a teardrop .
Page 41 text
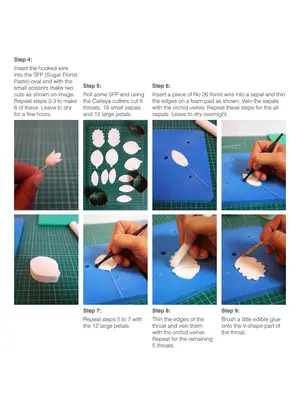
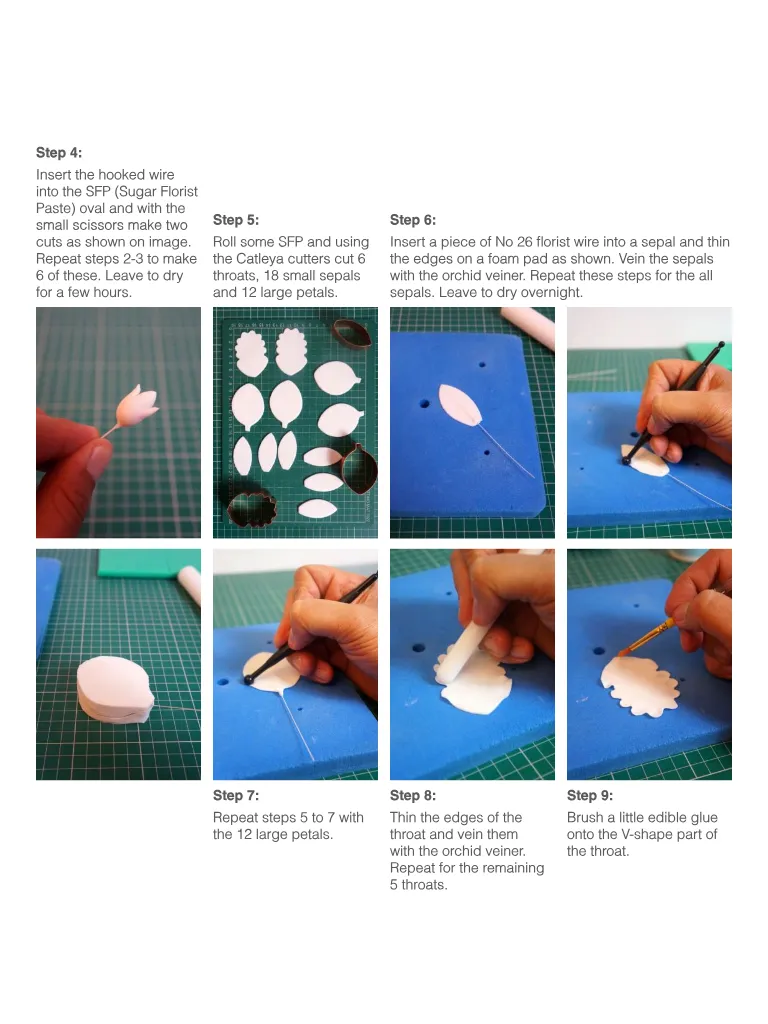
Step 4 : Insert the hooked wire into the SFP ( Sugar Florist Paste ) oval and with the small scissors make two cuts as shown on image . Repeat steps 2-3 to make 6 of these . Leave to dry for a few hours . Step 5 : Step 6 : Roll some SFP and using the Catleya cutters cut 6 throats , 18 small sepals and 12 large petals . Insert a piece of No 26 florist wire into a sepal and thin the edges on a foam pad as shown . Vein the sepals with the orchid veiner . Repeat these steps for the all sepals . Leave to dry overnight . Step 7 : Step 8 : Repeat steps 5 to 7 with the 12 large petals . Thin the edges of the throat and vein them with the orchid veiner . Repeat for the remaining 5 throats . Step 9 : Brush a little edible glue onto the V-shape part of the throat .
Page 42 text
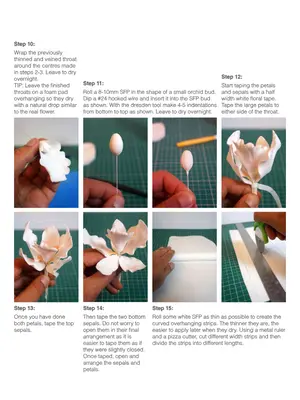
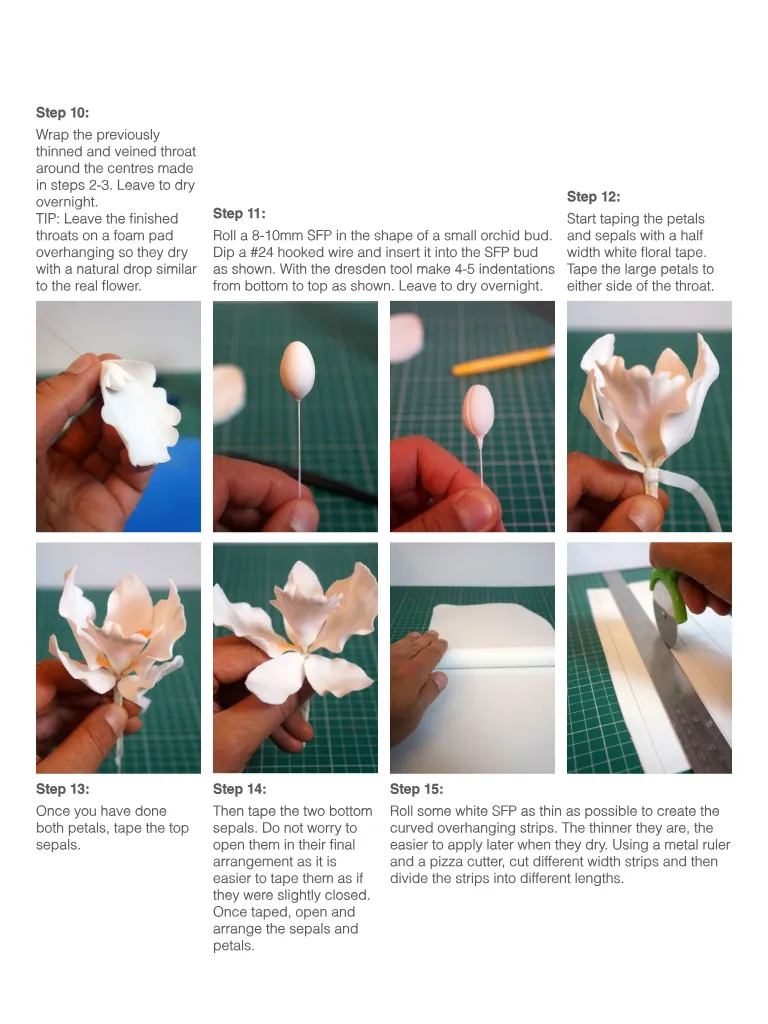
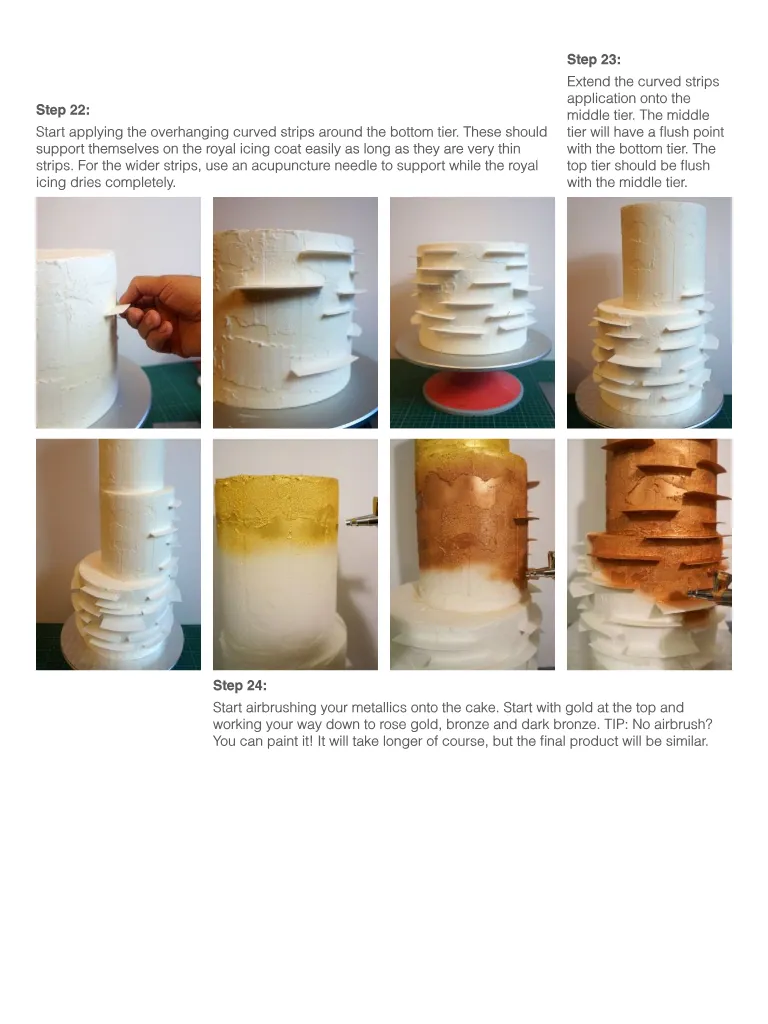
Step 10 : Wrap the previously thinned and veined throat around the centres made in steps 2-3 . Leave to dry overnight . TIP : Leave the finished throats on a foam pad overhanging so they dry with a natural drop similar to the real flower . Step 11 : Roll a 8-10mm SFP in the shape of a small orchid bud . Dip a # 24 hooked wire and insert it into the SFP bud as shown . With the dresden tool make 4-5 indentations from bottom to top as shown . Leave to dry overnight . Step 12 : Start taping the petals and sepals with a half width white floral tape . Tape the large petals to either side of the throat . Step 13 : Step 14 : Step 15 : Once you have done both petals , tape the top sepals . Then tape the two bottom sepals . Do not worry to open them in their final arrangement as it is easier to tape them as if they were slightly closed . Once taped , open and arrange the sepals and petals . Roll some white SFP as thin as possible to create the curved overhanging strips . The thinner they are , the easier to apply later when they dry . Using a metal ruler and a pizza cutter , cut different width strips and then divide the strips into different lengths .
Page 43 text
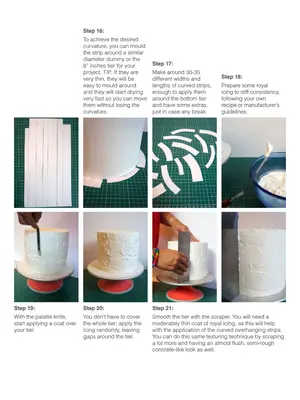
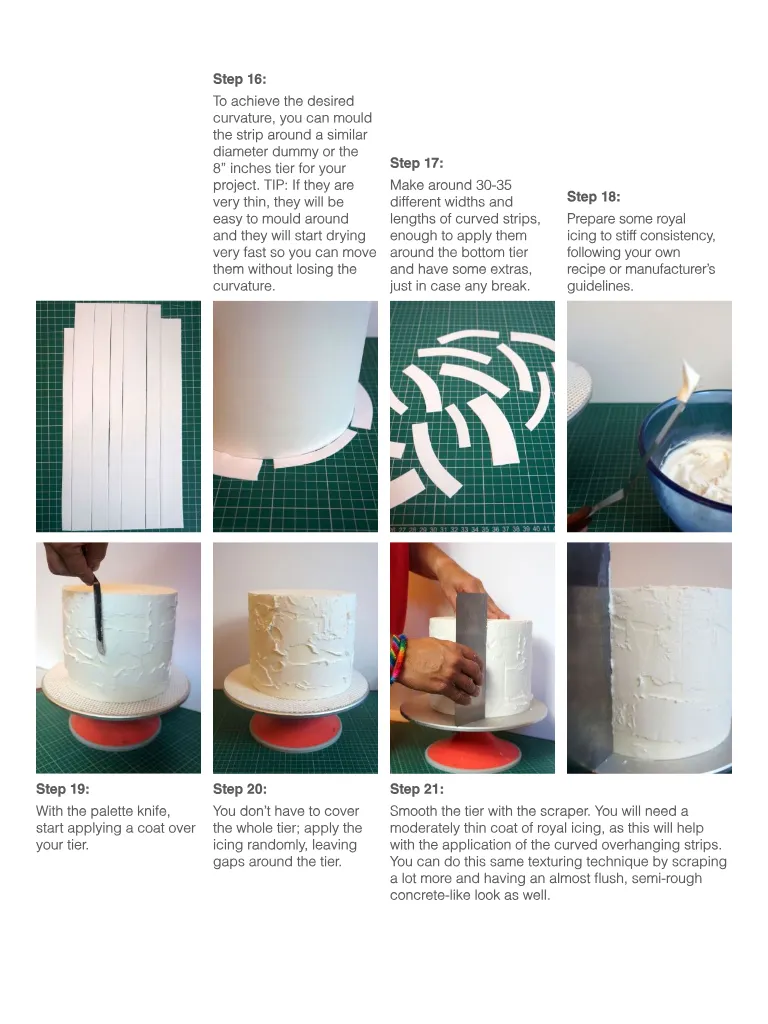
Step 16 : To achieve the desired curvature , you can mould the strip around a similar diameter dummy or the 8 ” inches tier for your project . TIP : If they are very thin , they will be easy to mould around and they will start drying very fast so you can move them without losing the curvature . Step 17 : Make around 30-35 different widths and lengths of curved strips , enough to apply them around the bottom tier and have some extras , just in case any break . Step 18 : Prepare some royal icing to stiff consistency , following your own recipe or manufacturer ’ s guidelines . Step 19 : Step 20 : Step 21 : With the palette knife , start applying a coat over your tier . You don ’ t have to cover the whole tier ; apply the icing randomly , leaving gaps around the tier . Smooth the tier with the scraper . You will need a moderately thin coat of royal icing , as this will help with the application of the curved overhanging strips . You can do this same texturing technique by scraping a lot more and having an almost flush , semi-rough concrete-like look as well .
Page 45 text
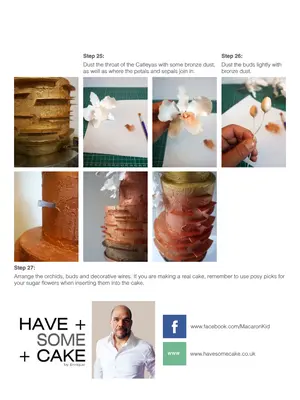
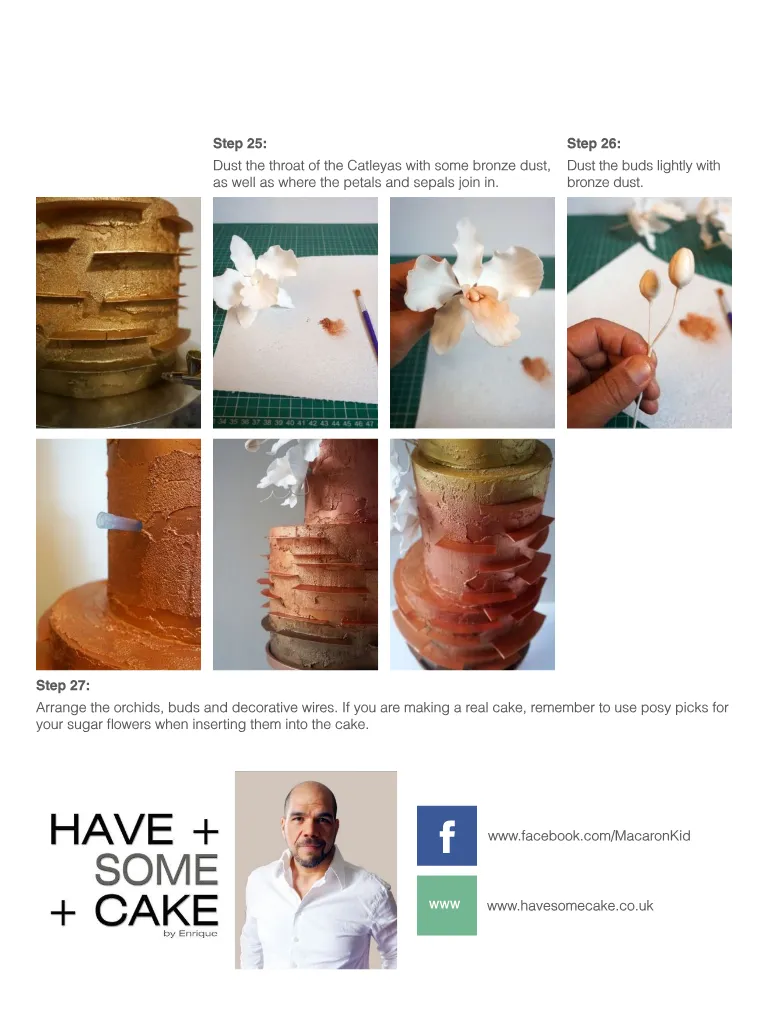
Step 25 : Dust the throat of the Catleyas with some bronze dust , as well as where the petals and sepals join in . Step 26 : Dust the buds lightly with bronze dust . Step 27 : Arrange the orchids , buds and decorative wires . If you are making a real cake , remember to use posy picks for your sugar flowers when inserting them into the cake . f www . facebook . com / MacaronKid www www . havesomecake . co . uk
Page 46 text
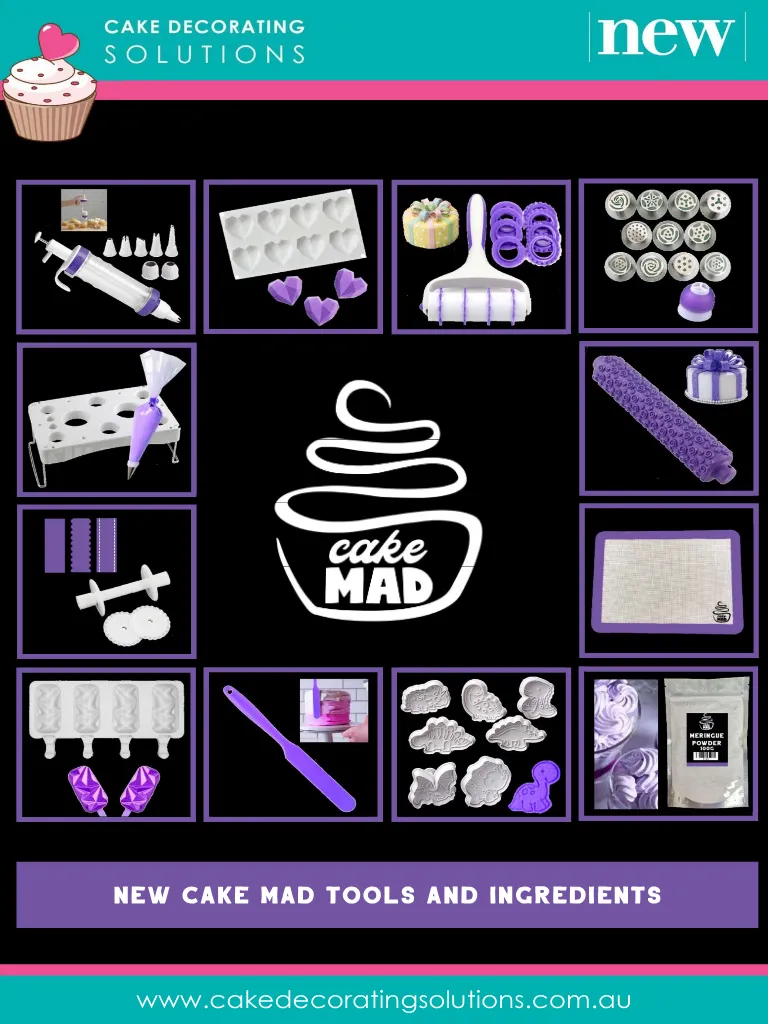
` www . cakedecoratingsolutions . com . au


Page 49 text
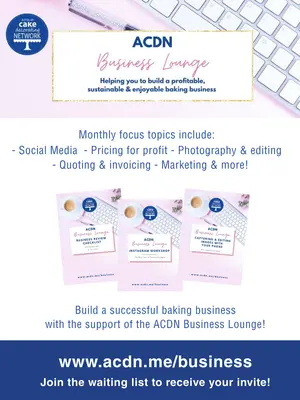
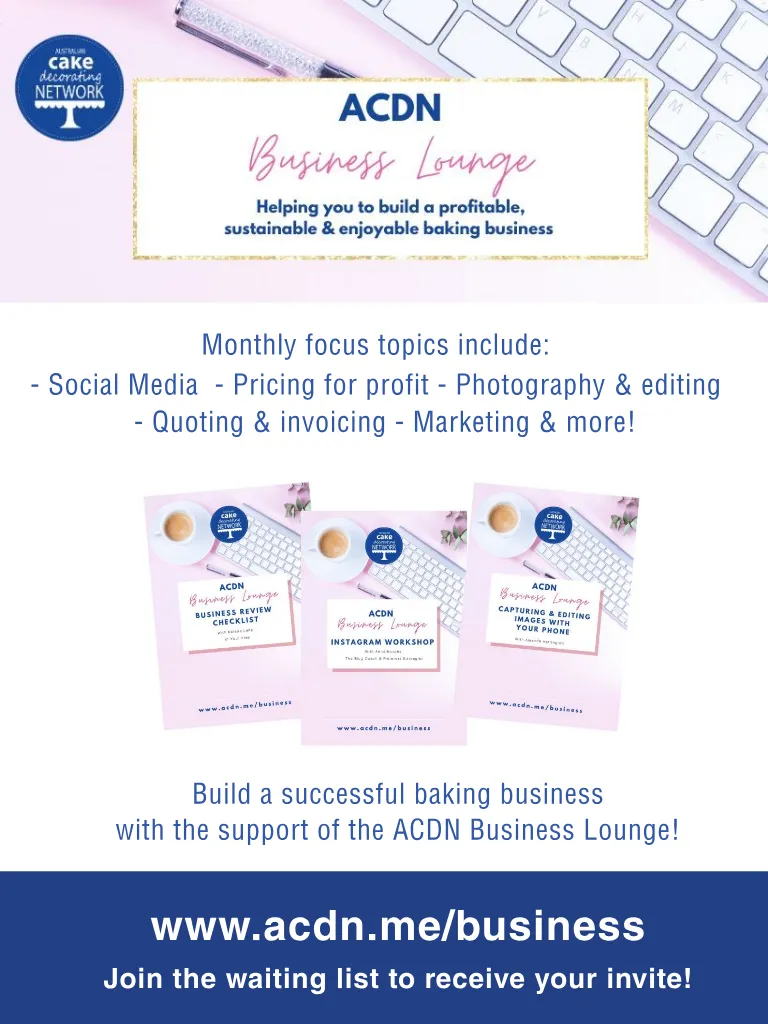
Monthly focus topics include : - Social Media - Pricing for profit - Photography & editing - Quoting & invoicing - Marketing & more ! Build a successful baking business with the support of the ACDN Business Lounge ! www . acdn . me / business Join the waiting list to receive your invite !


Page 50 text
Become a member of the Australian Cake Decorating Network and SAVE with great DISCOUNTS from our Preferred Suppliers ! JOIN US HERE !


Page 51 text
Interview time !