Page 7 of 83
Page 2 text
PUBLISHER : Cake ! Magazine is published by the Australian Cake Decorating Network Pty Ltd . ACN : 91 164 927 584 . © All content copyright 2022 Australian Cake Decorating Network Pty Ltd . All rights reserved . Reproduction any part of the magazine without written permission is prohibited . All prices included in Cake ! Magazine are approximate and are in AUD unless otherwise stated . Prices quoted are correct at the time of publishing and may vary or be subject to change . The Australian Cake Decorating Network Pty Ltd accepts no responsibility for damage or loss as a result of material submitted for , published in or as a result of this publication . The Australian Cake Decorating Network does not have an affiliation with any other magazine . The views and opinions expressed within this publication are not necessarily the views of the publisher or it ' s affiliates . While every effort has been made to ensure the accuracy of the information contained within Cake ! Magazine the publisher and Cake ! Magazine hold no responsibility for any errors , omissions , or consequences subsequent or otherwise , including loss or damage arising from reliance on information in this publication . Content is supplied for publication in Cake ! Magazine by parties external to the Australian Cake Decorating Network and it is the external party ' s responsibility to ensure content and credits are accurate . Cake ! Magazine contains advertising through individual arrangements , which may include paid affiliate arrangements . Cake ! Magazine may also contain affiliate links . The agreements are held between the advertiser or affiliate and the Australian Cake Decorating Network Ptd Ltd . To advertise in Cake ! magazine , contact : liz @ acdn . me
Page 3 text
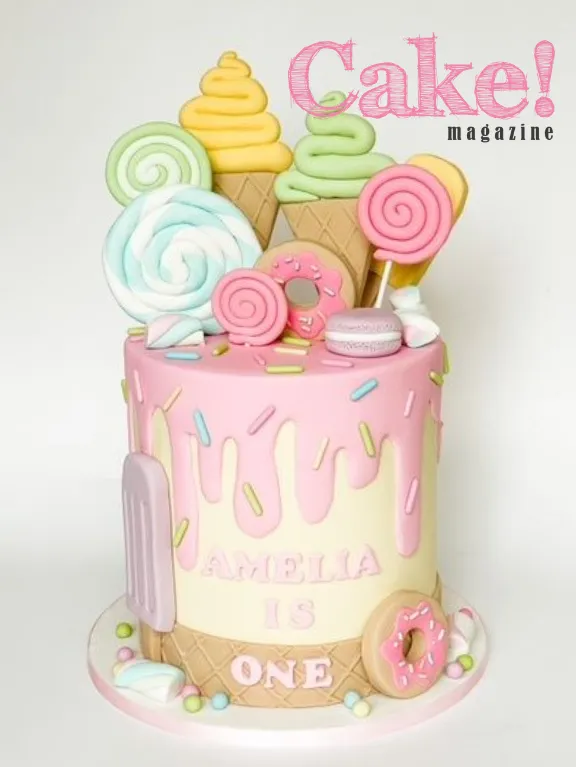
letter from the editor Hello and welcome to our third issue of Cake ! Magazine for 2022 ! Christmas is going to be here before we know it ! The past couple of months has been jam-packed with so many events such as the Cake Bake & Sweets Show and our Sydney Cake Crawl . It has been so great to see so many familiar faces and also meet some of our newer Members ! This issue of Cake ! Magazine is all about Kid ' s Parties featuring tutorials for cakes , cookies and toppers perfect for Kid ' s Parties along with many inspirational images in our Member Gallery . We are full steam ahead for our next event , the ACDN 10th Birthday Awards Night Celebration being held in Melbourne on the 5th of November . We will be celebrating 10 years of ACDN along with announcing the winners of the 2022 Cake Decorating & Baking Industry Awards . In this issue , we interview Georgia , the Founder of Cookie Trade Show Australia and have Amber Comadira- Smith back with her regular column for Cake ! Magazine talking all things design brief ! We hope you enjoy this issue of Cake ! Magazine ! Liz Enjoy ! COVER IMAGE : Luisa Nodarik Luisa ' s Sweet Creations
Page 4 text
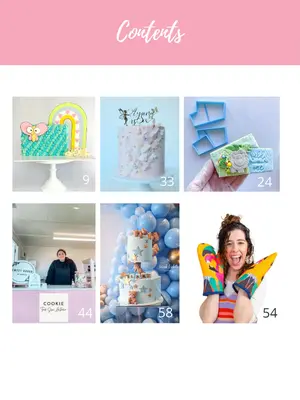
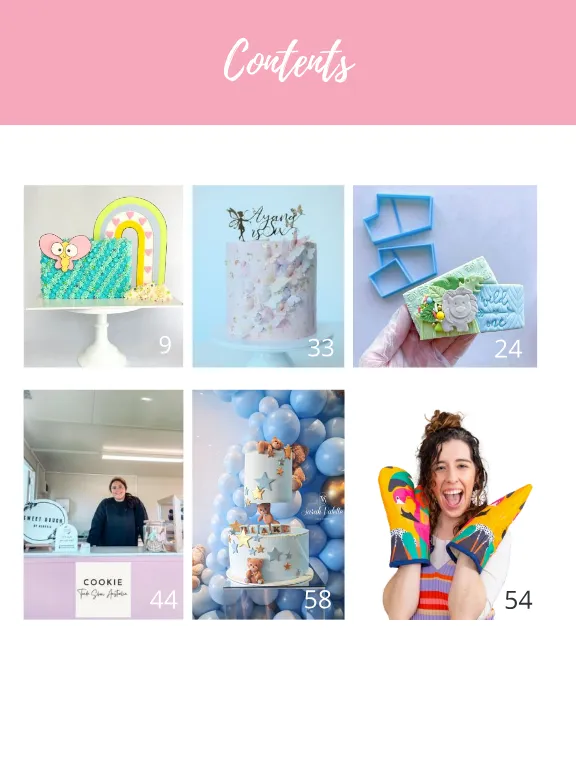
Contents 9 33 24 44 58 54
Page 5 text
September 2022 Features 40 2022 Awards Night 44 50 Interview with Georgia Foord , Founder of Cookie Trade Show Australia Sydney Cake Crawl Wrap-up 9 24 33 Tutorials Dollar Sweets Rainbow Buttercream Cake Cake Sera Sera Cutter Tutorial Perfectly Textured Buttercream Tutorial 54 58 Regulars Cake Chat with Amber Comadira-Smith ACDN Member Gallery
Page 7 text
Tutorials
Page 9 text
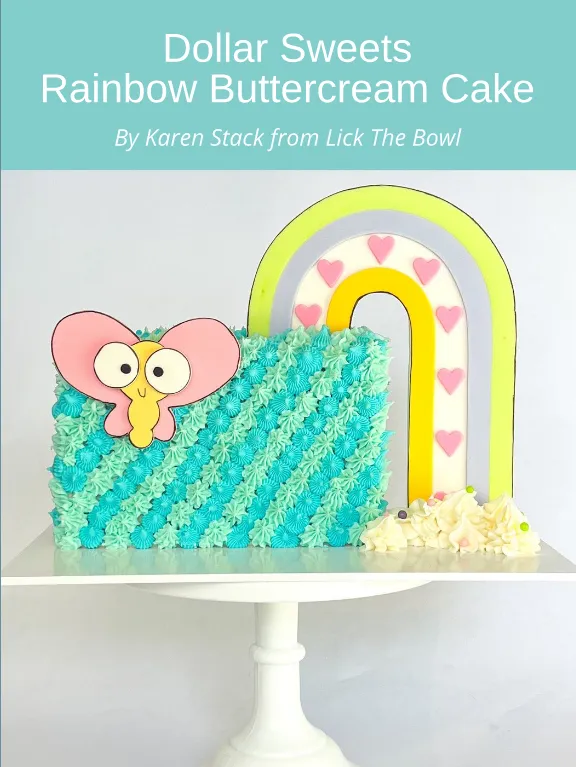
Dollar Sweets Rainbow Buttercream Cake By Karen Stack from Lick The Bowl
Page 10 text
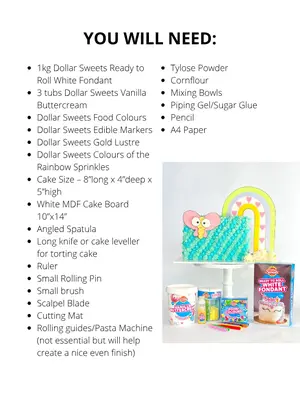
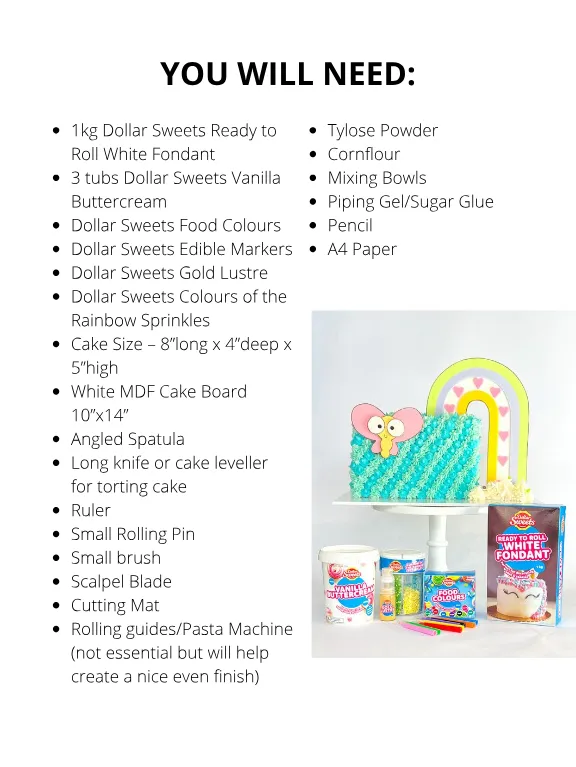
1kg Dollar Sweets Ready to Roll White Fondant 3 tubs Dollar Sweets Vanilla Buttercream Dollar Sweets Food Colours Dollar Sweets Edible Markers Dollar Sweets Gold Lustre Dollar Sweets Colours of the Rainbow Sprinkles Cake Size – 8 ” long x 4 ” deep x 5 ” high White MDF Cake Board 10 ” x14 ” Angled Spatula Long knife or cake leveller for torting cake Ruler Small Rolling Pin Small brush Scalpel Blade Cutting Mat Rolling guides / Pasta Machine ( not essential but will help create a nice even finish ) Tylose Powder Cornflour Mixing Bowls Piping Gel / Sugar Glue Pencil A4 Paper YOU WILL NEED : 1kg Dollar Sweets Ready to Roll White Fondant 3 tubs Dollar Sweets Vanilla Buttercream Dollar Sweets Food Colours Dollar Sweets Edible Markers Dollar Sweets Gold Lustre Dollar Sweets Colours of the Rainbow Sprinkles Cake Size – 8 ” long x 4 ” deep x 5 ” high White MDF Cake Board 10 ” x14 ” Angled Spatula Long knife or cake leveller for torting cake Ruler Small Rolling Pin Small brush Scalpel Blade Cutting Mat Rolling guides / Pasta Machine ( not essential but will help create a nice even finish ) Tylose Powder Cornflour Mixing Bowls Piping Gel / Sugar Glue Pencil A4 Paper
Page 11 text
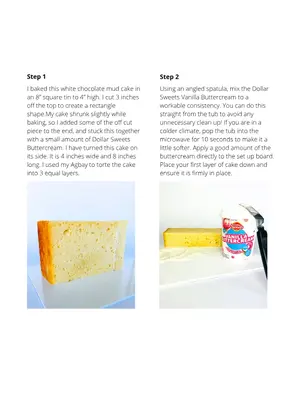
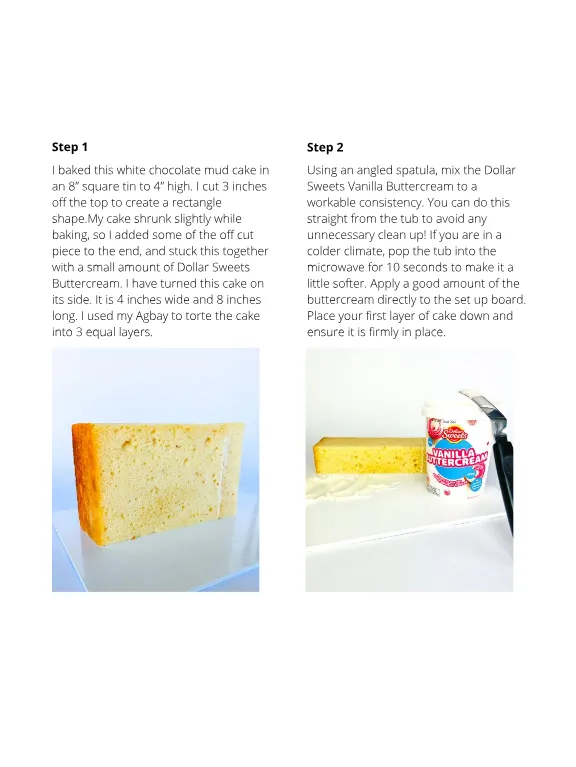
Step 1 I baked this white chocolate mud cake in an 8 ” square tin to 4 ” high . I cut 3 inches off the top to create a rectangle shape . My cake shrunk slightly while baking , so I added some of the off cut piece to the end , and stuck this together with a small amount of Dollar Sweets Buttercream . I have turned this cake on its side . It is 4 inches wide and 8 inches long . I used my Agbay to torte the cake into 3 equal layers . Step 2 Using an angled spatula , mix the Dollar Sweets Vanilla Buttercream to a workable consistency . You can do this straight from the tub to avoid any unnecessary clean up ! If you are in a colder climate , pop the tub into the microwave for 10 seconds to make it a little softer . Apply a good amount of the buttercream directly to the set up board . Place your first layer of cake down and ensure it is firmly in place .
Page 12 text
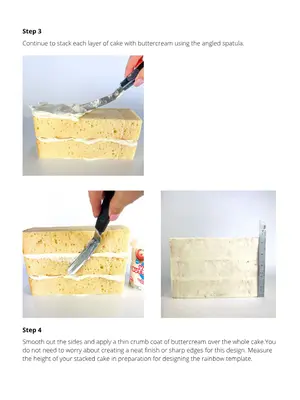
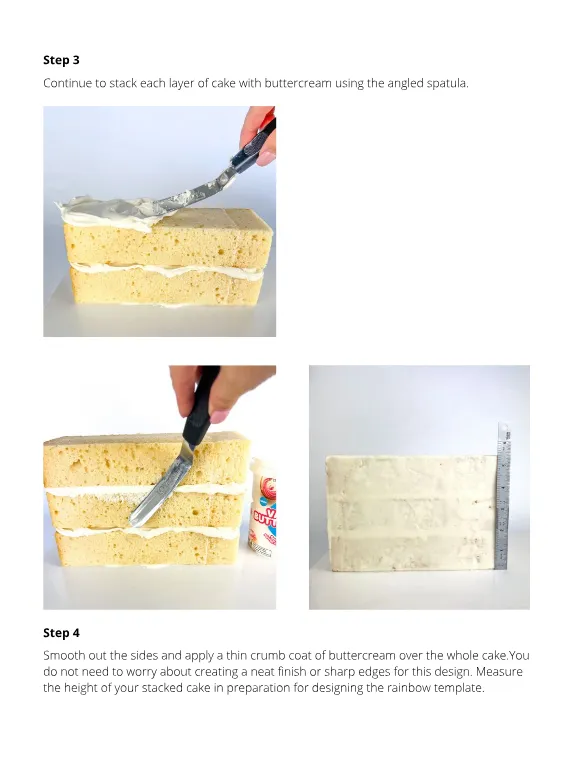
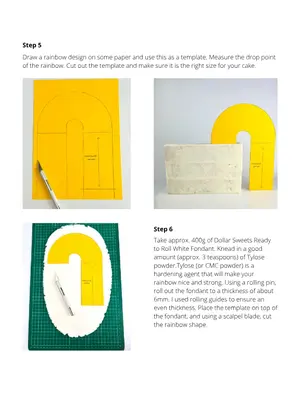
Step 3 Continue to stack each layer of cake with buttercream using the angled spatula . Step 4 Smooth out the sides and apply a thin crumb coat of buttercream over the whole cake . You do not need to worry about creating a neat finish or sharp edges for this design . Measure the height of your stacked cake in preparation for designing the rainbow template .
Page 13 text
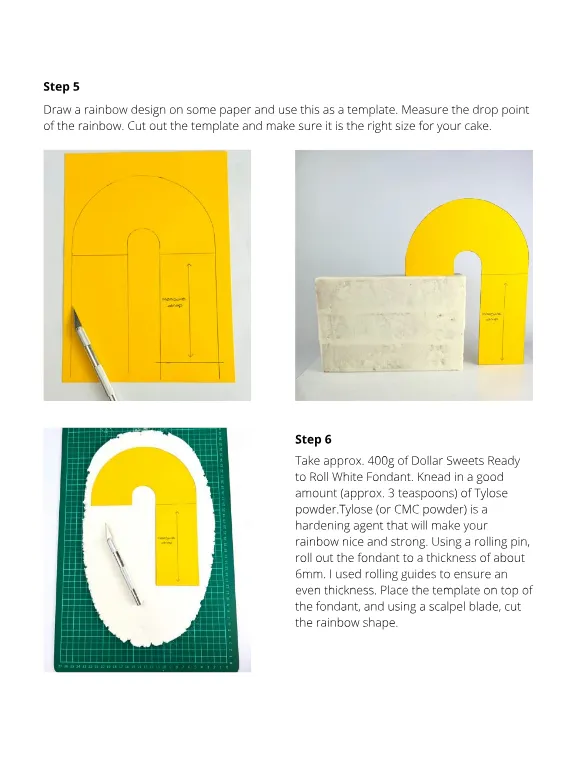
Step 5 Draw a rainbow design on some paper and use this as a template . Measure the drop point of the rainbow . Cut out the template and make sure it is the right size for your cake . Step 6 Take approx . 400g of Dollar Sweets Ready to Roll White Fondant . Knead in a good amount ( approx . 3 teaspoons ) of Tylose powder . Tylose ( or CMC powder ) is a hardening agent that will make your rainbow nice and strong . Using a rolling pin , roll out the fondant to a thickness of about 6mm . I used rolling guides to ensure an even thickness . Place the template on top of the fondant , and using a scalpel blade , cut the rainbow shape .
Page 14 text
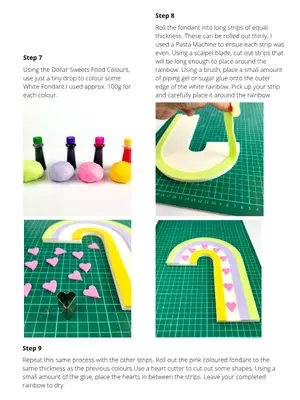
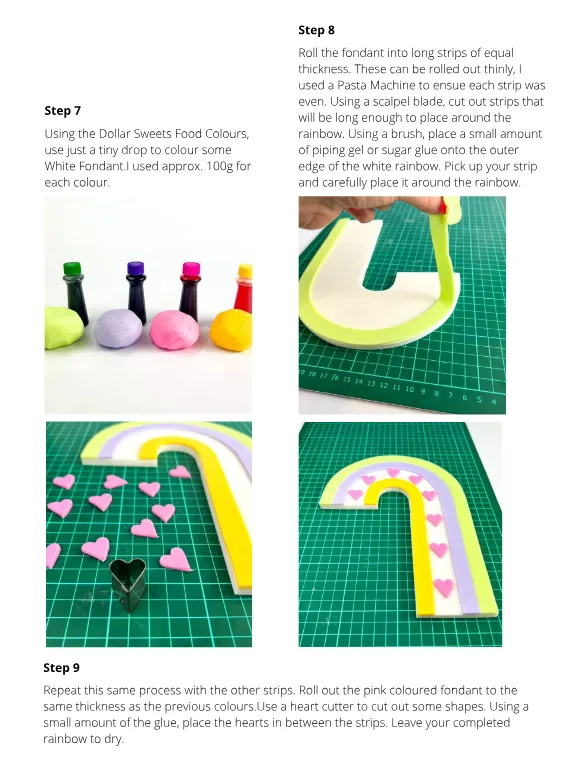
Step 8 Step 7 Using the Dollar Sweets Food Colours , use just a tiny drop to colour some White Fondant . I used approx . 100g for each colour . Roll the fondant into long strips of equal thickness . These can be rolled out thinly , I used a Pasta Machine to ensue each strip was even . Using a scalpel blade , cut out strips that will be long enough to place around the rainbow . Using a brush , place a small amount of piping gel or sugar glue onto the outer edge of the white rainbow . Pick up your strip and carefully place it around the rainbow . Step 9 Repeat this same process with the other strips . Roll out the pink coloured fondant to the same thickness as the previous colours . Use a heart cutter to cut out some shapes . Using a small amount of the glue , place the hearts in between the strips . Leave your completed rainbow to dry .
Page 15 text
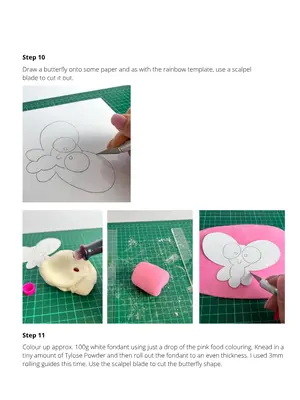
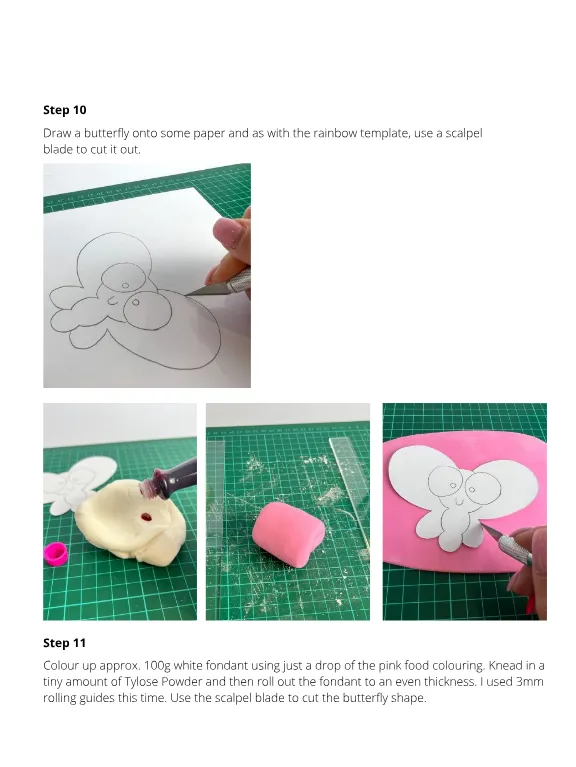
Step 10 Draw a butterfly onto some paper and as with the rainbow template , use a scalpel blade to cut it out . Step 11 Colour up approx . 100g white fondant using just a drop of the pink food colouring . Knead in a tiny amount of Tylose Powder and then roll out the fondant to an even thickness . I used 3mm rolling guides this time . Use the scalpel blade to cut the butterfly shape .
Page 16 text
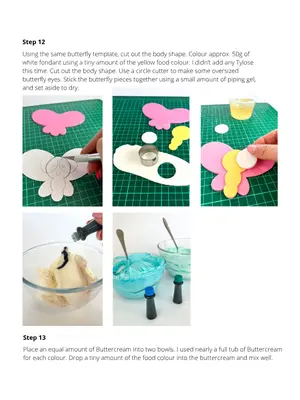
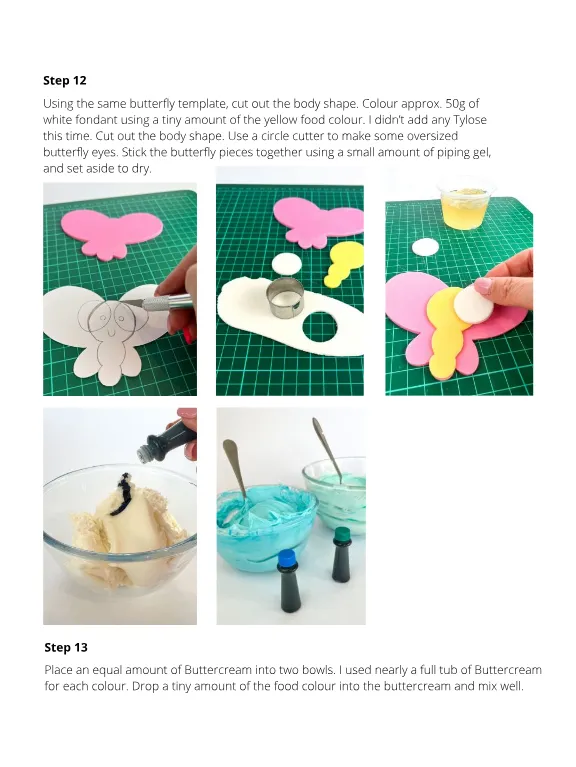
Step 12 Using the same butterfly template , cut out the body shape . Colour approx . 50g of white fondant using a tiny amount of the yellow food colour . I didn ’ t add any Tylose this time . Cut out the body shape . Use a circle cutter to make some oversized butterfly eyes . Stick the butterfly pieces together using a small amount of piping gel , and set aside to dry . Step 13 Place an equal amount of Buttercream into two bowls . I used nearly a full tub of Buttercream for each colour . Drop a tiny amount of the food colour into the buttercream and mix well .
Page 17 text
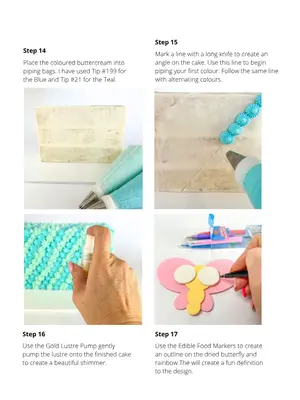
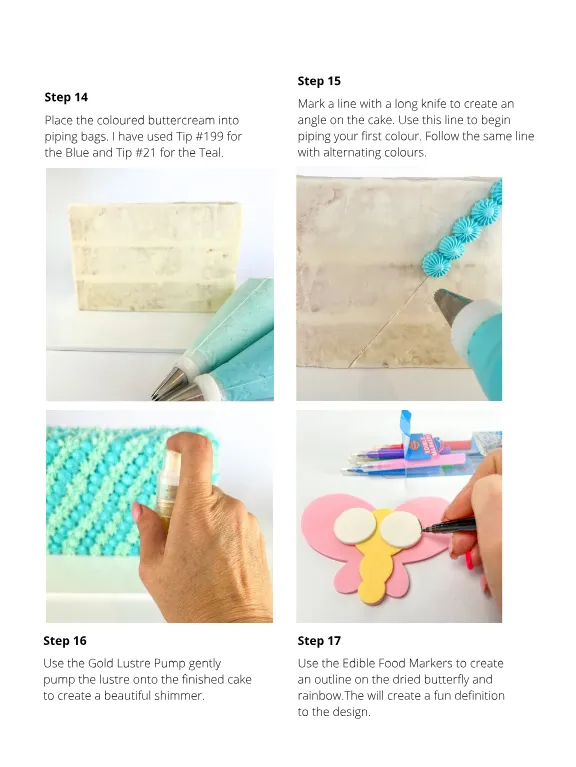
Step 14 Place the coloured buttercream into piping bags . I have used Tip # 199 for the Blue and Tip # 21 for the Teal . Step 15 Mark a line with a long knife to create an angle on the cake . Use this line to begin piping your first colour . Follow the same line with alternating colours . Step 16 Use the Gold Lustre Pump gently pump the lustre onto the finished cake to create a beautiful shimmer . Step 17 Use the Edible Food Markers to create an outline on the dried butterfly and rainbow . The will create a fun definition to the design .
Page 18 text
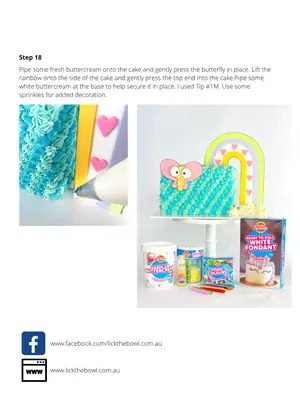
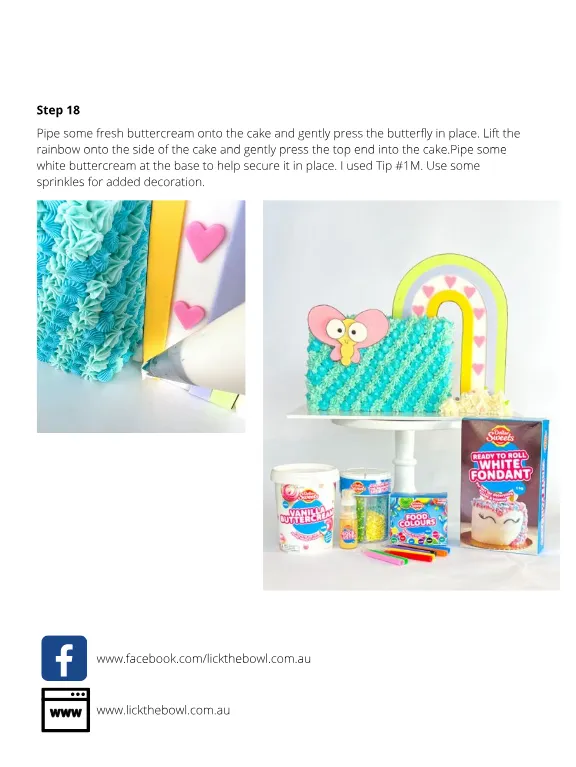
Step 18 Pipe some fresh buttercream onto the cake and gently press the butterfly in place . Lift the rainbow onto the side of the cake and gently press the top end into the cake . Pipe some white buttercream at the base to help secure it in place . I used Tip # 1M . Use some sprinkles for added decoration . www . facebook . com / lickthebowl . com . au www . lickthebowl . com . au
Page 24 text
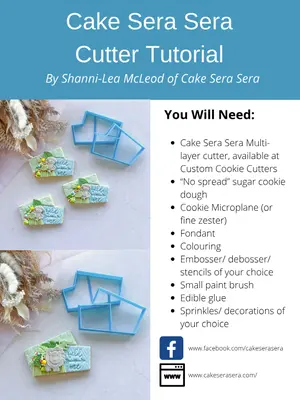
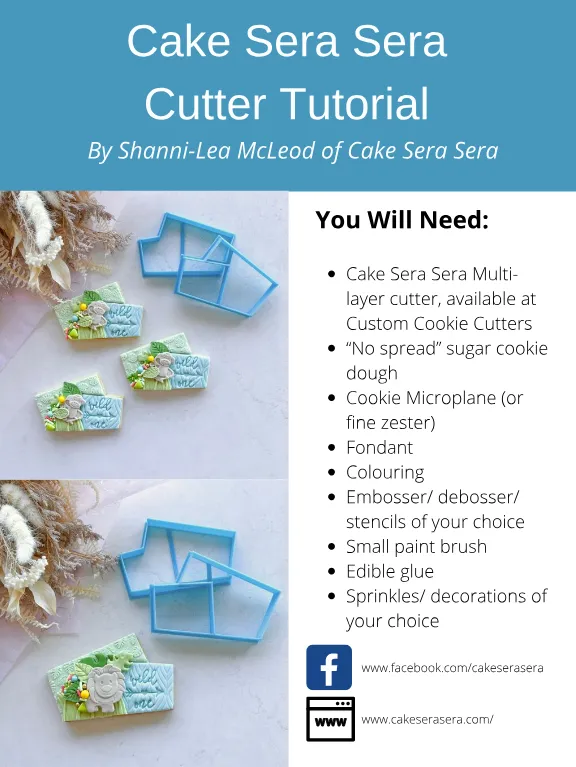
Cake Sera Sera Multilayer cutter , available at Custom Cookie Cutters “ No spread ” sugar cookie dough Cookie Microplane ( or fine zester ) Fondant Colouring Embosser / debosser / stencils of your choice Small paint brush Edible glue Sprinkles / decorations of your choice Cake Sera Sera Cutter Tutorial By Shanni-Lea McLeod of Cake Sera Sera You Will Need : Cake Sera Sera Multilayer cutter , available at Custom Cookie Cutters “ No spread ” sugar cookie dough Cookie Microplane ( or fine zester ) Fondant Colouring Embosser / debosser / stencils of your choice Small paint brush Edible glue Sprinkles / decorations of your choice www . facebook . com / cakeserasera www . cakeserasera . com /
Page 25 text
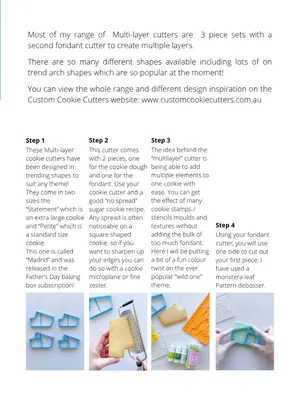
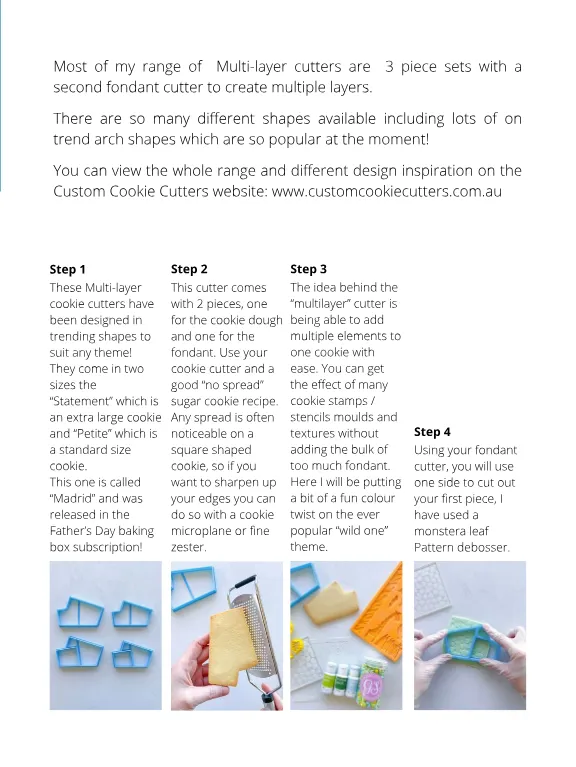
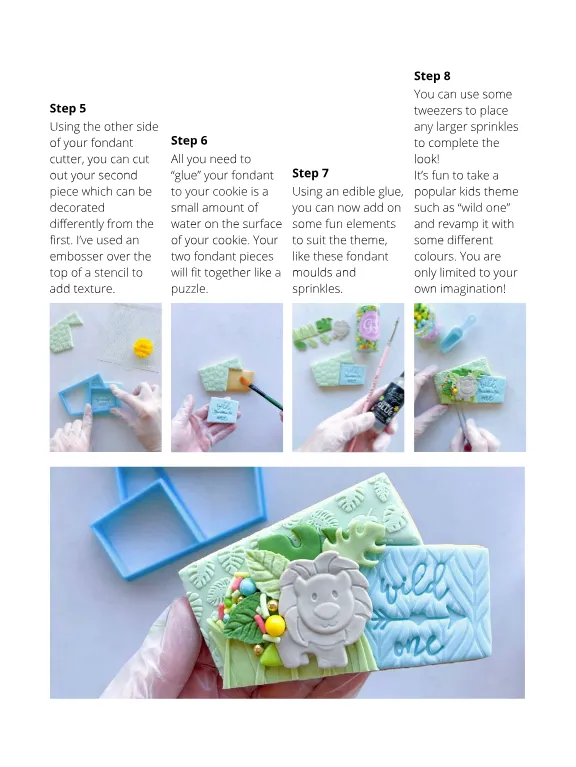
Most of my range of Multi-layer cutters are 3 piece sets with a second fondant cutter to create multiple layers . There are so many different shapes available including lots of on trend arch shapes which are so popular at the moment ! You can view the whole range and different design inspiration on the Custom Cookie Cutters website : www . customcookiecutters . com . au Step 1 Step 2 These Multi-layer cookie cutters have been designed in trending shapes to suit any theme ! They come in two sizes the “ Statement ” which is an extra large cookie and “ Petite ” which is a standard size cookie . This one is called “ Madrid ” and was released in the Father ’ s Day baking box subscription ! This cutter comes with 2 pieces , one for the cookie dough and one for the fondant . Use your cookie cutter and a good “ no spread ” sugar cookie recipe . Any spread is often noticeable on a square shaped cookie , so if you want to sharpen up your edges you can do so with a cookie microplane or fine zester . Step 3 The idea behind the “ multilayer ” cutter is being able to add multiple elements to one cookie with ease . You can get the effect of many cookie stamps / stencils moulds and textures without adding the bulk of too much fondant . Here I will be putting a bit of a fun colour twist on the ever popular “ wild one ” theme . Step 4 Using your fondant cutter , you will use one side to cut out your first piece , I have used a monstera leaf Pattern debosser .
Page 26 text
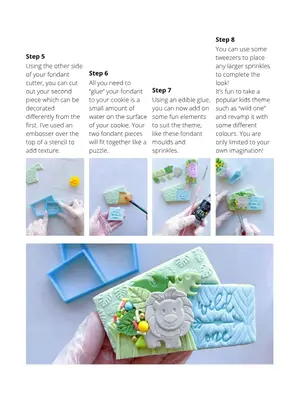
Step 8 Step 5 Using the other side of your fondant cutter , you can cut out your second piece which can be decorated differently from the first . I ’ ve used an embosser over the top of a stencil to add texture . Step 6 All you need to “ glue ” your fondant to your cookie is a small amount of water on the surface of your cookie . Your two fondant pieces will fit together like a puzzle . Step 7 Using an edible glue , you can now add on some fun elements to suit the theme , like these fondant moulds and sprinkles . You can use some tweezers to place any larger sprinkles to complete the look ! It ’ s fun to take a popular kids theme such as “ wild one ” and revamp it with some different colours . You are only limited to your own imagination !


Page 33 text
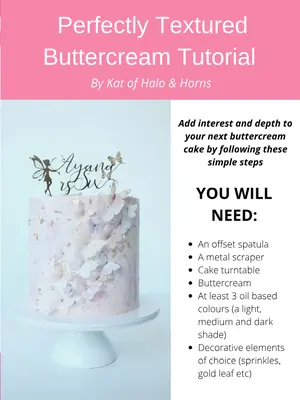
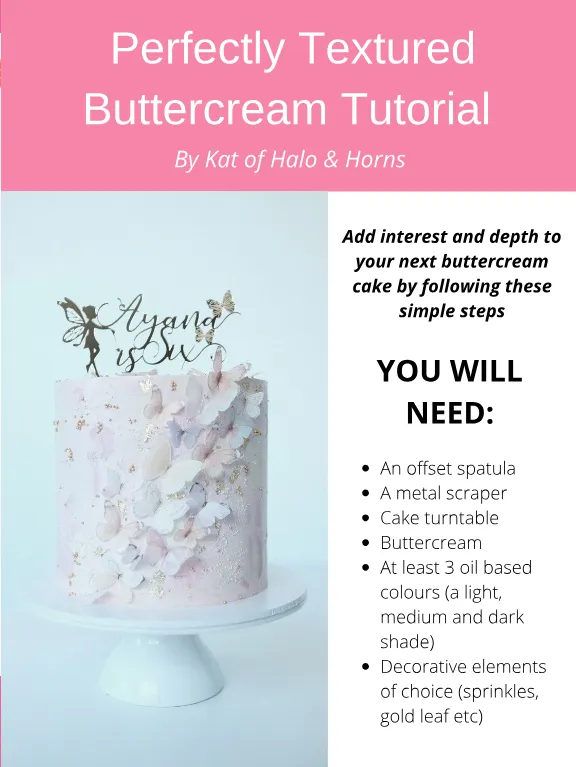
Add interest and depth to your next buttercream cake by following these simple steps Perfectly Textured Buttercream Tutorial By Kat of Halo & Horns Add interest and depth to your next buttercream cake by following these simple steps YOU WILL NEED : An offset spatula A metal scraper Cake turntable Buttercream At least 3 oil based colours ( a light , medium and dark shade ) Decorative elements of choice ( sprinkles , gold leaf etc )
Page 34 text
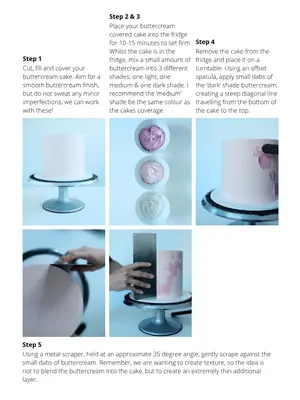
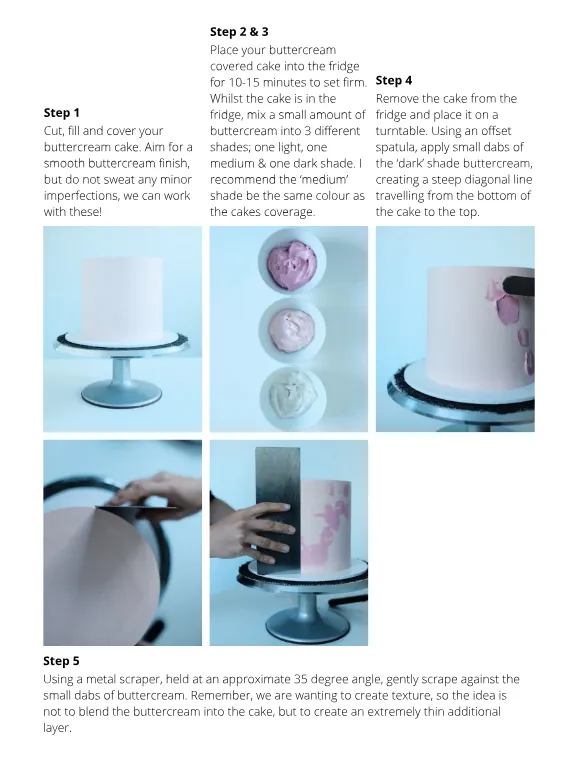
Step 1 Cut , fill and cover your buttercream cake . Aim for a smooth buttercream finish , but do not sweat any minor imperfections , we can work with these ! Step 2 & 3 Place your buttercream covered cake into the fridge for 10-15 minutes to set firm . Whilst the cake is in the fridge , mix a small amount of buttercream into 3 different shades ; one light , one medium & one dark shade . I recommend the ‘ medium ’ shade be the same colour as the cakes coverage . Step 4 Remove the cake from the fridge and place it on a turntable . Using an offset spatula , apply small dabs of the ‘ dark ’ shade buttercream , creating a steep diagonal line travelling from the bottom of the cake to the top . Step 5 Using a metal scraper , held at an approximate 35 degree angle , gently scrape against the small dabs of buttercream . Remember , we are wanting to create texture , so the idea is not to blend the buttercream into the cake , but to create an extremely thin additional layer .
Page 35 text
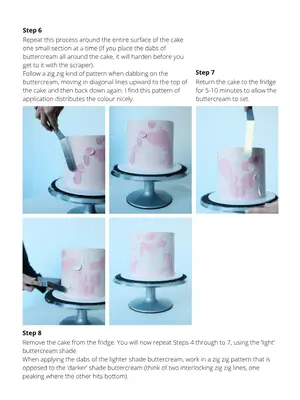
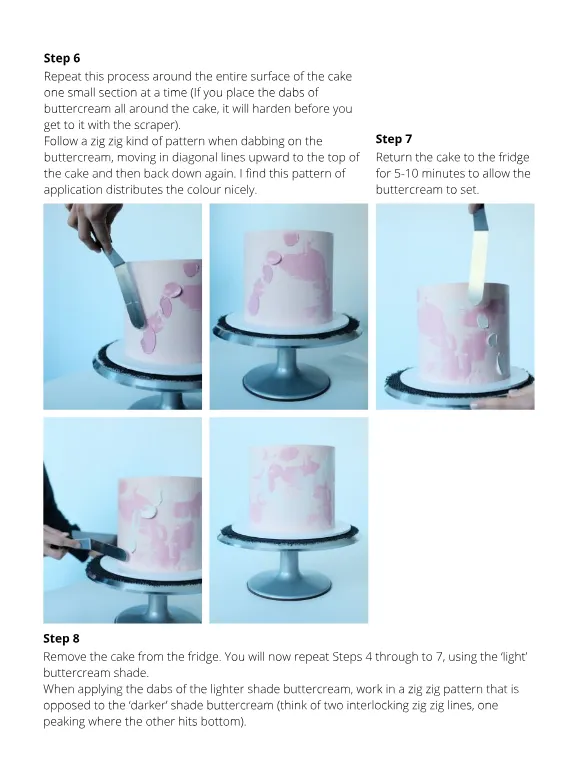
Step 6 Repeat this process around the entire surface of the cake one small section at a time ( If you place the dabs of buttercream all around the cake , it will harden before you get to it with the scraper ). Follow a zig zig kind of pattern when dabbing on the buttercream , moving in diagonal lines upward to the top of the cake and then back down again . I find this pattern of application distributes the colour nicely . Step 7 Return the cake to the fridge for 5-10 minutes to allow the buttercream to set . Step 8 Remove the cake from the fridge . You will now repeat Steps 4 through to 7 , using the ‘ light ’ buttercream shade . When applying the dabs of the lighter shade buttercream , work in a zig zig pattern that is opposed to the ‘ darker ’ shade buttercream ( think of two interlocking zig zig lines , one peaking where the other hits bottom ).
Page 36 text
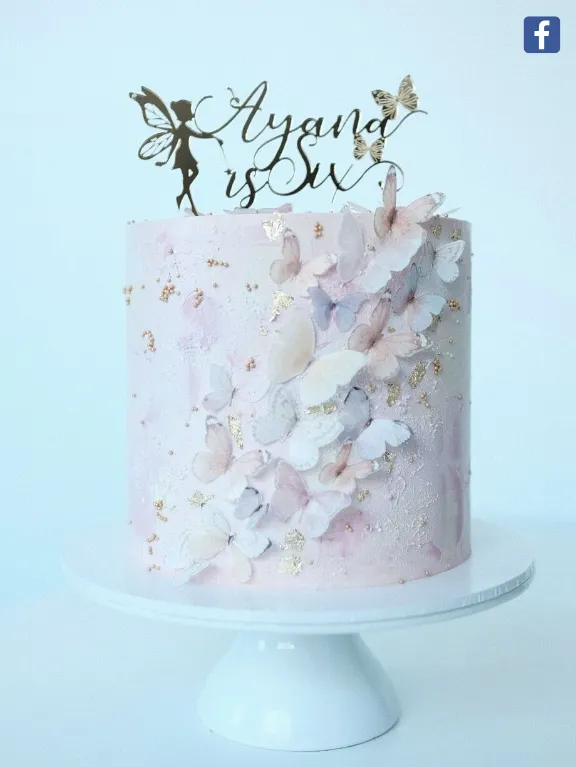
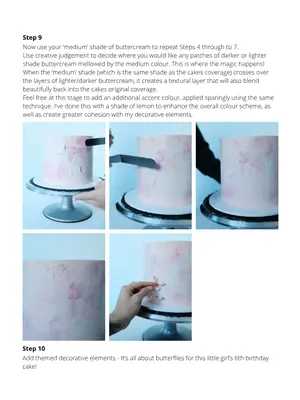
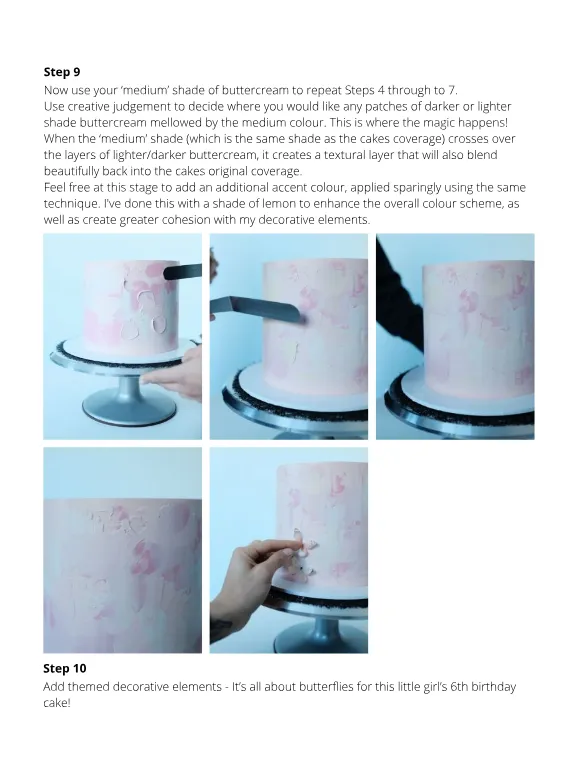
Step 9 Now use your ‘ medium ’ shade of buttercream to repeat Steps 4 through to 7 . Use creative judgement to decide where you would like any patches of darker or lighter shade buttercream mellowed by the medium colour . This is where the magic happens ! When the ‘ medium ’ shade ( which is the same shade as the cakes coverage ) crosses over the layers of lighter / darker buttercream , it creates a textural layer that will also blend beautifully back into the cakes original coverage . Feel free at this stage to add an additional accent colour , applied sparingly using the same technique . I ' ve done this with a shade of lemon to enhance the overall colour scheme , as well as create greater cohesion with my decorative elements . Step 10 Add themed decorative elements - It ’ s all about butterflies for this little girl ’ s 6th birthday cake !
Page 37 text
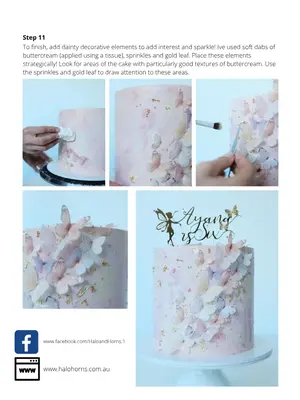
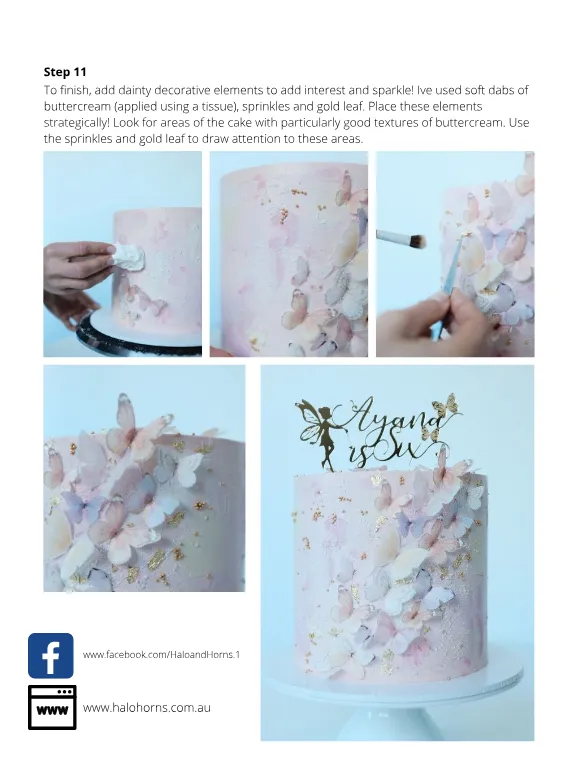
Step 11 To finish , add dainty decorative elements to add interest and sparkle ! Ive used soft dabs of buttercream ( applied using a tissue ), sprinkles and gold leaf . Place these elements strategically ! Look for areas of the cake with particularly good textures of buttercream . Use the sprinkles and gold leaf to draw attention to these areas . www . facebook . com / HaloandHorns . 1 www . halohorns . com . au


Page 40 text
ACDN 10th Birthday Awards Night Celebration TICKETS ON SALE NOW ! Melbourne 5TH NOVEMBER 2022 www . acdn . me / awards
Page 41 text
Event updates : www . acdn . me / awards


Page 44 text
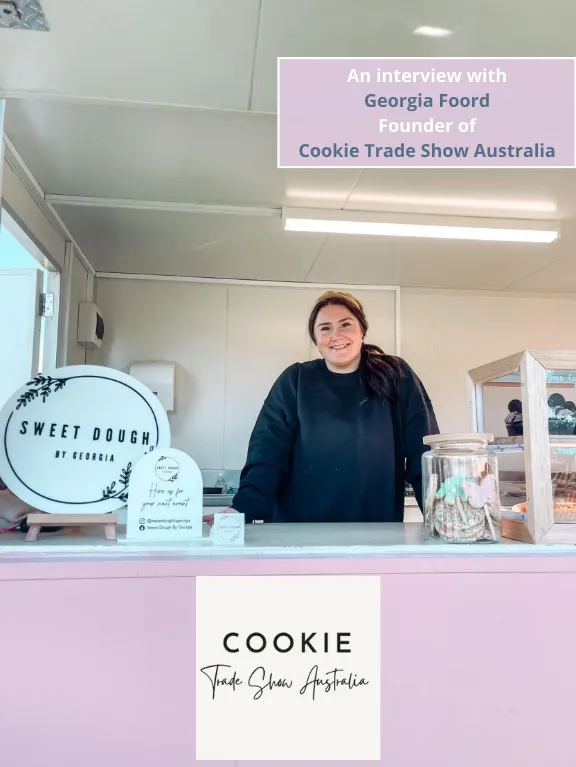
An interview with Georgia Foord Founder of Cookie Trade Show Australia An interview with Georgia Foord Founder of Cookie Trade Show Australia
Page 45 text
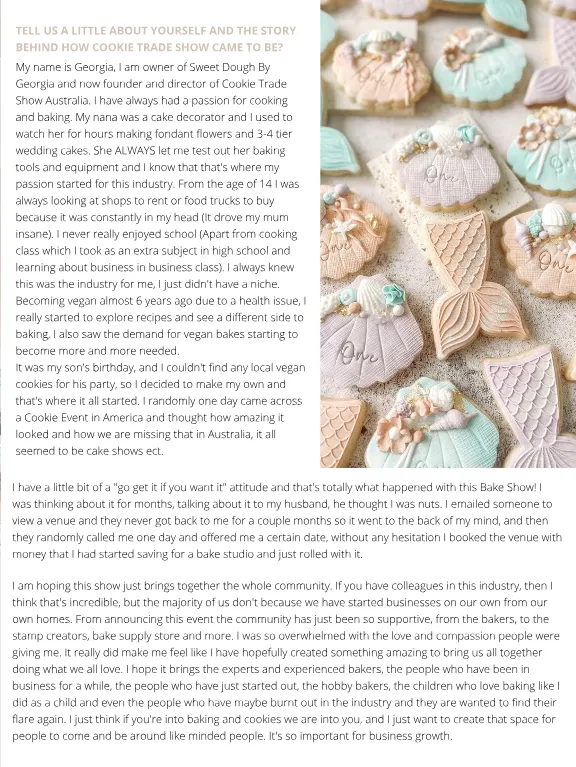
TELL US A LITTLE ABOUT YOURSELF AND THE STORY BEHIND HOW COOKIE TRADE SHOW CAME TO BE ? My name is Georgia , I am owner of Sweet Dough By Georgia and now founder and director of Cookie Trade Show Australia . I have always had a passion for cooking and baking . My nana was a cake decorator and I used to watch her for hours making fondant flowers and 3-4 tier wedding cakes . She ALWAYS let me test out her baking tools and equipment and I know that that ' s where my passion started for this industry . From the age of 14 I was always looking at shops to rent or food trucks to buy because it was constantly in my head ( It drove my mum insane ). I never really enjoyed school ( Apart from cooking class which I took as an extra subject in high school and learning about business in business class ). I always knew this was the industry for me , I just didn ' t have a niche . Becoming vegan almost 6 years ago due to a health issue , I really started to explore recipes and see a different side to baking , I also saw the demand for vegan bakes starting to become more and more needed . It was my son ' s birthday , and I couldn ' t find any local vegan cookies for his party , so I decided to make my own and that ' s where it all started . I randomly one day came across a Cookie Event in America and thought how amazing it looked and how we are missing that in Australia , it all seemed to be cake shows ect . I have a little bit of a " go get it if you want it " attitude and that ' s totally what happened with this Bake Show ! I was thinking about it for months , talking about it to my husband , he thought I was nuts . I emailed someone to view a venue and they never got back to me for a couple months so it went to the back of my mind , and then they randomly called me one day and offered me a certain date , without any hesitation I booked the venue with money that I had started saving for a bake studio and just rolled with it . I am hoping this show just brings together the whole community . If you have colleagues in this industry , then I think that ' s incredible , but the majority of us don ' t because we have started businesses on our own from our own homes . From announcing this event the community has just been so supportive , from the bakers , to the stamp creators , bake supply store and more . I was so overwhelmed with the love and compassion people were giving me . It really did make me feel like I have hopefully created something amazing to bring us all together doing what we all love . I hope it brings the experts and experienced bakers , the people who have been in business for a while , the people who have just started out , the hobby bakers , the children who love baking like I did as a child and even the people who have maybe burnt out in the industry and they are wanted to find their flare again . I just think if you ' re into baking and cookies we are into you , and I just want to create that space for people to come and be around like minded people . It ' s so important for business growth .
Page 46 text
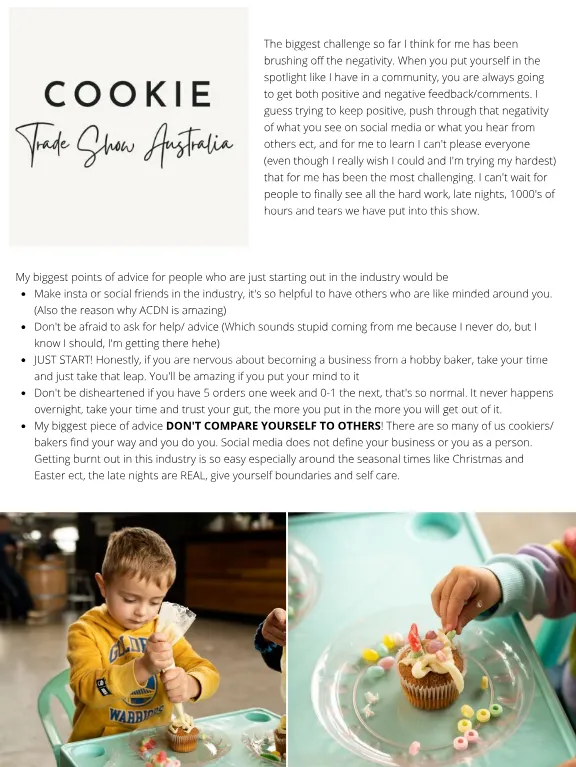
The biggest challenge so far I think for me has been brushing off the negativity . When you put yourself in the spotlight like I have in a community , you are always going to get both positive and negative feedback / comments . I guess trying to keep positive , push through that negativity of what you see on social media or what you hear from others ect , and for me to learn I can ' t please everyone ( even though I really wish I could and I ' m trying my hardest ) that for me has been the most challenging . I can ' t wait for people to finally see all the hard work , late nights , 1000 ' s of hours and tears we have put into this show . My biggest points of advice for people who are just starting out in the industry would be Make insta or social friends in the industry , it ' s so helpful to have others who are like minded around you . ( Also the reason why ACDN is amazing ) Don ' t be afraid to ask for help / advice ( Which sounds stupid coming from me because I never do , but I know I should , I ' m getting there hehe ) JUST START ! Honestly , if you are nervous about becoming a business from a hobby baker , take your time and just take that leap . You ' ll be amazing if you put your mind to it Don ' t be disheartened if you have 5 orders one week and 0-1 the next , that ' s so normal . It never happens overnight , take your time and trust your gut , the more you put in the more you will get out of it . My biggest piece of advice DON ' T COMPARE YOURSELF TO OTHERS ! There are so many of us cookiers / bakers find your way and you do you . Social media does not define your business or you as a person . Getting burnt out in this industry is so easy especially around the seasonal times like Christmas and Easter ect , the late nights are REAL , give yourself boundaries and self care .
Page 47 text
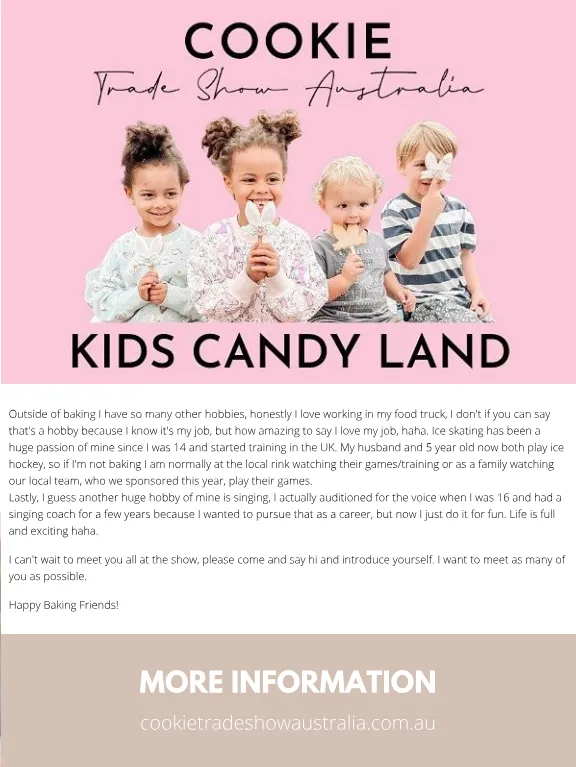
Outside of baking I have so many other hobbies , honestly I love working in my food truck , I don ' t if you can say that ' s a hobby because I know it ' s my job , but how amazing to say I love my job , haha . Ice skating has been a huge passion of mine since I was 14 and started training in the UK . My husband and 5 year old now both play ice hockey , so if I ' m not baking I am normally at the local rink watching their games / training or as a family watching our local team , who we sponsored this year , play their games . Lastly , I guess another huge hobby of mine is singing , I actually auditioned for the voice when I was 16 and had a singing coach for a few years because I wanted to pursue that as a career , but now I just do it for fun . Life is full and exciting haha . I can ' t wait to meet you all at the show , please come and say hi and introduce yourself . I want to meet as many of you as possible . Happy Baking Friends ! MORE INFORMATION cookietradeshowaustralia . com . au
Page 50 text
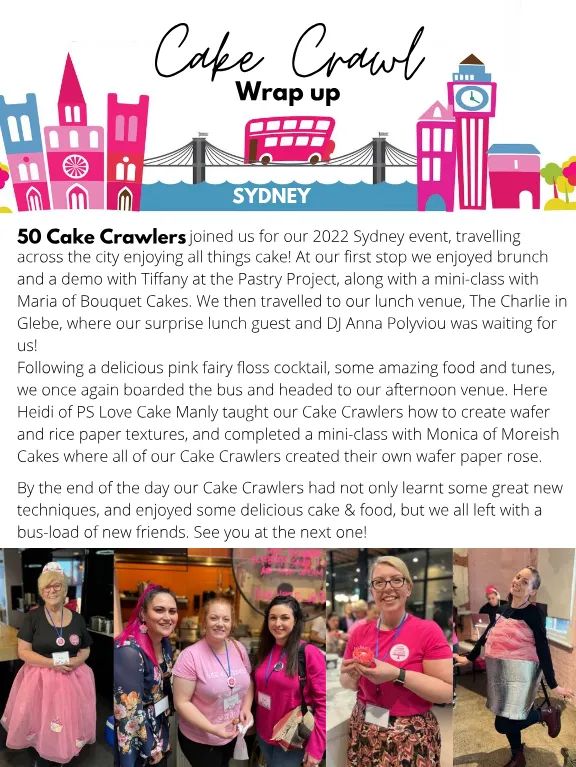
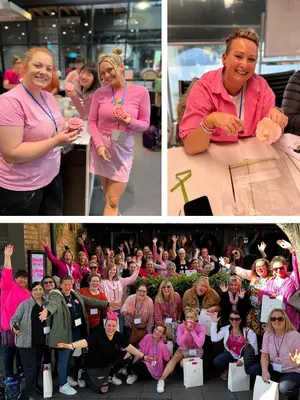
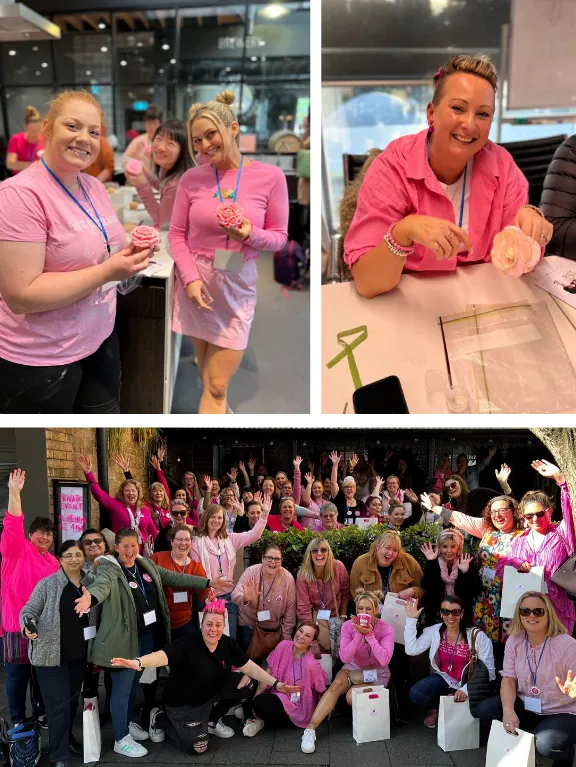
50 Cake Crawlers joined us for our 2022 Sydney event , travelling across the city enjoying all things cake ! At our first stop we enjoyed brunch Cake Crawl Wrap up SYDNEY 50 Cake Crawlers joined us for our 2022 Sydney event , travelling across the city enjoying all things cake ! At our first stop we enjoyed brunch and a demo with Tiffany at the Pastry Project , along with a mini-class with Maria of Bouquet Cakes . We then travelled to our lunch venue , The Charlie in Glebe , where our surprise lunch guest and DJ Anna Polyviou was waiting for us ! Following a delicious pink fairy floss cocktail , some amazing food and tunes , we once again boarded the bus and headed to our afternoon venue . Here Heidi of PS Love Cake Manly taught our Cake Crawlers how to create wafer and rice paper textures , and completed a mini-class with Monica of Moreish Cakes where all of our Cake Crawlers created their own wafer paper rose . By the end of the day our Cake Crawlers had not only learnt some great new techniques , and enjoyed some delicious cake & food , but we all left with a bus-load of new friends . See you at the next one !
Page 54 text
Cake Chat Cake Chat with Amber Comadira-Smith from Cake with Amber Amber shares her cake expertise so you can sweeten-up your cake skills and create amazing cakes with confidence ! DESIGN BRIEF : WHAT IS IT AND WHY DO YOU NEED IT ? Fact : you can ’ t create a good cake without knowing the type of event your catering for or what the client actually wants # truth That ’ s why the first step to starting ANY new cake project involves filling out a ‘ design brief ’ ( yay for planning !). * crickets chirping * * person in the back hesitantly raises their hand * " What is this design-brief-thing exactly …?" Good question . Let me explain this mysterious document to you … To keep it simple , a design brief is the ‘ who , what , when and why ’ form for ALL cake orders , that ’ s completed by yourself and your client at the start of EVERY cake project . The brief contains the core details for your cake order - anything from design aesthetic to cake flavours - giving you a clear direction and reference for your cake design throughout the cake-making process . The type of questions on the brief should go beyond the usual ‘ what event is it for ?’ questions you field on Facebook - it asks you to take an in-depth dive into the needs of the client and the emotional message you need to convey with your cake design . Apart from the usual ‘ when ’ and ‘ where ’ questions , here ’ s a few examples of the type of insightful questions I want to see on your design brief : “ Does the cake need to reflect a specific theme , idea or message ?” Is the cake you ' re making celebrating a happy 21st birthday in a las vegas theme ? Or maybe it ’ s a more feminine , thoughtful cake for someone who ’ s been unwell ?
Page 55 text
“ How do I want people to react and feel when they see my cake ?” It ’ s important to evoke thought and emotion that relates directly back to the theme and main message of the cake . Do you want people to feel happy when they see your cake ? Nostalgic ? Triumphant ? Just remember , that the tone of your piece really dictates how your cake is perceived by your audience . So if you want people to feel * insert emotion here * when they see your cake , how will you design your cake to get that type of emotional reaction ? “ Special design requirements from the client e . g . Likes , dislikes , style references , etc .” This might seem like an obvious question to nail down , but I thought it was important to reiterate the value of this question . We should never assume how a client will feel about a particular cake design or certain cake details . Their likes / dislikes dictate our cake design and will change the way we problem solve on the fly if we need to make any last minute cake design changes . Clients usually have a general idea of what they already want , or at the very least what they DON ’ T want . Make sure you go over this question in detail and obtain any reference photos the client may have for you . Having a design brief in place , and asking these more in-depth questions , will enable you to be your best creative self and allow you to create a cake that your client will adore ! Do you already have a design brief in place ? Hit me up on socials and let me know what type of questions you find the most helpful to ask your clients . Three cheers for design briefs and pre-planning ! Let ’ s all make the conscious choice to design with intention for cake success . MORE INFORMATION facebook . com / cakewithamber instagram . com / cakewithamber cakewithamber . com . au