Page 87 of 96
Page 1 text
Cake ! Cake ! MAGAZINE
Page 2 text
PUBLISHER : Cake ! Magazine is published by the Australian Cake Decorating Network Pty Ltd . ACN : 91 164 927 584 . © All content copyright 2022 Australian Cake Decorating Network Pty Ltd . All rights reserved . Reproduction any part of the magazine without written permission is prohibited . All prices included in Cake ! Magazine are approximate and are in AUD unless otherwise stated . Prices quoted are correct at the time of publishing and may vary or be subject to change . The Australian Cake Decorating Network Pty Ltd accepts no responsibility for damage or loss as a result of material submitted for , published in or as a result of this publication . The Australian Cake Decorating Network does not have an affiliation with any other magazine . The views and opinions expressed within this publication are not necessarily the views of the publisher or it ' s affiliates . While every effort has been made to ensure the accuracy of the information contained within Cake ! Magazine the publisher and Cake ! Magazine hold no responsibility for any errors , omissions , or consequences subsequent or otherwise , including loss or damage arising from reliance on information in this publication . Content is supplied for publication in Cake ! Magazine by parties external to the Australian Cake Decorating Network and it is the external party ' s responsibility to ensure content and credits are accurate . Cake ! Magazine contains advertising through individual arrangements , which may include paid affiliate arrangements . Cake ! Magazine may also contain affiliate links . The agreements are held between the advertiser or affiliate and the Australian Cake Decorating Network Ptd Ltd . To advertise in Cake ! magazine , contact : liz @ acdn . me
Page 3 text
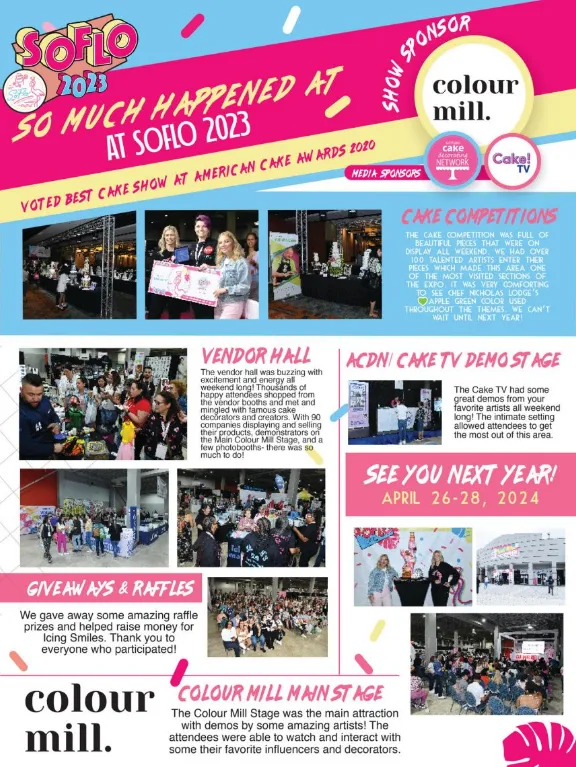
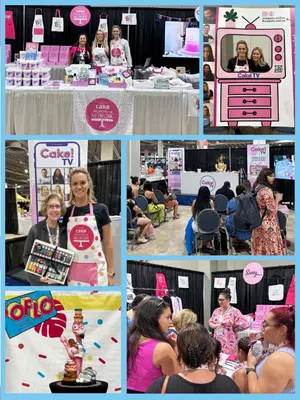
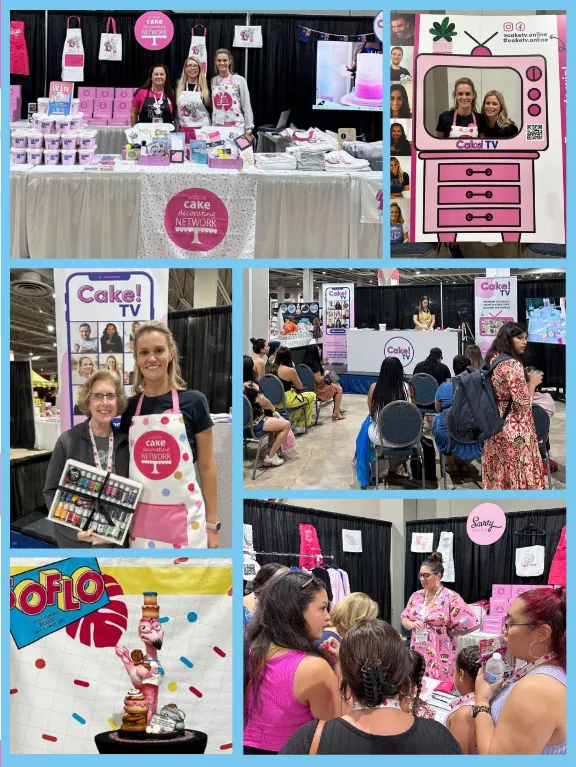
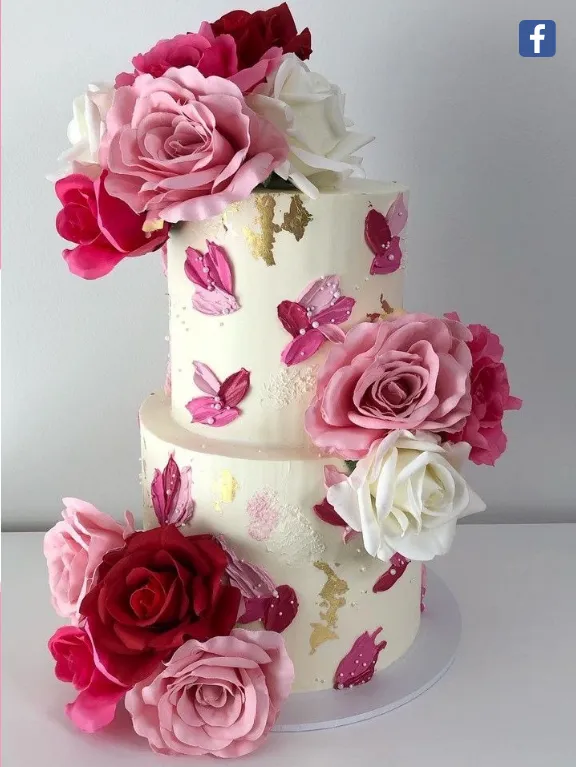
letter from the editor Hello and welcome to our second Cake ! Magazine issue for 2023 ! How are we already halfway through the year ?! We are still on such a high after returning home from Miami where we attended SoFlo Cake & Candy Expo ! We took the Baking Box with us , where we got to share and promote lots of awesome small Aussie businesses , and also had the Cake ! TV stage where we held amazing demos all weekend ! Later this month we are excited to be heading to the Cake Bake & Sweets show in Melbourne and in July we are hosting our VIC Cake Camp in the gorgeous Yarra Valley . This issue of Cake ! Magazine is Floral themed , featuring tutorials for cupcakes , cakes and sugar flowers along with many inspirational images in our Member Gallery . In this issue we interview Jacqueline Butler , the Founder of Petalsweet and have Amber Comadira-Smith back with her regular column for Cake ! Magazine helping you to elevate your cake photos ! We hope you enjoy this issue of Cake ! Magazine ! Enjoy ! Liz COVER IMAGE : Vanessa Gibilisco Pastel and Bloom
Page 4 text
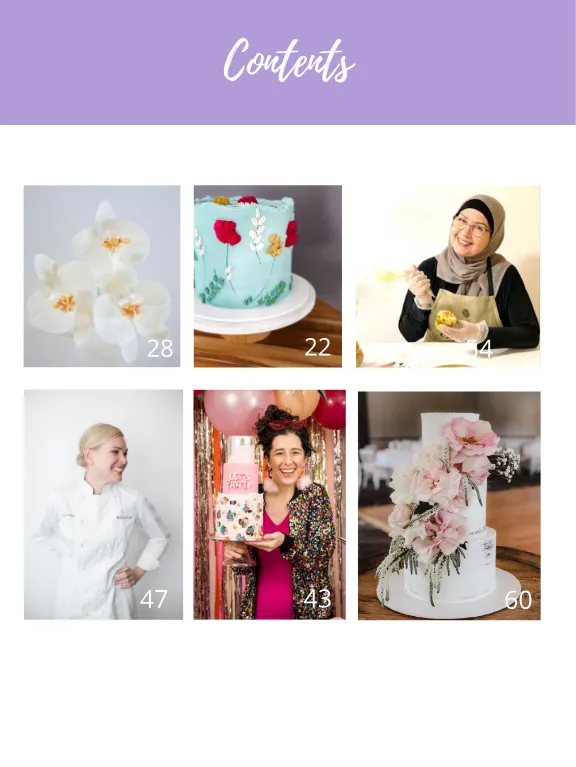
Contents 28 22 54 47 43 60
Page 5 text
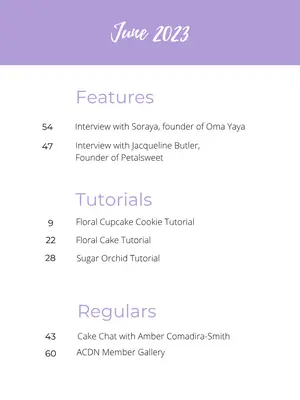
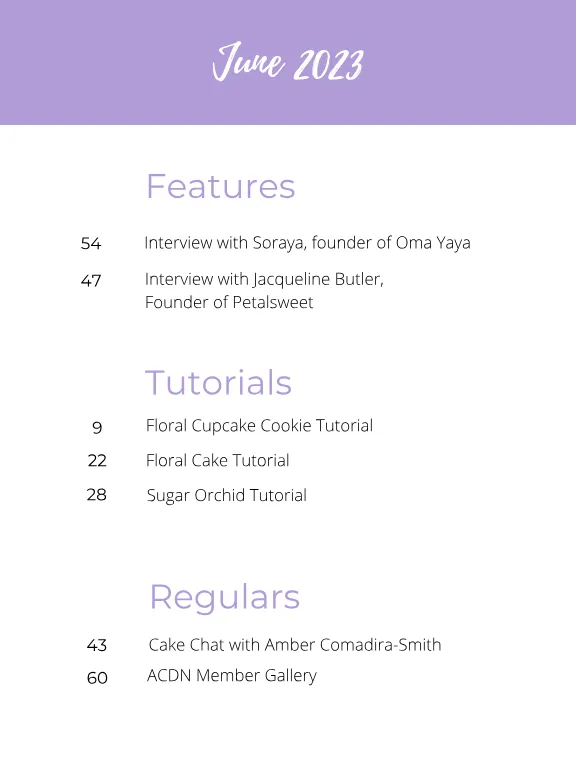
June 2023 Features 54 Interview with Soraya , founder of Oma Yaya 47 Interview with Jacqueline Butler , Founder of Petalsweet Tutorials 9 22 28 Floral Cupcake Cookie Tutorial Floral Cake Tutorial Sugar Orchid Tutorial Regulars 43 60 Cake Chat with Amber Comadira-Smith ACDN Member Gallery
Page 7 text
F L O R A L Tutorials
Page 9 text
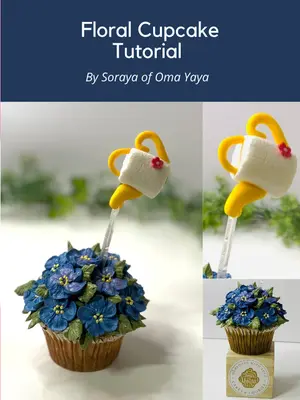
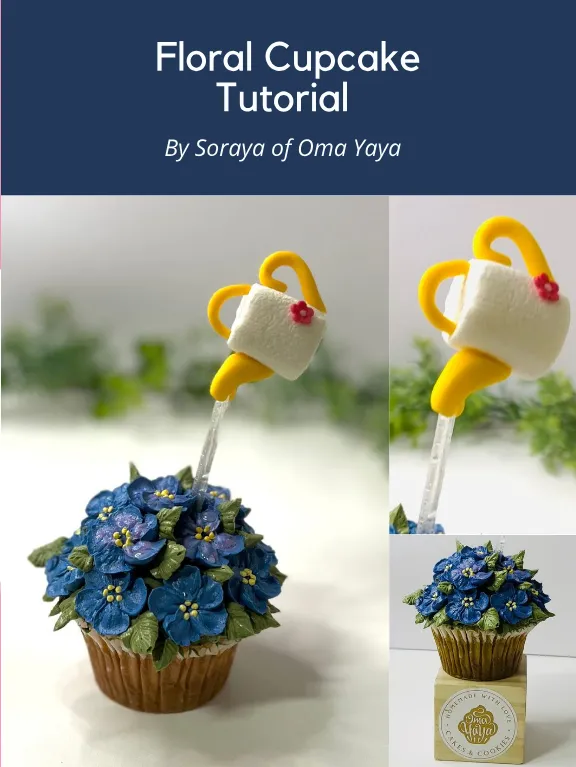
Floral Cupcake Tutorial By Soraya of Oma Yaya
Page 10 text
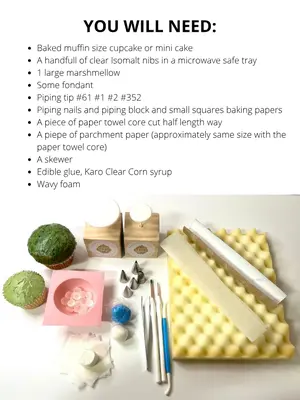
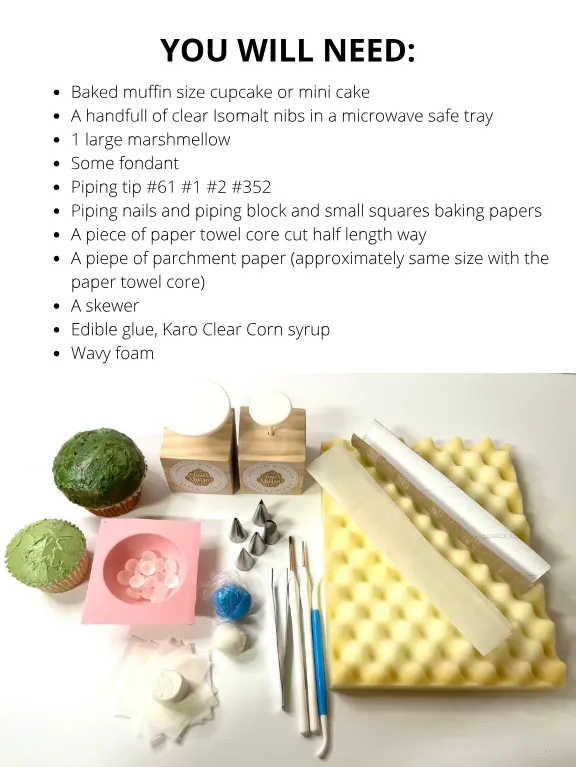
Baked muffin size cupcake or mini cake A handfull of clear Isomalt nibs in a microwave safe tray 1 large marshmellow Some fondant Piping tip # 61 # 1 # 2 # 352 Piping nails and piping block and small squares baking papers A piece of paper towel core cut half length way A piepe of parchment paper ( approximately same size with the paper towel core ) A skewer Edible glue , Karo Clear Corn syrup Wavy foam YOU WILL NEED : Baked muffin size cupcake or mini cake A handfull of clear Isomalt nibs in a microwave safe tray 1 large marshmellow Some fondant Piping tip # 61 # 1 # 2 # 352 Piping nails and piping block and small squares baking papers A piece of paper towel core cut half length way A piepe of parchment paper ( approximately same size with the paper towel core ) A skewer Edible glue , Karo Clear Corn syrup Wavy foam
Page 11 text
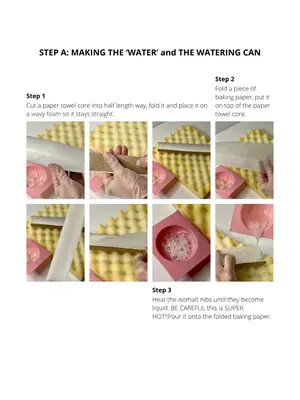
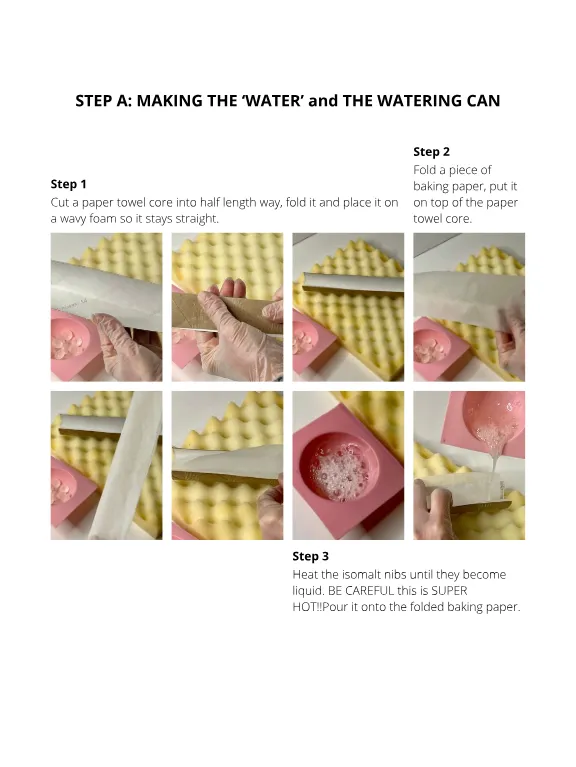
STEP A : MAKING THE ‘ WATER ’ and THE WATERING CAN Step 1 Cut a paper towel core into half length way , fold it and place it on a wavy foam so it stays straight . Step 2 Fold a piece of baking paper , put it on top of the paper towel core . Step 3 Heat the isomalt nibs until they become liquid . BE CAREFUL this is SUPER HOT !! Pour it onto the folded baking paper .
Page 12 text
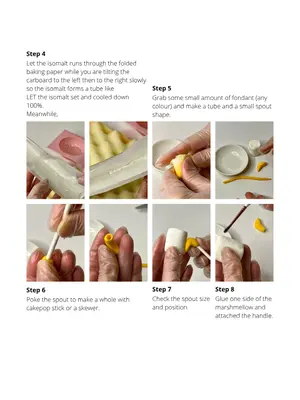
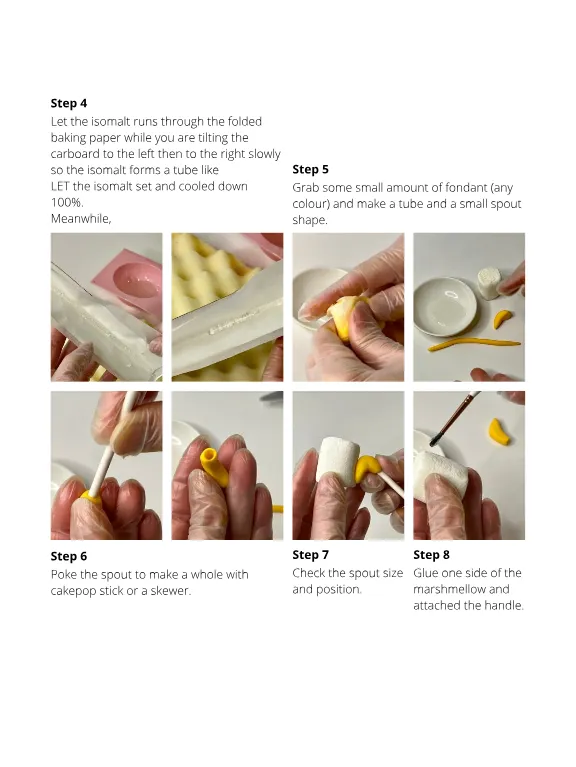
Step 4 Let the isomalt runs through the folded baking paper while you are tilting the carboard to the left then to the right slowly so the isomalt forms a tube like LET the isomalt set and cooled down 100 %. Meanwhile , Step 5 Grab some small amount of fondant ( any colour ) and make a tube and a small spout shape . Step 6 Poke the spout to make a whole with cakepop stick or a skewer . Step 7 Check the spout size and position . Step 8 Glue one side of the marshmellow and attached the handle .
Page 13 text
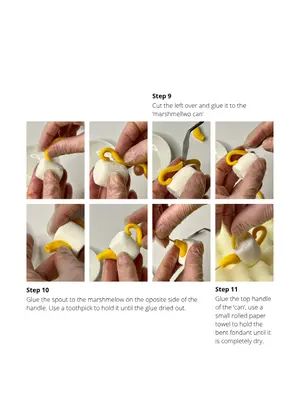
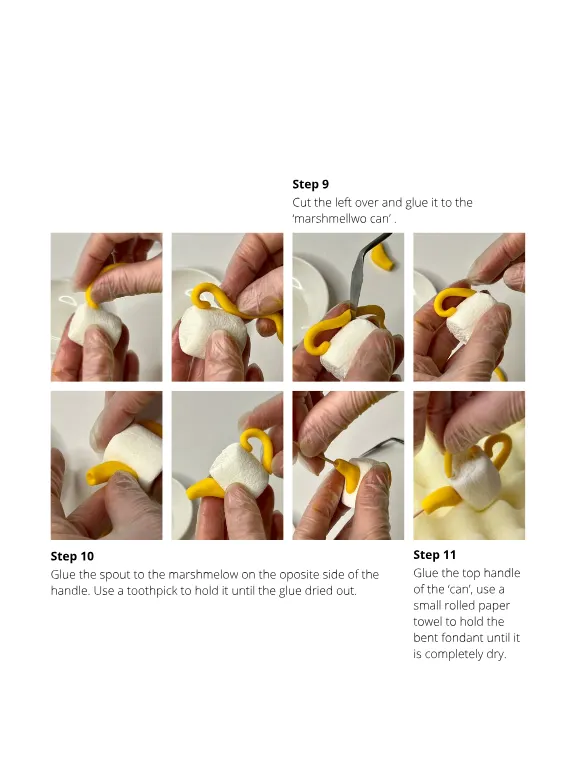
Step 9 Cut the left over and glue it to the ‘ marshmellwo can ’ . Step 10 Glue the spout to the marshmelow on the oposite side of the handle . Use a toothpick to hold it until the glue dried out . Step 11 Glue the top handle of the ‘ can ’, use a small rolled paper towel to hold the bent fondant until it is completely dry .
Page 15 text
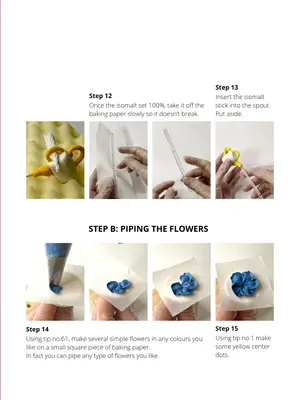
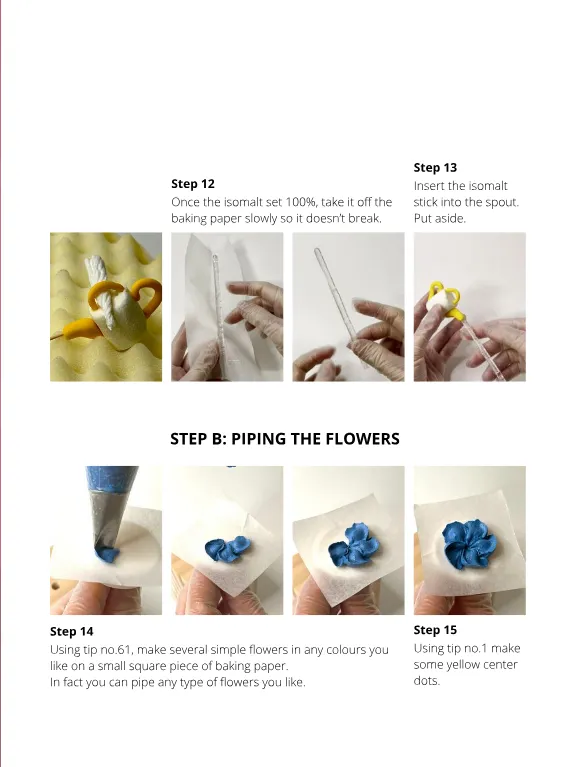
Step 12 Once the isomalt set 100 %, take it off the baking paper slowly so it doesn ’ t break . Step 13 Insert the isomalt stick into the spout . Put aside . STEP B : PIPING THE FLOWERS Step 14 Using tip no . 61 , make several simple flowers in any colours you like on a small square piece of baking paper . In fact you can pipe any type of flowers you like . Step 15 Using tip no . 1 make some yellow center dots .
Page 16 text
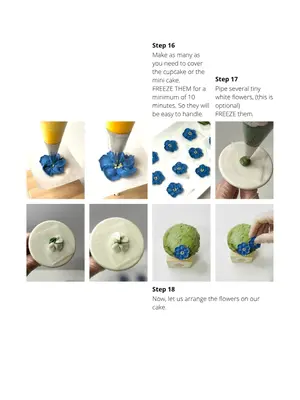
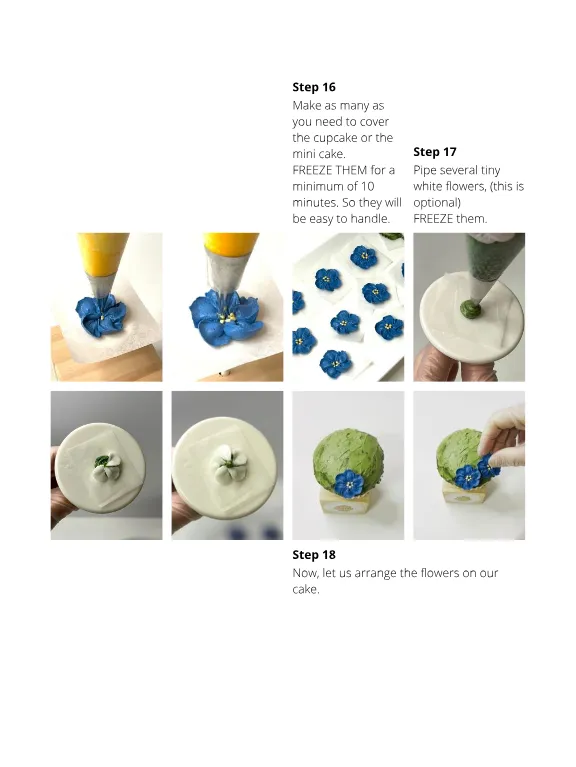
Step 16 Make as many as you need to cover the cupcake or the mini cake . FREEZE THEM for a minimum of 10 minutes . So they will be easy to handle . Step 17 Pipe several tiny white flowers , ( this is optional ) FREEZE them . Step 18 Now , let us arrange the flowers on our cake .
Page 17 text
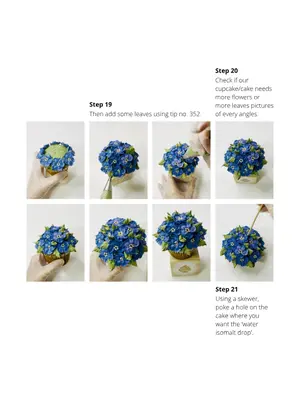
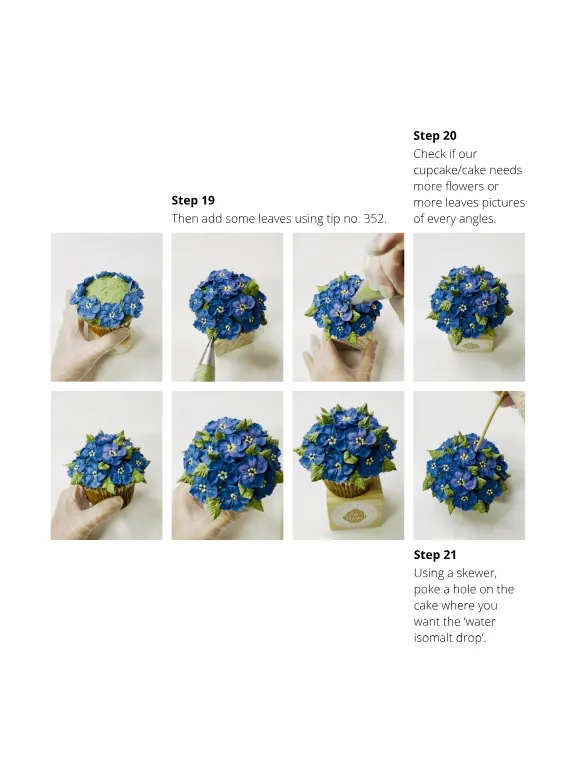
Step 19 Then add some leaves using tip no . 352 . Step 20 Check if our cupcake / cake needs more flowers or more leaves pictures of every angles . Step 21 Using a skewer , poke a hole on the cake where you want the ‘ water isomalt drop ’.
Page 18 text
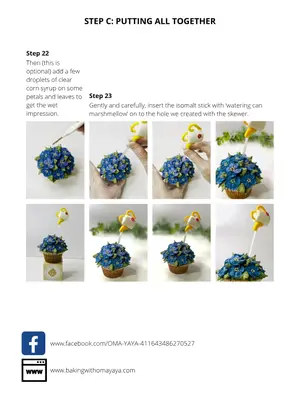
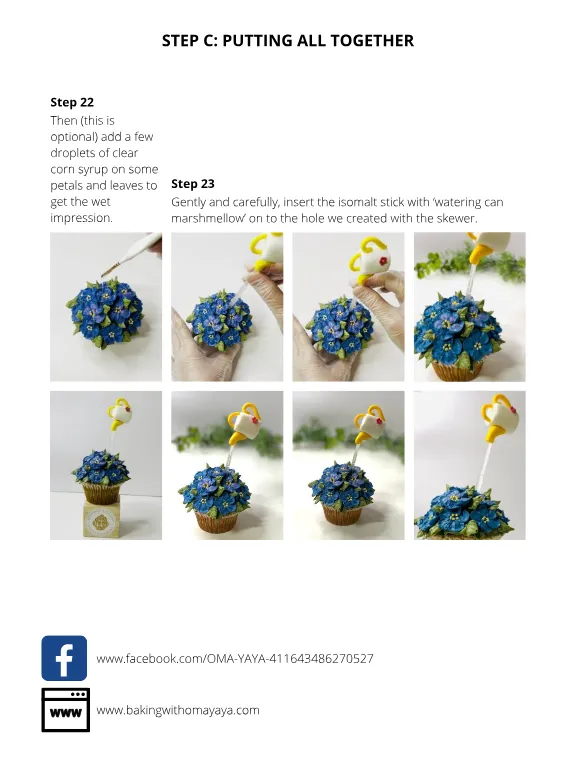
STEP C : PUTTING ALL TOGETHER Step 22 Then ( this is optional ) add a few droplets of clear corn syrup on some petals and leaves to get the wet impression . Step 23 Gently and carefully , insert the isomalt stick with ‘ watering can marshmellow ’ on to the hole we created with the skewer . www . facebook . com / OMA-YAYA-411643486270527 www . bakingwithomayaya . com


Page 19 text
Now live ! Cake ! TV PREMIUM TUTORIALS FROM DECORATORS AROUND THE WORLD caketv . online
Page 22 text
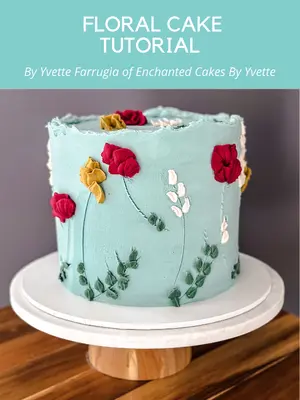
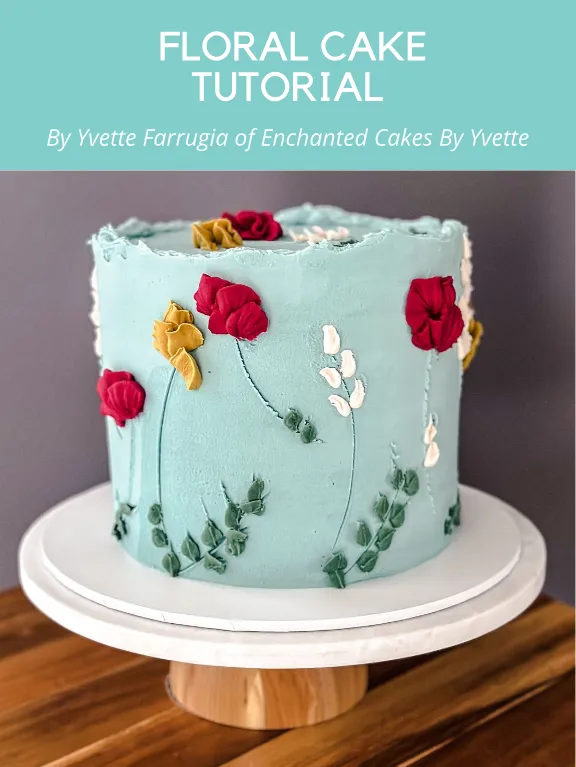
FLORAL CAKE TUTORIAL By Yvette Farrugia of Enchanted Cakes By Yvette
Page 23 text
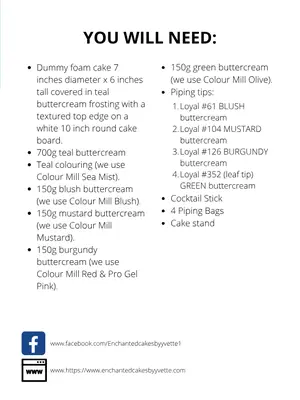
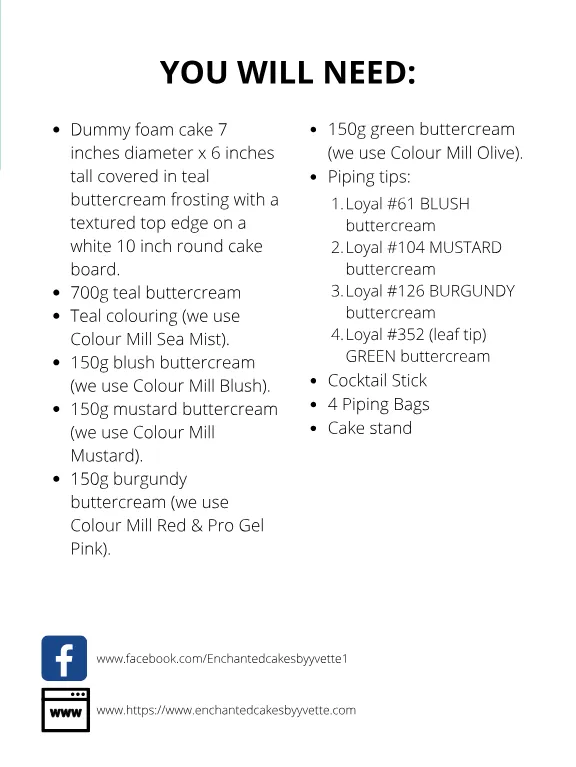
Dummy foam cake 7 inches diameter x 6 inches tall covered in teal buttercream frosting with a textured top edge on a white 10 inch round cake board . 700g teal buttercream Teal colouring ( we use Colour Mill Sea Mist ). 150g blush buttercream ( we use Colour Mill Blush ). 150g mustard buttercream ( we use Colour Mill Mustard ). 150g burgundy buttercream ( we use Colour Mill Red & Pro Gel Pink ). 150g green buttercream ( we use Colour Mill Olive ). Piping tips : 1 . Loyal # 61 BLUSH buttercream 2 . Loyal # 104 MUSTARD buttercream 3 . Loyal # 126 BURGUNDY buttercream 4 . Loyal # 352 ( leaf tip ) GREEN buttercream Cocktail Stick 4 Piping Bags Cake stand YOU WILL NEED : Dummy foam cake 7 inches diameter x 6 inches tall covered in teal buttercream frosting with a textured top edge on a white 10 inch round cake board . 700g teal buttercream Teal colouring ( we use Colour Mill Sea Mist ). 150g blush buttercream ( we use Colour Mill Blush ). 150g mustard buttercream ( we use Colour Mill Mustard ). 150g burgundy buttercream ( we use Colour Mill Red & Pro Gel Pink ). 150g green buttercream ( we use Colour Mill Olive ). Piping tips : 1 . Loyal # 61 BLUSH buttercream 2 . Loyal # 104 MUSTARD buttercream 3 . Loyal # 126 BURGUNDY buttercream 4 . Loyal # 352 ( leaf tip ) GREEN buttercream Cocktail Stick 4 Piping Bags Cake stand www . facebook . com / Enchantedcakesbyyvette1 www . https :// www . enchantedcakesbyyvette . com
Page 24 text
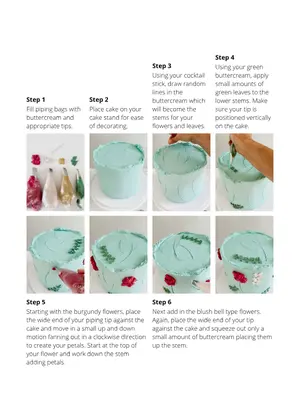
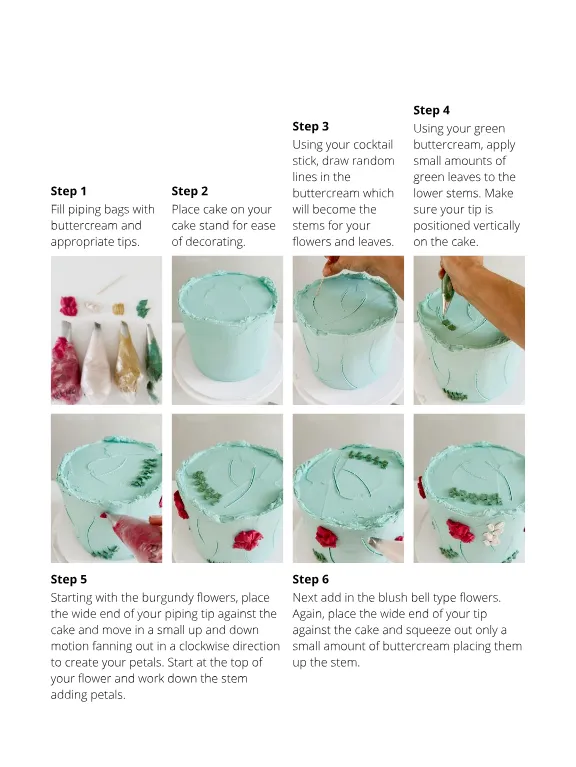
Step 1 Fill piping bags with buttercream and appropriate tips . Step 2 Place cake on your cake stand for ease of decorating . Step 3 Using your cocktail stick , draw random lines in the buttercream which will become the stems for your flowers and leaves . Step 4 Using your green buttercream , apply small amounts of green leaves to the lower stems . Make sure your tip is positioned vertically on the cake . Step 5 Step 6 Starting with the burgundy flowers , place the wide end of your piping tip against the cake and move in a small up and down motion fanning out in a clockwise direction to create your petals . Start at the top of your flower and work down the stem adding petals . Next add in the blush bell type flowers . Again , place the wide end of your tip against the cake and squeeze out only a small amount of buttercream placing them up the stem .
Page 25 text
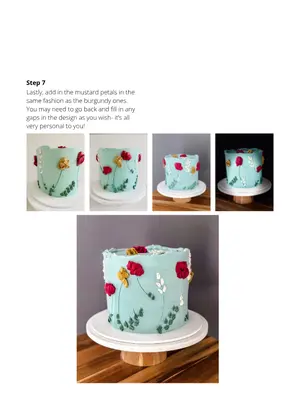
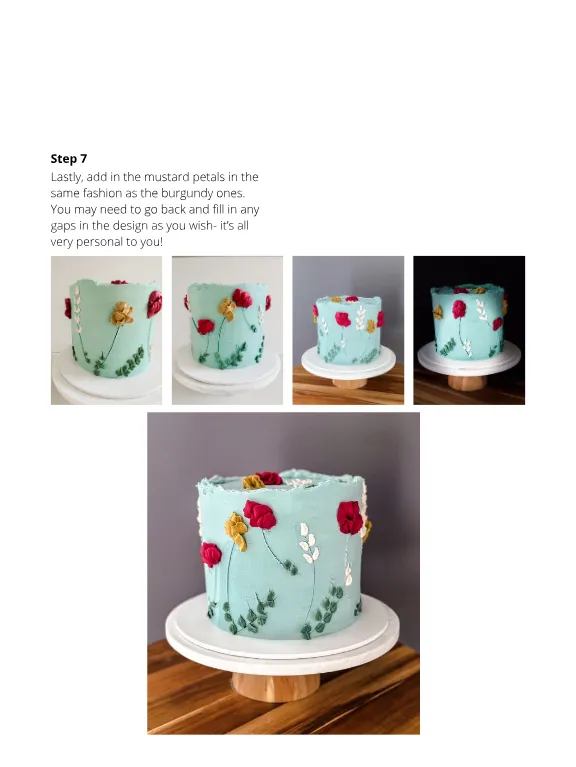
Step 7 Lastly , add in the mustard petals in the same fashion as the burgundy ones . You may need to go back and fill in any gaps in the design as you wish- it ’ s all very personal to you !

Page 28 text
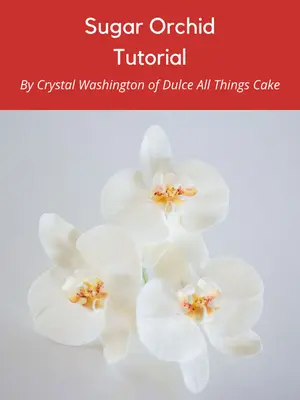
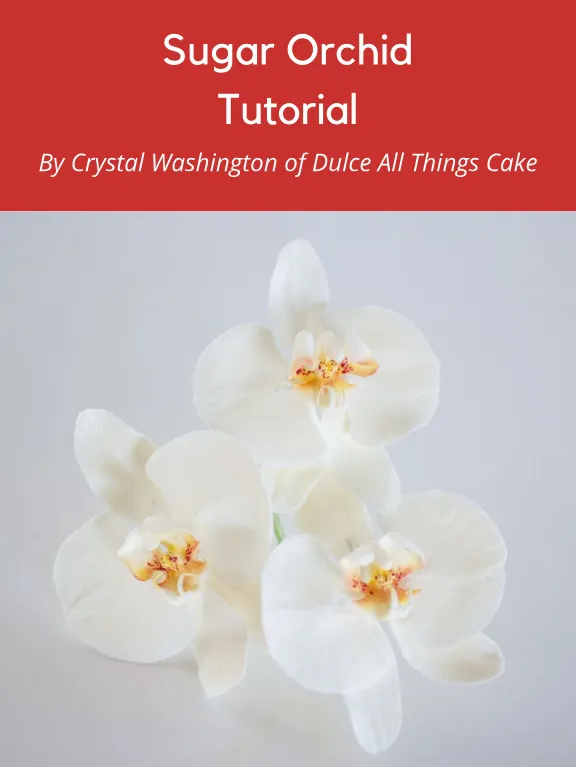
Sugar Orchid Tutorial By Crystal Washington of Dulce All Things Cake
Page 29 text
White gumpaste Cornflour ( for dusting ) Grooved flower board Small rolling pin 22 ” gauge floral wire Pliers Ball tool – various sizes Phalaenopsis Orchid ( Moth Orchid ) Cutter and Veiner Set ( 1 x small sepal cutter and veiner , 1 x large sepal cutter and veiner , 1 x petal cutter and veiner , 1 x orchid centre cutter and veiner ) Moreish Cakes ‘ More Pointy - Precision Tool ’ or toothpick White floral tape Scissors Edible sugar glue Plastic paint palette Paint brush Creative petal dust – Colours : Candy Cane , Big Bird , Pickled & Snow White Creative paste – Colour : Rose Pink Royal icing YOU WILL NEED : White gumpaste Cornflour ( for dusting ) Grooved flower board Small rolling pin 22 ” gauge floral wire Pliers Ball tool – various sizes Phalaenopsis Orchid ( Moth Orchid ) Cutter and Veiner Set ( 1 x small sepal cutter and veiner , 1 x large sepal cutter and veiner , 1 x petal cutter and veiner , 1 x orchid centre cutter and veiner ) Moreish Cakes ‘ More Pointy - Precision Tool ’ or toothpick White floral tape Scissors Edible sugar glue Plastic paint palette Paint brush Creative petal dust – Colours : Candy Cane , Big Bird , Pickled & Snow White Creative paste – Colour : Rose Pink Royal icing Note : Creating sugar orchids is a two-day process as the gumpaste pieces will need time to dry overnight before assembly .
Page 31 text
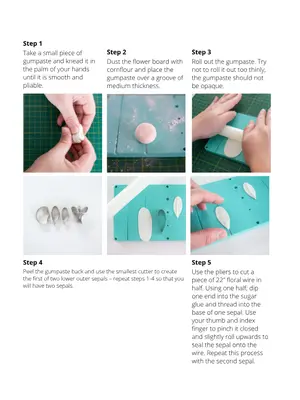
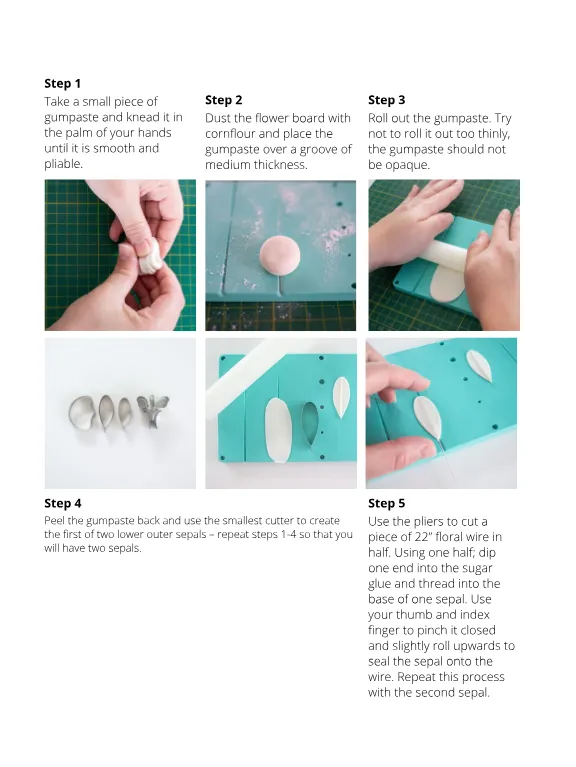
Step 1 Take a small piece of gumpaste and knead it in the palm of your hands until it is smooth and pliable . Step 2 Step 3 Dust the flower board with cornflour and place the gumpaste over a groove of medium thickness . Roll out the gumpaste . Try not to roll it out too thinly , the gumpaste should not be opaque . Step 4 Peel the gumpaste back and use the smallest cutter to create the first of two lower outer sepals – repeat steps 1-4 so that you will have two sepals . Step 5 Use the pliers to cut a piece of 22 ” floral wire in half . Using one half ; dip one end into the sugar glue and thread into the base of one sepal . Use your thumb and index finger to pinch it closed and slightly roll upwards to seal the sepal onto the wire . Repeat this process with the second sepal .
Page 32 text
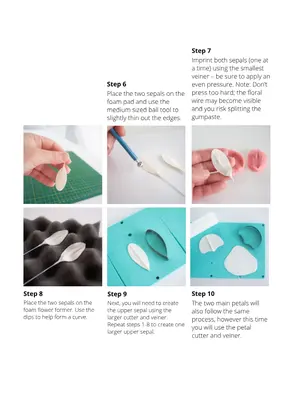
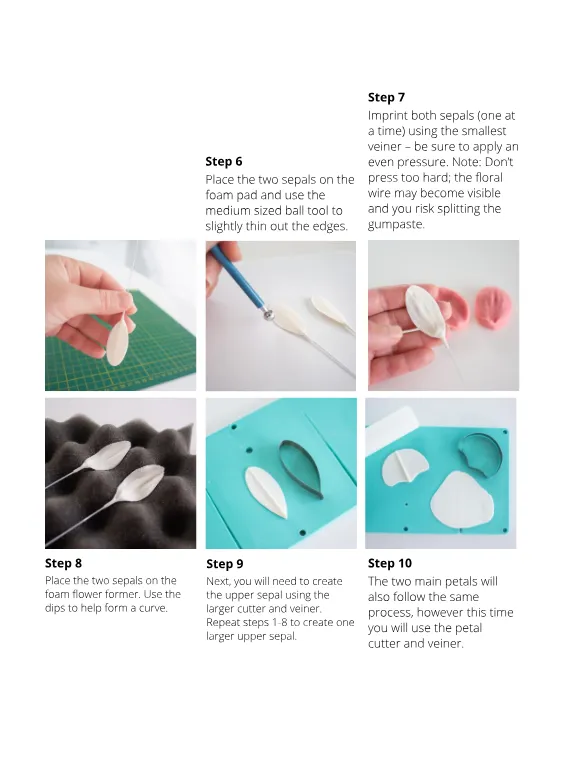
Step 6 Place the two sepals on the foam pad and use the medium sized ball tool to slightly thin out the edges . Step 7 Imprint both sepals ( one at a time ) using the smallest veiner – be sure to apply an even pressure . Note : Don ’ t press too hard ; the floral wire may become visible and you risk splitting the gumpaste . Step 8 Place the two sepals on the foam flower former . Use the dips to help form a curve . Step 9 Next , you will need to create the upper sepal using the larger cutter and veiner . Repeat steps 1-8 to create one larger upper sepal . Step 10 The two main petals will also follow the same process , however this time you will use the petal cutter and veiner .
Page 33 text
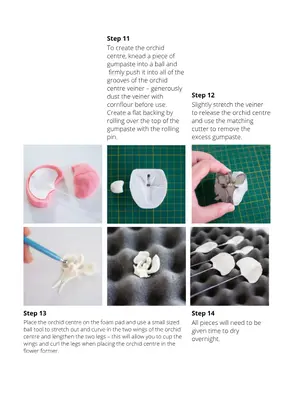
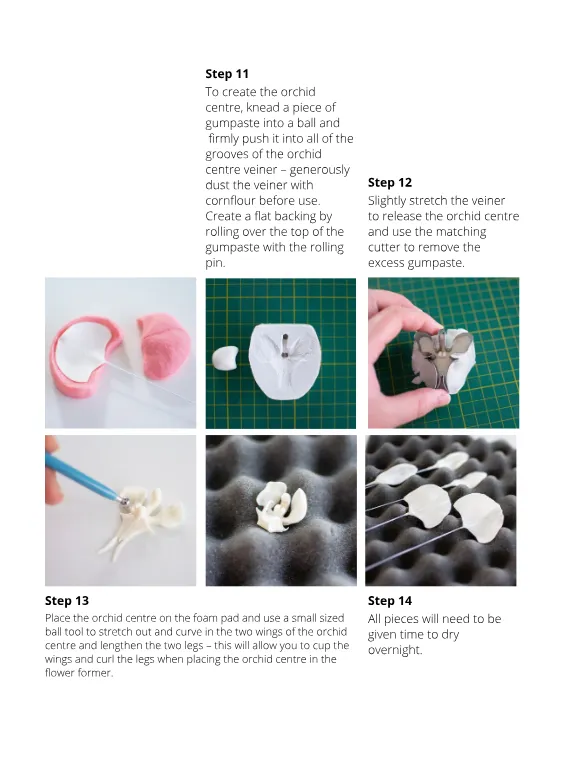
Step 11 To create the orchid centre , knead a piece of gumpaste into a ball and firmly push it into all of the grooves of the orchid centre veiner – generously dust the veiner with cornflour before use . Create a flat backing by rolling over the top of the gumpaste with the rolling pin . Step 12 Slightly stretch the veiner to release the orchid centre and use the matching cutter to remove the excess gumpaste . Step 13 Place the orchid centre on the foam pad and use a small sized ball tool to stretch out and curve in the two wings of the orchid centre and lengthen the two legs – this will allow you to cup the wings and curl the legs when placing the orchid centre in the flower former . Step 14 All pieces will need to be given time to dry overnight .
Page 34 text
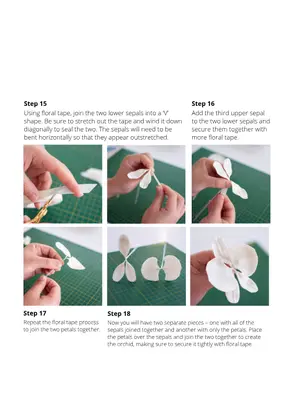
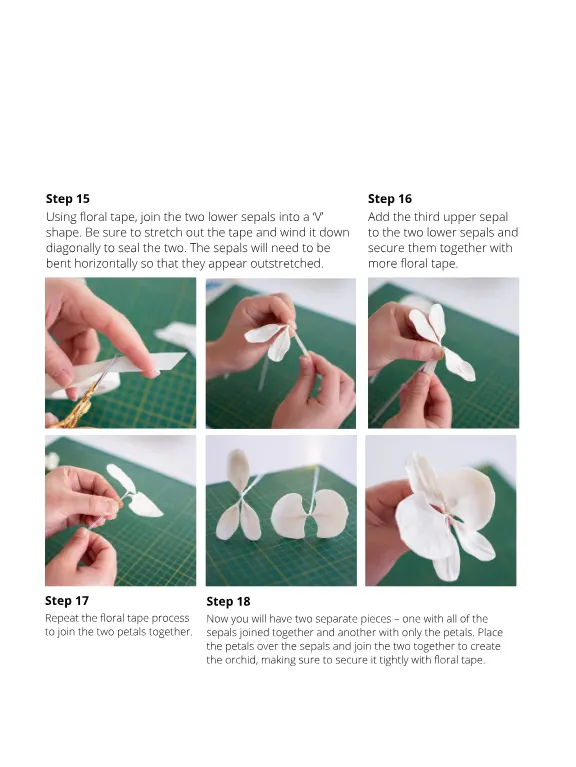
Step 15 Step 16 Using floral tape , join the two lower sepals into a ‘ V ’ shape . Be sure to stretch out the tape and wind it down diagonally to seal the two . The sepals will need to be bent horizontally so that they appear outstretched . Add the third upper sepal to the two lower sepals and secure them together with more floral tape . Step 17 Repeat the floral tape process to join the two petals together . Step 18 Now you will have two separate pieces – one with all of the sepals joined together and another with only the petals . Place the petals over the sepals and join the two together to create the orchid , making sure to secure it tightly with floral tape .
Page 35 text
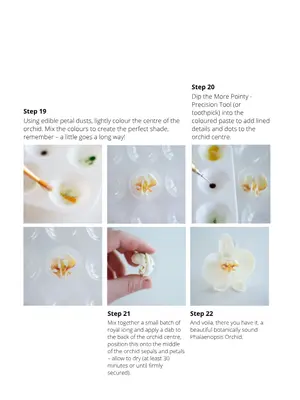
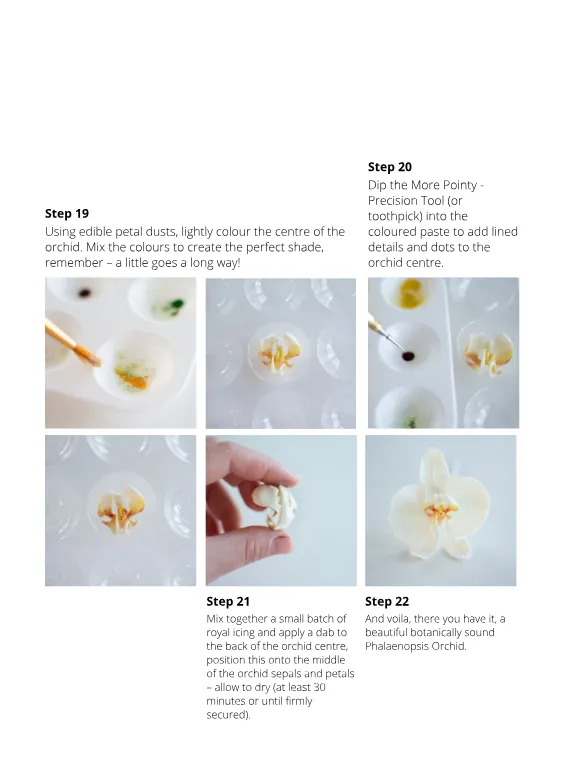
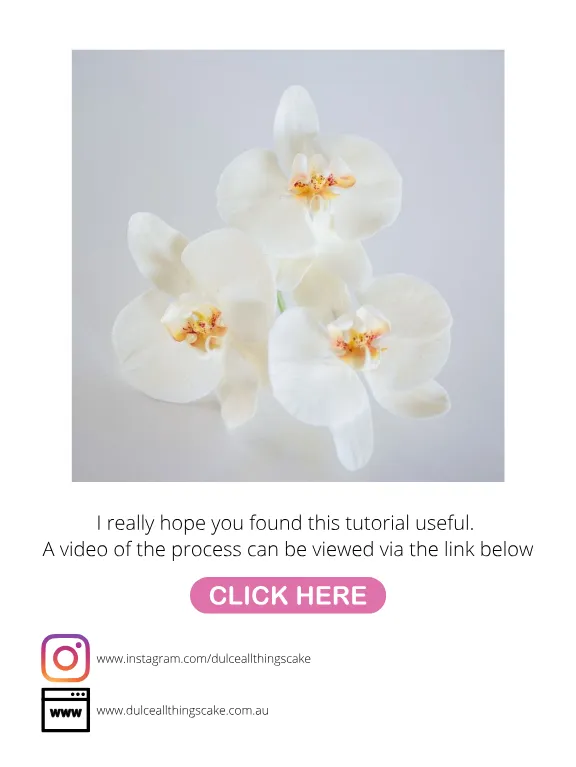
Step 19 Using edible petal dusts , lightly colour the centre of the orchid . Mix the colours to create the perfect shade , remember – a little goes a long way ! Step 20 Dip the More Pointy - Precision Tool ( or toothpick ) into the coloured paste to add lined details and dots to the orchid centre . Step 21 Mix together a small batch of royal icing and apply a dab to the back of the orchid centre , position this onto the middle of the orchid sepals and petals – allow to dry ( at least 30 minutes or until firmly secured ). Step 22 And voila , there you have it , a beautiful botanically sound Phalaenopsis Orchid .
Page 36 text
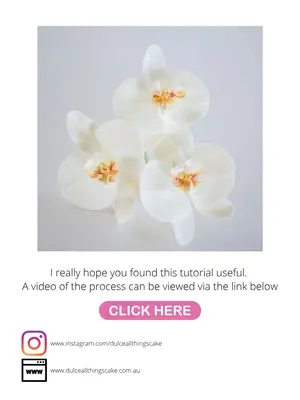
I really hope you found this tutorial useful . A video of the process can be viewed via the link below www . instagram . com / dulceallthingscake www . dulceallthingscake . com . au






Page 41 text
SAVE THE DATE ! SATURDAY 23RD SEPTEMBER 2023 www . acdn . me / awards
Page 43 text
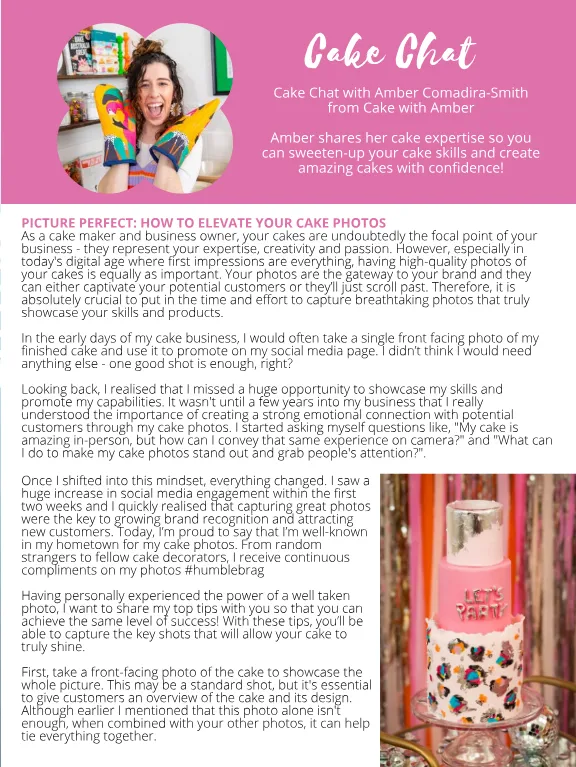
Cake Chat Cake Chat with Amber Comadira-Smith from Cake with Amber Amber shares her cake expertise so you can sweeten-up your cake skills and create amazing cakes with confidence ! PICTURE PERFECT : HOW TO ELEVATE YOUR CAKE PHOTOS As a cake maker and business owner , your cakes are undoubtedly the focal point of your business - they represent your expertise , creativity and passion . However , especially in today ' s digital age where first impressions are everything , having high-quality photos of your cakes is equally as important . Your photos are the gateway to your brand and they can either captivate your potential customers or they ’ ll just scroll past . Therefore , it is absolutely crucial to put in the time and effort to capture breathtaking photos that truly showcase your skills and products . In the early days of my cake business , I would often take a single front facing photo of my finished cake and use it to promote on my social media page . I didn ’ t think I would need anything else - one good shot is enough , right ? Looking back , I realised that I missed a huge opportunity to showcase my skills and promote my capabilities . It wasn ' t until a few years into my business that I really understood the importance of creating a strong emotional connection with potential customers through my cake photos . I started asking myself questions like , " My cake is amazing in-person , but how can I convey that same experience on camera ?" and " What can I do to make my cake photos stand out and grab people ' s attention ?". Once I shifted into this mindset , everything changed . I saw a huge increase in social media engagement within the first two weeks and I quickly realised that capturing great photos were the key to growing brand recognition and attracting new customers . Today , I ’ m proud to say that I ’ m well-known in my hometown for my cake photos . From random strangers to fellow cake decorators , I receive continuous compliments on my photos # humblebrag Having personally experienced the power of a well taken photo , I want to share my top tips with you so that you can achieve the same level of success ! With these tips , you ’ ll be able to capture the key shots that will allow your cake to truly shine . First , take a front-facing photo of the cake to showcase the whole picture . This may be a standard shot , but it ' s essential to give customers an overview of the cake and its design . Although earlier I mentioned that this photo alone isn ' t enough , when combined with your other photos , it can help tie everything together .
Page 44 text
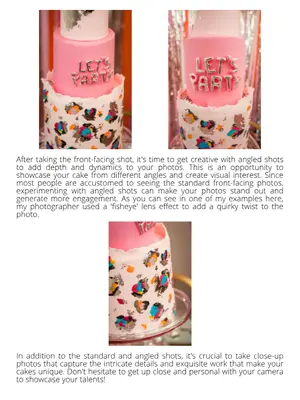
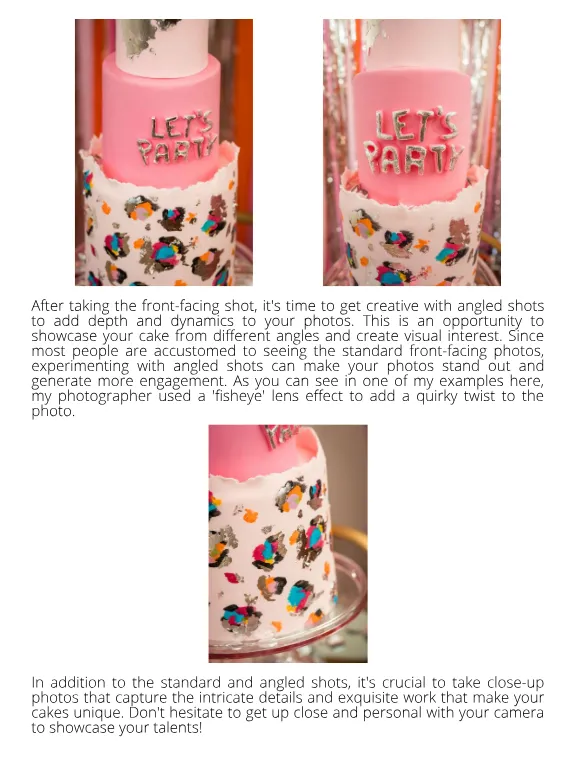
After taking the front-facing shot , it ' s time to get creative with angled shots to add depth and dynamics to your photos . This is an opportunity to showcase your cake from different angles and create visual interest . Since most people are accustomed to seeing the standard front-facing photos , experimenting with angled shots can make your photos stand out and generate more engagement . As you can see in one of my examples here , my photographer used a ' fisheye ' lens effect to add a quirky twist to the photo . In addition to the standard and angled shots , it ' s crucial to take close-up photos that capture the intricate details and exquisite work that make your cakes unique . Don ' t hesitate to get up close and personal with your camera to showcase your talents !
Page 45 text
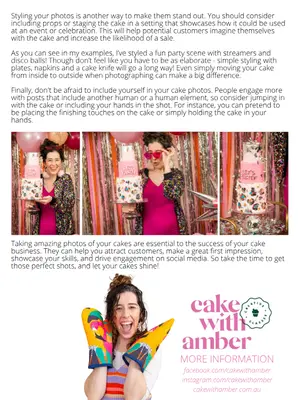
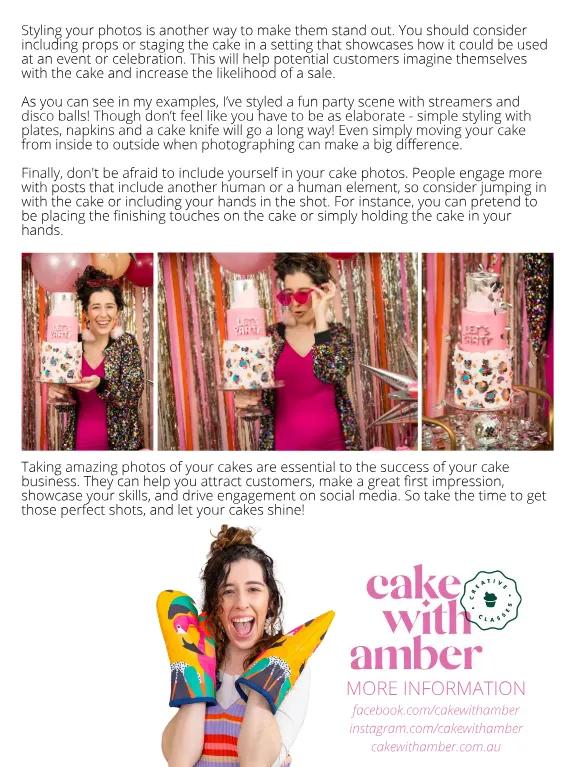
Styling your photos is another way to make them stand out . You should consider including props or staging the cake in a setting that showcases how it could be used at an event or celebration . This will help potential customers imagine themselves with the cake and increase the likelihood of a sale . As you can see in my examples , I ’ ve styled a fun party scene with streamers and disco balls ! Though don ’ t feel like you have to be as elaborate - simple styling with plates , napkins and a cake knife will go a long way ! Even simply moving your cake from inside to outside when photographing can make a big difference . Finally , don ' t be afraid to include yourself in your cake photos . People engage more with posts that include another human or a human element , so consider jumping in with the cake or including your hands in the shot . For instance , you can pretend to be placing the finishing touches on the cake or simply holding the cake in your hands . Taking amazing photos of your cakes are essential to the success of your cake business . They can help you attract customers , make a great first impression , showcase your skills , and drive engagement on social media . So take the time to get those perfect shots , and let your cakes shine ! MORE INFORMATION facebook . com / cakewithamber instagram . com / cakewithamber cakewithamber . com . au


Page 48 text
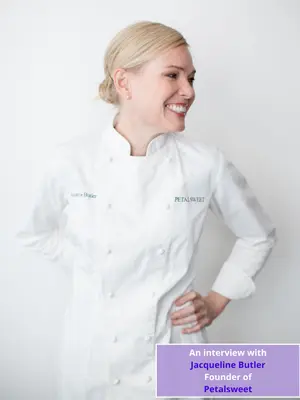
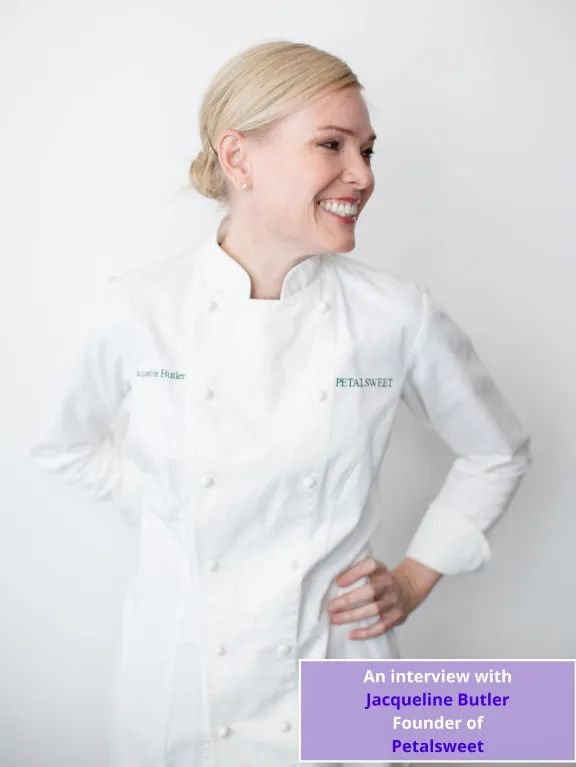
An interview with Jacqueline Butler Founder of Petalsweet
Page 49 text
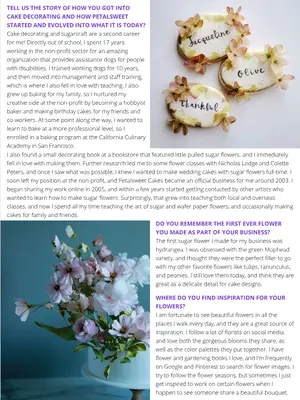
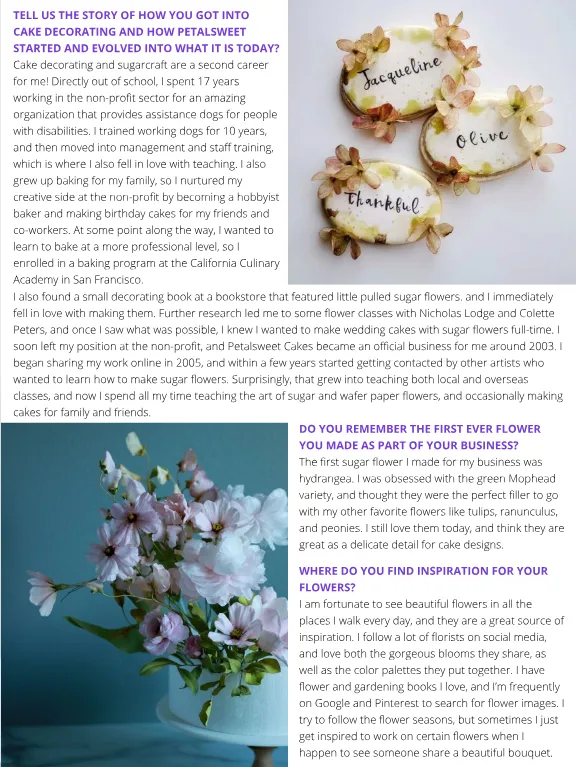
TELL US THE STORY OF HOW YOU GOT INTO CAKE DECORATING AND HOW PETALSWEET STARTED AND EVOLVED INTO WHAT IT IS TODAY ? Cake decorating and sugarcraft are a second career for me ! Directly out of school , I spent 17 years working in the non-profit sector for an amazing organization that provides assistance dogs for people with disabilities . I trained working dogs for 10 years , and then moved into management and staff training , which is where I also fell in love with teaching . I also grew up baking for my family , so I nurtured my creative side at the non-profit by becoming a hobbyist baker and making birthday cakes for my friends and co-workers . At some point along the way , I wanted to learn to bake at a more professional level , so I enrolled in a baking program at the California Culinary Academy in San Francisco . I also found a small decorating book at a bookstore that featured little pulled sugar flowers . and I immediately fell in love with making them . Further research led me to some flower classes with Nicholas Lodge and Colette Peters , and once I saw what was possible , I knew I wanted to make wedding cakes with sugar flowers full-time . I soon left my position at the non-profit , and Petalsweet Cakes became an official business for me around 2003 . I began sharing my work online in 2005 , and within a few years started getting contacted by other artists who wanted to learn how to make sugar flowers . Surprisingly , that grew into teaching both local and overseas classes , and now I spend all my time teaching the art of sugar and wafer paper flowers , and occasionally making cakes for family and friends . DO YOU REMEMBER THE FIRST EVER FLOWER YOU MADE AS PART OF YOUR BUSINESS ? The first sugar flower I made for my business was hydrangea . I was obsessed with the green Mophead variety , and thought they were the perfect filler to go with my other favorite flowers like tulips , ranunculus , and peonies . I still love them today , and think they are great as a delicate detail for cake designs . WHERE DO YOU FIND INSPIRATION FOR YOUR FLOWERS ? I am fortunate to see beautiful flowers in all the places I walk every day , and they are a great source of inspiration . I follow a lot of florists on social media , and love both the gorgeous blooms they share , as well as the color palettes they put together . I have flower and gardening books I love , and I ’ m frequently on Google and Pinterest to search for flower images . I try to follow the flower seasons , but sometimes I just get inspired to work on certain flowers when I happen to see someone share a beautiful bouquet .
Page 50 text
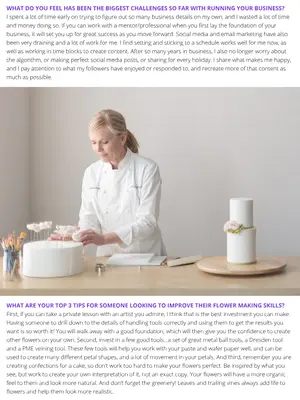
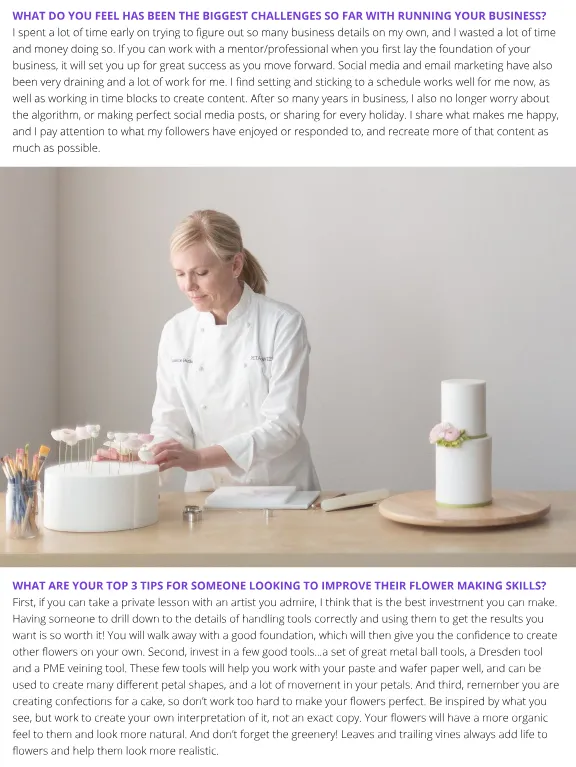
WHAT DO YOU FEEL HAS BEEN THE BIGGEST CHALLENGES SO FAR WITH RUNNING YOUR BUSINESS ? I spent a lot of time early on trying to figure out so many business details on my own , and I wasted a lot of time and money doing so . If you can work with a mentor / professional when you first lay the foundation of your business , it will set you up for great success as you move forward . Social media and email marketing have also been very draining and a lot of work for me . I find setting and sticking to a schedule works well for me now , as well as working in time blocks to create content . After so many years in business , I also no longer worry about the algorithm , or making perfect social media posts , or sharing for every holiday . I share what makes me happy , and I pay attention to what my followers have enjoyed or responded to , and recreate more of that content as much as possible . WHAT ARE YOUR TOP 3 TIPS FOR SOMEONE LOOKING TO IMPROVE THEIR FLOWER MAKING SKILLS ? First , if you can take a private lesson with an artist you admire , I think that is the best investment you can make . Having someone to drill down to the details of handling tools correctly and using them to get the results you want is so worth it ! You will walk away with a good foundation , which will then give you the confidence to create other flowers on your own . Second , invest in a few good tools … a set of great metal ball tools , a Dresden tool and a PME veining tool . These few tools will help you work with your paste and wafer paper well , and can be used to create many different petal shapes , and a lot of movement in your petals . And third , remember you are creating confections for a cake , so don ’ t work too hard to make your flowers perfect . Be inspired by what you see , but work to create your own interpretation of it , not an exact copy . Your flowers will have a more organic feel to them and look more natural . And don ’ t forget the greenery ! Leaves and trailing vines always add life to flowers and help them look more realistic .
Page 51 text
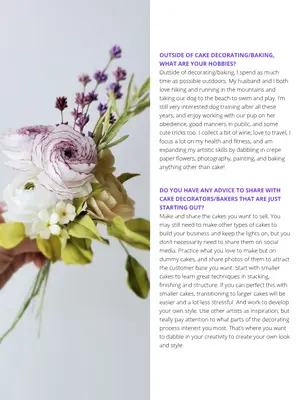
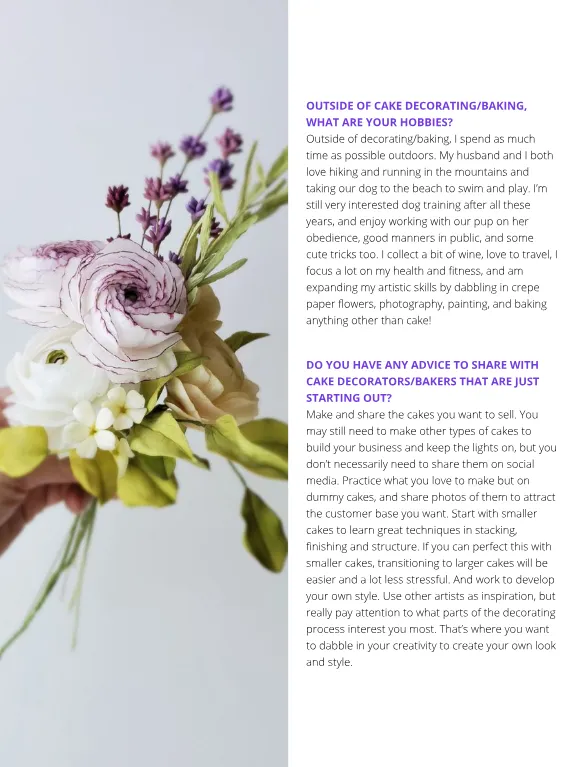
OUTSIDE OF CAKE DECORATING / BAKING , WHAT ARE YOUR HOBBIES ? Outside of decorating / baking , I spend as much time as possible outdoors . My husband and I both love hiking and running in the mountains and taking our dog to the beach to swim and play . I ’ m still very interested dog training after all these years , and enjoy working with our pup on her obedience , good manners in public , and some cute tricks too . I collect a bit of wine , love to travel , I focus a lot on my health and fitness , and am expanding my artistic skills by dabbling in crepe paper flowers , photography , painting , and baking anything other than cake ! DO YOU HAVE ANY ADVICE TO SHARE WITH CAKE DECORATORS / BAKERS THAT ARE JUST STARTING OUT ? Make and share the cakes you want to sell . You may still need to make other types of cakes to build your business and keep the lights on , but you don ’ t necessarily need to share them on social media . Practice what you love to make but on dummy cakes , and share photos of them to attract the customer base you want . Start with smaller cakes to learn great techniques in stacking , finishing and structure . If you can perfect this with smaller cakes , transitioning to larger cakes will be easier and a lot less stressful . And work to develop your own style . Use other artists as inspiration , but really pay attention to what parts of the decorating process interest you most . That ’ s where you want to dabble in your creativity to create your own look and style .
Page 52 text
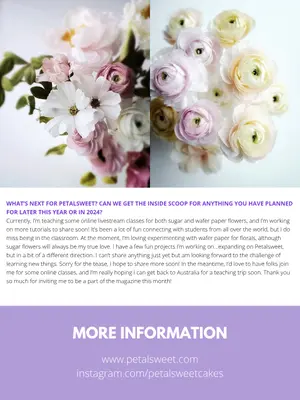
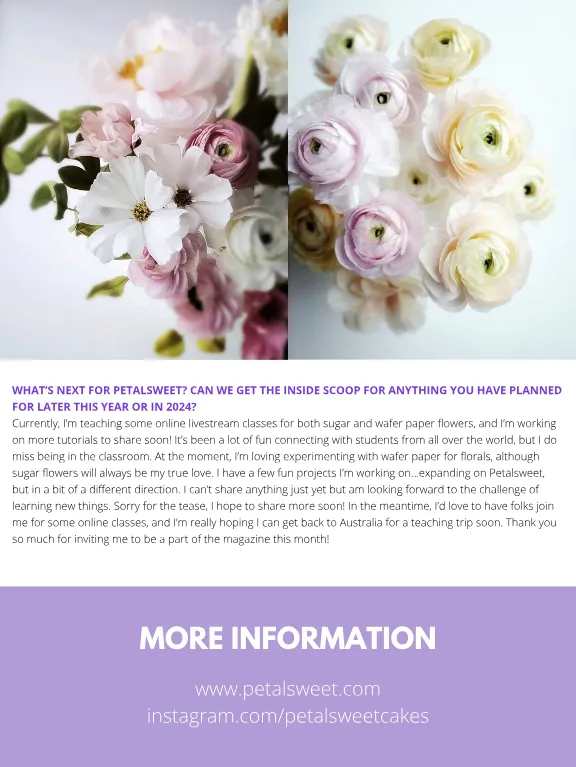
WHAT ’ S NEXT FOR PETALSWEET ? CAN WE GET THE INSIDE SCOOP FOR ANYTHING YOU HAVE PLANNED FOR LATER THIS YEAR OR IN 2024 ? Currently , I ’ m teaching some online livestream classes for both sugar and wafer paper flowers , and I ’ m working on more tutorials to share soon ! It ’ s been a lot of fun connecting with students from all over the world , but I do miss being in the classroom . At the moment , I ’ m loving experimenting with wafer paper for florals , although sugar flowers will always be my true love . I have a few fun projects I ’ m working on … expanding on Petalsweet , but in a bit of a different direction . I can ’ t share anything just yet but am looking forward to the challenge of learning new things . Sorry for the tease , I hope to share more soon ! In the meantime , I ’ d love to have folks join me for some online classes , and I ’ m really hoping I can get back to Australia for a teaching trip soon . Thank you so much for inviting me to be a part of the magazine this month ! MORE INFORMATION www . petalsweet . com instagram . com / petalsweetcakes


Page 54 text
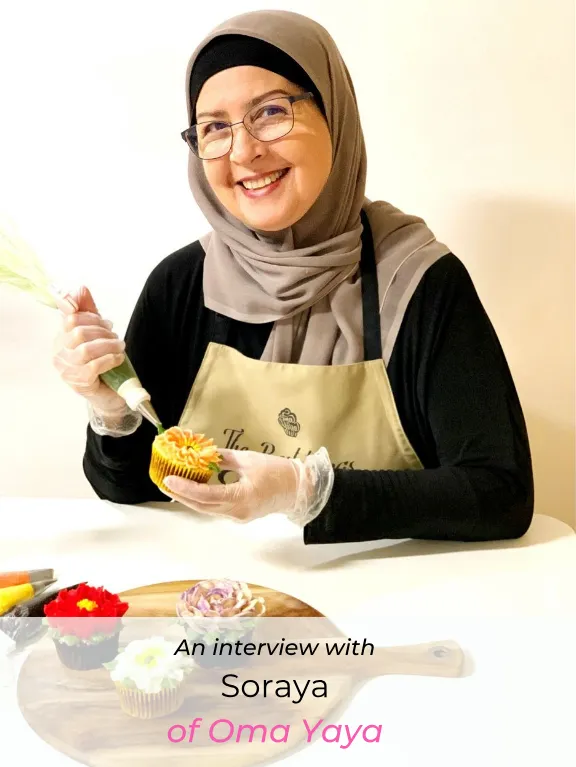
An interview with Soraya of Oma Yaya
Page 55 text
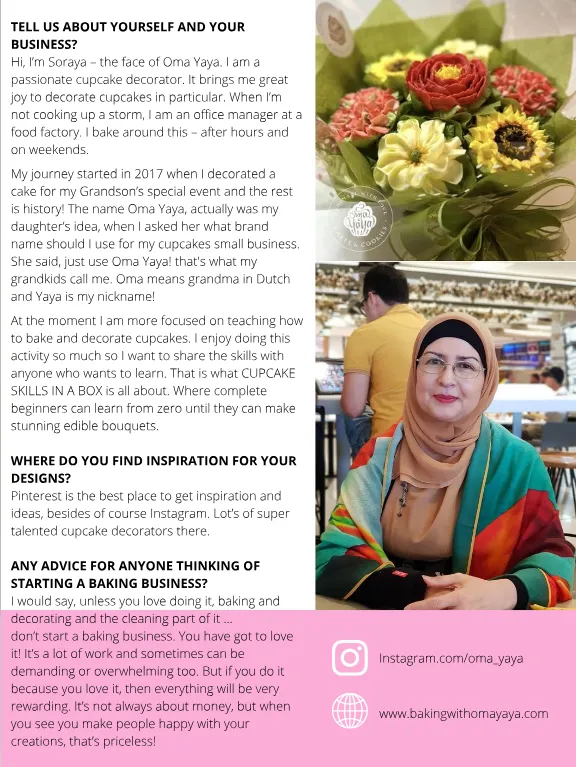
TELL US ABOUT YOURSELF AND YOUR BUSINESS ? Hi , I ’ m Soraya – the face of Oma Yaya . I am a passionate cupcake decorator . It brings me great joy to decorate cupcakes in particular . When I ’ m not cooking up a storm , I am an office manager at a food factory . I bake around this – after hours and on weekends . My journey started in 2017 when I decorated a cake for my Grandson ’ s special event and the rest is history ! The name Oma Yaya , actually was my daughter ’ s idea , when I asked her what brand name should I use for my cupcakes small business . She said , just use Oma Yaya ! that ' s what my grandkids call me . Oma means grandma in Dutch and Yaya is my nickname ! At the moment I am more focused on teaching how to bake and decorate cupcakes . I enjoy doing this activity so much so I want to share the skills with anyone who wants to learn . That is what CUPCAKE SKILLS IN A BOX is all about . Where complete beginners can learn from zero until they can make stunning edible bouquets . WHERE DO YOU FIND INSPIRATION FOR YOUR DESIGNS ? Pinterest is the best place to get inspiration and ideas , besides of course Instagram . Lot ’ s of super talented cupcake decorators there . ANY ADVICE FOR ANYONE THINKING OF STARTING A BAKING BUSINESS ? I would say , unless you love doing it , baking and decorating and the cleaning part of it … don ’ t start a baking business . You have got to love it ! It ’ s a lot of work and sometimes can be demanding or overwhelming too . But if you do it because you love it , then everything will be very rewarding . It ’ s not always about money , but when you see you make people happy with your creations , that ’ s priceless ! Instagram . com / oma _ yaya www . bakingwithomayaya . com






Page 86 text
Now live ! Cake ! TV PREMIUM TUTORIALS FROM DECORATORS AROUND THE WORLD caketv . online