Page 31 of 108
Page 1 text
Cake! MAGAZINE
Page 2 text
letter from the editor Welcome to the first issue of Cake! Magazine for 2025! We have kicked off the year with our Start Your Own Baking Business Live course and
Page 3 text
letter from the editor Welcome to the first issue of Cake! In this issue of Cake! Magazine, we’re celebrating all things Pretty in Pink! You’ll find an array of stunning cake and cookie We have kicked off the year with our Start tutorials, plus a gallery packed with Your Own Baking Business Live course and inspiring creations from our talented
Page 4 text
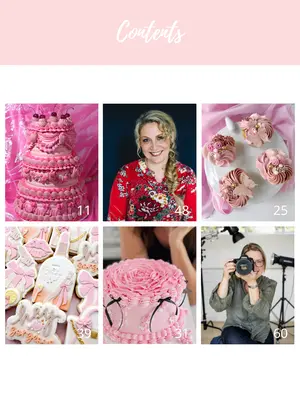
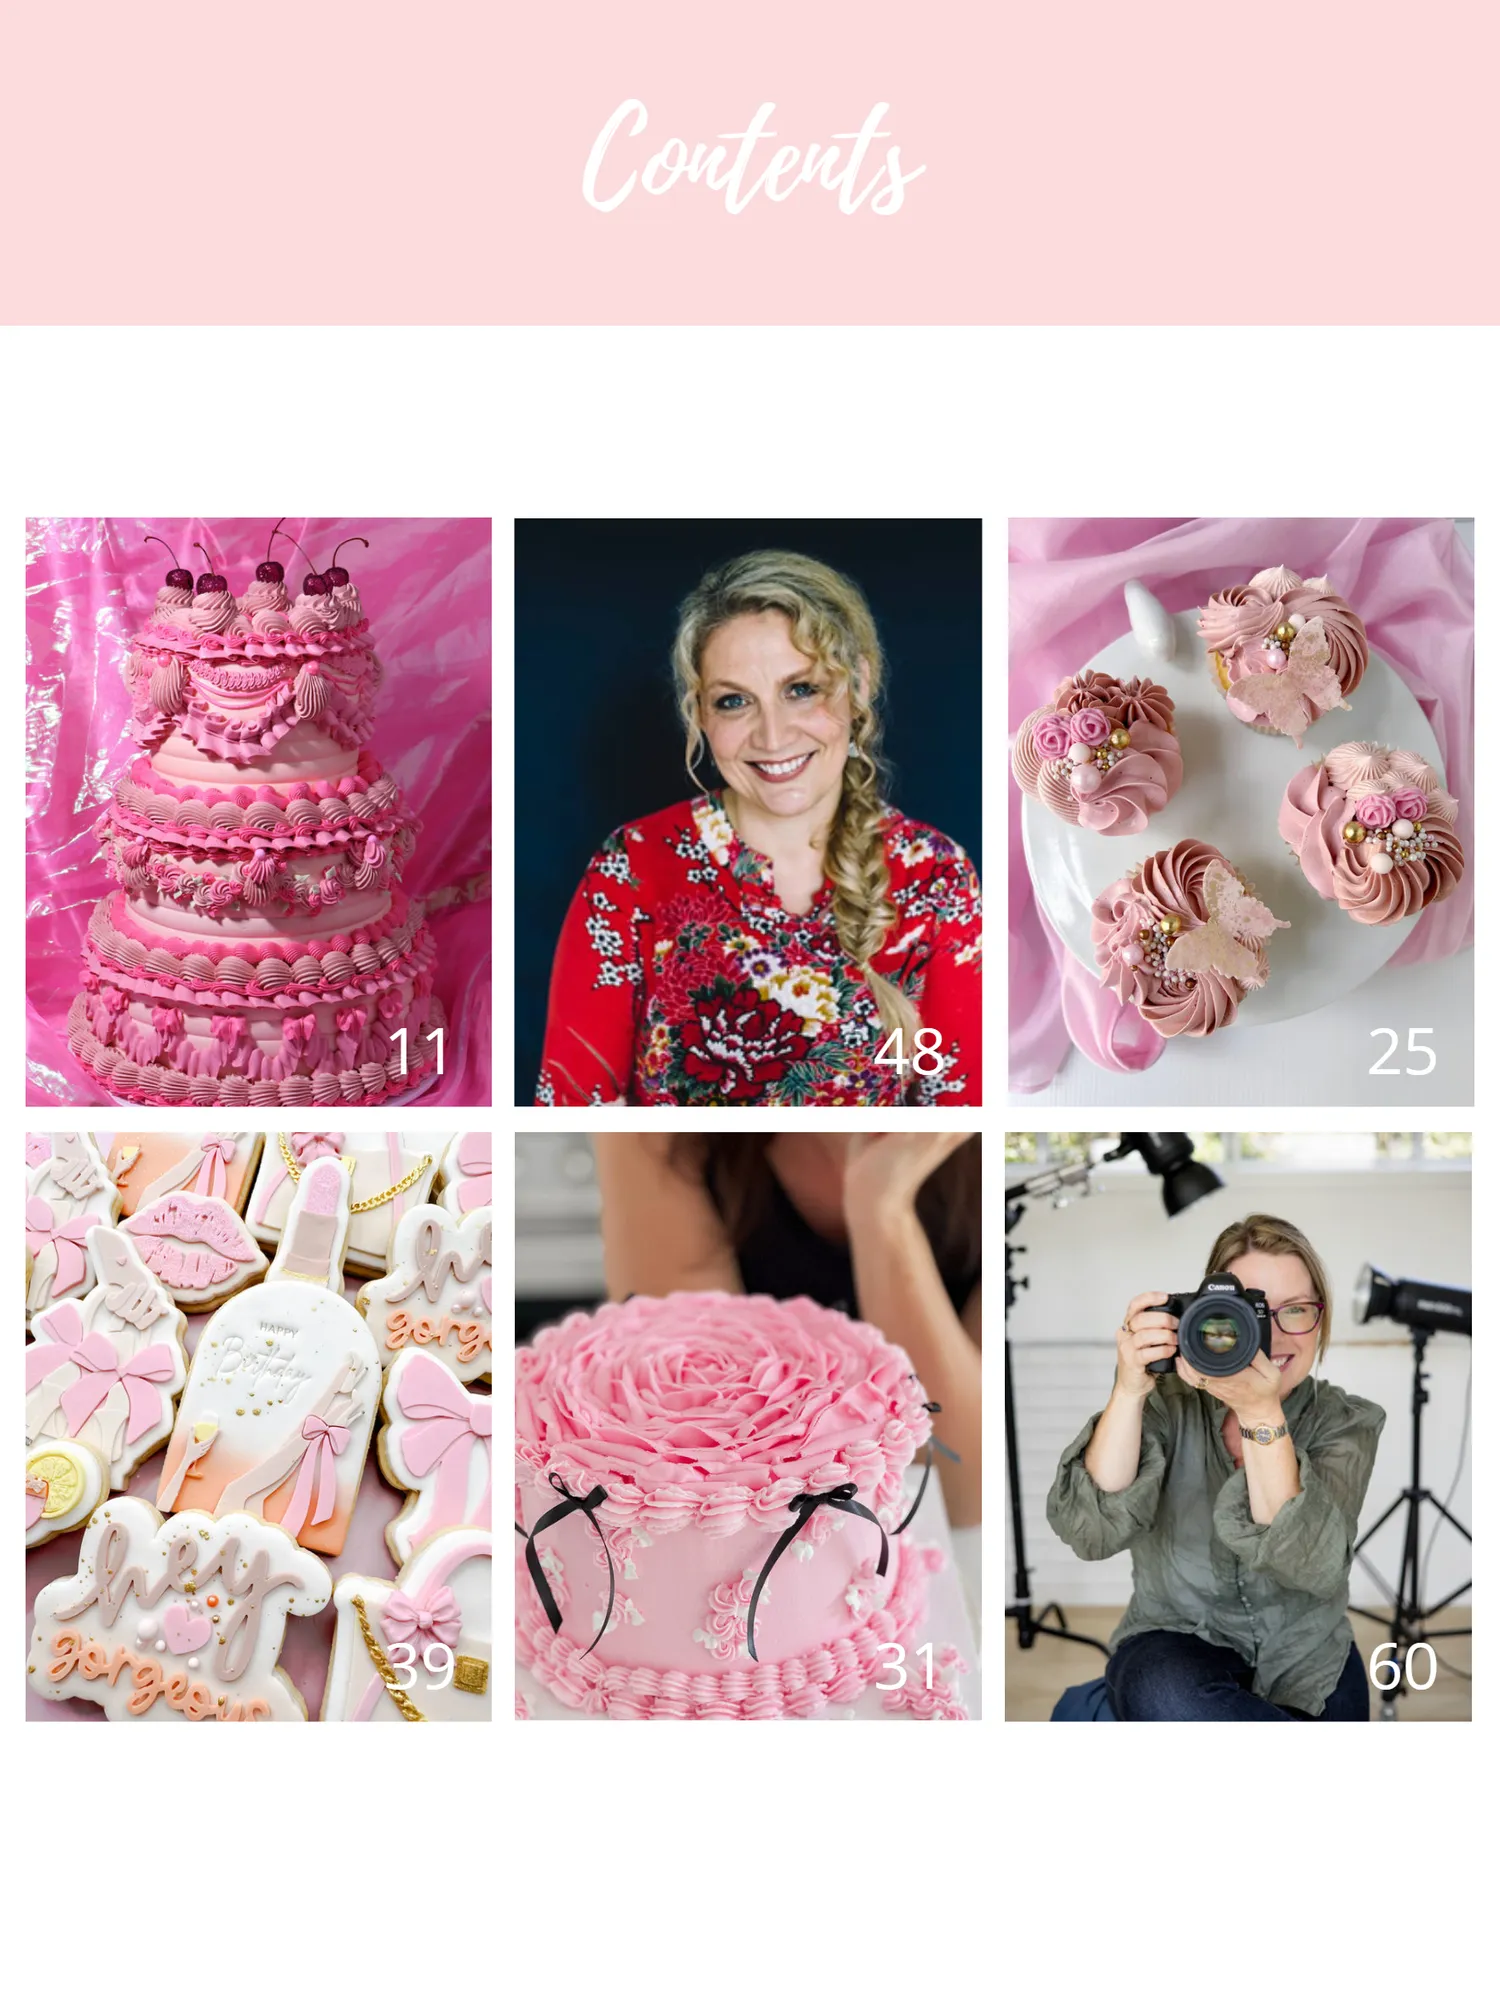
Contents 11 48 25 39 31 60
Page 5 text
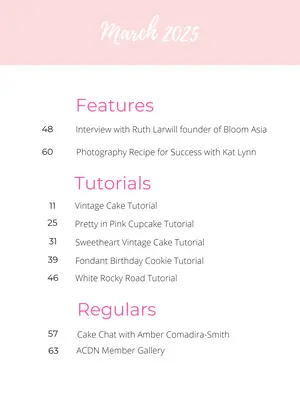
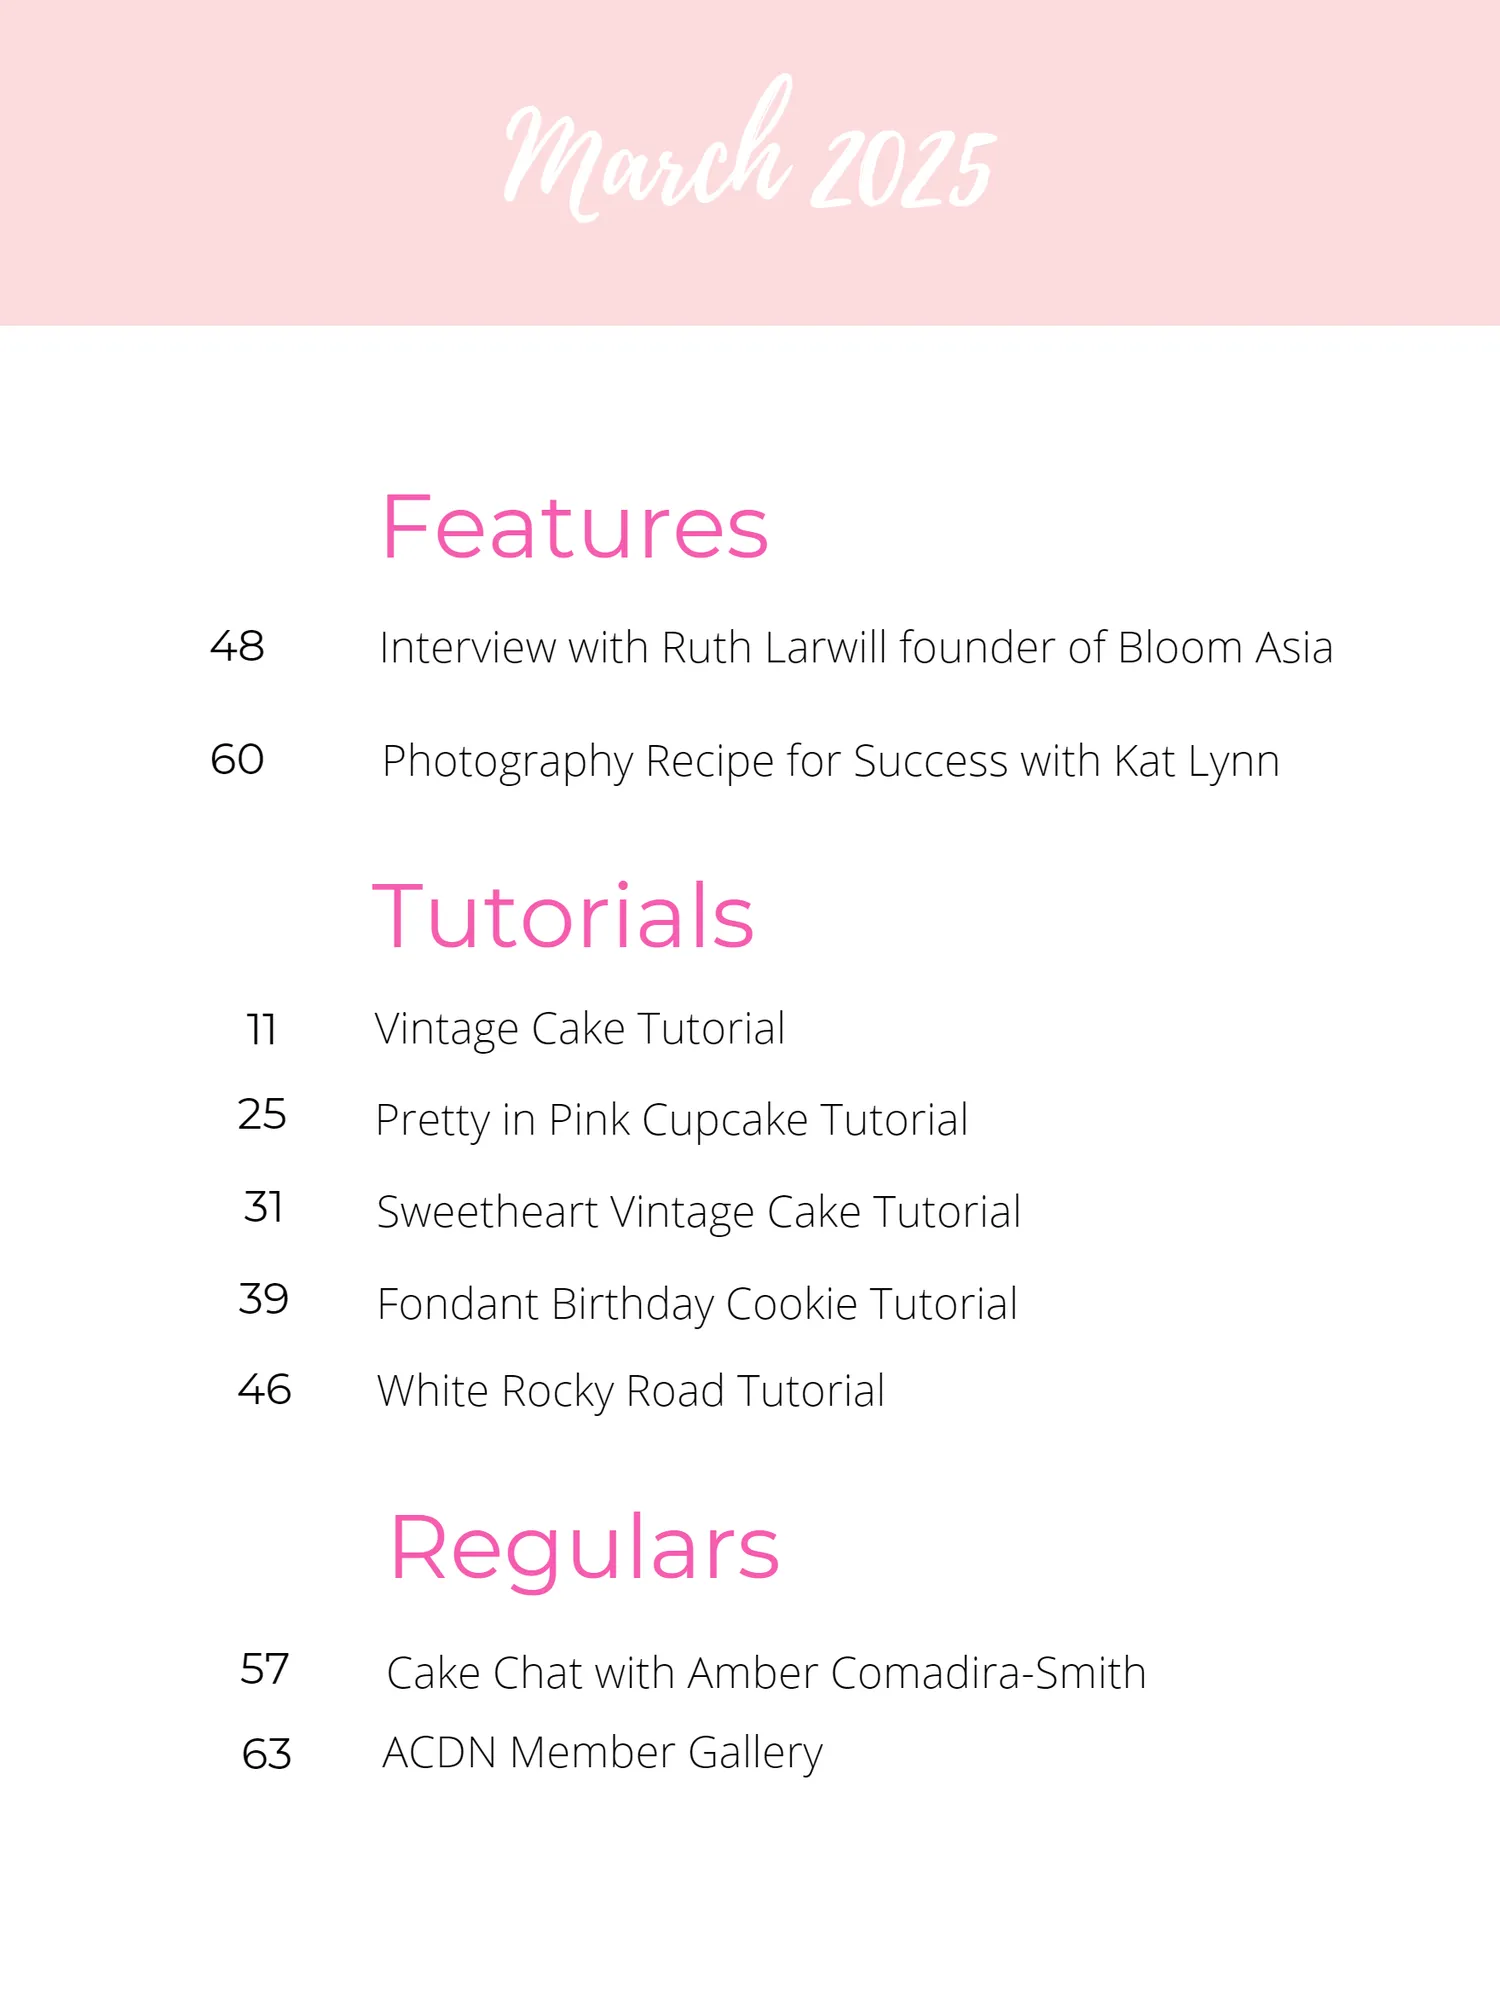
March 2025 Features 48 Interview with Ruth Larwill founder of Bloom Asia 60 Photography Recipe for Success with Kat Lynn Tutorials 11 Vintage Cake Tutorial 25 Pretty in Pink Cupcake Tutorial 31 Sweetheart Vintage Cake Tutorial 39 Fondant Birthday Cookie Tutorial 46 White Rocky Road Tutorial Regulars 57 Cake Chat with Amber Comadira-Smith 63 ACDN Member Gallery





Page 8 text
Pretty in Pink Tutorials


Page 10 text
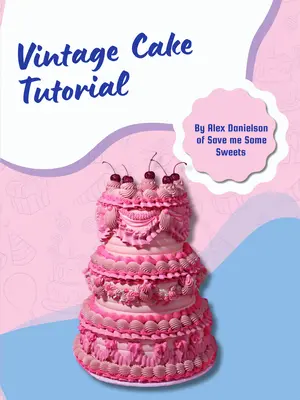
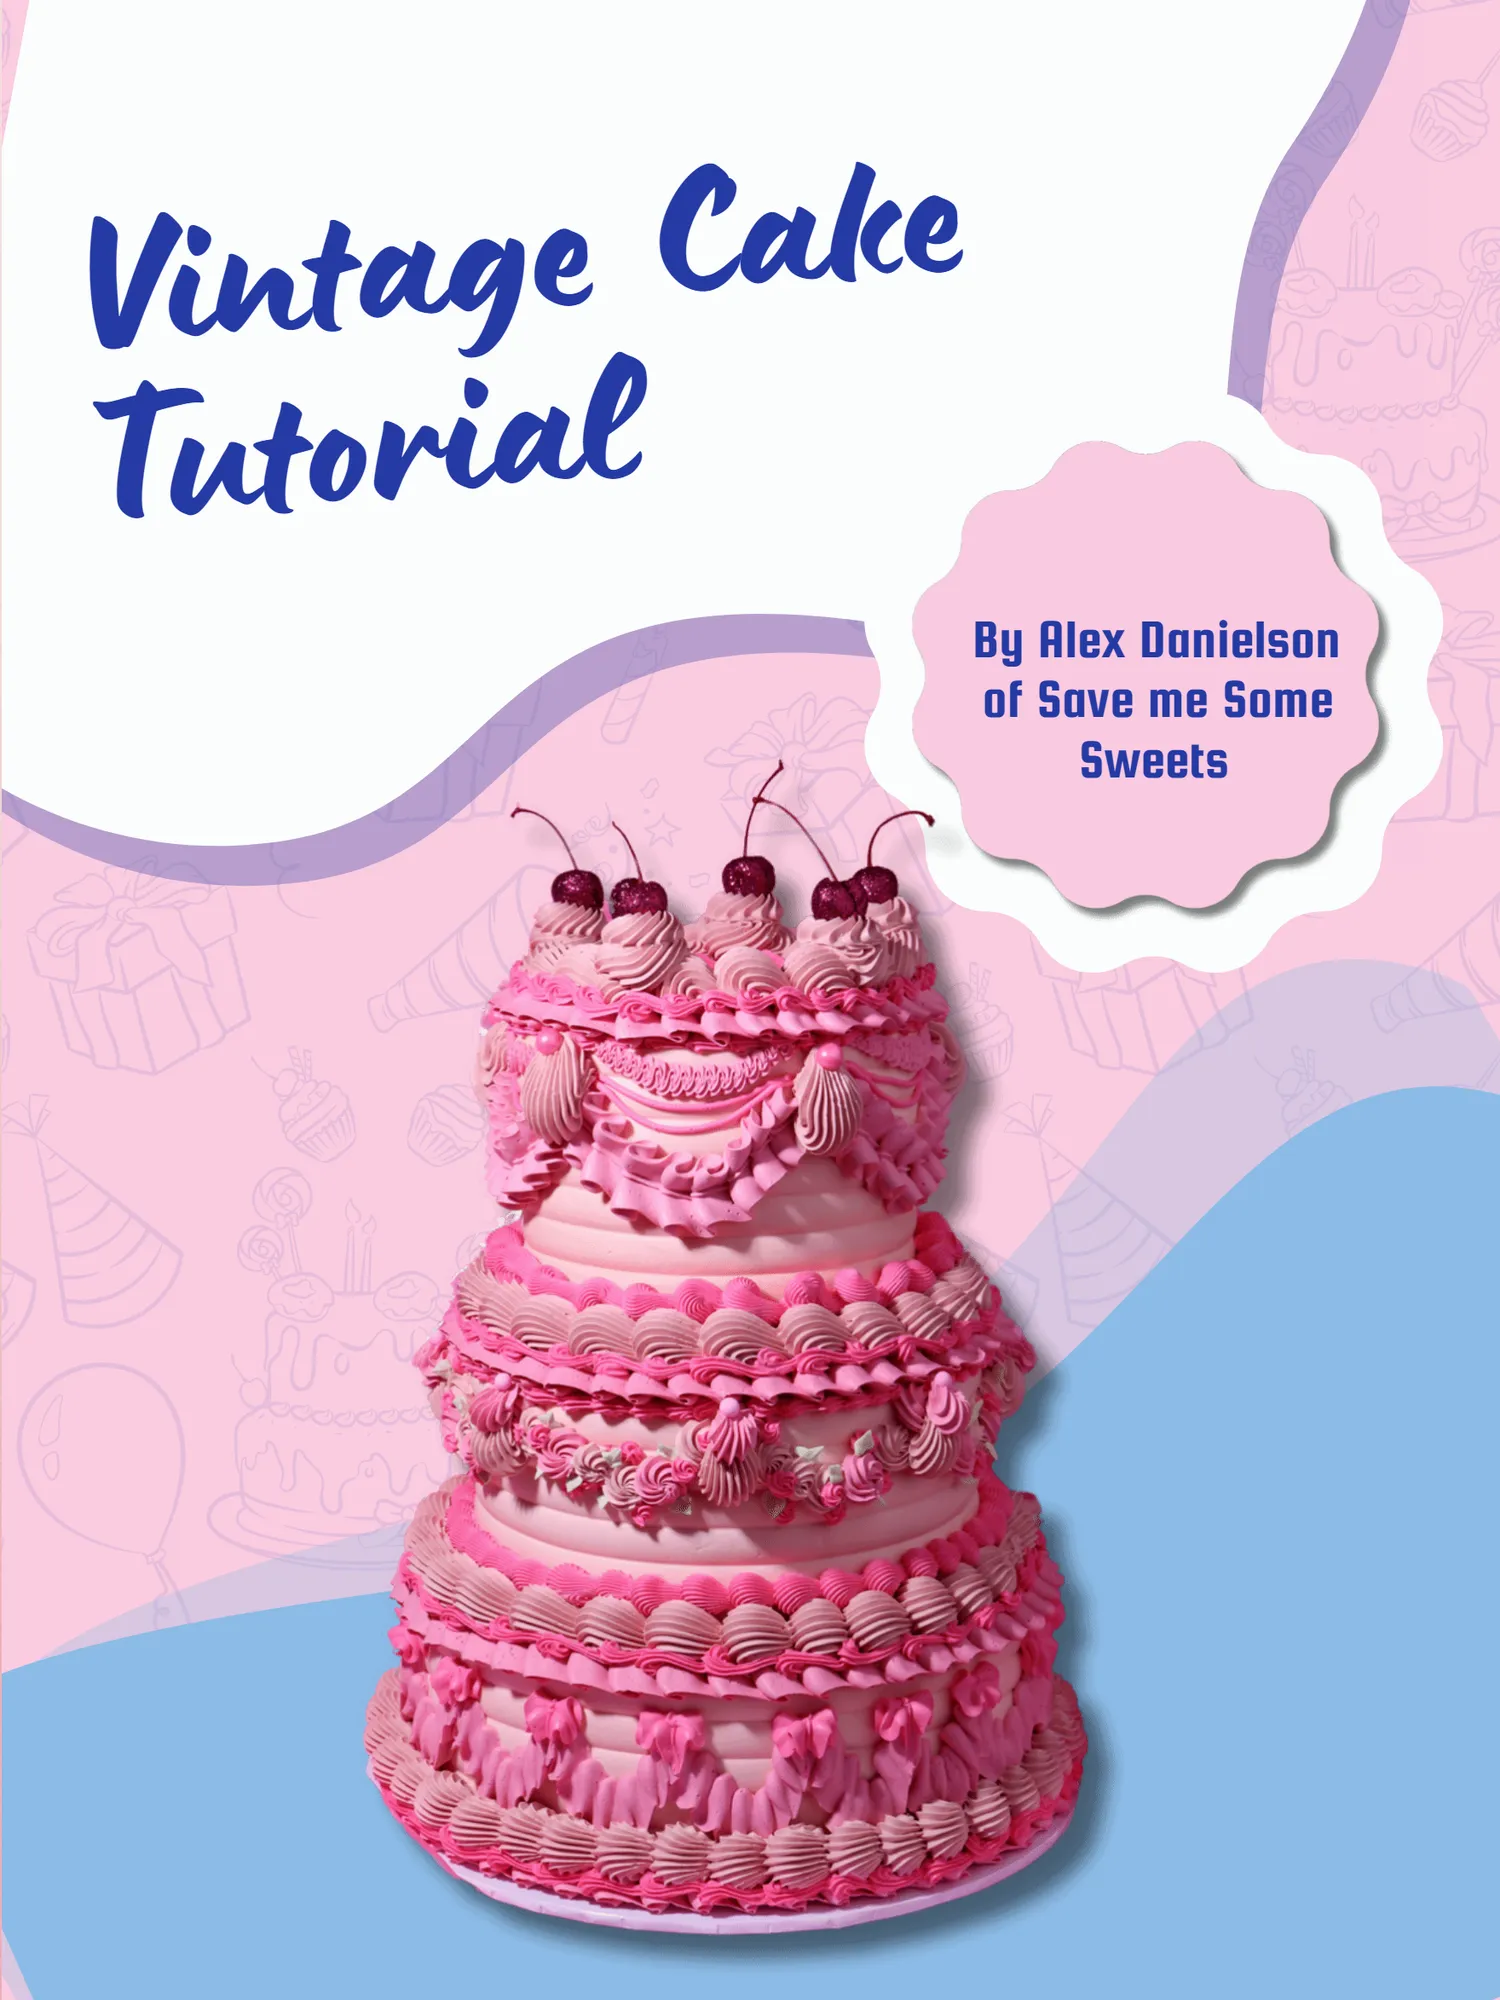
Vintage Cake Tutorial
Page 11 text
Vintage Cake Tutorial
Page 12 text
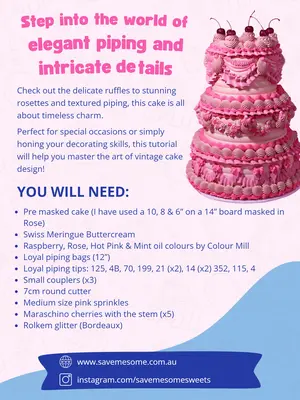
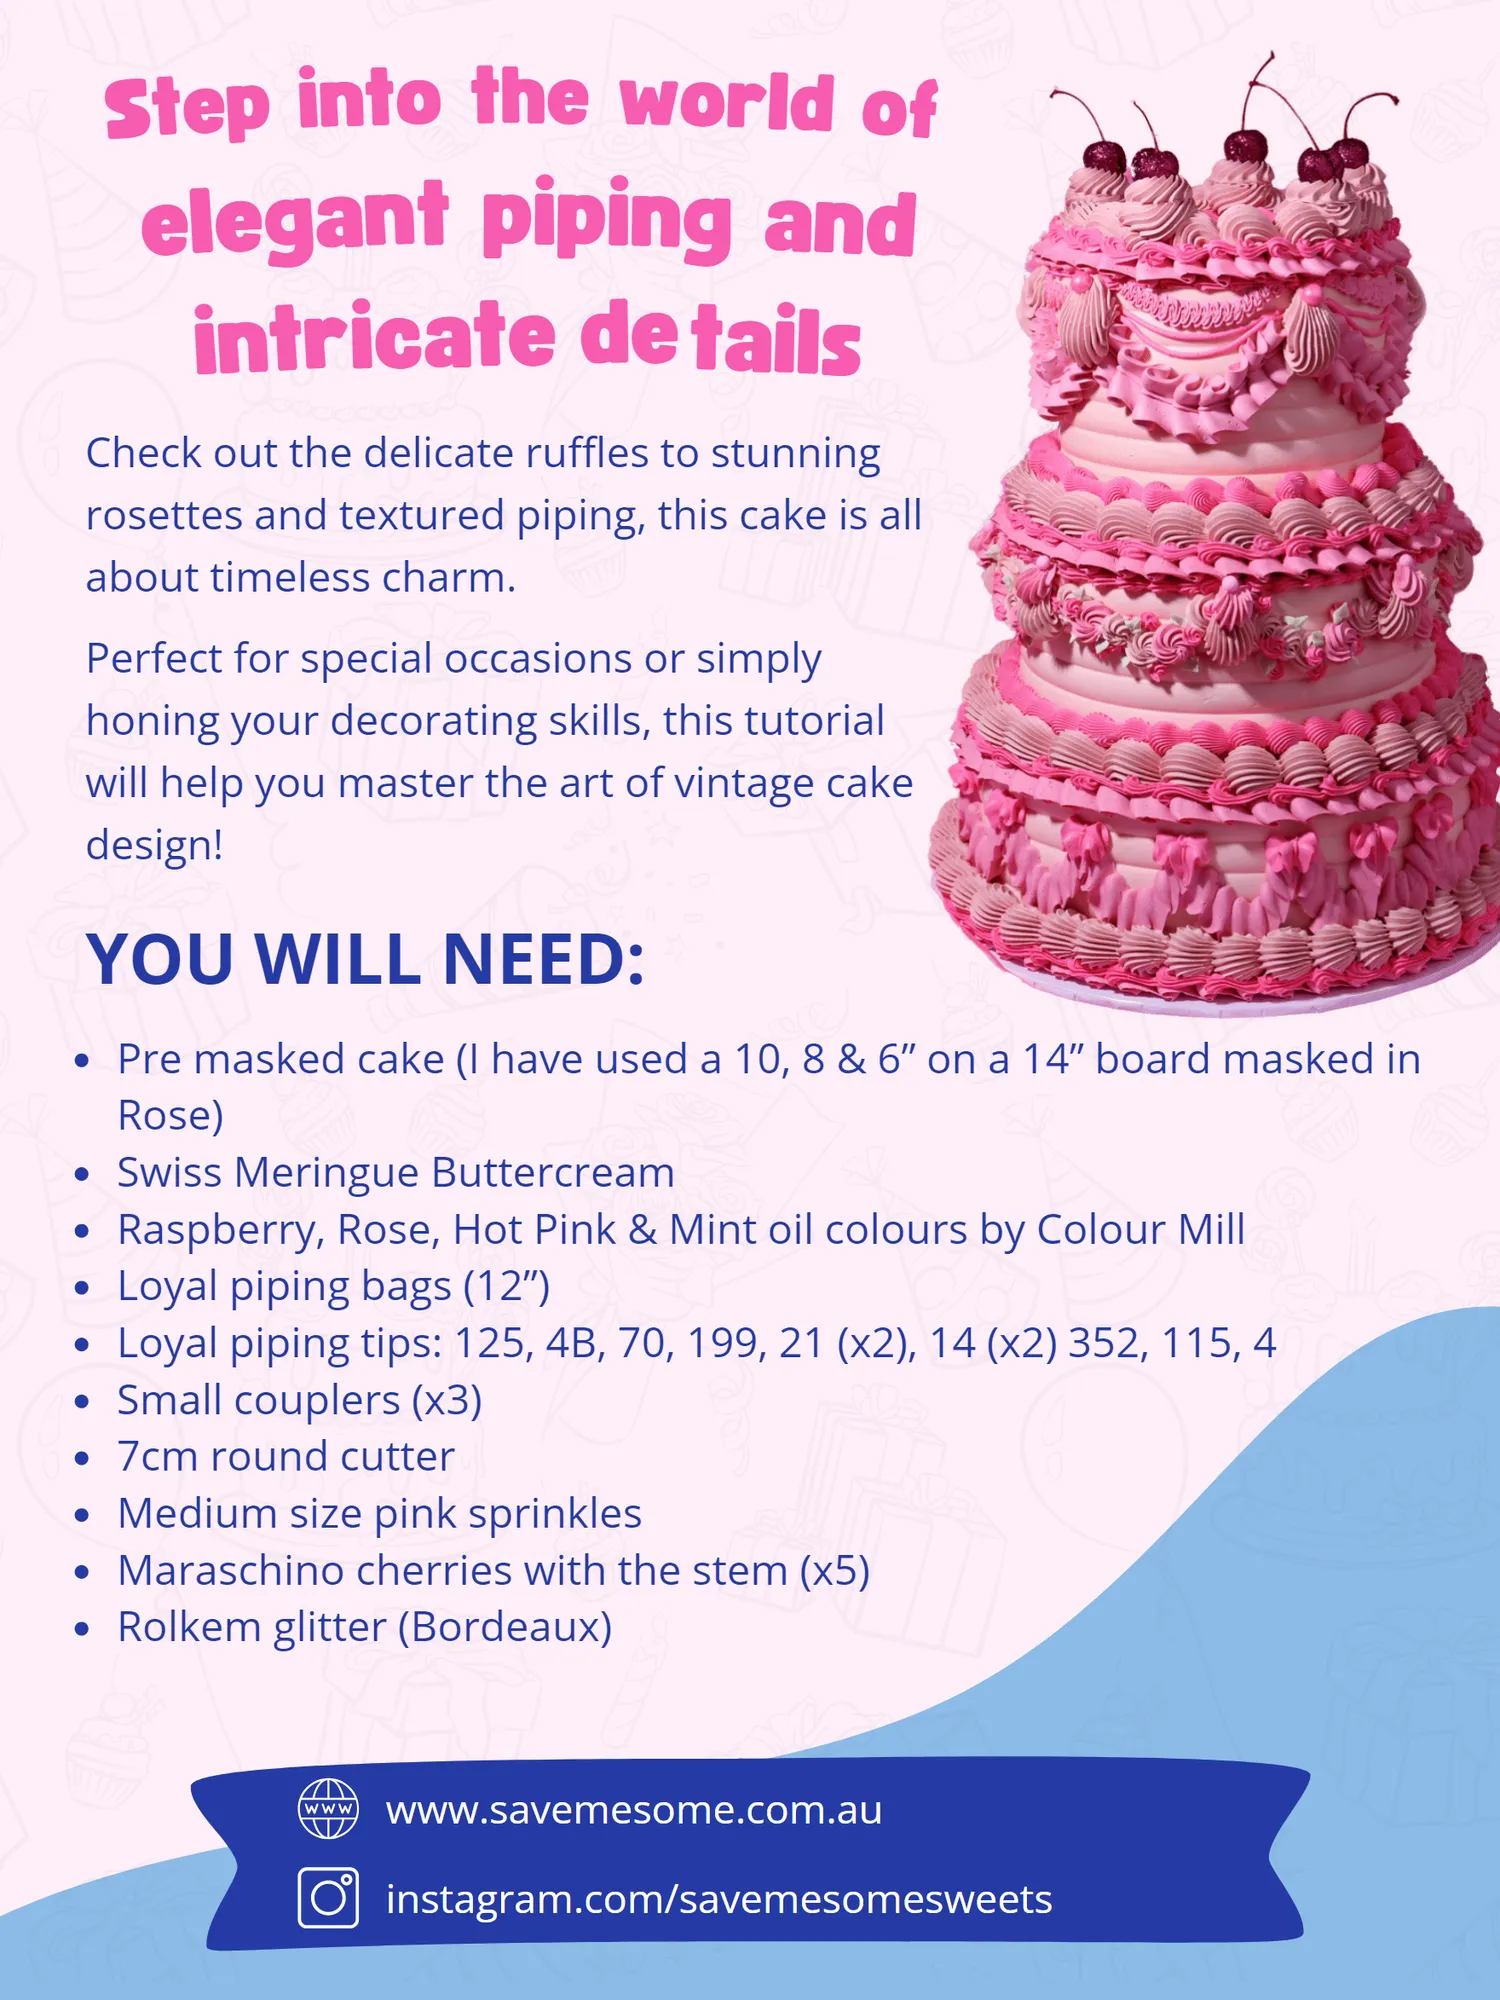
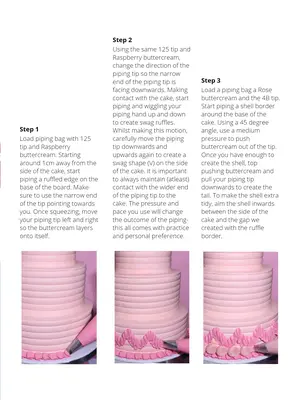
tep i nto t S gan e t cate de intr i Check out the delicate ruffles to stunning rosettes and textured piping, this cake is all about timeless charm. Step 1
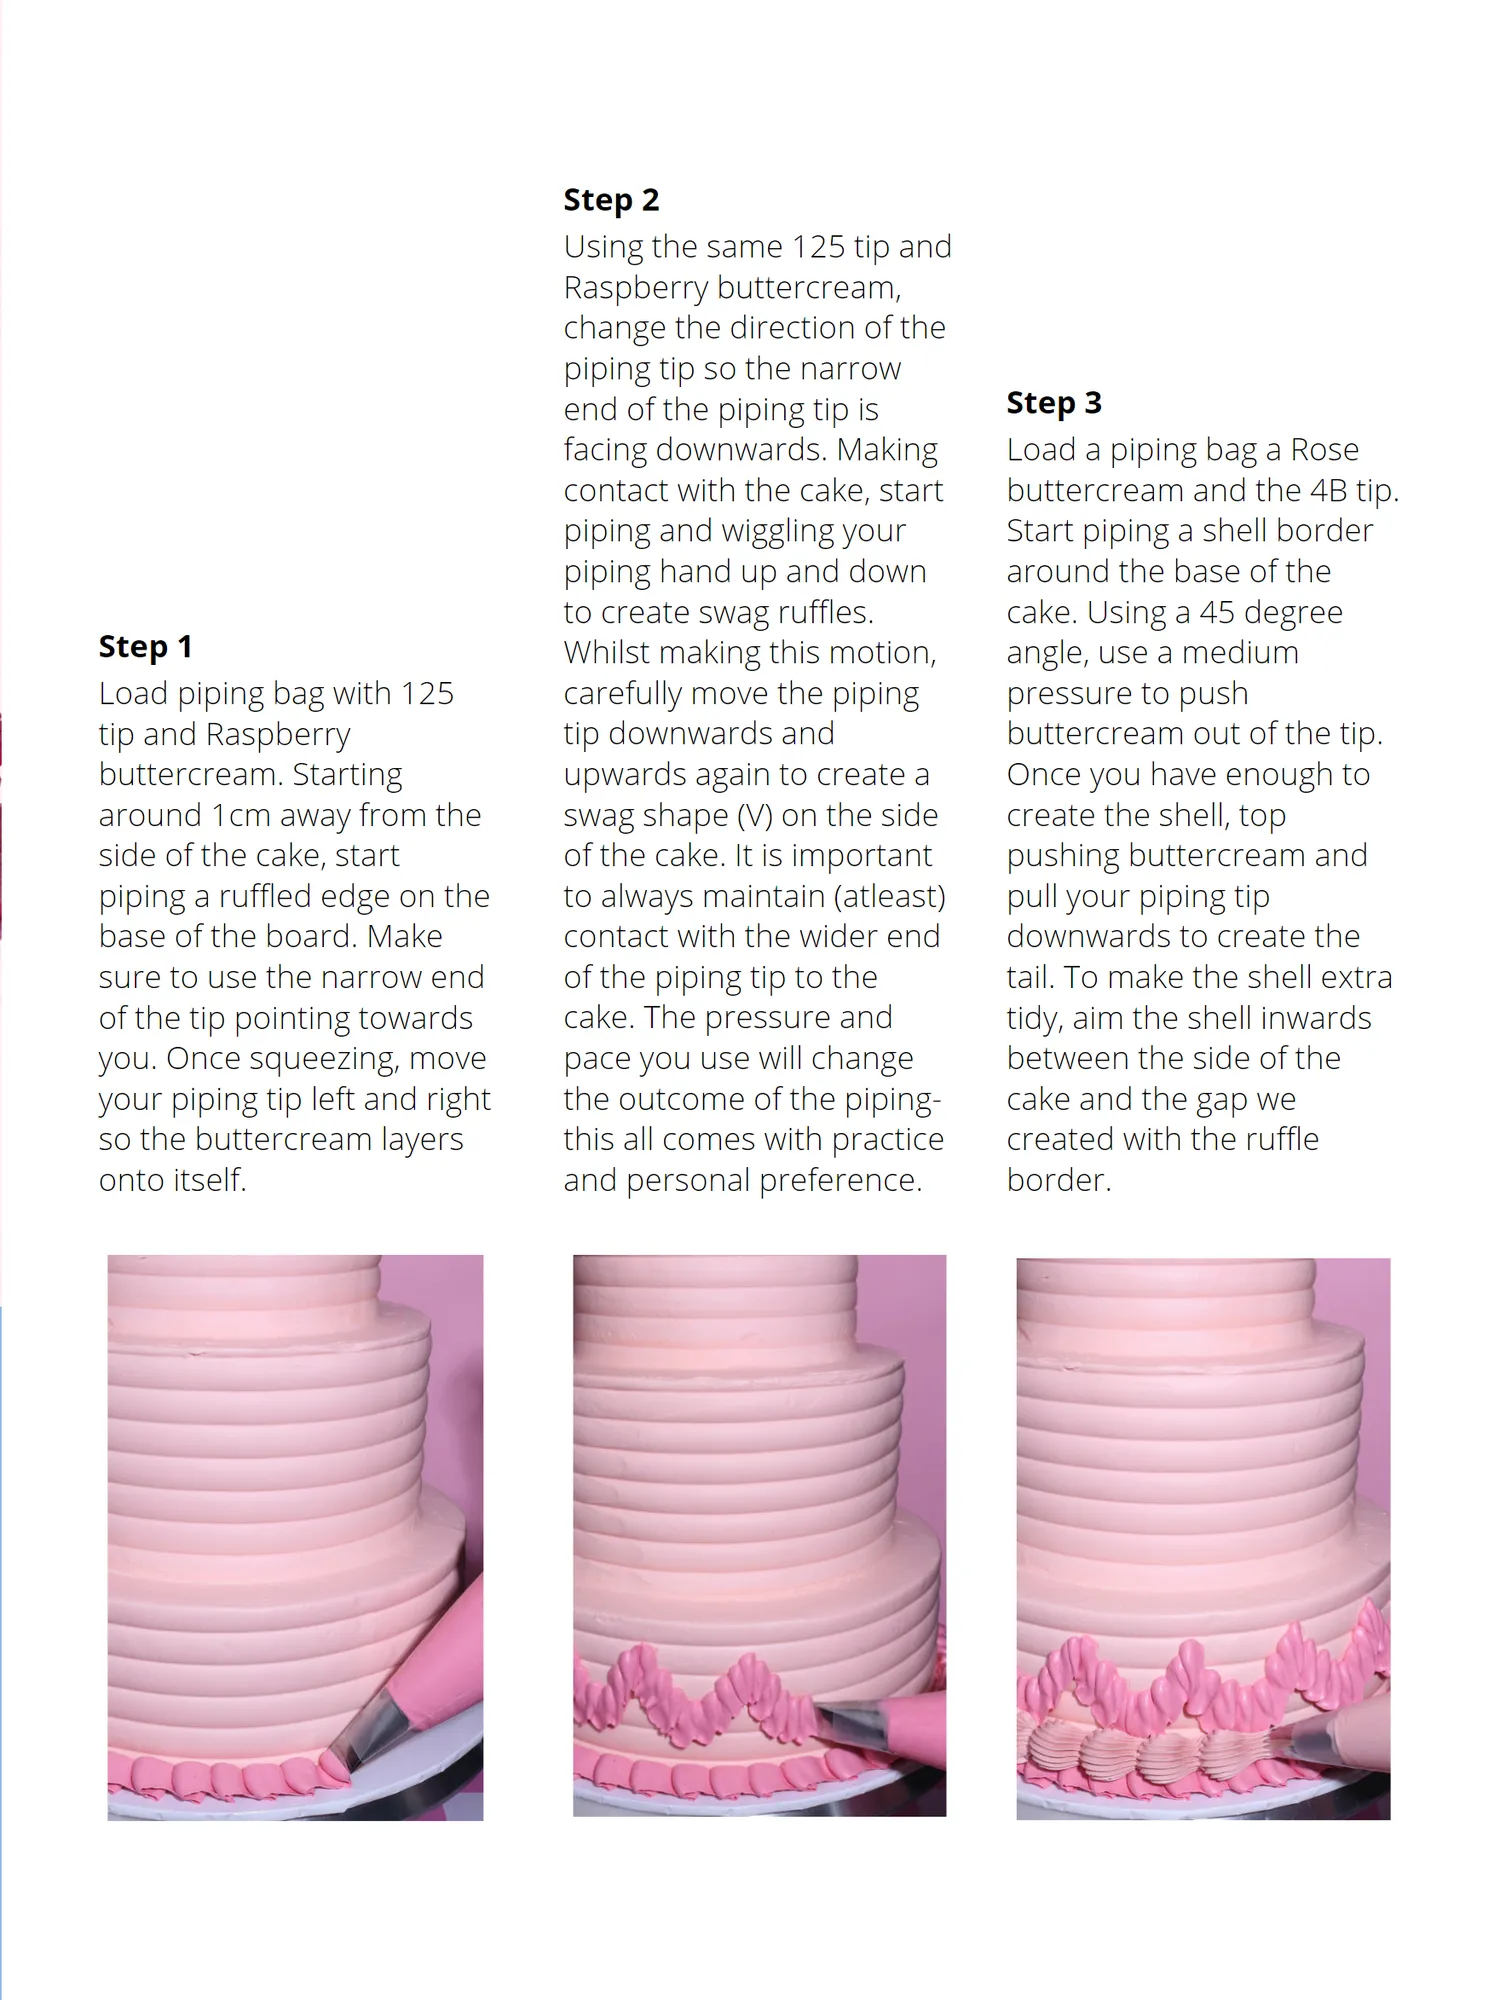
Page 13 text
t h e w l d o f p i p in a Step 2 d Using the same 125 tip and Raspberry buttercream, cate de il change the direction of the end of the piping tip is Check out the delicate ruffles to stunning facing downwards. Making contact with the cake, start rosettes and textured piping, this cake is all piping and wiggling your piping hand up and down to create swag ruffles. Whilst making this motion,
Page 14 text
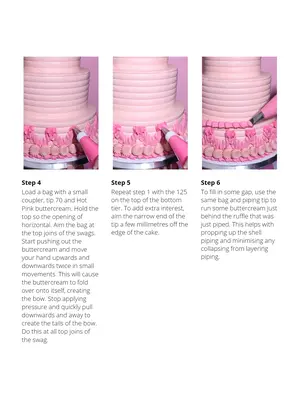
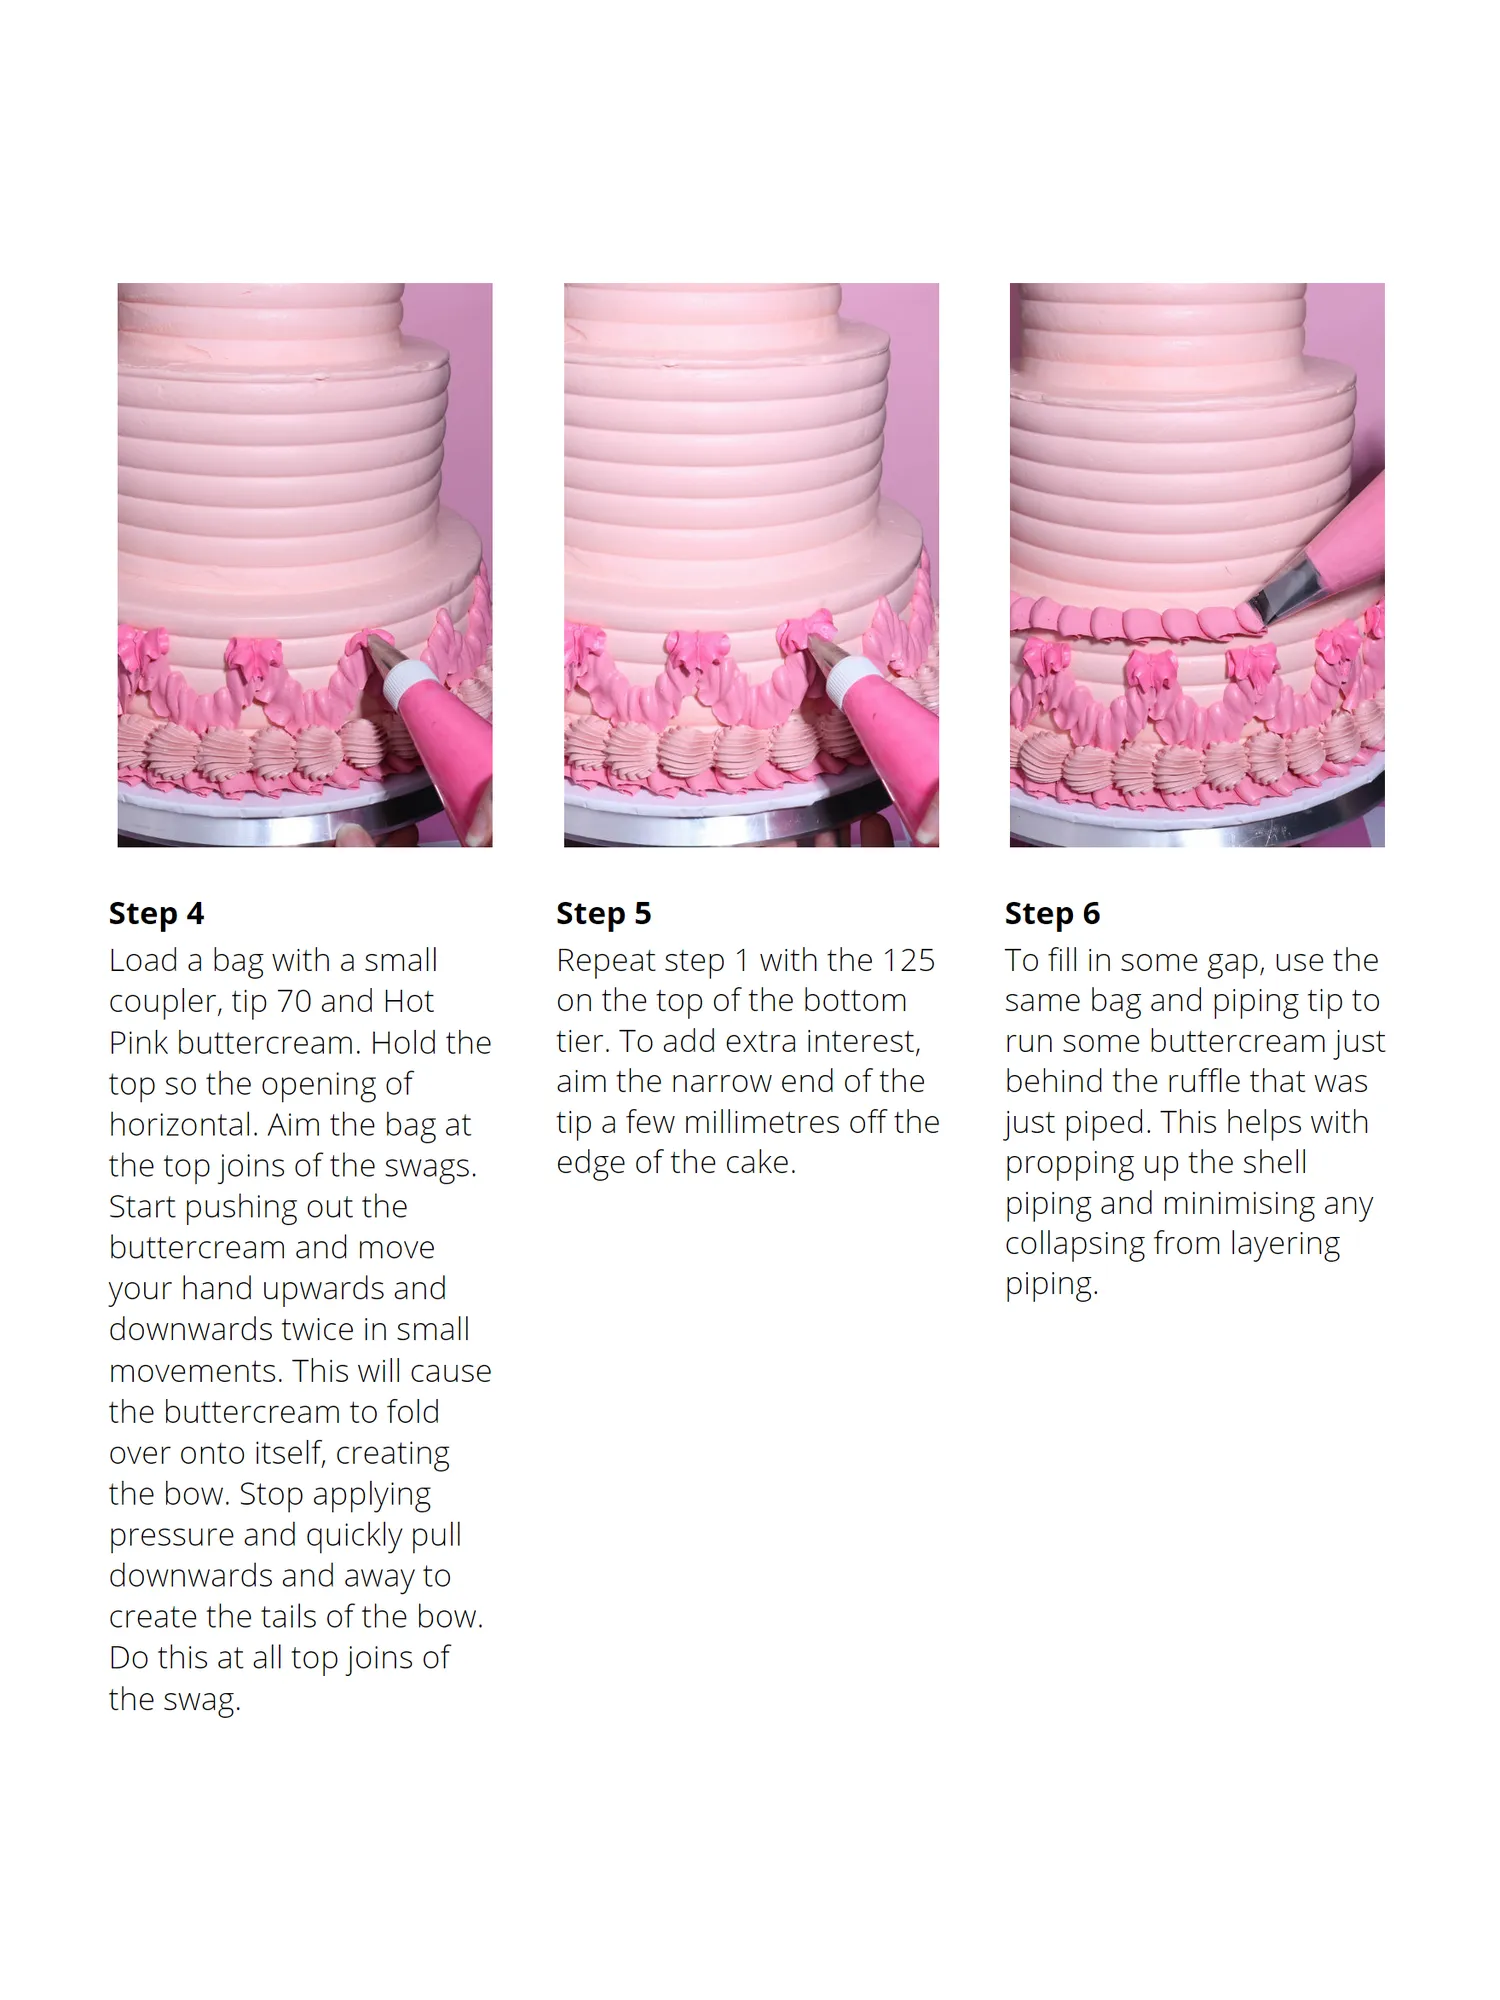
Step 4 Step 5 Step 6 Load a bag with a small Repeat step 1 with the 125 To fill in some gap, use the coupler, tip 70 and Hot on the top of the bottom same bag and piping tip to Pink buttercream. Hold the tier. To add extra interest, run some buttercream just top so the opening of aim the narrow end of the behind the ruffle that was horizontal. Aim the bag at tip a few millimetres off the just piped. This helps with the top joins of the swags. edge of the cake. propping up the shell Start pushing out the piping and minimising any buttercream and move collapsing from layering your hand upwards and piping. downwards twice in small movements. This will cause the buttercream to fold over onto itself, creating the bow. Stop applying pressure and quickly pull downwards and away to create the tails of the bow. Do this at all top joins of the swag.
Page 15 text
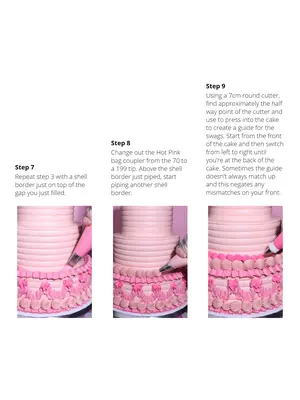
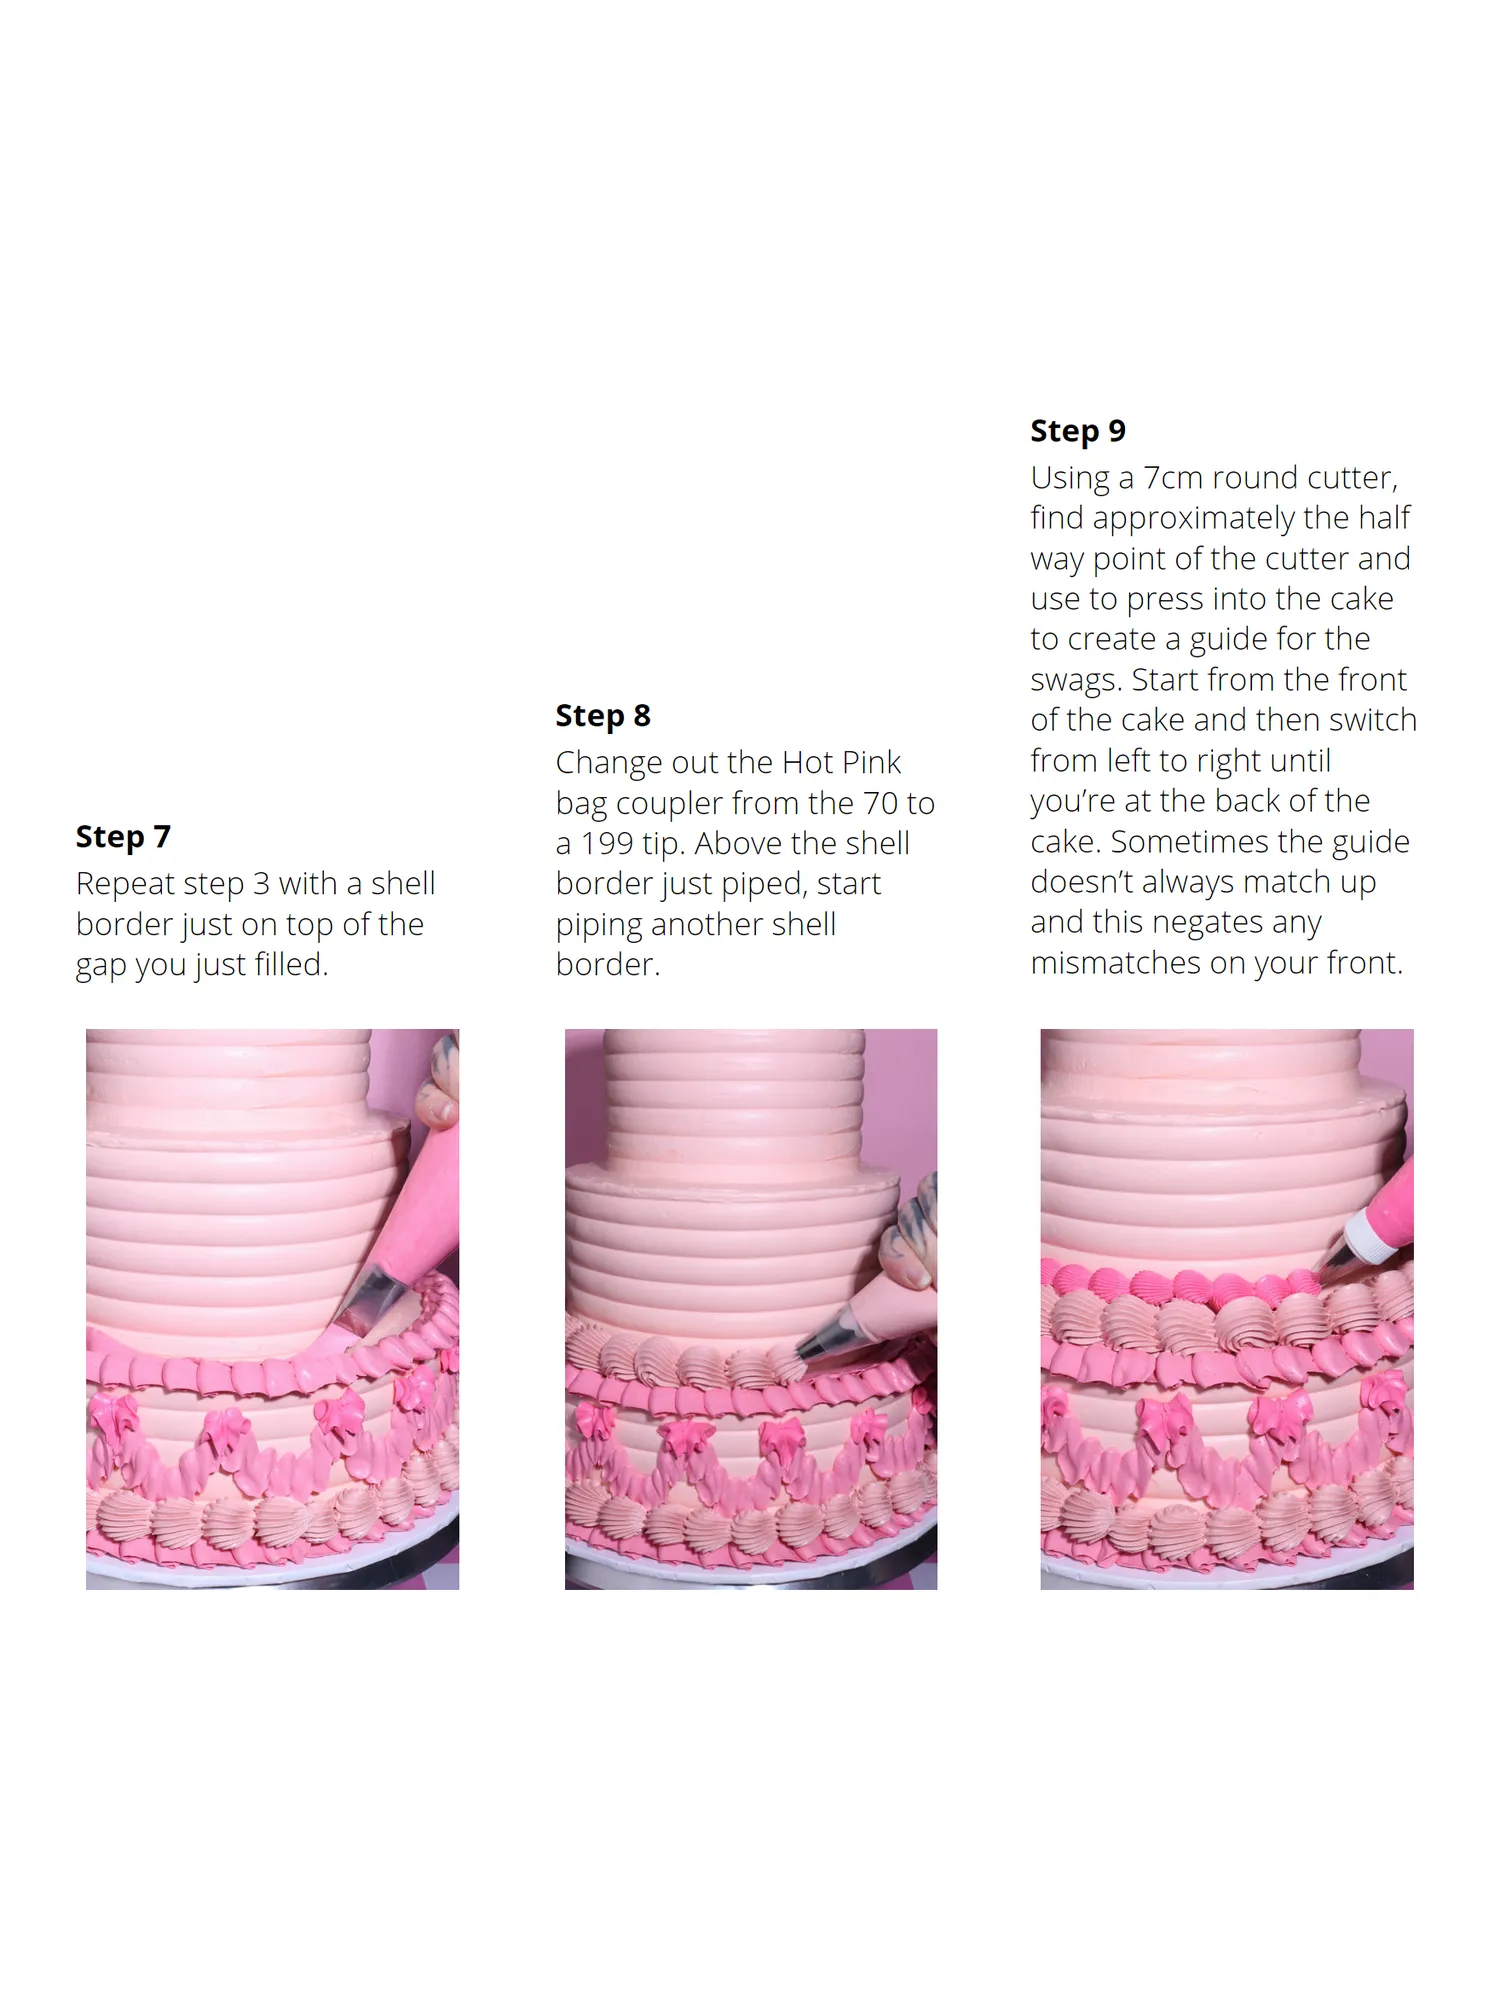
Step 9 Using a 7cm round cutter, find approximately the half way point of the cutter and use to press into the cake to create a guide for the swags. Start from the front Step 8 of the cake and then switch Change out the Hot Pink from left to right until bag coupler from the 70 to you’re at the back of the Step 7 a 199 tip. Above the shell cake. Sometimes the guide Repeat step 3 with a shell border just piped, start doesn’t always match up border just on top of the piping another shell and this negates any gap you just filled. border. mismatches on your front.
Page 16 text
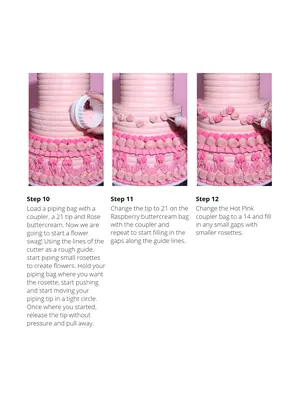
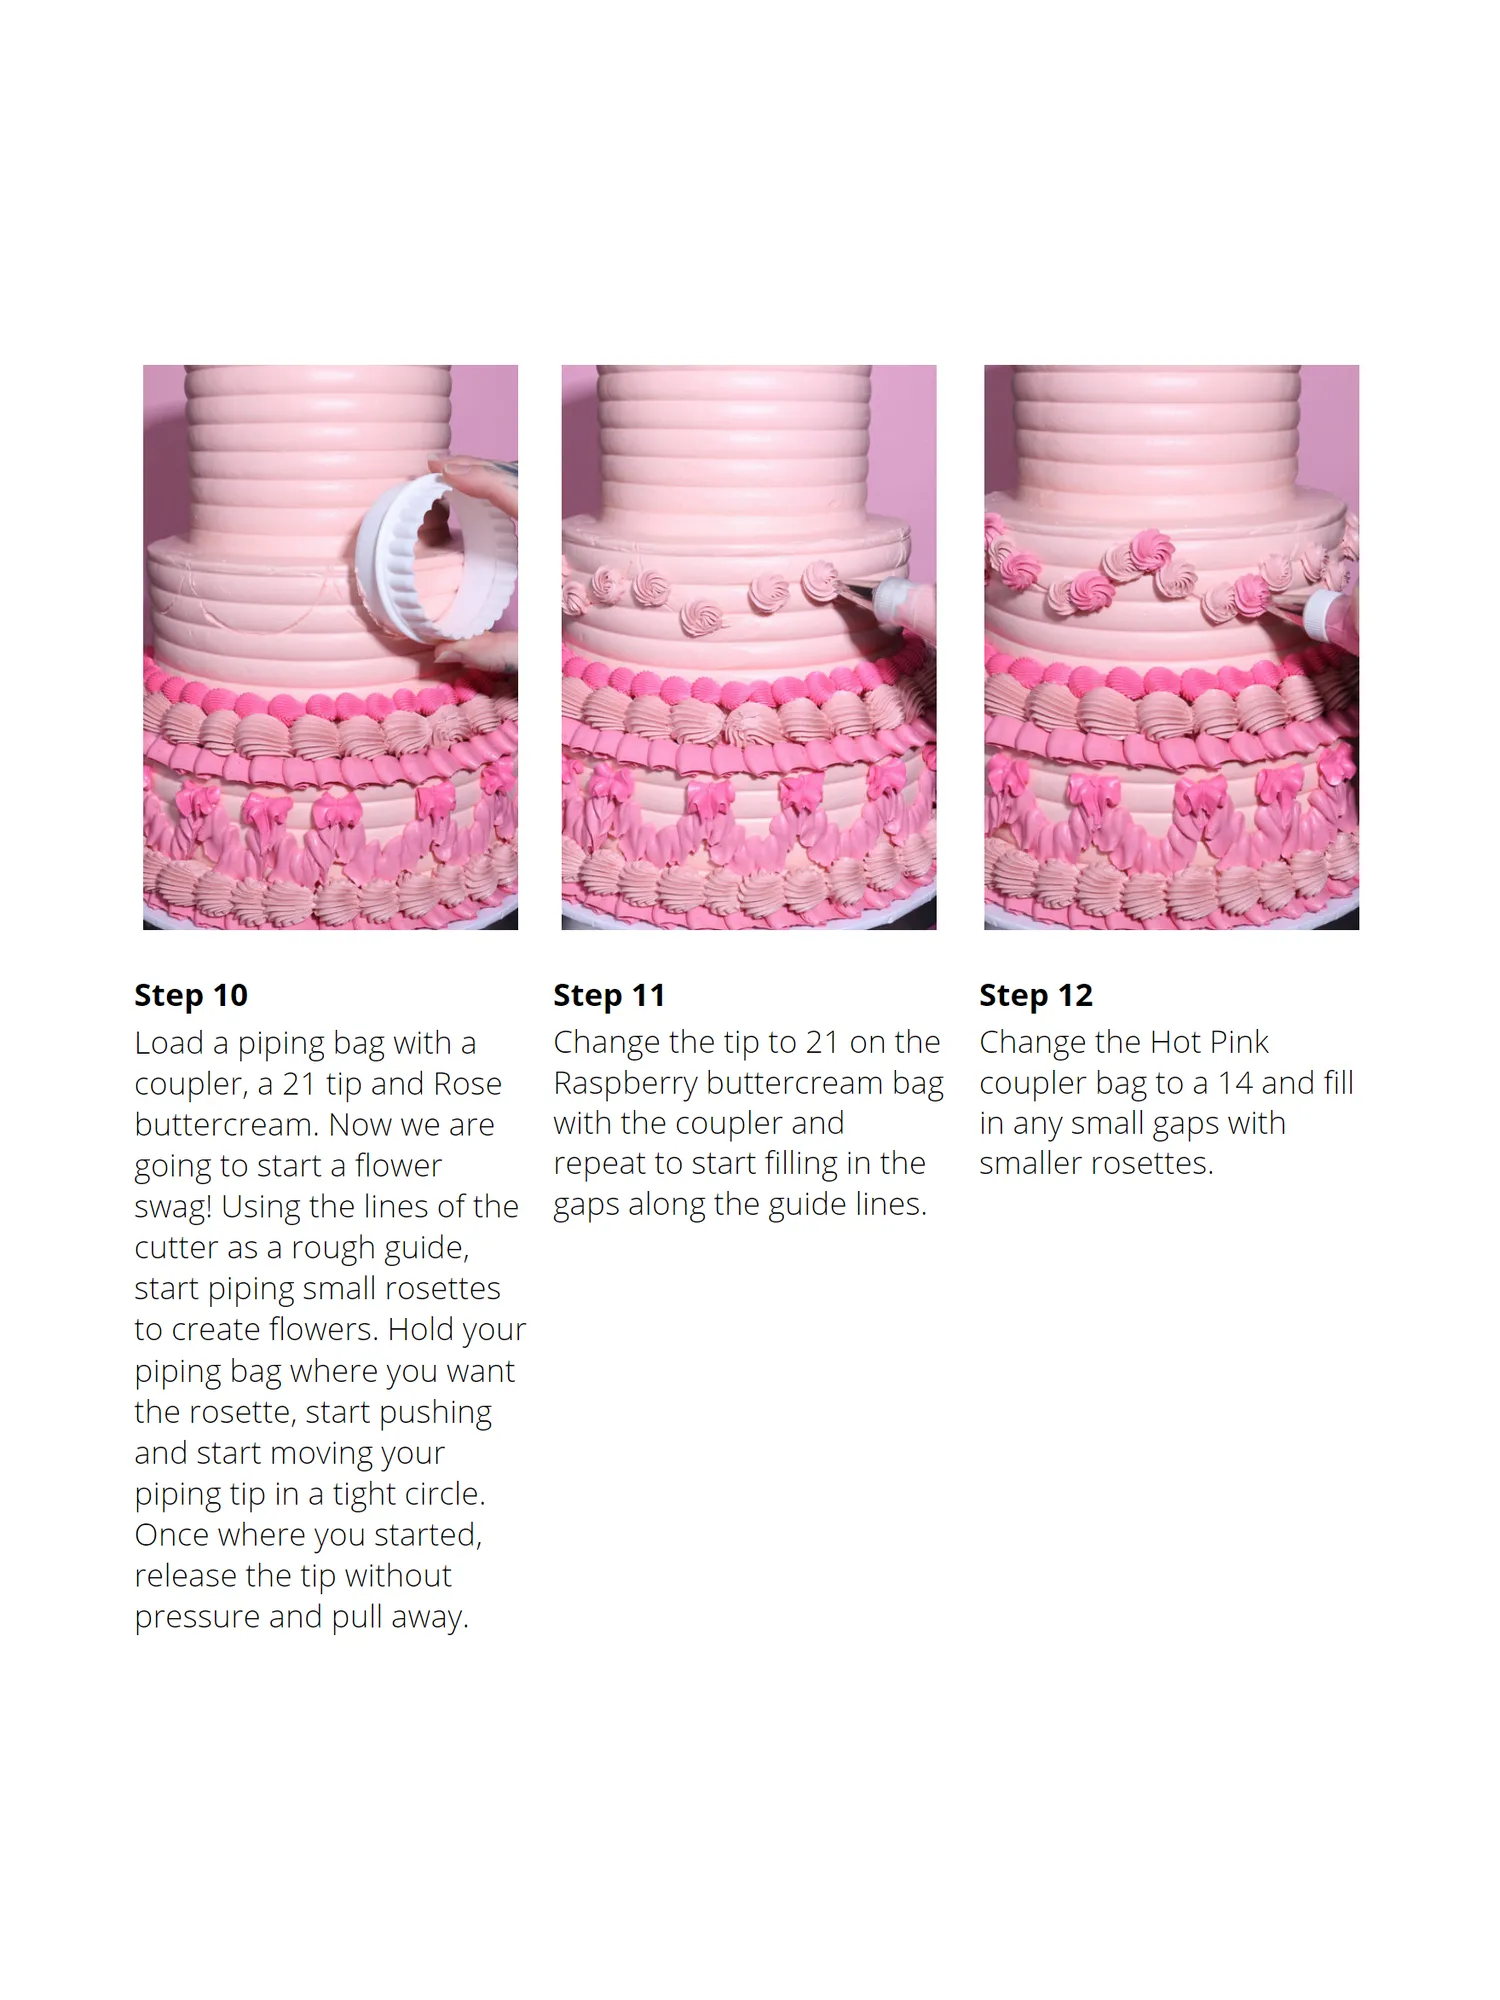
Step 10 Step 11 Step 12 Load a piping bag with a Change the tip to 21 on the Change the Hot Pink coupler, a 21 tip and Rose Raspberry buttercream bag coupler bag to a 14 and fill buttercream. Now we are with the coupler and in any small gaps with going to start a flower repeat to start filling in the smaller rosettes. swag! Using the lines of the gaps along the guide lines. cutter as a rough guide, start piping small rosettes to create flowers. Hold your piping bag where you want the rosette, start pushing and start moving your piping tip in a tight circle. Once where you started, release the tip without pressure and pull away.
Page 17 text
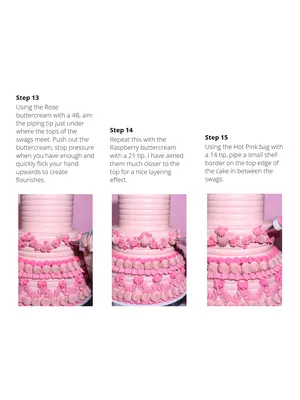
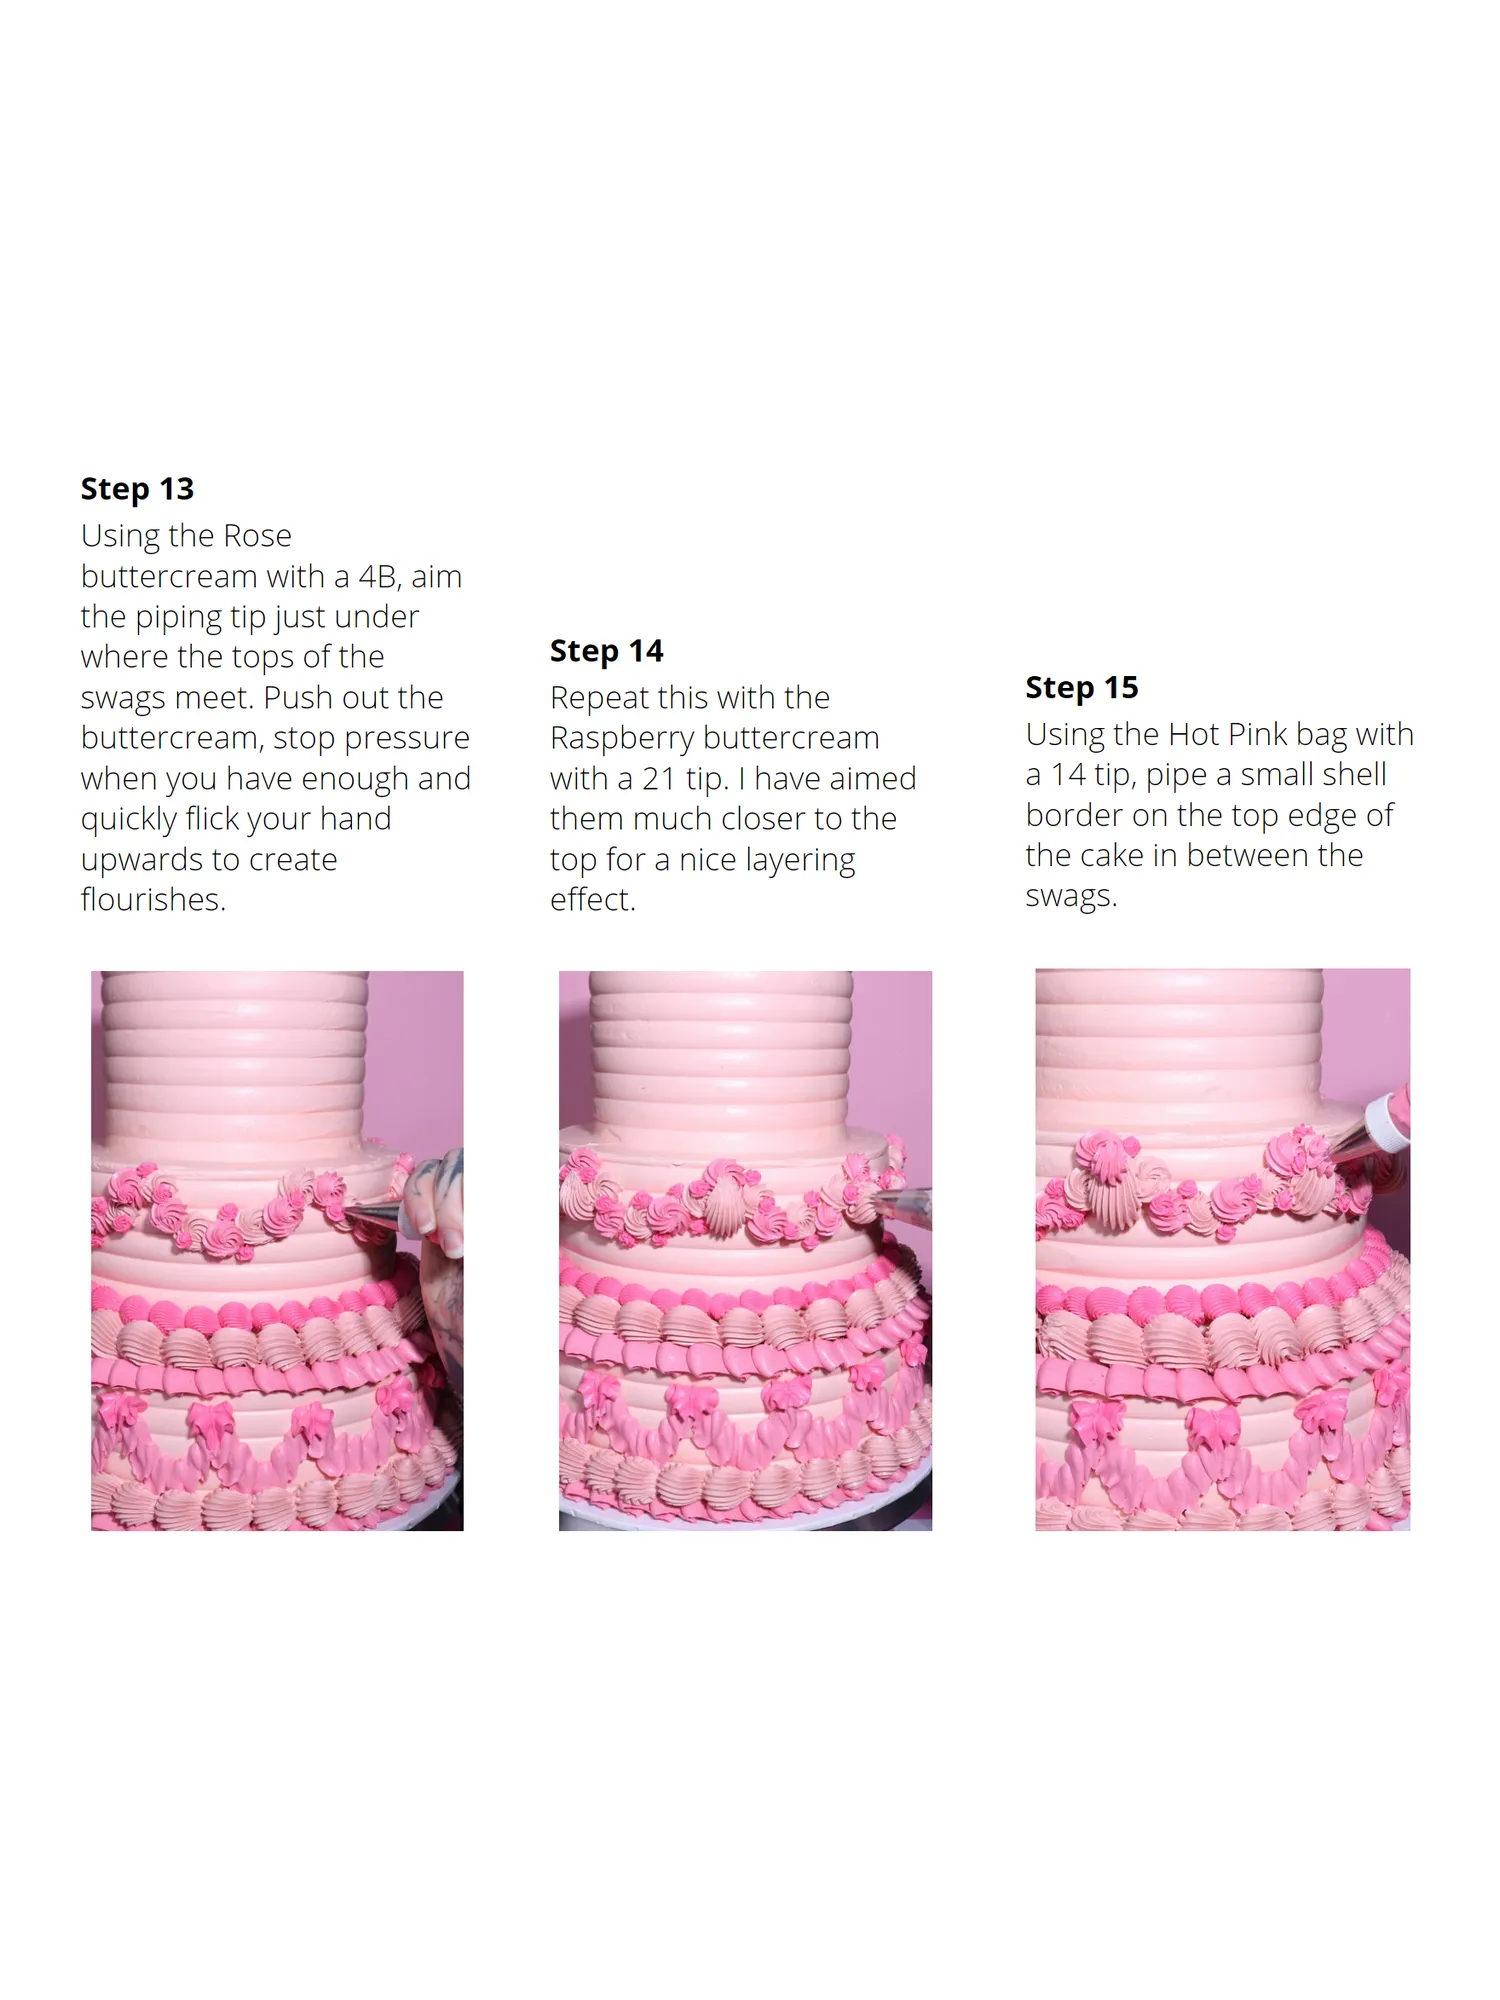
Step 13 Using the Rose buttercream with a 4B, aim the piping tip just under where the tops of the Step 14 swags meet. Push out the Repeat this with the Step 15 buttercream, stop pressure Raspberry buttercream Using the Hot Pink bag with when you have enough and with a 21 tip. I have aimed a 14 tip, pipe a small shell quickly flick your hand them much closer to the border on the top edge of upwards to create top for a nice layering the cake in between the flourishes. effect. swags.


Page 19 text
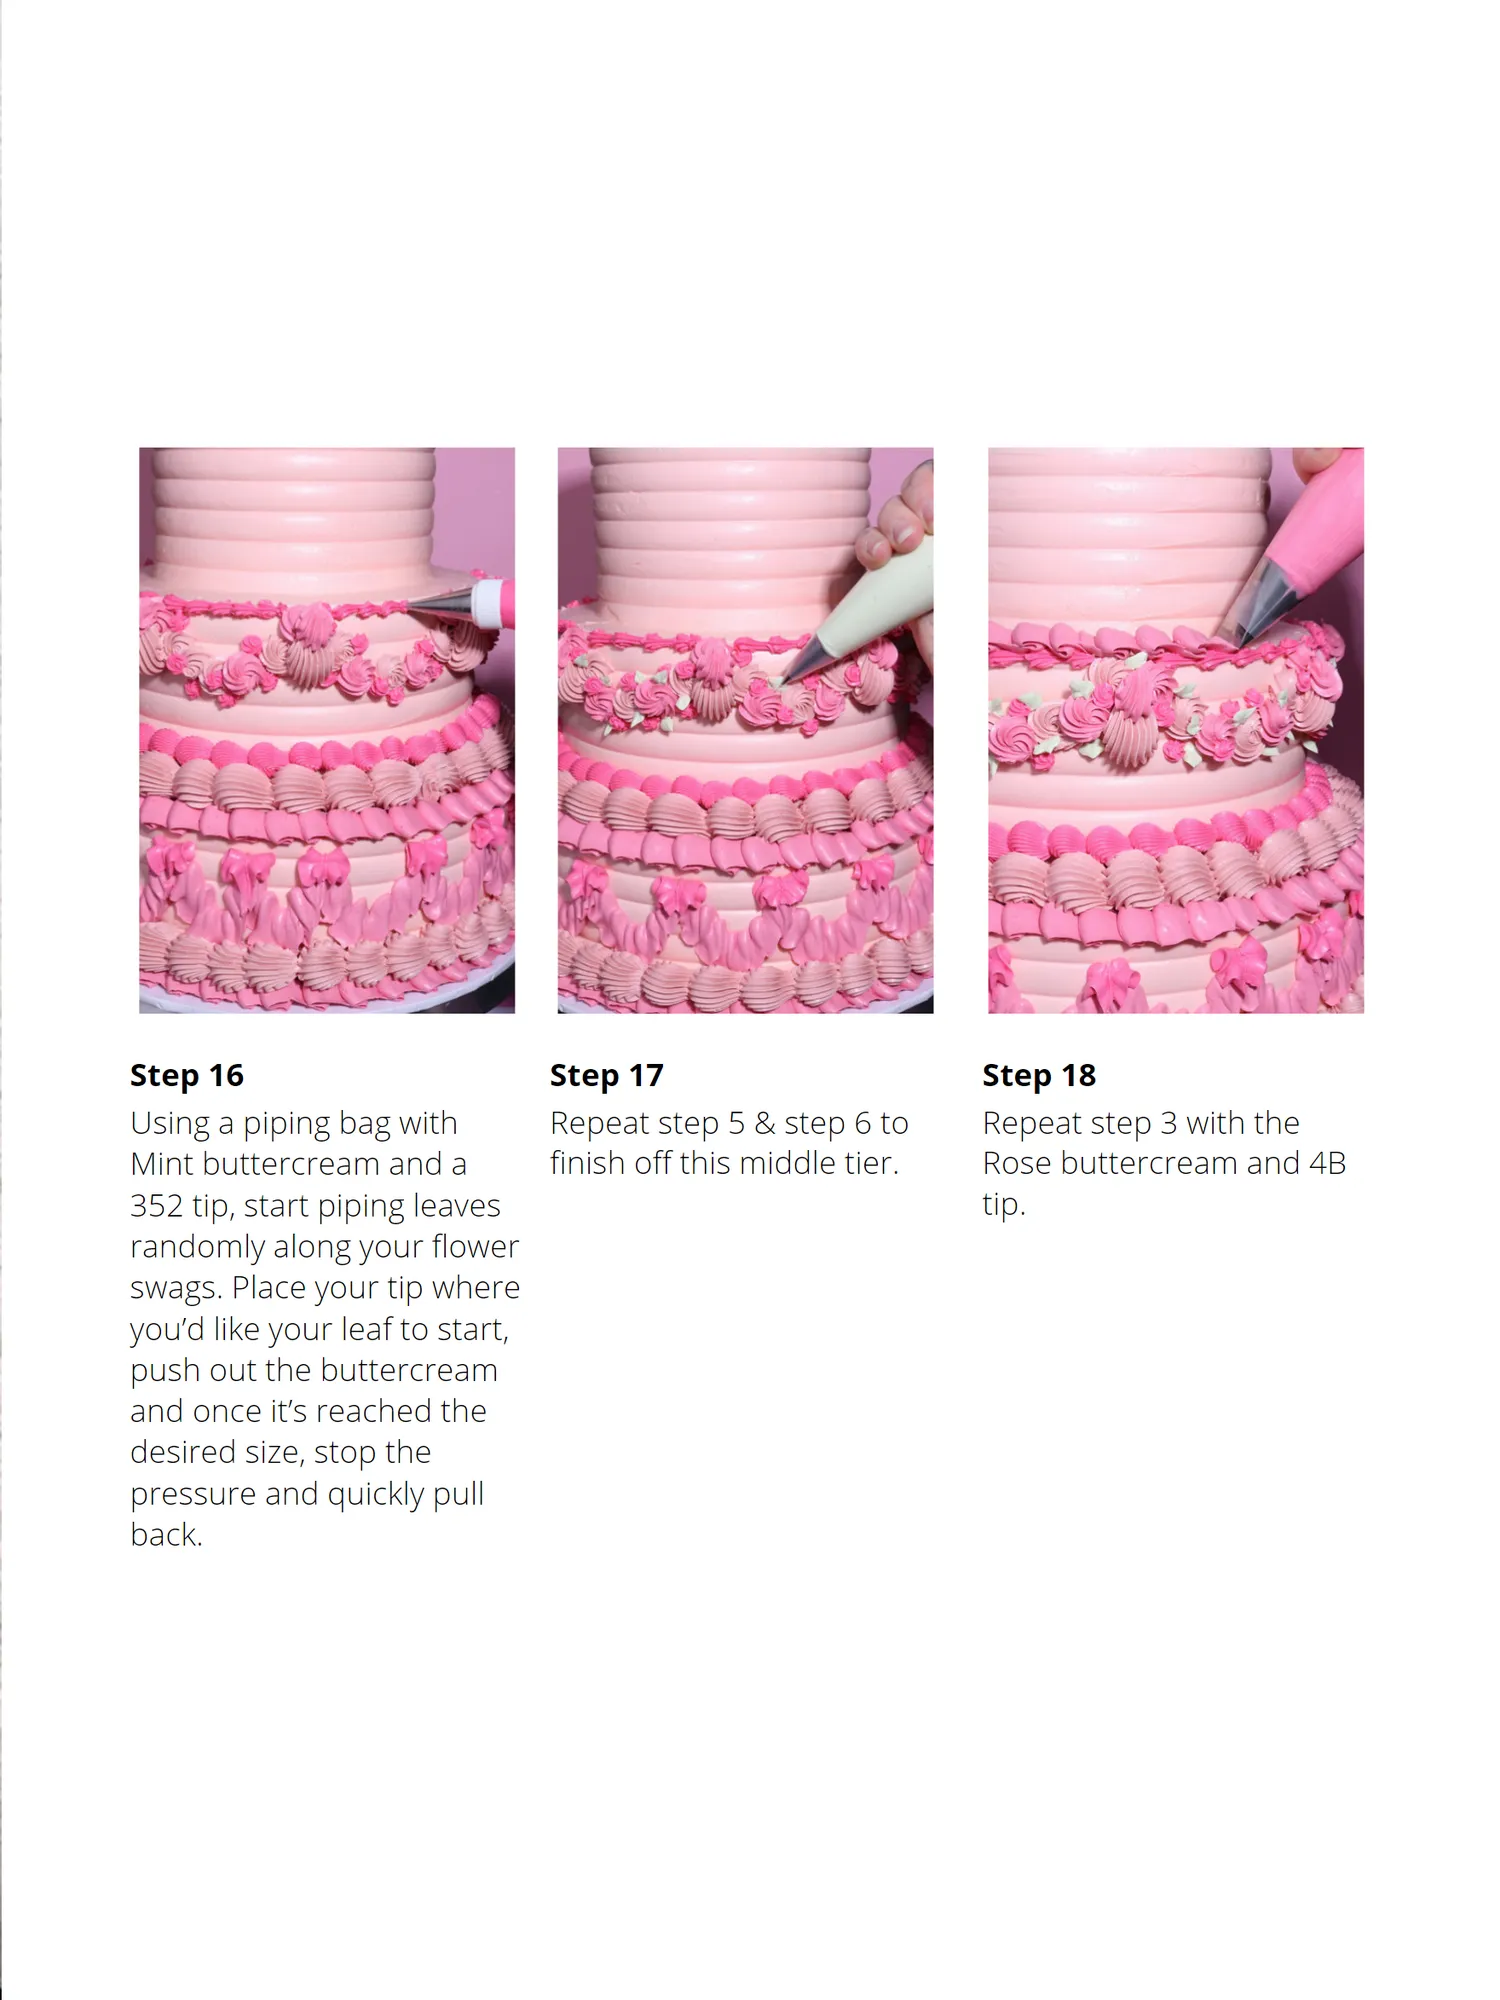
Step 16 Using a piping bag with Mint buttercream and a 352 tip , start piping leaves randomly along your flower swags . Place your tip where you ’ d like your leaf to start , push out the buttercream and once it ’ s reached the desired size , stop the pressure and quickly pull back . Step 17 Step 18 Repeat step 5 & step 6 to finish off this middle tier . Repeat step 3 with the Rose buttercream and 4B tip .
Page 20 text
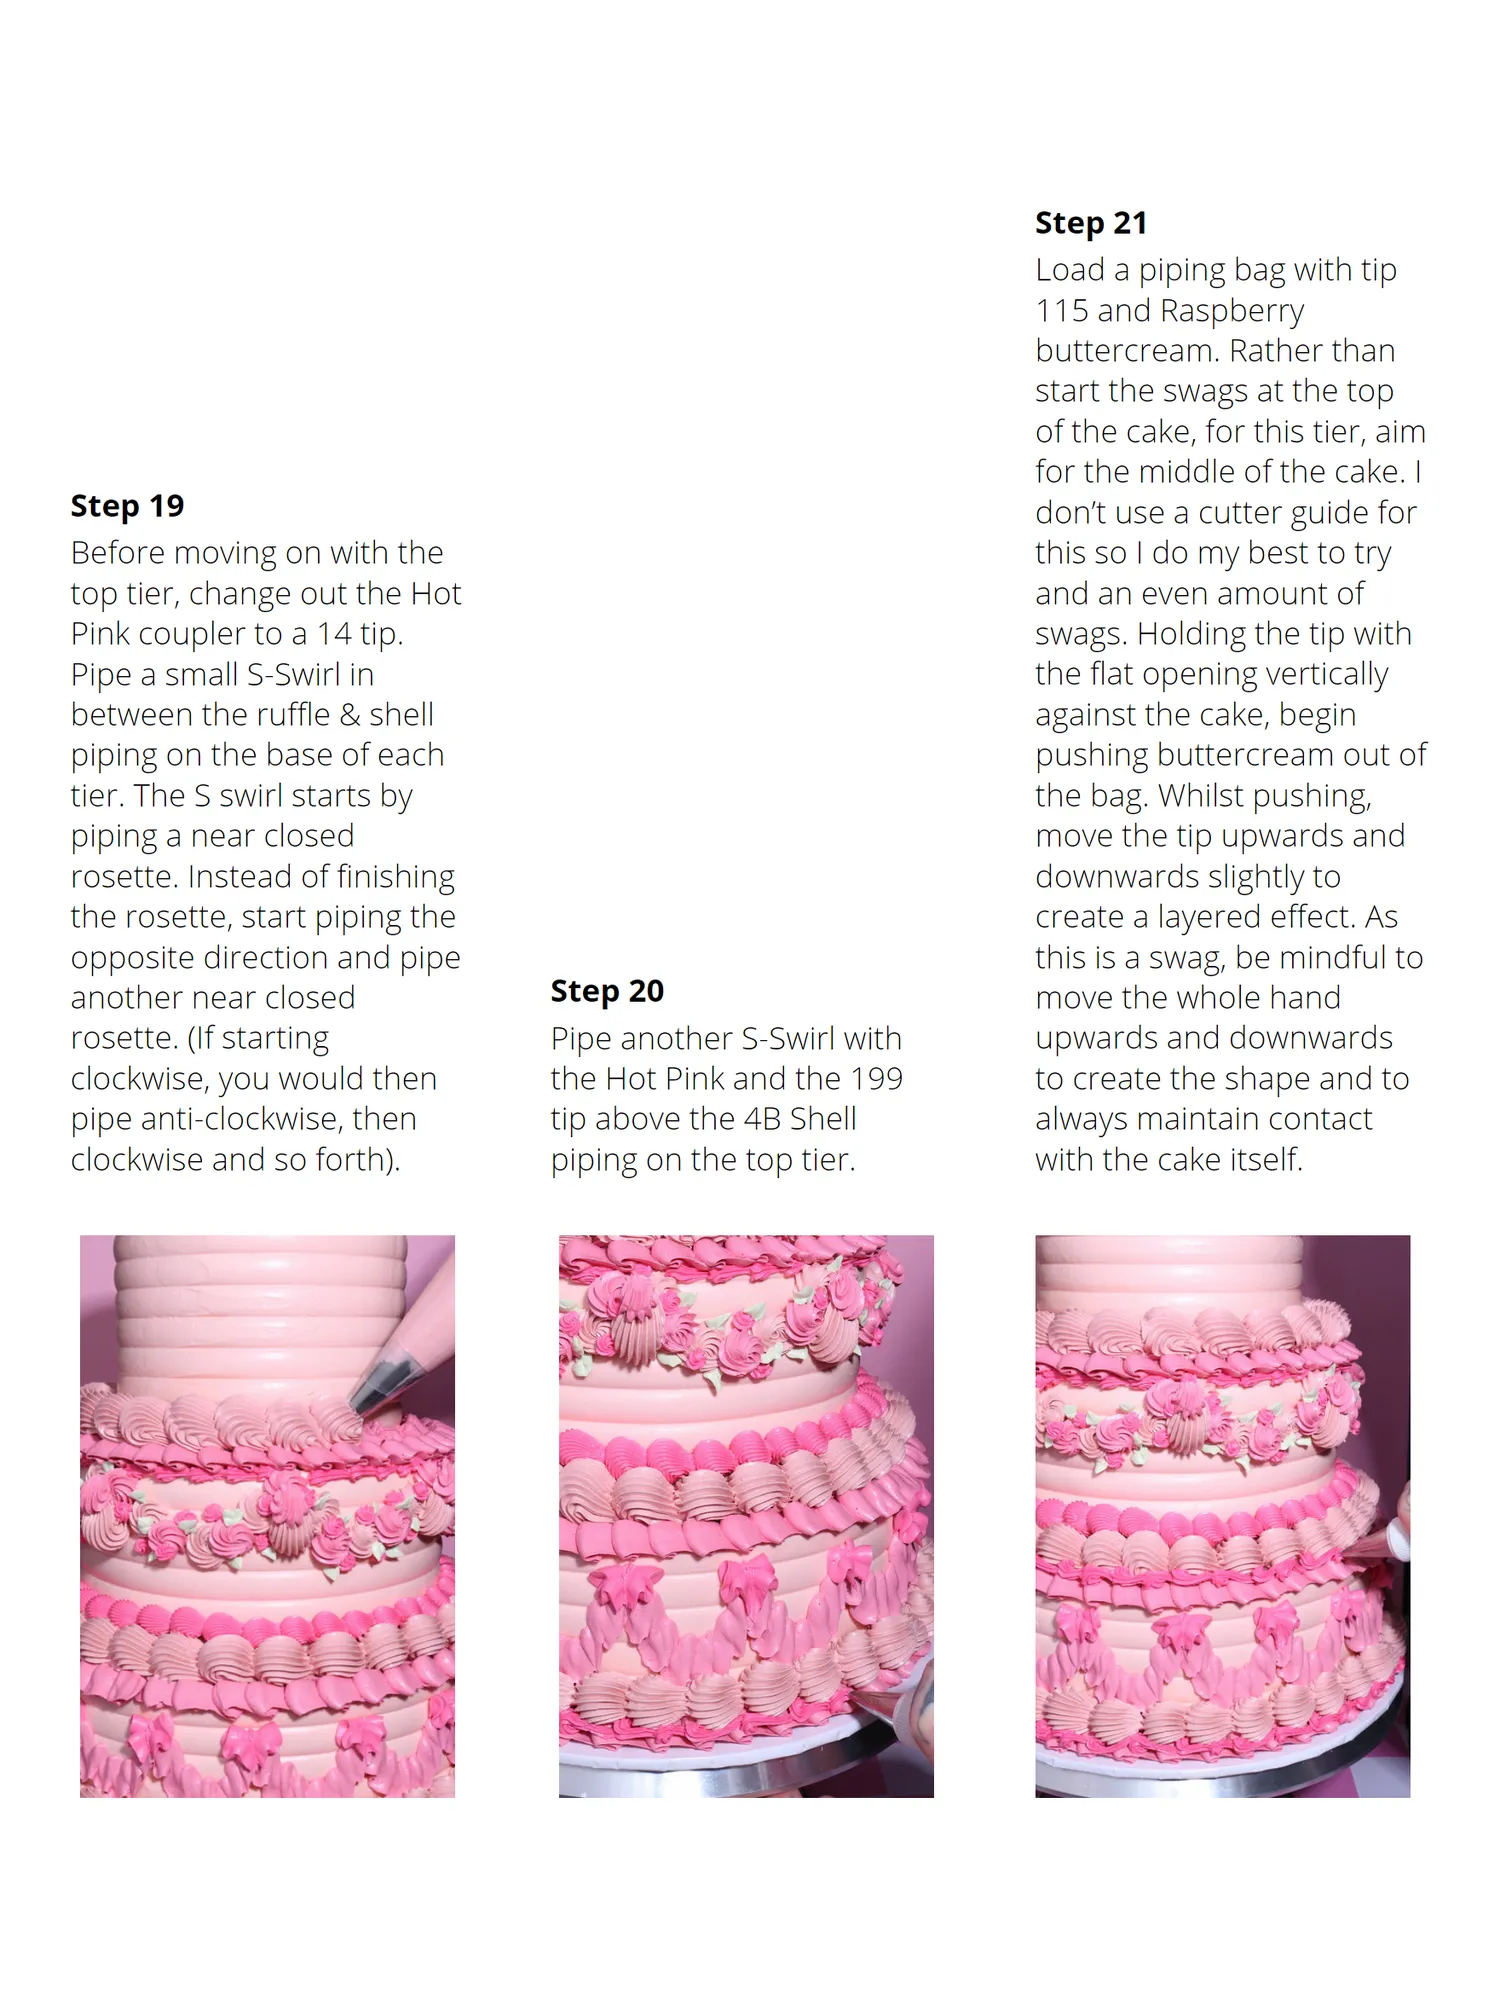
Step 21 Load a piping bag with tip 115 and Raspberry buttercream. Rather than start the swags at the top of the cake, for this tier, aim for the middle of the cake. I Step 19 don’t use a cutter guide for Before moving on with the this so I do my best to try top tier, change out the Hot and an even amount of Pink coupler to a 14 tip. swags. Holding the tip with Pipe a small S-Swirl in the flat opening vertically between the ruffle & shell against the cake, begin piping on the base of each pushing buttercream out of tier. The S swirl starts by the bag. Whilst pushing, piping a near closed move the tip upwards and rosette. Instead of finishing downwards slightly to the rosette, start piping the create a layered effect. As opposite direction and pipe this is a swag, be mindful to another near closed Step 20 move the whole hand rosette. (If starting Pipe another S-Swirl with upwards and downwards clockwise, you would then the Hot Pink and the 199 to create the shape and to pipe anti-clockwise, then tip above the 4B Shell always maintain contact clockwise and so forth). piping on the top tier. with the cake itself.
Page 21 text
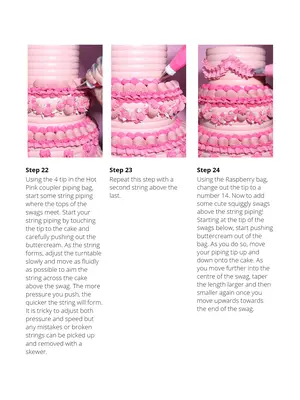
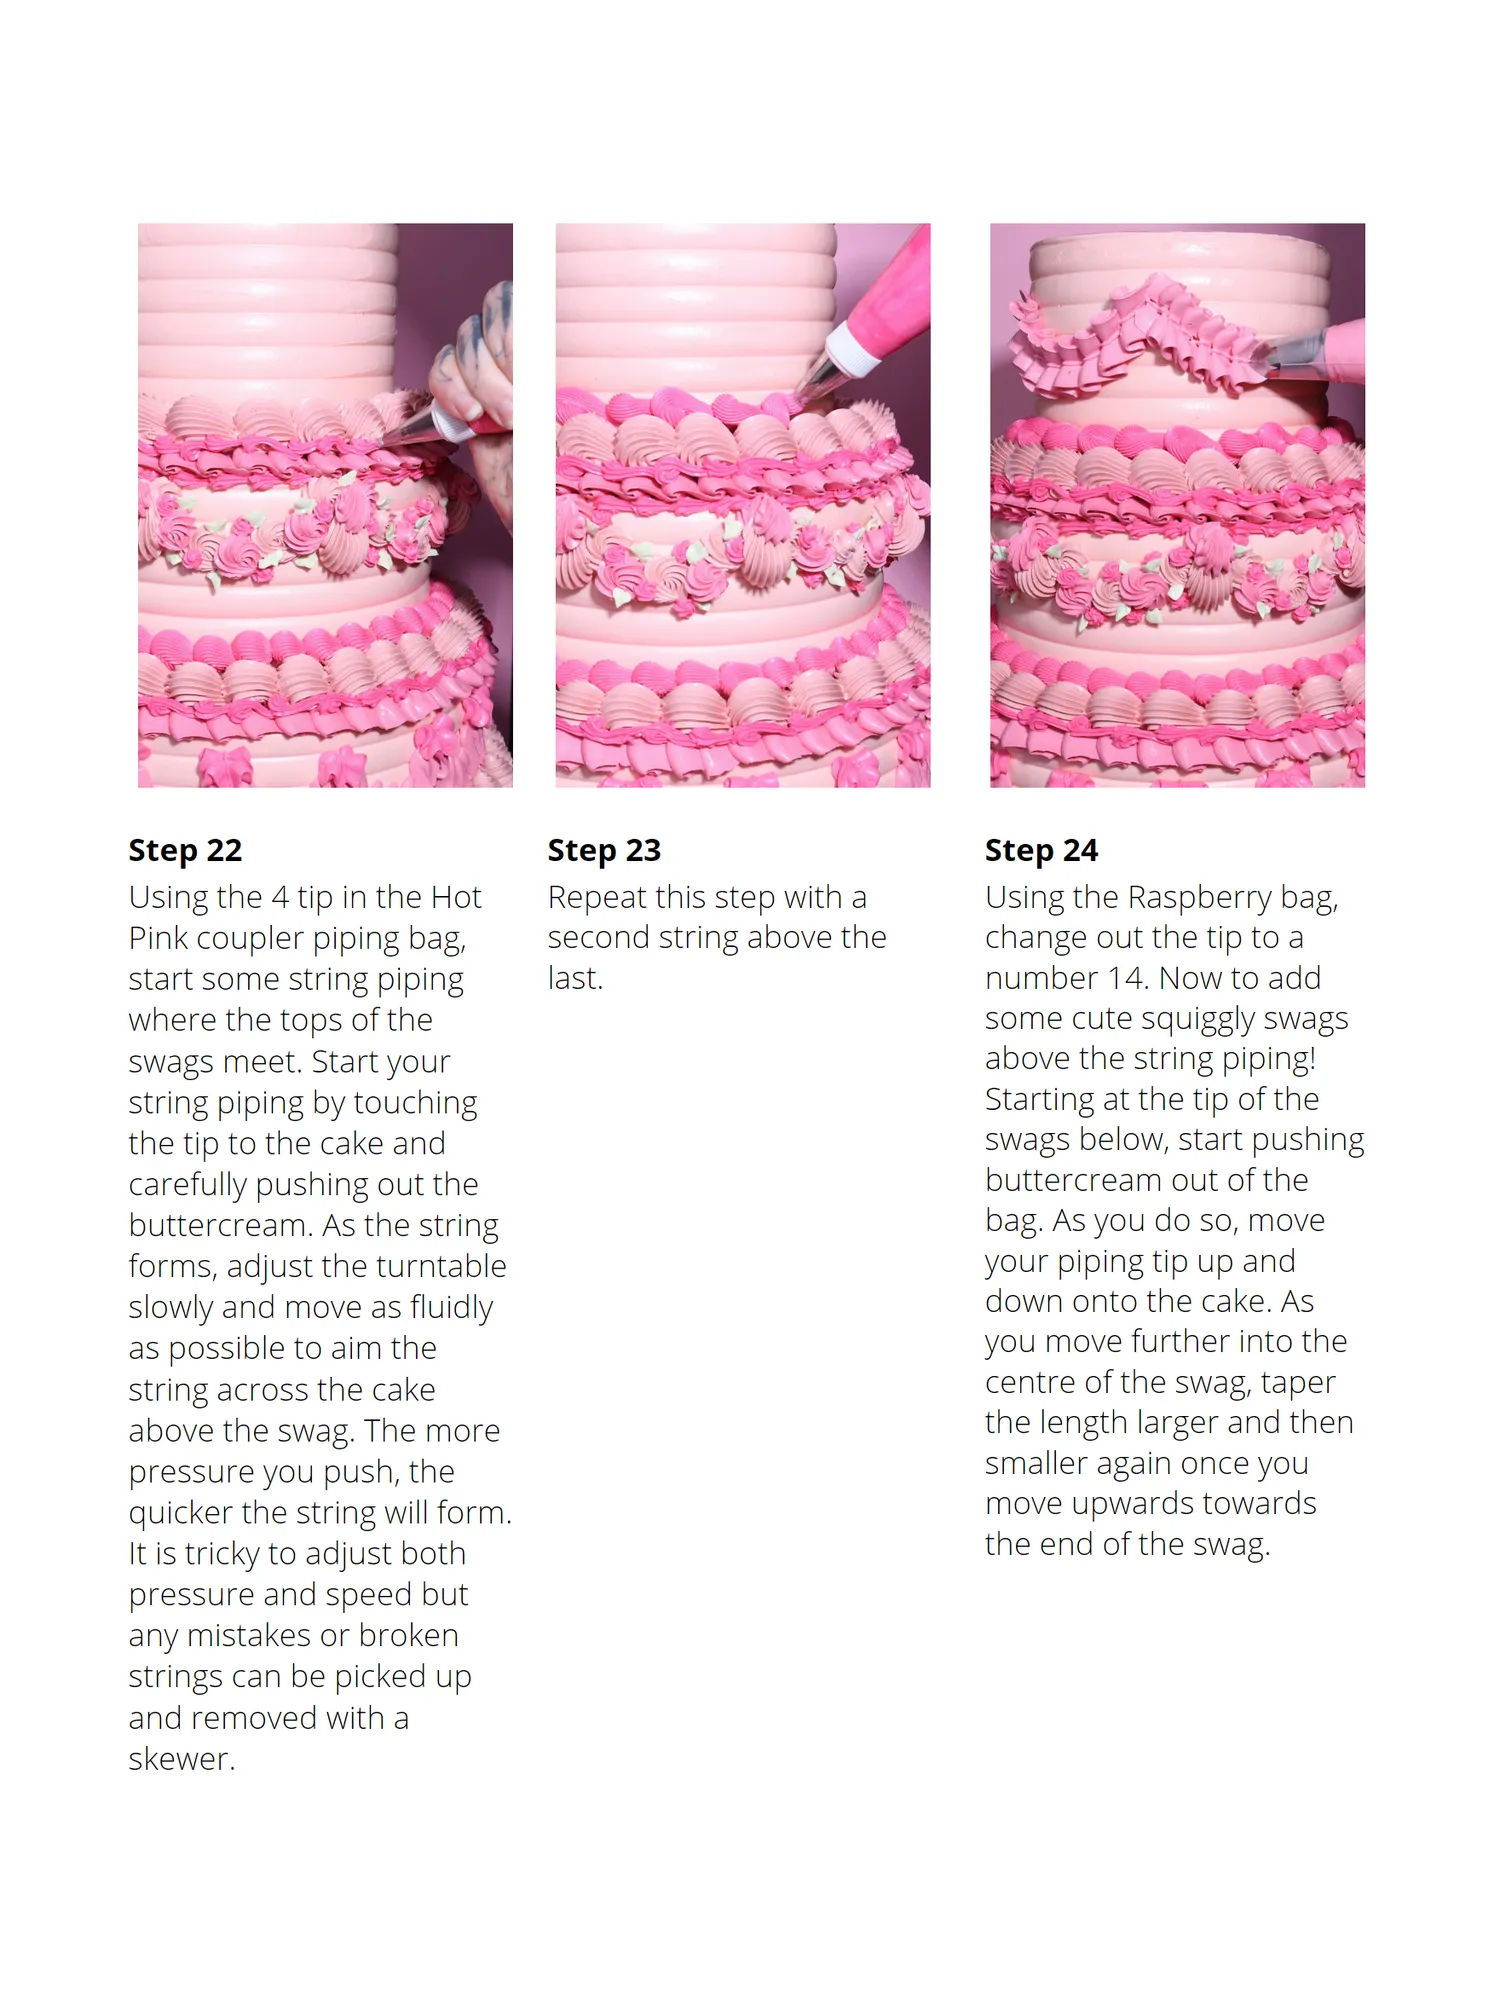
Step 22 Step 23 Step 24 Using the 4 tip in the Hot Repeat this step with a Using the Raspberry bag, Pink coupler piping bag, second string above the change out the tip to a start some string piping last. number 14. Now to add where the tops of the some cute squiggly swags swags meet. Start your above the string piping! string piping by touching Starting at the tip of the the tip to the cake and swags below, start pushing carefully pushing out the buttercream out of the buttercream. As the string bag. As you do so, move forms, adjust the turntable your piping tip up and slowly and move as fluidly down onto the cake. As as possible to aim the you move further into the string across the cake centre of the swag, taper above the swag. The more the length larger and then pressure you push, the smaller again once you quicker the string will form. move upwards towards It is tricky to adjust both the end of the swag. pressure and speed but any mistakes or broken strings can be picked up and removed with a skewer.
Page 22 text
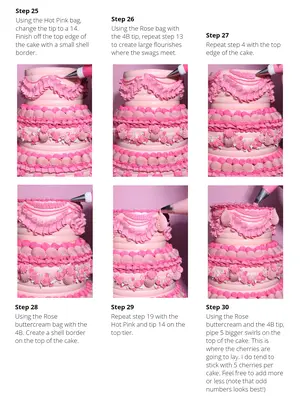
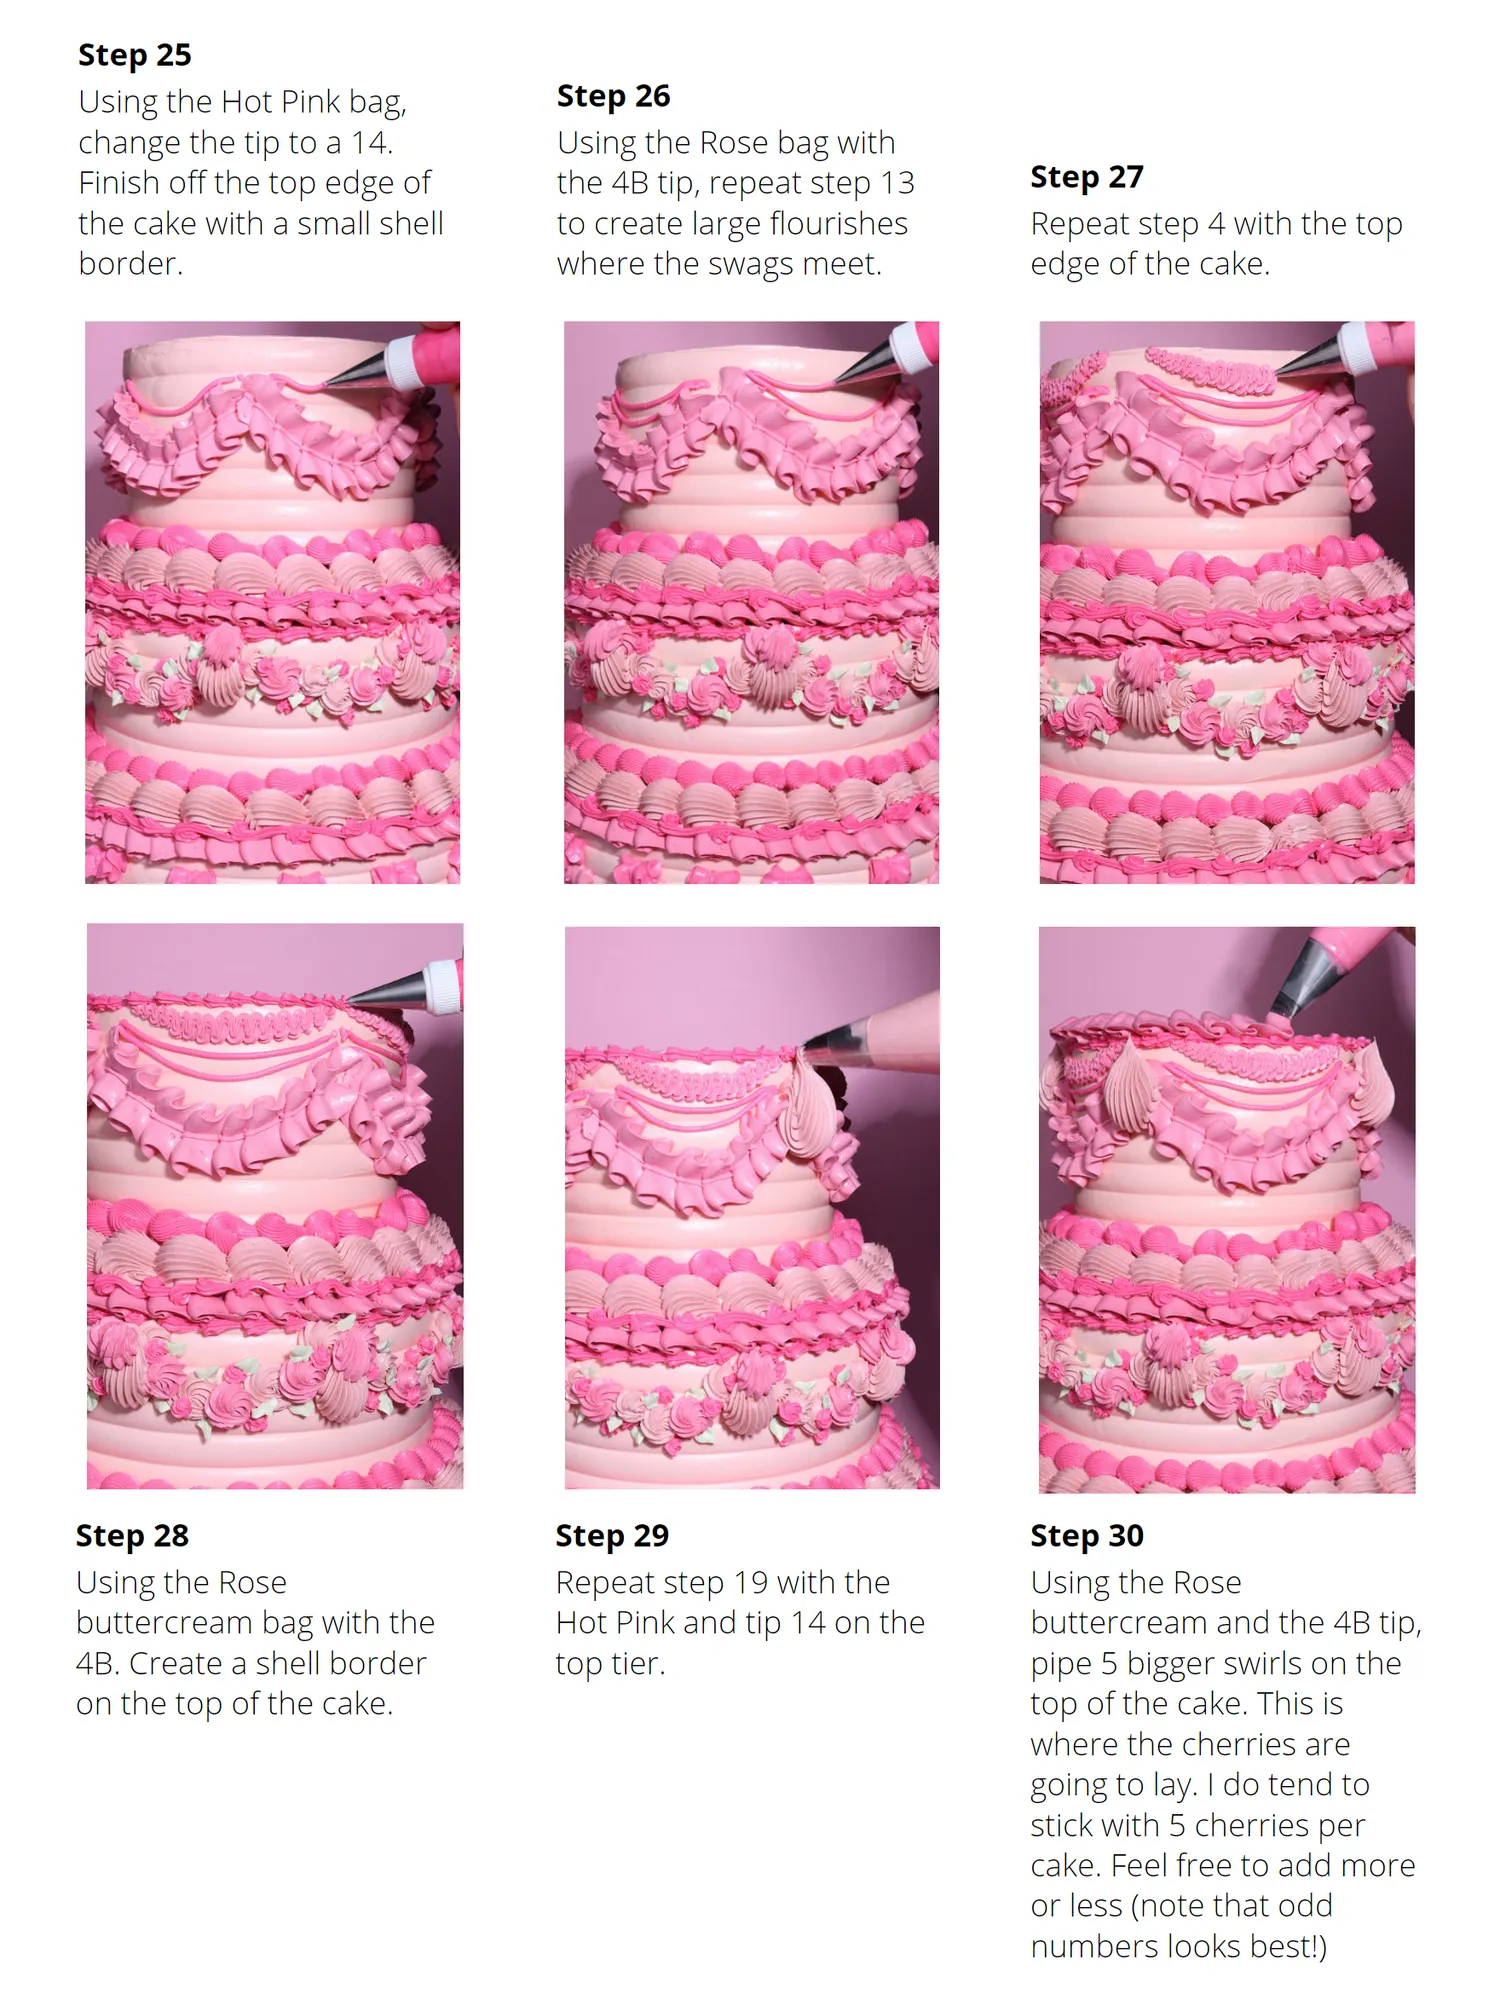
Step 25 Using the Hot Pink bag, Step 26 change the tip to a 14. Using the Rose bag with Finish off the top edge of the 4B tip, repeat step 13 Step 27 the cake with a small shell to create large flourishes Repeat step 4 with the top border. where the swags meet. edge of the cake. Step 28 Step 29 Step 30 Using the Rose Repeat step 19 with the Using the Rose buttercream bag with the Hot Pink and tip 14 on the buttercream and the 4B tip, 4B. Create a shell border top tier. pipe 5 bigger swirls on the on the top of the cake. top of the cake. This is where the cherries are going to lay. I do tend to stick with 5 cherries per cake. Feel free to add more or less (note that odd numbers looks best!)
Page 23 text
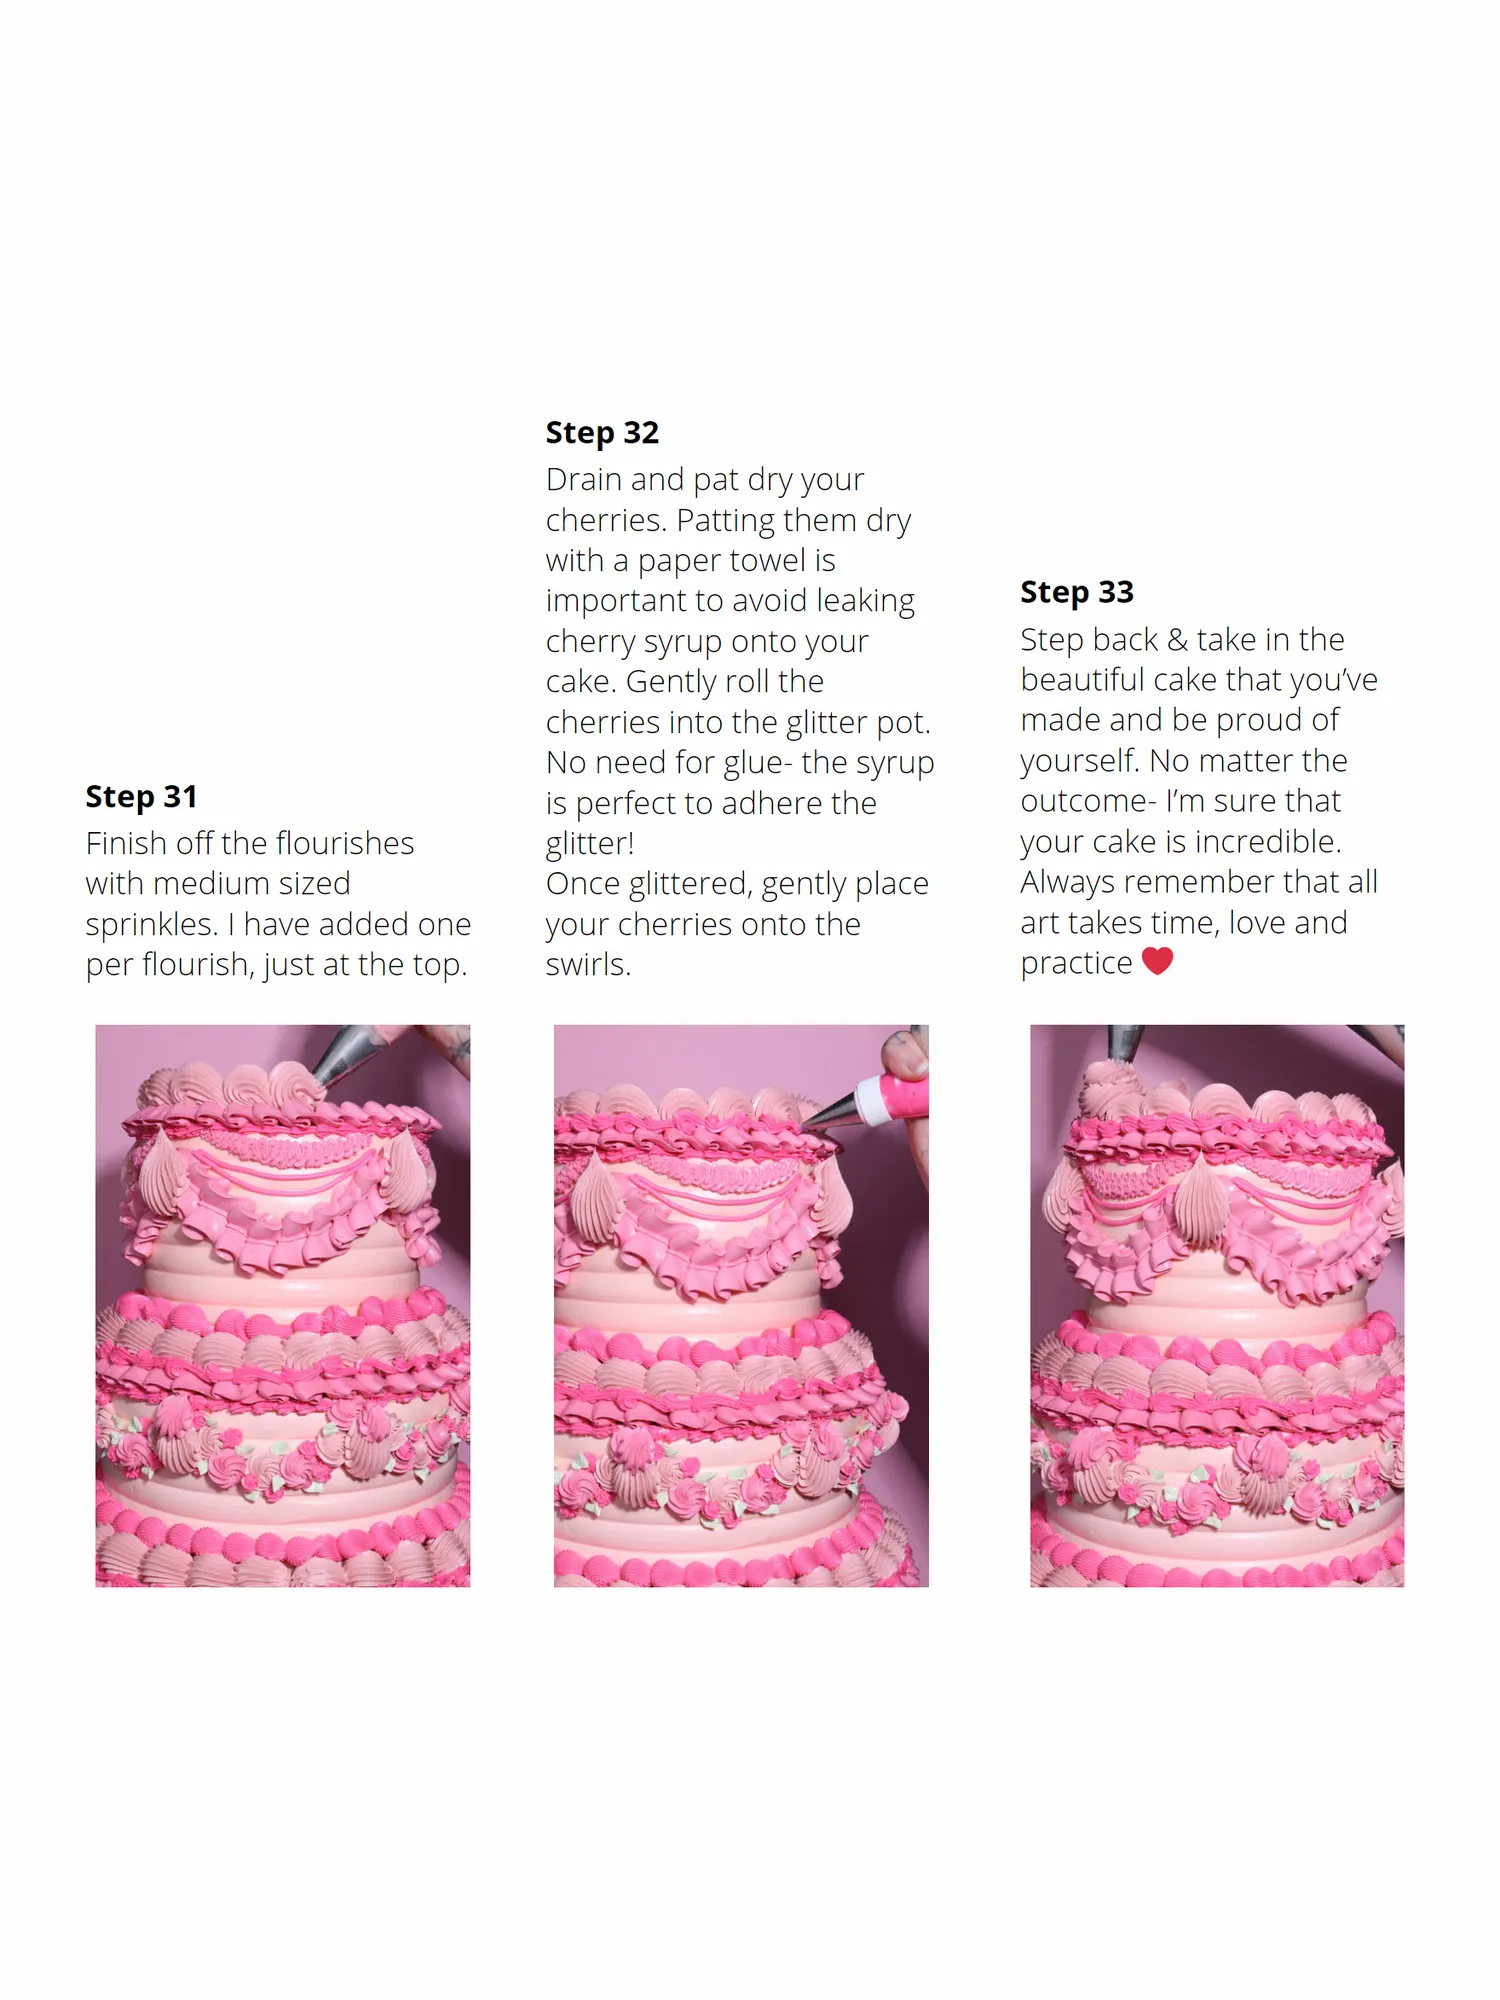
Step 32 Drain and pat dry your cherries. Patting them dry with a paper towel is important to avoid leaking Step 33 cherry syrup onto your Step back & take in the cake. Gently roll the beautiful cake that you’ve cherries into the glitter pot. made and be proud of No need for glue- the syrup yourself. No matter the Step 31 is perfect to adhere the outcome- I’m sure that Finish off the flourishes glitter! your cake is incredible. with medium sized Once glittered, gently place Always remember that all sprinkles. I have added one your cherries onto the art takes time, love and per flourish, just at the top. swirls. practice
Page 24 text
Pretty in Pink CupcakeTutorial
Page 25 text
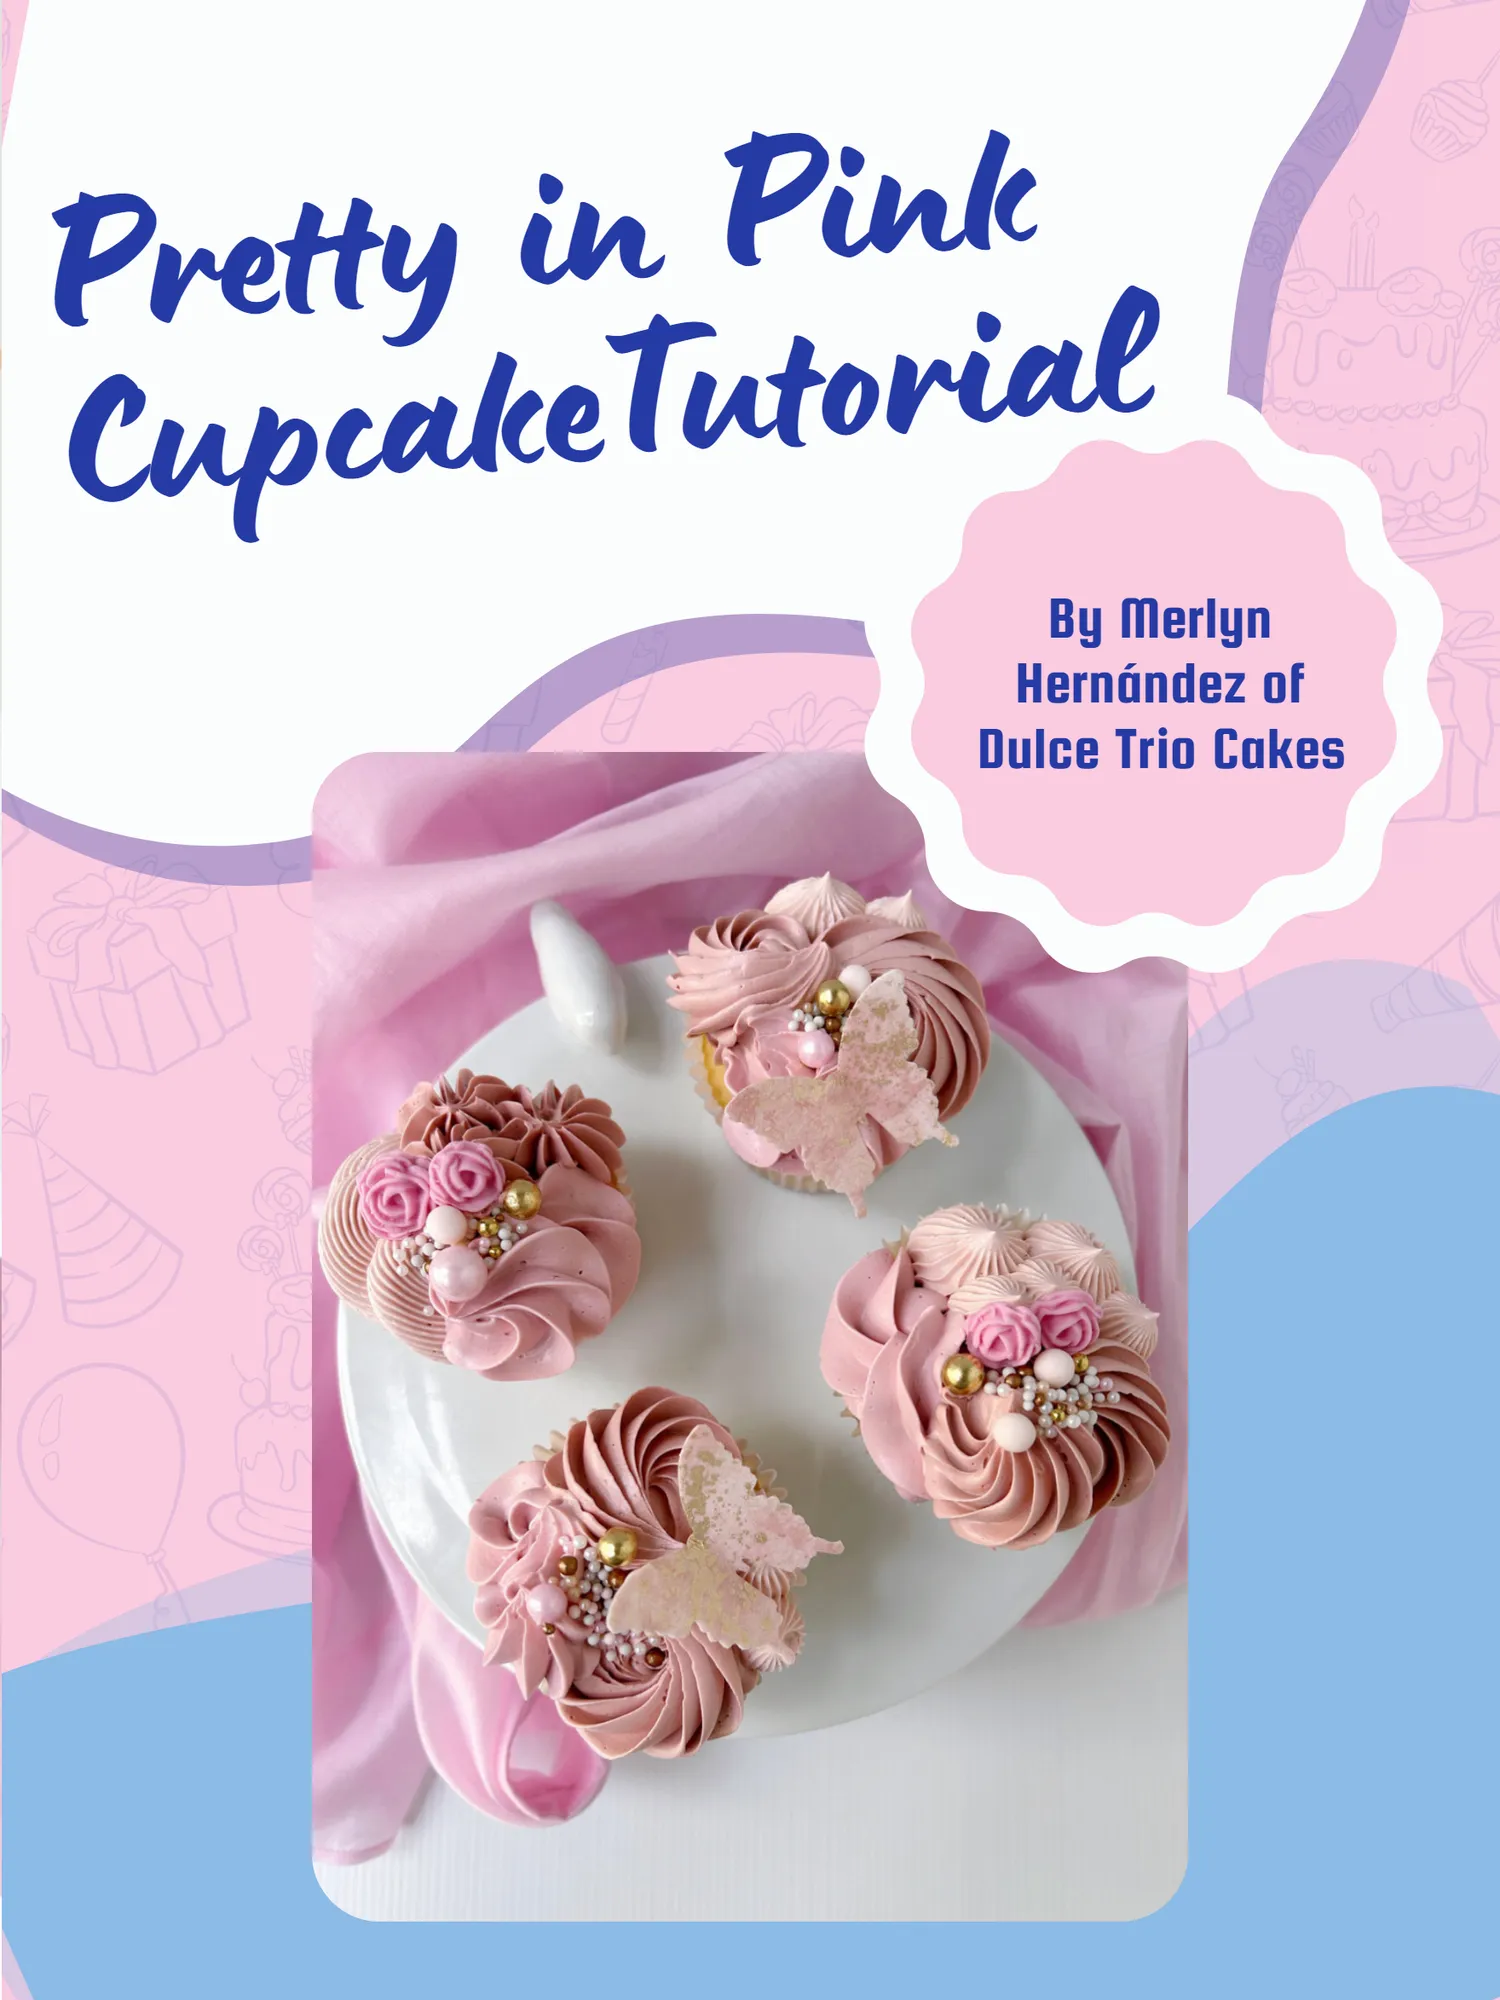
Pretty in Pink CupcakeTutorial
Page 26 text
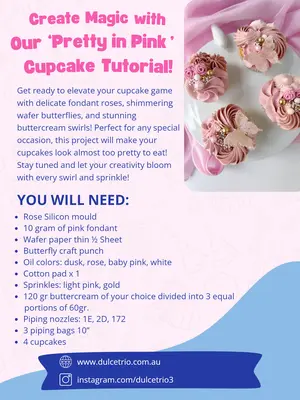
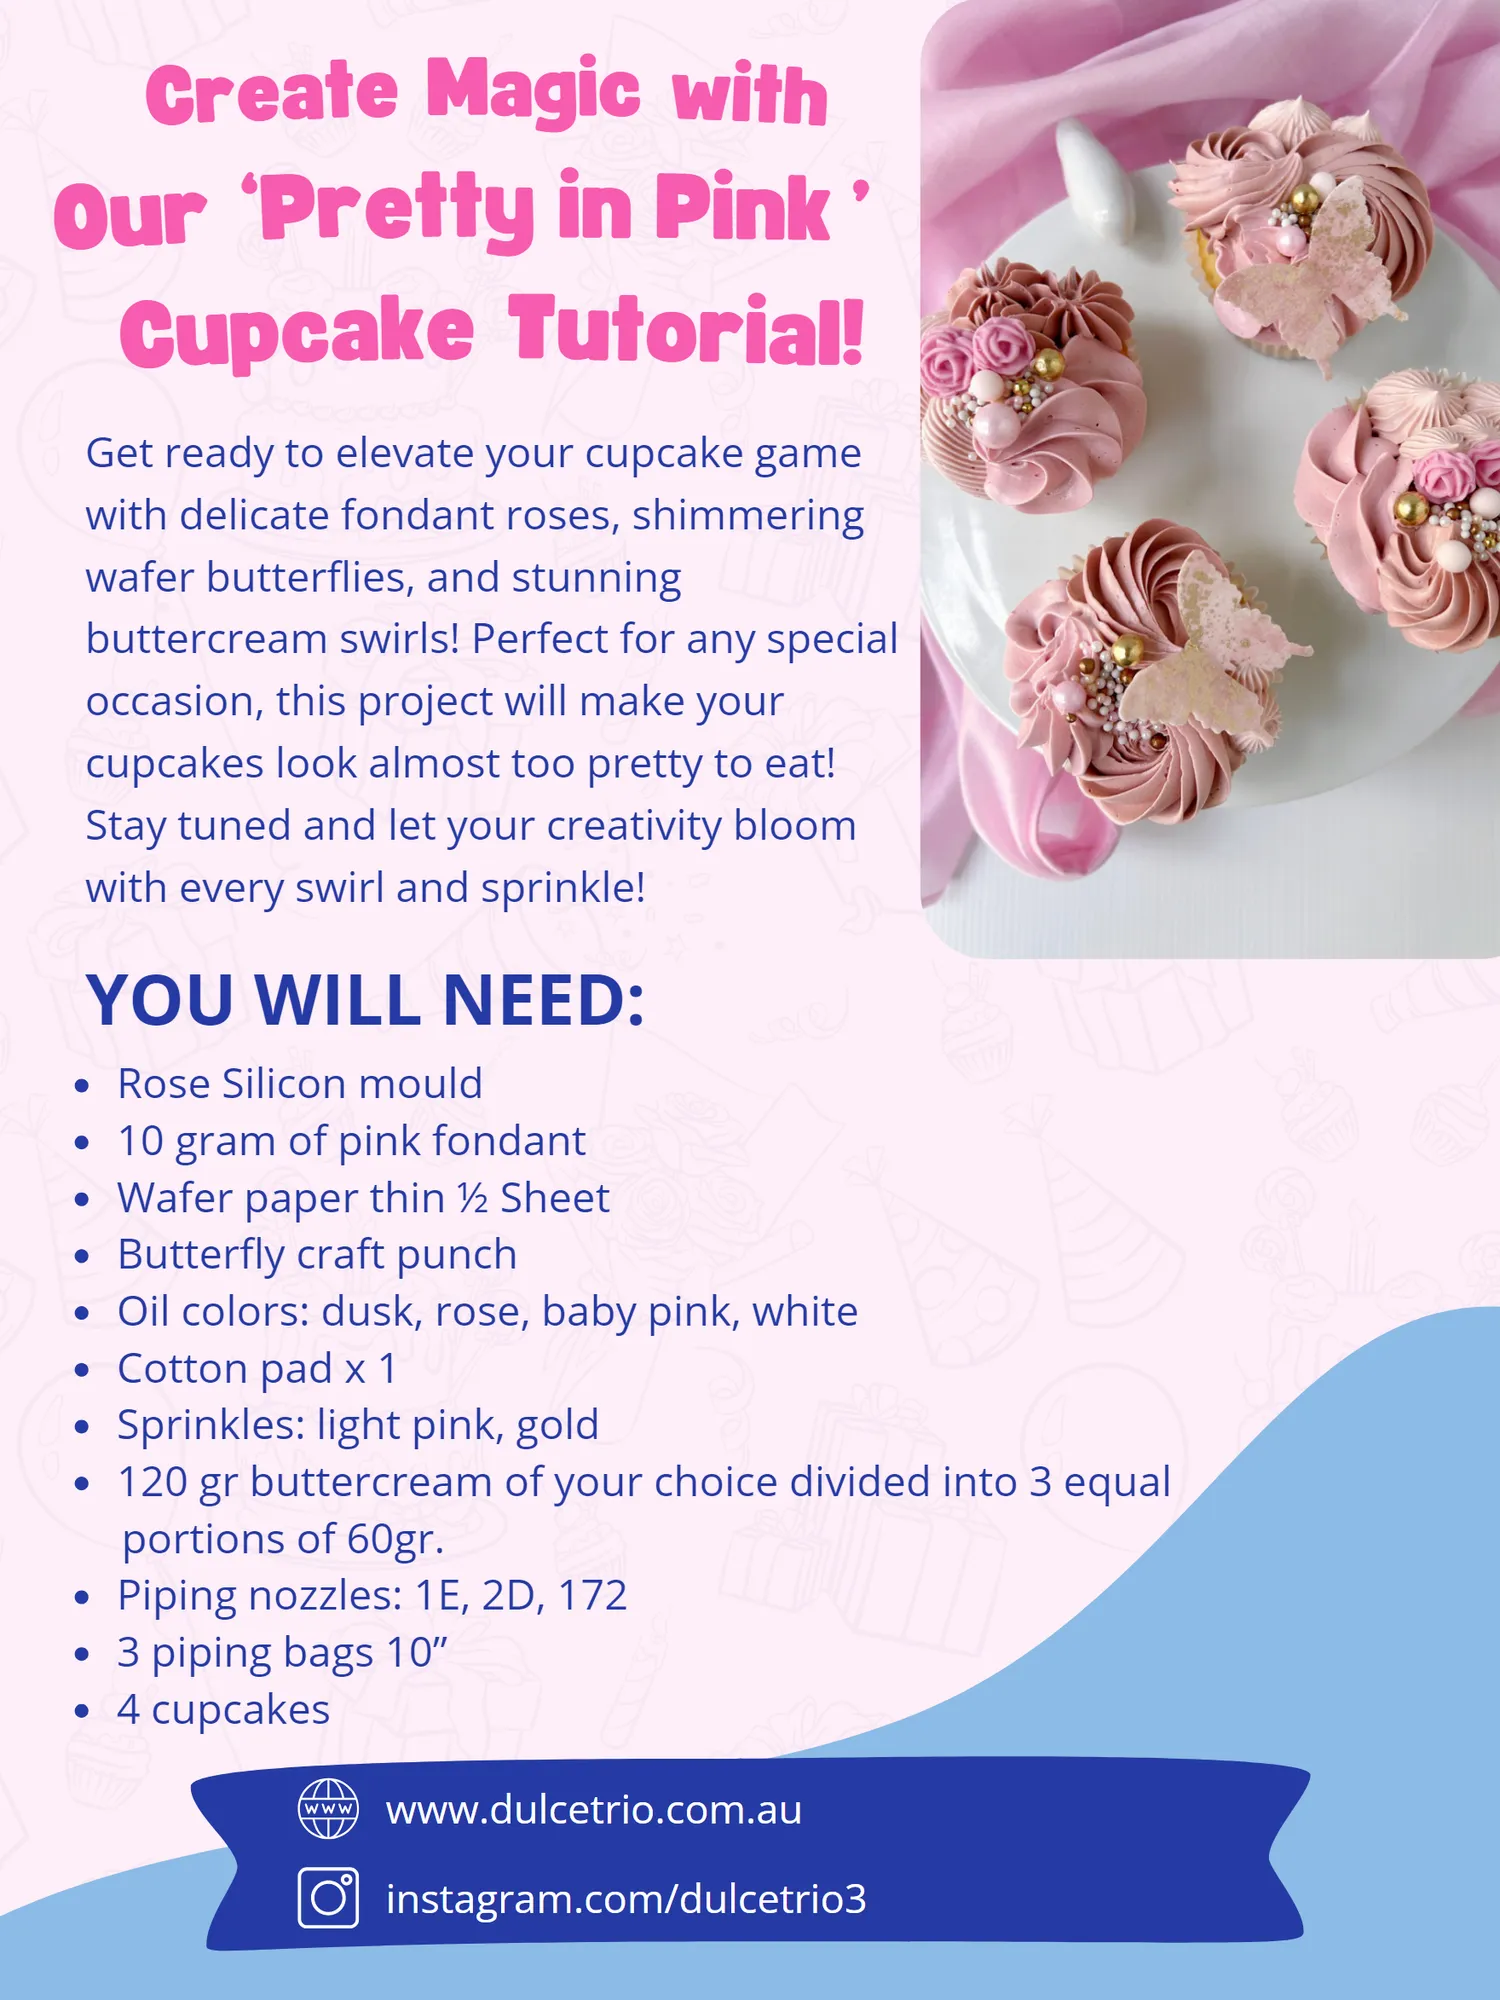
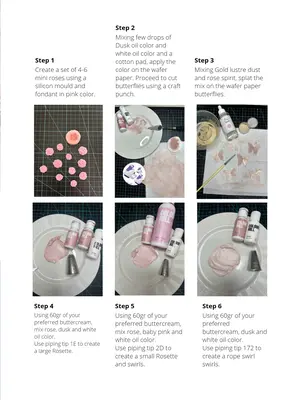
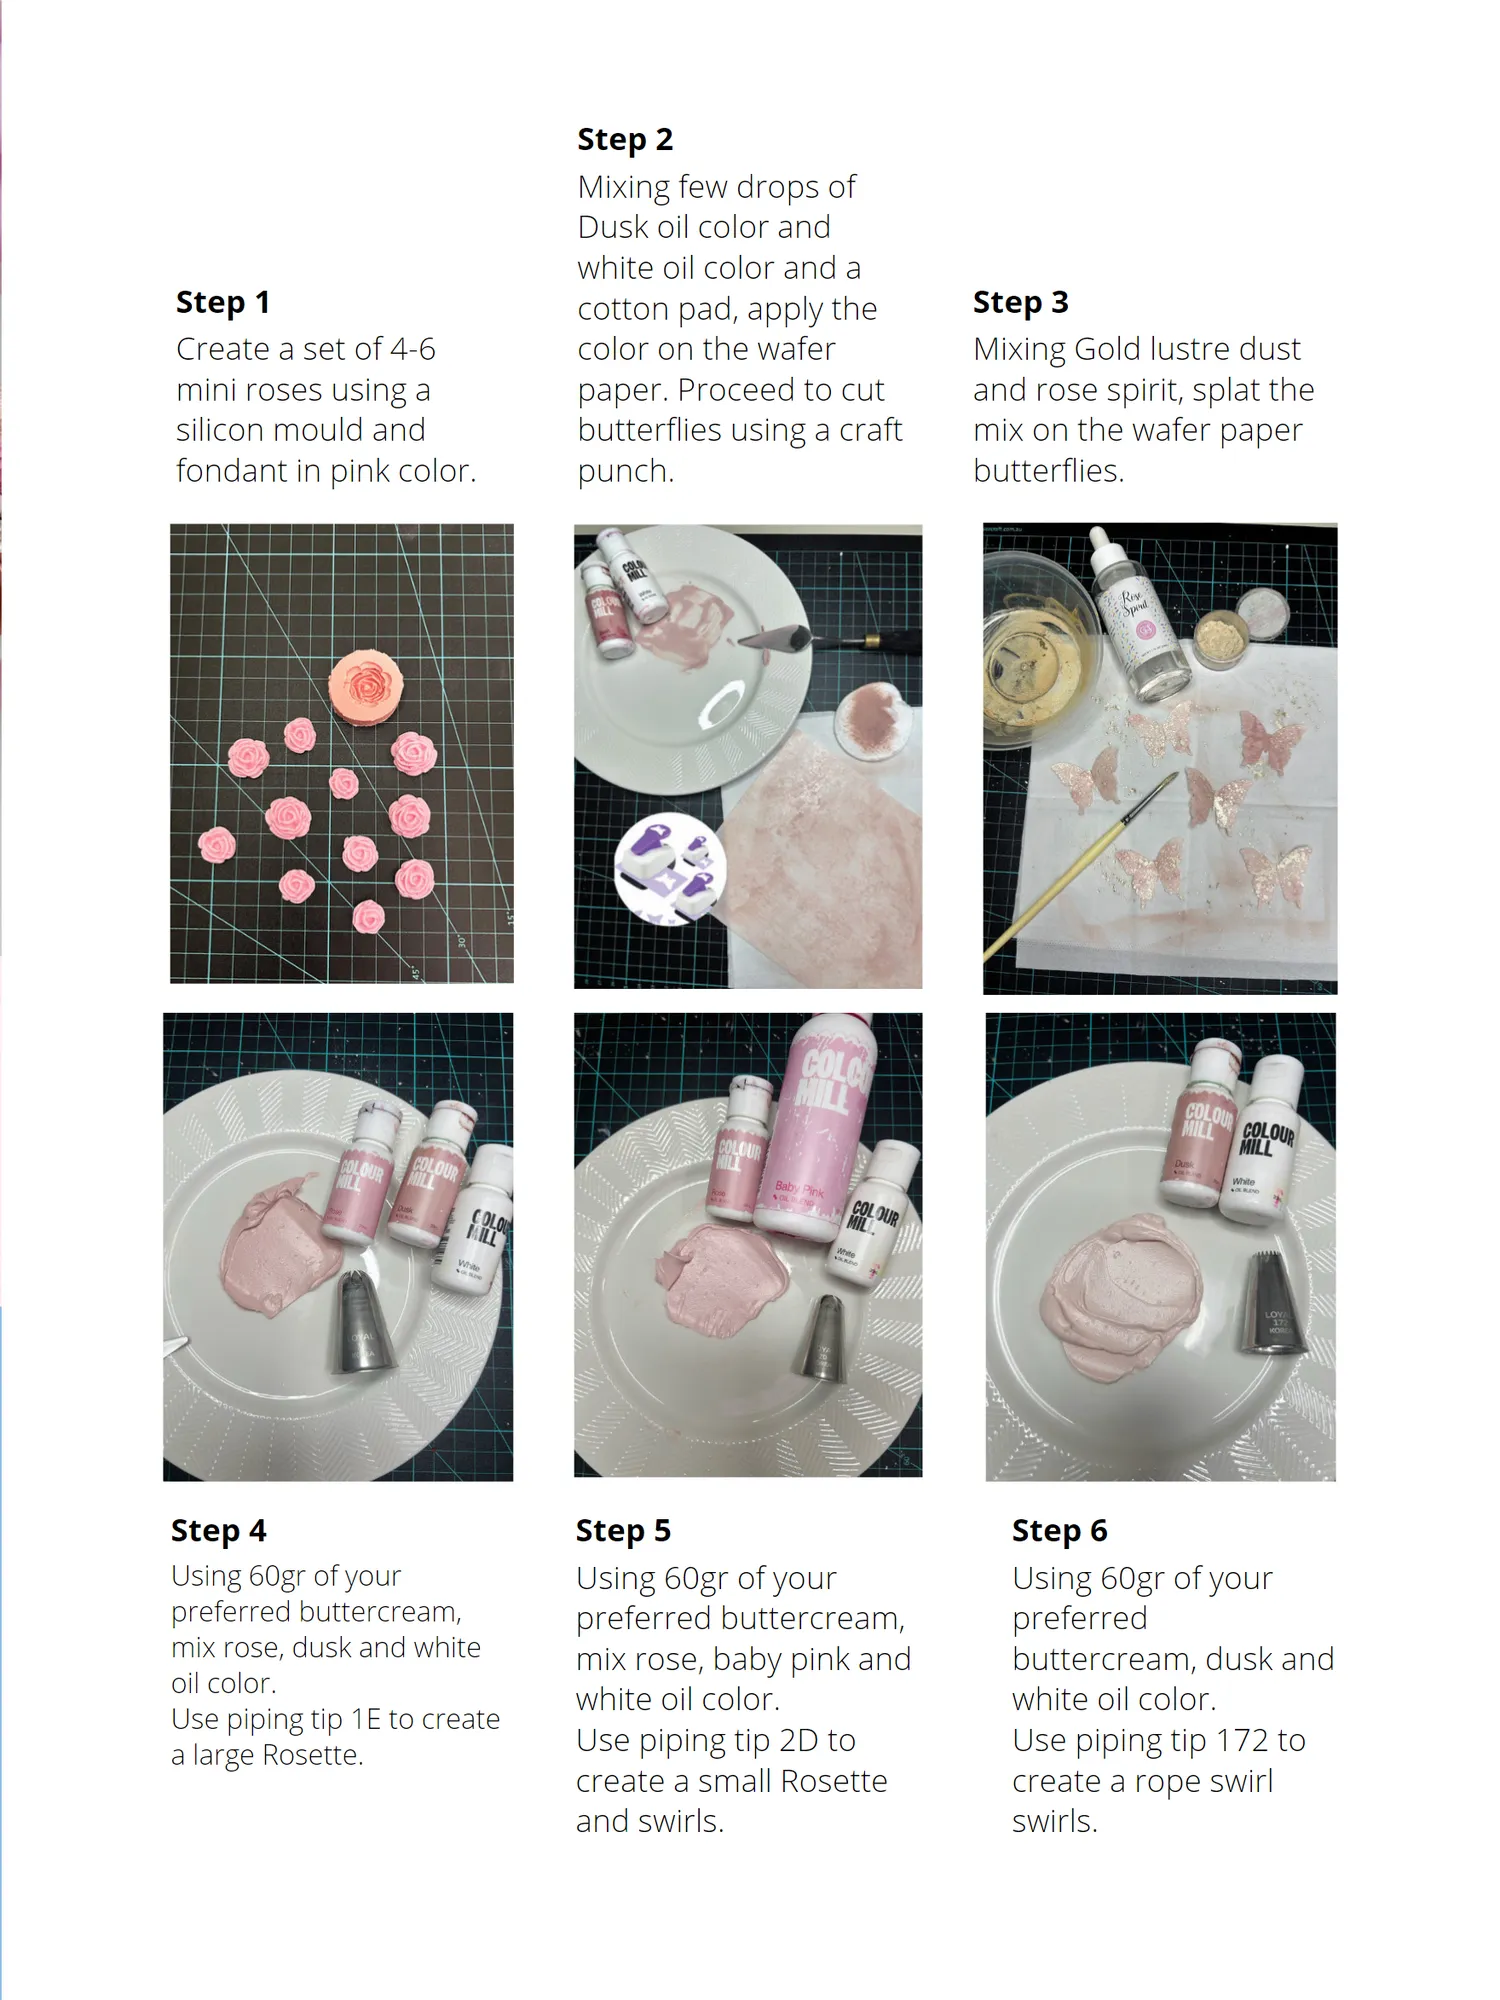
C r e a t e M ‘Pr e t t O Cup Step 1 c a k e Create a set of 4-6 mini roses using a silicon mould and Get ready to elevate your cupcake game fondant in pink color. with delicate fondant roses, shimmering wafer butterflies, and stunning buttercream swirls! Perfect for any special
Page 27 text
M agic it h Step 2 t y in Pink Mixing few drops of ’ Dusk oil color and white oil color and a T utorial! cotton pad, apply the color on the wafer paper. Proceed to cut butterflies using a craft Get ready to elevate your cupcake game punch. wafer butterflies, and stunning buttercream swirls! Perfect for any special
Page 28 text
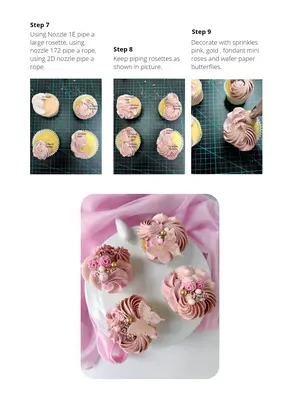
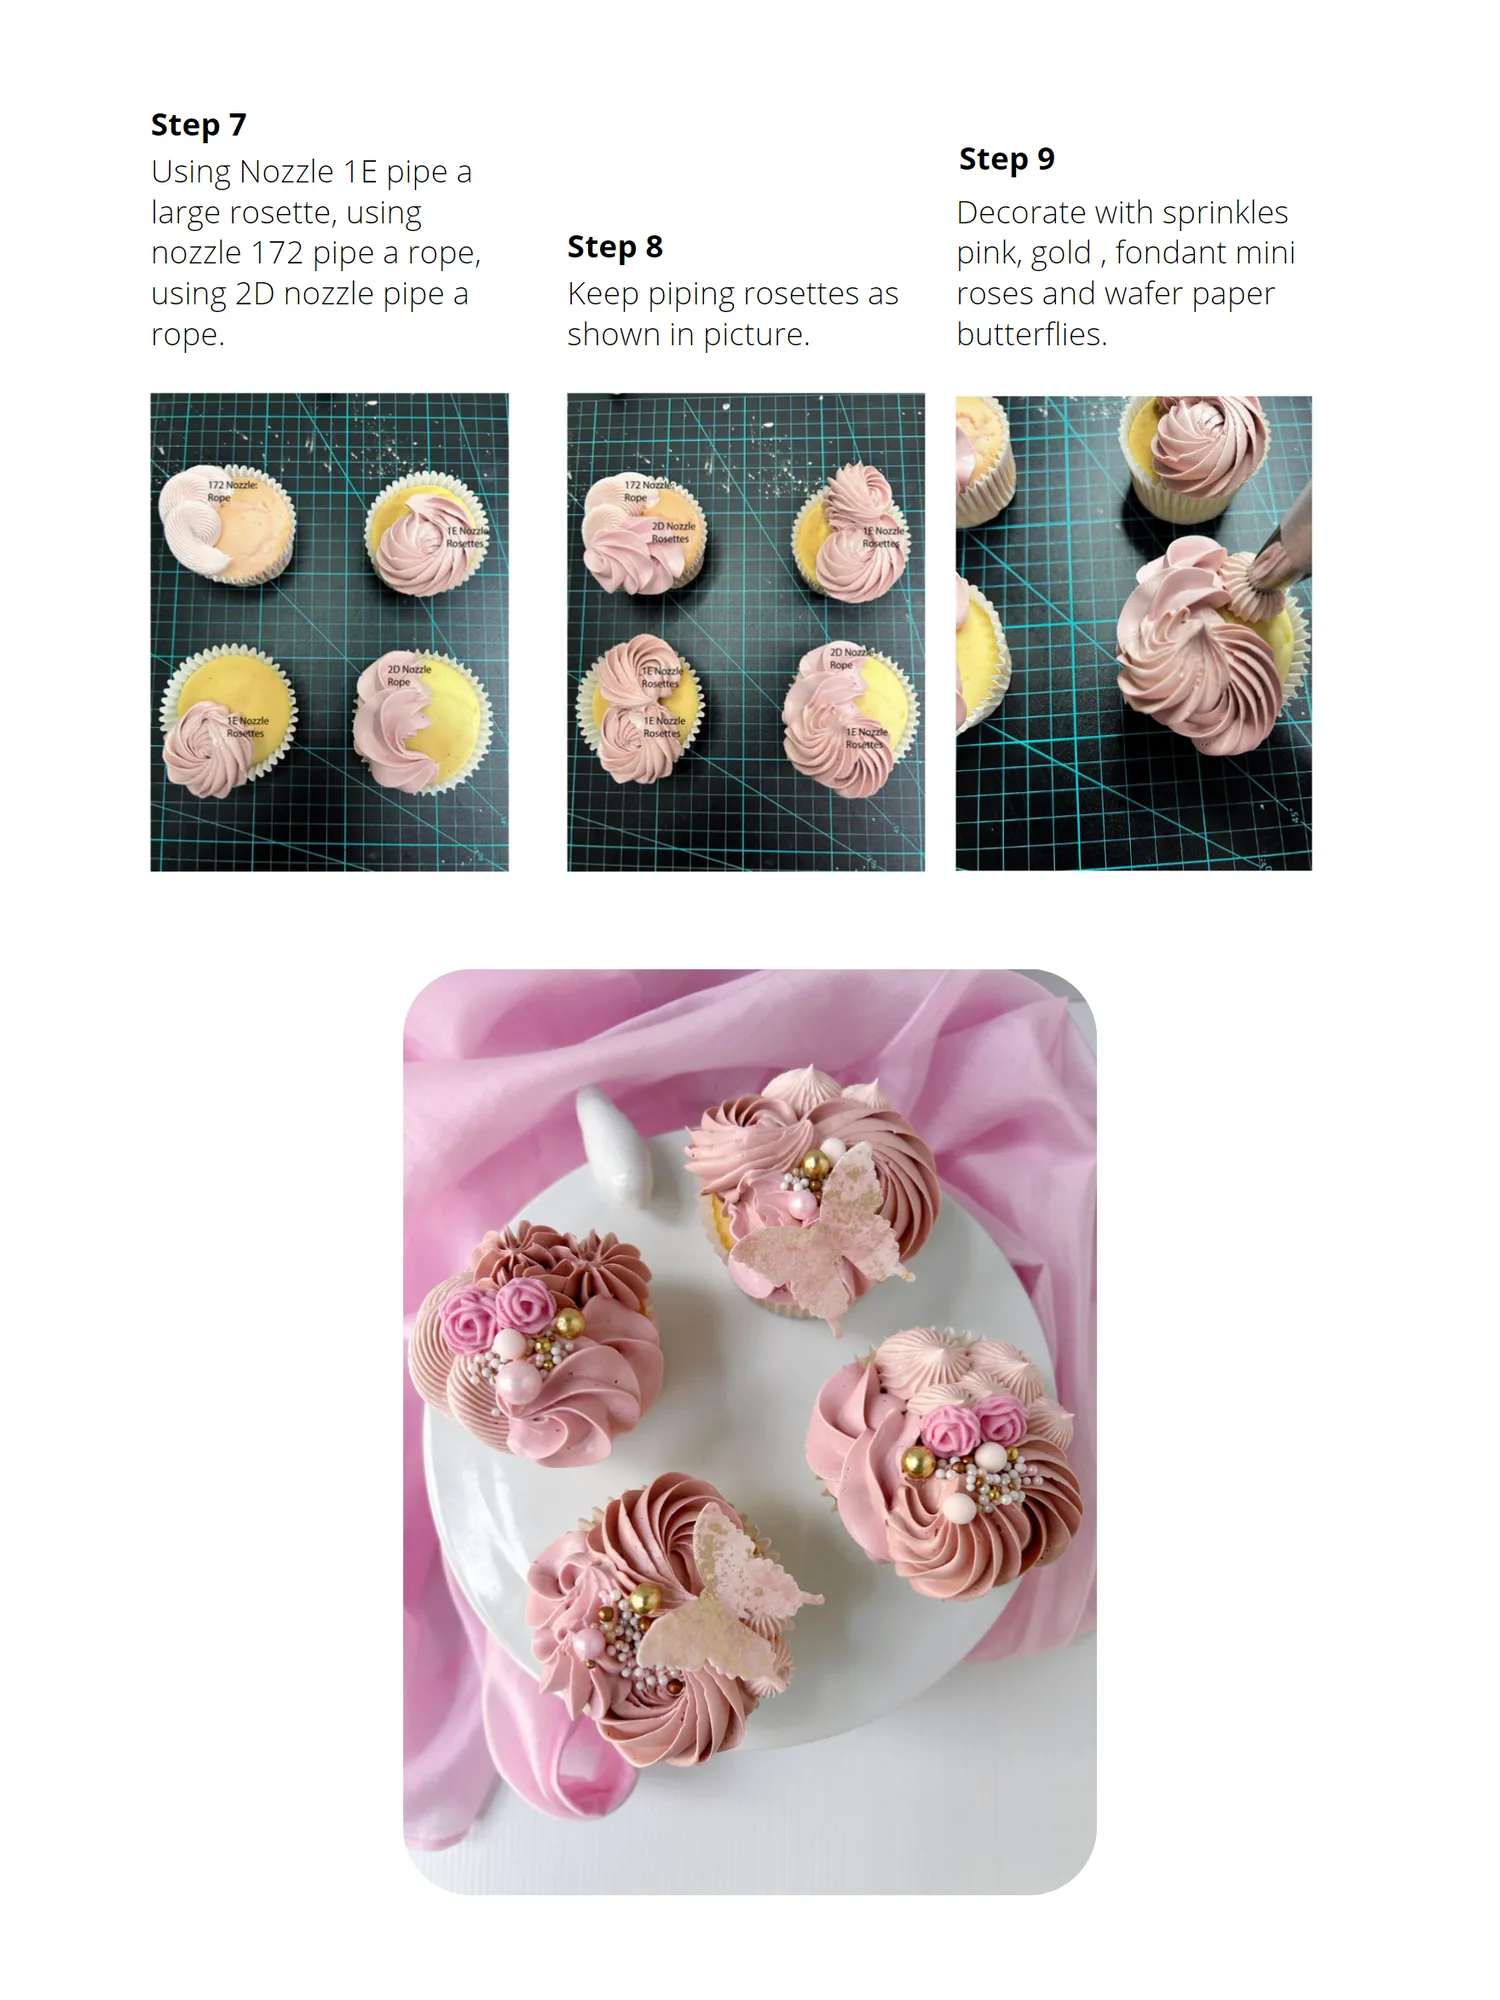
Step 7 Using Nozzle 1E pipe a large rosette, using nozzle 172 pipe a rope, using 2D nozzle pipe a rope.


Page 29 text
Step 9 Step 8 Keep piping rosettes as shown in picture. butterflies.


Page 30 text
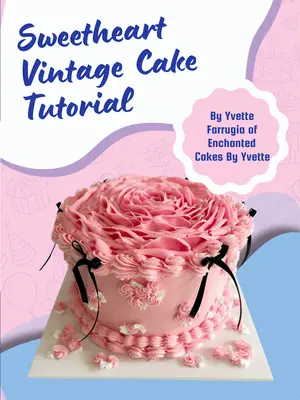
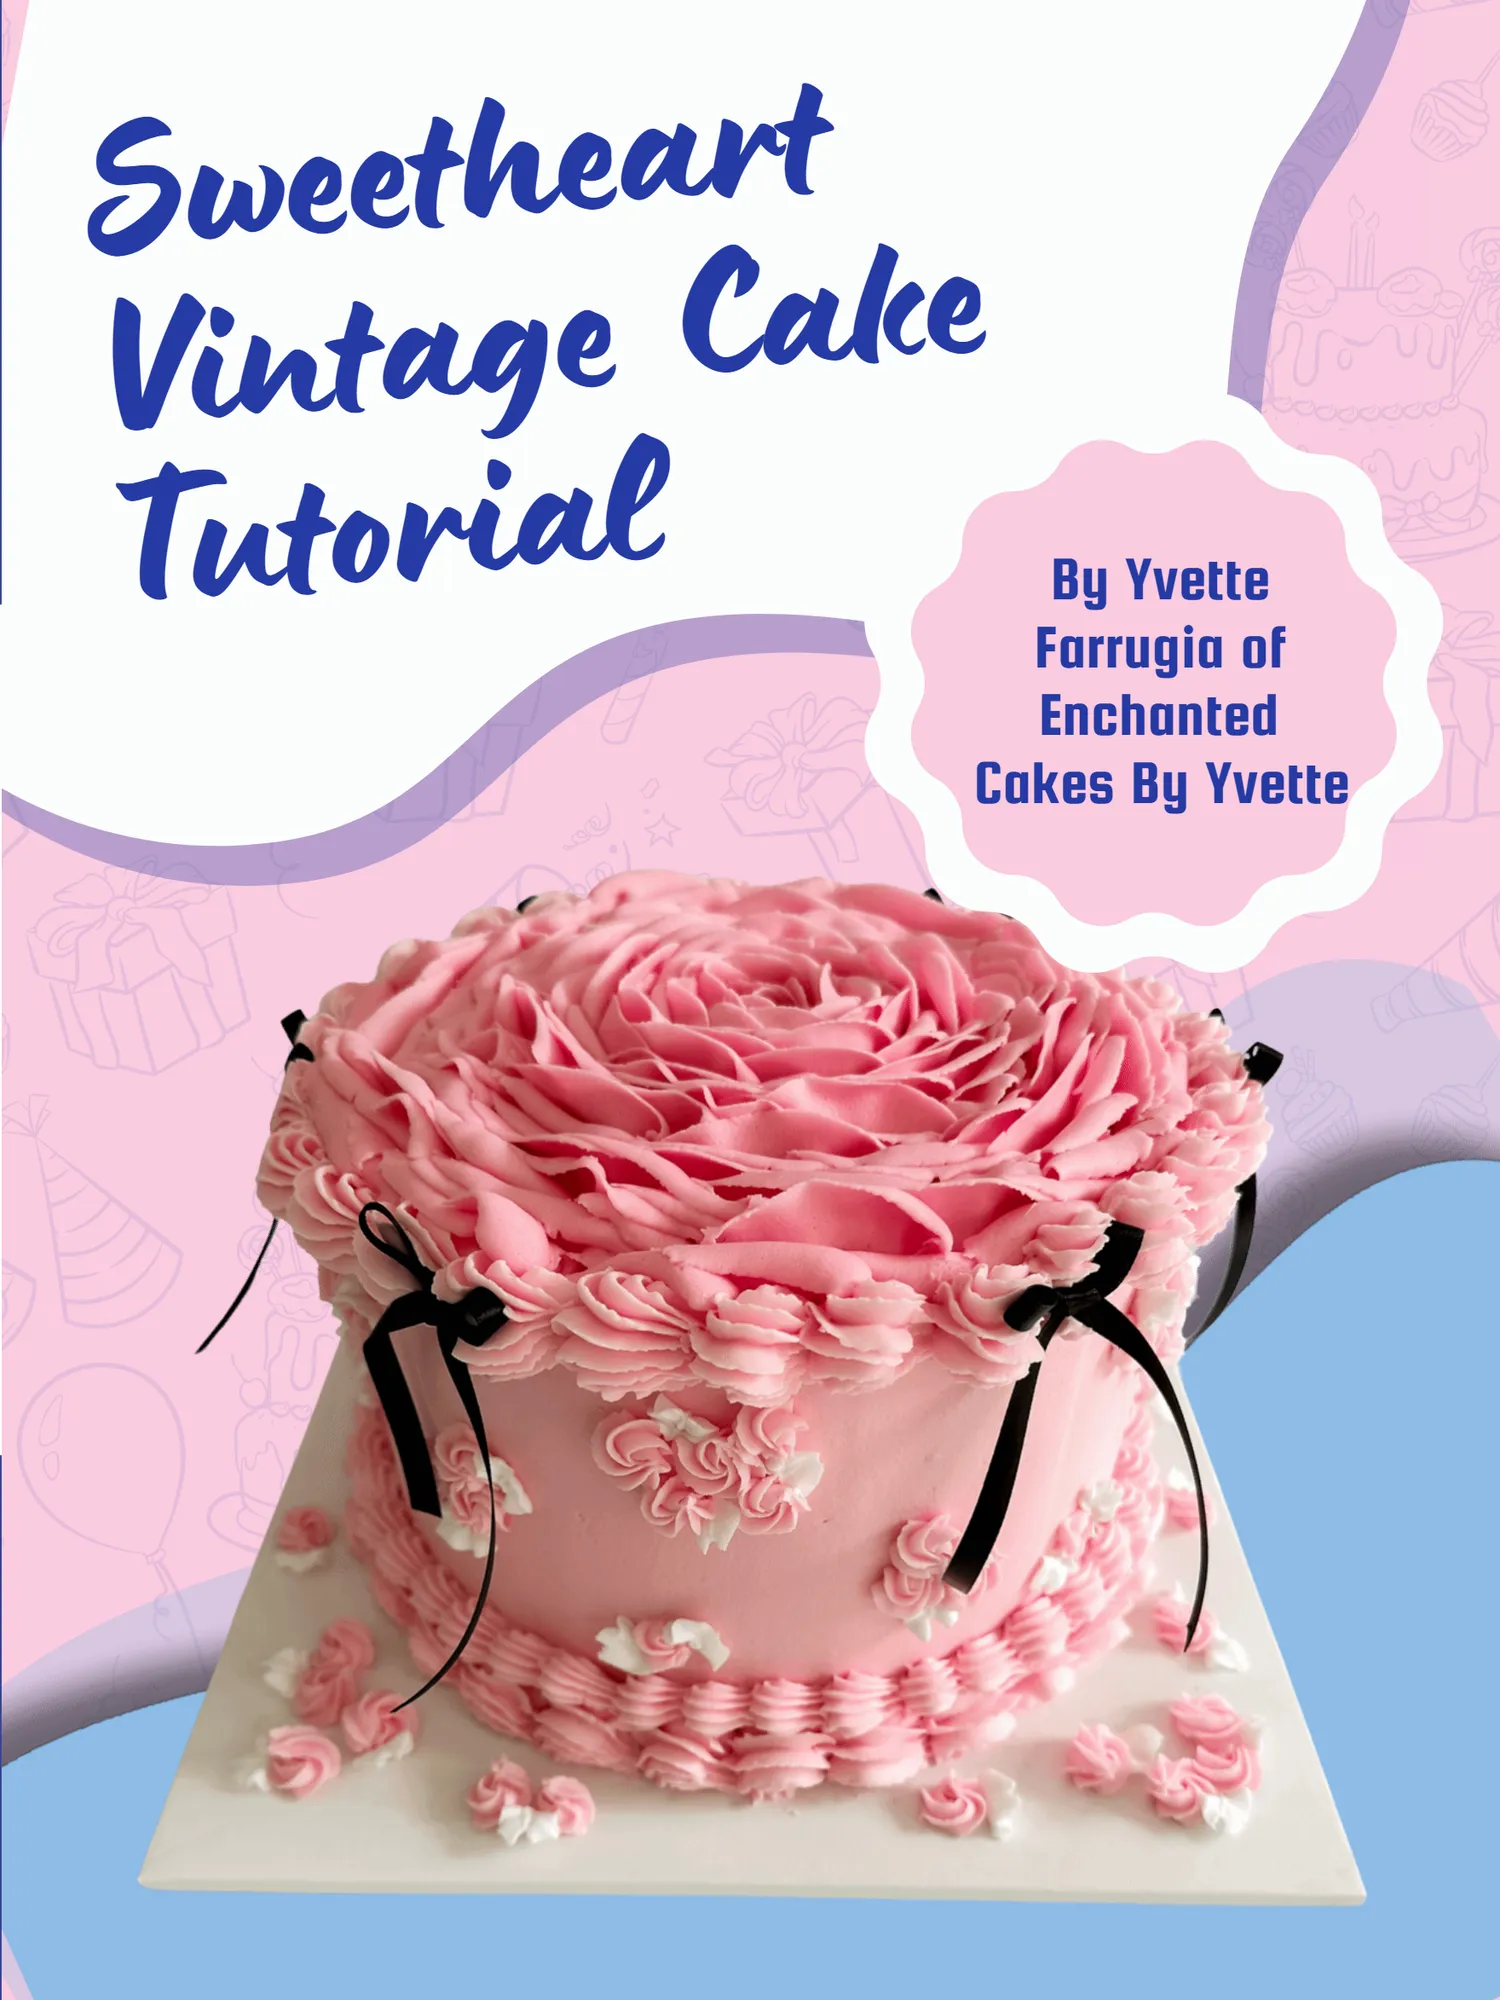
Sweetheart Vintage Cake Tutorial
Page 31 text
Sweetheart 2025 PREFERRED Vintage Cake SUPPLIERS MEMBER Tutorial DISCOUNTS
Page 32 text
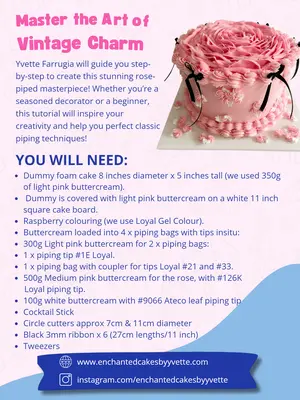
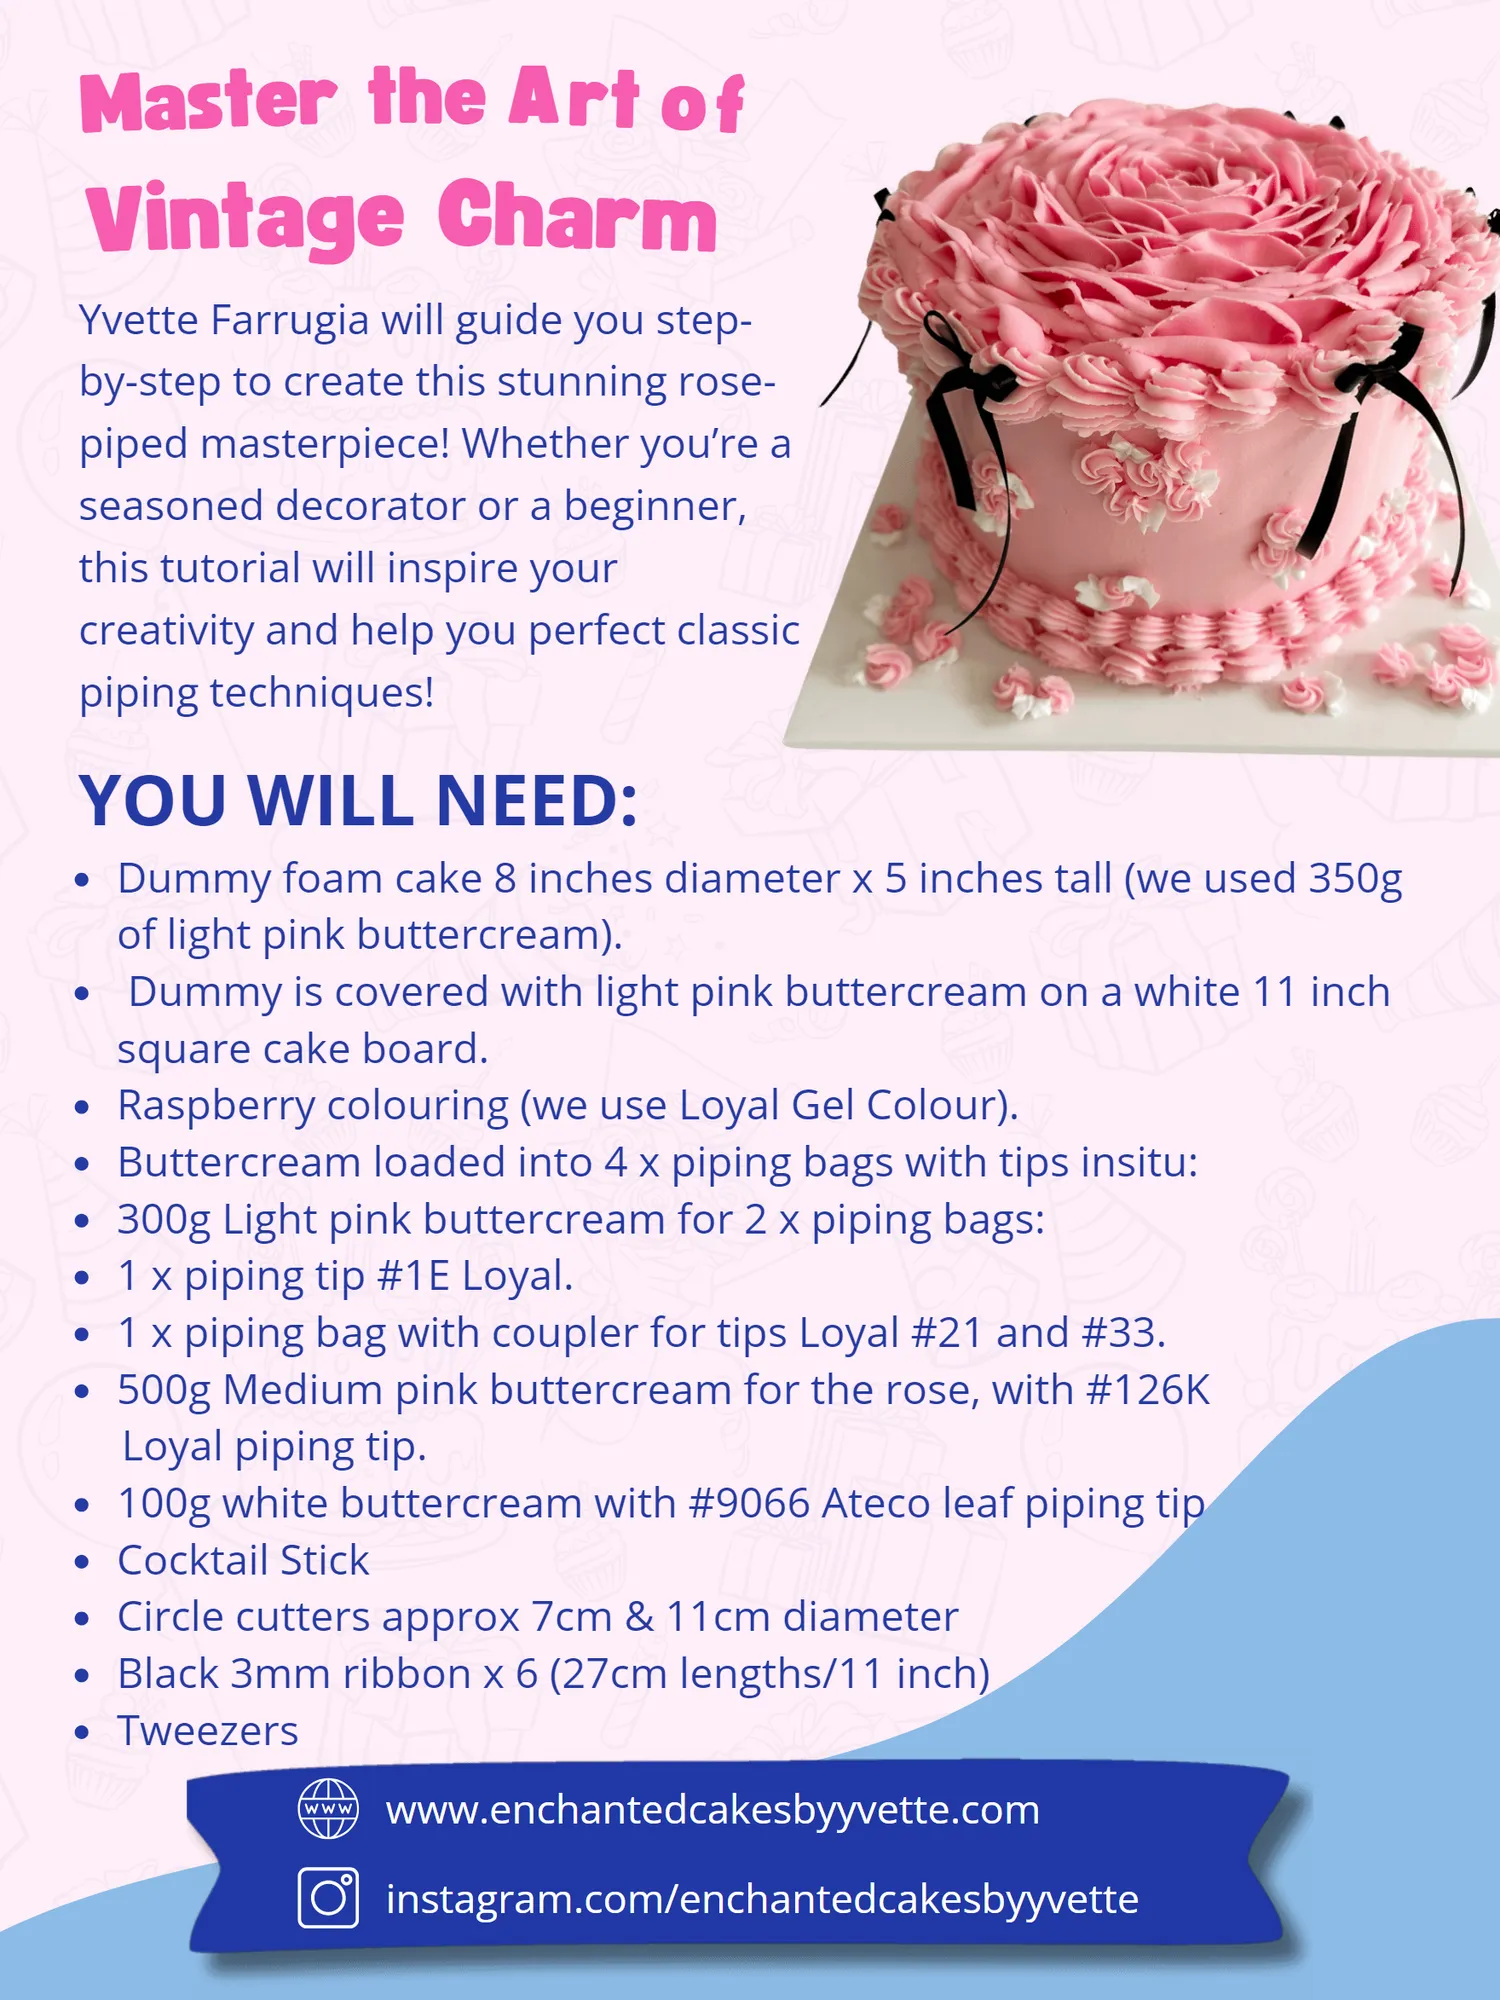
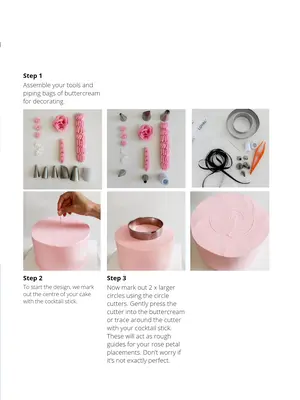
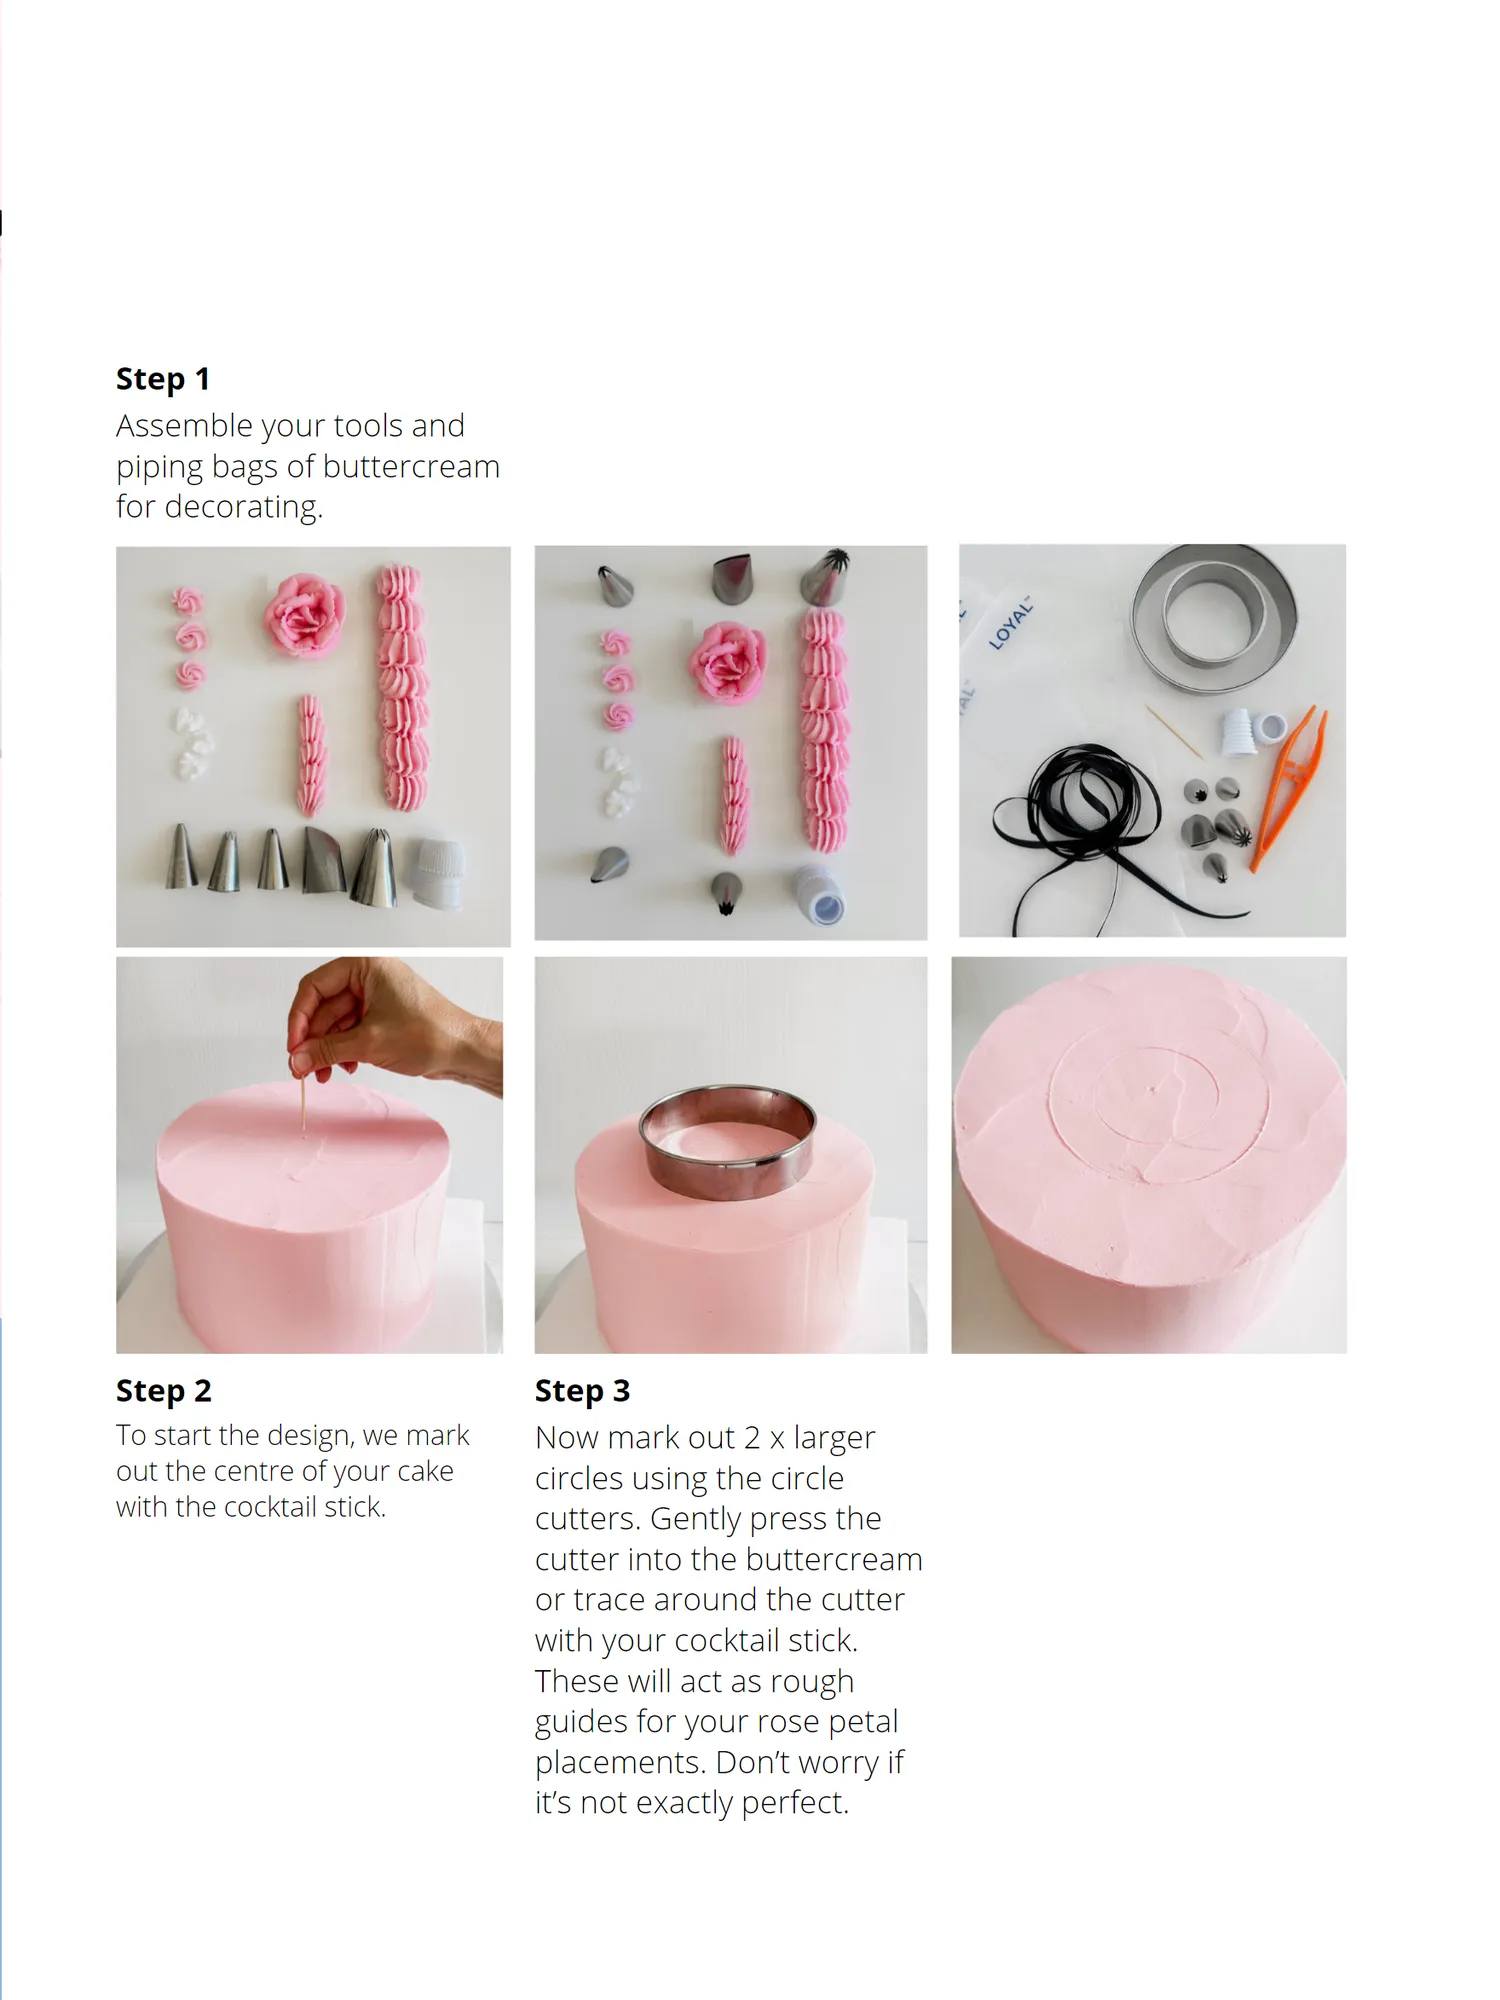
M as t e r t he A V i nt a ge C by-step to create this stunning rose- Assemble your tools and piped masterpiece! Whether you’re a piping bags of buttercream seasoned decorator or a beginner, for decorating. this tutorial will inspire your creativity and help you perfect classic
Page 33 text
he A r t o f C h arm Yvette Farrugia will guide you step- by-step to create this stunning rose- piped masterpiece! Whether you’re a seasoned decorator or a beginner, this tutorial will inspire your creativity and help you perfect classic
Page 34 text
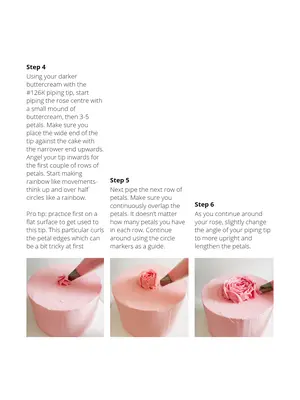
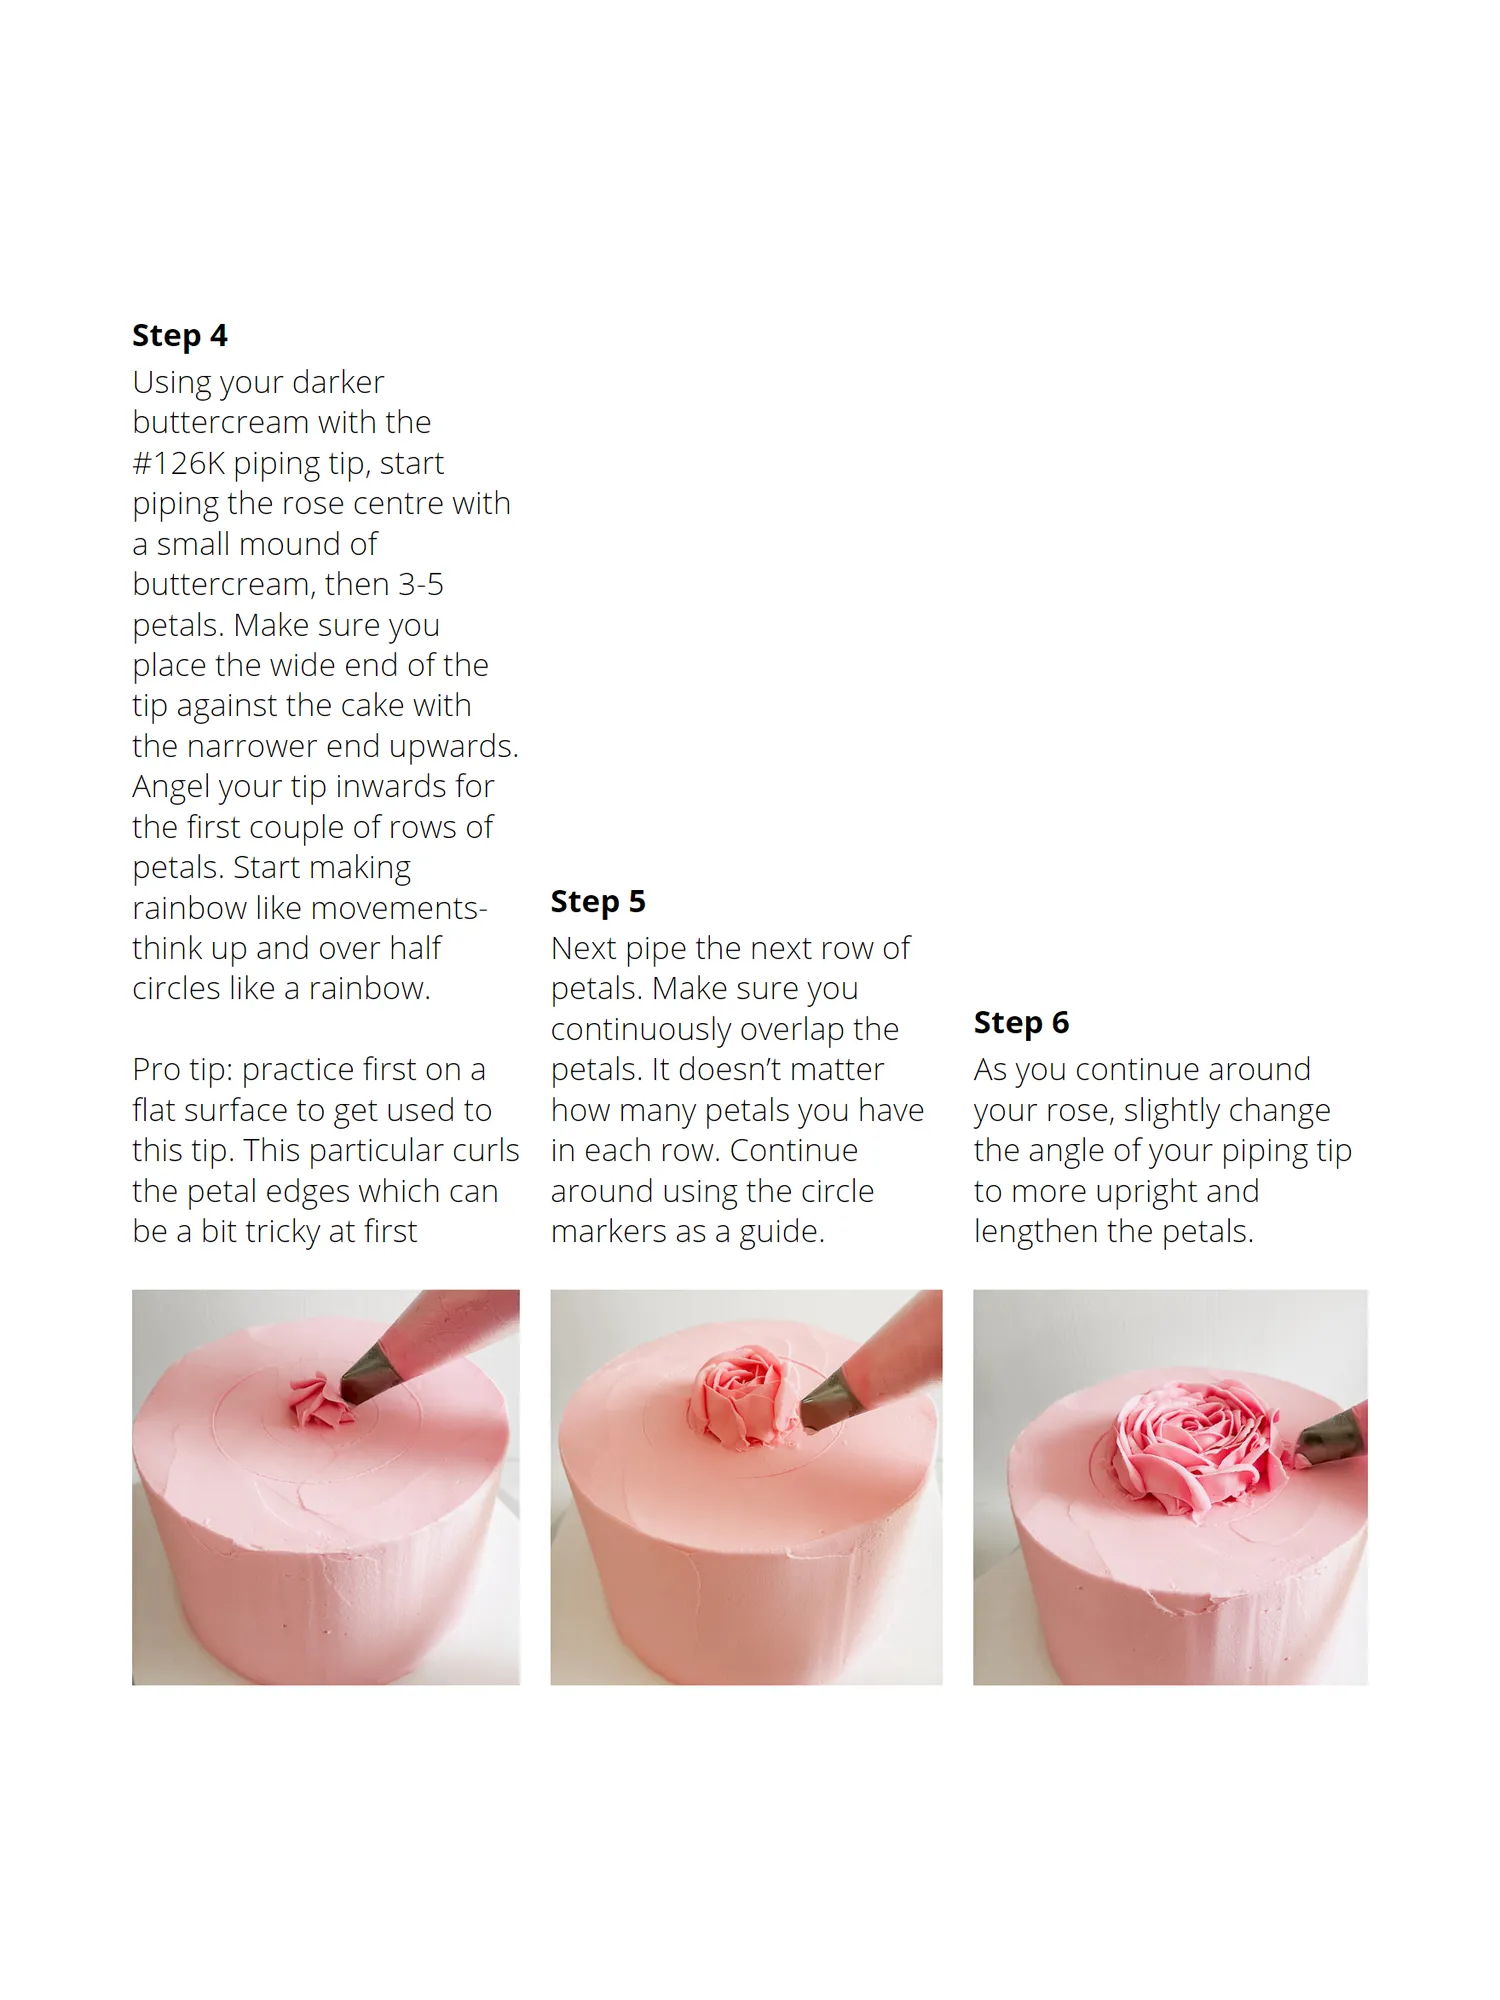
Step 4 Using your darker buttercream with the #126K piping tip, start piping the rose centre with a small mound of buttercream, then 3-5 petals. Make sure you place the wide end of the tip against the cake with the narrower end upwards. Angel your tip inwards for the first couple of rows of petals. Start making rainbow like movements- Step 5 think up and over half Next pipe the next row of circles like a rainbow. petals. Make sure you continuously overlap the Step 6 Pro tip: practice first on a petals. It doesn’t matter As you continue around flat surface to get used to how many petals you have your rose, slightly change this tip. This particular curls in each row. Continue the angle of your piping tip the petal edges which can around using the circle to more upright and be a bit tricky at first markers as a guide. lengthen the petals.
Page 35 text
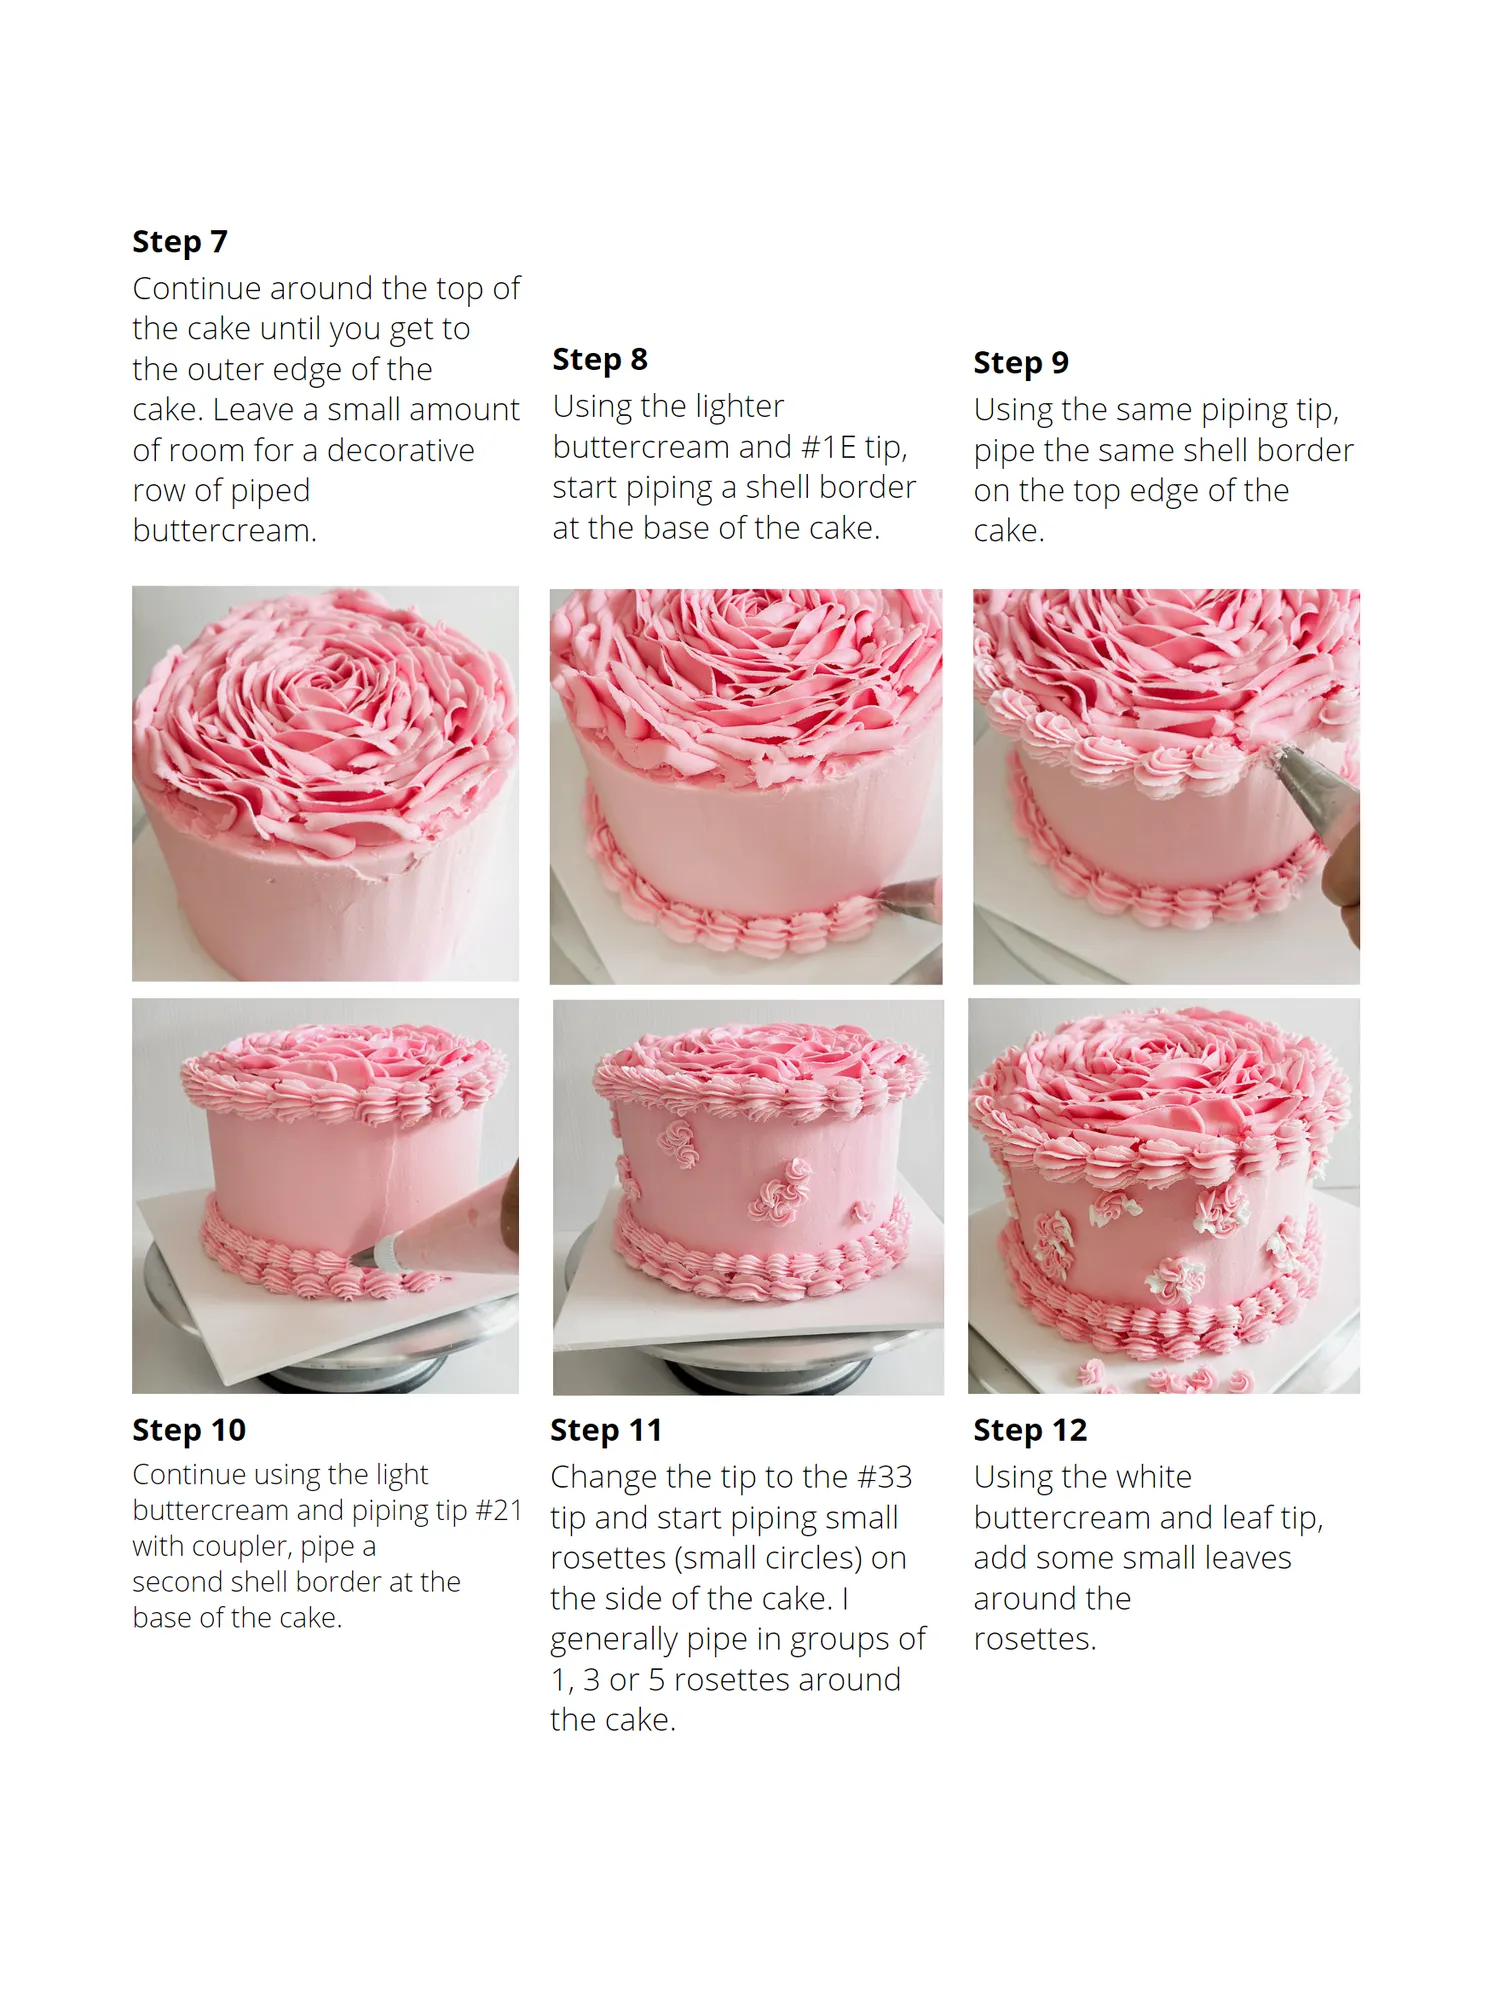
Step 7 Continue around the top of the cake until you get to the outer edge of the Step 8 Step 9 cake. Leave a small amount Using the lighter Using the same piping tip, of room for a decorative buttercream and #1E tip, pipe the same shell border row of piped start piping a shell border on the top edge of the buttercream. at the base of the cake. cake. Step 10 Step 11 Step 12 Continue using the light Change the tip to the #33 Using the white buttercream and piping tip #21 tip and start piping small buttercream and leaf tip, with coupler, pipe a rosettes (small circles) on add some small leaves second shell border at the the side of the cake. I around the base of the cake. generally pipe in groups of rosettes. 1, 3 or 5 rosettes around the cake.
Page 36 text
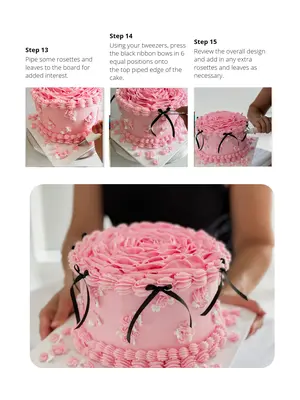
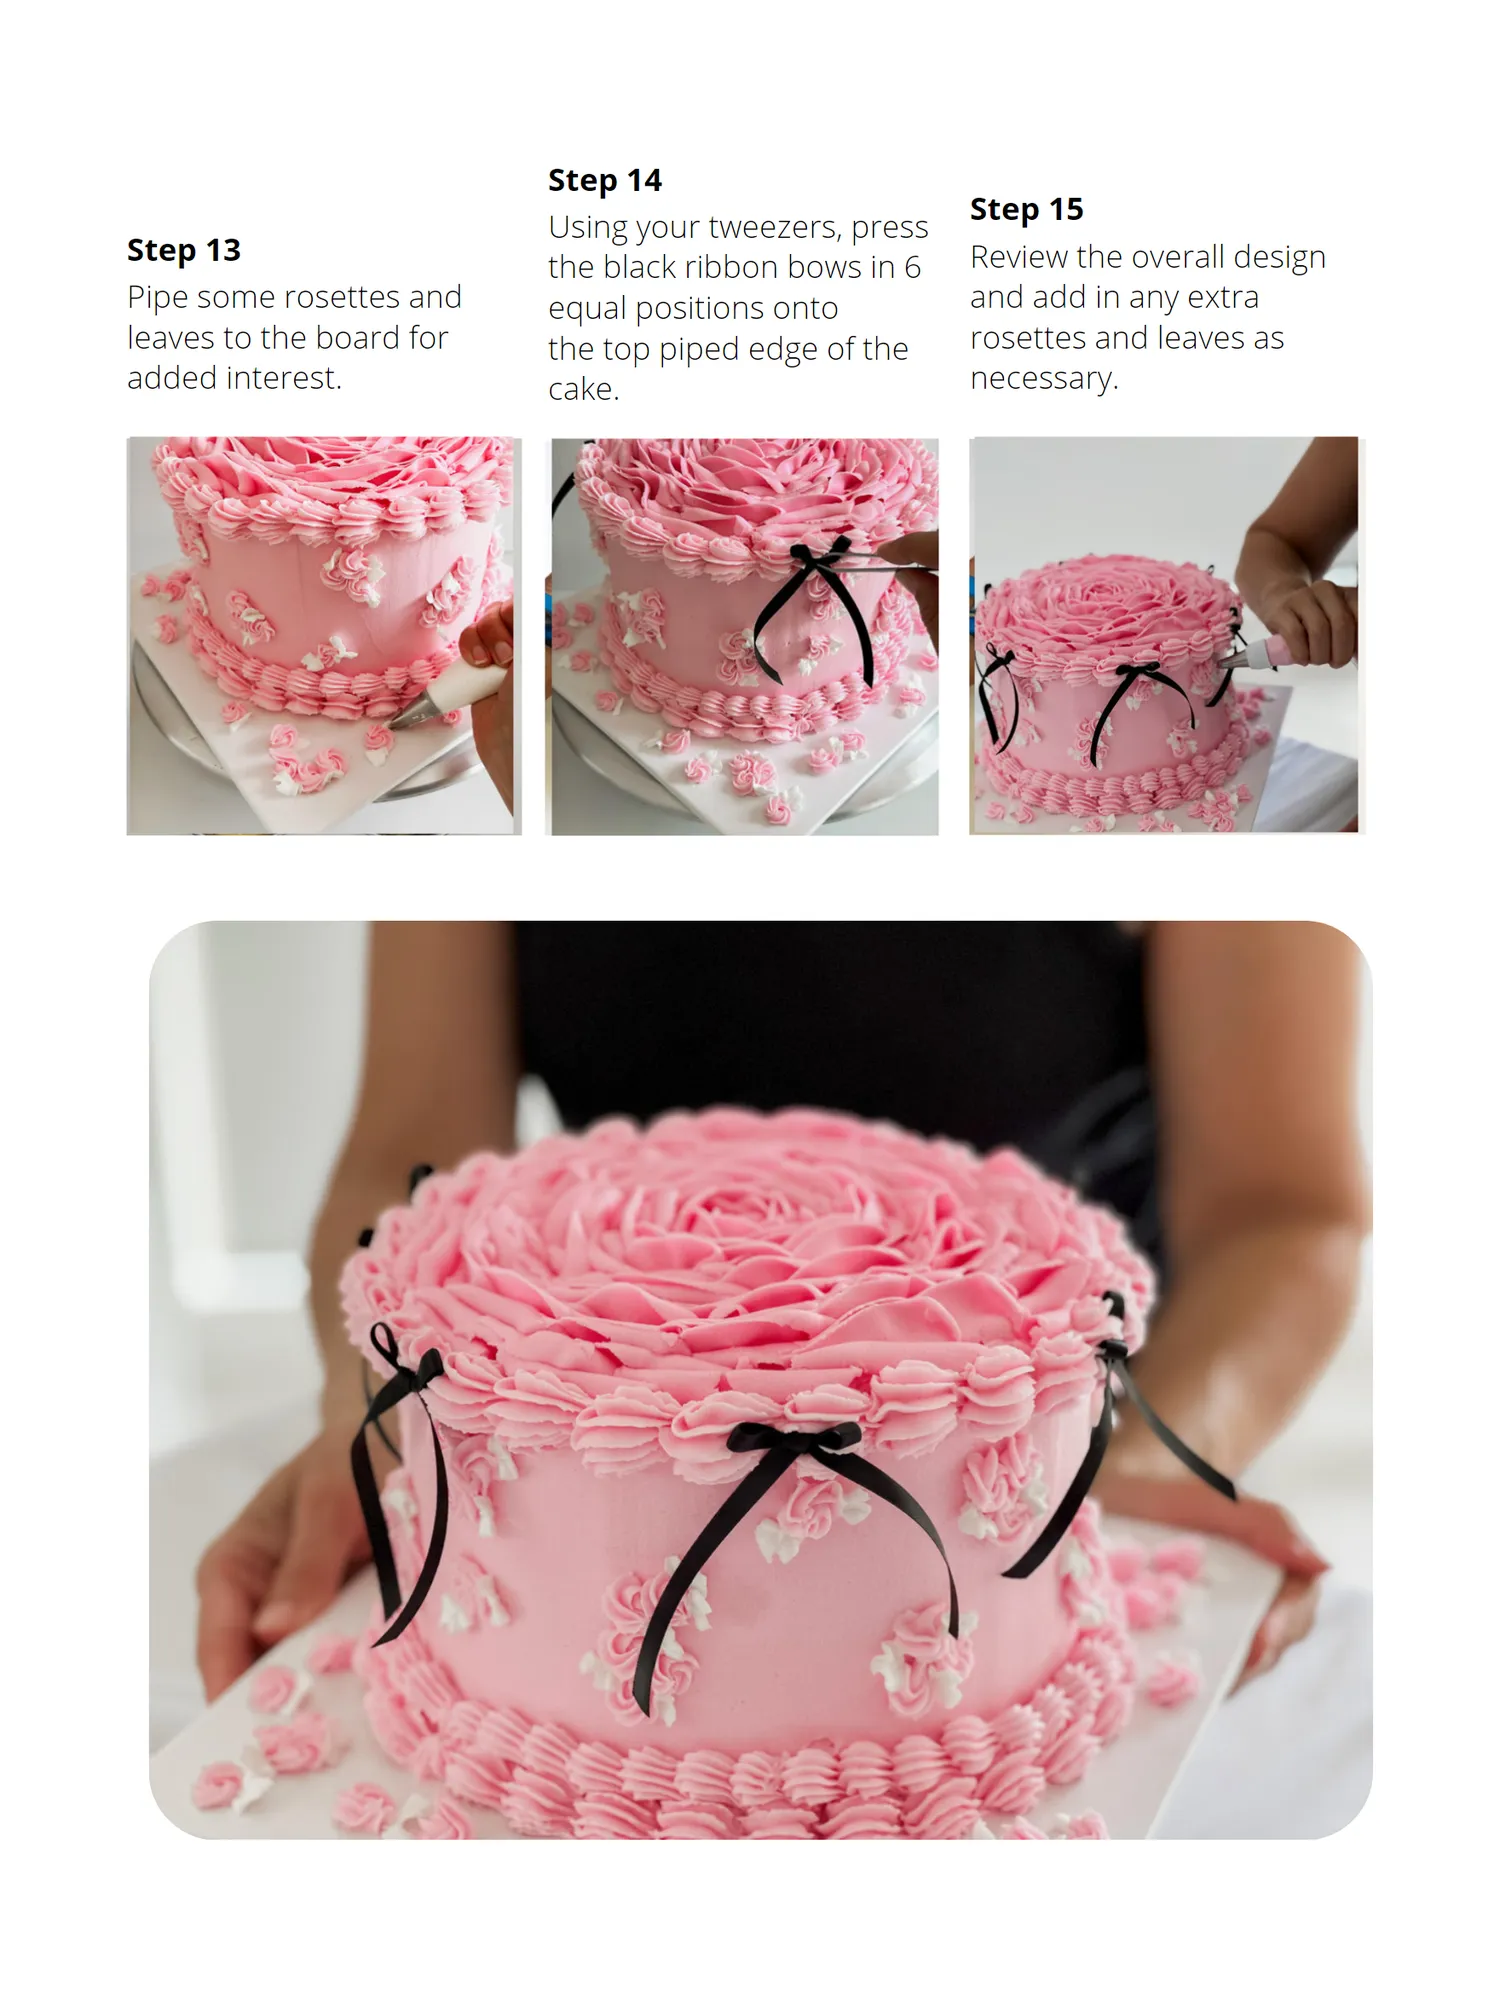
Step 13 Pipe some rosettes and leaves to the board for added interest.
Page 37 text
Step 14 Using your tweezers, press the black ribbon bows in 6 equal positions onto the top piped edge of the cake.

Page 38 text
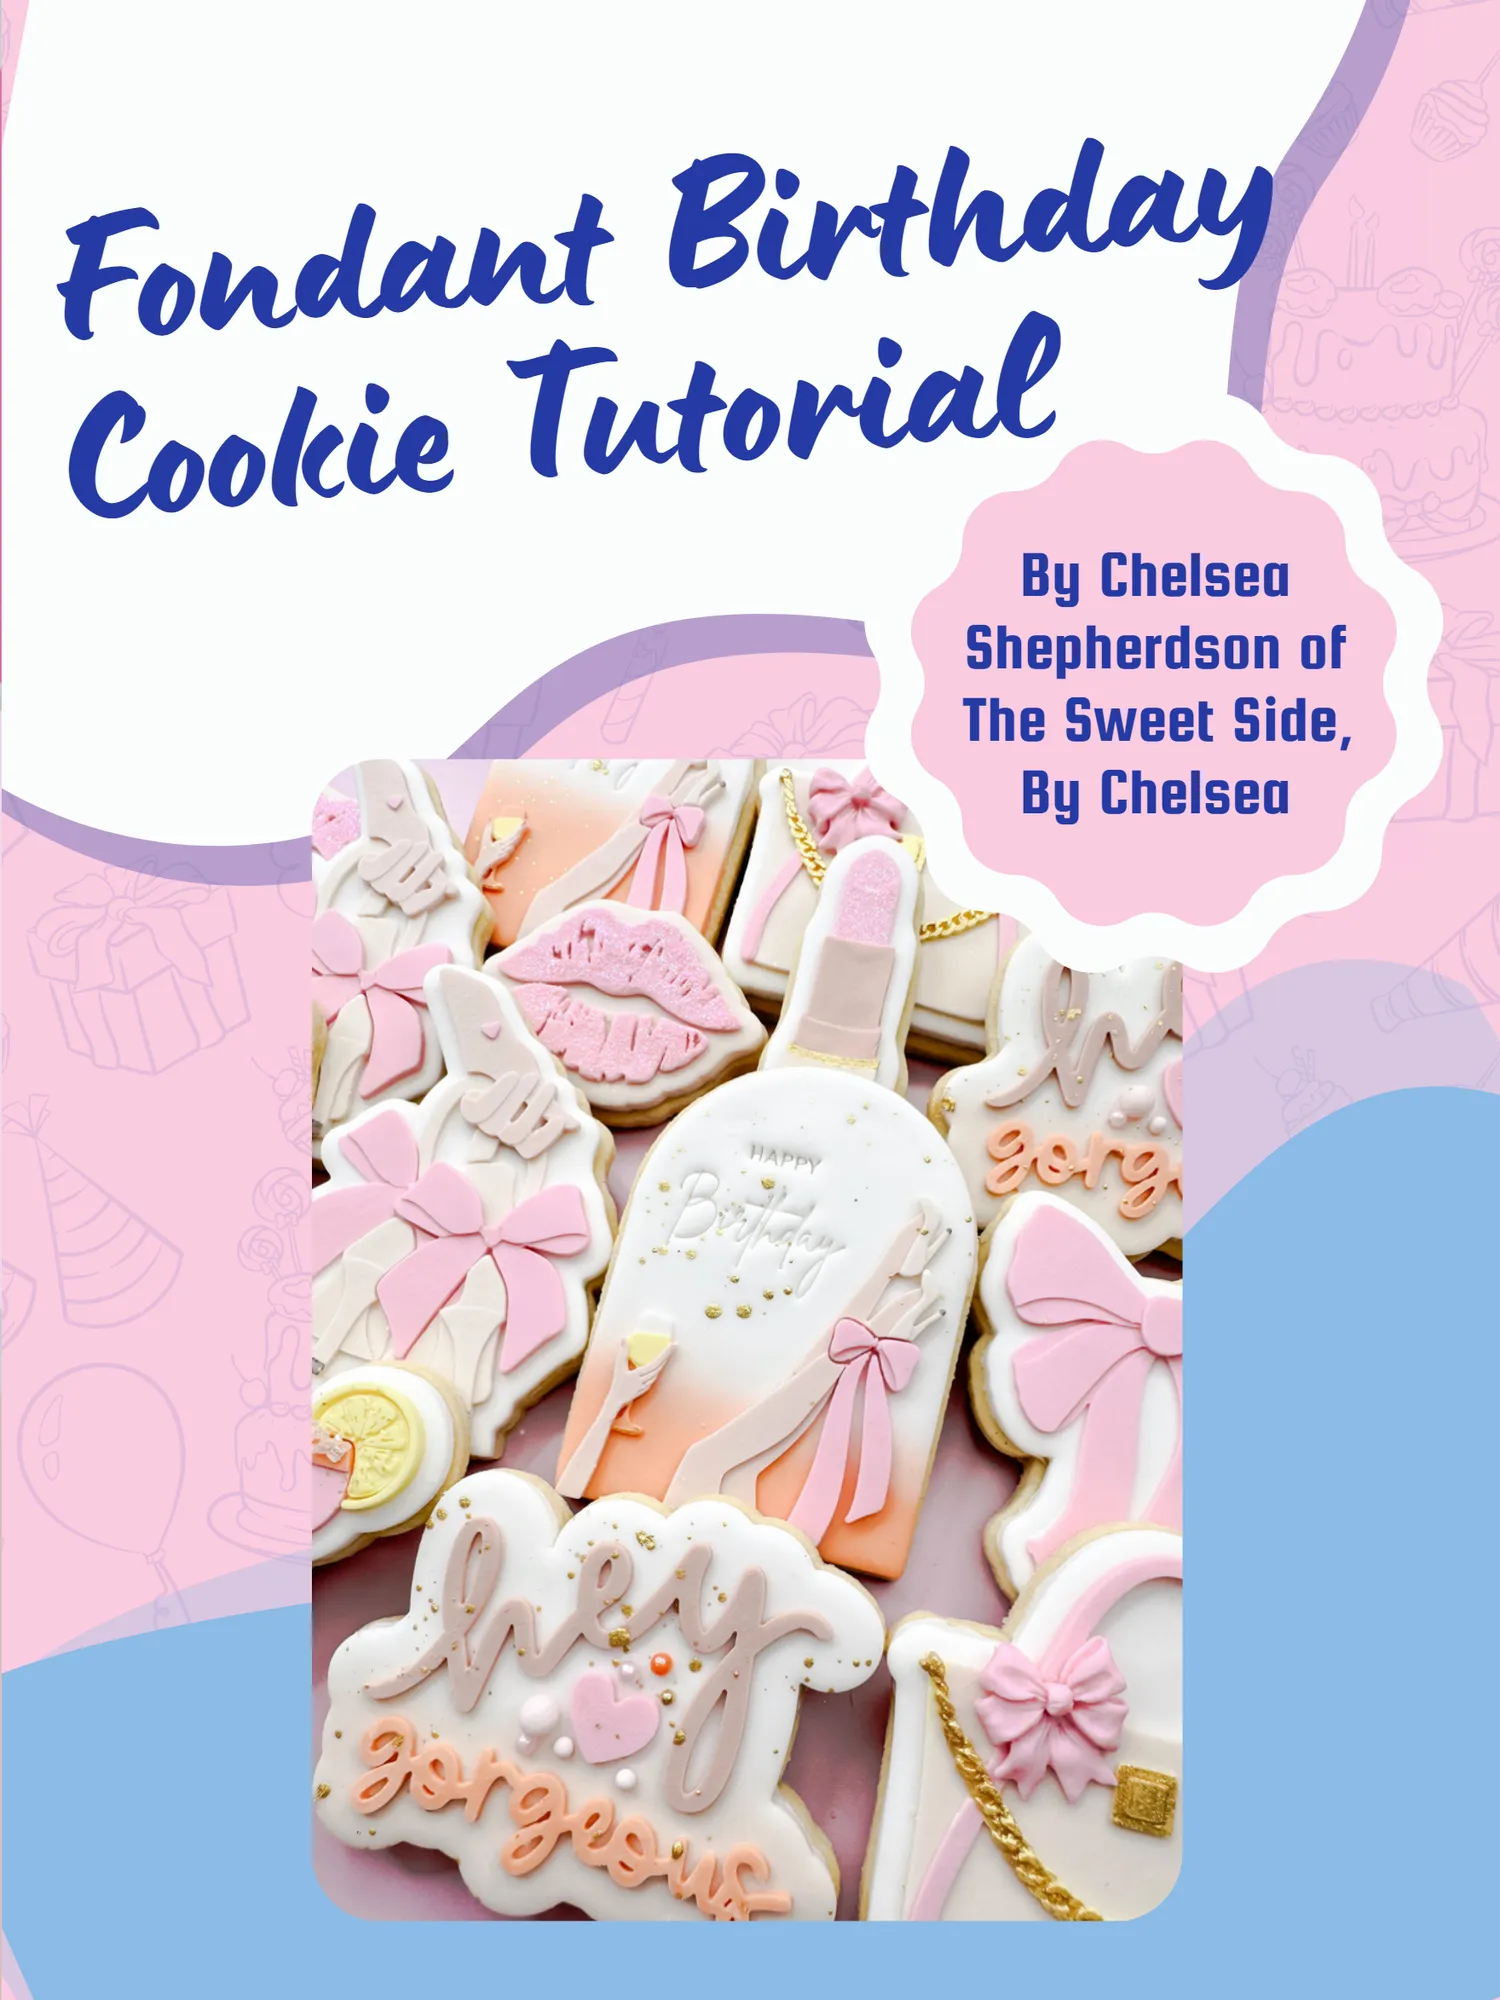
Fondant Birthday Cookie Tutorial

Page 39 text
Fondant Birthday Cookie Tutorial
Page 40 text
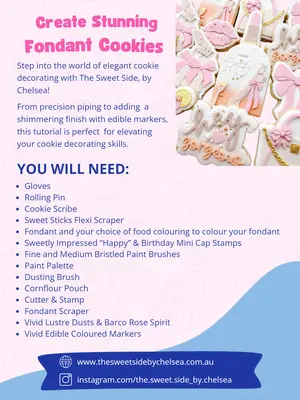
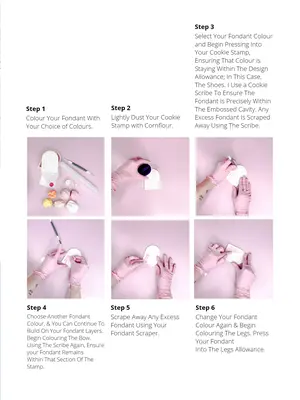
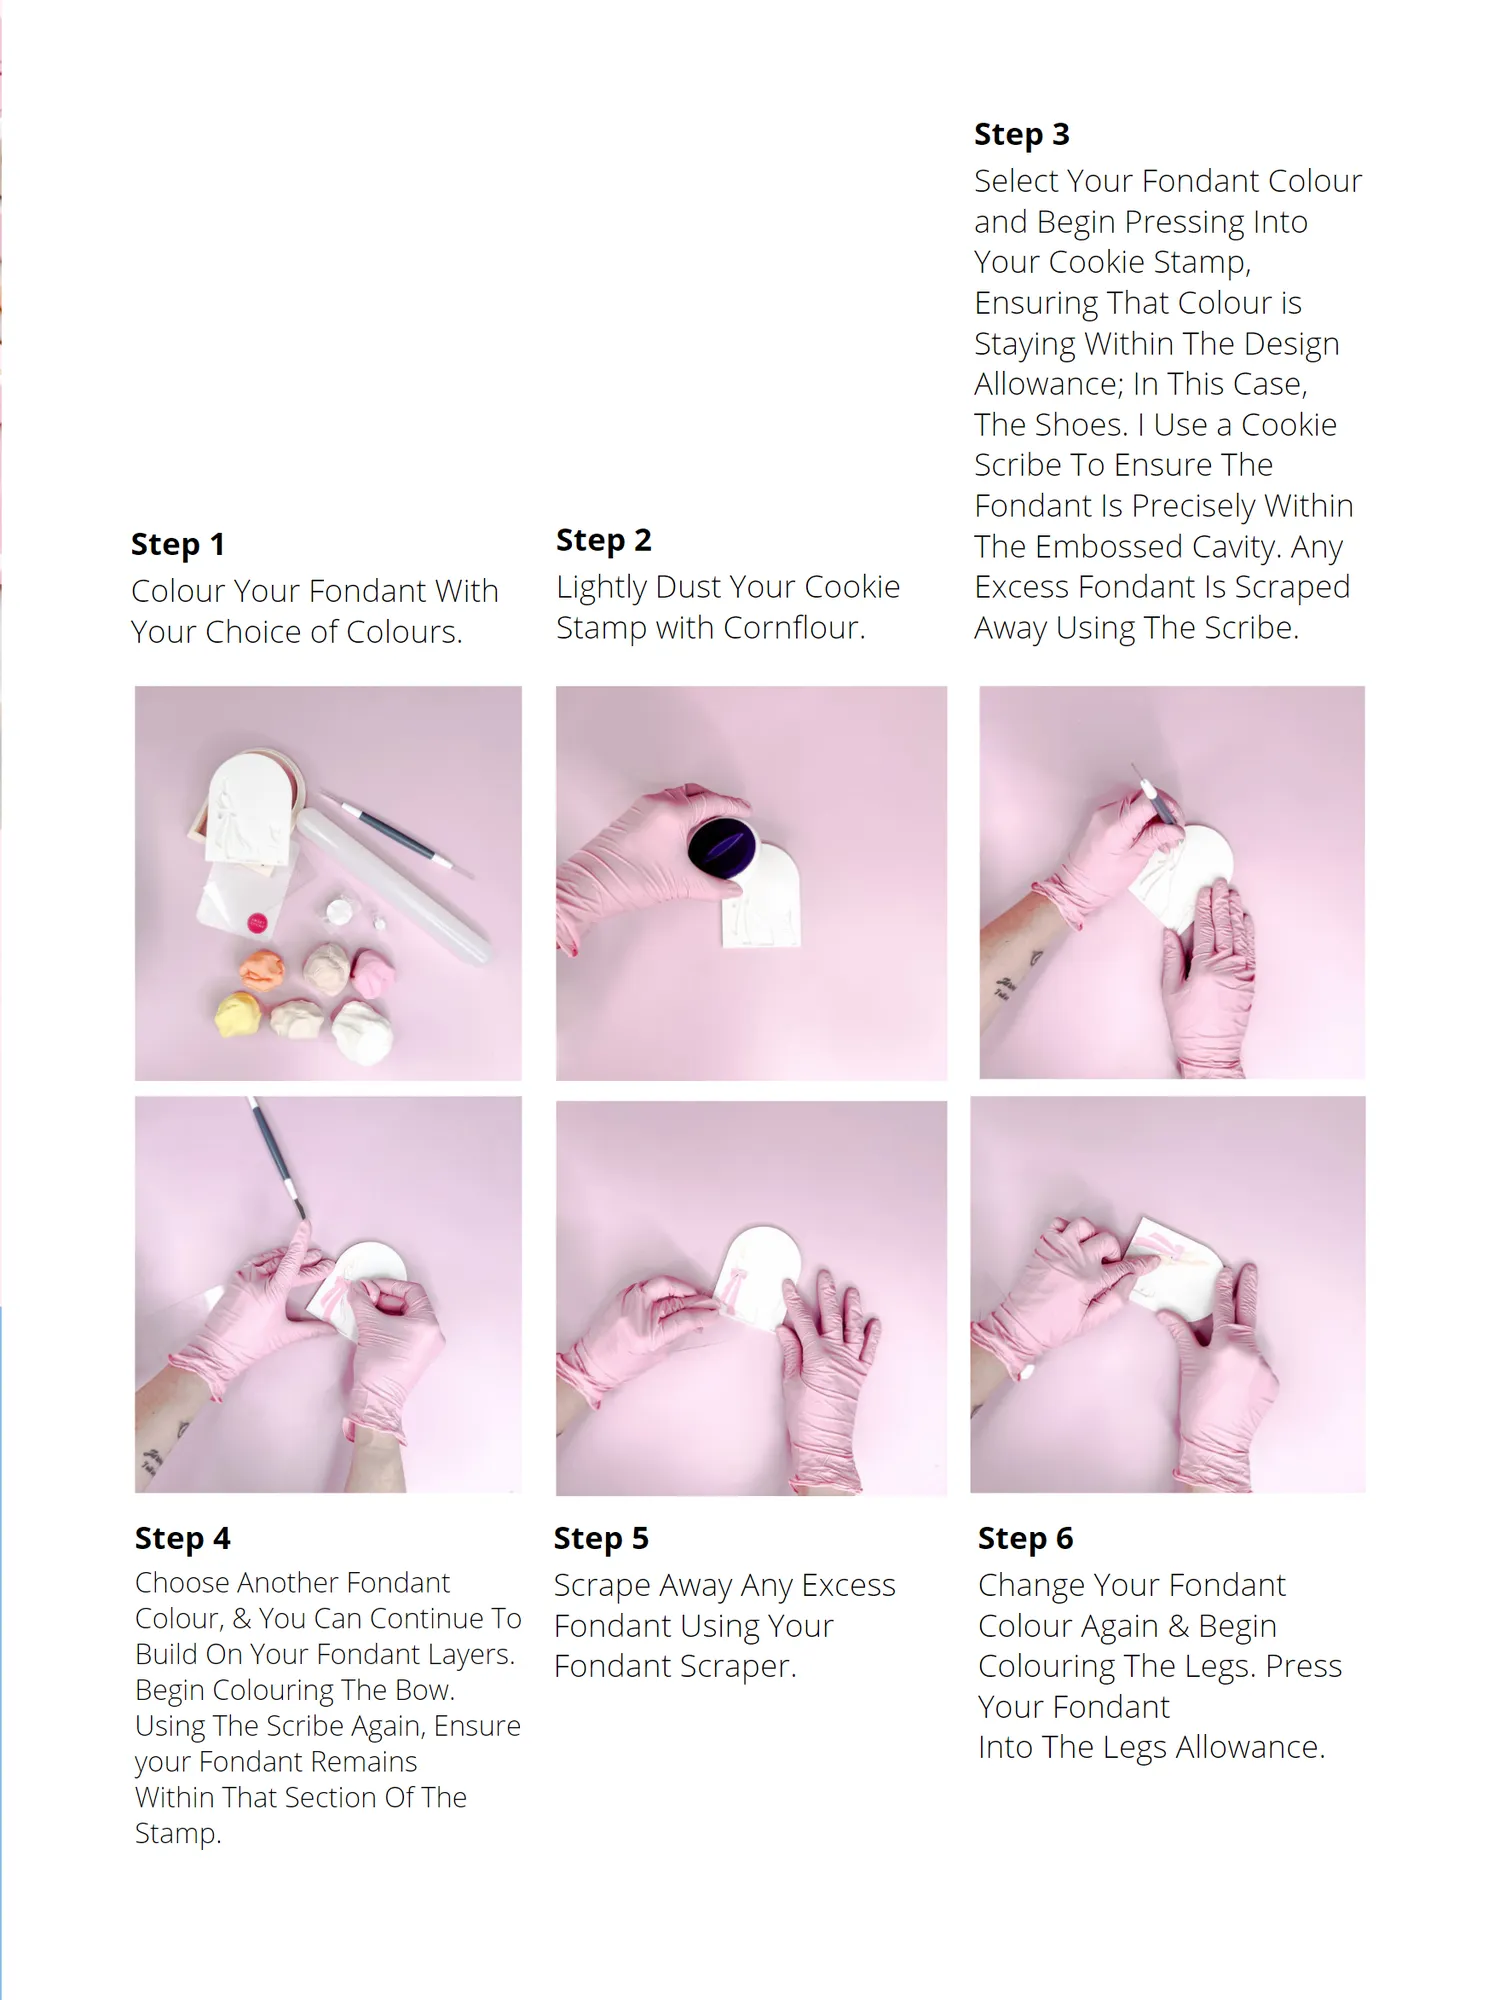
Cr e at e Fo nd ant Step into the world of elegant cookie decorating with The Sweet Side, by Chelsea! From precision piping to adding a shimmering finish with edible markers, Colour Your Fondant With Your Choice of Colours.
Page 41 text
Stunnin g C o ok i es Step into the world of elegant cookie decorating with The Sweet Side, by Step 2 shimmering finish with edible markers, Lightly Dust Your Cookie Stamp with Cornflour.
Page 42 text
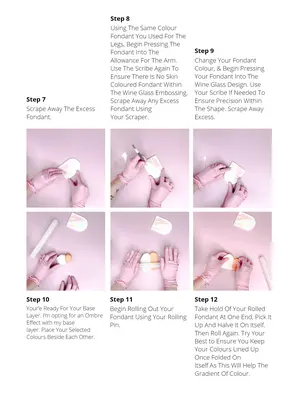
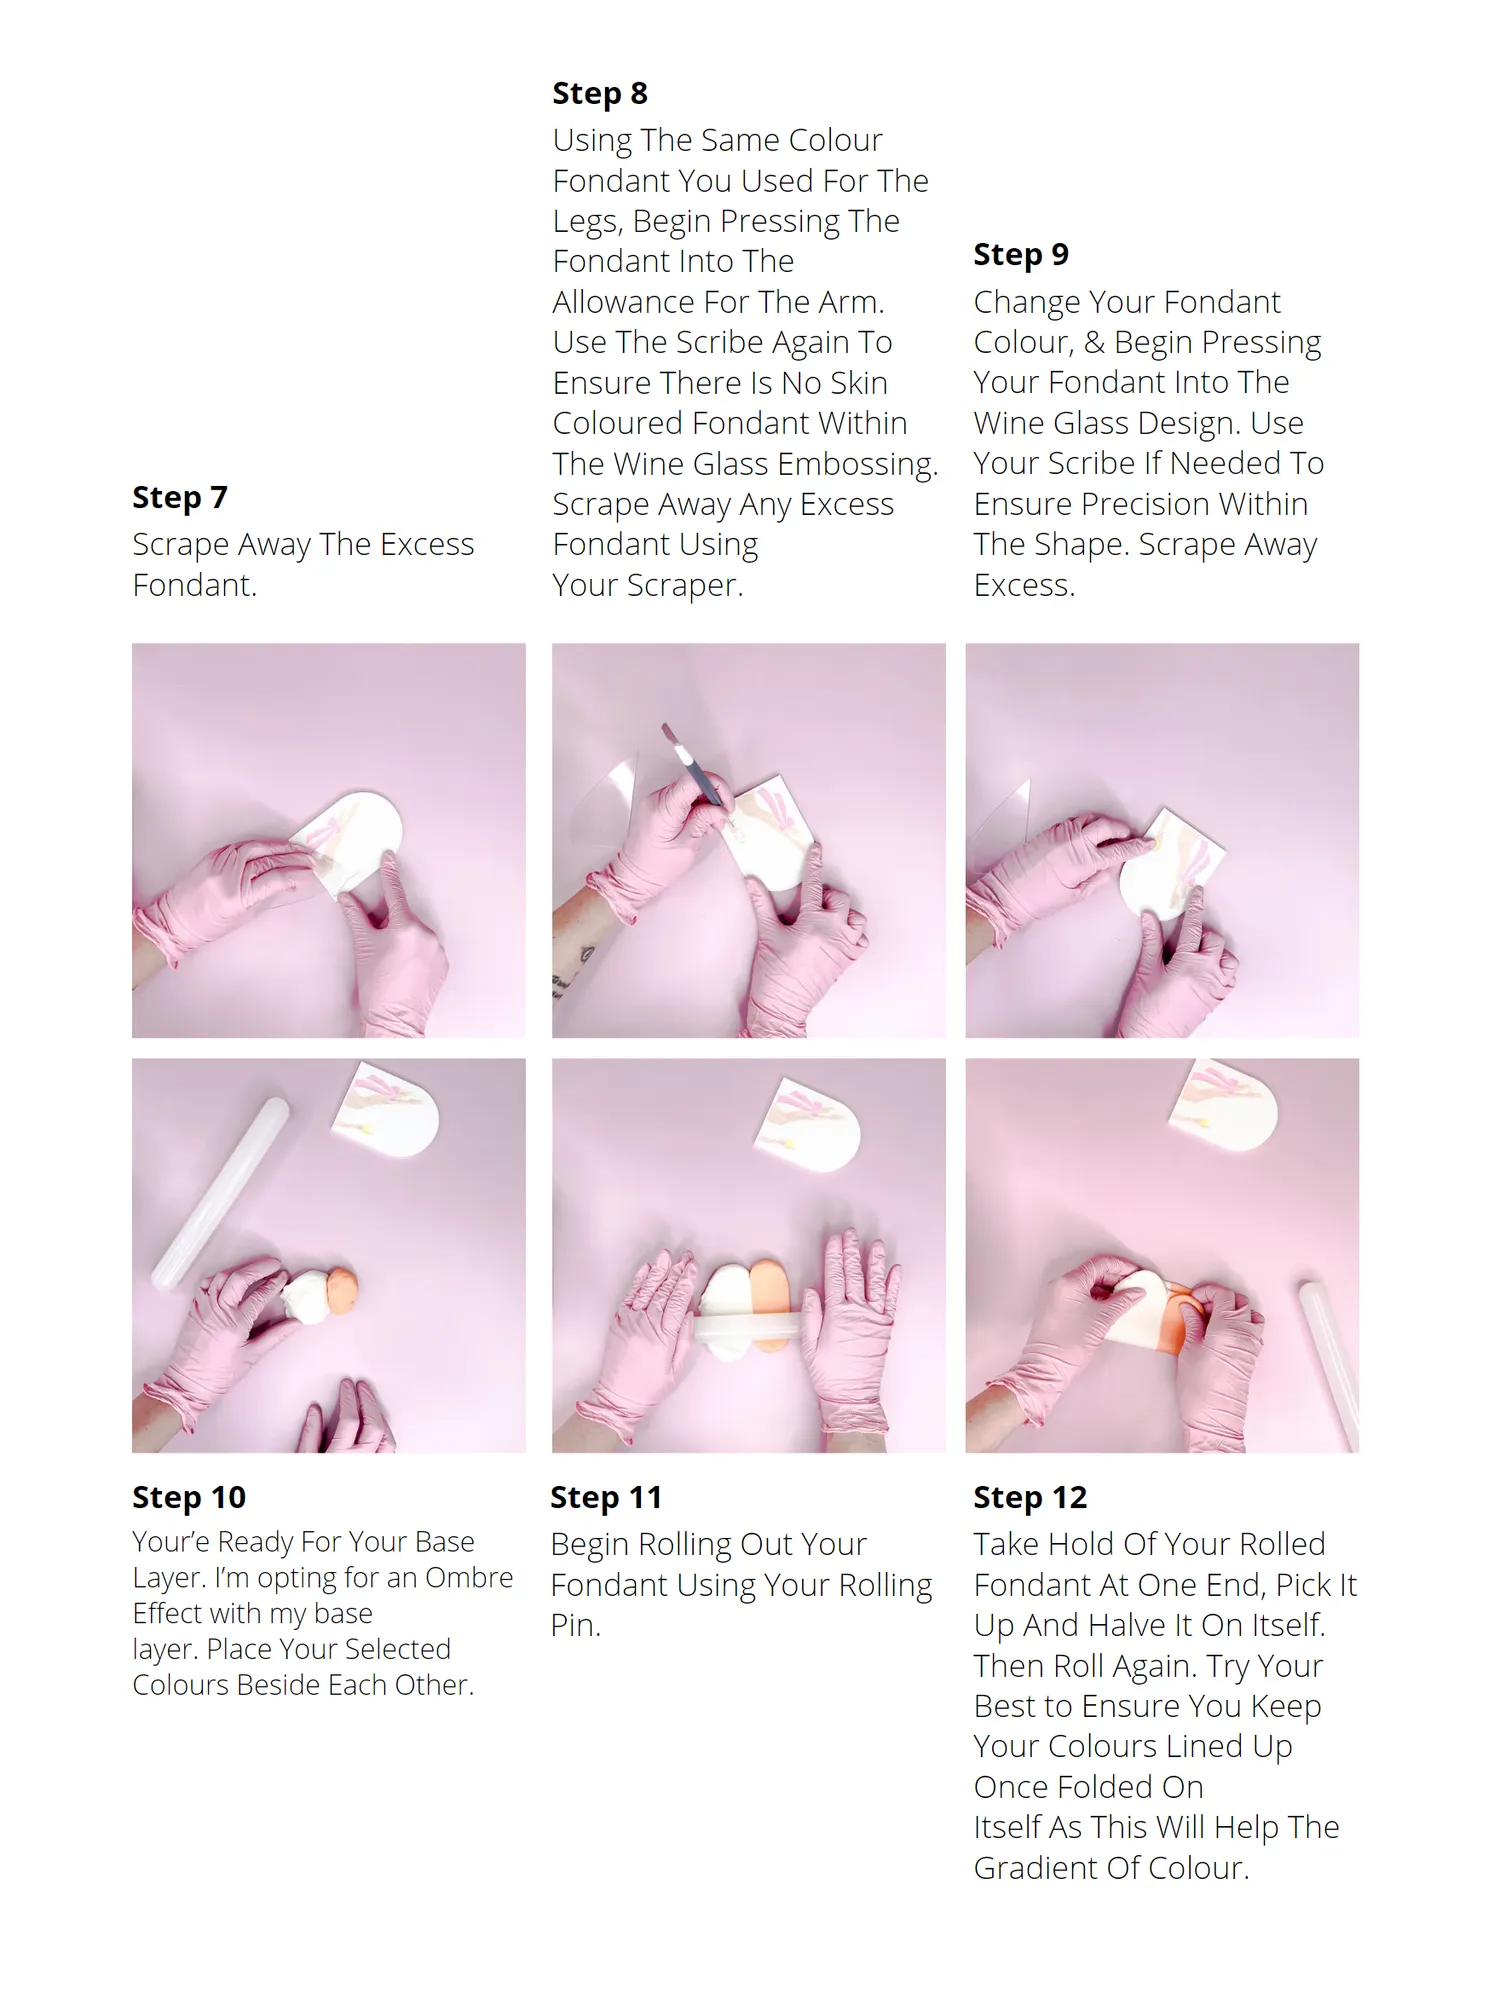
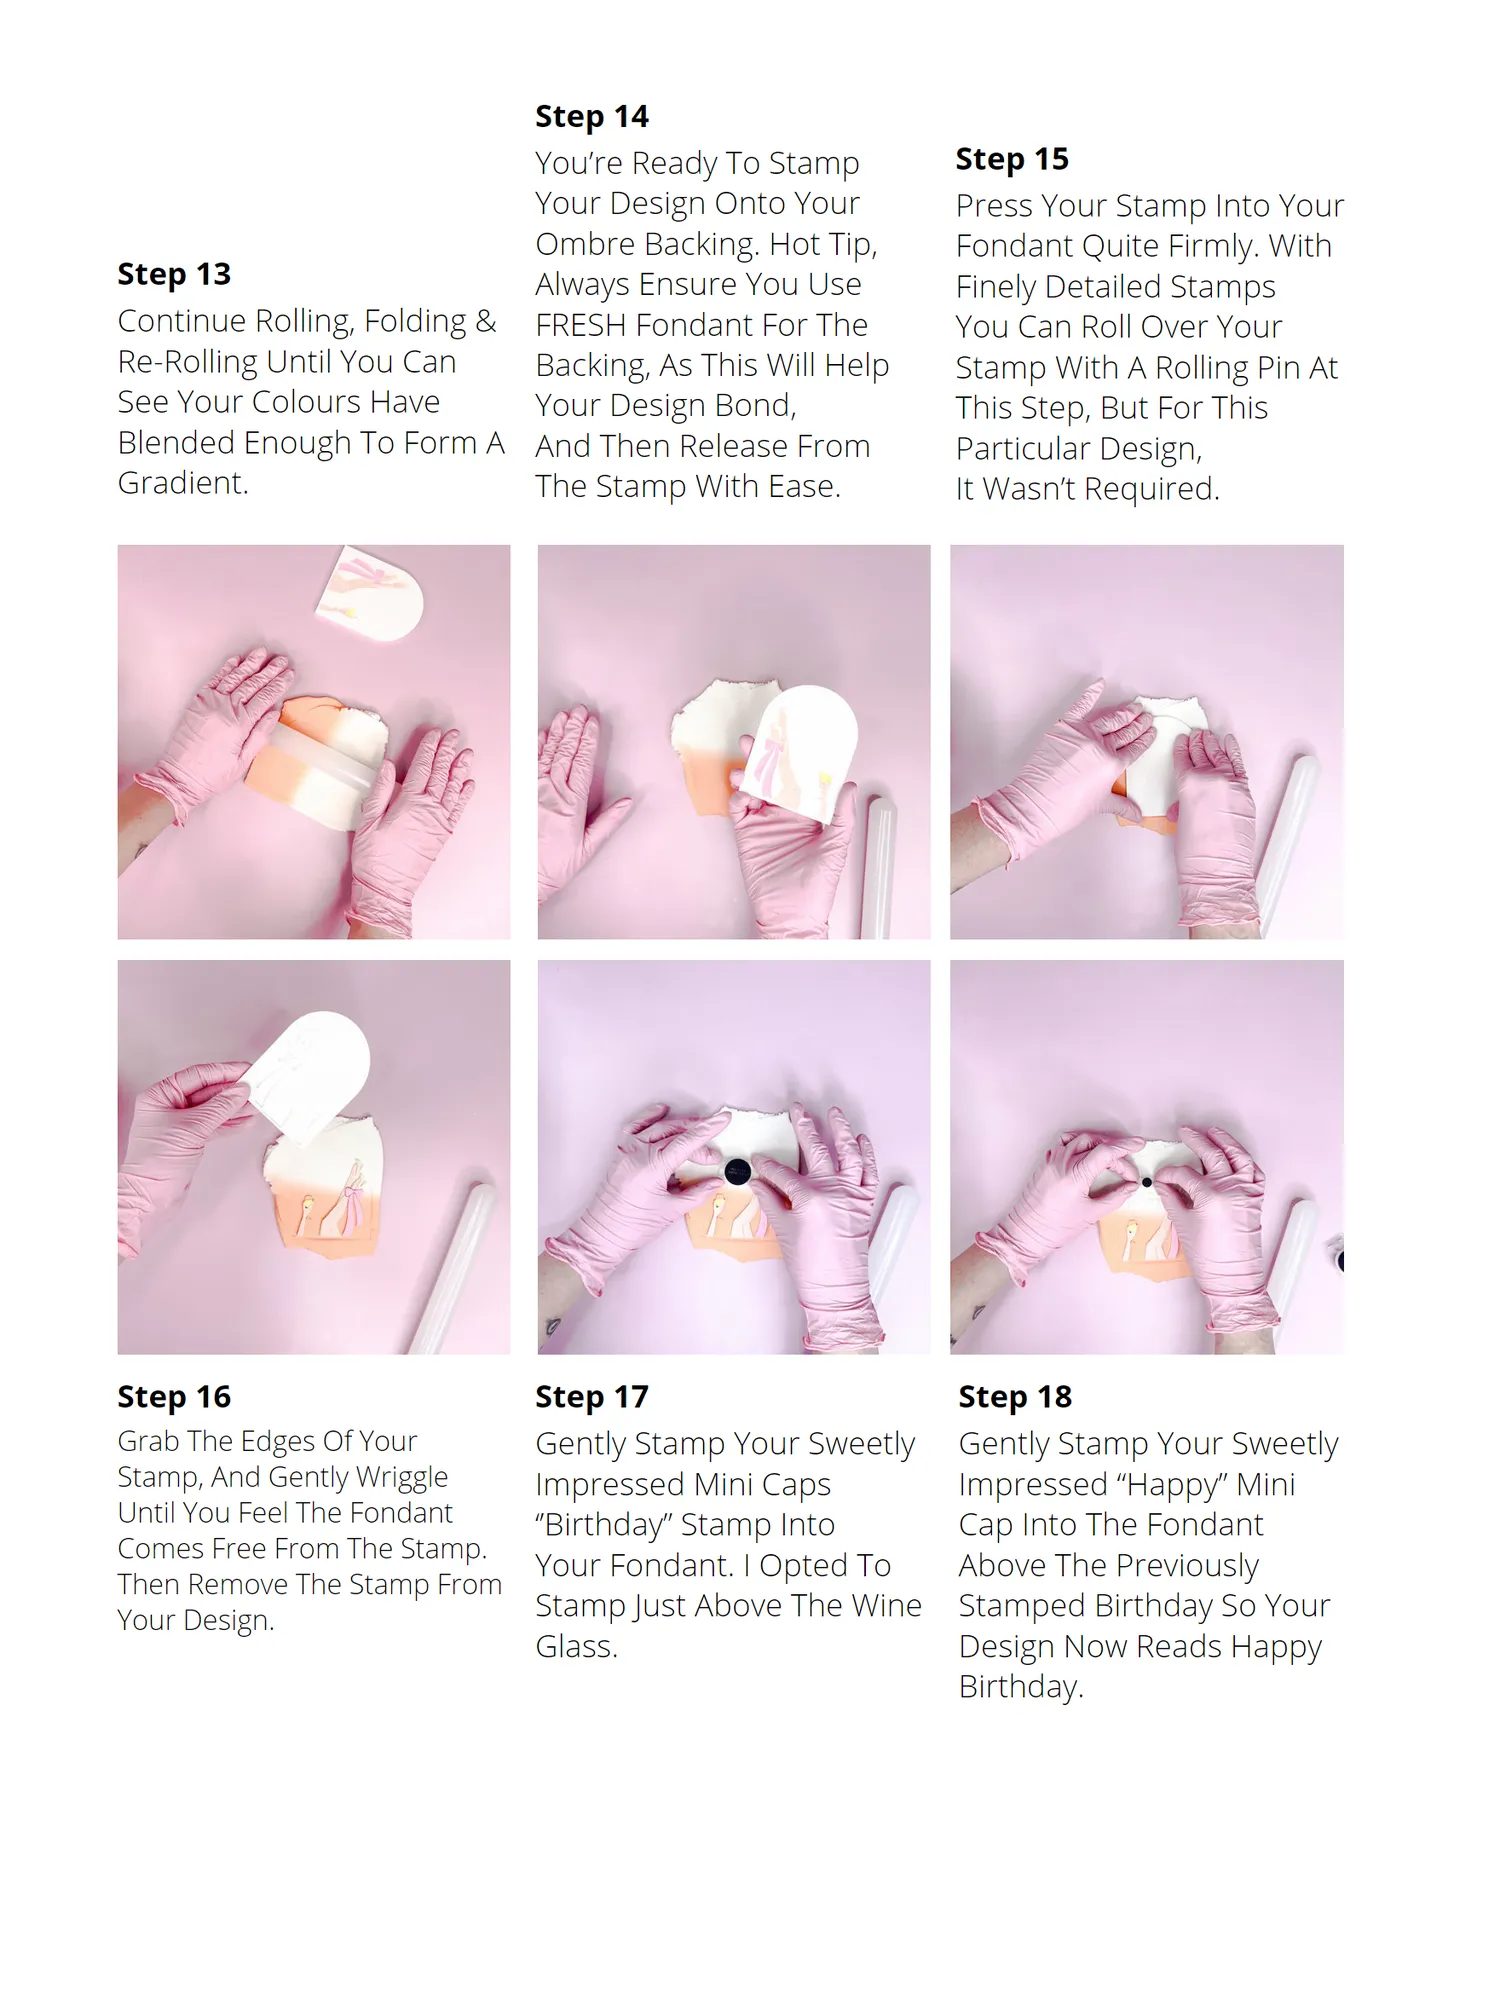
Step 8 Using The Same Colour Fondant You Used For The Legs, Begin Pressing The Fondant Into The Step 9 Allowance For The Arm. Change Your Fondant Use The Scribe Again To Colour, & Begin Pressing Ensure There Is No Skin Your Fondant Into The Coloured Fondant Within Wine Glass Design. Use The Wine Glass Embossing. Your Scribe If Needed To Step 7 Scrape Away Any Excess Ensure Precision Within Scrape Away The Excess Fondant Using The Shape. Scrape Away Fondant. Your Scraper. Excess. Step 10 Step 11 Step 12 Your’e Ready For Your Base Begin Rolling Out Your Take Hold Of Your Rolled Layer. I’m opting for an Ombre Fondant Using Your Rolling Fondant At One End, Pick It Effect with my base Pin. Up And Halve It On Itself. layer. Place Your Selected Then Roll Again. Try Your Colours Beside Each Other. Best to Ensure You Keep Your Colours Lined Up Once Folded On Itself As This Will Help The Gradient Of Colour.
Page 43 text
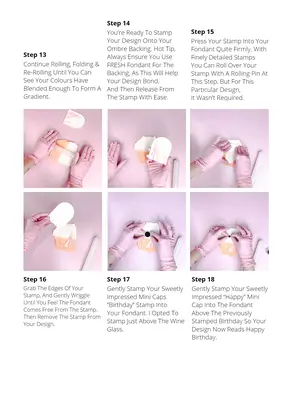
Step 14 You’re Ready To Stamp Step 15 Your Design Onto Your Press Your Stamp Into Your Ombre Backing. Hot Tip, Fondant Quite Firmly. With Step 13 Always Ensure You Use Finely Detailed Stamps Continue Rolling, Folding & FRESH Fondant For The You Can Roll Over Your Re-Rolling Until You Can Backing, As This Will Help Stamp With A Rolling Pin At See Your Colours Have Your Design Bond, This Step, But For This Blended Enough To Form A And Then Release From Particular Design, Gradient. The Stamp With Ease. It Wasn’t Required. Step 16 Step 17 Step 18 Grab The Edges Of Your Gently Stamp Your Sweetly Gently Stamp Your Sweetly Stamp, And Gently Wriggle Impressed Mini Caps Impressed “Happy” Mini Until You Feel The Fondant ‘’Birthday” Stamp Into Cap Into The Fondant Comes Free From The Stamp. Your Fondant. I Opted To Above The Previously Then Remove The Stamp From Stamp Just Above The Wine Stamped Birthday So Your Your Design. Glass. Design Now Reads Happy Birthday.
Page 44 text
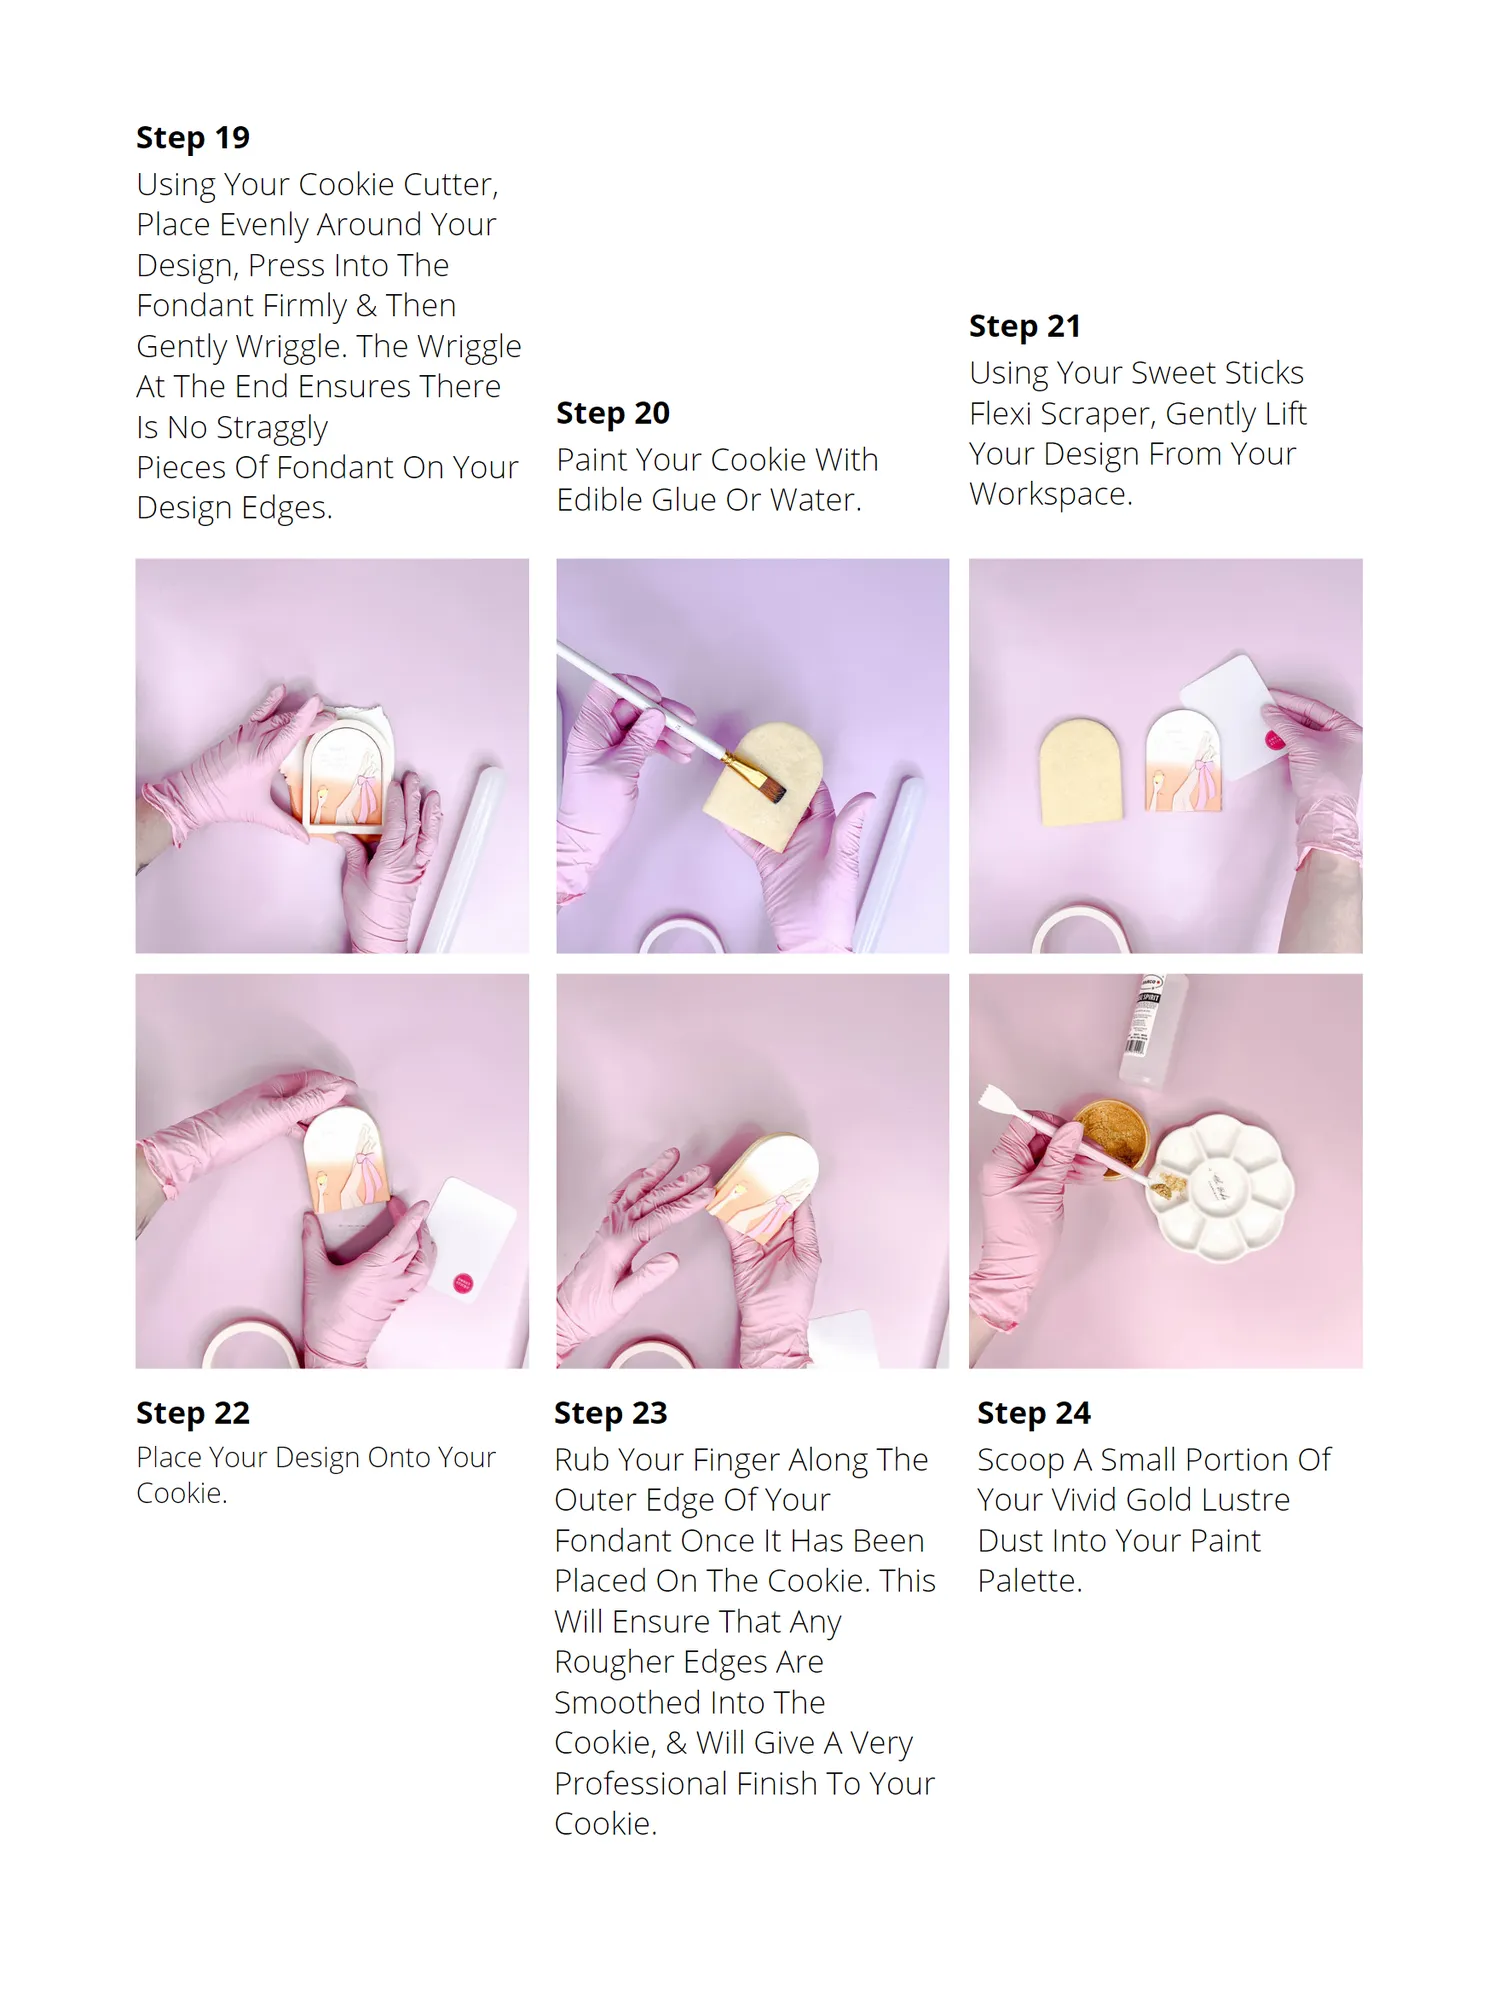
Step 19 Using Your Cookie Cutter, Place Evenly Around Your Design, Press Into The Fondant Firmly & Then Step 21 Gently Wriggle. The Wriggle At The End Ensures There Using Your Sweet Sticks Is No Straggly Step 20 Flexi Scraper, Gently Lift Pieces Of Fondant On Your Paint Your Cookie With Your Design From Your Design Edges. Edible Glue Or Water. Workspace. Step 22 Step 23 Step 24 Place Your Design Onto Your Rub Your Finger Along The Scoop A Small Portion Of Cookie. Outer Edge Of Your Your Vivid Gold Lustre Fondant Once It Has Been Dust Into Your Paint Placed On The Cookie. This Palette. Will Ensure That Any Rougher Edges Are Smoothed Into The Cookie, & Will Give A Very Professional Finish To Your Cookie.
Page 45 text
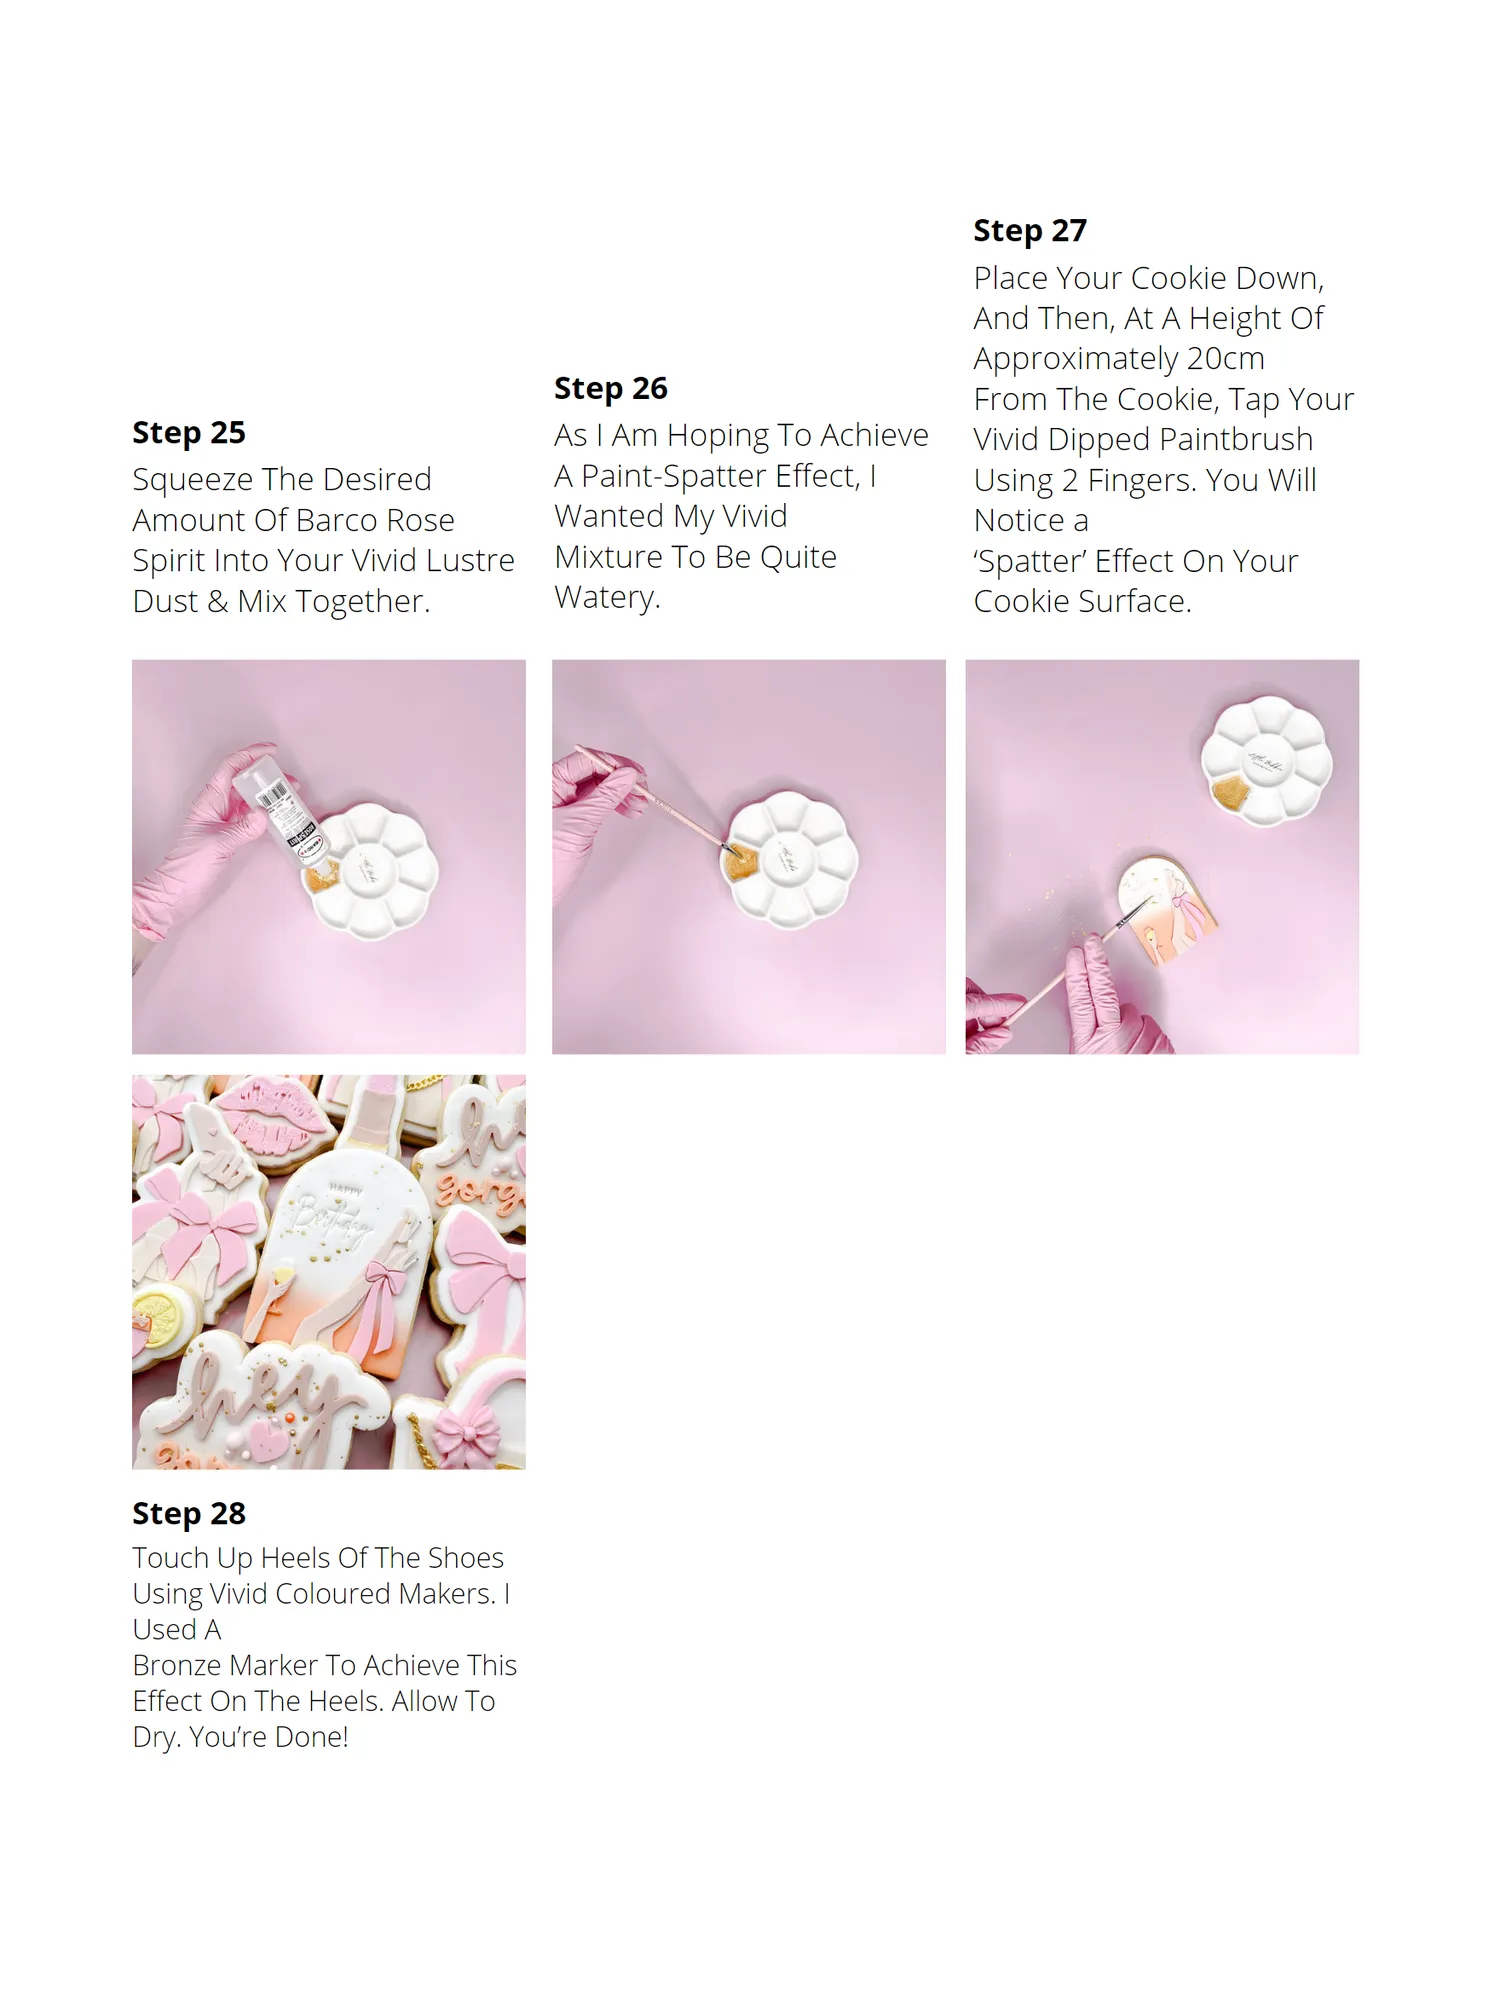
Step 27 Place Your Cookie Down, And Then, At A Height Of Approximately 20cm Step 26 From The Cookie, Tap Your Step 25 As I Am Hoping To Achieve Vivid Dipped Paintbrush Squeeze The Desired A Paint-Spatter Effect, I Using 2 Fingers. You Will Amount Of Barco Rose Wanted My Vivid Notice a Spirit Into Your Vivid Lustre Mixture To Be Quite ‘Spatter’ Effect On Your Dust & Mix Together. Watery. Cookie Surface. Step 28 Touch Up Heels Of The Shoes Using Vivid Coloured Makers. I Used A Bronze Marker To Achieve This Effect On The Heels. Allow To Dry. You’re Done!
Page 46 text
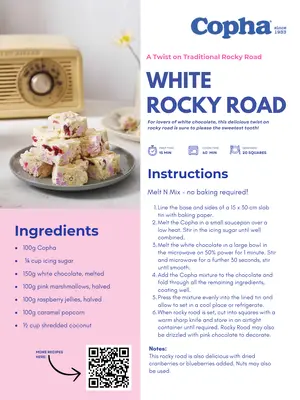
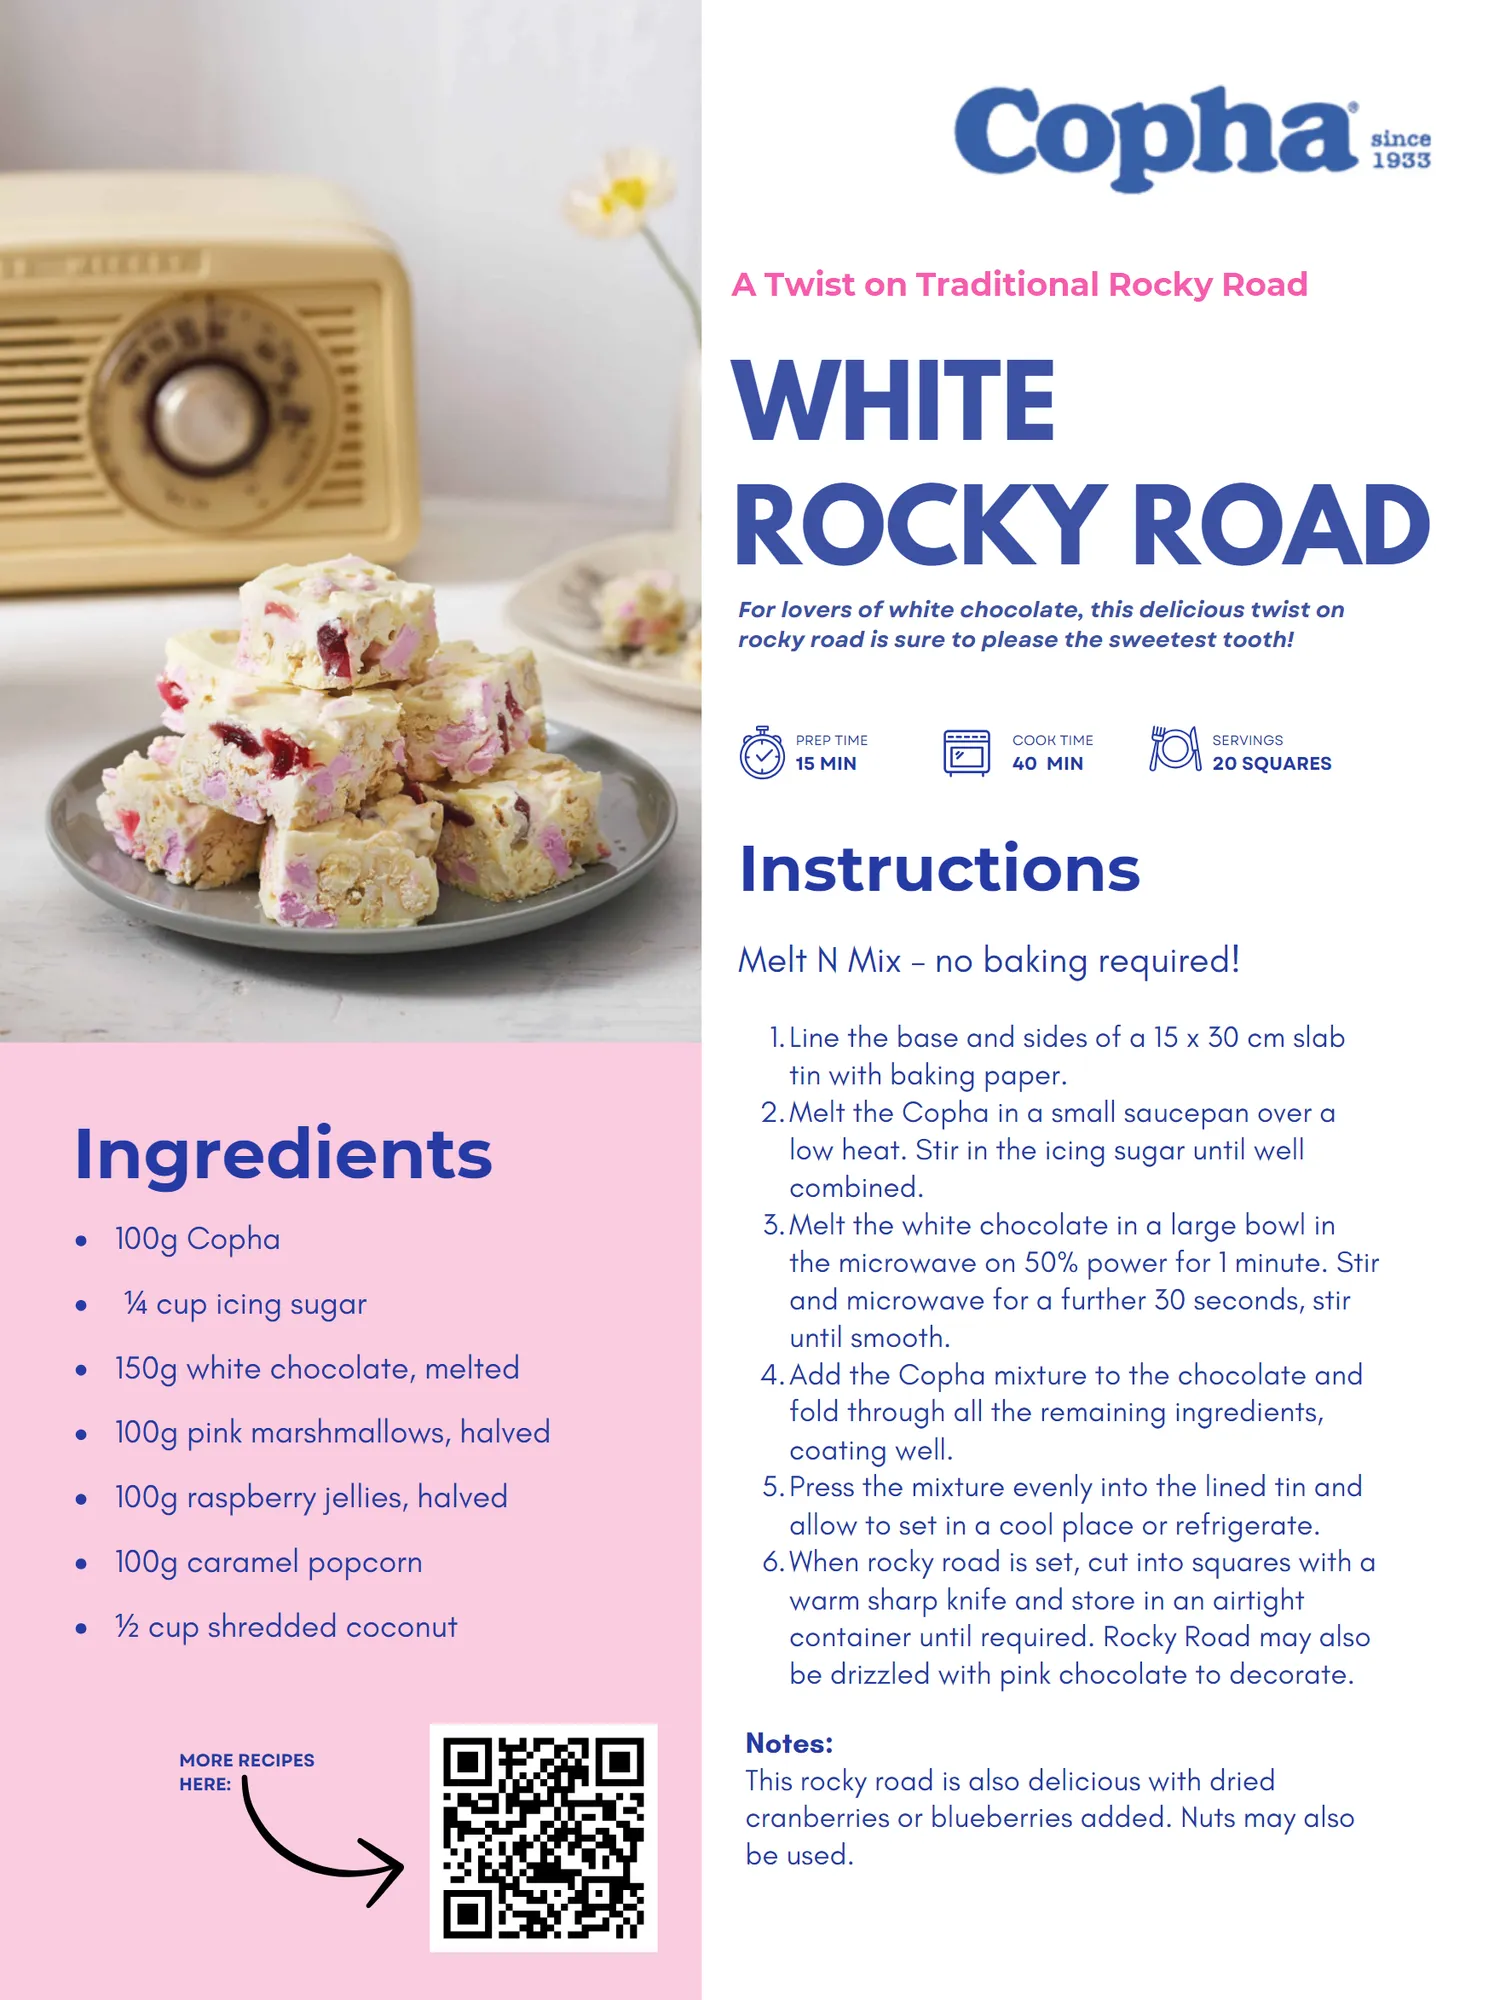
A Twist on Traditional Rocky Road WHITE ROCKY ROAD For lovers of white chocolate , this delicious twist on rocky road is sure to please the sweetest tooth ! PREP TIME COOK TIME SERVINGS 15 MIN 40 MIN 20 SQUARES Instructions Melt N Mix – no baking required ! Ingredients 100g Copha ¼ cup icing sugar 150g white chocolate , melted 100g pink marshmallows , halved 100g raspberry jellies , halved 100g caramel popcorn ½ cup shredded coconut MORE RECIPES HERE : 1 . Line the base and sides of a 15 x 30 cm slab tin with baking paper . 2 . Melt the Copha in a small saucepan over a low heat . Stir in the icing sugar until well combined . 3 . Melt the white chocolate in a large bowl in the microwave on 50 % power for 1 minute . Stir and microwave for a further 30 seconds , stir until smooth . 4 . Add the Copha mixture to the chocolate and fold through all the remaining ingredients , coating well . 5 . Press the mixture evenly into the lined tin and allow to set in a cool place or refrigerate . 6 . When rocky road is set , cut into squares with a warm sharp knife and store in an airtight container until required . Rocky Road may also be drizzled with pink chocolate to decorate . Notes : This rocky road is also delicious with dried cranberries or blueberries added . Nuts may also be used .
Page 47 text
A Twist on Traditional Rocky Road WHITE ROCKY ROAD For lovers of white chocolate, this delicious twist on rocky road is sure to please the sweetest tooth!


Page 49 text
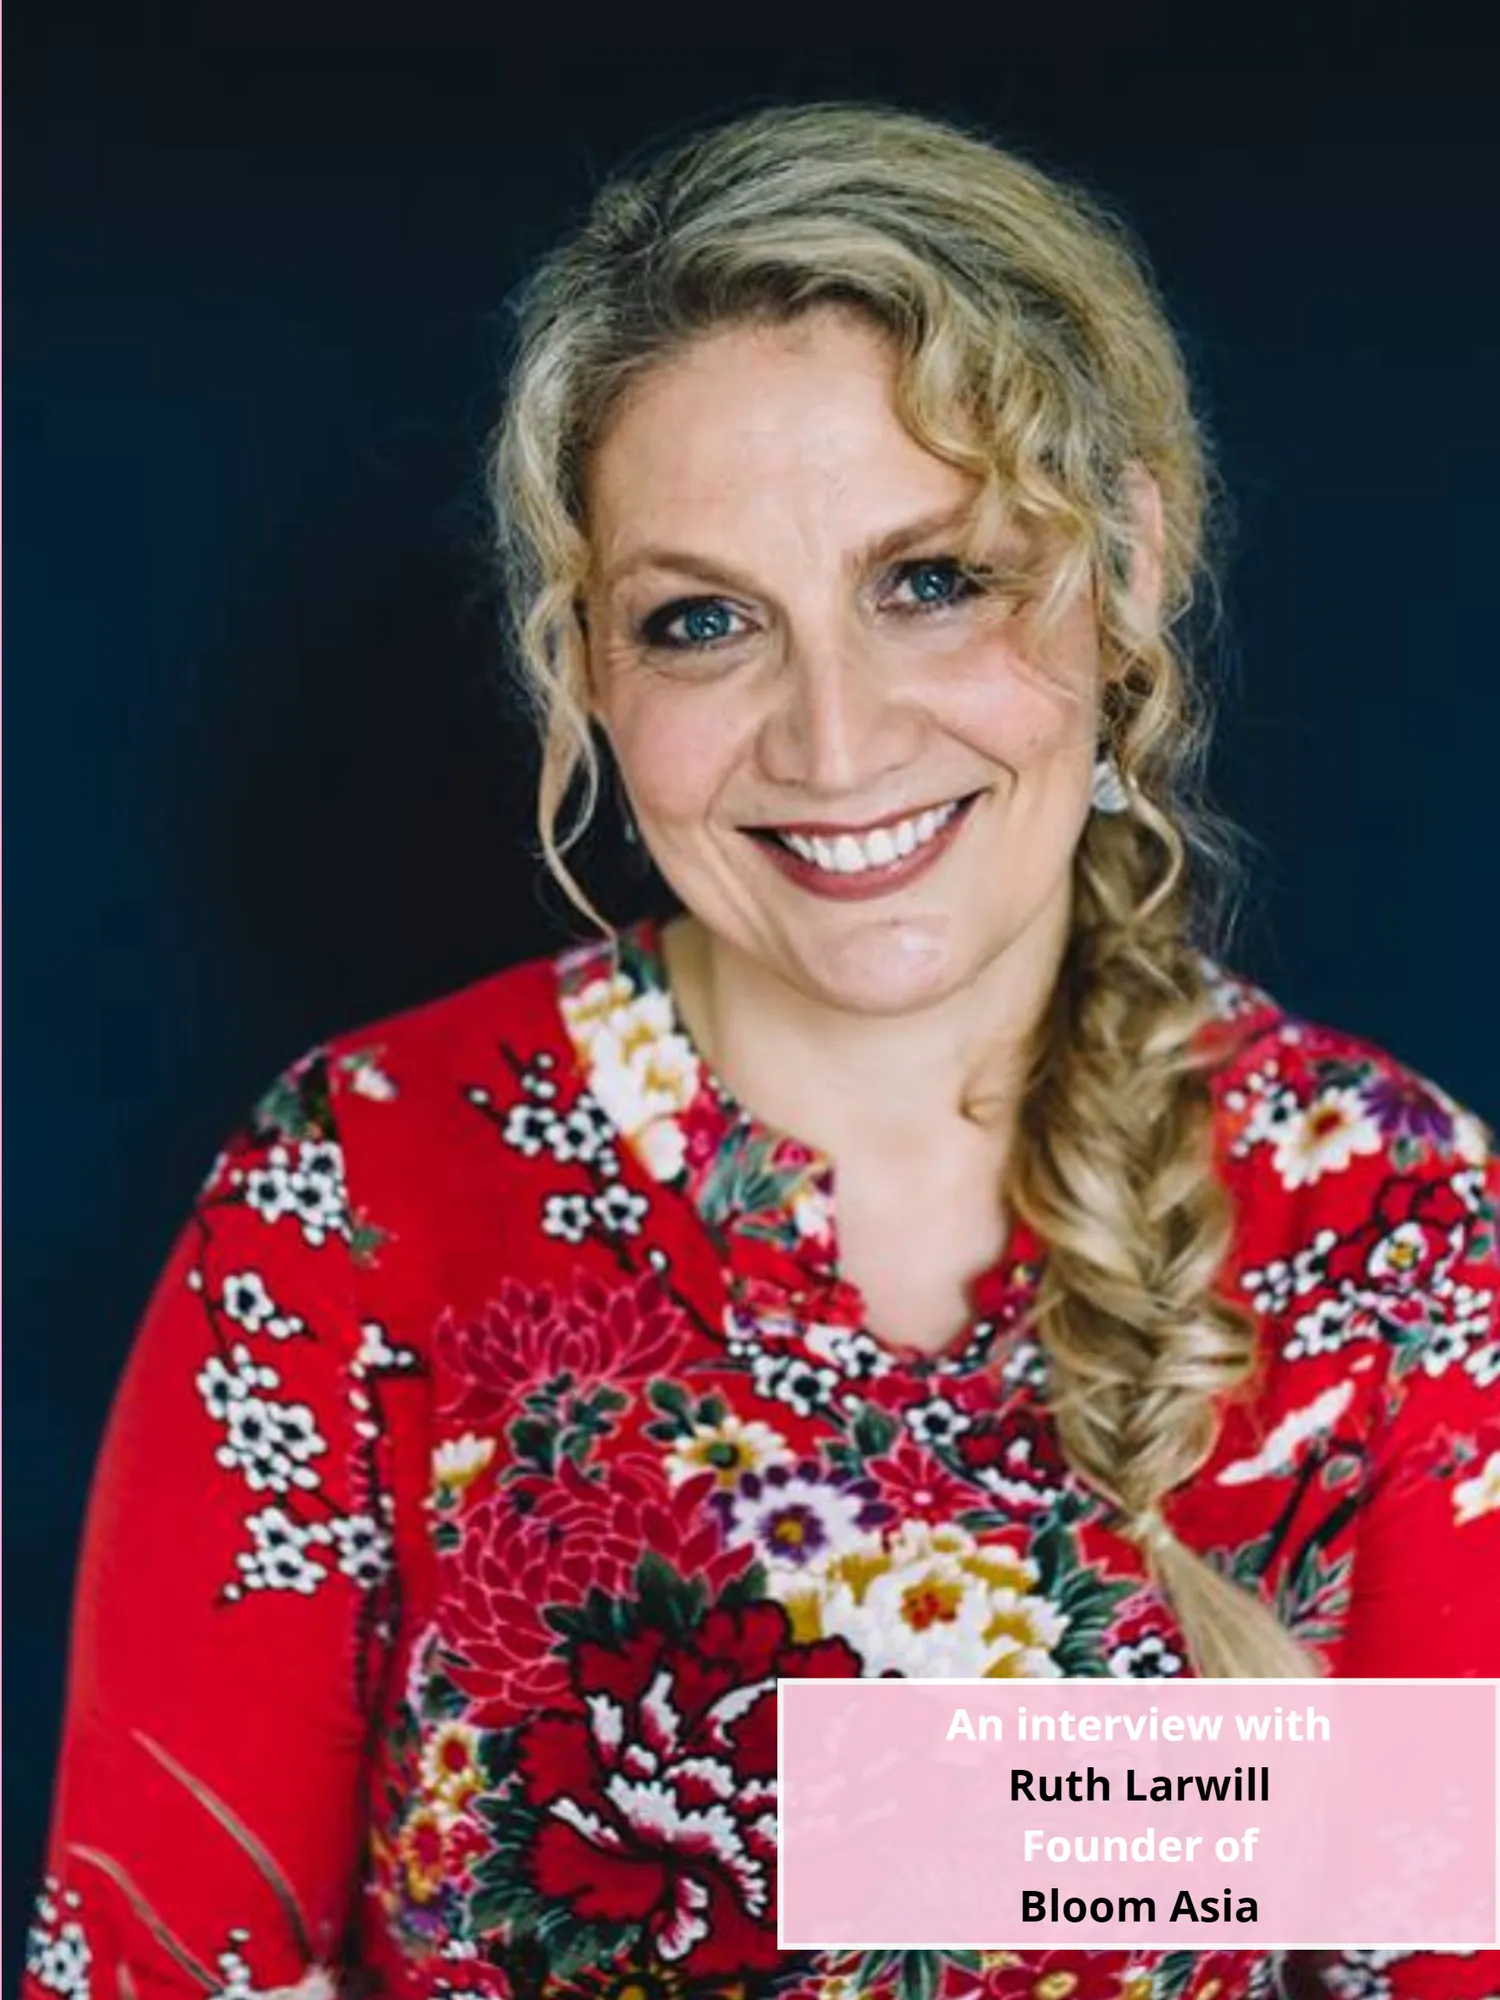
An interview with Ruth Larwill Founder of Bloom Asia
Page 50 text
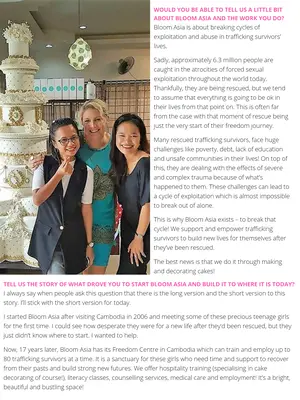
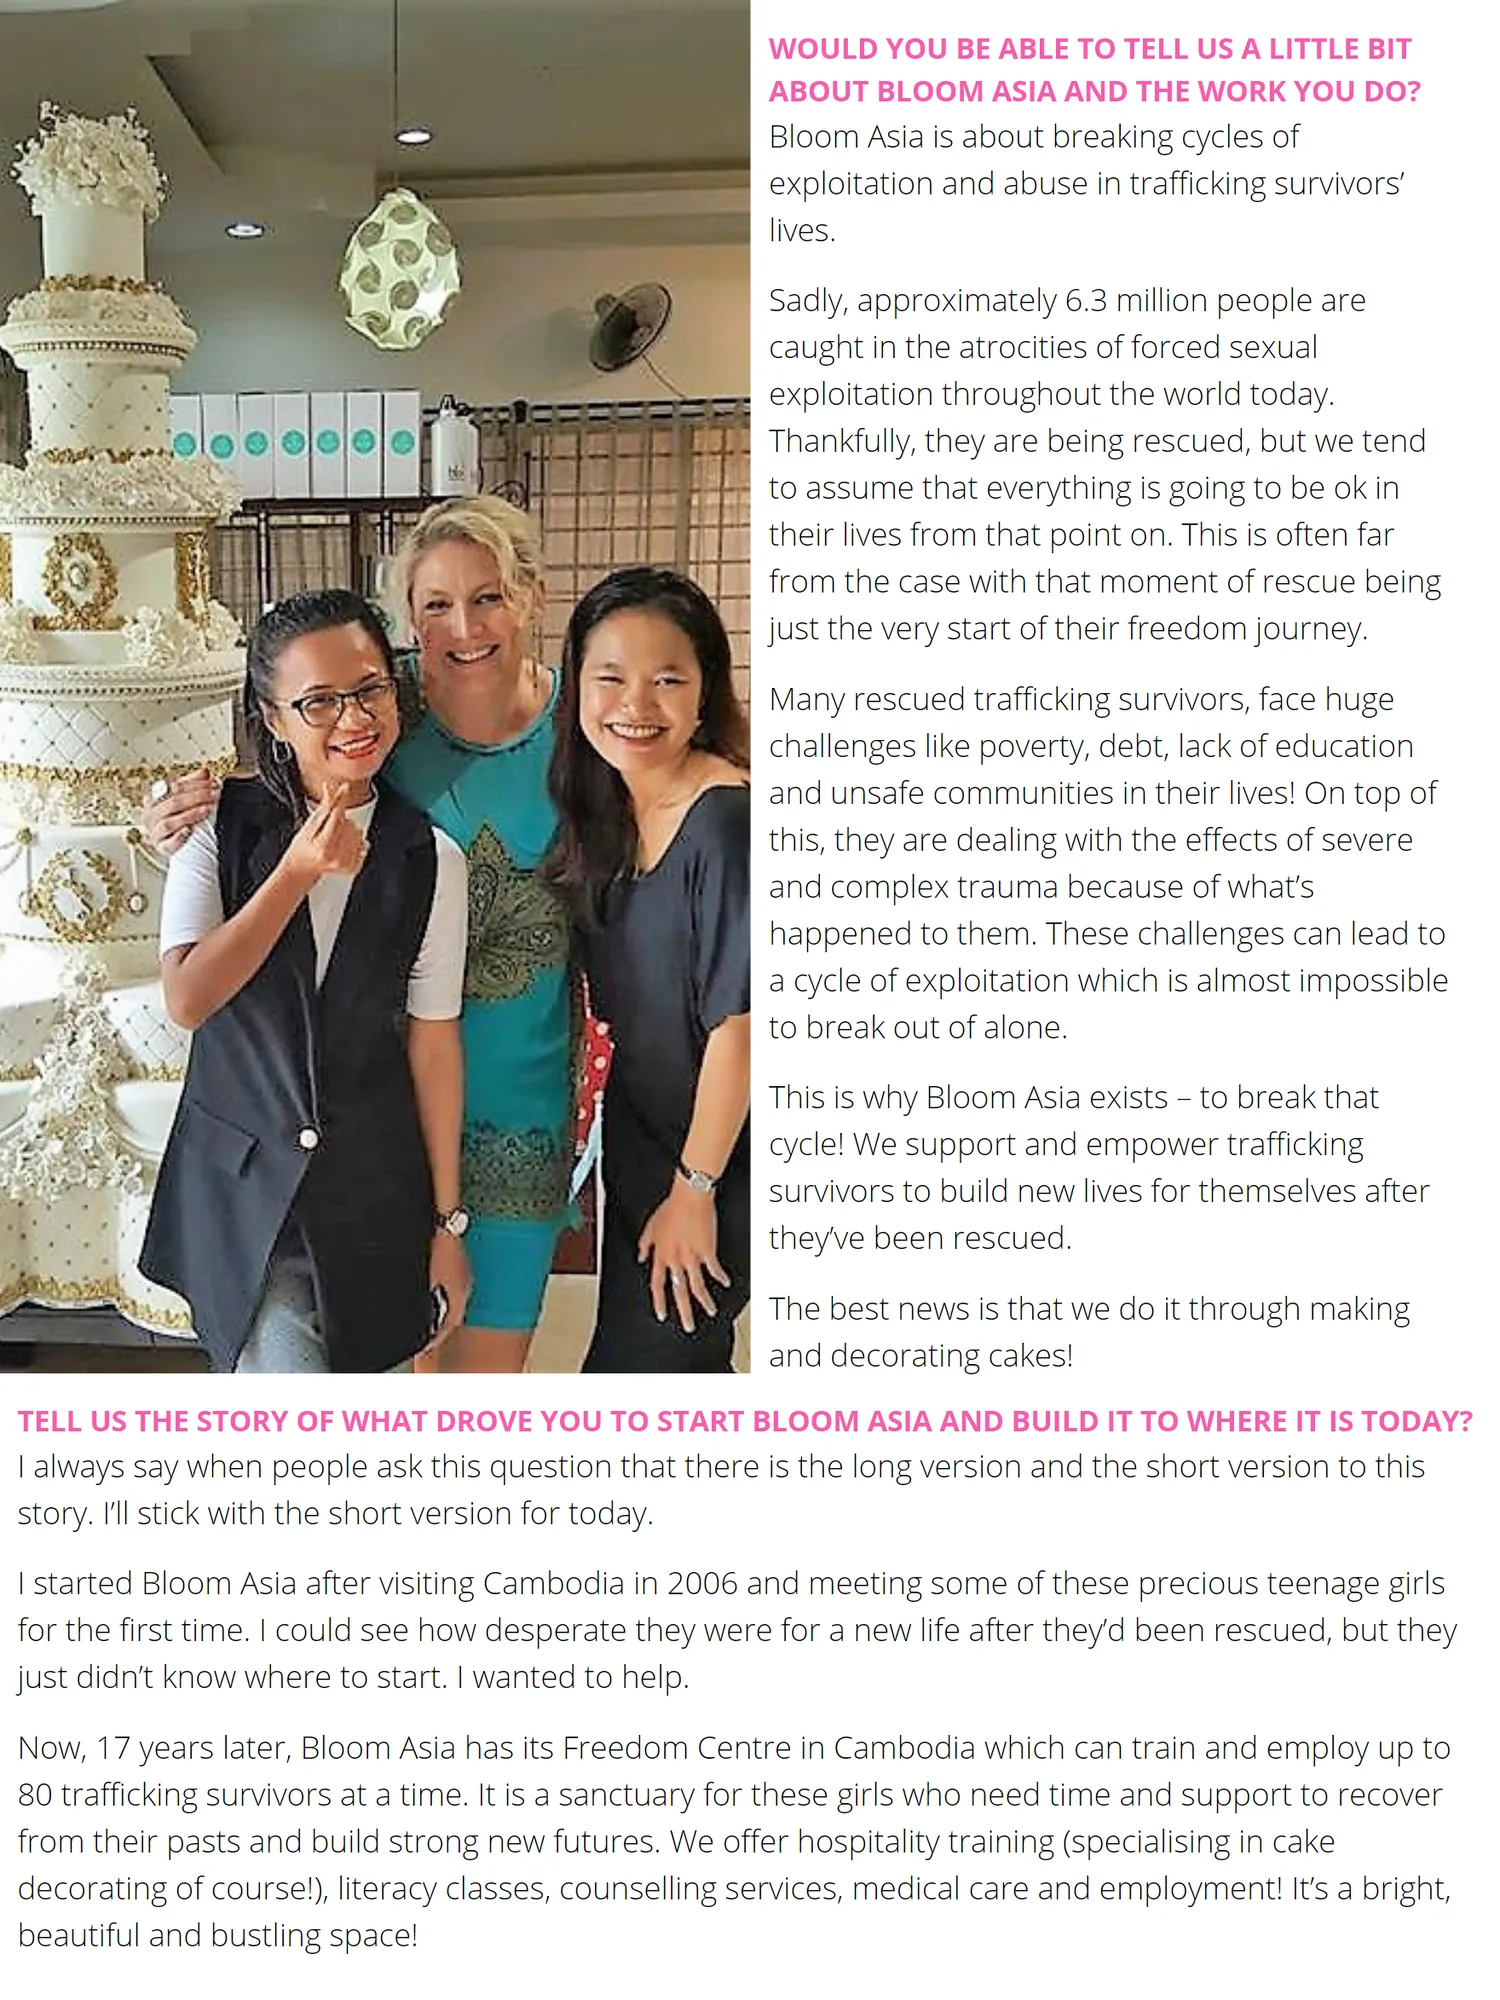
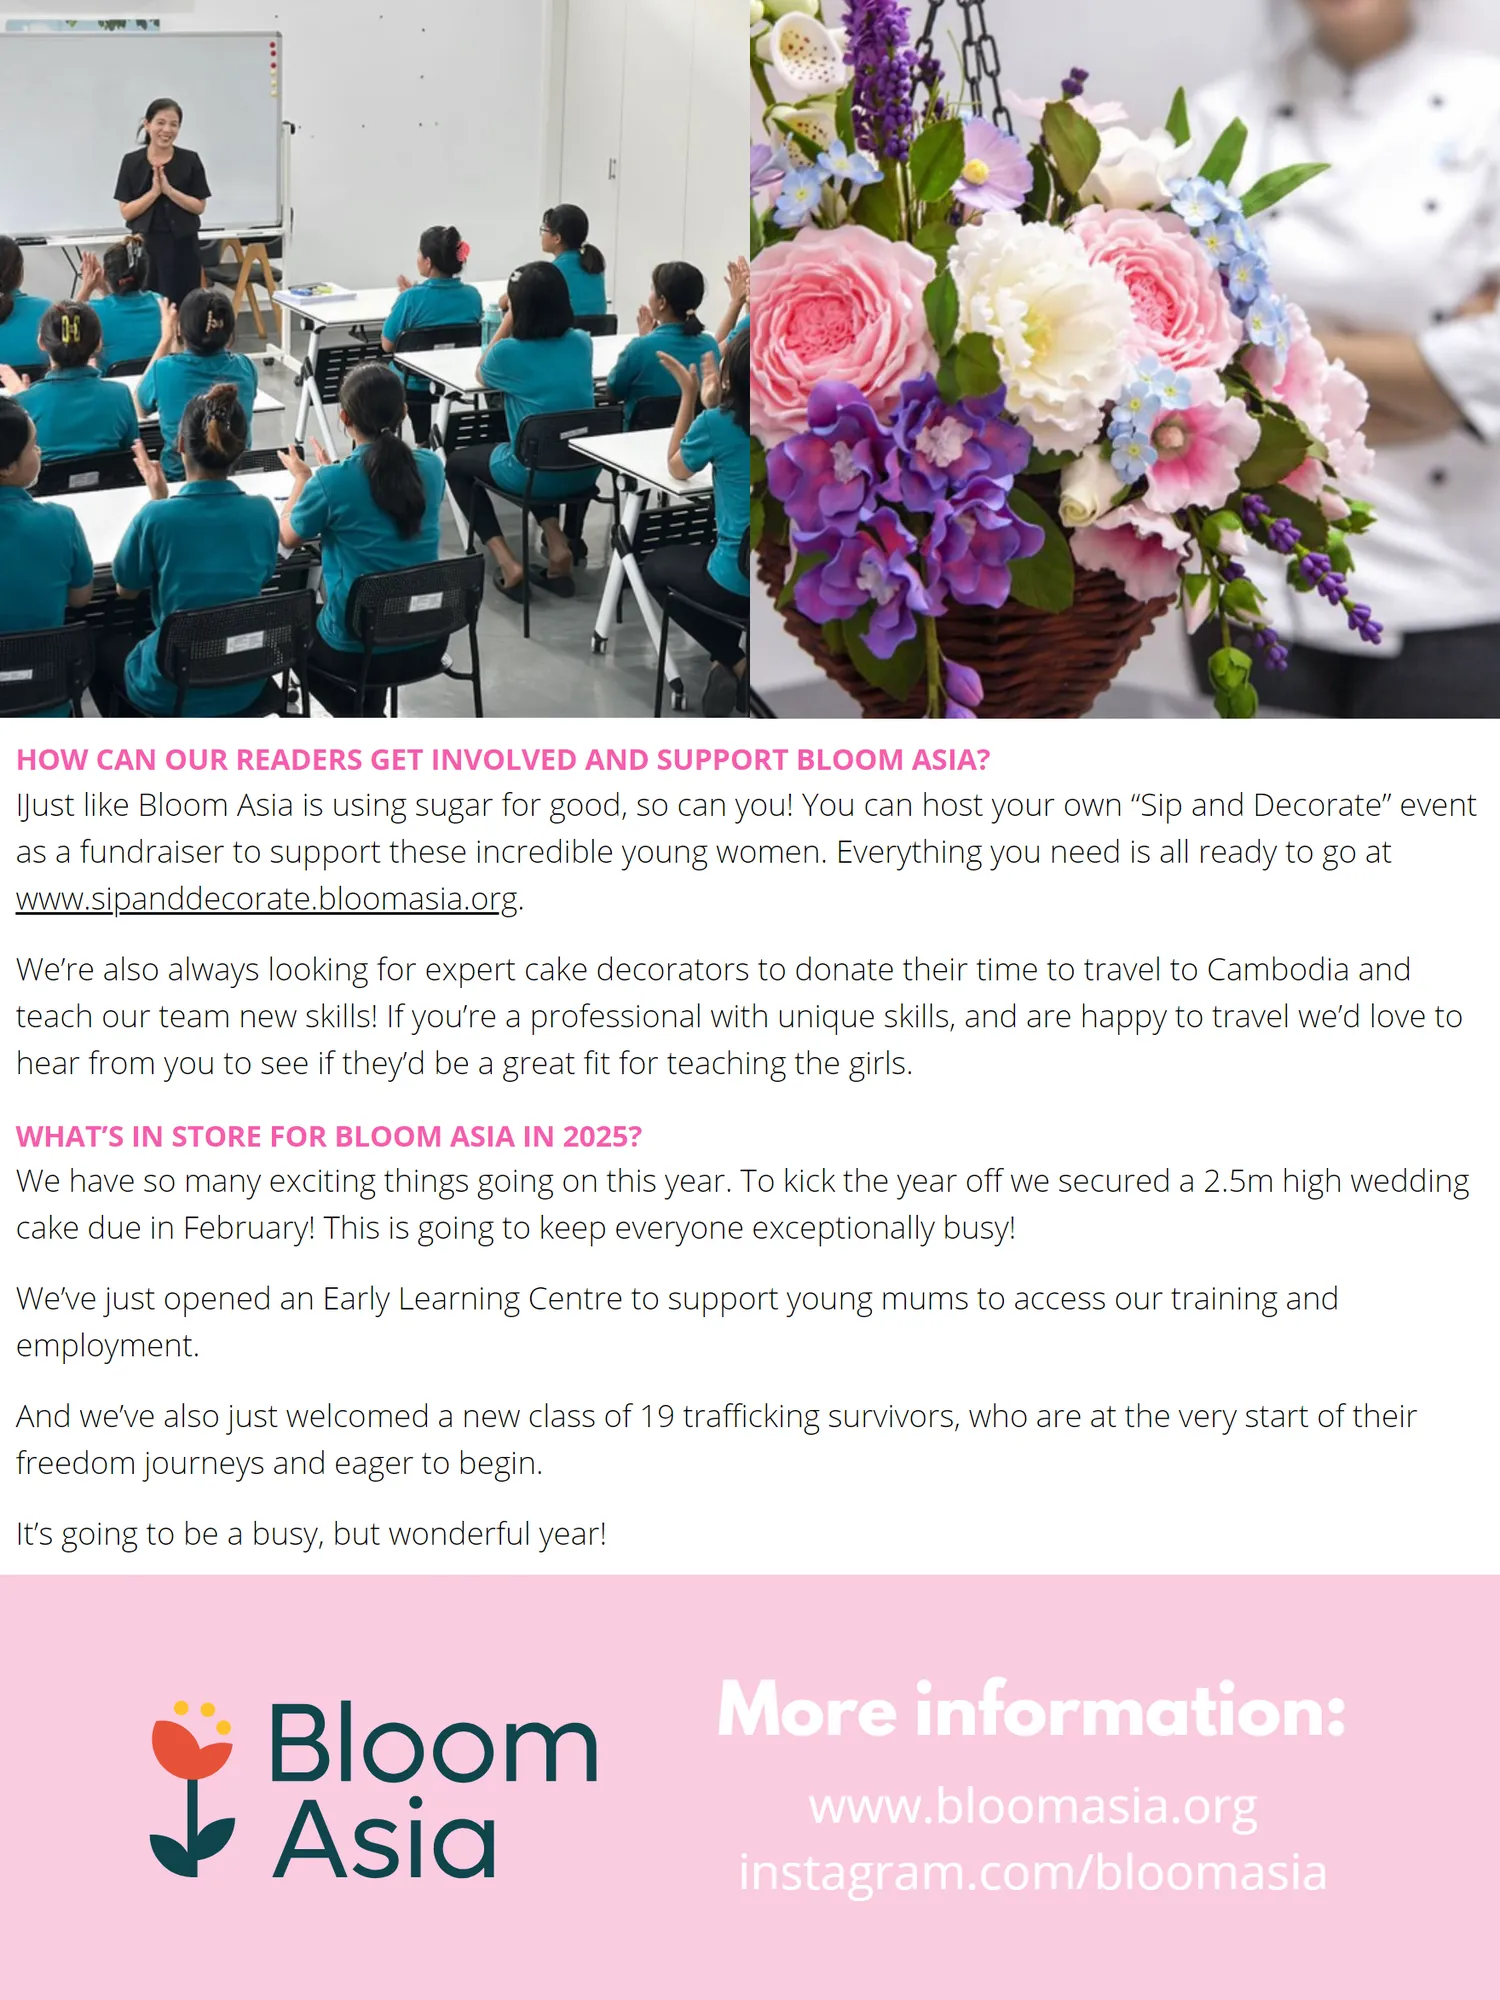
WOULD YOU BE ABLE TO TELL US A LITTLE BIT ABOUT BLOOM ASIA AND THE WORK YOU DO? Bloom Asia is about breaking cycles of exploitation and abuse in trafficking survivors’ lives. Sadly, approximately 6.3 million people are caught in the atrocities of forced sexual exploitation throughout the world today. Thankfully, they are being rescued, but we tend to assume that everything is going to be ok in their lives from that point on. This is often far from the case with that moment of rescue being just the very start of their freedom journey. Many rescued trafficking survivors, face huge challenges like poverty, debt, lack of education and unsafe communities in their lives! On top of this, they are dealing with the effects of severe and complex trauma because of what’s happened to them. These challenges can lead to a cycle of exploitation which is almost impossible to break out of alone. This is why Bloom Asia exists – to break that cycle! We support and empower trafficking survivors to build new lives for themselves after they’ve been rescued. The best news is that we do it through making and decorating cakes! TELL US THE STORY OF WHAT DROVE YOU TO START BLOOM ASIA AND BUILD IT TO WHERE IT IS TODAY? I always say when people ask this question that there is the long version and the short version to this story. I’ll stick with the short version for today. I started Bloom Asia after visiting Cambodia in 2006 and meeting some of these precious teenage girls for the first time. I could see how desperate they were for a new life after they’d been rescued, but they just didn’t know where to start. I wanted to help. Now, 17 years later, Bloom Asia has its Freedom Centre in Cambodia which can train and employ up to 80 trafficking survivors at a time. It is a sanctuary for these girls who need time and support to recover from their pasts and build strong new futures. We offer hospitality training (specialising in cake decorating of course!), literacy classes, counselling services, medical care and employment! It’s a bright, beautiful and bustling space!
Page 51 text
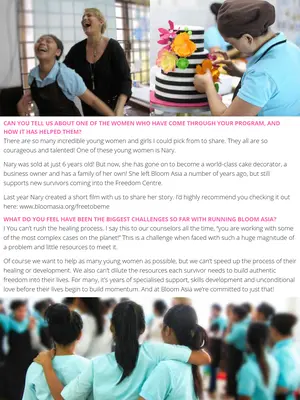
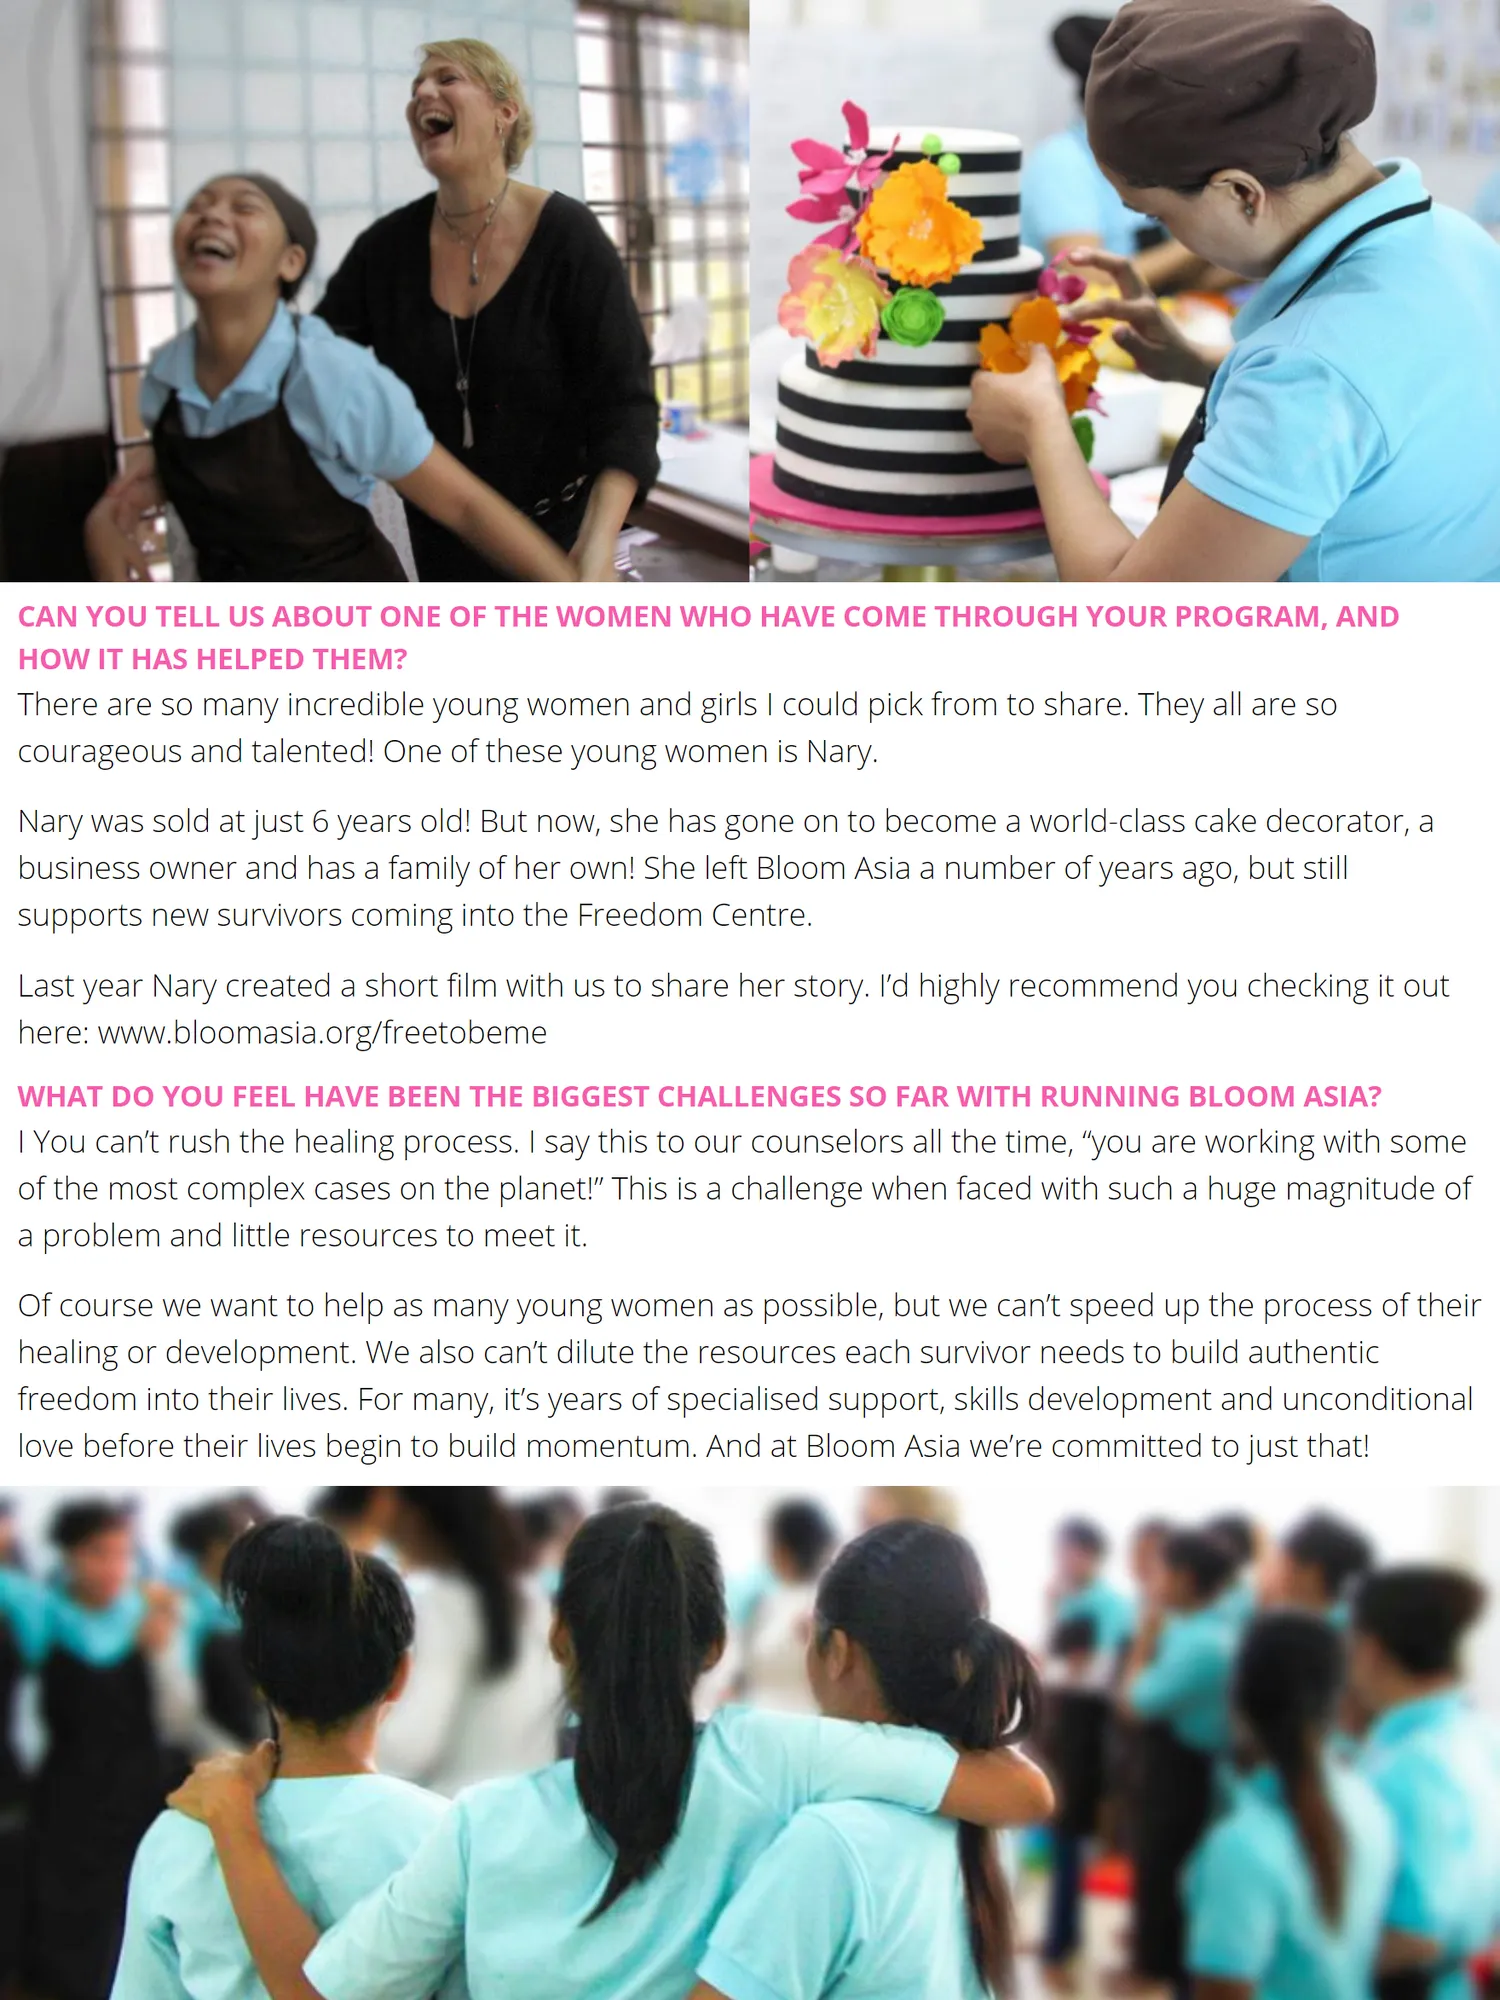
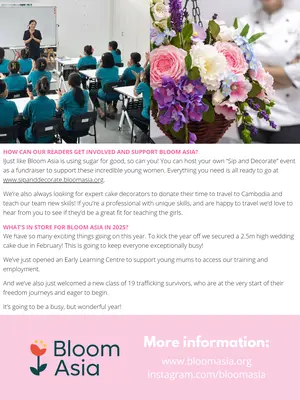
CAN YOU TELL US ABOUT ONE OF THE WOMEN WHO HAVE COME THROUGH YOUR PROGRAM, AND HOW IT HAS HELPED THEM? There are so many incredible young women and girls I could pick from to share. They all are so courageous and talented! One of these young women is Nary. Nary was sold at just 6 years old! But now, she has gone on to become a world-class cake decorator, a business owner and has a family of her own! She left Bloom Asia a number of years ago, but still supports new survivors coming into the Freedom Centre. Last year Nary created a short film with us to share her story. I’d highly recommend you checking it out here: www.bloomasia.org/freetobeme WHAT DO YOU FEEL HAVE BEEN THE BIGGEST CHALLENGES SO FAR WITH RUNNING BLOOM ASIA? I You can’t rush the healing process. I say this to our counselors all the time, “you are working with some of the most complex cases on the planet!” This is a challenge when faced with such a huge magnitude of a problem and little resources to meet it. Of course we want to help as many young women as possible, but we can’t speed up the process of their healing or development. We also can’t dilute the resources each survivor needs to build authentic freedom into their lives. For many, it’s years of specialised support, skills development and unconditional love before their lives begin to build momentum. And at Bloom Asia we’re committed to just that!
Page 52 text
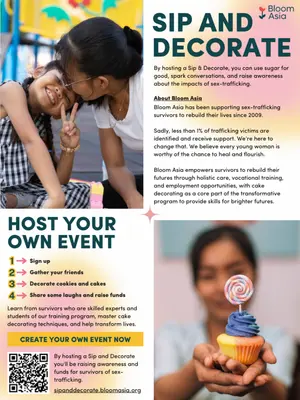
HOW CAN OUR READERS GET INVOLVED AND SUPPORT BLOOM ASIA ? IJust like Bloom Asia is using sugar for good , so can you ! You can host your own “ Sip and Decorate ” event as a fundraiser to support these incredible young women . Everything you need is all ready to go at www . sipanddecorate . bloomasia . org . We ’ re also always looking for expert cake decorators to donate their time to travel to Cambodia and teach our team new skills ! If you ’ re a professional with unique skills , and are happy to travel we ’ d love to hear from you to see if they ’ d be a great fit for teaching the girls . WHAT ’ S IN STORE FOR BLOOM ASIA IN 2025 ? We have so many exciting things going on this year . To kick the year off we secured a 2.5m high wedding cake due in February ! This is going to keep everyone exceptionally busy ! We ’ ve just opened an Early Learning Centre to support young mums to access our training and employment . And we ’ ve also just welcomed a new class of 19 trafficking survivors , who are at the very start of their freedom journeys and eager to begin . It ’ s going to be a busy , but wonderful year ! More information : www . bloomasia . org instagram . com / bloomasia



Page 54 text
Baking Box Subscription Baking Box Subscription


Page 55 text
Baking Box Subscription Baking Box Subscription A QUARTERLY SUBSCRIPTION OF CAKE AND BAKING GOODIES DELIVERED TO YOUR DOOR!


Page 56 text
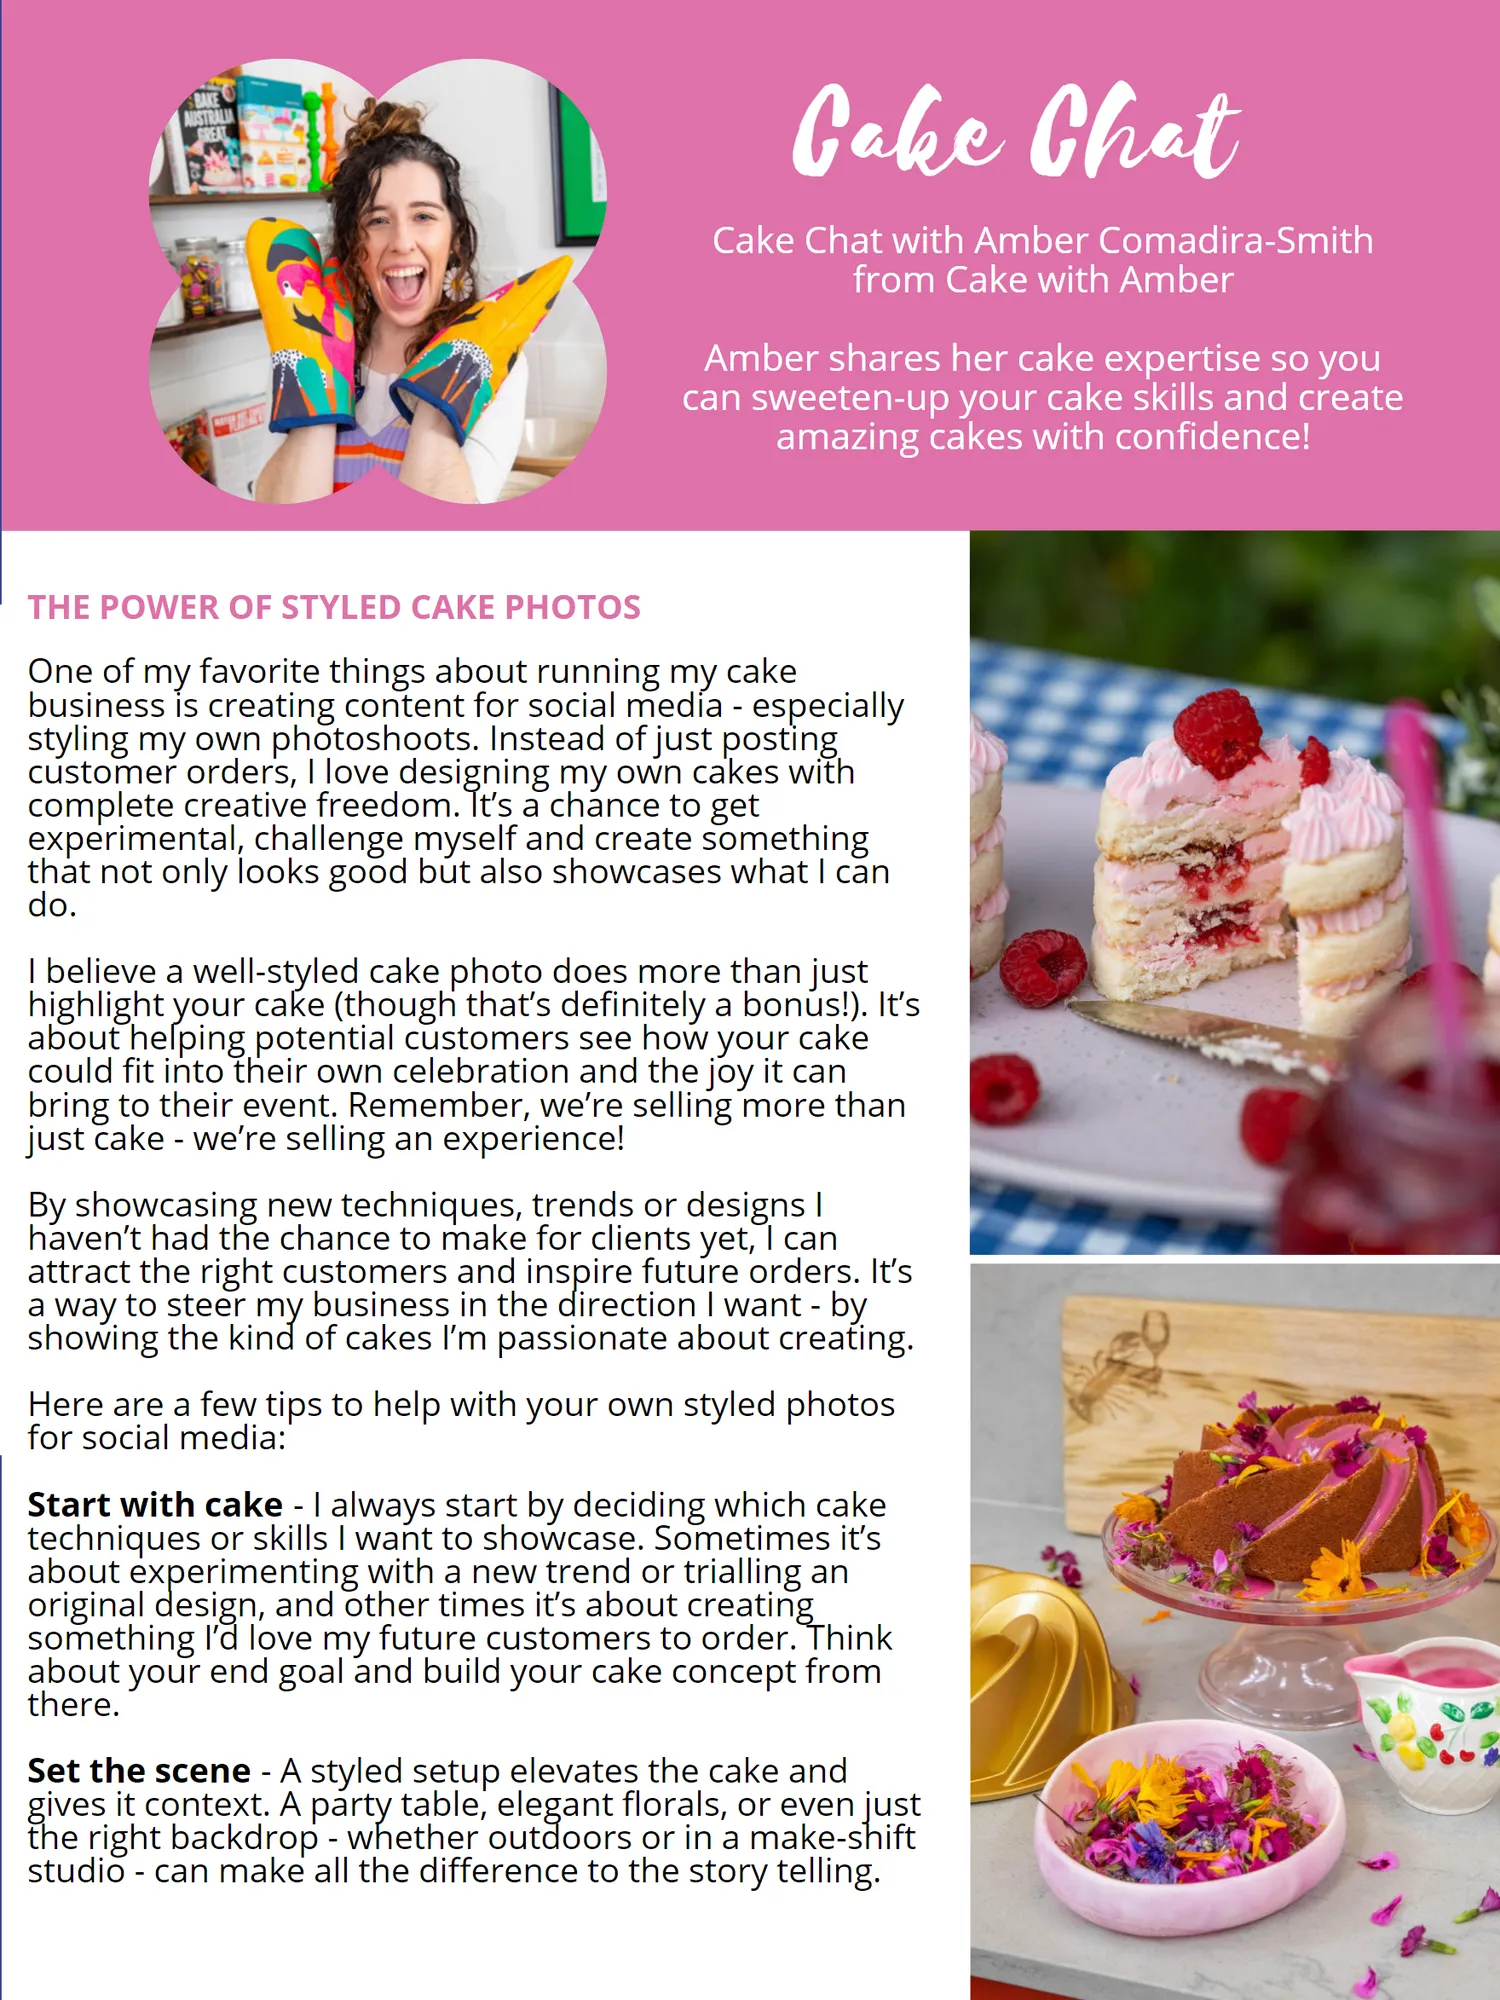
THE POWER OF STYLED CAKE PHOTOS
Page 57 text
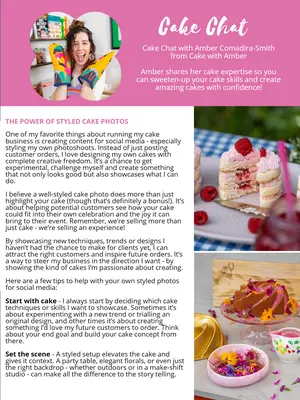
Cake Chat 2025 PREFERRED Cake Chat with Amber Comadira-Smith SUPPLIERS from Cake with Amber MEMBER Amber shares her cake expertise so you can sweeten-up your cake skills and create amazing cakes with confidence!
Page 58 text
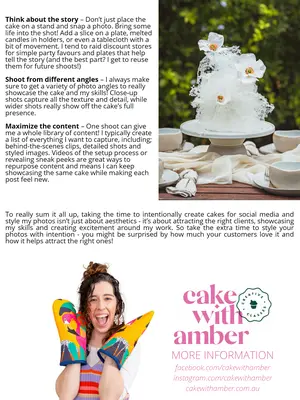
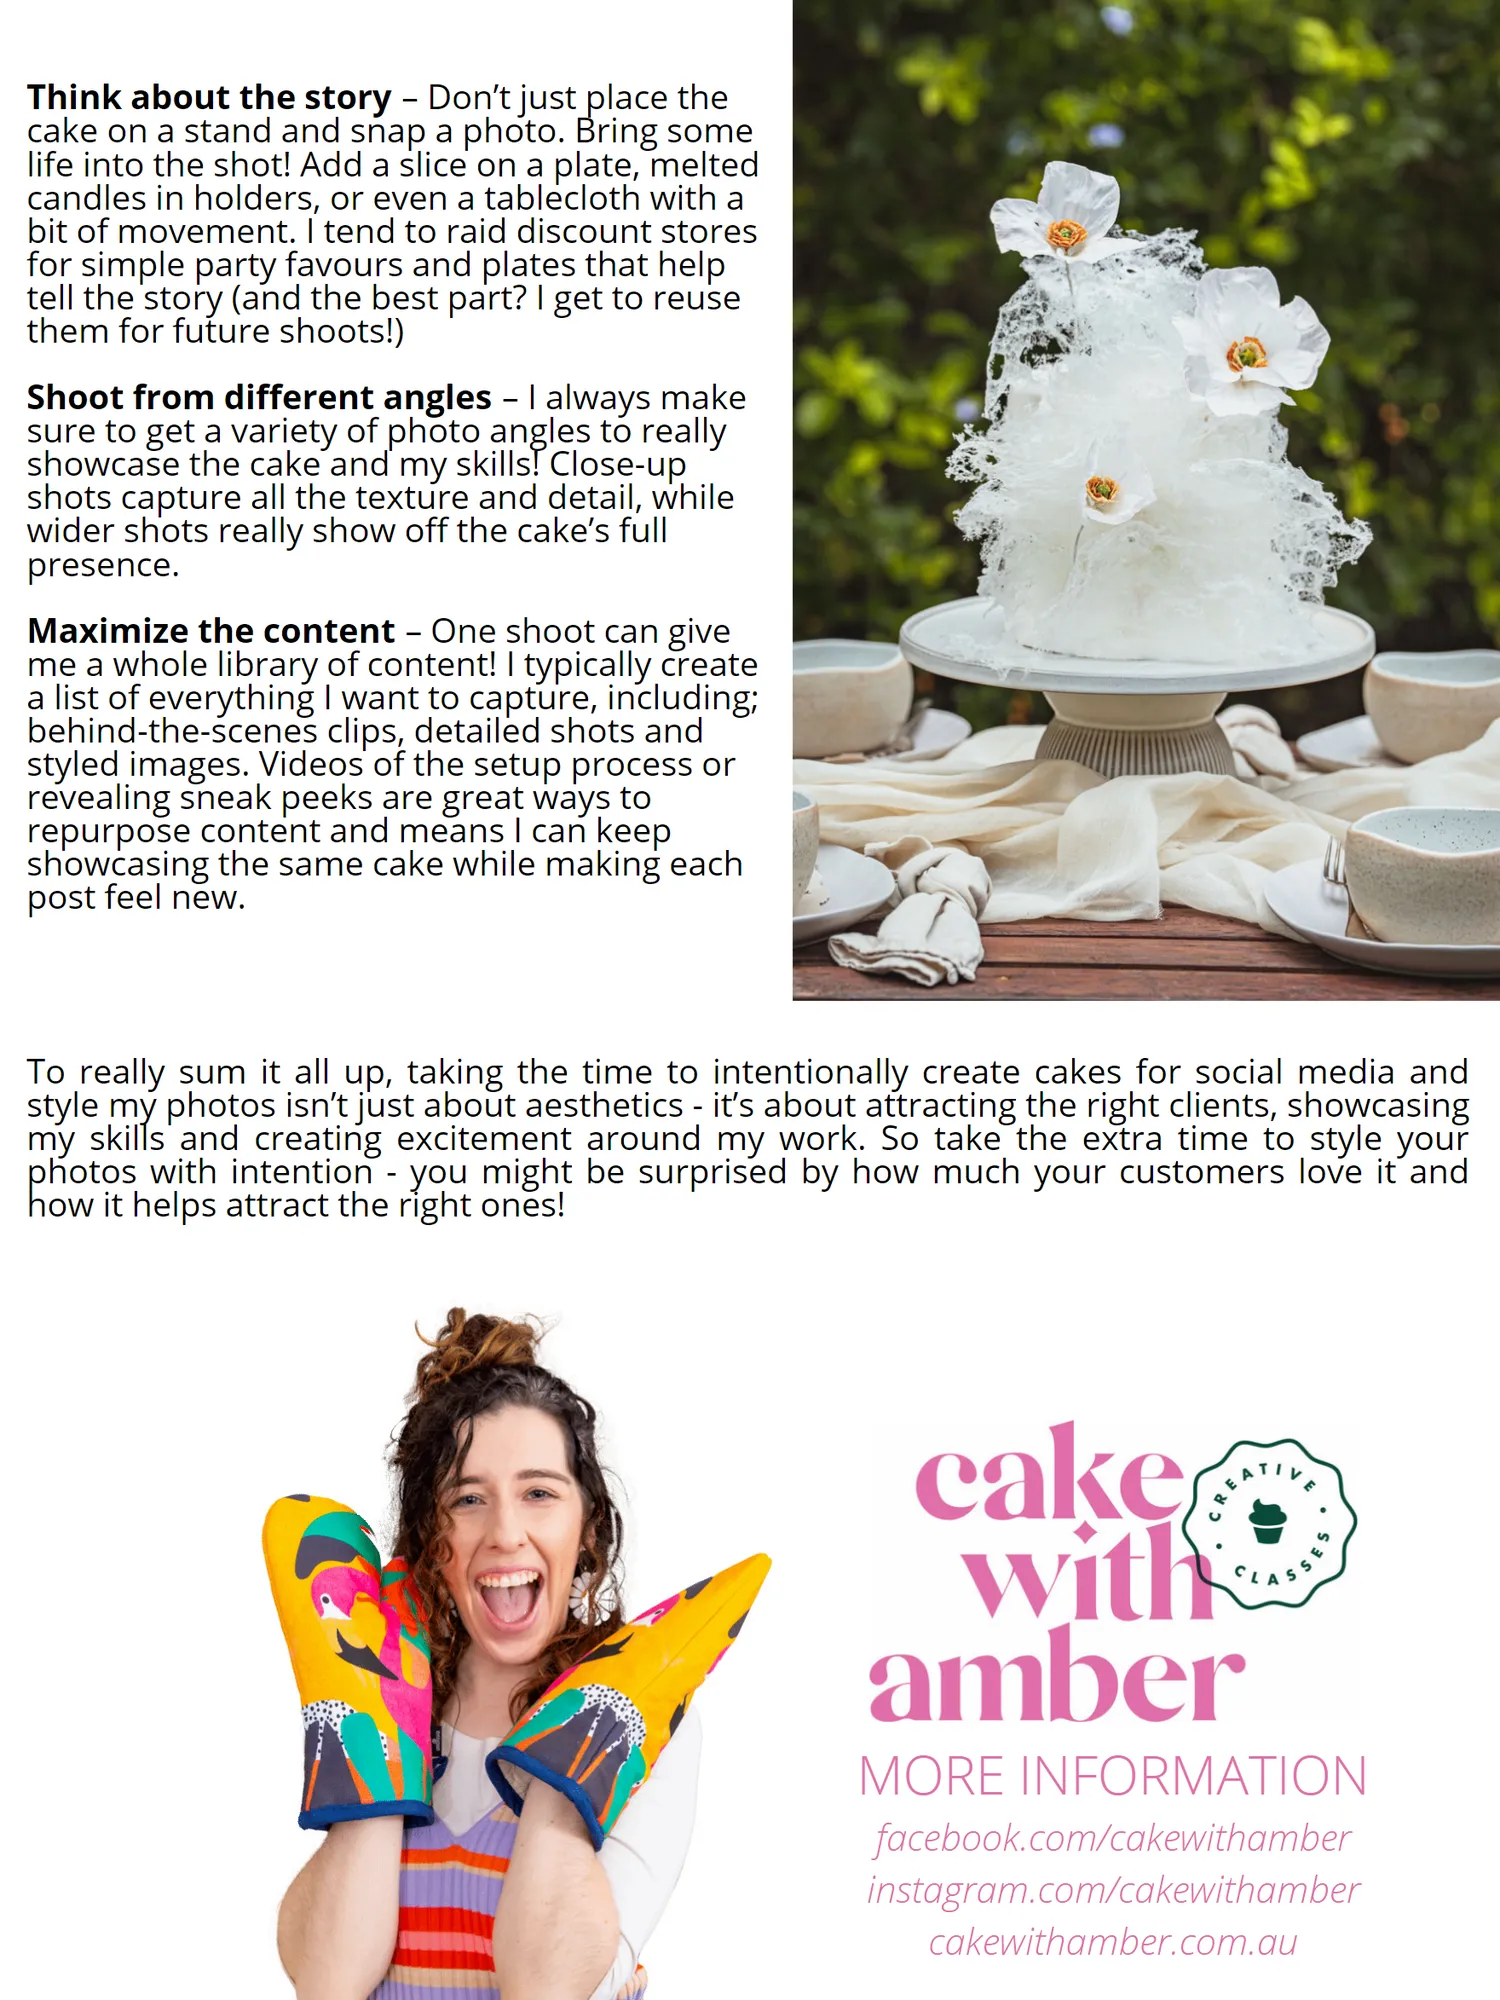
Think about the story – Don’t just place the cake on a stand and snap a photo. Bring some life into the shot! Add a slice on a plate, melted candles in holders, or even a tablecloth with a bit of movement. I tend to raid discount stores for simple party favours and plates that help tell the story (and the best part? I get to reuse them for future shoots!) Shoot from different angles sure to get a variety of photo angles to really showcase the cake and my skills! Close-up shots capture all the texture and detail, while wider shots really show off the cake’s full presence. Maximize the content – One shoot can give


Page 59 text
– Don’t just place the cake on a stand and snap a photo. Bring some life into the shot! Add a slice on a plate, melted candles in holders, or even a tablecloth with a bit of movement. I tend to raid discount stores for simple party favours and plates that help tell the story (and the best part? I get to reuse – I always make sure to get a variety of photo angles to really showcase the cake and my skills! Close-up shots capture all the texture and detail, while wider shots really show off the cake’s full – One shoot can give
Page 60 text
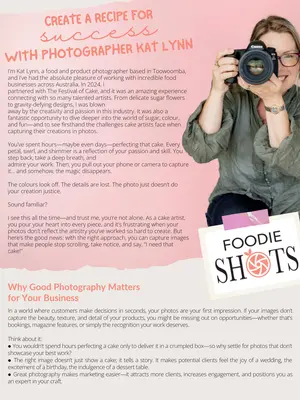
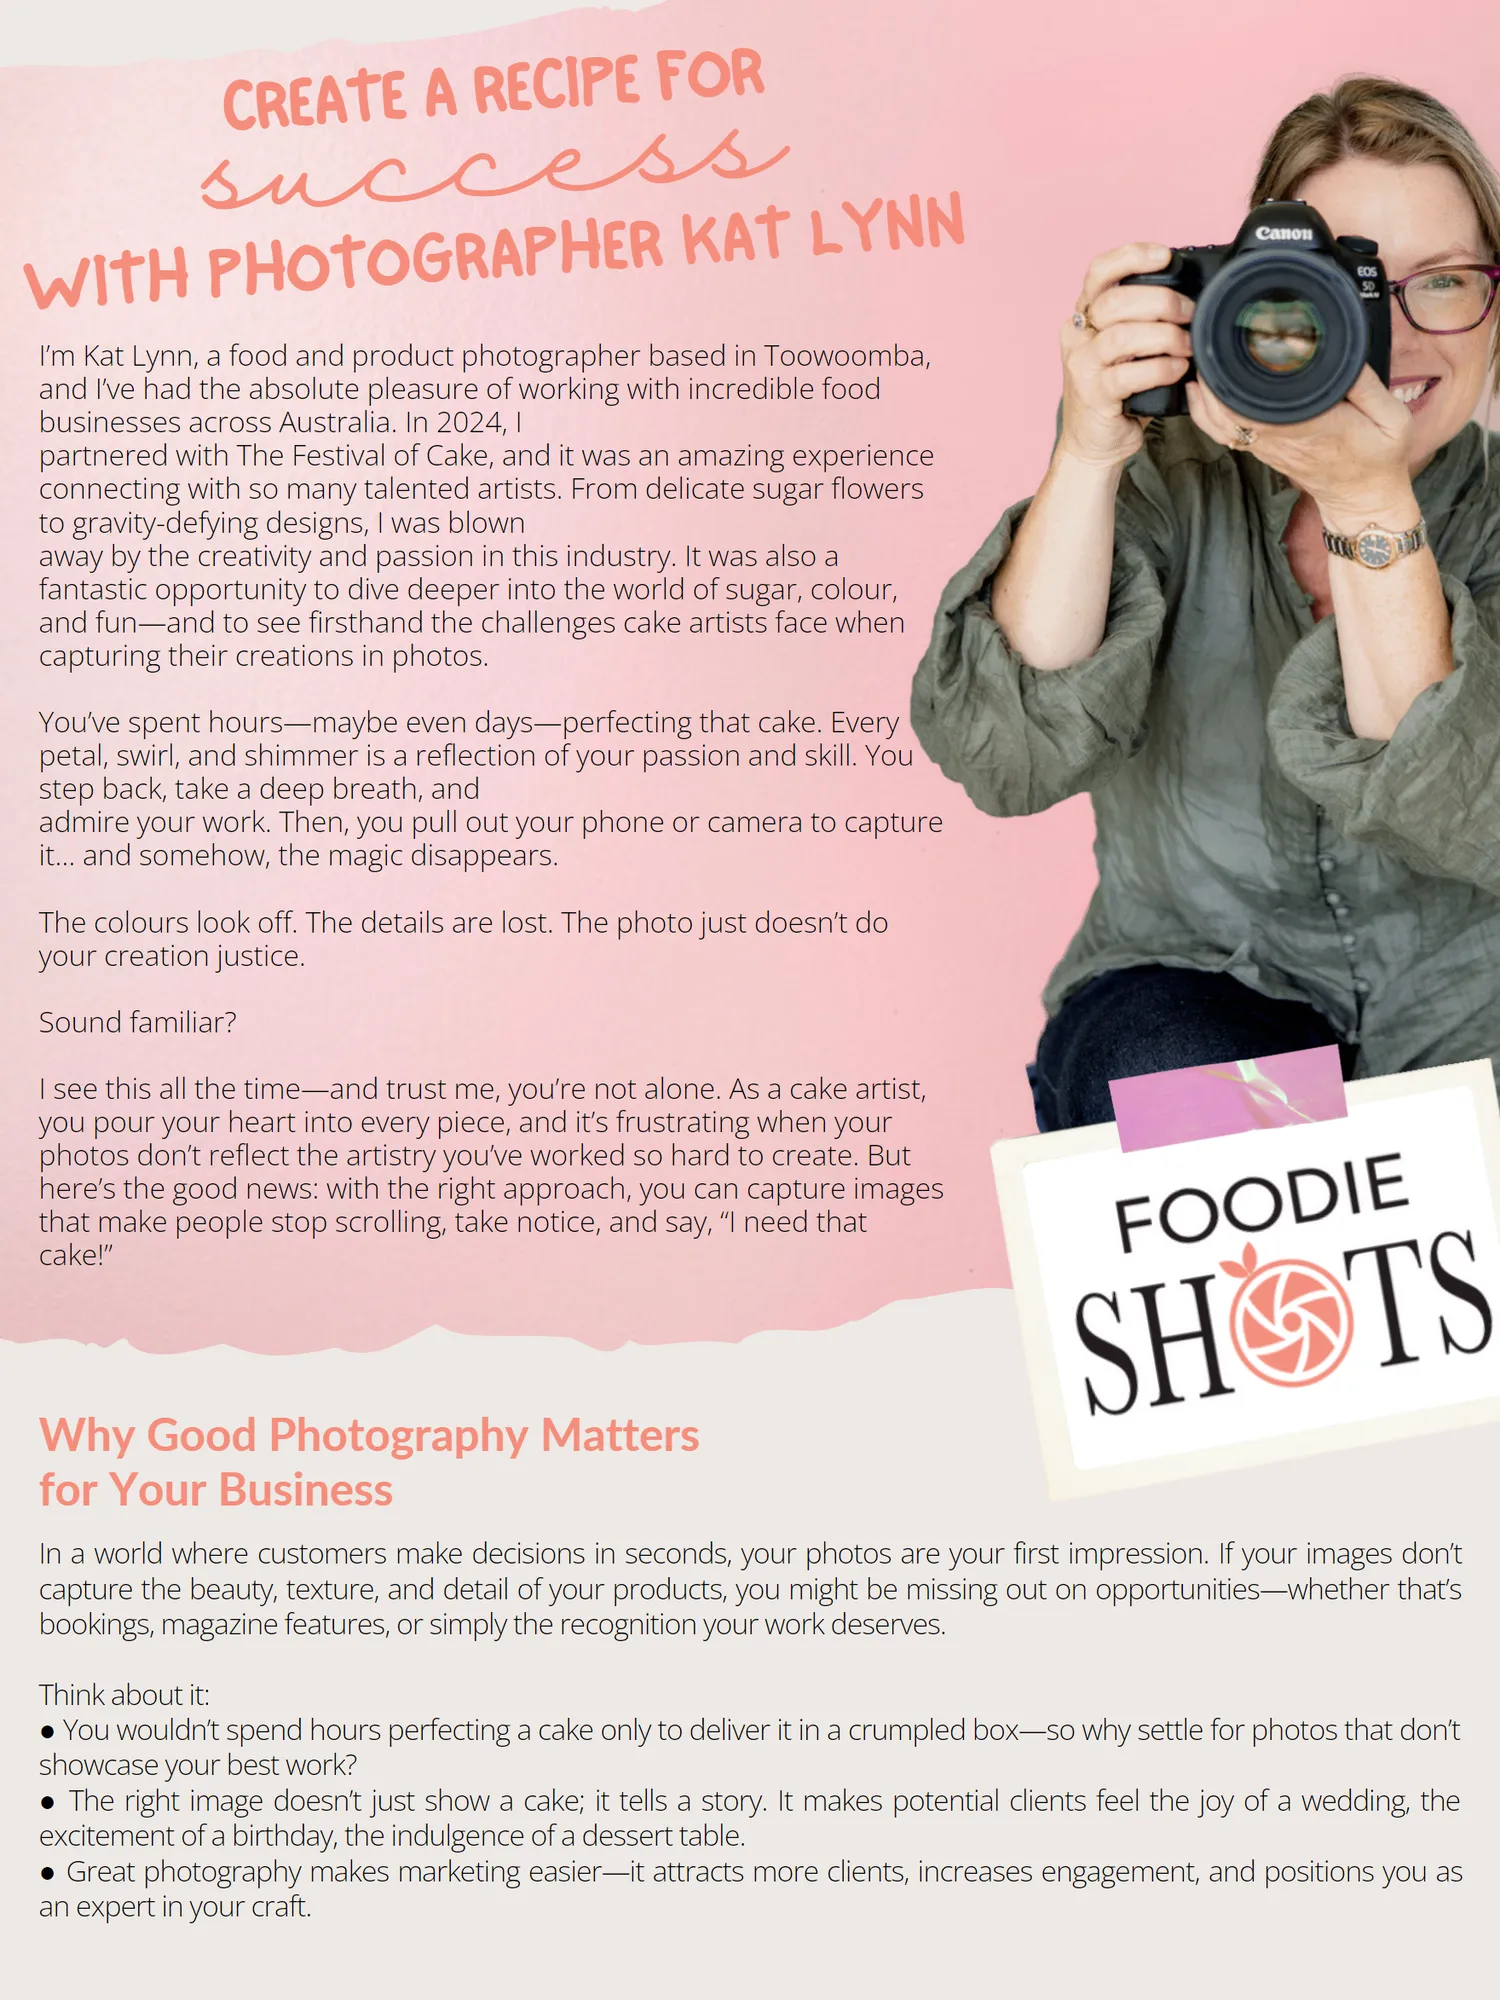
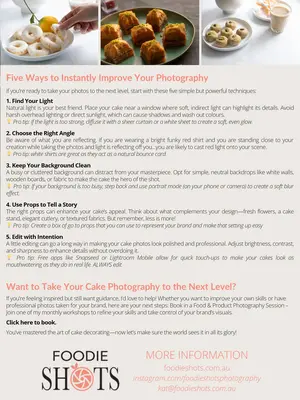
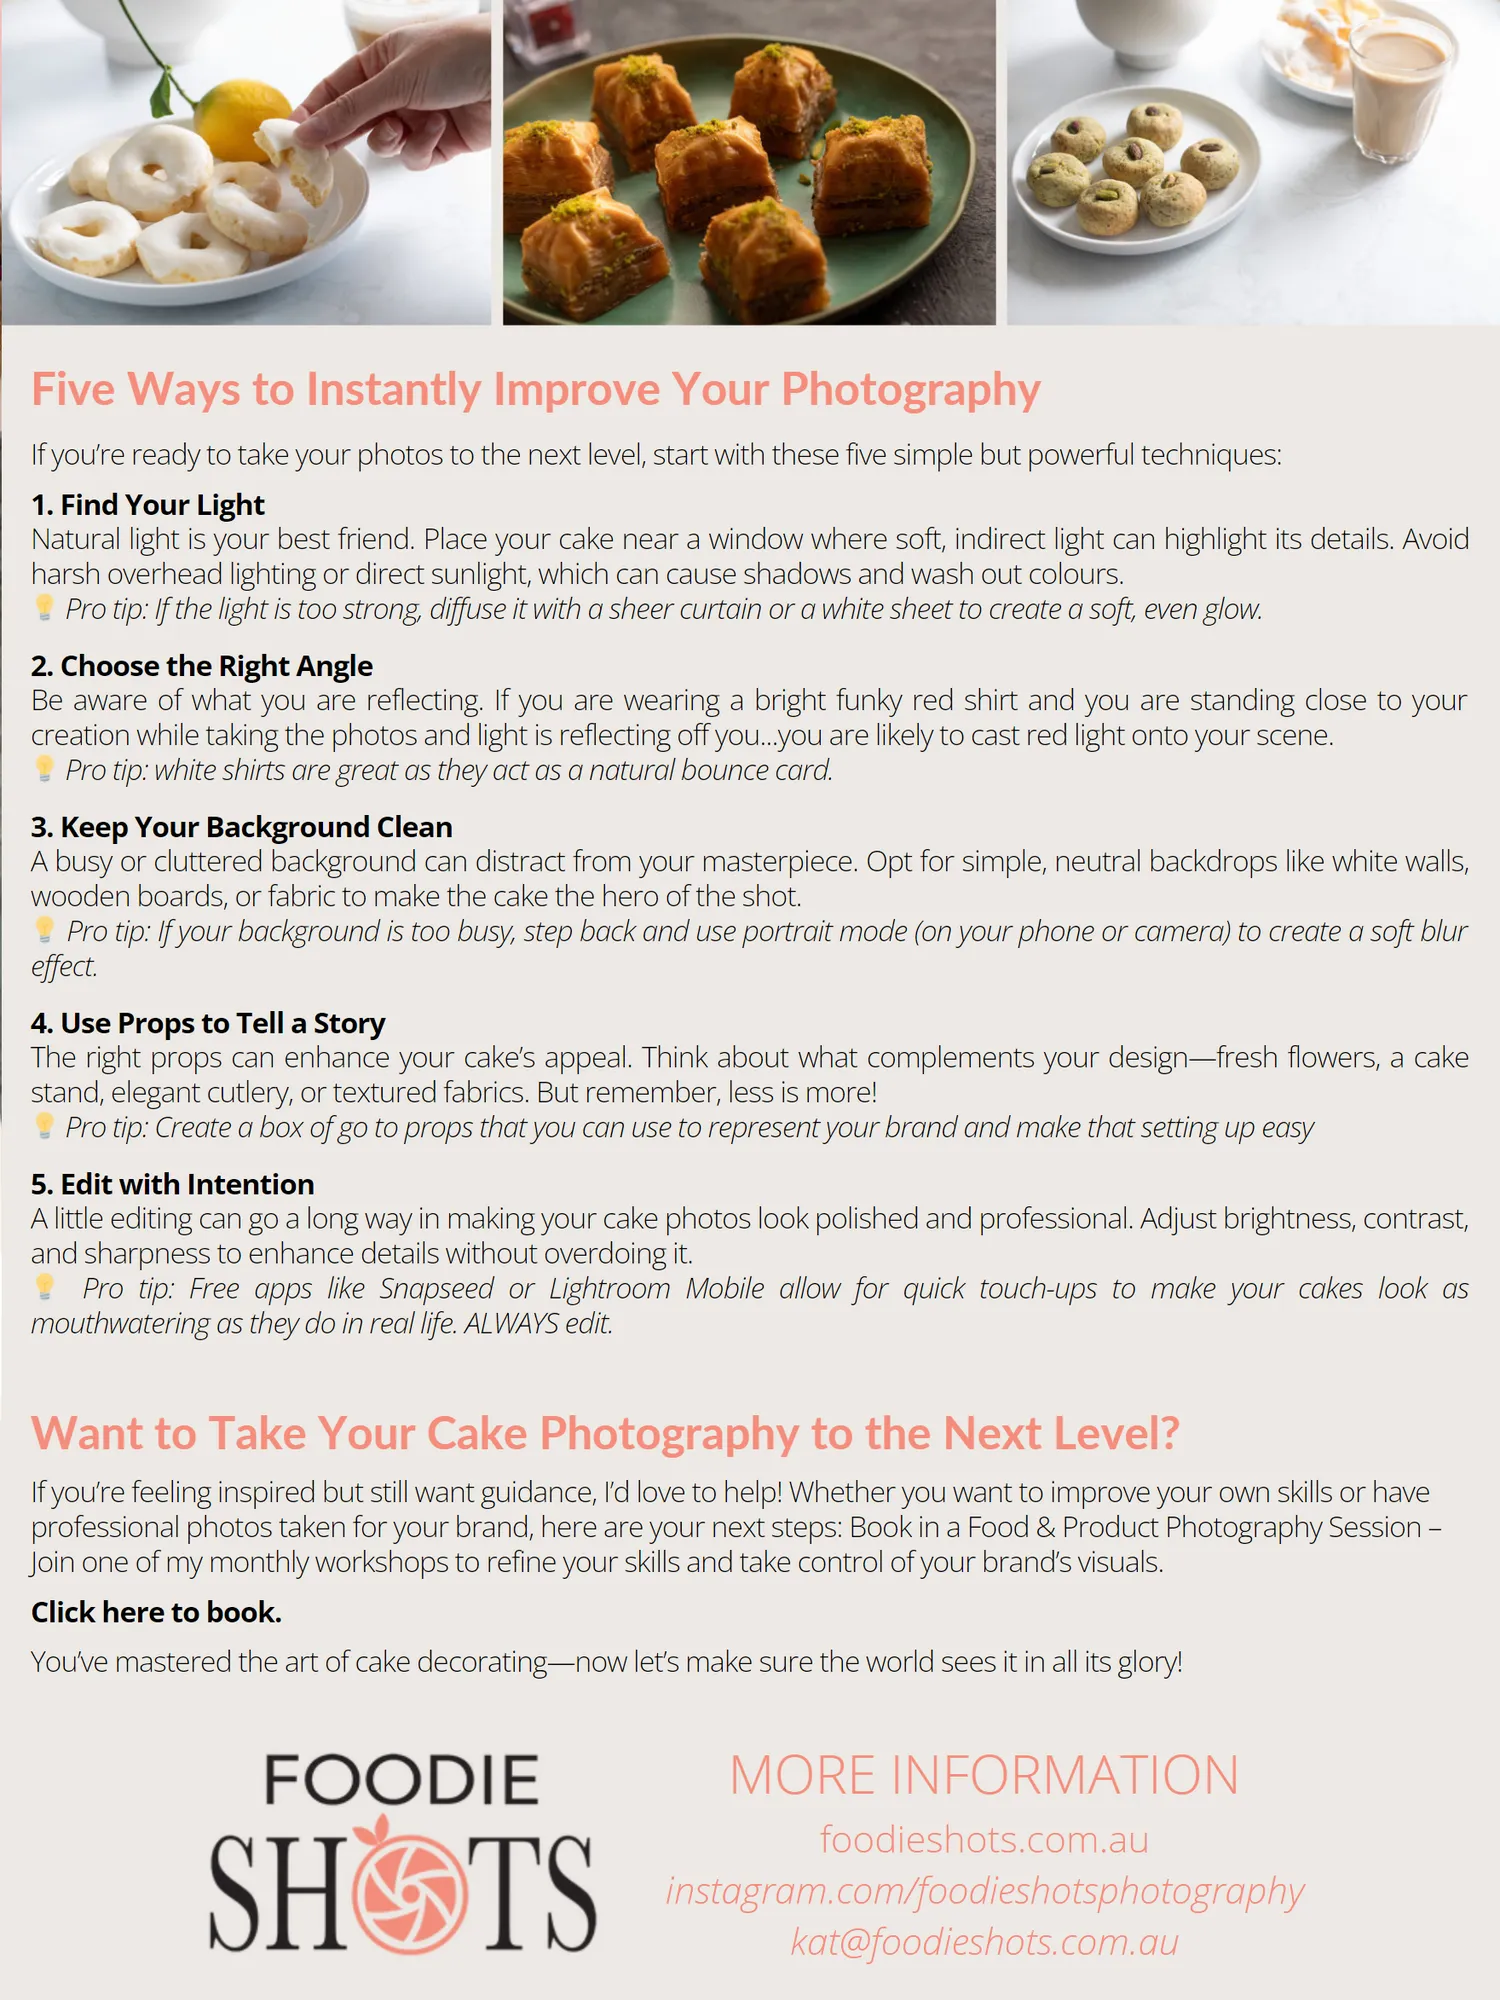
CREATE A RECIPE FOR success I’m Kat Lynn, a food and product photographer based in Toowoomba, and I’ve had the absolute pleasure of working with incredible food businesses across Australia. In 2024, I If you’re ready to take your photos to the next level, start with these five simple but powerful techniques: partnered with The Festival of Cake, and it was an amazing experience connecting with so many talented artists. From delicate sugar flowers to gravity-defying designs, I was blown Natural light is your best friend. Place your cake near a window where soft, indirect light can highlight its details. Avoid away by the creativity and passion in this industry. It was also a harsh overhead lighting or direct sunlight, which can cause shadows and wash out colours. fantastic opportunity to dive deeper into the world of sugar, colour, and fun—and to see firsthand the challenges cake artists face when
Page 61 text
CREATE A RECIPE FOR success I’m Kat Lynn, a food and product photographer based in Toowoomba, Five Ways to Instantly Improve Your Photography and I’ve had the absolute pleasure of working with incredible food If you’re ready to take your photos to the next level, start with these five simple but powerful techniques: partnered with The Festival of Cake, and it was an amazing experience Natural light is your best friend. Place your cake near a window where soft, indirect light can highlight its details. Avoid away by the creativity and passion in this industry. It was also a harsh overhead lighting or direct sunlight, which can cause shadows and wash out colours. Pro tip: If the light is too strong, diffuse it with a sheer curtain or a white sheet to create a soft, even glow.








Page 92 text
$199




Page 105 text
2025 PREFERRED SUPPLIERS MEMBER DISCOUNTS