Page 87 of 120
Page 1 text
Cake! MAGAZINE
Page 2 text
Page 3 text
letter from the editor It reminded me then, as it does now, that What an incredible privilege it is to be writing my cake is far more than sugar and skill. It’s very first “Letter from the Editor” for Cake connection. It’s story. It’s community. Decorating Magazine. Stepping into the role of And that’s exactly what I see reflected so director — and now Editor — of the Australian beautifully in this magazine and in all of you. Cake Decorating Network has been one of the As the new steward of ACDN, my most exciting and meaningful moments of my
Page 4 text
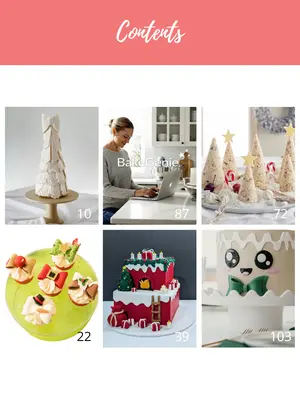
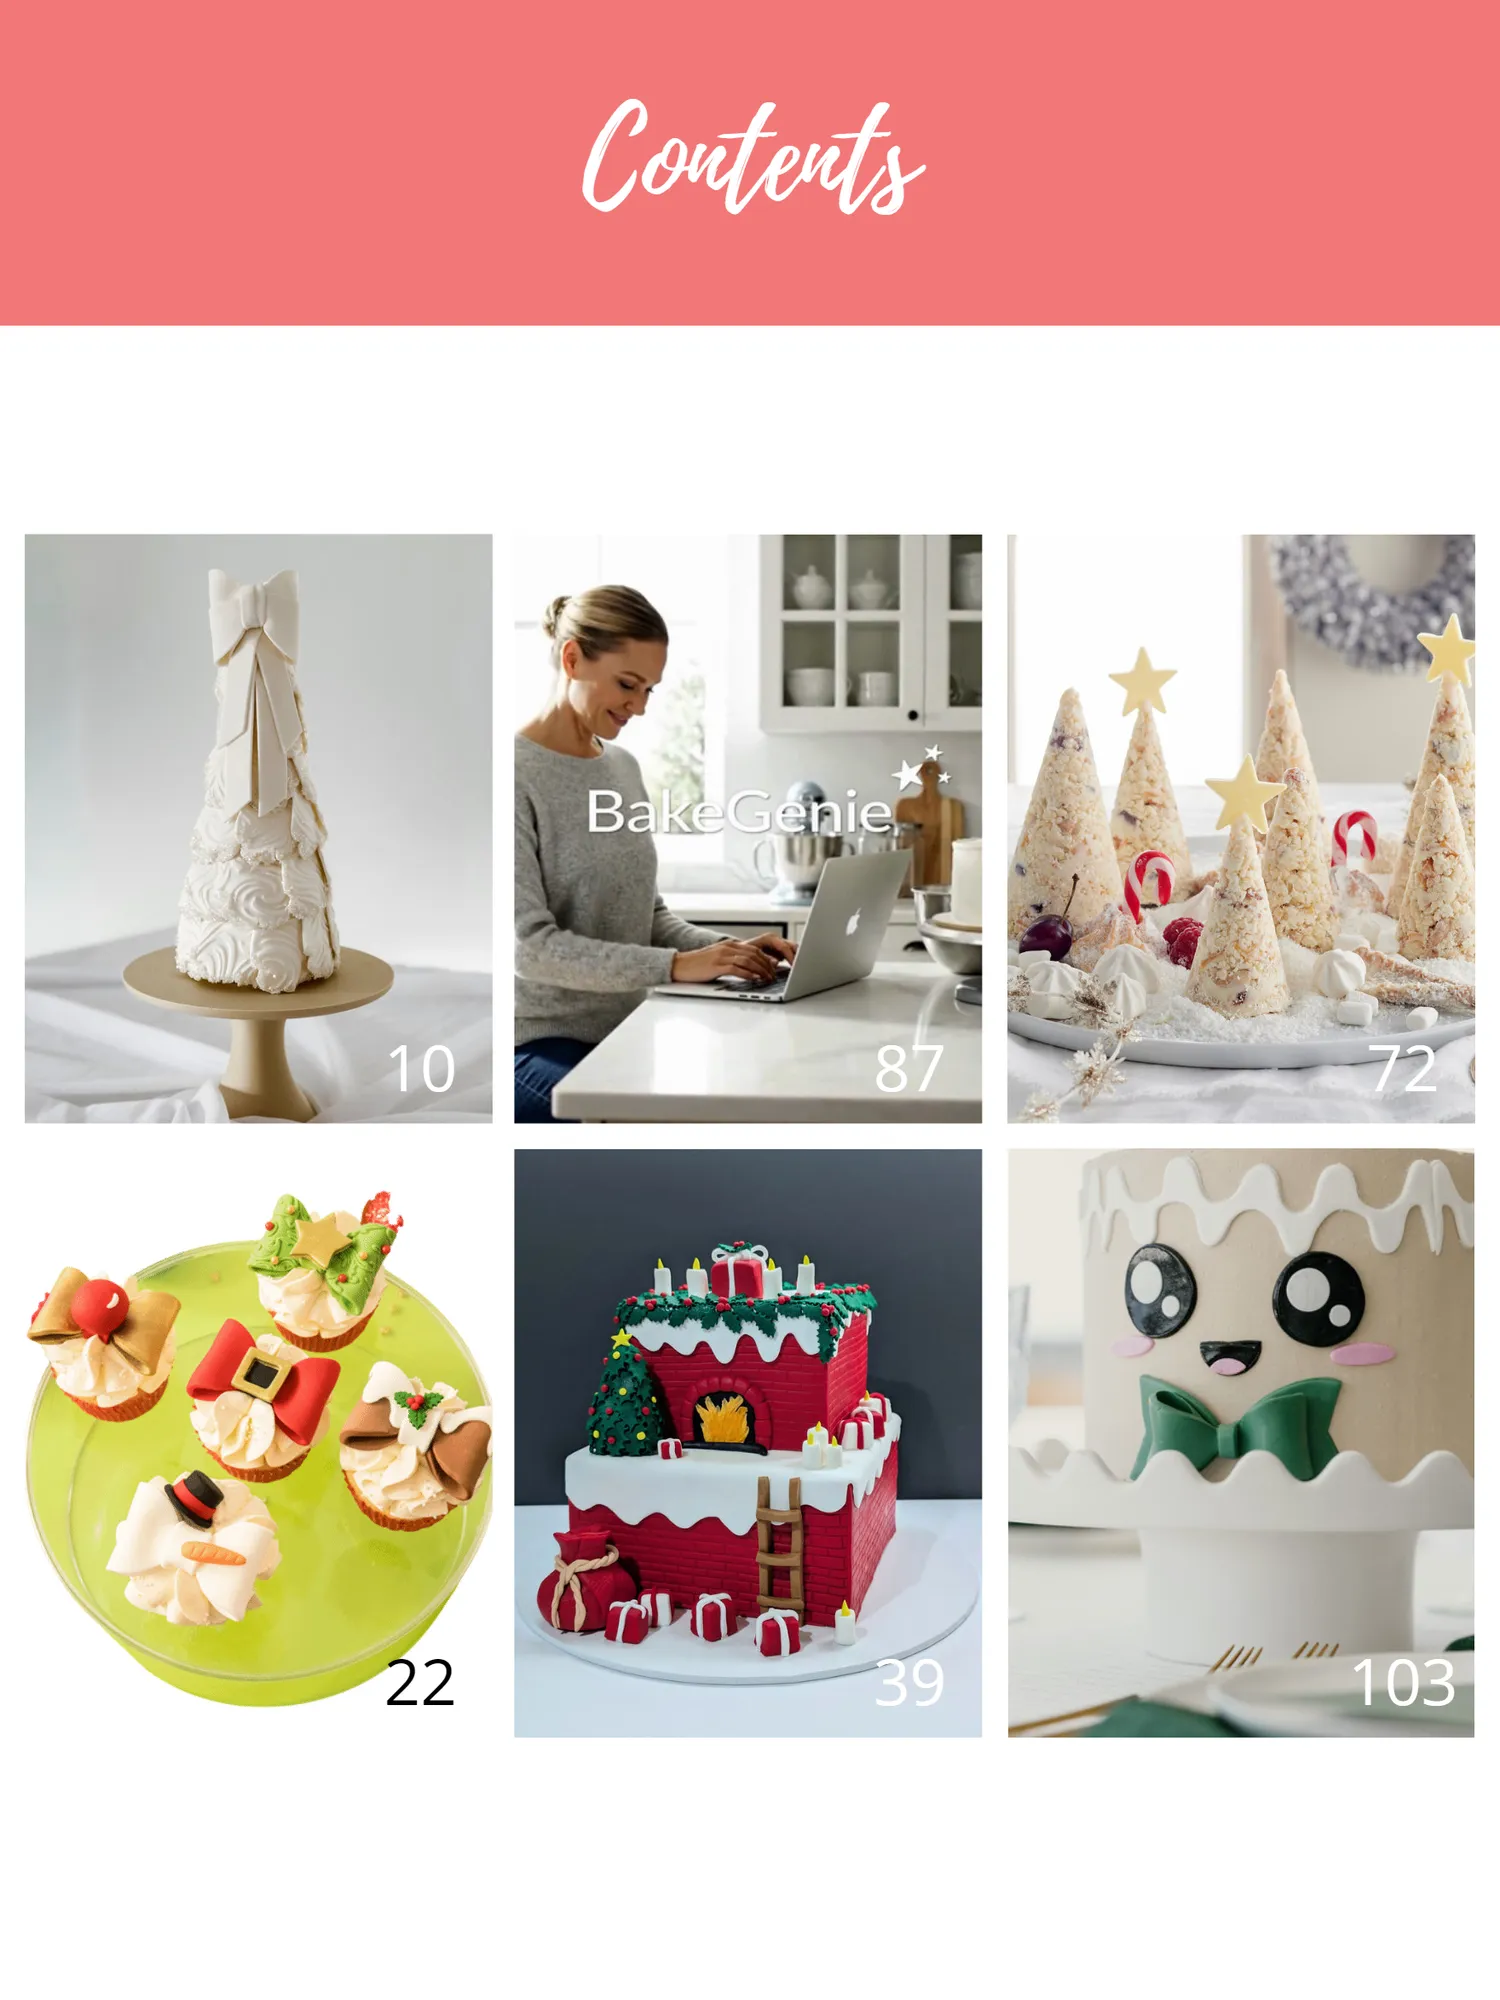
Contents 10 87 72 22 39 103
Page 5 text
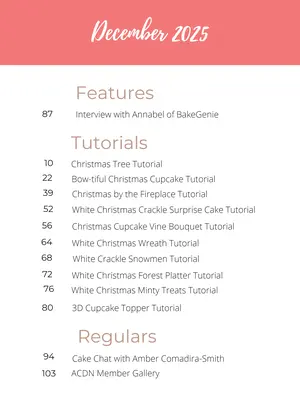
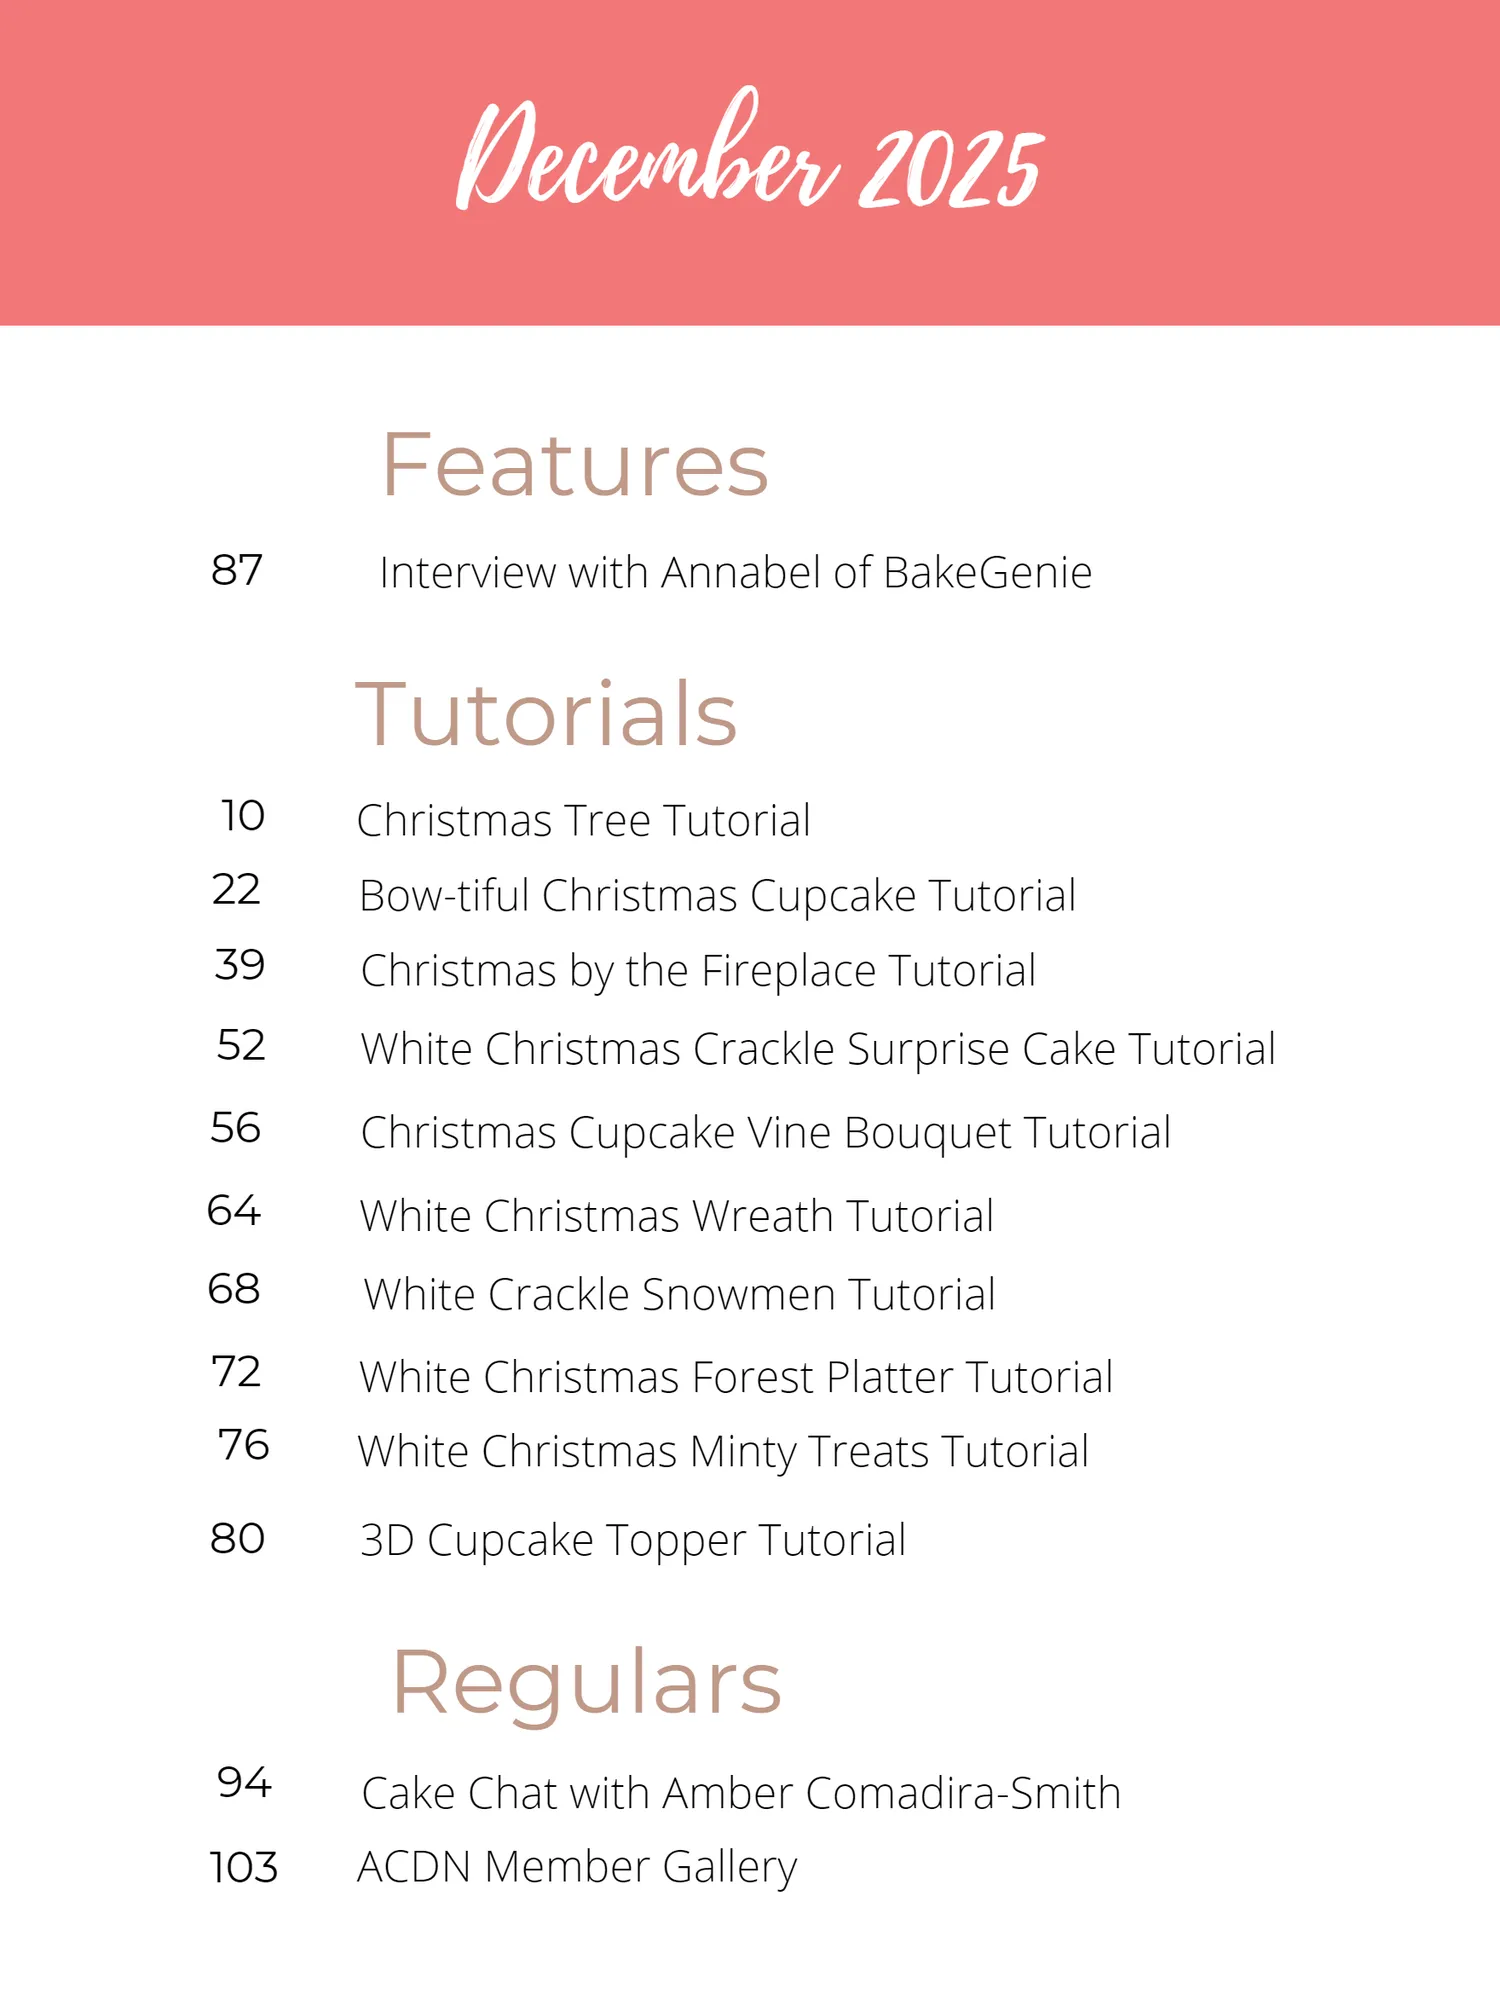
December 2025 Features 87 Interview with Annabel of BakeGenie Tutorials 10 Christmas Tree Tutorial 22 Bow-tiful Christmas Cupcake Tutorial 39 Christmas by the Fireplace Tutorial 52 White Christmas Crackle Surprise Cake Tutorial 56 Christmas Cupcake Vine Bouquet Tutorial 64 White Christmas Wreath Tutorial 68 White Crackle Snowmen Tutorial 72 White Christmas Forest Platter Tutorial 76 White Christmas Minty Treats Tutorial 80 3D Cupcake Topper Tutorial Regulars 94 Cake Chat with Amber Comadira-Smith 103 ACDN Member Gallery
Page 6 text


Page 7 text
2025 PREFERRED SUPPLIERS MEMBER DISCOUNTS
Page 8 text
CHRISTMAS TUTORIALS Sprinkle Joy THIS CHRISTMAS
Page 10 text
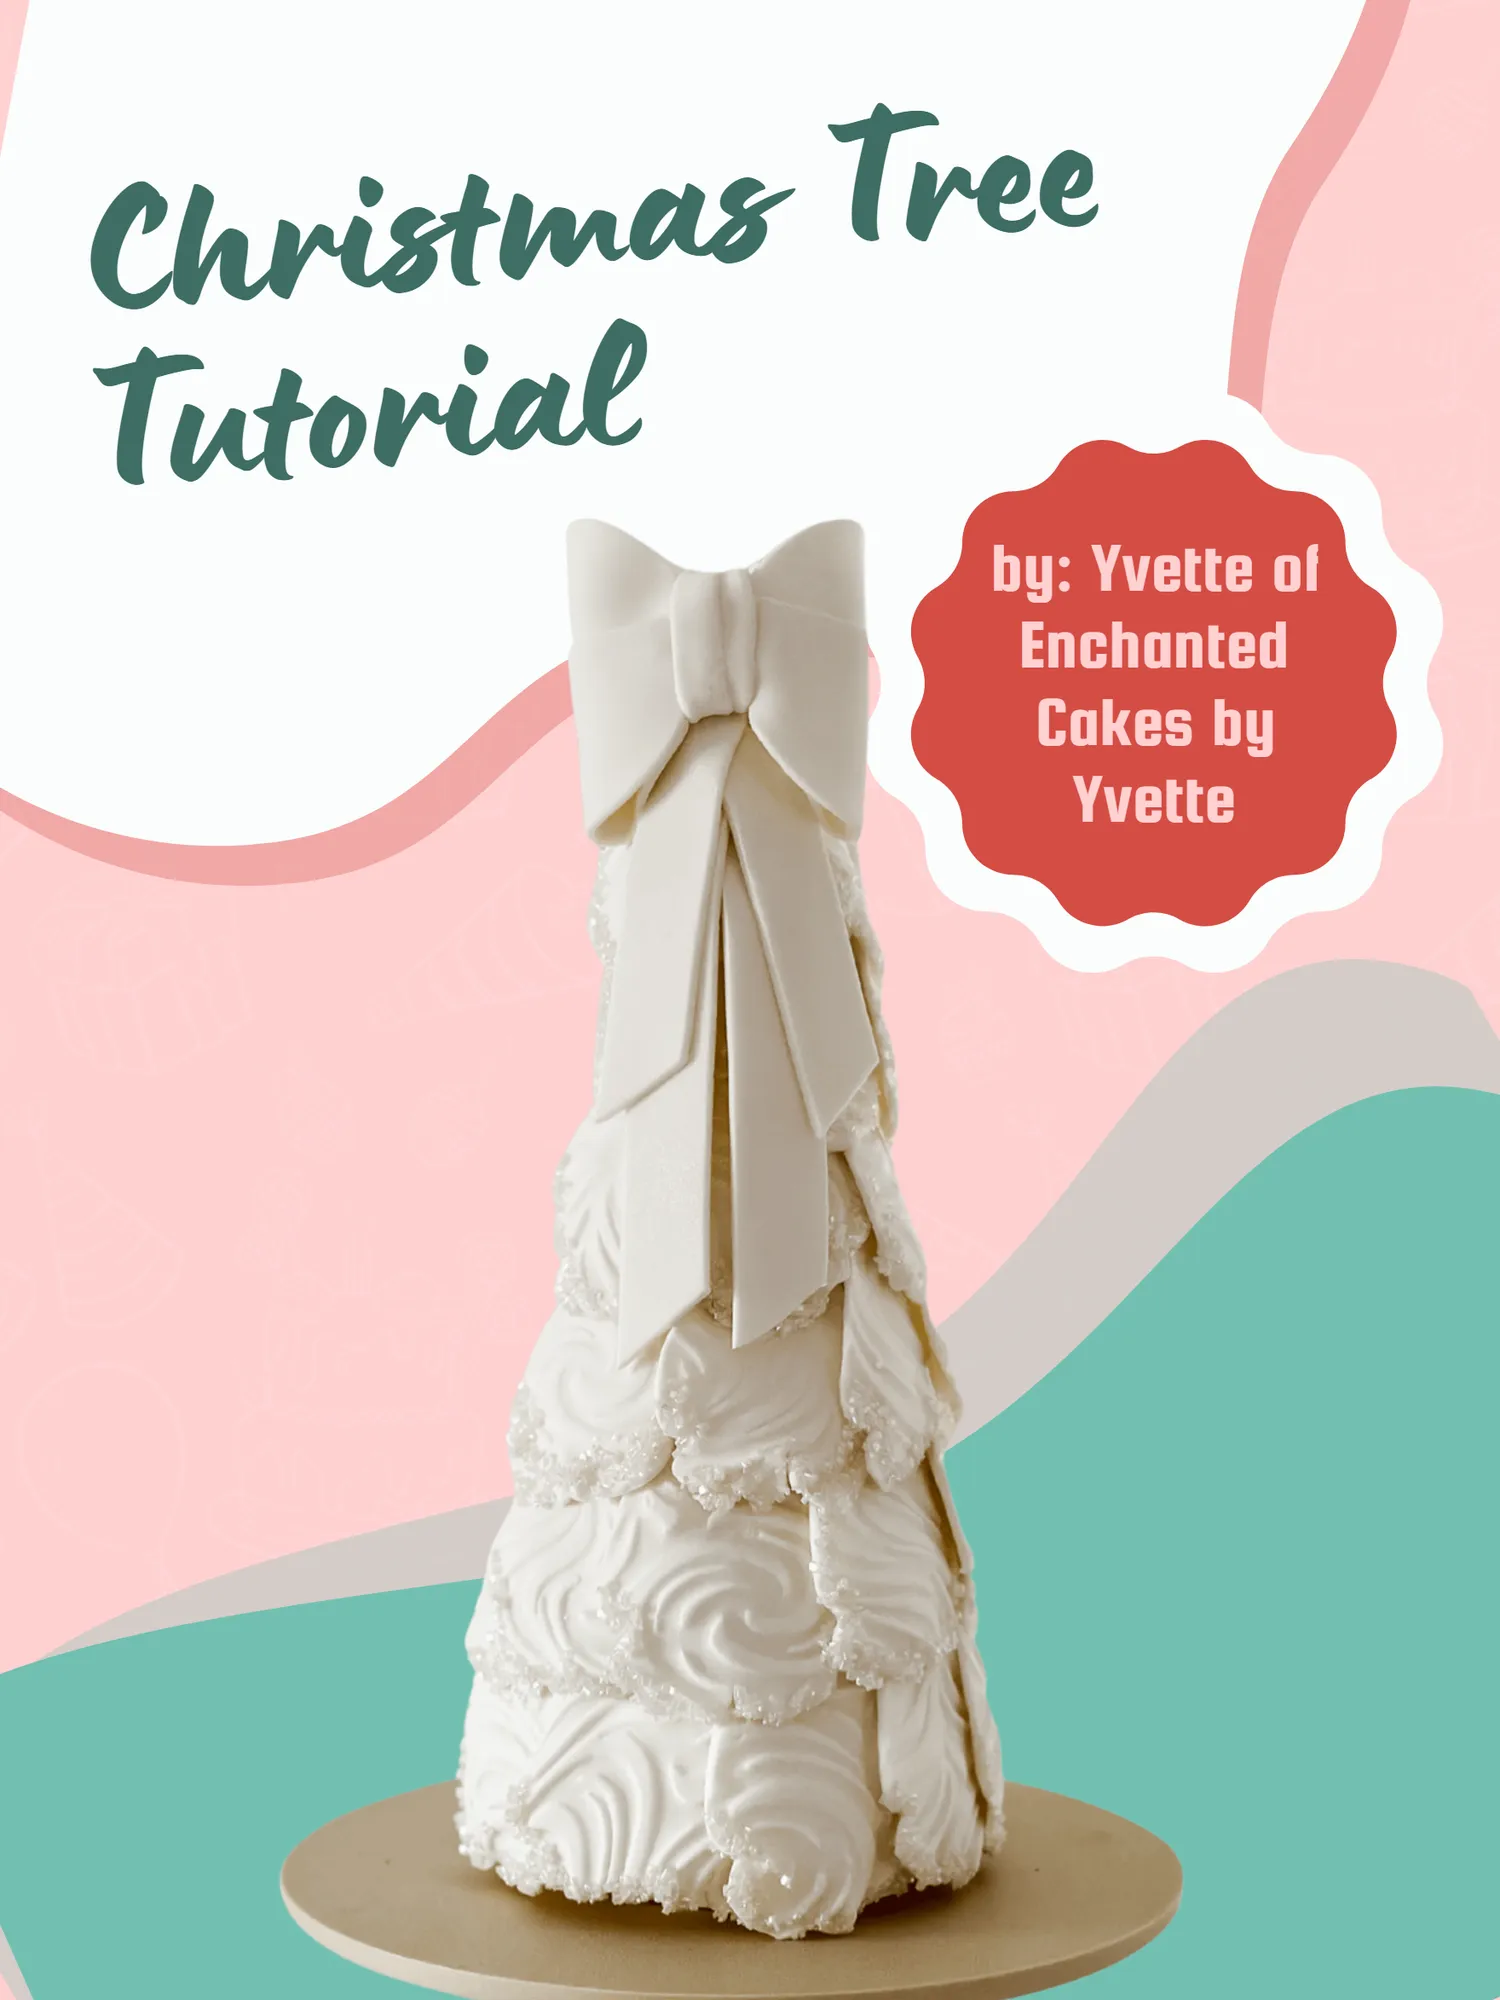
Christmas Tree Tutorial by: Yvette of Enchanted Cakes by Yvette
Page 11 text
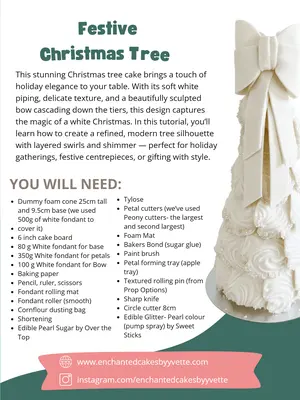
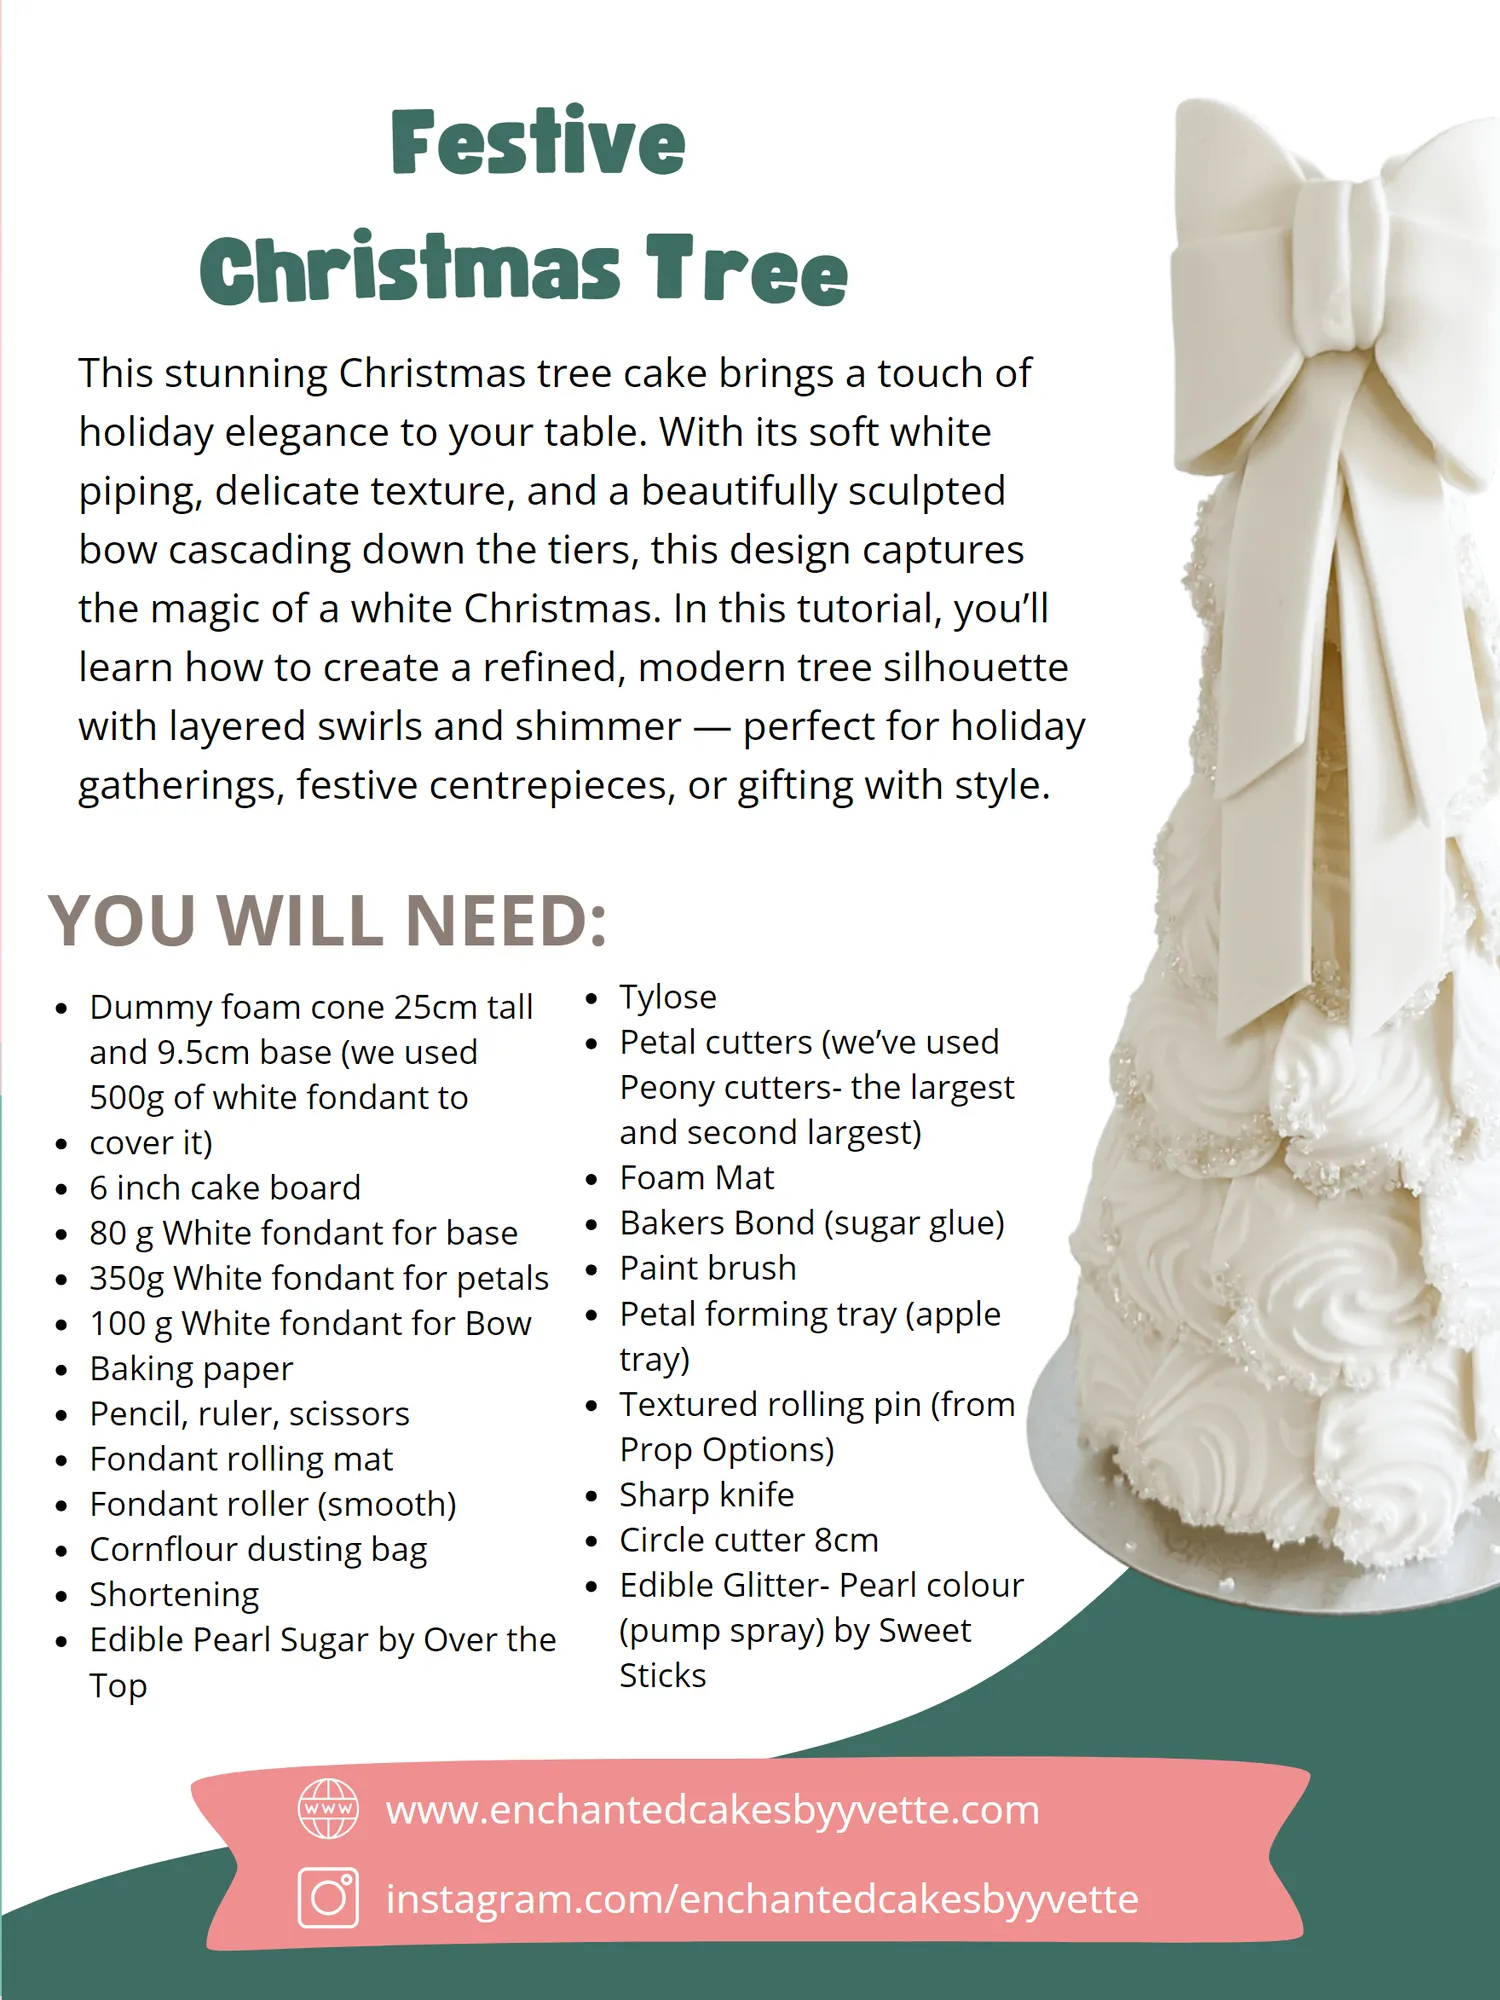
Christmas Tree e s t i ve stm a s T re e Tutorial This stunning Christmas tree cake brings a touch of holiday elegance to your table. With its soft white piping, delicate texture, and a beautifully sculpted bow cascading down the tiers, this design captures the magic of a white Christmas. In this tutorial, you’ll learn how to create a refined, modern tree silhouette
Page 12 text
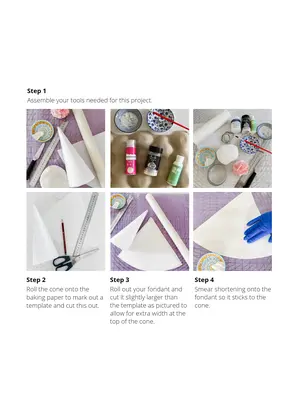
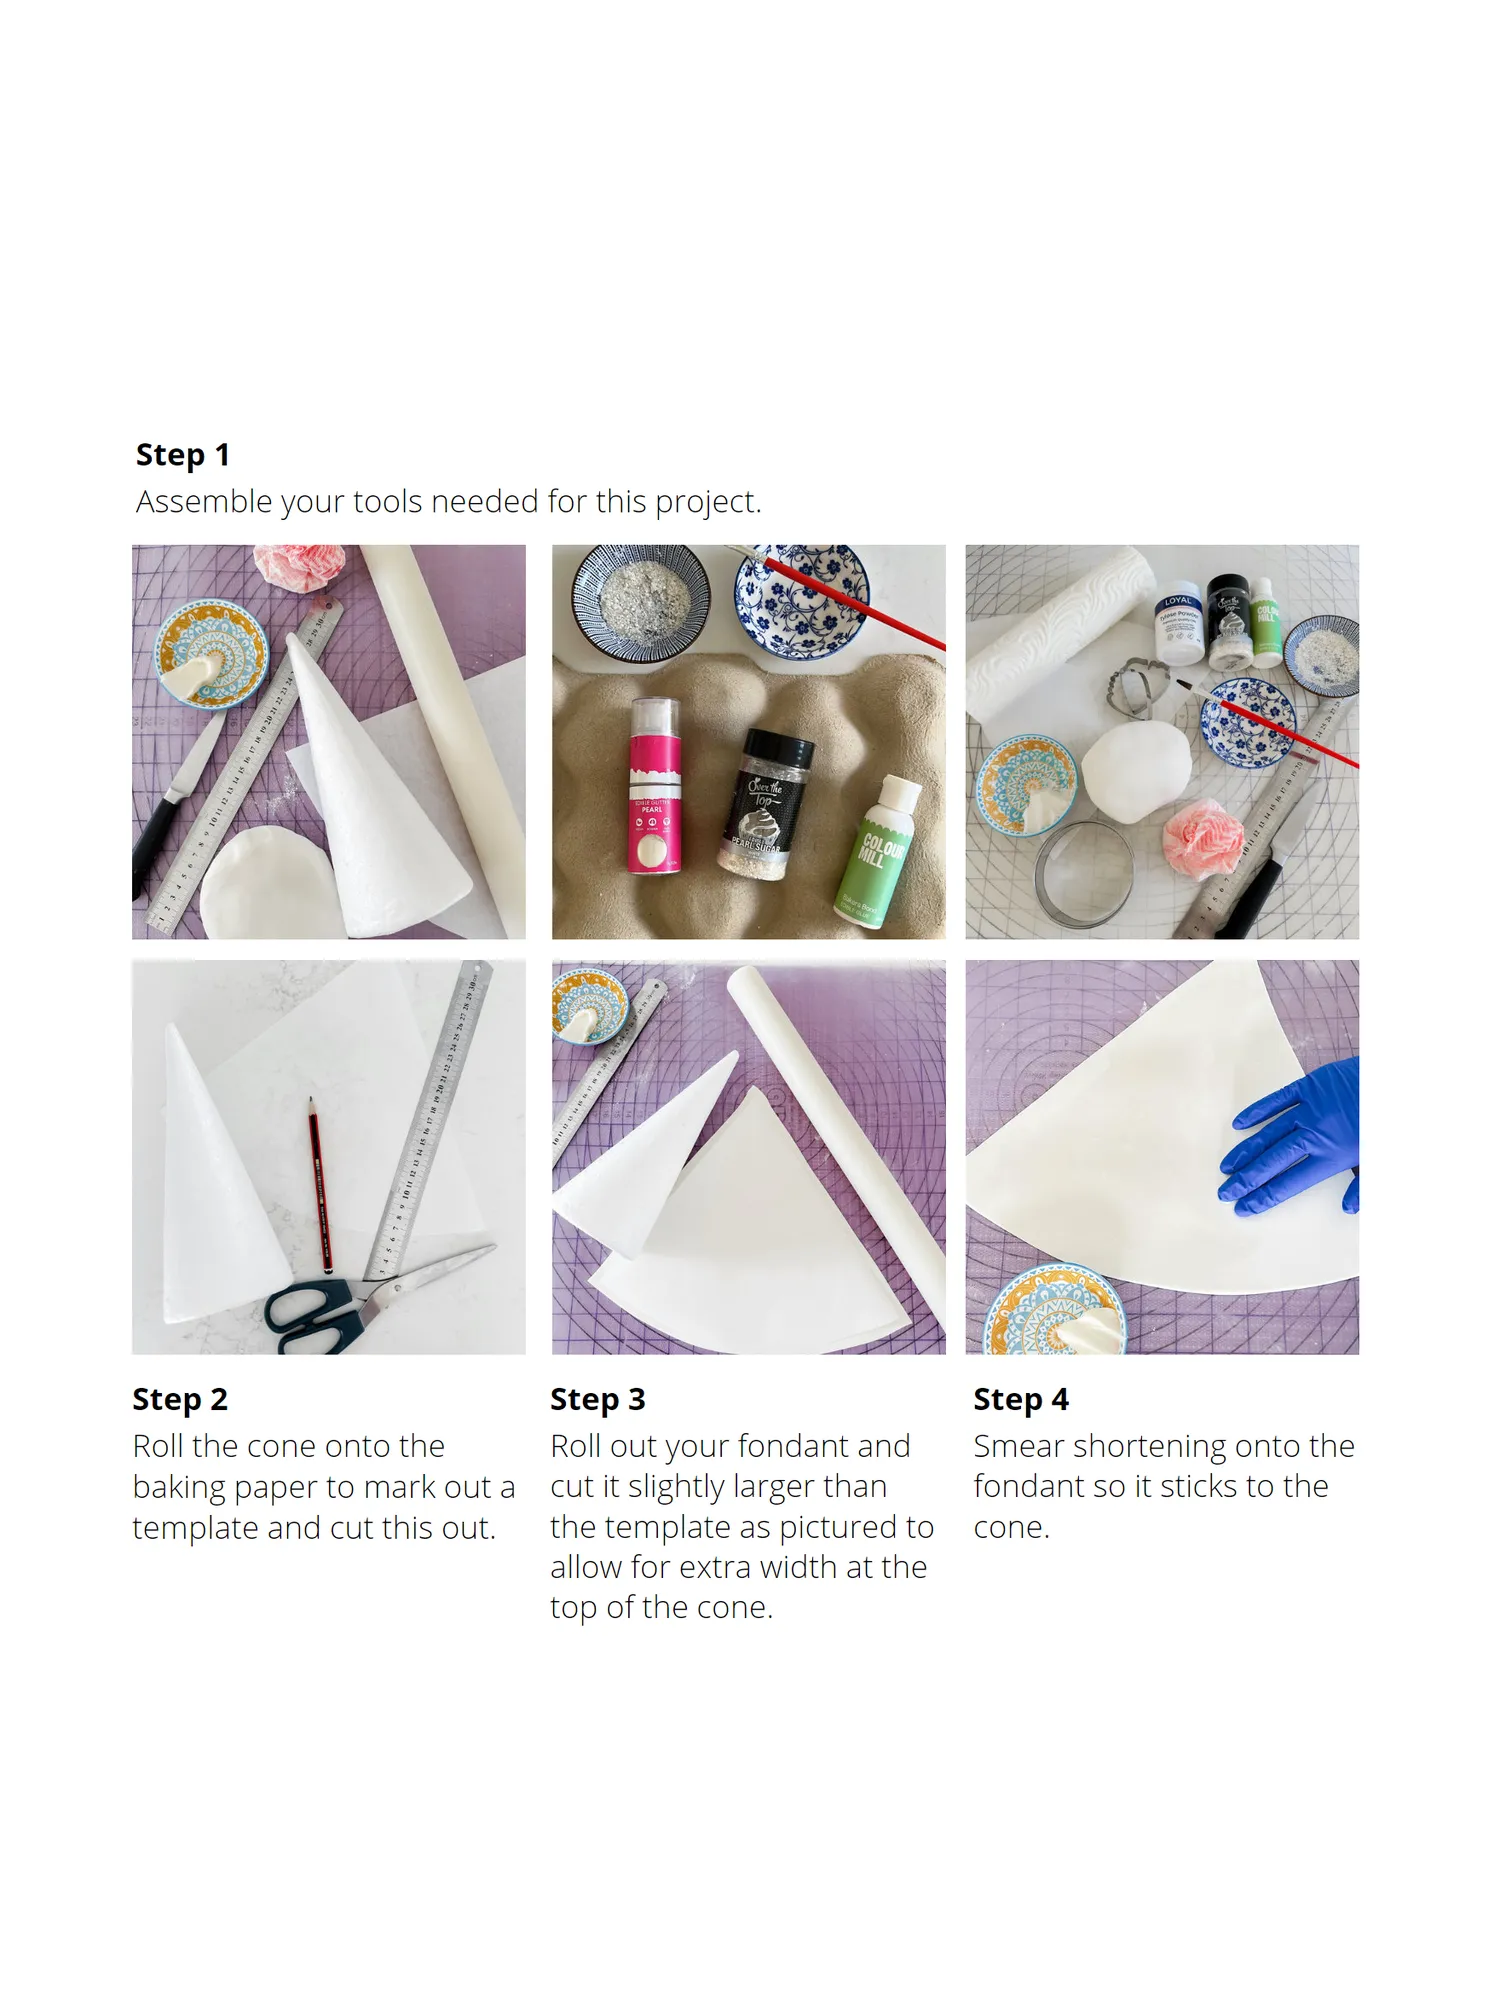
Step 1 Assemble your tools needed for this project. Step 2 Step 3 Step 4 Roll the cone onto the Roll out your fondant and Smear shortening onto the baking paper to mark out a cut it slightly larger than fondant so it sticks to the template and cut this out. the template as pictured to cone. allow for extra width at the top of the cone.
Page 13 text
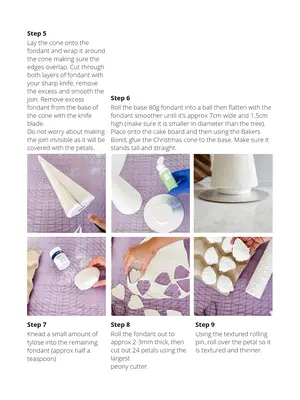
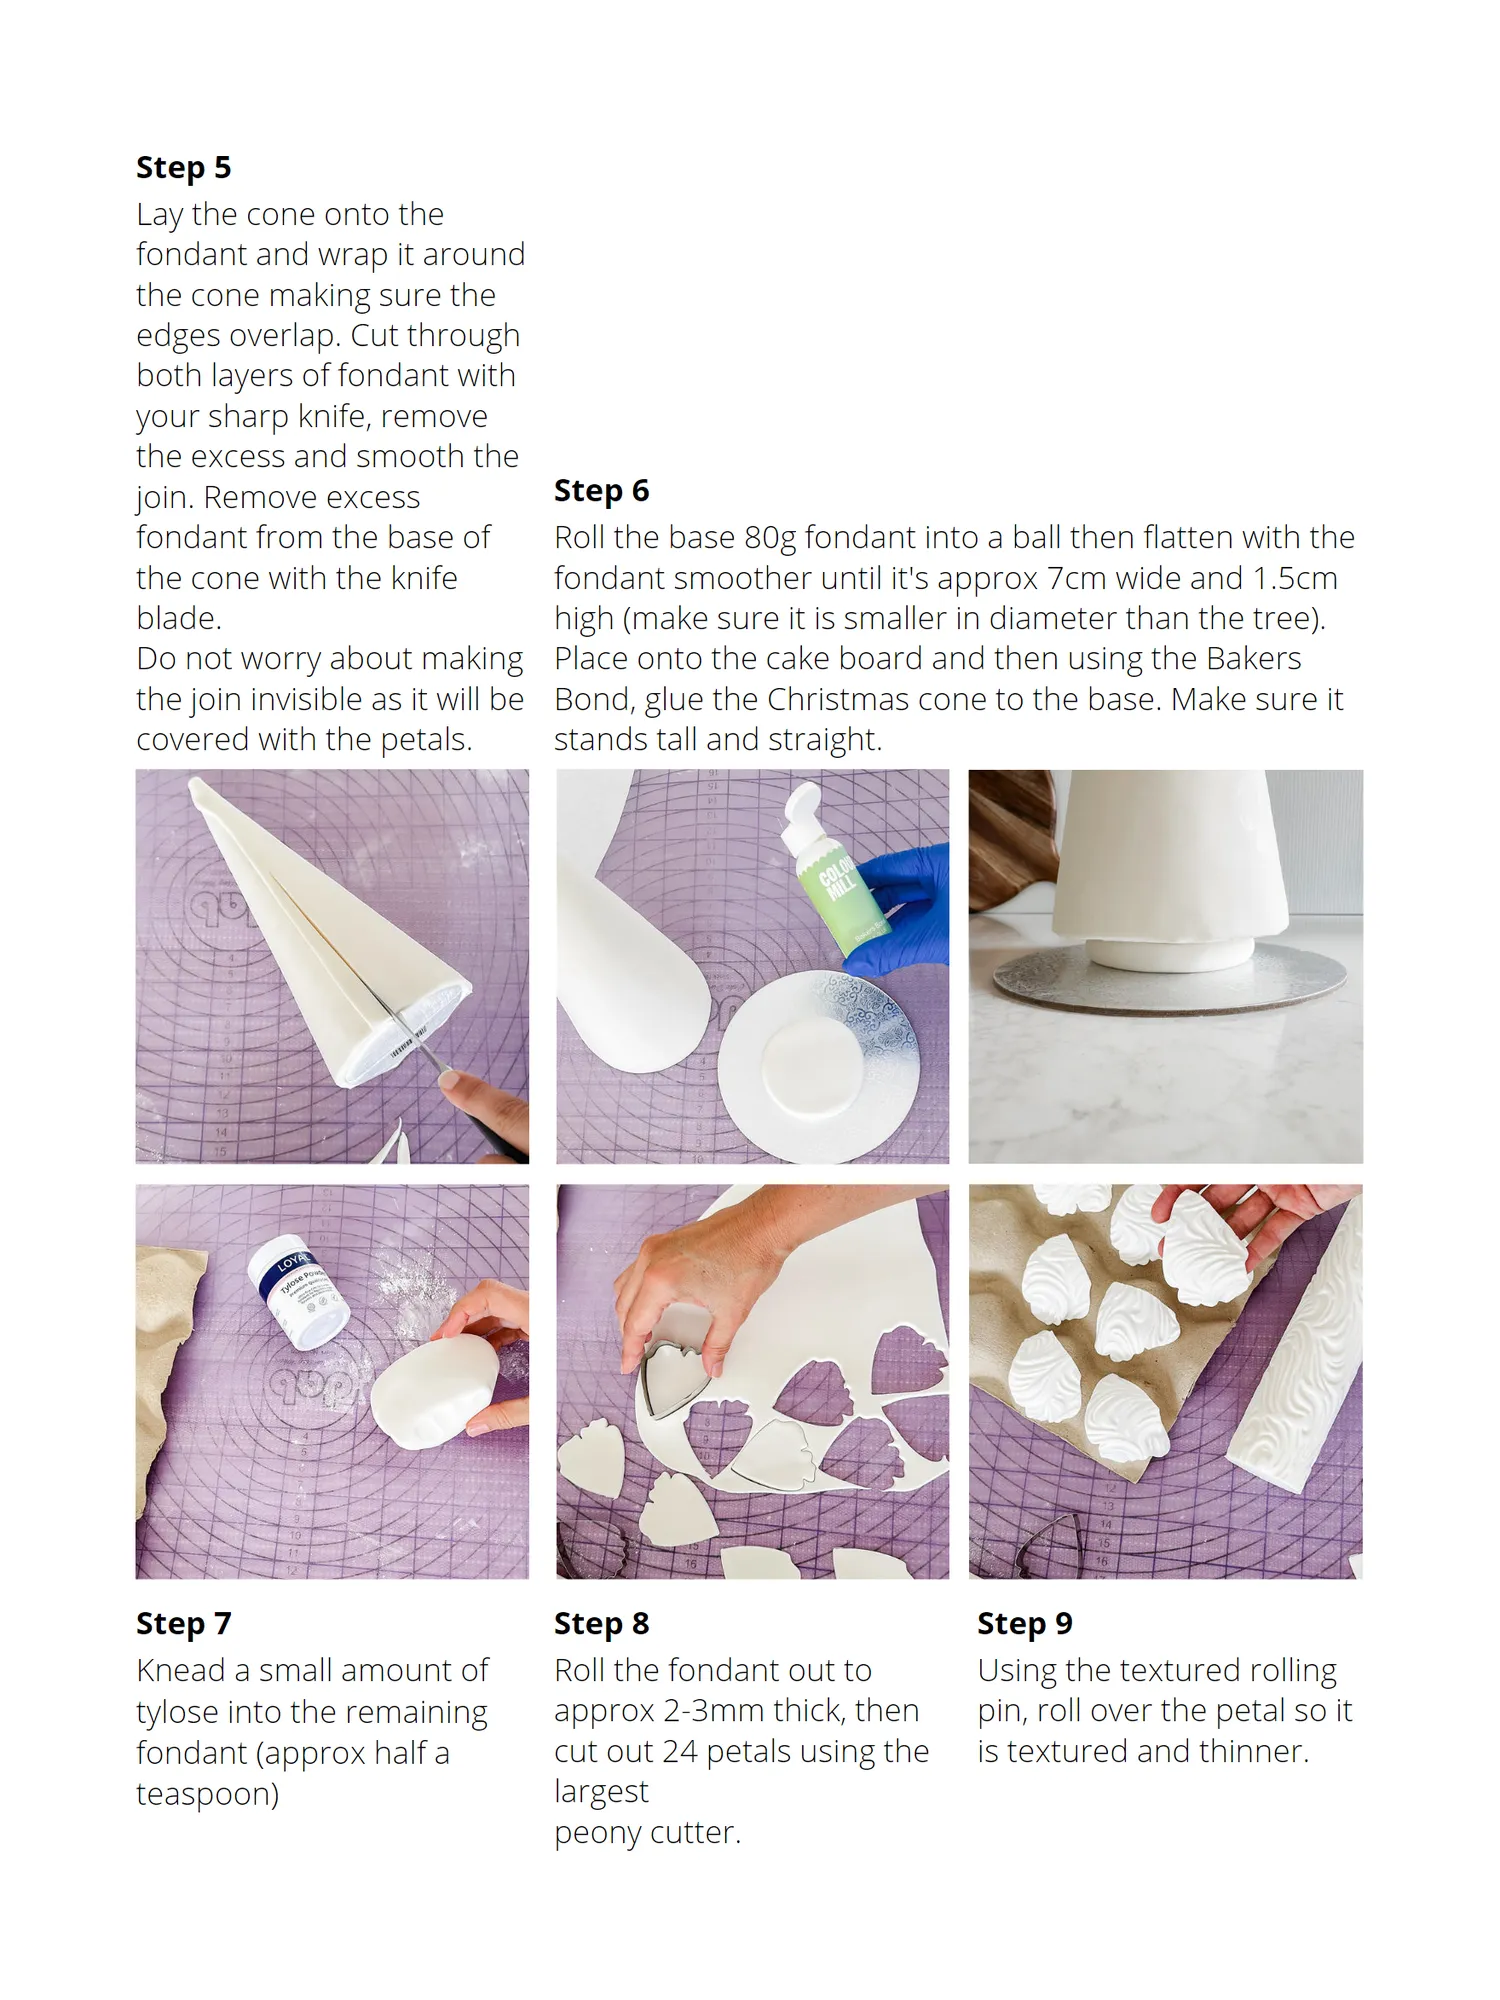
Step 5 Lay the cone onto the fondant and wrap it around the cone making sure the edges overlap. Cut through both layers of fondant with your sharp knife, remove the excess and smooth the join. Remove excess Step 6 fondant from the base of Roll the base 80g fondant into a ball then flatten with the the cone with the knife fondant smoother until it's approx 7cm wide and 1.5cm blade. high (make sure it is smaller in diameter than the tree). Do not worry about making Place onto the cake board and then using the Bakers the join invisible as it will be Bond, glue the Christmas cone to the base. Make sure it covered with the petals. stands tall and straight. Step 7 Step 8 Step 9 Knead a small amount of Roll the fondant out to Using the textured rolling tylose into the remaining approx 2-3mm thick, then pin, roll over the petal so it fondant (approx half a cut out 24 petals using the is textured and thinner. teaspoon) largest peony cutter.
Page 14 text
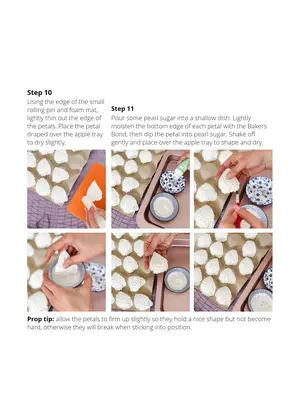
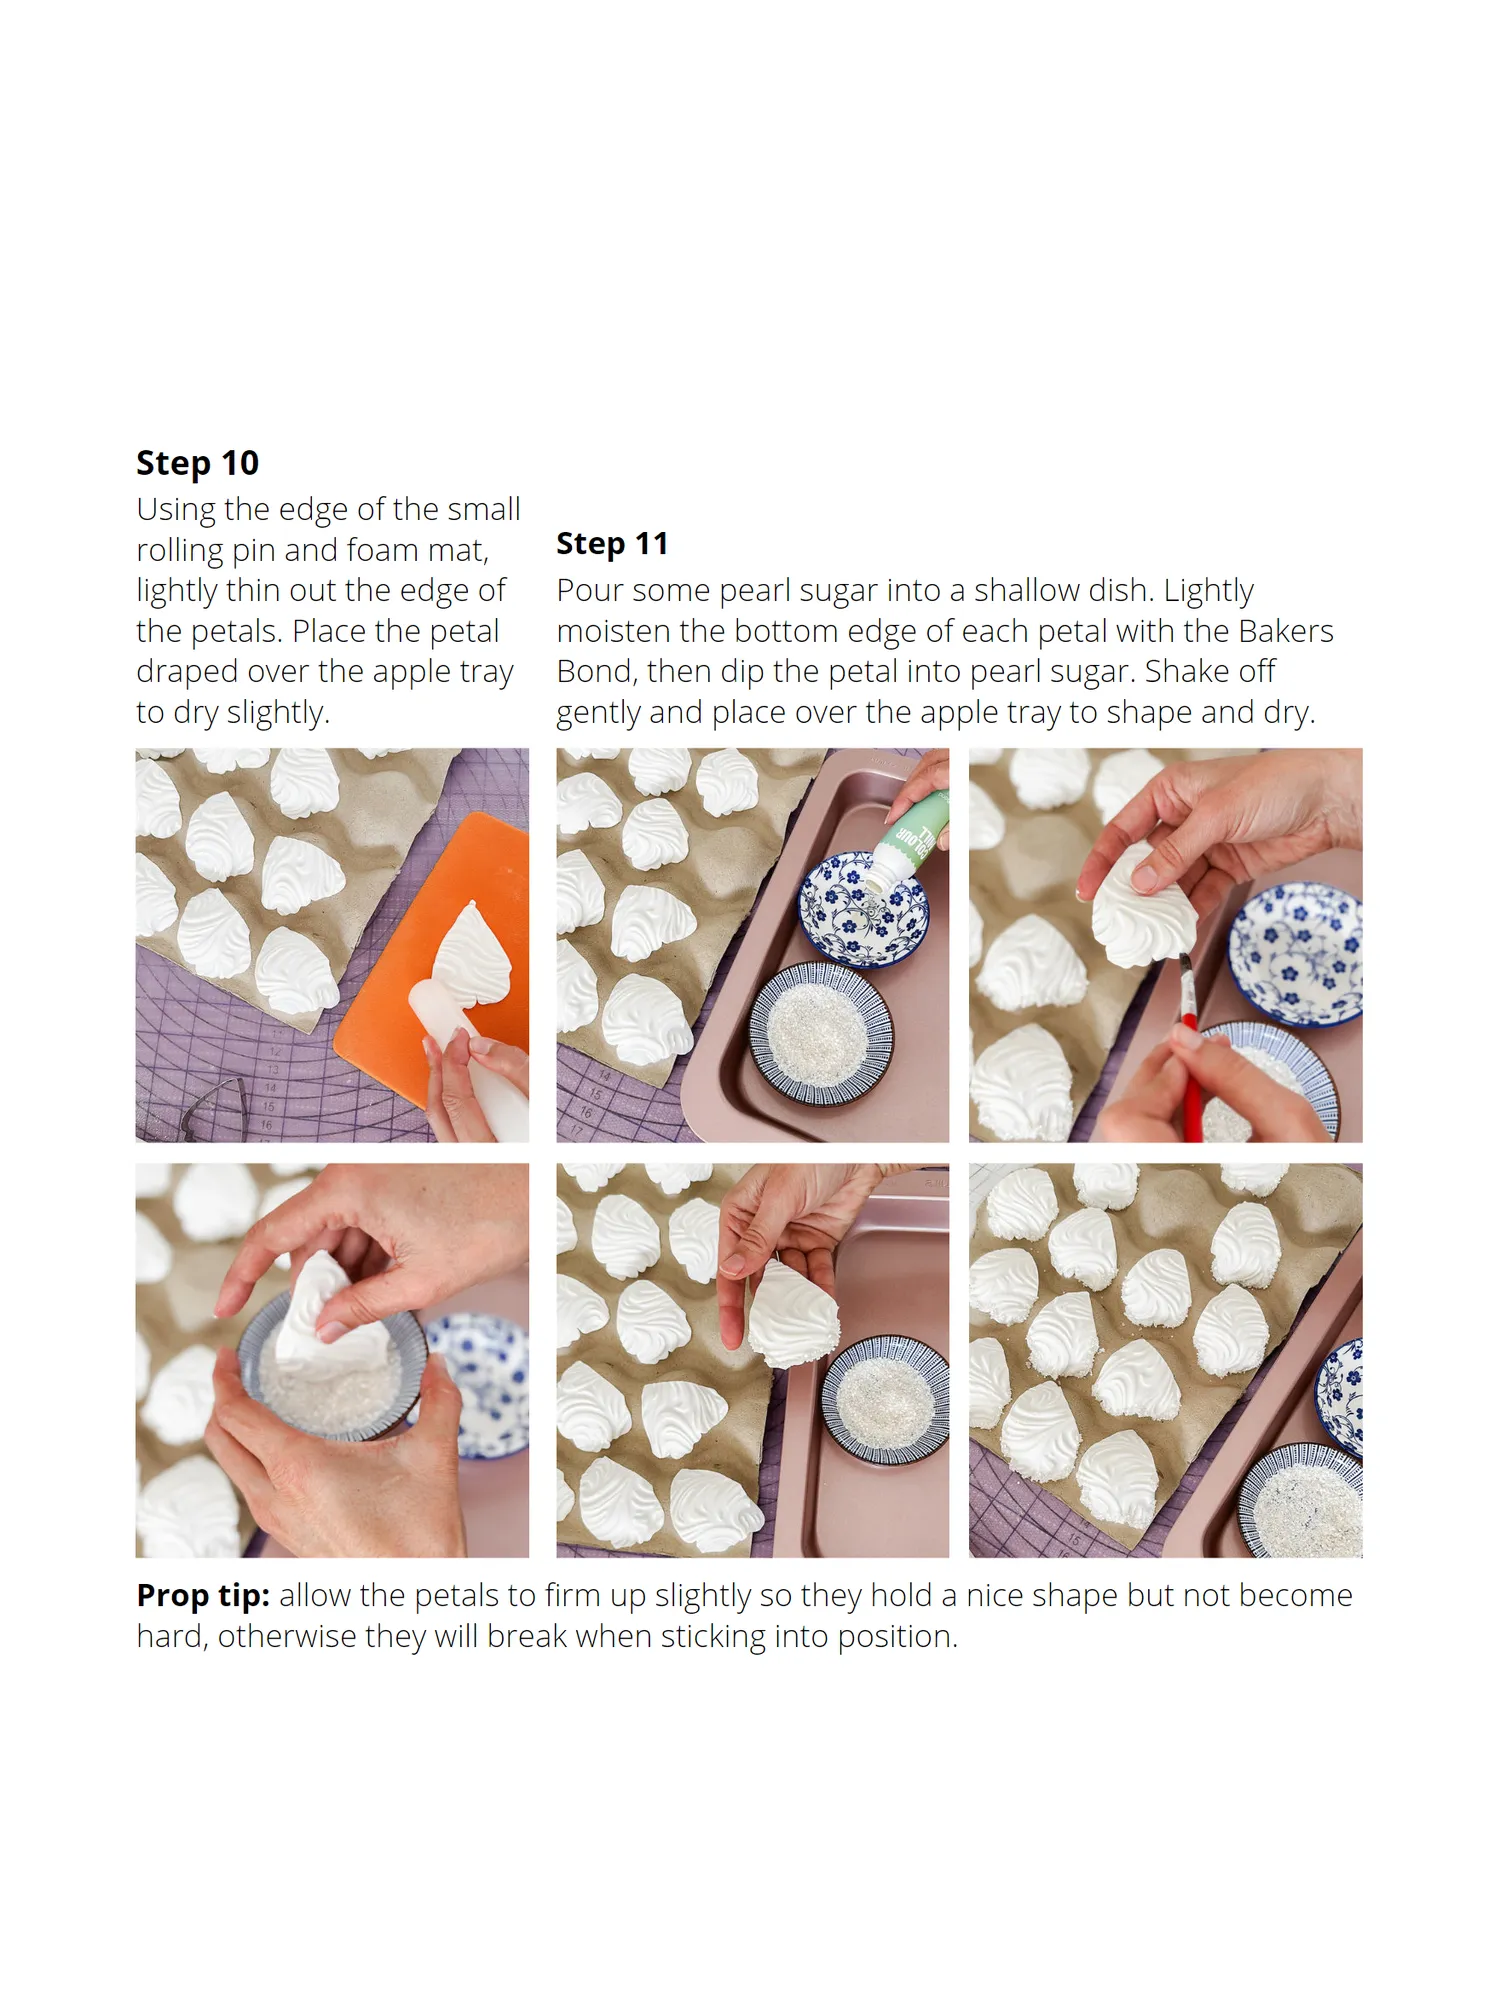
Step 10 Using the edge of the small rolling pin and foam mat, Step 11 lightly thin out the edge of Pour some pearl sugar into a shallow dish. Lightly the petals. Place the petal moisten the bottom edge of each petal with the Bakers draped over the apple tray Bond, then dip the petal into pearl sugar. Shake off to dry slightly. gently and place over the apple tray to shape and dry. Prop tip: allow the petals to firm up slightly so they hold a nice shape but not become hard, otherwise they will break when sticking into position.
Page 15 text
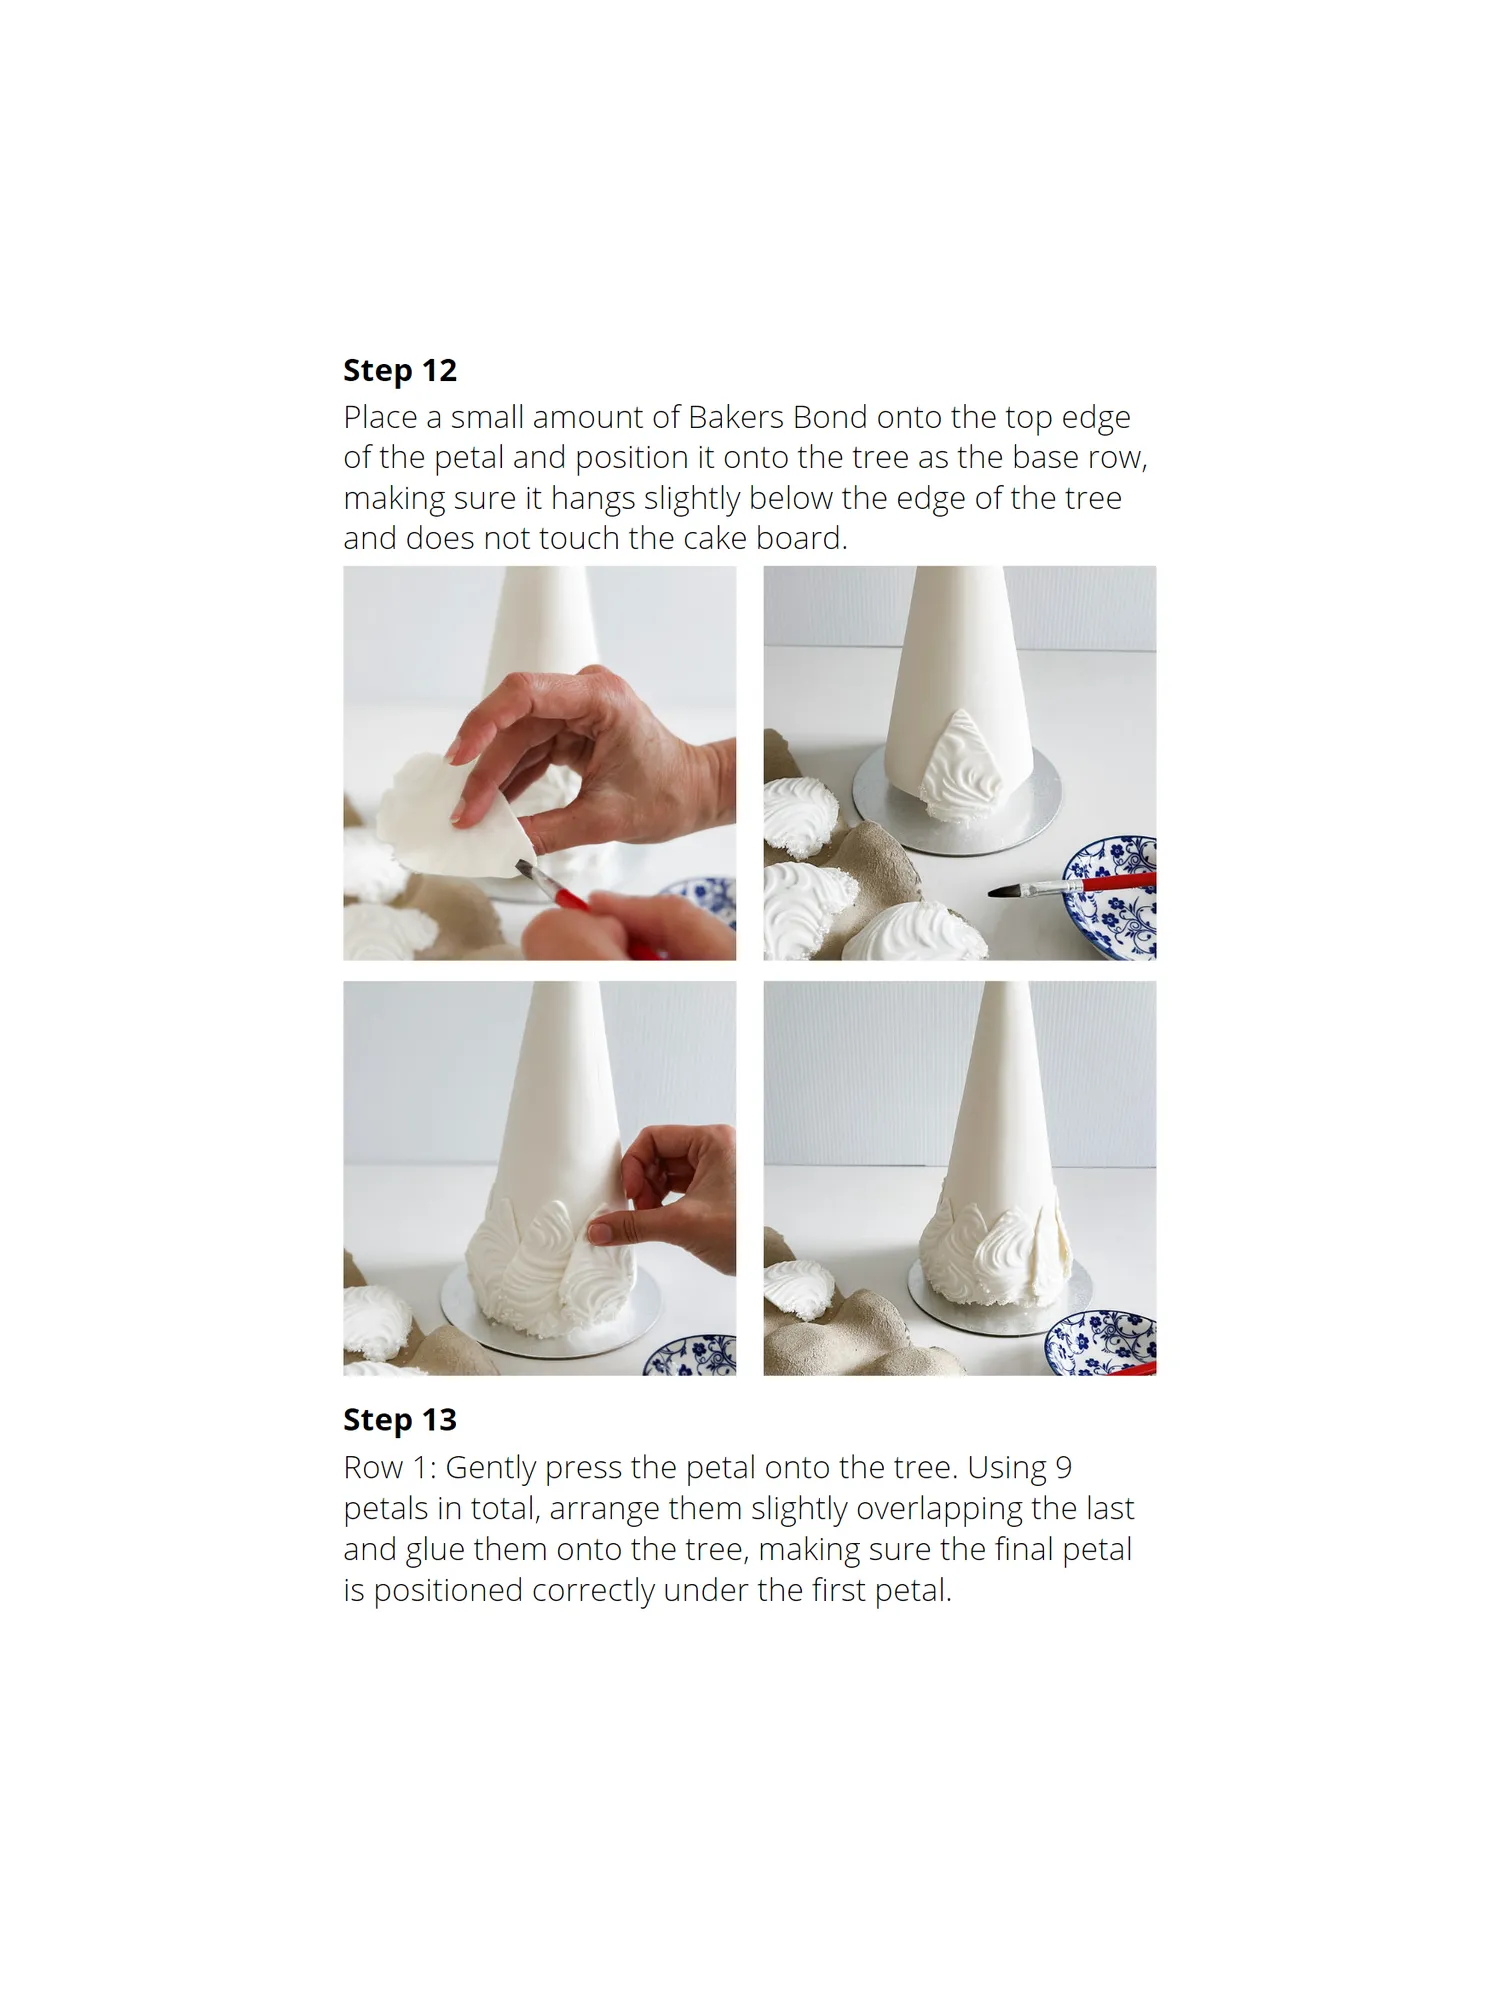
Step 12 Place a small amount of Bakers Bond onto the top edge of the petal and position it onto the tree as the base row, making sure it hangs slightly below the edge of the tree and does not touch the cake board. Step 13 Row 1: Gently press the petal onto the tree. Using 9 petals in total, arrange them slightly overlapping the last and glue them onto the tree, making sure the final petal is positioned correctly under the first petal.
Page 16 text
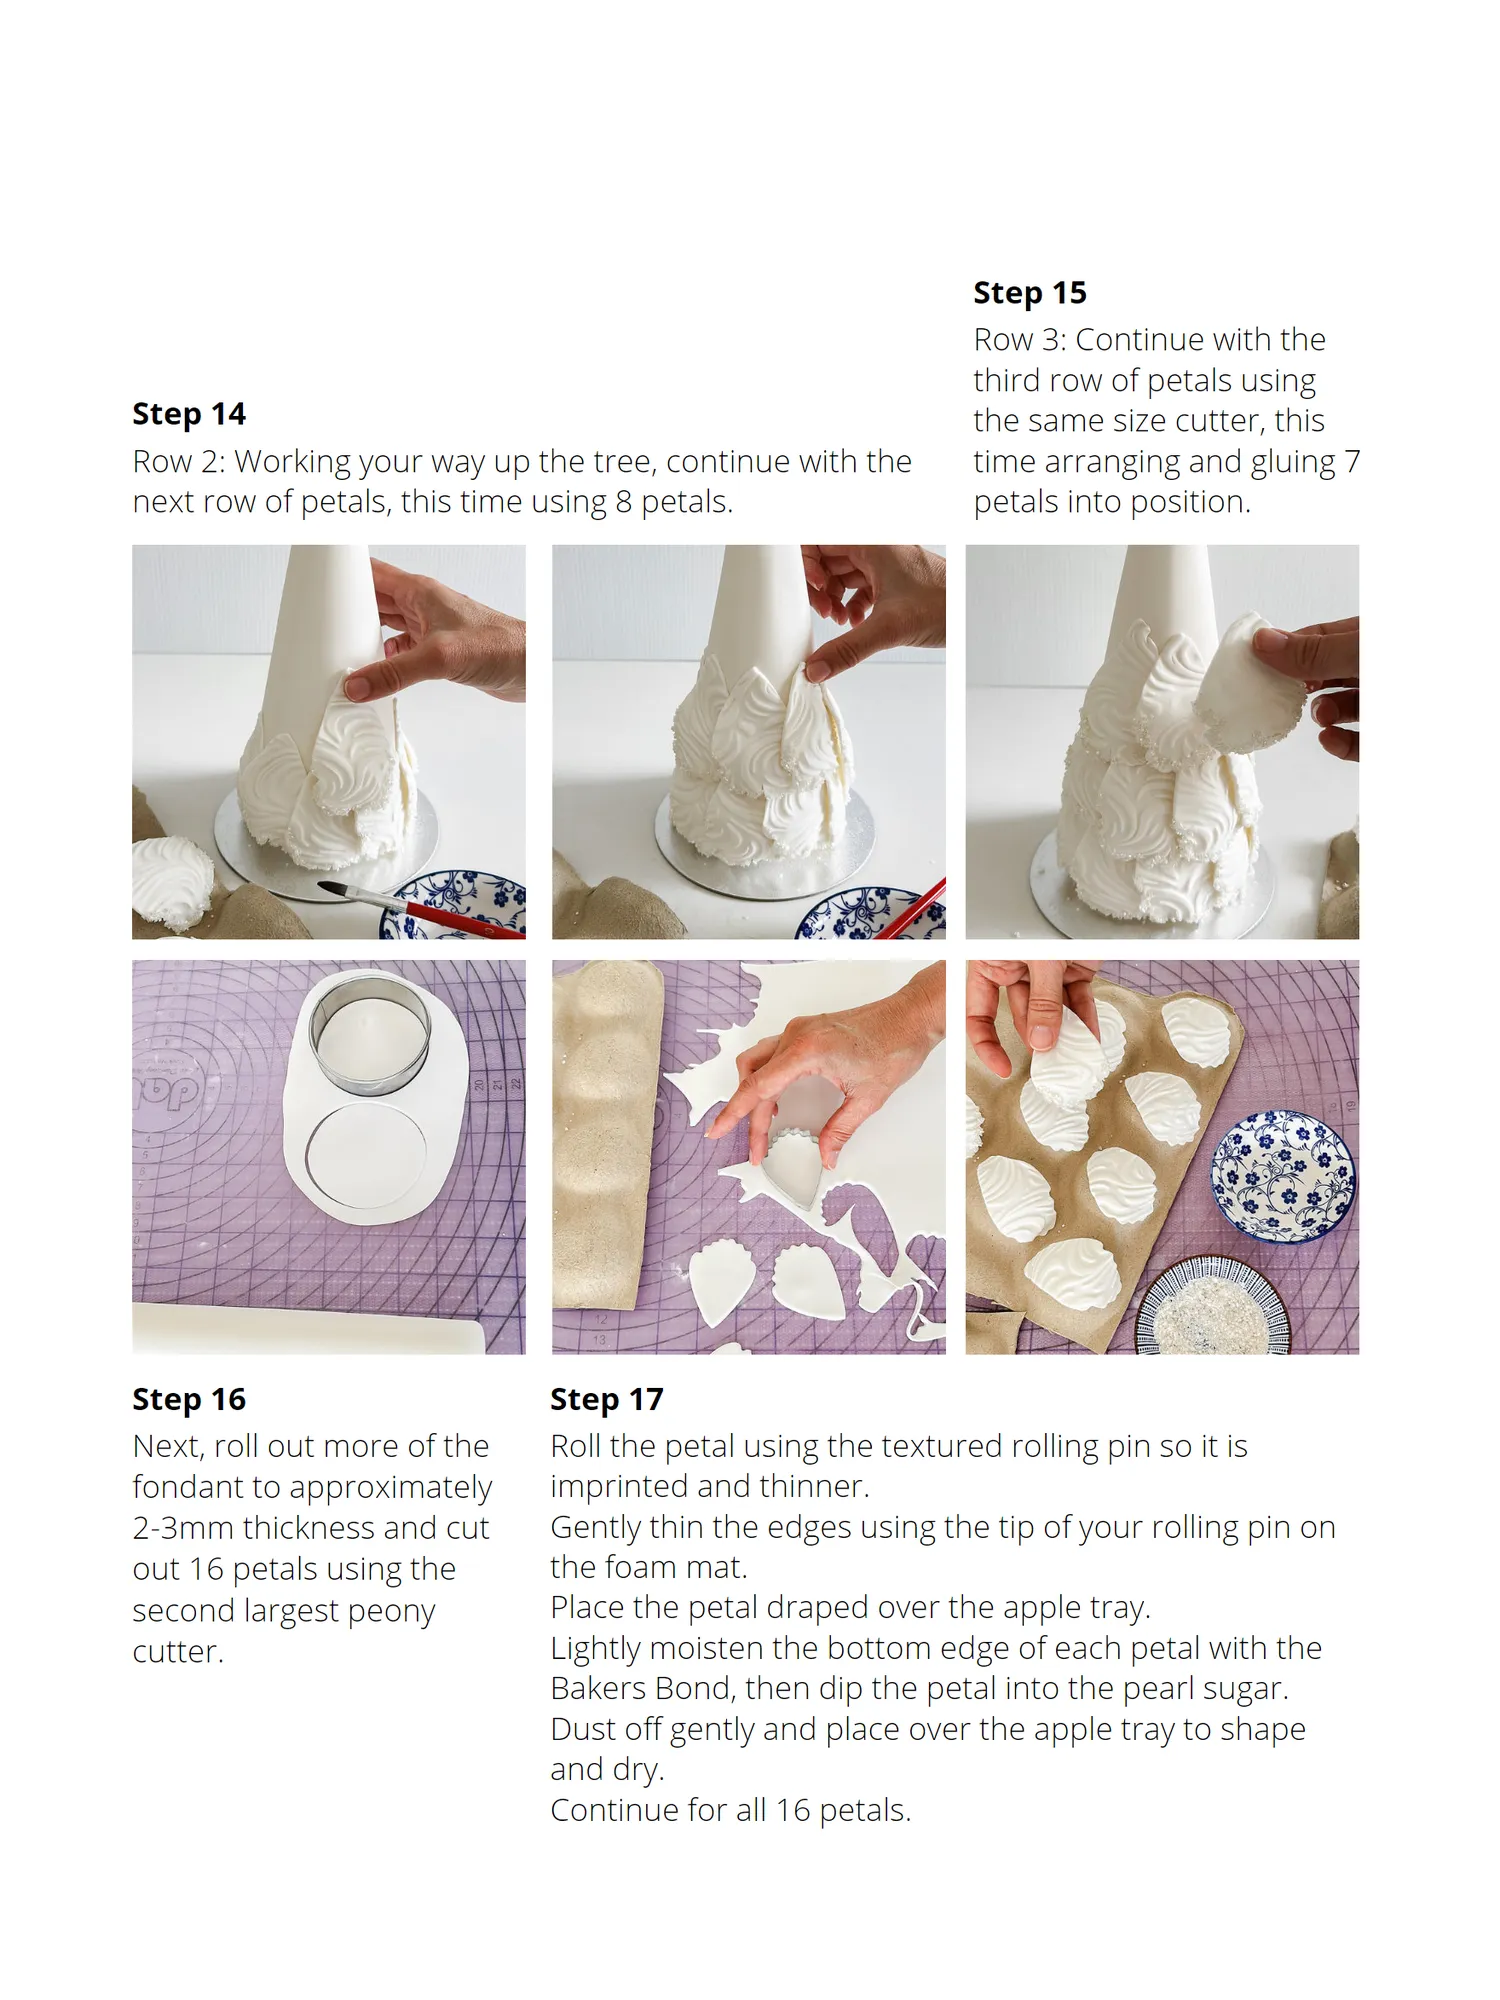
Step 15 Row 3: Continue with the third row of petals using Step 14 the same size cutter, this Row 2: Working your way up the tree, continue with the time arranging and gluing 7 next row of petals, this time using 8 petals. petals into position. Step 16 Step 17 Next, roll out more of the Roll the petal using the textured rolling pin so it is fondant to approximately imprinted and thinner. 2-3mm thickness and cut Gently thin the edges using the tip of your rolling pin on out 16 petals using the the foam mat. second largest peony Place the petal draped over the apple tray. cutter. Lightly moisten the bottom edge of each petal with the Bakers Bond, then dip the petal into the pearl sugar. Dust off gently and place over the apple tray to shape and dry. Continue for all 16 petals.
Page 17 text
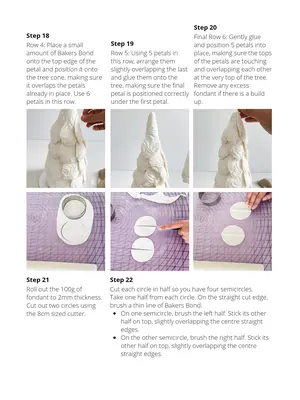
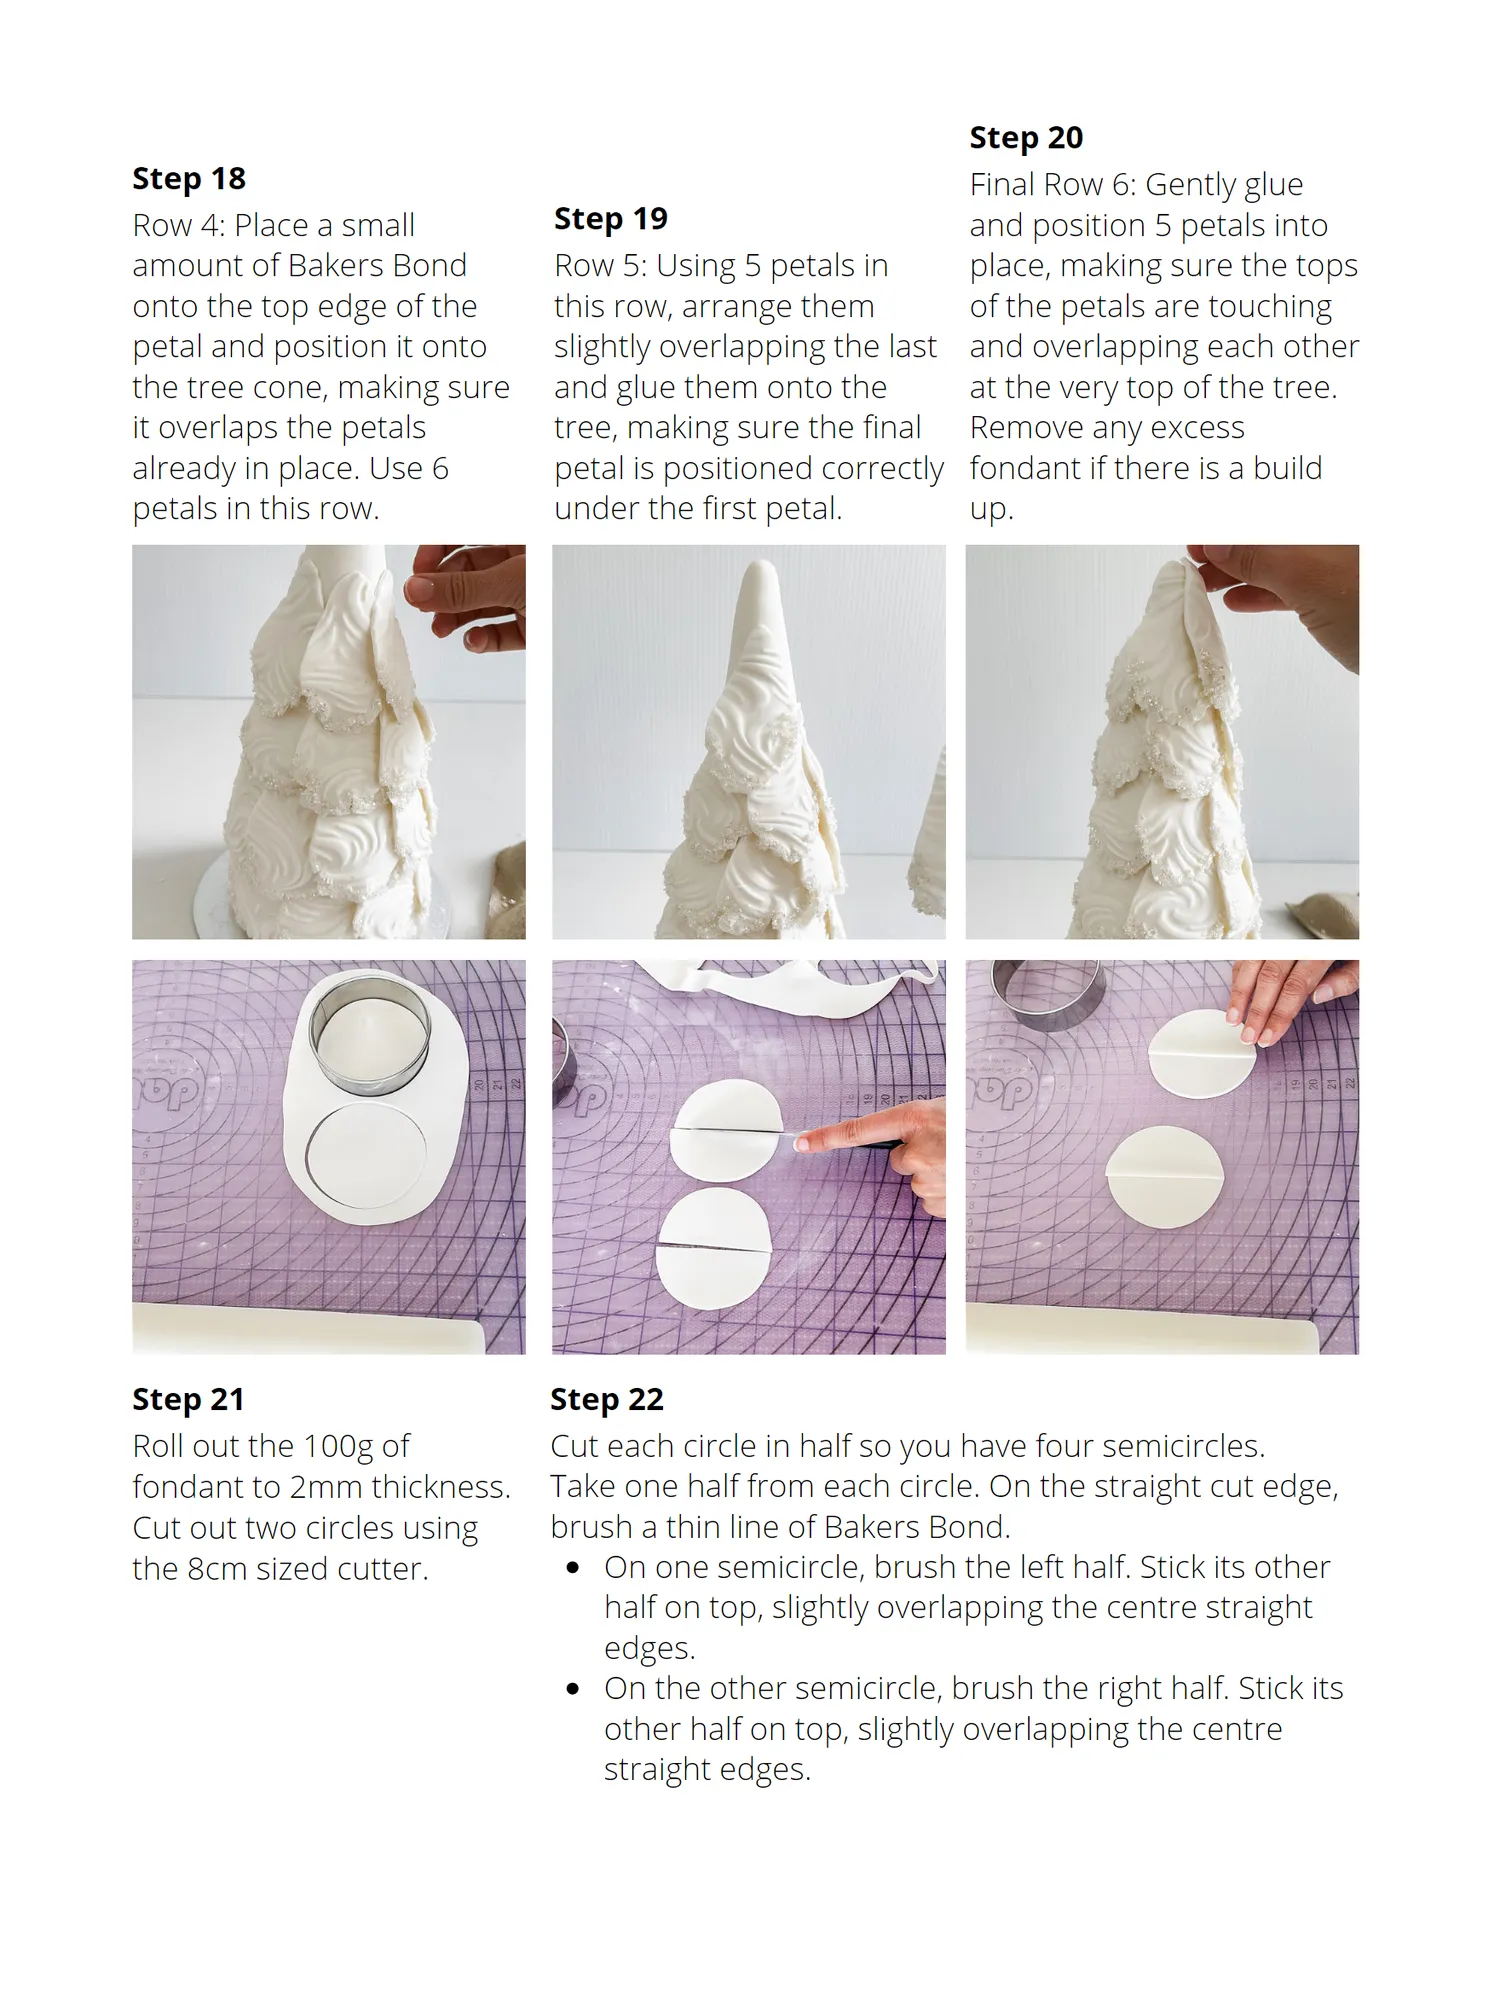
Step 20 Step 18 Final Row 6: Gently glue Row 4: Place a small Step 19 and position 5 petals into amount of Bakers Bond Row 5: Using 5 petals in place, making sure the tops onto the top edge of the this row, arrange them of the petals are touching petal and position it onto slightly overlapping the last and overlapping each other the tree cone, making sure and glue them onto the at the very top of the tree. it overlaps the petals tree, making sure the final Remove any excess already in place. Use 6 petal is positioned correctly fondant if there is a build petals in this row. under the first petal. up. Step 21 Step 22 Roll out the 100g of Cut each circle in half so you have four semicircles. fondant to 2mm thickness. Take one half from each circle. On the straight cut edge, Cut out two circles using brush a thin line of Bakers Bond. the 8cm sized cutter. On one semicircle, brush the left half. Stick its other half on top, slightly overlapping the centre straight edges. On the other semicircle, brush the right half. Stick its other half on top, slightly overlapping the centre straight edges.
Page 18 text
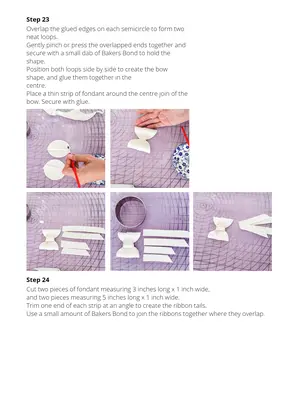
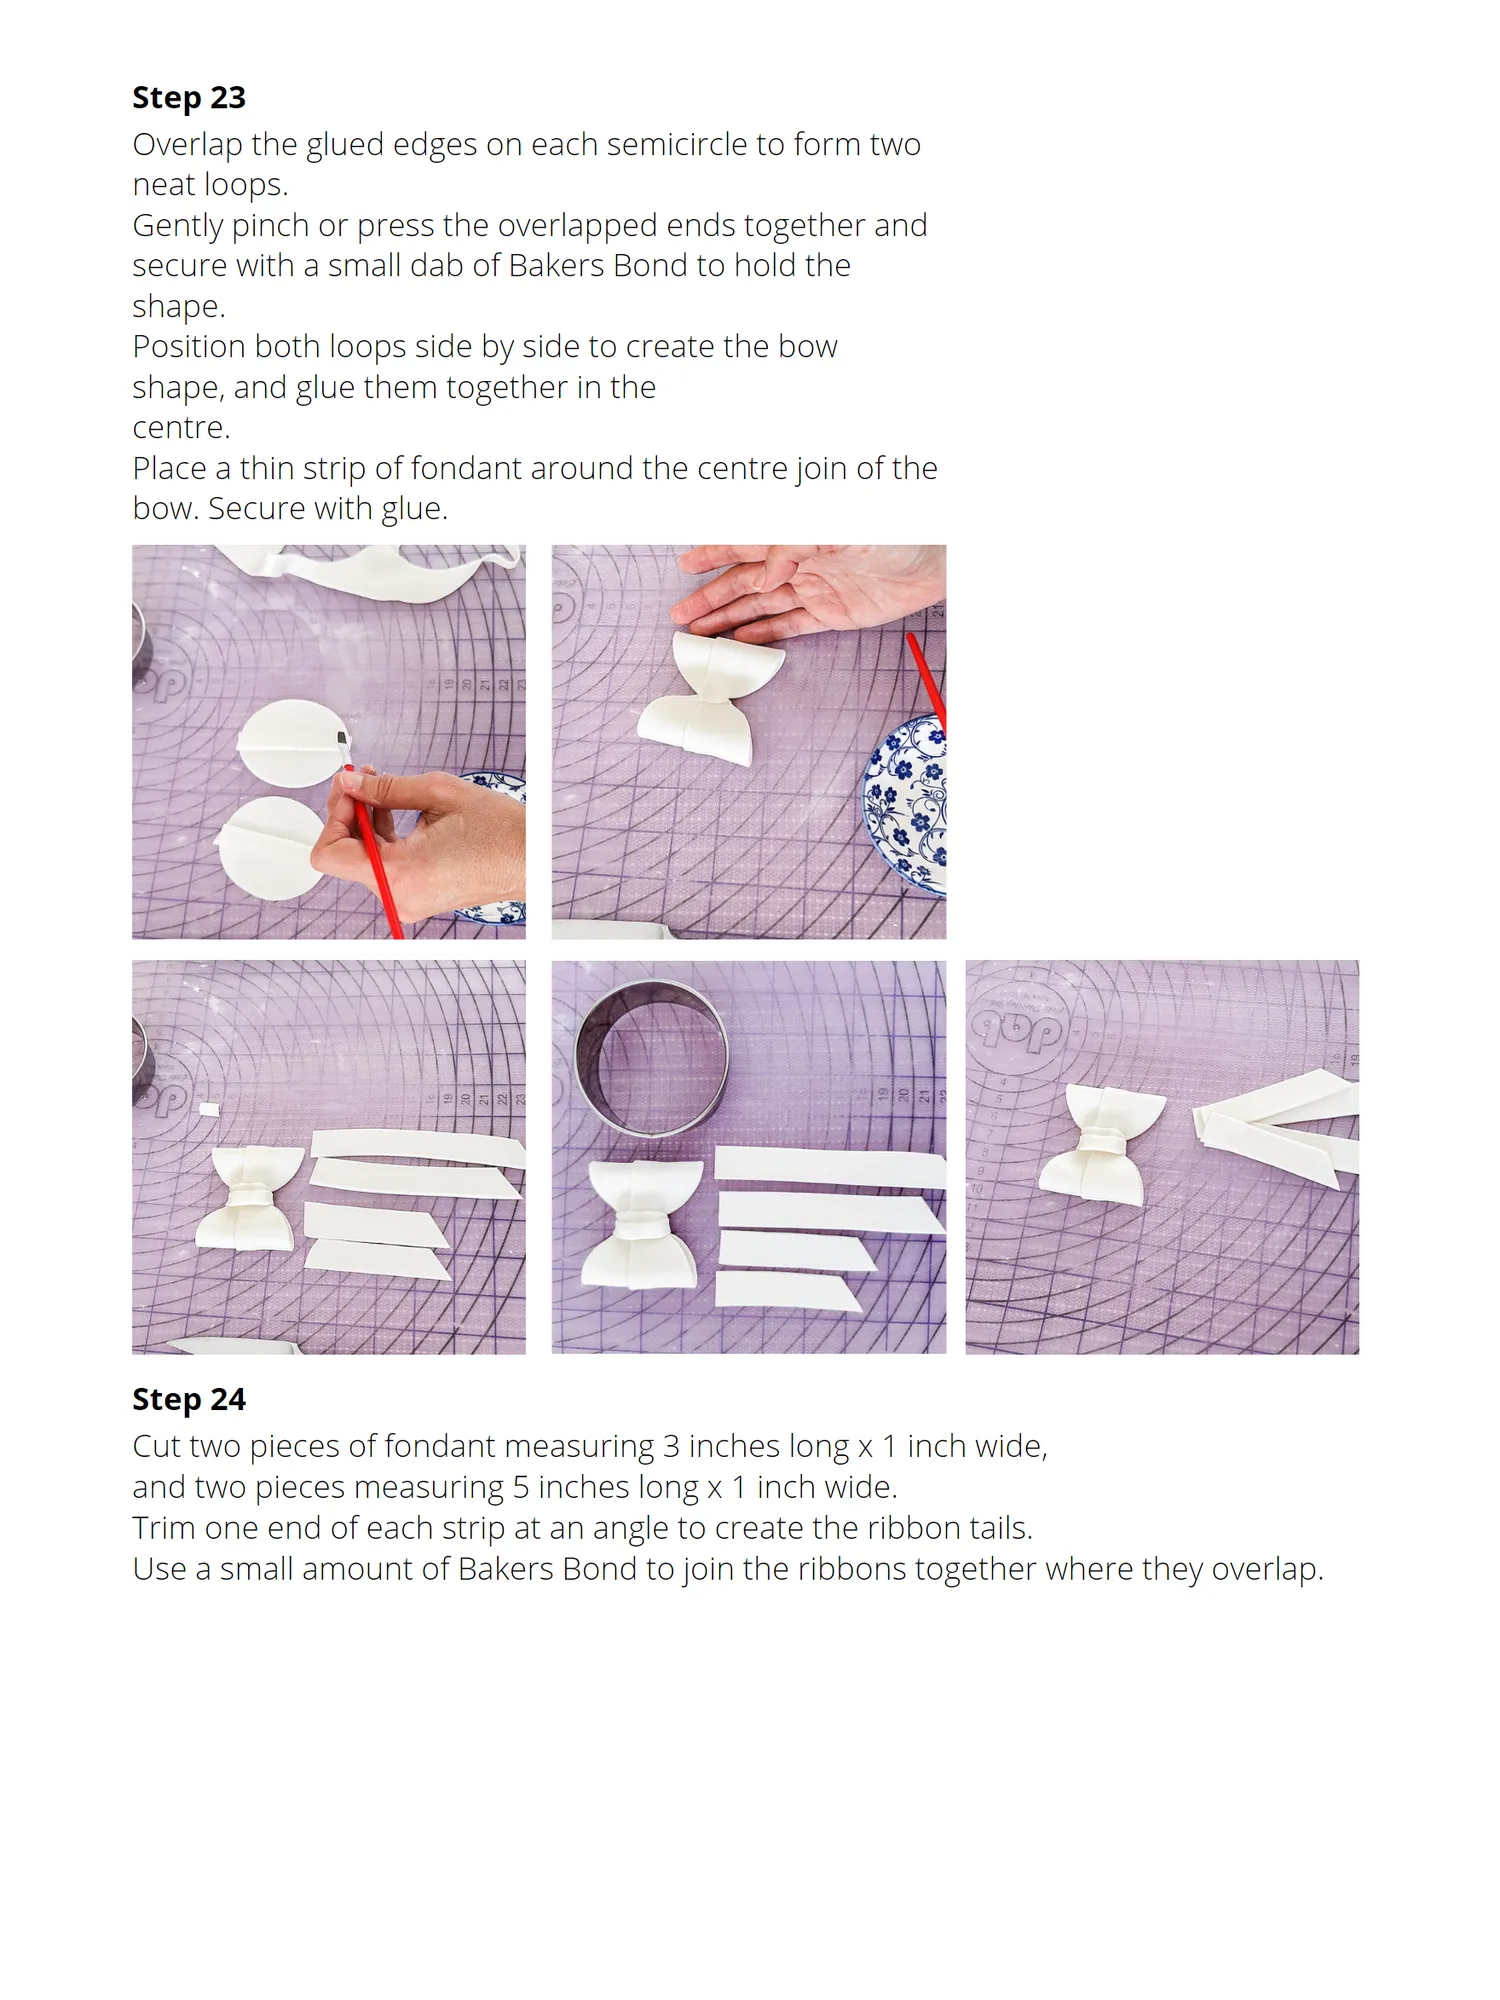
Step 23 Overlap the glued edges on each semicircle to form two neat loops. Gently pinch or press the overlapped ends together and secure with a small dab of Bakers Bond to hold the shape. Position both loops side by side to create the bow shape, and glue them together in the centre. Place a thin strip of fondant around the centre join of the bow. Secure with glue. Step 24 Cut two pieces of fondant measuring 3 inches long x 1 inch wide, and two pieces measuring 5 inches long x 1 inch wide. Trim one end of each strip at an angle to create the ribbon tails. Use a small amount of Bakers Bond to join the ribbons together where they overlap.
Page 19 text
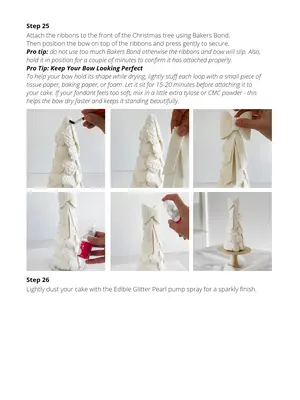
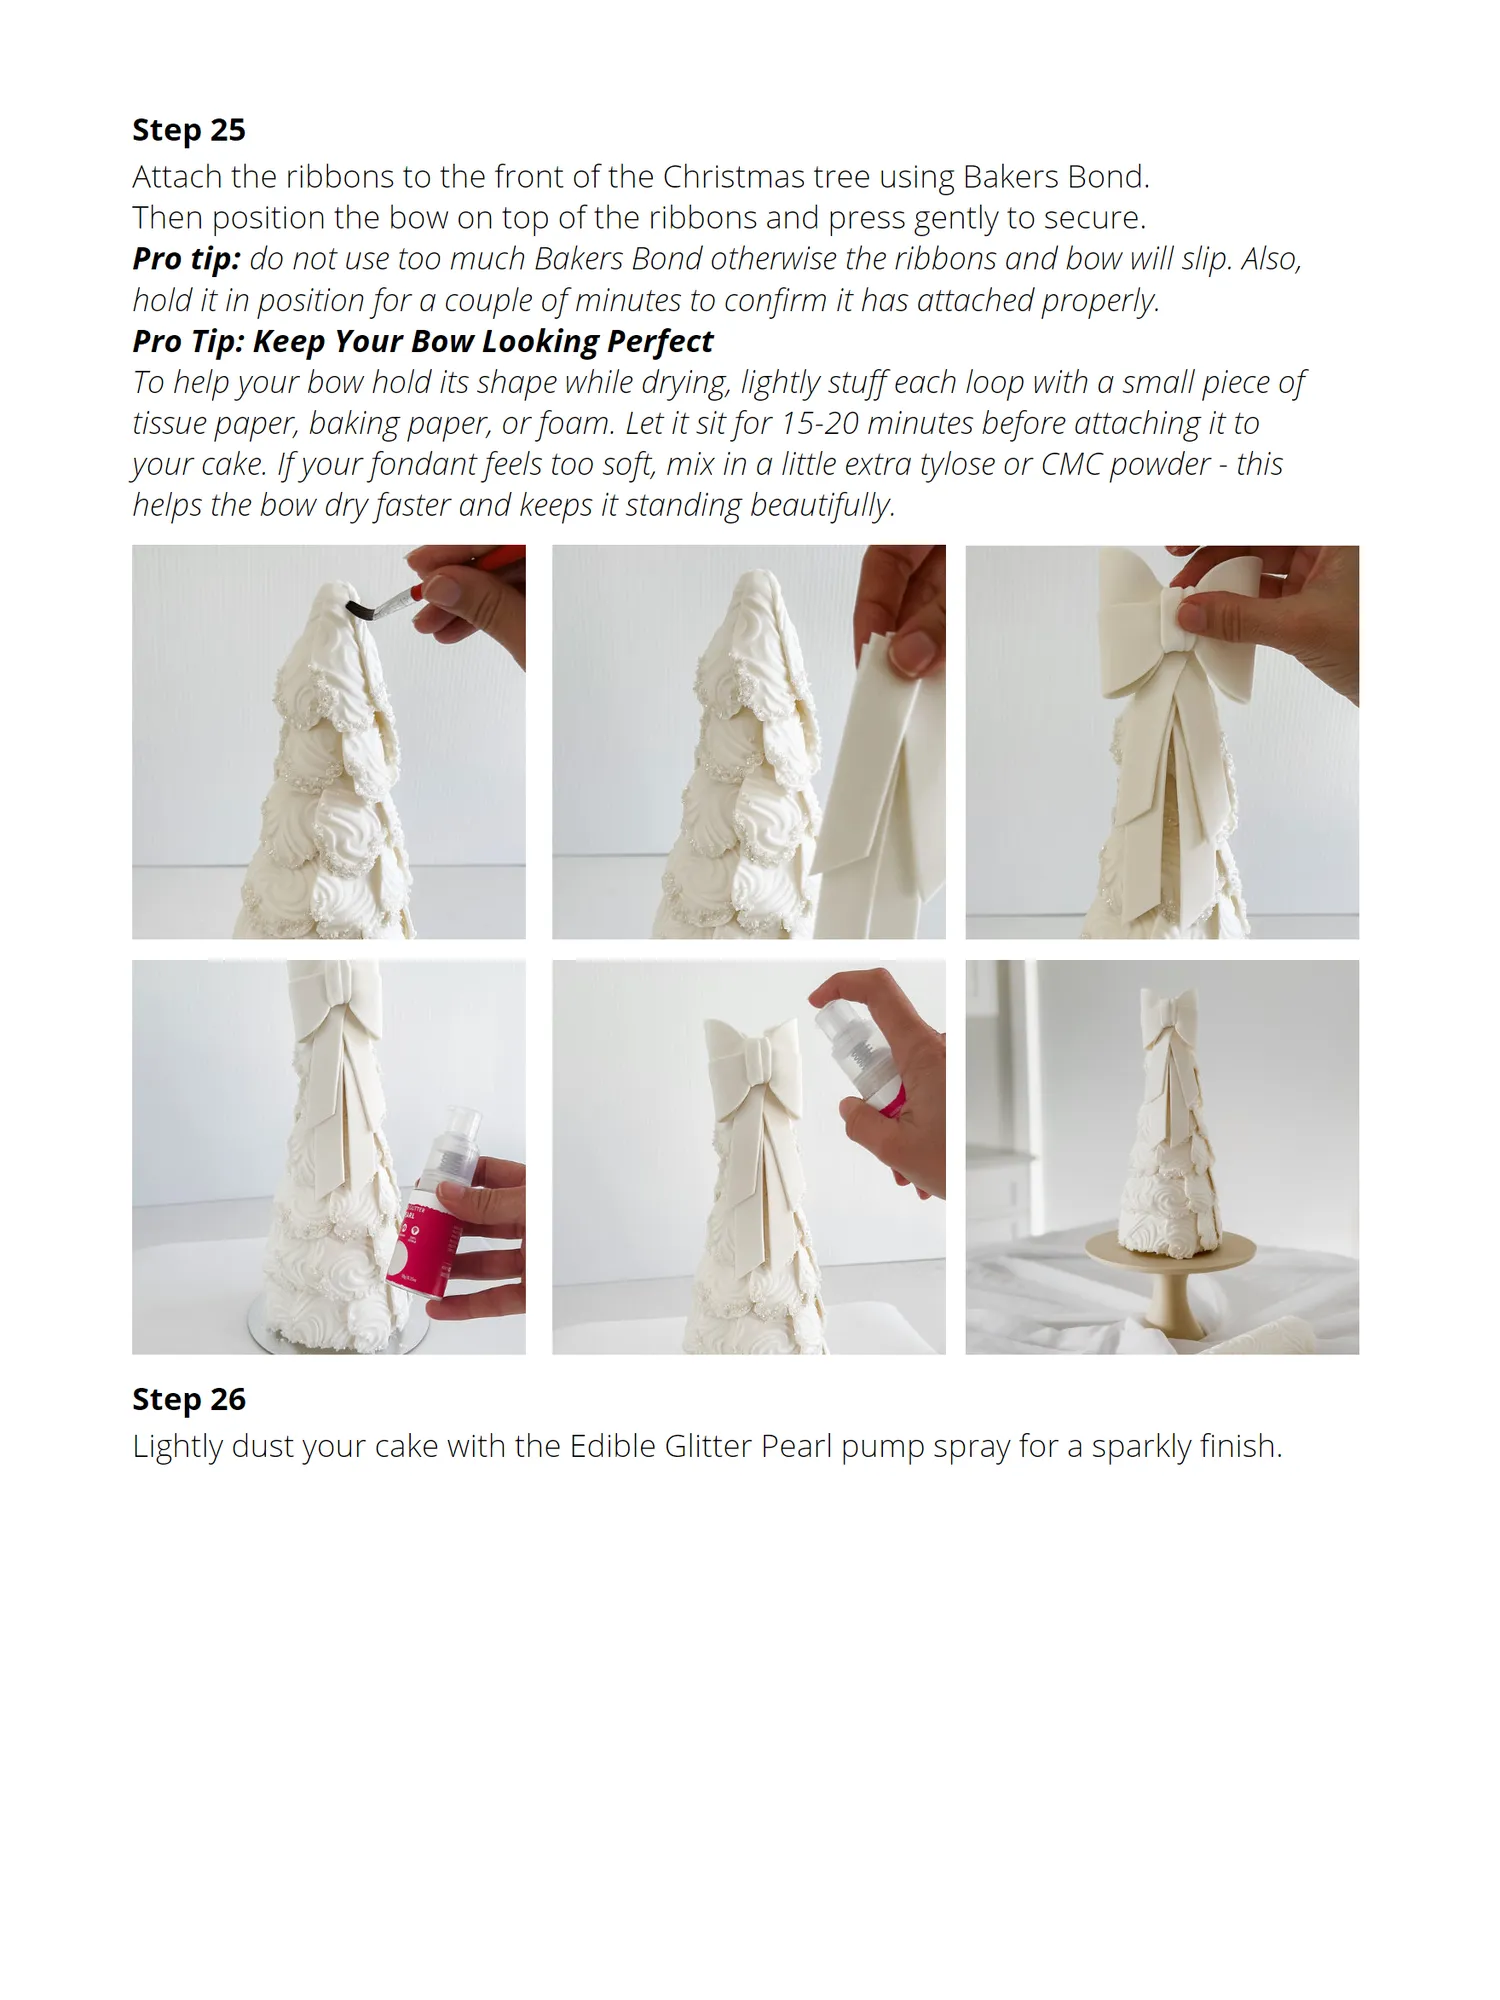
Step 25 Attach the ribbons to the front of the Christmas tree using Bakers Bond. Then position the bow on top of the ribbons and press gently to secure. Pro tip: do not use too much Bakers Bond otherwise the ribbons and bow will slip. Also, hold it in position for a couple of minutes to confirm it has attached properly. Pro Tip: Keep Your Bow Looking Perfect To help your bow hold its shape while drying, lightly stuff each loop with a small piece of tissue paper, baking paper, or foam. Let it sit for 15-20 minutes before attaching it to your cake. If your fondant feels too soft, mix in a little extra tylose or CMC powder - this helps the bow dry faster and keeps it standing beautifully. Step 26 Lightly dust your cake with the Edible Glitter Pearl pump spray for a sparkly finish.
Page 20 text
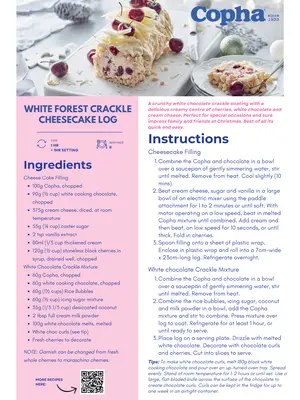
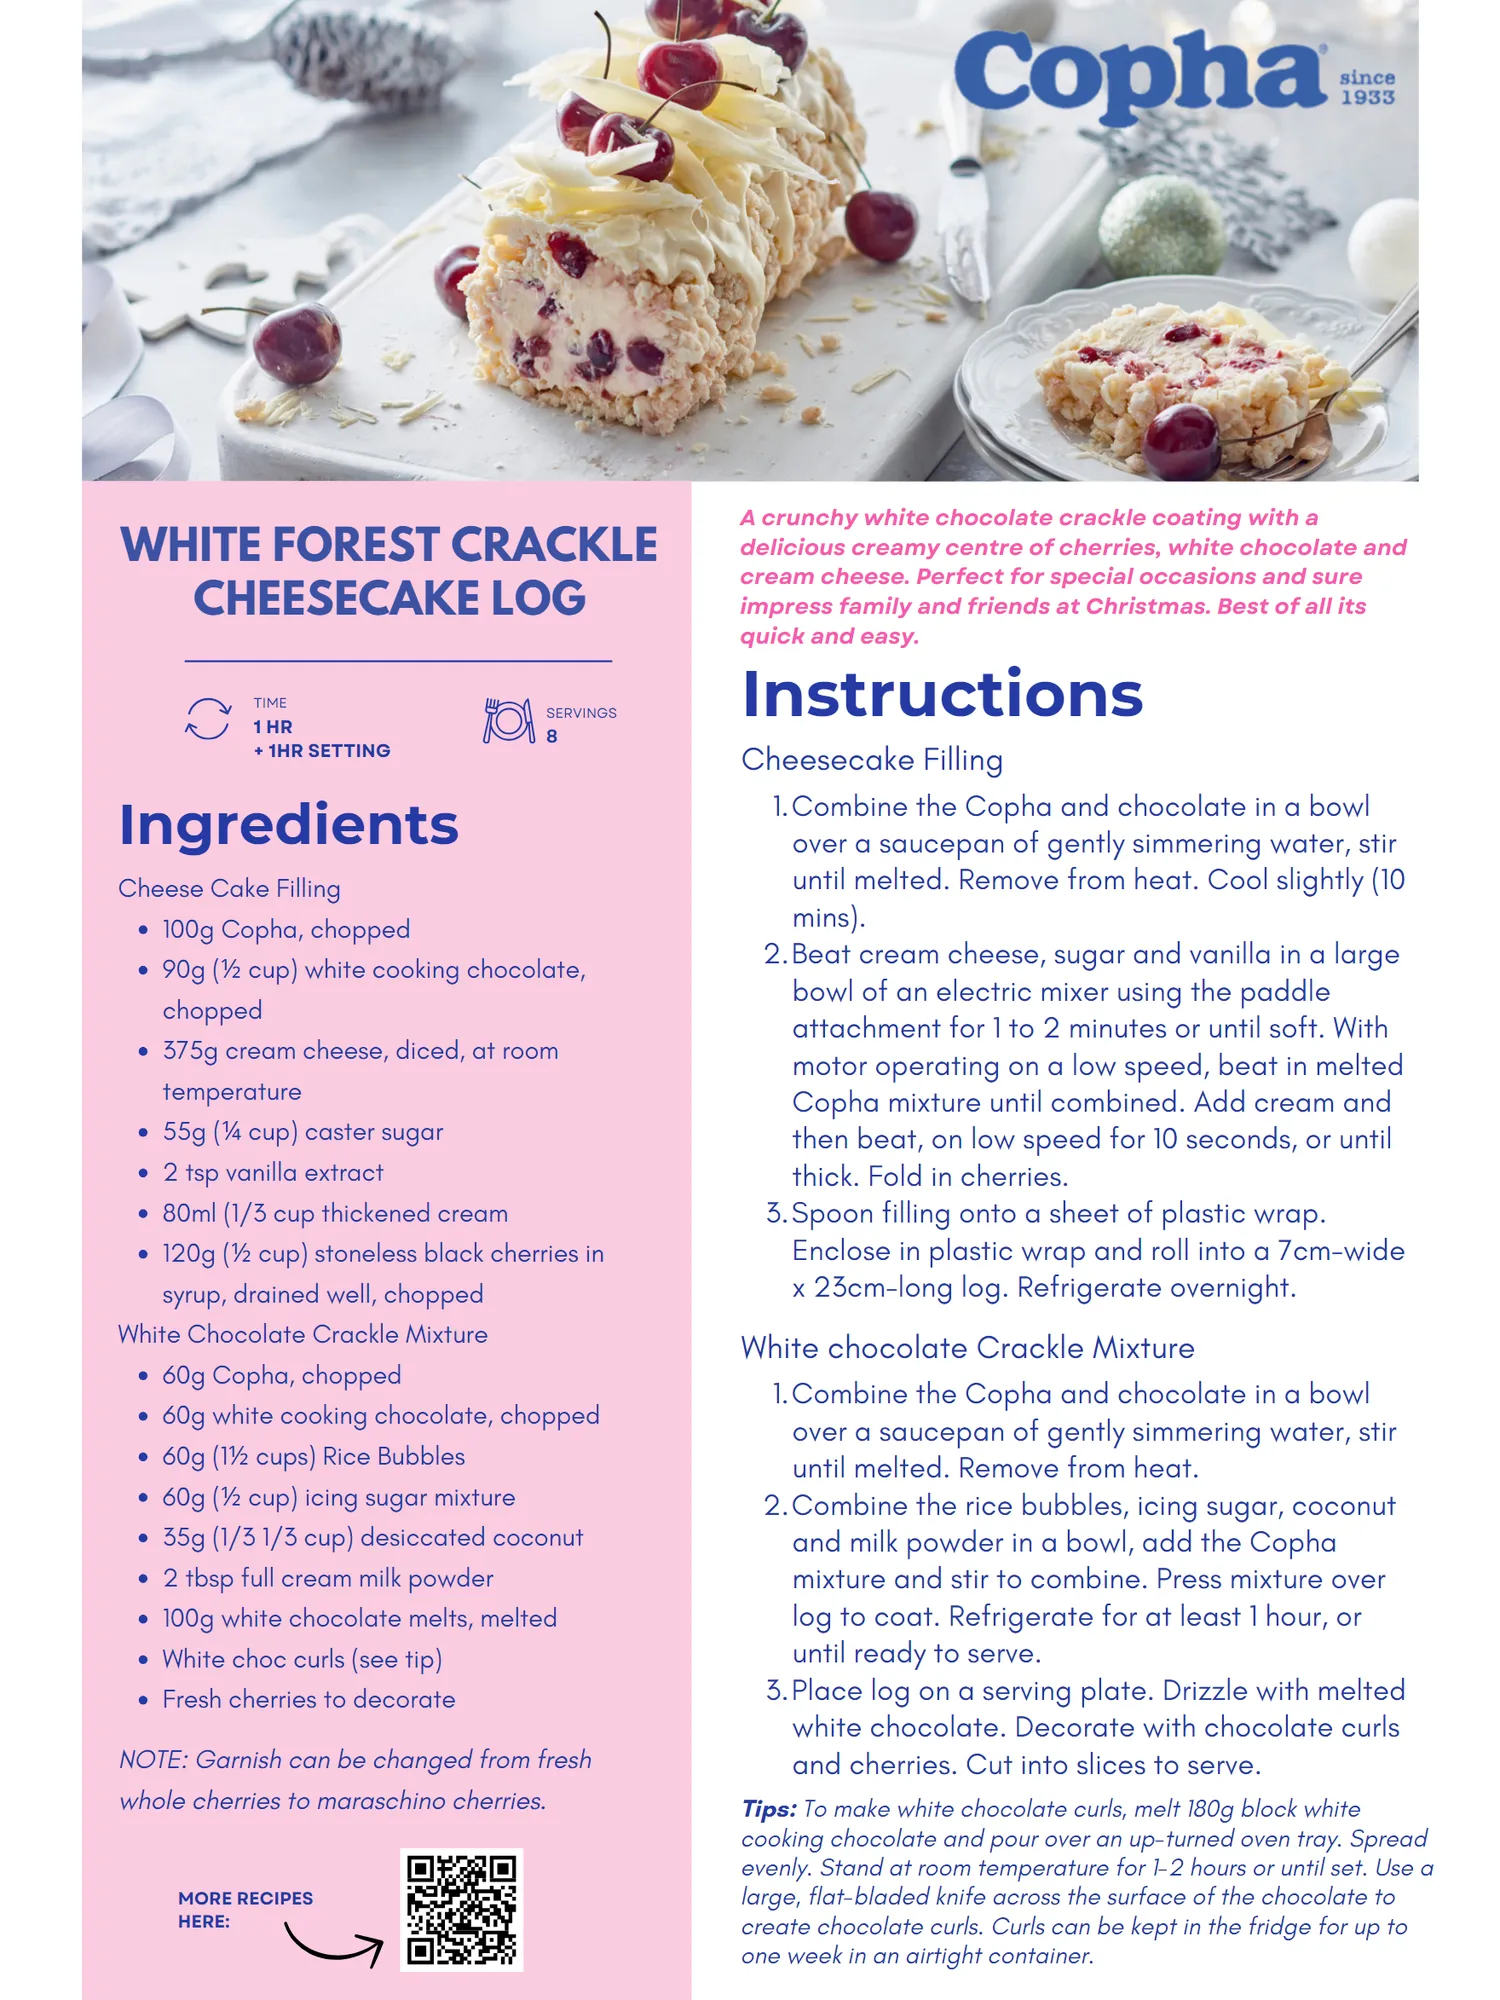
WHITE FOREST CRACKLE CHEESECAKE LOG TIME 1 HR + 1HR SETTING Ingredients Cheese Cake Filling 100g Copha, chopped SERVINGS 8 90g( ½ cup) white cooking chocolate, chopped 375g cream cheese, diced, at room temperature 55g( ¼ cup) caster sugar 2 tsp vanilla extract 80ml( 1 / 3cup thickened cream 120g( ½ cup) stoneless black cherries in syrup, drained well, chopped White Chocolate Crackle Mixture 60g Copha, chopped 60g white cooking chocolate, chopped 60g( 1½ cups) Rice Bubbles 60g( ½ cup) icing sugar mixture 35g( 1 / 3 1 / 3 cup) desiccated coconut 2 tbsp full cream milk powder 100g white chocolate melts, melted White choc curls( see tip) Fresh cherries to decorate NOTE: Garnish can be changed from fresh whole cherries to maraschino cherries. MORE RECIPES HERE: A crunchy white chocolate crackle coating with a delicious creamy centre of cherries, white chocolate and cream cheese. Perfect for special occasions and sure impress family and friends at Christmas. Best of all its quick and easy. Instructions Cheesecake Filling 1. Combine the Copha and chocolate in a bowl over a saucepan of gently simmering water, stir until melted. Remove from heat. Cool slightly( 10 mins). 2. Beat cream cheese, sugar and vanilla in a large bowl of an electric mixer using the paddle attachment for 1 to 2 minutes or until soft. With motor operating on a low speed, beat in melted Copha mixture until combined. Add cream and then beat, on low speed for 10 seconds, or until thick. Fold in cherries. 3. Spoon filling onto a sheet of plastic wrap. Enclose in plastic wrap and roll into a 7cm-wide x 23cm-long log. Refrigerate overnight. White chocolate Crackle Mixture 1. Combine the Copha and chocolate in a bowl over a saucepan of gently simmering water, stir until melted. Remove from heat. 2. Combine the rice bubbles, icing sugar, coconut and milk powder in a bowl, add the Copha mixture and stir to combine. Press mixture over log to coat. Refrigerate for at least 1 hour, or until ready to serve. 3. Place log on a serving plate. Drizzle with melted white chocolate. Decorate with chocolate curls and cherries. Cut into slices to serve. Tips: To make white chocolate curls, melt 180g block white cooking chocolate and pour over an up-turned oven tray. Spread evenly. Stand at room temperature for 1-2 hours or until set. Use a large, flat-bladed knife across the surface of the chocolate to create chocolate curls. Curls can be kept in the fridge for up to one week in an airtight container.


Page 22 text
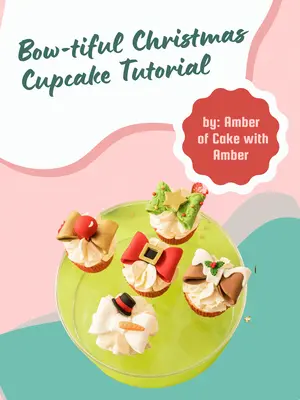
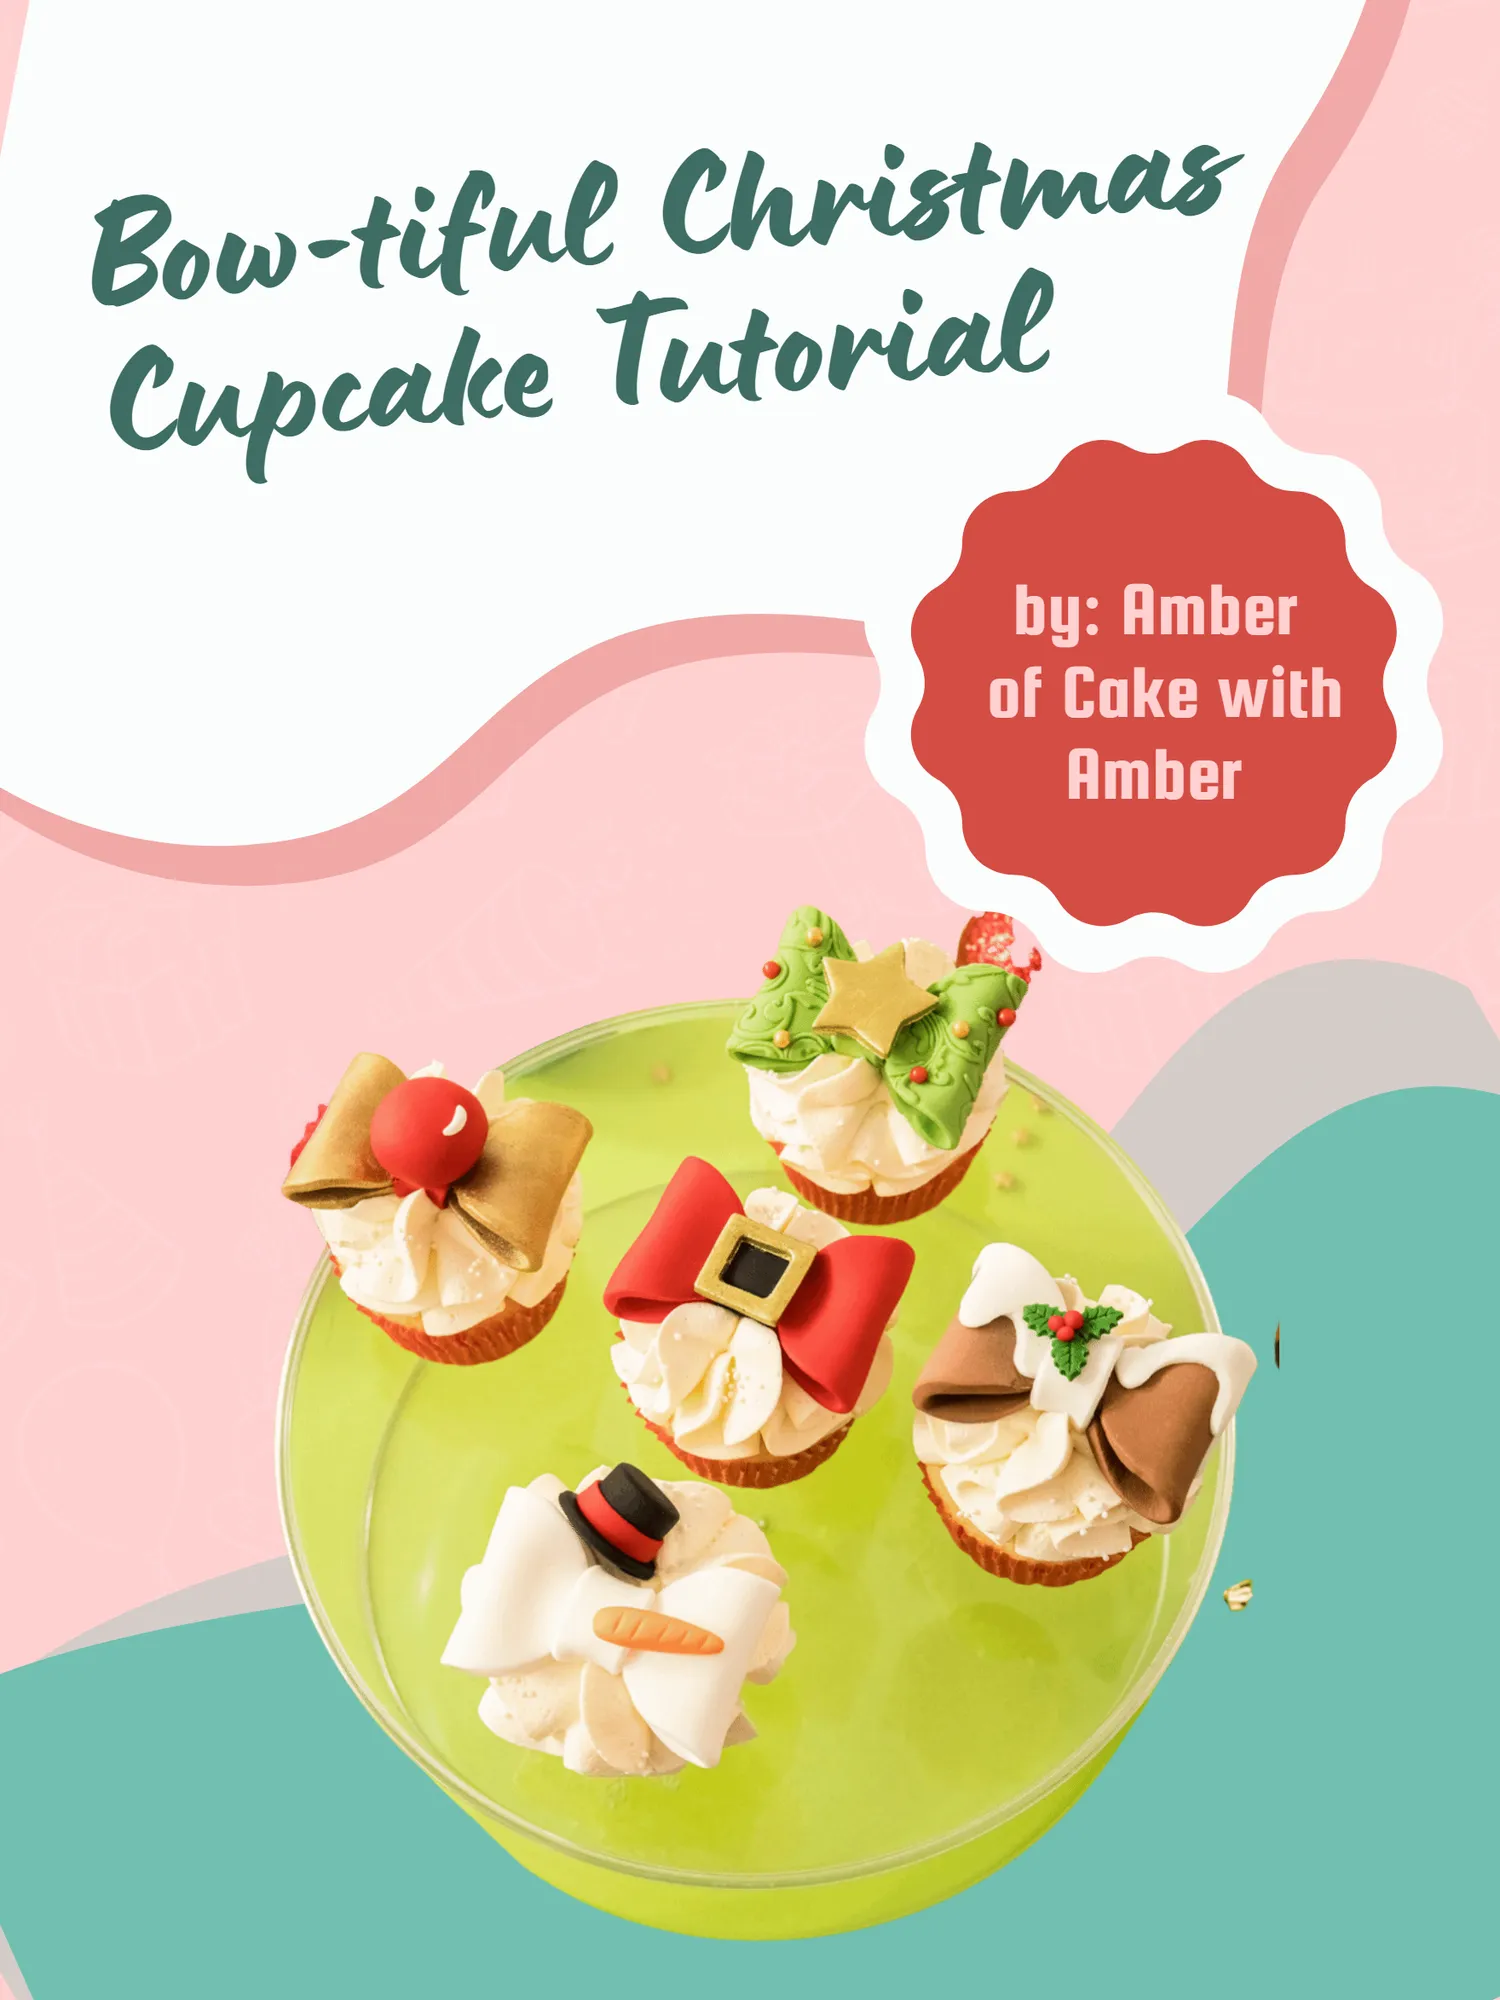
Bow-tiful Christmas Cupcake Tutorial by: Amber of Cake with Amber
Page 23 text
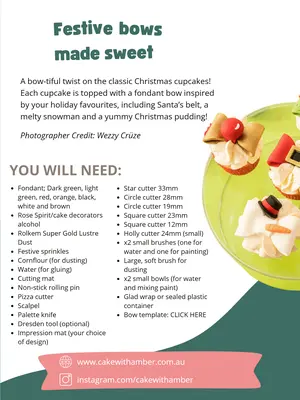
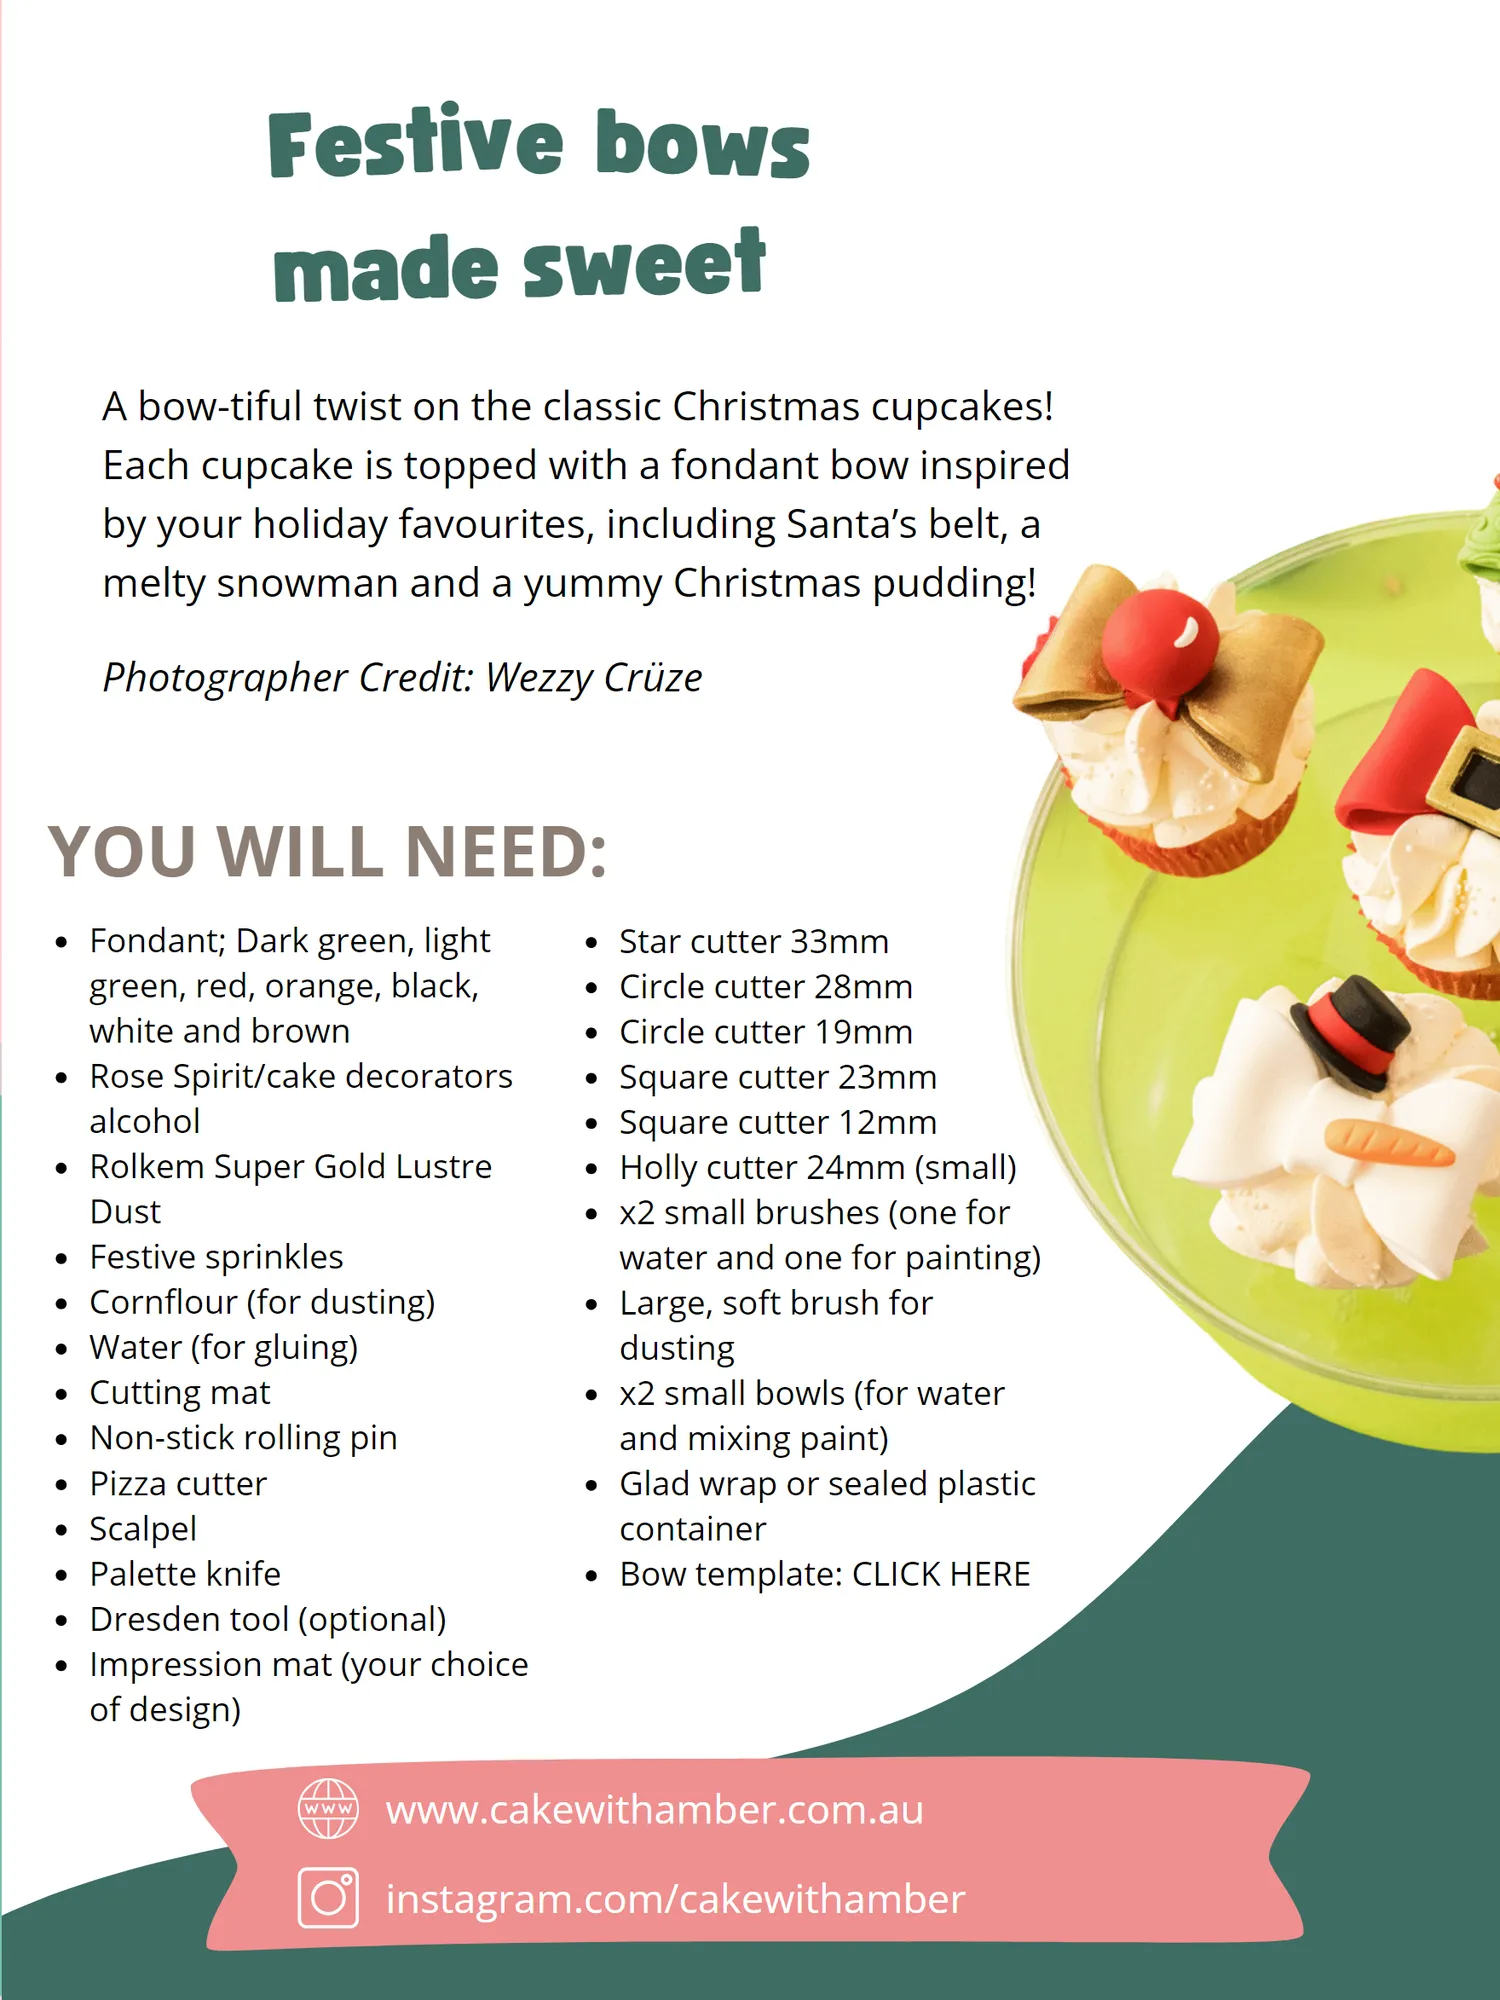
Festive bows made sweet A bow-tiful twist on the classic Christmas cupcakes! Each cupcake is topped with a fondant bow inspired by your holiday favourites, including Santa’ s belt, a melty snowman and a yummy Christmas pudding! Photographer Credit: Wezzy Crüze YOU WILL NEED: Fondant; Dark green, light green, red, orange, black, white and brown Rose Spirit / cake decorators alcohol Rolkem Super Gold Lustre Dust Festive sprinkles Cornflour( for dusting) Water( for gluing) Cutting mat Non-stick rolling pin Pizza cutter Scalpel Palette knife Dresden tool( optional) Impression mat( your choice of design) Star cutter 33mm Circle cutter 28mm Circle cutter 19mm Square cutter 23mm Square cutter 12mm Holly cutter 24mm( small) x2 small brushes( one for water and one for painting) Large, soft brush for dusting x2 small bowls( for water and mixing paint) Glad wrap or sealed plastic container Bow template: CLICK HERE www. cakewithamber. com. au instagram. com / cakewithamber
Page 24 text
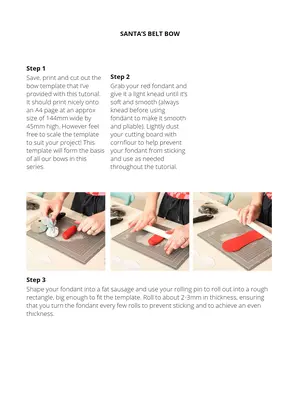
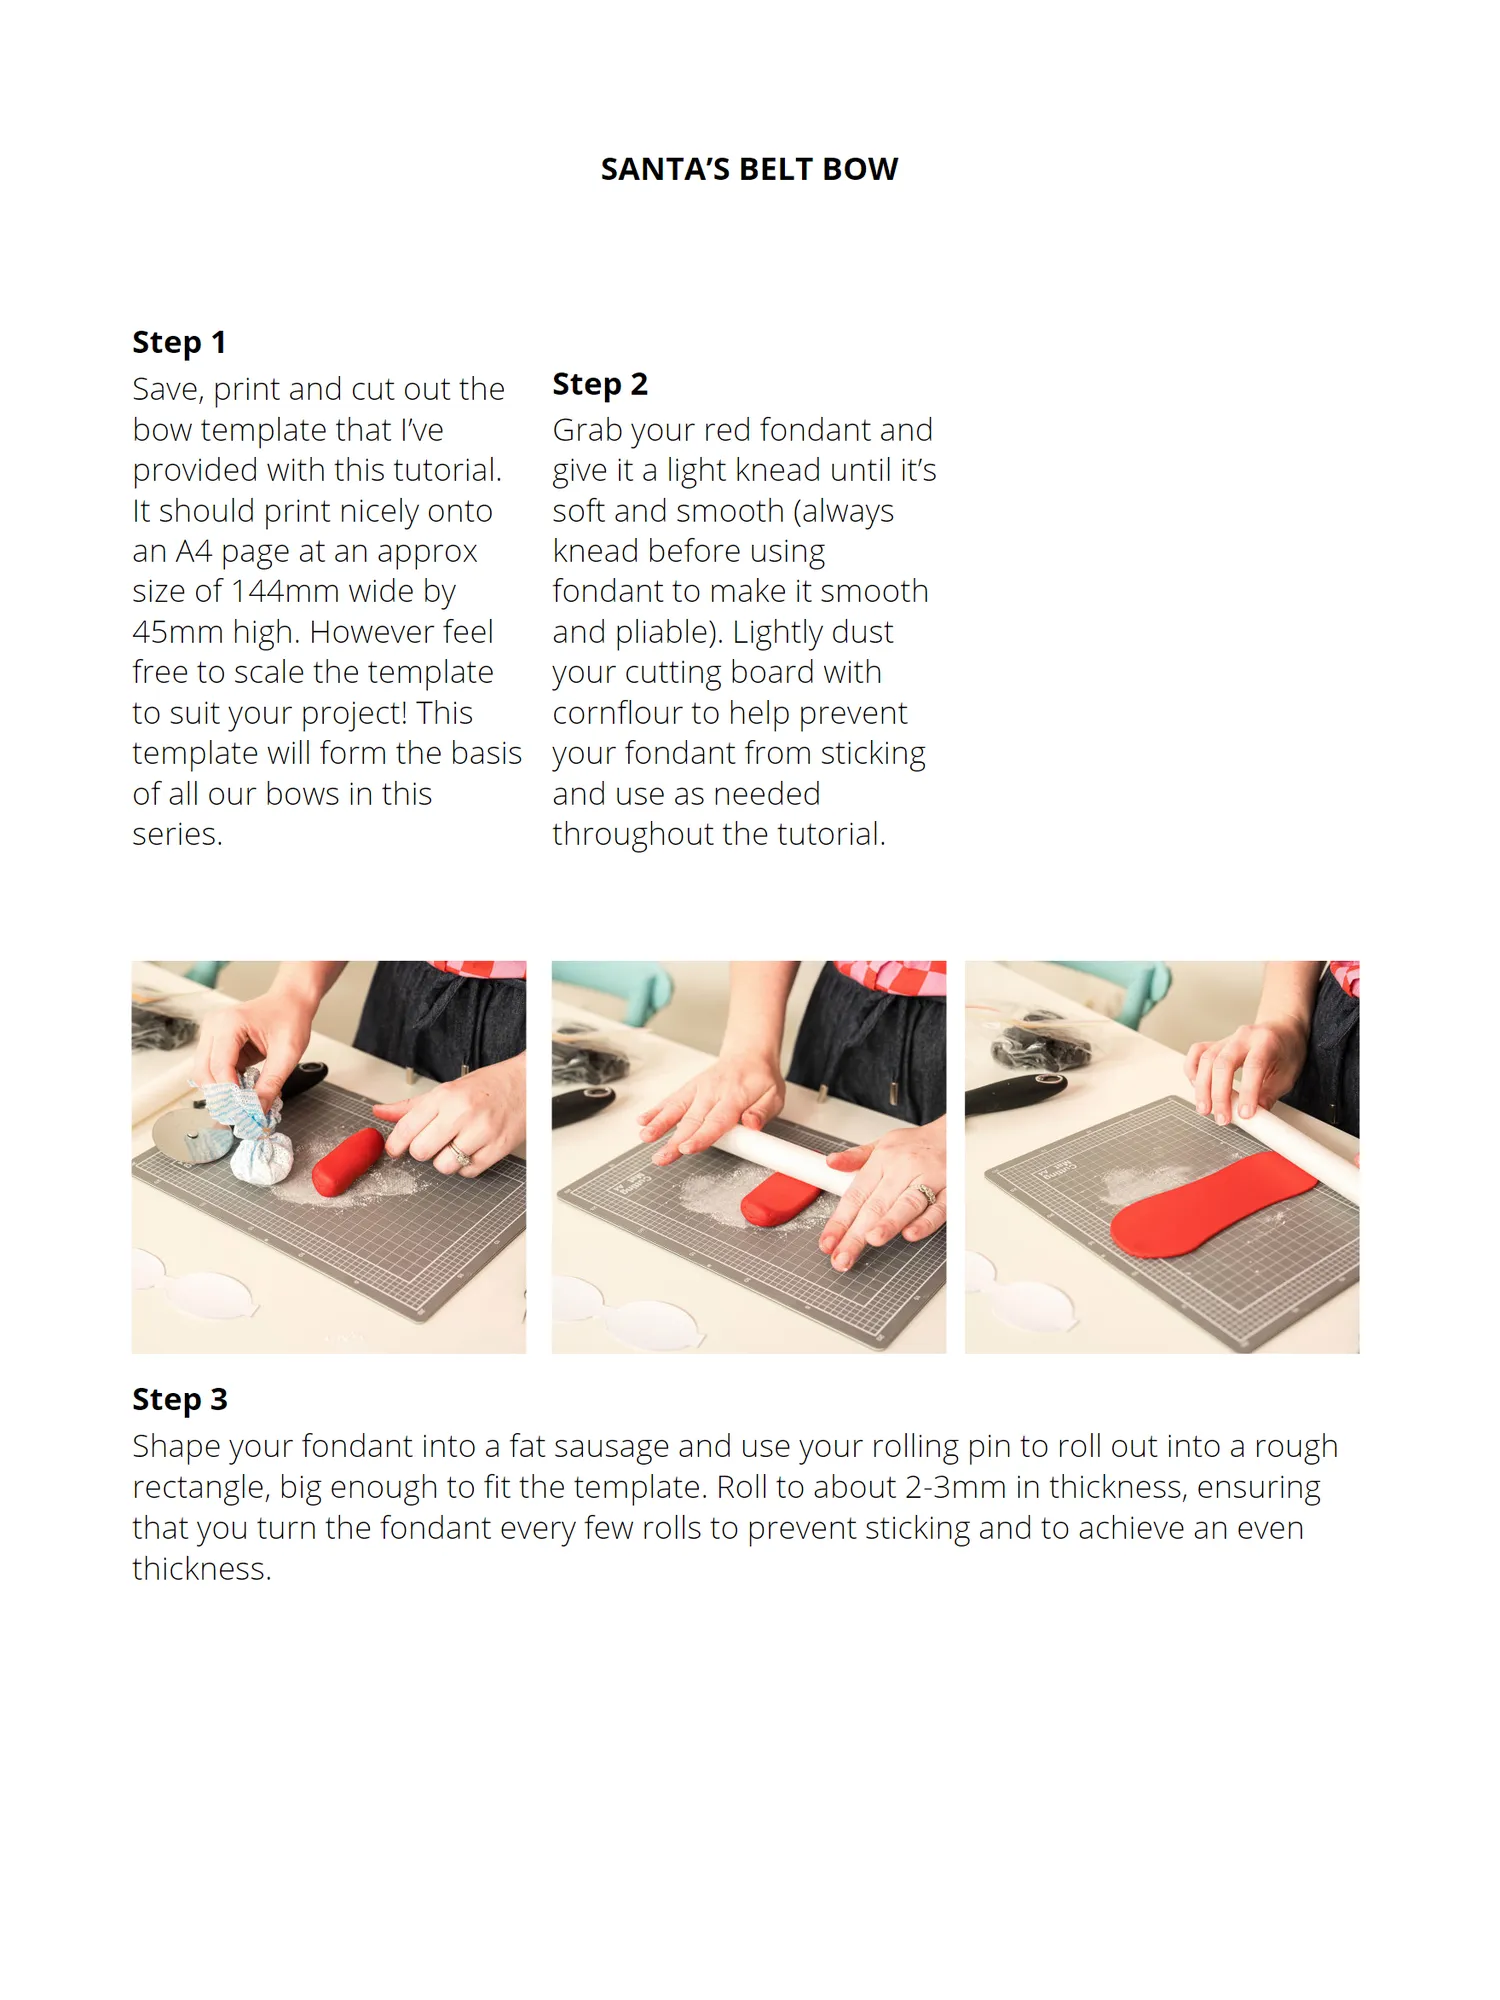
SANTA’S BELT BOW Step 1 Save, print and cut out the Step 2 bow template that I’ve Grab your red fondant and provided with this tutorial. give it a light knead until it’s It should print nicely onto soft and smooth (always an A4 page at an approx knead before using size of 144mm wide by fondant to make it smooth 45mm high. However feel and pliable). Lightly dust free to scale the template your cutting board with to suit your project! This cornflour to help prevent template will form the basis your fondant from sticking of all our bows in this and use as needed series. throughout the tutorial. Step 3 Shape your fondant into a fat sausage and use your rolling pin to roll out into a rough rectangle, big enough to fit the template. Roll to about 2-3mm in thickness, ensuring that you turn the fondant every few rolls to prevent sticking and to achieve an even thickness.
Page 25 text
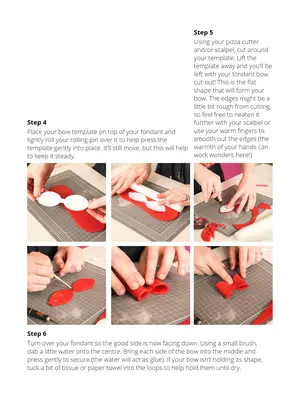
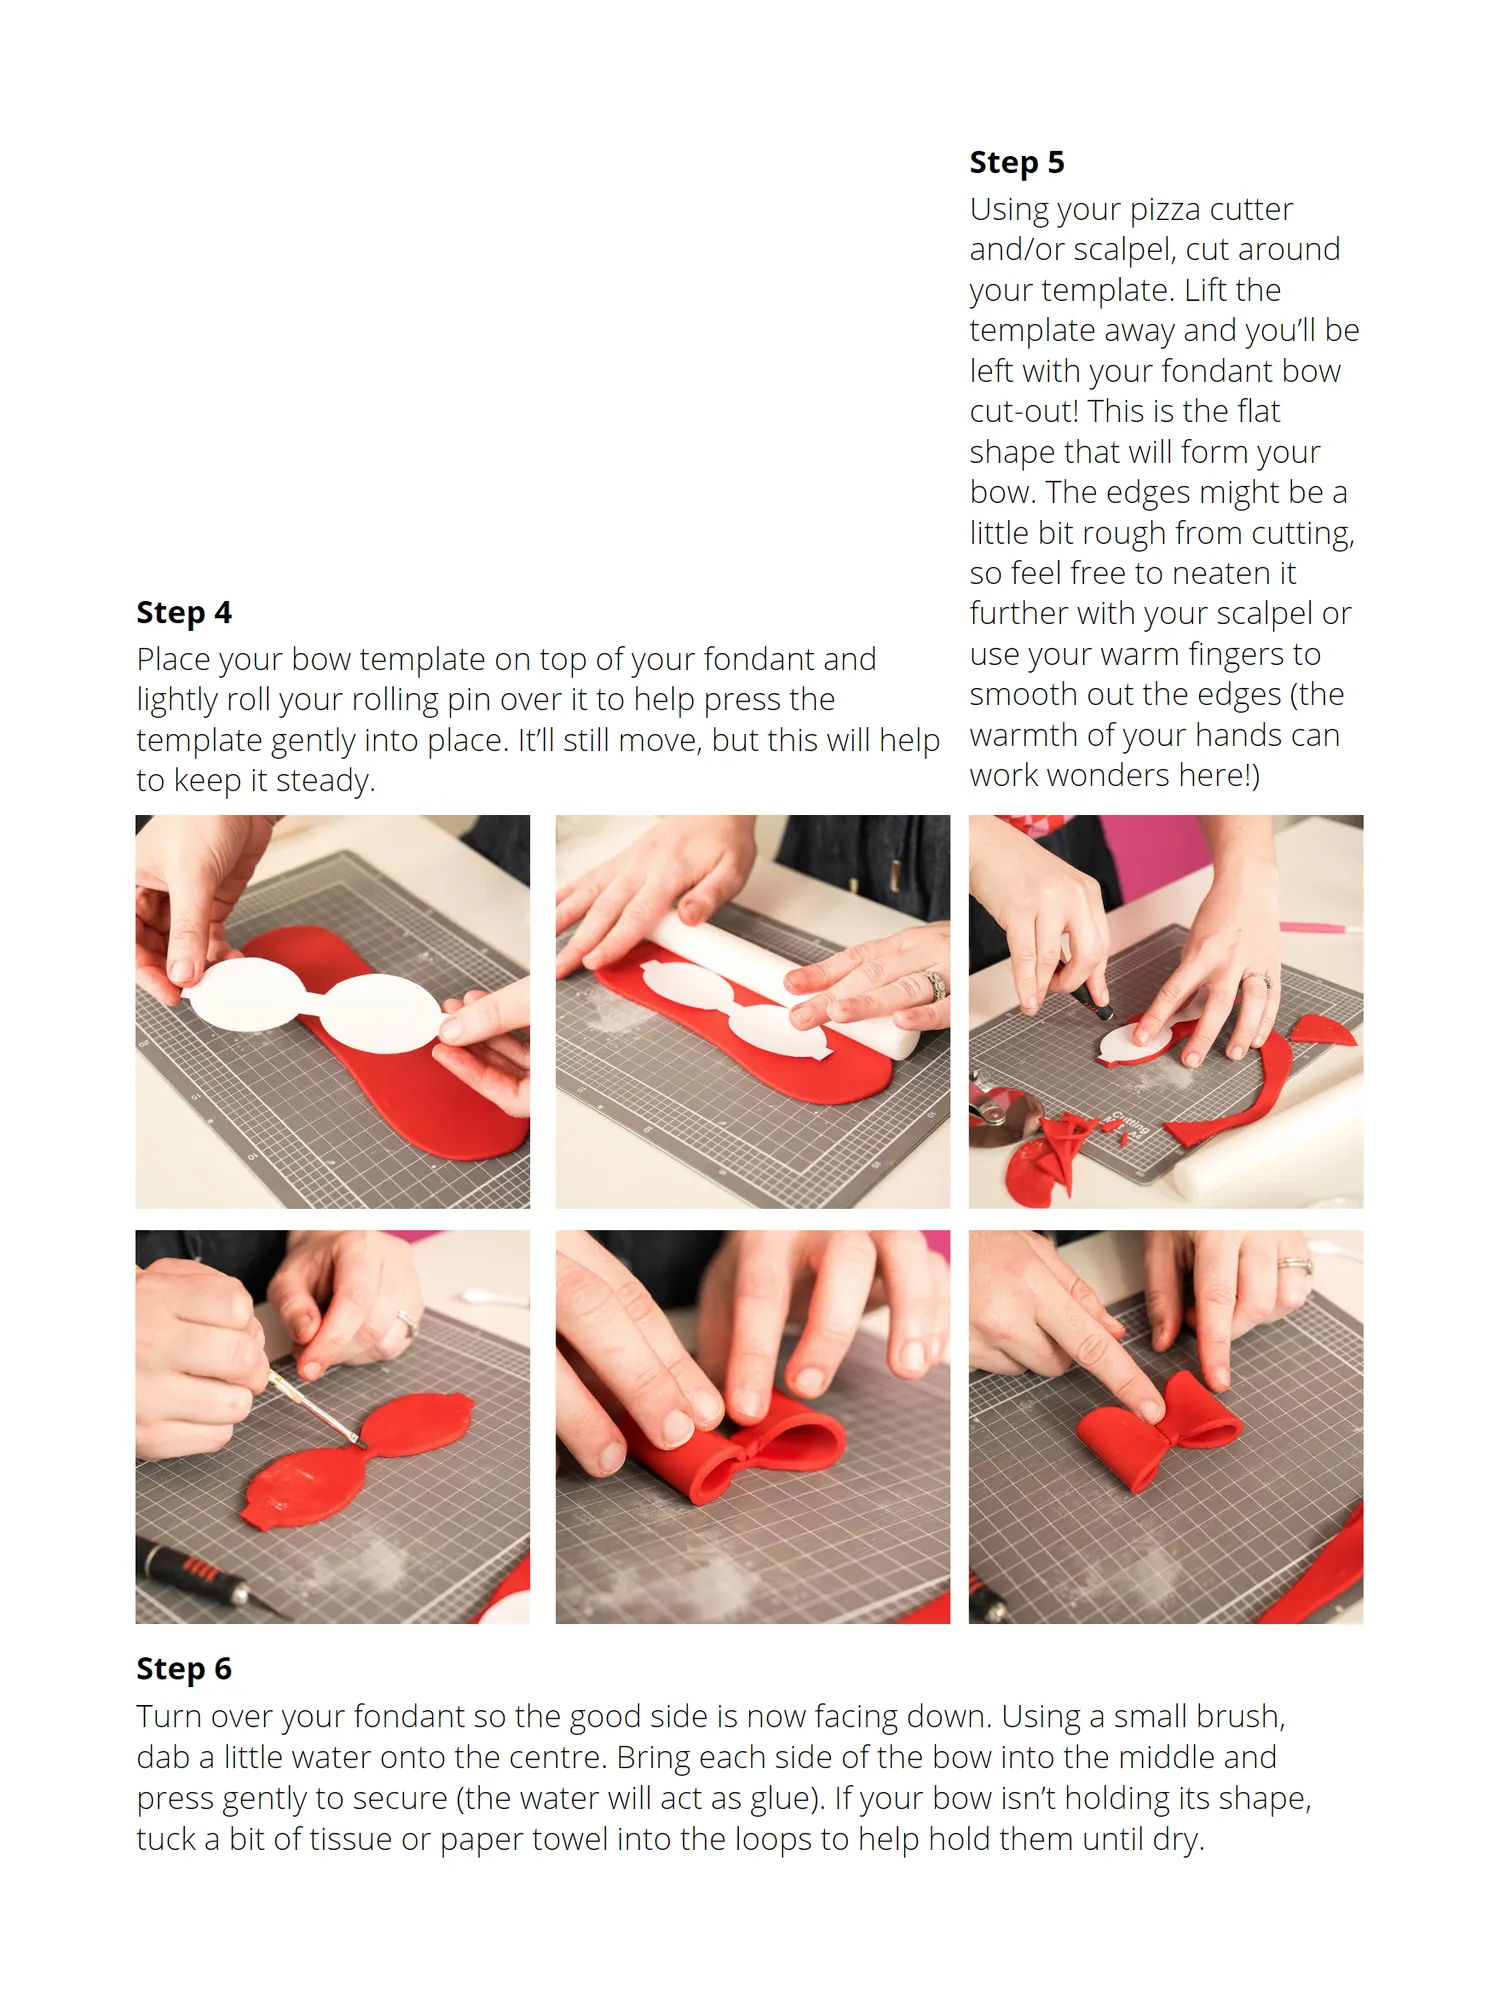
Step 5 Using your pizza cutter and/or scalpel, cut around your template. Lift the template away and you’ll be left with your fondant bow cut-out! This is the flat shape that will form your bow. The edges might be a little bit rough from cutting, so feel free to neaten it Step 4 further with your scalpel or Place your bow template on top of your fondant and use your warm fingers to lightly roll your rolling pin over it to help press the smooth out the edges (the template gently into place. It’ll still move, but this will help warmth of your hands can to keep it steady. work wonders here!) Step 6 Turn over your fondant so the good side is now facing down. Using a small brush, dab a little water onto the centre. Bring each side of the bow into the middle and press gently to secure (the water will act as glue). If your bow isn’t holding its shape, tuck a bit of tissue or paper towel into the loops to help hold them until dry.
Page 26 text
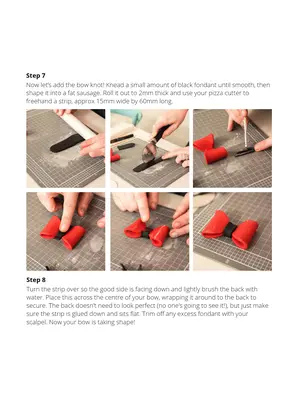
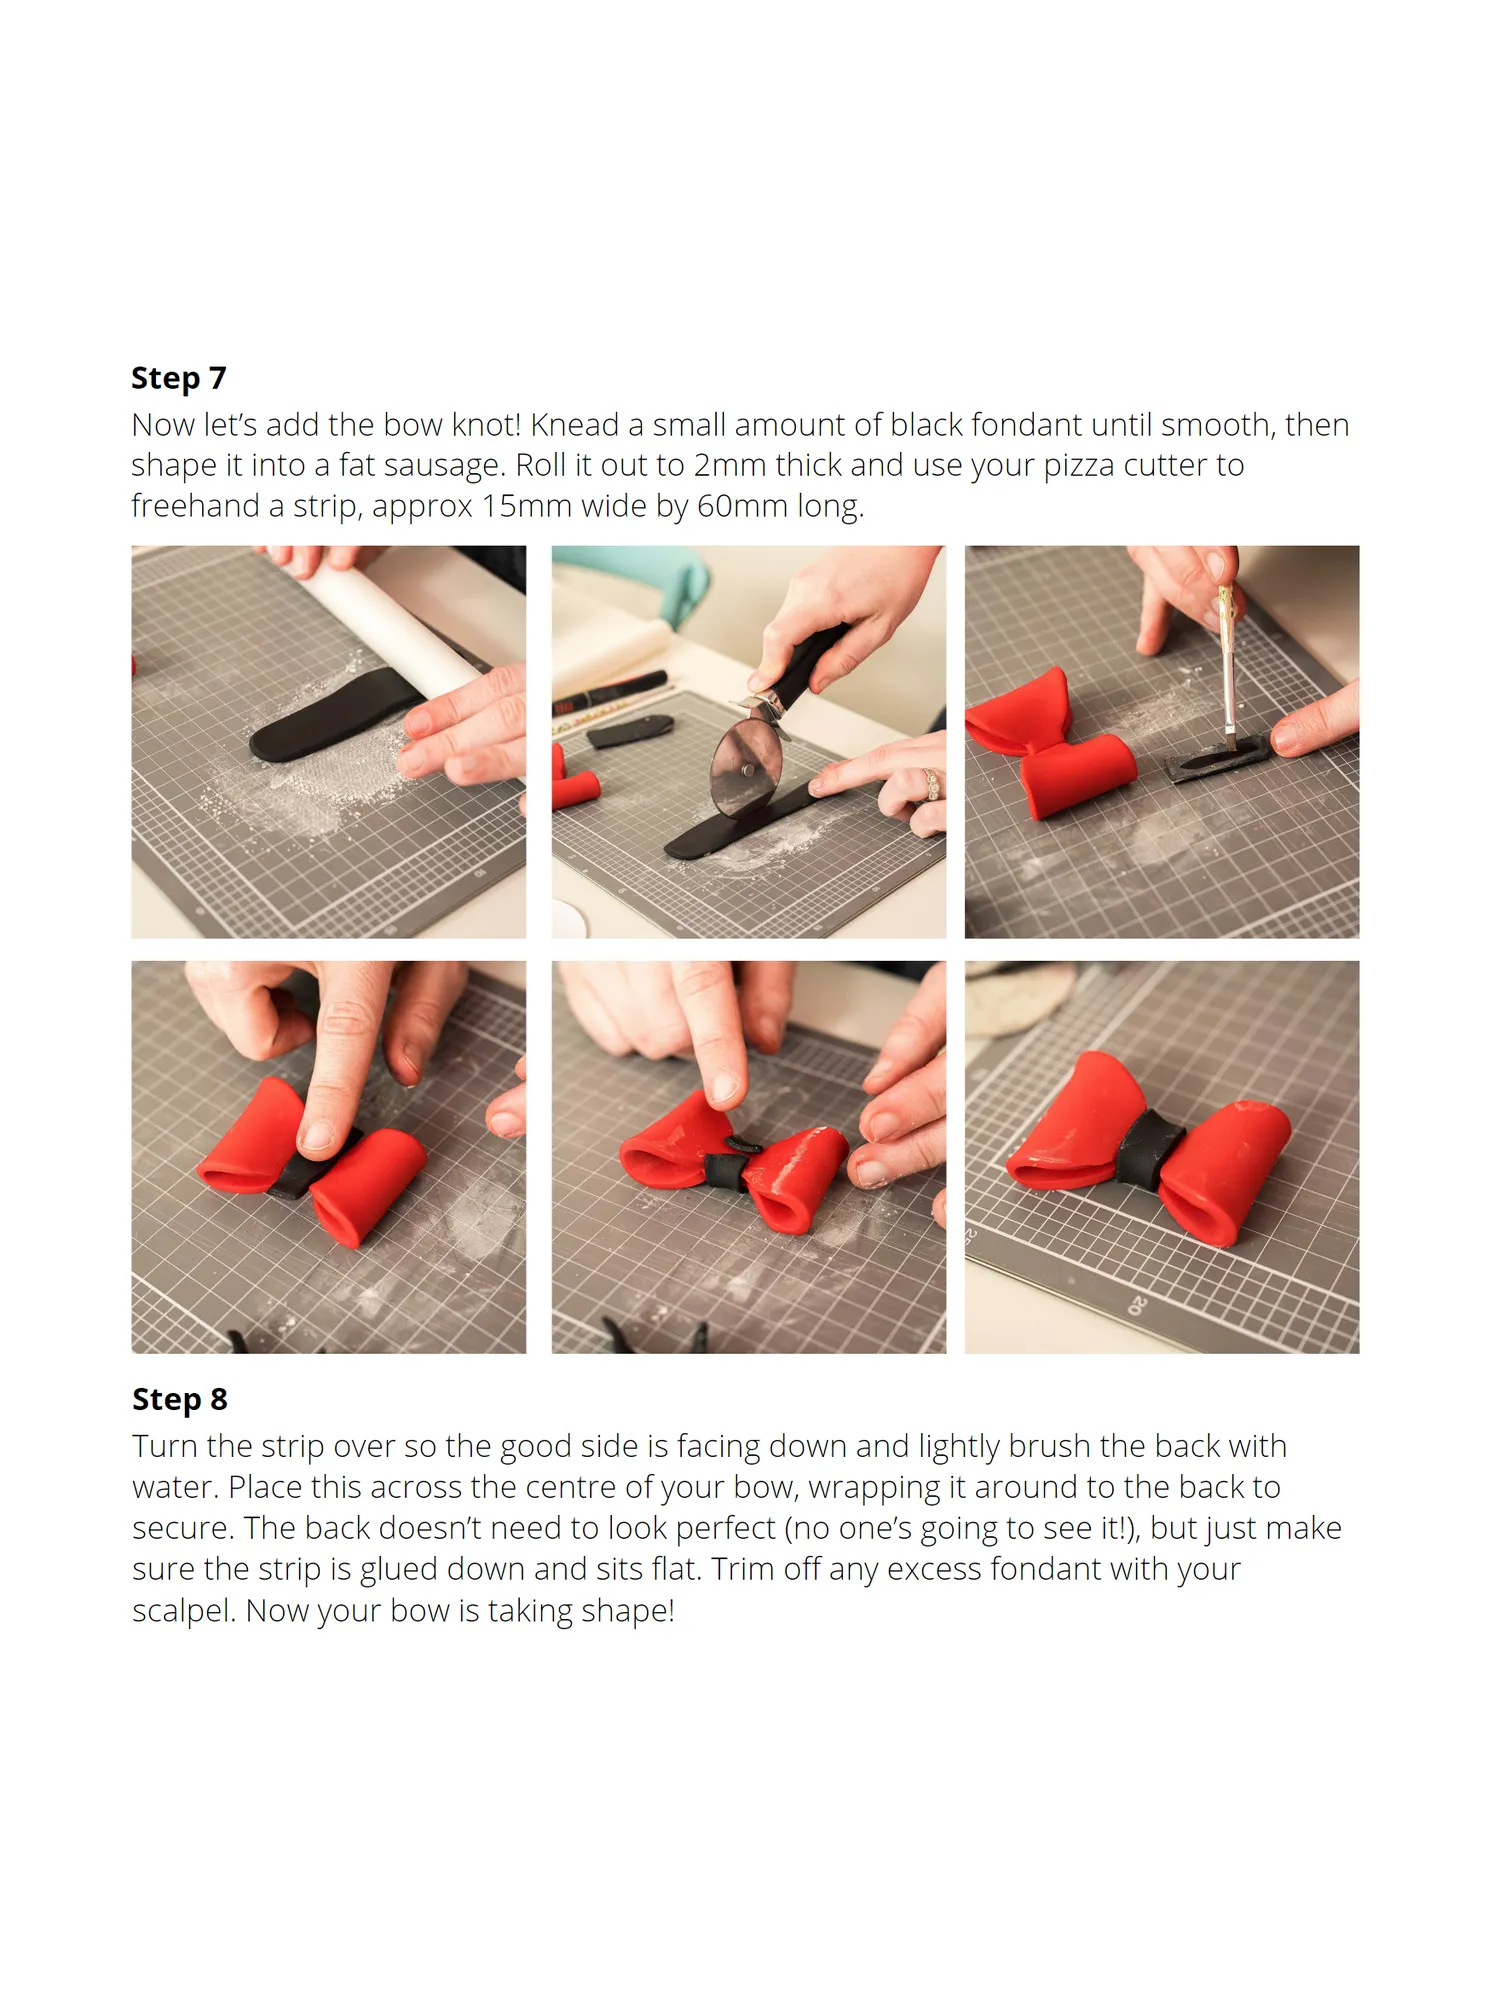
Step 7 Now let’s add the bow knot! Knead a small amount of black fondant until smooth, then shape it into a fat sausage. Roll it out to 2mm thick and use your pizza cutter to freehand a strip, approx 15mm wide by 60mm long. Step 8 Turn the strip over so the good side is facing down and lightly brush the back with water. Place this across the centre of your bow, wrapping it around to the back to secure. The back doesn’t need to look perfect (no one’s going to see it!), but just make sure the strip is glued down and sits flat. Trim off any excess fondant with your scalpel. Now your bow is taking shape!
Page 27 text
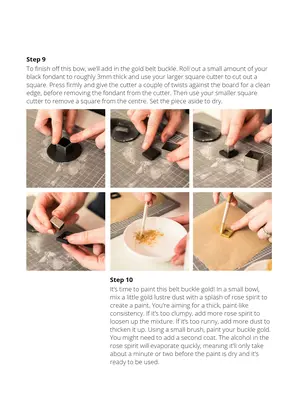
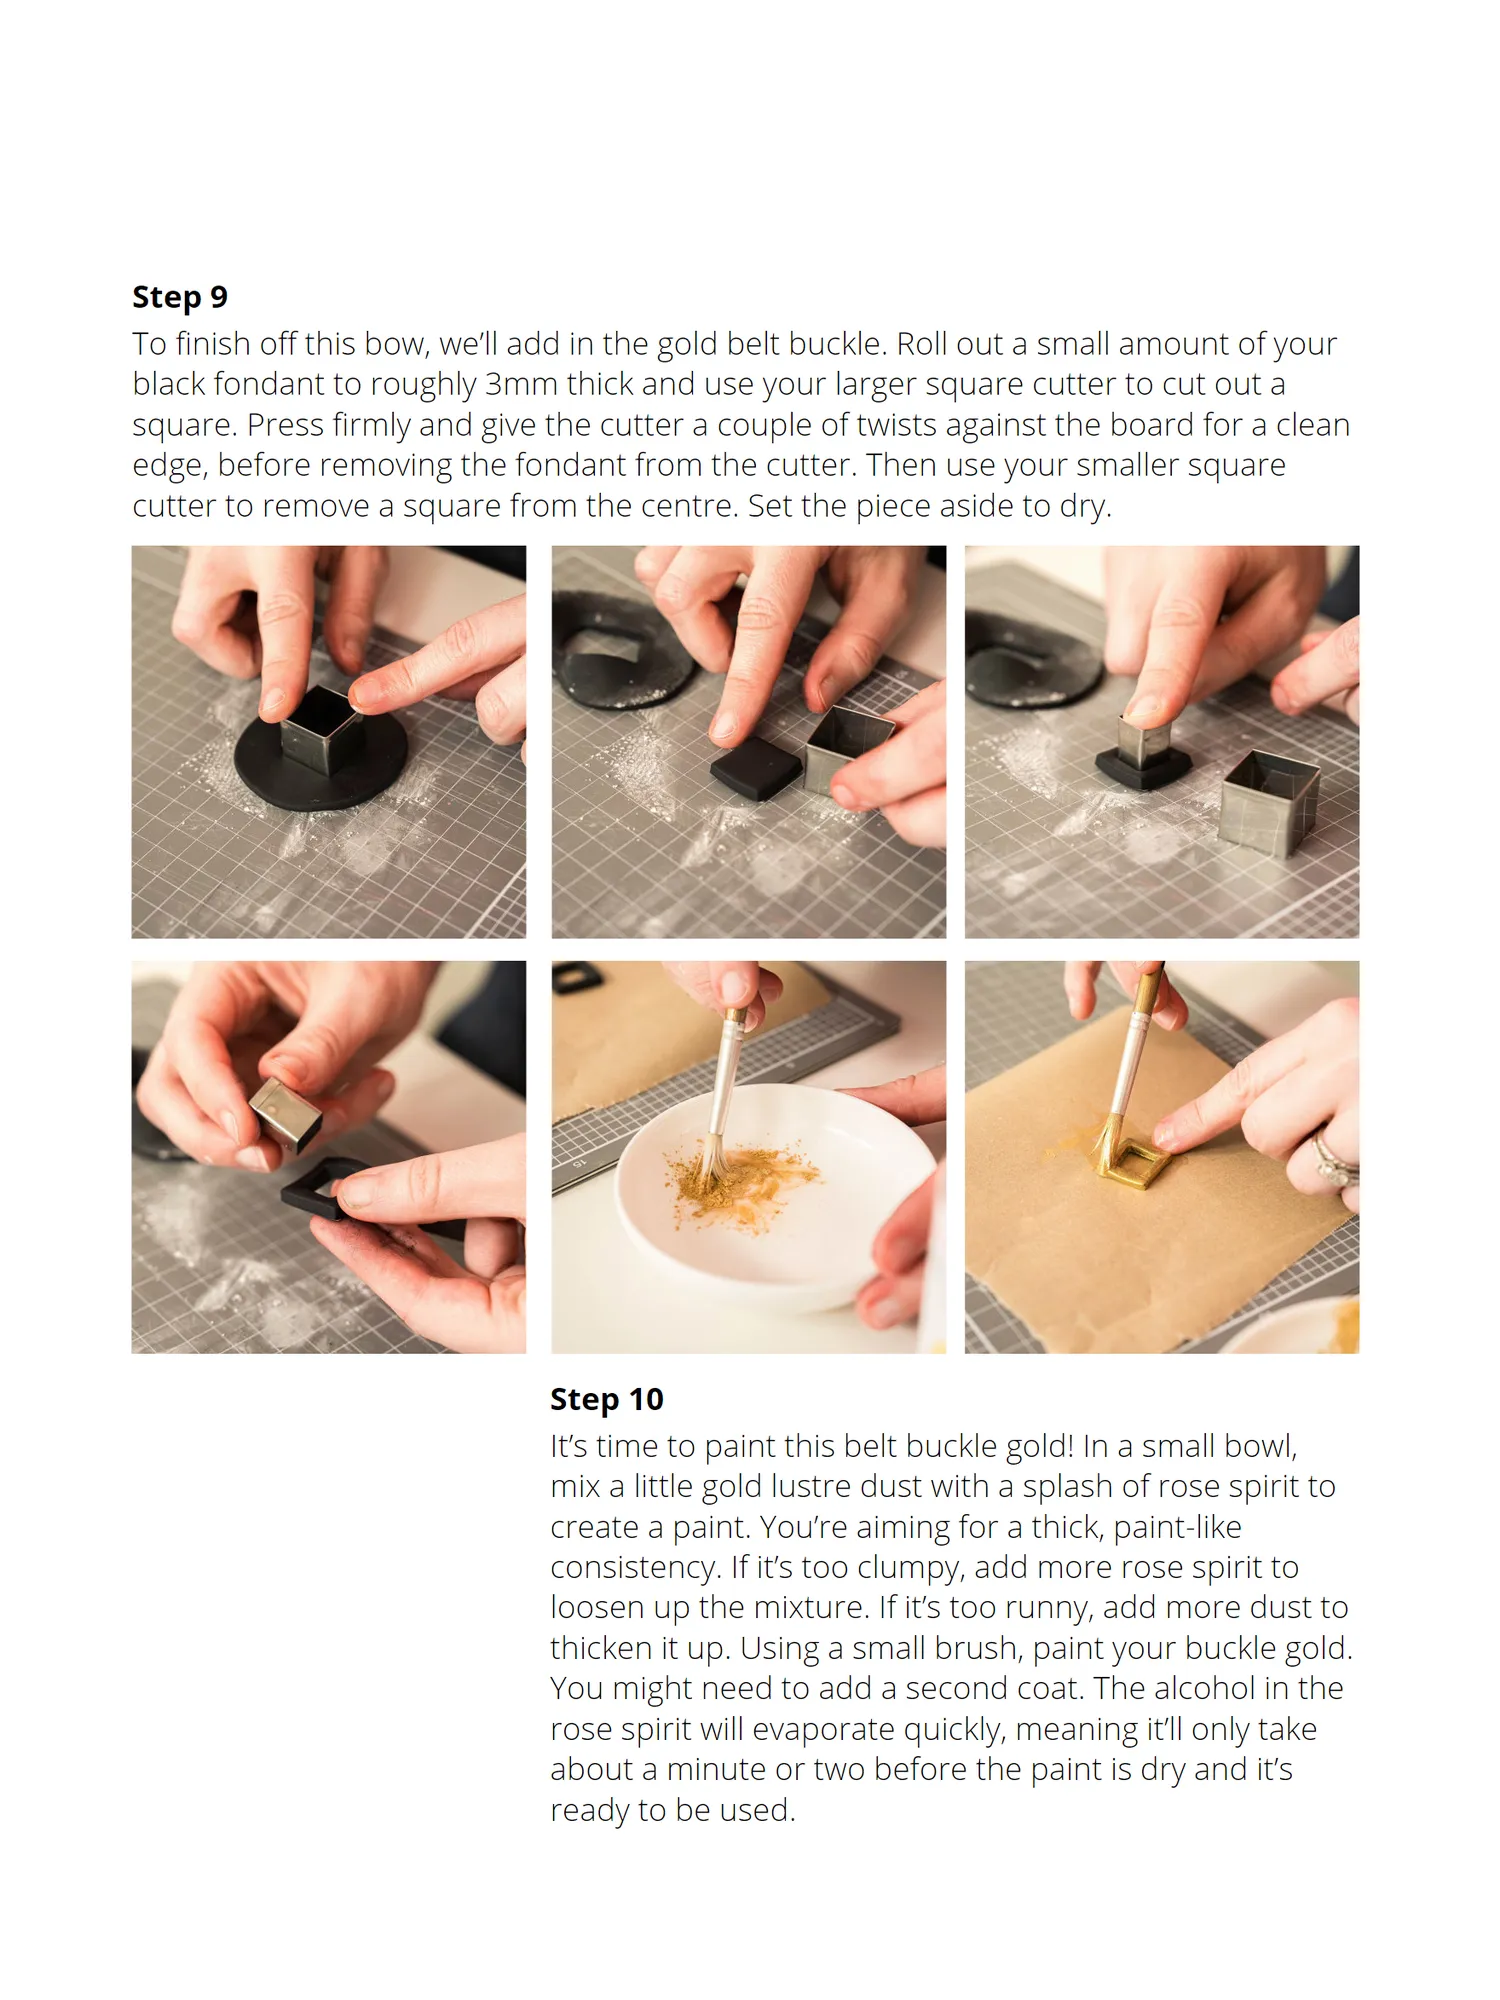
Step 9 To finish off this bow, we’ll add in the gold belt buckle. Roll out a small amount of your black fondant to roughly 3mm thick and use your larger square cutter to cut out a square. Press firmly and give the cutter a couple of twists against the board for a clean edge, before removing the fondant from the cutter. Then use your smaller square cutter to remove a square from the centre. Set the piece aside to dry. Step 10 It’s time to paint this belt buckle gold! In a small bowl, mix a little gold lustre dust with a splash of rose spirit to create a paint. You’re aiming for a thick, paint-like consistency. If it’s too clumpy, add more rose spirit to loosen up the mixture. If it’s too runny, add more dust to thicken it up. Using a small brush, paint your buckle gold. You might need to add a second coat. The alcohol in the rose spirit will evaporate quickly, meaning it’ll only take about a minute or two before the paint is dry and it’s ready to be used.
Page 28 text
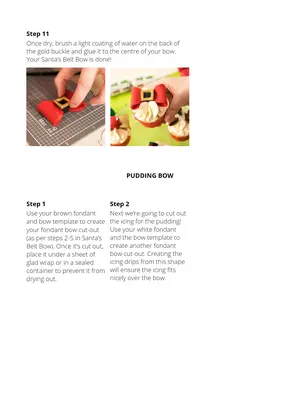
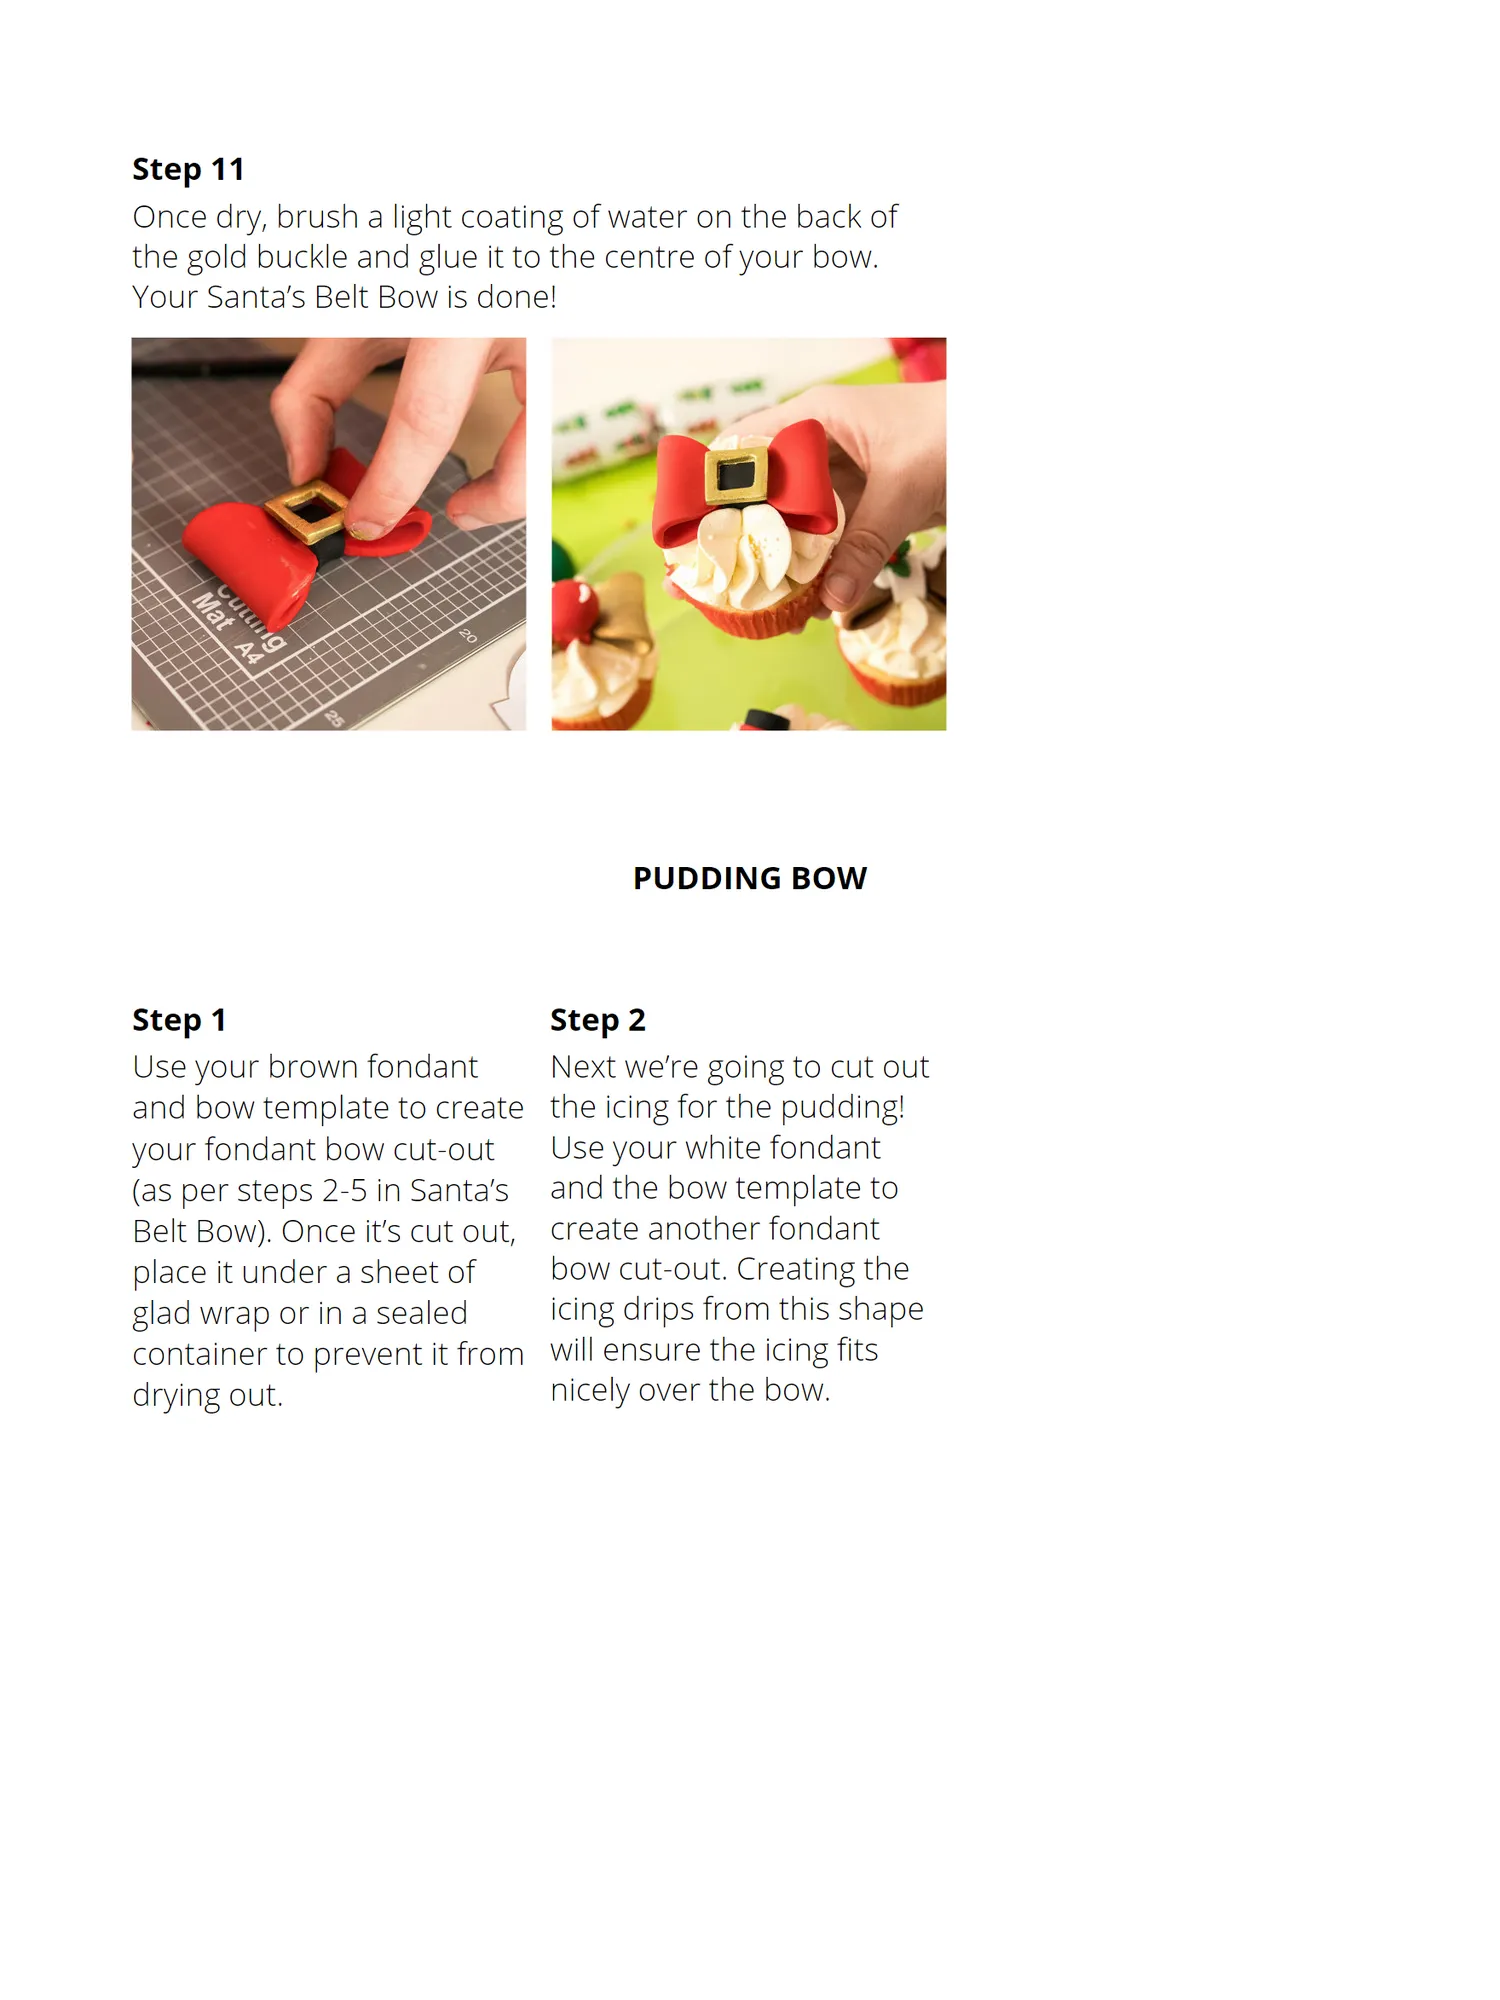
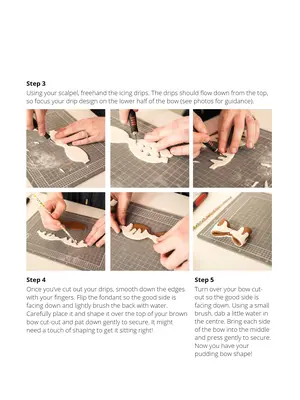
Step 11 Once dry, brush a light coating of water on the back of the gold buckle and glue it to the centre of your bow. Your Santa’s Belt Bow is done! PUDDING BOW Step 1 Step 2 Use your brown fondant Next we’re going to cut out and bow template to create the icing for the pudding! your fondant bow cut-out Use your white fondant (as per steps 2-5 in Santa’s and the bow template to Belt Bow). Once it’s cut out, create another fondant place it under a sheet of bow cut-out. Creating the glad wrap or in a sealed icing drips from this shape container to prevent it from will ensure the icing fits drying out. nicely over the bow.
Page 29 text
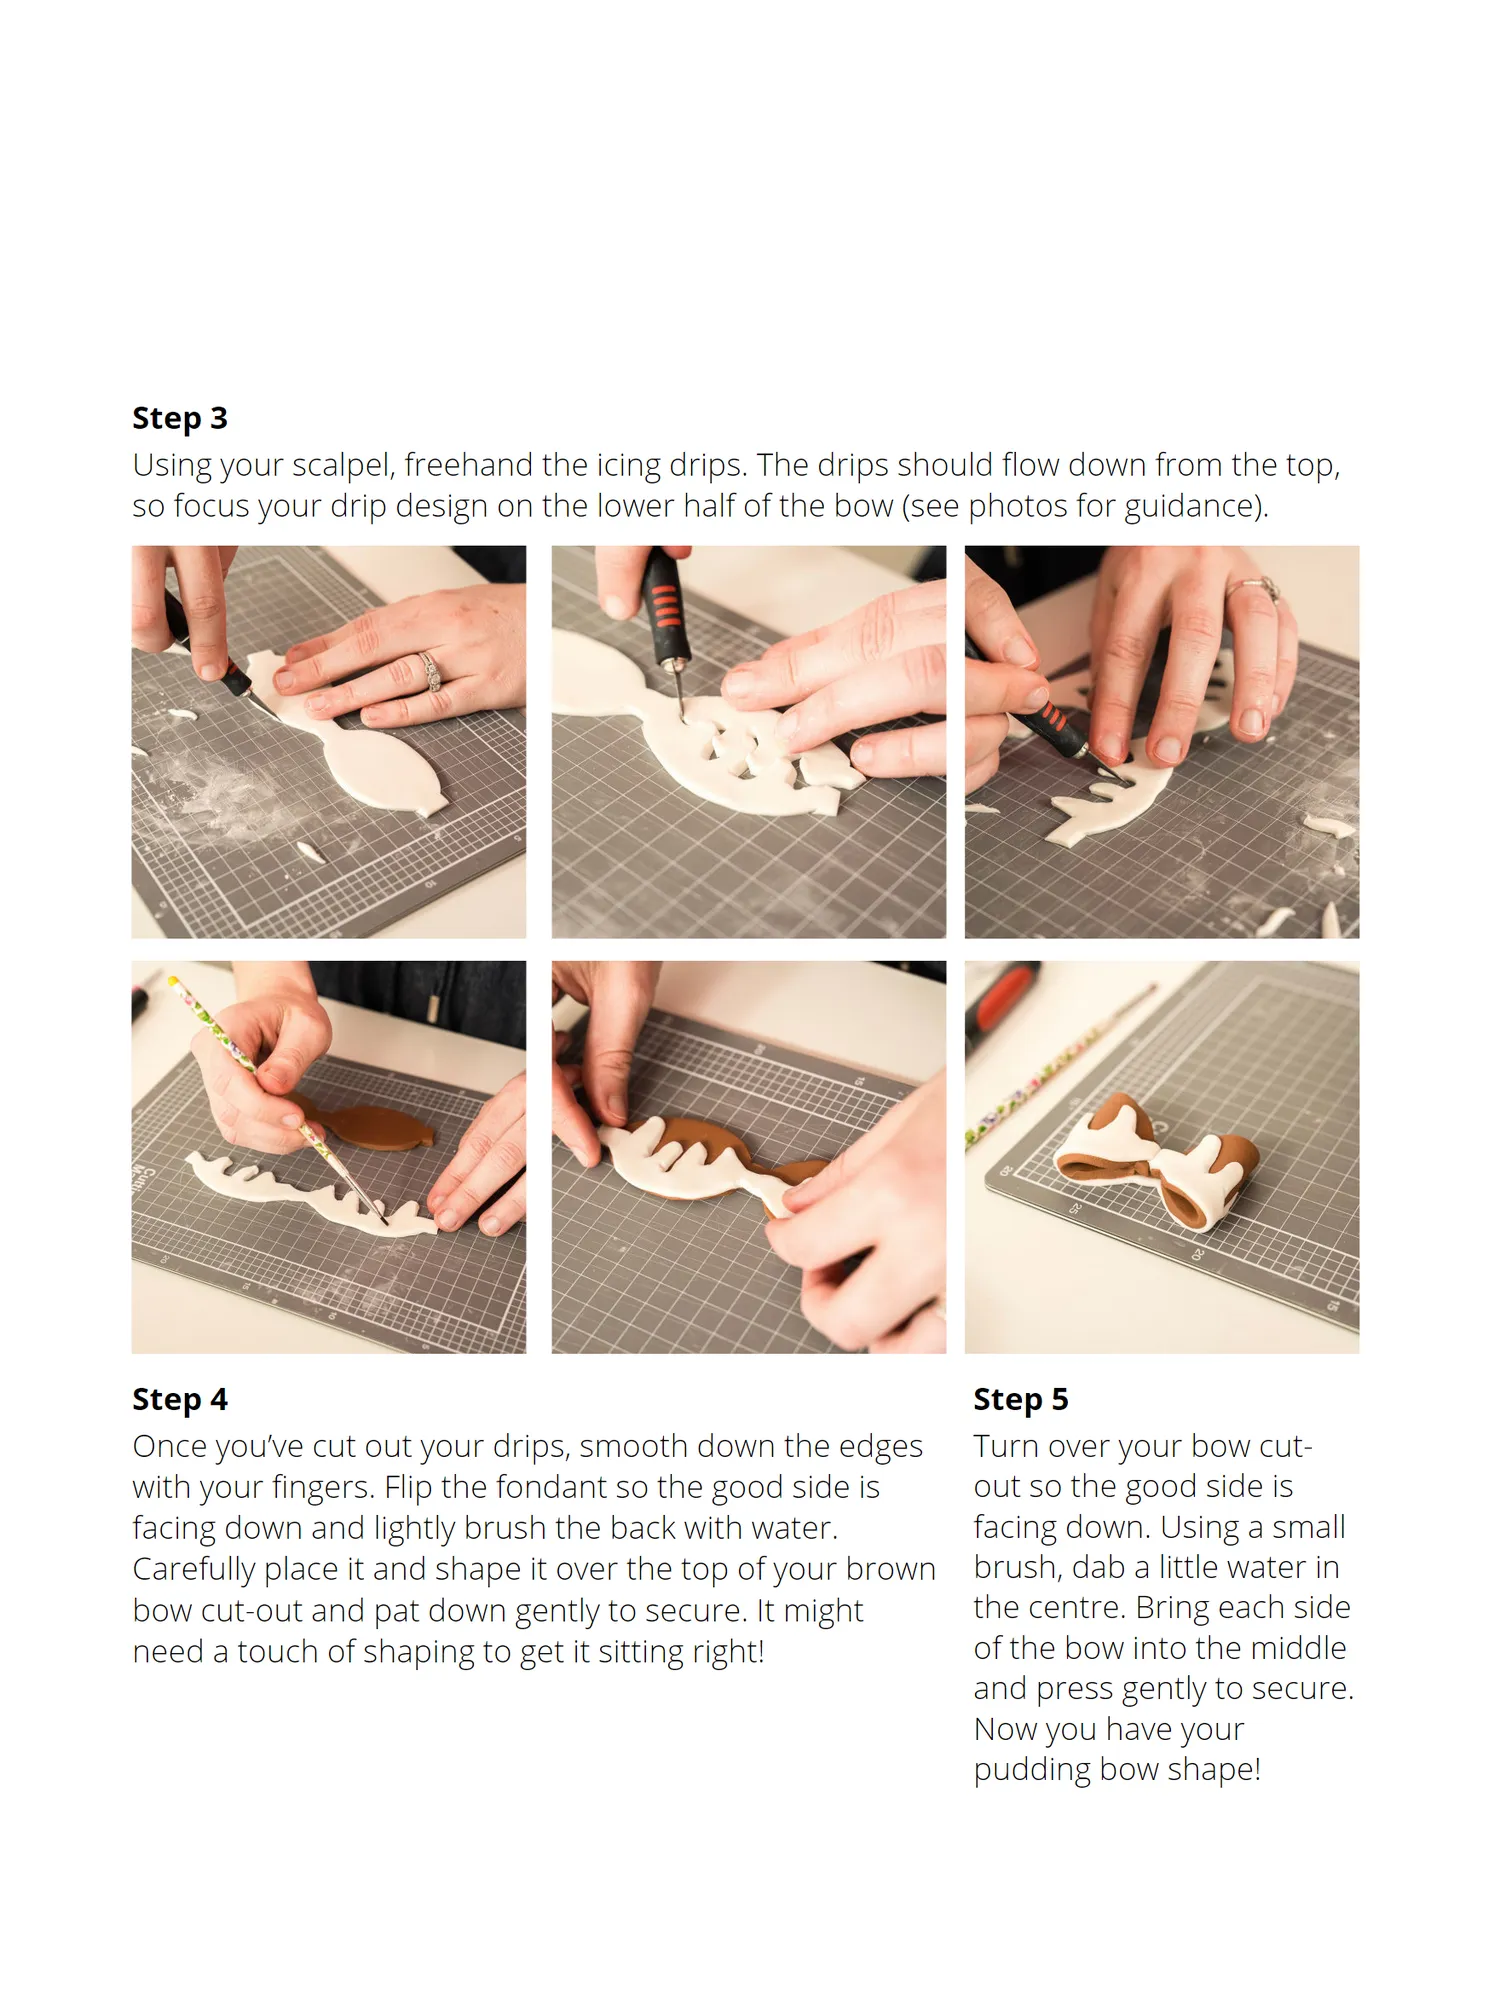
Step 3 Using your scalpel, freehand the icing drips. The drips should flow down from the top, so focus your drip design on the lower half of the bow (see photos for guidance). Step 4 Step 5 Once you’ve cut out your drips, smooth down the edges Turn over your bow cut- with your fingers. Flip the fondant so the good side is out so the good side is facing down and lightly brush the back with water. facing down. Using a small Carefully place it and shape it over the top of your brown brush, dab a little water in bow cut-out and pat down gently to secure. It might the centre. Bring each side need a touch of shaping to get it sitting right! of the bow into the middle and press gently to secure. Now you have your pudding bow shape!
Page 30 text
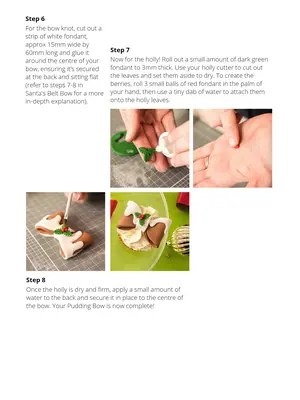
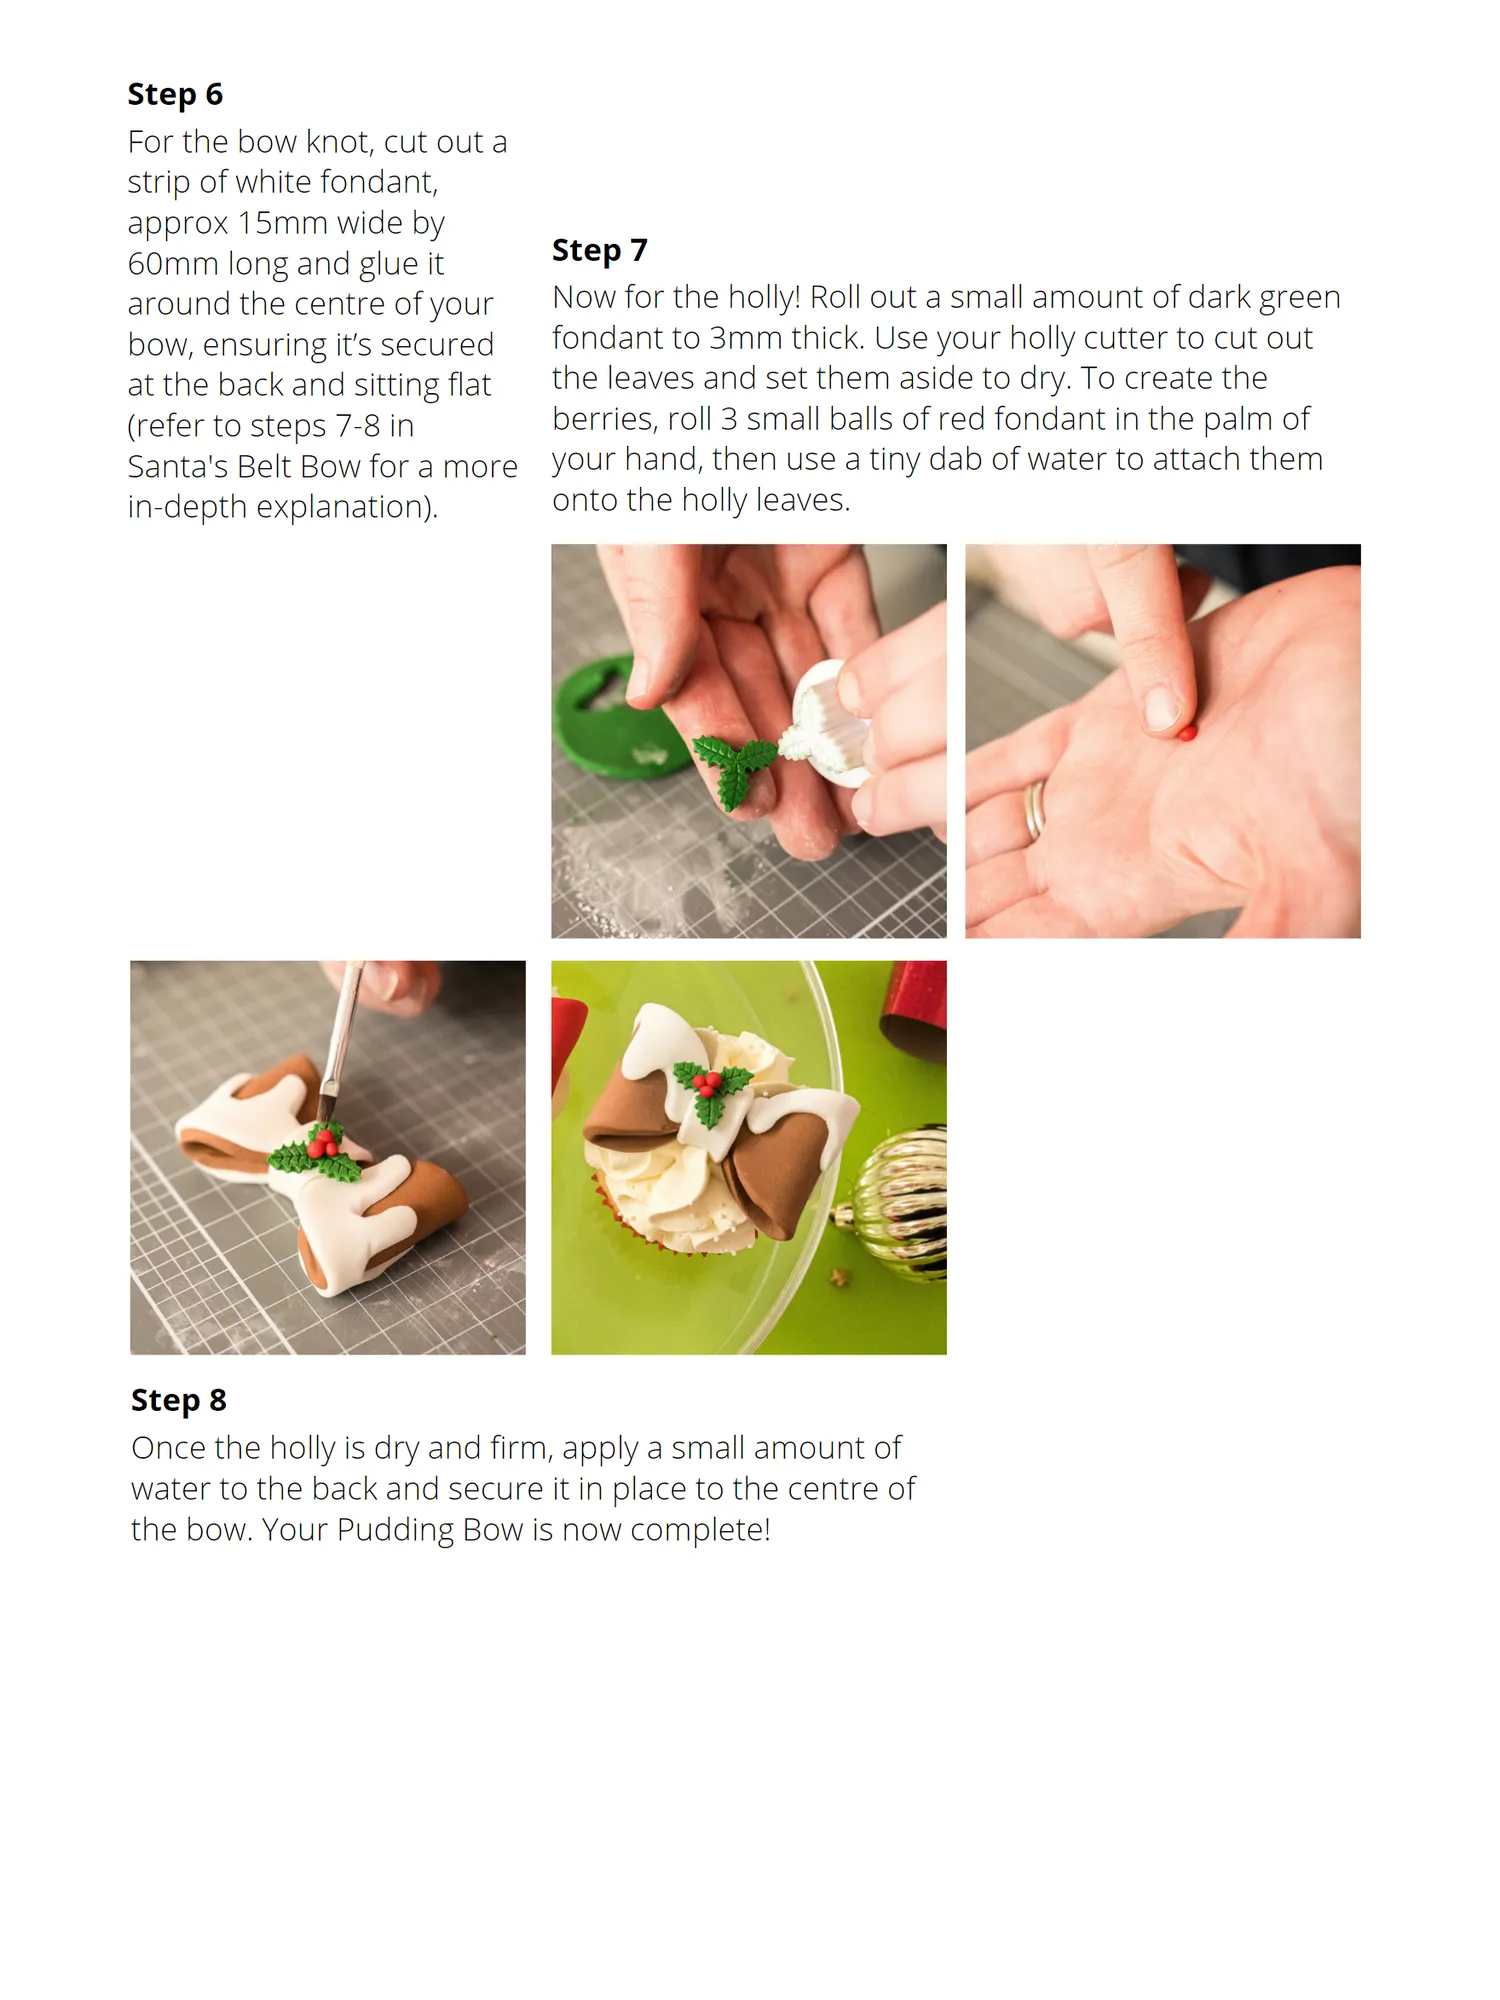
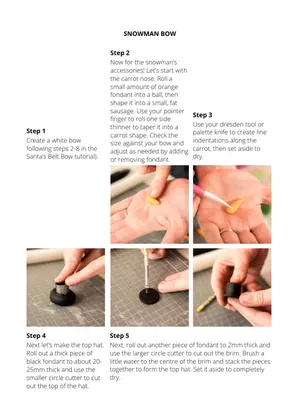
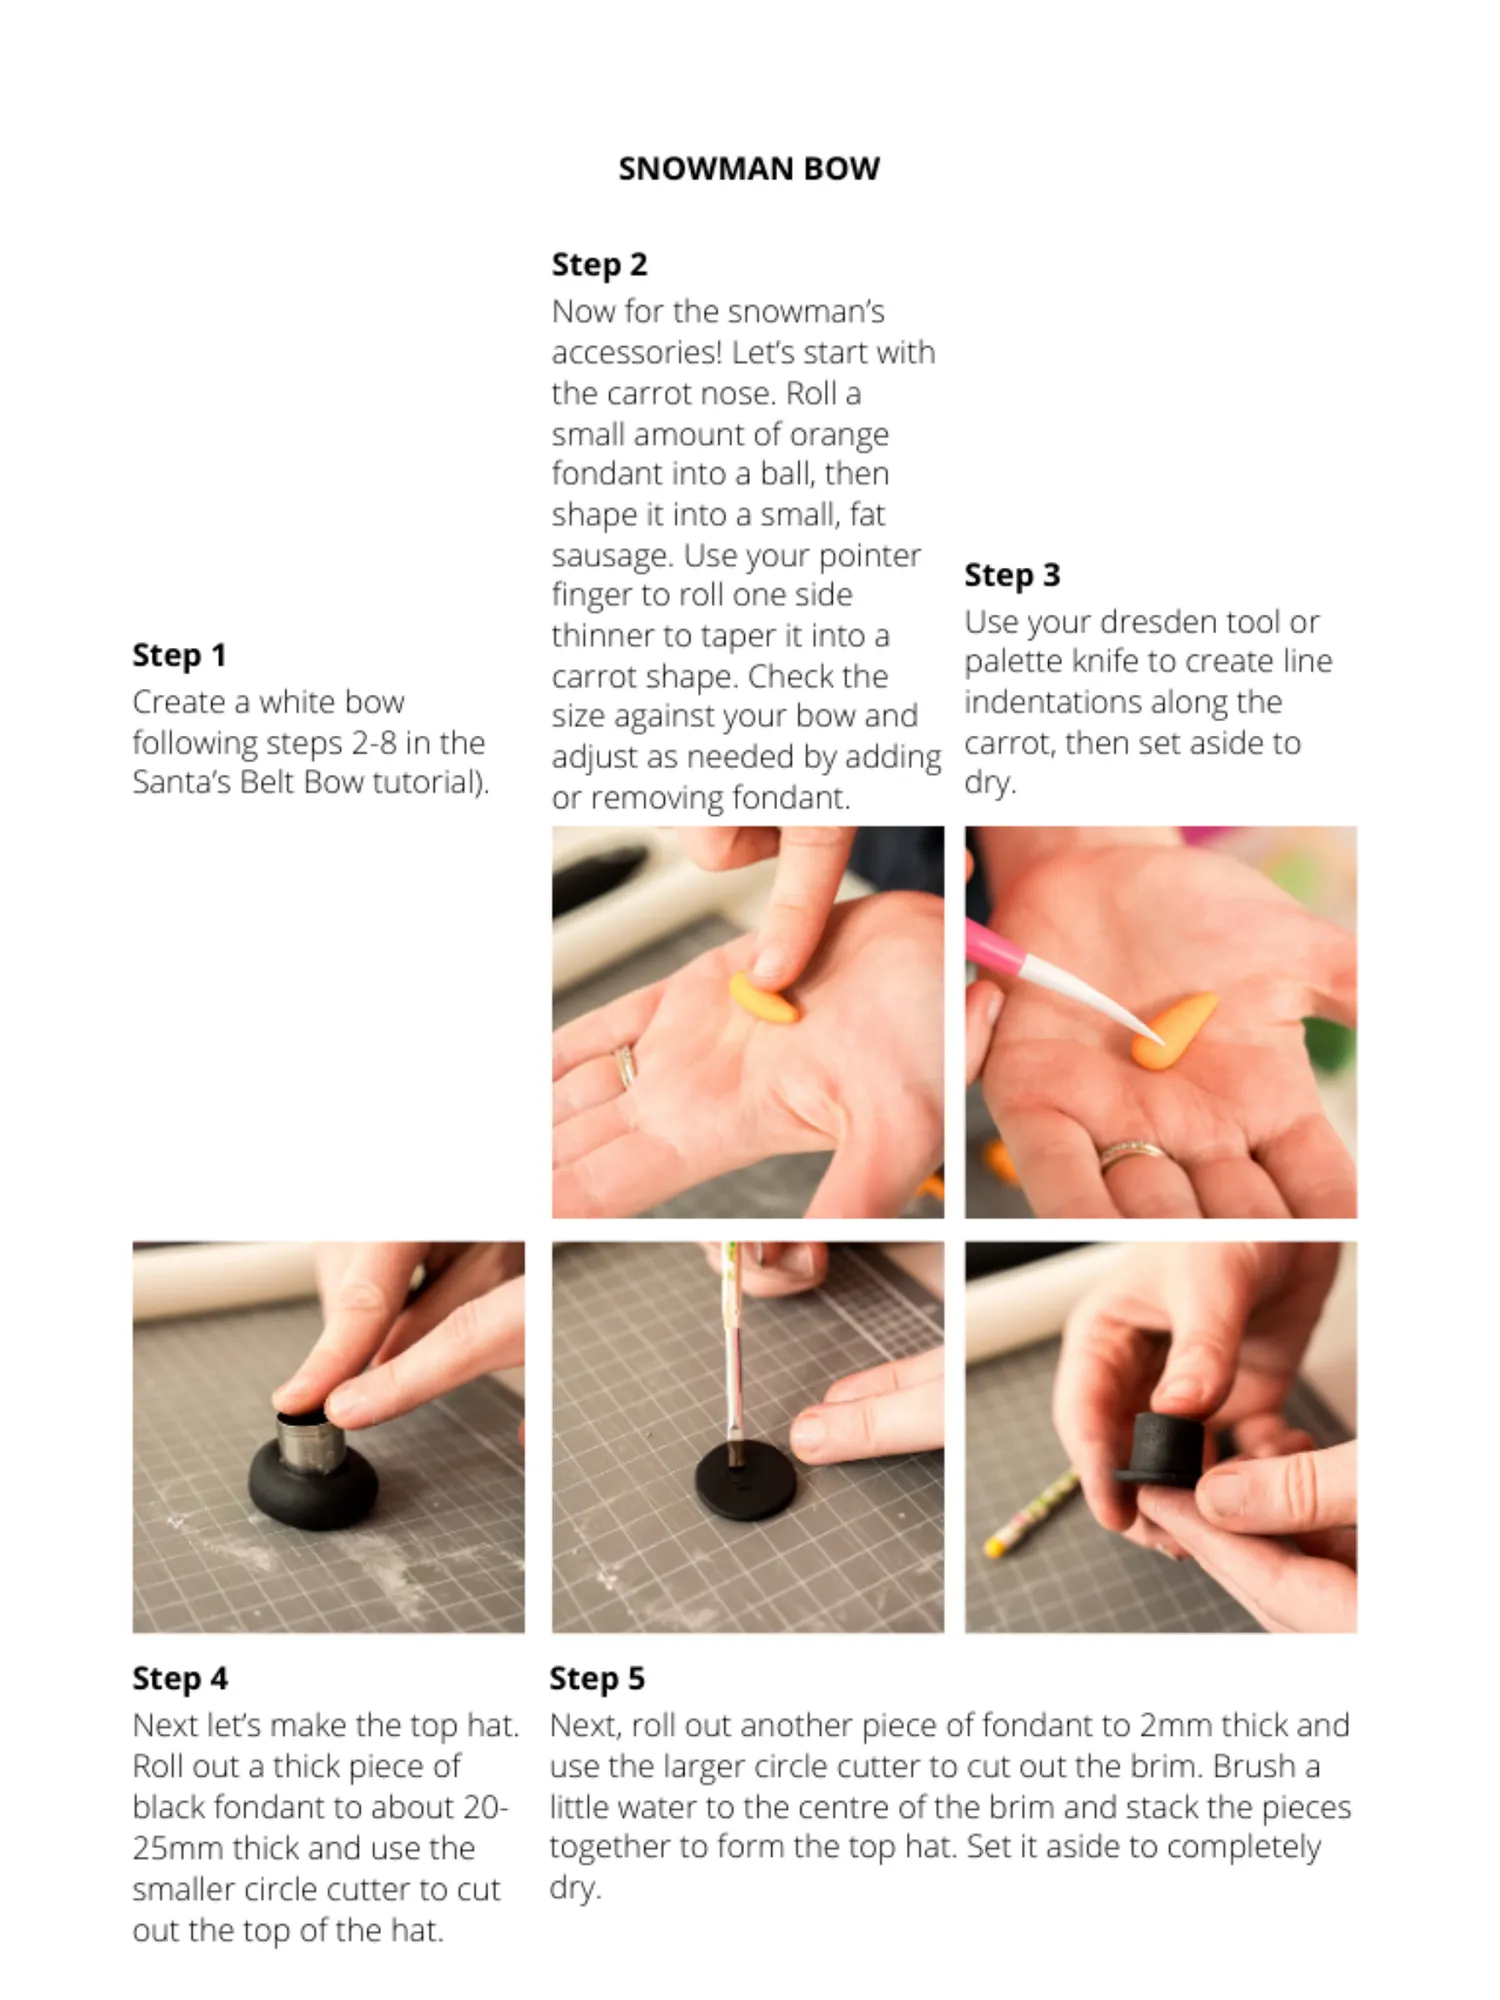
Step 6 For the bow knot, cut out a strip of white fondant, approx 15mm wide by 60mm long and glue it around the centre of your bow, ensuring it’ s secured at the back and sitting flat( refer to steps 7-8 in Santa ' s Belt Bow for a more in-depth explanation). Step 7 Now for the holly! Roll out a small amount of dark green fondant to 3mm thick. Use your holly cutter to cut out the leaves and set them aside to dry. To create the berries, roll 3 small balls of red fondant in the palm of your hand, then use a tiny dab of water to attach them onto the holly leaves. Step 8 Once the holly is dry and firm, apply a small amount of water to the back and secure it in place to the centre of the bow. Your Pudding Bow is now complete!
Page 31 text
SNOWMAN BOW Step 1 Create a white bow following steps 2-8 in the Santa’ s Belt Bow tutorial). Step 2 Now for the snowman’ s accessories! Let’ s start with the carrot nose. Roll a small amount of orange fondant into a ball, then shape it into a small, fat sausage. Use your pointer finger to roll one side thinner to taper it into a carrot shape. Check the size against your bow and adjust as needed by adding or removing fondant. Step 3 Use your dresden tool or palette knife to create line indentations along the carrot, then set aside to dry. Step 4 Next let’ s make the top hat. Roll out a thick piece of black fondant to about 20- 25mm thick and use the smaller circle cutter to cut out the top of the hat. Step 5 Next, roll out another piece of fondant to 2mm thick and use the larger circle cutter to cut out the brim. Brush a little water to the centre of the brim and stack the pieces together to form the top hat. Set it aside to completely dry.
Page 32 text
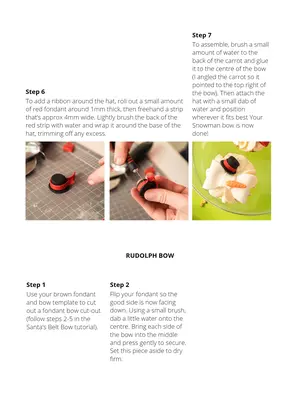
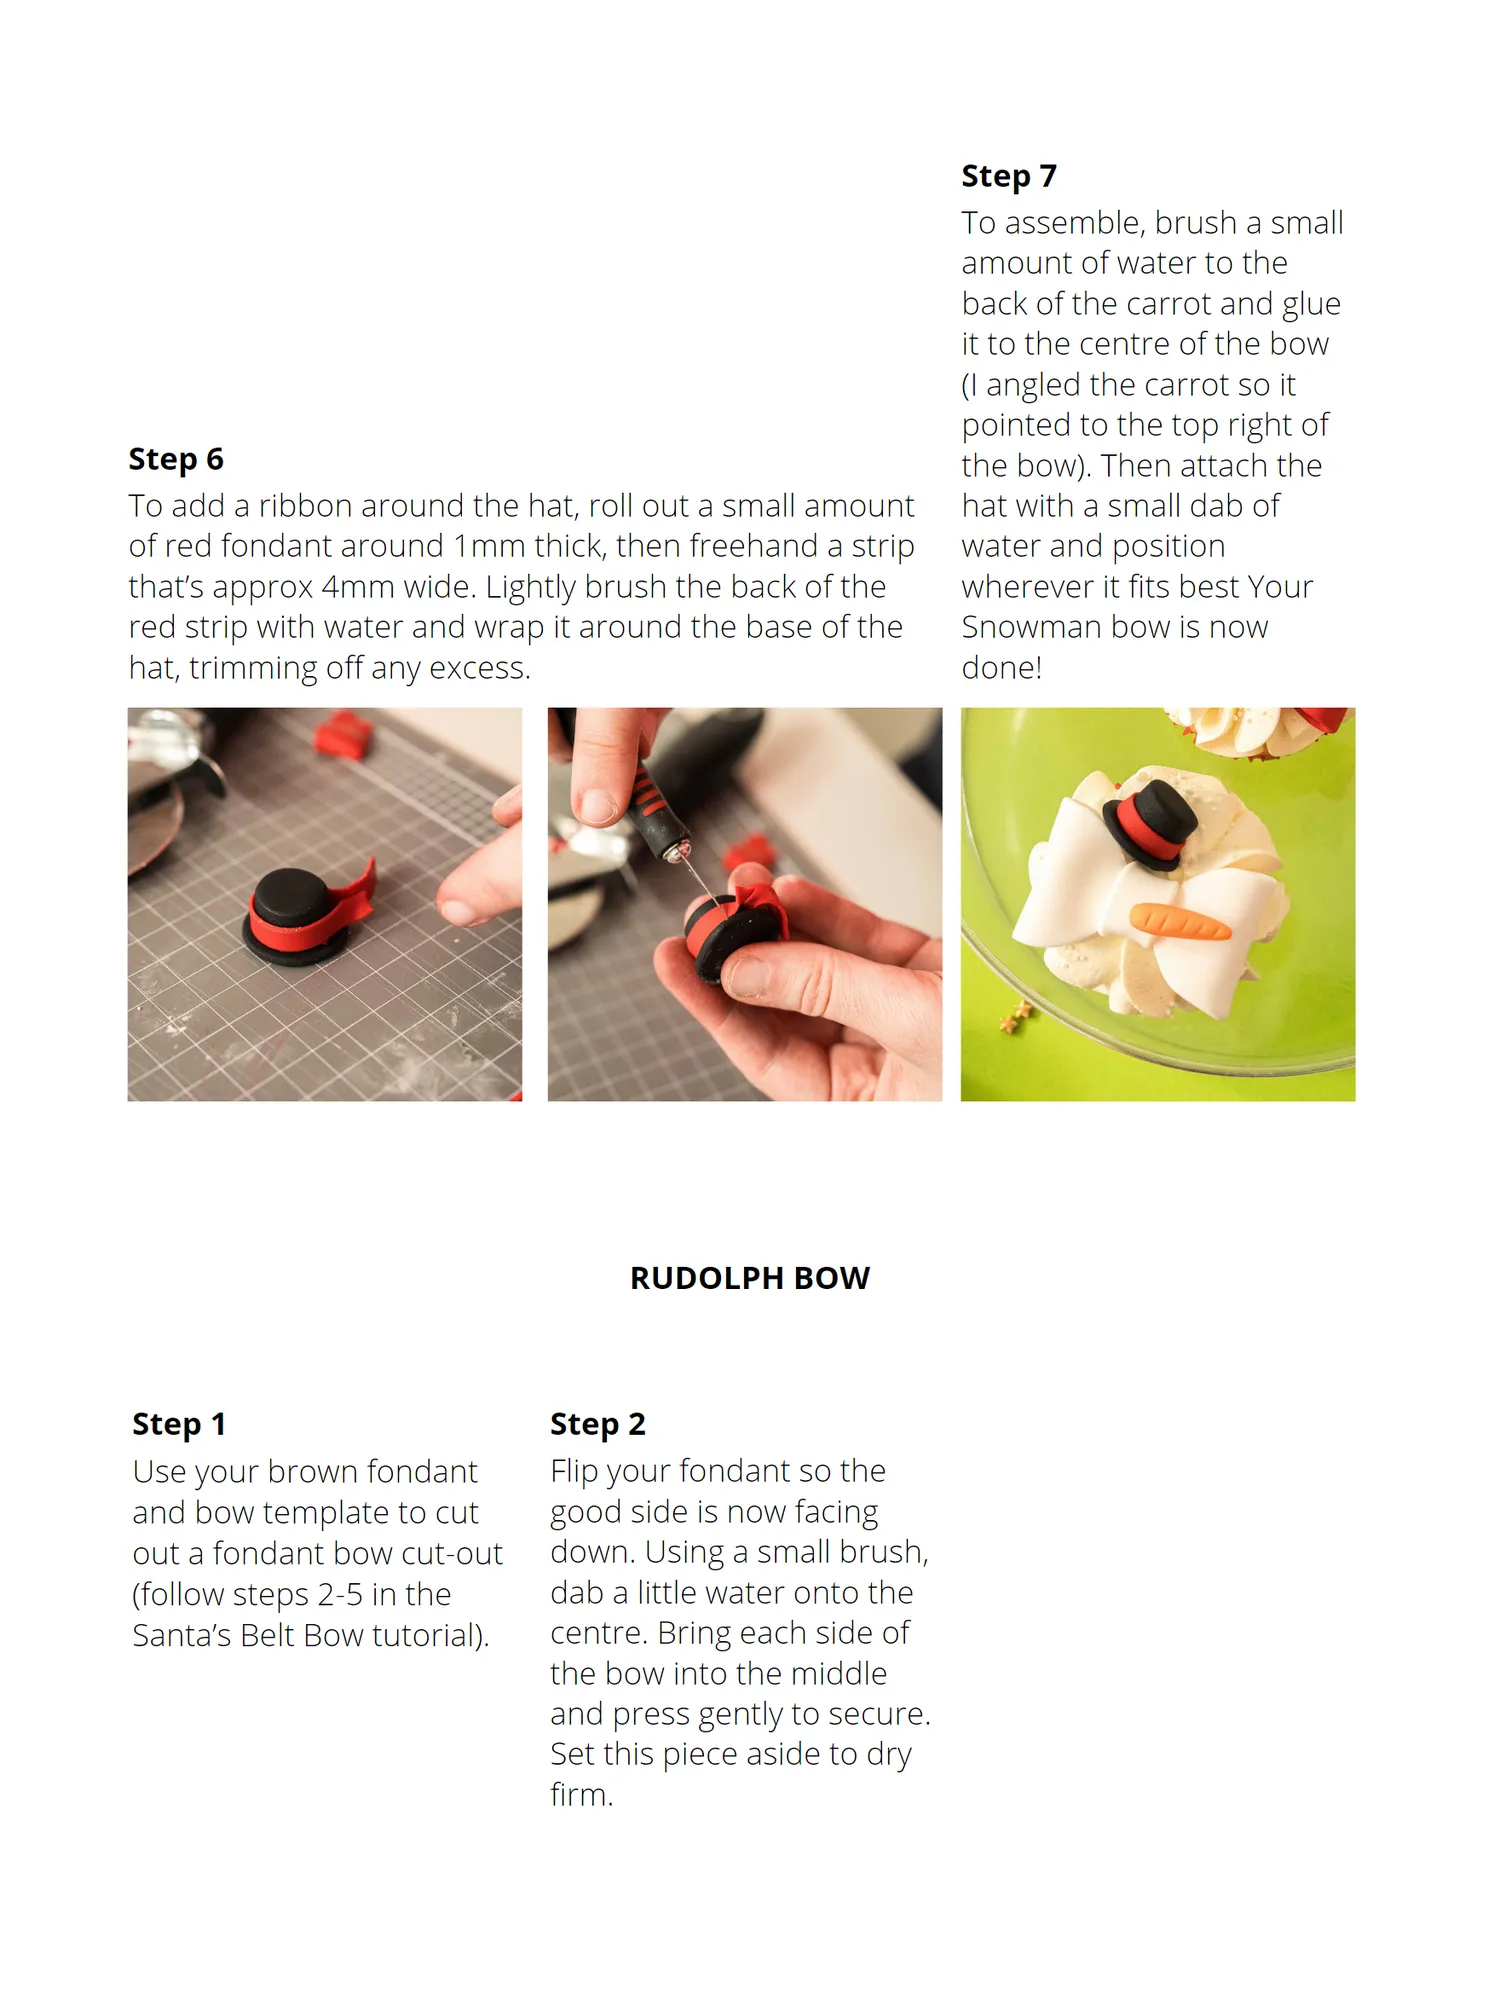
Step 7 To assemble, brush a small amount of water to the back of the carrot and glue it to the centre of the bow (I angled the carrot so it pointed to the top right of Step 6 the bow). Then attach the To add a ribbon around the hat, roll out a small amount hat with a small dab of of red fondant around 1mm thick, then freehand a strip water and position that’s approx 4mm wide. Lightly brush the back of the wherever it fits best Your red strip with water and wrap it around the base of the Snowman bow is now hat, trimming off any excess. done! RUDOLPH BOW Step 1 Step 2 Use your brown fondant Flip your fondant so the and bow template to cut good side is now facing out a fondant bow cut-out down. Using a small brush, (follow steps 2-5 in the dab a little water onto the Santa’s Belt Bow tutorial). centre. Bring each side of the bow into the middle and press gently to secure. Set this piece aside to dry firm.
Page 33 text
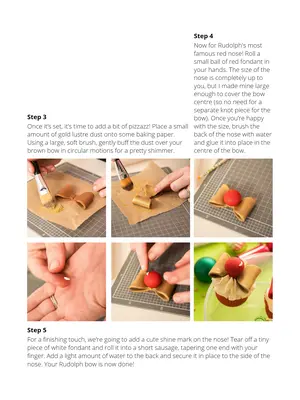
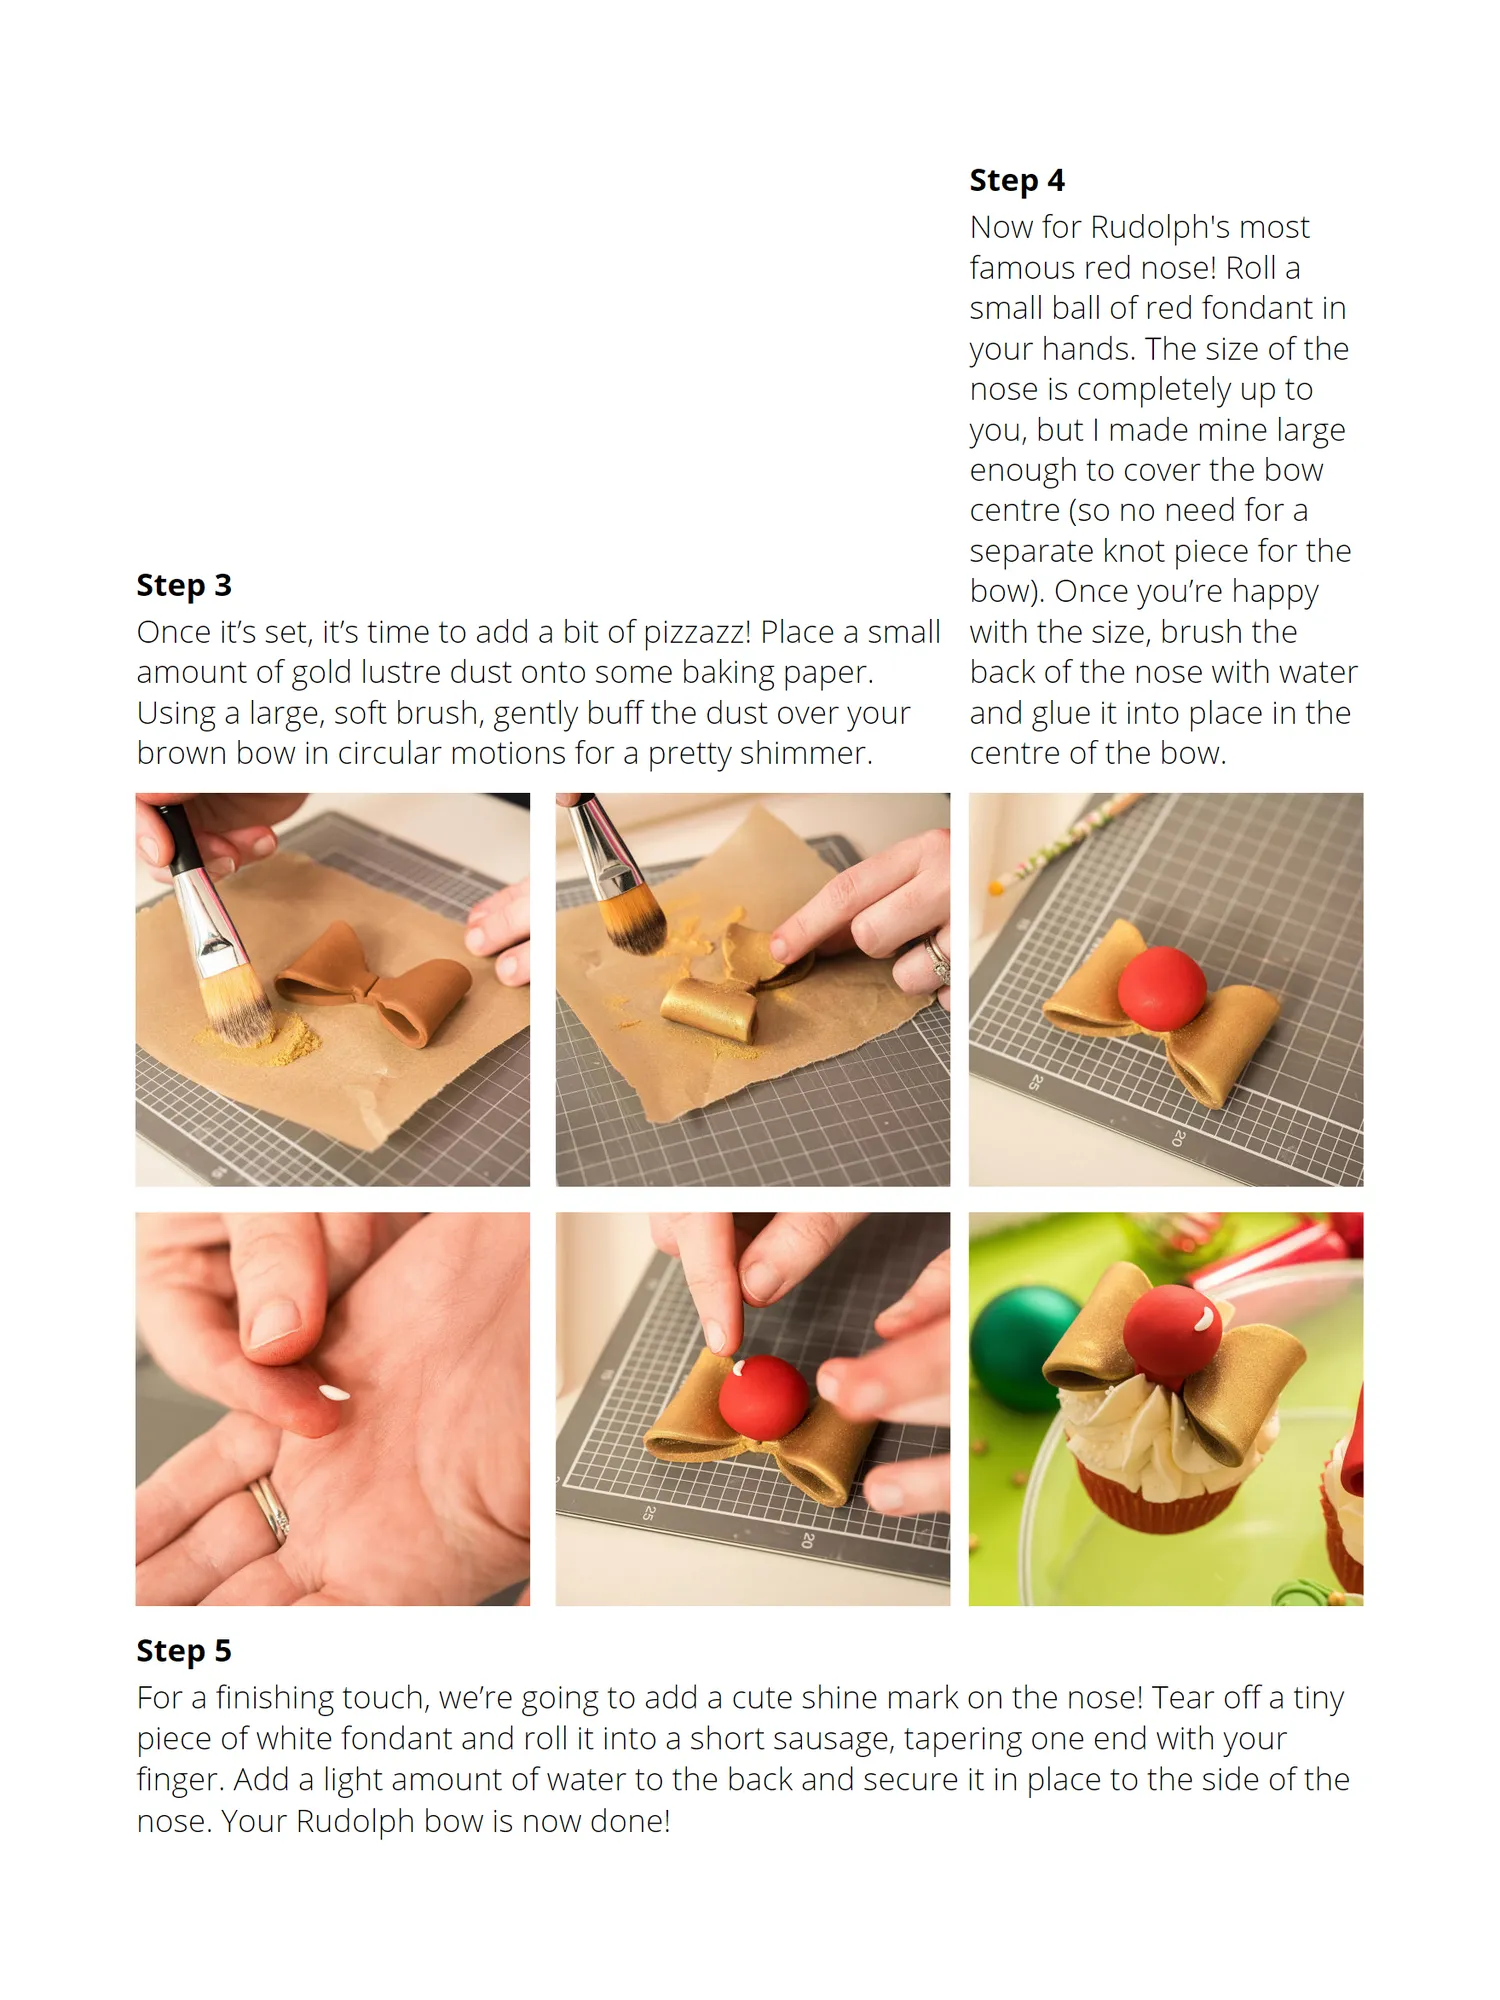
Step 4 Now for Rudolph's most famous red nose! Roll a small ball of red fondant in your hands. The size of the nose is completely up to you, but I made mine large enough to cover the bow centre (so no need for a separate knot piece for the Step 3 bow). Once you’re happy Once it’s set, it’s time to add a bit of pizzazz! Place a small with the size, brush the amount of gold lustre dust onto some baking paper. back of the nose with water Using a large, soft brush, gently buff the dust over your and glue it into place in the brown bow in circular motions for a pretty shimmer. centre of the bow. Step 5 For a finishing touch, we’re going to add a cute shine mark on the nose! Tear off a tiny piece of white fondant and roll it into a short sausage, tapering one end with your finger. Add a light amount of water to the back and secure it in place to the side of the nose. Your Rudolph bow is now done!
Page 34 text
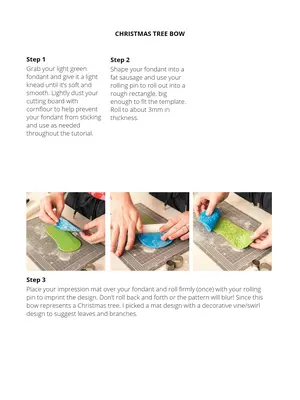
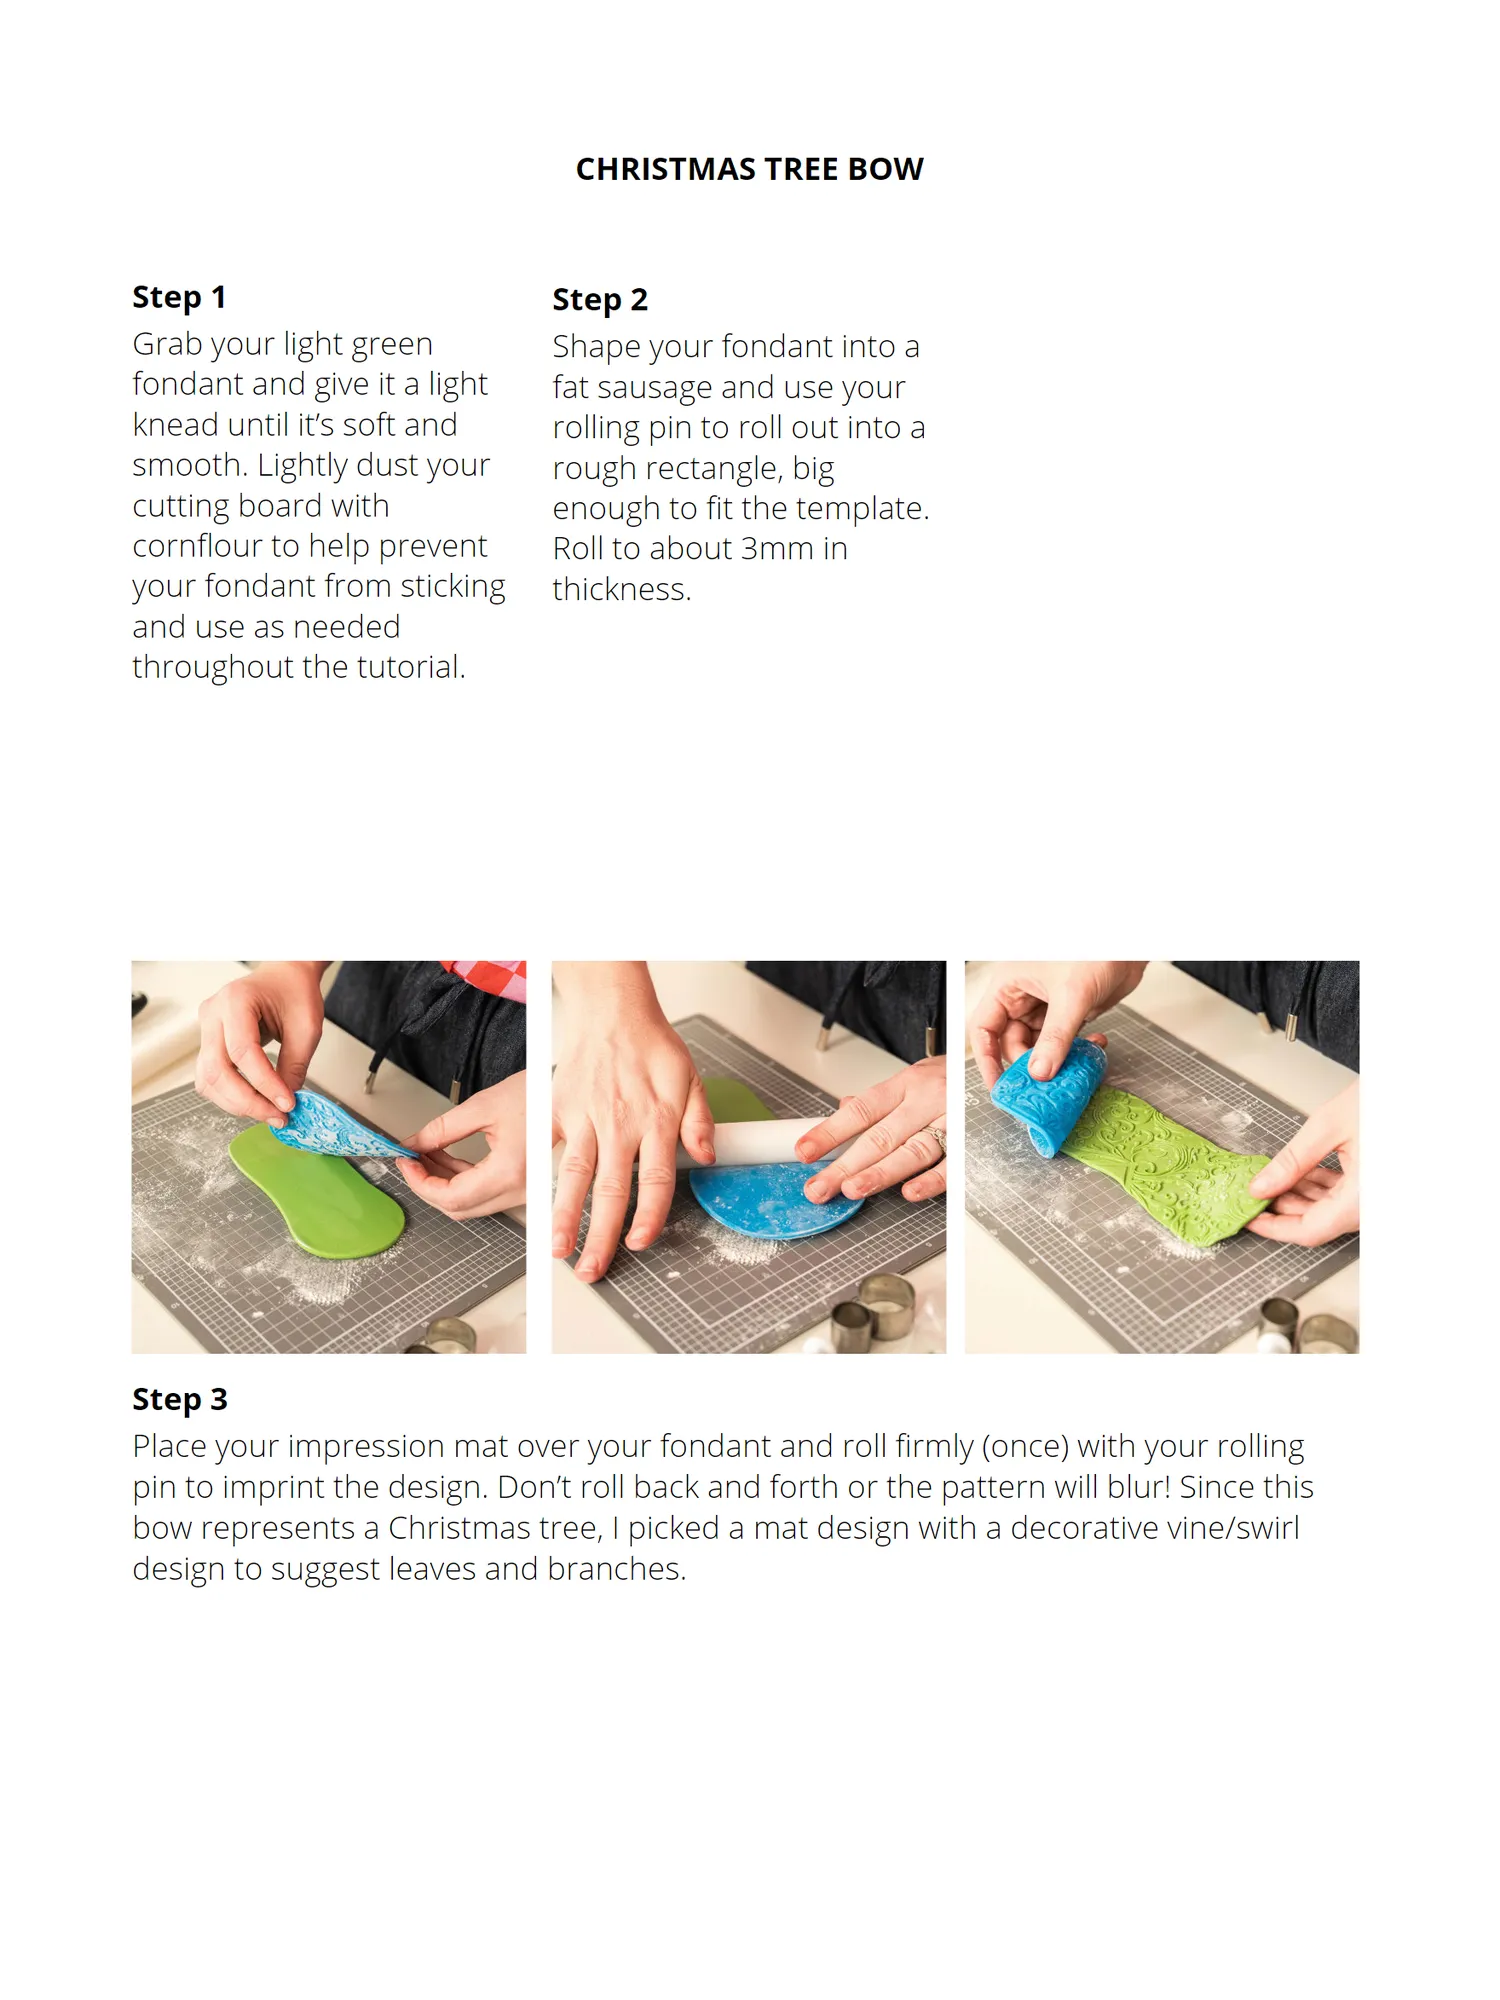
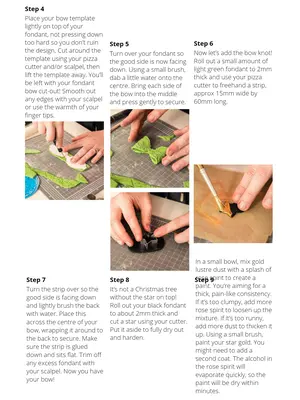
CHRISTMAS TREE BOW Step 1 Step 2 Grab your light green Shape your fondant into a fondant and give it a light fat sausage and use your knead until it’s soft and rolling pin to roll out into a smooth. Lightly dust your rough rectangle, big cutting board with enough to fit the template. cornflour to help prevent Roll to about 3mm in your fondant from sticking thickness. and use as needed throughout the tutorial. Step 3 Place your impression mat over your fondant and roll firmly (once) with your rolling pin to imprint the design. Don’t roll back and forth or the pattern will blur! Since this bow represents a Christmas tree, I picked a mat design with a decorative vine/swirl design to suggest leaves and branches.
Page 35 text
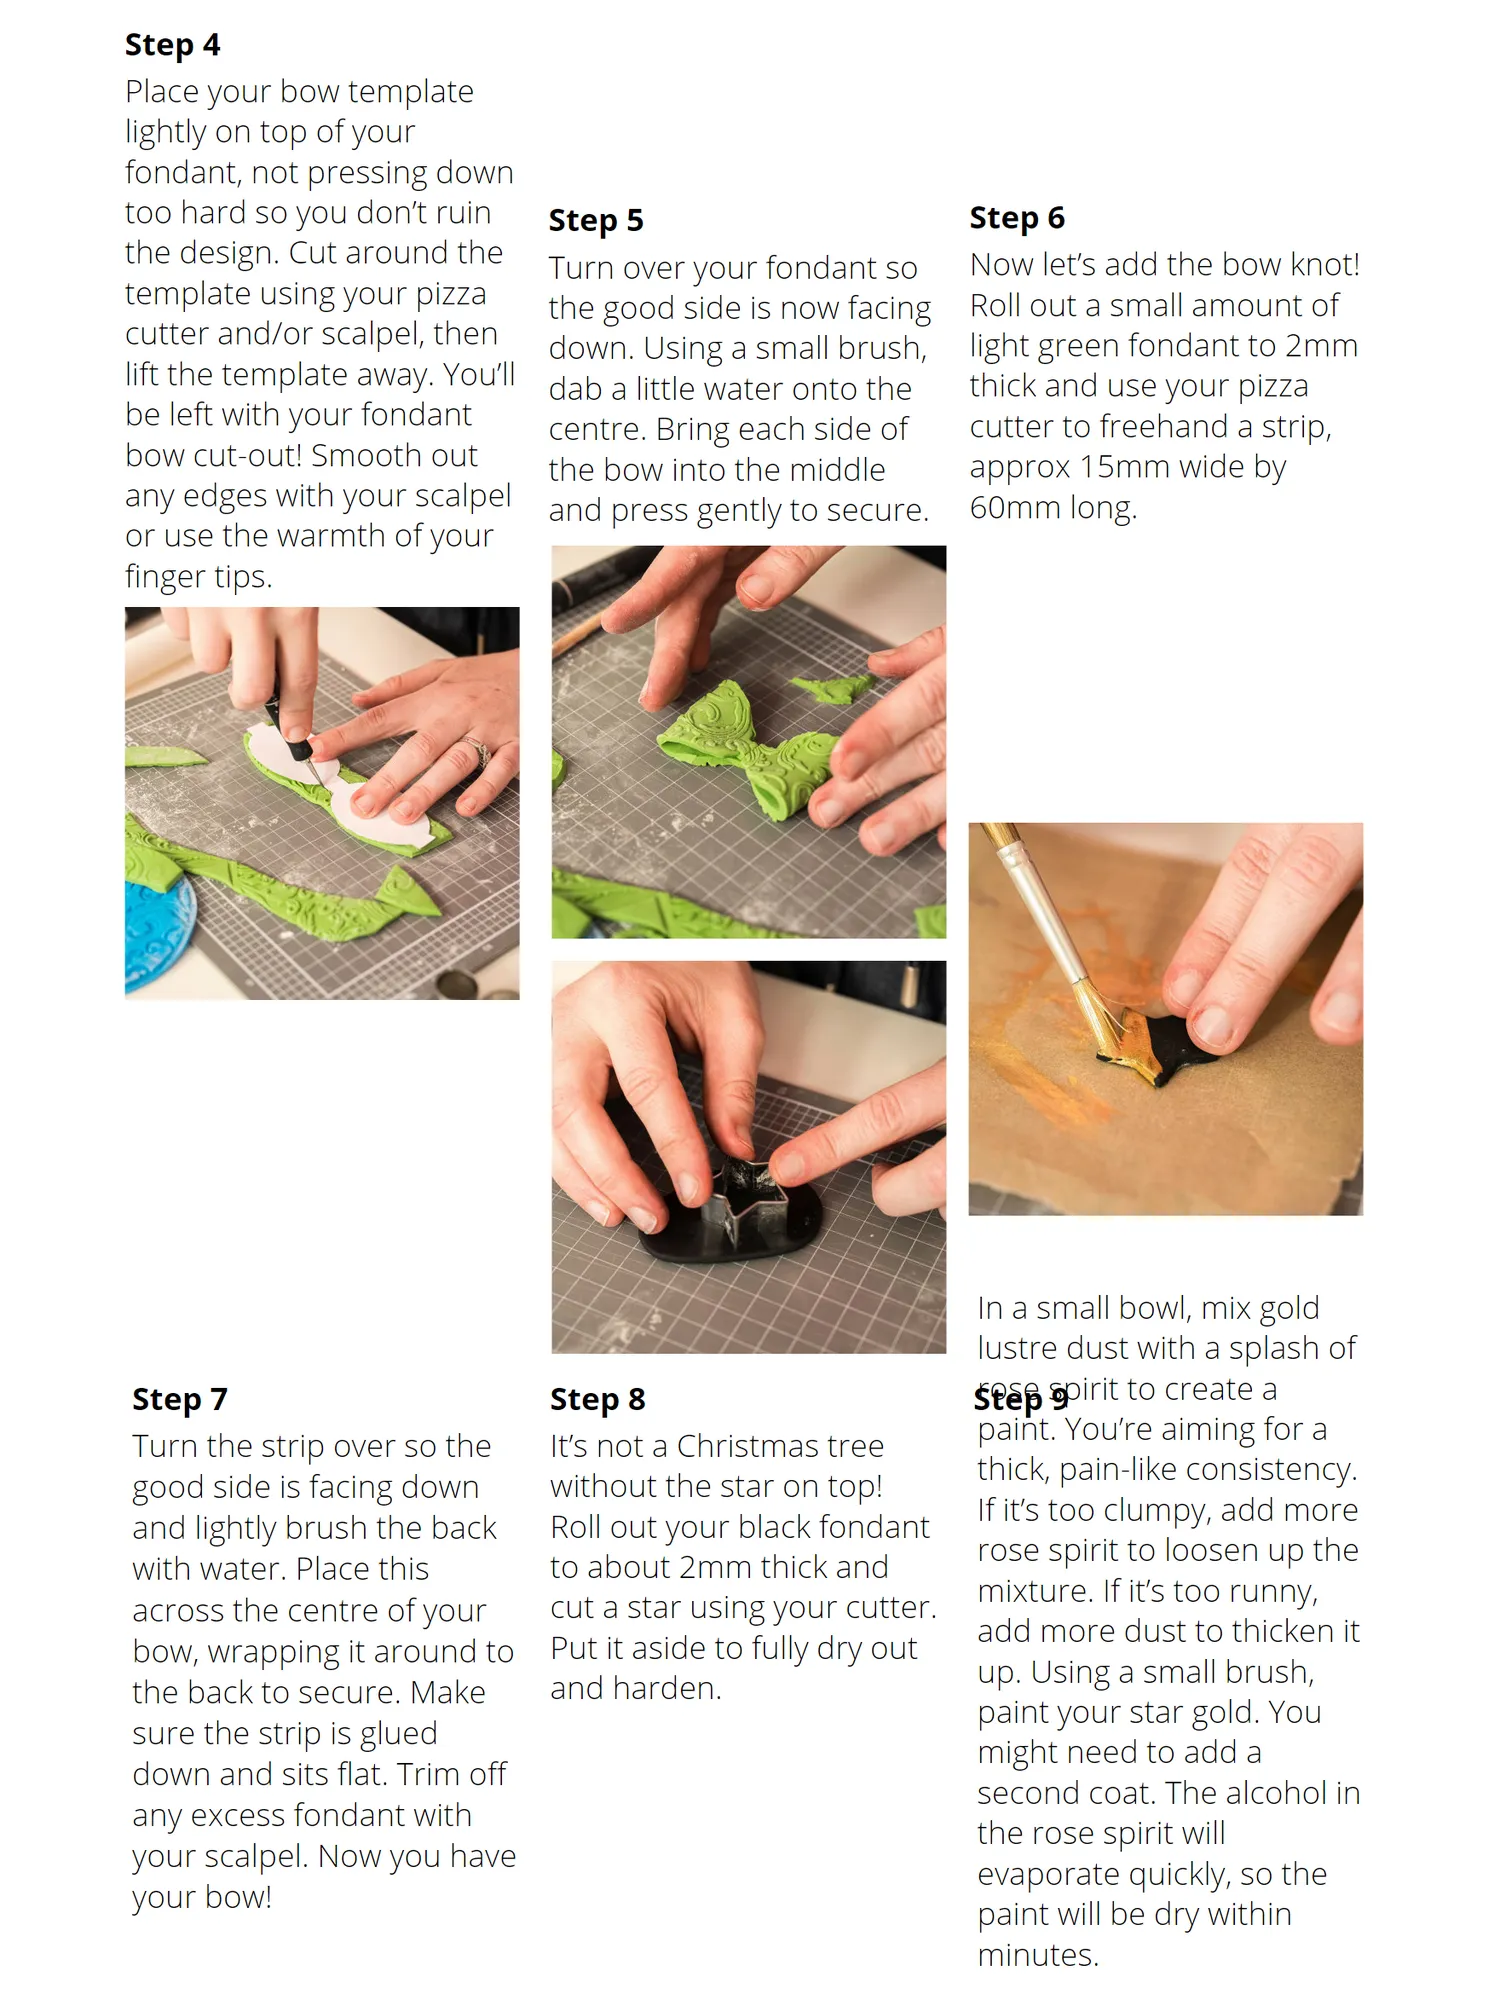
Step 4 Place your bow template lightly on top of your fondant, not pressing down too hard so you don’t ruin Step 5 Step 6 the design. Cut around the Turn over your fondant so Now let’s add the bow knot! template using your pizza the good side is now facing Roll out a small amount of cutter and/or scalpel, then down. Using a small brush, light green fondant to 2mm lift the template away. You’ll dab a little water onto the thick and use your pizza be left with your fondant centre. Bring each side of cutter to freehand a strip, bow cut-out! Smooth out the bow into the middle approx 15mm wide by any edges with your scalpel and press gently to secure. 60mm long. or use the warmth of your finger tips. In a small bowl, mix gold lustre dust with a splash of Step 7 Step 8 Step 9 rose spirit to create a paint. You’re aiming for a Turn the strip over so the It’s not a Christmas tree thick, pain-like consistency. good side is facing down without the star on top! If it’s too clumpy, add more and lightly brush the back Roll out your black fondant rose spirit to loosen up the with water. Place this to about 2mm thick and mixture. If it’s too runny, across the centre of your cut a star using your cutter. add more dust to thicken it bow, wrapping it around to Put it aside to fully dry out up. Using a small brush, the back to secure. Make and harden. paint your star gold. You sure the strip is glued might need to add a down and sits flat. Trim off second coat. The alcohol in any excess fondant with the rose spirit will your scalpel. Now you have evaporate quickly, so the your bow! paint will be dry within minutes.
Page 36 text
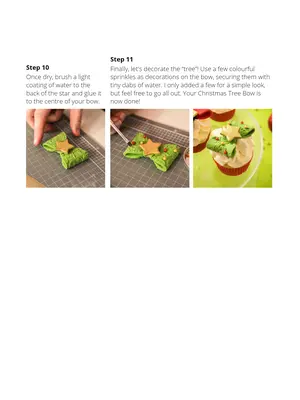
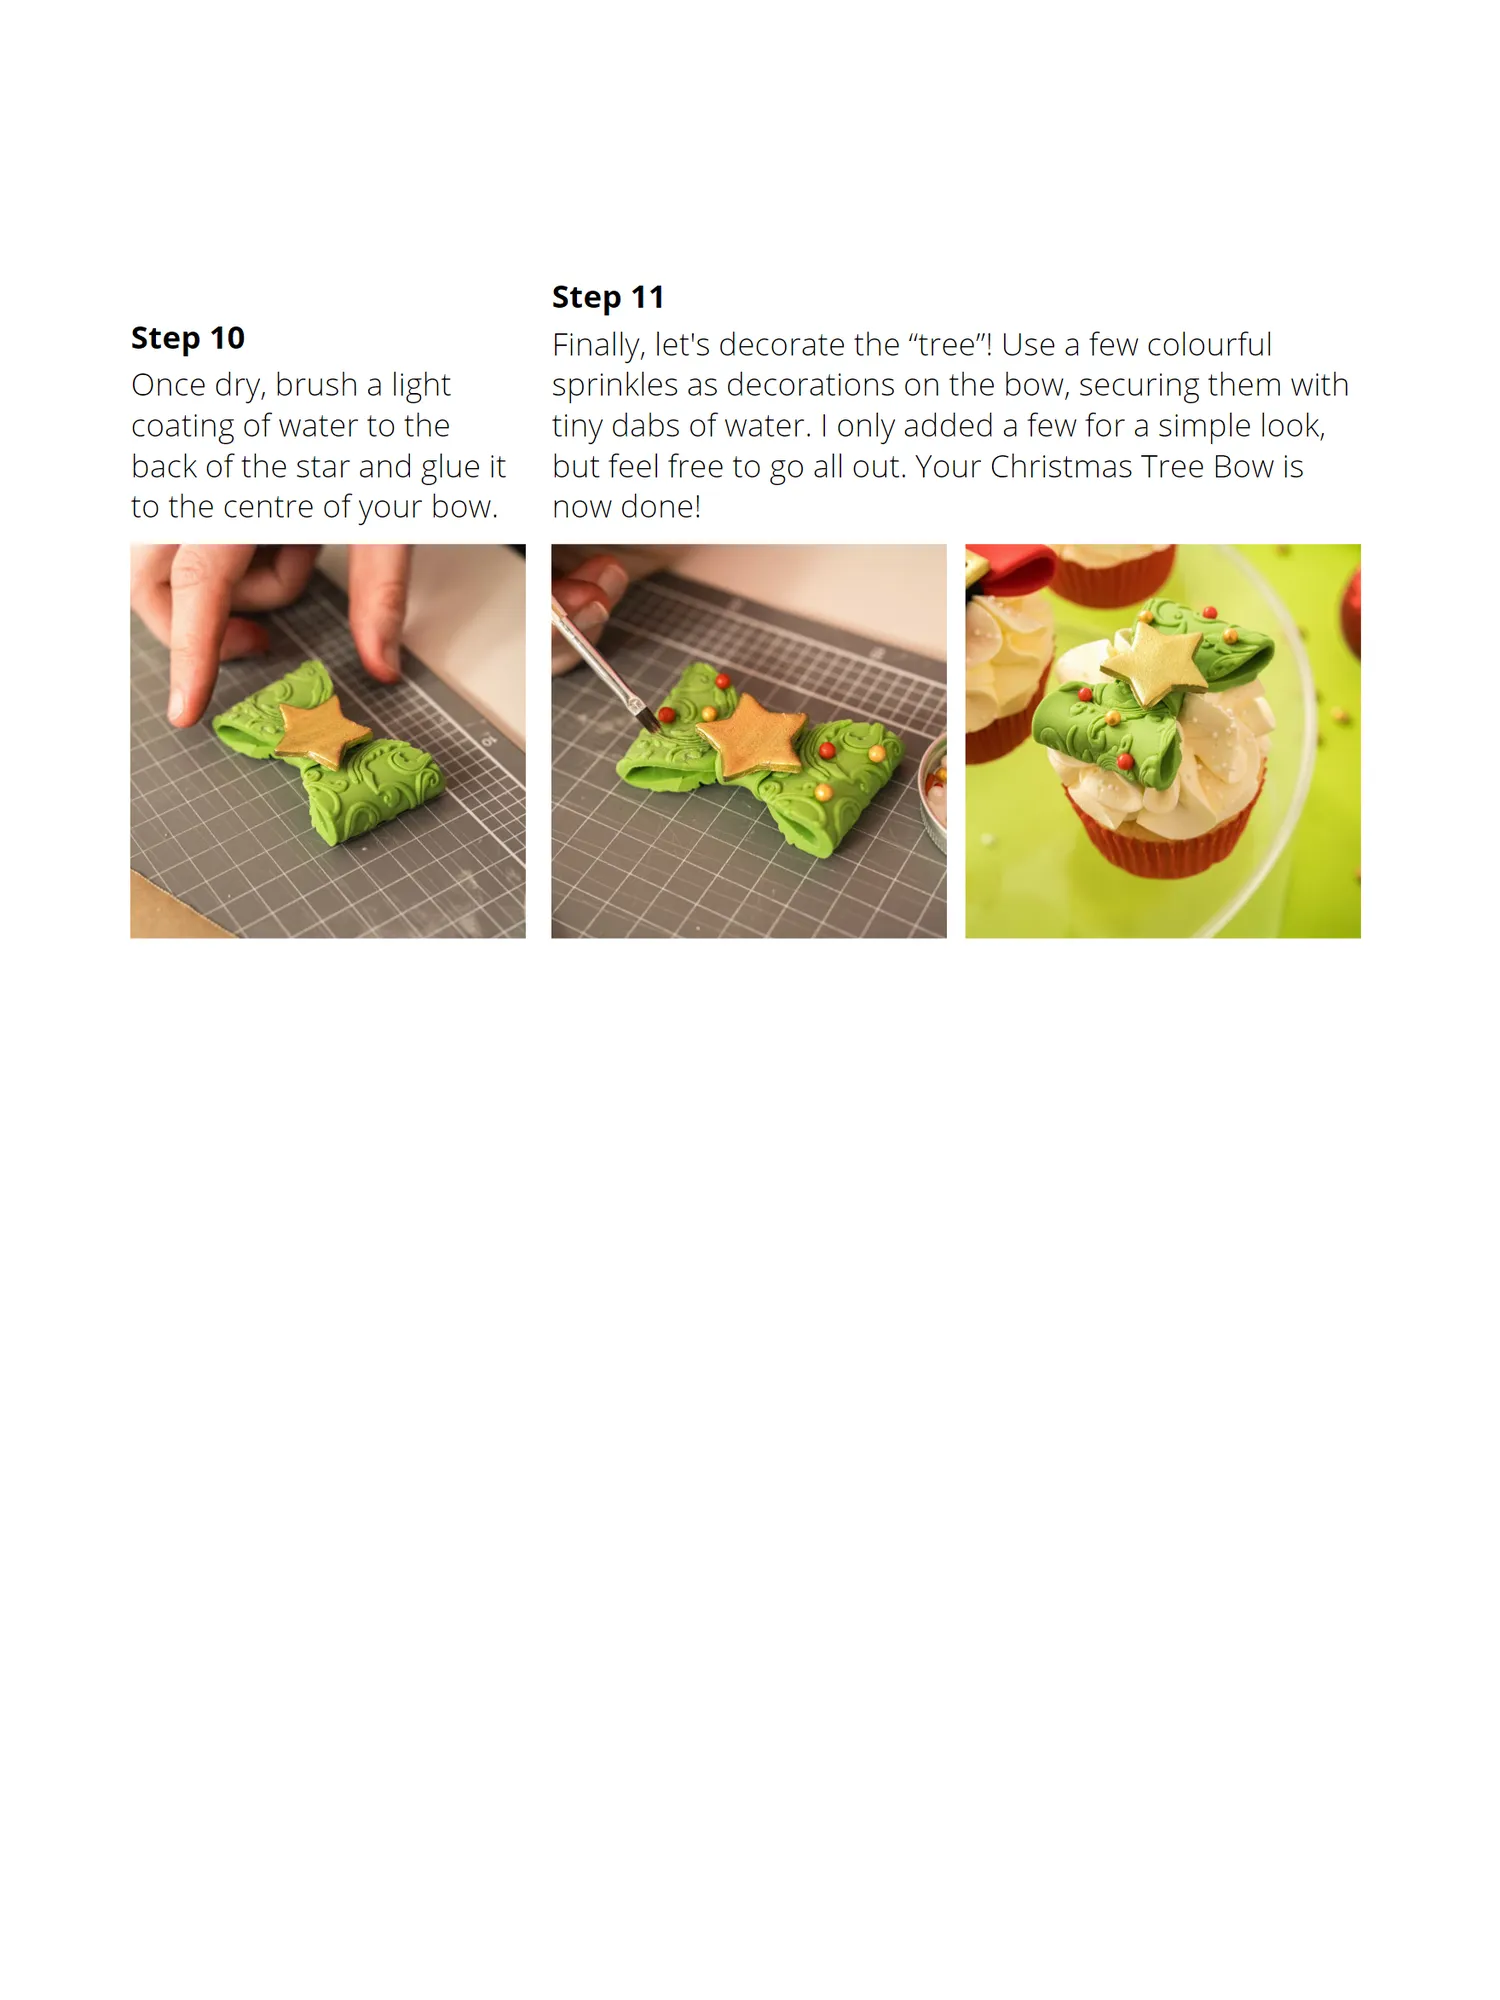
Step 10 Once dry, brush a light coating of water to the back of the star and glue it to the centre of your bow.
Page 38 text
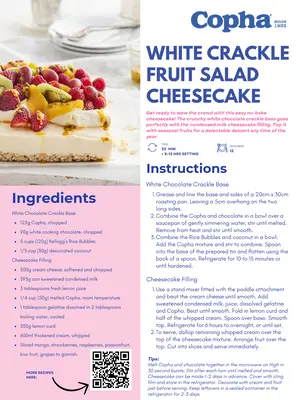
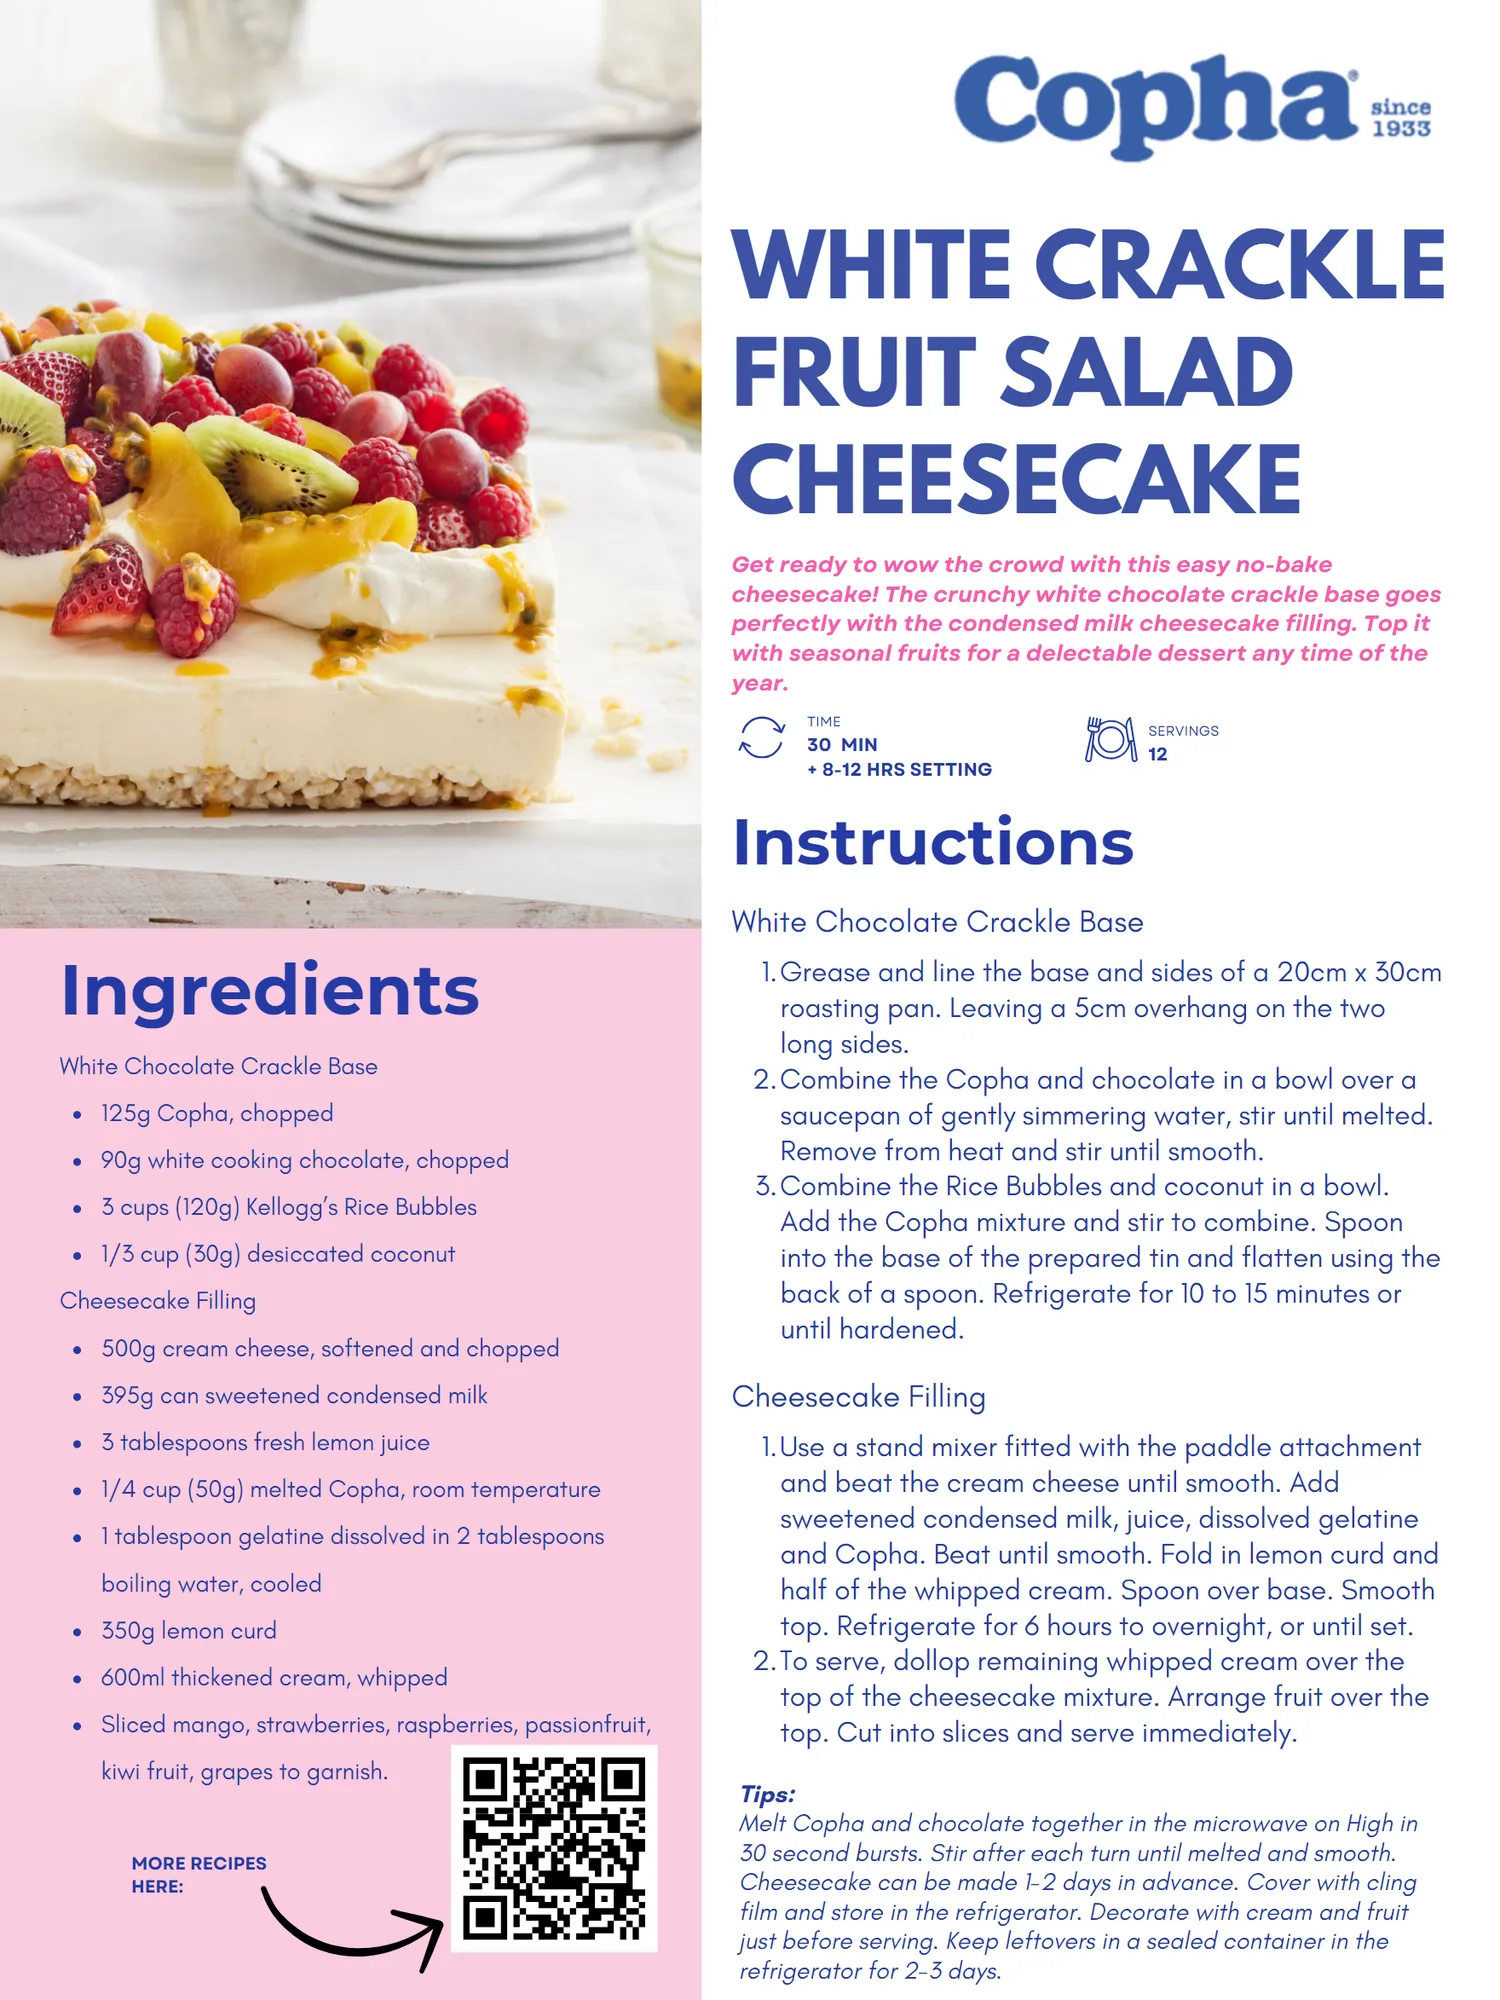
WHITE CRACKLE FRUIT SALAD CHEESECAKE Get ready to wow the crowd with this easy no-bake cheesecake! The crunchy white chocolate crackle base goes perfectly with the condensed milk cheesecake filling. Top it with seasonal fruits for a delectable dessert any time of the year. Ingredients White Chocolate Crackle Base 125g Copha, chopped 90g white cooking chocolate, chopped 3 cups( 120g) Kellogg’ s Rice Bubbles 1 / 3 cup( 30g) desiccated coconut Cheesecake Filling 500g cream cheese, softened and chopped 395g can sweetened condensed milk 3 tablespoons fresh lemon juice 1 / 4 cup( 50g) melted Copha, room temperature 1 tablespoon gelatine dissolved in 2 tablespoons boiling water, cooled 350g lemon curd 600ml thickened cream, whipped Sliced mango, strawberries, raspberries, passionfruit, kiwi fruit, grapes to garnish. MORE RECIPES HERE: TIME 30 MIN + 8-12 HRS SETTING Instructions White Chocolate Crackle Base SERVINGS 12 1. Grease and line the base and sides of a 20cm x 30cm roasting pan. Leaving a 5cm overhang on the two long sides. 2. Combine the Copha and chocolate in a bowl over a saucepan of gently simmering water, stir until melted. Remove from heat and stir until smooth. 3. Combine the Rice Bubbles and coconut in a bowl. Add the Copha mixture and stir to combine. Spoon into the base of the prepared tin and flatten using the back of a spoon. Refrigerate for 10 to 15 minutes or until hardened. Cheesecake Filling 1. Use a stand mixer fitted with the paddle attachment and beat the cream cheese until smooth. Add sweetened condensed milk, juice, dissolved gelatine and Copha. Beat until smooth. Fold in lemon curd and half of the whipped cream. Spoon over base. Smooth top. Refrigerate for 6 hours to overnight, or until set. 2. To serve, dollop remaining whipped cream over the top of the cheesecake mixture. Arrange fruit over the top. Cut into slices and serve immediately. Tips: Melt Copha and chocolate together in the microwave on High in 30 second bursts. Stir after each turn until melted and smooth. Cheesecake can be made 1-2 days in advance. Cover with cling film and store in the refrigerator. Decorate with cream and fruit just before serving. Keep leftovers in a sealed container in the refrigerator for 2-3 days.
Page 39 text
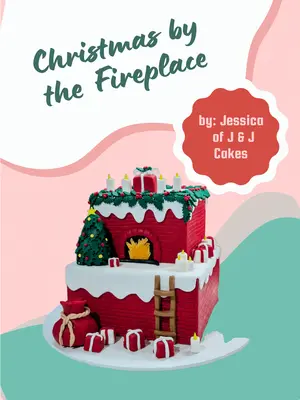
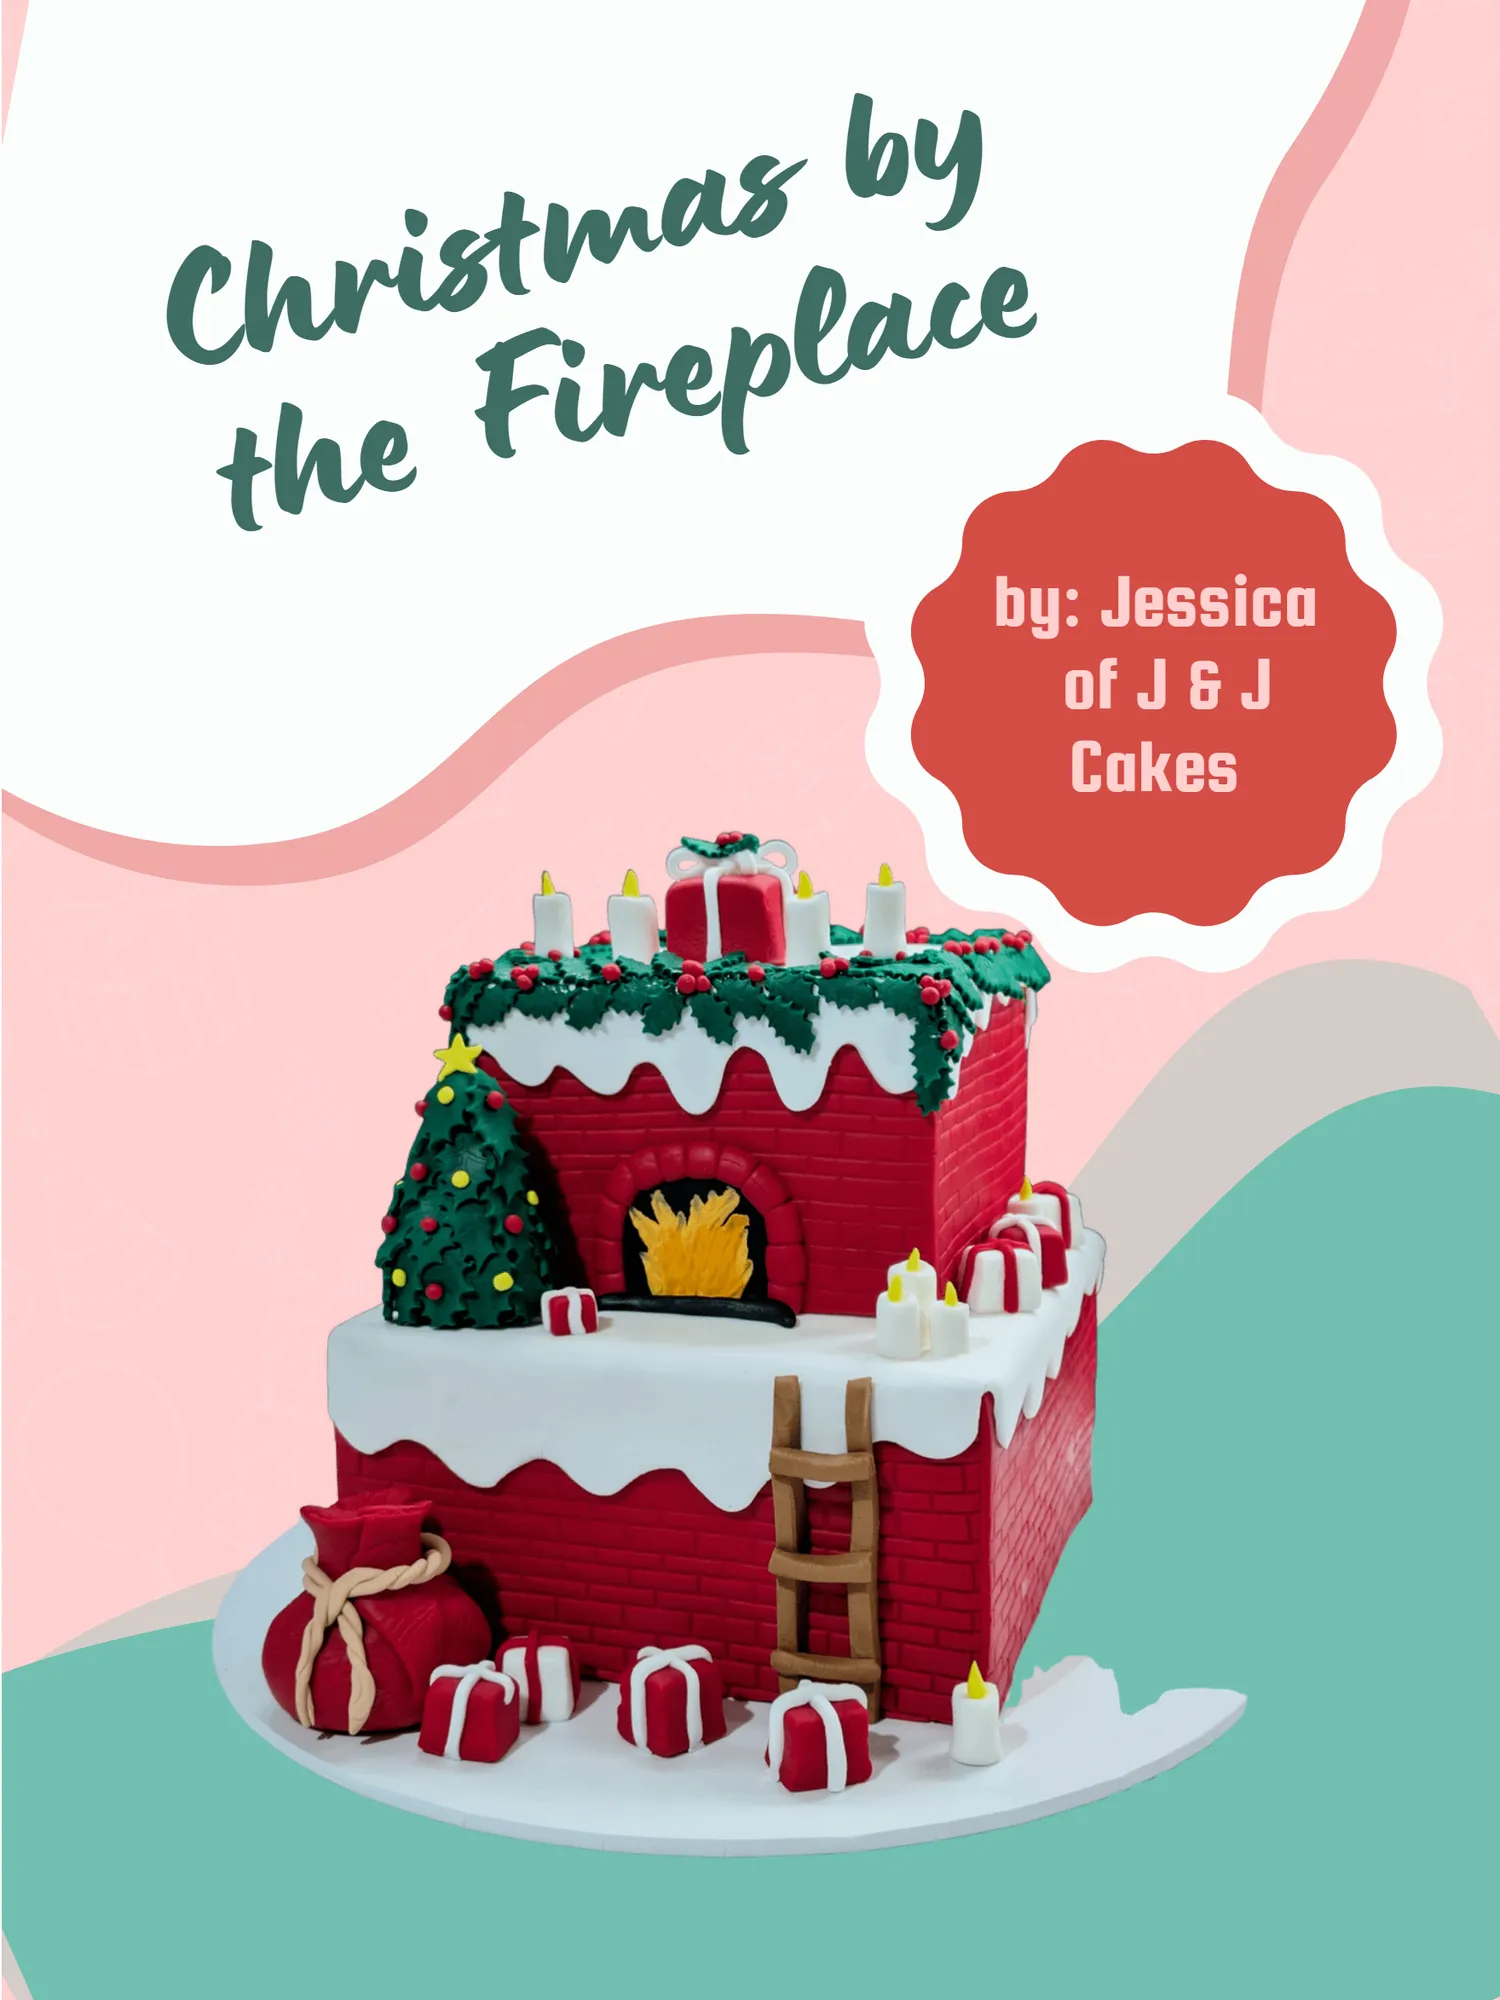
Christmas by the Fireplace by: Jessica of J & J Cakes
Page 40 text
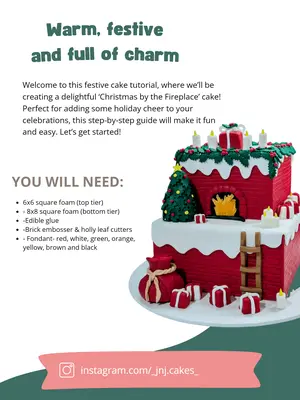
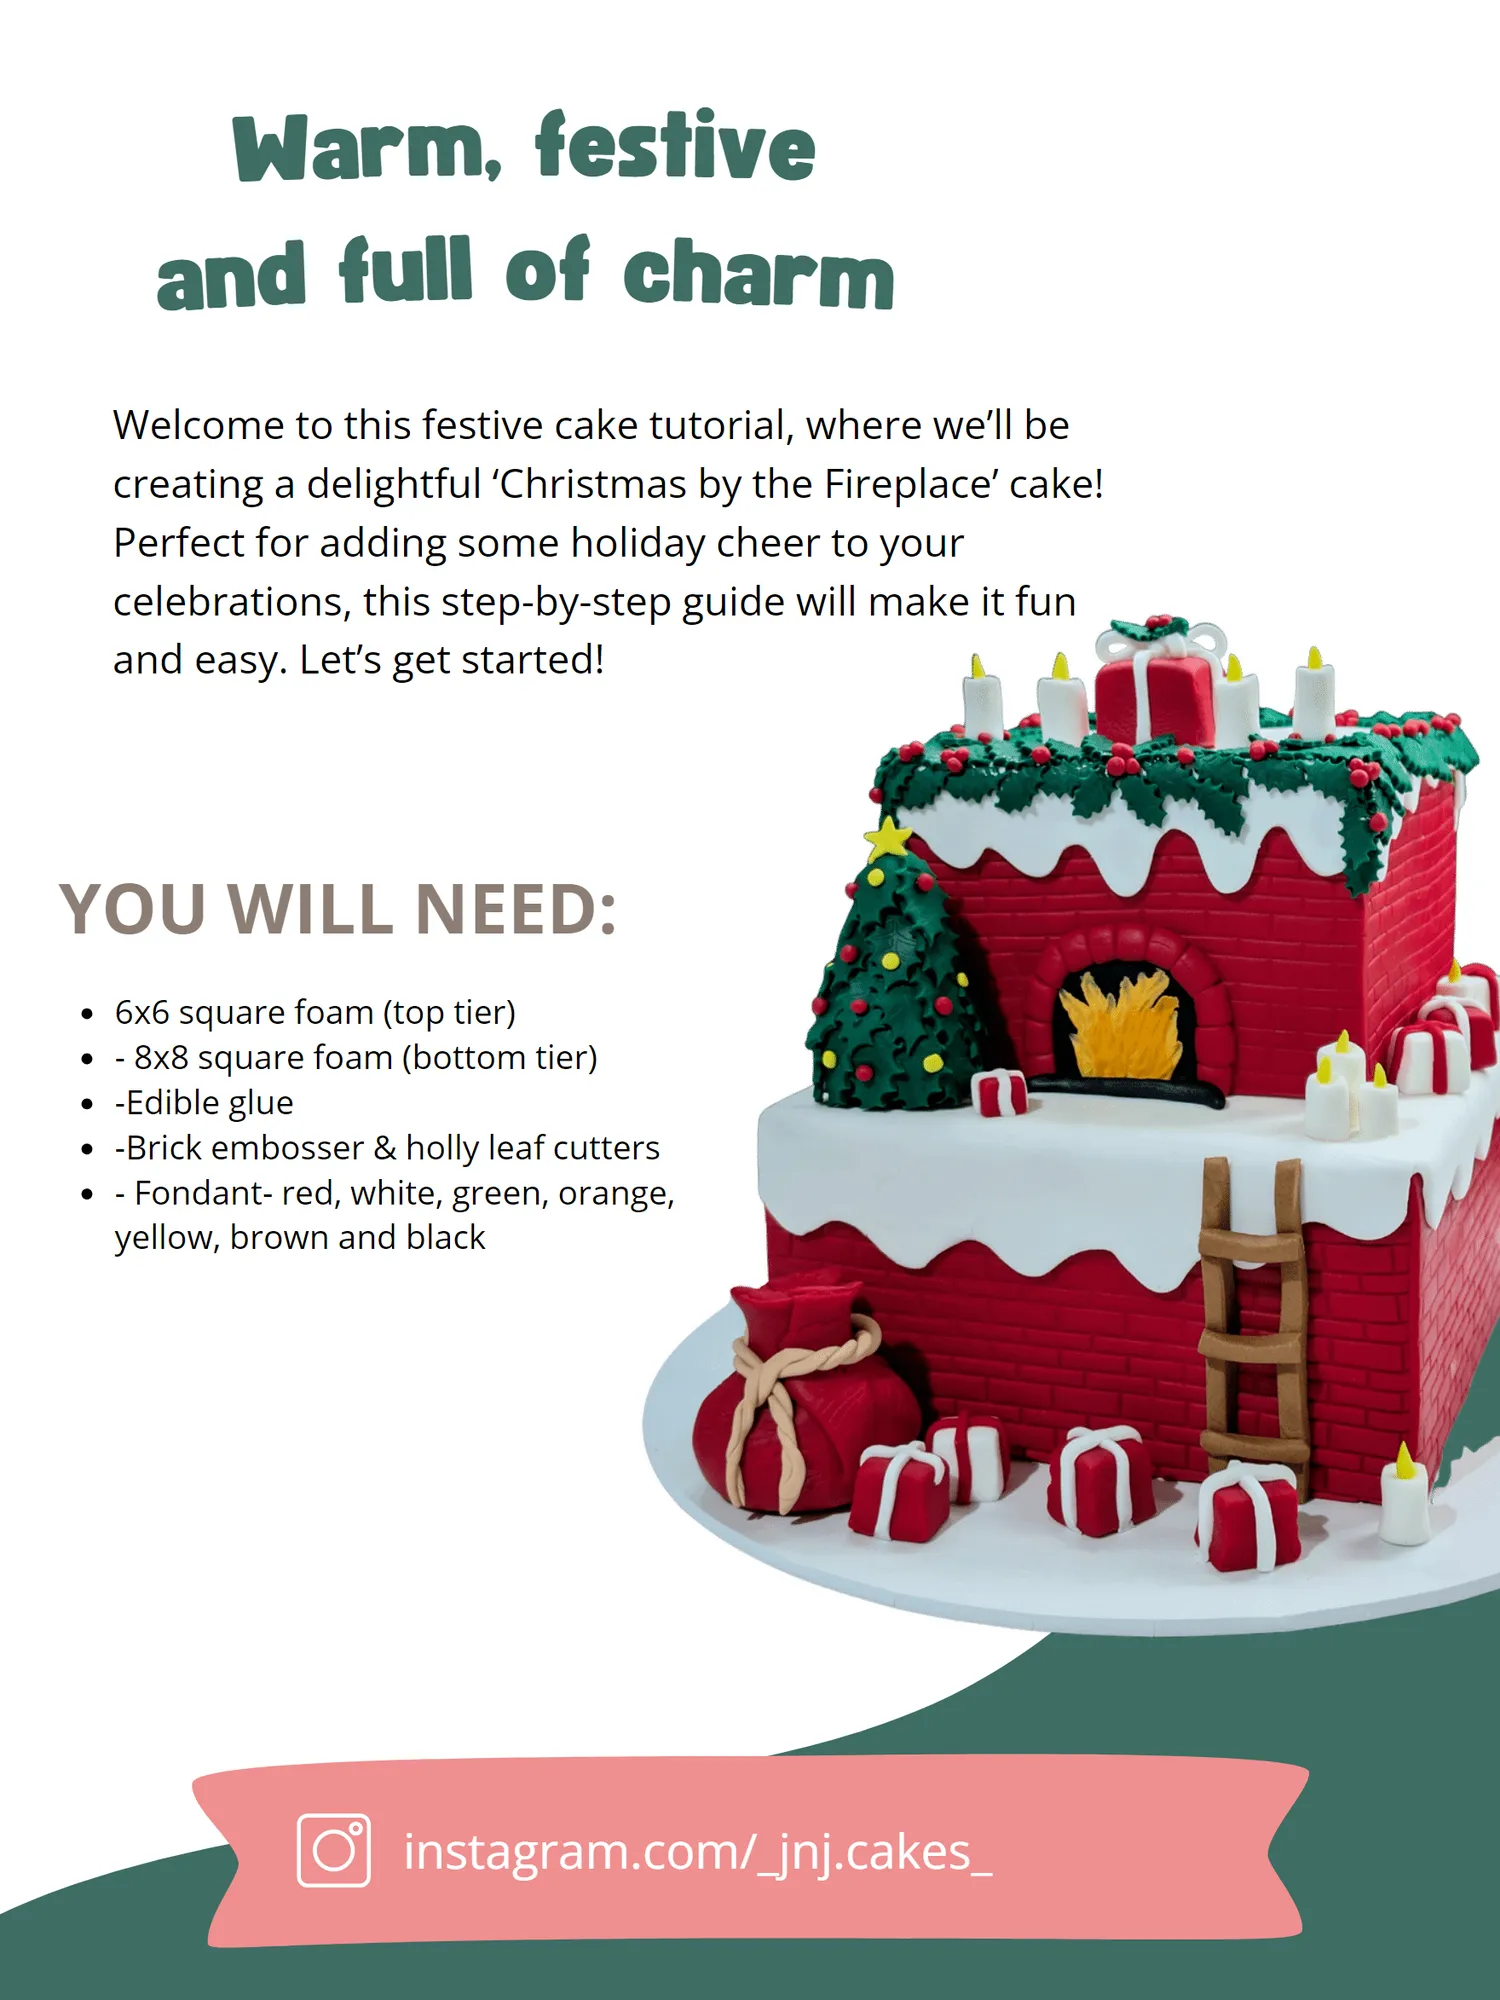
War m , f e s tive an d full o f c ha rm Welcome to this festive cake tutorial, where we’ll be creating a delightful ‘Christmas by the Fireplace’ cake! Perfect for adding some holiday cheer to your celebrations, this step-by-step guide will make it fun and easy. Let’s get started! YOU WILL NEED: 6x6 square foam (top tier) - 8x8 square foam (bottom tier) -Edible glue -Brick embosser & holly leaf cutters - Fondant- red, white, green, orange, yellow, brown and black instagram.com/_jnj.cakes_
Page 41 text
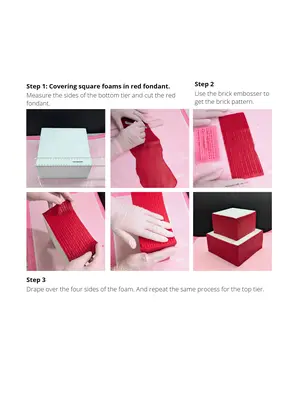
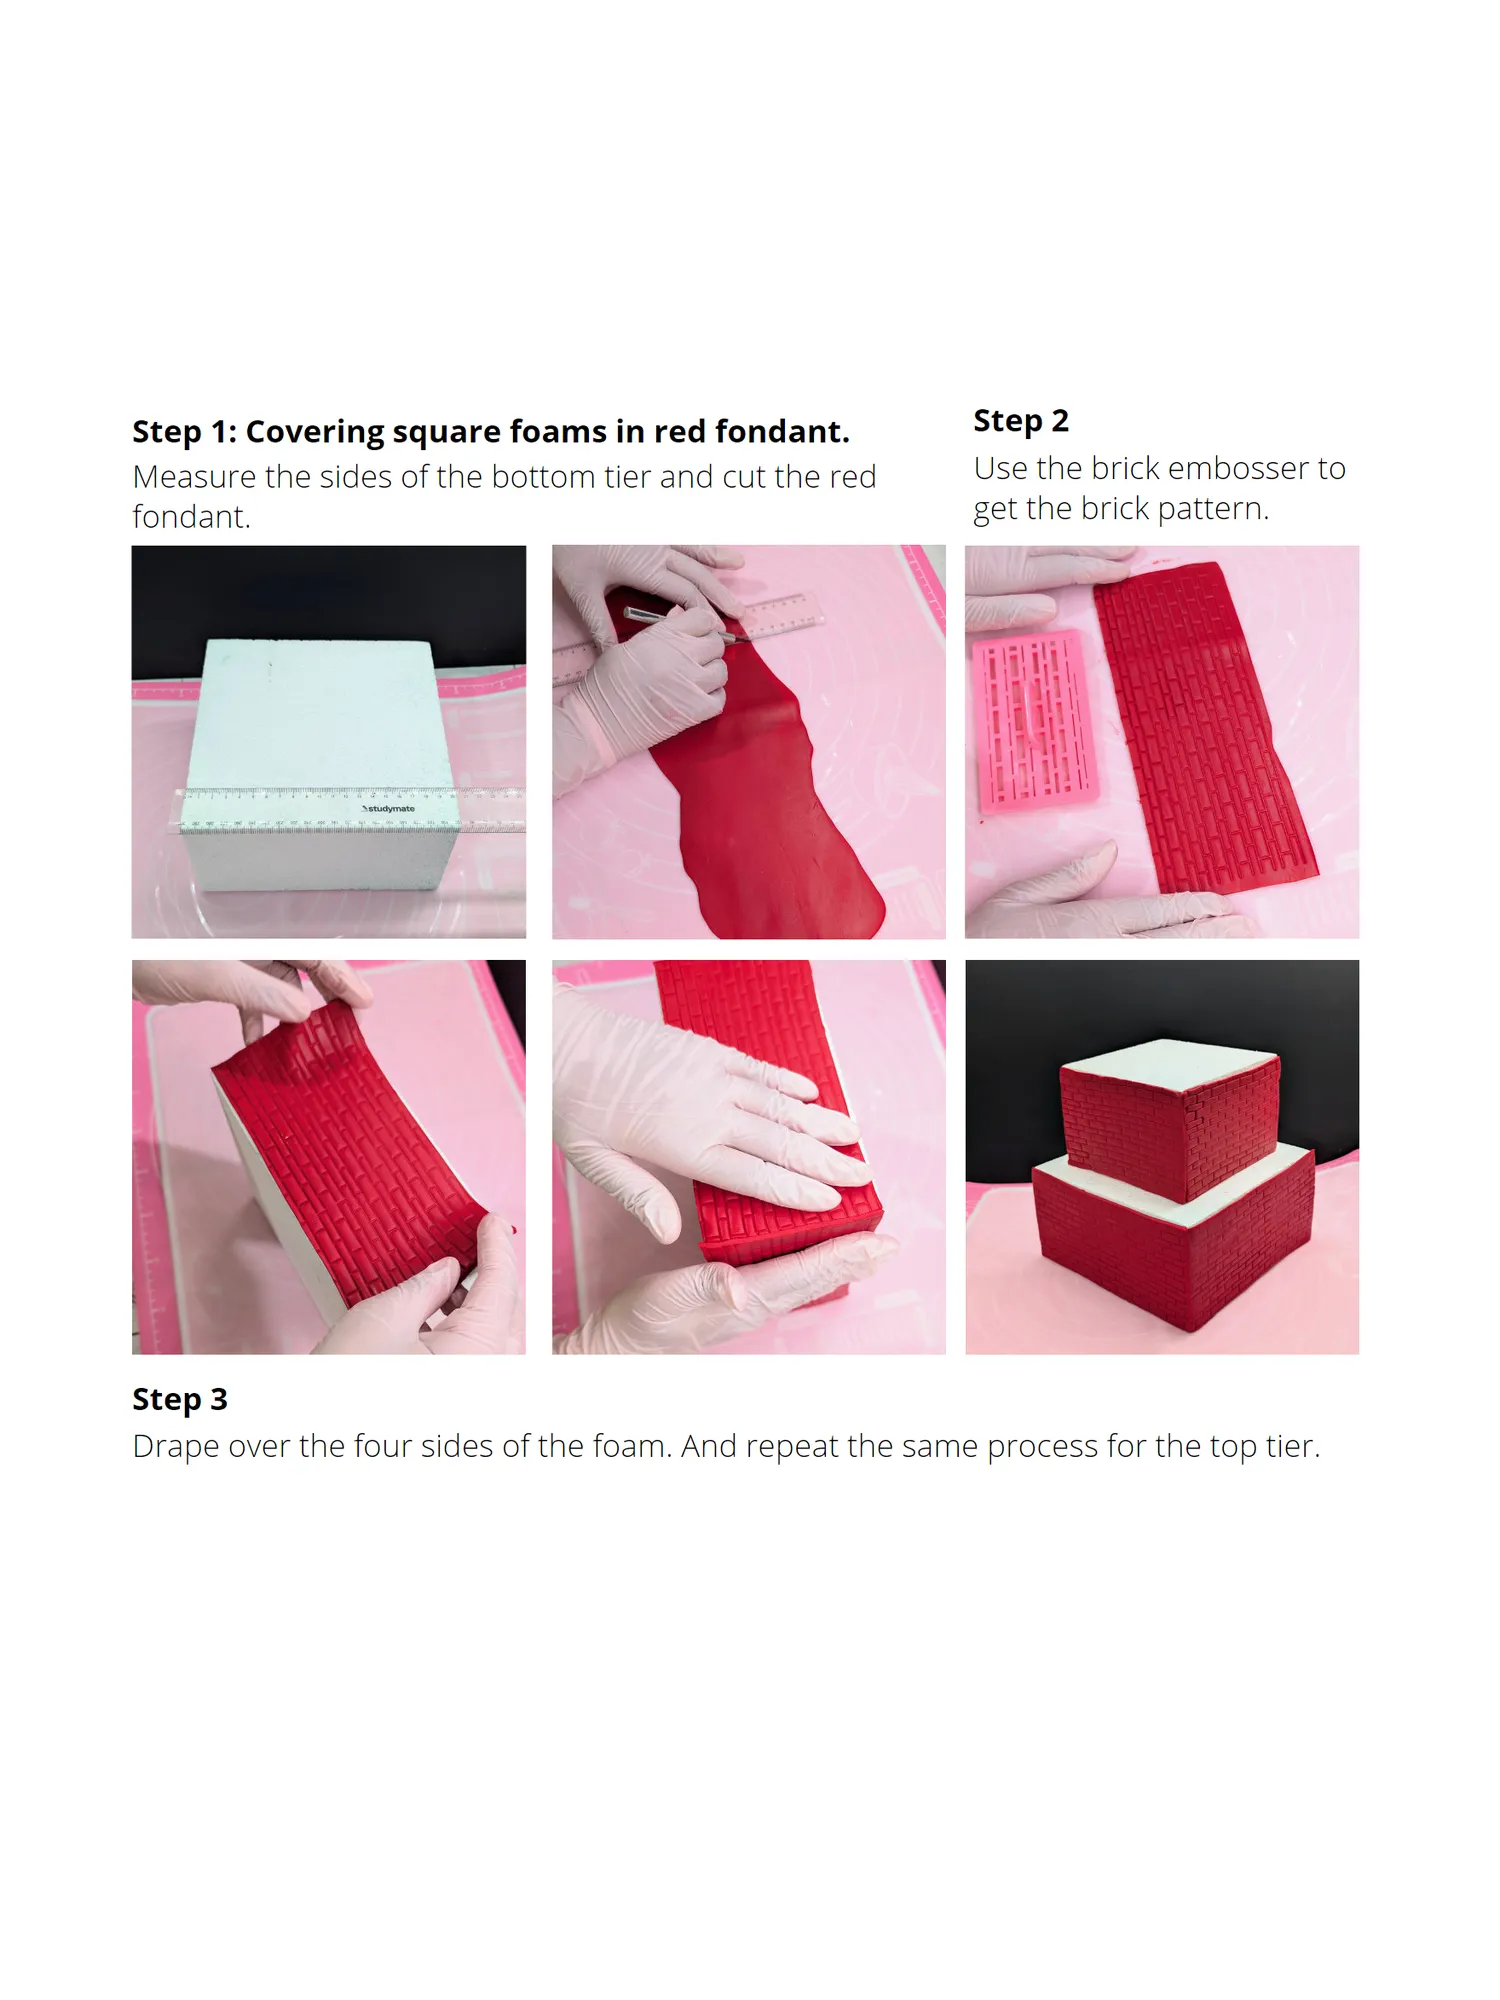
Step 1: Covering square foams in red fondant. Step 2 Measure the sides of the bottom tier and cut the red Use the brick embosser to fondant. get the brick pattern. Step 3 Drape over the four sides of the foam. And repeat the same process for the top tier.
Page 42 text
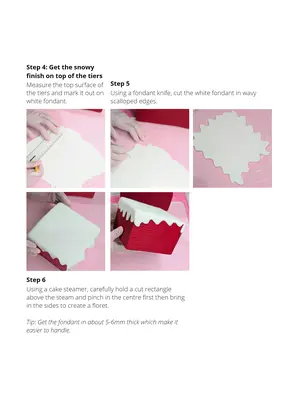
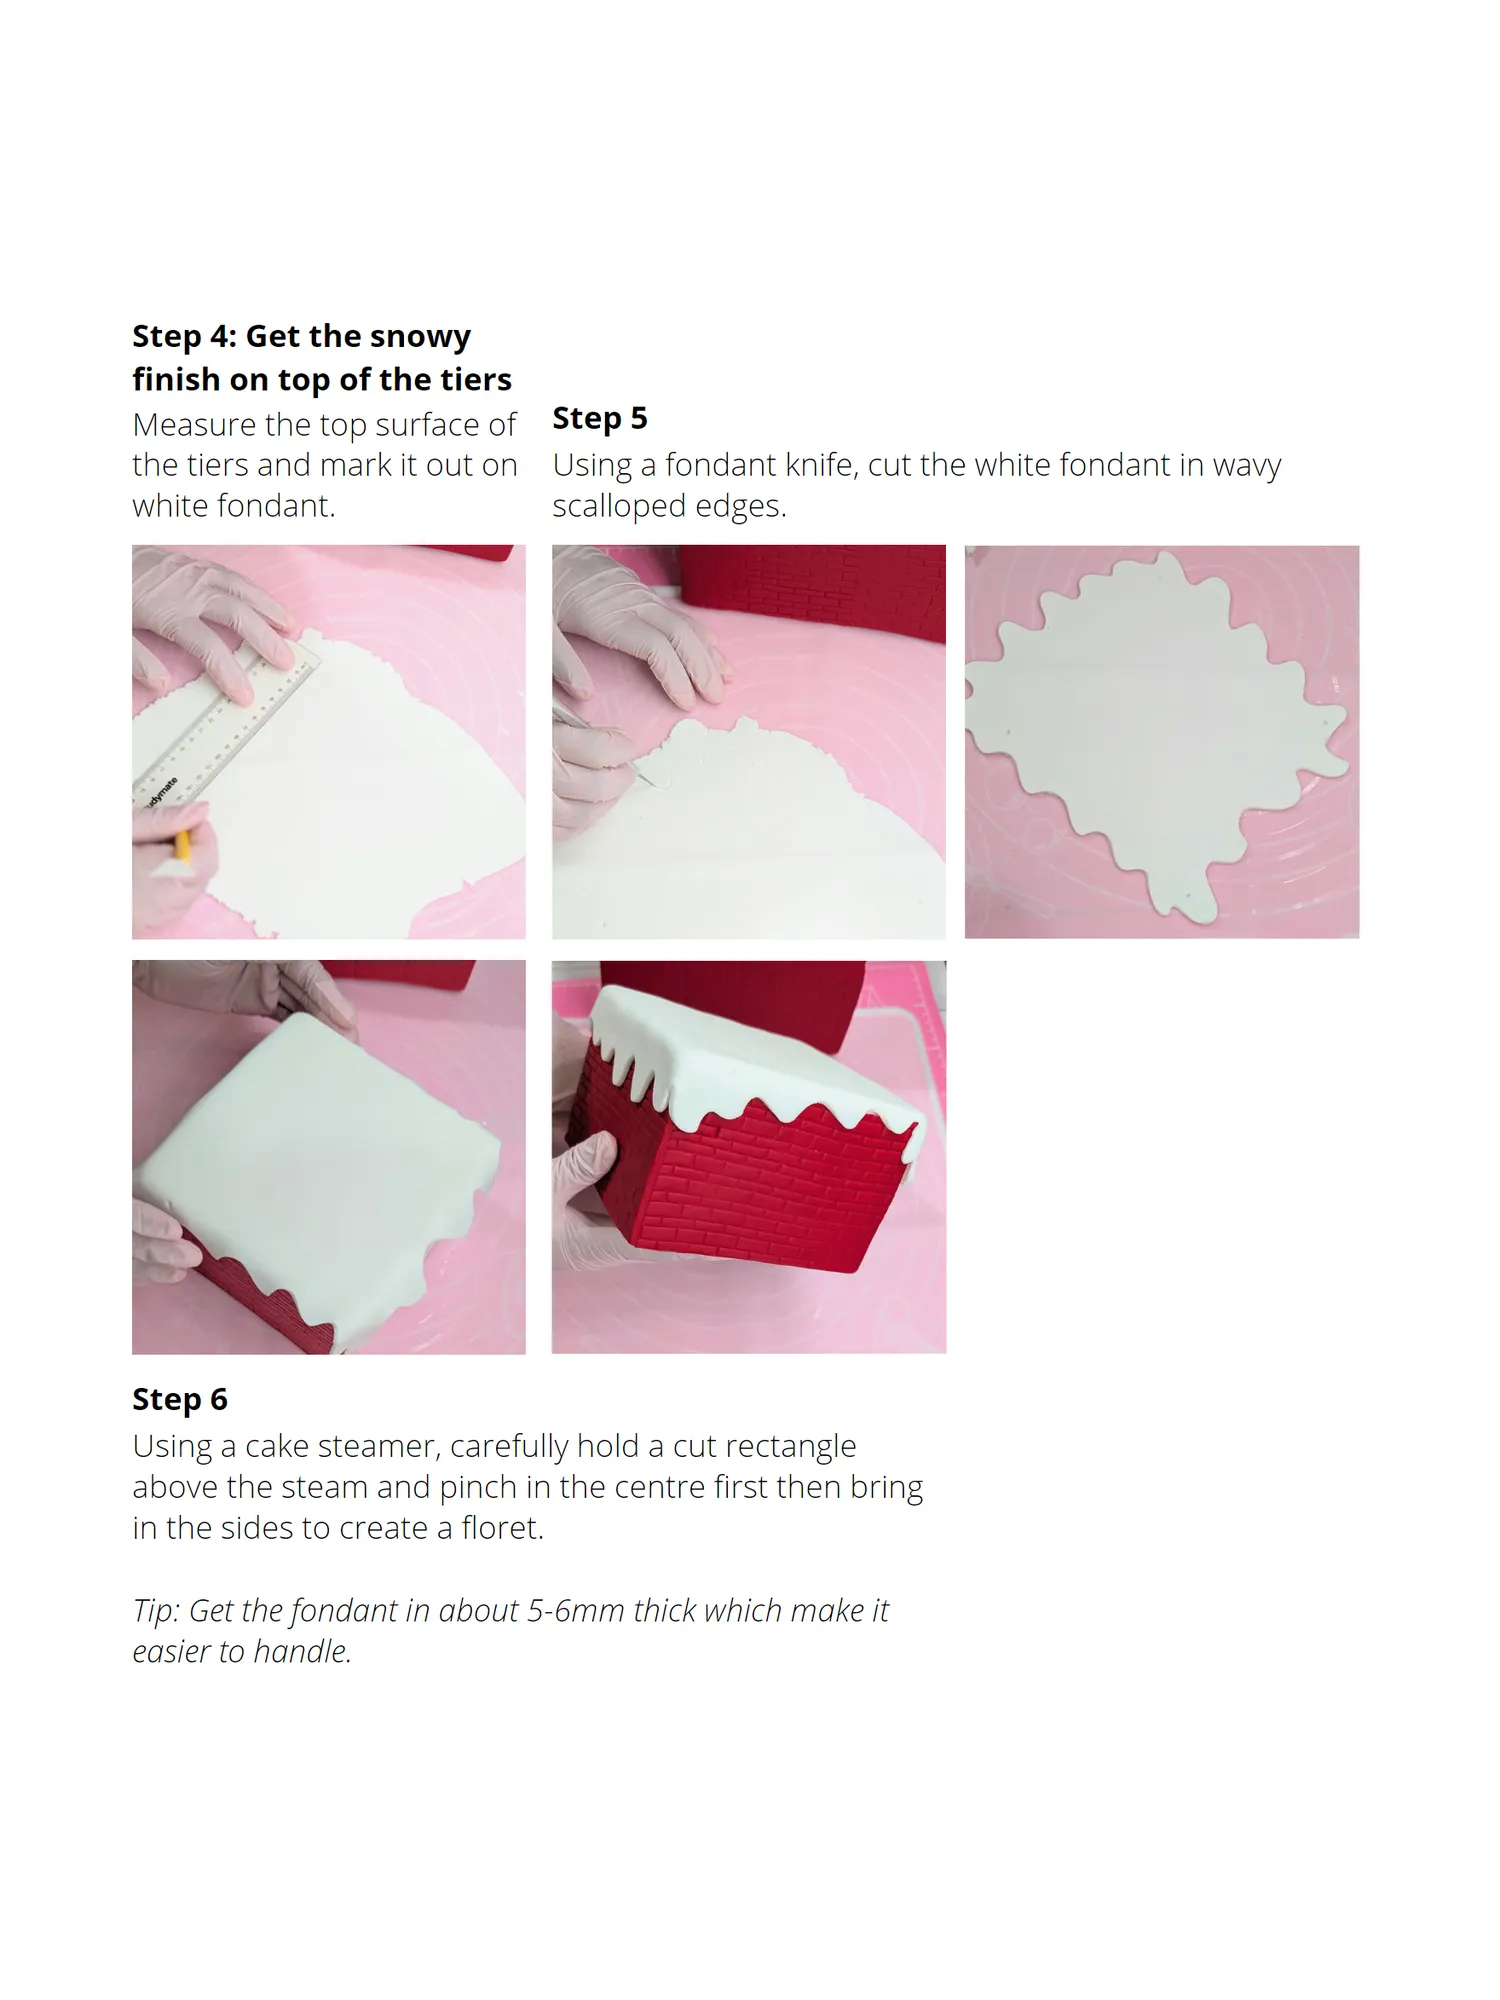
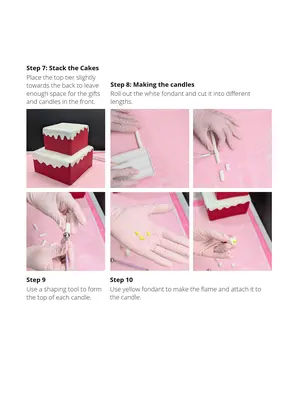
Step 4: Get the snowy finish on top of the tiers Measure the top surface of Step 5 the tiers and mark it out on Using a fondant knife, cut the white fondant in wavy white fondant. scalloped edges. Step 6 Using a cake steamer, carefully hold a cut rectangle above the steam and pinch in the centre first then bring in the sides to create a floret. Tip: Get the fondant in about 5-6mm thick which make it easier to handle.
Page 43 text
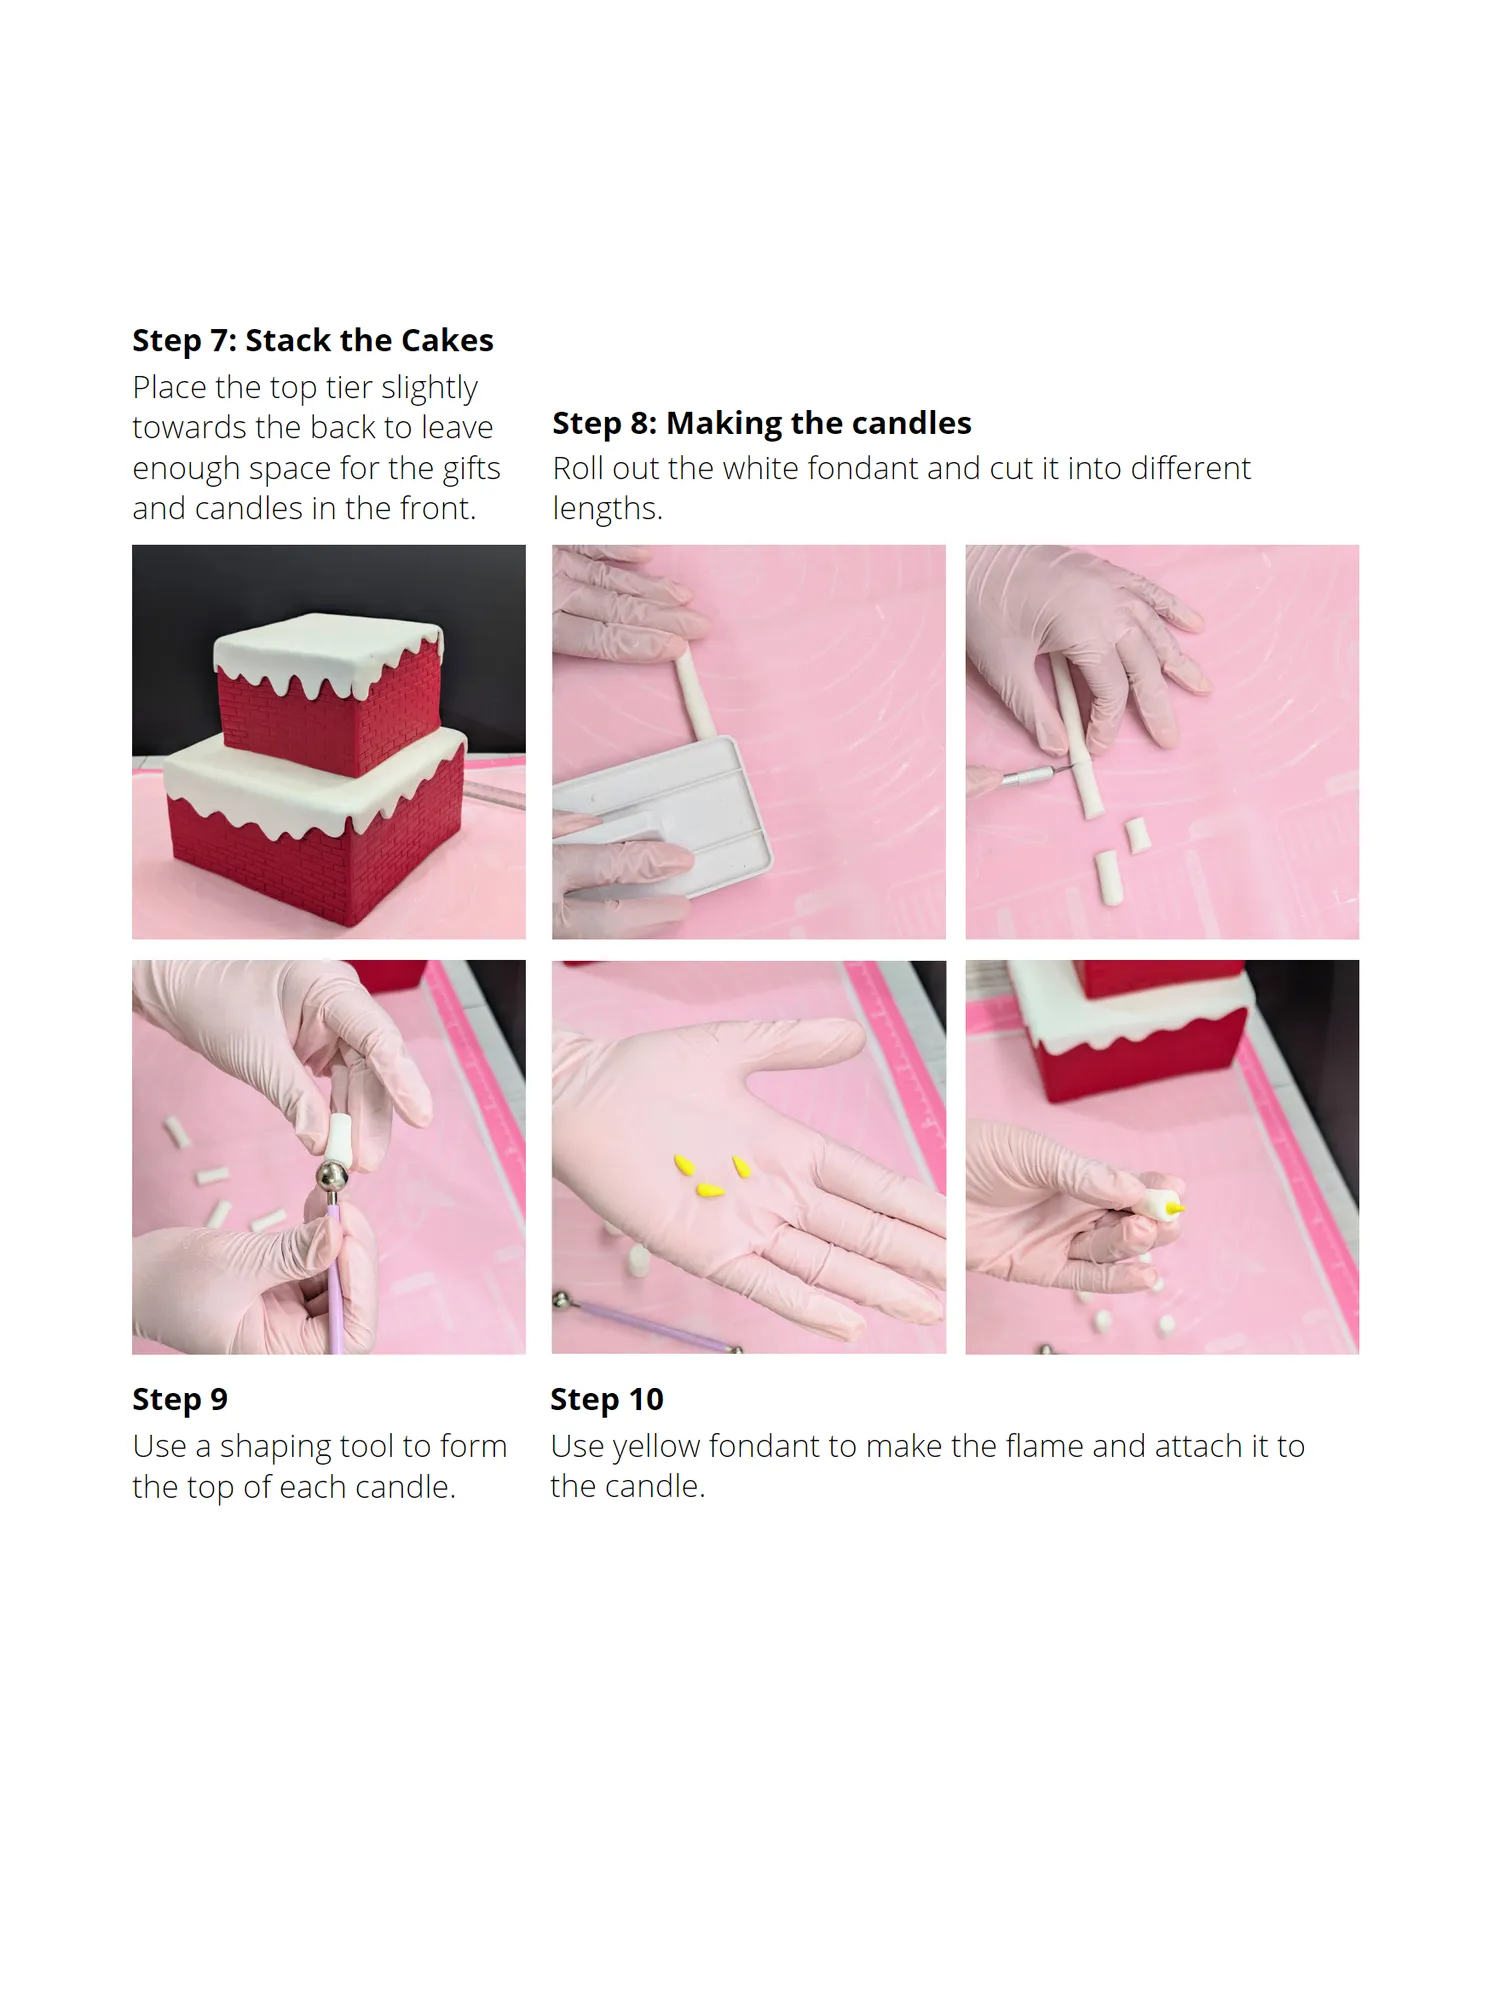
Step 7: Stack the Cakes Place the top tier slightly towards the back to leave Step 8: Making the candles enough space for the gifts Roll out the white fondant and cut it into different and candles in the front. lengths. Step 9 Step 10 Use a shaping tool to form Use yellow fondant to make the flame and attach it to the top of each candle. the candle.
Page 44 text
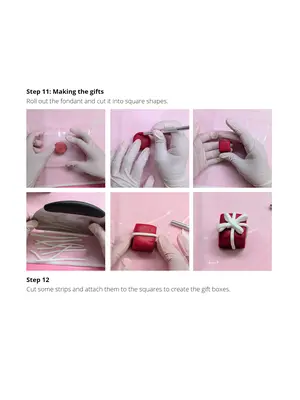
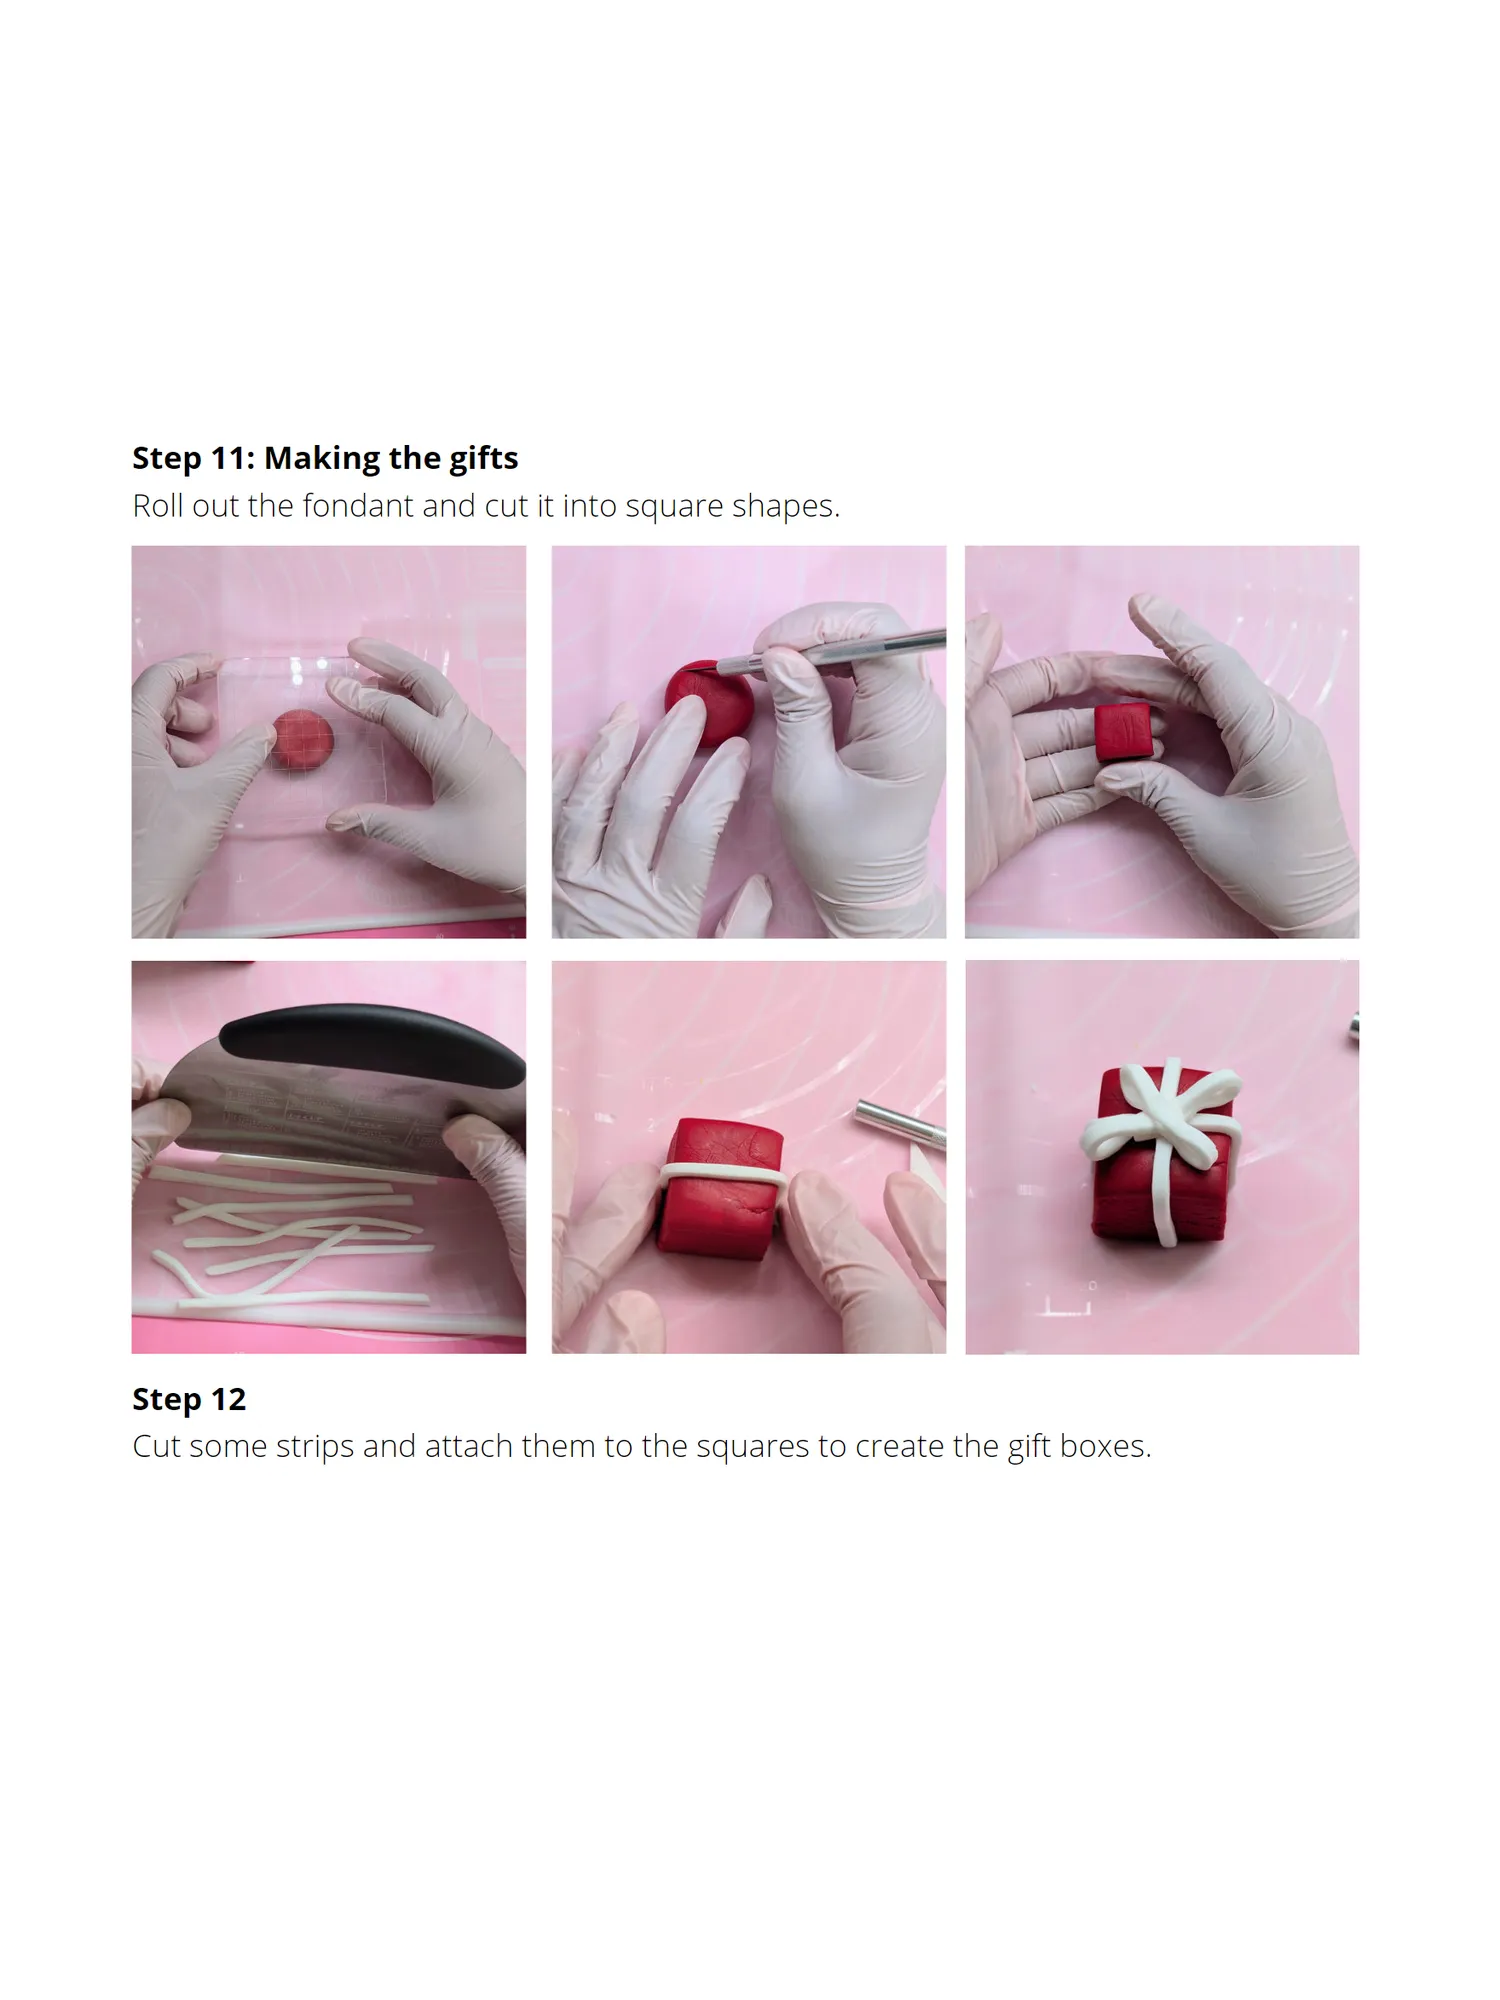
Step 11: Making the gifts Roll out the fondant and cut it into square shapes. Step 12 Cut some strips and attach them to the squares to create the gift boxes.
Page 45 text
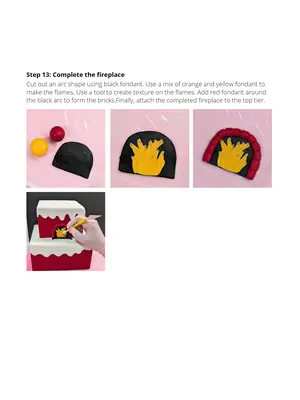
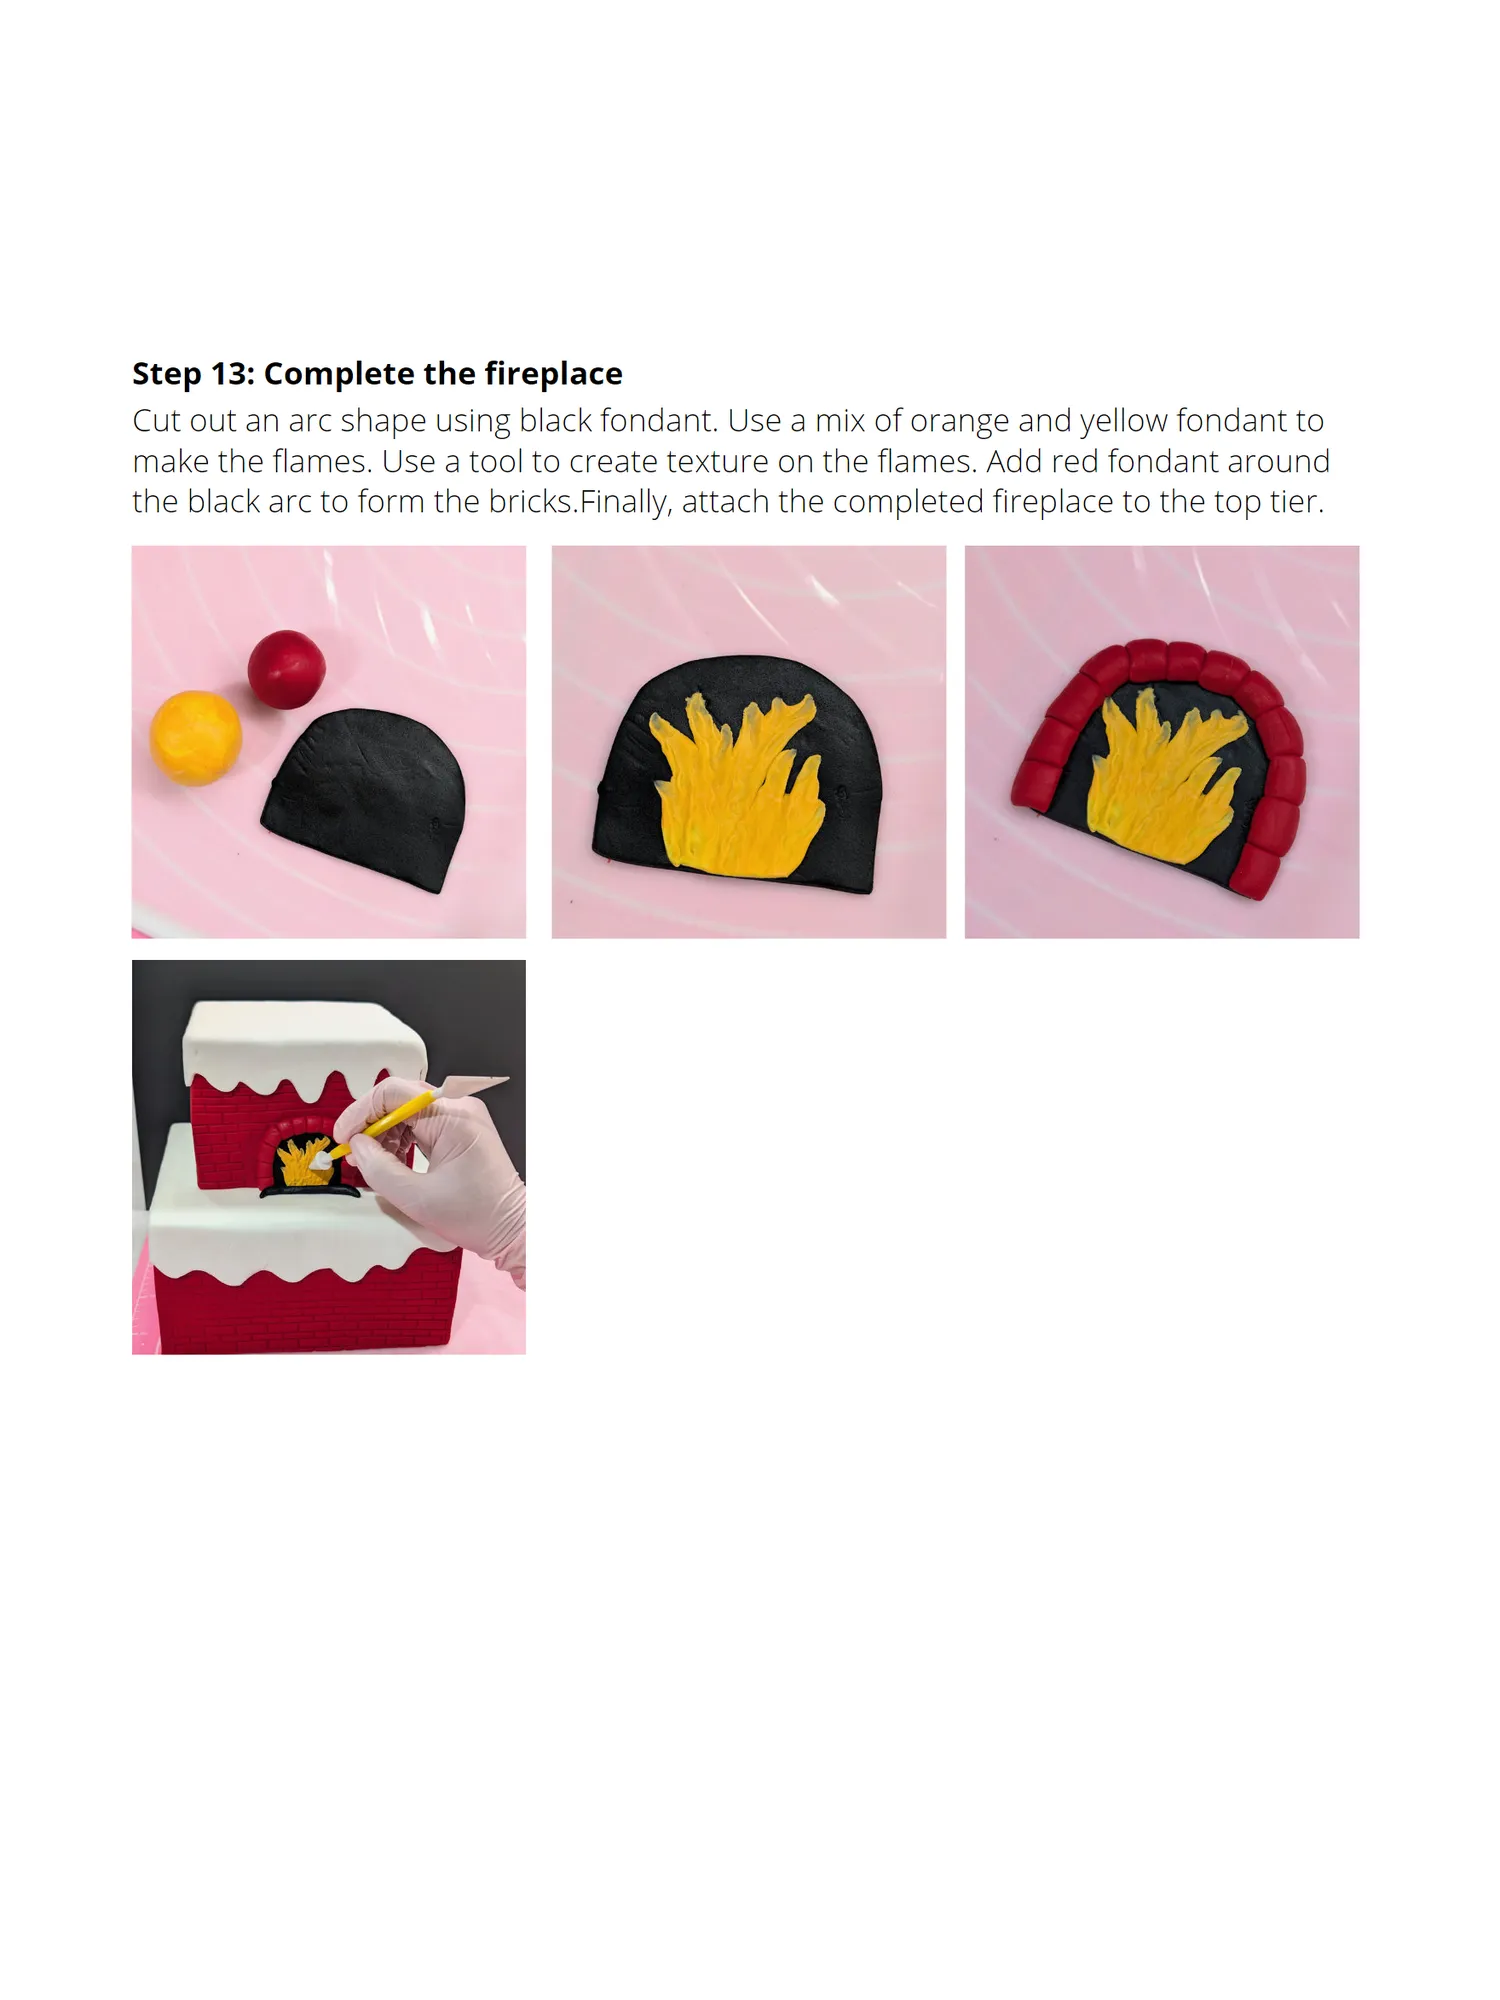
Step 13: Complete the fireplace Cut out an arc shape using black fondant. Use a mix of orange and yellow fondant to make the flames. Use a tool to create texture on the flames. Add red fondant around the black arc to form the bricks.Finally, attach the completed fireplace to the top tier.
Page 46 text
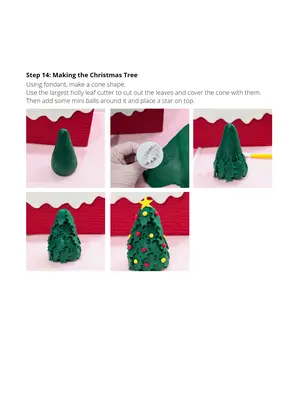
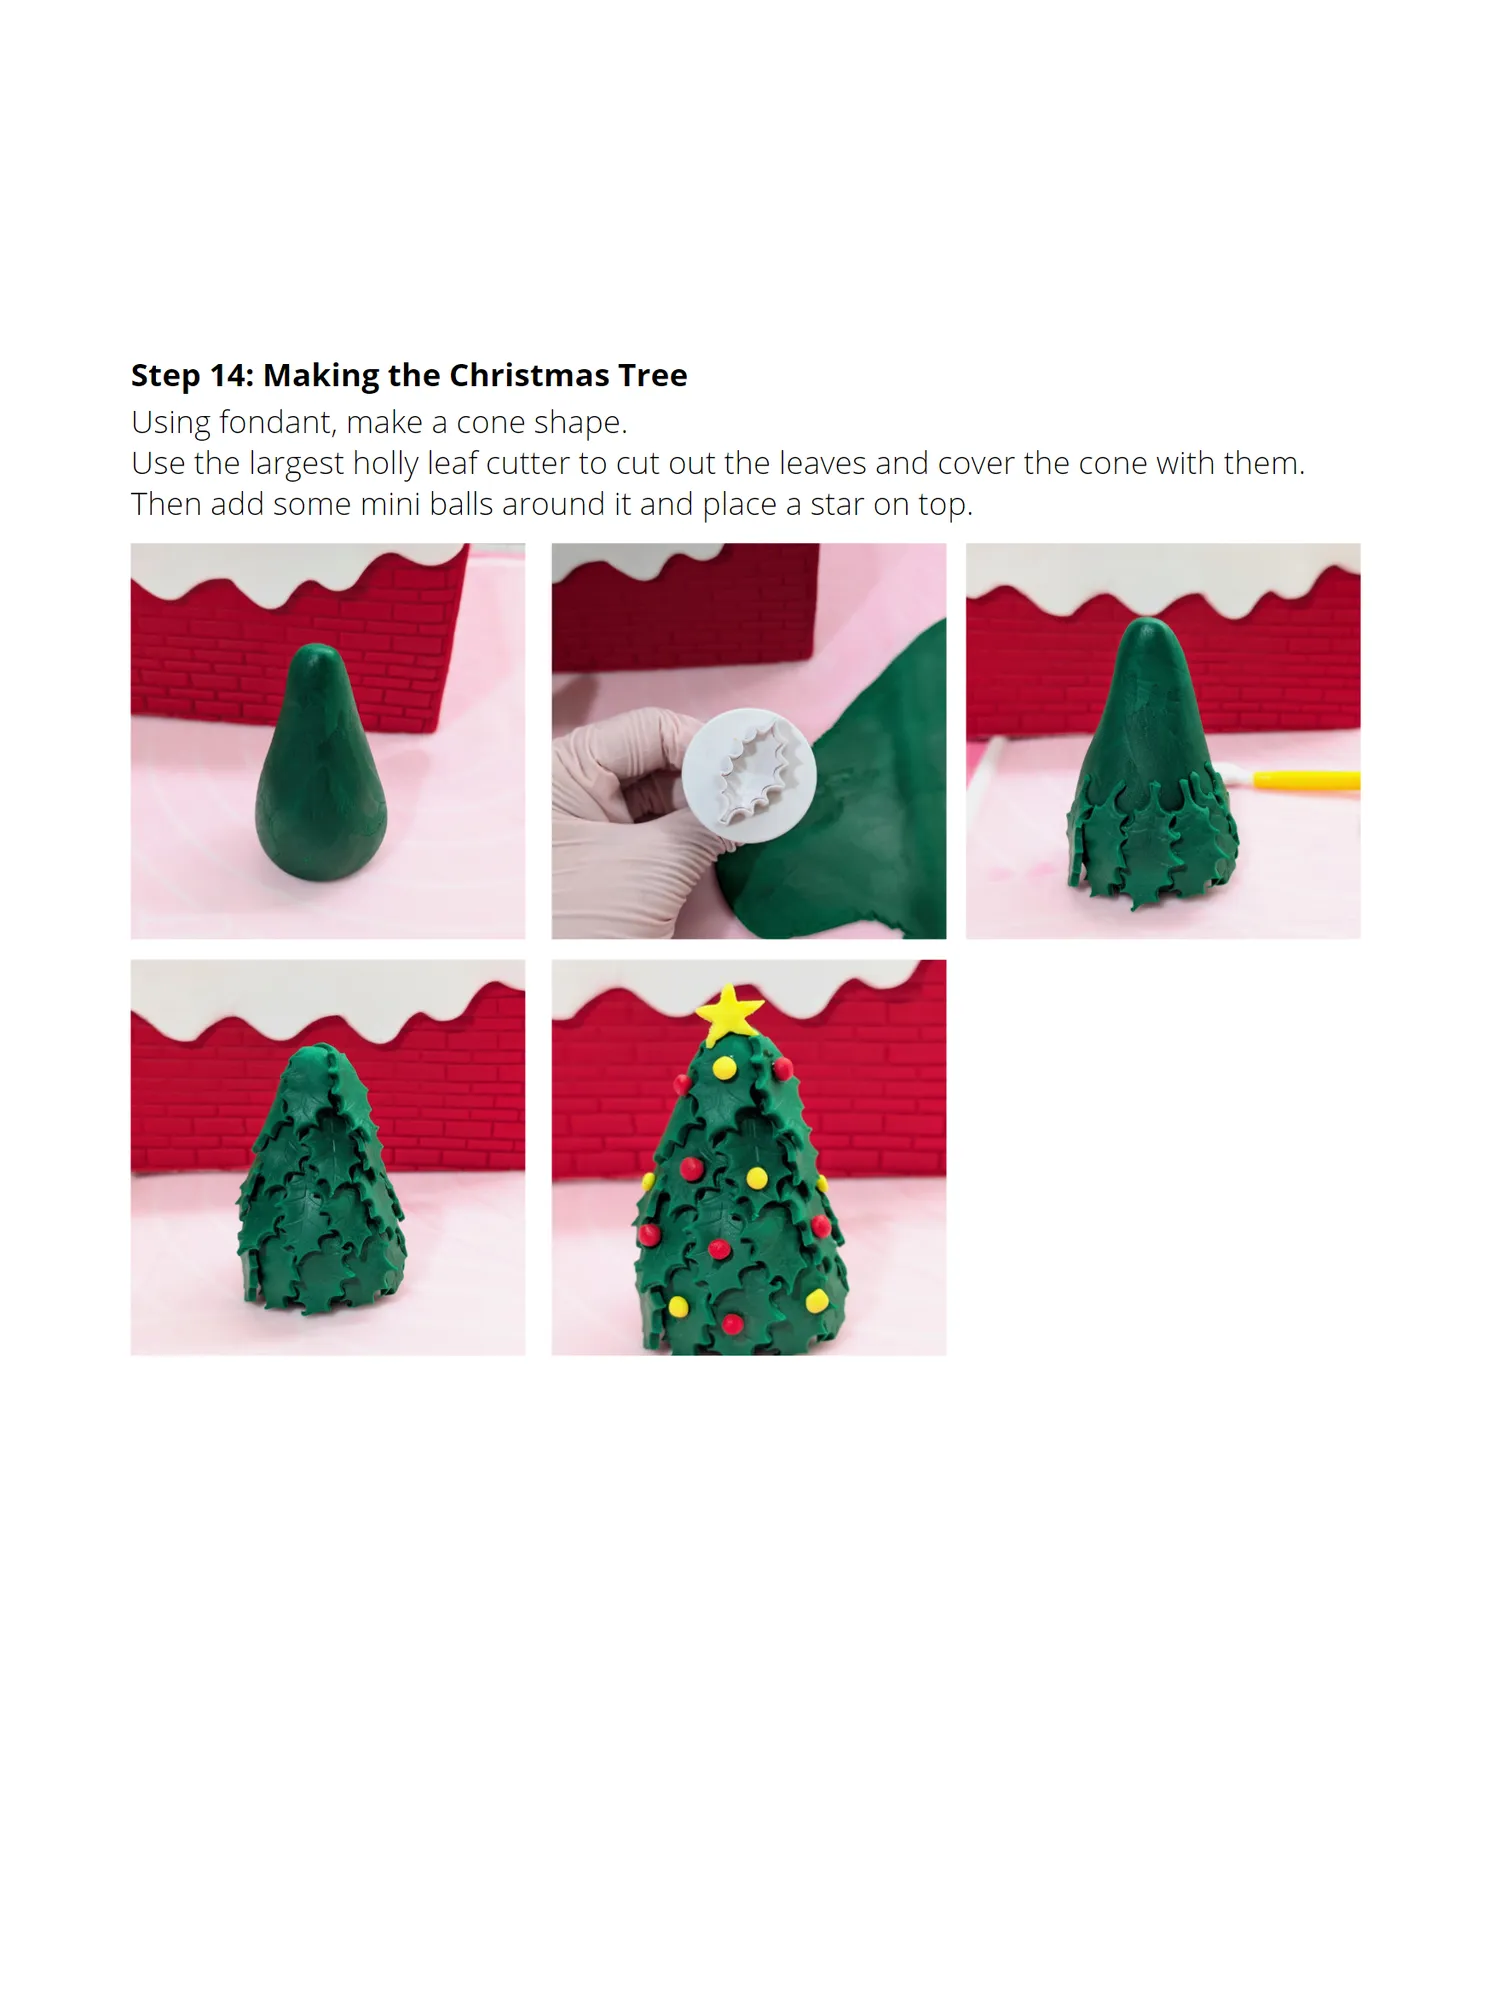
Step 14: Making the Christmas Tree Using fondant, make a cone shape. Use the largest holly leaf cutter to cut out the leaves and cover the cone with them. Then add some mini balls around it and place a star on top.
Page 47 text
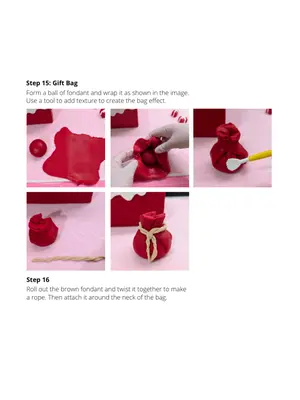
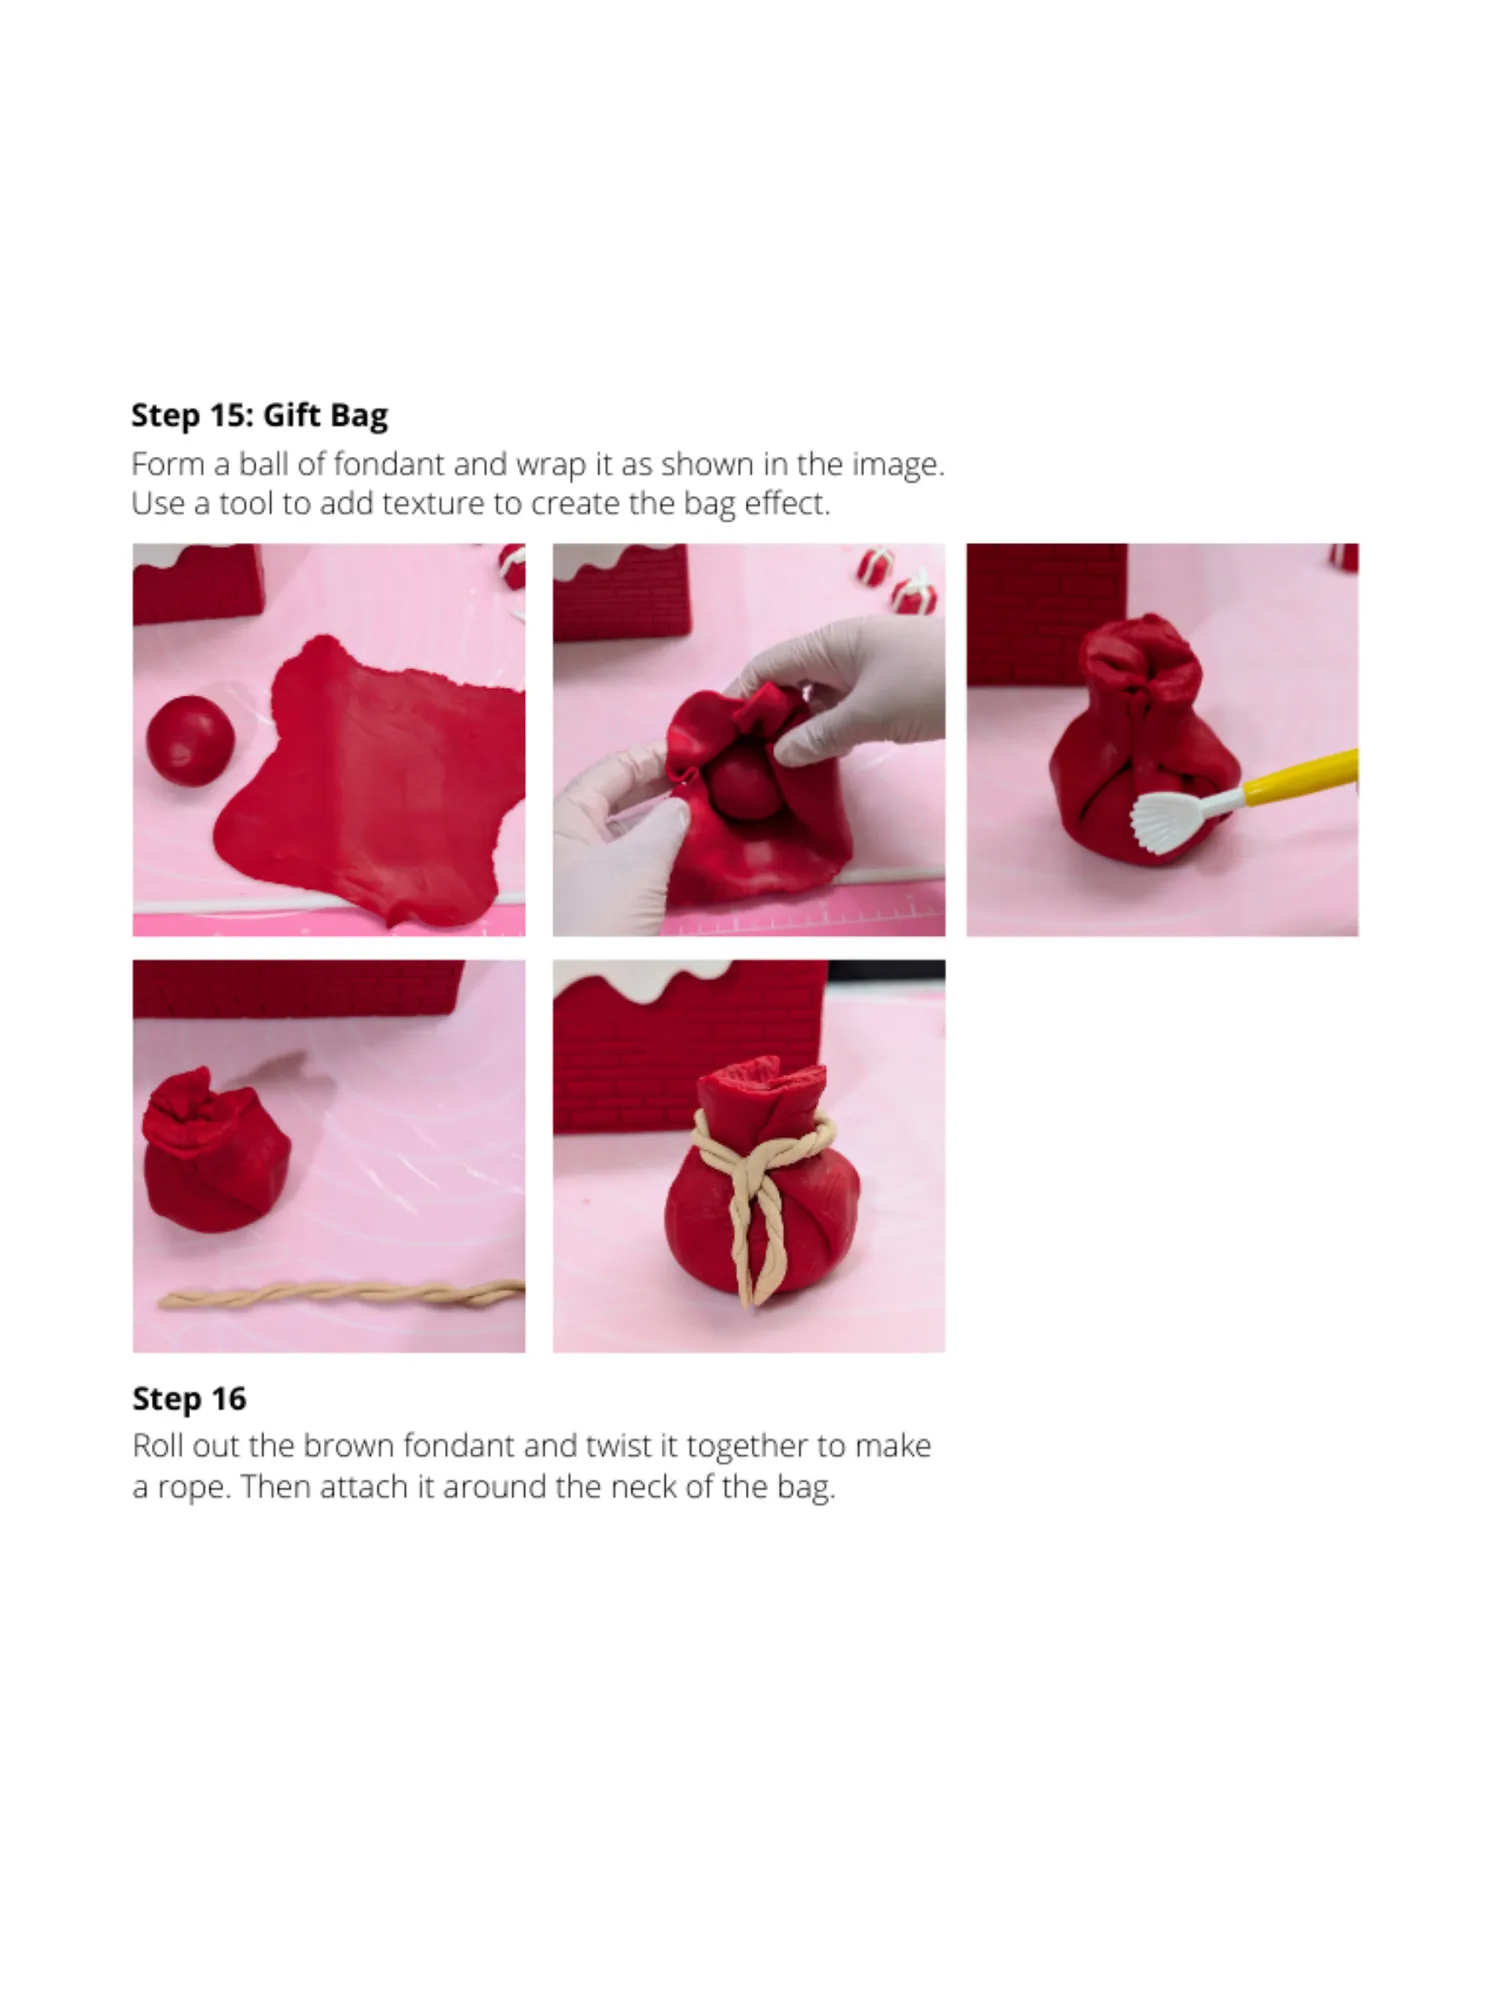
Step 15: Gift Bag While your cakes are baking, prepare your wafer florets. Start by cutting A4 sheets of wafer paper into 4. Step 16 Roll out the brown fondant and twist it together to make a rope. Then attach it around the neck of the bag.
Page 48 text
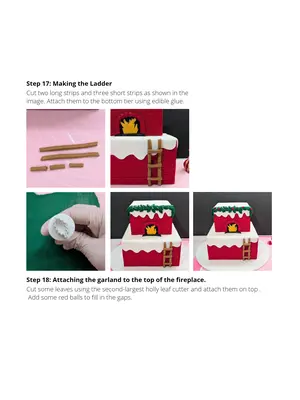
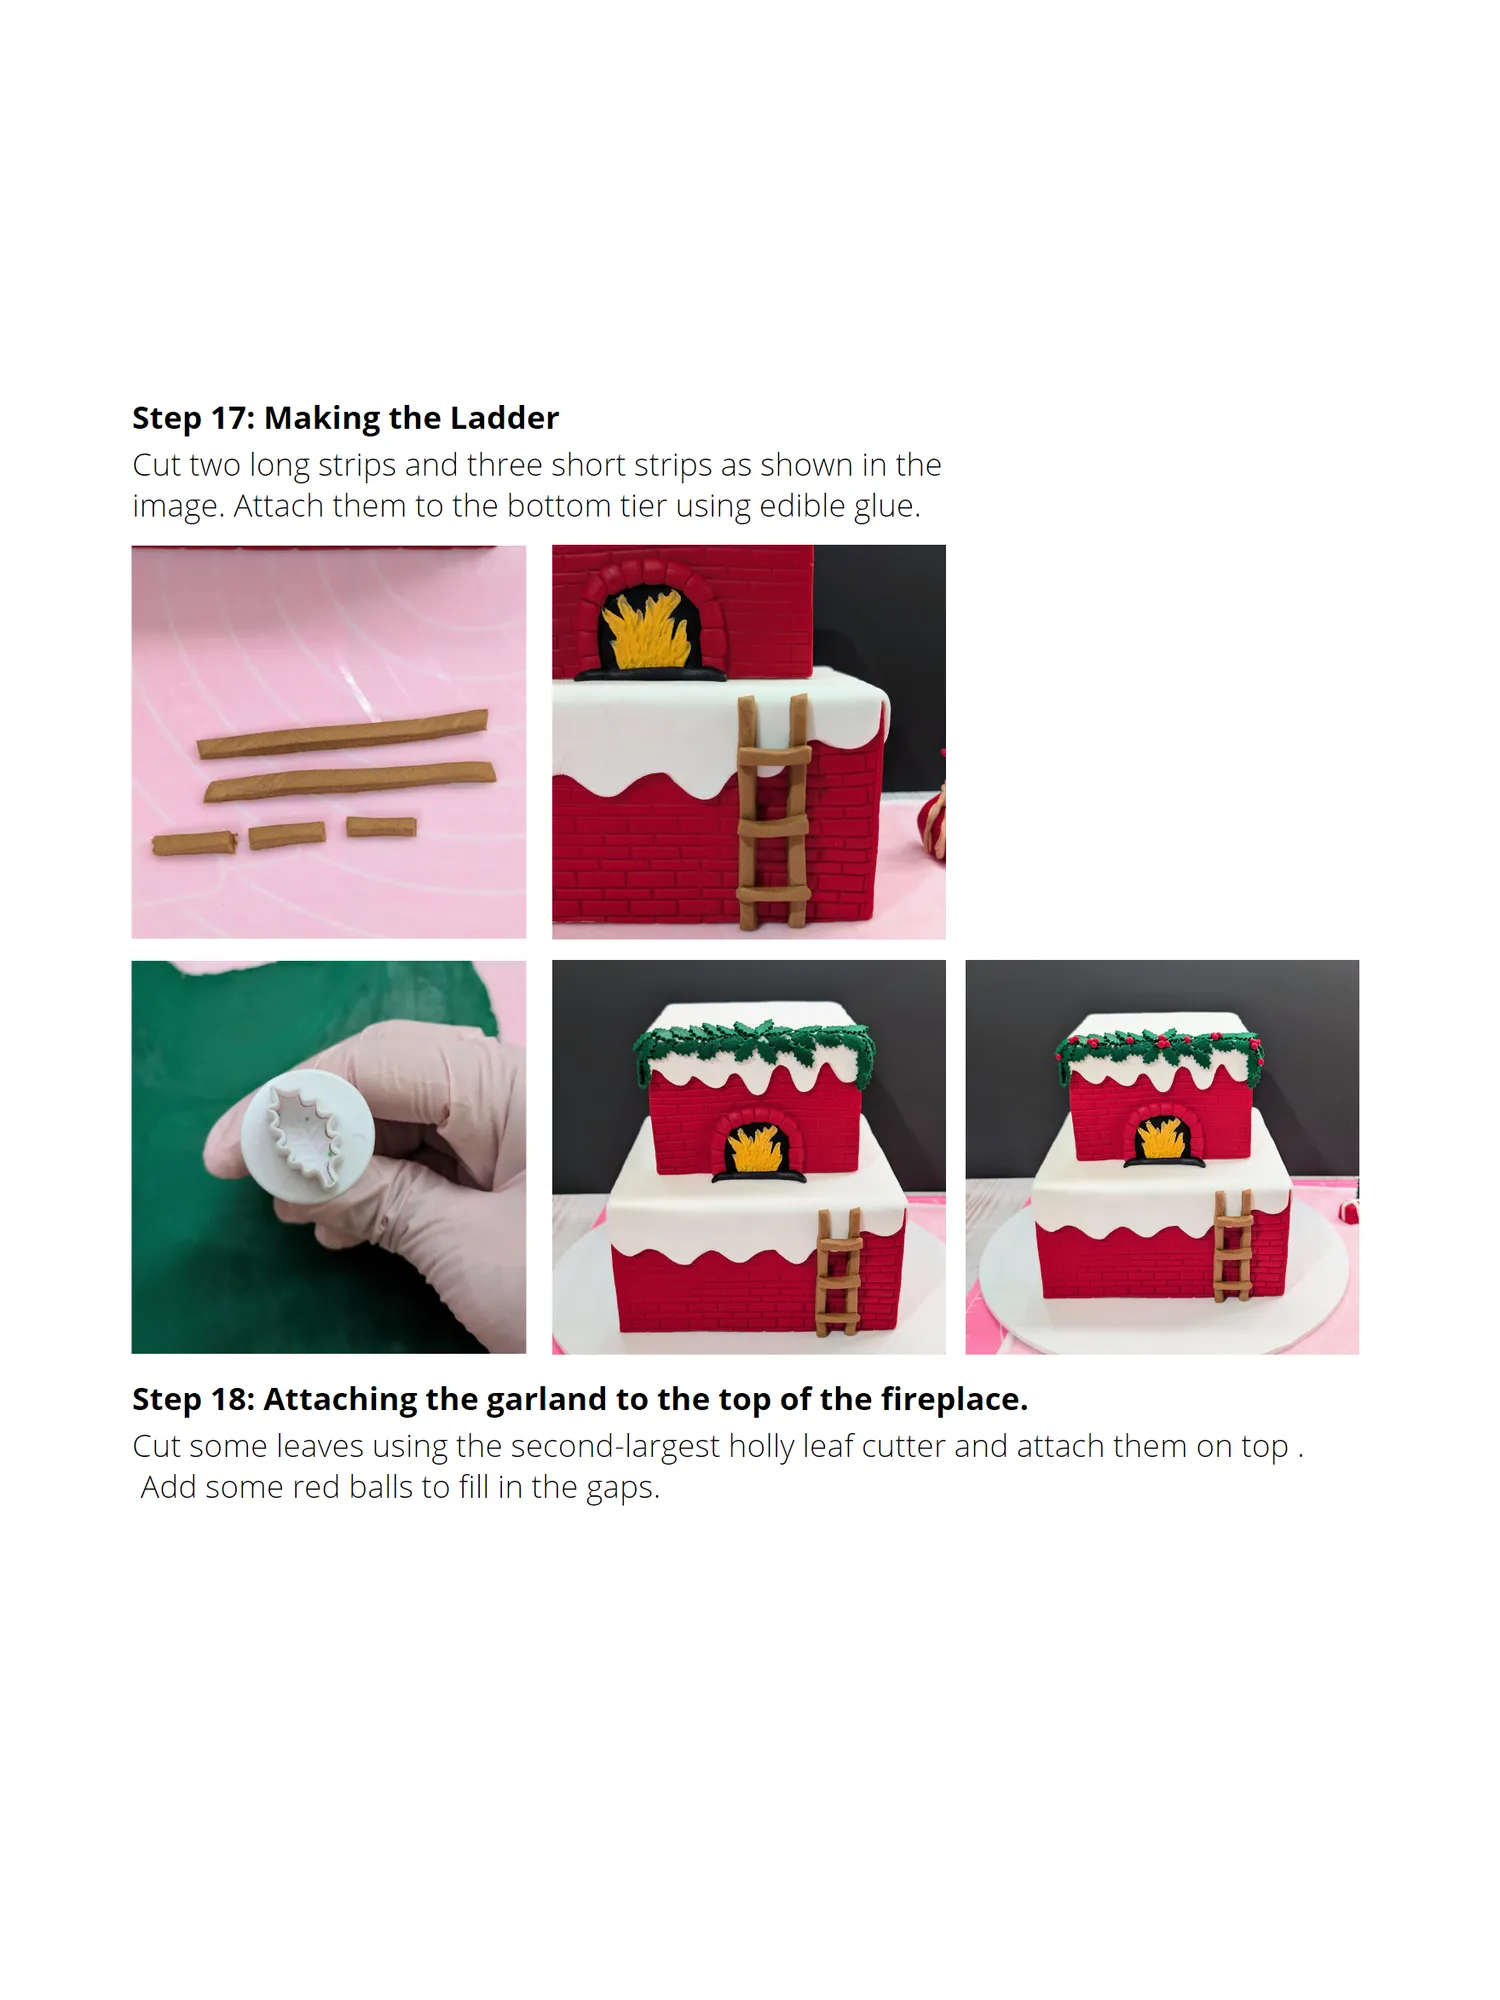
Step 17: Making the Ladder Cut two long strips and three short strips as shown in the image. Attach them to the bottom tier using edible glue. Step 18: Attaching the garland to the top of the fireplace. Cut some leaves using the second-largest holly leaf cutter and attach them on top . Add some red balls to fill in the gaps.
Page 49 text
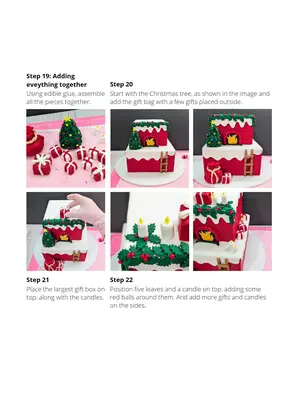
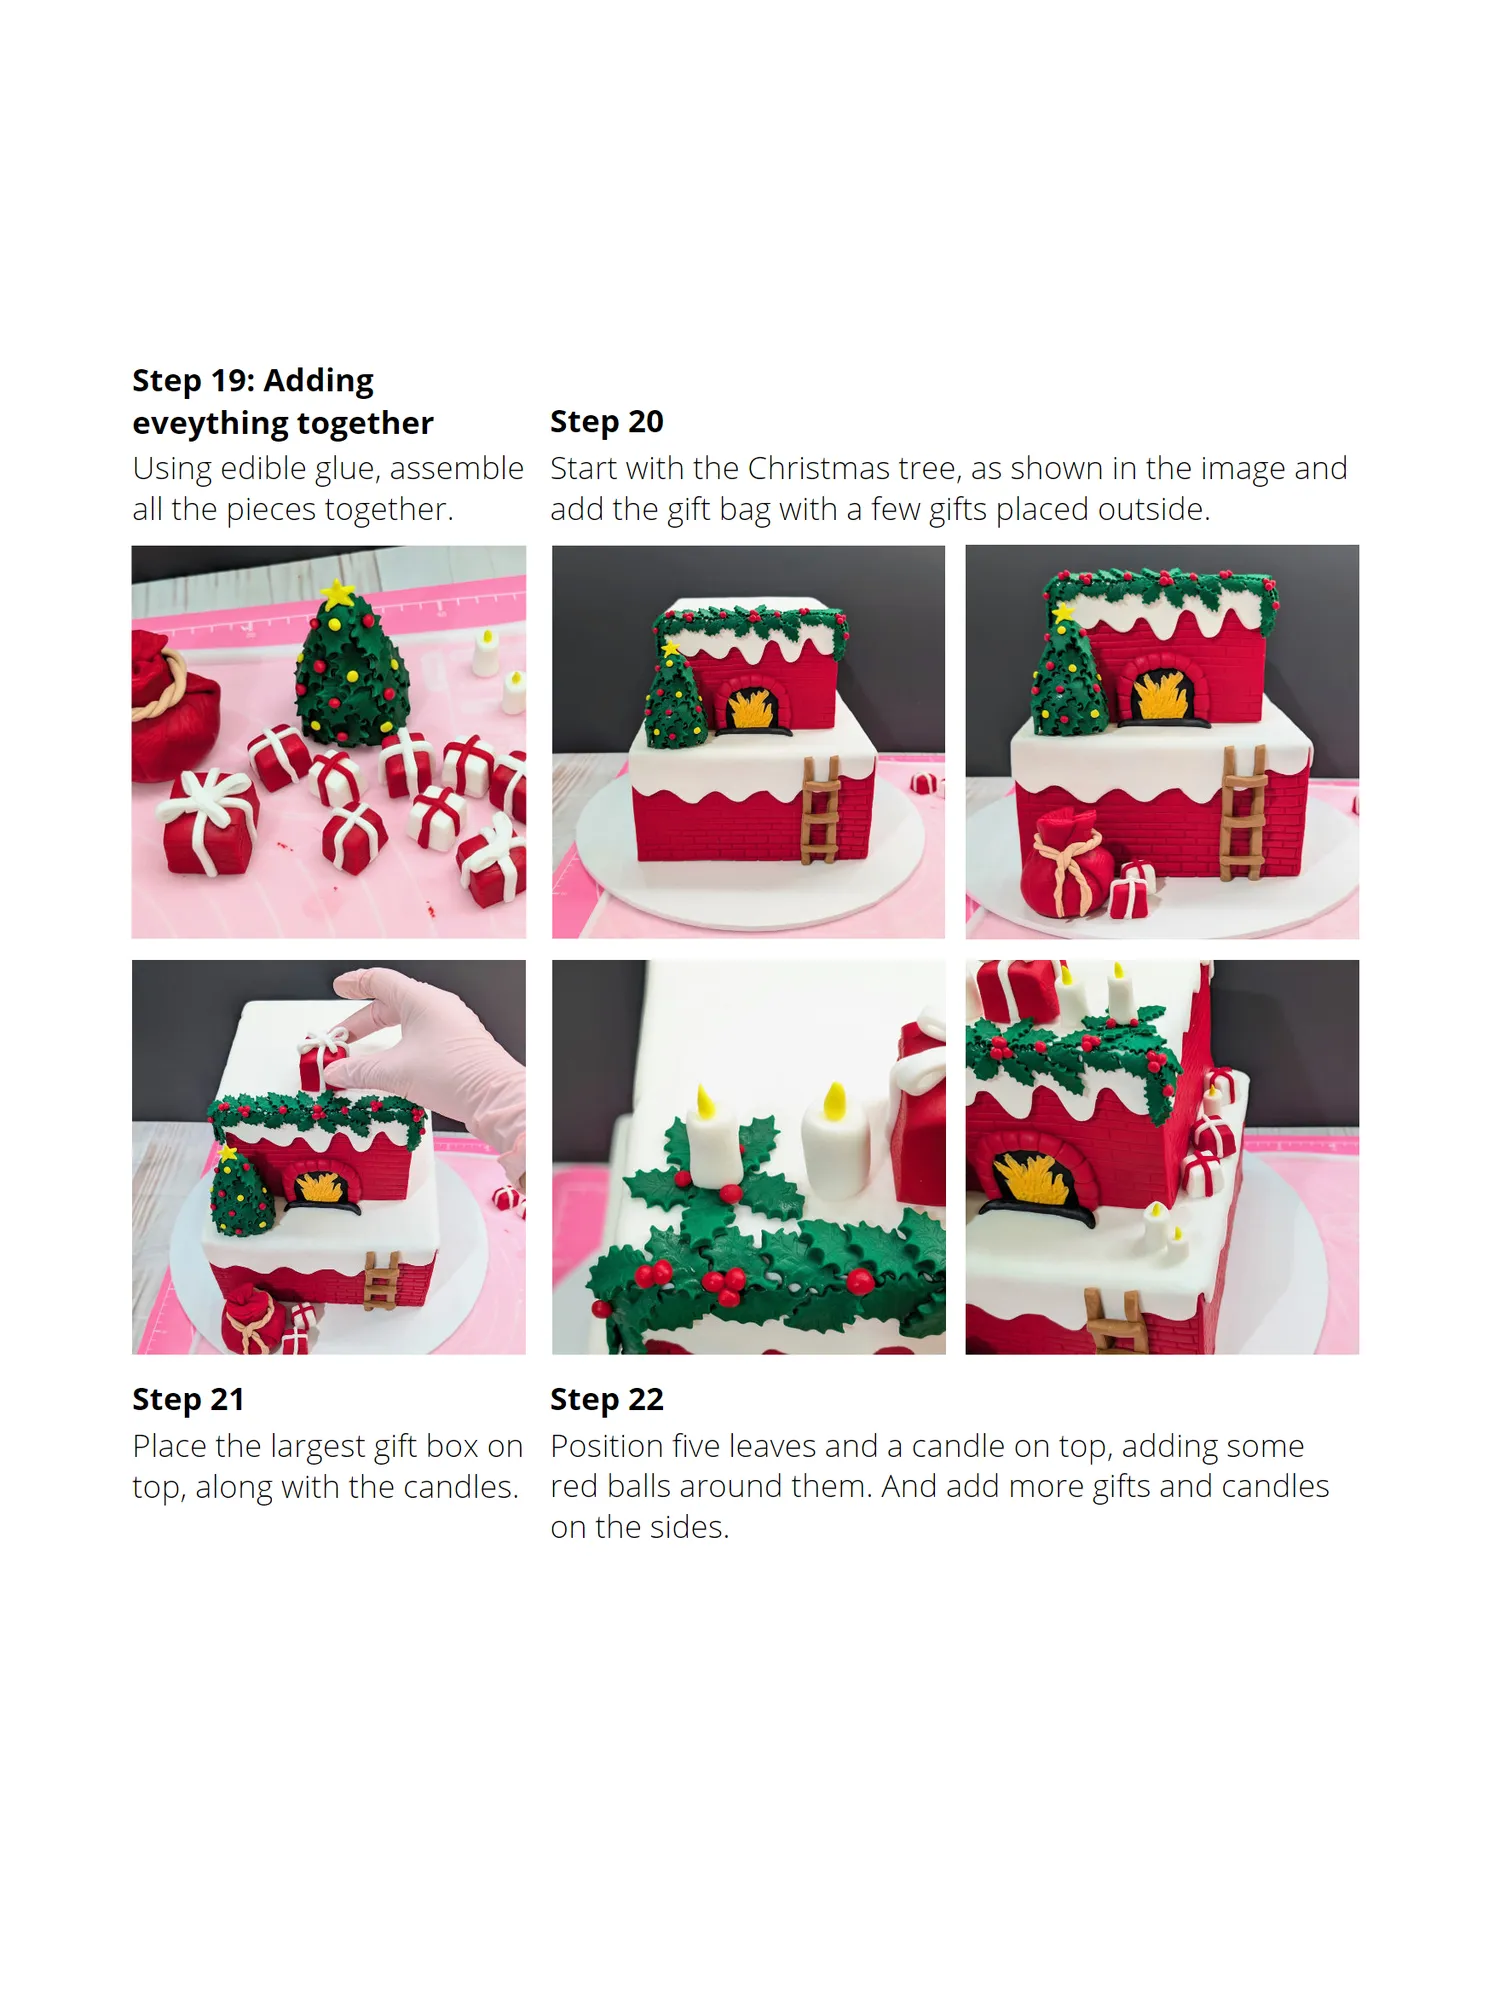
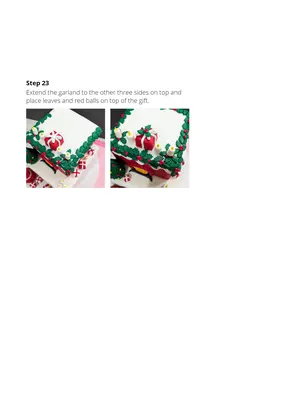
Step 19: Adding eveything together Step 20 Using edible glue, assemble Start with the Christmas tree, as shown in the image and all the pieces together. add the gift bag with a few gifts placed outside. Step 21 Step 22 Place the largest gift box on Position five leaves and a candle on top, adding some top, along with the candles. red balls around them. And add more gifts and candles on the sides.
Page 50 text
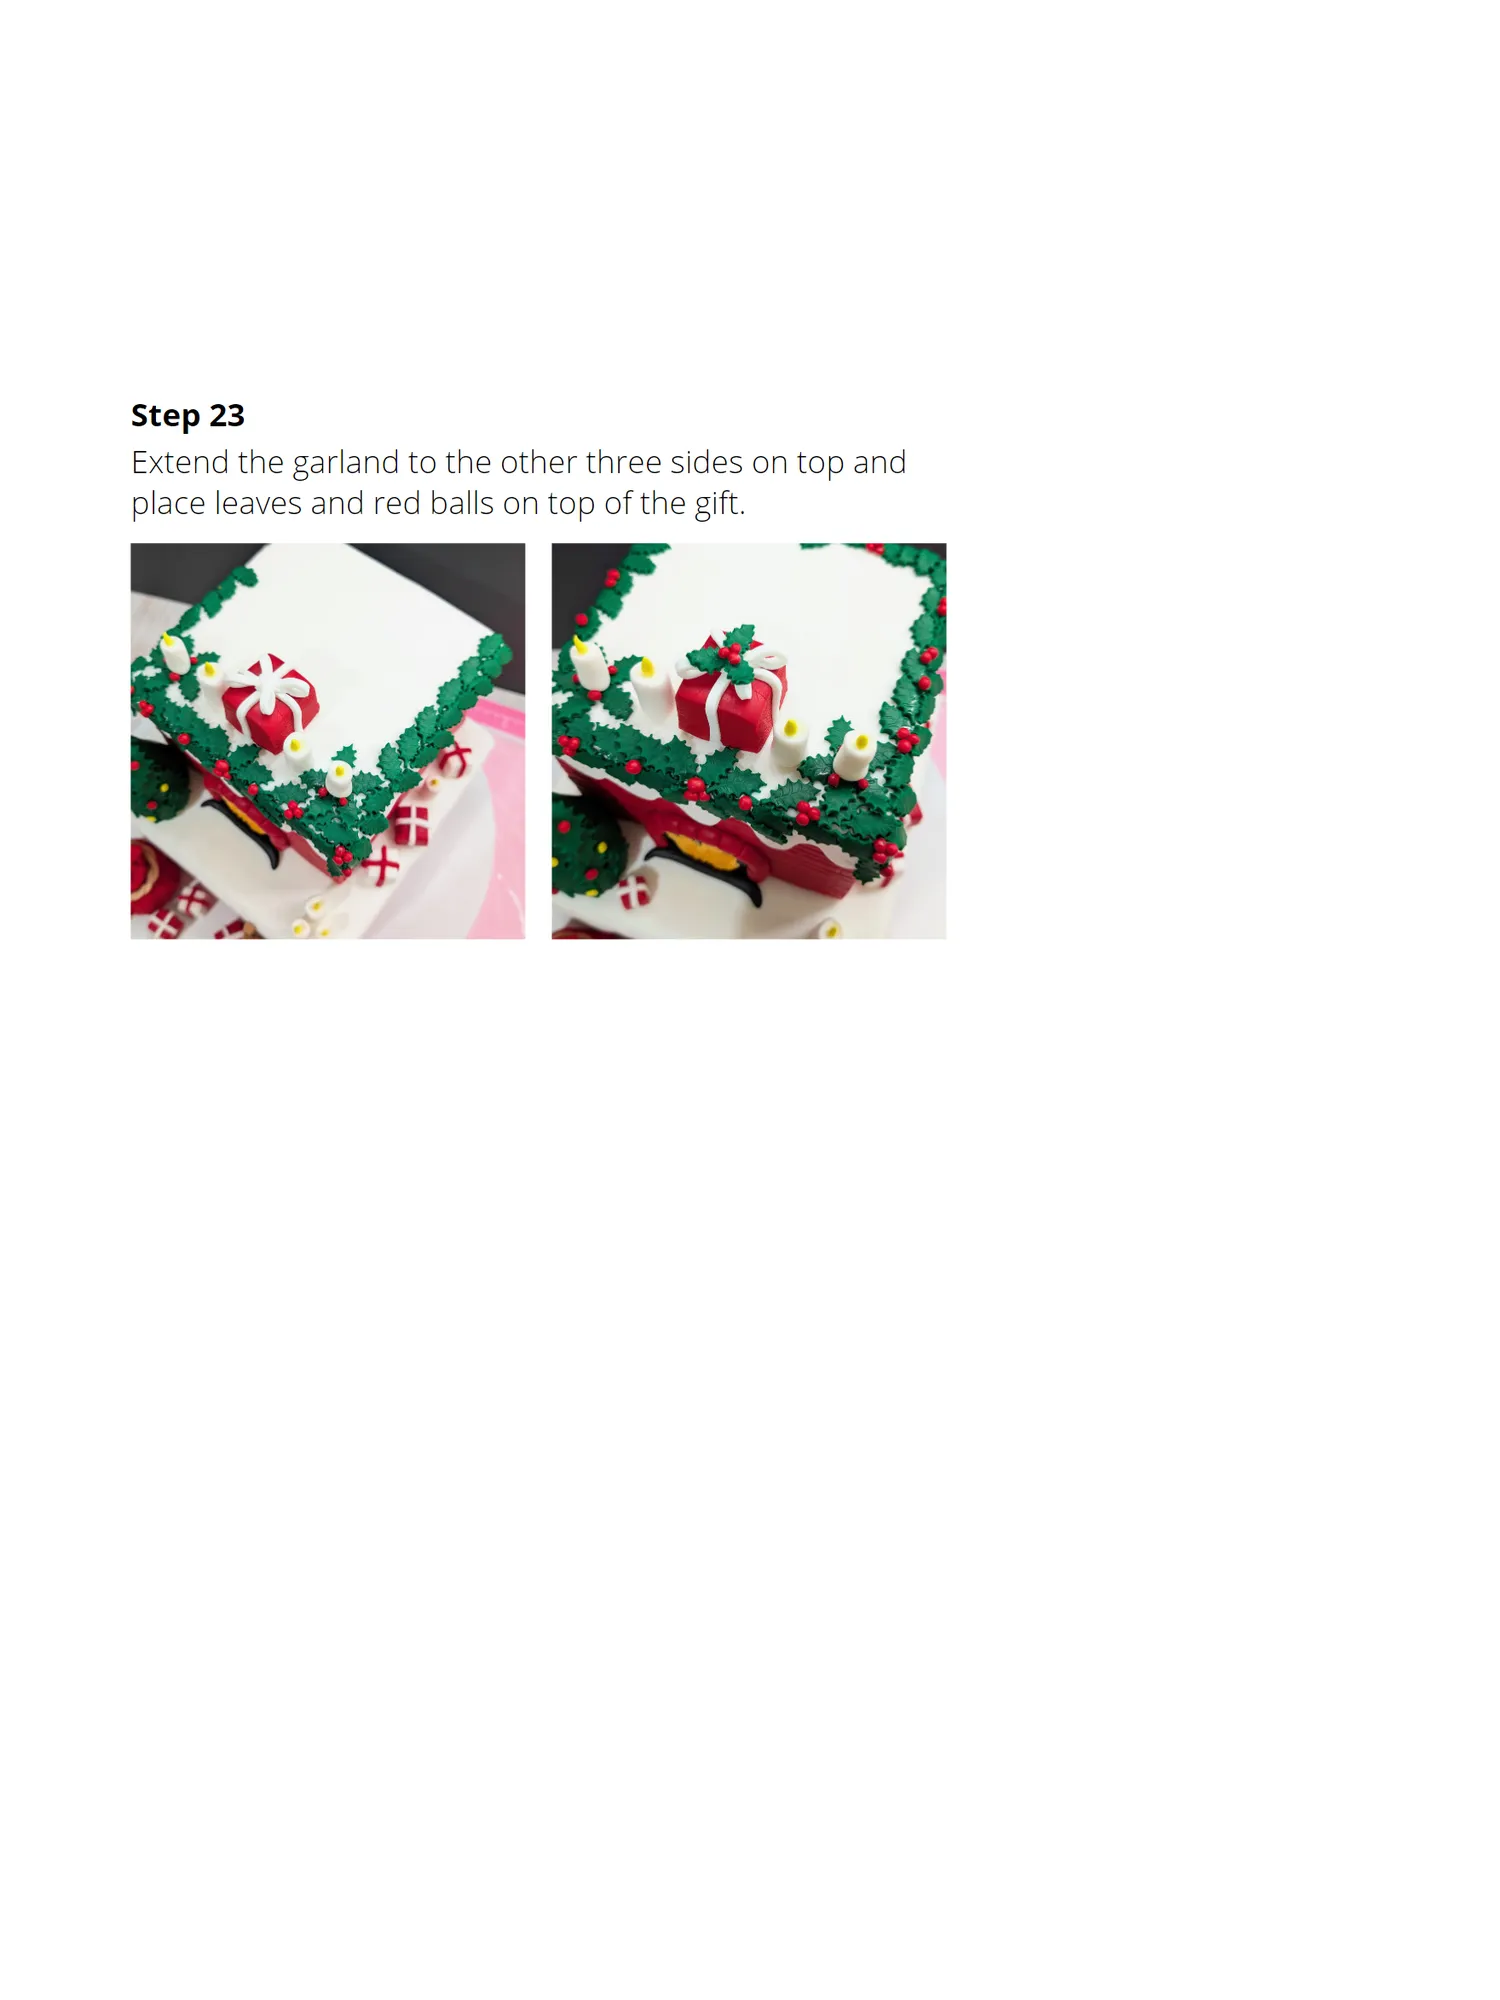
Step 23 Extend the garland to the other three sides on top and place leaves and red balls on top of the gift.
Page 51 text
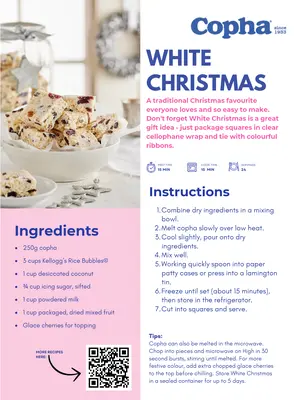
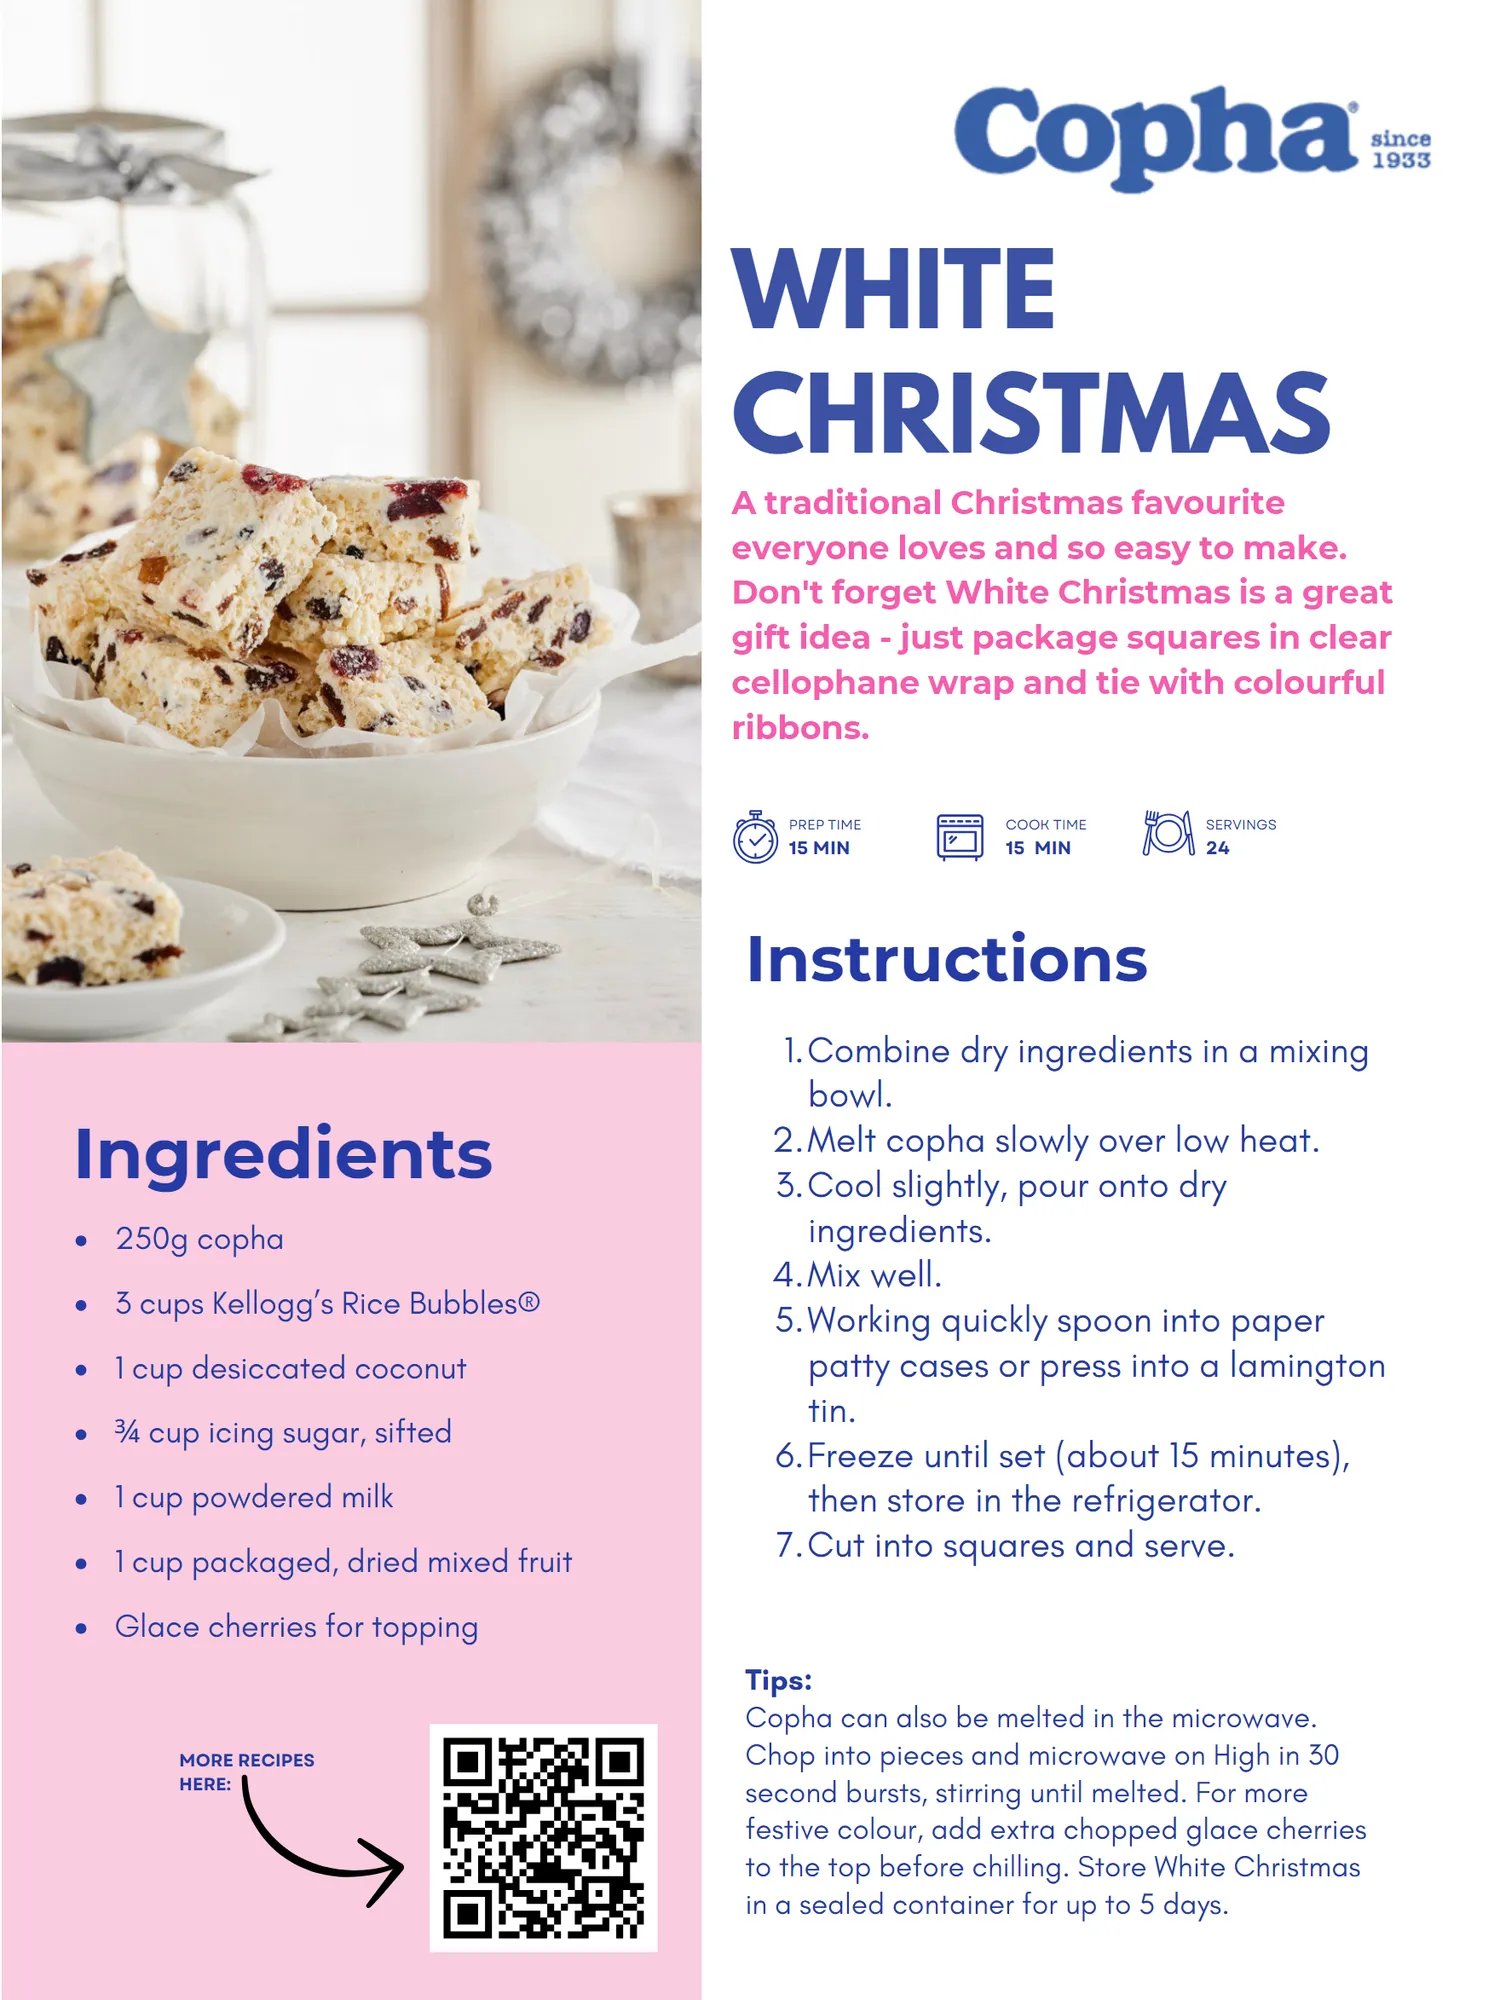
WHITE CHRISTMAS A traditional Christmas favourite everyone loves and so easy to make. Don ' t forget White Christmas is a great gift idea- just package squares in clear cellophane wrap and tie with colourful ribbons. PREP TIME COOK TIME SERVINGS 15 MIN 15 MIN 24 Instructions Ingredients 250g copha 3cups Kellogg’ s Rice Bubbles ® 1 cup desiccated coconut ¾cup icing sugar, sifted 1 cup powdered milk 1 cup packaged, dried mixed fruit Glacecherries for topping MORE RECIPES HERE: 1. Combine dry ingredients in a mixing bowl. 2. Melt copha slowly over low heat. 3. Cool slightly, pour onto dry ingredients. 4. Mix well. 5. Working quickly spoon into paper patty cases or press into a lamington tin. 6. Freeze until set( about 15 minutes), then store in the refrigerator. 7. Cut into squares and serve. Tips: Copha can also be melted in the microwave. Chop into pieces and microwave on High in 30 second bursts, stirring until melted. For more festive colour, add extra chopped glace cherries to the top before chilling. Store White Christmas in a sealed container for up to 5 days.
Page 52 text
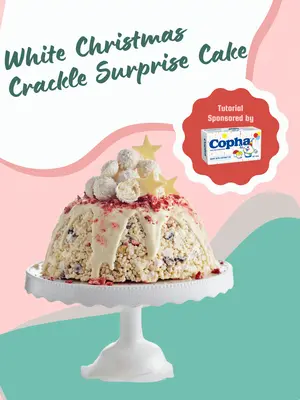
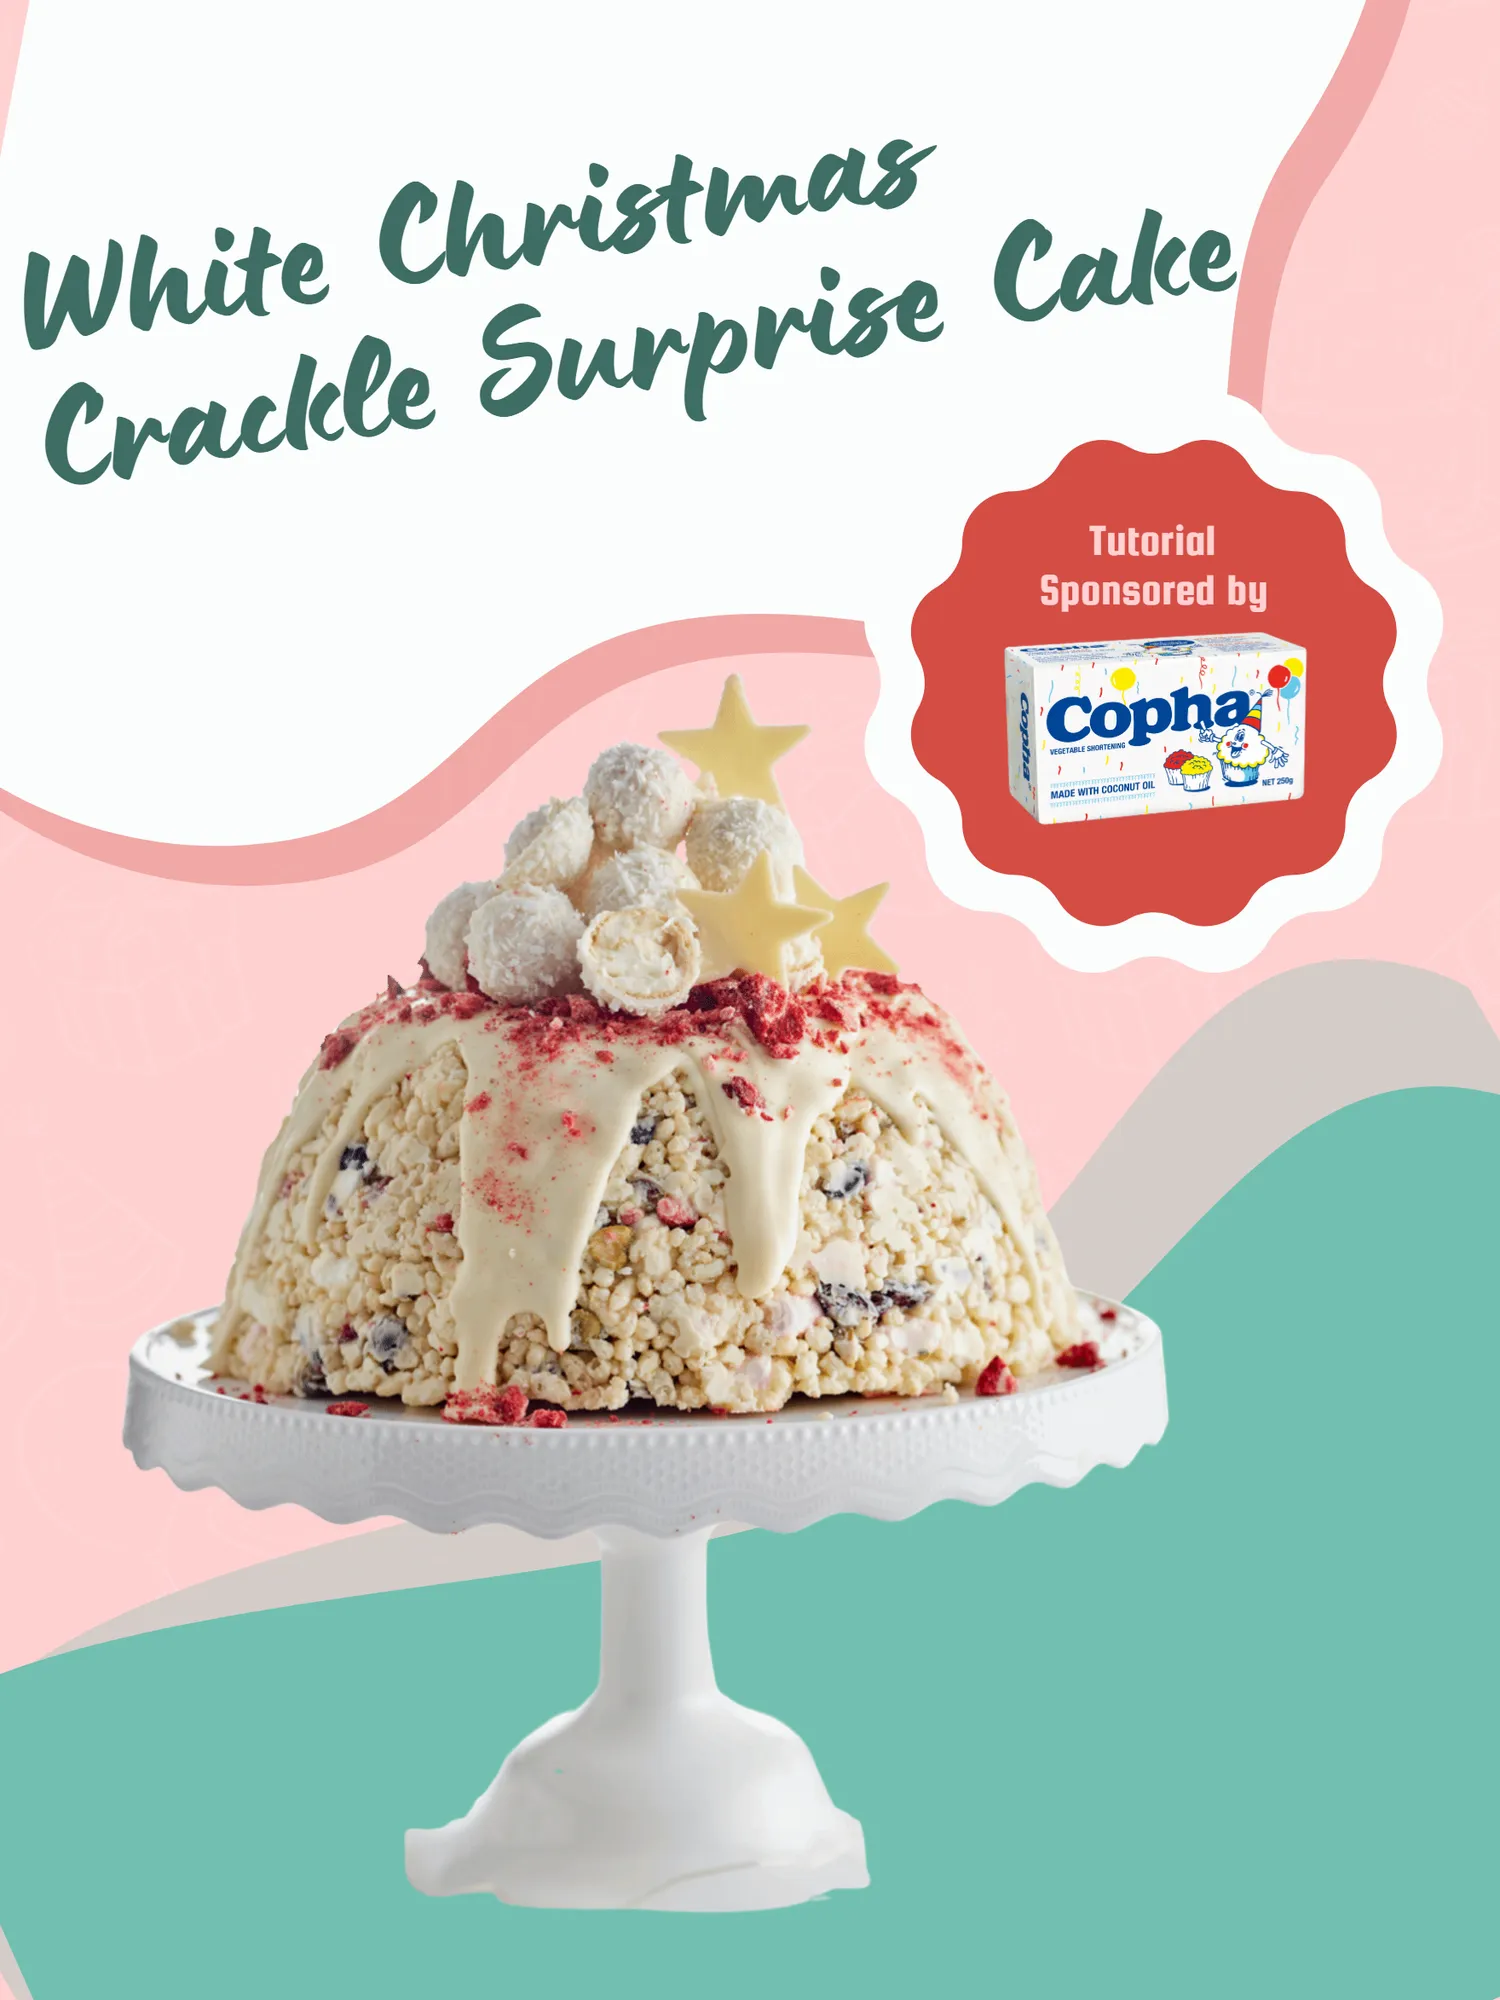
Tutorial Sponsored by White Christmas Crackle Surprise Cake Tutorial Sponsored by
Page 53 text
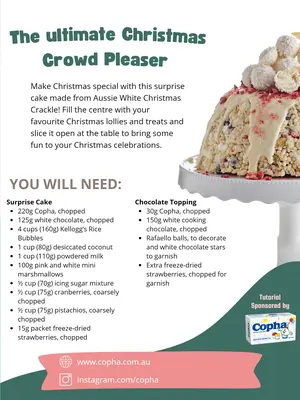
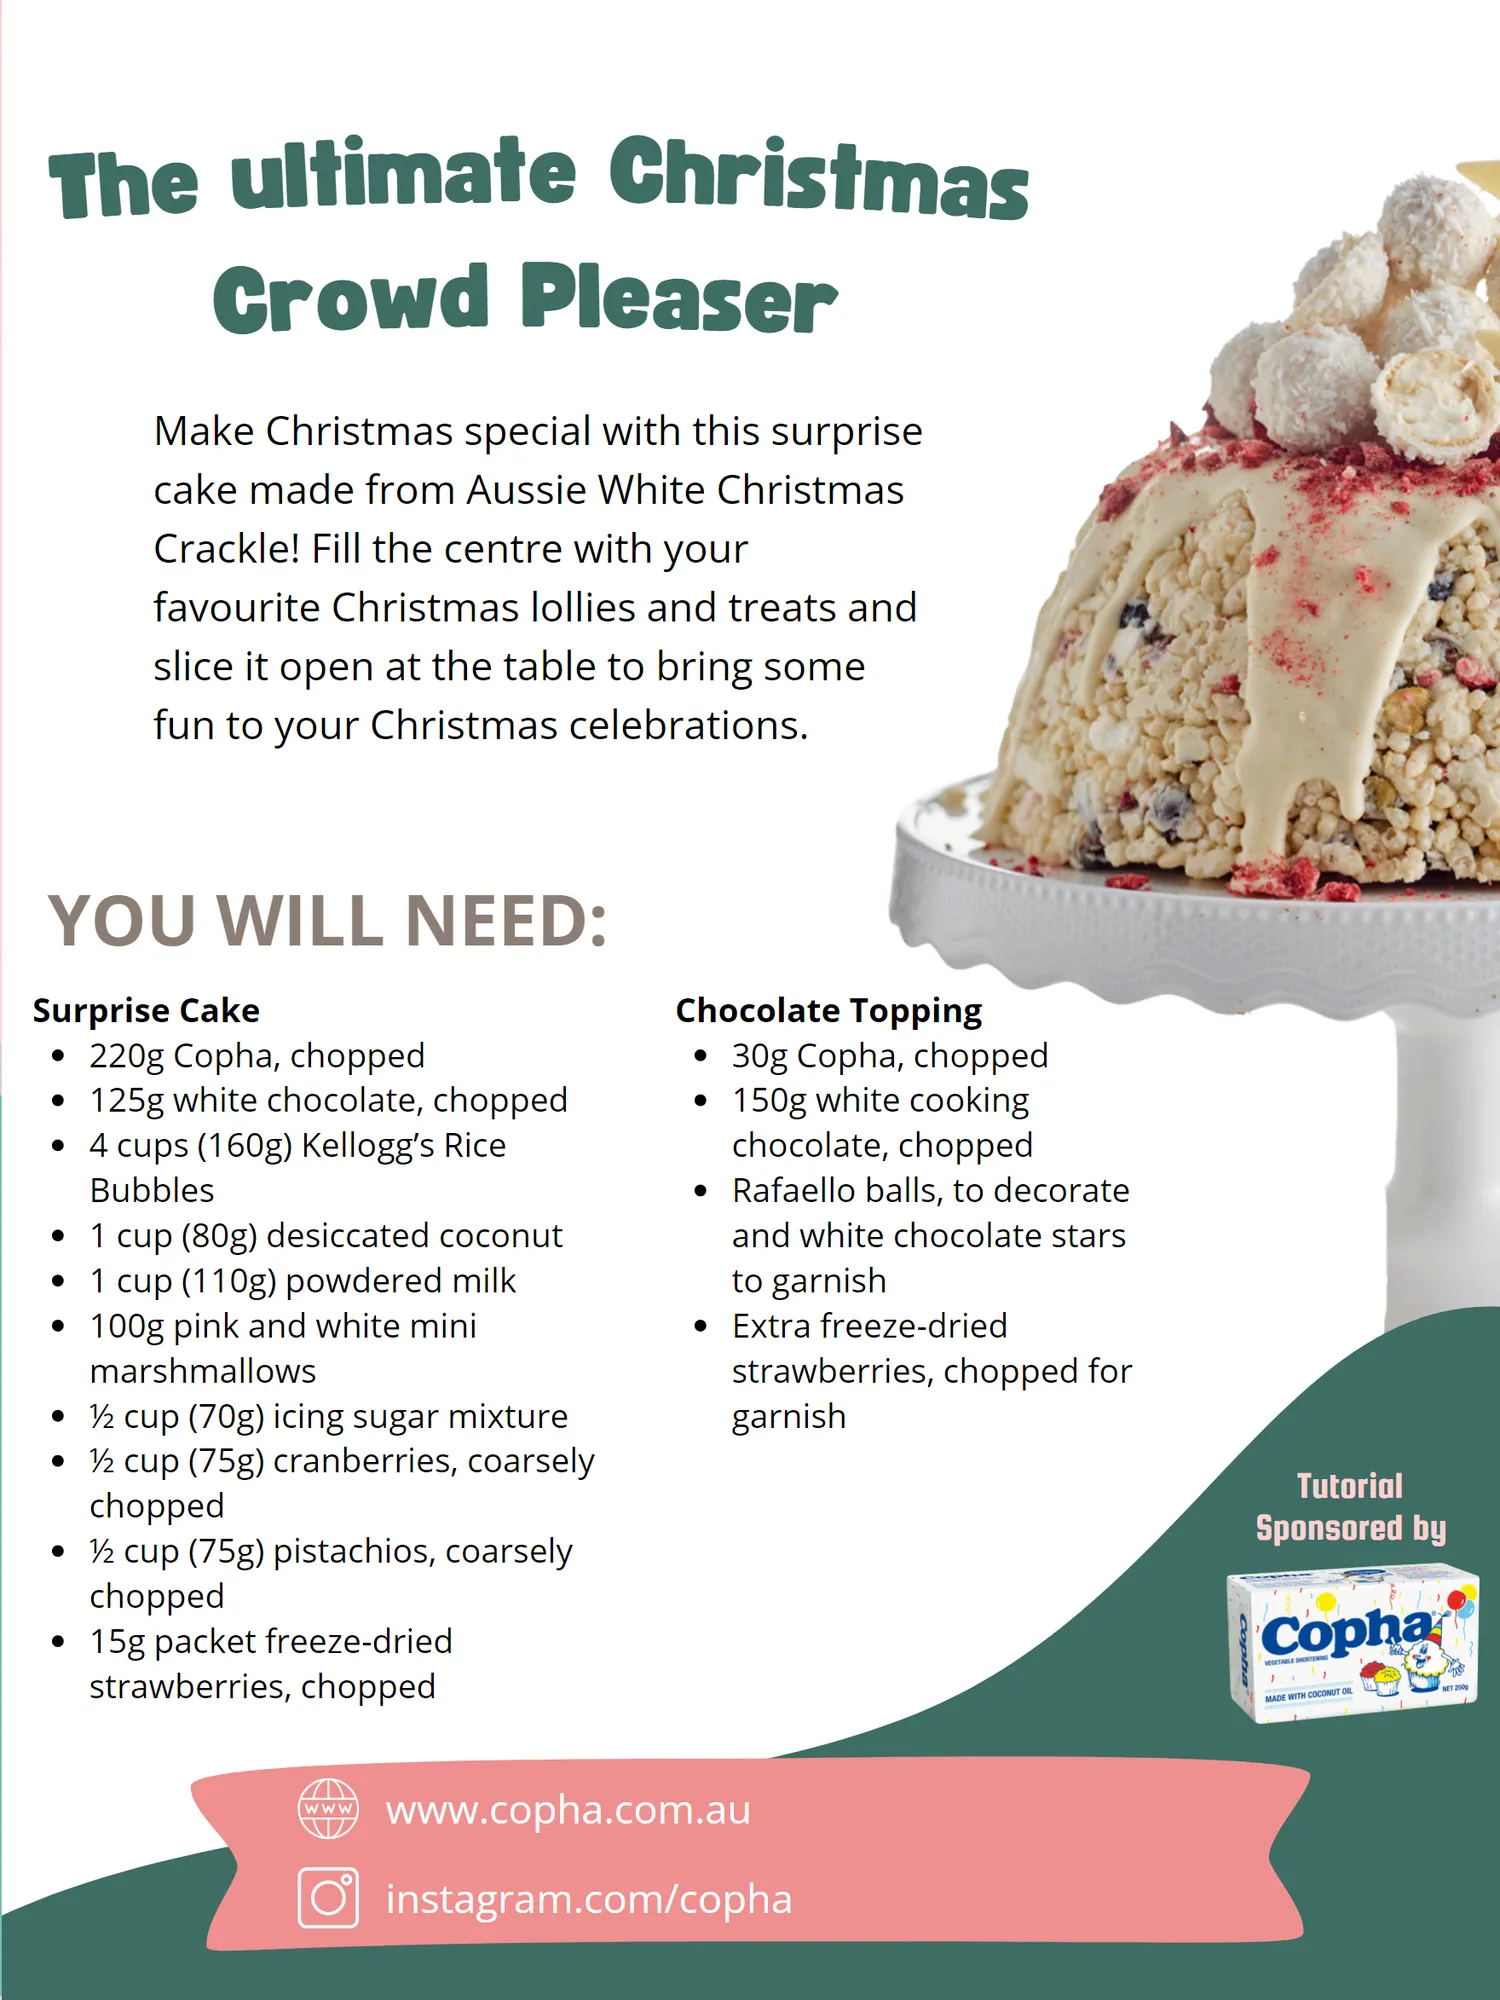
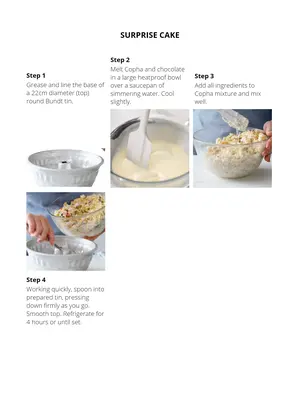
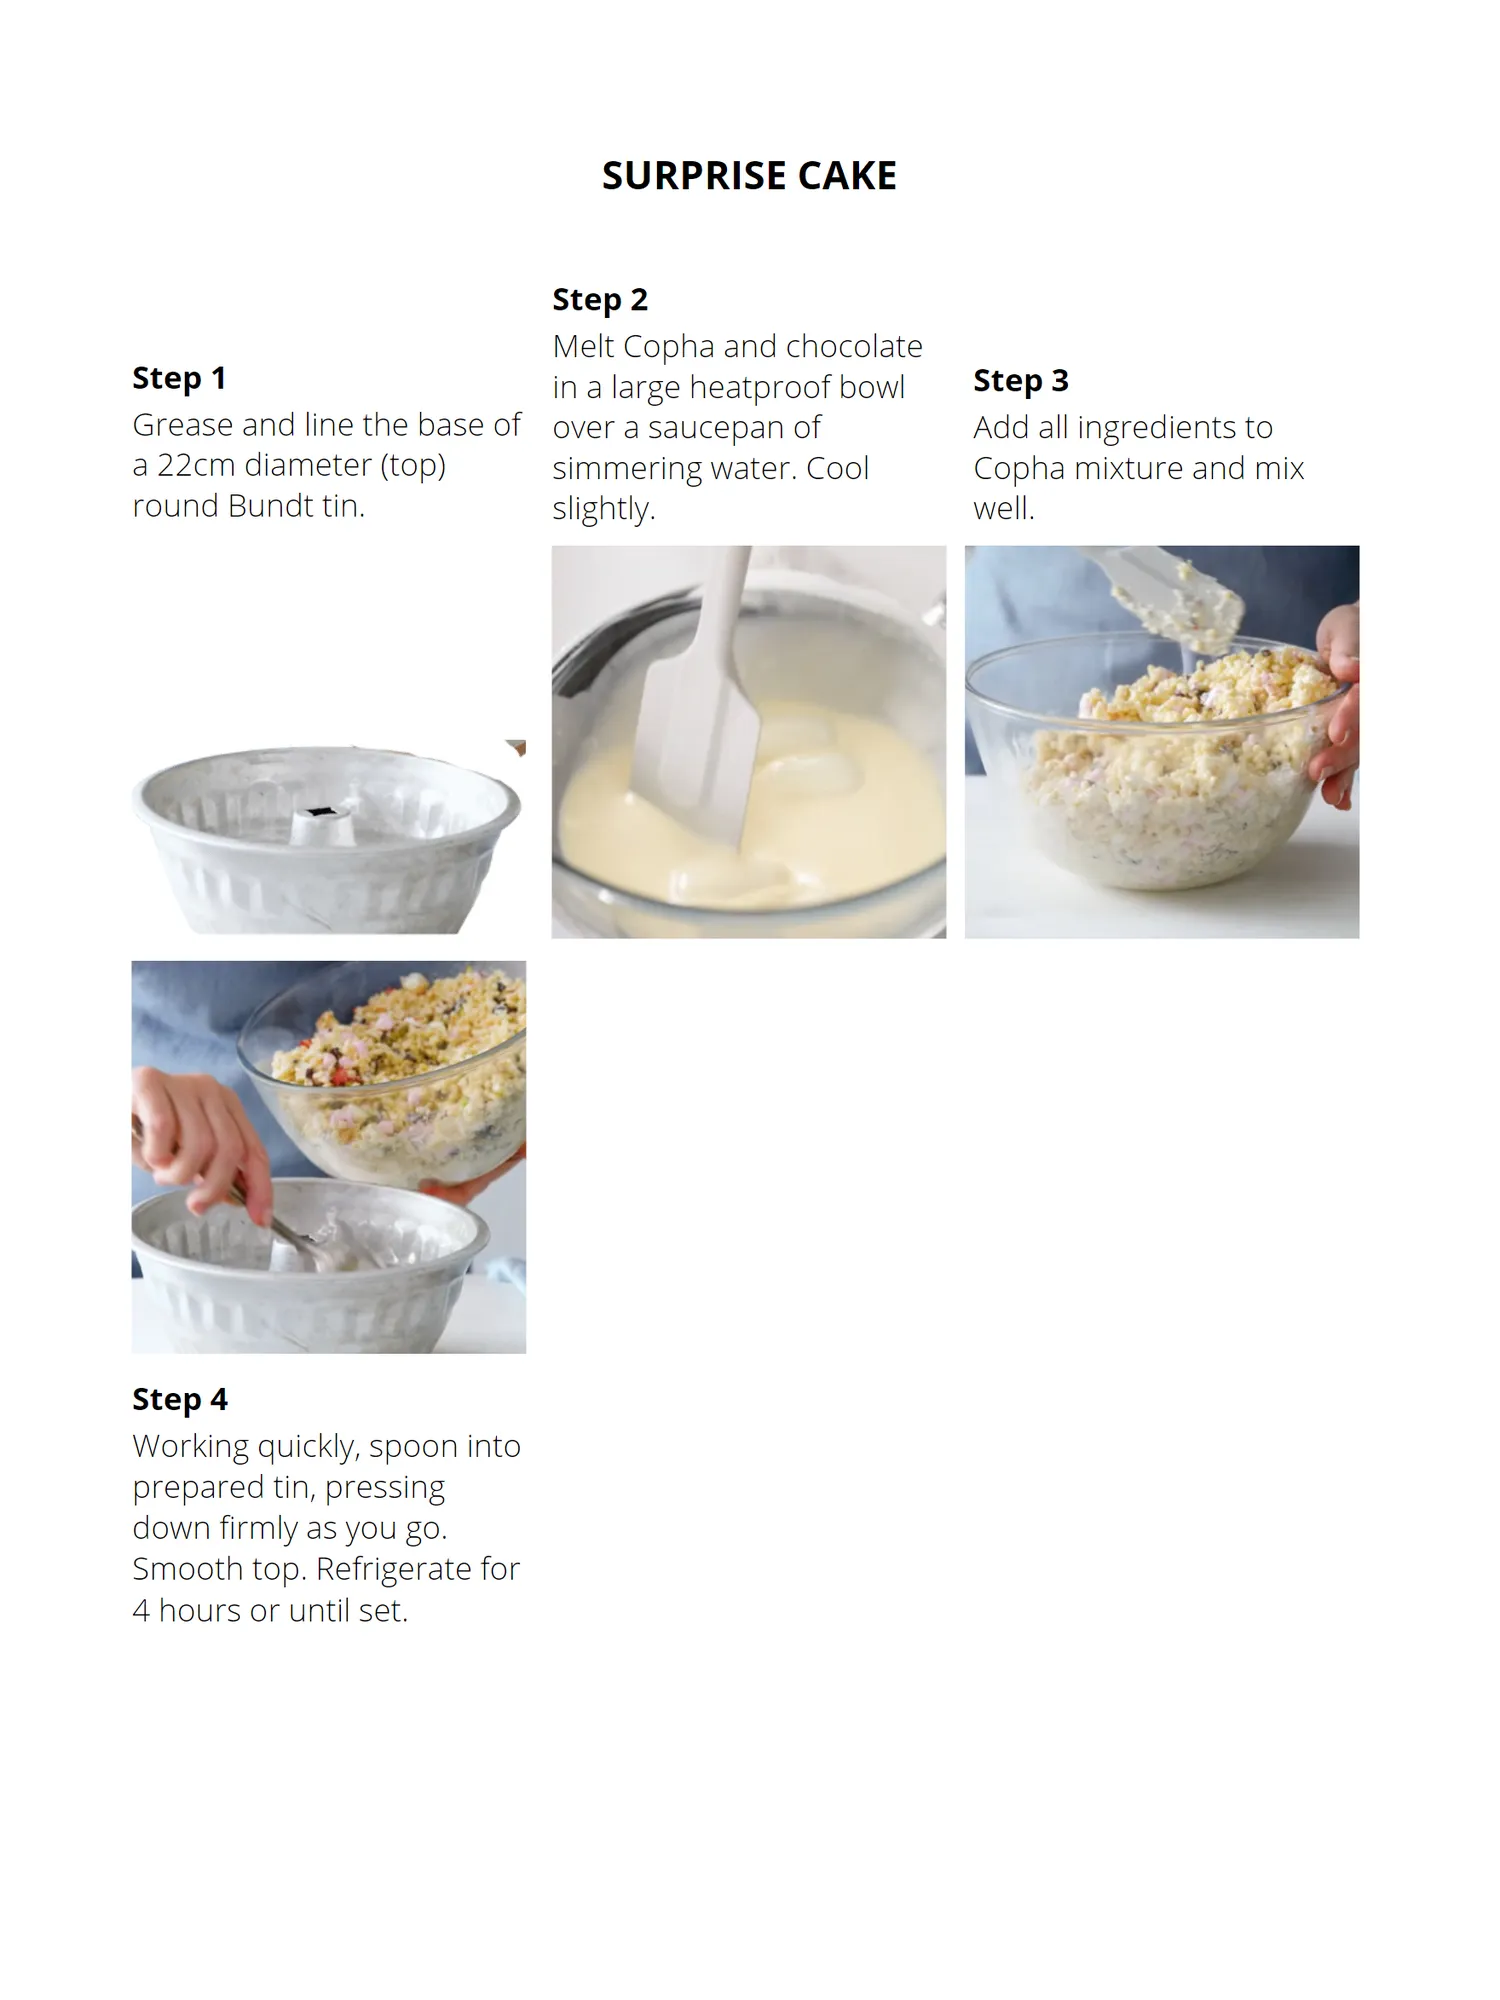
The ultimate Christmas Crowd Pleaser Make Christmas special with this surprise cake made from Aussie White Christmas Crackle! Fill the centre with your favourite Christmas lollies and treats and slice it open at the table to bring some fun to your Christmas celebrations. YOU WILL NEED: Surprise Cake 220g Copha, chopped 125g white chocolate, chopped 4 cups( 160g) Kellogg’ s Rice Bubbles 1 cup( 80g) desiccated coconut 1 cup( 110g) powdered milk 100g pink and white mini marshmallows ½ cup( 70g) icing sugar mixture ½ cup( 75g) cranberries, coarsely chopped ½ cup( 75g) pistachios, coarsely chopped 15g packet freeze-dried strawberries, chopped Chocolate Topping 30g Copha, chopped 150g white cooking chocolate, chopped Rafaello balls, to decorate and white chocolate stars to garnish Extra freeze-dried strawberries, chopped for garnish Tutorial Sponsored by www. copha. com. au instagram. com / copha
Page 54 text
SURPRISE CAKE Step 2 Melt Copha and chocolate Step 1 in a large heatproof bowl Step 3 Grease and line the base of over a saucepan of Add all ingredients to a 22cm diameter (top) simmering water. Cool Copha mixture and mix round Bundt tin. slightly. well. Step 4 Working quickly, spoon into prepared tin, pressing down firmly as you go. Smooth top. Refrigerate for 4 hours or until set.
Page 55 text
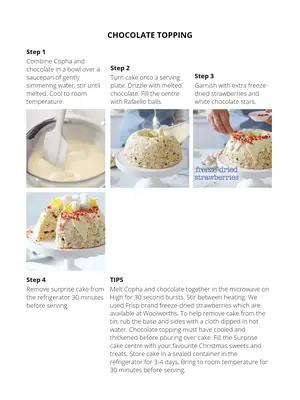
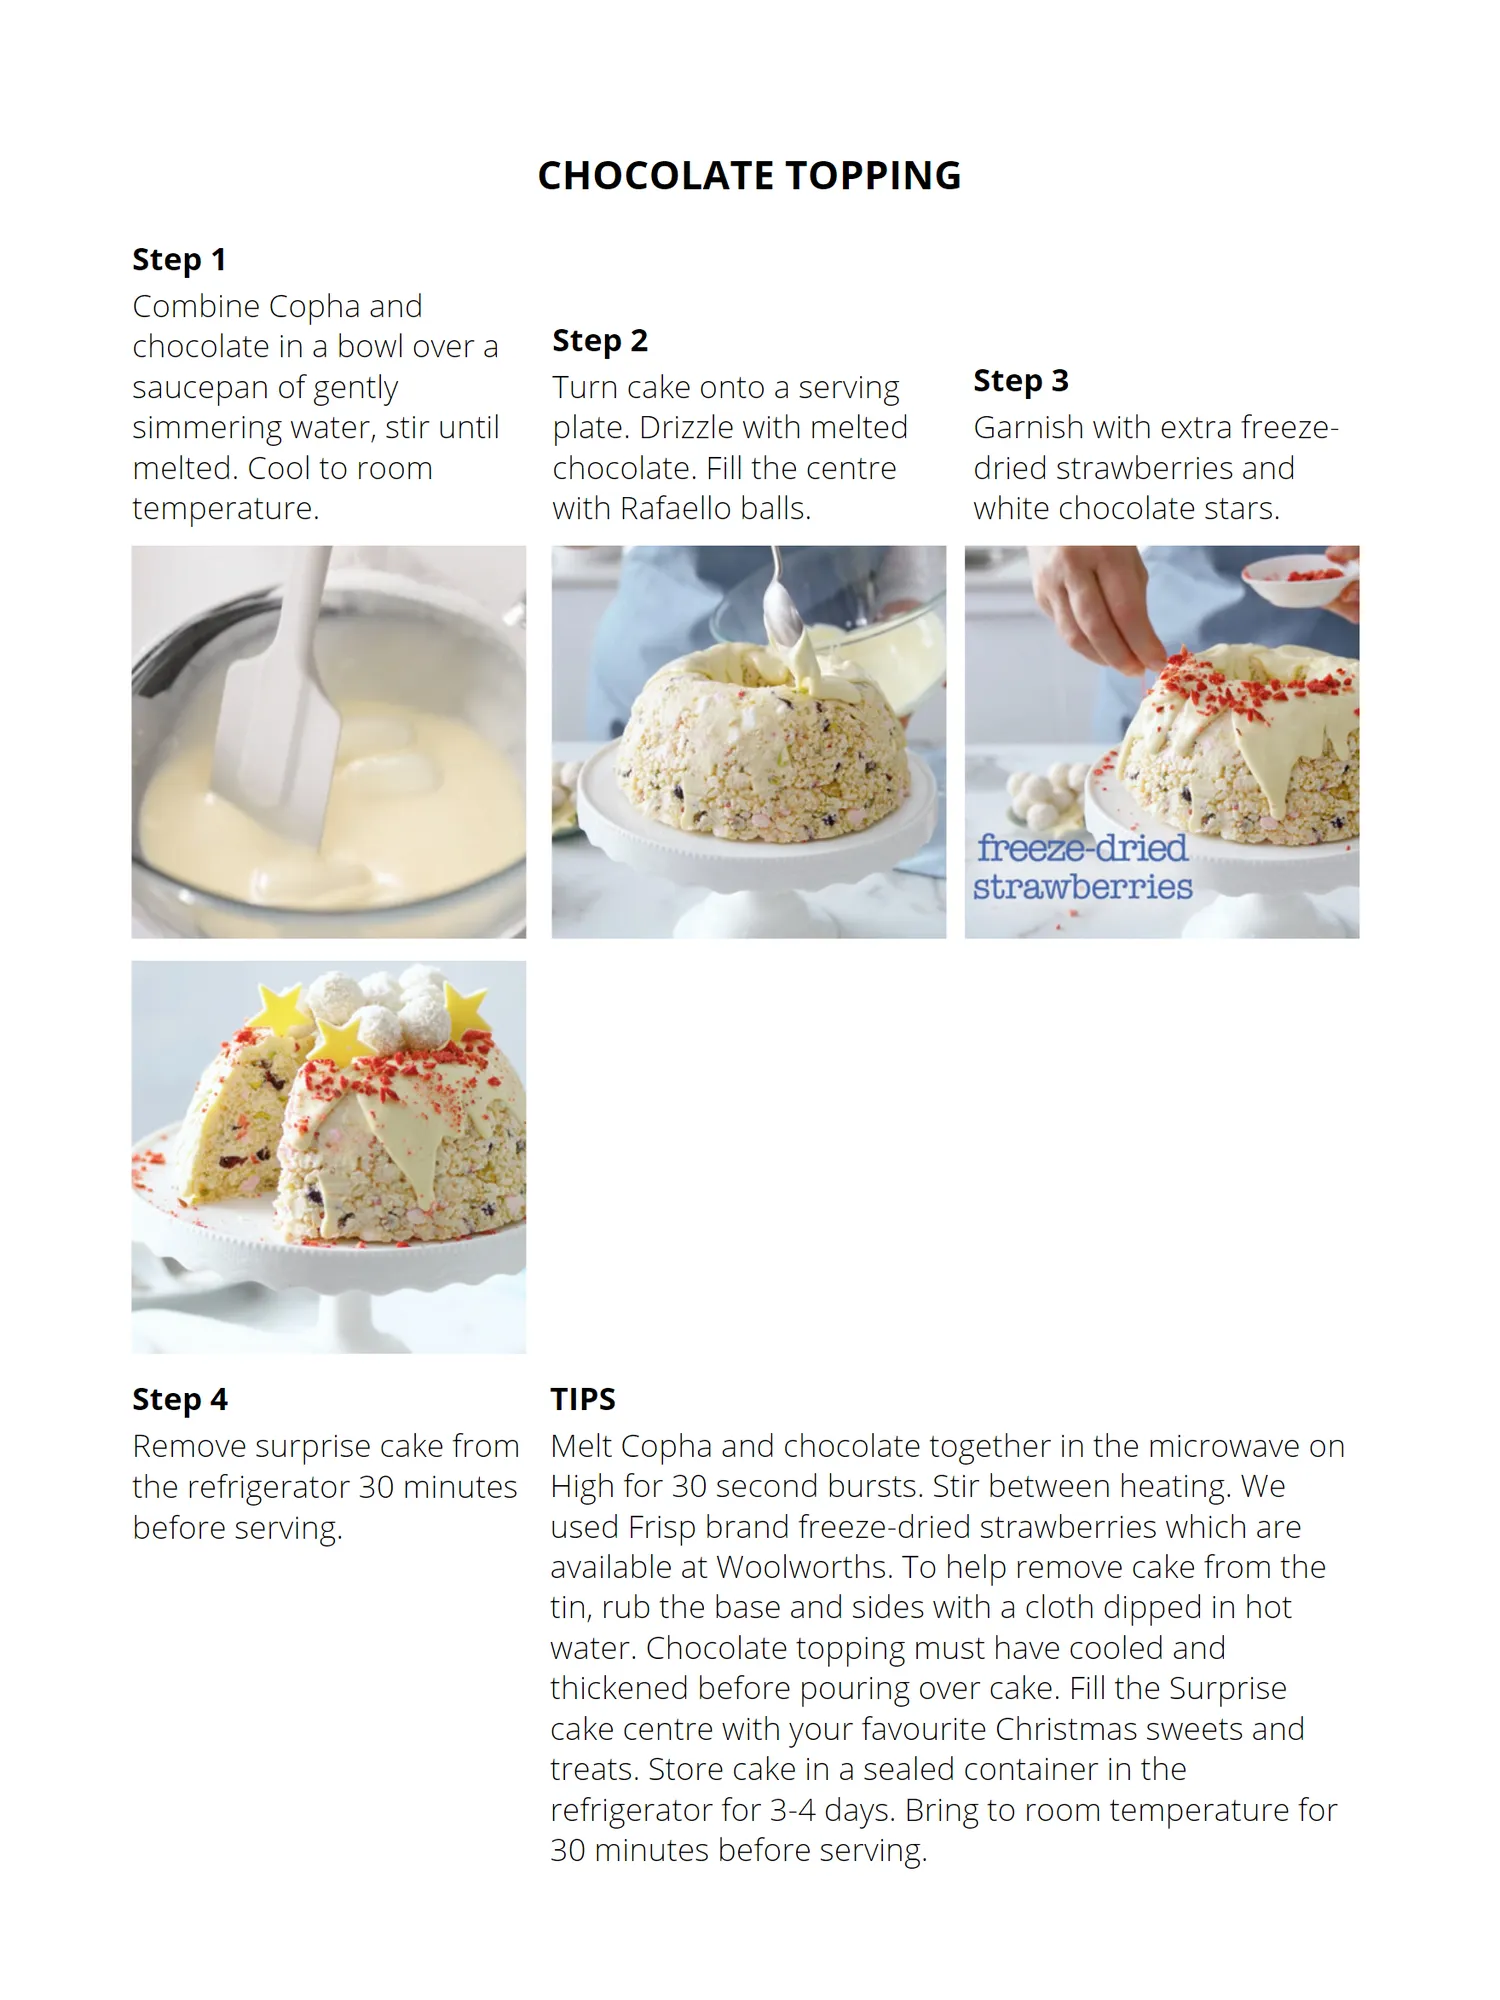
CHOCOLATE TOPPING Step 1 Combine Copha and chocolate in a bowl over a Step 2 saucepan of gently Turn cake onto a serving Step 3 simmering water, stir until plate. Drizzle with melted Garnish with extra freeze- melted. Cool to room chocolate. Fill the centre dried strawberries and temperature. with Rafaello balls. white chocolate stars. Step 4 TIPS Remove surprise cake from Melt Copha and chocolate together in the microwave on the refrigerator 30 minutes High for 30 second bursts. Stir between heating. We before serving. used Frisp brand freeze-dried strawberries which are available at Woolworths. To help remove cake from the tin, rub the base and sides with a cloth dipped in hot water. Chocolate topping must have cooled and thickened before pouring over cake. Fill the Surprise cake centre with your favourite Christmas sweets and treats. Store cake in a sealed container in the refrigerator for 3-4 days. Bring to room temperature for 30 minutes before serving.
Page 56 text
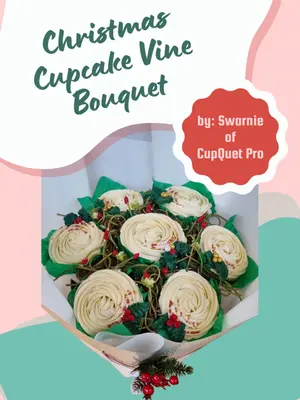
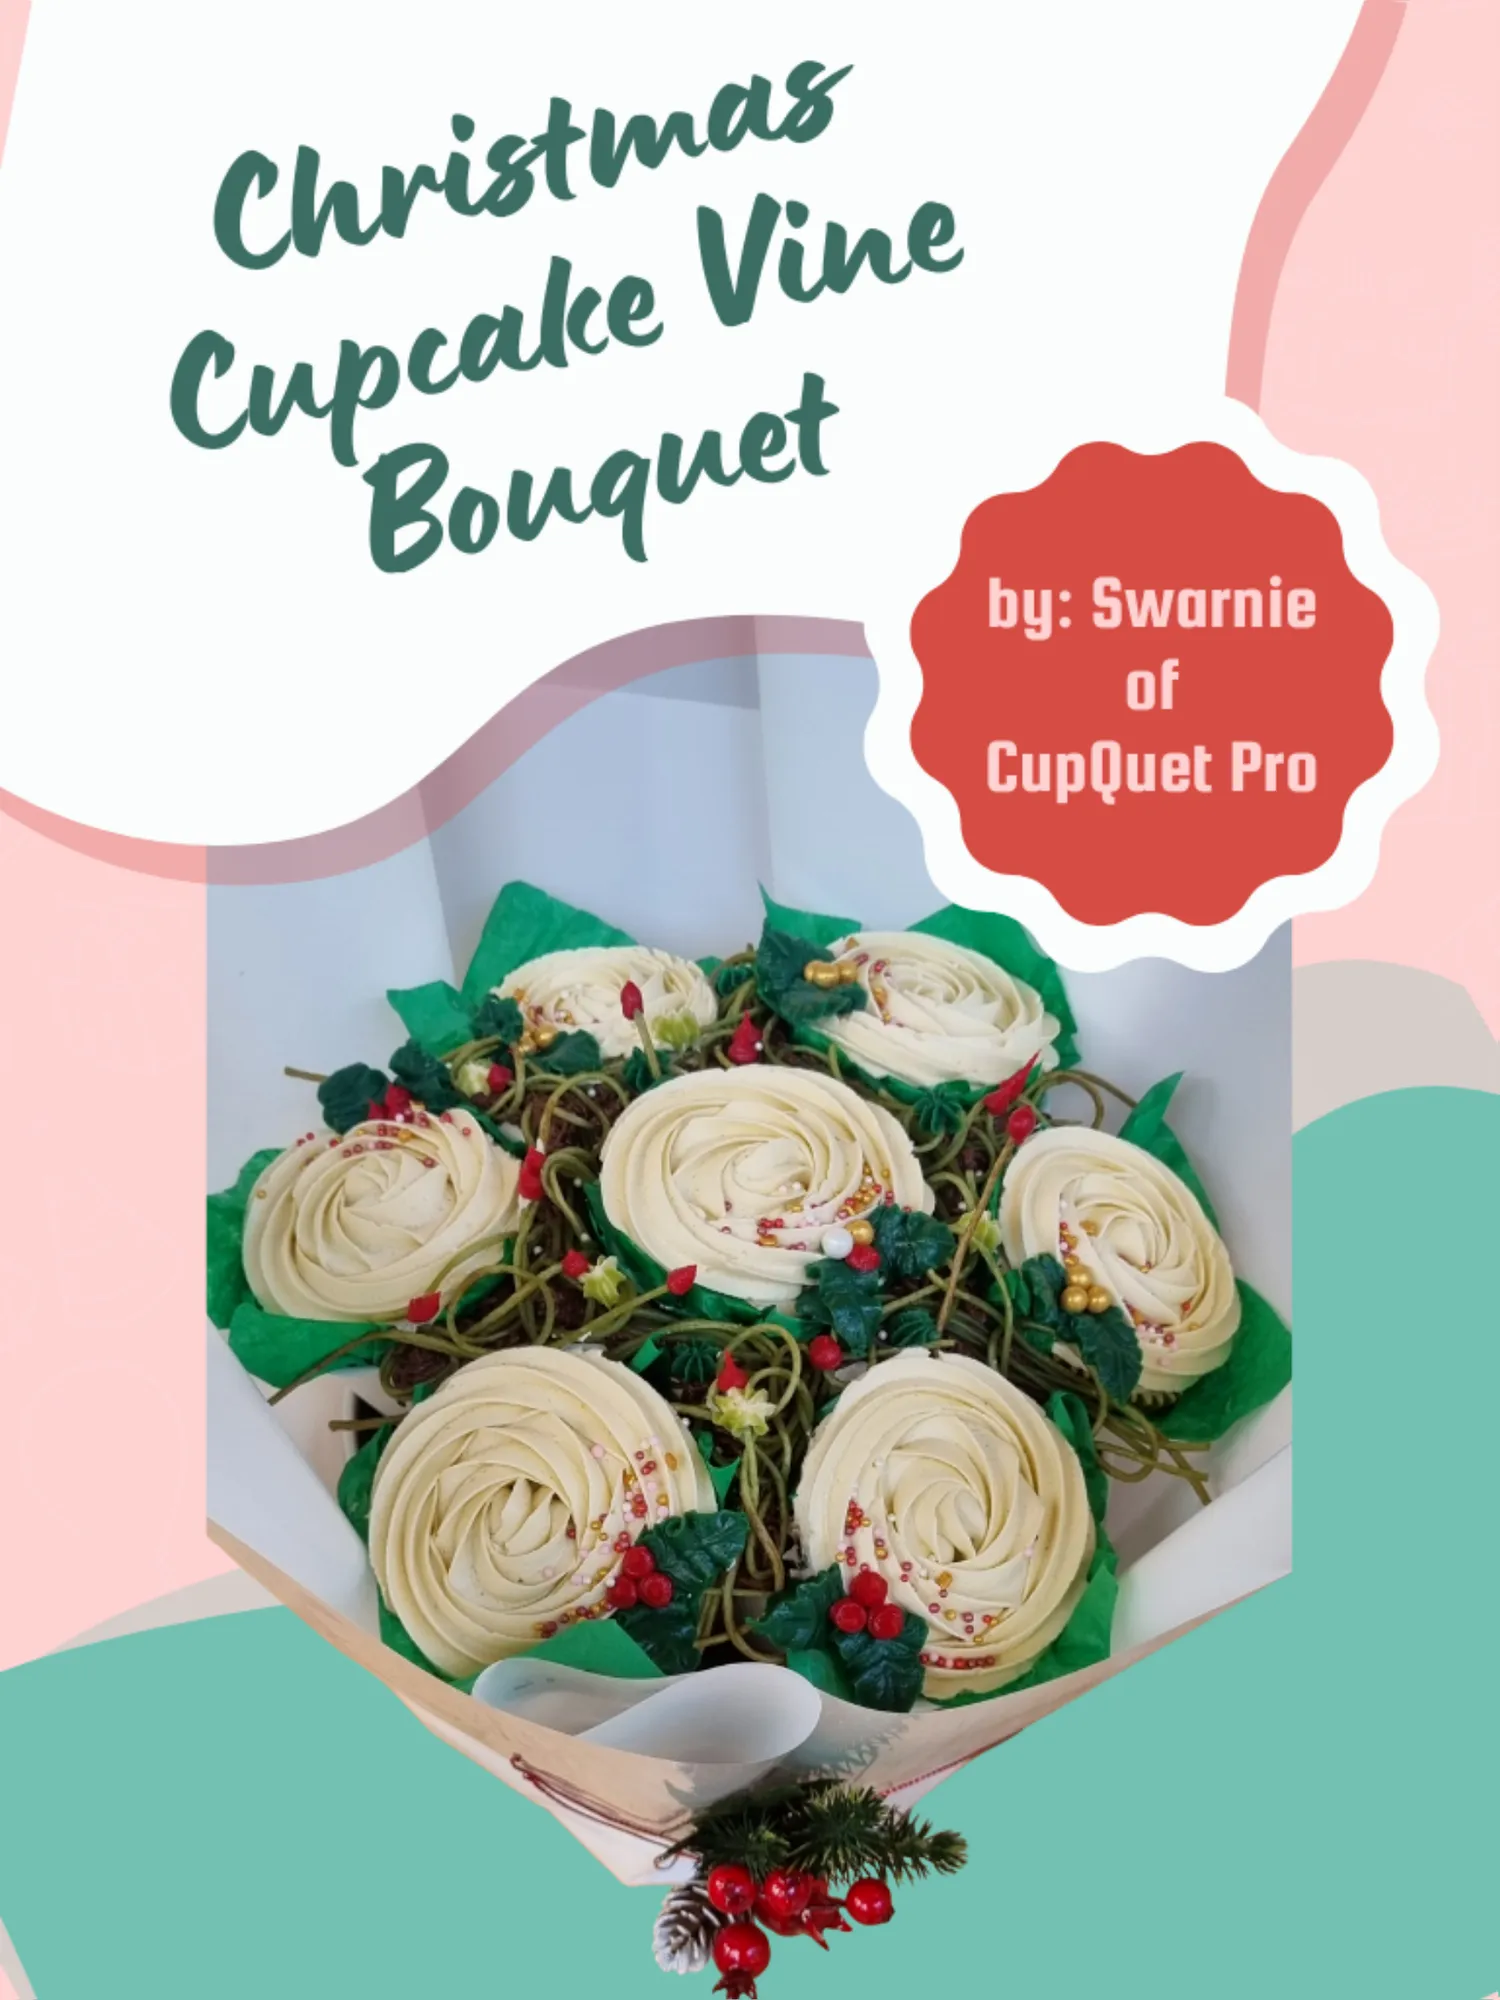
Christmas Cupcake Vine Bouquet by: Swarnie of CupQuet Pro
Page 57 text
Warm, festive and full of charm Hey cupcake bouquet lovers! I’ m Swarnie Condon, founder of CupQuet Pro, your go-to for innovative cupcake bouquet packaging! I may not be a professional baker or piping guru, so bear with me on my piping skills! Instead of a baking or buttercream tutorial, I’ m thrilled to show you a fun twist: using spaghetti to create beautiful vines for your cupcake bouquets, and since it’ s the festive Christmas edition of ACDN Magazine, we’ re adding some holiday flair! Let’ s get creative and make magical treats! YOU WILL NEED: Spaghetti – thinner style Pot with water for cooking spaghetti & strainer Food safe, green colouring for water Sheet of baking paper Baking tray Buttercream – brown, greens and red Your choice of nozzles – I’ m using Loyal 233, leaf tips, small star tips Sprinkles 7pax cupcake bouquet display holder 7 decorated cupcakes Tissue Paper Squares x 7 – I’ m using Forest Green Gift bucket for height- optional Bouquet wrapping paper + decoration or ribbon / bow Tape www. cupquetpro. com. au instagram. com / cupquetpro
Page 58 text
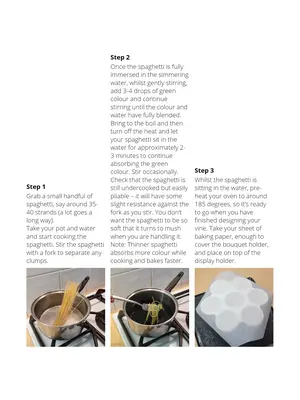
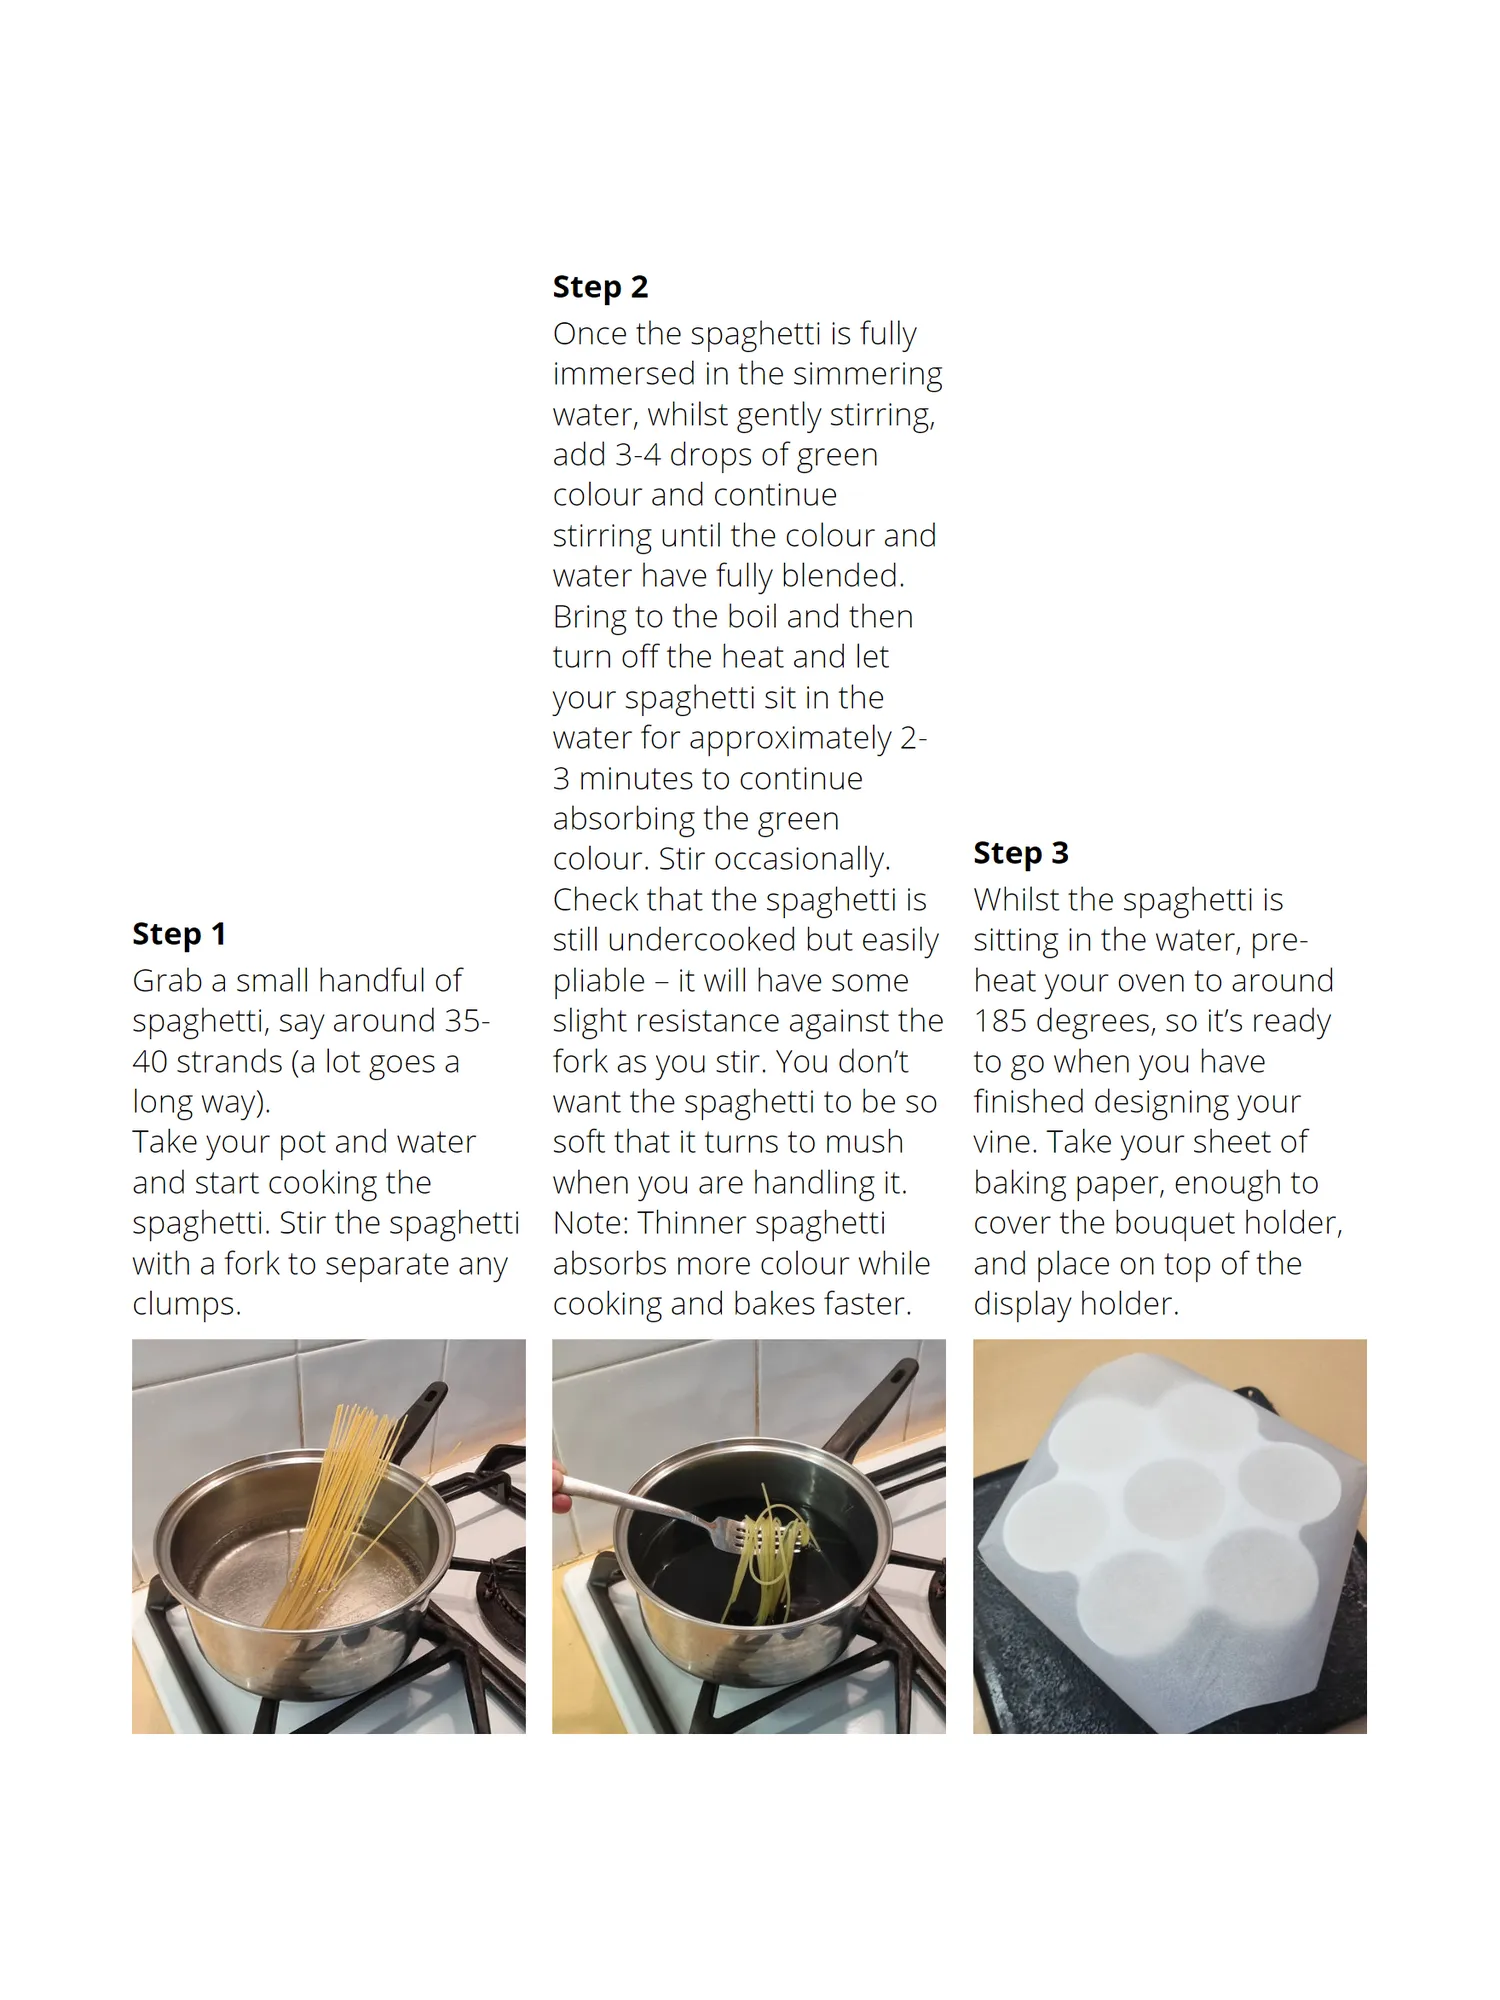
Step 2 Once the spaghetti is fully immersed in the simmering water, whilst gently stirring, add 3-4 drops of green colour and continue stirring until the colour and water have fully blended. Bring to the boil and then turn off the heat and let your spaghetti sit in the water for approximately 2- 3 minutes to continue absorbing the green colour. Stir occasionally. Step 3 Check that the spaghetti is Whilst the spaghetti is Step 1 still undercooked but easily sitting in the water, pre- Grab a small handful of pliable – it will have some heat your oven to around spaghetti, say around 35- slight resistance against the 185 degrees, so it’s ready 40 strands (a lot goes a fork as you stir. You don’t to go when you have long way). want the spaghetti to be so finished designing your Take your pot and water soft that it turns to mush vine. Take your sheet of and start cooking the when you are handling it. baking paper, enough to spaghetti. Stir the spaghetti Note: Thinner spaghetti cover the bouquet holder, with a fork to separate any absorbs more colour while and place on top of the clumps. cooking and bakes faster. display holder.
Page 59 text
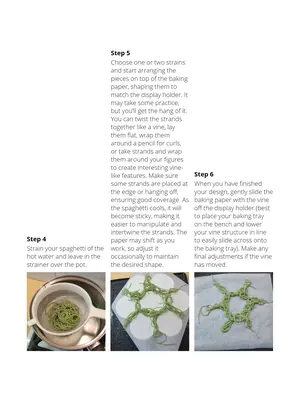
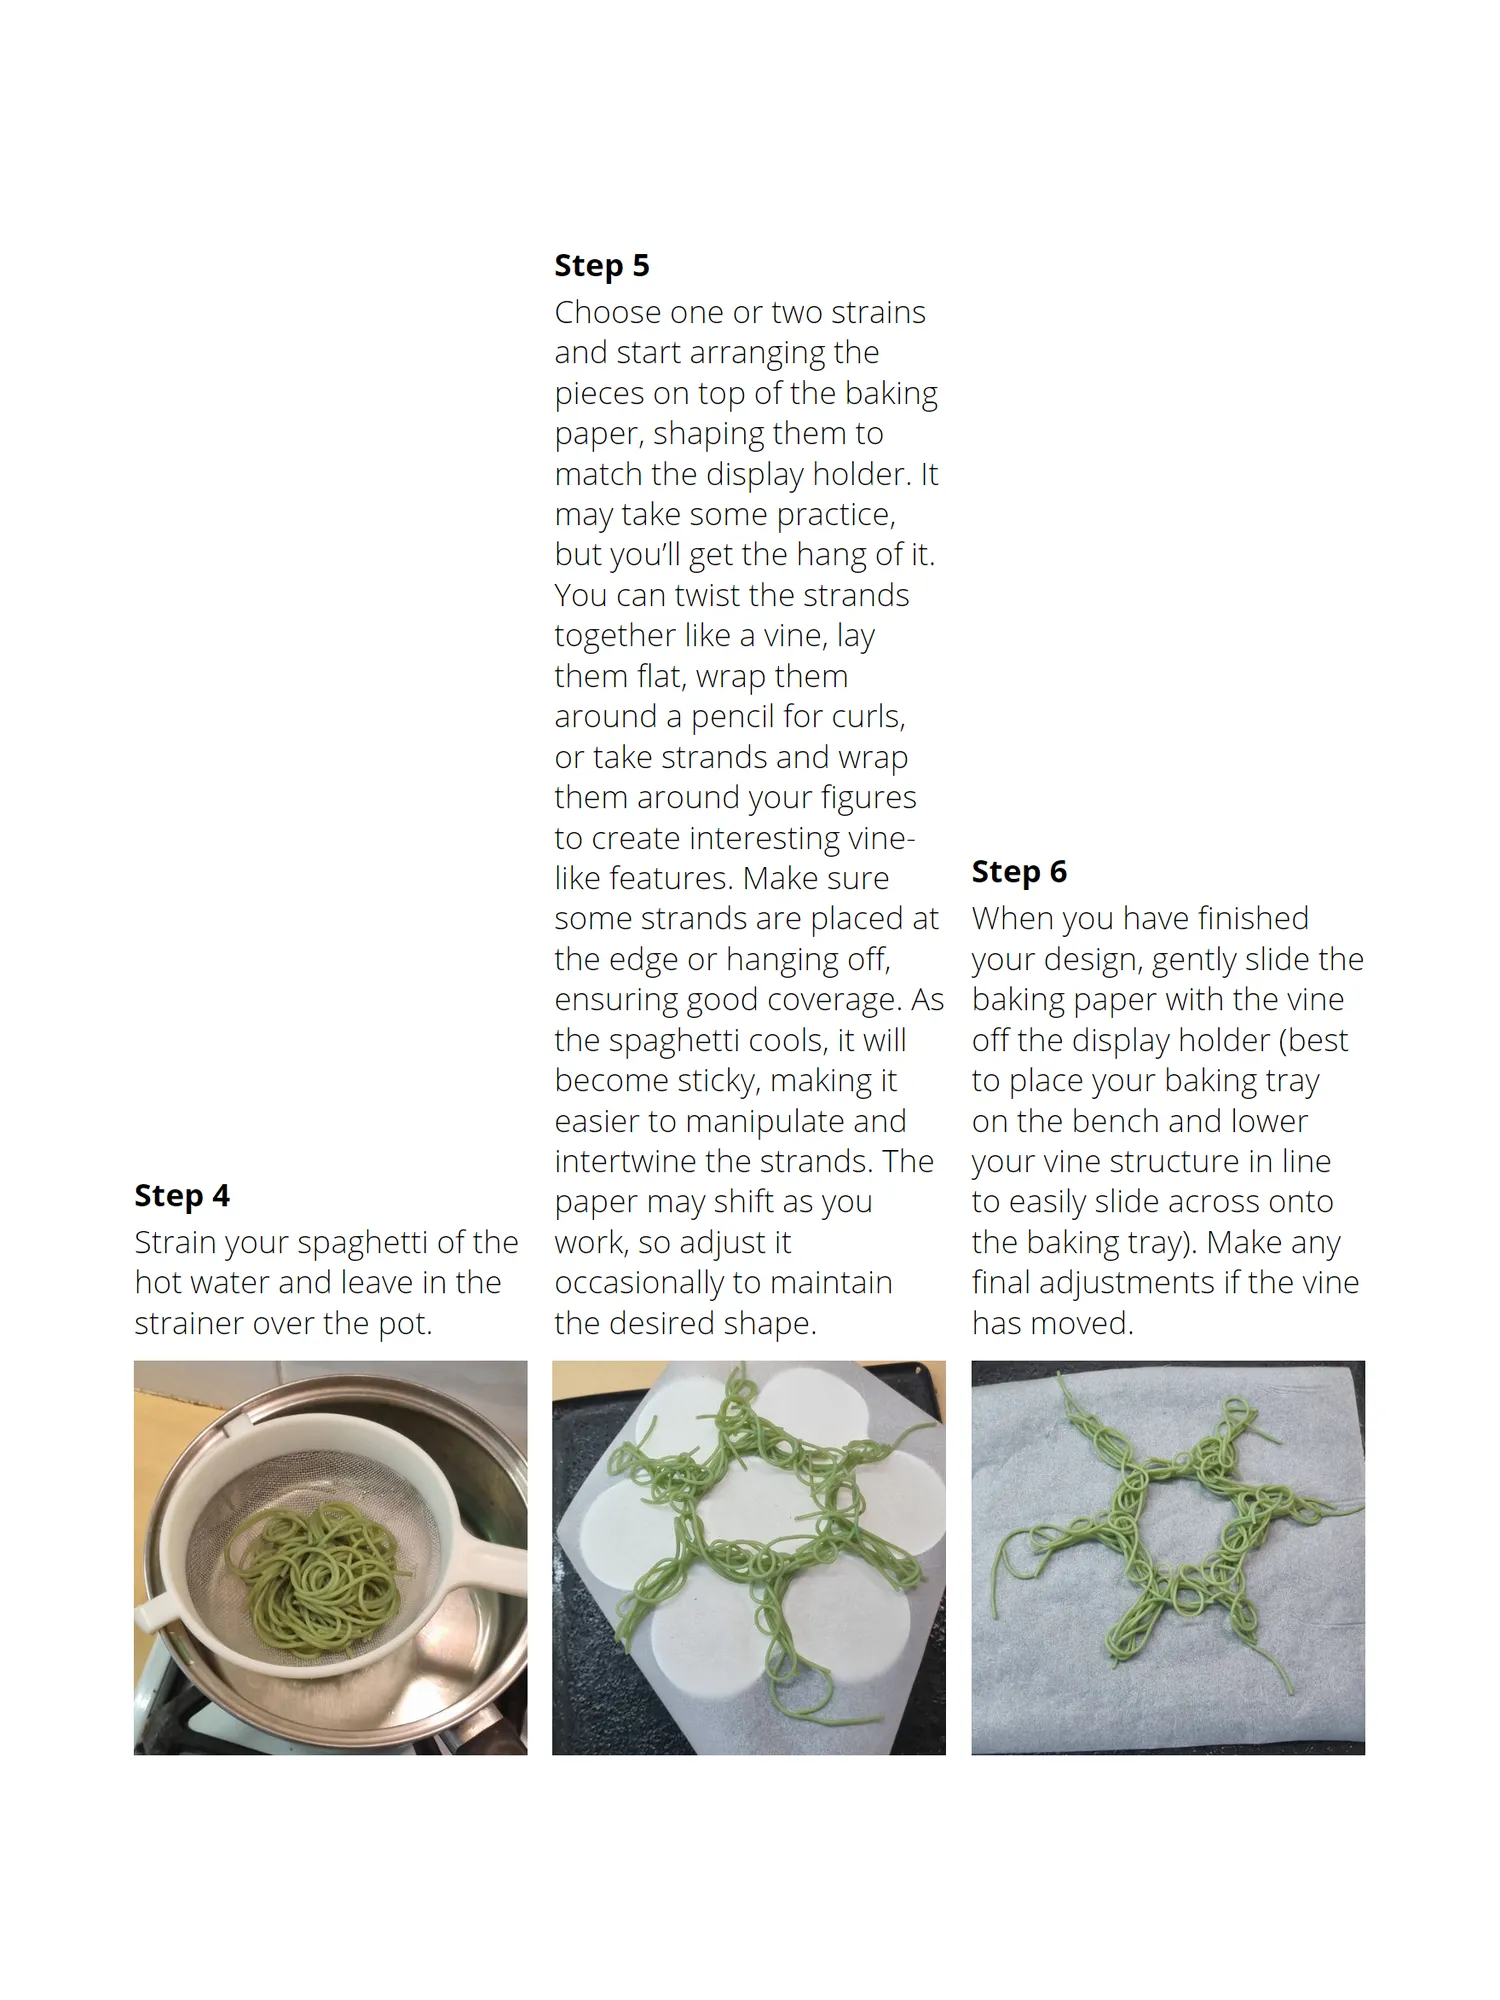
Step 5 Choose one or two strains and start arranging the pieces on top of the baking paper, shaping them to match the display holder. It may take some practice, but you’ll get the hang of it. You can twist the strands together like a vine, lay them flat, wrap them around a pencil for curls, or take strands and wrap them around your figures to create interesting vine- like features. Make sure Step 6 some strands are placed at When you have finished the edge or hanging off, your design, gently slide the ensuring good coverage. As baking paper with the vine the spaghetti cools, it will off the display holder (best become sticky, making it to place your baking tray easier to manipulate and on the bench and lower intertwine the strands. The your vine structure in line Step 4 paper may shift as you to easily slide across onto Strain your spaghetti of the work, so adjust it the baking tray). Make any hot water and leave in the occasionally to maintain final adjustments if the vine strainer over the pot. the desired shape. has moved.
Page 60 text
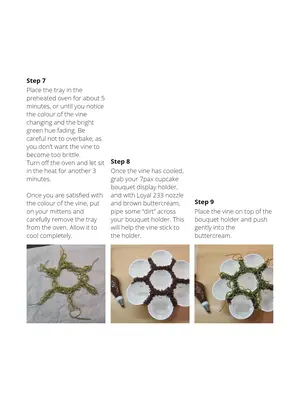
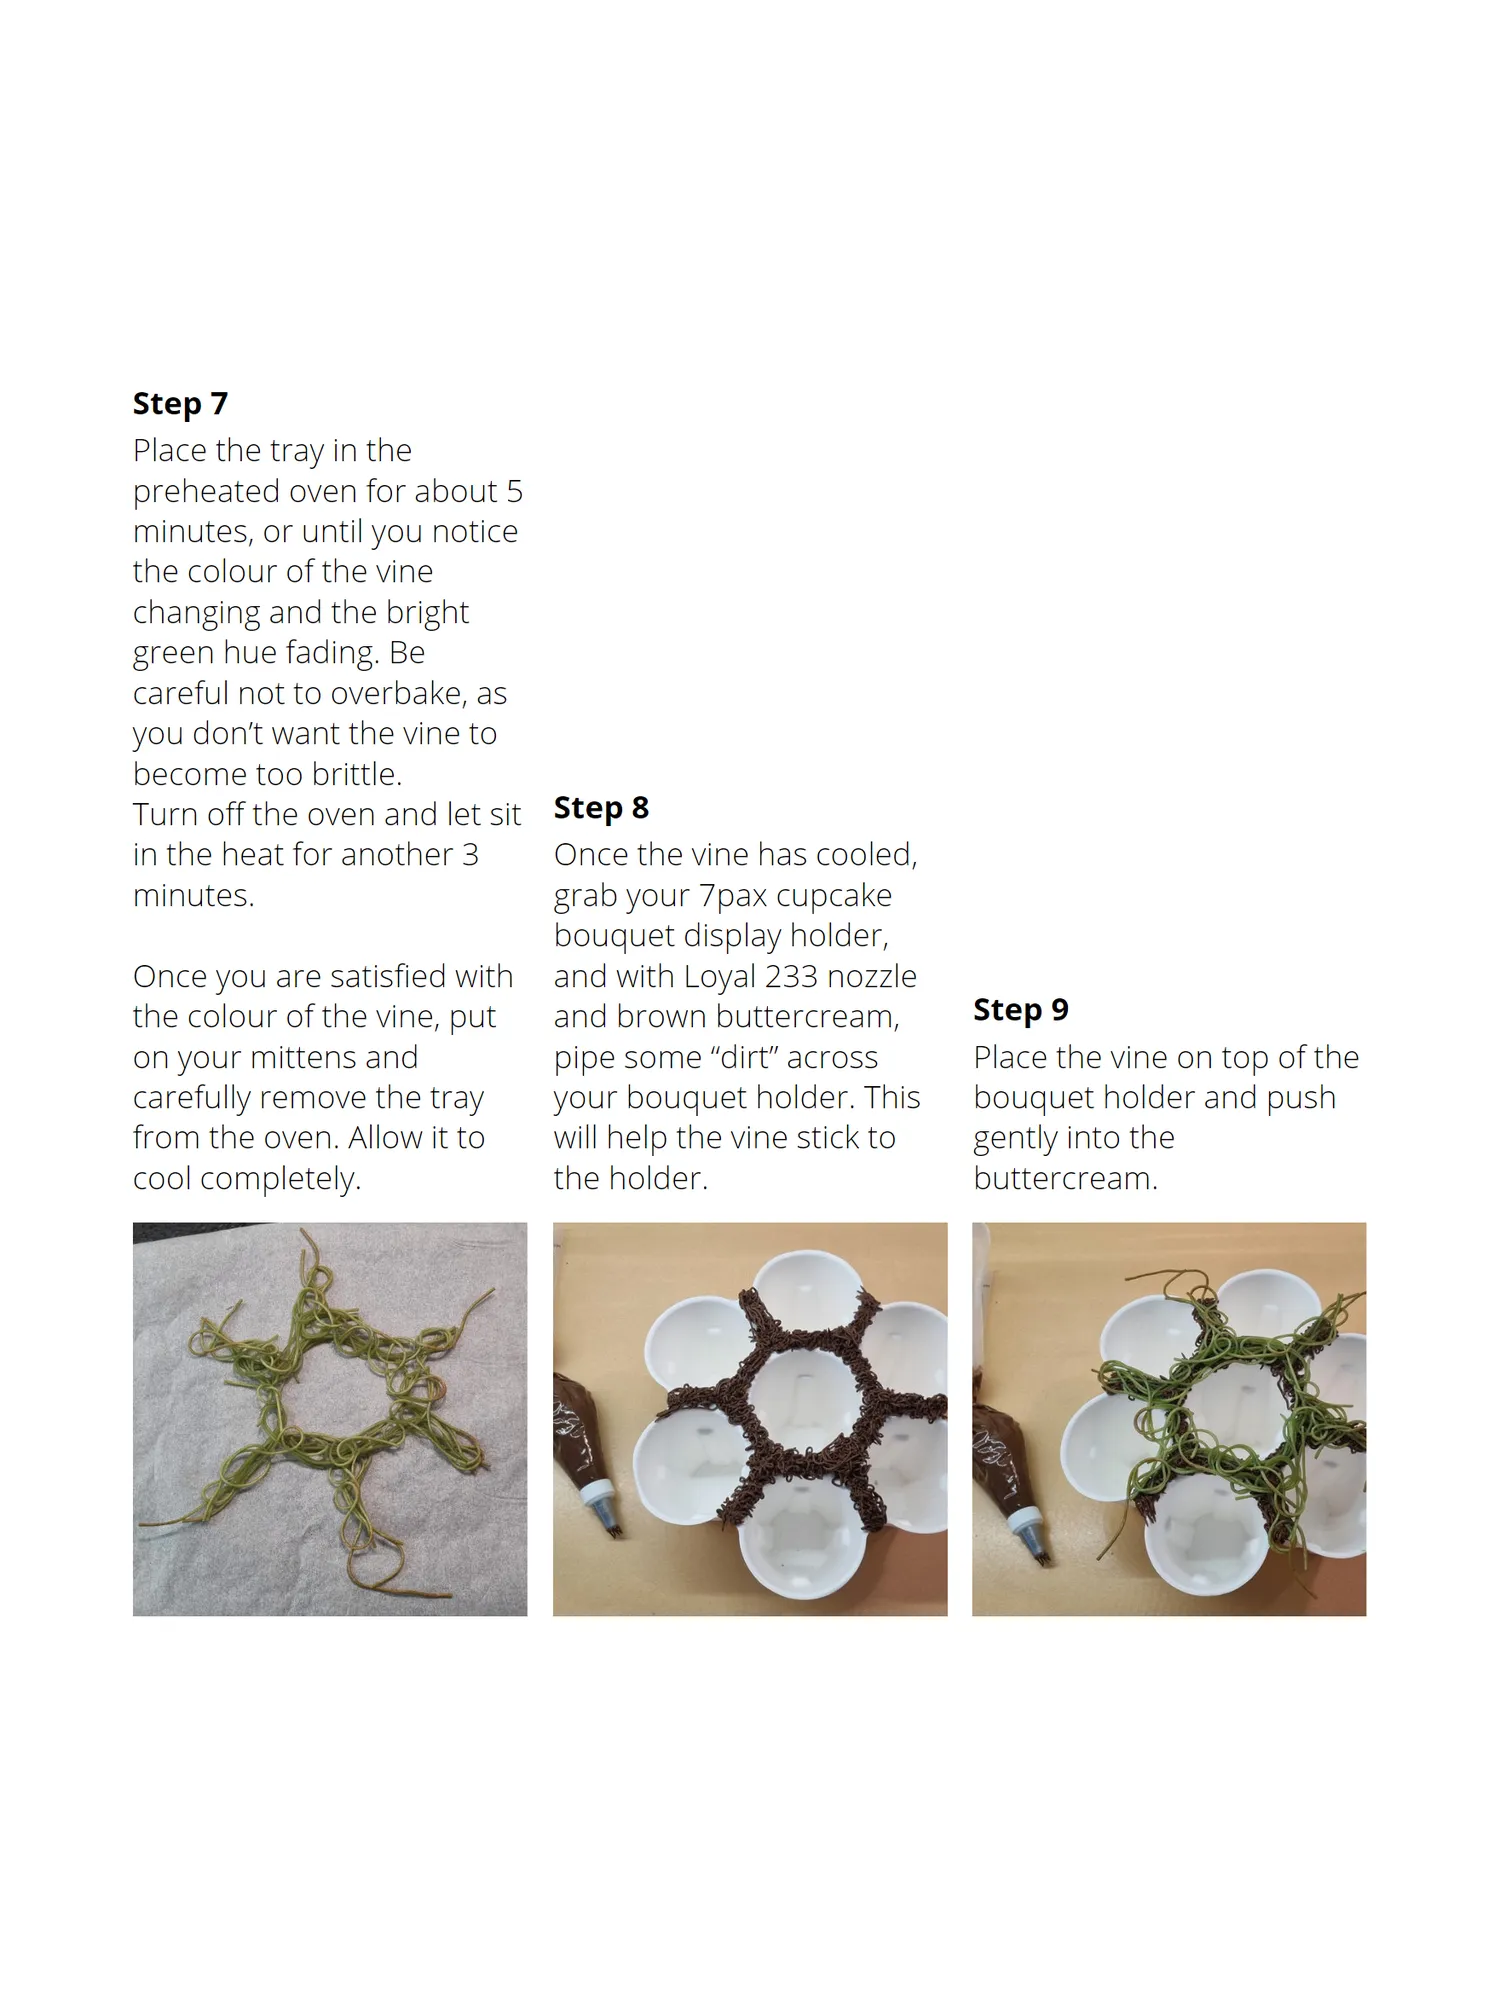
Step 7 Place the tray in the preheated oven for about 5 minutes, or until you notice the colour of the vine changing and the bright green hue fading. Be careful not to overbake, as you don’t want the vine to become too brittle. Turn off the oven and let sit Step 8 in the heat for another 3 Once the vine has cooled, minutes. grab your 7pax cupcake bouquet display holder, Once you are satisfied with and with Loyal 233 nozzle the colour of the vine, put and brown buttercream, Step 9 on your mittens and pipe some “dirt” across Place the vine on top of the carefully remove the tray your bouquet holder. This bouquet holder and push from the oven. Allow it to will help the vine stick to gently into the cool completely. the holder. buttercream.
Page 61 text
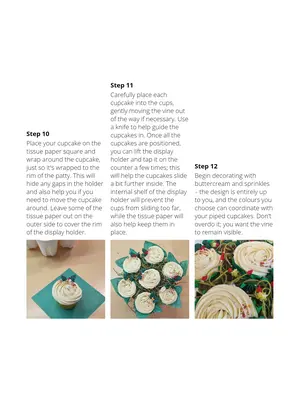
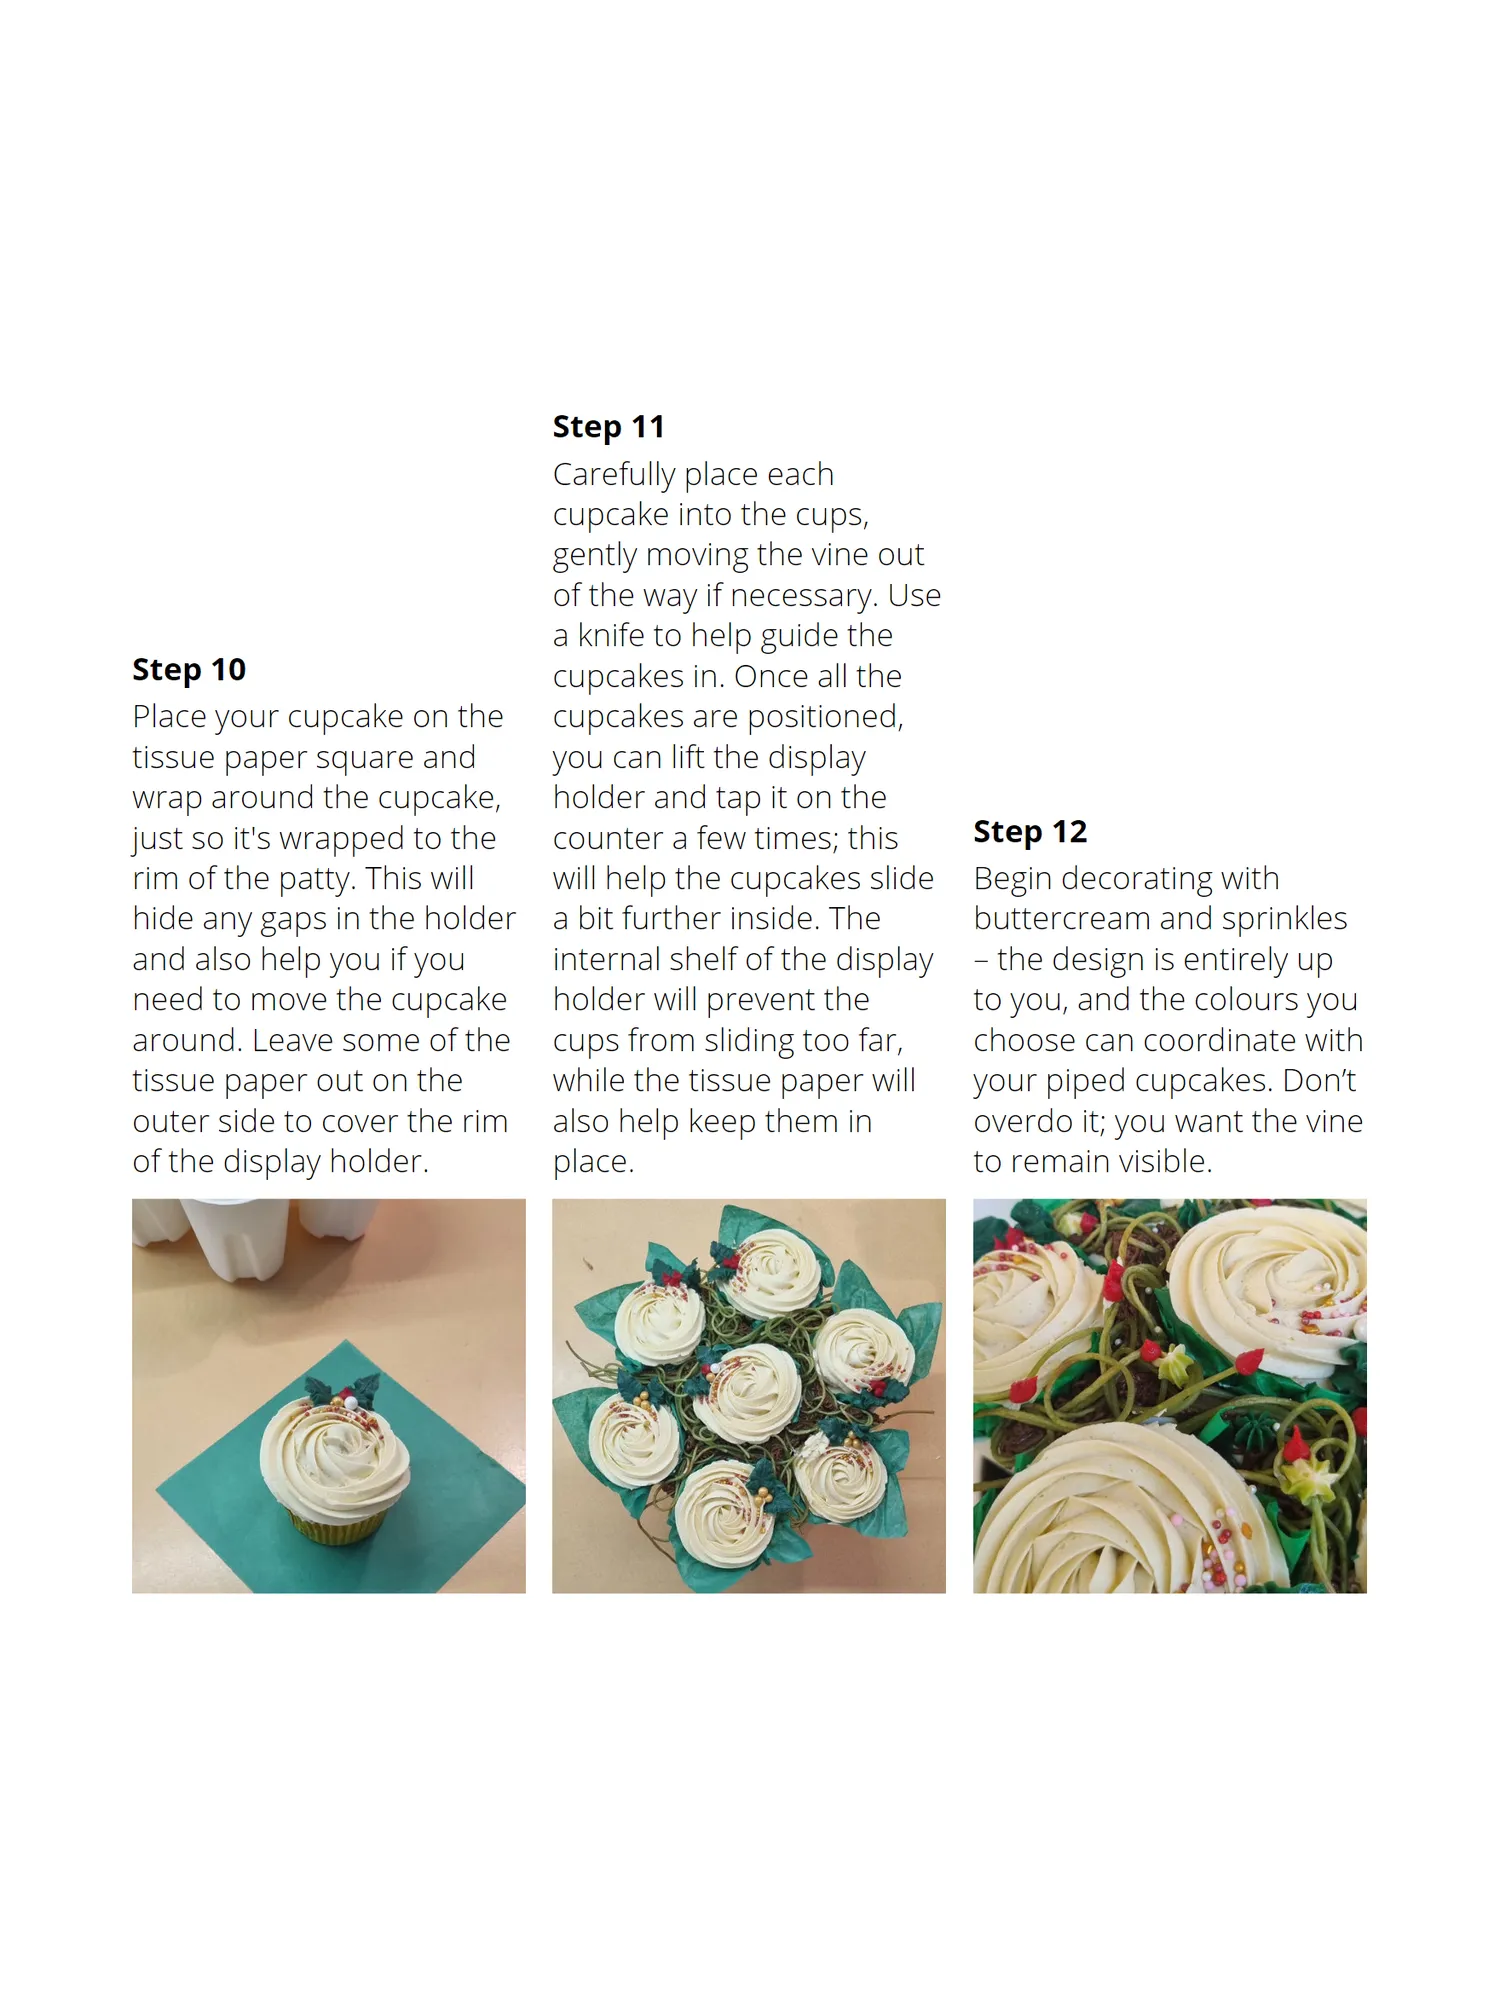
Step 11 Carefully place each cupcake into the cups, gently moving the vine out of the way if necessary. Use a knife to help guide the Step 10 cupcakes in. Once all the Place your cupcake on the cupcakes are positioned, tissue paper square and you can lift the display wrap around the cupcake, holder and tap it on the just so it's wrapped to the counter a few times; this Step 12 rim of the patty. This will will help the cupcakes slide Begin decorating with hide any gaps in the holder a bit further inside. The buttercream and sprinkles and also help you if you internal shelf of the display – the design is entirely up need to move the cupcake holder will prevent the to you, and the colours you around. Leave some of the cups from sliding too far, choose can coordinate with tissue paper out on the while the tissue paper will your piped cupcakes. Don’t outer side to cover the rim also help keep them in overdo it; you want the vine of the display holder. place. to remain visible.
Page 62 text
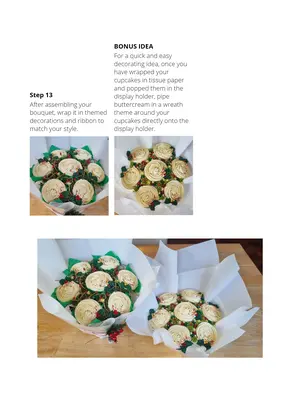
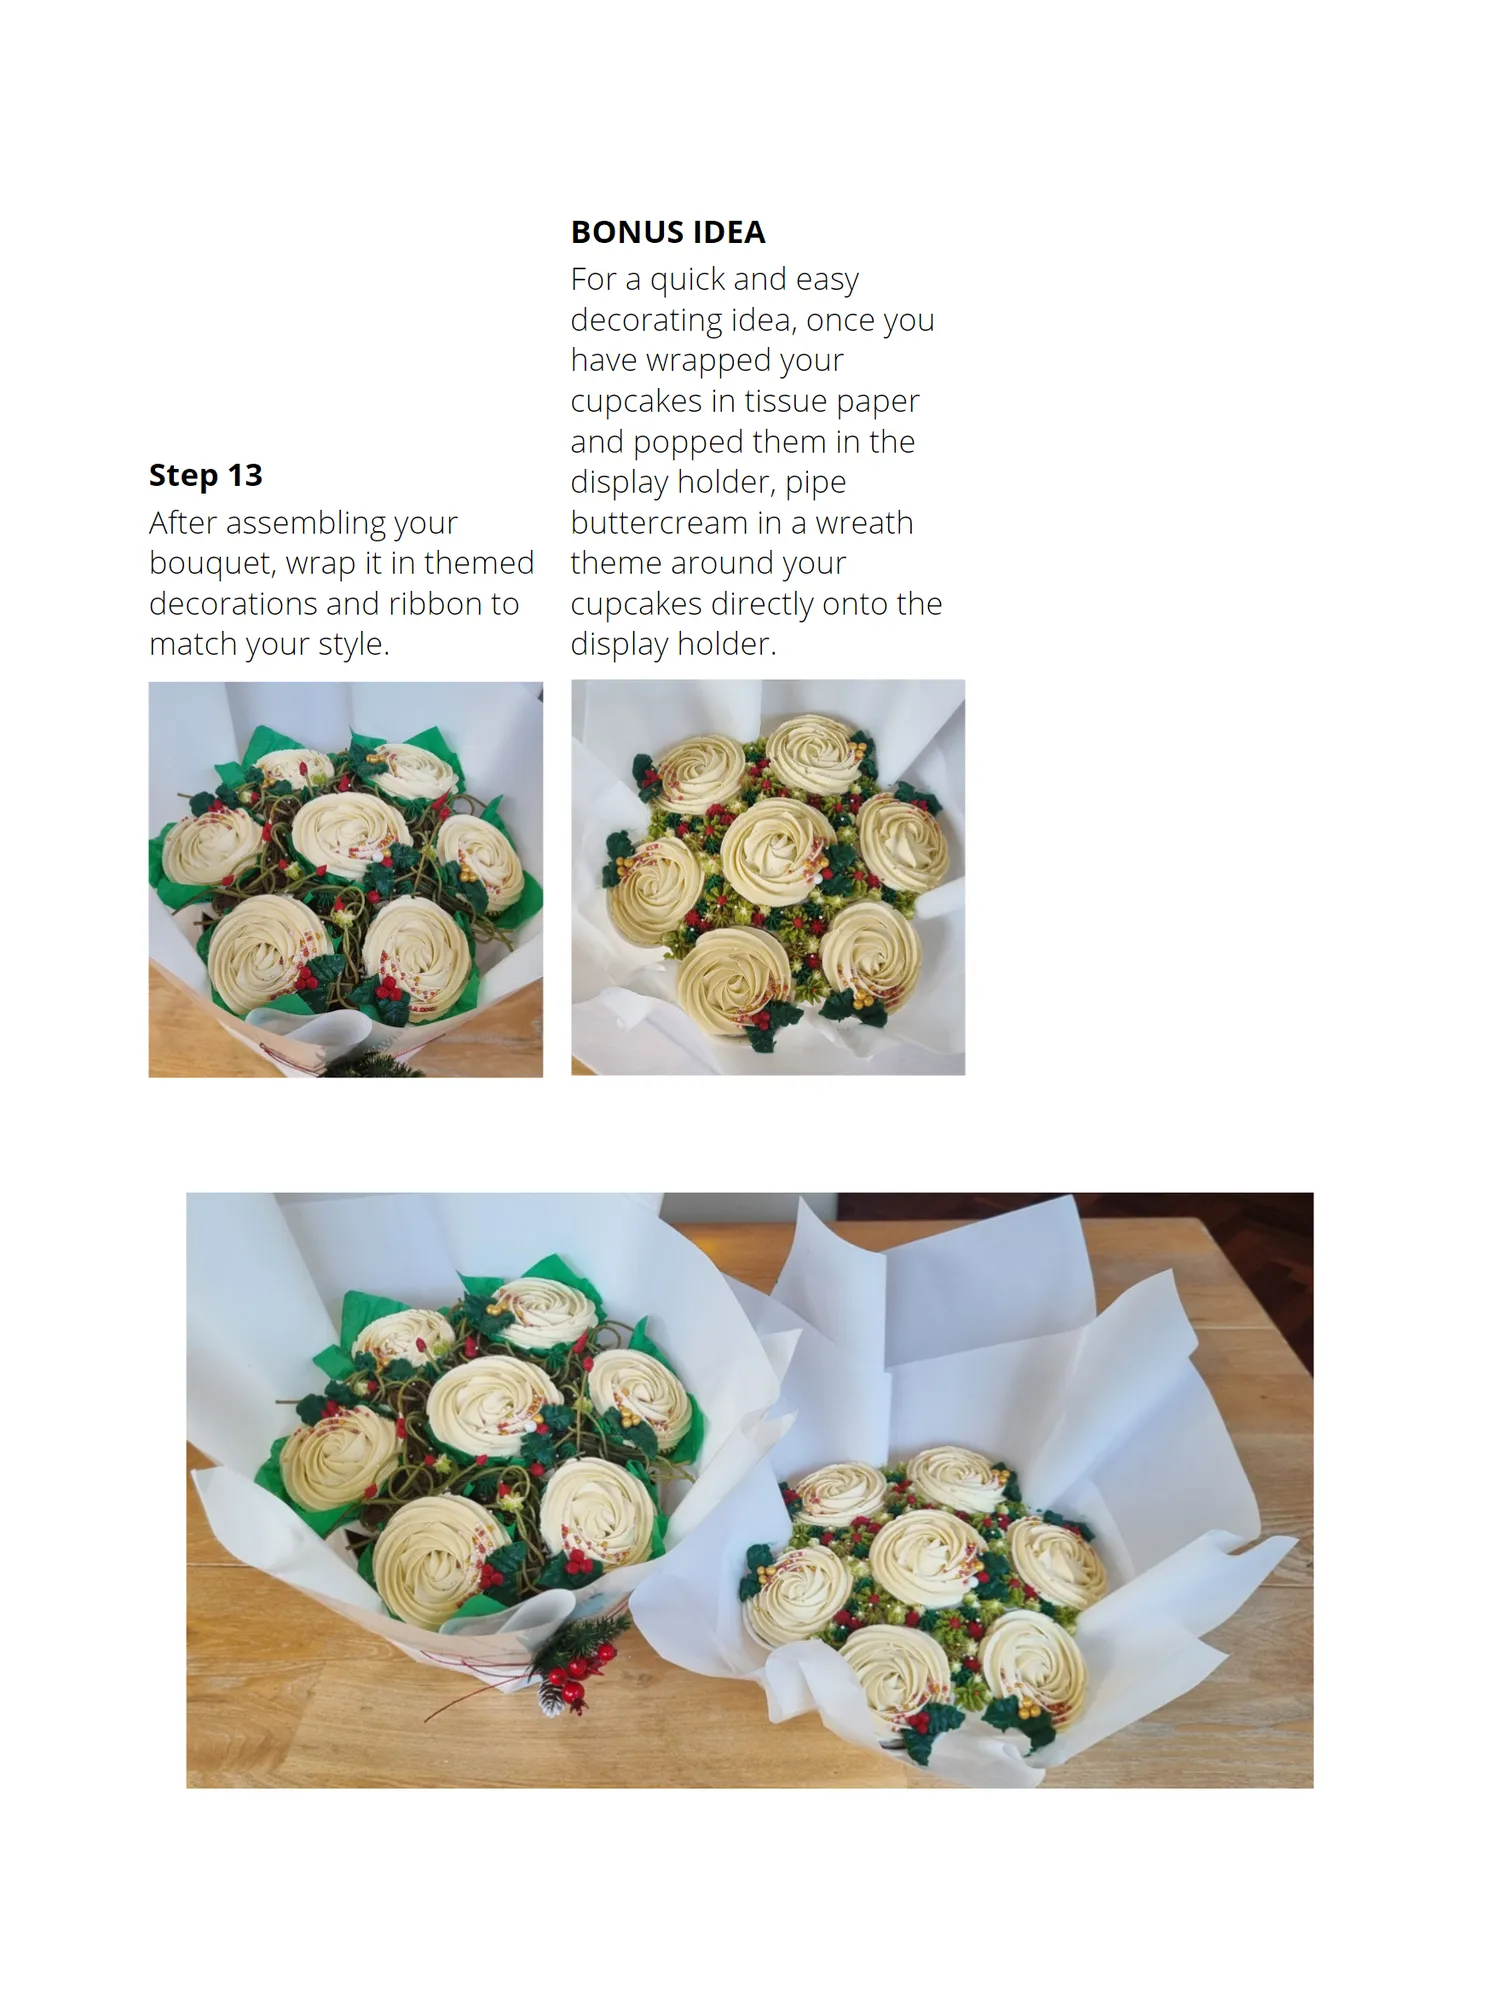
Step 13 After assembling your bouquet, wrap it in themed decorations and ribbon to match your style.


Page 63 text
2 0 2 5 P R E F E R R E D S U P P L I E R S M E M B E R D I S C O U N T S Become a member of the Australian Cake Decorating Network and SAVE with great DISCOUNTS from our Preferred Suppliers Join us here!
Page 64 text
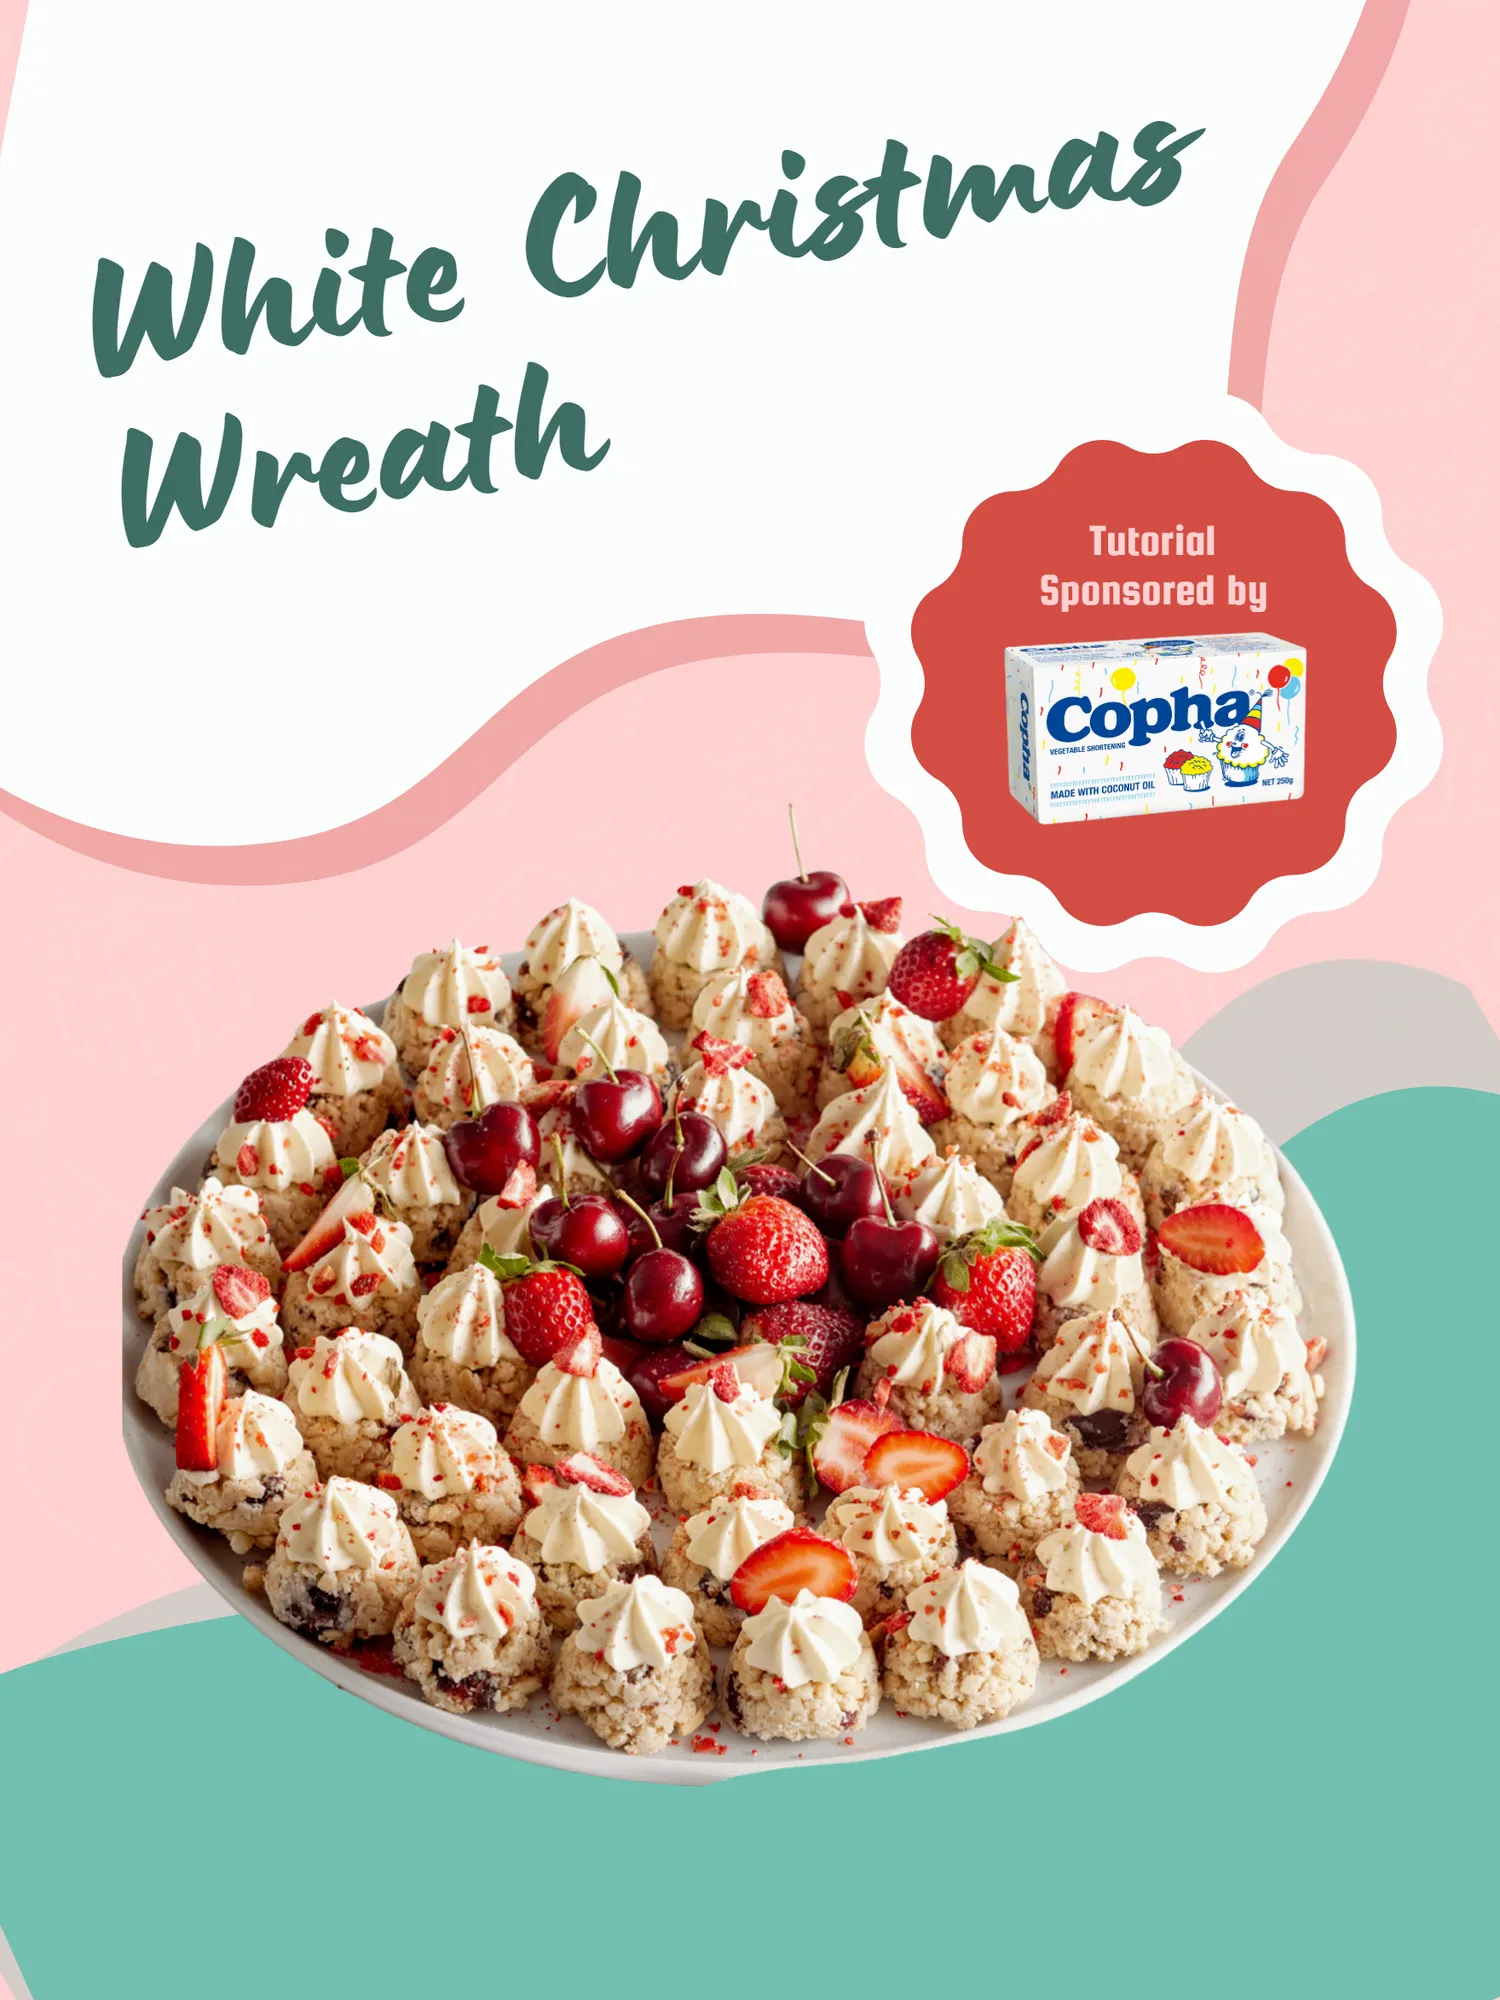
Tutorial Sponsored by White Christmas Wreath Tutorial Sponsored by
Page 65 text
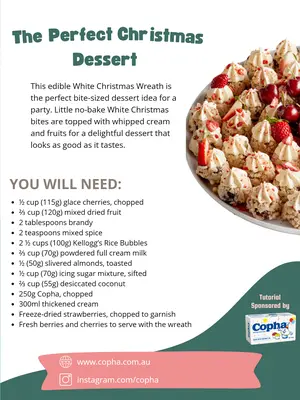
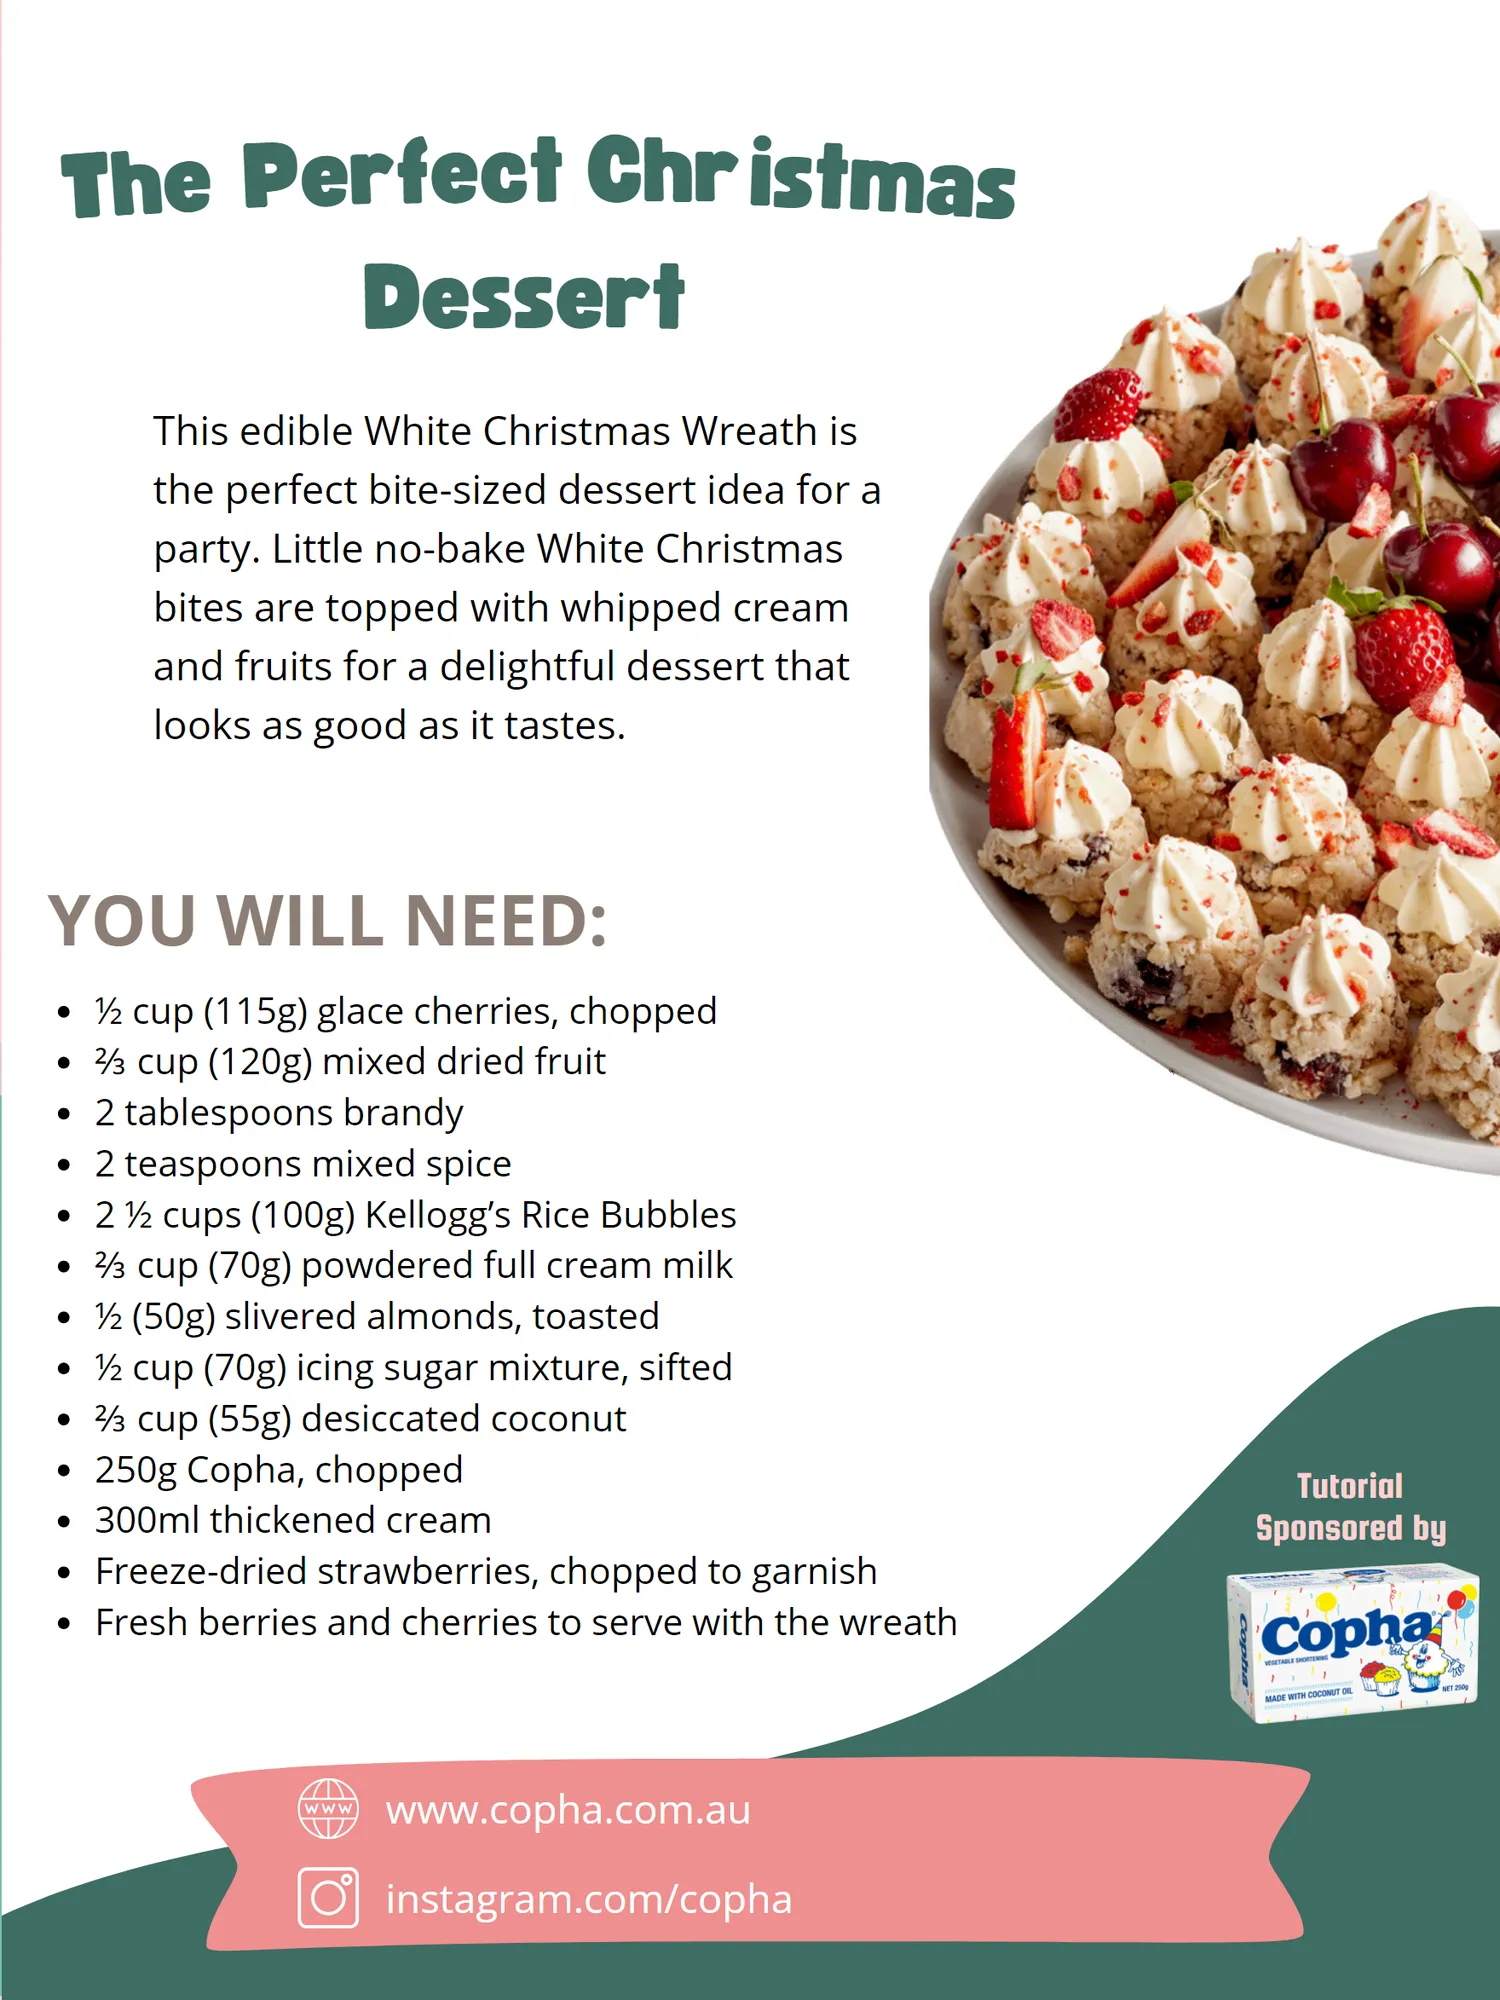
White Christmas fe c t Chr is tm a s De s s e rt Wreath This edible White Christmas Wreath is the perfect bite-sized dessert idea for a party. Little no-bake White Christmas bites are topped with whipped cream and fruits for a delightful dessert that
Page 66 text
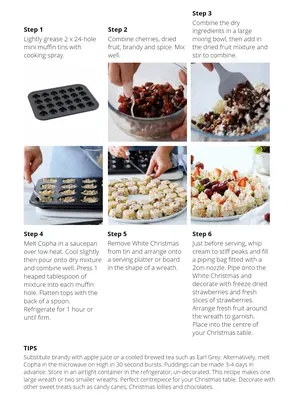
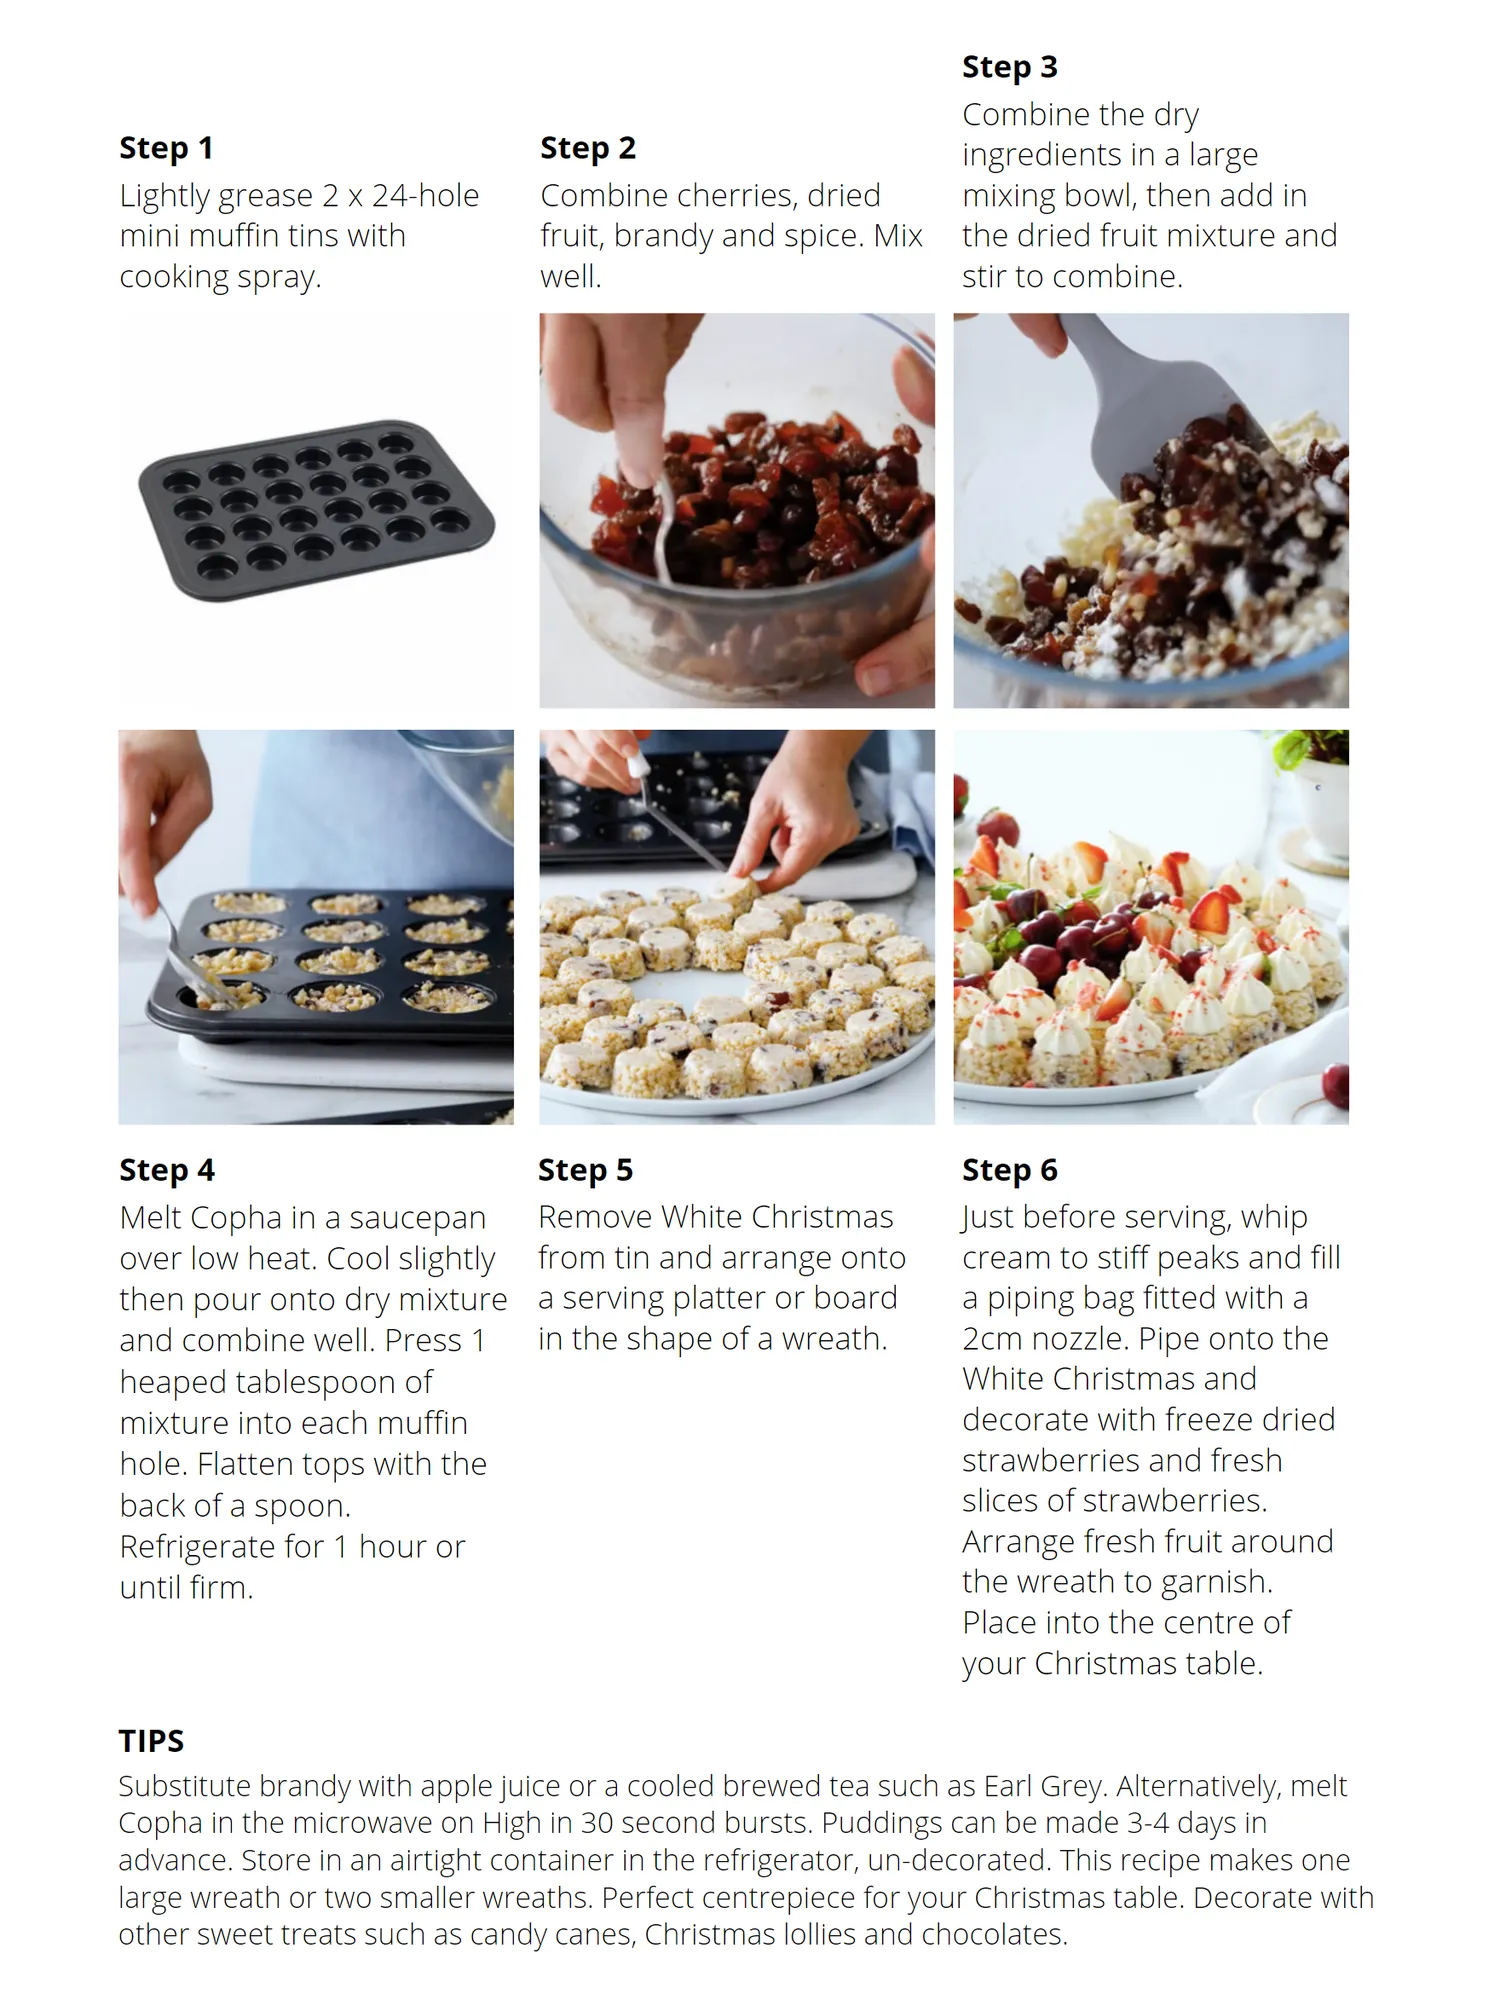
Step 1 Lightly grease 2 x 24-hole mini muffin tins with cooking spray.
Page 68 text
Tutorial Sponsored by White Crackle Snowmen Tutorial Sponsored by
Page 69 text
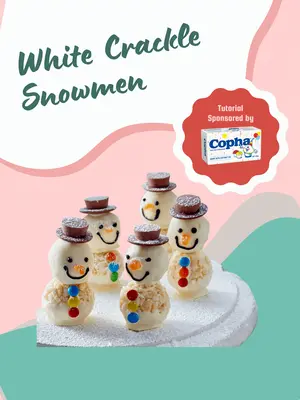
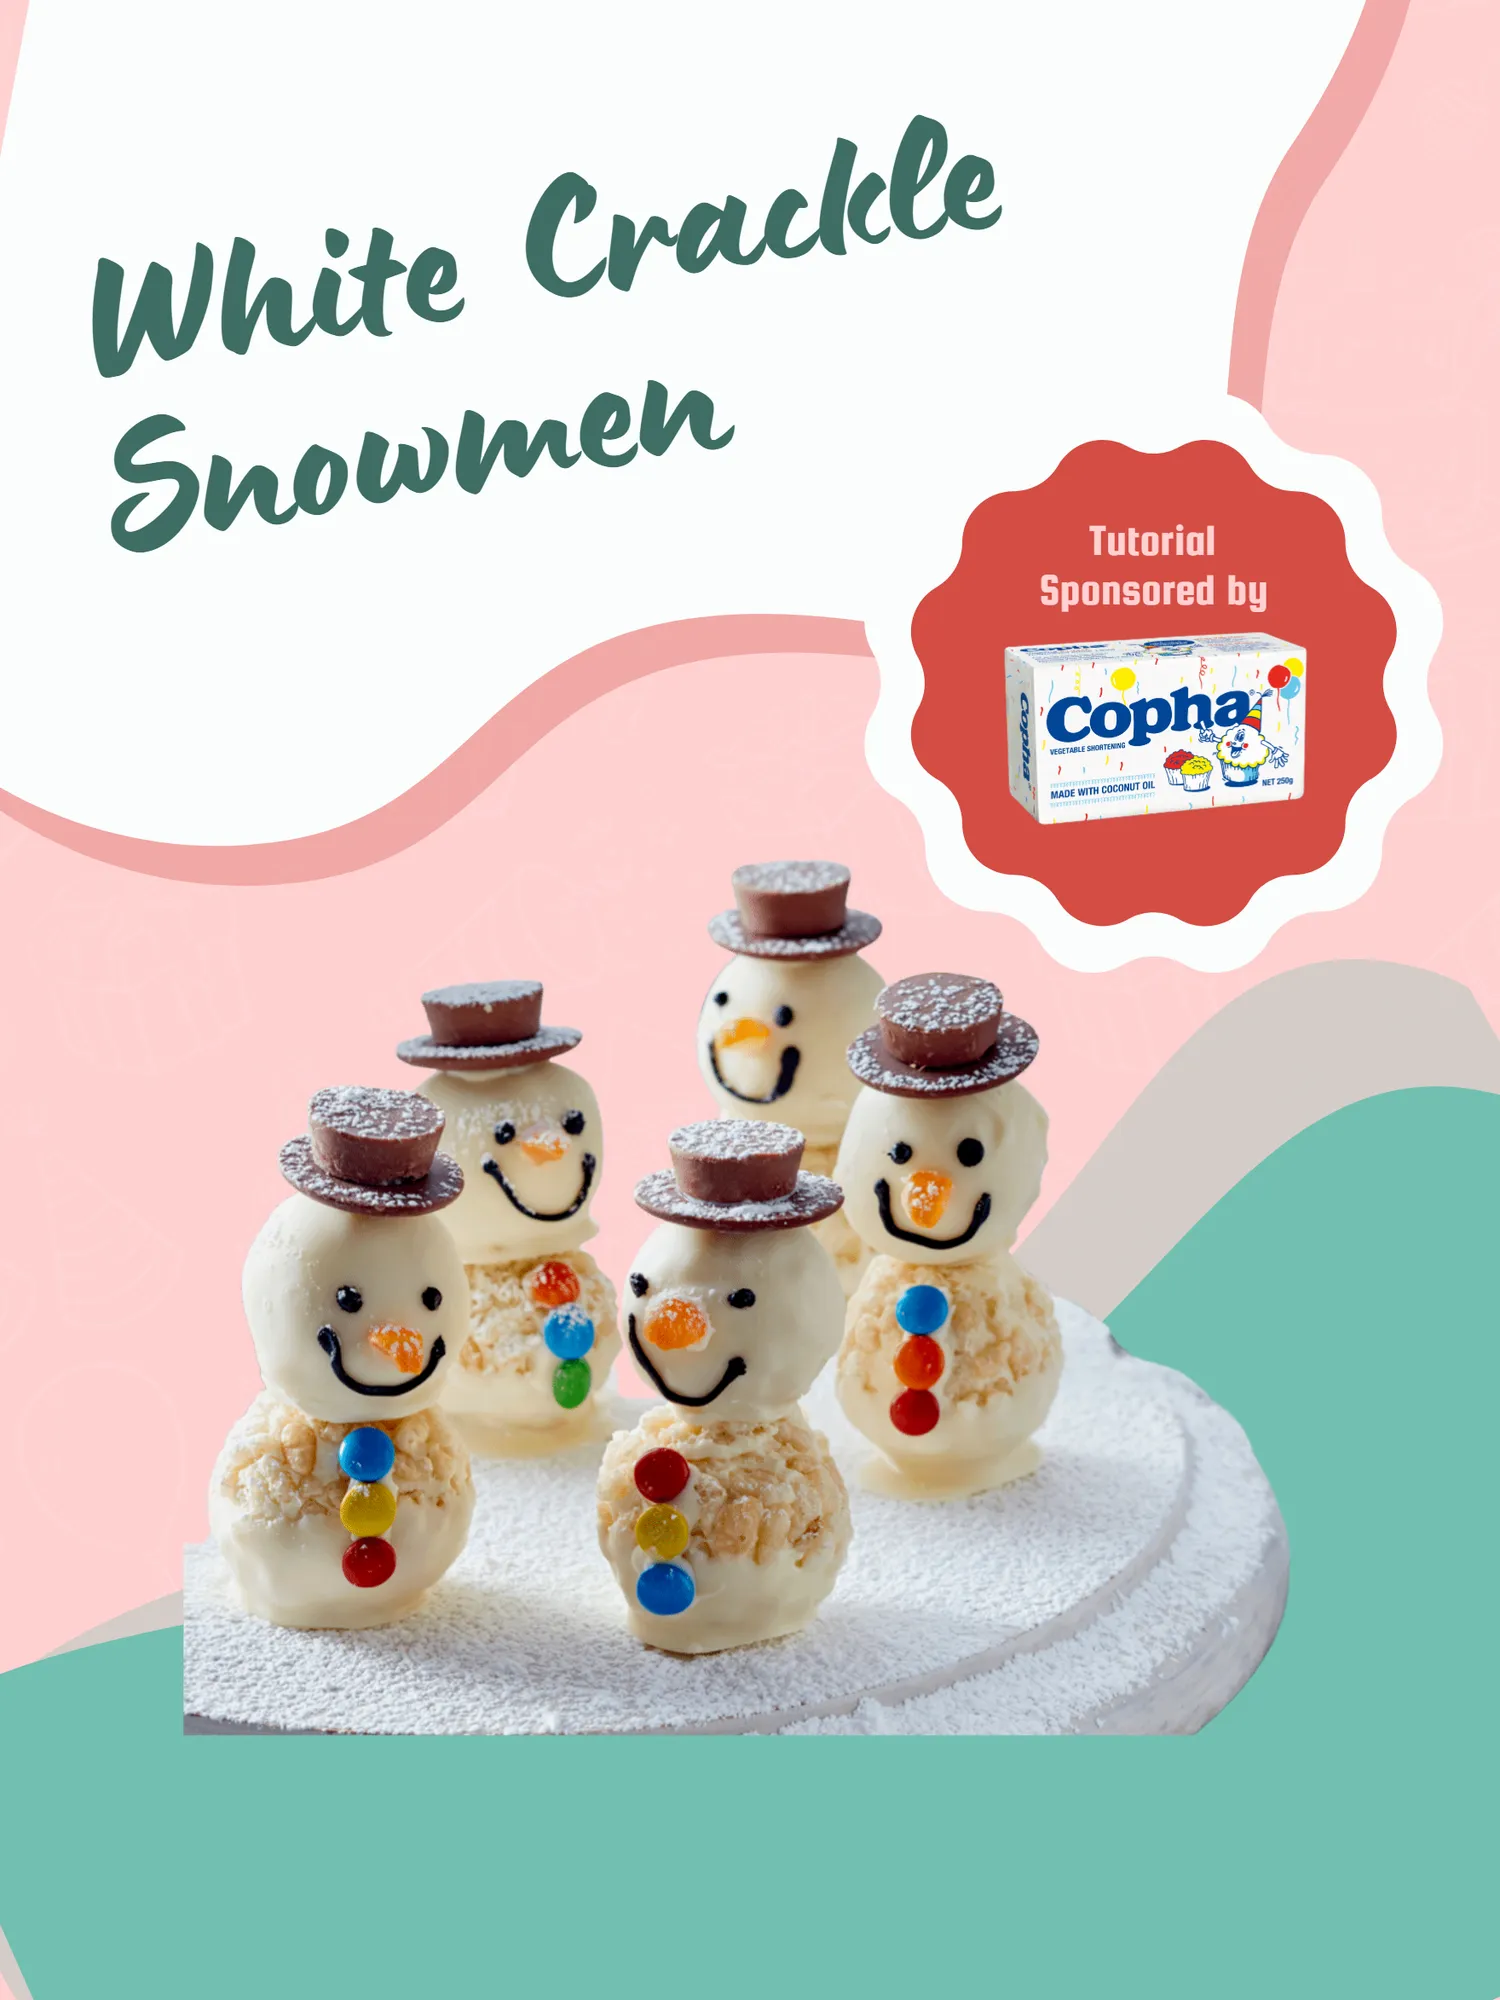
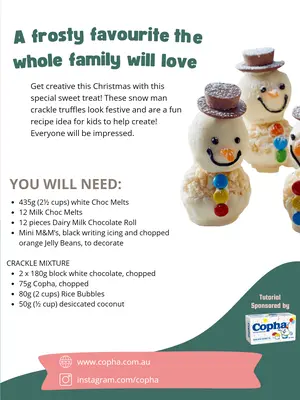
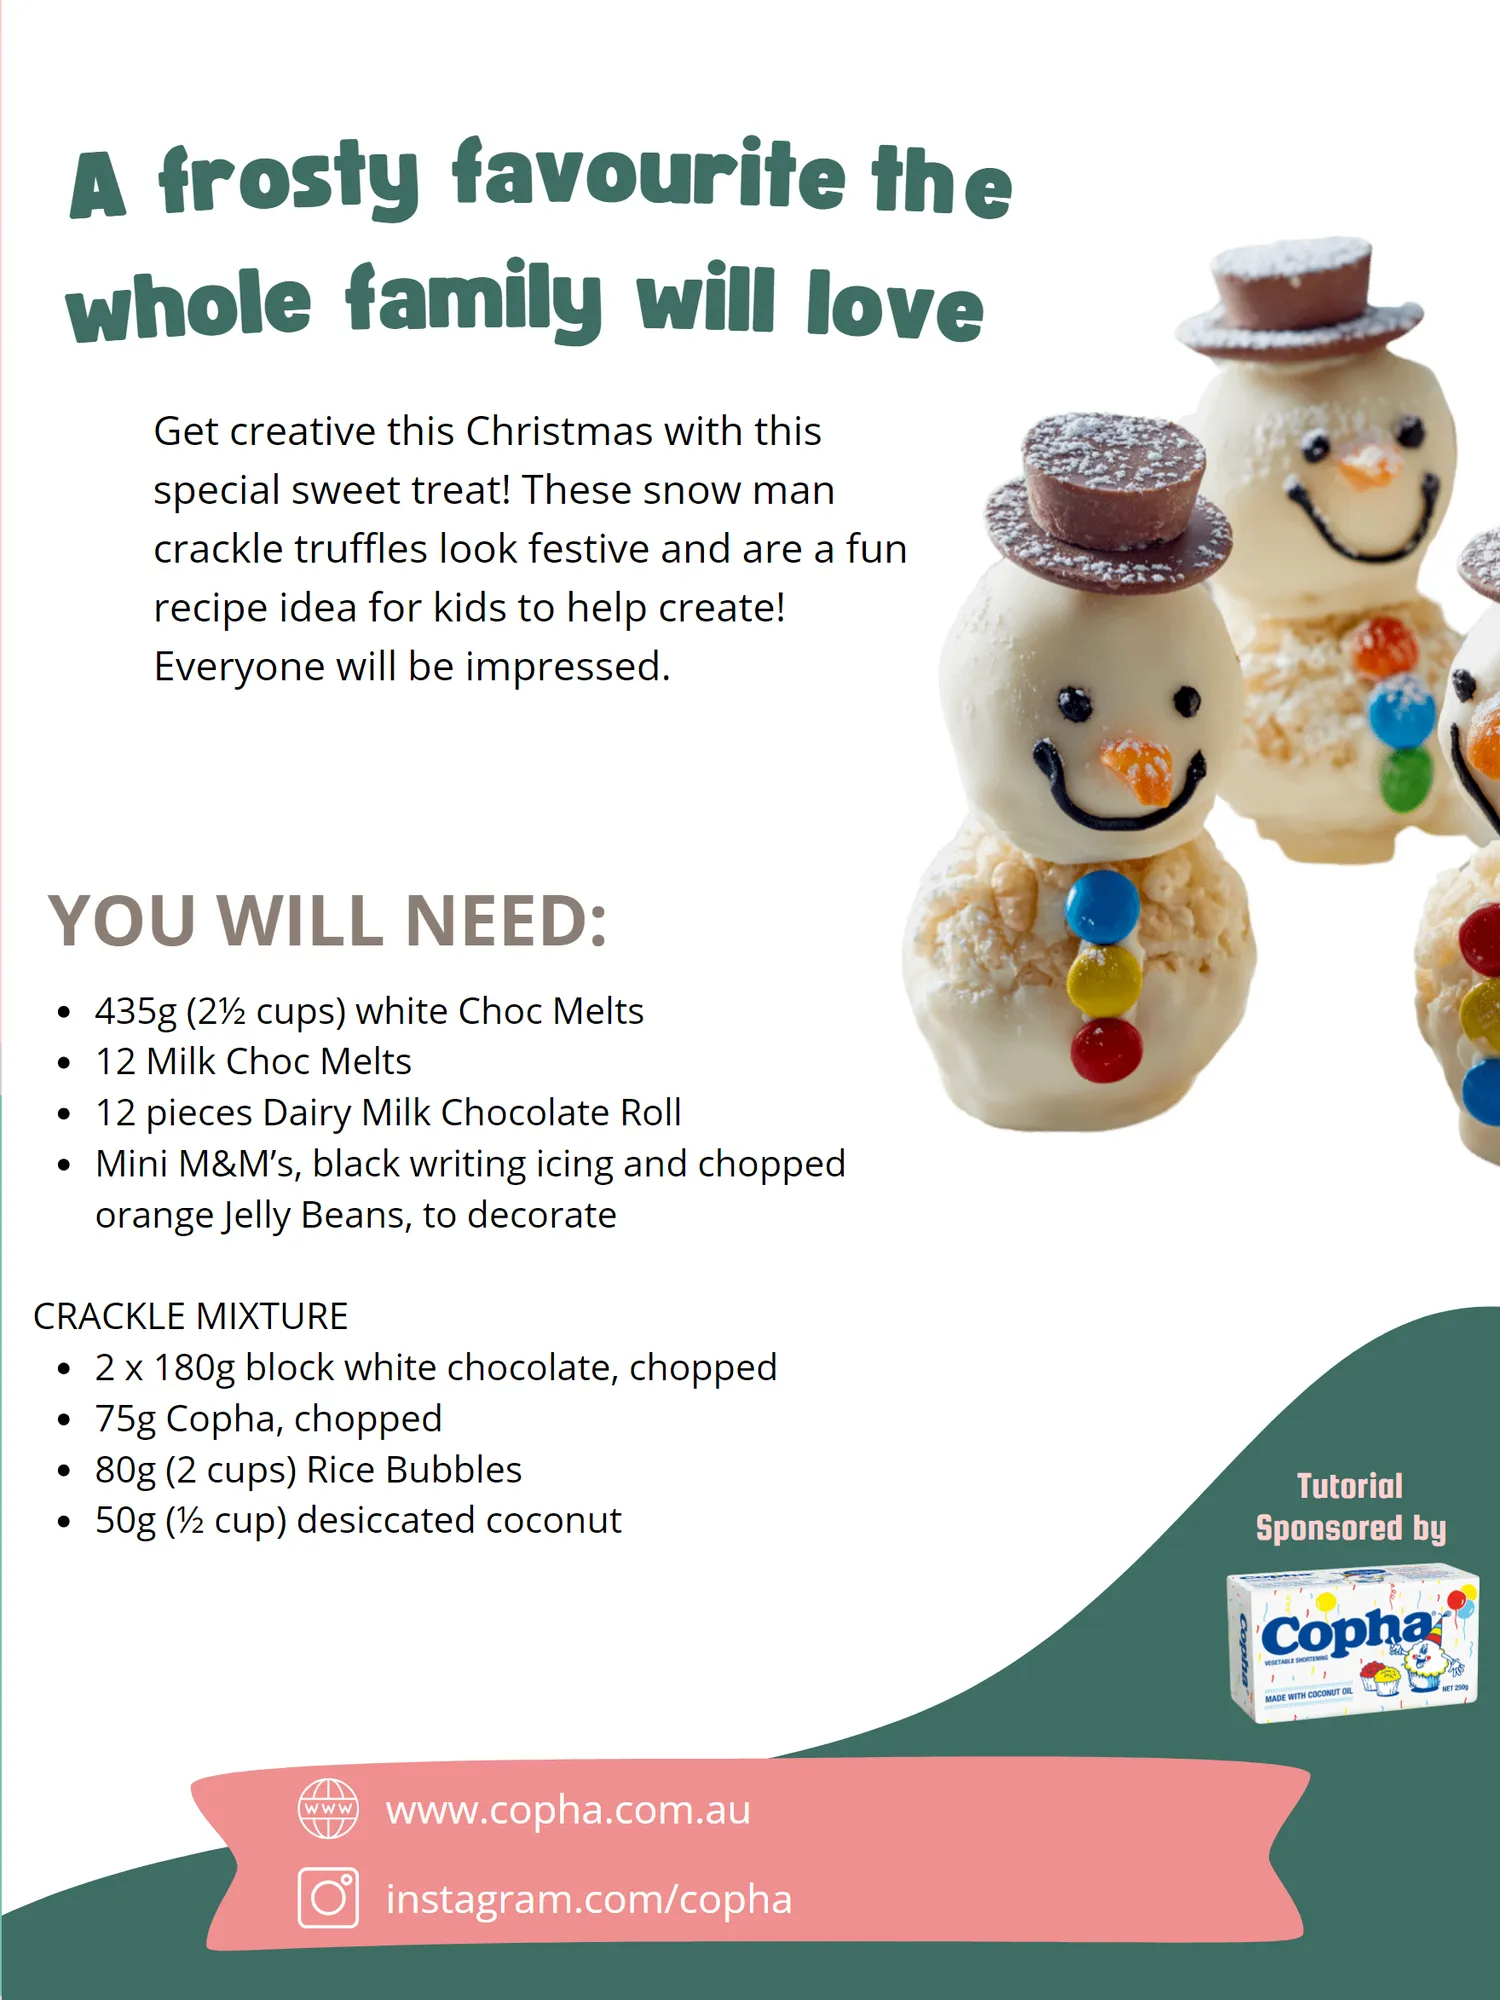
A frosty favourite the whole family will love Get creative this Christmas with this special sweet treat! These snow man crackle truffles look festive and are a fun recipe idea for kids to help create! Everyone will be impressed. YOU WILL NEED: 435g( 2½ cups) white Choc Melts 12 Milk Choc Melts 12 pieces Dairy Milk Chocolate Roll Mini M & M’ s, black writing icing and chopped orange Jelly Beans, to decorate CRACKLE MIXTURE 2 x 180g block white chocolate, chopped 75g Copha, chopped 80g( 2 cups) Rice Bubbles 50g( ½ cup) desiccated coconut Tutorial Sponsored by www. copha. com. au instagram. com / copha
Page 70 text
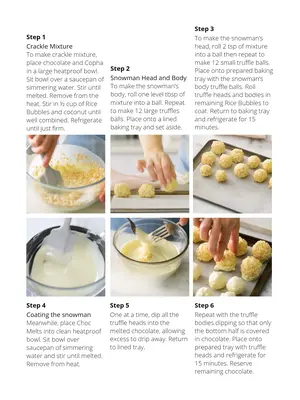
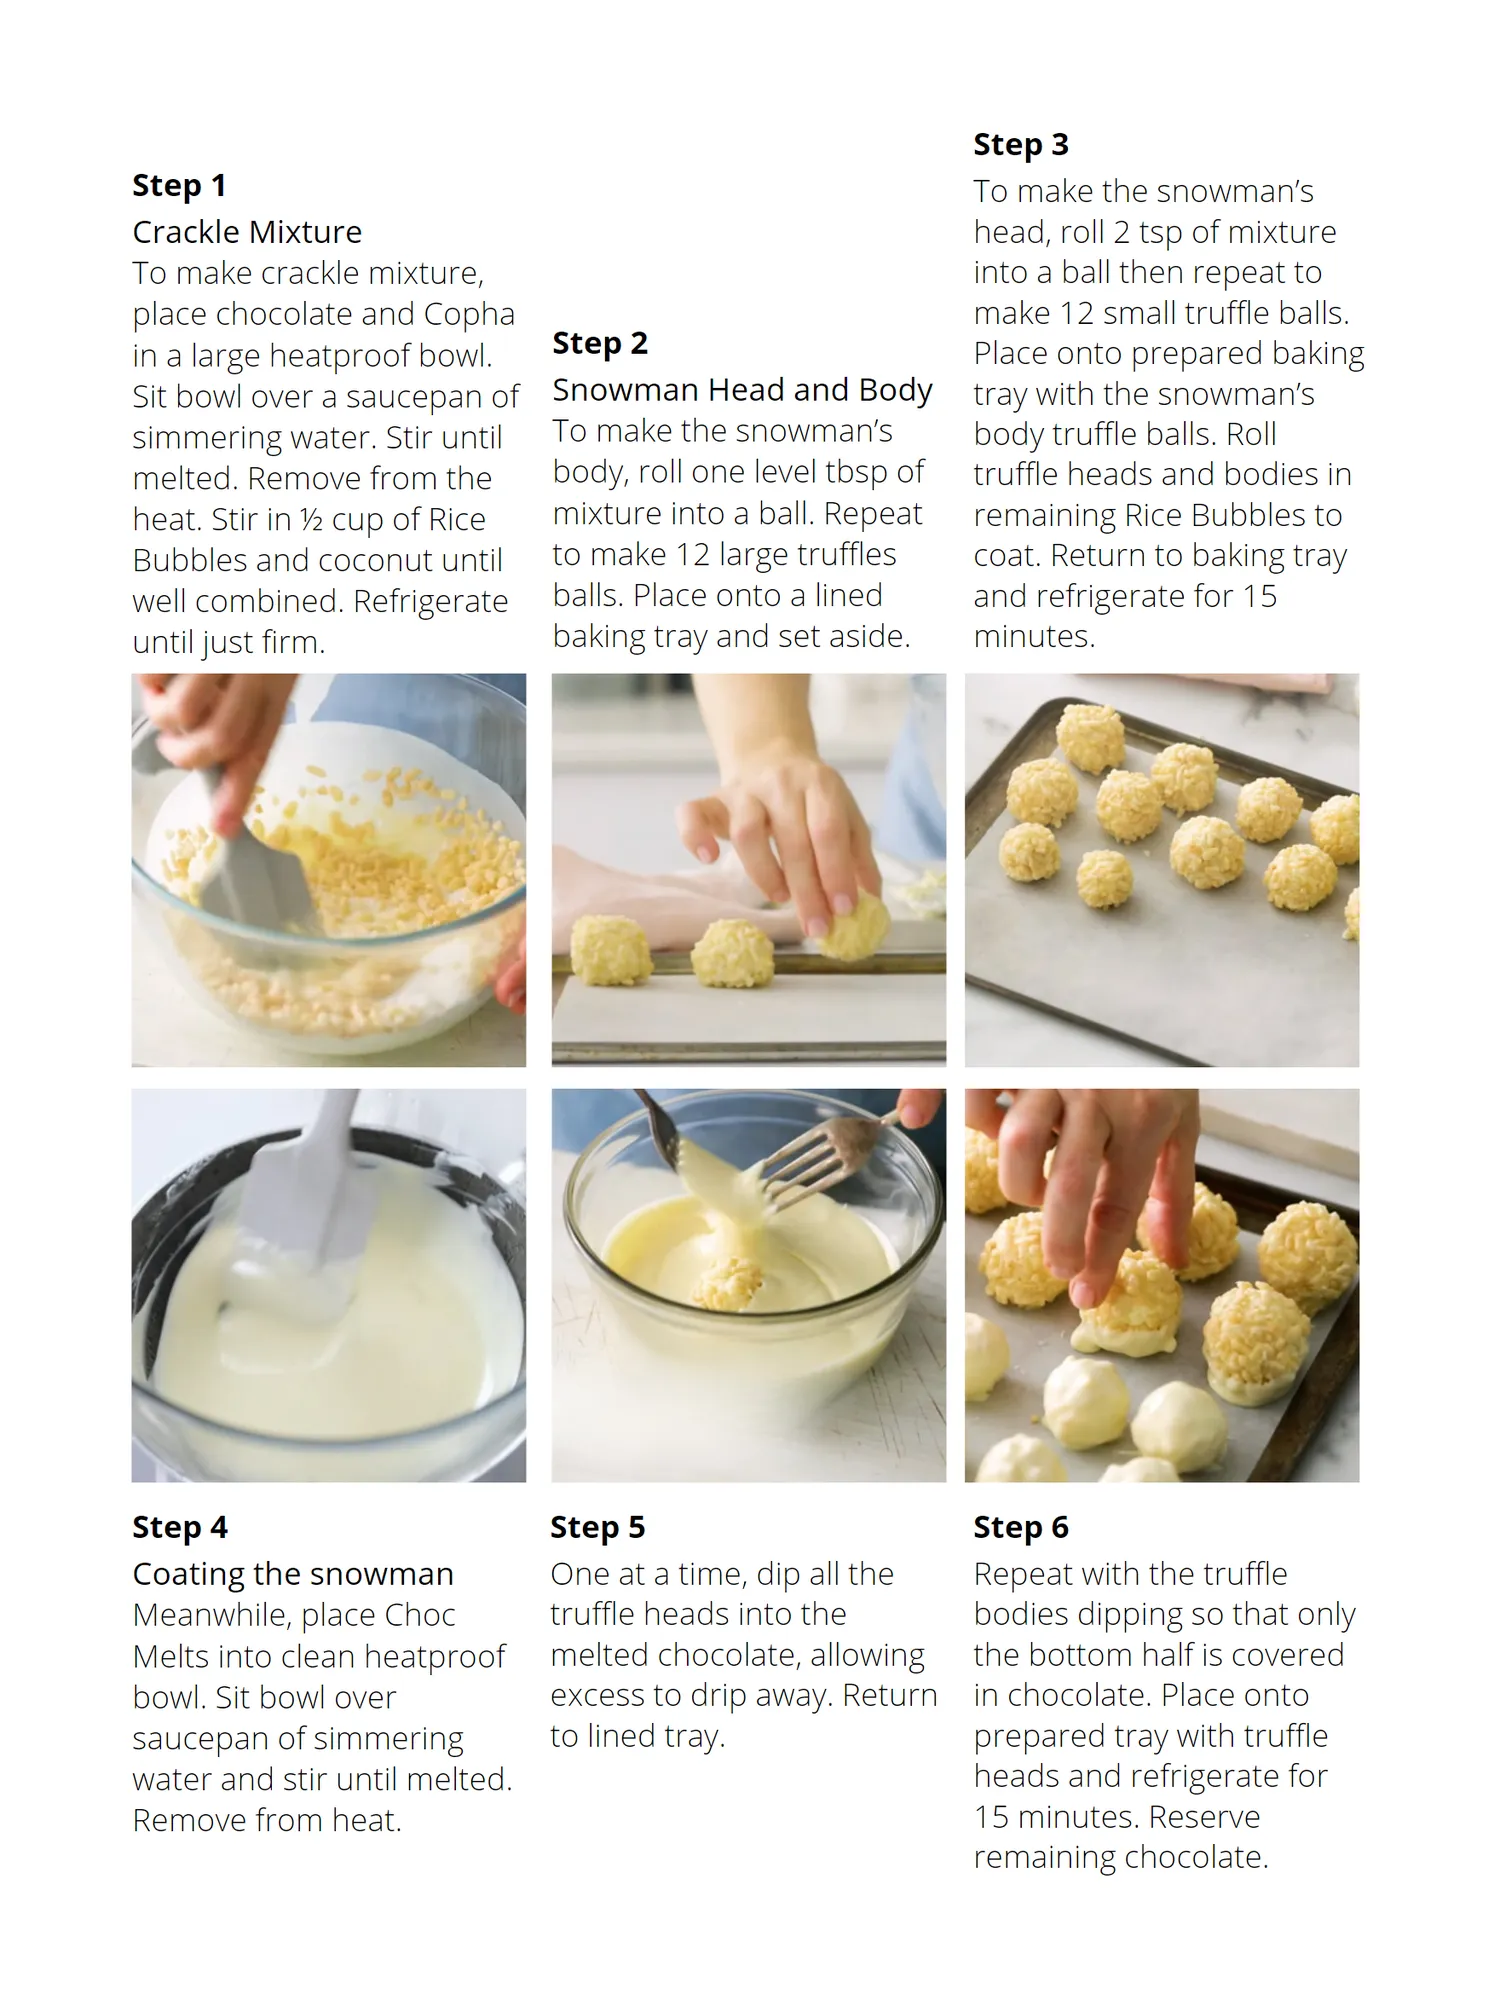
Step 3 Step 1 To make the snowman’s Crackle Mixture head, roll 2 tsp of mixture To make crackle mixture, into a ball then repeat to place chocolate and Copha make 12 small truffle balls. in a large heatproof bowl. Step 2 Place onto prepared baking Sit bowl over a saucepan of Snowman Head and Body tray with the snowman’s simmering water. Stir until To make the snowman’s body truffle balls. Roll melted. Remove from the body, roll one level tbsp of truffle heads and bodies in heat. Stir in ½ cup of Rice mixture into a ball. Repeat remaining Rice Bubbles to Bubbles and coconut until to make 12 large truffles coat. Return to baking tray well combined. Refrigerate balls. Place onto a lined and refrigerate for 15 until just firm. baking tray and set aside. minutes. Step 4 Step 5 Step 6 Coating the snowman One at a time, dip all the Repeat with the truffle Meanwhile, place Choc truffle heads into the bodies dipping so that only Melts into clean heatproof melted chocolate, allowing the bottom half is covered bowl. Sit bowl over excess to drip away. Return in chocolate. Place onto saucepan of simmering to lined tray. prepared tray with truffle water and stir until melted. heads and refrigerate for Remove from heat. 15 minutes. Reserve remaining chocolate.
Page 71 text
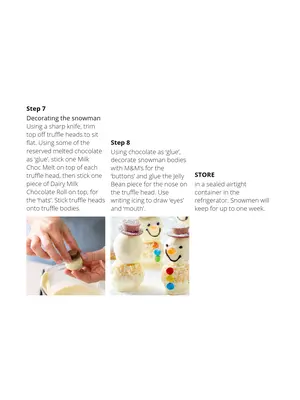
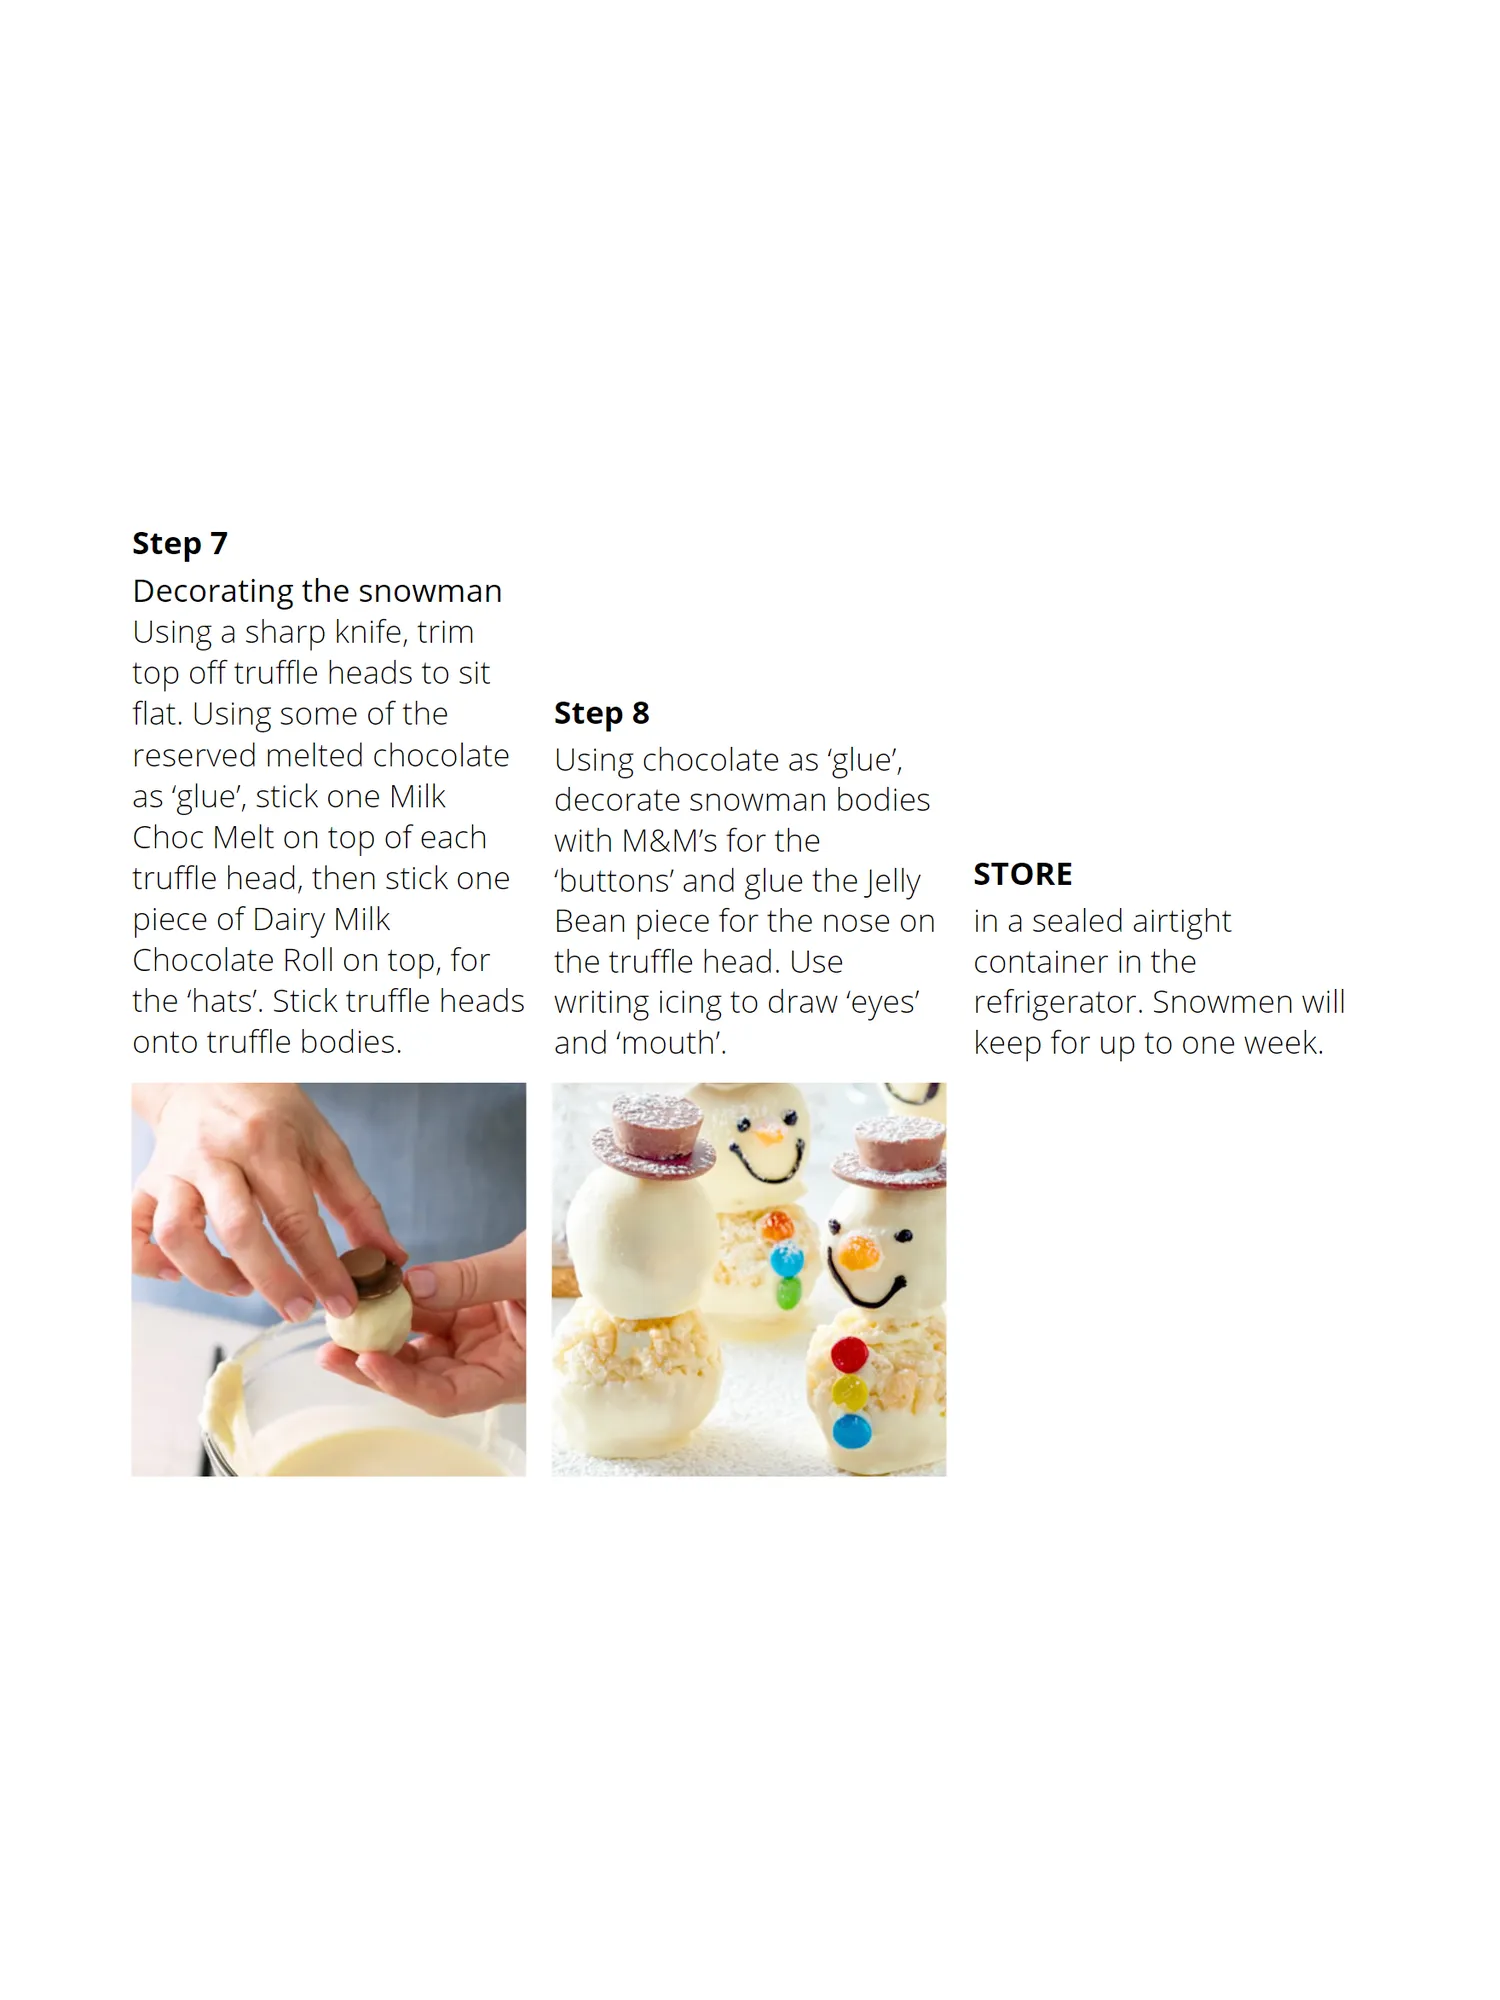
Step 7 Decorating the snowman Using a sharp knife, trim top off truffle heads to sit flat. Using some of the Step 8 reserved melted chocolate Using chocolate as ‘glue’, as ‘glue’, stick one Milk decorate snowman bodies Choc Melt on top of each with M&M’s for the truffle head, then stick one ‘buttons’ and glue the Jelly STORE piece of Dairy Milk Bean piece for the nose on in a sealed airtight Chocolate Roll on top, for the truffle head. Use container in the the ‘hats’. Stick truffle heads writing icing to draw ‘eyes’ refrigerator. Snowmen will onto truffle bodies. and ‘mouth’. keep for up to one week.
Page 72 text
Tutorial Sponsored by White Christmas Forest Platter Tutorial Sponsored by
Page 73 text
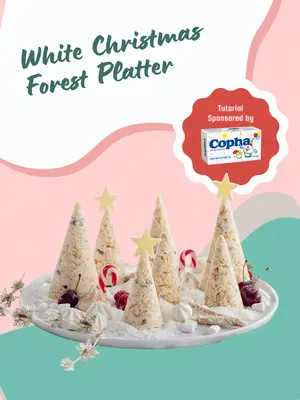
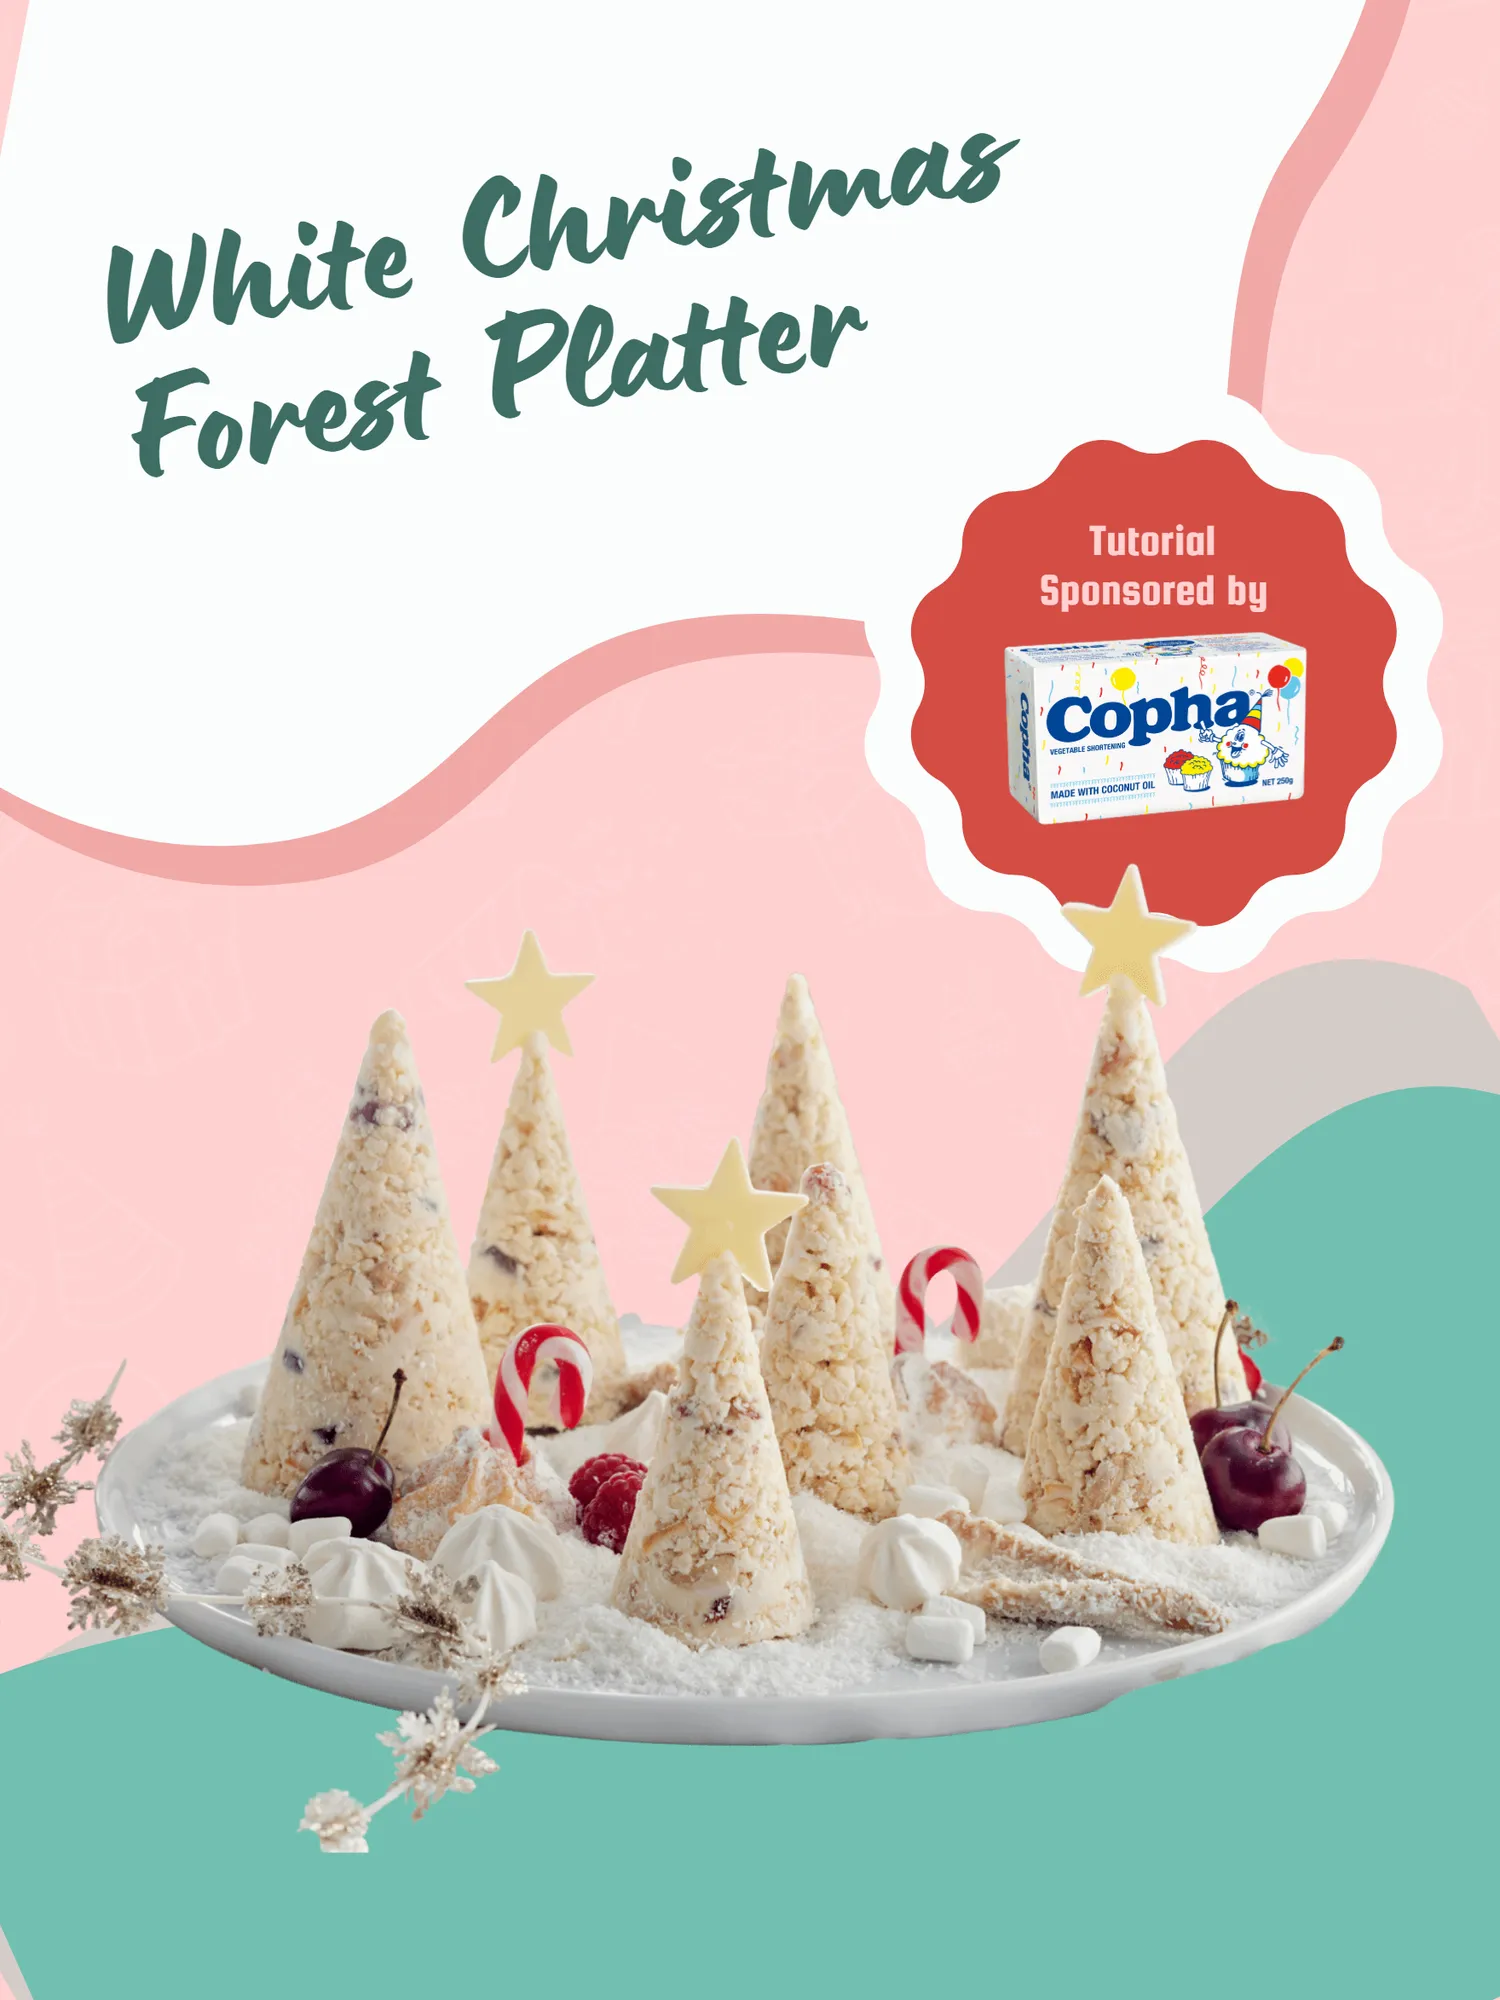
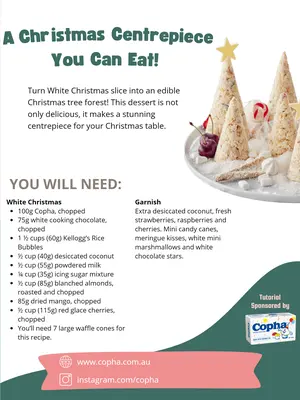
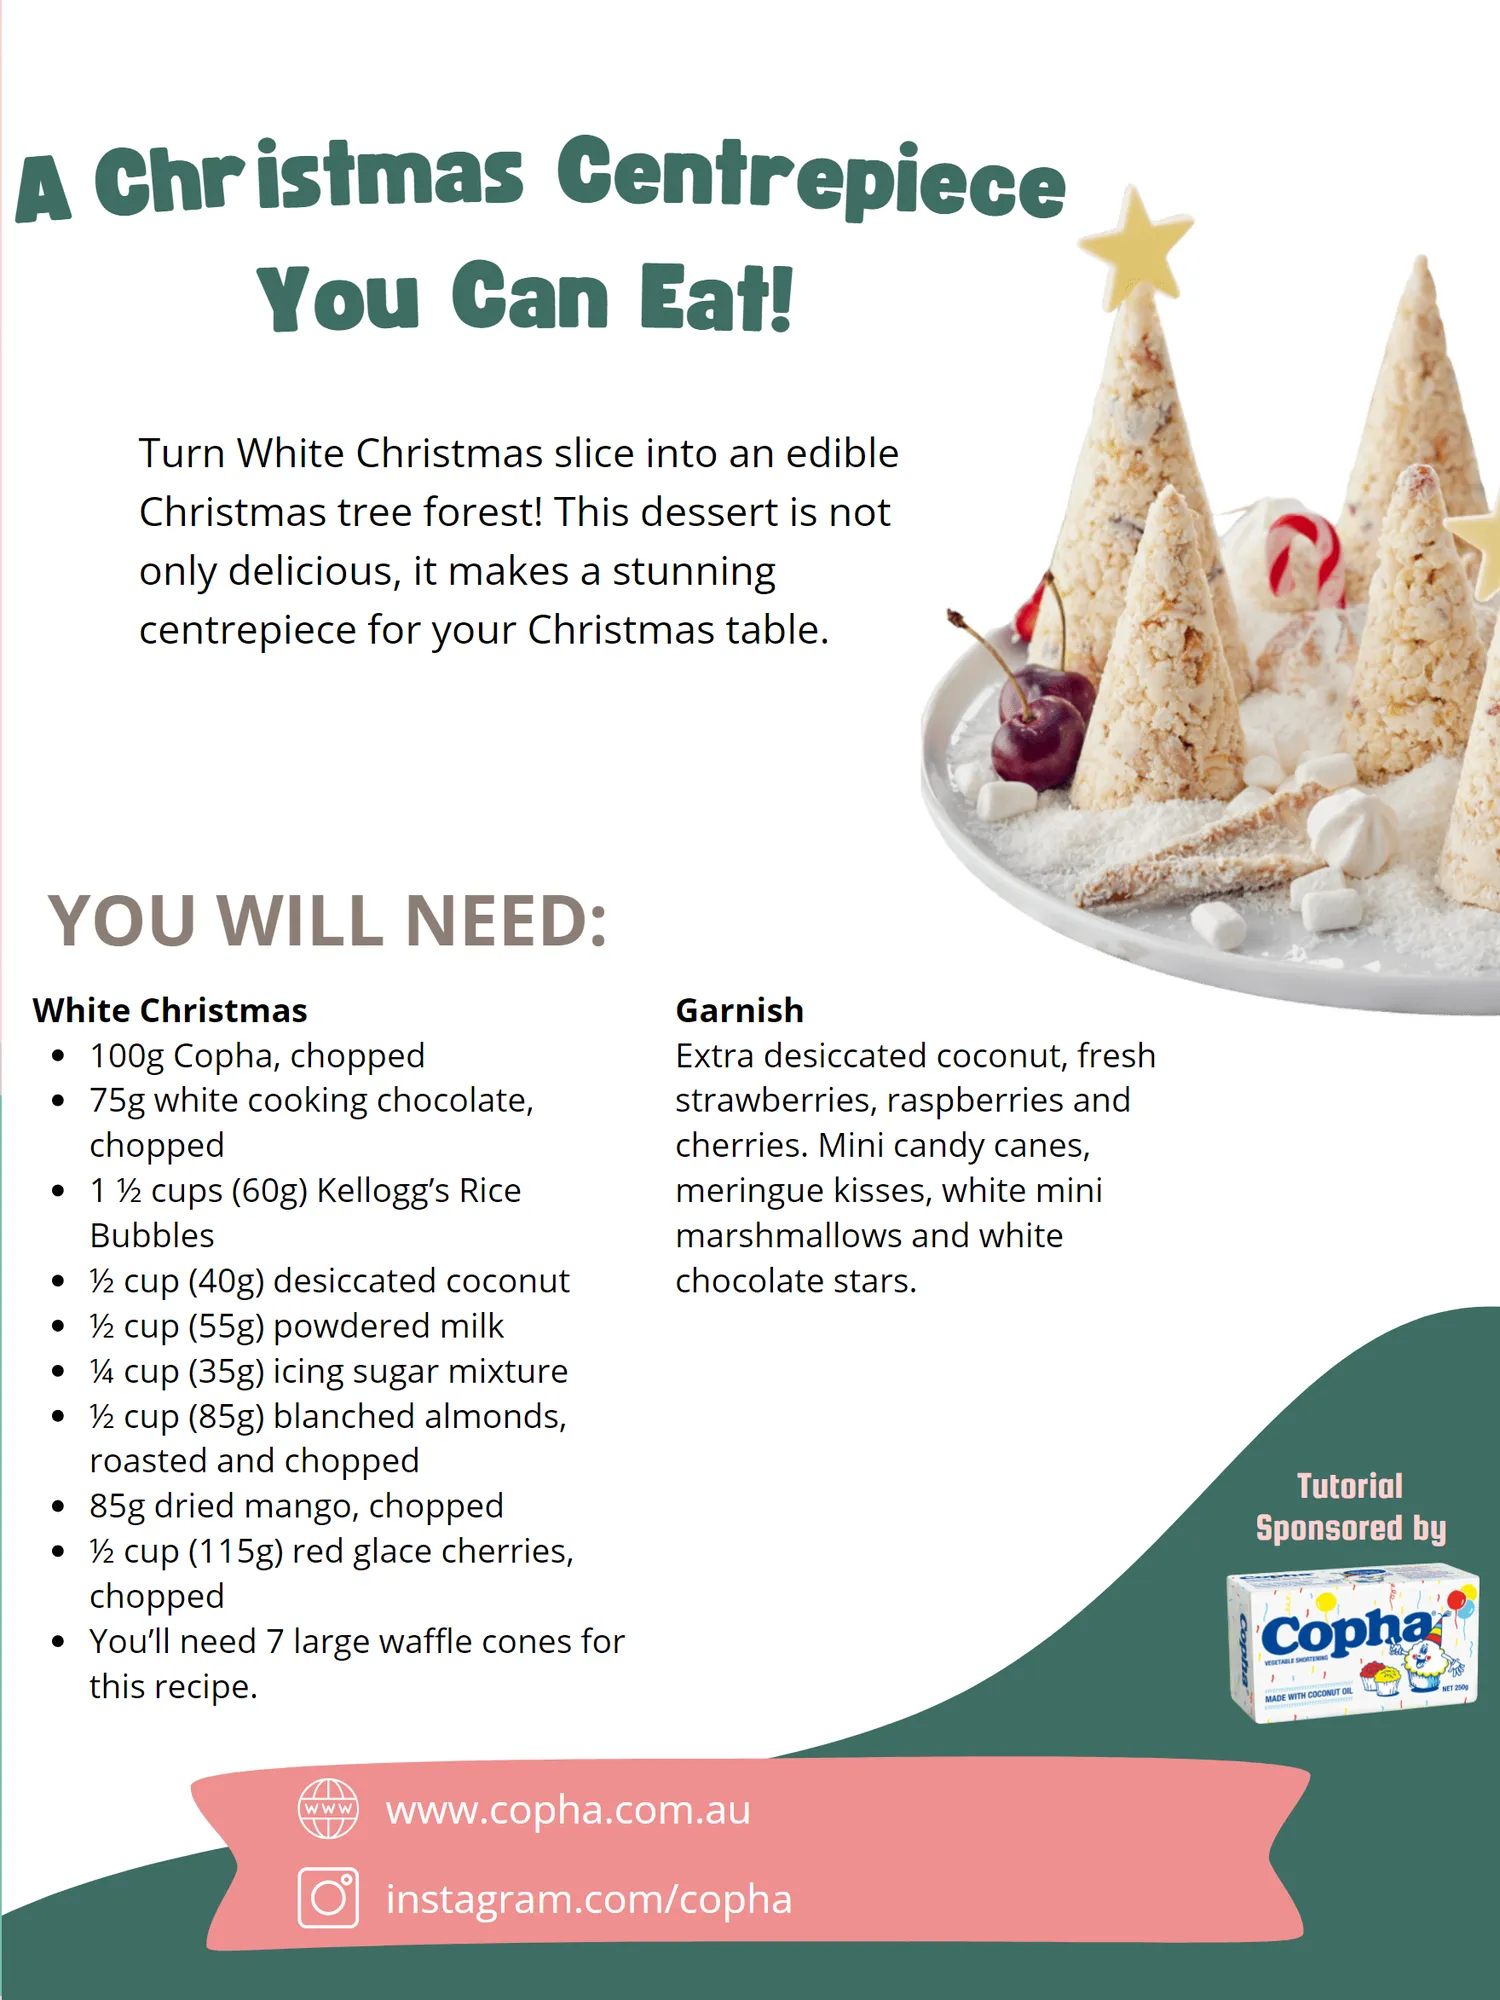
A Christmas Centrepiece You Can Eat! Turn White Christmas slice into an edible Christmas tree forest! This dessert is not only delicious, it makes a stunning centrepiece for your Christmas table. YOU WILL NEED: White Christmas 100g Copha, chopped 75g white cooking chocolate, chopped 1 ½ cups( 60g) Kellogg’ s Rice Bubbles ½ cup( 40g) desiccated coconut ½ cup( 55g) powdered milk ¼ cup( 35g) icing sugar mixture ½ cup( 85g) blanched almonds, roasted and chopped 85g dried mango, chopped ½ cup( 115g) red glace cherries, chopped You’ ll need 7 large waffle cones for this recipe. Garnish Extra desiccated coconut, fresh strawberries, raspberries and cherries. Mini candy canes, meringue kisses, white mini marshmallows and white chocolate stars. Tutorial Sponsored by www. copha. com. au instagram. com / copha
Page 74 text
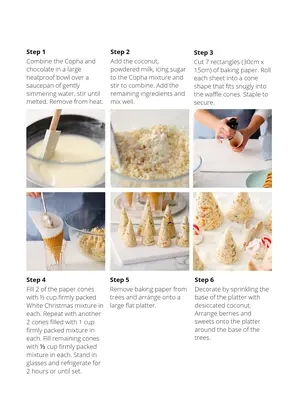
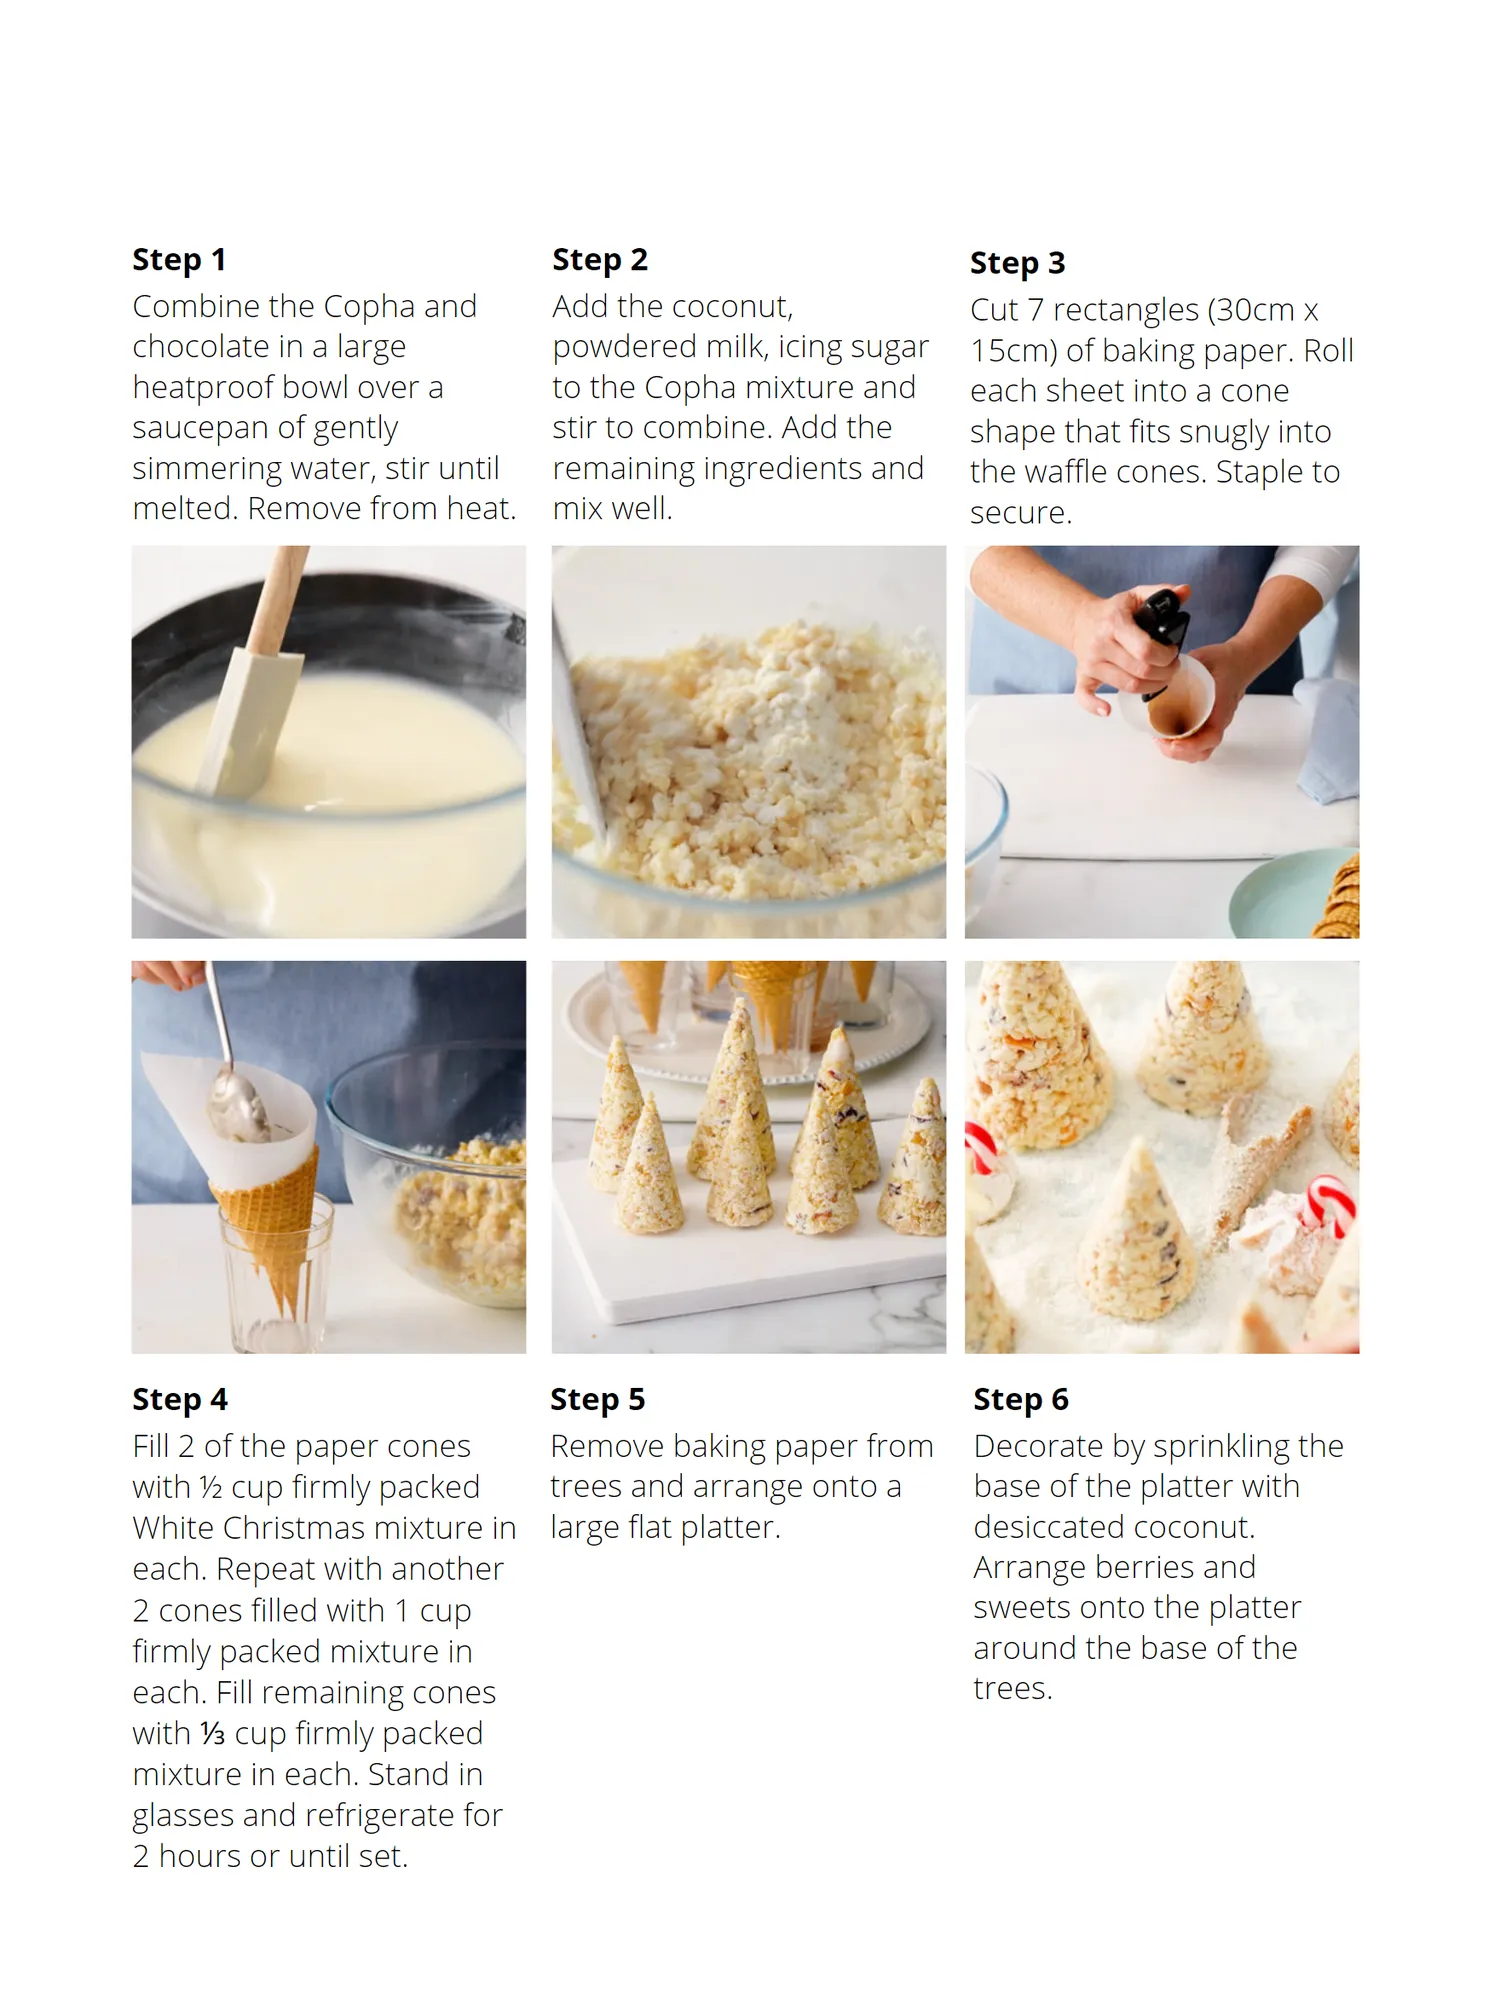
Step 1 Step 2 Step 3 Combine the Copha and Add the coconut, Cut 7 rectangles (30cm x chocolate in a large powdered milk, icing sugar 15cm) of baking paper. Roll heatproof bowl over a to the Copha mixture and each sheet into a cone saucepan of gently stir to combine. Add the shape that fits snugly into simmering water, stir until remaining ingredients and the waffle cones. Staple to melted. Remove from heat. mix well. secure. Step 4 Step 5 Step 6 Fill 2 of the paper cones Remove baking paper from Decorate by sprinkling the with ½ cup firmly packed trees and arrange onto a base of the platter with White Christmas mixture in large flat platter. desiccated coconut. each. Repeat with another Arrange berries and 2 cones filled with 1 cup sweets onto the platter firmly packed mixture in around the base of the each. Fill remaining cones trees. with ⅓ cup firmly packed mixture in each. Stand in glasses and refrigerate for 2 hours or until set.
Page 75 text
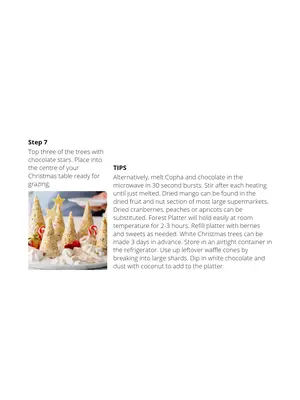
Step 7 Top three of the trees with chocolate stars. Place into the centre of your TIPS Christmas table ready for Alternatively, melt Copha and chocolate in the grazing. microwave in 30 second bursts. Stir after each heating until just melted. Dried mango can be found in the dried fruit and nut section of most large supermarkets. Dried cranberries, peaches or apricots can be substituted. Forest Platter will hold easily at room temperature for 2-3 hours. Refill platter with berries and sweets as needed. White Christmas trees can be made 3 days in advance. Store in an airtight container in the refrigerator. Use up leftover waffle cones by breaking into large shards. Dip in white chocolate and dust with coconut to add to the platter.
Page 76 text
Tutorial Sponsored by White Christmas Minty Treats Tutorial Sponsored by
Page 77 text
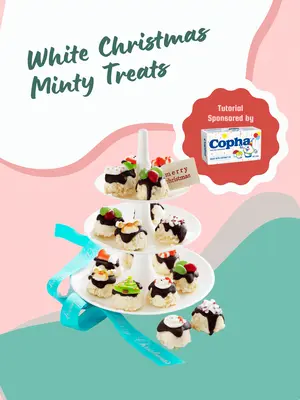
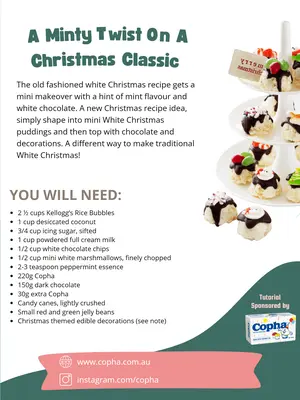
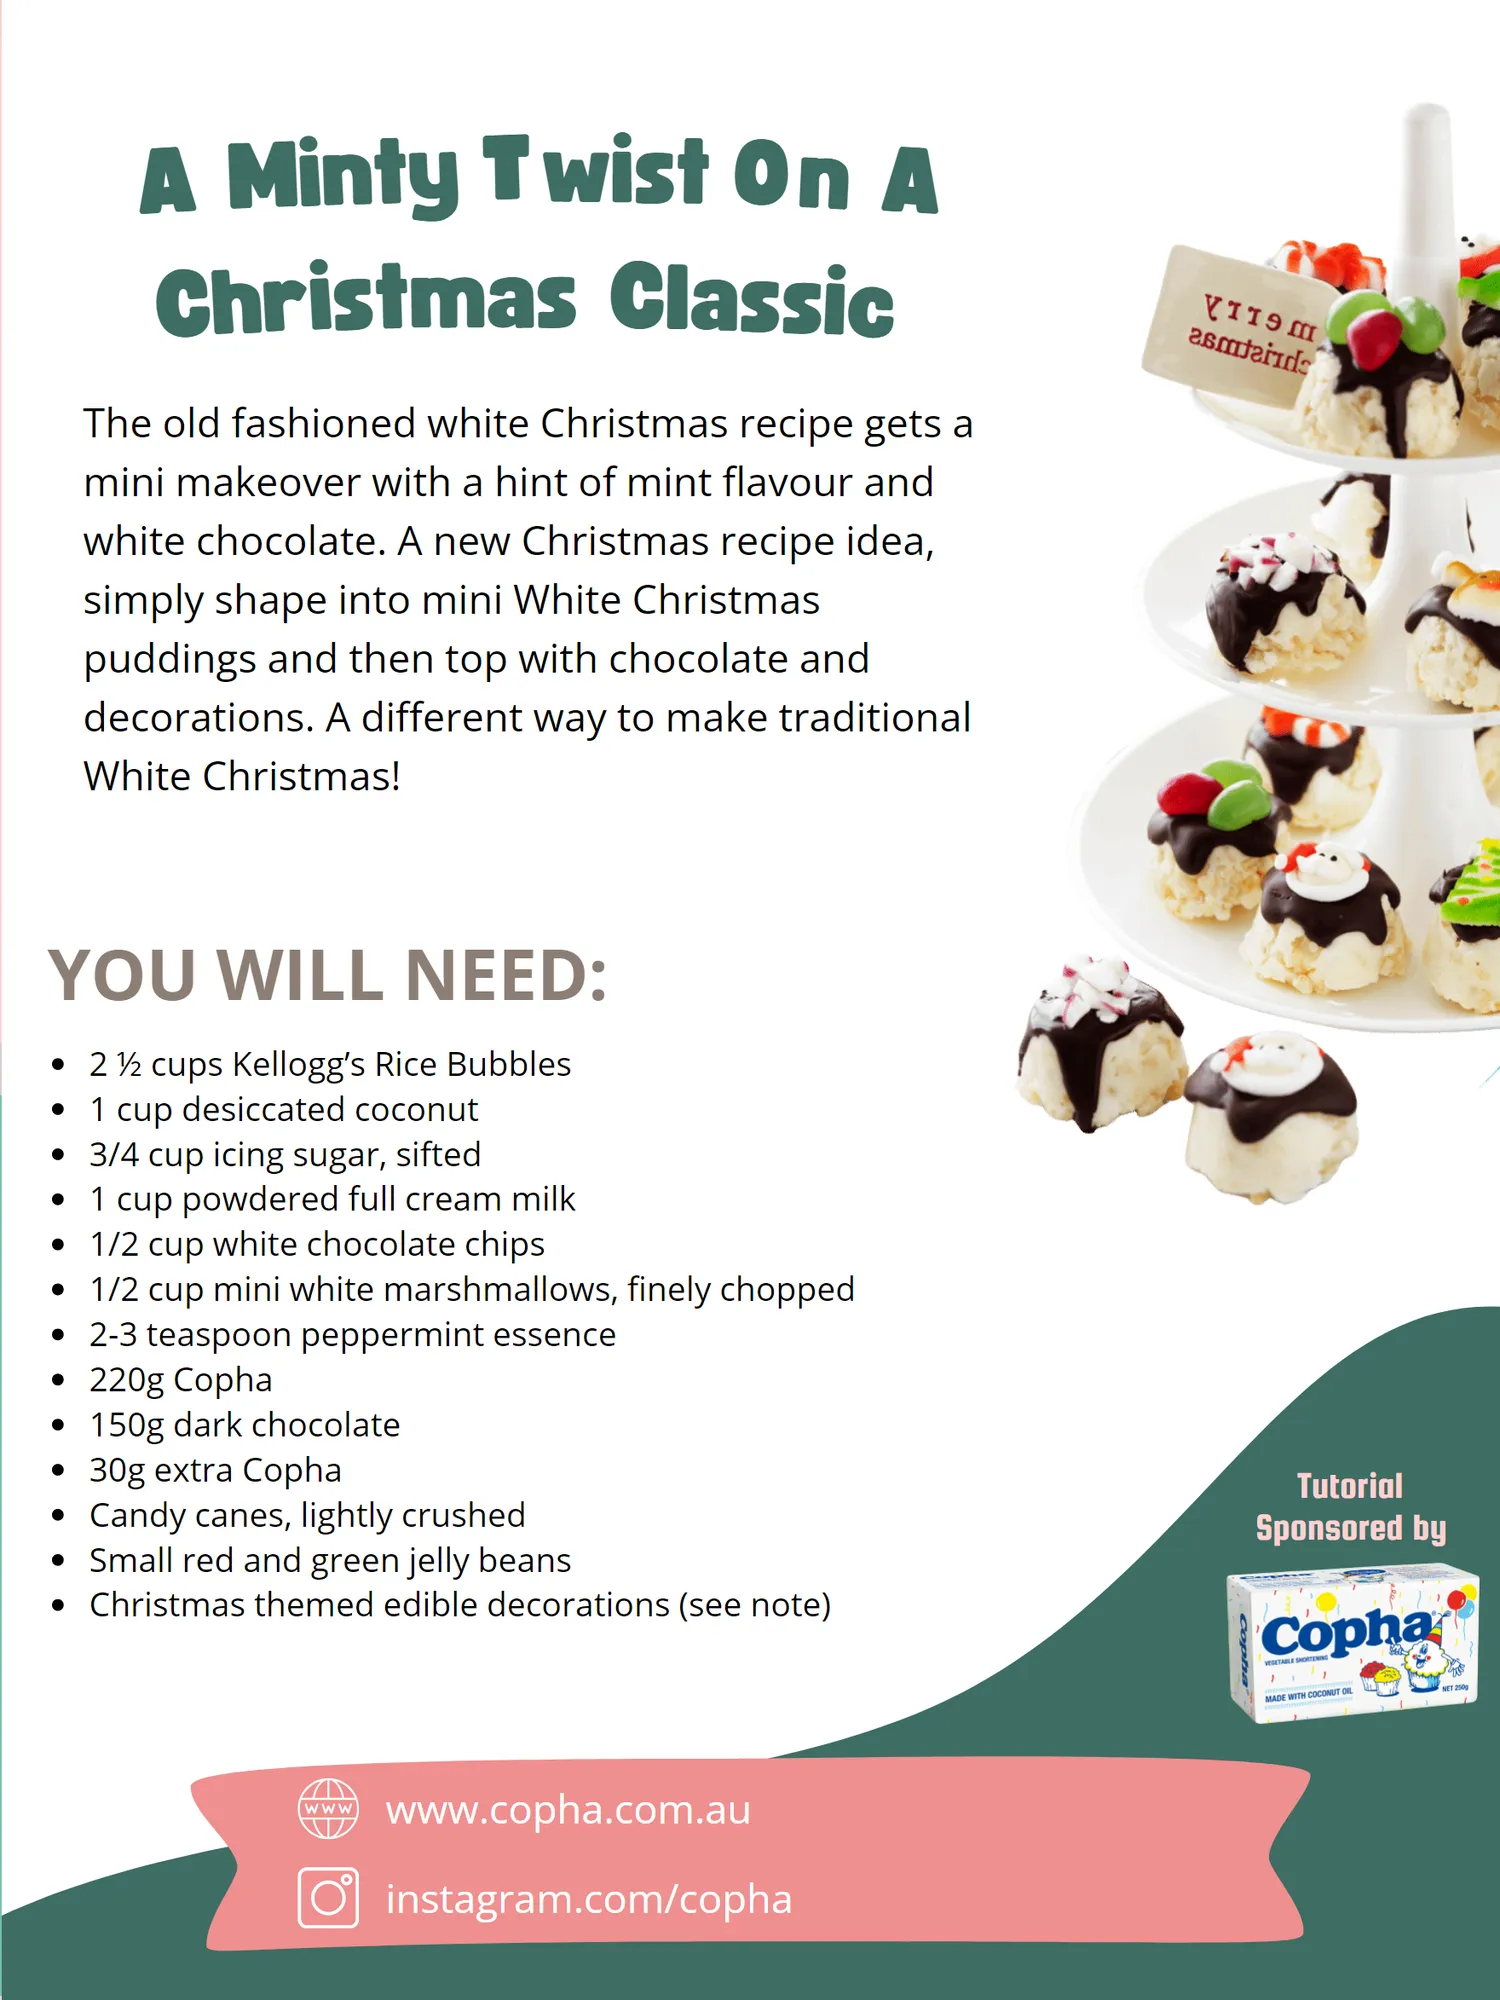
A Minty Twist On A Christmas Classic The old fashioned white Christmas recipe gets a mini makeover with a hint of mint flavour and white chocolate. A new Christmas recipe idea, simply shape into mini White Christmas puddings and then top with chocolate and decorations. A different way to make traditional White Christmas! YOU WILL NEED: 2 ½ cups Kellogg’ s Rice Bubbles 1 cup desiccated coconut 3 / 4 cup icing sugar, sifted 1 cup powdered full cream milk 1 / 2 cup white chocolate chips 1 / 2 cup mini white marshmallows, finely chopped 2-3 teaspoon peppermint essence 220g Copha 150g dark chocolate 30g extra Copha Candy canes, lightly crushed Small red and green jelly beans Christmas themed edible decorations( see note) Tutorial Sponsored by www. copha. com. au instagram. com / copha
Page 78 text
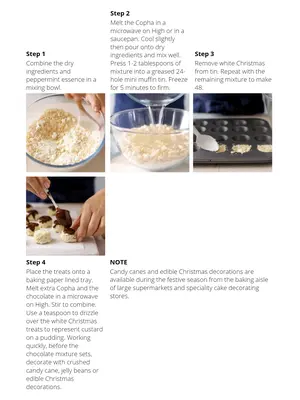
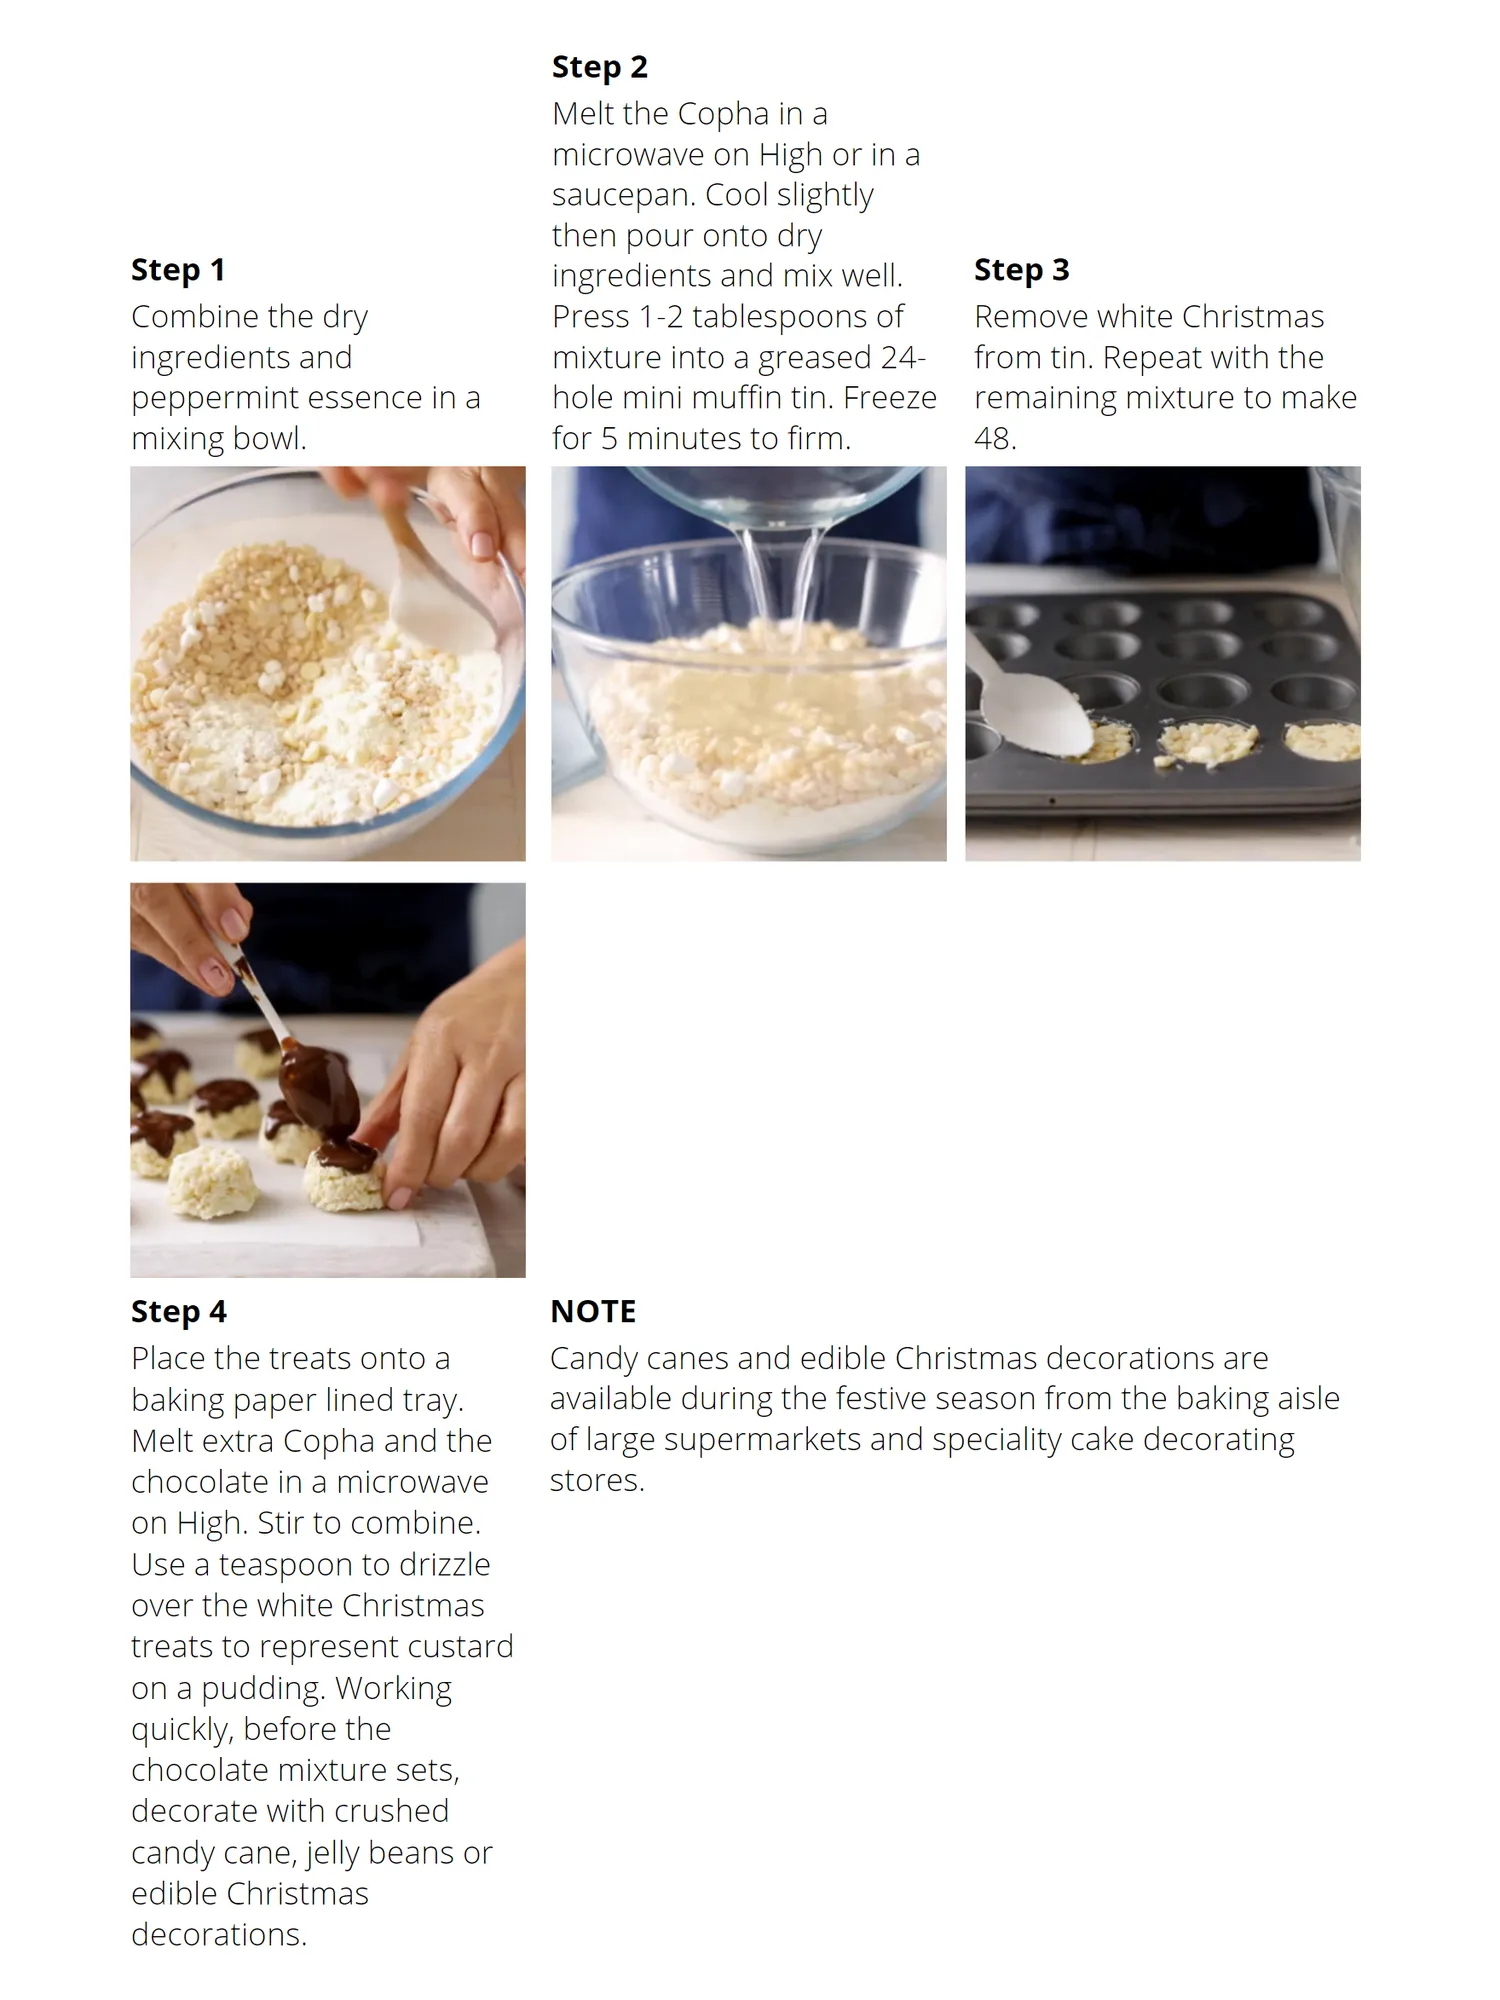
Step 1 Combine the dry ingredients and peppermint essence in a mixing bowl. Step 2 Melt the Copha in a microwave on High or in a saucepan. Cool slightly then pour onto dry ingredients and mix well. Press 1-2 tablespoons of mixture into a greased 24- hole mini muffin tin. Freeze for 5 minutes to firm. Step 3 Remove white Christmas from tin. Repeat with the remaining mixture to make 48. Step 4 Place the treats onto a baking paper lined tray. Melt extra Copha and the chocolate in a microwave on High. Stir to combine. Use a teaspoon to drizzle over the white Christmas treats to represent custard on a pudding. Working quickly, before the chocolate mixture sets, decorate with crushed candy cane, jelly beans or edible Christmas decorations. NOTE Candy canes and edible Christmas decorations are available during the festive season from the baking aisle of large supermarkets and speciality cake decorating stores.
Page 79 text
Baking Box Subscription A QUARTERLY SUBSCRIPTION OF CAKE AND BAKING GOODIES DELIVERED TO YOUR DOOR!
Page 80 text
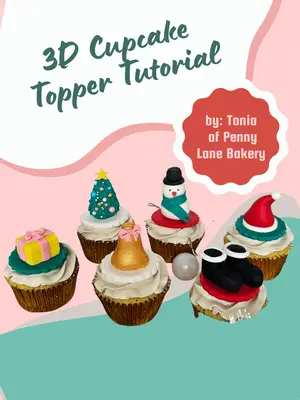
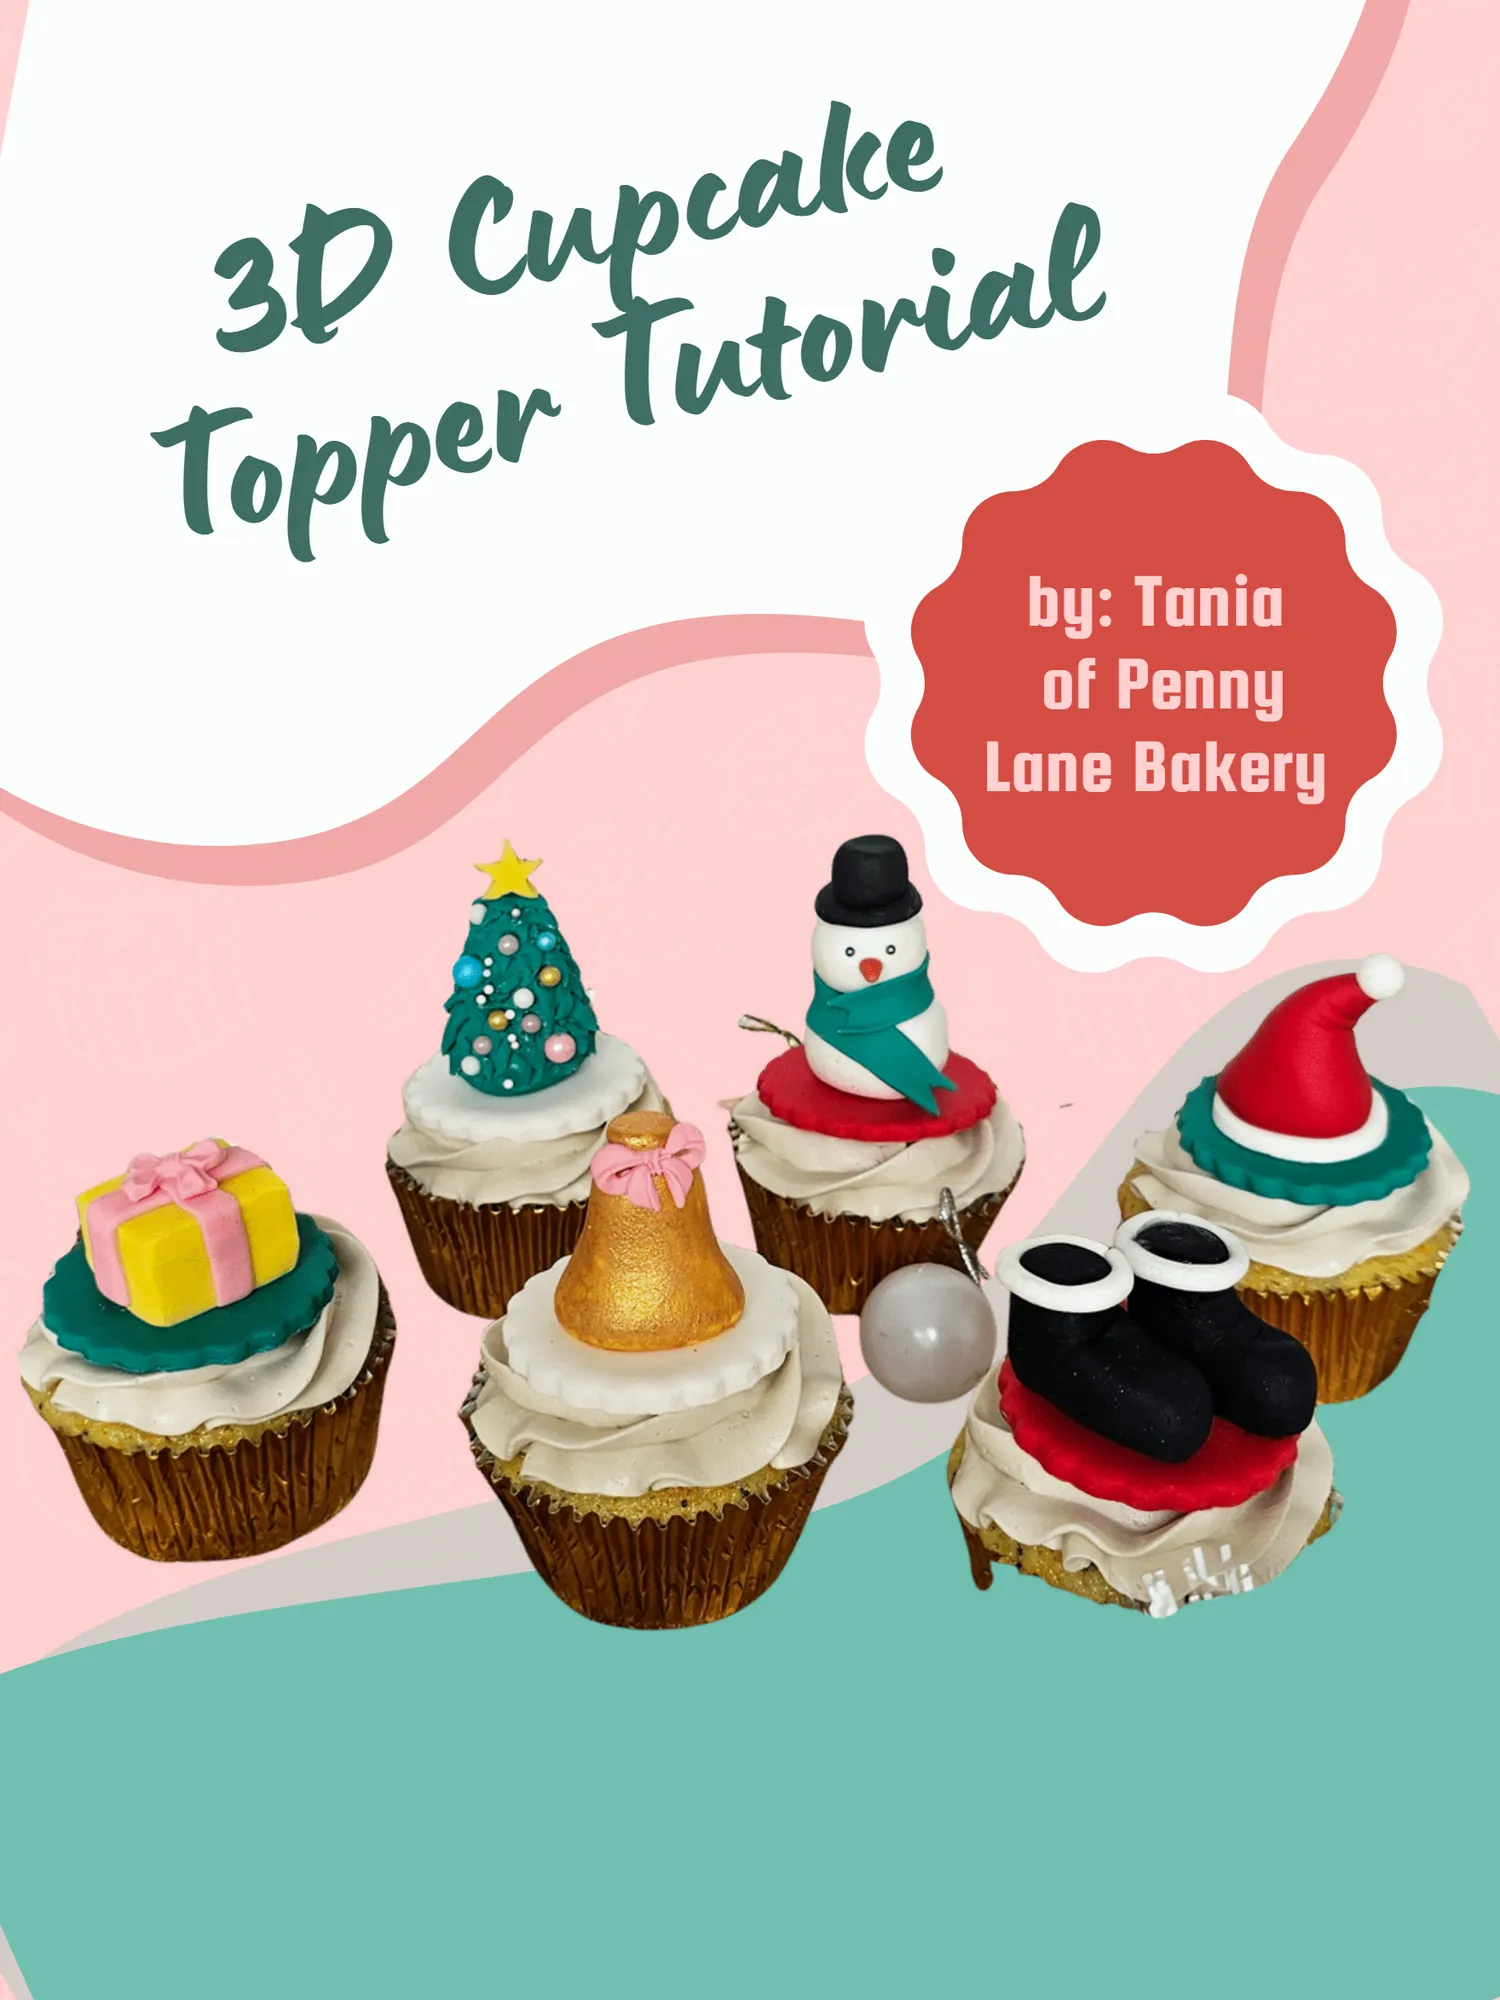
3D Cupcake Topper Tutorial by: Tania of Penny Lane Bakery
Page 81 text
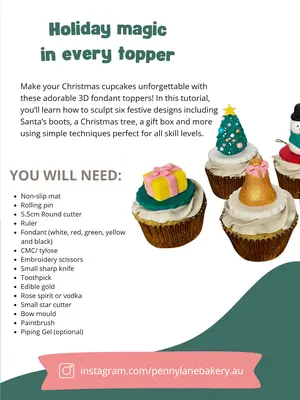
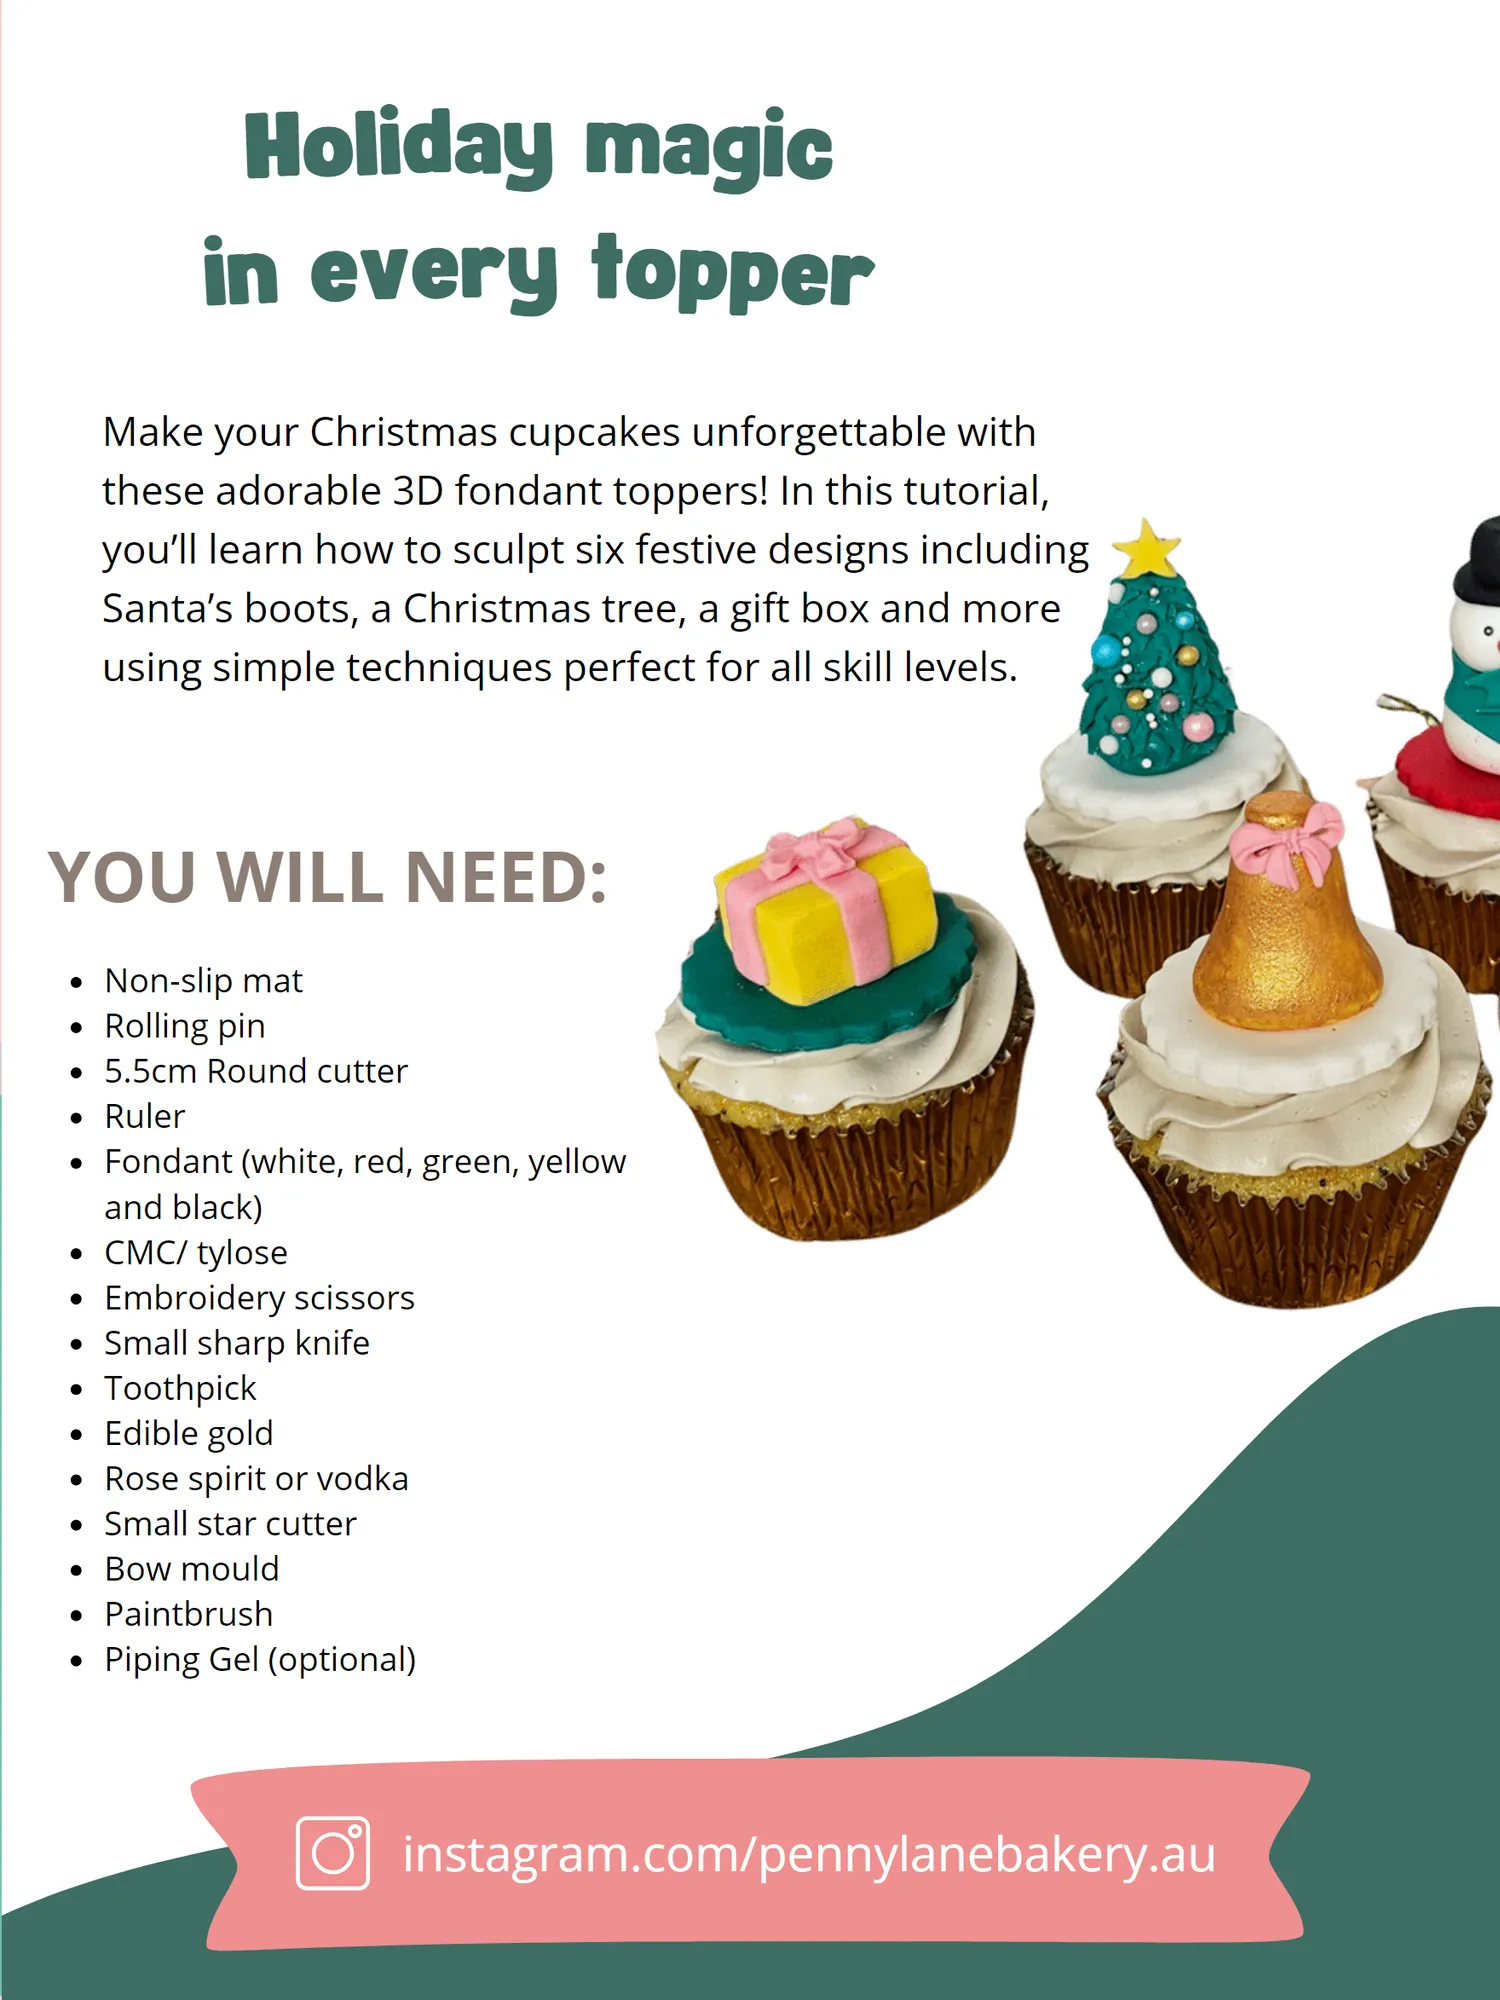
Holiday magic in every topper Make your Christmas cupcakes unforgettable with these adorable 3D fondant toppers! In this tutorial, you’ ll learn how to sculpt six festive designs including Santa’ s boots, a Christmas tree, a gift box and more using simple techniques perfect for all skill levels. YOU WILL NEED: Non-slip mat Rolling pin 5.5cm Round cutter Ruler Fondant( white, red, green, yellow and black) CMC / tylose Embroidery scissors Small sharp knife Toothpick Edible gold Rose spirit or vodka Small star cutter Bow mould Paintbrush Piping Gel( optional) instagram. com / penny lane bakery. au
Page 82 text
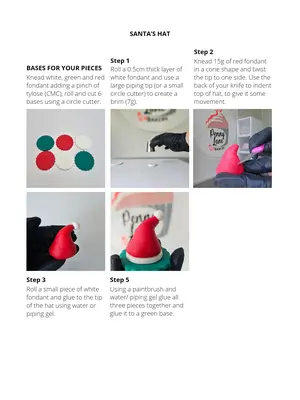
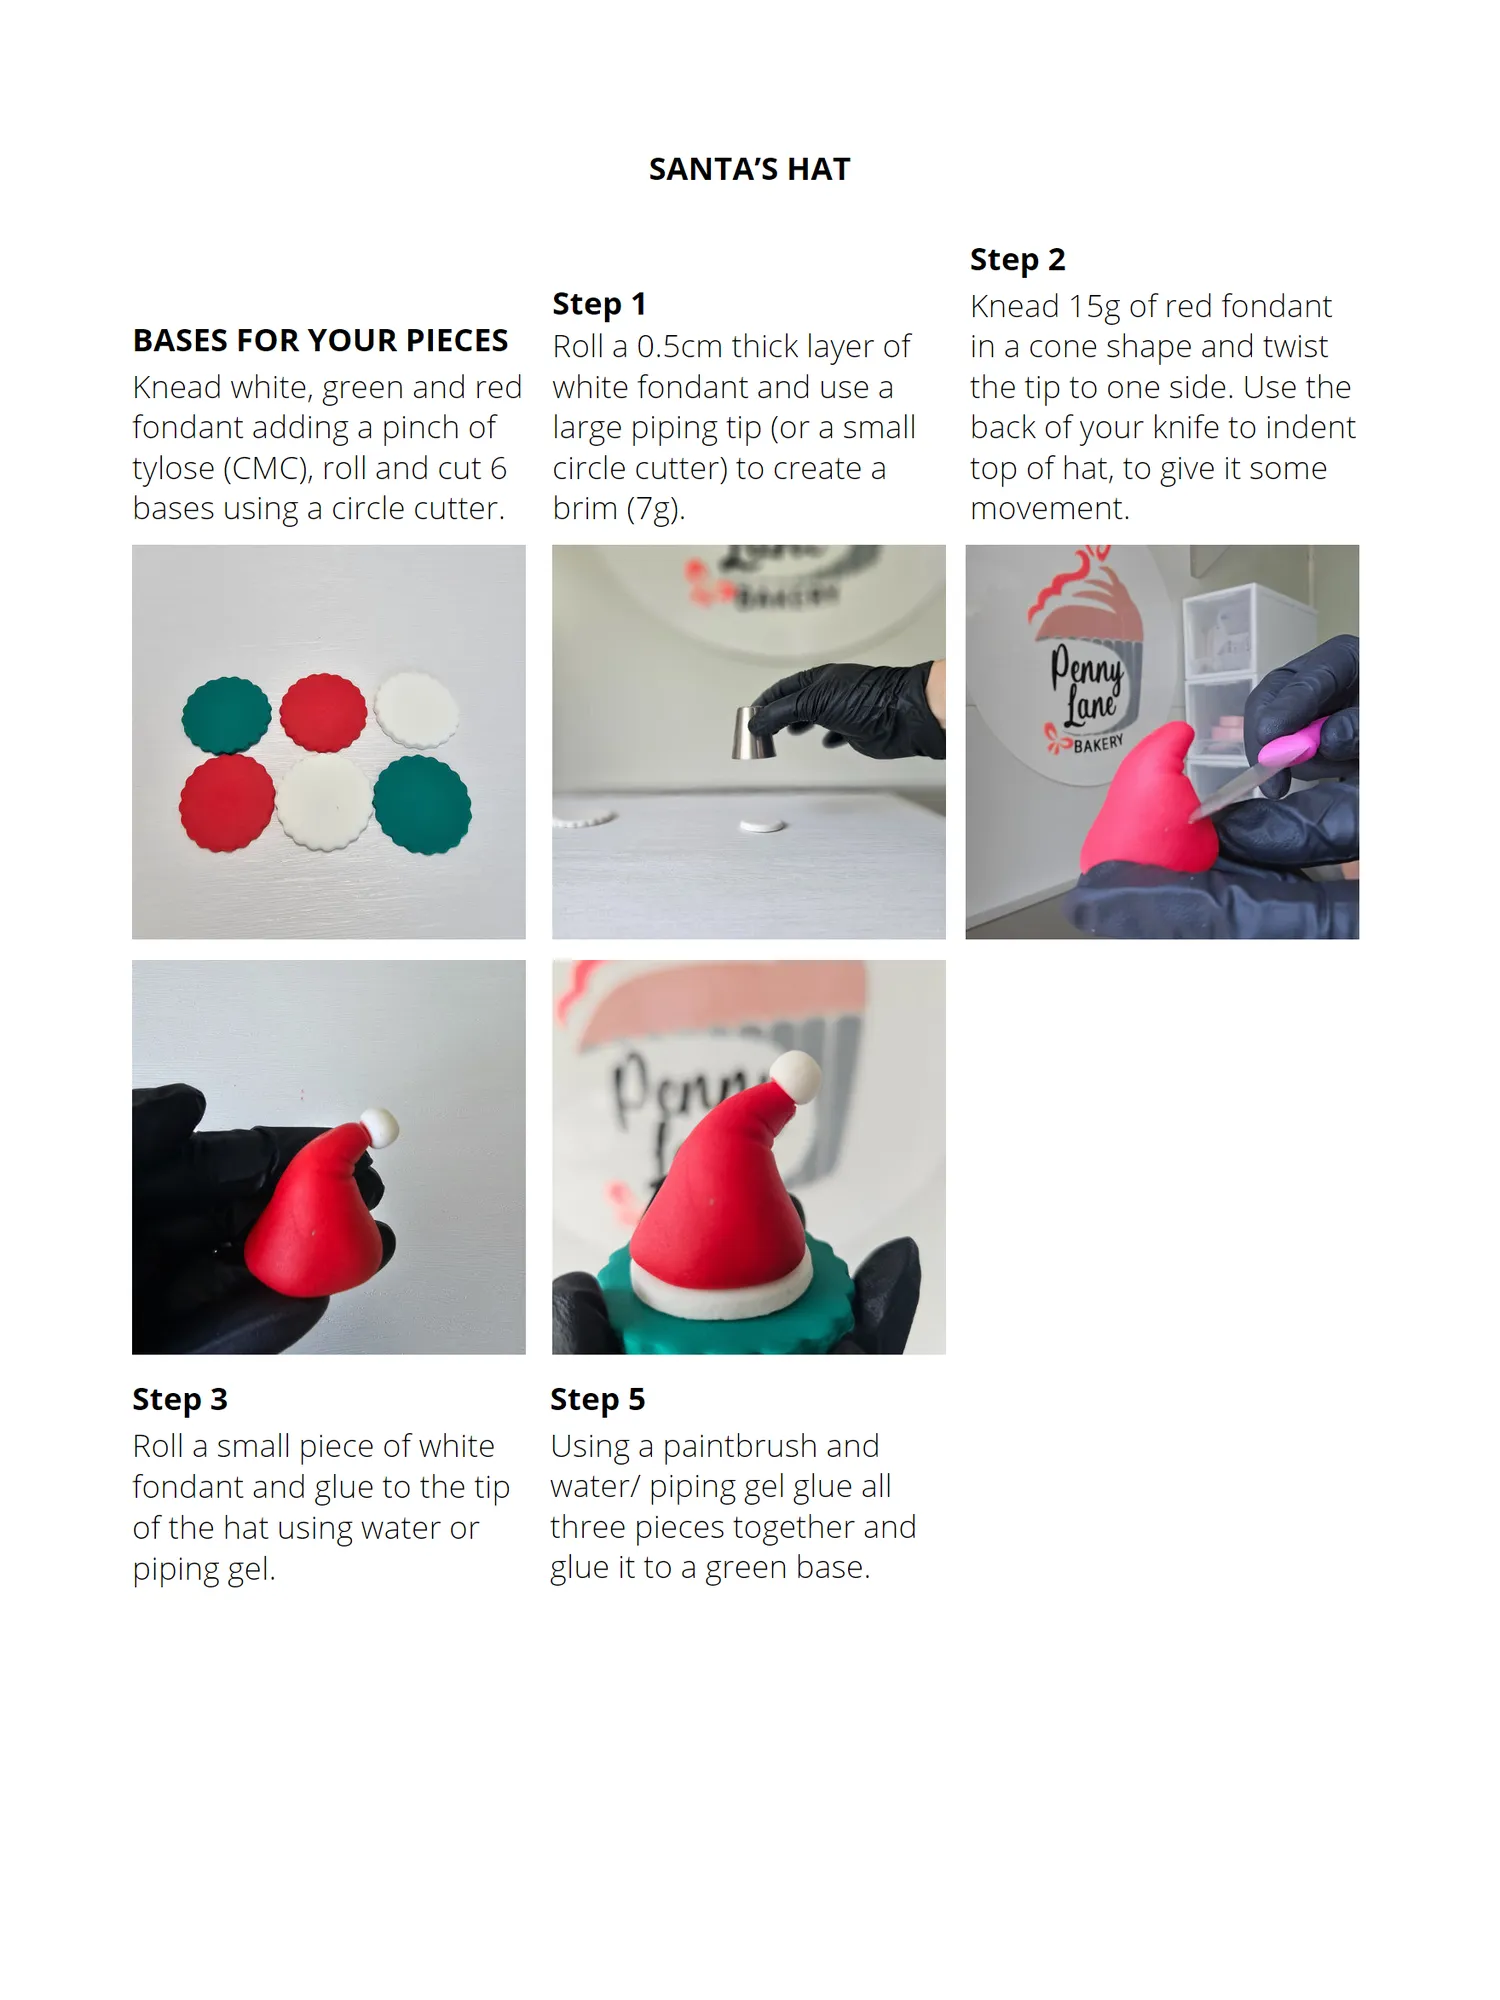
SANTA’S HAT Step 2 Step 1 Knead 15g of red fondant BASES FOR YOUR PIECES Roll a 0.5cm thick layer of in a cone shape and twist Knead white, green and red white fondant and use a the tip to one side. Use the fondant adding a pinch of large piping tip (or a small back of your knife to indent tylose (CMC), roll and cut 6 circle cutter) to create a top of hat, to give it some bases using a circle cutter. brim (7g). movement. Step 3 Step 5 Roll a small piece of white Using a paintbrush and fondant and glue to the tip water/ piping gel glue all of the hat using water or three pieces together and piping gel. glue it to a green base.
Page 83 text
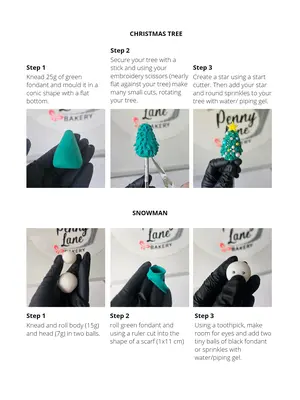
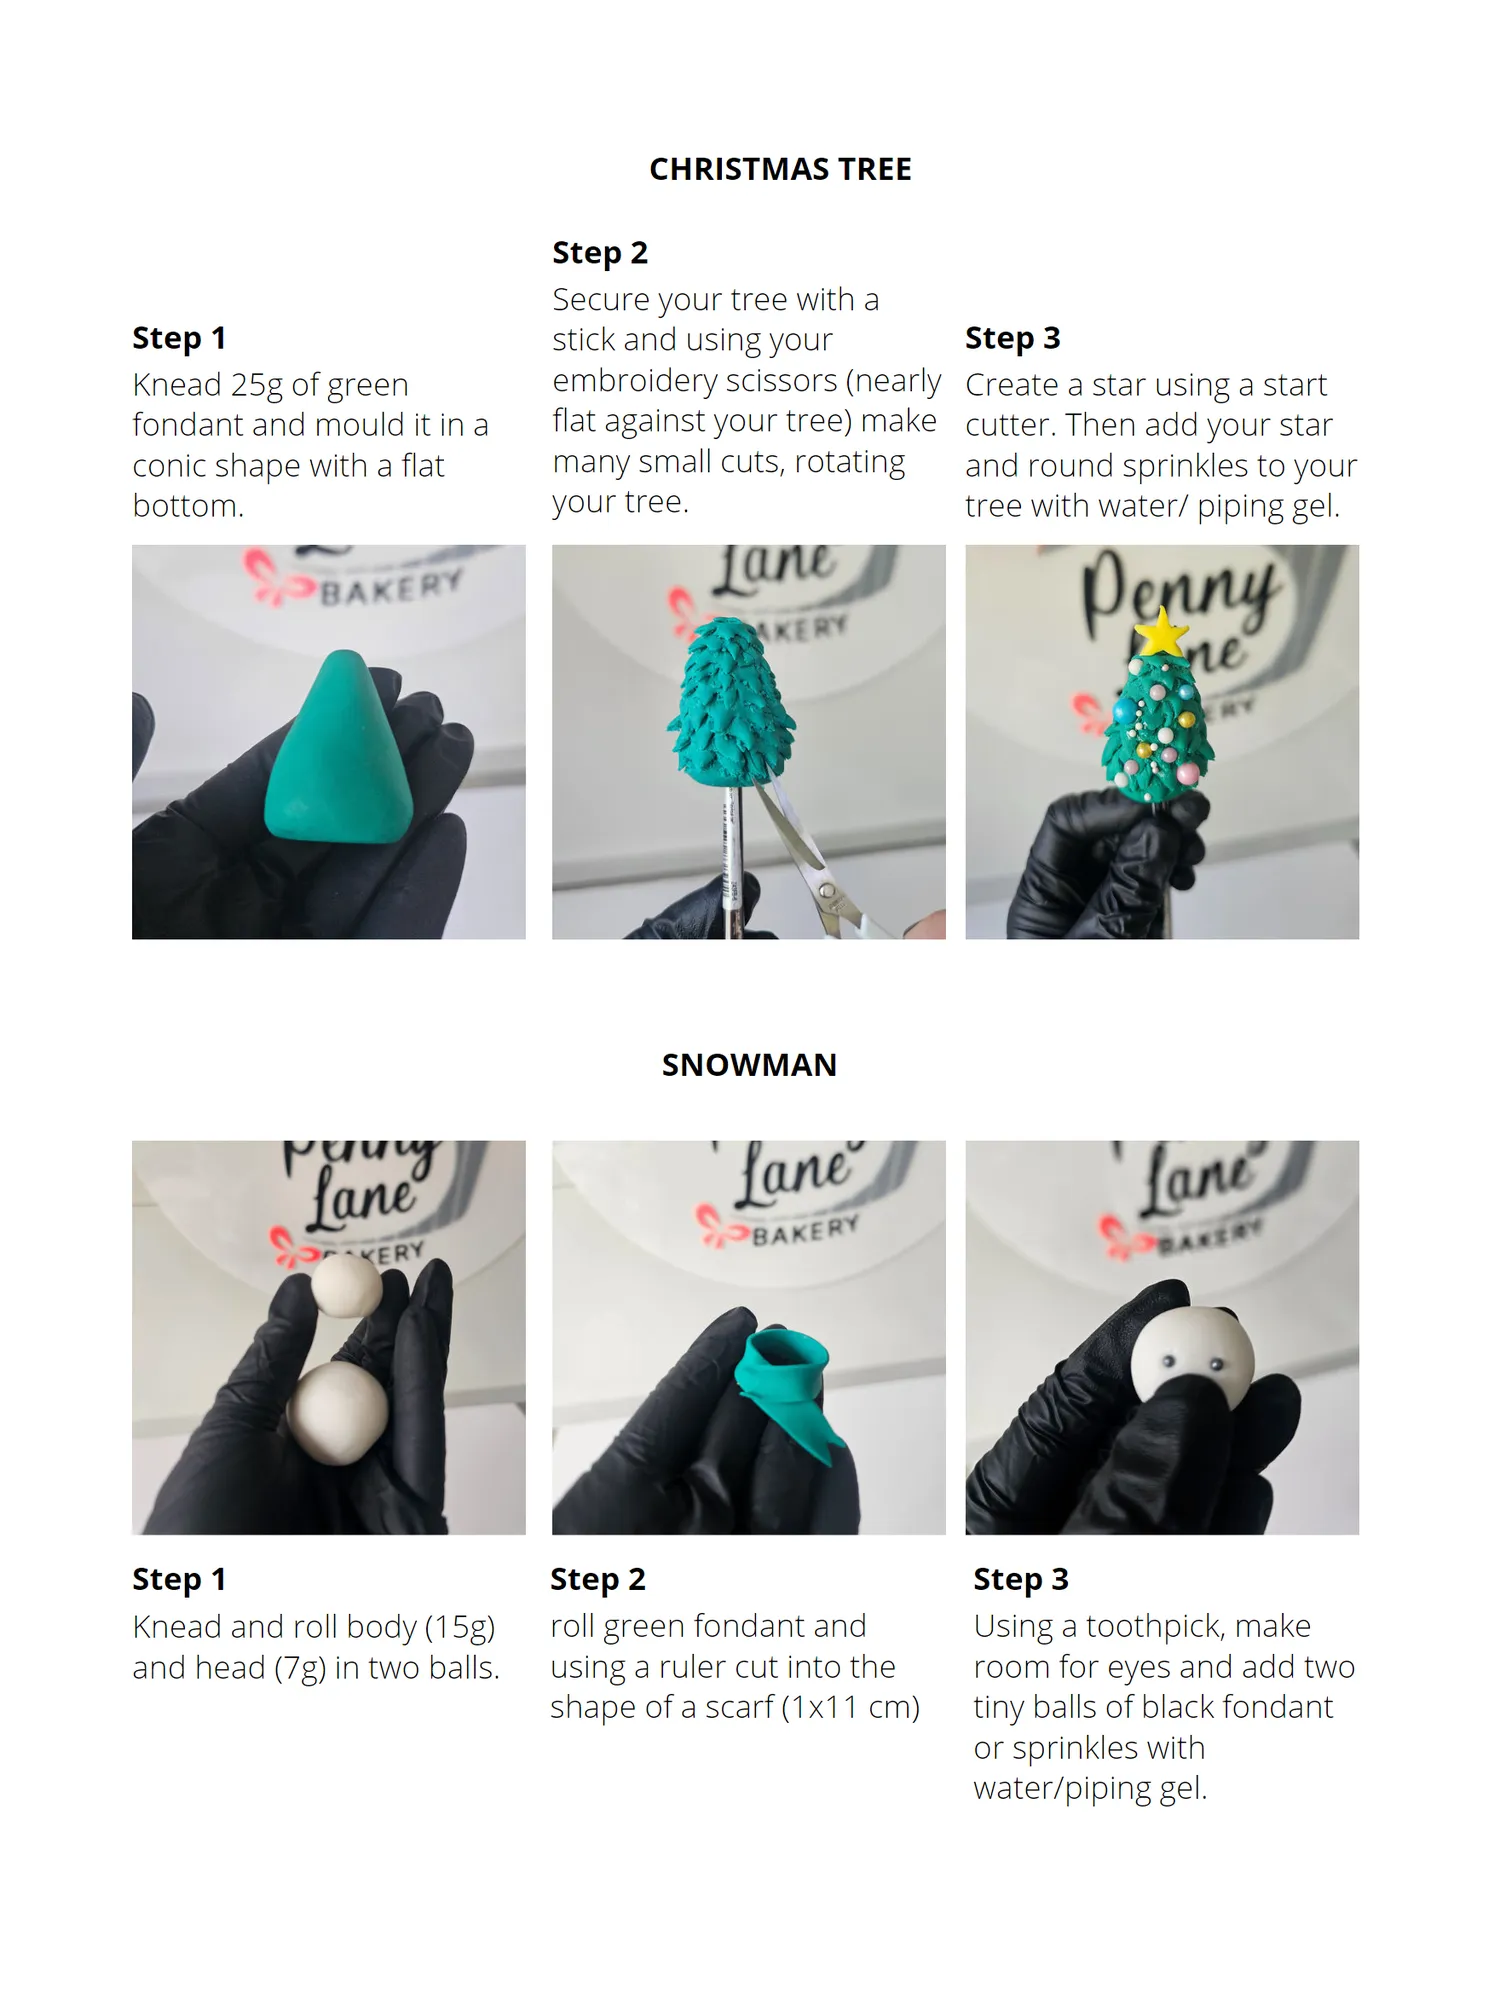
CHRISTMAS TREE Step 2 Secure your tree with a Step 1 stick and using your Step 3 Knead 25g of green embroidery scissors (nearly Create a star using a start fondant and mould it in a flat against your tree) make cutter. Then add your star conic shape with a flat many small cuts, rotating and round sprinkles to your bottom. your tree. tree with water/ piping gel. SNOWMAN Step 1 Step 2 Step 3 Knead and roll body (15g) roll green fondant and Using a toothpick, make and head (7g) in two balls. using a ruler cut into the room for eyes and add two shape of a scarf (1x11 cm) tiny balls of black fondant or sprinkles with water/piping gel.
Page 84 text
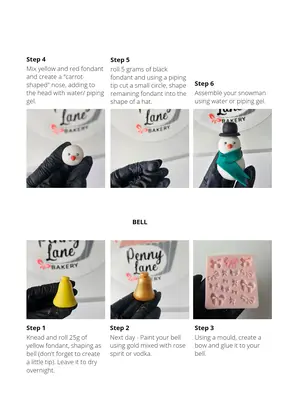
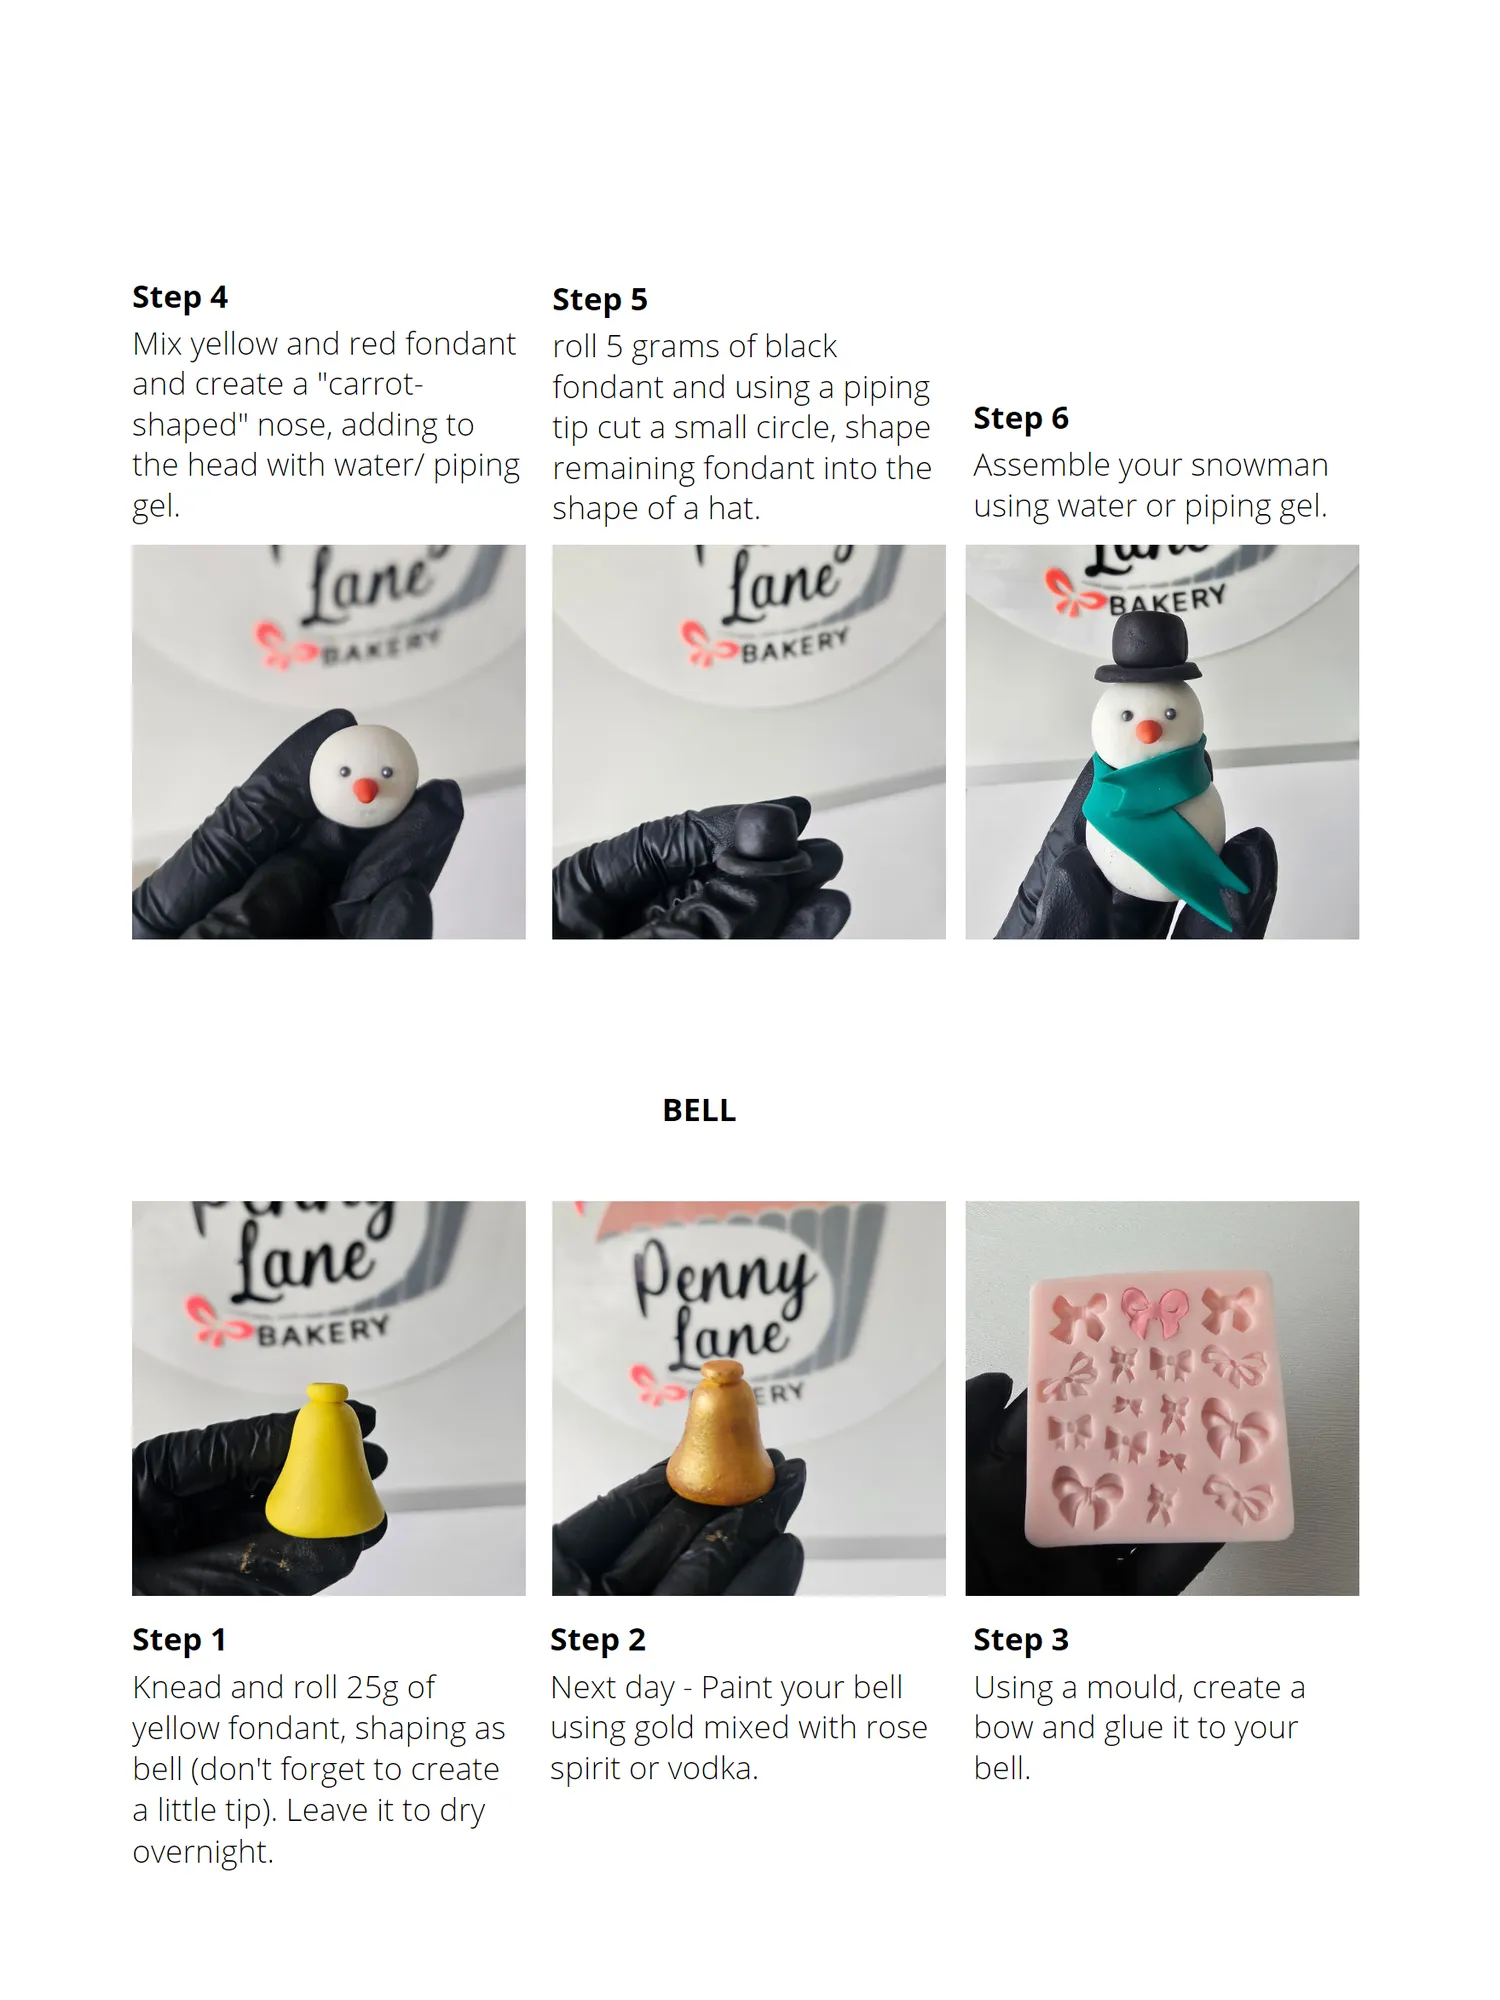
Step 4 Step 5 Mix yellow and red fondant roll 5 grams of black and create a "carrot- fondant and using a piping shaped" nose, adding to tip cut a small circle, shape Step 6 the head with water/ piping remaining fondant into the Assemble your snowman gel. shape of a hat. using water or piping gel. BELL Step 1 Step 2 Step 3 Knead and roll 25g of Next day - Paint your bell Using a mould, create a yellow fondant, shaping as using gold mixed with rose bow and glue it to your bell (don't forget to create spirit or vodka. bell. a little tip). Leave it to dry overnight.
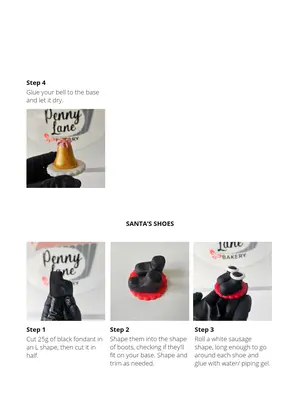
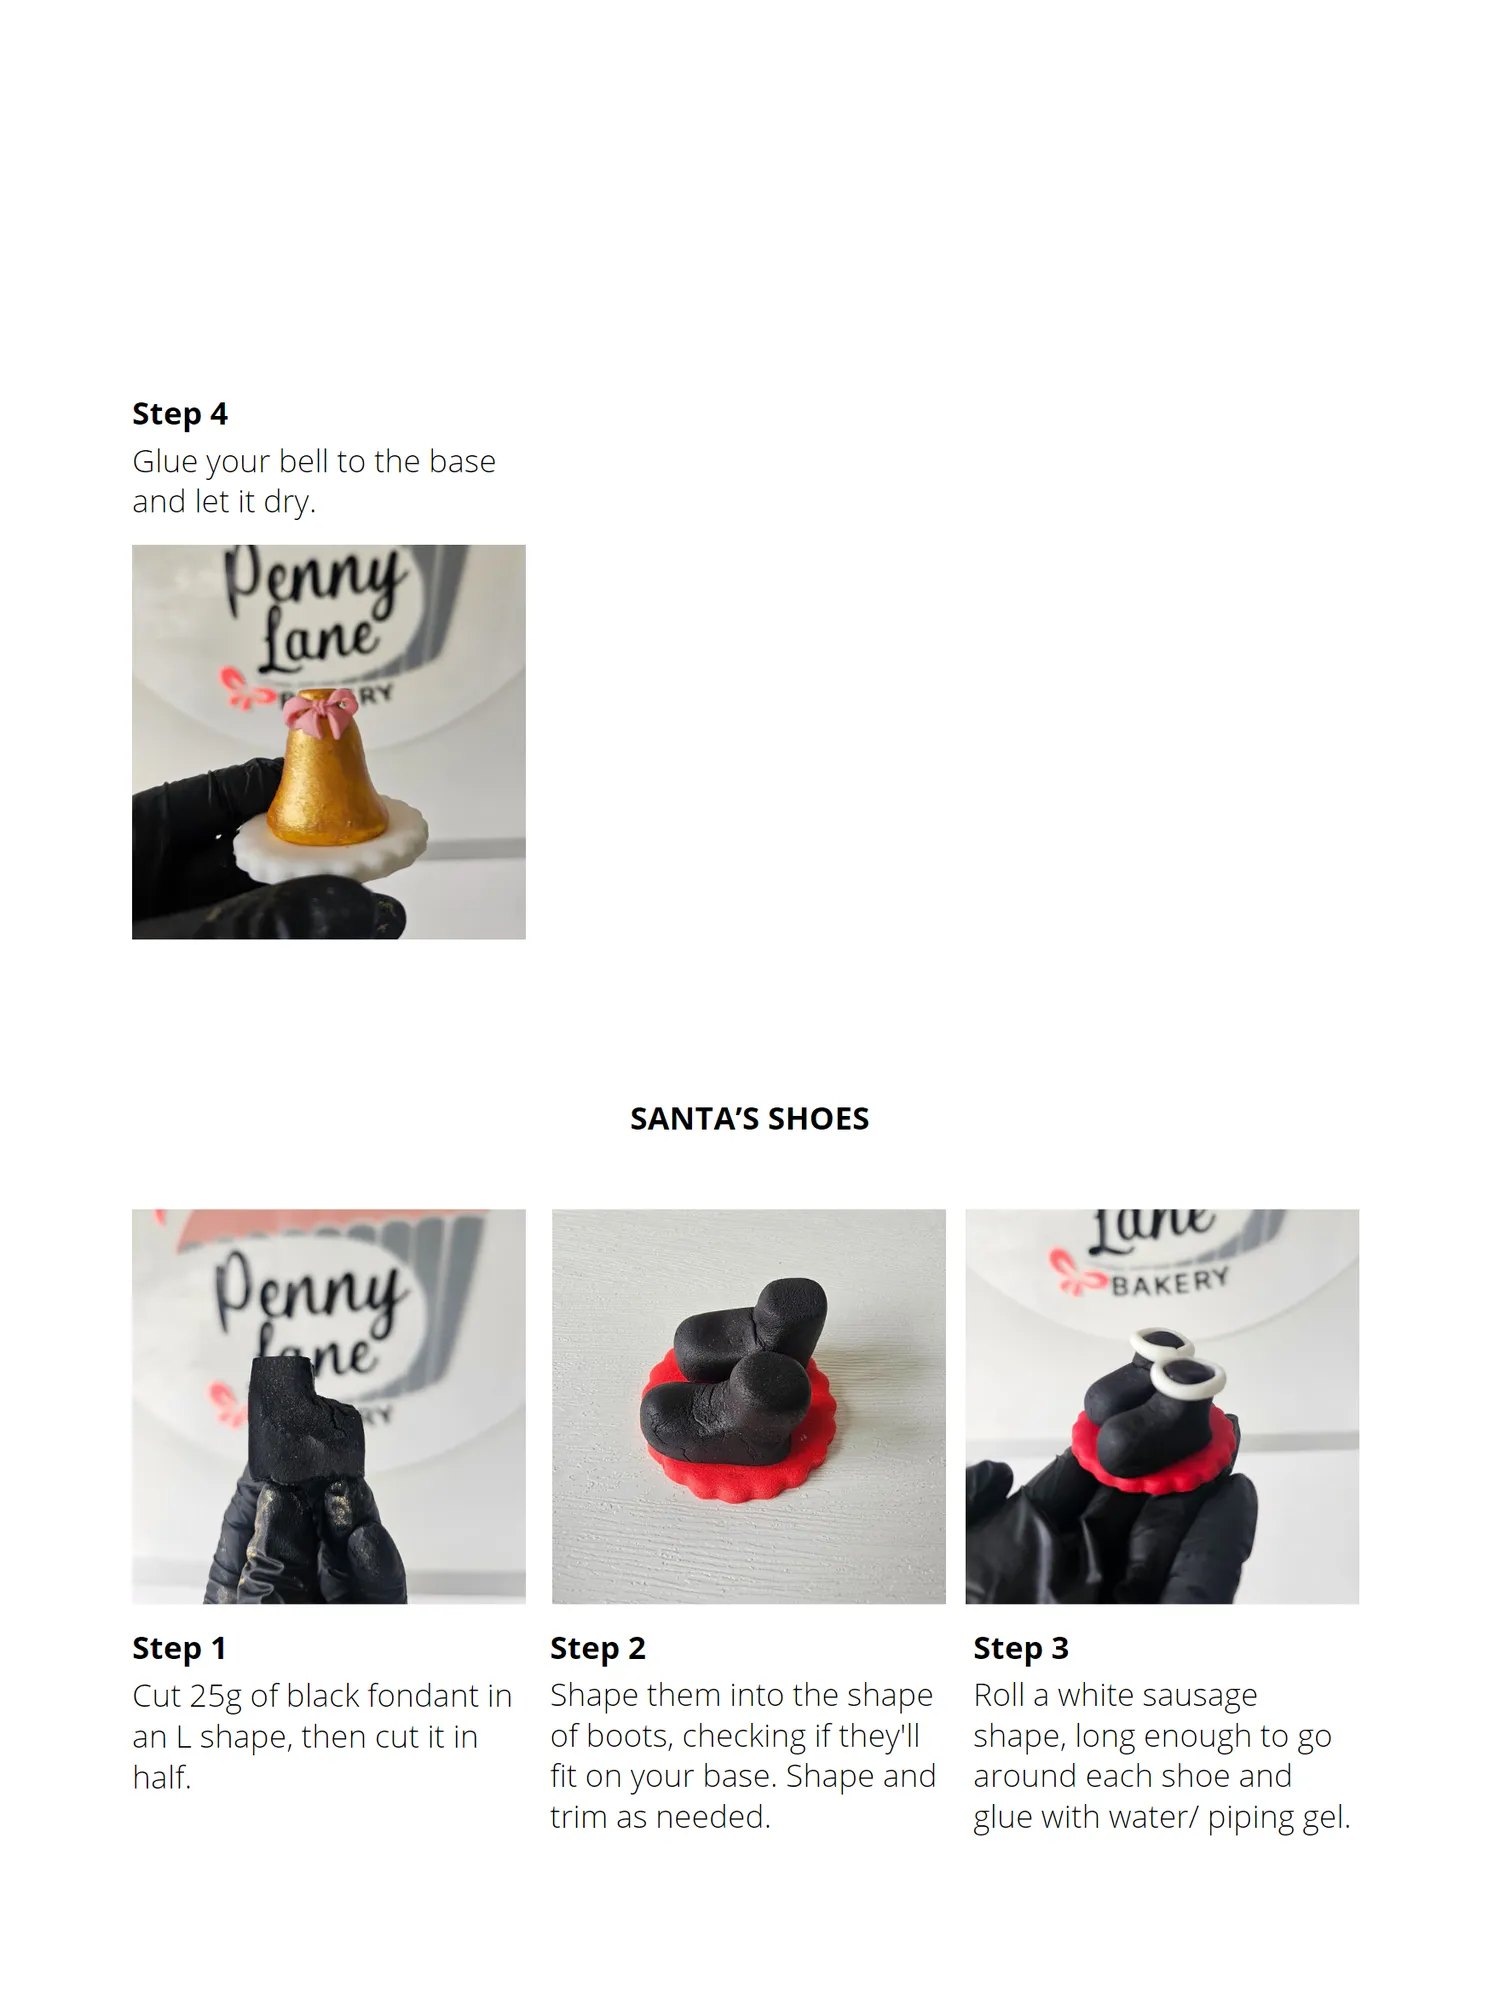
Page 85 text
Step 4 Glue your bell to the base and let it dry. SANTA’S SHOES Step 1 Step 2 Step 3 Cut 25g of black fondant in Shape them into the shape Roll a white sausage an L shape, then cut it in of boots, checking if they'll shape, long enough to go half. fit on your base. Shape and around each shoe and trim as needed. glue with water/ piping gel.
Page 86 text
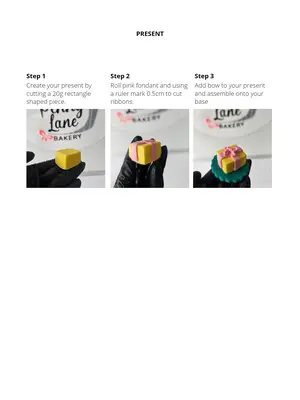
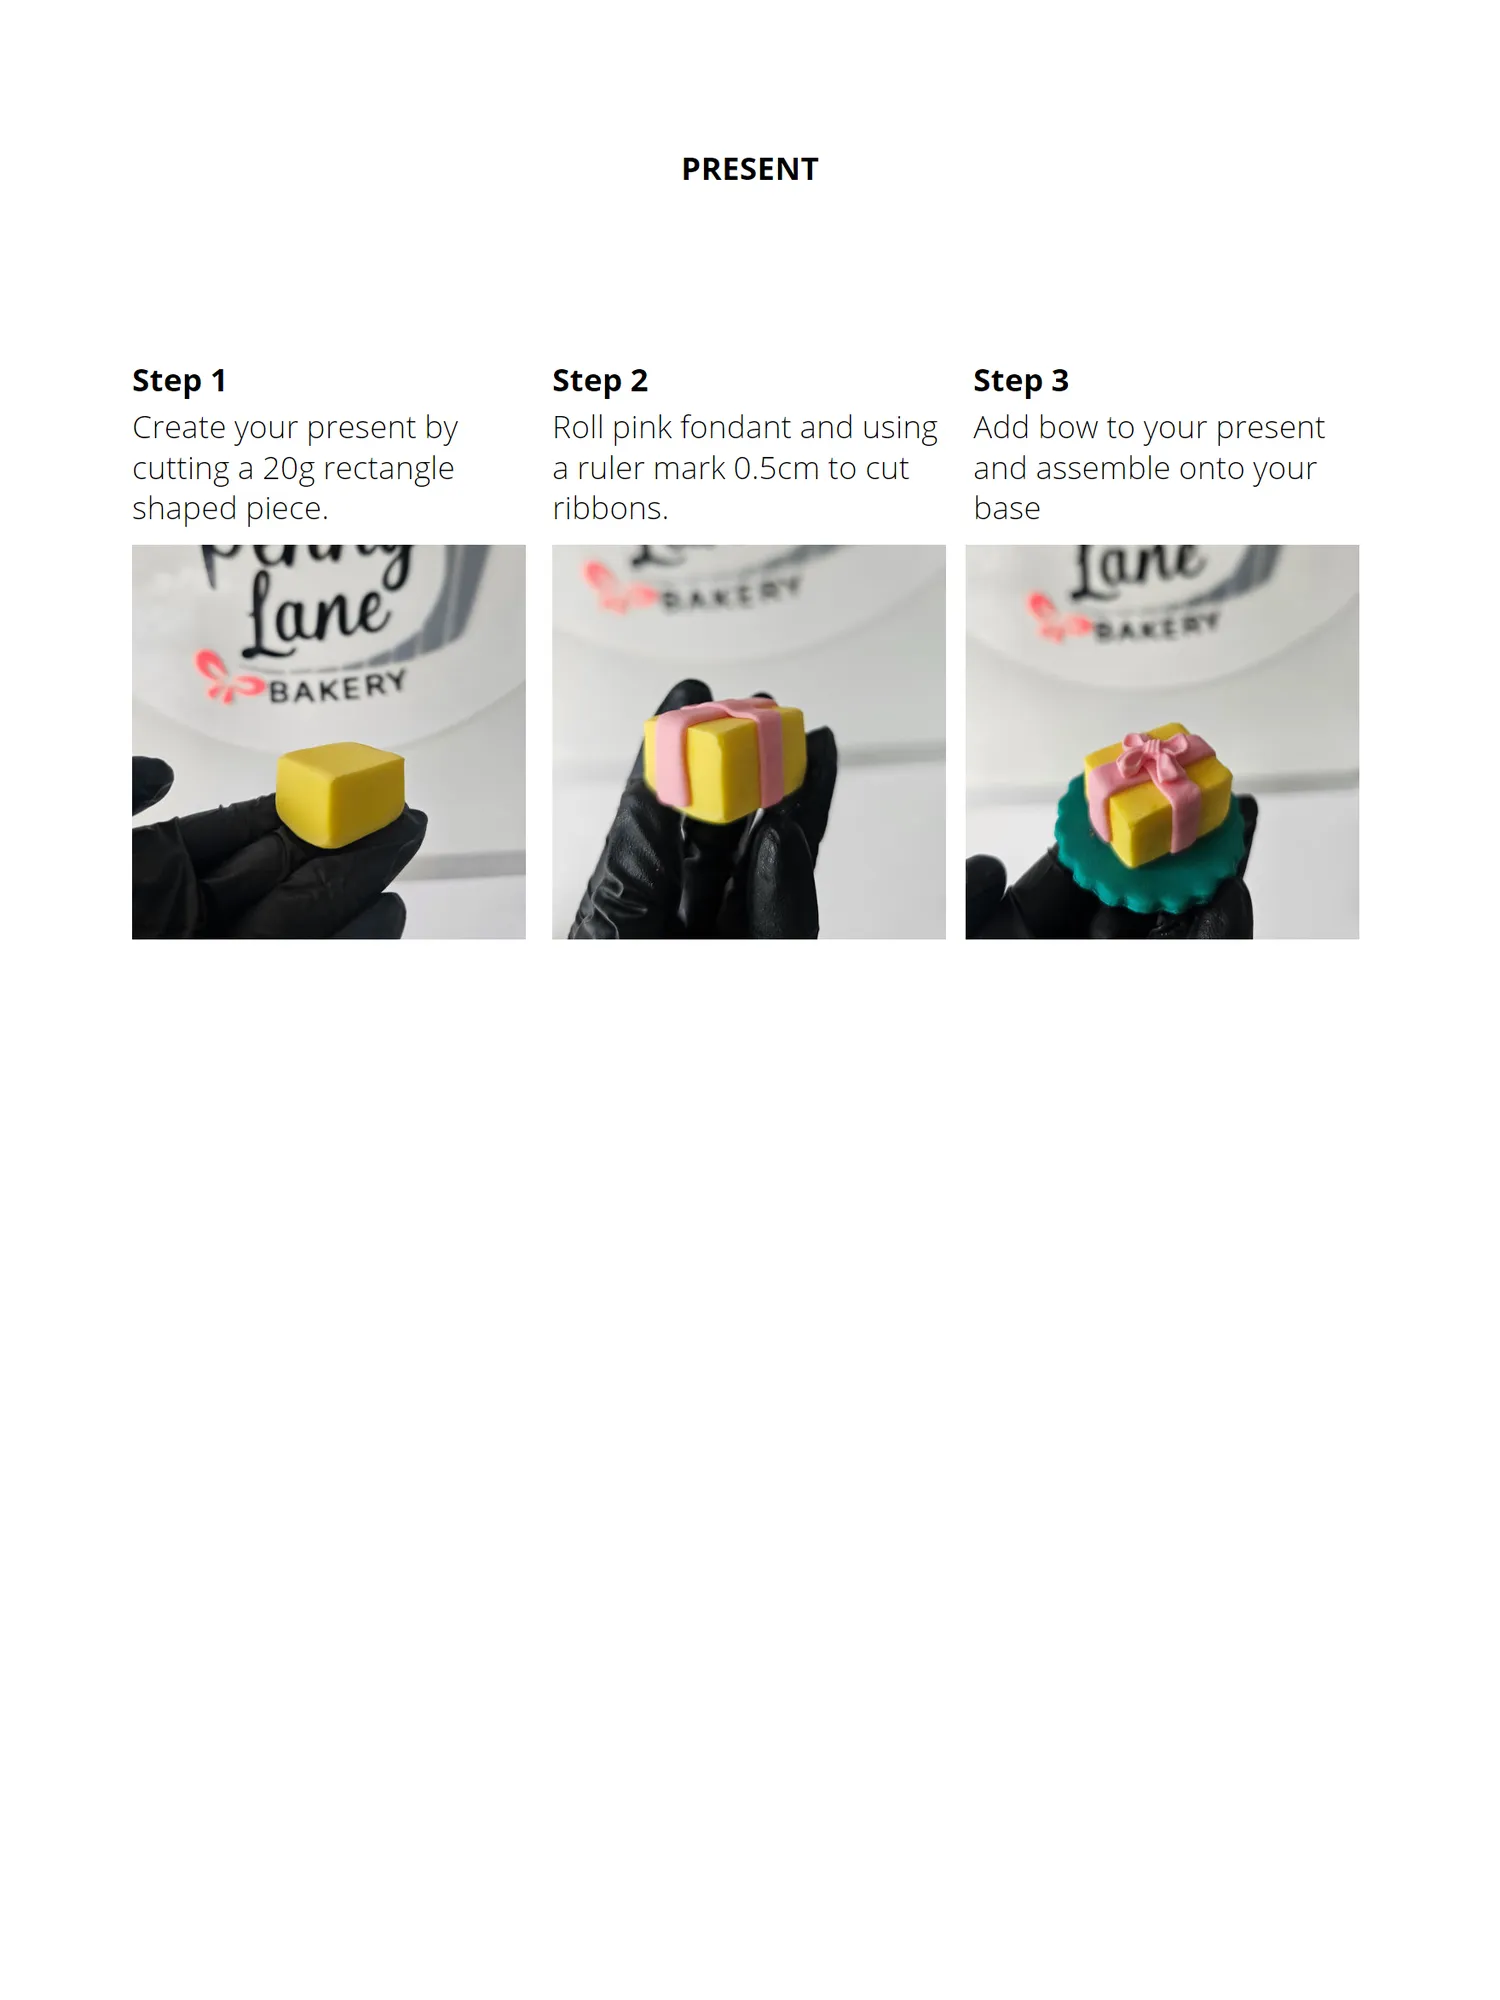
PRESENT Step 1 Step 2 Step 3 Create your present by Roll pink fondant and using Add bow to your present cutting a 20g rectangle a ruler mark 0.5cm to cut and assemble onto your shaped piece. ribbons. base



Page 88 text
An interview with Annabel Founder of BakeGenie
Page 89 text
TELL US A LITTLE ABOUT YOURSELF AND HOW BAKEGENIE CAME ABOUT? I’ m a wife and mum of three, living in regional Queensland. Before kids, I had a corporate career in business management and spent a few years in Hong Kong. I moved from one of the biggest cities in the world, surrounded by incredible food, to a small country town, where access to those things disappeared. So I learnt how to bake and cook. Cake decorating started as a creative outlet around seven years ago and eventually became my business, Annabel Bakes, whilst raising children. I love how a baking business can give you real flexibility, you can take on as many or as few orders as you like and block out days or even whole weeks when life calls for it. In the early days I ran everything from a physical diary with very little organisation, and like many bakers, I learnt the hard way what it feels like to have no proper system behind you. In mid-2025 a favourite and widely-used baking software announced their sudden closure due to personal reasons. Very quickly, many bakers were left without a system and something in me lit up. I’ d worked with a lot of different systems throughout my corporate career and always had a genuine interest in how good software can make work easier. When this opportunity appeared, it felt like the perfect alignment of timing, experience and passion. Very quickly I made the decision to create BakeGenie. With little sleep, and an incredible team of developers behind me, we built and launched the first version of BakeGenie in just eight weeks. From day one I wanted BakeGenie to be simple, intuitive and easy to use, especially for bakers who don’ t consider themselves tech-savvy. Software should reduce overwhelm, not add to it. Since launching, we haven’ t slowed down much. We continue adding new features every week, shaped by feedback from the BakeGenie community.
Page 90 text
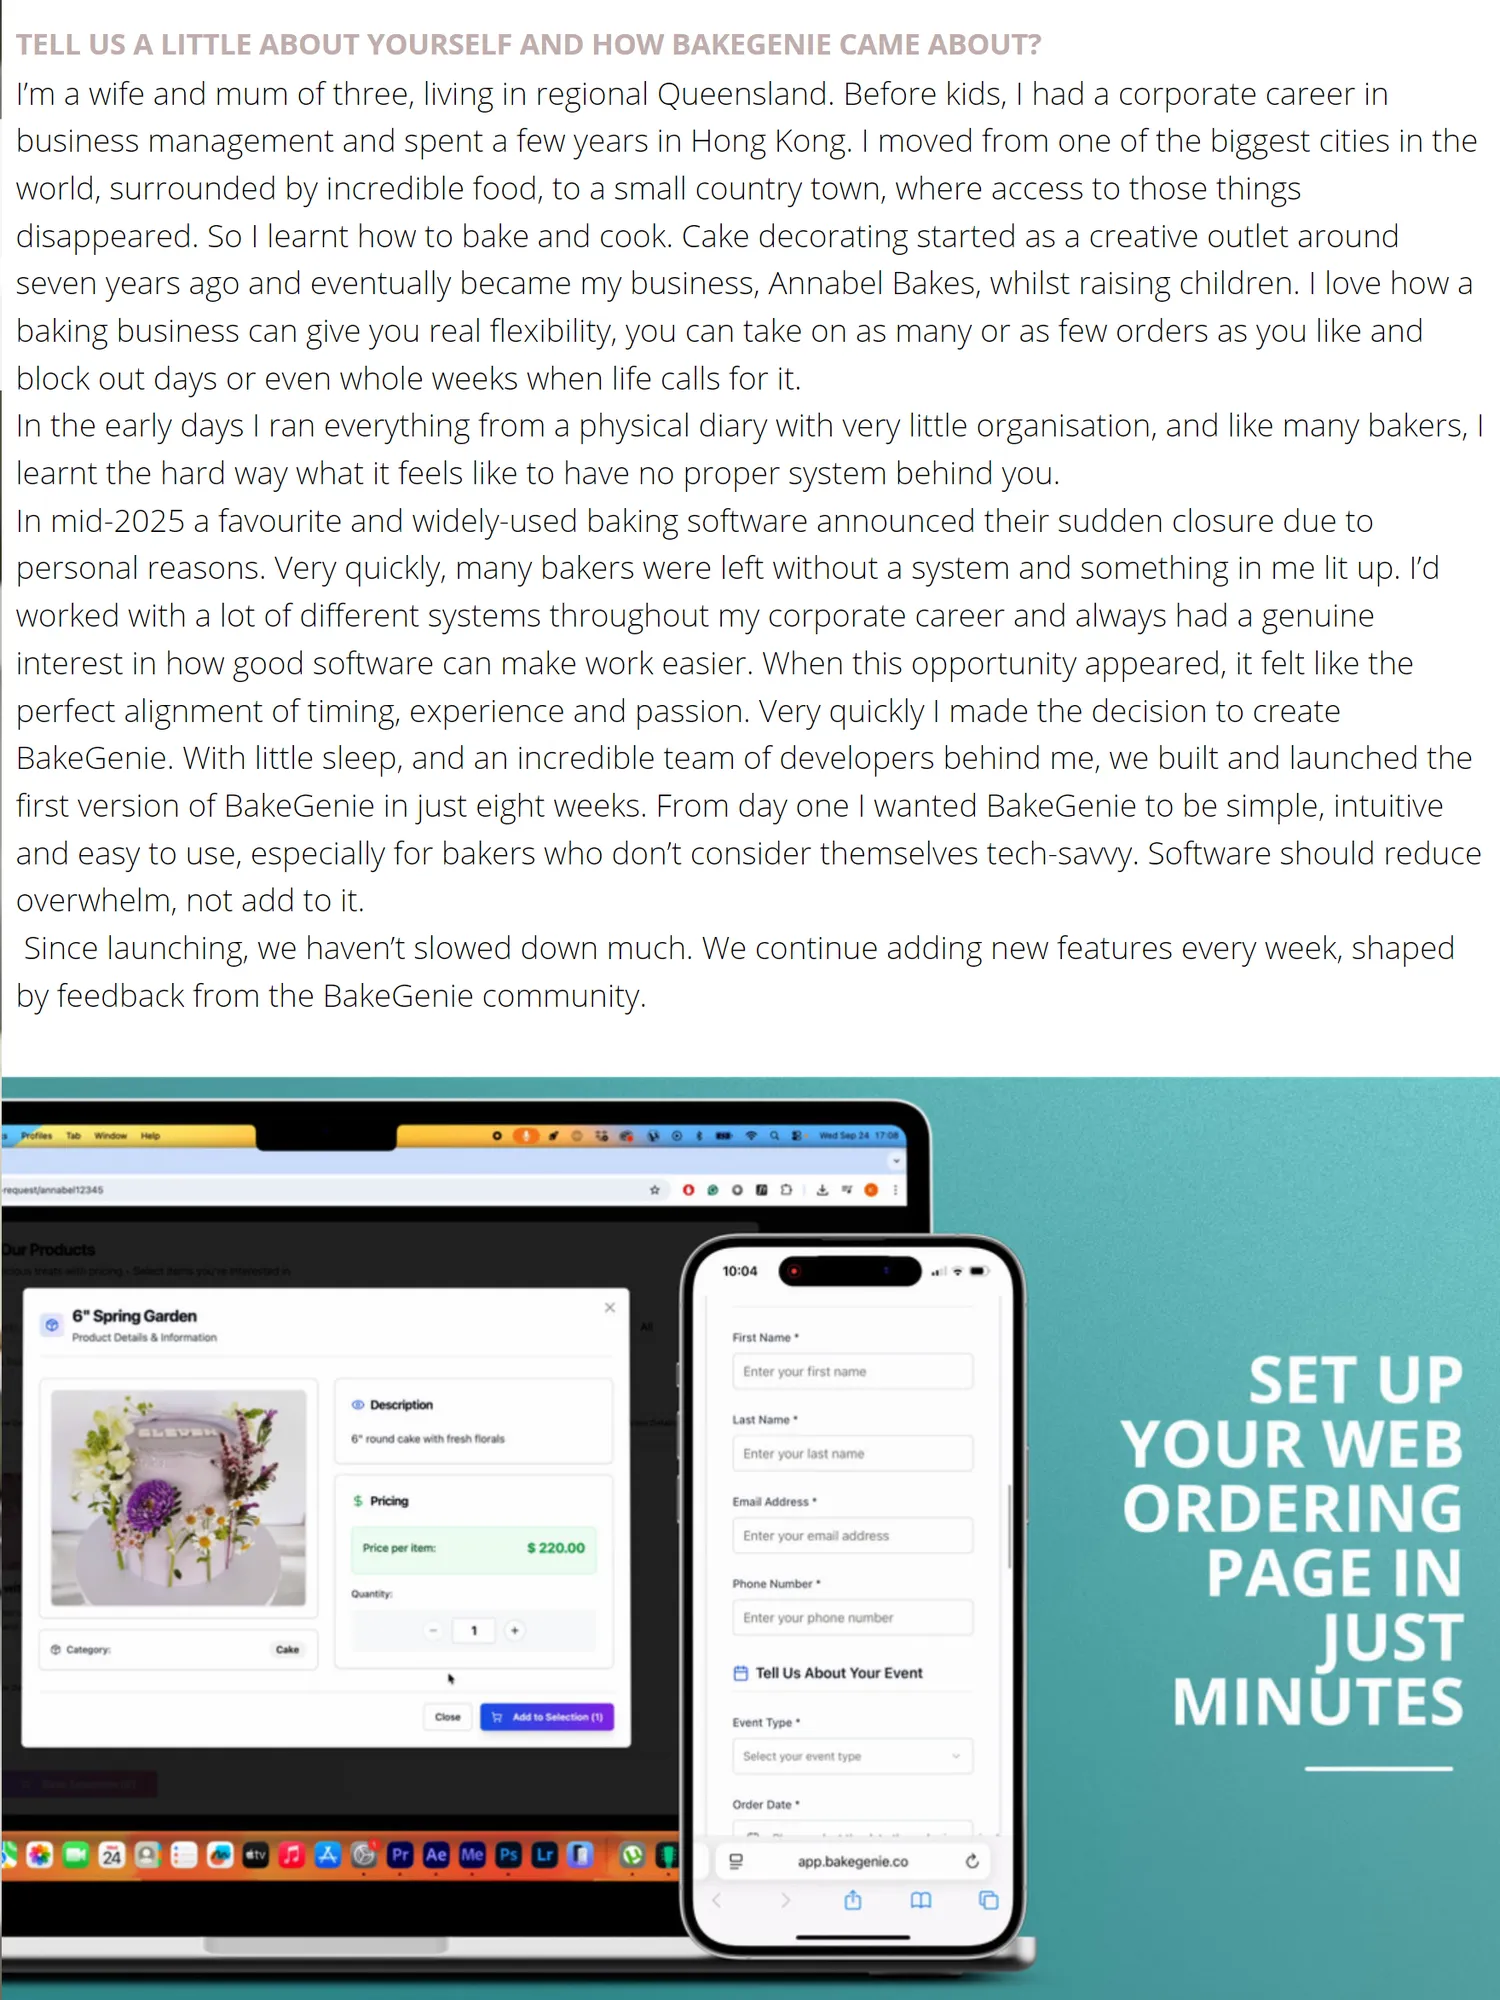
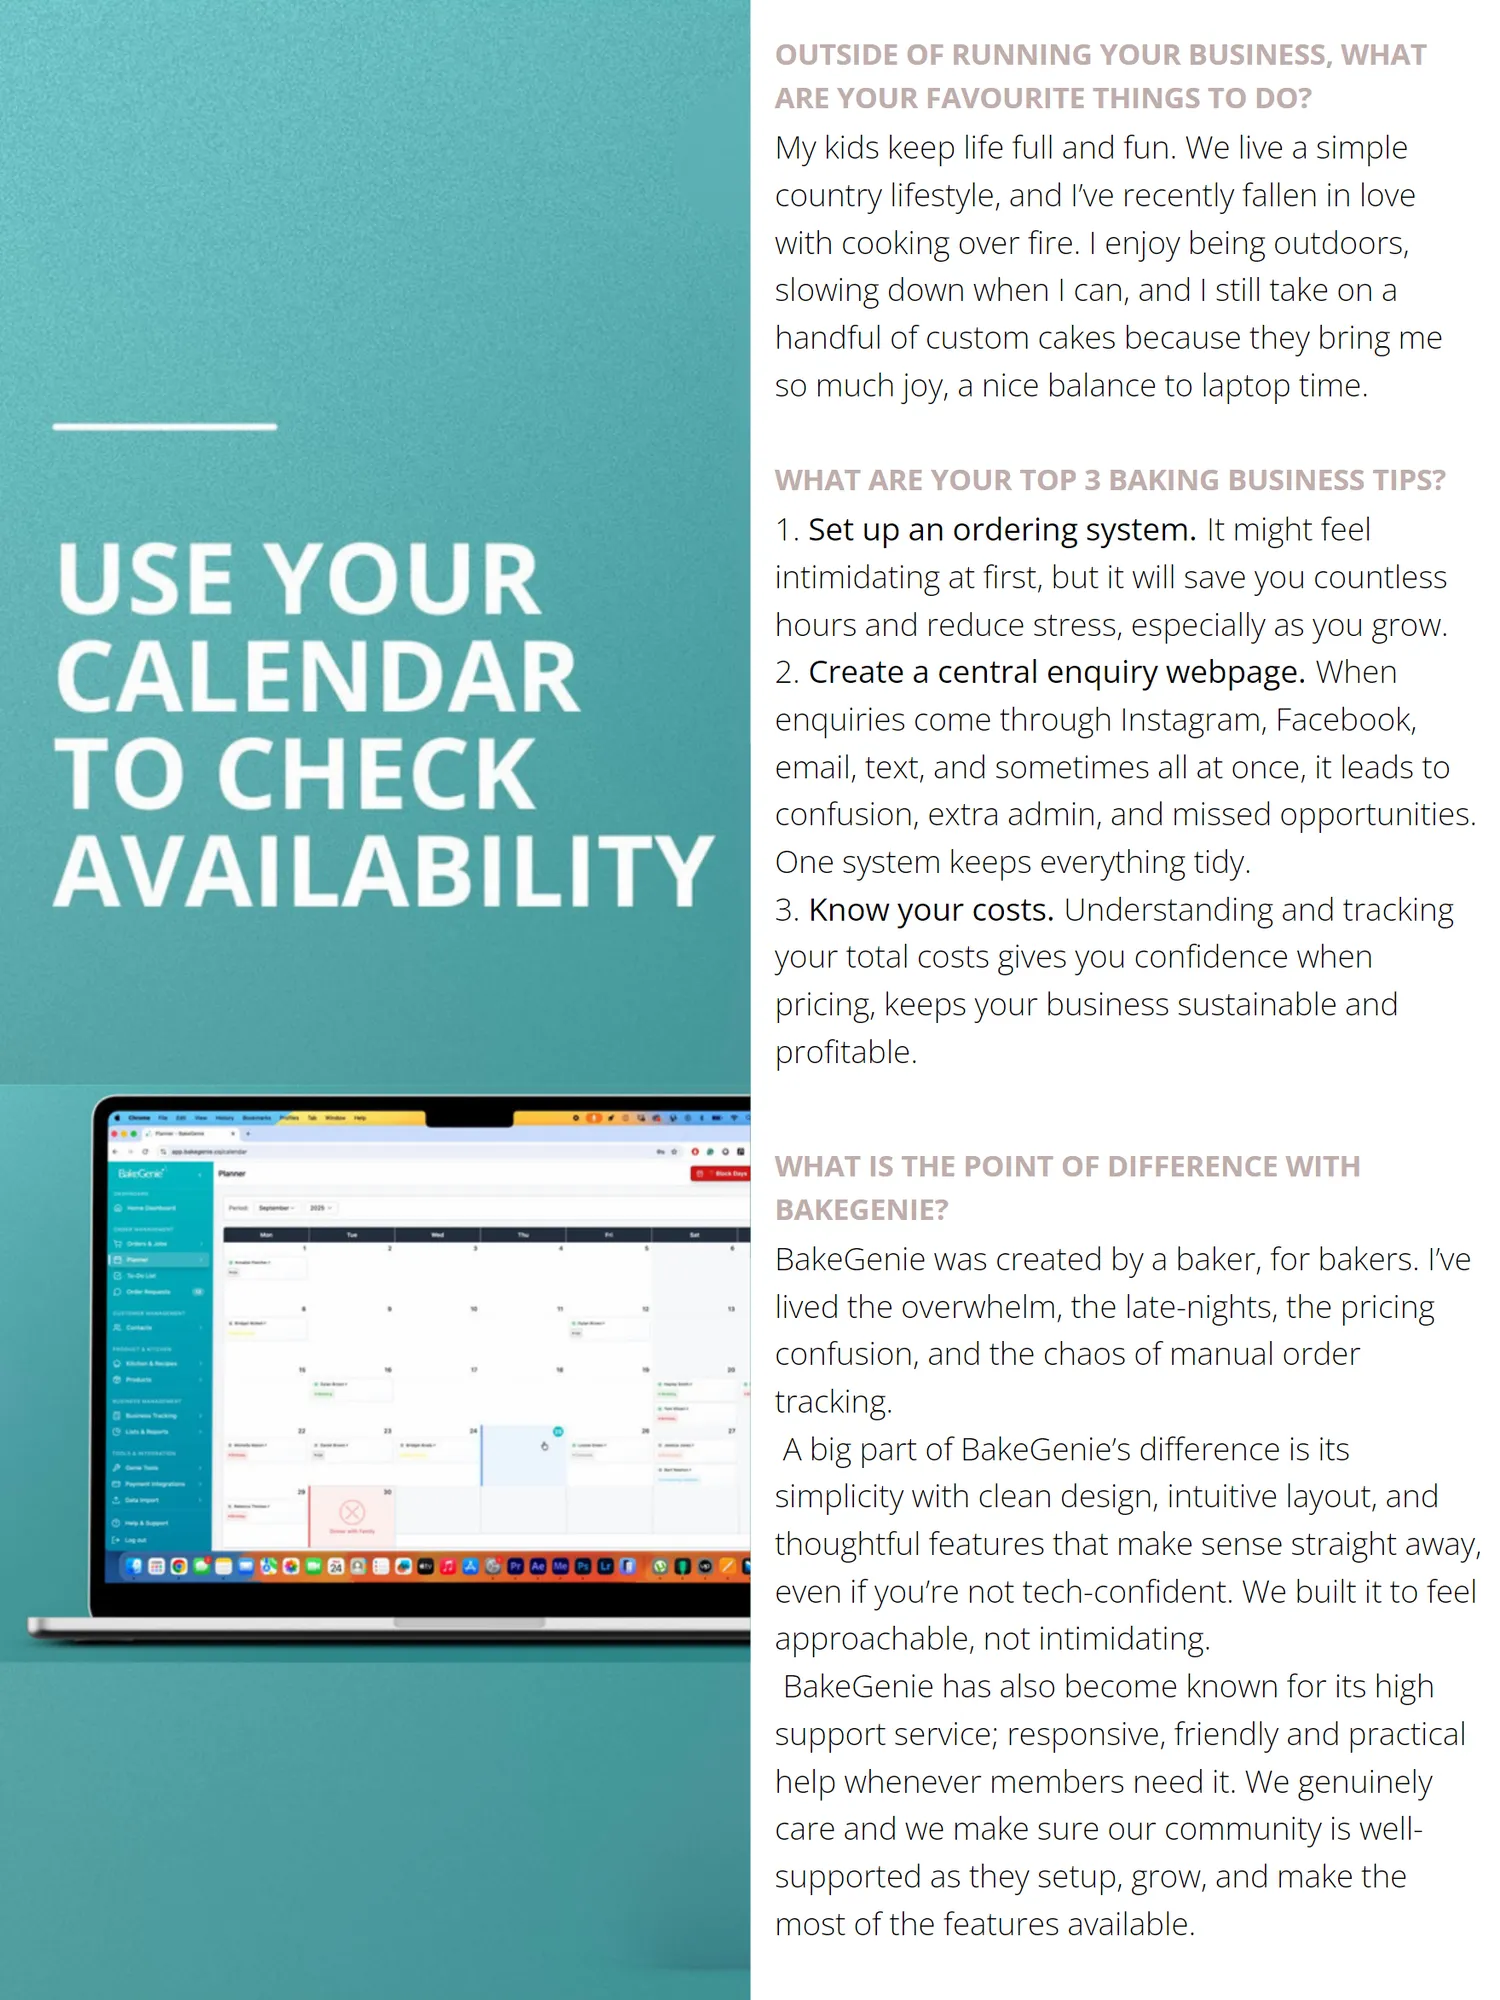
OUTSIDE OF RUNNING YOUR BUSINESS, WHAT ARE YOUR FAVOURITE THINGS TO DO? My kids keep life full and fun. We live a simple country lifestyle, and I’ ve recently fallen in love with cooking over fire. I enjoy being outdoors, slowing down when I can, and I still take on a handful of custom cakes because they bring me so much joy, a nice balance to laptop time. WHAT ARE YOUR TOP 3 BAKING BUSINESS TIPS? 1. Set up an ordering system. It might feel intimidating at first, but it will save you countless hours and reduce stress, especially as you grow. 2. Create a central enquiry webpage. When enquiries come through Instagram, Facebook, email, text, and sometimes all at once, it leads to confusion, extra admin, and missed opportunities. One system keeps everything tidy. 3. Know your costs. Understanding and tracking your total costs gives you confidence when pricing, keeps your business sustainable and profitable. WHAT IS THE POINT OF DIFFERENCE WITH BAKEGENIE? BakeGenie was created by a baker, for bakers. I’ ve lived the overwhelm, the late-nights, the pricing confusion, and the chaos of manual order tracking. A big part of BakeGenie’ s difference is its simplicity with clean design, intuitive layout, and thoughtful features that make sense straight away, even if you’ re not tech-confident. We built it to feel approachable, not intimidating. BakeGenie has also become known for its high support service; responsive, friendly and practical help whenever members need it. We genuinely care and we make sure our community is wellsupported as they setup, grow, and make the most of the features available.
Page 91 text
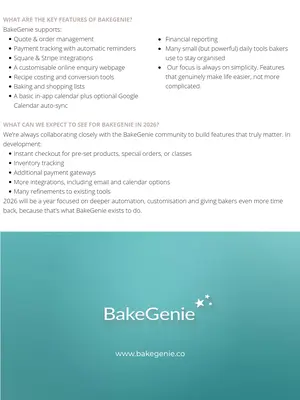
WHAT ARE THE KEY FEATURES OF BAKEGENIE? BakeGenie supports: Quote & order management Payment tracking with automatic reminders Square & Stripe integrations A custom is able online enquiry webpage Recipe costing and conversion tools Baking and shopping lists A basic in-app calendar plus optional Google Calendar auto-sync Financial reporting Many small( but powerful) daily tools bakers use to stay organised Our focus is always on simplicity. Features that genuinely make life easier, not more complicated. WHAT CAN WE EXPECT TO SEE FOR BAKEGENIE IN 2026? We’ re always collaborating closely with the BakeGenie community to build features that truly matter. In development: Instant checkout for pre-set products, special orders, or classes Inventory tracking Additional payment gateways More integrations, including email and calendar options Many refinements to existing tools 2026 will be a year focused on deeper automation, customisation and giving bakers even more time back, because that’ s what BakeGenie exists to do.


Page 94 text
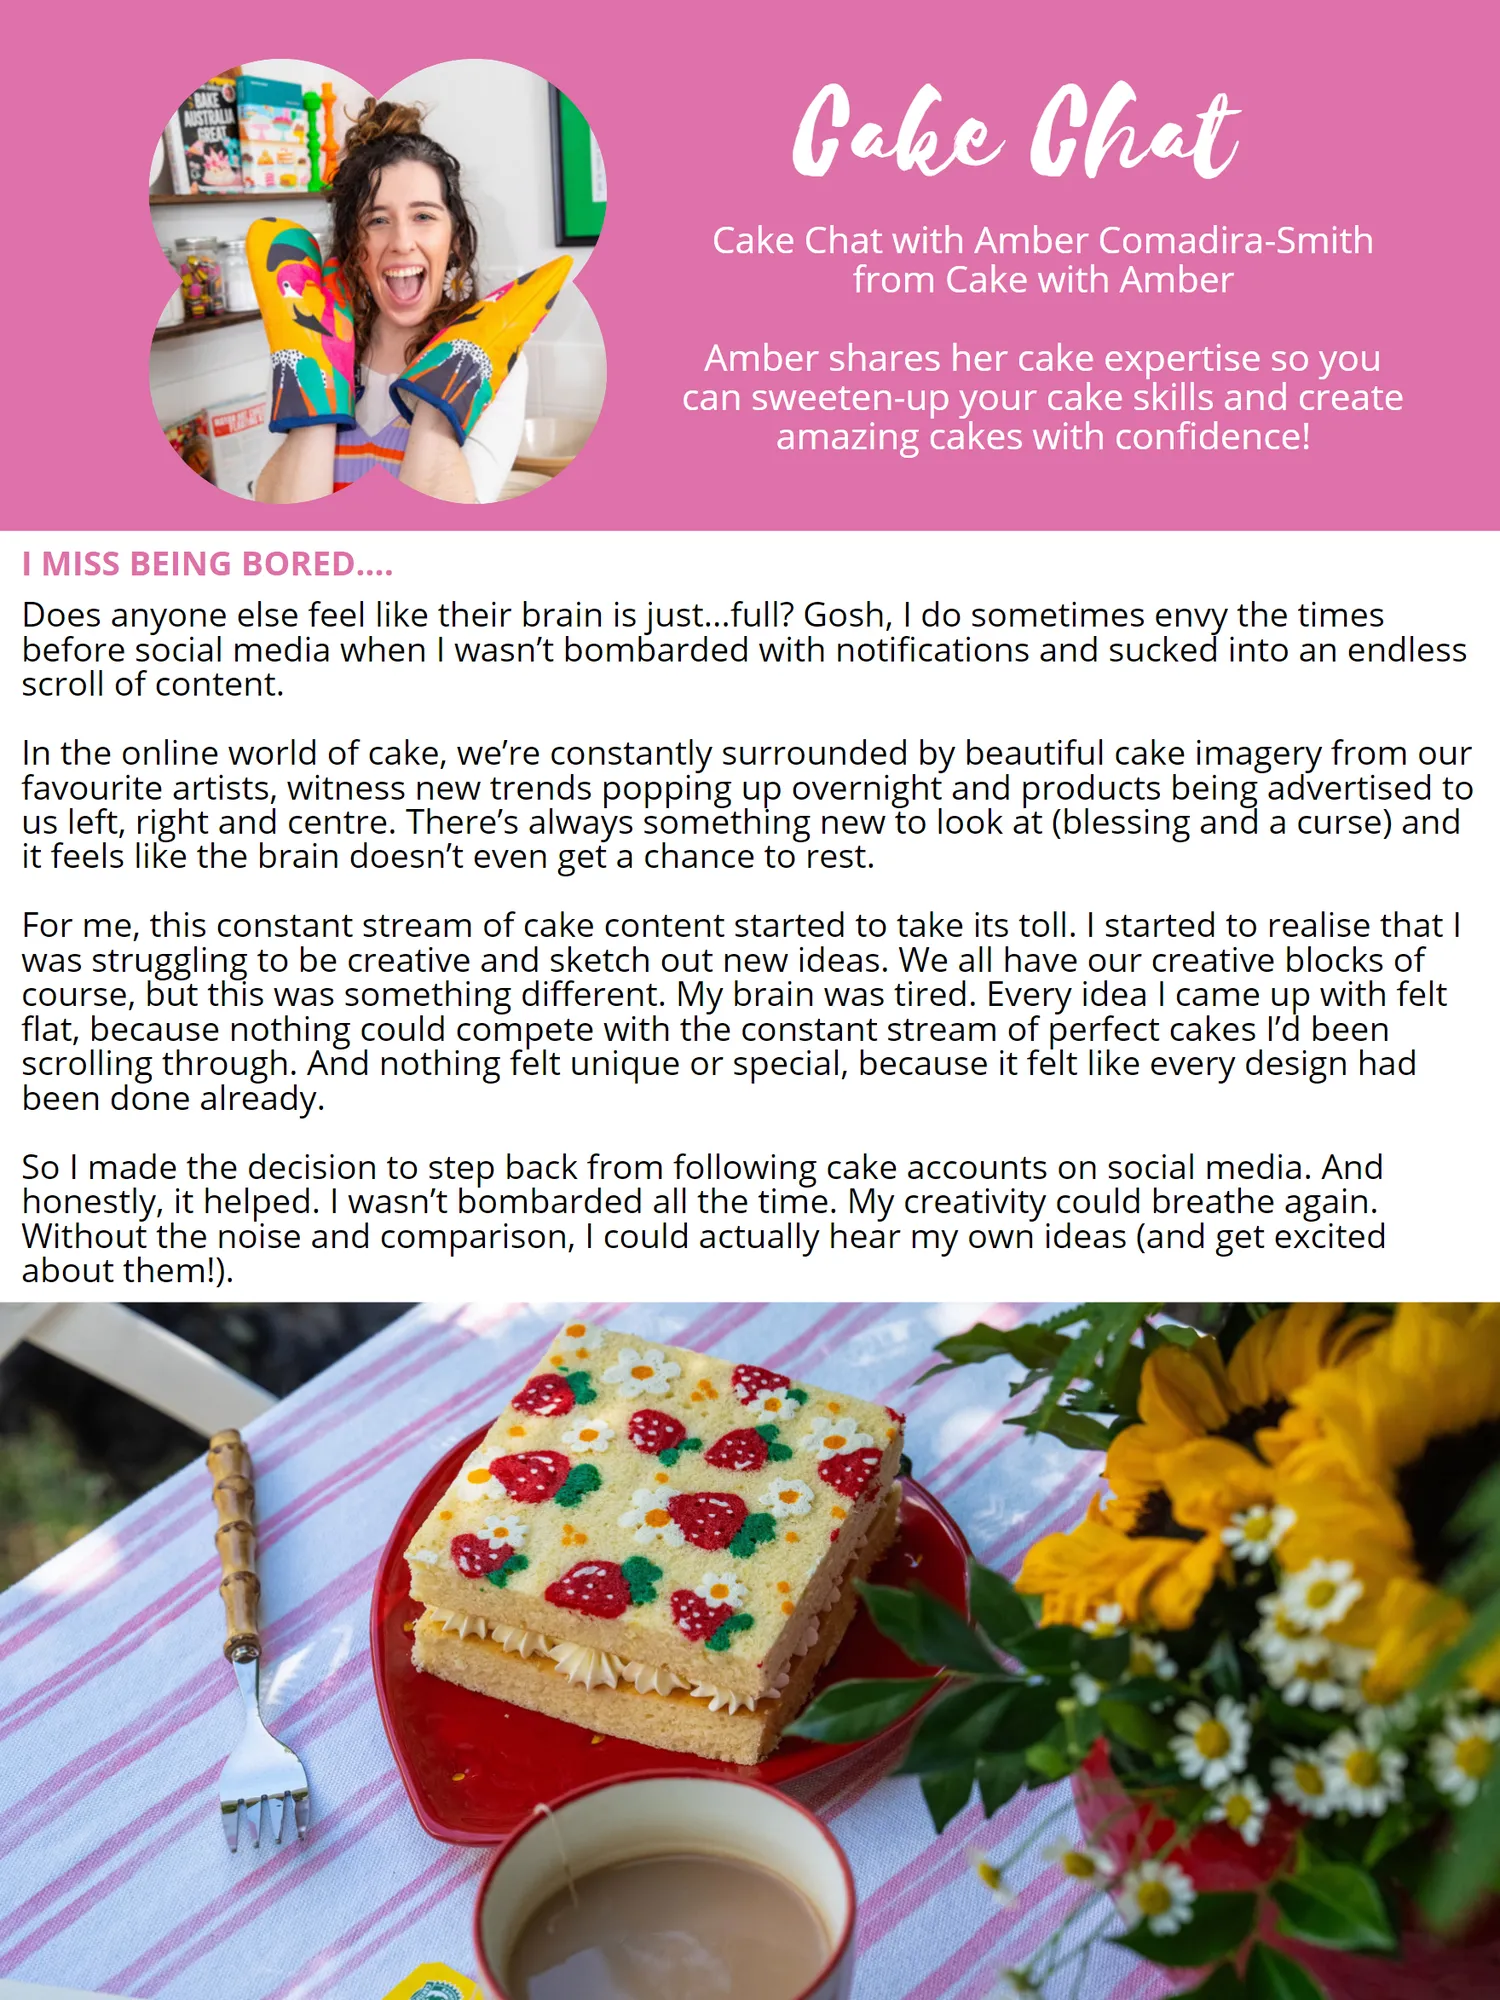
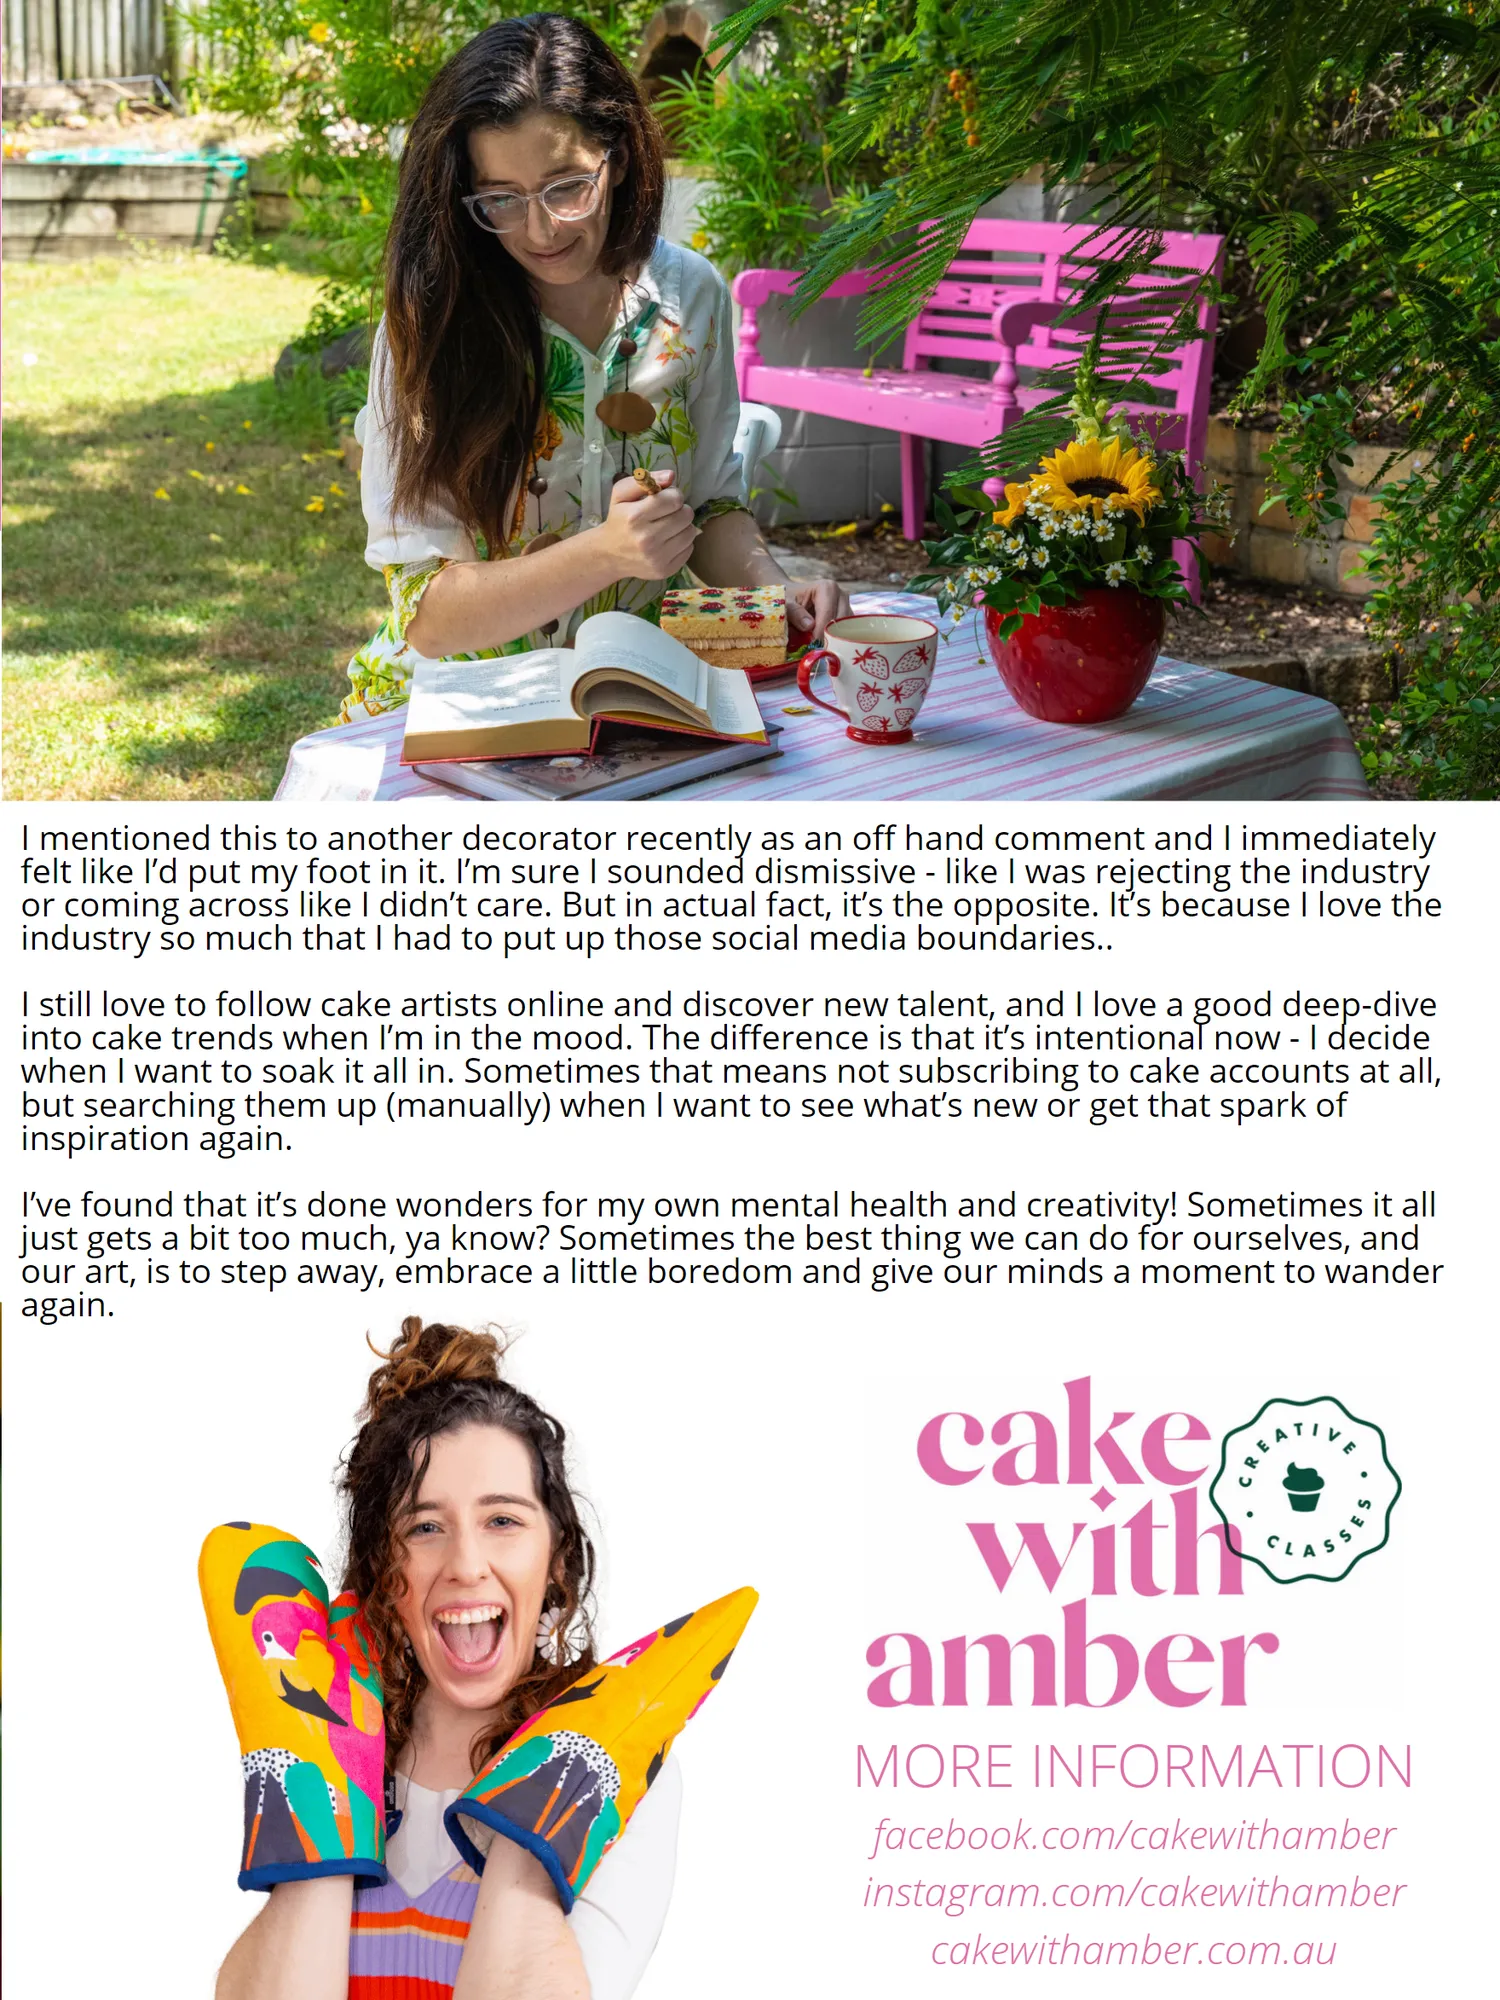
Cake Chat Cake Chat with Amber Comadira-Smith from Cake with Amber Amber shares her cake expertise so you can sweeten-up your cake skills and create amazing cakes with confidence! I MISS BEING BORED.... Does anyone else feel like their brain is just … full? Gosh, I do sometimes envy the times before social media when I wasn’ t bombarded with notifications and sucked into an endless scroll of content. In the online world of cake, we’ re constantly surrounded by beautiful cake imagery from our favourite artists, witness new trends popping up overnight and products being advertised to us left, right and centre. There’ s always something new to look at( blessing and a curse) and it feels like the brain doesn’ t even get a chance to rest. For me, this constant stream of cake content started to take its toll. I started to realise that I was struggling to be creative and sketch out new ideas. We all have our creative blocks of course, but this was something different. My brain was tired. Every idea I came up with felt flat, because nothing could compete with the constant stream of perfect cakes I’ d been scrolling through. And nothing felt unique or special, because it felt like every design had been done already. So I made the decision to step back from following cake accounts on social media. And honestly, it helped. I wasn’ t bombarded all the time. My creativity could breathe again. Without the noise and comparison, I could actually hear my own ideas( and get excited about them!).
Page 95 text
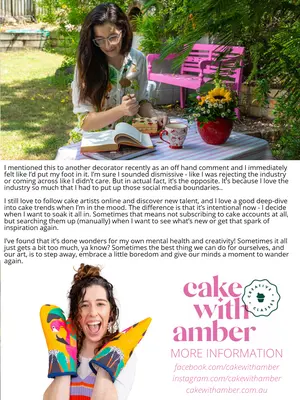
I mentioned this to another decorator recently as an off hand comment and I immediately felt like I’ d put my foot in it. I’ m sure I sounded dismissive- like I was rejecting the industry or coming across like I didn’ t care. But in actual fact, it’ s the opposite. It’ s because I love the industry so much that I had to put up those social media boundaries.. I still love to follow cake artists online and discover new talent, and I love a good deep-dive into cake trends when I’ m in the mood. The difference is that it’ s intentional now- I decide when I want to soak it all in. Sometimes that means not subscribing to cake accounts at all, but searching them up( manually) when I want to see what’ s new or get that spark of inspiration again. I’ ve found that it’ s done wonders for my own mental health and creativity! Sometimes it all just gets a bit too much, ya know? Sometimes the best thing we can do for ourselves, and our art, is to step away, embrace a little boredom and give our minds a moment to wander again. MORE INFORMATION facebook. com / cakewithamber instagram. com / cakewithamber cakewithamber. com. au
Page 96 text
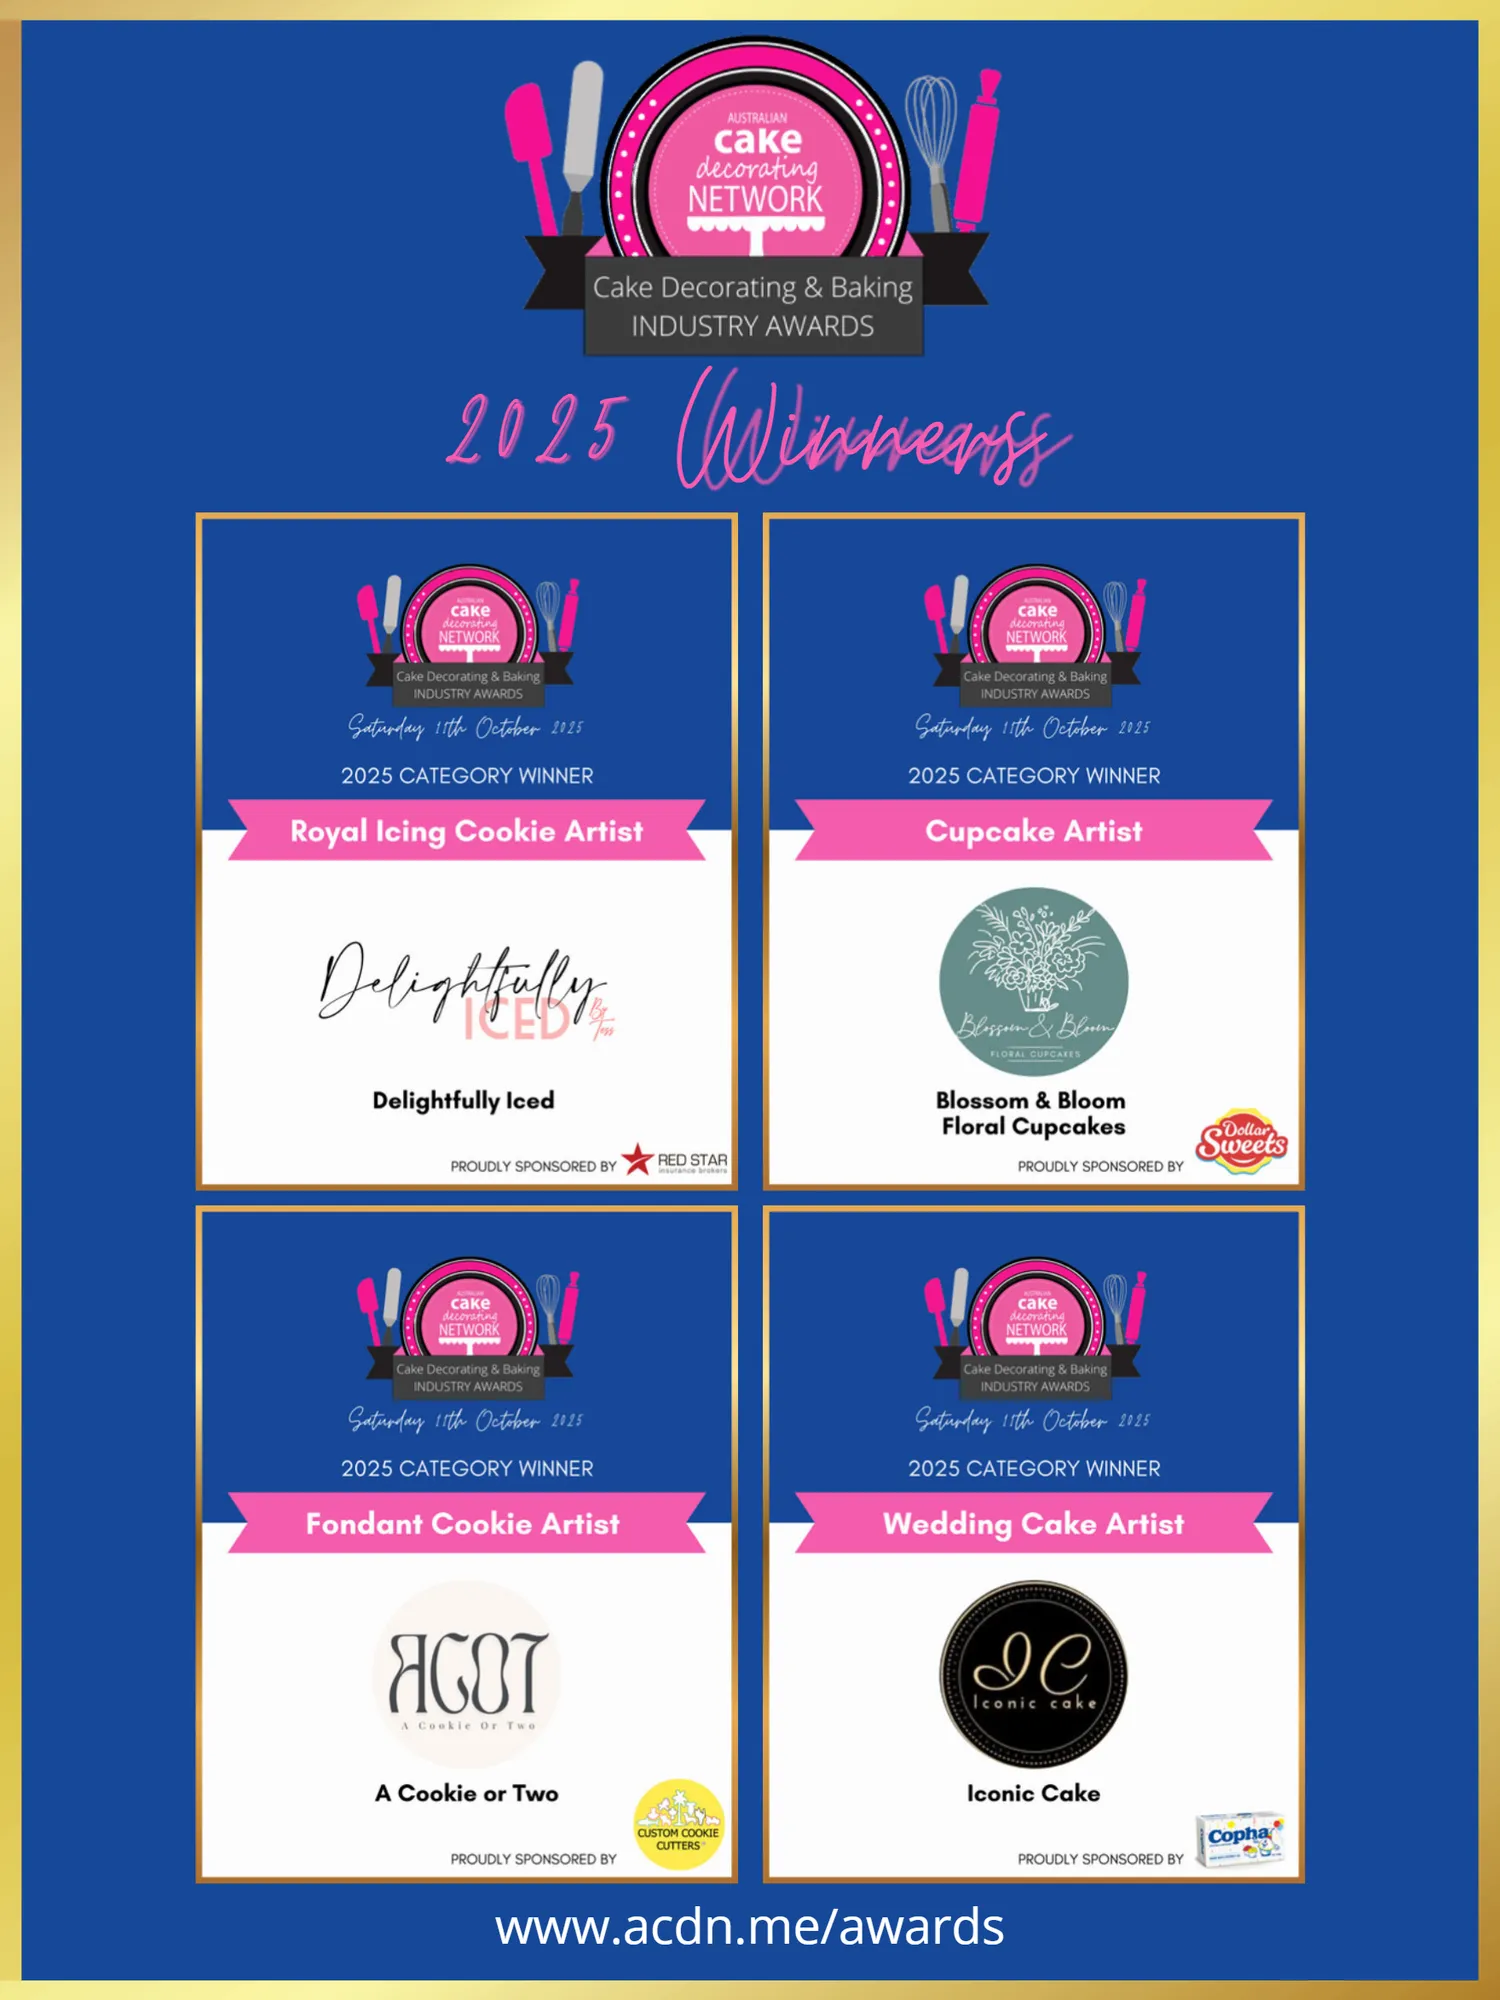
AND THE WINNERS ARE... Sydney SATURDAY 11TH OCTOBER 2025 WWW.ACDN.ME/AWARDS


Page 98 text
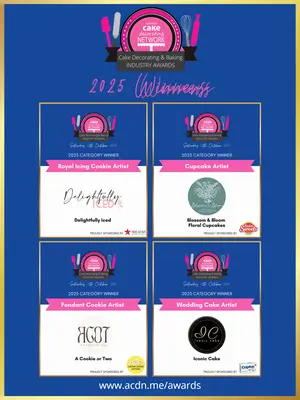
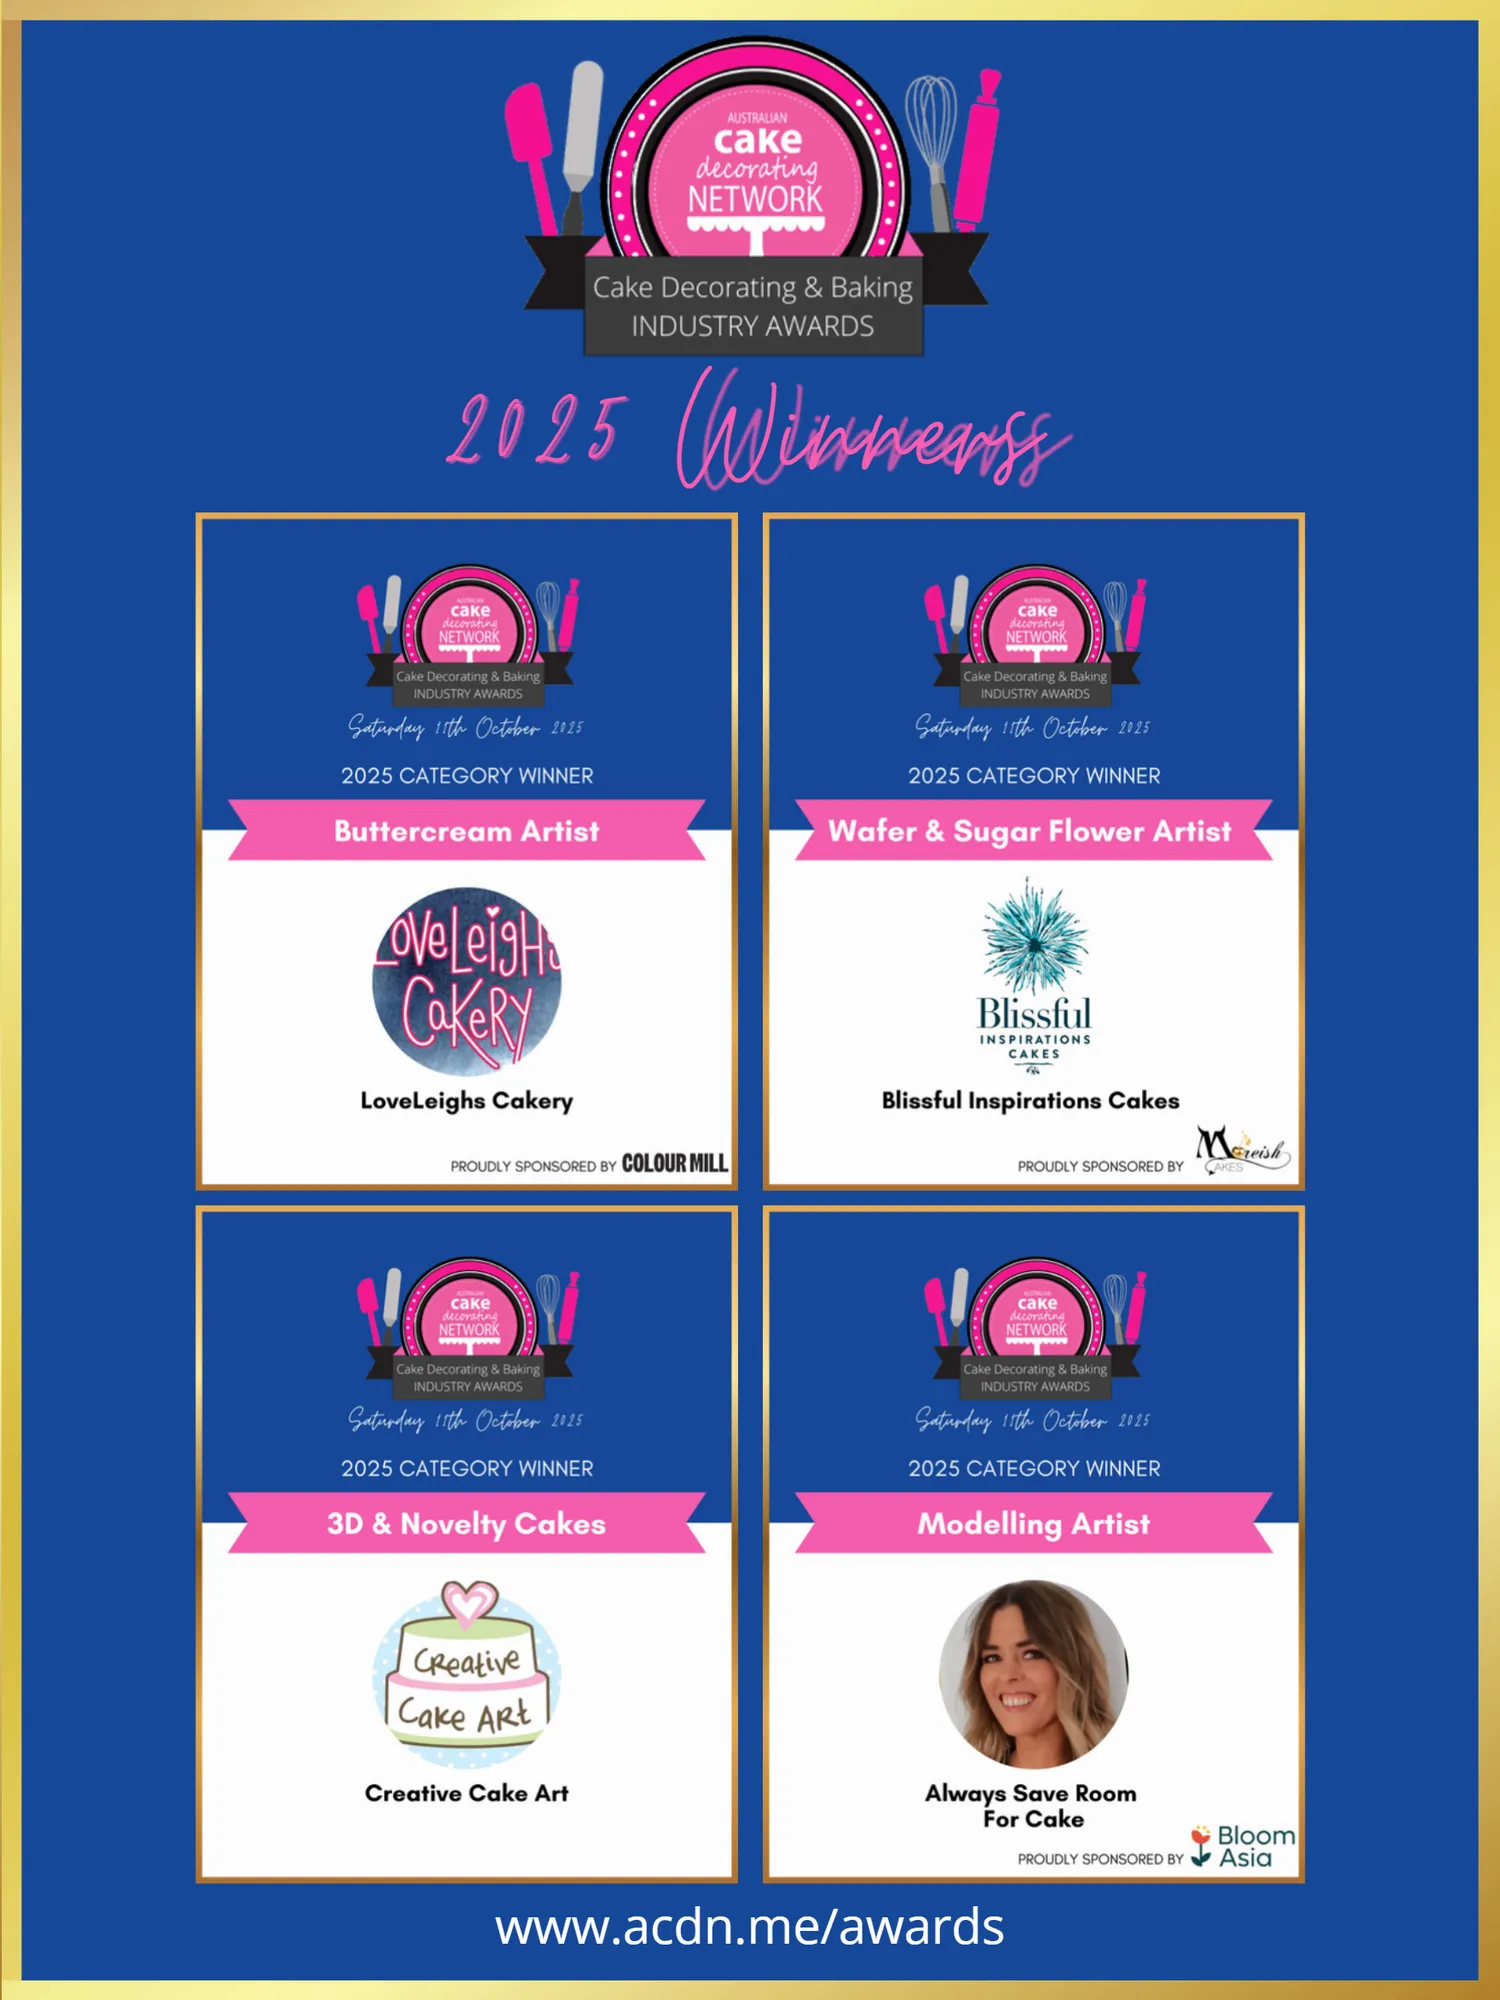
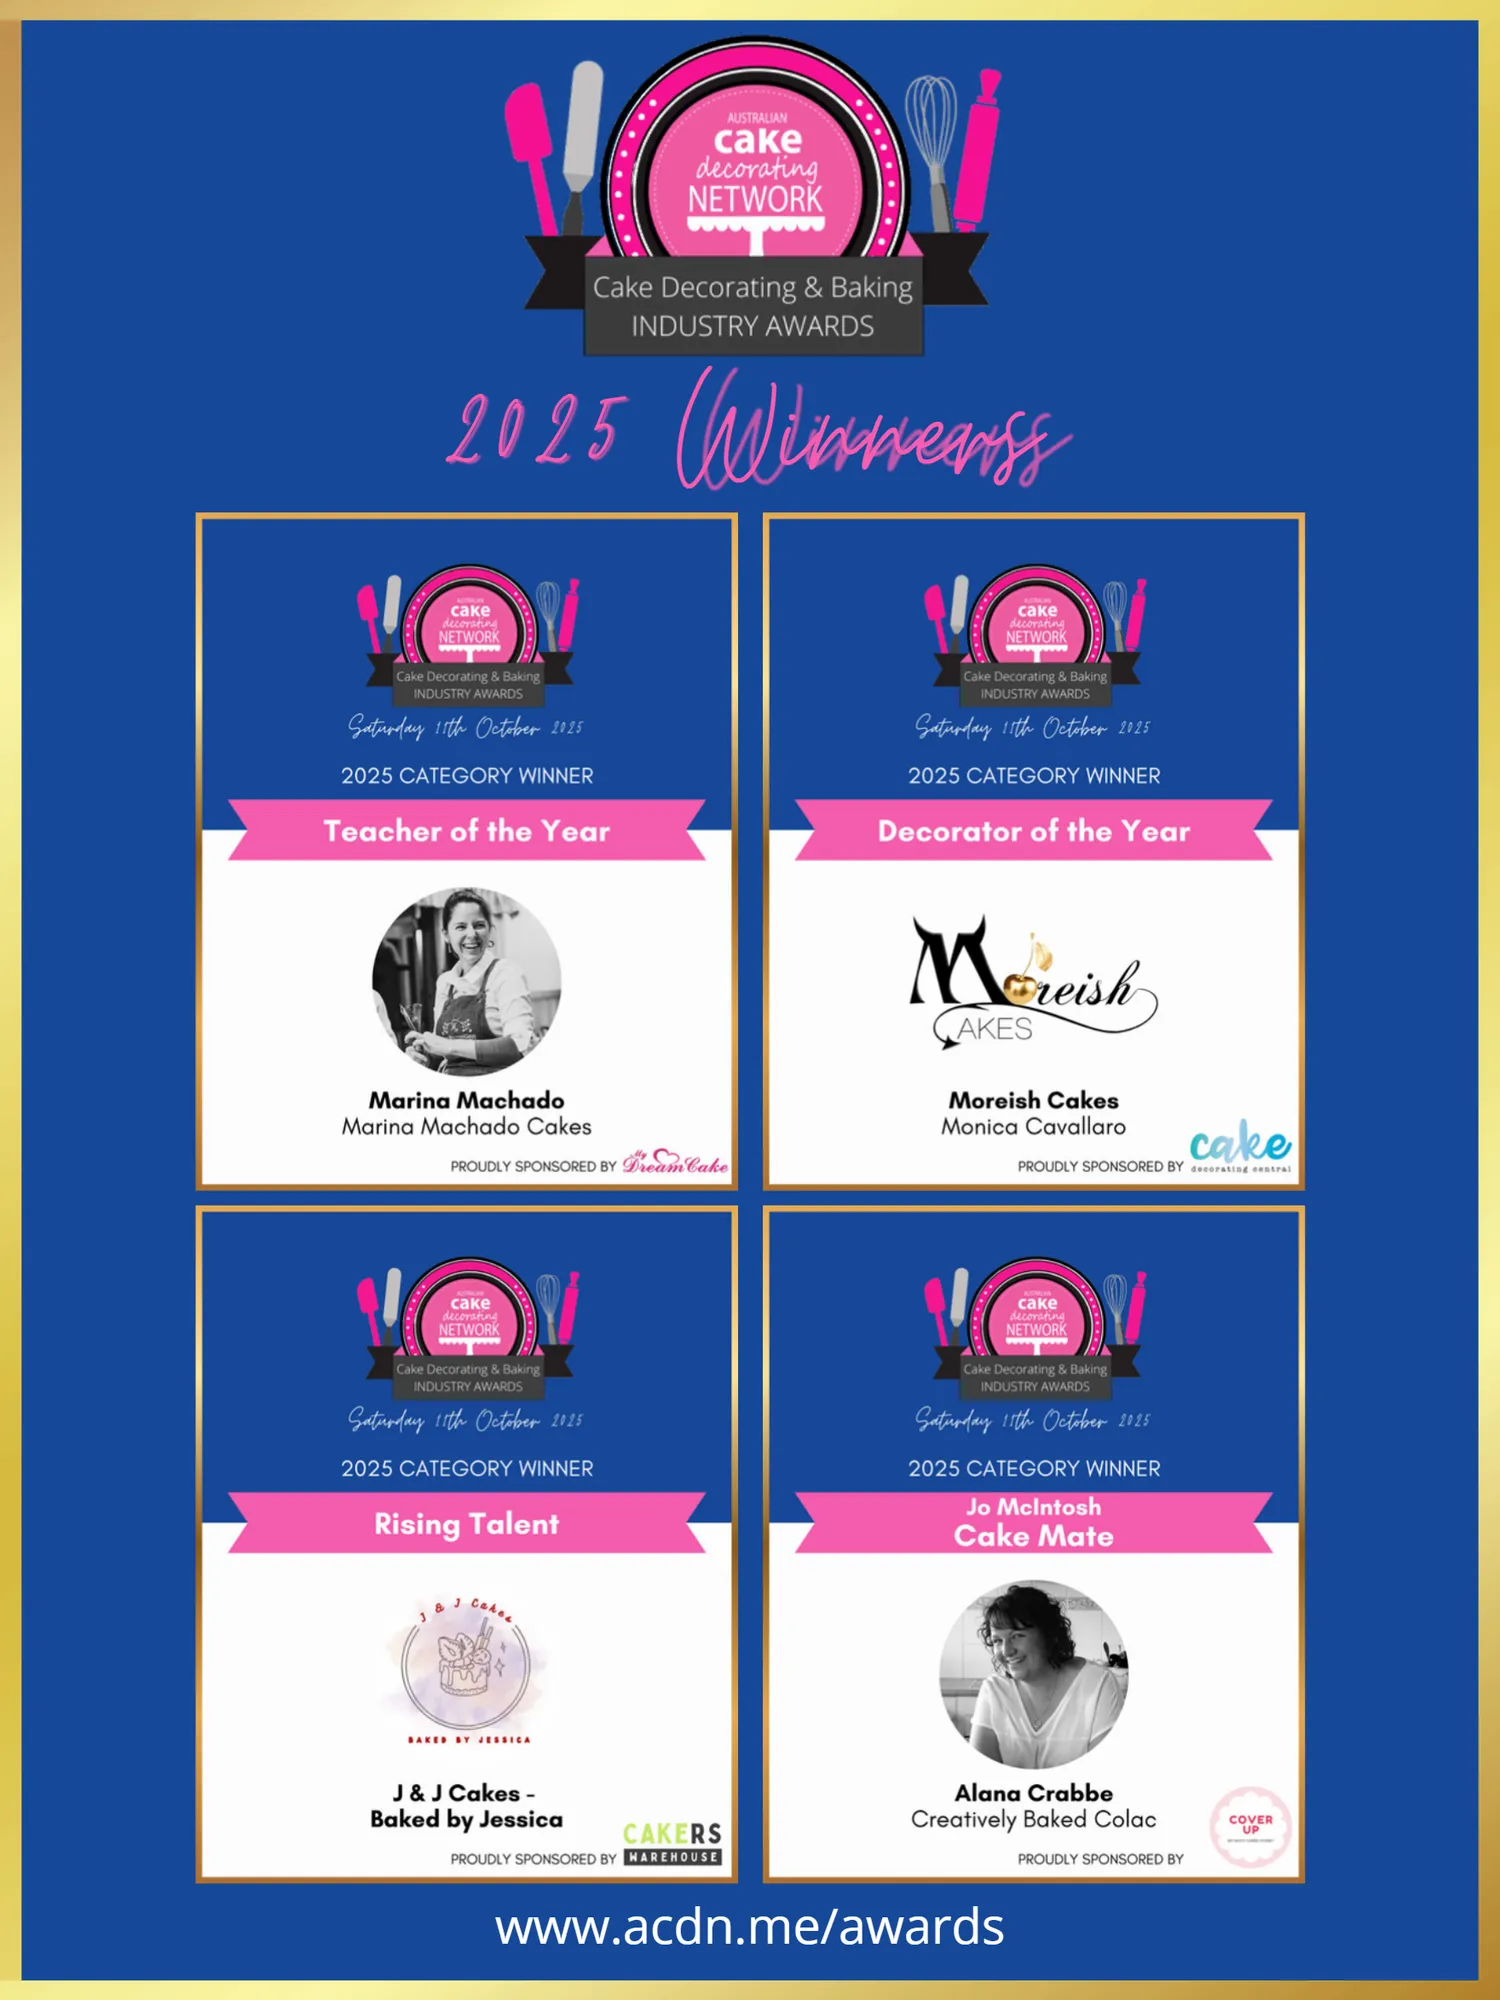
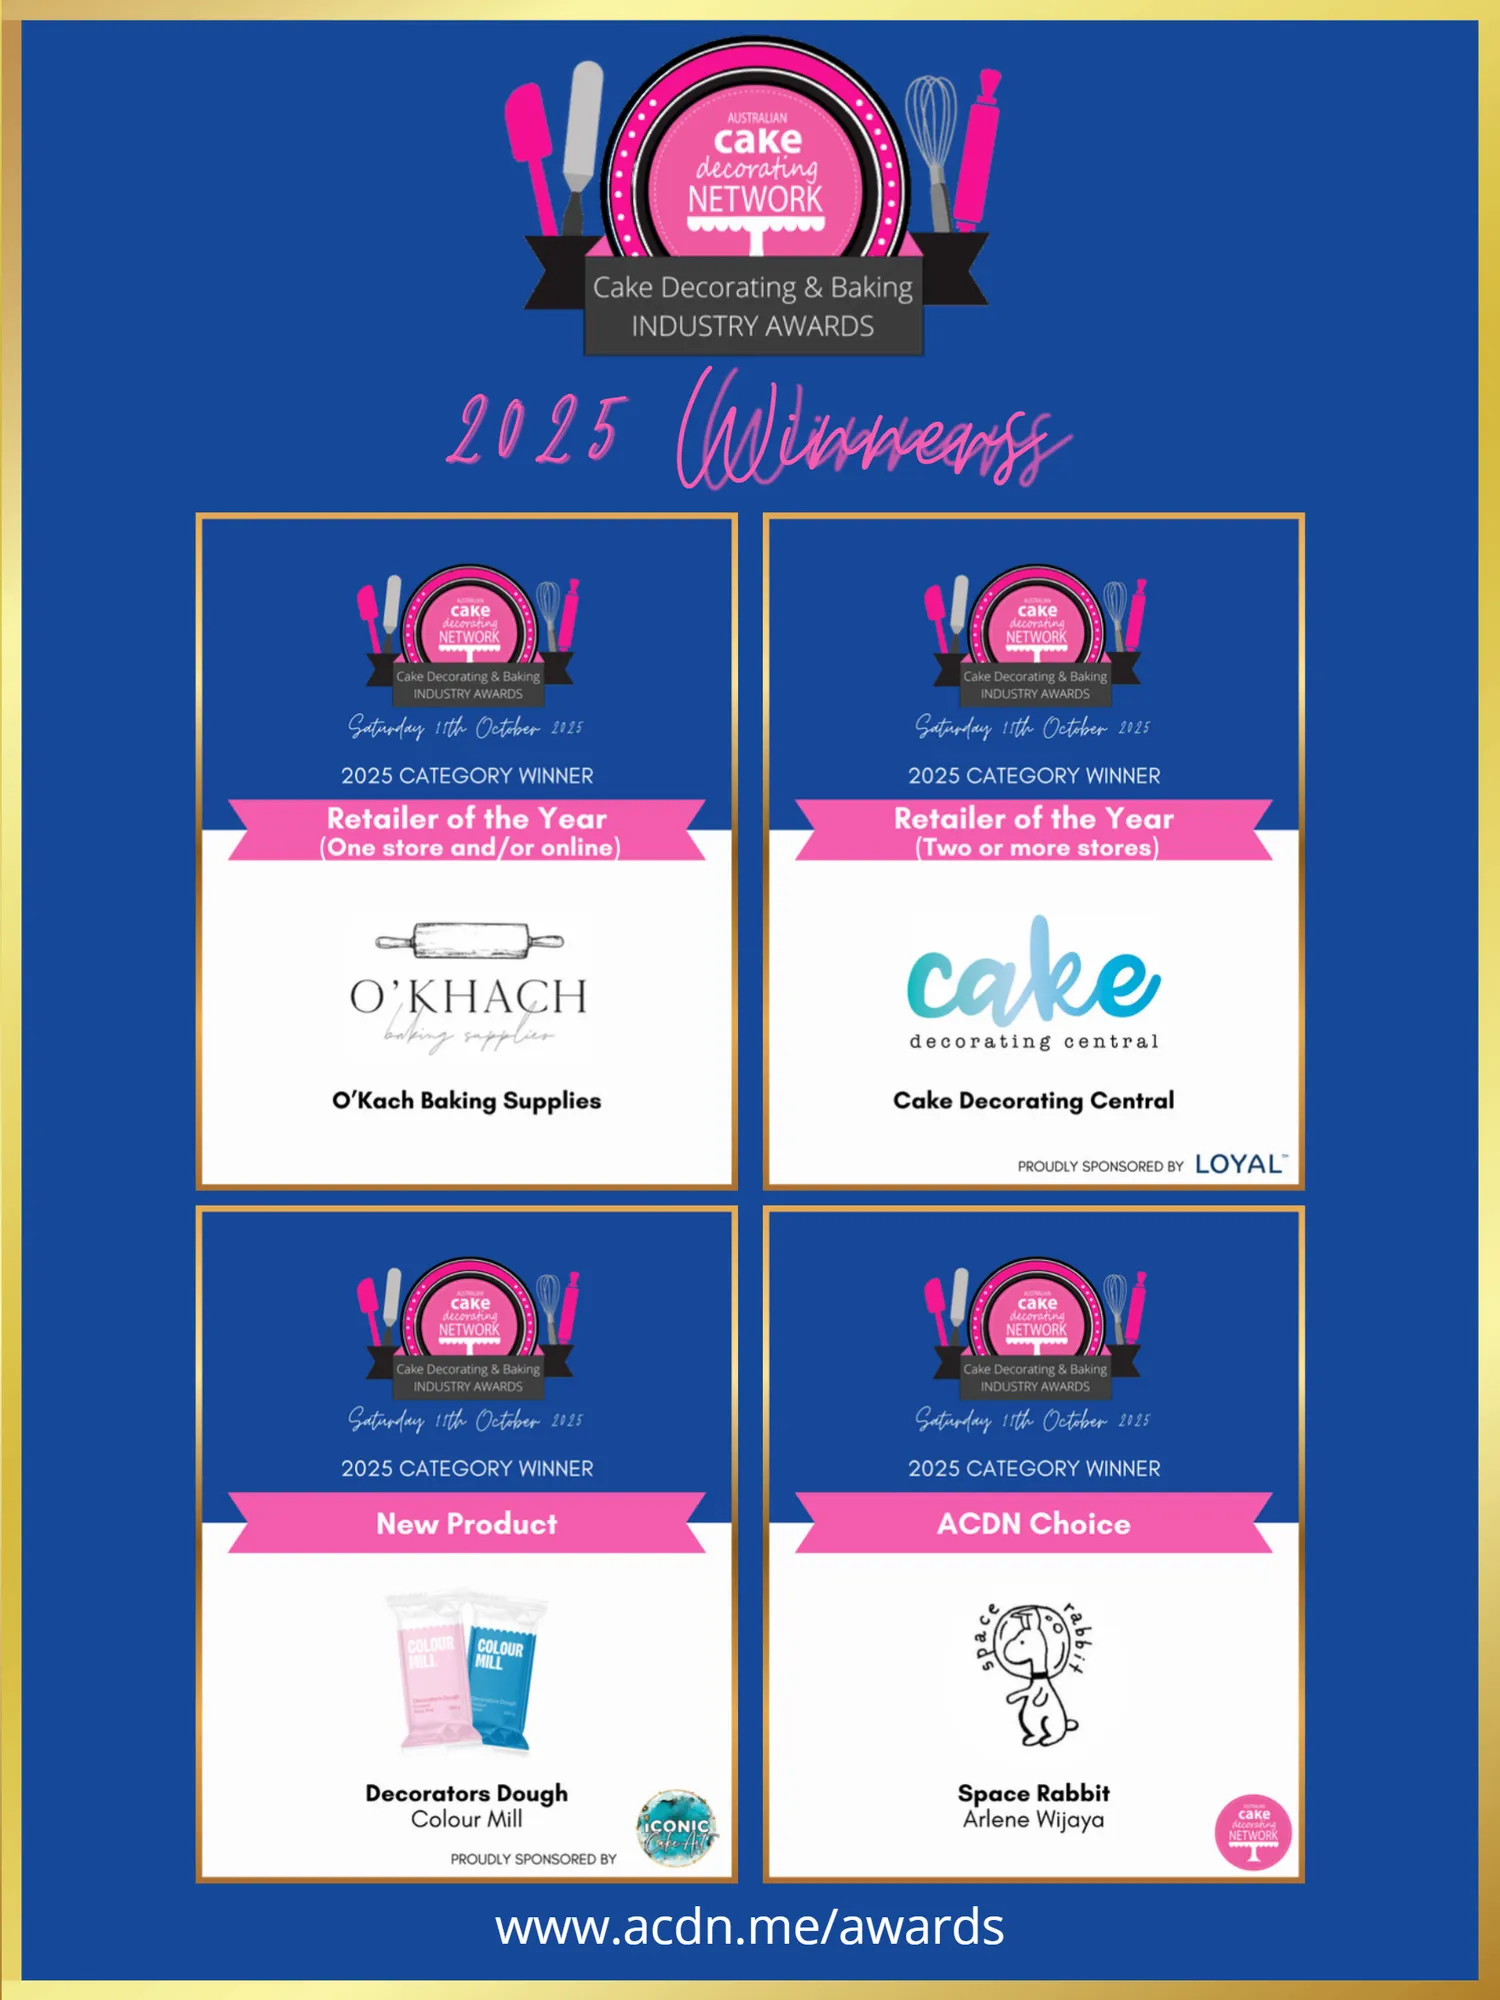
2025 Winners www. acdn. me / awards
Page 99 text
2025 Winners www. acdn. me / awards
Page 100 text
2025 Winners www. acdn. me / awards
Page 101 text
2025 Winners www. acdn. me / awards
Page 102 text
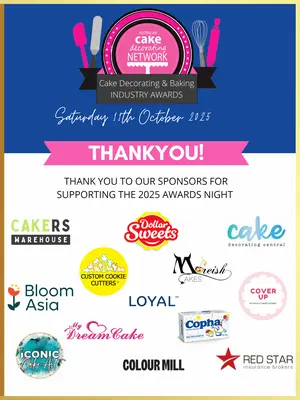
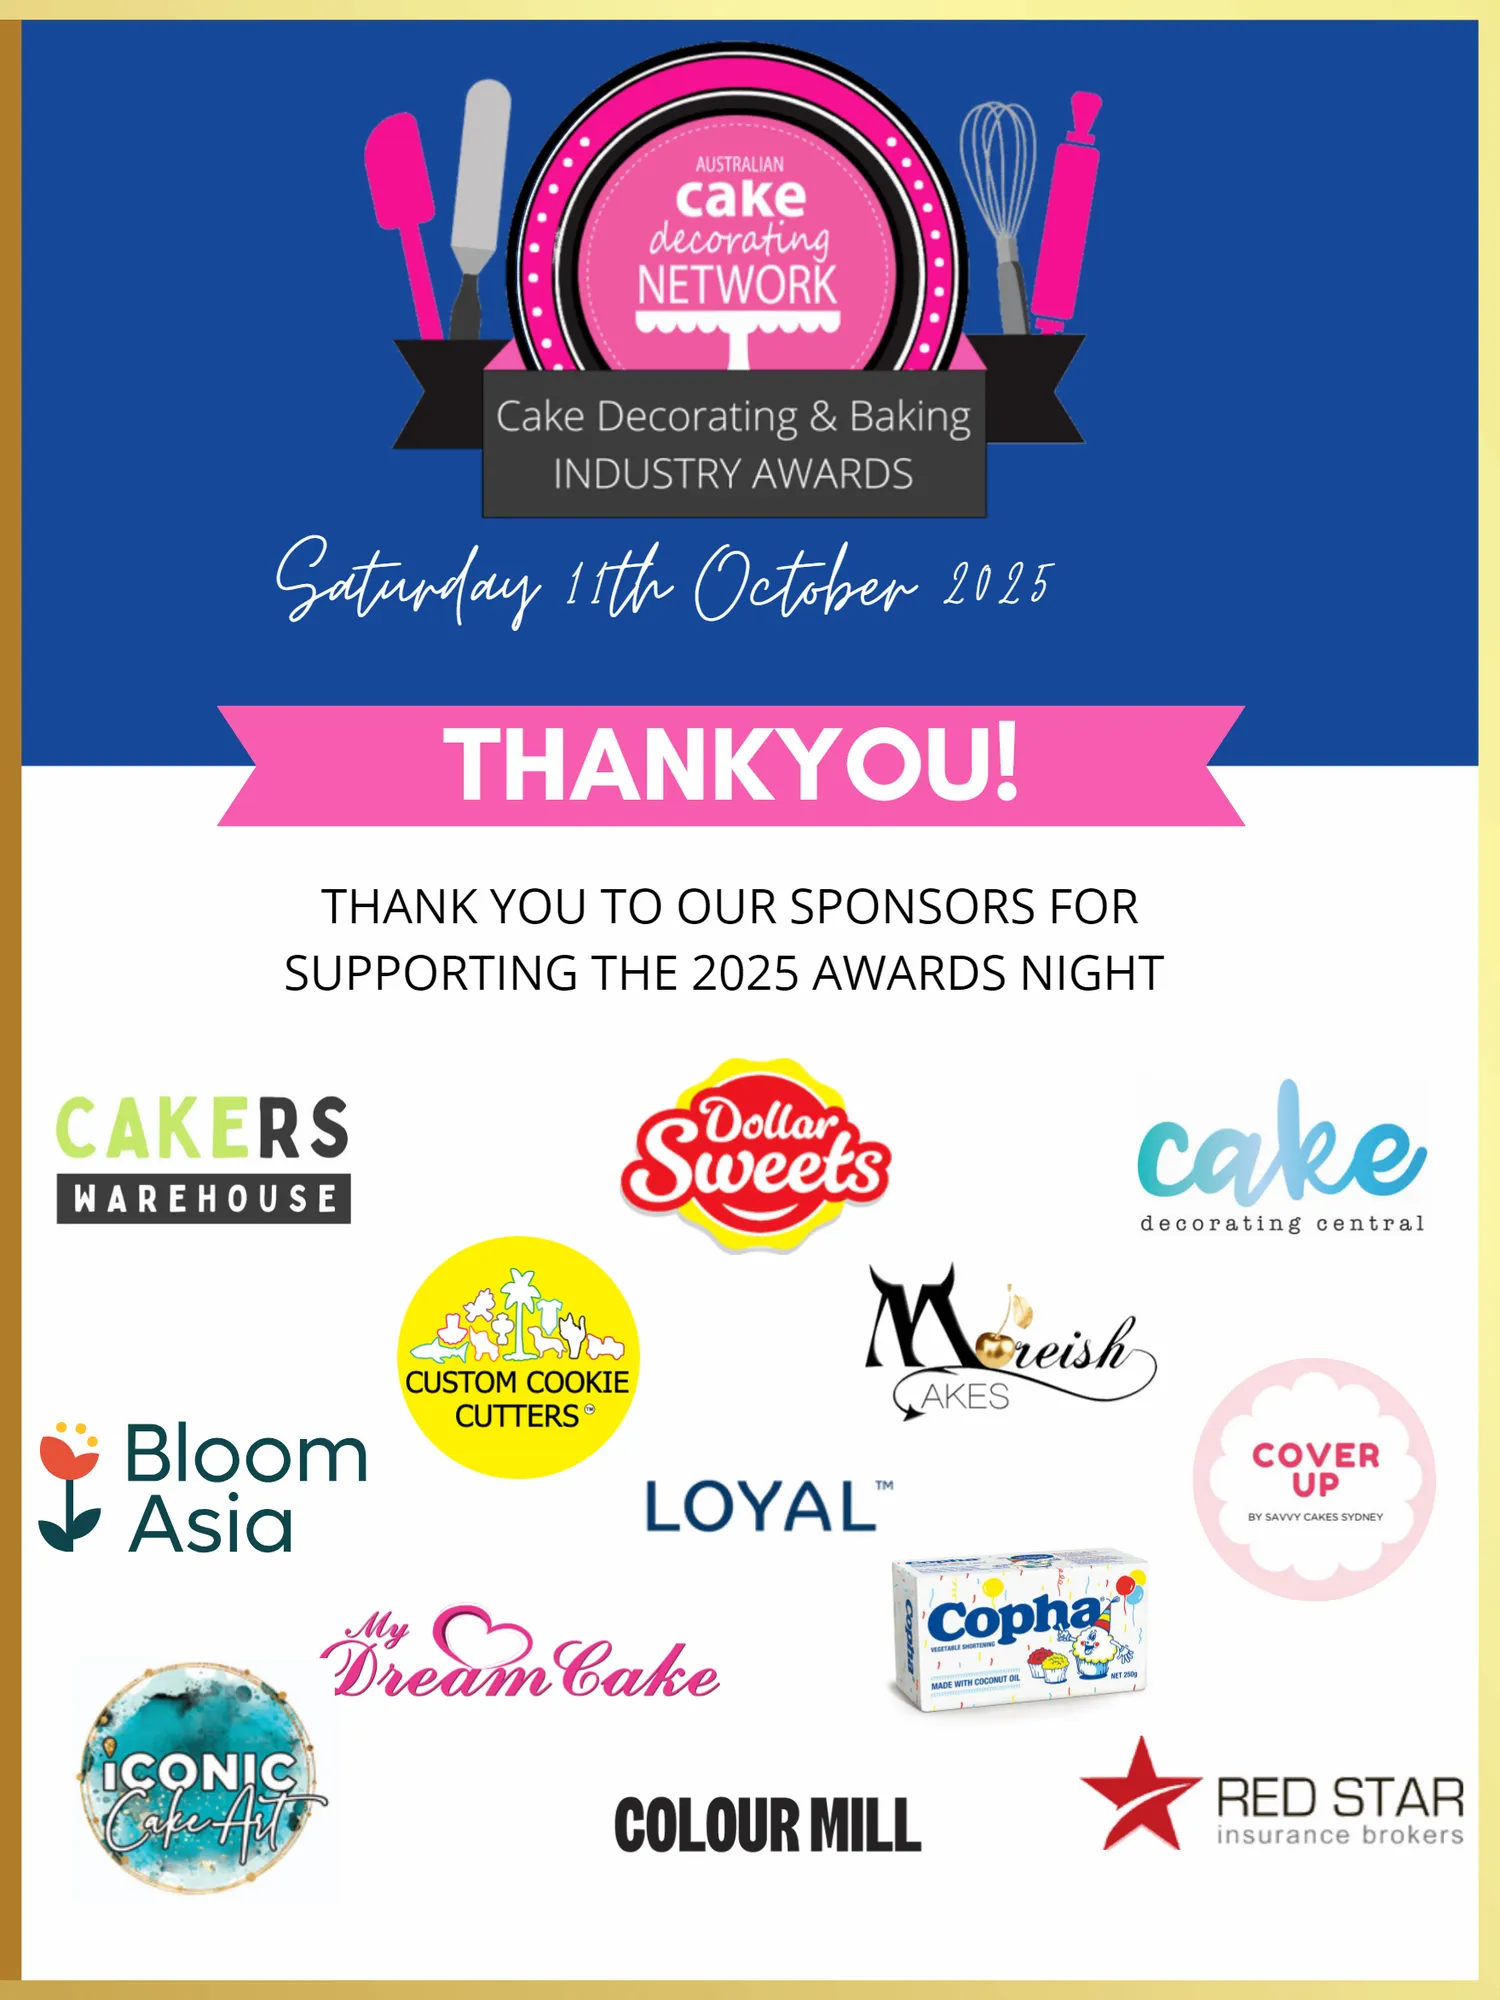
Saturday 11th October 2025 THANKYOU! THANK YOU TO OUR SPONSORS FOR SUPPORTING THE 2025 AWARDS NIGHT




Page 117 text
2025 PREFERRED SUPPLIERS MEMBER DISCOUNTS